Transcripts
1. Hello ! Welcome Back: Stokwise, spending 30 minutes on a little self care
art practice is not just a class but also a
mini vacation for yourself. Fast paced lives, it's easy to get caught up in the
hassle and puzzle. That's where art come
in as a magical escape. Today, take 30
minutes and step away from chaos and immerse yourself
in the joy of creation. So consider this class as
not just an art lesson, but a form of self care. It's your canvas. Your time, your opportunity to recharge. Hello, I'm Sakuta. Your guide to the wonderful
world of watercolor, winter landscapes Helen
from vibrant land of India. Painting wasn't just a
career shift for me, it's been a lifelong passion. Past six years, I have had the joy of being a teacher
here on skillshare, connecting with so many students from all the corners
of the globe. It's been an incredible journey. And today I'm
excited to embark on a new artistic adventure
with each one of you, Welcome to quick and delightful watercolor winter
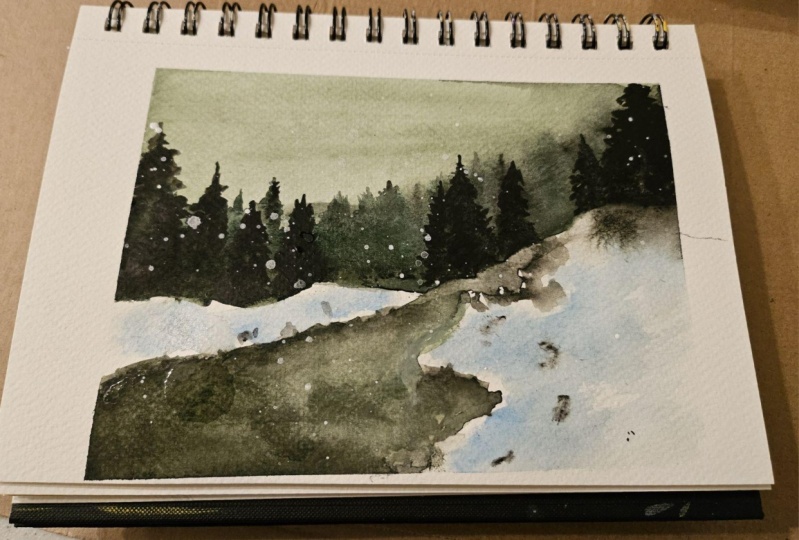
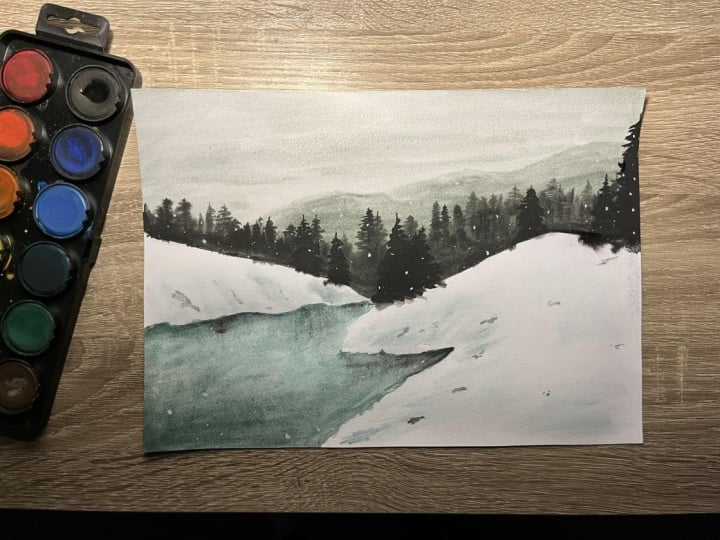
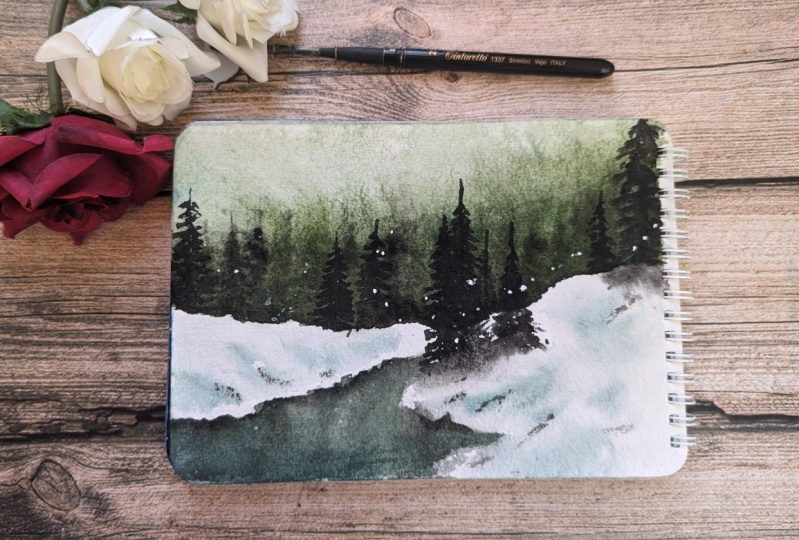
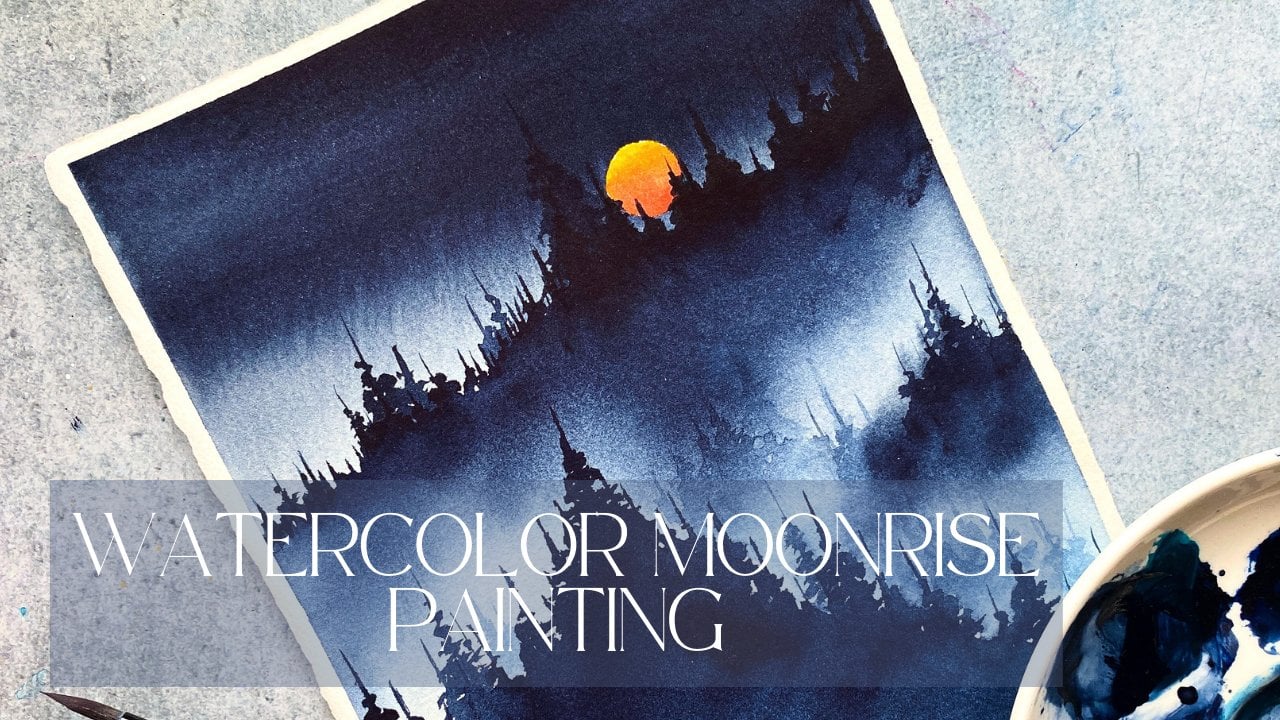
landscape class. In just 30 minutes, I'll whisky away to a serene winter wonderland
with greenish pine trees, misty mountains, and
a peaceful lake. We will begin the class
by discussing about all the art materials that we're going to need
to begin the class. We will then start the
landscape with a simple sketch, followed by painting
the sky mountain and the blurry pine trees. Then begins the foreground, where we will paint
the darker pine trees. And these pine trees
will be more detailed. We will paint the
lake, of course, with reflections
and a few details. Then we will be done
with landscape. This class has a ton
tonight techniques, and those techniques
are considered as fundamentals of
watercolor painting. If you're familiar
with those techniques, this class should be easy. If you are a complete beginner, well, there is no harm
in trying, right? Are you ready to
start this 30 minutes of Winter Wonderland
at therapy with me? So am I. Let's jump
into the next video.
2. Art Materials : Let us now discuss all the Ott materials that we're going to need to
start this class. I will begin with the paper. This is arches, 100% cotton, 300 GSM, cold pressed paper. I have used this one to
paint my winter landscape. This is 15, 30 centimeters. You can use any size of
the paper that you have, but make sure it is 100%
cotton and 300 GSM. I will talk about pressures. Now, I have used four
brushes in this class. The first one is flat brush and its size three by four and it's from the
brand called Aquaton. I have used this only
for the initial washes. That is, for wetting the paper. This is Raphael
number zero brush. This is a round brush. Most of the work is
done using this brush. The lake or the
mountain, the sky. This is silver black velvet. Number six, the smaller. I have used this one to
paint the details like pine trees in the background and in the foreground
is from dawn. She. This is a rigger brush. I have used this only for painting tiny
details you can see on the ground for splattering
the white paint. That is all about the brushes. We'll talk about the colors now. I have used only three
colors for this landscape. You can say it's a limited
palette class that one Hookers green
from Seneliar and Shadow green And this is
Pinsray from Aquaton. I have used white color
to splatter the snow. You can use white if you have. But white water color is enough. We're going to swatch
these colors in a minute. I have used a ceramic palette
and a water jar tissues. What else? Masking tape. And I have taped down my paper to divide it between
the landscape and the colors swatched. I'll tell you why I watched the colors over there as well. Let us begin now. Let us watch these three colors. I've already swatched the colors in my main landscape as well, but I'm showing
here also this way. I can also tell you what the alternative
colors that you can use. Hookers Green is from the
brand called Seneliar. It's a bright green color and shadow green is a bit
dark green, you can say. But it's not dark. I think it's a muted
green and pions gray. Of course, everyone
will have it, will have this color
in their collections. You can use sap green
instead of Hookers green. They both look similar. Second color is Shadow green from the brand
called Aquaton. You can use a mix of
sap green and pions gray to get shadow green if you don't have shadow
green in your collection. The last color is pines gray from the brand
called Aquaton. Of course, everyone will be having pines gray
in their palette, but in case you don't, you can use light black
color. That is all. I think this is all about
the colors and materials. We're going to get started
with the sketching in the next video. I'm
going to see you there.
3. Sketch : We will begin the sketching
for the landscape. I have to tell you the sketching is very simple for this one. I did not go into
very detailed sketch, just the placements
where the lake will be and the foreground
and the pines. This should be simpler for you, but if you find sketching
with me a bit difficult, I have already included the final sketch image
below in the downloads. You can go ahead and check it out and sketch at your own pace. You don't have to sketch with
me in case this feels rush. Sketching includes the ground. The snow covered ground
below here will be the lake, and the upper part will be the pine trees and
mountain and sky. But we don't have
to sketch that. We can directly paint. We are done with the sketch. Such simple sketch, right,
for today's landscape, because I want the experience for you to be relaxing
and not stressing. So you can also download
the final sketch below. So I'm going to see you in
the next studio where we're going to paint the
sky and the mountain.
4. Sky, Mountain : I will also swatch the
colors here onto the paper, the main paper that we're going to paint the landscape on. This is the practice that
I've picked up very recently. I just want my colors to be seen on my paper all the time, or else I'll just mix up the colors and end up
painting the wrong shades. We have three colors,
Green from Senelia, shadow green from Aqua, and pins gray from Aqua as well. You don't have to have
these brands exactly. You can have any brands, but make sure the
colors are similar. Again, if you don't
have exact shades, you can use alternative colors. I'm going to list out a
few for Hookers green, you can use sap green. For shadow green, you can take a mix of sap
green and pines gray. Of course, every one of us will be having
pines gray, right? Again, if you don't
have pines gray, you can use very light
shade of black color. These color combinations
are perfect to paint any misty landscapes,
not just this one. This is a winter scape, right? You can use these combinations, all these three colors to
paint a perfect misty forest, or a forest scene without pine
trees and a country scene. That will work as well, but you have to add a bit of indigo for the sky and stuff. Yeah, that's all
about the colors. I write these colors down. I'm going to list
the colors down for your reference
and for mine as well. I am now taking my flat brush to wet the paper and I will only wet the sky area
in the background. I'm going to leave the
border that we have drawn, the horizon line between
the sky and the land. Do not that area we only the sky part add water even le and make sure you're not leaving puddles of water in the
middle of the paper. That's very important. It
will not give you even wash. Take your time and
wet the paper properly. I'm going to do two things now. First thing is I'm
going to flip my paper. I'm going to place my masking
tape under the paper. This way I can get an even wash. For the
sky. For the sky. Of course, I'm using Hookers green with a mix
of shadow green. As you can see, I'm
using my Raphael brush, it's number zero round brush
and apply the paint evenly. You can see I'm doing
just that here. And after that,
let the paper dry. My paper has dried now. I will take a mix of shadow green and very
little of pine gray. We don't want to darken this up, I'm using that color with
my silver black velvet. Number six, brush
the smaller one. Do not use darkest color guys, just a bit darker than the sky that we
have painted before. Just very slowly drag the paint towards the
left of the paper. As you can see, we have
got a soft mountain here. Simple. Right now I'm going
to keep the paper for drying. In the next video,
we're going to paint the pine forest for that, your paper has to dry. Okay, I'm going to see you
guys in the next video.
5. Pines & Lake: Start by re, wetting the paper, but make sure the mountain and the sky has tried completely. Do not put too much
pressure on the paper. Add the water very
gently or else you can risk the previous layers coming out the
mountain and the sky. Now I'm taking my silver black
velvet number six brush. I'm going to use shadow green and pine scream
mix to get this dark green. And I'm going to begin
painting this blurry pines. The paper is wet,
hence you don't see a very detailed trees and
that's what we are going for. These pine trees are
in the background, that's why they have
to look blurry. This is wet on wet technique. That's why you have to paint faster or else you will risk
the paper getting dried up. And that is also why I'm
painting very fast here. We're almost done.
And this is one of my favorite techniques to paint backgrounds in
watercolor landscape, be it any kind of landscape. This is one of my
most used techniques. Make this pine forest realistic. Just a little bit.
We're going to just add a few detailed
pines here and there. This gives the
character and also a viewer can recognize
that these are pine trees. You will see it in a
minute once this dries up and we are done with
the background pines. Let's move on to
painting the lake now. And I have changed my brush. I'm now using a Raphael brush. The number zero, round one. I'm going to just take
a shadow green color. I'm going to f start
with this one later, we can layer it up. Oh, let us layer this one up. I'm going to add a bit of pines
gray to the shadow green. And we're going to paint
one more layer to the lake. You can see I'm
intentionally not adding darker shades at the
top of the lake. Only adding the darker
shades at the bottom. Let it be that way. It
looks more realistic. Now, I'm going to take a
little bit darker shade, maybe lots of pines, gray to the shadow, green. And I'm going to
add the shadows. And I'm going to use my
silver black colt number six for this, the smaller brush. Important to not overdo
this one because you can easily get confused with
ripples and the reflections. So I'm going to just
keep it simple. I'm gonna keep paper for drying. It's almost dried now, but I'm going to give it a
couple of minutes later. We're going to paint the pine
trees on the foreground. As you can see,
the paper is dried and I'm going to use
only pines gray now. And I'm going to paint
a few pine trees. These are darker in shade. You can see the pine
trees in the background. We have just painted wet on. Wet, right. Those are very light in shade. This is darker. That means these pine trees that we are painting
are closer to us. Can you observe how we are using the colors to show the
depth of the painting? Right. The lighter shades
indicate that the subject is in the background and the darker shades indicate the subject
is in the foreground. You can use these techniques. You can say these are
tips, not techniques. You can use the tip to
paint other landscapes. You can use this to
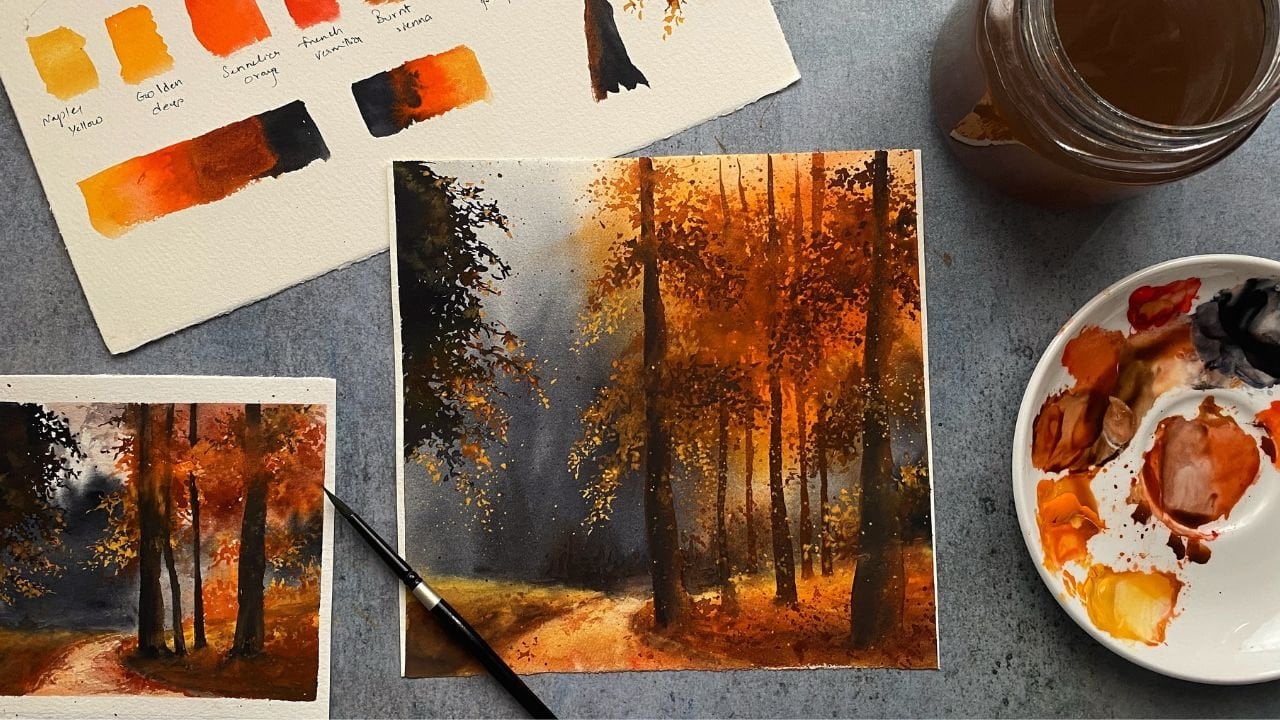
paint any forest, be it winter or otherwise. You can use this tip to paint Autumn forest
works perfectly. Mountains or any country scenes. Yeah, the sky is
the limit, really. Again, these pine trees
should not be overdone. You shouldn't just
completely fill this area up with the
darker pine trees. We can just paint, uh, around five or
six pine trees. We'll see how it goes. This is just a reminder that do not overdo your
watercolor painting, be it any kind of landscape by the looks of it, you can guess this pine tree is
the bigger one of all, we are done. I think these 123-456-7899 pine
trees are a good balance. Okay. Ten. This
is the tenth one, I swear this is the last. These are a perfect
balance to the background. Pines. I'm going to
stop now because I have a habit of overdoing
my painting all the time. So, I'm going to see
you in the next radio.
6. Reflections & Snow : All right, my paper has dried. I will start rewetting
but only the lake area. We will work on
reflections in this video. Be taking only the shadow
green color For this part, I'm going to start adding the paint from the
bottom of the paper. Gradually we move upwards. Now I'm going to drag these
pine trees to the foreground. For that, I'm going to
have to take the pines, gray and my smaller
brush, silver black. Let number six brush, and I'm going to drag these pines down
onto the foreground. It's important to remember
not to drag all of these trees down towards the foreground. Just
a few would do. I just want to create
a few random details here because all of these pine trees are
in the background and it's looking monotonous. I don't want that track
this tree as well, the one just behind these pine trees with the same pines gray and
with the same brush. I'm going to add
reflections in the lake. Reflections doesn't have
to be very detailed. There can just be a few
darker shades in the lake. As you can see, that's
what I'm doing here. I'm adding a few vertical lines, vertical breast strokes here to suggest that there
are reflections of these pine trees but not
very clearly because it's in water and the reflections
in water are always. Remember that once that is done, we're going to work on
the foreground here. I am just wetting
the paper here. The foreground area. And I'm using my Rafael brush. I'm going to get this one, the area on my left as well. For this, for
adding the shadows, I'm going to be taking
shades of shadow green. I'm not using pine
gray or forest screen, I'm going to be using very
light shade of shadow green. I'm going to just
randomly add a few. Again, I'm not being
very detailed here. Again, as a second layer, I'm going to be adding
a few more shadows. Again, no details. If you ask me where and when to add these shadows
in the foreground, I would say it comes
with practice. I have painted thousands of winter watercolor landscapes
so far, I kind of know. Now if you don't, you can just follow
me in this tutorial. But you can observe a few winter
landscape photographs and see where the
shadows are in the snow. That'll really help also drag this pine tree
onto the foreground. I'm using a pine scray for this. With this, we are done
with reflections and snow. In the next video,
which is very small, we're going to go
for a few details. You can call it as final
details and we will be done with a winter landscape. I'm going to see you there.
7. Final Details : Now I have taken my Da
Vinci Rigger brush and I'm going to just add
a few lines, literal. Random rhines with pines, gray. You see these twigs and some
random stuff on the ground. These lines are
supposed to be that keep stopping yourself
before adding another set of lines because it's important
to not overdo the details with the same rigger brush. I have taken some white paint
and I will splatter some of it onto the paper and we are done with our
entre landscape. Thank you so much
for joining me. In the next video,
we're going to talk a little bit more
about what we have learned so far and how you can use these techniques
in your future landscape. Do not miss it. I'm
going to see you there.
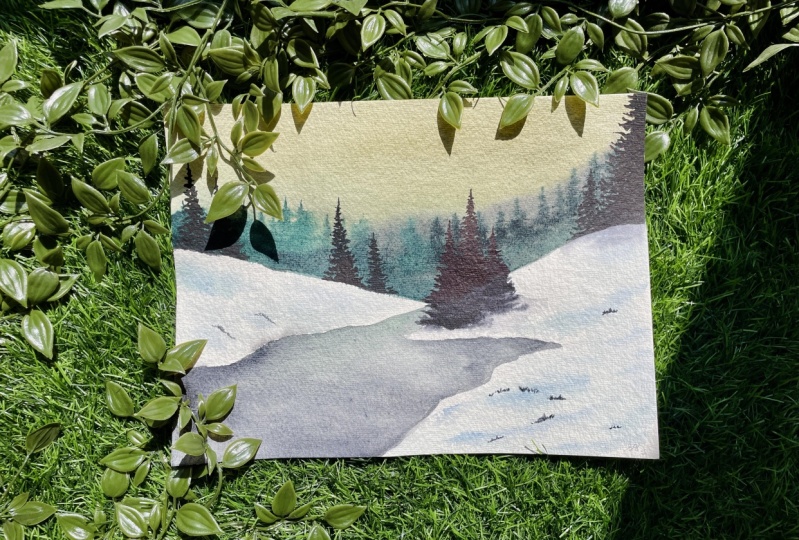
8. Conclusion : A few things before
we wrap up the class. We have painted this
beautiful winter landscape. Today, I've said in intro video, this winter landscape
had two techniques, wet on wet, wet on dry. I hope you guys are familiar
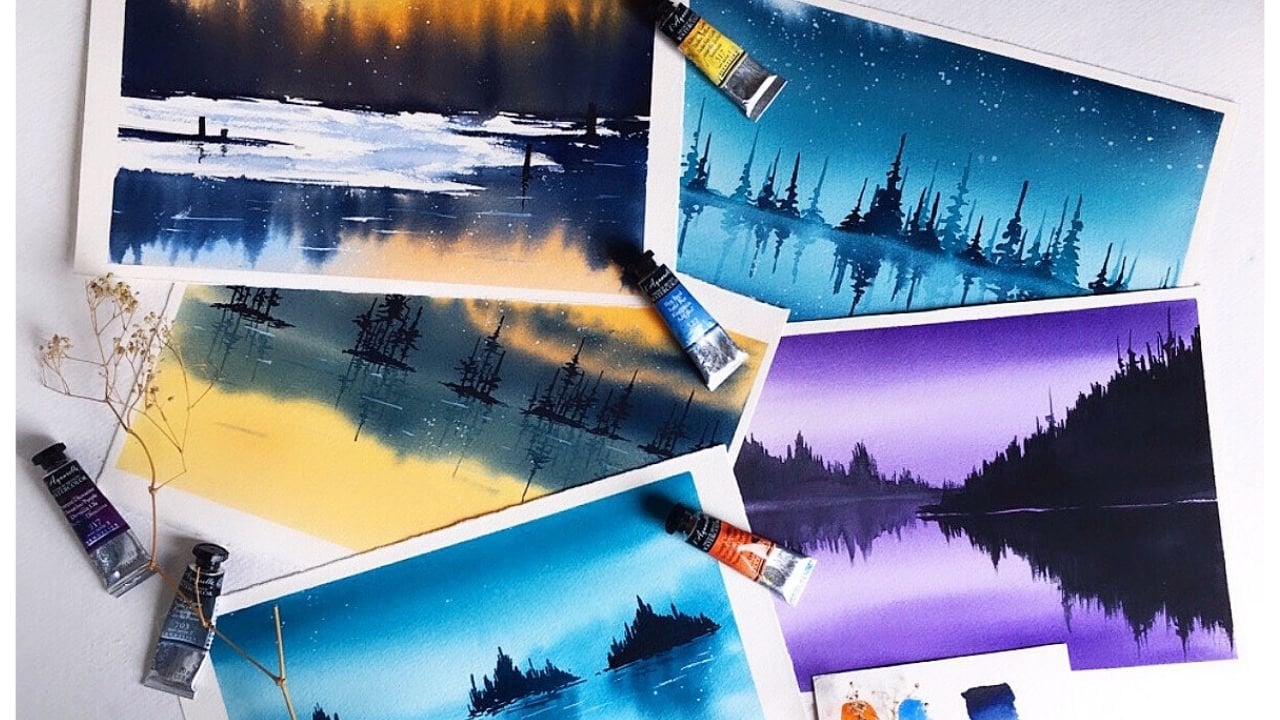
now with these techniques. After painting This one painted a lot of winter landscapes and not just winter
lake landscapes, winter cabin, winter
sky, you name it. And I have used only
these two techniques on a combination of
these techniques. So if you want to try out
more winter landscapes, you can go ahead and
check out on picks away website for
copyright free pictures. And try out winter like
landscapes there from references. If you want me to share a few, you can always ask me in
the discussion below. And if you like the class, please share your
review as well. Also, if you try
out this landscape, you can post it in the
project section below. Okay, I'm very happy with my painting today and I
hope you guys are as well. I'm going to see you
in my next class. Bye.
 Sukrutha Jagirdhar, Watercolor Artist I Creative Entrepreneur