Transcripts
1. What Is This Class About ?: Art washes from the soul, the desktop, everyday
life set Picasso. I agree with it.
With my whole heart. I have been painting
since I was a child. I have painted when I was sad. I have painted when I was happy. And I have painted
when I was lonely. Looking back at has provided me all the
comfort in the world. Today has become
my full-time job. My favorite part of
my job is one of those days when I paint without anticipating
for the final result. Paint only for the comfort. For the soothing effects
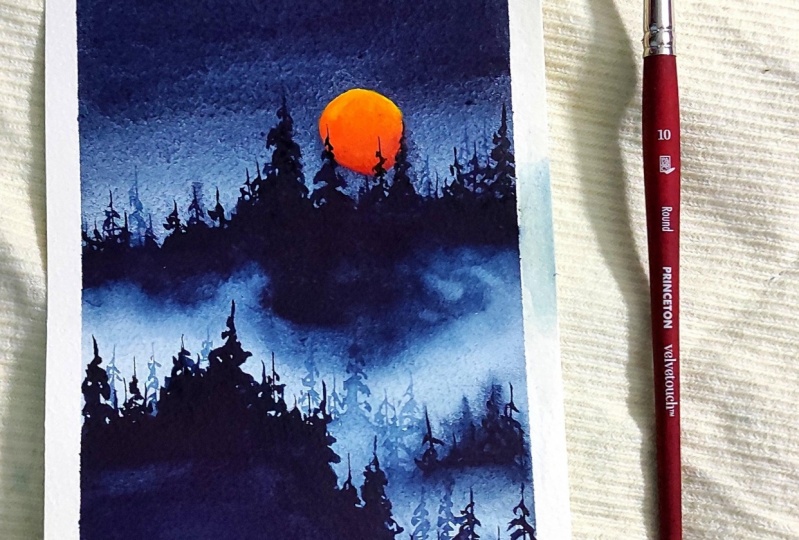
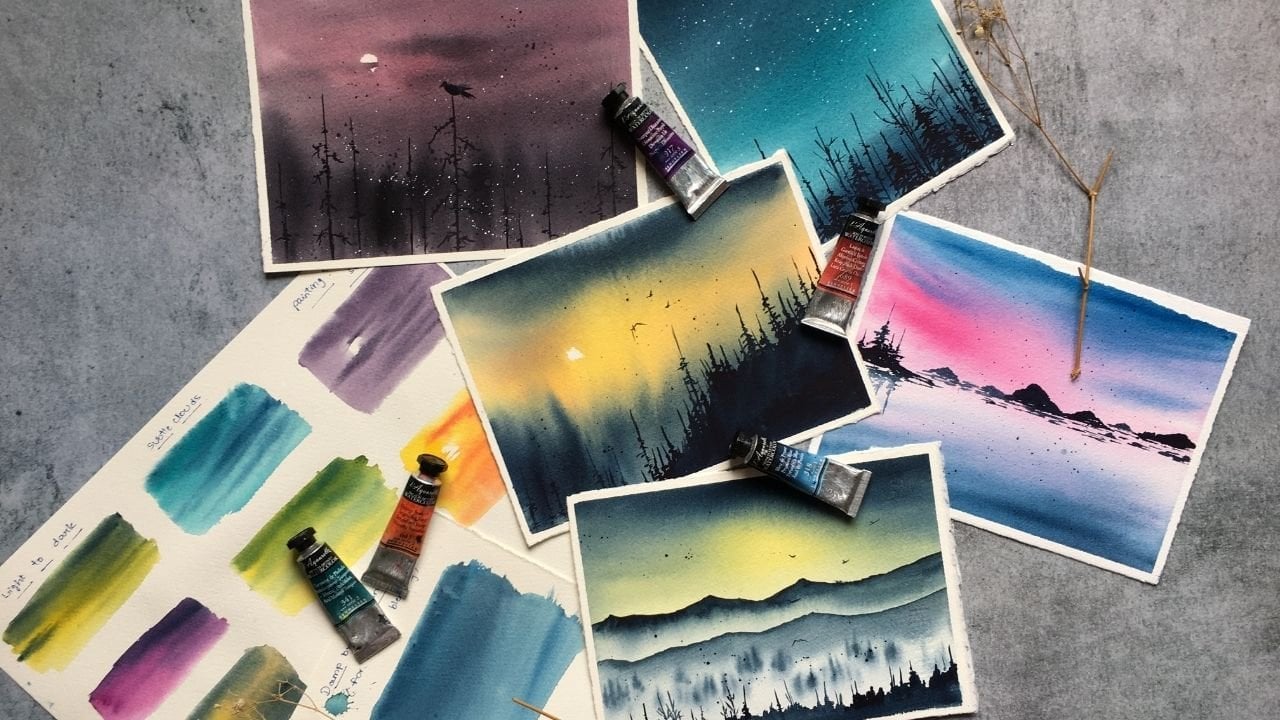
that can provide. Today's landscape will not have any complicated techniques. So sit back, relax, take out your art supplies. Let's spend this
weekend together painting this beautiful
Moonrise landscape.
3. Prepping The Paper: Let's start by grabbing the
paper. It's not a big deal. Really. Take a masking tape and cut the tape in a round shape using
a pair of scissors. Alternatively, you
can use masking fluid instead of masking
tape to cover up the moon. But masking fluid was
never kind to me. So I have always
used masking tape. It showed the proportions of
paper and the moon, right? If you are going for
large sized paper, say A3 size, go for
a coin size to move. My paper here is around A4. I'm going for smaller size. Now that I'm done with them, I'm going to stick it to
the paper. After that. Let's see what colors
we're going to use. See you in the next video.
4. Colors & Sketch: Coming to the
colors, I have used, indigo and it entering blue
for the Main Landscape. And blue is from Sennelier and indigo
is from White Nights. I initially thought
to use only indigo, but I just needed
a bit of change. For the moon. I have
used primary law. Sorry, this is a locker. Let me just change the tube. And French vermilion, it's a
beautiful red from Janelia. Actually, you will get orange color when
you mix elon read. So you don't have to separately
take the orange color. Do not go for a single color
when painting the moon. Try mixing different shades. Here I'm using two colors, so I'll get three shades of
yellow, orange, and red, which will look very
realistic when painted. So now I'm gonna take these
colors on my palette. I will also show you the
shade that I'm going to use by mixing it entry
in blue and indigo. If you don't have
an entry in blue, you can use Prussian
blue instead. This is the shared that
I get when I mixed Sennelier in anderen Blue
and White Nights indigo, It's quite similar to the
indigo shade of Daniel Smith. I will also show you the colors separately in order to give
you an idea of the shades. This is the color. If you have
indigo from Daniel Smith, you can directly use that. It's quite similar
to the shape that I got by mixing two
different colors. Now that we have
figured out the colors, we can go for a light sketching. When I said light sketching,
I really mean it. I'm just going to
place the pine trees. I don't think this
sketch will be visible after painting the
first layer or second layer. But this slide
sketching is also very useful if you are
painting from a picture, especially because the size of the paper and the size of the picture will
be very different. So it's good that aware of going for
this slide sketching. So we would know where
the trees will be. Now that we are done
with the light sketch, we can move on to
painting the first layer. See you guys in the next video.
5. Class Project 1 First Layer: So the good part, stats. Now, I'm going to take the masking tape first and I'm gonna place
it under the board. The paint will just slide down. And it gives that misty effect. Without us doing anything. I'm using my silver black velvet number 14 brush and I'm wetting the
paper with clean water. I'm going to take my favorite
color of the day, indigo. And in the entry in blue mix, I'm gonna get started
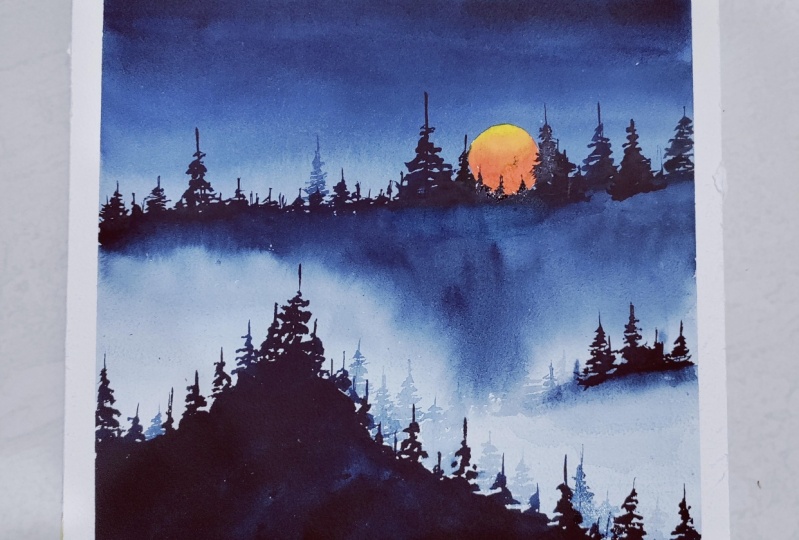
with painting the sky. The sky has to be in
darkest color possible. Then only our moon
will be a highlight. This is not dark enough, so I'm going to add one
more layer of the color. Make sure the paint is
covering the paper. Only about two inches, not more than that. Now let's blend this
color into the paper. For this, you're going to need a wet brush without
adding any more color to the brush and just drag
the paint slowly down. Just like I'm doing right here. Once that is done, I'm going to remove
the masking tape and I'm gonna keep this
one for drying. To avoid the backflow. Remove the excess water and
paint around the board. This is a very small
step, but very important. Now let the paper dry. I'm not going to use
hairdryer at this time because I want the
sky to be dark color. So I'm gonna see you
guys in the next video.
6. Class Project 1 Second Layer: Now let's start with
the second layer, but make sure the first
layer is completely dry. I'm using my Princeton
number eight brush. I'm gonna be using
the same color. I'm going to get
started with painting the first layer of pine trees. The masking tape under
the board is back because I just wanted some
balance for the board. As you can see, I'm not painting these spines in a
very detailed manner. I'm first starting with
a straight line and then I'm moving my brush
in a zigzag manner. I get a structure that is something similar
to a pine tree. Using the reference picture. I'm going for the first
layer of this pine trees. I don't always paint exactly
like the reference picture. I incorporate a lot of changes starting from
the color itself. For this particular picture. I felt I don't need
to change one bit. It's looking so magical. I felt like if I
change something, the picture would lose its
inner fluid, lose its magic. So I also just wanted to paint beautiful
Moonrise painting. Yeah, we're not gonna change
anything in this picture. I have slowly completed almost completed painting the
first layer of the pint. Now it's officially completed. Let's move on to
painting the midst. To paint the missed a
little bit more water than you have taken to paint the pines and slowly add the color just to
under the pine trees. I'm switching to silver
black velvet number 14, brush, a little bigger. Now I'm taking the wet brush and I'm dragging the paint down. This creates the misty effect. We're not done yet. But this is the first step. Using that same wet brush. Remove those hard edges. There will be no hard
edges in misty landscape. Now one more step in
painting the midst, we're gonna give you the shape, the dismissed based on
the reference picture. You can see in the
reference picture, the midst easing V-shape. I'm going for that. I think I'm done with the
first layer of pints. So I'm going to just blend the mist area with the rest of the paper
using a wet brush. Let's paint the second
layer of pine trees. And for this, I'm using my
Princeton number eight brush. While the paper is still wet, I'm going to start
painting the pints. For this tool. We're gonna
follow the same procedure. We have painted the
first layer of find. Fast. We're gonna
make the shape. Then we're gonna blend with
the rest of the paper. This is not the final, final detailed apart, but I am going to paint
a few more pints here. We're going to come back and
paint more details later, but for now, the shape is suffice and my paper
is still wet here. Now I'm taking very light color and I'm going to paint
a few background pints, just like in the
reference picture. Now we're going to blend this
with the rest of the paper. This is not the
final detailed part. We're gonna have to come
back for this later. The next video will be
the third layer of pines. But first, let the second
layer dry on its own. Do not use a hairdryer. Yeah. See you guys
in the next video.
7. Class Project 1 Third Layer: Let's start with
the third layer of pine trees and make sure the second layer
is completely dried up. Now, as usual, I'm following the reference
picture religiously. And with the help of my
Princeton number eight, brush the dark indigo
blue mixture color. I'm going to paint the
third layer of pints. You are seeing that
large pine tree in the reference picture, right? So I'm starting from there. The most important part of this landscape is
this third layer. The main focus of this painting
will be on two things. One is the rising moon and the second is this third
layer of pine trees. To paint this third layer of
pine trees to perfection, follow a few steps. First one is lead
the second layer completely dry. Do not paint. Even if the paper
is very little, but make sure it's completely,
completely dried up. Second is to, you know, for us to place the pine trees. Based on the reference
picture. The placement. I mean, make sure the shape of the third layer pine trees is exactly like in the
reference picture. Another step is to have patient. Even if you get something wrong, do not freak out. Think. Find a way on how to
correct a mistake. It's very easy to character
mistake in watercolor, especially if you're
painting wet-on-dry. Last step is to have the right
paper and the right brush. The right paper will help
you paint the misty effect. Perfectly. Sharp brush. Preferably a synthetic brush will help you have
a good hold on. Painting Pines. See the, see the pines that
I'm painting here, especially in the third layer, they are very sharp. It's because this brush
is having a sharp edge. And if it isn't natural brush, the natural brush will
have its own mind. And I never actually
managed to get a sharp detail for any of my paintings
using the natural brush. Once you've managed to
have the right shape. For the third layer. The only part that is remaining
is to paint the midst. Use the same color
that you have used to paint the pines for
this mr as well. In previous first, second layer, we have used a little
bit light color, but for the third layer, it will be darker. Just like in the
reference picture. I'm going to use my silver
black velvet brush. And I'm going to
paint a few details. First layer and second layer of the paint using the
same indigo color, darker shade. This time. I told you guys while painting the first
layer and second layer, that we're gonna have
to go for details. This is the detail. I'm going to use my silver black velvet number 14
brush, the large one, and I'm going to blend this binds using that wet brush
and also a tissue paper. Do remote the hard edges. Dabbing with a dry tissue, removed the hard edges. This is one of the brilliant
techniques to paint. Mist. Will continue to paint the pine tree details in the first layer based
on the reference picture. Now I'm going to paint
that large pine tree just beside the moon. Few light-colored, fine
trees in between first, second layer and
third layer as well. Using light shade
of indigo color. I'm going to paint
those as well. Adding more water to the paint will give
you the light color. Now taking the dark color, we're going to paint the
detailed pine trees. The second layer of binds the dark edges using the wet
brush on the tissue paper. A few more pines in light color, as well as their dark color based on their friends picture. This stays off the painting. Either make brachial
walk, paint very slowly. Do not get all ones. So many steps. I understand there
are so many binds. Study how to paint here. Almost done with
the third layer. Painting the pines. Make sure to have a sharp brush when painting the
detailed pines. And of course that
I'd paper will help. See you guys in the next video, where we're going to
paint a few details.
8. Class Project 1 Details Part 1: In a paint the
details in two parts. And this is part one. Only after the third layer
is completely dry it up. Remove the masking tape. If it is wet, please do not attempt
to remove the tape. It's going to ruin
the whole painting. Mentioned before. We're gonna need primary yellow and French while million red
color to paint the moon. I'm taking those
colors on my palette. We're going to need freshwater. Because if you use a local
array using this water, it's going to turn into green. So I'm going to
quickly come back with a fresh giraffe water. A couple of tips
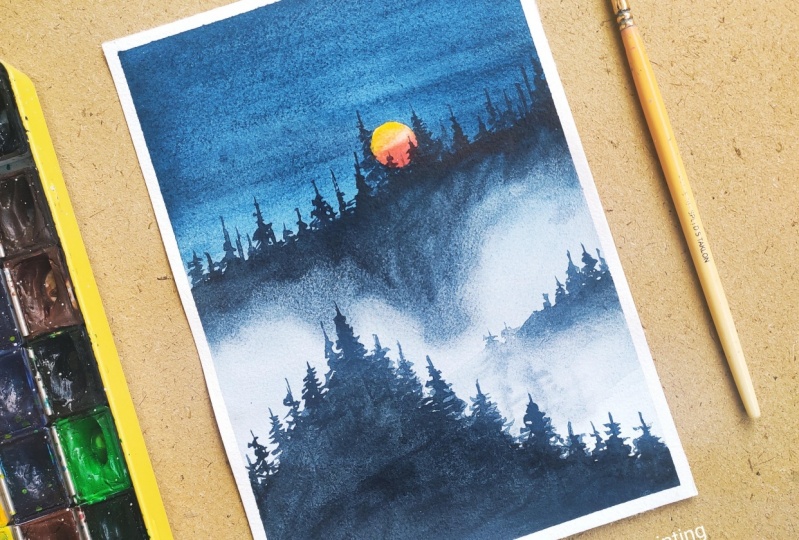
to paint the moon. First is to take a sharp brush. Make sure it's a smaller size. And the second is, if you're going for the
realistic Blood Moon, then you have to divide
it into two parts. The light color on the top
part and the dark color. The bottom part. In the middle. Obviously, you're gonna see
the blend of two colors. Yellow is the light color. So I'm gonna start to paint the yellow at the top of the moon. I'm going to mix the
yellow with a little bit of red to get the orange shade. Now, I'm going to paint
it in the middle. Blend these two
colors carefully. Do not paint orange at the top. Make sure it's still a low. Will be in dark color. I'm going to use
a red color now. Once all these three
colors painted, keep something under the board, like a masking tape, little box, you not to
let the color flow down. That's all you need to do to paint the
realistic blood moon. I'm gonna give this for drying. And I'm gonna see you guys in the next video where
we're going to paint a few more details.
9. Class Project 1 Details Part 2: The details, but also the
final video of the class. Before starting
anything, please make sure the moon part is
completely dried up. Since we are following
the reference picture, we had to make sure it's
completely identical to it. A few more steps to go. First part is to paint the
pines on this top layer. My favorite part
of this painting, these spines that I'm
painting right now. Painting a couple of
trees over the moon. That's what makes it look very, very realistic. Dress me. And now I'm going to
paint one more layer of this large pine
tree because it was looking rather dull in color. Then a few more. This is the hardest part. Painting. You just cannot stop. You keep going back and forth. Now I'm going to
blend this binds using a wet brush
and a tissue paper. By instead we have painted with light color how
completely disappeared. It's very normal. Now, I'm going to paint one more layer of
light color pines using light, a light shade of indigo. Blend these pine trees using a wet brush on the tissue paper. It's really difficult
for me to stop. I think we are done
with today's class. Wait till the paper dries up and then remove
the masking tape. I hope you guys enjoyed painting this simple and beautiful Moonrise painting with me today. I'm gonna see you guys
soon in my next class. Thank you very much
for joining me today.
 Sukrutha Jagirdhar, Watercolor Artist I Creative Entrepreneur