Transcripts
1. Hello..Welcome !: Have you ever wonder
what's at the edge of this land or at the edge of all the water or
edge of that moon itself. Join me. Let's explore those unfamiliar endless vast
night skies where we can let our imaginations
freely run wild and bring those glorious skies in our hands with just
our paints and paper? Hello, I'm Sucta watercolor
artist and instructor, and welcome to Expressive
Watercolor night skies. Every day for the
next three days, we're going to be painting
a glorious night sky. And I will guide you through
every step of the way. Take out your paints and let's create some beautiful
night skies. If you find this
class interesting, come, let's get started. Okay.
2. Art Supplies: Let's quickly see the supplies
that we're going to need. Let's check the papers first. I always use fabriano, 100% cotton, 300 GSM paper. I usually buy them in rolls and cut them up in the
sizes that I need. In case you don't have fabriano, please use 100% cotton
paper, be it any brand. Coming to the paints, I have three brands
of paints with me, White knights,
Ceneia and Turners. And the colors we need will be mentioned before
painting the landscape. See what brushes we're
going to be needing. This is Raple number
six soft Aqua brash. This is a mob brash. I'm going to use this
for initial washes. I have recently purchased
silver black velvet brash, and these two, I'm going to be using to paint the subjects. Finally, this is one
of my old brushes. It's number one round. I'm going to use this
to splatter the stars. Of course, a palette
tissues and water jar. Oh, and always use the supplies that you're
comfortable with. You don't have to use the
same brands that I'm using. And that's it for art supplies, and let's quickly move
on to the next video.
3. Before You Start..: Before we start, as
you guys already know, there is no techniques or tips video for this
class separately. Don't worry. I will explain
the process of building these landscapes step by step as we paint along
each class project. So are you ready with
your art supplies? If the answer is, then come. Let's get started with
our HAS class project.
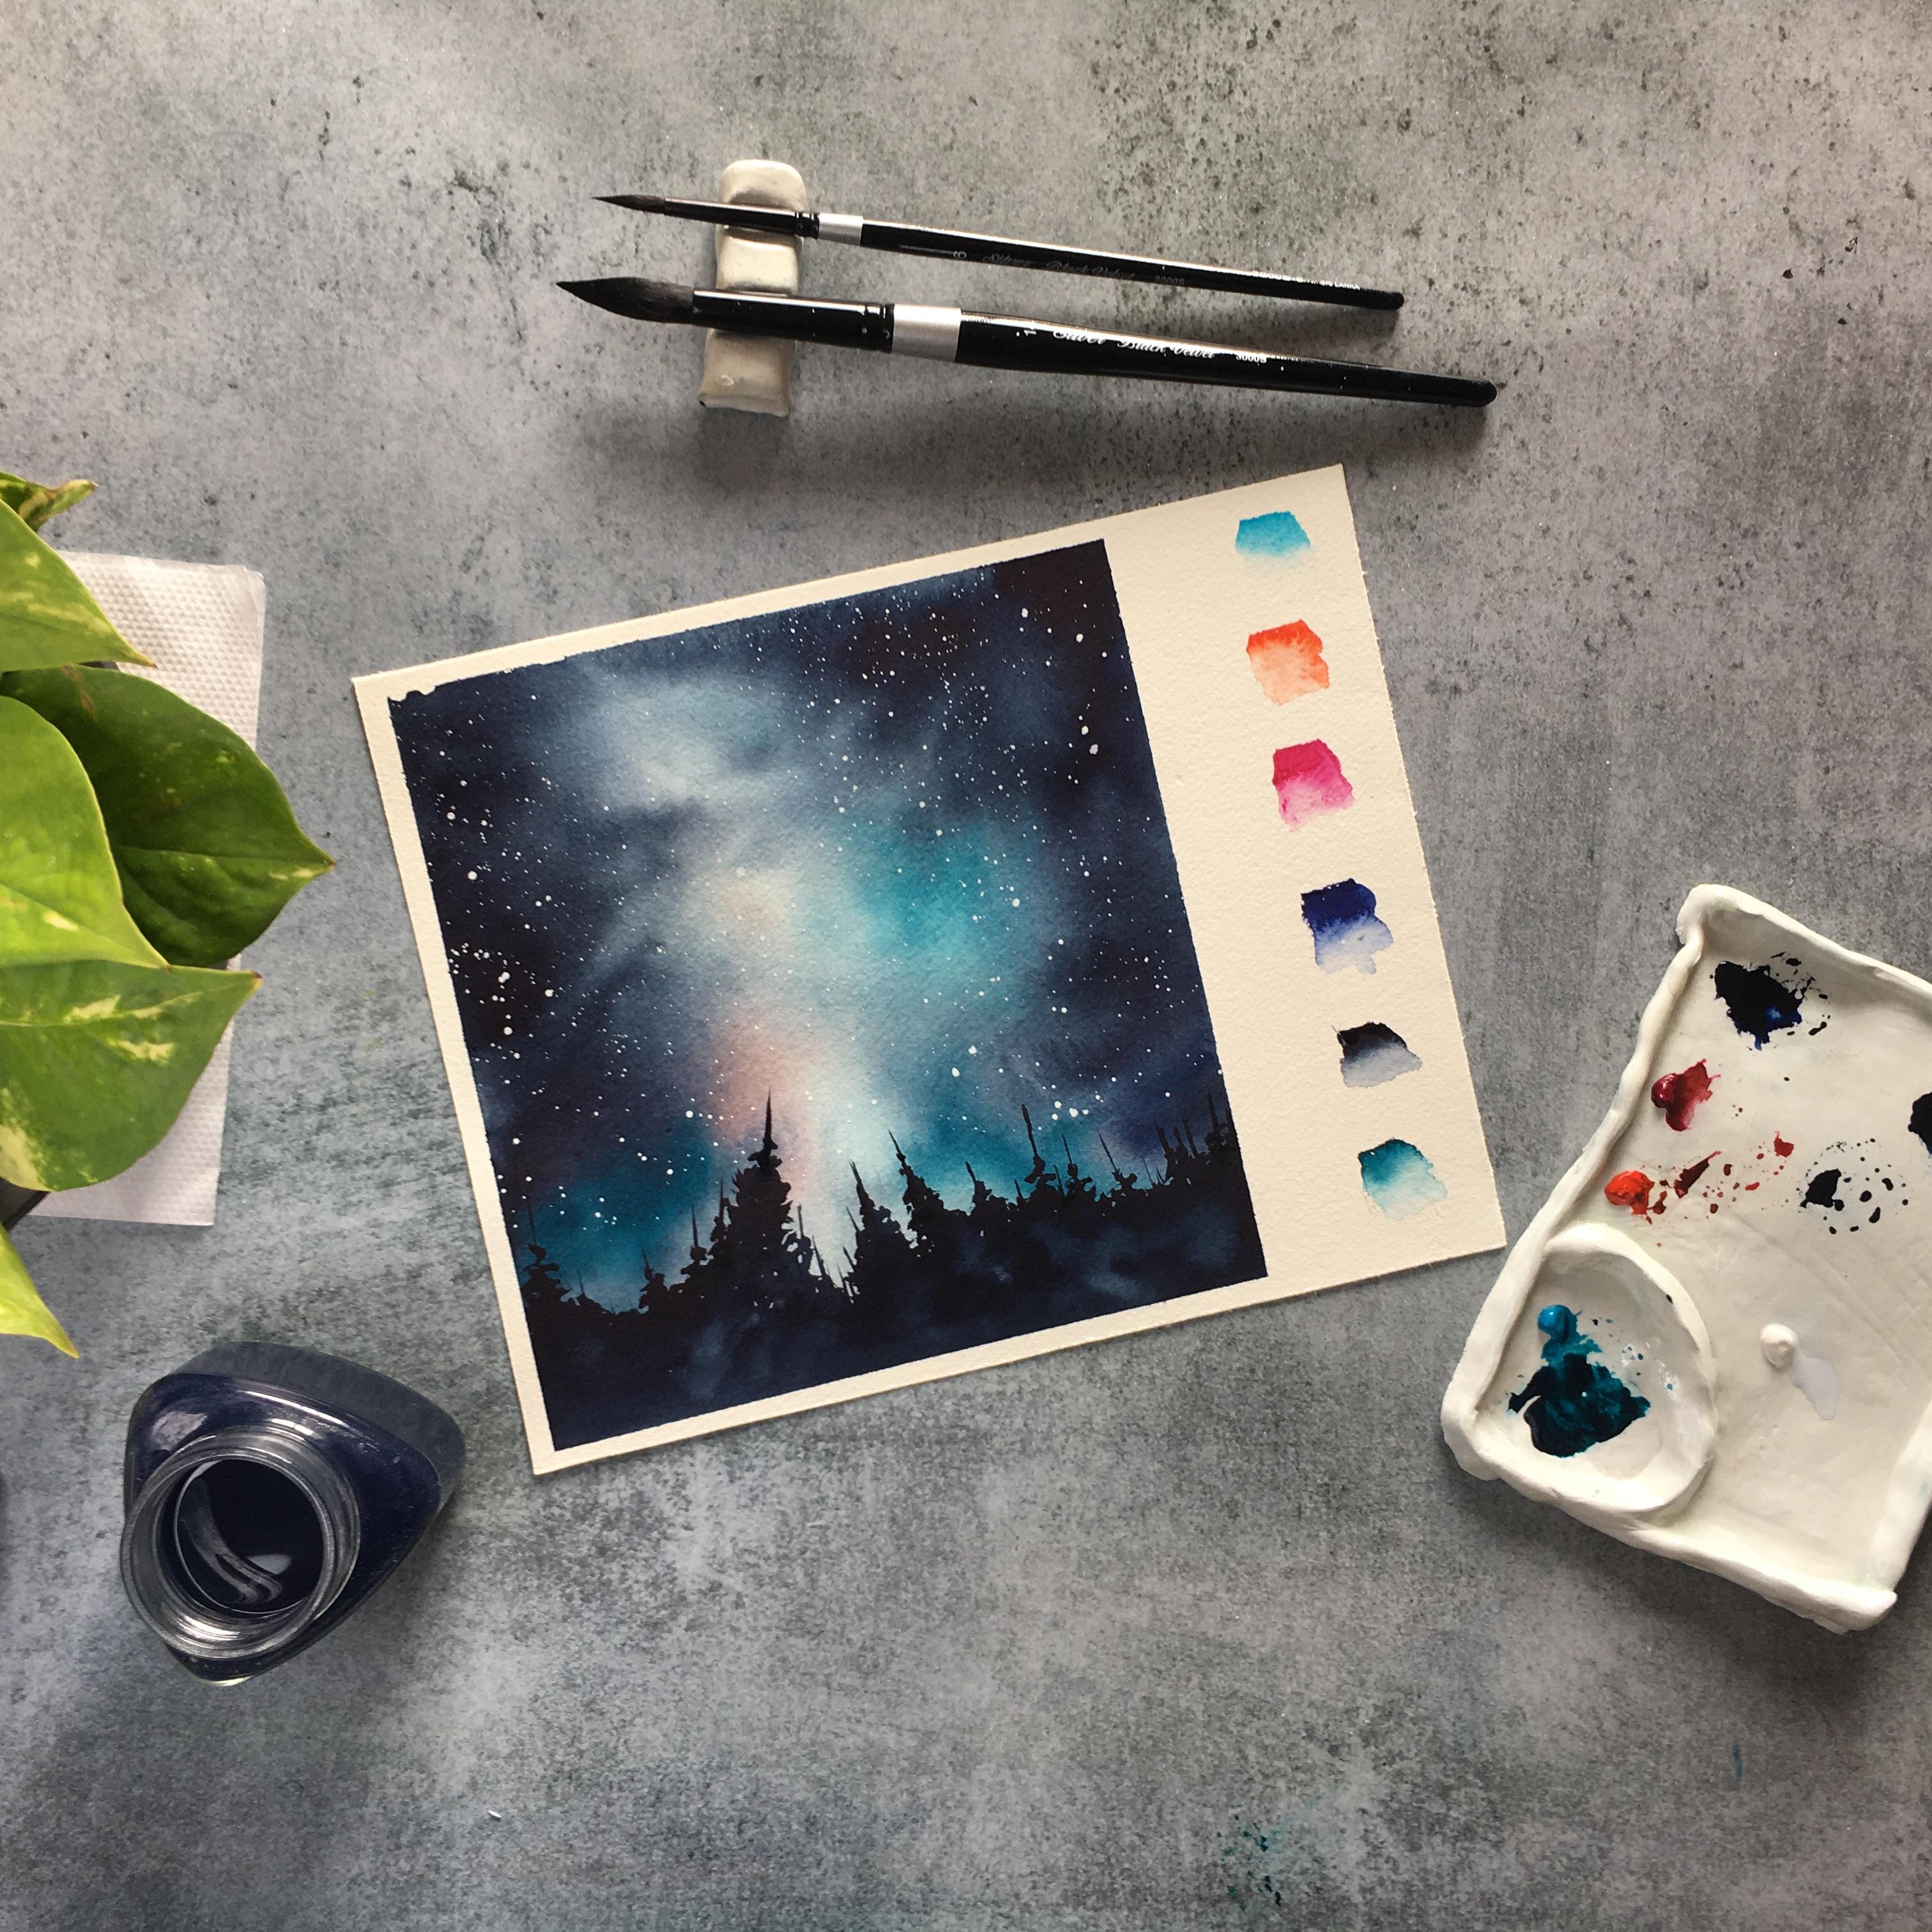
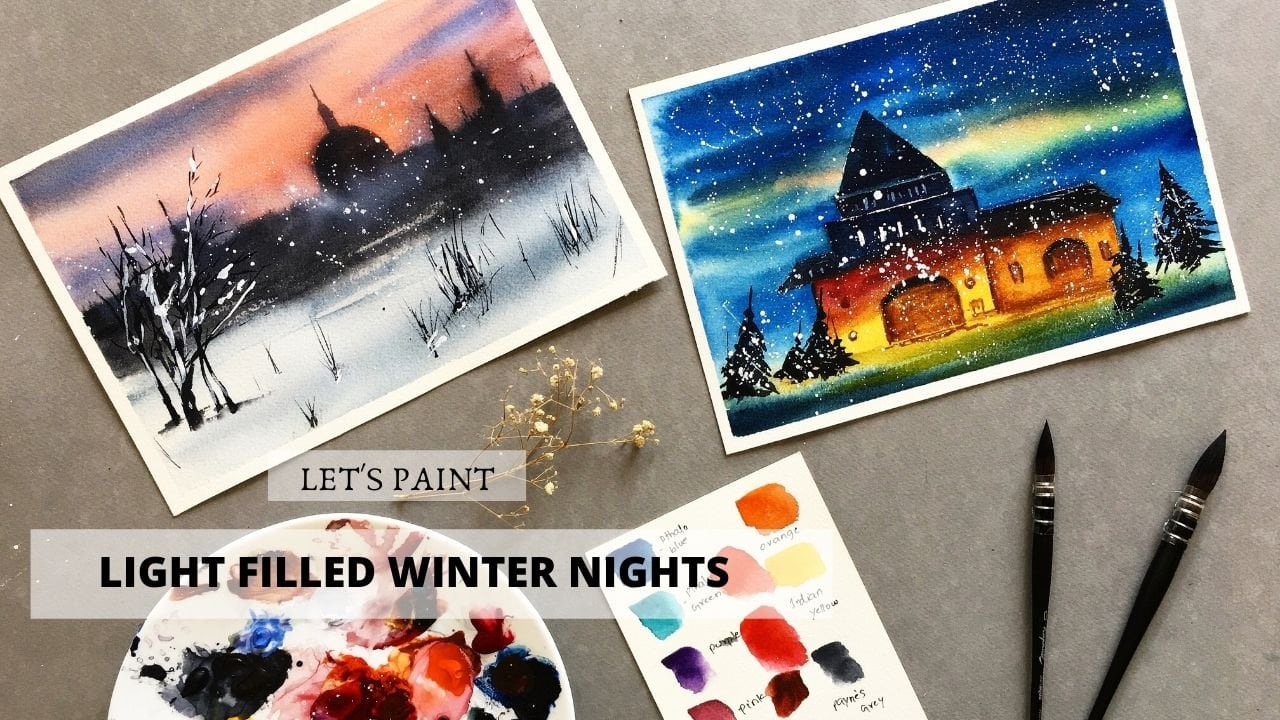
4. Class Project 1 - Evening View: Get started with
first class project, evening Vew I used a total
of five colors for this. Turquoise blue, Vamonse
blue and indigo. All of these colors are from the brand called
White knights, except that Turquoise color, it's from Turner's
The Toquoie color from Turner seemed
way too light for me. I have used White Knight
toque blue as well. For the class project, I'm going to be using
both brands toque color because Turner is way too light and White
Knights is a bit dark. I'm going to mix both of them. I'm going to be swatching
these colors out, so it'll be easier for you
guys to pick the shades closest to in case you don't have the exact
brands or colors. The vermilion and Quin rose
are from White Knights, and above Tarkoe
is from Turners. And the blue that I'm painting now is from White
Knights as well. And this is Indigo. It's from White nights as well. And now I'm going to swatch the White Knight
Tokose Turner Tokose is on the top and White Knight
Tokose is at the bottom. Now that we have
sorted our colors, let's get started with
painting the class project. As you guys already know
from my art supplies video. I'm using my new brushes today. This is Raphael number
six soft Aqua brash. This is quite a large brush, so I'm going to be using
this as a mob brash. Going to get started by
wetting the paper with water. Make sure to apply an even
of water on the paper. Once that is done, I'm going to be switching
my brushes from Raphael to silver
brush number 14. Let's begin by taking a mix of two torques colors from
two different brands. Bgin by painting cloud like
structures on a wet paper. And leave the space white
or empty in the middle. It's important to leave these
white spaces in a galaxy. I'm going to be using
a mix of ermlion and Quinroros I'm going to slightly apply it nearby
the stroke color. Now, let's use the blue color. You can use any blue
that you prefer. I'm using anthro blue. These colors in a
shape of a cloud and make sure to blend them with the rest of the colors that are already
present on the paper. Now, let's use another
dark color that is indigo, and it's very important to use contrasting colors when
you're painting a galaxy. You can use black color, but I prefer to use
indigo or PS gray, Pinscrey would work too. That I have placed
indigo wherever I want. It's time to blend all of
these colors together. And for blending, I'm
simply using my wet brush. Oh, let's also go and blend these colors very lightly in
that white space as well. So you can see, I am being very careful not to let go of that
white color in the middle. And using some more
of the indigo, I'm going to darken the
edges of the paper. I'm going to take some
more of indigo and I'm going to add on the
bottom sides as well, but make sure to not add
any color in the middle, that white space is
very important for us. With the wet brush, I'm going to simply drag the color into the middle
of that white space, but I'm not completely letting off that white space,
as you can see. I'm adding a generous
amount of taco is blue and vermilion
and Quin rose. It's a one more coat because the previous coat was,
you know, very light. My paper is staying
very wet all this time. So this process is
very easy for me. Now, without using any
more of the indigo color, I'm going to drag the paint that is already
there on the paper, and I will slightly add those smaller cloud shapes in the middle of
that white space. And let's paint
those cloud shapes on the right side as well, using a bit of indigo. Please remember, there is no
wrong way to paint a galaxy. It's all about, you know, just going in with a lot of colors and blending
them perfectly. We are almost at the end of
painting the background. And as you can see,
I did not lose the turquoise blue color and I did not lose that
Quinan red color, and I did not lose the
white space in the middle. I have at the end, preserved all the things that I wanted to show in a galaxy. So painting a night sky or
a galaxy is all about going back and forth with a lot of colors and blending them
perfectly with each other. So for this, you really need a good paper and a
good brash, of course. Now that I'm satisfied with
how my background is looking, I'm going to keep
this for drying, and I'll come back once
it's completely dried, It's dried, isn't it? I will you know
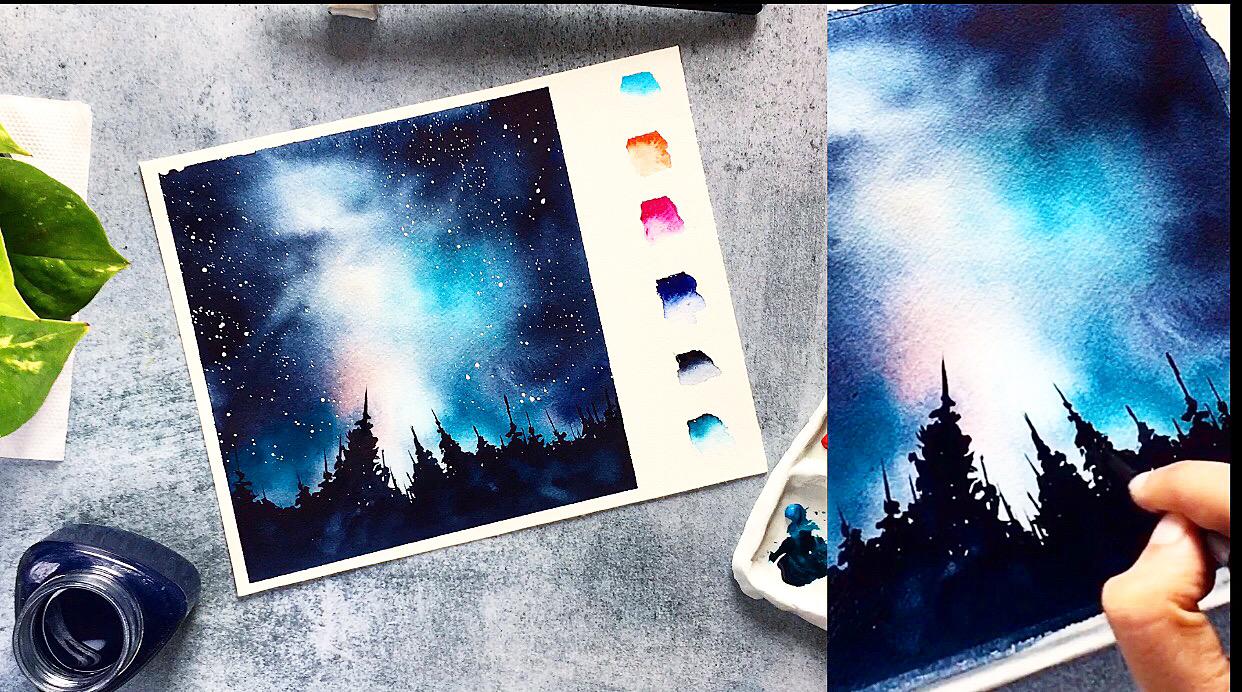
check with my hand, and yeah, it's completely dry. But ignore my hand. It's full of paint. And using my silver
brush number 14, I'm going to get started with
painting the foreground. For this, I'm going
to be using a mix of blue and indigo instead
of plain black color. There are going to be a lot of different foregrounds in
the coming class projects. But for today, we're
going to go with one simple and very
common subject, that is the pine trees. It's very easy and simple
to paint a pine tree. If you have a right brush, Typically, your pine tree should look like a triangle at the end. So make sure you get that particular shape while you are painting a pine trees. And it's also very important, like I said, to
use a good brush. This brush is proving to
be very heavy on my hands. I'm going to quickly
change into a smaller one. And this small brush is number
four silver brush as well. And using blue and
indigo mixture, I'm going to paint pines
all over the foreground. But please take a note that all my pine trees are
in a different sizes. They're also facing in
different directions as well. And that small step really helps to add a lot of character
to your painting. Sure, you do the
same of painting pine trees or any trees for that matter in a different
sizes than one another. And also make sure to change
the placements of each tree. And now that I'm done, painting all of the pine trees, I'm going to take
a lot of paint on my brash and I'm going to cover the entire
foreground with it. Oh. You're painting the foreground, I realized my pine trees are
slightly smaller in size. So I'm going to paint
a large one here. And also a couple of pine trees on the
right side as well, because they are also
looking very small. Once I'm done with
the foreground, it's time to go for the details. In this case, it's
about adding the stars. For that, I'm going to be using white gas and a very small number
one zitang brash. I'm going to be using a
rough paper that I used to practice on and I will
cover the foreground with it. I don't want the stars to be
splattering on these trees. I just want them
to be in the sky and taking a lot of
paint on a wet brush, I'm going to splatter
away the stars. 'Cause I'm going to add a few strays manually
using my brush. Go to splatter once more because it's still
looking very plain. And that is it for Class
Project one evening ew. And I hope you guys enjoyed painting this
class project with me. I really had so much fun because using all of these different
colors is very new to me. I usually go with
a limited palette. And I will see you guys tomorrow with a
new class project, and thank you for watching.
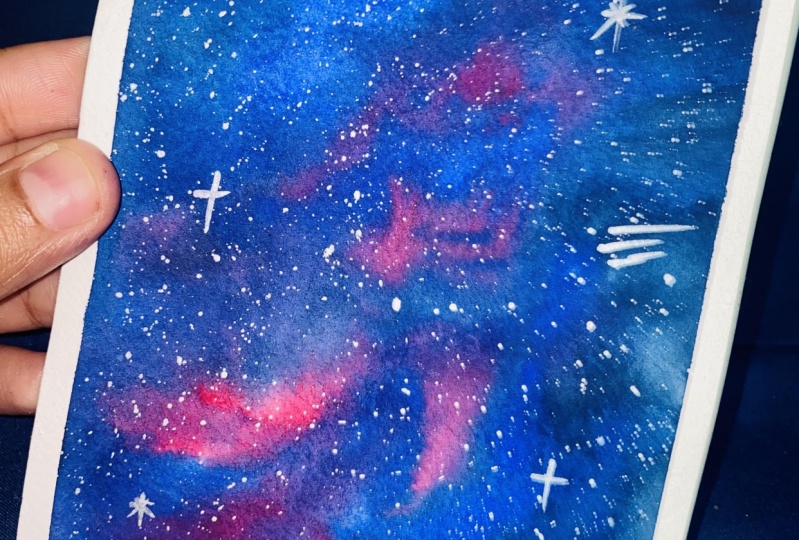
5. Class Project 2 - Star Dust: Hello. Welcome to
Class Project two. Stardust. There is
only three colors that we're going to be needing to paint today's class project. Quinrose blue, and Indigo. I have taken these
colors on my palette. Now I'm going to
make the swatches. This is quin rose, and I'm going to swatch
blue color here. It's end blue. You can use any blue that you want if you have ultramarine, which is very common, and
you can use that too. And the final color is Indigo. All of these pins are from a
brand called White nights. You might see purple color
in the final landscape. It's because when quin rose
and blue get mixed up, it'll give purple color. I just want to swatch
that color too. So I'm only using three colors, and of course, white at the end, but I'm going to be getting this secondary color purple because of quin rose and blue. And let's get started
with the class project. And the first step is wetting
the paper with clean water. And I'm using my Rafael brush. Make sure to apply an
even coat of water. Now, I'm going to get
started with Quin rose. I'm applying these loose
cloud like structures with white space in between. Quickly, followed by blue color. As you can see, I'm already
getting that purple color wherever the Quin rose and
blue color is getting makes. I used to get really worried when the landscape
is at this stage. You can see how messy it looks. I'm quickly adding
the indigo as well. Galaxies night
skies is all about getting those paints
played into each other and getting them
blend with each other. And until you add the stars, sometimes you don't even
see the final picture, and that is perfectly okay. What matters most is your blending and make sure
you're not leaving out any hard edges like
you are seeing here between those quin rose
and the bluish colors. With my wet brush, I'm going to just blend
them all together, not leaving any hard edges. I'm going to add a layer of blue color on the left
side of the paper. And right here at the bottom
of the paper as well. As you can see my
paper is really wet and I think it's been
around eight to 10 minutes, and if your paper dries up, you really cannot blend all
of these colors together. So what to do when your
paper completely dries up, but you're still not done. Well, there is one
technique that you can use when your paper
has dried up. The technique is to wait until the paper is completely
dried and then re it and then adding another layer or as many
layers as you want. So that you can do, but it's quite a bit
difficult for a beginner. And also, a lot of
artists a white color after finishing up with the
background instead of leaving the white space empty, like we have done in
previous class project. And today, I'm going to show you both of
these techniques, revetting and adding
the white color. So my previous layer
is completely dried. Now it's time to add white color as well as
to revet the paper. I'm using white water color instead of guash color because not everyone is going to be having this gauche color
in their collection. So I'm using this plain
white watercolor for adding that extra white color
in the in the landscape, as well as for the stars, of course, I'm going to use a hake brush
to ret the paper. If you don't have
the Hake brush, you can use any of your
brush that you want. I'm using this
particular brush today because the reveting
can be done quickly. But keep in mind, whatever brush that
you are easing, make sure you're not pressing
the brush into the paper. Just light strokes are enough. And once that is done, I'm going to be using the white watercolor and I'm going to just add that color
generously onto my paper. These are the two places that I want a little bit
of white color. So. Now I'm going to be
using Quin rose color, and I'm going to blend
it with the white. We are back at square one. It's again looking very messy, and you don't have to worry at this point because
we are not done yet. Because you can add as
many colors as you want. You can add as many layers of those colors as you
want at this point. And you can definitely
get the best results possible at the end because
that's how galaxes work. That's why it's one of my favorite and stress landscape to paint because you
can't get it wrong. I'm going to be extending
those clouds into that white and pink
mixture with blue color. So it sort of us like
a Nebula structure. Now, all that's left is to blend this blue color
into the landscape. And of, add a tiny bit of blue at the top left side
of the paper as well. Like I said, I'm going
to be adding that blue color on the
top left because it was looking rather and a layer
of blue. He's always good. This is how it looks
at the end of our pre wetting and adding white color and blending that white color
with the rest of the paper. So yeah, I'm going to keep
this for drying and I'll come back once it's completely dried so that we
can add the stars. Just take a fresh jar of water because the previous previously, the water was so blue, and the stars will be
here in blue color too. We don't want that.
I'm going to be using my normal white watercolor and my number one brush to
splatter the stars. If you're painting
a Galaxy and stars. It's always a good idea to
add a few shooting stars. That is it for today's
class project. Even though the
concept of galaxies and night skies is a
very common subject. I try to bring something
new in this class. Today, we have learned
about re wetting and adding that extra layer of white
into the landscape. I hope you find that useful, and I really hope
you will use that in your future landscapes and see you guys tomorrow for
our last class project. A.
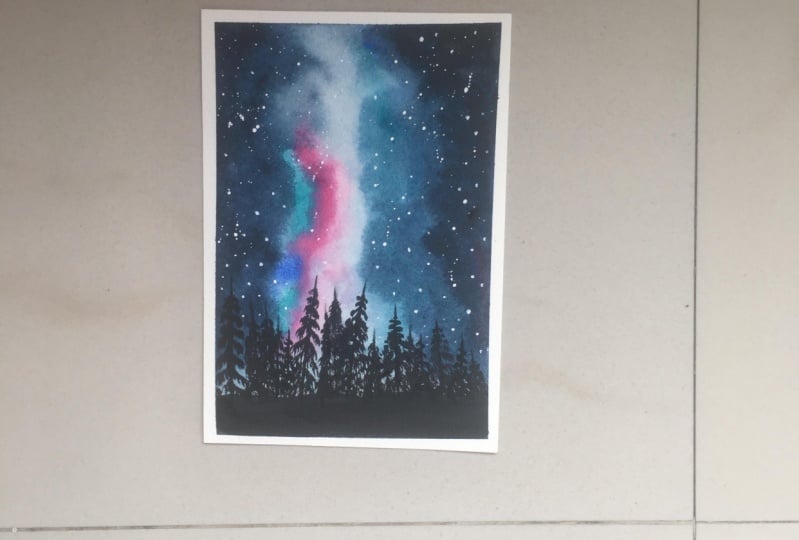
6. Class Project 3 - Stellar Night: Hello, Welcome to Class Project 3. We're going to need three colors for today's landscape. Lemon yellow, chocolate is blue, and indigo. Chocolate is blue, is from the brand called terminals. And the remaining two colors are from White Nights. And now let's see how these colors Luke. So I'm going to make a few swatches here. All these colors are already there on my palate. So this is lemon yellow. Stokoe is blue. Final color is indigo. Choose whatever brand of colors that you have, but make sure they are similar to this shape. We're going to be needing. A fresh and dry day should be a bar for later in the landscape. So make sure keep one ready. And now I'm going to be using my number 6 brush and I'm going to read the paper with clean or dirty debt. Make sure to apply an even coat. Okay. I'm going to be switching to my number 14 syllabus acrylic brush. And I'm going to pick the first color is a lemon yellow color. And I'm gonna take generous amount of paint. The brush. These brushes hold a lot of water and paint. I'm just applying the first layer of yellow. In watercolor. We should always try from light to dark. So my next color would be clockwise blue. And the minute the drug or is blue patches in low it done screen because there is some amount of blue color in there. And that is okay. Green is a beautiful color. All the paint from my brush, I'm going to just blend these two colors together. Elo and Docker is blue. Now I'm going to add a little bit of takeaways on the top of the paper. Now, let's paint the darkest color. And the last indigo. And softly blending indigo with DACA is blue-collar. Hopefully you guys know that this is only possible if the paper is wet. If it is dried, the two colors will not blend. And now without much force applying to the big ball, slowly and softly blend all these three colors together. As you can see, there is already a bit of green color are bearing in the elbow zone. So I have taken a bit of a law, fresh law, and I'm going to be applying it on the paper. At this point. It's about following your intuition. If you think it's blended, good enough, you can stop right here. If not, you can keep on moving your brush very softly agonist to be above until the colors are blended. I think these colors are blended enough now. So I'm going to be taking a dry day should be bombed. And I'm going to lightly dab in a diagonal shape. Paper is still wet so the color is getting lifted off. And so you can see that white color. Again, it's about following your intuition here. I don't think there is enough white. So I'm going to be dabbing with my tissue paper once more. I'm going to keep this for drying. And I'm going to come back once it's completely dried, the paper is dry. So I'm going to be using indigo color. And I'm going to paint the foreground. This time. I'm going to be adding a small mountain like structures for ground using indigo color. And once I've added that, I'm going to be quickly adding pine trees while the paint is still wet so the mountain doesn't remain plane. And you might be wondering why I did not show bending of this mountain daily at the end of this class project. Keep adding these fine trees, very small ones on the edge of the mountains. And now let's add the big binary is using the same brush and paint. I'm going to be taking a small number for silver black velvet brush and the same indigo color. And I'm going to be painting a very large pine trees. The pine tree on the left side of the painting as well as you can see, I'm painting over an already previous one because it was looking very small. Comeback to the boundaries on the right side. Let's cover up the entire left side with a few big binaries. Let's paint a boil with a lot of wise by applying very light pressure on the paper with your brush. Fainter feel wise. Paint them in a very thin lines. Brush with a very sharp dip really helps in making these wires. Realistic. Paint as many ways as possible around the pole. Make it very messy. The more messy, the more realistic it looks. Now cover the entire tree area with the spirit of paper. And now it's time to splatter some white paint. For this, I'm going to be using my number 1 round brush. It's a very small one and y two articles instead of whitewash. Now, I'm going to splatter the stars in the sky, more stars near that Milky Way galaxy. Now I'm going to add a few big stars manually using my number one brush. Reason why I did not show painting that small mountain area is because I forgot to press the record. Actually, I forgot to press the Red Guard on branding this entire floor ground. So I had to paint over twice. You can see these two landscapes right here. So I'm sorry for that. So I really hope you guys found these landscapes helpful in branding normal, giving a vaccine the easy way, using the tissue paper. And I hope you guys had fun painting these three landscapes with me for the past three days as well. And thank you so much for watching and I'll see you in the next video.
7. Final Thoughts: I can't believe how fast these three days have gone by. And each day we have learned something new. Even though the subject is very common. For the first landscape, we have learned how to live those whitespaces in the landscape. And for the second landscape, we have learned how to use that whitewater color gracefully to paint galaxies. And for the final landscape, we have learned how to use additional paper to paint Milky Way galaxy. In each of this landscape, you can find one common thing, These making complex landscapes using very simple and easy techniques. And also we got to play with such beautiful and very bright colors in all of these landscapes. So much fun painting these three landscapes in the past three days. And I hope you had to see you guys in my next class. And thank you so much for watching.
 Sukrutha Jagirdhar, Watercolor Artist I Creative Entrepreneur