Transcripts
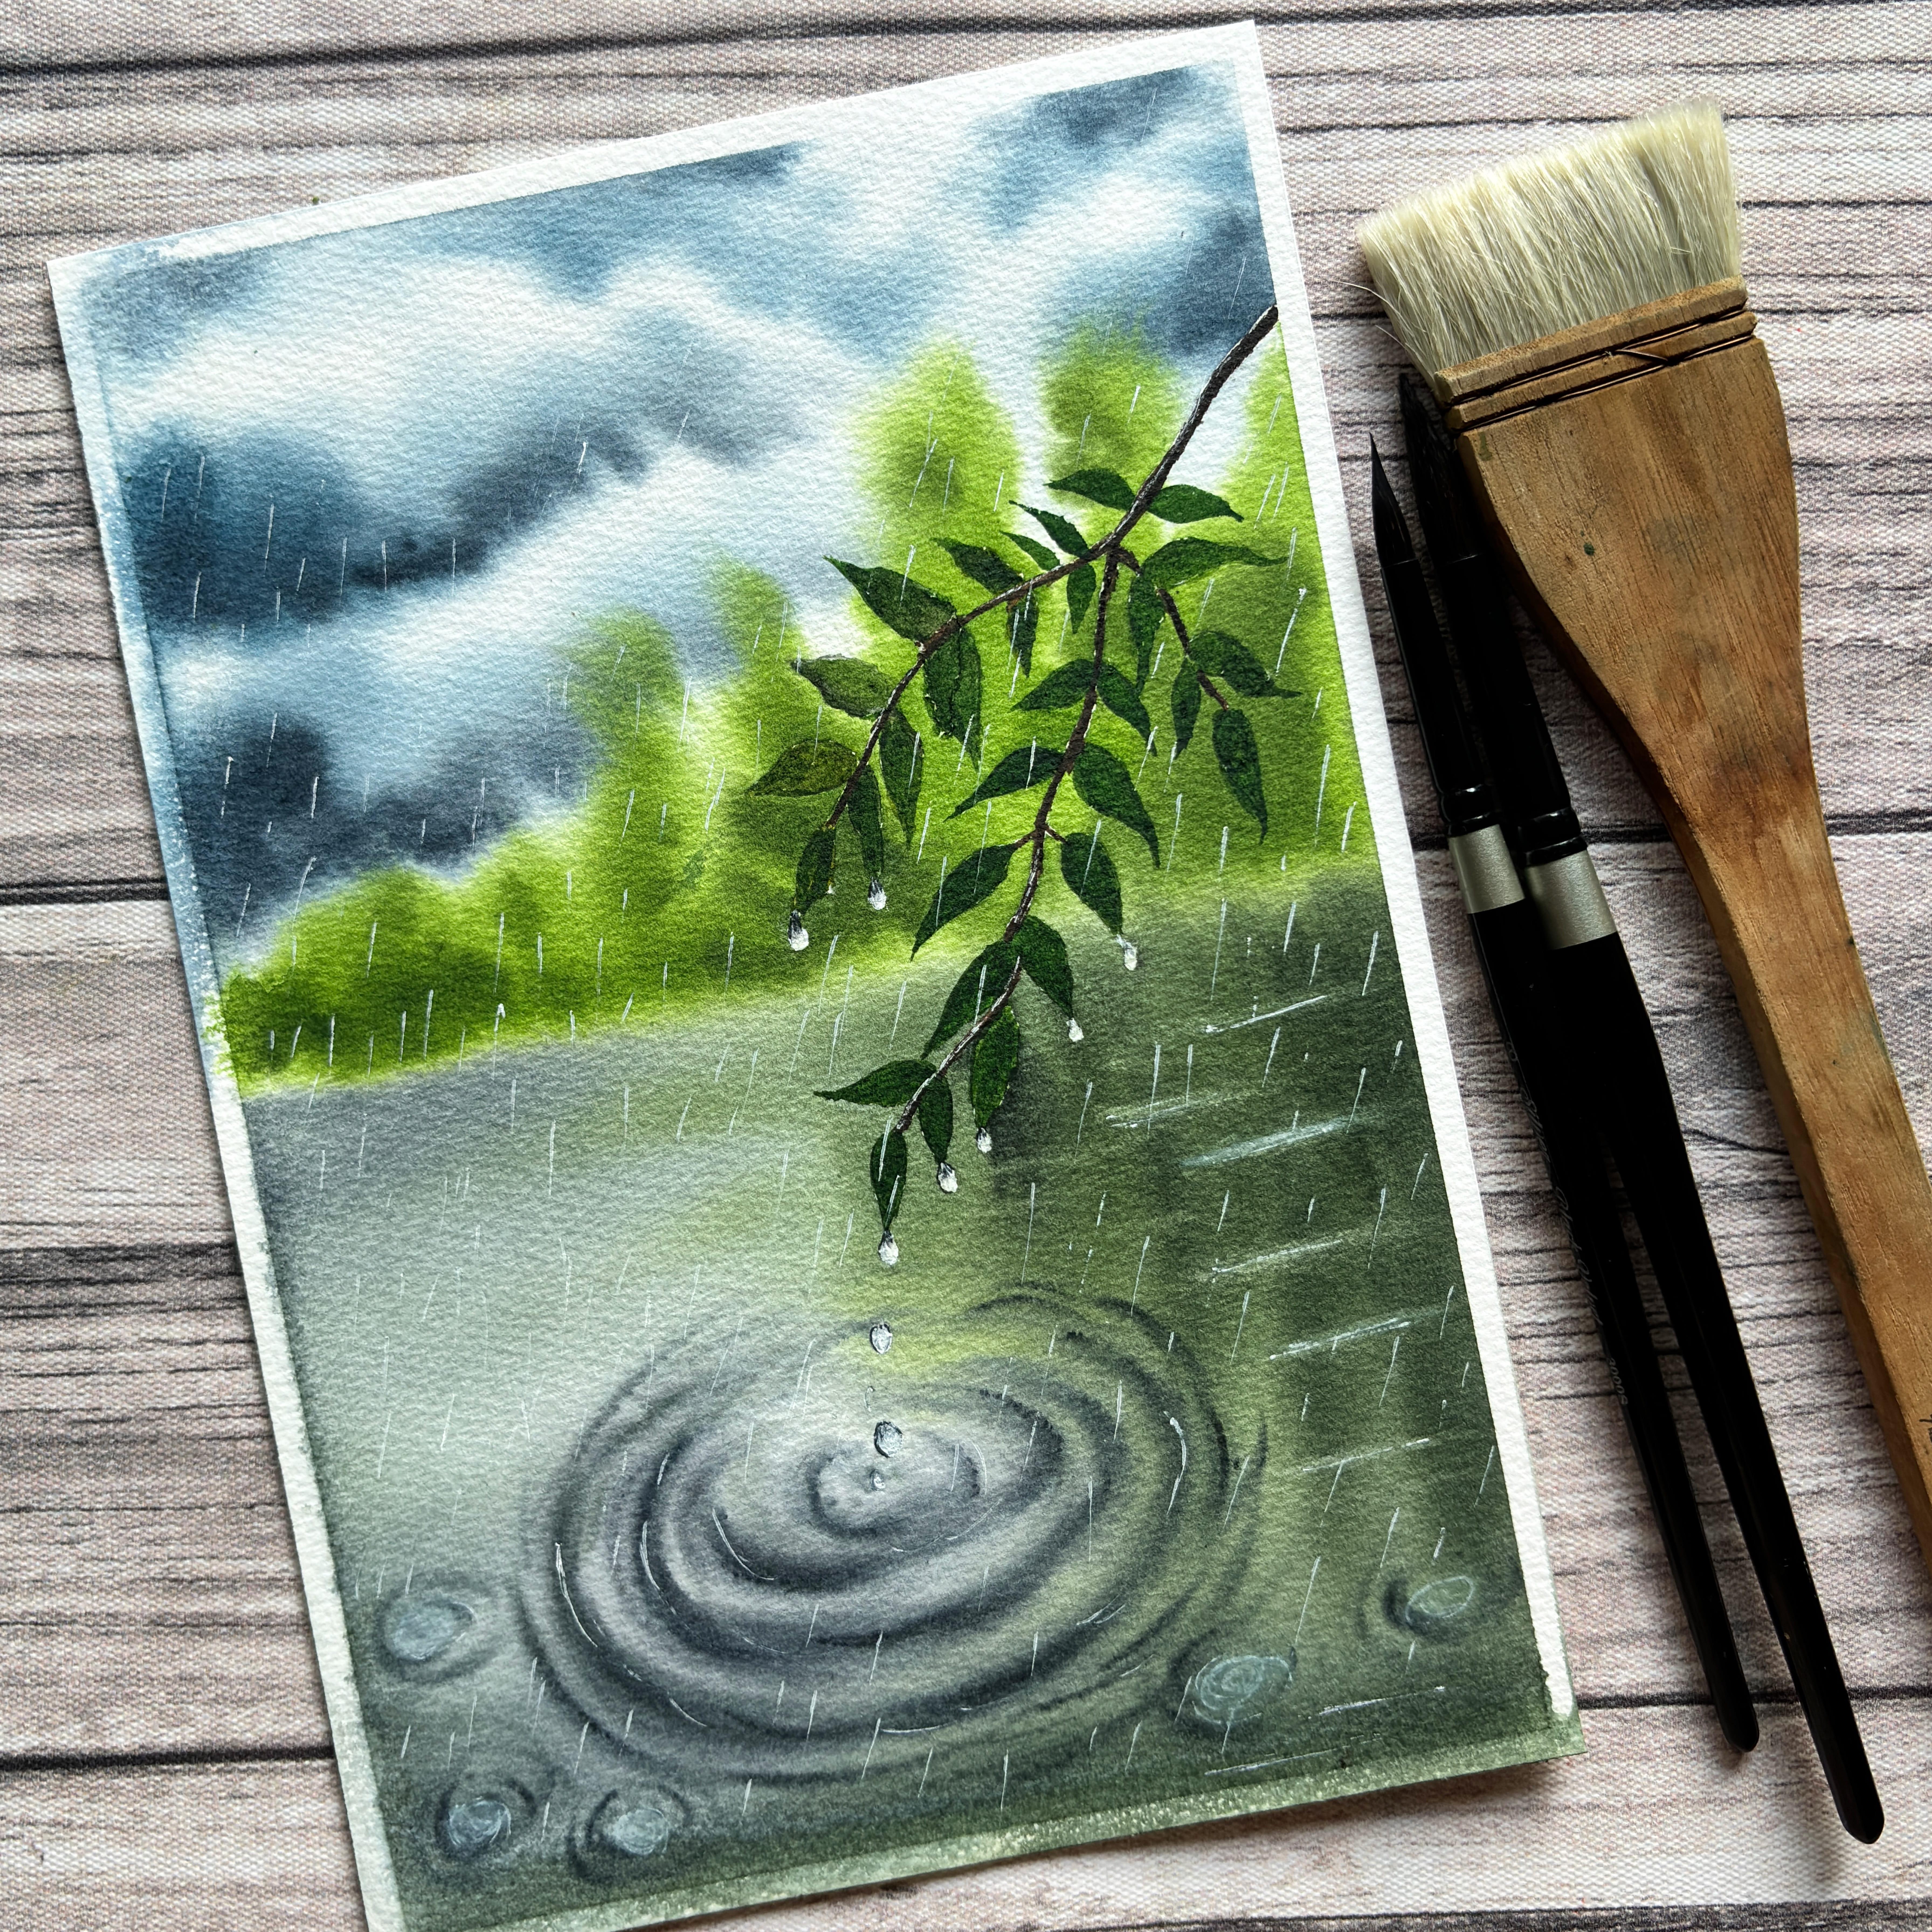
1. Hello Monsoon!: There's something truly magical
about the monsoon season, the dramatic rain filled skies, the fresh scent of the
Earth after the first show, the vibrant greens
that come alive, and the gentle sound of raindrops creating
ripples on still water. It's a season that
reminds us to slow down, appreciate nature and find beauty in the simplest moments. Hello, everyone. I'm Aswaia an engineer and a
watercolor artist, and welcome to this brand
new watercolor class. In this class, you will
learn how to paint soft, moody skies, create
glowing green foliage, add realistic rain effects, paint delicate water
droplets on the leaves, and bring the water
surface to life with beautiful
reflections and ripples. Whether you're a beginner
looking to build confidence or an experienced artist wanting to paint a peaceful rainy scene, you can follow along with ease. So gather your art supplies, find a comfortable spot, and let's celebrate the
beauty of Monsoon together.
2. Art Supplies: All right, so let us take a look at the art supplies
that you will need. First is the paper. So I'm using the paper from the brand Saunders water food. It is a 300 GSM, 100 person cotton
watercolor paper with a minimum thickness of 140 Bs, and it is a cold pressed
watercolor paper. So you can just have a look
at the texture of this paper. So you can go with any
watercolor paper of your choice. Just make sure it is 300 GSM and 100% cotton watercolor paper that is going to give
you the best results. Next, you're going to require a pencil and an eraser for
making the pencil sketch. And let us take a look at the basic brushes
that you will need. You will need a flat brush to wet the entire
surface of the paper, and you'll need a couple of round brushes, size number 12, or ten, and size number eight, six, and a mini detailing brush. That's it. These are the basic brushes
that you will need. All these brushes are from the
brand silver black velvet, but you can go with any
brushes of your choice. Next, you will need
a white gelpin. If you don't have one, you
can go with white guash. These are the colors that I'll be using for this
particular class. I have a separate video on which colors you will need
for this particular painting. Next, you'll need
two jars of water. I just have one over here, but you will require two
jars of clean water, one to wash away all
the dirty paint, and other one is to pick up
the fresh paint. All right. Next up, you will
require masking fluid. This is to mask out the
leaf and the branch area. But if you don't have one, you can directly go
with the white gouache, and you can paint
the leaves direct. You need a masking tape, and you'll also need
some tissues and paper cloth to wipe off all the excess amount
of water and the paint, and you'll also
need packing board, a board like this
to fix the paper. And, yeah. So these are pretty
much the art supplies. So go get them ready, and I'll see you soon
in the next section.
3. Colour Palette: All right. Let us take a look at the colors that you will need
for this particular class. For painting the
dramatic clouds, you will need bright blue and a mixture of basically
you will need a mixture of bright blue and pains
gray so that you get a nice bluish gray tone for creating those
dramatic clouds. You can go with any blue. It could be serle and blue, it could be any
other light blue. Just take slight amount of that blue and mix
it with your pains gray and create this beautiful bluish gray
shade for your clouds. Next for creating the lush green forest in the background, I'm going to be using
this nice shade called sap green
from white knights. So you can go with any
green from your palette. It could be radiant hue. It could be dark green, or if you just have olive green
or any light green shade, then mix it with little
amounts of brown or sepia and create this
nice cooler blue. I mean, nice,
cooler green shade. And this is the
olive green that I will be using to
paint the background. So make sure you pick
up different amounts of greens and mix it in your palette and then you
can go ahead and paint it. Alright, now for creating
the branch that you see, which is present
in the foreground, you can go with any
of your ndike brown or any dark brown. And to add the details
and highlights, you can choose sepia. So this is the sepia shade
that I have swatched out. So yeah, these are pretty
much the basic colors, very minimal color palette, and I hope all these colors are present already
in your palette. So just get them ready,
prep your colors, and I'll see you soon
in the next section. A
4. Let's create the Pencil Sketch: All right, so let us begin
with the pencil sketch. So the pencil sketch
is really simple. First, let us start by
defining the horizon line. Basically, we want to separate the lake region from
the sky region, and that is what
we are doing here. And this need not be exactly half of the
page, but, you know, just maintain that
proportion one fourth, and the rest of it is the lake. So now we are going to
draw a teeny tiny branch, not very tiny though. So we are just going to draw
a branch that is going to be the focus of this
particular painting, and the rest of the
background is going to remain in the out of focus. Basically, it's
going to be blurry. So the branch is going
to be really simple. We're just going to define
a branch with some leaves. So you can just wait for me to finish the complete
pencil sketch, and later on, you can
stop or pause the video, take a screenshot and create the pencil
sketch for yourself. So there's nothing complicated or rocket science over here. It's that simple. So all you have to do is just follow along and just
create the pencil sketch. So as we progress further, you will get an idea of what the painting is going
to look like, right? So to avoid a lot of erasing, just do not attempt to the
pencil sketch as of now. You can just wait
for me to finish it, and then you can go ahead
and create it. All right. So now this branch or the leaves that we
are going to create, it need not be in the
same manner as I am doing because nature
is very unique and, you know, it has
different elements. So it's up to you how
you want to create this branch and
create those leaves. All right. So there's no
hard and fast rule to make it appear just as it
is looking in my painting. All right, so I'm just going
to quickly go ahead and finish the pencil sketch and you can follow
along with me. All right, so this is how the branch and the leaves
are looking as of now, and I'm quite happy
with the pencil sketch. So now let's move on to adding some dew drops on these leaves. So since it's the
monsoons, obviously, when it rains, you can see a lot of dew drops on the leaves, and we want to show that
exact effect where the drops are falling from the edges
or the tips of the leaves. And as they fall into the lake, they are creating the
ripple effect in the water, and that is what
we are trying to depict in today's painting. All right, do not be
afraid of anything. Let us just push away all the fears and let us
just focus on creating. As I always say in
all the classes, just trust in the process and the end is going to
be really beautiful. All right. You can see now the dew drops
are really simple. You have to just create
the shape of the dew drop. And it need not be exactly
the shape of a drop. It can be circular in shape or slightly oval and pointed
at the top. All right. So yeah, that is it. And for creating the
dew drops as well, you can do it on all the
leaves or some of the leaves, and it's just going
to be very random. So be very random, keep it organic, and
try to create that. Alright, so this is
how it is looking. Now, let us go ahead and define the ripples that are going
to appear in the lake. So you can do this or you can
completely omit this step. I am doing this because later
on when we start painting, I will have an exact layout
or a blueprint so that, you know, I can just
see these lines and directly go and
apply my paint. I need not find or think where do I need
to put my ripples. So a pencil sketch acts like a blueprint and it guides you
throughout your painting. All right. So this is the very important
step in your painting. So always get the pencil sketch right because once you
have that layout set in, it makes your life
much more easier. All right. So at this point, if you want to do
any kind of changes, if you want to
erase it and if you want to redefine
your pencil sketch, all of that can be done
in this particular stage. And once you have the
pencil sketch right, you can just go and
paint seamlessly. All right, so this is how the pencil sketch is
looking as of now, and you can see the pencil
sketch is completed now, so you can just pause the video, take a screenshot and
paint it for yourself. And once the pencil
sketch is ready, let us quickly dive
into our painting, and I'm really excited
to start the painting.
5. Wetting the Paper: All right, so you
can see that I have masked out the branches
and the leaves and also the dew drops because
I wanted to paint it in the second layer once the
background is completely dried. But if you do not
have masking fluid, then what would you do? So wait for the
background to dry, and then you can
go ahead and paint the branches and
the leaves over it. Okay, for that matter, your pencil sketch has to be visible through the background, and for painting the dew drops, you can go ahead and
use opaque white guash. So this is one of the
important tips for those of you who do not have
masking fluid. All right. So for those of you who have masking fluid,
you can just go ahead, mask out the regions
and wait for it to dry completely
before wetting the paper. All right. So now for
wetting the paper, I'm using my larger
sized flat brush from silver black velvet, but you can go with any
other larger sized brush. It could be a mob brush, a round brush, or
simply a flat brush. Okay? The main goal of this particular section
is to wet the paper thoroughly so that the paper is nicely since we are going
to work on the wet on wet, the entire painting is
going to be wet on wet, so you can imagine the amount of wetness the
paper should hold. Okay? So just make sure you're doing it multiple
number of times. I know this is a
super boring step, but this is an important
foundational step. In the wet on wet
watercolor paintings. I have been telling
this in all my classes, and I'm going to repeat
the same thing again because this is a
very important step. Many of our times
I see that people complain about the paper
getting dried and all of that. So it also depends upon the kind of paper
that you're using. Please go with 100 person
cotton watercolor paper with a minimum
thickness of 300 GSM. All right, so just go ahead, prep your paper, wet it nicely, and I'll see you soon
in the next section.
6. Let's paint the background: All right. So now that our
background is nicely wet, let us quickly dive
into our painting. So first, I am taking
some paints gray, and I'm mixing little
amounts of blue, basically the bright blue. So I just want to create a nice bluish gray
mixture for creating those magical monsoon clouds
which are a little dramatic. So make sure you create the mix and you can just drop
this onto your paper. So there's no particular shape. I'm just trying to create some nice fluffy clouds here and there and just going with a lighter tonal
value in the beginning. And as I progress ahead, I'm just going to keep building
the colors. All right. So this is what I like to
do in all my paintings, start light, and then keep
on building in layers. All right, so you
can I have laid out some certain shapes
in a random manner. Right now, it might be looking a little
messier and weird. But like I say, always, just trust the process, and once the painting is
going to dry completely, you'll be amazed with
the results. All right. So yeah, I'm using my
larger sized round brush. This is from silver
black velvet again. This is size number 12. And if you're comfortable
with size number ten, you can also go
ahead and use that for painting the
clouds. All right. So you can see this is how
it is looking at the moment, and what I'm quickly
going to do is I'm going to just dab the brush
on the tissue paper, remove the excess
amount of water, and I'm just going to
smudge the paint onto the background so that if
there are any hard edges, we want to avoid that. And while the paper
is still wet, we want to make these
adjustments because once the paper is going to
dry you cannot touch it. You have to wait for the
paper to dry completely, re wet the paper again, and then you have to again
redo the entire process. So that is how it works. All right. So make sure
you remember these steps. So now you can see slowly the painting is
taking its shape. Now the clouds are looking
a little bit defined. So why we went with
a base shade is the base layer is going to
appear like the shadow, and we're going to add
darker shadow areas for the clouds using
the darker tonal value. So this is how we have
created the clouds. Now, let us quickly go ahead and start adding some
background bushes, and this is also going
to be on wet on wet. Remember that your entire paper is completely wet right now, and if you feel like the
paper has started to dry, then do not worry
or do not panic. Just take another brush and slightly start rewetting
the paper. All right. So for painting the bushes or the branches in
the background, I'm going with my sap green. This is from white knights, but you could go with
any other green. Just make sure it's
a nice leafy green. We want to give that monsoon
effect onto the bushes. So you might have
seen this greenery all over during the monsoons, so make sure you go with
a nice bright leaf green. Alright, so this is how the background bushes are looking. Since it's in the background, it's going to be blurred
and it's out of focus. We're not going to
worry on the details of how long or short it is or, you know, we're just not
worried about the leaves. We just want to show that there is something
in the background, some greenery in the
background. All right, so see. Now we are going to create more depth
into the background. So I don't want to go
with one flat color, so I'm going to go with a darker tonal value
of this green. So how did I create the darker
tonal value of this green? I took the same sabgreen added a little bit of
paints gray to it, and then I created this
particular dark shade of green. So do not always go with
direct colors from the tube. Just try to mix two
different colors and see what shade you get. That is how the painting looks more realistic
and more natural. So now you can see the sky is ready with some fluffy
dramatic clouds. The bushes are ready
in the background. So far, really, it's going good, and I hope you're
really enjoying the process along with me. Alright, so now, let us start
painting the lake region. So if at all, your lake
region has started to dry, please take a brush and re wet the entire surface without
disturbing the horizon. So now you can see I'm
using the paints gray, very light, very
subtle tonal value. And I'm just dropping
this onto the background, back and forth movement with the same round, larger sized brush. Alright, so now we are
going to create the shadow, basically the shadow
of the bushes and the clouds being depicted
on the lake region. Not the shadow, but
the reflection. And like I said, we are going to follow the guideline of
the pencil sketch, and we're going to
create those ripples. So for creating the ripples, make sure that your brush should not have
too much of water. If your brush is
having too much water, then first dab it onto a tissue, remove the excess
amount of water, and then create these ripples. Because if you have
too much water and paint on your brush, then you will not be able to control the flow of the paint. Okay? So it's going
to spread very fast, and then it'll be
very difficult to, you know, control uh, paint. So it's very important to know the right amount of water
and paint on your brush. So just go with minimal water. There's already
water on your paper, so you need not have a lot
of water on your brush. So you can see now I'm
able to completely take charge of how my
ripples should look like. So it's not going to be always perfect,
circular in nature. The ripples appear circular
in nature, but, you know, it can be broken slightly in middle and it can have a
different shape as well. So I'm just trying to
be very organic and very realistic over here because
it should not look like, you know, as though
you have sketched something and you want
to depict the same. We don't want that to happen. We just want to have
some ripples in the water and make it look a little more realistic
and natural. So far, I'm liking how the
ripples have taken its shape. Now, while we were
painting the ripples, it might so happen that your paper might
start to dry again. So again, do not worry, take a dam brush and
re wet the paper. Now we will create the
reflection for the bushes. So I'm going to go ahead
with the same green, the sap green that
I used earlier, and you can see how I'm dropping this onto the lake region, and I'm trying to blend
it with the gray, the paints gray that
we added earlier. Adding reflections is one of
the very satisfying things. I really love adding
the reflections. You can see there's no
much water on my brush, and that is the very reason
why the paint is not flowing and I'm able to
control the brush strokes. So go with very damp brush
and very little paint, and then keep building. You can see there's no
movement of water or paint flowing on my paper because there's no much
water on the brush. The paper is nicely wet, it's evenly wet for that matter. Alright, so I loved how the reflections of the bushes
are appearing on the lake, and I want to define
it a little bit more because once the watercolor
is going to dry, it's going to make your
painting look very you know, it's going to make it
look very lighter. So I don't want that to happen. So right now, the paper is wet, and that is why the
painting is looking darker. But once it is going to dry, it's going to dry
one shade lighter. So always keep this in mind and go with darker tonal value. So that's the reason I say start light and then
keep building and, you know, just adjust the
intensity of the paint. Alright, so this is
how it is looking, so you can just
follow along with me. All right, so this is how
the ripples are looking. Now, we will just go ahead
and paint some teeny, tiny ripples on either sides. So since it's already raining, this is a rainy scene and
since it's already raining, we want to show those raindrops falling on the entire lake. And that's the
reason we are adding these additional
ripples on either side. So again, it's going to be same, just some circular shapes and don't make it
too much darker. We just want to show that the
dew drops of the rain are falling and it's kind of creating that ripple
effect on the lake. Okay? So just keep it simple
and just keep it natural. Do not do it all over the lake, just a few places
here and there, and you're good to go. Alright, so I am at this point, if you ask me, I'm really
enjoying the process. It really feels very refreshing, and I always love to paint
nature and landscapes. And this has been my go
to painting subject. And yeah, I hope you're
enjoying the monsoons, and, you know, you're enjoying the process while painting. So sometimes it may get tedious and sometimes it
may get overwhelming, so I highly encourage
you to grab your favorite drink and just keep sipping on through it
and just enjoy the process. It's all about enjoying
the process and just let go of that
pressure of getting things done right and let go of that pressure of making things look a certain way or
feel a certain way. All right. So once you take
this pressure off yourself, you will be in a big relief. And yeah, that's the
secret to a joyful life. And yeah, so I always
keep saying that. And yeah, let's just follow
that in our life as well. So now, just take a teeny, tiny brush and try to lift
off some paint and create these teeny tiny
reflections onto the areas of the bushes where we have added
the bushy reflection. So just some watery
reflections, some patterns. So that, you know, your painting looks nice and realistic. So these teeny, tiny details just make your
paintings stand out, and this is what we
have to work on. Alright, I'm super happy with how the background
has turned out, and I hope you are also happy
with your painting so far. So let us allow the background to dry completely before we go ahead and paint the main
branches and the leaves. All right, so I'll see you
soon in the next section.
7. Painting the Leaves: All right. So now that the background has
completely dried, let us start
painting the leaves. Painting the leaves is
really simple since I had already masked out my
leaves and the branches, I have just removed that with the help of
an masking eraser. But if you guys did not
have masking fluid, you can just go over
it and directly use the watercolor to
paint your leaves. So it does not make
any big difference, but I thought this
would be easier. And so I chose this method, but you can go directly
paint your leaves. So now, since we already
have a blurry background, which is also in
the shade green, so we want the leaves in the foreground to be
nicely visible and dark. So let us just keep
adding the colors. First, I am going to start
with some olive green. And you can see that. I painted using the olive green, but the leaf is not visible
because the bushes in the background are
also lighter in shade. Now I picked up some sap green, and now you can see
the leaf is really highlighted and it is
looking really beautiful. So you can go with a darker
shade of your green. Mix both the colors
and then you can just paint with so painting
leaves is very simple. Again, just go with organic
shapes for your leaves, and they need not be arranged
in a particular order. It can be just in a
random organic way. All right. So there's nothing
much to explain here. All you have to do is just
pick up a nice shade of green, mix two shades of green, and just go ahead and
paint the leaves. And for the branches, basically, it's a very thin branch. So I'll be going
with my dark brown. It could be Dike brown
or you can go with sepia to add in the highlights. So need not worry much about this because although it
is in the foreground, we're not going to
focus on painting the details like the
veins of the leaf. No, we are not doing that
in this particular class. So here it is just about
showing the monsoon effect. The dew drops from the leaves are falling into the
lake and they're creating that ripple kind of effect in the
lake. All right. So we're just going
to stick to that and just keep it simple
for this particular class. All right, so you can just
watch or if you're interested, you can just follow
along with me. All right, so I have been really enjoying
painting these leaves, and it has been quite of
a relaxing experience. So I know sometimes
it may get boring to paint the same subject
over and over again, like painting leaves,
wetting the paper. These monotonous
small little things, they might bore you sometimes. And that's absolutely
fine because we are not used to doing the same
things again and again. We are constantly looking for a new thing, a
different thing. We always want to try
different things. But that's not bad. That's also good, but sometimes it's also important
to, you know, just be grateful for what
we have and just slow down and look at the things that we already
have in our lives. So this is your sign, and this is your opportunity to take this moment, slow down, shut off all the other
tabs from your mind, from your busy mind, and just take this
time for yourself. Take this particular moment to, you know, paint and
get immersed fully. Just don't think
about anything else. Just be yourself, right. Just enjoy and live
in the moment. That is what I want to tell through this
particular painting. So yeah, these are the
small things which, you know, we don't
usually pay attention to. But when we start observing
these small things, they make a huge world
of a difference, and it really makes us
feel good from the inside. So having said that, we
have painted the leaves, I think there's last one left, so I'm quickly going to go
ahead and paint that one. So I hope painting these leaves
was not a big, huge task. It was as simple as that. And yeah, you can just
take your own sweet time, switch on your favorite music, grab your favorite drink, and just paint
these leaves. Okay? And if at all, you get bored, then just take a
break and come back. There's no pressure to
do everything in one go. Right. So let us allow this to dry and I'll see you
soon in the next section.
8. Painting the Branch: All right. So now that we
have painted the leaves, let us quickly go ahead
and add the branch. So the branch is going
to be really simple. You're going to pick any
of your brown shade. It could be ndike brown, and once you have done that, we're going to go
with a slightly deeper brown like sepia, and we're going to
add another layer so that it's nicely
visible, right. So it's going to
be really simple. If you have already
sketched out the branch, then you have to just
go and paint over it. But if you have not used
masking fluid again, you need to create a branch
using the paint directly. All right. So there's nothing much more to
explain over here. You have to just follow
your pencil sketch and just finish
painting the branch. All right. So you can just
follow along with me. All right. So now
I'm going to quickly go ahead with a deeper
brown like sepia, and I'm just going to
go over the branches again and just add highlights. Okay. So since the brown that I used earlier was a
little bit lighter, I want to add some
few more highlights using the darker
shade that is sepia. Alright. So you can also
see that on the branch, I'm just leaving some white
gaps or white spaces. This is just to show that light is falling on the branch
and it is reflecting. These teeny tiny details will make your painting look
more realistic and natural. Rather than going and filling the entire branch
with a plain brown, you try to create some
details like add some whites, leave some white
gaps, if at all, you have not left any white
gap, that's completely fine. You can go with your
white marker or with your white gouache
and you can add these details or
highlights later on. But do not forget to do this step because
this step is what makes your painting look
much more better. All right. So yeah, this is looking
really beautiful and nice. Now that you can see, as I
added this dark atonal value, that is the sepia, the
branches are really highlighted and it's
looking much more defined. Alright, so this is how
the branch is looking, and I'm quite happy with
the way it has turned out. Now, coming back to our leaves, I think it needs to
be much more defined, and I'm going to go ahead
and add another layer of sap green onto all of these
leaves and make it slightly, much more darker and give
it a nice depth all right. It's going to be
the same process. I'm just going to do
this for all the leaves. But if you already
have darker leaves, then you can completely
skip this particular step. I'll quickly go ahead and paint all the leaves in another
layer of sap green, and I'll see you soon
in the next section.
9. Adding the Final Details: All right, so we are
on to the final step. Let us quickly go ahead
and finish our painting by adding some awesome
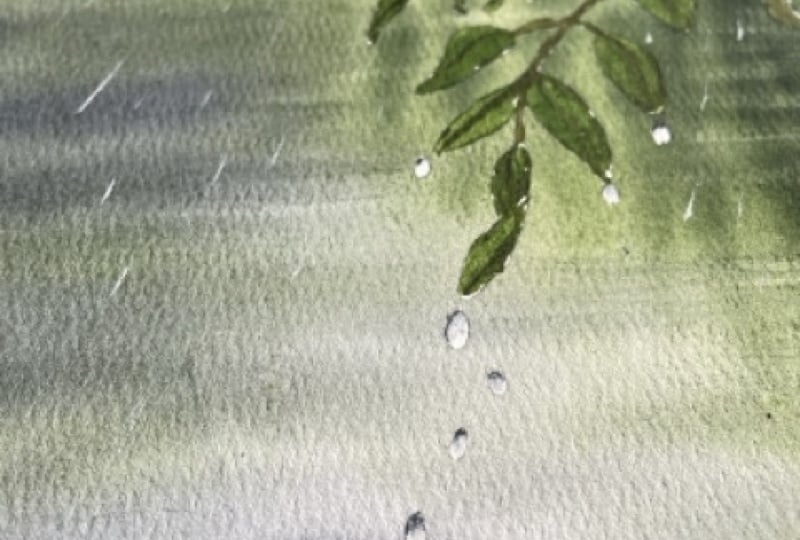
details. All right. So now to paint the dew drops, it's going to be really simple. I'm going to pick up some
lighter shade of pains grey. When I say very light, you're going to start with very light tonal value with lots of water onto
the paints gray, and you're going to fill only the top layer of the dew drop, and the bottom half is
going to remain as it is, that is the paper white, or if you're using white gouache, then you can go ahead with that. But make sure the entire drop is not going to be
covered with paints gray. You might have seen or
closely observed dew drop. So it contains the
shadow region and it contains the white water
droplet. All right. That is what we want to
exactly depict over here. But if you're confused on
how to paint the dew drops, you can just search for rainy dew drops or rainy
images on Pinterest, and you will be able to
observe the drop closely, and then later you can
come back and paint. Alright, so it's going
to be really simple. There's nothing complicated. Just pick a little amount of
Pains gray onto your brush, go with a very teeny, tiny round brush and just add the shadow
using Pains gray. There's nothing to fear. It's really simple, and it will look like a drop
once you finish painting. I know at beginning,
you might feel like, Oh, my God, what is this? This might look a
little bit weird. But once you have finished, it will start
appearing like a drop. So now, right now, you
can see it's looking so beautiful and it's already looking so natural
and realistic. So in this manner, you're going to go ahead and
paint all the dew drops. If you have done it on all the leaves, that's
absolutely fine. Okay. The main drop
is the one that is present inside the
ripple, the center drop. That is what I'm talking about. So that is going to be
a bit more highlighted, and you have to make that drop look more realistic and natural because that is what is going to create the ripple effect
in your all right. So now I'm going to take
my white water gel pen. Basically, this is
a white gelpen and it's easily available on Amazon. You can
just search for it. So I'm going to quickly go
ahead over those dew drops, and I'm just going
to highlight it. So using a pen becomes more convenient if
you want to avoid the boring process of loading your brush with white
guash, and all of that. But if you don't have this pen, then you can quickly grab your white watercolor
or white gauche. But I suggest going with white gouache because
this is more opaque and, you know, to make the dew
drop look more defined, you can go with
something opaque. All right. Just make sure you're not going to
overdo this step already already if you're already satisfied
with the dew drops, then please stop and you can
just sit back and relax. All right, so this is
how it is looking, and I'm completely in love with how those dew drops are
simply looking so beautiful. All right. So now that we
have added the dew drops, let us quickly go ahead and add some highlights
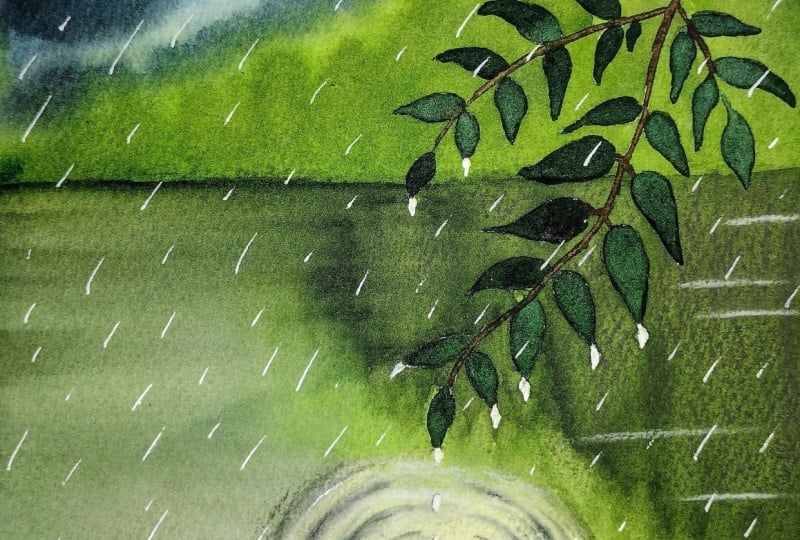
onto the branches. So with the same white gelpin, I'm just going to go over the branches and just
add some highlights. This is just to
show the light is falling on the branch, right. And you can do this step again with the help
of white gush, but make sure you're going with a size number zero brush
because the highlights have to be very thin and they
have to be very delicate. You're not going to draw thick bold lines because that's going to ruin the entire essence
of the painting. All right. So now with the
same white gelpin, I'm going to create
the rain drops, that is the rain falling
because this is a rainy scene, and we want to depict
that it's already raining and the dew drops
are falling onto the lake. Alright. So again, I'm going
with thin delicate lines. These are not thick. You must
have seen the rain drops. When it is raining,
you must have seen how it looks, right? It's a bit slanted, and we're going to
follow that direction. And again, if you're not
having the white gelpin, you can go with white guash. But again, make
sure the brush is going to be very
important over here. The brush that you're using is going to be very important. Go with a very thin
size number zero brush, or you can also go
with a rigor brush, but be mindful of
that. All right. So this was very
convenient for me because the white
gelpin really saved me, and I really enjoyed using
the gelpin over here. But if you don't have
this, you can go with white guash and
a smaller size brush. Alright, so I think we
have completed everything, and I just can't wait to reveal the
final painting to you, and I'll see you soon
in the next section.
10. Thank You!: Alright, so let us take a look at the final and the
finished painting. So this is how it looks, and it is so gorgeous. I'm in love with my painting, and I hope you are also in
love with your painting. Just take a look at that. Just look at the
dramatic clouds, the lush green forest
in the background. The calm, serene
reflection on the lake. And the most amazing
part of this painting is the ripple effect and the dew drops
falling on the lake. Everything is so peaceful, so calming and so magical
about this painting. Like, I just feel like
staring at this painting, and I am feeling like
I am present there, and it really feels so
good and it brings me joy. And I hope your painting
brings joy to you as well. So I would love to see your beautiful creations in the project section of
this particular class. And if you're posting
it on Instagram, then do tag me using
my Instagram handle. And yeah, I would like to thank each one of you for
making it till the end. Thank you for all the love
and the support that you guys shower upon me each and every time I come up
with a new class. And yes, I'm going
to be coming up with a few more new
classes in the future, exciting things coming your way, and I can't wait to
share it with you guys. So keep creating. Stay happy, and I'll see you soon next time.
 Aishwarya Shetty, my__paint___story | Watercolour Artist