Transcripts
1. 1 Introduction Trim: Hello and welcome
to this new course. Today, we'll talk about
WhatsApp based home automation. This is asha from educational
engineering team. As you know, most
of the WhatsApp or any service automation requires monthly payments and it's
a pain to connect to. In this course, we
will share with you a technique to connect your home automation system to Watson freely without
paying anything. We'll also explain how
you can do that with any microcontroller that
has Wi-Fi capability. By the end of this course, you will be able to
achieve connecting your devices to the
microcontroller. And you will start receiving messages on your
WhatsApp regarding doorbell ringing
or a light off or light on situation or
any other situation. We used to use IFTTT for this Batson's the limited
their free service so much, that is not a workable
solution anymore. Now, Whatsapp has a
developer program in which you can get
access to the API. And my using this and using the free board that
we will introduce today, it will be able to receive unlimited messages on your
WhatsApp number for free. Now, let's talk about what you
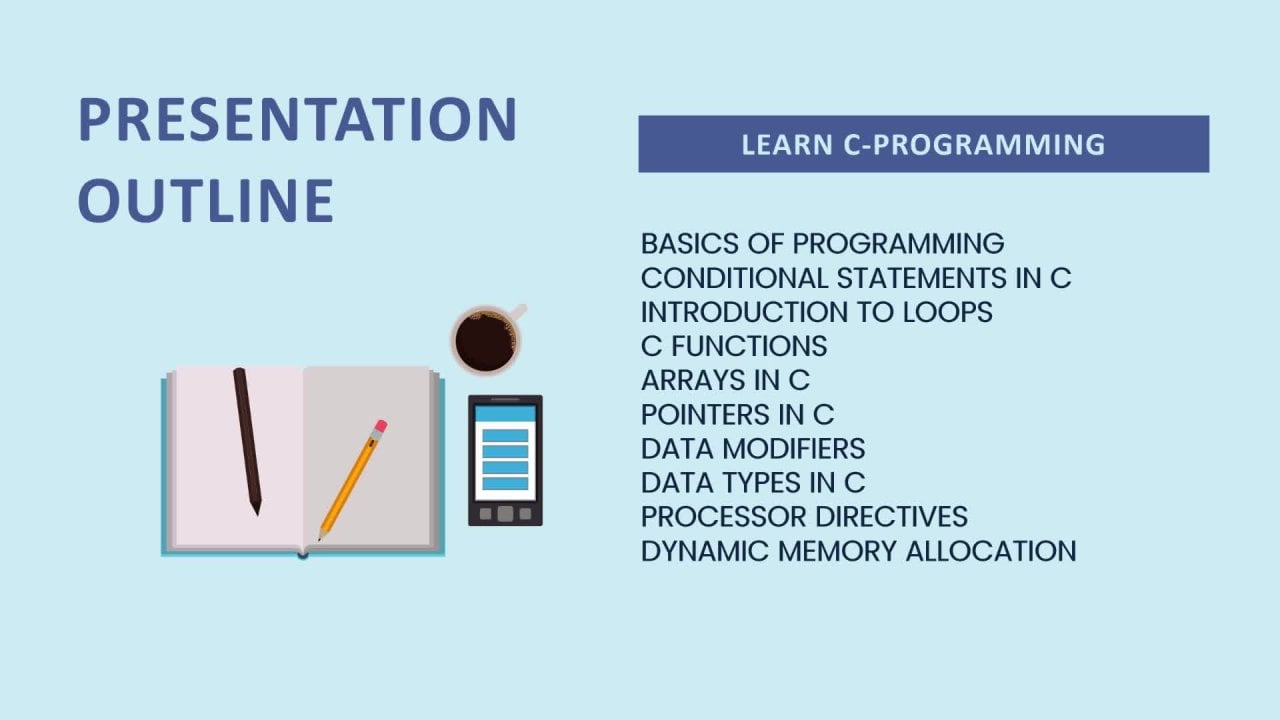
will learn in this course. First, we'll talk about the hardware and
software requirements. Then we will talk about
sitting up, WhatsApp. After that, we will
start coding our board. Much could be any board. The same code works for Arduino, ESP, and other balls. As long as they have
Wi-Fi connectivity. Then we will do a practical
distinct for this code. And we'll show you how
to control outputs and inputs easily
through your Watson. I'm sure that at the
end of this course, you will learn a
lot of new things. And you will learn about WhatsApp boats and how they can benefit you in
your daily life. Watching this introduction.
2. 2 Preparing the WhatsApp Bot Connection Trim: Hello and welcome this new
lesson in which we are going to talk about the port that we are going to use to send and receive messages
using WhatsApp for free. It's called me, but now you
need to install WhatsApp on your phone and you'll
need to add calling me both mobile
number as a contact. If you want to
call me bought.com and went to the free
WhatsApp message. You can see the options. Now click send messages. And here you can see what you
need to do to set this up. First, you need to add
this mobile phone. Let me zoom in. And you need, once you have it added, it's better to name the
contact with the same name, call me bought, then go to WhatsApp and
send it a message. Which is basically
this message I allow Call me what
to send me messages. Make sure that all of
these are small letters. Now, once you do that, you will receive two messages. One that called me
bought, ABI is activated, and the other one is that you can now send messages
using the API, which means that you
have successfully enable this call me messages. Now, as you can see, once you have done this, it means that you are activated. Call me, but let me walk you through this in a
practical manner. Now let's do it. First. I'm adding the number, then create a new contact
and call it, call me Bob. Now, it's better to call it
like that so that you know, from where they are getting these messages now
paid over to WhatsApp. And once you are there, send a new message to call me. Start typing. I allow the message needs to
be with the same letters. And you need to make
sure that only i is capital in this message. So you'll need to write, I allow this fault
to send me messages. So let's do that. My first attempt was
wrong because I added ED. I allowed now you need to fight. I allow me to send me messages. Then you have to
wait a few seconds. You will receive two messages. The first message is calling me Bot API activated
for this number, which is my number and
my API key is there. Now you can send
messages using this API. Now if you'll receive
these two messages, it means that everything
was set correctly. Now, I didn't receive
the link as we just saw. And I pasted this link on
my Chrome web browser. And you can see here. Now, does it work? If you are seeing, this means that it works. And this is the
message that was sent. And as you can see here, this is a test. Now if we went back to WhatsApp, we can see this message. So let's go back to WhatsApp. Here you can see
this is a test which means that we did receive the
message from my WhatsApp. Now we can change this message. We can send educational
engineering. And here we can send. Now, this is the message
that will be sent. For one tier. Here we will see the new message called
educational engineering team. You need to wait a few seconds before
receiving this message. But as long as you can see this, as you can see now,
we have the message. Education engineering
team means that the bot is working without any problems. Now if you did
receive this message, means that you are ready to go to the next step that's
watching this lesson.
3. 3 Coding The Board Trim fixed: Hello and welcome
to this new lesson, annual charter going to start
coding the ESP ball nor dart to send messages to our WhatsApp depending
on certain conditions. Now, the first step is
going to the Arduino IDE. And from there, we
need to do few things. The first thing here is
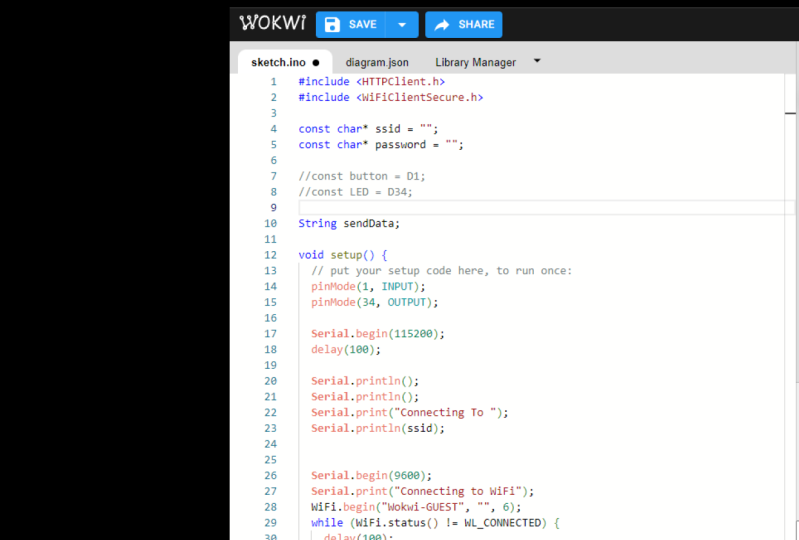
to create a new project. And inside this new project, we need first to set
our Wi-Fi credentials. So constant pointer
to character, SSID equal here your Wi-Fi name. Now we also need
another color stance, which will be for the password. Now, here will be
your Wi-Fi password. Now you can add a
button you want. And you can surely add an LED. Let's say the poll. Now, let's go to the setup menu will keep going back and
forth and the code. So here we need to
set the pinMode. Pinmode or the baton. And four. Again, when moods here for
the button will be input. Here for the lid will be output. The next thing is starting
serial specific baud rate. So Serial.begin, a 115,200 baud rate and then a delay so that the cereal can
stabilize. After doing that. The a 100 millisecond delay, then add a new line on
the serial monitor. Now, we have to start
connecting Todd Wi-Fi network, which would be the first step. So in here, we need to
write connecting to. And here we need to derive
the SSID of our Wi-Fi. After that, we will use the
Wi-Fi that began library. Now in order to use
this library, first, we need here to include
the wildfire library. So you can go to Sketch
Include Library. From here. You can check ESP theta2. You can include that
library for PSP theta2. And if you keep scrolling, you can see that we have out of other libraries
that you can use. We'll also need the
HTTP client library. And now we will include the Wi-Fi library as
well, include WiFi edge. After doing that, the next step is to start the
Wi-Fi connection. So inside you will sit up. You need to go back
here underneath the SSID and you need to call Wi-Fi SSID and password. Once done, we need to make
sure that we are actually connected to Wi-Fi using
the famous wild statements. Add a delay, half a seconds, then cilia to print. Now inside the while, if Wi-Fi status not equal,
Wi-Fi connected. So if WiFi is not connected, WWL can connect it. Then you need to keep trying to connect to
the Wi-Fi network. After that, if it did connect, you need to print a few things. So serial.print, LN. New line. Then
after the new line, we would include the Wi-Fi. Connected will also
include the IP address. Then we will call the IP
address function local IP. Now, once done, this means that our void setup function is done. The next step here is to go
to the void loop function. Now inside the void loop, the first thing that we
need to do is as follows. First, we need to type that we are
connecting to what's up. So serial.print. The next thing to serial.print. In here, you can
simply write WhatsApp. After doing that, we need
to call the Wi-Fi clients. So right, wi-fi client
and call it a client. And we also need to declare an object of the
class HTTP client. So right edge TTB client, and call it http. Now, you need to make sure that you are writing
everything correctly. Sometimes it's splitters
to verify the code. But first let's make
sure that we have yes, we have two bonds are elected. Mine is called do it. Yes, because it's a tool didn't get difficult version one. Now, I will save the code. So let's call it
WiFi, or WhatsApp. Would mention using WhatsApp. And let's select allocation. So here we will save it
inside a folder and let's call it codes automation. Now, let's verify the
code to see if it is recognizing that HTTP
client library of nuts. Okay, now as you can see, here, we have fewer shares. D1 laws not declared
in this scope, which is basically the
number four, our button. So let's remove that. Let's come in this form now, we will get back to them when we are testing with the
button on the lid. Now I forgot to change this, so let's change
them with numbers. Now. Verify again. Done compiling, so
everything design. Now, let's go back here. We need to create
a new variable. Let's call this
thing, send data. Then go back here and start. Now, the first thing that
we need to send source and data will be the text
from our WhatsApp. So let's putting that this is basically the first
line that we need to bring. Okay, let's bring all of this
and we can work on it here. So I would connect it here. Now we will start with the word sub up to
the question mark, and we will copy
this, paste it here. Then we need to say cin data. You can say plus equal. The next text, which is in
this case the phone number. So after the question mark, take the phone number
up to this point. Without Danmark. Now send data plus equal. In here, we need
to add the text, which is basically this text. So we will take the text and we will stop by sending
education engineering team. So up to this point, next step is sent
data loss equal. And in here, we need
to send the API key. So on. That's it. This is how easy it is. Now, the first step is
to type http dot begin. Now there are slight
modifications to the code once we start
the testing process. And we will do them. Because this library
keeps being updated, which cause a lot of
issues with HTTP clients. Sorry. So now we need
to send the request. So end's HTTP codes
equal HTTP looked good. And after that, we will check. If the HTTP code
is greater than 0. Then we need to get
that request to the prompt response
payload by typing string, the load equal http
dot get string. Now this will get the
request response payload and we'll print it out
on the serial monitor. So print the response payload. Here, type pay load, which is basically the payload
that we got from our HTTP. Now, once done, simply close the connection by
typing http dot end, which is the int function. Now, let's verify again to make sure that we
don't have any issues. Here. We have an
issue. Let's check. Send data was not
declared in this scope. Okay. It'd be panam. Is it a ten? Okay. Oxygen data was spilling it all. Now, again, that was not
the pockets and data. He if he or she is unchanged. But if I again okay, done compiling,
everything is called f. And I'll make sure that you
have this wi-fi client, client, client HTTP. And now you are ready
for the testing. Just change the Wi-Fi name and password to your
WiFi name and password. And make sure to
change the API key and done by lumbar with your
API key and combine lumbar. Then you are good to go. You should be able to test
this out on your board. Now when you are
running this code, what will happen is
that you will receive this message educational
engineering team. Now if you didn't receive it
or if there was a problem with the serial monitor means
that something is wrong. So you need to
double-check the code. Now, one more thing. This is not controlling any input or output on
the ESP. There is two. This is the first phase, which is testing the
actual connection. Then we will control
a button and an LED. We will turn the LED on
and off using WhatsApp. And we will do few
modifications in the code.
4. 4 Making Modifications and Testing Trim: Hello and welcome to
this new last one in which we are going to do a few modifications to all
code to make it work better. Now the first thing
that we need to do is to copy everything inside the loop here and
leave the loop empty. Bowl, create a new function
for all its send that to Watson and paste
your code inside it. Now this is the first step. Now the second step
would be changing from wi-fi client to change
this from Wi-Fi. Wi-fi client secure, which is basically a more
secure Wi-Fi connection that can deal with HTTPS. And after doing that, you
need to make sure that you are changing the name and the password for
your WiFi network. Then scroll down. Now we need to
call this function inside the setup function. We don't want to call it inside the loop function
because we don't want to keep sending What's up? This will over flow the amount of messages
that we can send per hour. So I will send
messages using setup. Now after doing that, we also need to do
something here. As you can see, we are
sending HTTP again here. Now what you need
to do at this point is instead of sending
the client and the data, you will only send one thing, which is the data. Let's remove the
fluid from here. Now after that, we will
implement the HTTP code. So HTTP code, after
defining it as integer, will equal http dot post. Now after posting, we need
to add two parentheses. Now inside the boss, we will send the data
source and data here. So now we have STB
posts and data, and the code will
be stored here. After that, we can simply say
STB equal is to build kit. It's up to you if you're on the postcode or the gate code. Now, once you are
done with this step, you can move on to make sure that everything is
everything correctly. Here the Wi-Fi clients
needs to be changed with the same name here,
Wi-Fi clients secure. So scroll all the way
down my pipeline. Secure. Now save your code, make sure that
everything is added correctly and verify it. Now, you can upload
it anticipates out. But for me, I will
use this platform. We have a course in which
we explained how to simulate ESP 32
using this platform. And you need to
add this code for the Wi-Fi connection because
we are using our platform. So to make sure that this will
platform has Wi-Fi enabled without our network
SSID and password, you'll need to add this code. After doing that, let's
copy the whole code from here and place it here. Now we need to make sure
that all of these are above. This is just doing a
few configurations. I'm just copying
and pasting things. So the code or our
code is paste it here. And we don't want this
part, the Wi-Fi part, because we already
have Wi-Fi connection, which is inside the
simulated environment, since this whole page is already connected
to the Internet. After doing that, you are
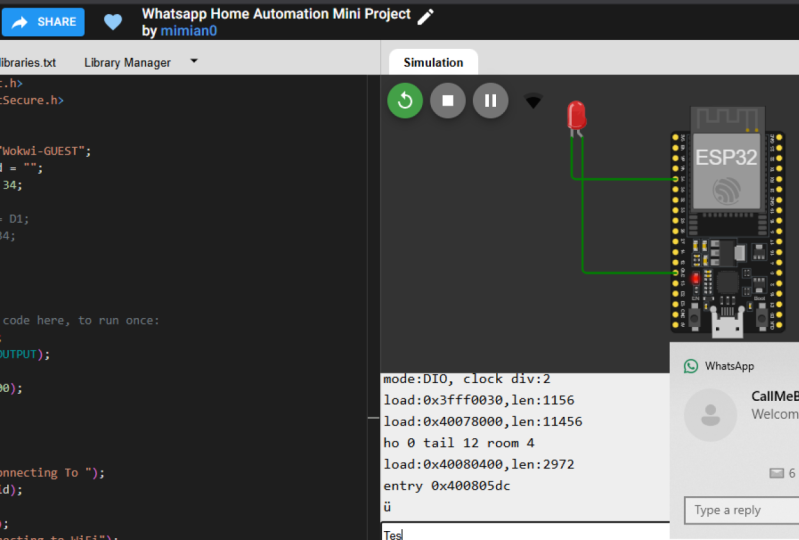
ready to test things out. So hit Run here. Now this is the network or the simulation platform
link, WO K wi.com. And once you have
the code ready here, you can easily hit the Run button to start
simulating and see the results. Now, as you can see here,
connecting to Ashraf, connecting to WiFi,
connecting to Watson. Now, as you can see, here, is the sentence that we have written here connecting
to WhatsApp, and it was only printed once. Now, this is the result
of running our code. Now we need to make sure that
we have received a message. Now, since I've done this a lot, you can see the message here. If you scroll down. Now
the time is 01:38 PM, and here's the message, one that a PM. And we just received our
message from Whatsapp, bought from ESP fell to toolbox. Now if you use this
code on your toolbar, you'll be able to
do the same thing. You will keep
receiving messages. Now, what you can do is
basically unlimited. You can read a sensor. Which is something that will not explain here because this is not an ESP helps to, let's say, concentrated courses
about controlling things using WhatsApp
and your ESP theta2. Now you can connect a
temperature sensor. And if the temperature is
above a certain limit, you can simply send a message by calling this function send data to WhatsApp or
send temperature to adsorb to send an alert
that something went wrong. Now I will show you this in a quick example without
inputs and outputs. So let's say that we
have a temperature, and let's make it equal
50 degrees Celsius. Now we can go inside here, inside the loop and say if the temperature is
above or equal 45, then we need to call
this function washes, send that to watch Sub you can configure
it to receive an input. And here you can change the
message to hide in ritual detected by the detector. And now, if you try to stop
and run the code again, you should expect to
see an output here. And we should receive a message alert telling us that there is
high temperature. Now in your house or on your, let's say anywhere we
replaced your device. And this is basically
the main concepts. You will receive
notifications to adsorb indicating that
there is high temperature. As you can see now
it's connected. And in here, you can see that
we will receive a message. It's around 14 to one PM. So we will wait a few seconds. Now. Try not to send a lot of messages every hour
because you have like six to 103 messages
per hour to WhatsApp. Now if you tried to
send more messages, this will cause a problem. Which means that the platform will block you for
an hour or two. And it happened with
me more than once. So you need to make
sure that you are not putting your code inside the while loop where the condition will
keep running here. Now as you can
see, the condition is planning again and again, which means that we will face an overflow problem
just like before. Now for me, while testing this, I did cross the limit to the number of messages
that I can receive the hour. That's why we haven't received
the temperature message. But I think you got the point. Basically, you can add any sense for three the data
and put a condition. And if this condition is met, then send a WhatsApp message
and you can go from there. Now if you have any questions or if the code didn't
work with you, or if you face any
problem, I'm here to help. That's it for this lesson. Thanks for watching.
 Achraf Mad, Creative Engineer