Transcripts
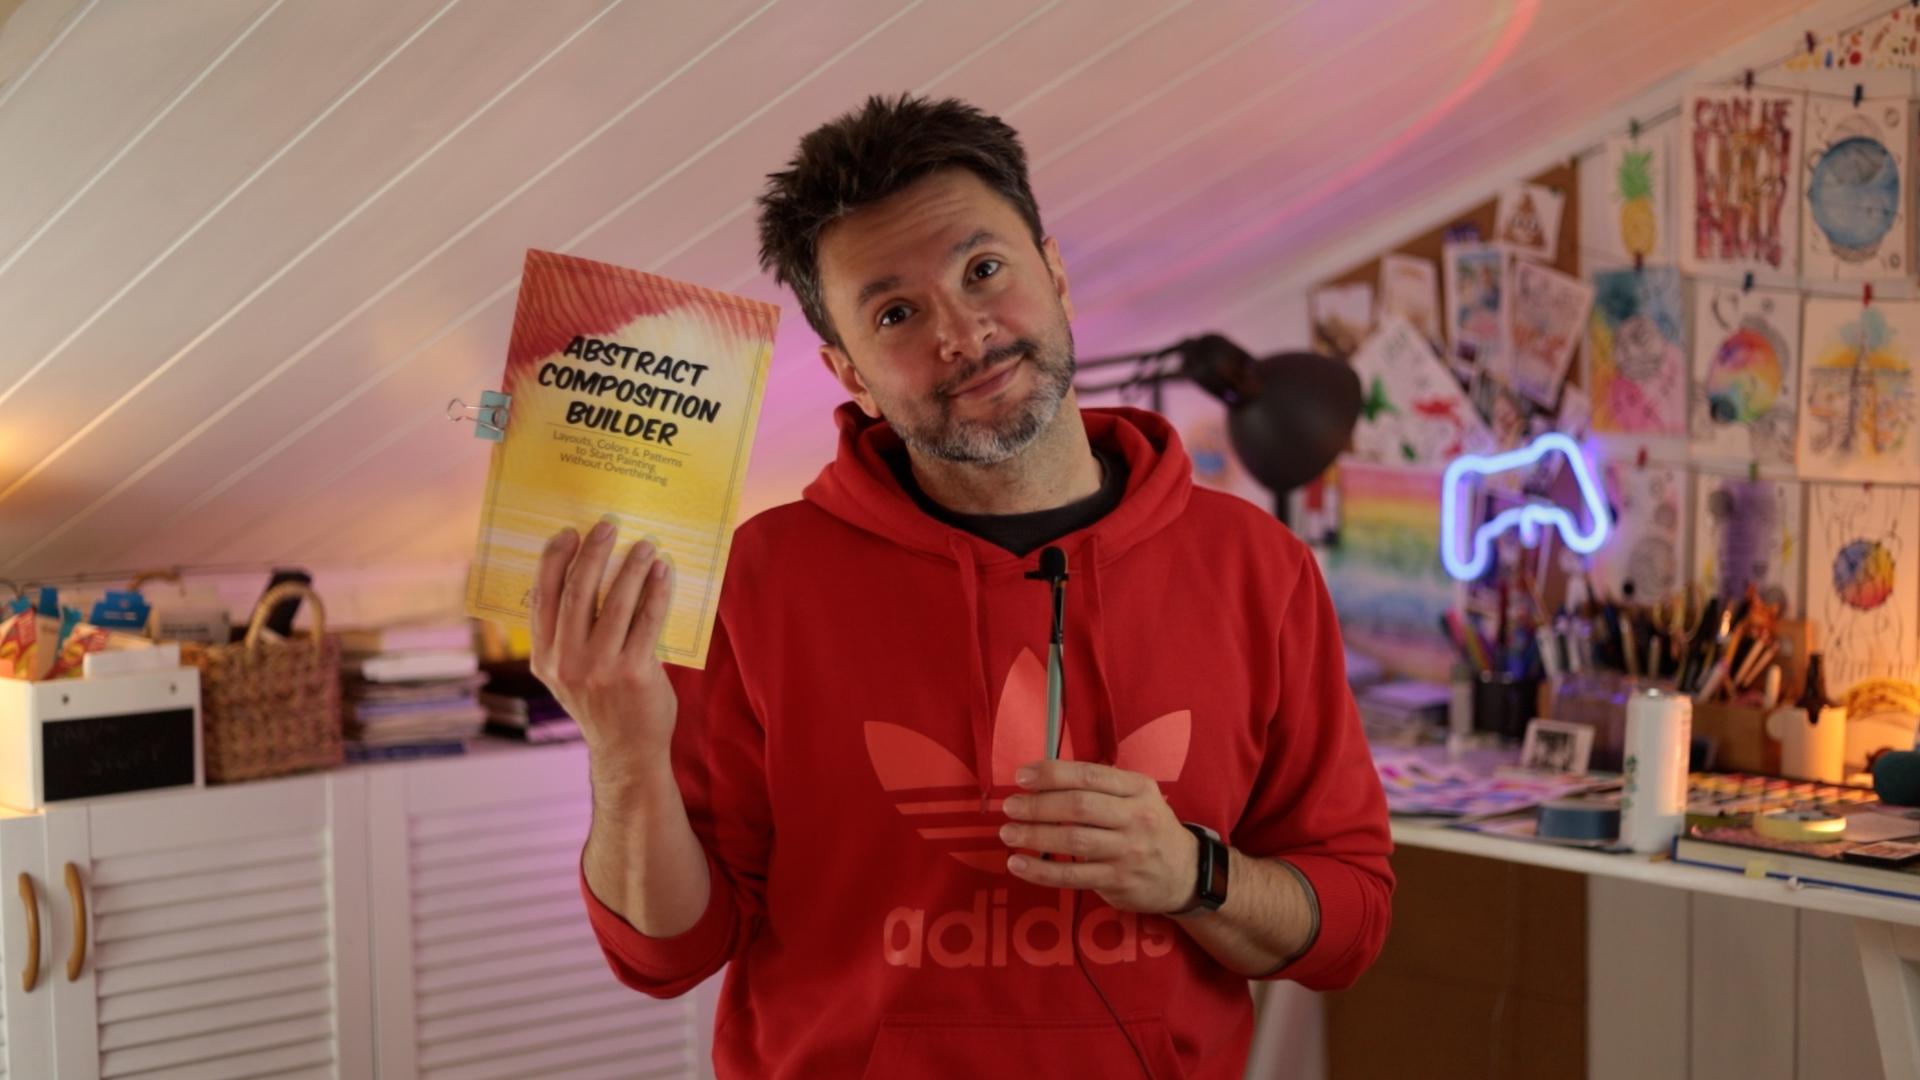
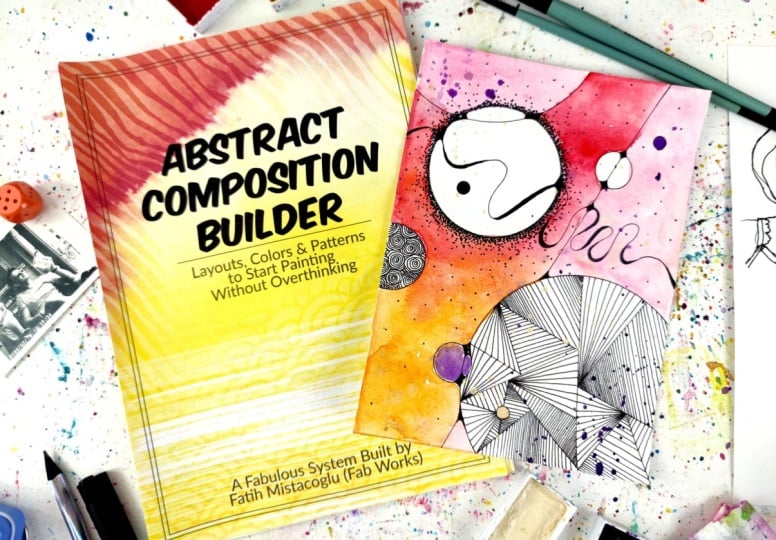
1. Introduction to Abstract Composition Builder: I found a solution to your blank page
problem, and it's this. Abstract Composition
Builder. Inside this, there are ten layouts, ten
color sets, and ten patterns. And if you were to
use one layout and one color set and three
patterns per each painting, this gives you 12,000
possible combinations. Let me put that in
perspective for you. 12,000 combinations
means if you were to paint one composition
a day from this, it would take you 32 years
to finish all of them. 32 years. Jack,
did you hear that? 32 years. I mean, you
would be dead by then. For sure. For sure. You won't make it 30 years. So what are we doing today? Today, we are going to paint one composition from Abstract
Composition Builder, and there's no end. That's it. I can't show you the painting
we are going to paint today because it
doesn't exist yet. We're going to build it with the Abstract
Composition Builder, and it will be
beautiful, I'm sure. As usual, we're going
to use watercolors, fine liner pens,
maybe brush pens, and watercolor paper and water. There is nothing extreme. Whatever you use at home,
you are free to use them. I hope I have whatever
I needed from this. Like, I will be able to get
intro video. I hope. Bye.
2. Class Project: And what are we
doing here today? We are going to paint one composition from After
Composition Builder. So we're going to use
this tool, basically. And you're going to
get out of this class. This class still
works without this because I'm going to give
you a layout and color set. You can follow me and
make your painting, and that gives you one painting. But this is like, don't give me a fish, but teach me how to
fish kind of thing. So this class gives
you just one painting. This product gives
you 12,000 of them. So I think you know what I mean? Something that makes
sense in that area, like fish catching fish, learn how to catch a fish. Jack, did that make sense? You can find this PDF as a
digital product on Skillshare. You will find the link in
the description somewhere, but you can take this class totally without this
product as well. I'm going to give
you the layout and the color set and the patterns and everything. We
will do it together. However, if you
want to support me, you can also get this product, which will give you
12000/12000 ideas for abstract
watercolor paintings, which in result, I guess
you will never say, again, I don't know
what to paint. That's the hope. So if
you want to support me, you can get the Abstract
Composition Builder, or you can just take this class, paint with me, have one painting at the end of the day,
feel accomplished. That's also good enough.
3. What is Abstract Composition Builder?: So I want to say
this part there was this idea of me explaining
what this product actually is. So I will try to explain what Abstract Composition
Builder actually is, like, the way it feels
to me this product. I make these paintings. You can see the wall
is full of them, and there are way more
sitting down there. And I will probably
continue to make them. I really enjoy making them. It's relaxing and fun. But also I really enjoy the
end result. They look pretty. And I want to do something with them
in the future, for sure. But the reason I made this that I made this
market research, and many people were saying
that they have a problem with starting and they
don't know where to start. I thought, Okay, I'm
doing this all the time, and I'm not different than you. What's the difference
between you and me? So I kind of brought
it to its essentials, the layout and the color
set and the patterns, creates kind of a formula. And I realize this happens
automatically in my brain. I kind of train myself for
it, I guess, over time. And the way it feels to me, I'm going to put this
down for a second, that I kind of there was
this scene in Harry Potter. Dumbledor was taking
out with his want. He was taking out a memory. And putting into
this water thing for Harry to see that memory. This really feels
to me like that. I try to really take
out that part of my brain and put it
into this PDF so you can dip your head in it and experience it and
use it the way I do it. So this is what it
is, part of my brain. I hope you're going
to buy this part of my brain and enjoy and make
lots of paintings with it. That would be the
best reward for me. It really is seeing other people seeing you
seeing students making paintings using my classes or my examples makes
me really happy. And that's what I want to say. And I think with that, wherever I'm going
to put this part, if it's going to be in the
intro or later, I don't know. Oh, maybe this is at
the end of, like, there is a little
video after the intro before the painting starts.
So maybe it will be there. So maybe we are going
to painting part now. So I'm going to say, let's go and paint over
the desk just in case. So let's go and paint one
now. See over the desk. By. No, not buy. Like,
we will be over there. Okay? Check. Let's
go over the desk. Go over the desk.
4. Using ACB to Create a Composition: Yes. So now today we're going to use
it's really exciting. We're going to use Abstract
Composition Builder. It's exciting because I really don't know what's
going to be a tent. But I have high hopes and trust that it
will be a good one. We're going to use Abstract
Composition Builder to build as a
Abstract composition, basically, we use this guide that will actually it's
actually more than a guide. I would like to call
this more of a tool. This is a tool that when
we put it in motion, it will give us something
that we can work on, and that will give
us a painting. So it's like a box
that you put you fit something from one end
and something else comes from the other
end, kind of thing. So how to use this guide. It says, pick any layout,
add any color set, pick three patterns,
start putting them on paper. It's that simple. So basically, abstract painting
like this is a layout, colors, and three patterns. This three more can be less
that I think three is ideal. But also this number I gave you, 12,000 is based on
three patterns. If you use four or more and
the combination of them, then this number is very bigger. And so you can end up with
a painting like this. But the other thing is
with the same things, so many people can come up
with so many different ways. So actually, it's limitless what you can come up with
what you have in here. That you can get the
same layout and colors, which is unlikely and end up with totally
different painting as well, because it goes into how you put the paint and where
you put the paint. We will talk about this
in a second, as well. So as you can see, I'm
guiding you throughout the tool throughout the PDF. Just pick one and
pretend it was yours. So what I would
do, I would go to the end here there are colors, and now there are patterns. And after all that, in here, there's a page. It says, I'm going to
actually do it like this. It will be easier. It says, Let the
universe decide. What is that about?
This is the page. You can see I used this
I think last Friday. It's already here marked in. In here, you can use a dice, but there are ten possibilities here and a normal dice has six. You could use a dice if you have those ten sided dice at home. If you're a pro gamer and you like boarding games, you
might have one of those. You can use those or I think
the easiest way to do this is when you search a
dice roller on Google, you will get a roller like this, and you can just select
whichever dice you want to use. I selected ten sided dice, and you just roll the dice, and you roll the dice
once for layout, once for the color set, once for the pattern, sorry, three times for the pattern. And this gives you from all the layouts and color sets and patterns what
you're going to use today. And so you don't have to think, you don't have to
decide on anything. This is deciding for you. And then you just do the thing. You can just skip to the
fun part, basically. So let's roll the dice. Two, two for the layout. I'm going to quickly
erase this one, so I made the other day. This chart is to actually
visualize it for you. You can also just write
on a piece of paper. For the layout, we got two. Now we are rolling
let's mark it here. For the color set,
let's roll the dice. We got one. So again, you can do it like this as
well to not keep digging. You might print
this out as well, so this is a way to
do it for the color. We got one and now
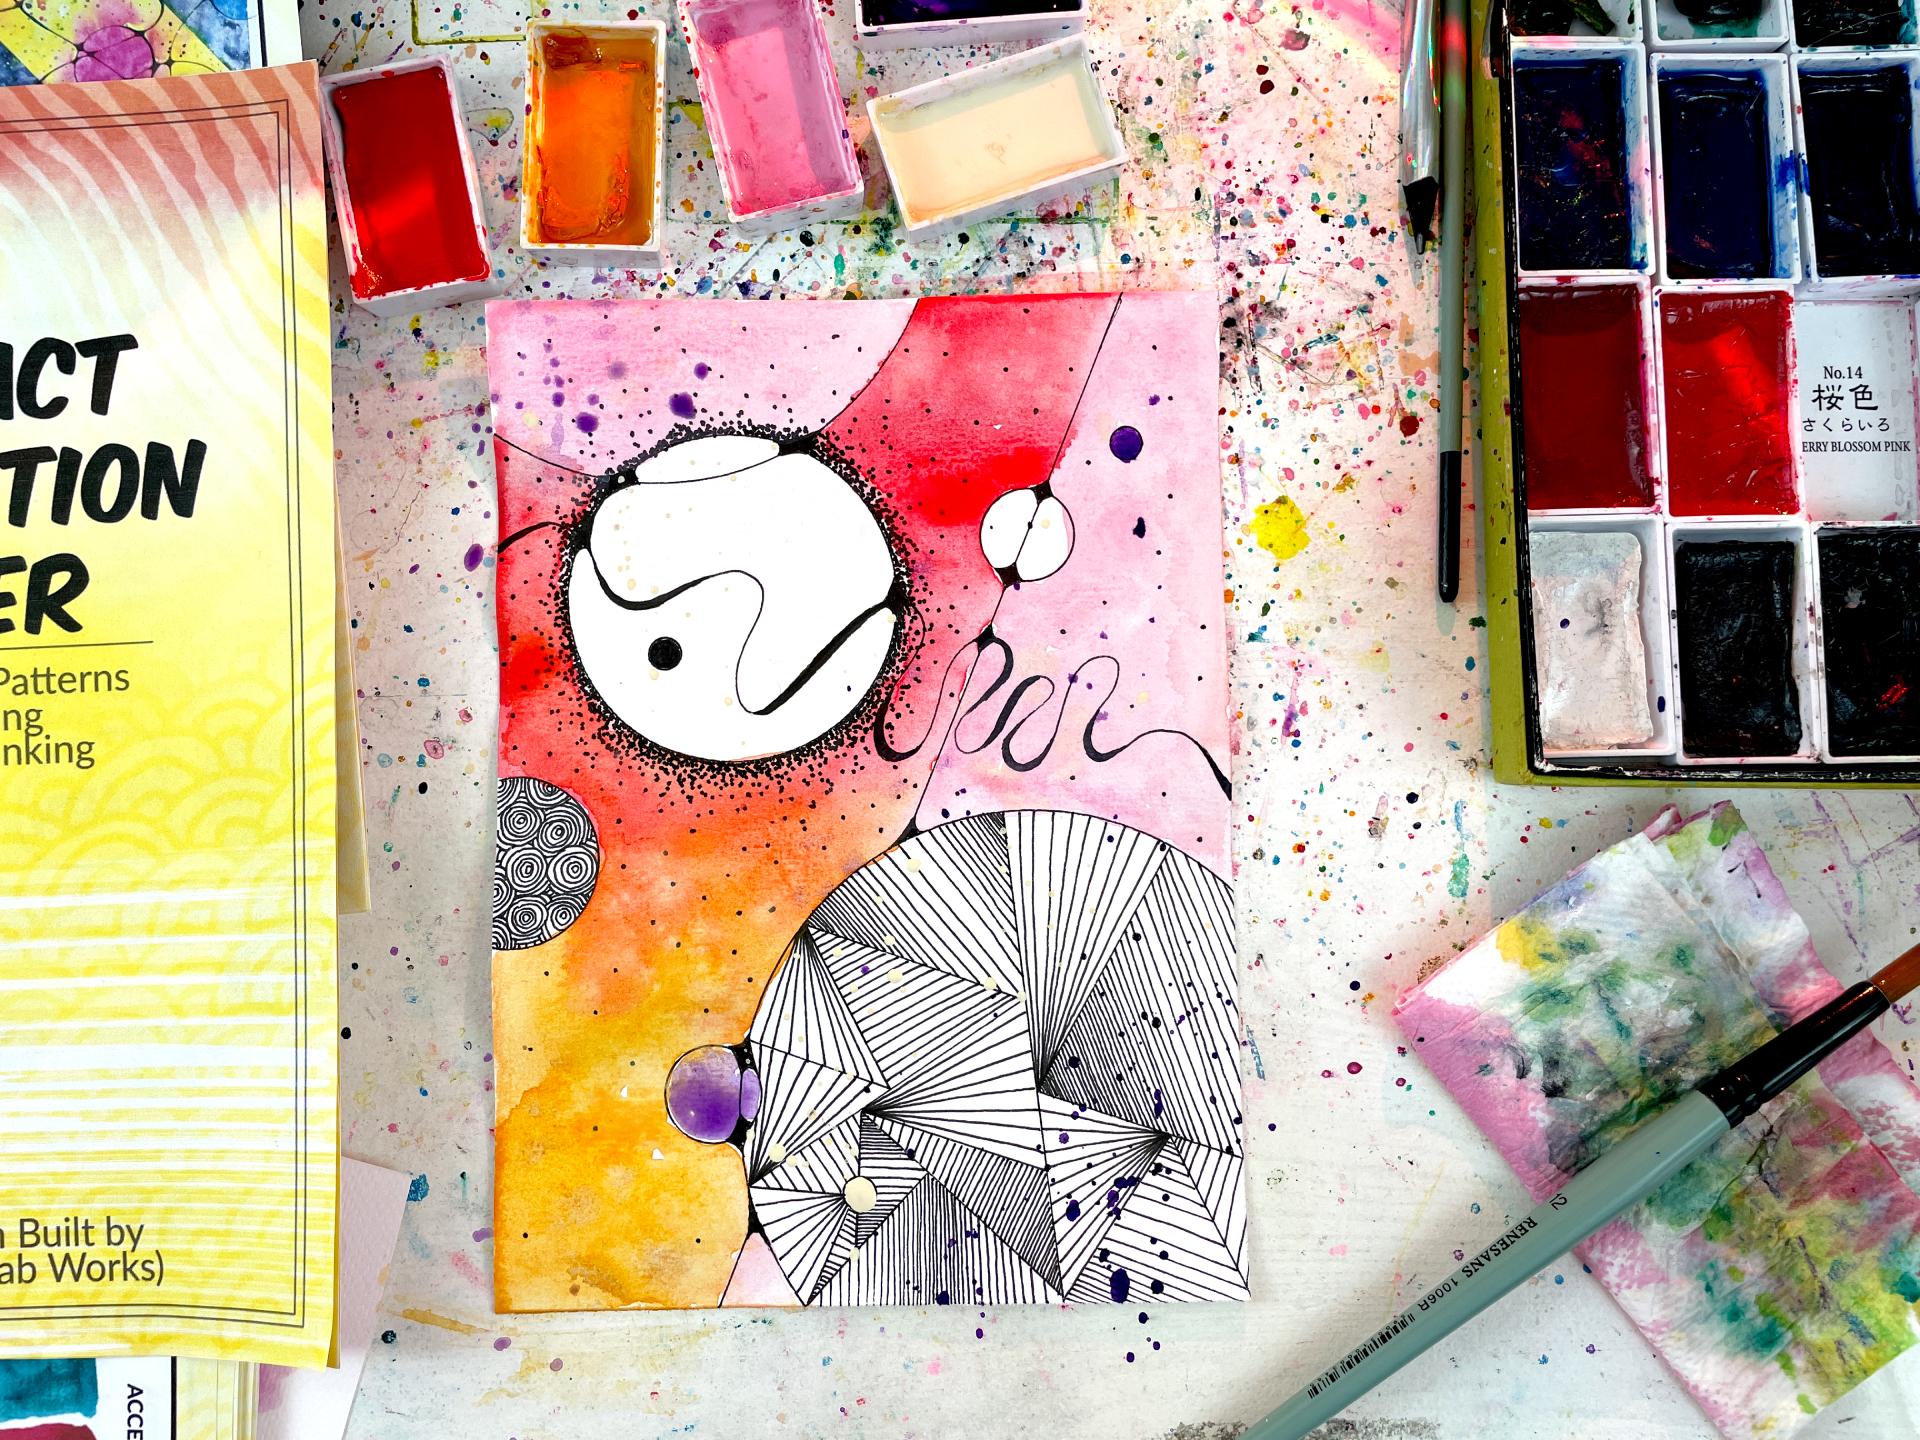
for the patterns. Pattern one, five, pattern 29. And 859 8598. So this is basically
what this two does for you it gives you this
21598 with the dice. And this means we're going to use let's put our dice aside. Here we are. And
so for the layout, we're going to use
the second one. So we're going to
use this layout. And for the colors, we're going to use this
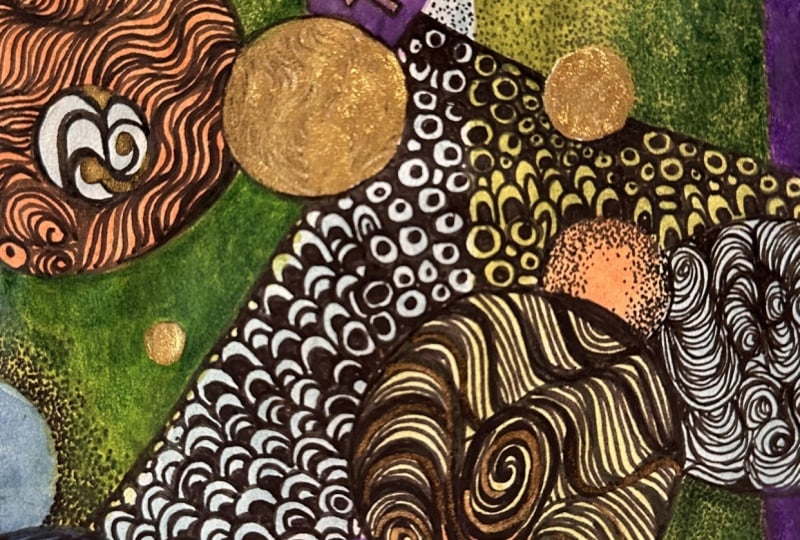
color set called Kate. So we have what we have here. We have Steve, we
have Kate and 598. And that would be
one of my favorites, radiating dots, five, and eight, these ripples and nine, broken mirror another
one of my favorites. Okay, so this is good. Dots and ripple and the mirror. So this is what we
used to tool for. Now, the decision part is over. We just all we need to
do is to get down to creating this layout that Abstract Composition
Builder gave us. And this is comes on
paper. I can show you. It's mixed media,
actually, 224 grams, so not a light paper, not too heavy either. It's not 300 gram, but for this job, it
should do the work. So I'm putting this aside. Here are my pens that
I used most often. These are Faber
Castel, pit, artist, pen, fine liner, pens,
and they're all black. This is 0.5. I guess I
use this on the most. The thickness of it to
this size of paper, like 20 to 15
centimeters is ideal. And if I need to go thinner, I have the very thin 0.05, and I have my brush pen. And so let's have a
look at that Steve. So we have one big circle here and a smaller circle there, and even another big circle. And okay. I'll put that on the
side somewhere probably. Or let's just put
like this for now, but it will be there. So
5. Drawing the Layout: So I actually enjoy using these plastic cups
for my circles. So what I wanted to say
about layouts before, this is the thing to consider that the interpretation
also makes the possibilities
limitless because you see a circle
here in this layout. You might take this as Okay, this is an object that I'm going to draw and
fill with pattern. It can be an object
filled with color or it can be like in
some of my paintings, it can be directly, you know, you can start
with the color as well. So it can be just color and then the rest of the
objects come in. So just even with
your interpretation, that it gives you so many
other possibilities. So keep that in mind. I think I'm going to go one on one to keep it
simple for this one. I think this is big enough. And I'm going to get my 0.5. And I think for the
second one, I will also And in here, you see some lines. Those are they can
be straight lines. They can be just a place you put a masking tape to actually
keep the paint from going, or it can be just
squiggly lines we do. Like, these are basically not a final thing
you have to do, but more like an idea
starter for you. And I guess for this one, I will go with this And for some smaller, I have my broken circle
maker. That's what I call it. And one over here, one over here. And in here, I think I
will break the mold a bit. And instead of the smaller one, I'm going to add
a big one because I can and you can too
and some small ones, and I really like
these small ones. They really add a lot. Do you see how quick this was? It's already we started.
We are doing it already. This goes here. And now I'm
thinking about the lines. I think I will do I will do one line like this
to represent this one. Instead of a squid
line like this one, I will make a straight line. So we are doing a bit
differently than the example and exploring different
possibilities. So this way, our
layout is almost done. At least we put it on paper. Now, what we're going to do, we're going to add the
neurographic connections, and we'll add more
weight to our lines. I'm going to start
with this one. I'm using the brush
pen for this. I think I'm going
to add to this one. Because this line
was a bit too flat. From my hand, it
came out like that. So I tried to hide it
bit the thicker lines. Okay. And When you are struggling in small
space with the brush pen, you can always go back to your 0.5 and smooth it out. There is no shame
in that. I think that's now good enough, and I think I'm going to
fix here it's a bit flat. And here at the end. Now, it looks like a
ribbon in the in the wind. And because this line
is like this flat, I'm going to keep it as it is. The circles also,
but I'm going to add some neurographic
connections and connect where the
lines are connecting. Again, this is the relaxing part of if you watch my Abstract watercolor
escape classes. This is why we are doing
this in the first place. And now I'm focusing on
where are the connections. Everything is recording, good. Okay. And in here actually, that's it. Two more. And now I'm just gonna
fill those in or that brush pen is faster. While I'm trying
to fix one side, I'm making a mess
on the other side. Okay. Back to crash pen. Because with this, I'm able
to cover bigger area faster. But then again, I'm
more clumsy with it, so still trying to do this and keep control over it also helps you build muscle memory. There's no other way to build muscle memory other than
doing repetitive actions. So you might not feel like it, but while doing this, you are
getting better at drawing. Patterns are very good for that, which will come to
it in a second, because we are almost done with our layout. Okay. So our layout is in. And now, this can also make a difference
in your final result. Will go with the color next or will you go with
the patterns next that they can also
be interchangeable. I find going with the
layout first easier because you have something to
put in straight away and you already started
then you will continue. Um but later on, as you do more of this, you
can start with the color. You can start with the layout. And after the layout,
you can choose to go with the pattern
first and then color, you can change the order of
things as well. Just saying.
6. Creating the Patterns: So, we had three patterns, and those were the dots and the broken mirror
and the ripples. So I think I'm going to go
with the patterns first. And so I think here, broken mirror is perfect. Like, it's big. Let's
fill that in first. I was doing in my one color one pattern
class, this pattern. It's really fun one to build. We just quickly divide our space that we dedicate
to this into triangles. That I'm trying not to think
too much just going with it. Like this or like this. I think I want to
want to go through this go behind the circle here, and then divide this
one up like that. Okay, I think we
broke up nicely. Now we will I think for
this, I will use 0.3. So it will touch thinner
than these original lines. And so we are using the first
pattern or second pattern. I don't know in which
order we picked them. So let's go with this that I use parallel
lines a lot for this. And it's fun to start them a little bit
apart from each other. And then get closer and closer. Can you see how much the feeling of death this gives immediately? Because things appearing closer and closer to each other means that they are going
away from you. Let's turn it around
and do the other side. You can make it that it just keeps going further
and further away or make it that they are coming closer and
closer on this side as well. And let's get more parallel lines. This one is more
straightforward. But we also need
to fill the space. We can't always do tricks that some of them need
to be more simple. And another one I like
doing is this that they radiate from
corner of the triangle. And I think I want to do the
same trick here as well. But from a different angle. And then to the other side, because these triangles
like meet at the base here, I will make it match
on the other side. Then you can see
they are standing against each like this. Oh, I know these patterns
are time consuming, but that's exactly why
we are doing them. These patterns, building
them line by line, helps you to slow
down and relax. But to your taste, you can keep them to minimum or pick the patterns that
happens a bit faster. And all the wavy patterns
happen pretty quickly, especially the brush pen wavy and focus on the
coloring part as well. You can adjust it depending on how much time and
how much time you want to spend on these things. Getting there. I don't know about you, but
trying to do straight lines, just stripes, but
trying to keep them parallel to each other
is quite challenging. But at the end, even if
they are not perfectly parallel and your lines aren't perfectly straight
like they were here, altogether, it creates a
really good looking texture. Okay, halfway done with this
pattern. Pattern number one. Also for the recording purposes, it makes sense for
me to do this way, so at the end, we don't have to wait for
the paint to dry. You can just finish and walk away while and live your life
while the paint is drying. I just took a zip from
my coconut water. Now, how shall we tackle this? Maybe this one here, like from the center. One, two, three triangles left. As you can see, I
always say that this pattern is good
for big shapes. It's very, um, striking. It draws your attention
straightaway, so it's good for the main
object in your painting, and I think it works well here. I will try to match this one
to the lines next to it. Like this. And then I will match this one to this
one as well. Let's see. Oh, I almost knocked down
my water to this one. So I'm starting from the middle to go along with these lines, and then I will do the top part. And the stop part is
getting closer and closer. I will reduce the
distance between them. I want to look like going
into the middle legs. I love the texture it creates. That's because I'm
recording now, I may nervous and and my hand is a little
shaky. I can tell. But this actually makes lines a little bit jittery and the texture
looks really good. And the last one,
last one, last one. Should we do race
or Let's do race. So I like this this this This Okay. And like that, the
first pattern we used, you can see how nicely
you fill the space. The thing is, again, it all comes into
interpretation. You don't have to use this once. You can use in three
different places as well, the same pattern. Or instead of the big one, you can feel the
small ones as well. That is up to you. Now, let's do the ripple
pattern. Ripple pattern. I think I'm going to
use the radiating dots here on this one. And I think I want to use the
colors for the background. And I'm going to use
radiating dots here. So I think this will be a
small part or dots here. Yeah, I'm not counting this
as another circular object. It's another big line. And I want these
ones to be black. So I'm going to use
the ripples in here. As you can see that you will also have your
own interpretation. I'm giving you a starting point. So for the ripples, I just
put down some thyme circles, and then I will at two lines each or
three up to you. That I always say
it's up to you, but I also don't want to
leave it too loose for you. So you can, while taking
any of my classes, you can choose to listen
to me 100% and do everything exactly
like I do, or 0%. You don't have to
listen to me at all. Like, I'm not forcing you. Whatever really suits
you in this way. So you can do everything I say. But if you don't not going
to be mad about that. Basically, whatever
is your need from me, I will I'm trying
to give you that. If you need full
instructions and just follow what I say,
you can do that, too. But if you want to go and do your own thing,
I'm fine with that. This ripple pattern
is really good for hand eye coordination
because, I mean, you can see it I'm struggling to make these circles round. But forcing yourself to
do this, at the end, it doesn't matter
because as a whole, you don't see these
imperfections that it still looks good. But, oh, boy, it's
a good exercise. I can feel it in my hands here. And, you know, this
is like any exercise. If it's hurting, you
know it's working. Almost there. So now I'm just
filling the gaps, like I think one circle at a
time to each starting point. Like, one for you, one for you. One for you. One for
you, one for you. And just like that, this
one is also filled in. And I'm going to use this 1.5 very thick one
because this is a big circle. And we are recording. After all, With the dots, it's maybe the most time consuming pattern. And in some evenings when I have time for myself and when I make these paintings, I really enjoy making them. Is tally pattern happening
one dot at a time. Because this 1.5 is thick, it happens faster. That helps. Normally, I use 0.8, I think, or 0.7, as well. But basically, the thing
about this pattern is, the more you put,
the better it looks. The more you spend
time heading the dots. The better it is. You guys see it's already
started radiating outwards. Maybe I will do in a way that is radiating outwards
here, but not here. But I'm not sure now. We'll see. That I'm always up to
something like What if this? What if that? There's also a page
called What if I here. That's I call it the most important
page because that's the artist's mindset you
need to have with this. And if you get the PDF, make sure to check that page up. And now we are adding
the final pattern. Again, this I'm doing
one pattern at a time, just for the sake of
demonstrating to you guys, but it could have been
in more places as well, it doesn't have
to be one pattern in one place, and that's it. I'm keeping my hands circular. Also in my free guide patterns, I'm showing how I'm
building these patterns. You can also get that. There's a link to
that in PDF as well. Or if you go to my profile, there's a link there as well. I'm showing ten or ten
patterns that I have here, but in there, it's
specifically for the patterns. I'm showing stage by stage
how I'm making these patterns and how you can make them too. Everything is recording, yes. I know I know it's
time consuming. But for the video, I will
spit this part up anyway. Circular motions. No, I think I will go
all the way around it. But sometimes it's good to
wait for these decisions and make part of it
and see where it goes. Then it will tell you
where it wants to go. Your brain will tell you. We are almost there
with the last pattern, and the painting part will
be fairly quick, I think. Wait a minute. As you can see it took the center
stage with the dots. But I think the
final result will be different than the example
in here, for sure. I want this black. I think maybe I will
keep those right. We have still colors coming. And we said which colors
color number one paper.
7. Painting with Watercolors: It's this one here. And for that, I'm going
to put this aside. Now we are doing the color.
Pens down, like in an exam. We need cadmium red. I'm going to bring them
here so it will be easier. Cadmium orange. And cherry blossom pink. These are the main
colors in the big ones. And then these two are accents. So that mainly we're going to use these colors,
and these ones, I'll put them sideways will like small things or
maybe splashes and so on. So now, quickly, I'm taking some there's
a Paper towel here. I'm thinking for this painting. Let's first fit some water here so they will get
wet and saturated. I'm using an eye dropper
for this eyedropper aside. I'm going to use the
background to paint, but I'm going to use
this straight line as a separation between
maybe two colors. And this color set actually is if you notice that they have different
names, all of them. Tell me in the comments or in the discussion
work if you figure out what are they named after. But this one specifically, my wife once told me to make a painting with red
orange jumping, and I said, Really red orange jumping,
that's never going to work, and I love the result, which actually led to my first abstract watercolor
escape class. In there, I use those colors, and since then I love
this combination. So I think I'm going
to start with red. Let's see how it goes. That I'm not going to be too
strict about the color. If they mix, and
they're gonna be mixed. But if they further mix, I'm not bothered by it. That's my approach
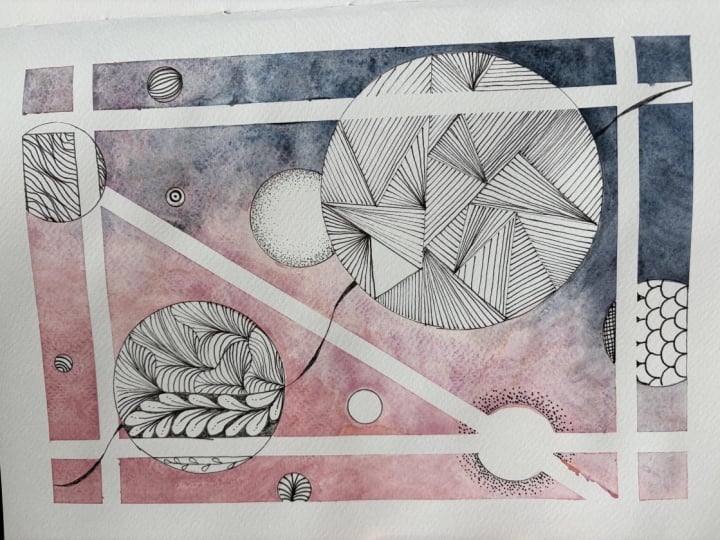
for this painting. I made one using Abstract
watercolor Builder on Friday. And in there, I had a
different idea for it. It was more, everything
was a bit separate. I can show you
that like in here. This is also a way to
go, but not today. O. Mm, maybe that's an idea. I just got an idea for the
future version of this. Maybe I will add different
approaches to the mix. The way we decide on the
layouts and the colors, maybe I will give you
guys something to Oh, I didn't even wash my I'm going to give you
guys how to approach, like do color blocking
or Mm, I like this idea. Check. Take a note. When my paper starts bending
like that, I bend it back. And I had more color here. And I want to put some more
red around here as well. And that is pink color, I like, but it's
opaque and it covers the lines you put a bit. For this, I later,
if it bothers me, I go and Um, go over those lines again
and it's really not a big deal that you
can bring them back. And once it's dry, it's also, easier to It comes
back a bit, the lines. And I'm going to use pink
for this side as well. I'm leaving this
white because I think I'm going to use one of the
accent colors for this. I'm letting the colors touch and do their
thing and mingle. Okay, I already like
where this is going. And oh, there's this section here that should be also pink. Okay, and now only
the accent colors which I'm going to use. I think I will use the
beige just to splash around a bit and purple as well. And this side. I think it's almost dry. I want to use purple
in small amounts. This violet, not purple. I think in here or this part. And I think since I am still on violet that I'm gonna
splash with violet as well. Not too much. And
one thing left, and it's this white and I
want this white dot here, and I want this to be the base. And like that, are painting complete can
you believe that? When I started this class just
like an hour 2 hours ago, I didn't know what painting
was going to come out, and this is the
painting that came out, and I actually love it. And if you look at the example
that was from this layout, like, we use the same layout, but these are totally
two different paintings. This is what this does, Abstract Composition
Builder does. So like, from nothing,
from no idea, we just sit down and we have a complete like full painting,
but not just that. We just didn't know
that this existed. It didn't exist 2 hours
ago, and now it does. I love this, and I hope
you guys will get this and make hundreds of paintings that won't be the
same every time. When you do, please
share them with me. I'm looking forward
to seeing them. I hope you enjoyed this class, and I'm going to see you
probably in the conclusion. You know, editing and
stuff things happen. They don't happen in
chronological order. If you didn't know,
I'm letting you know. I'm going to see you in the
conclusion and this is it. Go get this, use this. I think it's a
bargain, 12,000 ideas. You will find a link
somewhere in the description, and, you know, by now,
stay creative. Bye. The
8. Conclusion: ACB is Awesome!: I. Welcome back. Congratulations. You made
it to the conclusion video. It means you finish the entire class almost because you need to
watch this part, too. Thank you very much
for taking part in this class and joining my kind of unknown challenge diving into unknown with the
absurd Composition Builder. But this is the thing I want to talk to you about
if you find yourself in a position that you don't
know what to paint or you always feel like doing the same things over
and over again. This Abstract Composition
Builder can be a way to unlock. You unlock the situation, and it can help you to break the blank page when you don't
know what to draw, or you want to do something else and change
the routine a bit. Like if you feel like you
are repeating yourself, you can just just choose something different or
roll the dice completely, let the universe decide
and use different layouts, different color sets that
otherwise you wouldn't use and pick the
patterns or again, decide with dice and you're going to end up with something
new, I'm sure of it. So this is a way
to refresh things, like I mentioned before, or if I didn't mention before,
I'm going to mention now. This is a digital product. You can go and find it. In the description,
there will be a link. If you want to support me,
you can get this product, or thank you very much for taking part and
using the layout and the color set and the
patterns I used in this class and made
a painting with me. This also helps me survive as an artist and
an online teacher. And but if you get this, like I said, this class
was me giving you a fish. This is you getting 12,000
fish for $12 and that's it. So that's all from me. Thank you very much for this. Don't forget to share
your class projects, and please leave a review. That's very valuable for me. If you have any other comments, you can find ways to reach
out to me via email. Or on Instagram DMs. There are links somewhere. I'm sure you will find
it. Go to my profile. There are all the links
there. And yeah, that's it. It was fun, wasn't it? Jack? It was fun. I had fun. It's exciting not knowing
what's going to come out of it, and you just go through the system and you
have a product. Yeah. This is it from me, and I hope you
enjoyed this class. I hope you enjoy Abstract
Composition Builder, and I'm going to see you on
the next one until next time. Stay creative. Bye. And
 Fatih (fab) Mistacoglu, watercolor storyteller