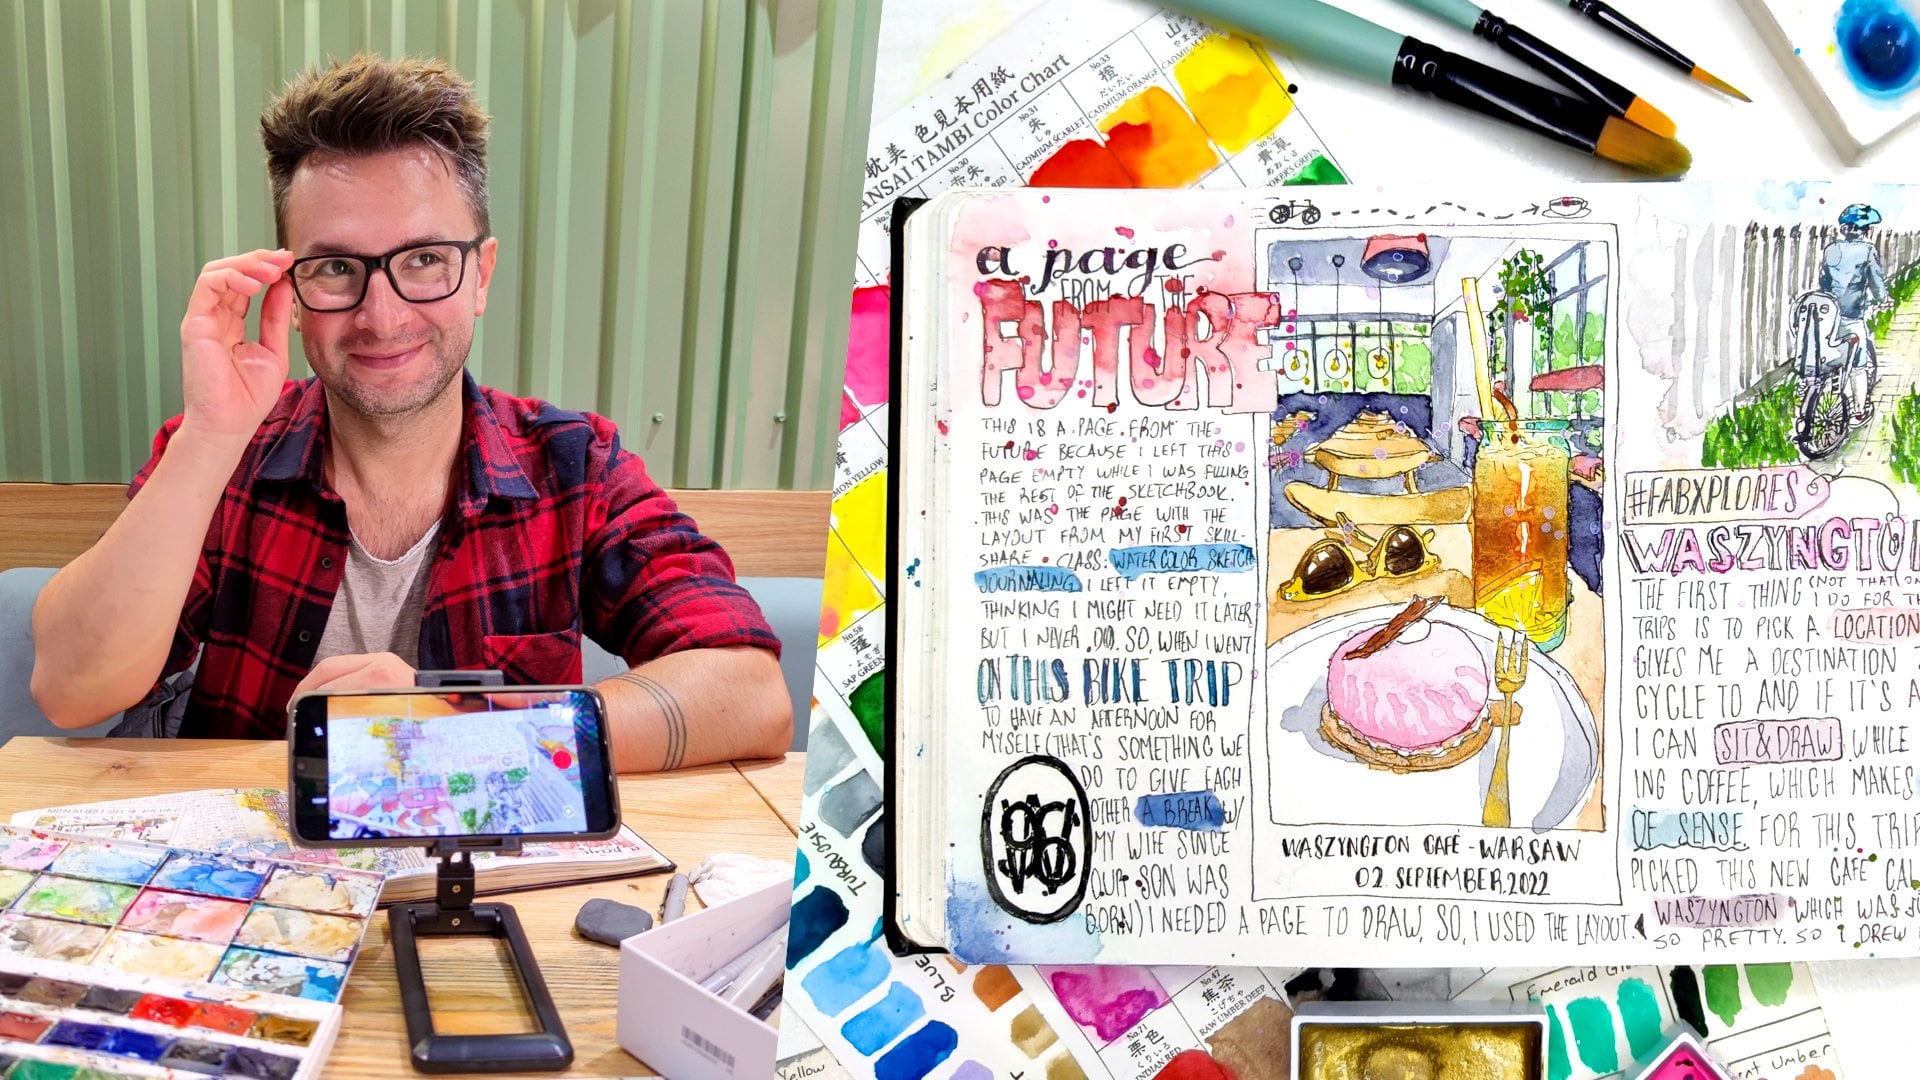
Transcripts
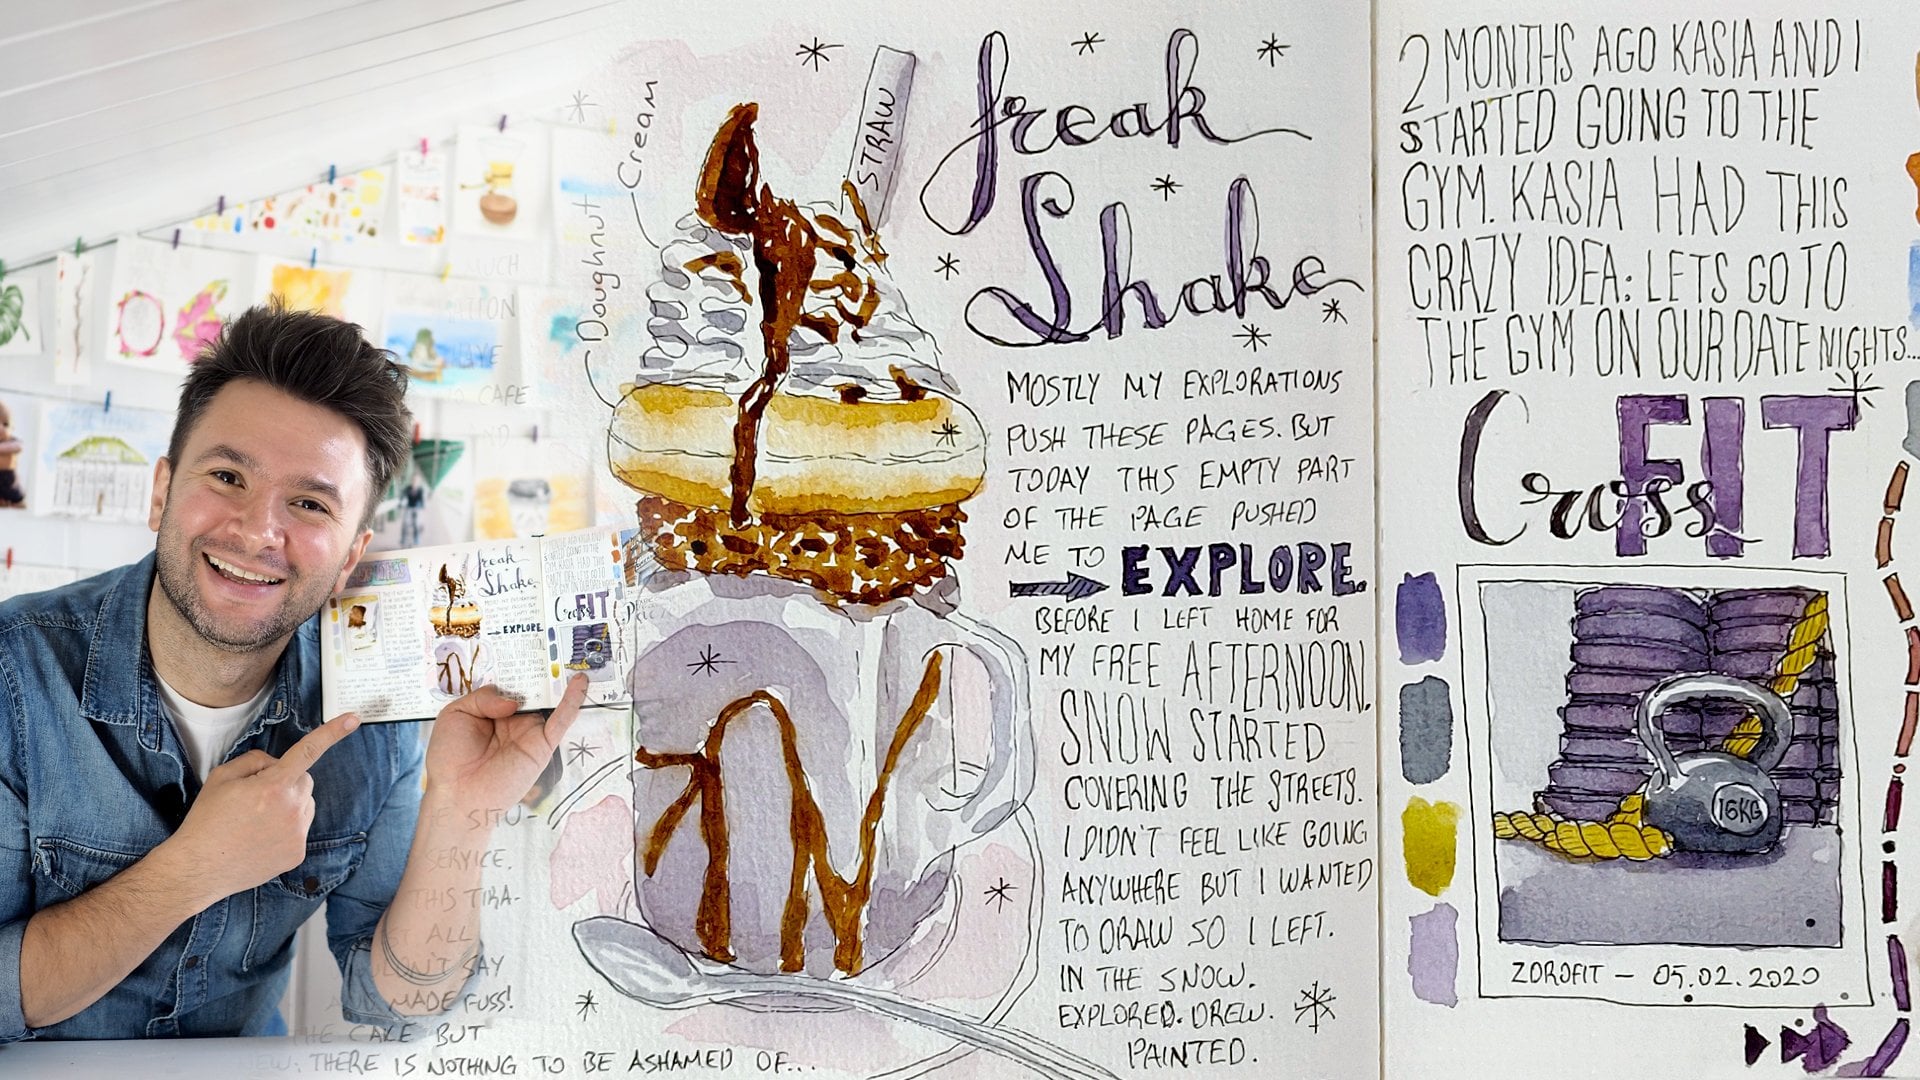
1. Break the Blank Page: Want to draw and
paint but stuck at the blank page. Follow me. You sit down to create
something, but nothing comes. No ideas, no direction. The page is so white and so perfect, you don't
want to waste it. In this class, we are
going to change that. Hi, I'm Fab. I'm a watercolor artist
and an online teacher, and I have helped thousands
of students to start painting even when they
felt complete stack. My goal is simple, making
art feel approachable, relaxing, and something that you can actually
do not overthink. In this class, I will show
you a simple way to break the blank page using
just one pattern and one color from
your watercolor set. Learning this is important because once you
know how to start, everything else becomes easier. And by the end of this class, you will have a repeatable
way to get back into painting anytime
you feel stuck. This class is based on something I created
called fab patterns, a collection of simple
patterns I use in my own work. I made it to remove
the pressure from abstract painting and turn it into something anyone can enjoy. This class is perfect for
beginners, hobby artists, or anyone who wants to
get back into painting without feeling overwhped.
Need much to get started. Just some watercolors, pen, paper, and willingness
to stay creative. We will go through
this as a five day challenge where each day, you will paint a tiny painting using one color and one pattern. That's enough. Along the way, you will learn how
to build texture, stay consistent, and
most importantly, keep going without overthinking. For your project, you will create at least
one tiny painting, or you will go in
and create all five. Heard that Jack has
a special surprise for those who complete the set. I'm talking about
these tiny paintings. That was the vanilla version
of your class project. If you are feeling a
bit more adventurous, you can choose the
spicy route and get a chance to win a one year
ski share membership. If this drew your attention, make sure to watch the next
video for more information. So if you ever thought,
I want to paint, but I don't know where to start, you're in the right
place. Let's get started.
2. Class Project: Do is recording two. This is the class project video. Now, let's talk about
your class project. Say hi to my
sketchbook, microphone. You see I'm showing you
so many different ways you can use your sketchbook, and this is one of them. Now, let's talk about
your class project. This is where everything comes
together, but don't worry. We are going to keep it
simple. Are we, Jack? What I have in mind
is not quite simple, but they will get it. It. It's one way or another. You can choose
whatever you want. Yes. Yes. Let's go. You can take this class
project two versions. Version number one,
the Vanila version. Your goal is to create at least one tiny painting using one color and one pattern
from this class. That's it. Just one. If you ever felt stuck in front of a blank page, this is already a huge win. You showed up, you started, and you created something. If you want to take
it a step further, you can complete all five
paintings from this class. And if you do, you will get a special comment from
Jack to do what Jack. I don't know, this was your idea to celebrate your consistency. Thanks for my new Mg. Guys, and now the spicy version. If you are feeling a bit more adventurous, I have
a game for you. Other than the five original and five alternative paintings I made for this challenge, I made one more secret painting. Here it is. I used one
pattern from patterns that I didn't use during the class and one
color from this five. Your challenge is to figure out that combo and recreate
it in a tiny painting. Pick the same pattern
color combo as me, create a tiny painting, and share it in
your class project. The first person to
get it right will win a one year ski
share membership. You can submit as many
paintings as you want. Each painting is
a chance to win. Think about this like you
are buying a lottery ticket. But the winning number
is already chosen and you are writing down
your own numbers to win. Invite your friends,
share the load, try different combos,
play together to win. To play, you will need
Fab Patterns PDF, so make sure to download it. You can find the link in the
class project description. Whether you go with
the vanilla version or the spice version or
both, who can stop you. This is all about
breaking the blank page, having fun, and getting
into the flow of painting. I can't wait to
see what you will create. See you in
the first lesson.
3. Why patterns?: Pattern. Welcome, everyone.
Before we start, I want to tell you why I'm
doing this, why patterns. When I think about
patterns and why I make them and why I am
so drawn into them, there are four things that
pops into my mind, four. The first one is the
relaxing aspect. In here, I will put some Bros. The repetitive nature of
patterns is so relaxing. Sometimes I can turn off my brain and just
draw the pattern. It really quiets
everything else down. The second one is the impact. The impact it has on
my abstract paintings. It adds a lot of texture
and depth to my paintings. It gives your eye
so much to look at. The third one is the
hand eye coordination. I'm not very
coordinated right now. You might not notice it, but every time you
engage in this practice, you are getting
better at drawing. Line after line, your hand tries to do what
your brain wants, and this is really the only
way to get better at this. The final thing, the fourth
thing that draws me to patterns is because it has an emergent property.
What do I mean by that? Emergence is a term when something has a certain
property as a complex system, but not as the individual parts
that creates that system. For example, water molecules
are not wet by themselves, but when you bring
a bunch of them together, things get wet. So wetness is an
emergent property. Wetness emerges when the water
molecules come together. Patterns are a bit like that. A single line doesn't really tell you how the pattern
is going to look like, but altogether, it
becomes wavy or tridy. There is this surprising
element to it, and when I start
the new pattern, I can't wait to see how it's going to look
like at the end. So this is why I love and use patterns. But
that's not all. We are here today
because patterns are also a very good tool
to break the blank page. And this is the main
focus of this challenge. When you don't
know what to draw, where to start, you can
use patterns to warm up. They are easy, repetitive, and you build them
one line at a time. And I was thinking, How can I invite people in without scaring them
with a full painting? And I came up with this idea. One color, one pattern,
tiny paintings. When you don't know
what to draw or paint, warm yourself up first. Pick a color you
like, and then pick a pattern from my
free guide patterns. It has my ten favorite patterns, and I break down
how I make them, and just make a tiny painting with that one pattern
and one color. Low stakes, no pressure. So for this, I
decided to challenge myself and invite you guys
for a five day challenge. You can take this class also as a five day challenge or take it all at once.
That's up to you. I will pick one color
and one pattern and create tiny paintings for five days, and they
will look amazing. To prove you guys how
low stake this is, I actually recorded
the whole thing as live on Instagram
with people watching. This is how we will break the blank page and remove
the creative blocks. And you won't even realize, but soon you will be drawing
and painting just like me. So that's all I wanted to say. I think Jack, is
there anything else? No, I can't validate
your parking. I told you you can't park there. And it's also not relevant. I meant about the class if there is anything
you want to add. Of course not. That's
enough talking. Let's break the blank page. See you with the Day
one painting. Check.
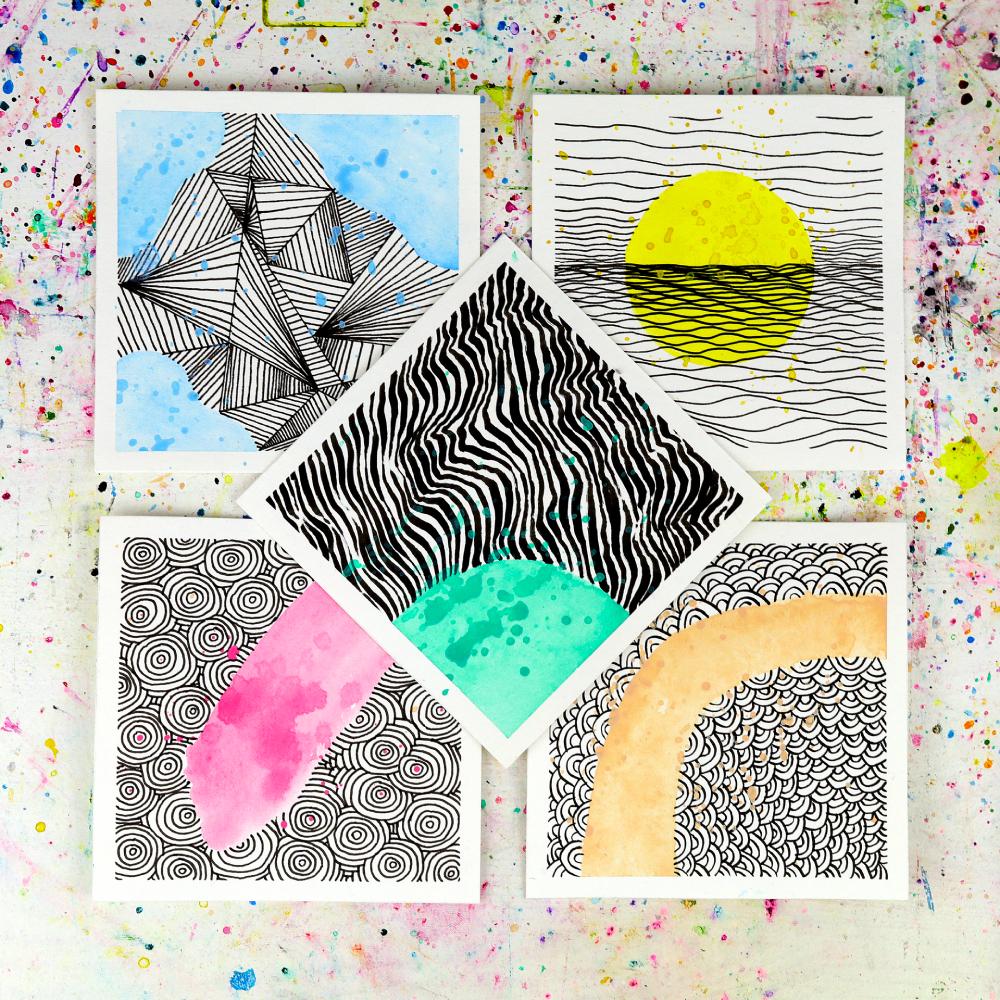
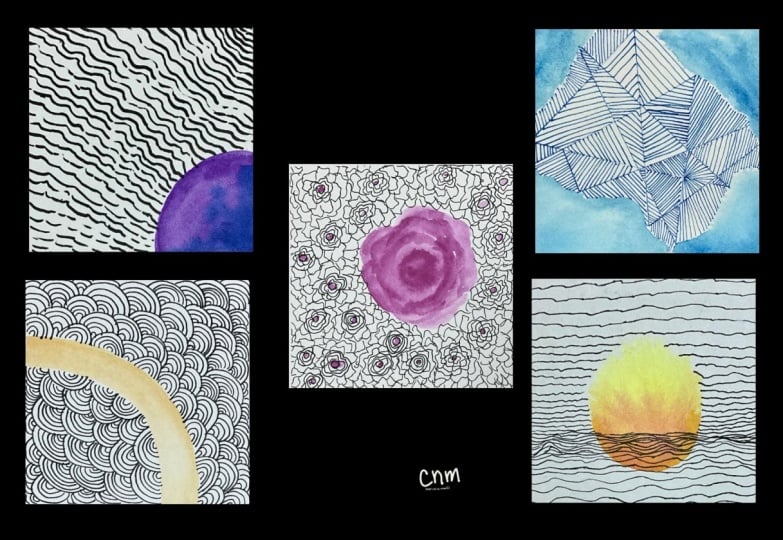
4. Day 1: Broken Mirror and Horizon Blue: This is day one painting. Today, I want to actually
recreate this one. For this, I use
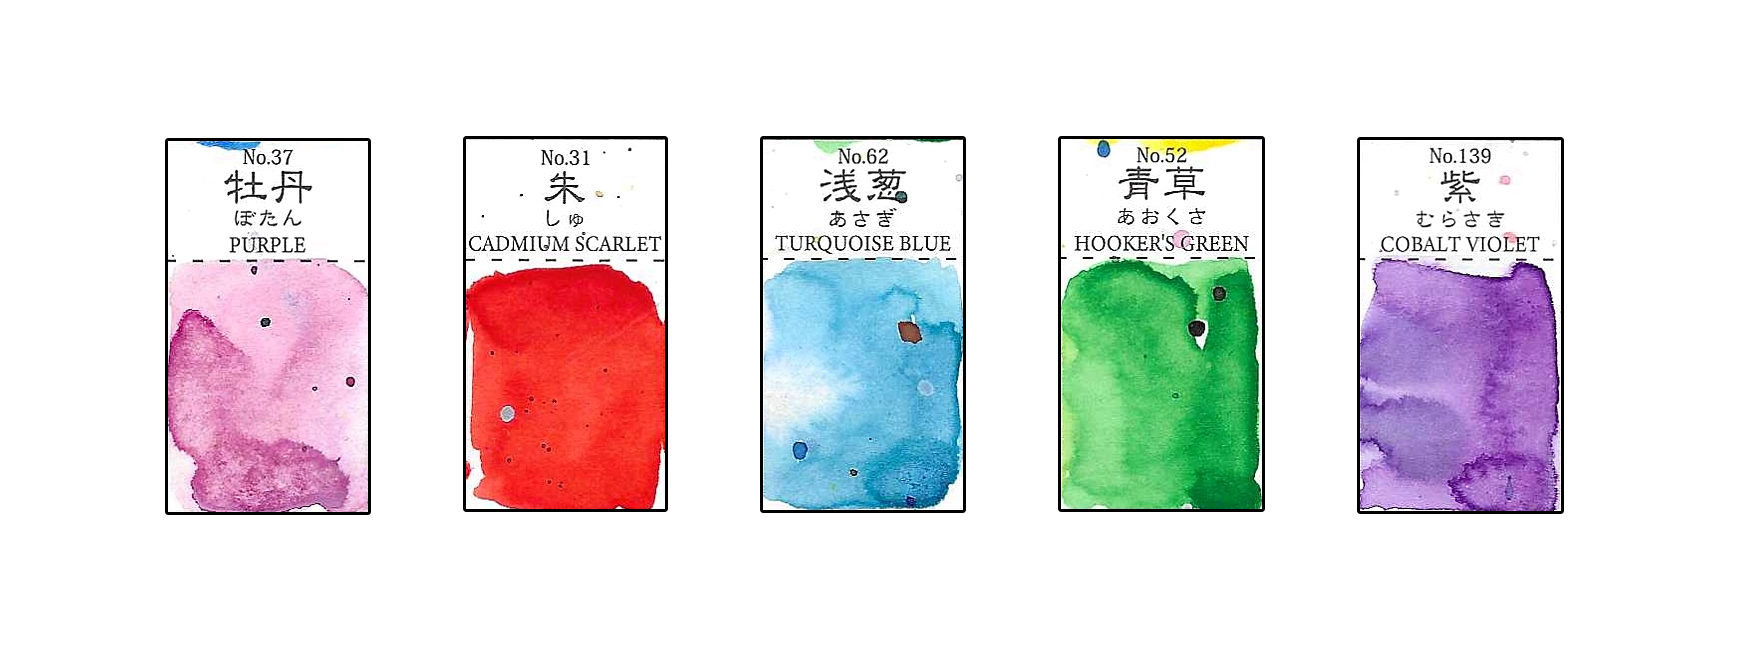
this horizon blue. It's a beautiful
color. It's opaque. I'm going to lay
this down first. But you could also just sketch the area and do it like that,
like the other way around. But in my opinion, this is better that put down
the color first, and then you will feel the
space with the pattern. And here's my horizon blue. As you can see, I used a lot. It's almost finished
and get a fresh paper. And this is like I have A
four size watercolor paper. I just cut them 9.5 by 9.5
centimeters squares from it. I didn't buy this specifically. And the reason why you might ask 9.5 is because if I do ten, I can only cut out
four out of an A four. If I do 9.5, I can cut out six. And so I use the paper better. So it's 9.5 by 9.5 centimeters. I don't know what's in
inches. Sorry about that. And for this painting, this is also a nice thing that
the end result is better. That if you tape the edges, the end result looks very nice and tidy. I don't
always do this. I most often paint all the
way to the edge of the paper. But for this project, we
are we don't have a lot. We have one color and one
pattern to work with. So at least I thought this will have a nice effect
without doing much, and as you can see, it does a nice effect. I have my waters here
that I always use two cups that there's
one clear for one dirt. Like, I wash it here and
then cup some fresh water. And but since in here, I'm using only one color, doesn't really make
much difference. It's more about not mixing
two colors and making them lose their
saturation, get dull. The twin color is not
really a problem. I'm just going to
create some blobs. This is the composition
I picked for this. I thought from the
puffy sides that this pattern is very jaratinT
it comes very strong. That's why I call
this broken mirror and I thought it would
be a good contrast between this very nice baby
blue and puffy cloud shape, but in the middle there will
be contrasting pattern. So I'm putting this here. And on this side, I'm on purpose, I don't want
them to be symmetrical. I'm trying to make
them asymmetrical that always to my eye, it looks more interesting. And the last corner this is also something
I just came up with. You don't have to
do four corners. You can do two corners and the rest you can fill
with patterns that I try to do lots of different things that
the color in the middle, the color on the side, you can basically change and
replace all the colors, all the shapes and compositions in here
with all the patterns. Only between these
five paintings, if you just replace the patterns and the
colors in between, you could come up with hundreds of different designs, basically. Now this is basically done. How do I create this pattern? I usually create one line going across whatever
space I'm working with. And then basically, we need to break this mirror into charts
and how will we do that? We need to create lots
of triangles, basically. The key, in my opinion, is not to create
all the triangles from one center. Don't
keep doing this. Break this space up. Into different shapes
and then from there, try to get some triangles. We are breaking this
space up until we are on the left with triangles. Now what do we do with
this? As you can see, this is basically
mostly parallel lines. But how do I differ this? And this kind of gives
the feeling of, like, things are not flat like this, but broken and
sitting with a bit of an angle that when
I do like rays that coming from one center and then separate towards the other edge of the triangle and then
match with this other one, it looks like they are
sitting like this. Or when I do and I basically
change the distance between the parallel lines
of these stripes and then it becomes it's
sitting further away from us, so it gives the
feeling of depth. So by varying the
distance between the lines and how you place
them parallel or rays, it creates lots of
depth and it gives the feeling of shattered
broken mirror basically. Like I said, being able to do these lines
parallel like this. If they are not super parle, don't worry about it.
That's the first thing. This is a really good
practice for your hand. For any kind of drawing, this will help you immensely. So totally recommend it. Often, when I do these things, I say it is a good way
to break the blank page. When I'm doing this,
this is a simple task. There's not much to think about. But as I'm doing this, it gives me ideas, Oh,
what if I try this? What if I try that? Then this
is actually how you break the creative block because then the idea starts generating because you are already
doing something, your brain is busy with this, but then if you think, Oh, what if I change this a little
bit and suddenly you have an idea for a new
project and boom, the creative clock is. Just like that, our
painting is done. Here is the original I made. Here's the new one. Okay. I think this is it. This was one blank
page like this one, broken, with one
pattern and one color, and I love how they look. And in the next days, we're going to do this one. We're going to do
this one. We're going to do this one
today or tomorrow. And don't forget. You can go and get fab patterns, the ink in Bio as I always say, stay creative and I
will see you tomorrow. Thanks for joining me. Bye. And
5. Day 2: Regular Wavy and Aureolin: This is day two painting. Okay. I'm sorry. I was just
looking at the camera. I forgot to press record with second camera, but
it will be okay. So now this is done. This is the one I just did
it like 20 minutes ago. I'm putting this aside to dry. And we're gonna
continue from this. We need to tape this. I'm using my washi tapes
not to waste too much. Okay. Now, what I'm going to do is I imagine the
middle is like a horizon. So how I change the
pattern I have in the PDF. That's also something you can do. That's always an option. And it's basically you can
always bring the lines closer to each other or put them more apart
from each other. And this also changes the feeling and intensity
of the pattern. And in here, when we do that,
this feels like, again, it's going away from us, into the distance
because that's how things would appear to
us in the perspective. Like when we look at the
waves that first they are more they are actually all the same
distance from each other, more or less, and then they would appear closer
and closer to each other, and that gives the
feeling of depth. So that's what I'm
going to use here. Again, I'm using
0.5, my fiber caste. And I will start with
one line in the middle. Then I will try to do this try and hopefully succeed
this wavy pattern. Let's go. The next one will be
much closer to this and the pattern will be almost
not visible even in there. But when you complete
it, it shows itself. Don't worry too much about it, it's going to go over itself. The thing you need to be
mindful about this pattern. That whichever way you
do is basically fine. But if you want the
waves to appear, this is also what I explained
in the PDF, it's important. The next line, where is it
touching or getting close to the previous line because that's where the wave continues. This is again, this
emergent property of the patterns I was
telling you about. It only reveals itself
once you make it. But when you make
enough of them, you know what to do to
achieve a certain look. But usually I try not to
worry too much about it, just go with the lines. They need to be tight. It is a little bit
counterintuitive because I'm basically that let's say there's a dip here
in the line yes, I'm touching it from the left. So in the first look, you would think that the
wave would go this way, but no the wave goes
the other way around. This pattern, I think, develops much faster than the
one we did before. So today's life will be
accordingly shorter, I think. Now slowly, I will try to
separate them a little. And this first part is done. The second, again, I'm using because we said
that for these paintings, just one pattern, one color. Okay, I'm still here with that, but I'm modifying the
pattern I'm using a bit. And how am I doing that? I will turn this upside down. And now my goal is like
yesterday not to go over the color that this
yellow will stay here. And I'm not going to do the way I'm going to still
do the wavy pattern, but I'm not going to
make them touch so much, so this will separate the
sea from the sky a bit. Okay, we're not
doing a sea and sky. It's an abstract painting,
but you know what I mean? And again, it's going to
start more close together, and then towards up in the sky, I'm going to make them more and more separate like this one. So it's still the same wave
pattern, but basically, I kind of the lines, I'm shifting a little bit. So where the peaks of the waves are not
touching each other, but they stay parallel to it. And just like that, we
broke the white page with nice seaview using
one color and one pattern. And I think this is
a great exercise. It's shorter than yesterday's. Maybe it will be
more appealing to some of you that you could try. And you can see it
took like 15 minutes. This was the pattern from my free pattern
guide five patterns, and today we use regular
wavy and in here, I explain what you need to
do to achieve this look. And this was day two of my
five day pattern challenge, and I'm going to see you
tomorrow with another one. Yeah, go download the
PDF, use the patterns, break the blank page, and I
will see you tomorrow. Bye. Jack, did I forget anything? You're useless. Okay. Bye. Mmm.
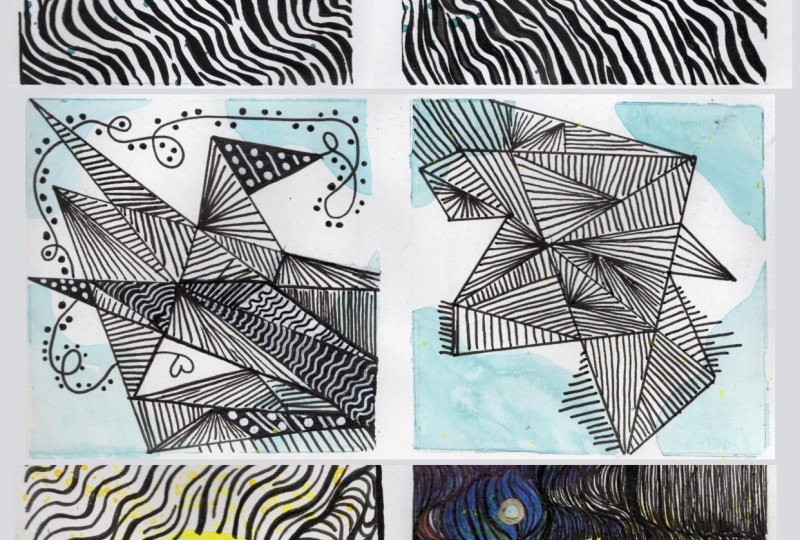
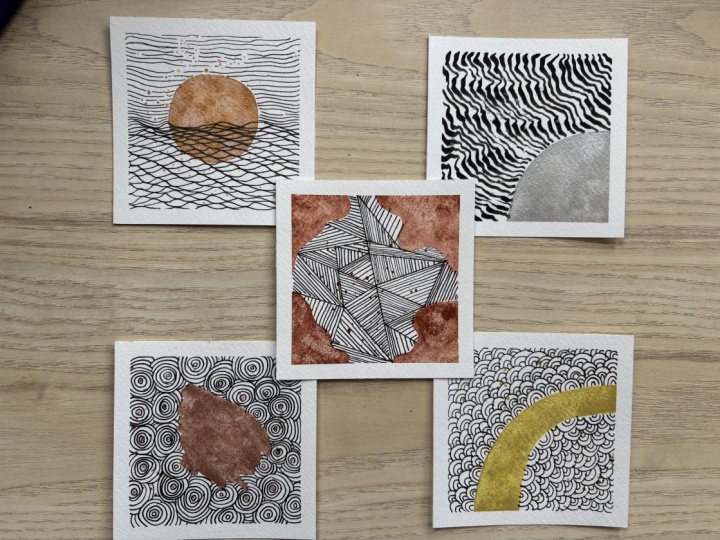
6. Day 3: Brush Pen Wavy and Malachite: This is day three painting. What I wanted to show
you guys was before we started because before we started before this
challenge starts, I made some examples to show what we are
going to do, yes. And then in the too many times. During the challenge, I
make one for you guys. So these ones are
the ones I made. But also, I was ending up with unused painted papers without
the patterns on them. This was the one from day one, and I thought, I'm going
to be swapping them. I'm going to apply day two pattern on the day one
color and composition. And this way, I end
up with this one, and I actually like it
even more this way. And you can see just by
changing one thing, like, instead of broken mirror pattern from fab patterns
to regular wavy, that you end up with
completely different painting. Like the feeling of
it is very different. This way, you can
everything I show you here, you can just change the colors, change the shapes,
change the patterns, and end up with really
hundreds of different designs. And I love this process. And today, we are going to use another wavy brush pan wavy. This is also one
of my favorites. I love the effect. It gives you. Like when you are painting, you have a painting and you
want to have I don't know, there's a big circular
object in the middle and you want that
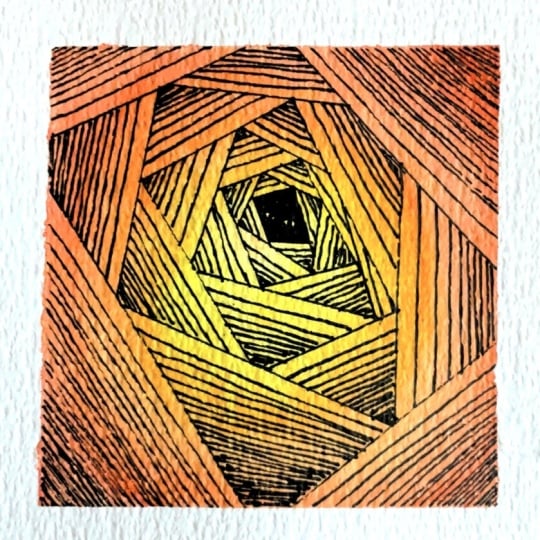
to be impactful. This is the pattern
to grow to it has more contrast than the other
patterns in my opinion. Today we are going to make this. I have a Brush paper. Today, it will be also
quick this pattern because we are using a brush pan again, too many pans here. I just need my brush pen because we're going
to use the brush pen. This one this pattern
develops very quickly, and that's also a good thing. So I'm going to tape
it up again. Okay. And for this, you know
the drill by now, one color, which
finger one color, one pattern, and
one tiny painting. And the color I
chose is Malachite, I think, this one. I'm not even drawing this. I'm just going to
go ahead and apply like a quarter of a
circle here, cropped out. If you don't want to be
like a perfect circle, it doesn't have to can be
different shape as well. I think I want a bit bigger. Okay. And I'm taking more
water because splash, you need a bit of water in your mixture that it
needs to be a bit runny. I'm going to do the
splashes straightaway. I will take my other
painting away for this. By the way, you can
totally sit down, do five of these. Paint different shapes,
different colors, and then put them aside to dry. And then for the next five days, you have ready papers to
go. That's totally fine. I do that often, actually, with bigger
papers as well. So now I put it aside, and I have a dry one. So now we can move
on to the pattern. Today we are doing
the brush pen wavy. Yes. And how do we do
this brush pen wavy? Let's bring this one in? Because I will I draw
from left to right. I can do from right
to left as well, but it's easier to do
from left to right. So because of that, I will turn my paper this way. And I will start
from the corner. And then when I
come to the color, I want go across the color. I'm starting from the corner. The way we do this is
I basically do a wavy, but every now and then, sometimes I'm pressing
less my brush pan. When I press less,
it makes it 109. When I press harder, that the brush pan gets bended
and it makes a thicker line. And those thicker parts when you align them when they keep
happening one after another, it gives this time
this wave effect. And also, basically, I try to follow my previous
line as much as I can. And with all the imperfections
like going up and down, I try to emphasize
that on the next line, and this kind of slowly, slowly develops
into this pattern. And it is really fun to make. I would recommend
you try this one. Now, starting from the corner, look, when I'm not
pressing, it's a thin line. I'm starting thin
and at the end, I'm pressing down,
there's a ticker line. And we keep going and I
try to keep it close. To this one. I try to kind
of copy the line before. But of course, I can't
do that with perfection, and this creates another line to follow underneath
that is similar, but also not similar
to the previous one, and it keeps going like that. So start with a thin one. You see, there was
a dip in there, and I tried to get in there with my brush pen and I
follow this line. So in here now, I will
also get a bit thicker as you can see, I'm keeping the thick lines now
start going thin. So then this wave of thicker
parts moving this way. And I try to follow these imperfections
from the previous line. Start. Tick again. Here thinner. Really in here, the garage pan does the job for you, does
the work for you. At least most of
the heavy lifting. Sometimes these lines
can be glocen as well. I also like doing
that sometimes. And just like that, our
pattern is complete. I think I like the
effect that this is, I think, good enough that
it's showing the spot. I think I'm going
to splash a bit more because, you know, why not? That I always say
in doubt splash. So it will be a bit
more emphasized. Yeah, I think this
is much better. One color, one pattern,
tiny paintings. Do this for warming up. Do this when you don't
know what to draw, do this to break the blank page. Do this to remove
creative blocks when you are a bit lost
and don't know what to do. This is really easy to do. And it's a good tool, and I will see you tomorrow. Thanks for joining me. Bye.
7. Day 4: Soap Bubbles and Rose Beige: This is day four painting. So from patterns, today we are
going to use soap bubbles. With this design. As
you can see in here, it's built very regularly. But the interesting thing about
this pattern is that when you have a different surface
like a curved surface, depending on if you're on
the inside or outside, the pattern changes a bit. If you are keeping it like regularly building. We
will also talk about it. I think I want to change it a little for today's
project from this bit. In here, for example,
it's more random. I think today, I'm going
to do it more like this. The first thing
to do, of course, like we do, we're going
to add the color first. I'm going to reuse
my washi tapes. Today we are using
the one color I chose is rose beige,
another opaque color. I'm going to do the
same arc like I did before I want to keep this
design more or less the same. So I'm going to make this arc. I'm not worrying too much. I'm just going with my gut. I didn't This doesn't
have to be perfect. If it's not even or
something in here, I think on purpose,
even I made this part of it wider. So just go with it. I think this is good enough. And then I will add some
maybe this one I will make a touch ticker.
And let's see. And then there's a difference, I want to splash straight
away on this one. That on the origin, I didn't. These splashes were made later. And later I might
decide to do more as well because I like
splashing around. So the painting part
was already done. And putting this
aside and bringing the already dried one,
almost already dried. But we will work on the inside here and those parts are dry
and so it should be okay. So we are building this pattern, but I'm going to let's see, as we are doing this, I'm going to do a bit more
random, like in here. So as I was saying, when you add this pattern on the outside, that spreads out and
it changes a bit. By doing it random, I think
I will be able to keep them more in the same
shape. So let's go. So on this original one, I did one, two, three on top of each other. I'm not going to now
go next to each other. I will try to more
randomize, okay? And they will have four or more. I'm going to work on
the outside first. And it's up to you
that you can try to avoid the splashes,
like go under them. Like, don't make your
pen, go over them, or I'm going to do what I'm going to do is
I'm going to go over them. Anyway, maybe later, I will do a little more splash on it. Yeah. As I'm doing this, I can really say that building the pattern this way is definitely
much more fun. But when I was building this
one on top of each other, then I started really a bit worrying that do I
have the same amount? Like, should I shrink time
as I go on the second, third, fourth level, and so on. At the end, actually, you can't even see that it just
becomes a whole thing, like a texture that that's what I was
saying at the beginning as well that your patterns once you finish and
fill the space, it just becomes one thing
like looking at a tree. You don't see the individual
leaves unless you really go down and look and so it doesn't actually
really matter. But as I was building, it was making me
concerned a bit, but this way is more fun. So I would recommend you
try doing randomly as well. I'm done. Okay, this didn't take as much as
I thought it would. Wow. Actually, it's 20 minutes. I'm enjoying myself so much. I didn't realize it's been 20 minutes since
I pressed record. Okay, now the side. Because they get shrink because they are on the
inside of this, let's say, incomplete circle, maybe
I will make them a bit quicker on this side
because they tend to shrink and this way to
also finish faster. Yeah, now I can already feel that because we
are on the inside, the way you build the pattern is much more interesting
that there is less space here and then that it closes faster rather than getting
more and more open here, like in here, it's more inwards. Yes, but I can feel
that on this side, I decided to make the bubbles picker because they
tend to shrink. And the shape of this curve is actually
pushing me to be smaller. So it's kind of
balancing it out. Meantime, I'm trying
to even out this bit came a bit too
strong one side. It's a bit lifted to the left. I want to finish it,
like in the corner. And like that, it's done. You can see changing
one thing, like, kind of the idea, how we're gonna approach
to the pattern, change the feeling
of the painting so much that this one is much
more compacted and like, there's more contrast in
this when you look at it. But this one looks
more interesting. The texture is better on
this one, in my opinion. So like that, our
day four is done. And yeah, I will see
you tomorrow. Bye. The
8. Day 5: Ripples and Cherry Blossom Pink: This is day five painting. Okay. Now, I'm going to tape my paper because we're
going to splash also. Let's reuse yesterday's tape. A load of color, and just I try to do it
very naturally, like this. Or. Because if you don't have
a very big brush for this that you can only carry
so much paint in it. Yes, when I spread like this, it becomes thin that it spreads the pigments,
yes, the pigments. Yeah, the pigments get very spread away and it
looks a bit pale, and I want this to look strong. That's why after deciding, Okay, this looks like a nice
brushstroke shape that I want. I'm adding a bit more
like tab, dab, tab. And then I will take some
more and here slash, slash. And, yeah, I think
we have actually, I like this m or
this feels a bit more like swept away like there. Yeah. So normally, like I said, I would wait for this to try. However, we are doing this live. So I prepared one
already ready to go. I'm putting that one aside. Now it's time for a pan. Where's mine? Yeah, 0.5 here. So how do we achieve
this pattern? We start with basically drawing tiny circles around and then bit by bit
enlarging those circles, and then they start
interacting with each other and cover the entire space. Basically, like how a
ripple would go outward and fill the entire pond.
It will be just like that. And it doesn't have
to be very evenly. But in the original one, you can see that in here, it's missing one ripple, so that they create a bit
going downward effect here. I'm not a very big fan of it. It looks interesting,
but I think there should have been
another dot there. So it's okay. And what I'm going to
do, I will also use some of these splashes that they will be the epicenter
of some of the ripples. Not all of them because they shouldn't be too
close to each other. They need some space to spread. But definitely some of them. Okay, I think we covered it. Yeah, I think this will do. So this is the first step. And then this looks
like nothing, really. But then what you do, what I do want to, I try to go from left to right
in order and line by line. And I just start adding one to three lines, three circles on top
of the first one, and move on to the next. Don't worry if it's not
perfect. I always say this. At the end, you will
see the whole thing, not the individual lines. This is really one of those
patterns that when you want to use the relaxing
aspect of patterns, you can just sit
down the music on. It's really perfect productive. You can do it from
your mind easily. You don't need to
look at the phone, any reference portal, nothing. Just sit down and do this and
keep going until it's done. Oh Okay. Now, as you can see, it's already like the
first drops of rain hit and the ripple
starts happening. Now, what we're going to do, we'll go back to the
beginning and start adding two each one, two, and then this one's t. It's already being blocked
by the first ripple. Two. Next one is this. As you can see, it's
like when they emerge, it just becomes, I don't
know, from the top also, it looks like a bunch of
flowers packed in together, or, like I said,
ripples in a pond. It's a very fun
pattern to build. Line by line. Circle by circle. As you guys, it's
almost finished by now. I hope you will
give this challenge a chance and give it a call
that it is really easy to do. And every day, you just give, like, half an hour or
so and one college. One pattern. Tiny paintings. And hopefully, through this, you start making other paintings
like I've been showing. Um, and just like that, our ink brush stroke
painting is done. So this was it for today. We used from pop patterns, the ripple ripples pattern, and we used the
cherry blossom pink rose from my u take
watercolor set. This is it for our painting today and also for
our challenge. I hope you enjoyed it.
Thank you for joining me. Jack, do you want
to add anything? As you should know. Mmm. The
9. Conclusion and Behind the Scenes: Welcome. First of all, thank you for being
here and taking this class with me,
congratulations. Seriously, whether you made just one painting or all five, you showed up, you started,
you created something. That matters. Quickly remember what
you've done in this class. First, we looked at why patterns work, how
they are relaxing, how they improve your
hand eye coordination, and how they add depth and
texture to your paintings. Then, we use that
idea in practice. For five days, we created paintings using just one
color and one pattern. We kept things simple, approachable, and easy to start. And that's really the
point of this class. If there is one thing I hope you take from this class, it's this. When you don't know
what to create, just start with one
color and one pattern. You don't need a big idea.
You don't need motivation. You just need a place to start. And now, you have one. Before you go, make sure you upload your project to the
Class Project gallery. I would love to see
what you came up with. And if you are playing
the Spicy version, I can't wait to see who's going to come up with
the secret Combo first. If you enjoy this class, please remember
to leave a review and follow me here on Skillshare so I will know what you think and you will want to
miss the next ones. And if you haven't
already download the Fab Patterns PDF
and keep exploring, you can find the link in the class description or the class project description,
some of the descriptions. There is a lot more you can do with this. That's it for now. Looking forward to your
class projects and reviews. Until next time, stay creative. Bye. Jack, do you
want to say bye? Check also says Bye. Bye. Man. I hope this works.
What was my line? Want to draw and paint, but
stuck at the blank page. Follow me. Okay, here we go. Here goes nothing. Want
to draw and paint, but stuck at the blank page. Follow me. I'm so curious how this looks.
Did I do it right? I guess we'll find
out in the edit. Okay. This was fun. Check out the class to
find out how it turns out. By. Hi, I'm Fab. I'm a watercolor
artist and teacher, and I help thousands
of students. Yeah, start painting. That was correct. It
feels difficult to say. I helped thousands of students. But I did, even when they felt completely stuck because
once you know how to start, everything else becomes easier. Wow I summer coming again? I'm sweating in the hood, Jack. This was your idea years ago. You don't need much
to get started. Just some watercolors,
pen painter. Pen, paper. No painter. Painter is actually the
words in Turkish for cheese. Painter. Again, we'll go through this as a five
day challenge where each day you will paint
a tiny painting using just one color and one pattern. I went blank there for a second. Again, for your project, you will create at least
one tiny painting, one pattern pattern. If you want to take it a
step further, further. Not further. If you want
to take it a step further, you can complete all five tiny
paintings from this class. And if you do, you will
get a special comment from Jack to celebrate
your consistency. Jack, come on. Okay. Again, you will get a
special comment from Jack to celebrate your consistency. Jack, you distracted me. Okay. So I finished three
jumps. This is four. Pick the same pattern
color combo as me. Again. Pick the same
pattern color combo. Again? Yes, I'm using my sketchbook as my
microphone holder. Everyone is using something. I thought my tiny sketchbook is perfect for that.
Isn't that cute? The final thing, the fourth
thing that draws me to patterns is because it
has an emerging again, is because it has an
emergent Oh, Jesus. Again, emergence a term when something has a certain
property as a complex system, but not as individual parts
that creates that system. I would like to see
you say that sentence. And I was thinking how I could
invite people in without scaring them with a full
painting, scaring them. Again, let's do. Maybe we'll tiny paintings using
just one paint, one color and one pattern. For five days, we
create paintings. And if you haven't already, download the patterns
again. I think that's it.
 Fatih (fab) Mistacoglu, watercolor storyteller