Transcripts
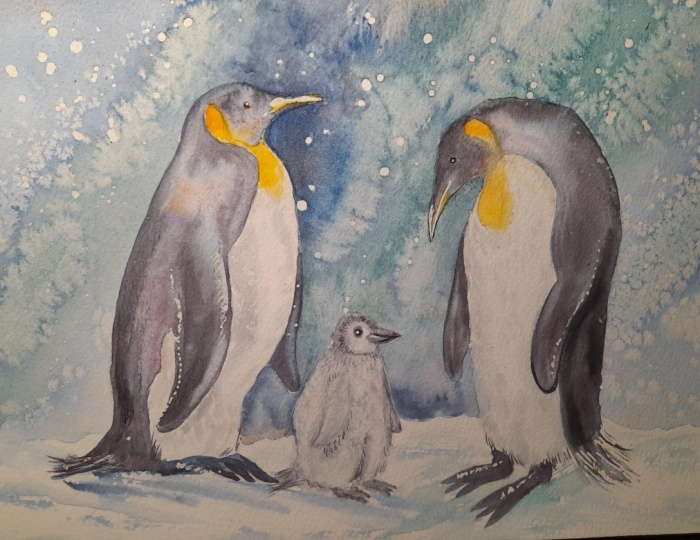
1. INTRODUCTION: Hello, and welcome. Today, we're going
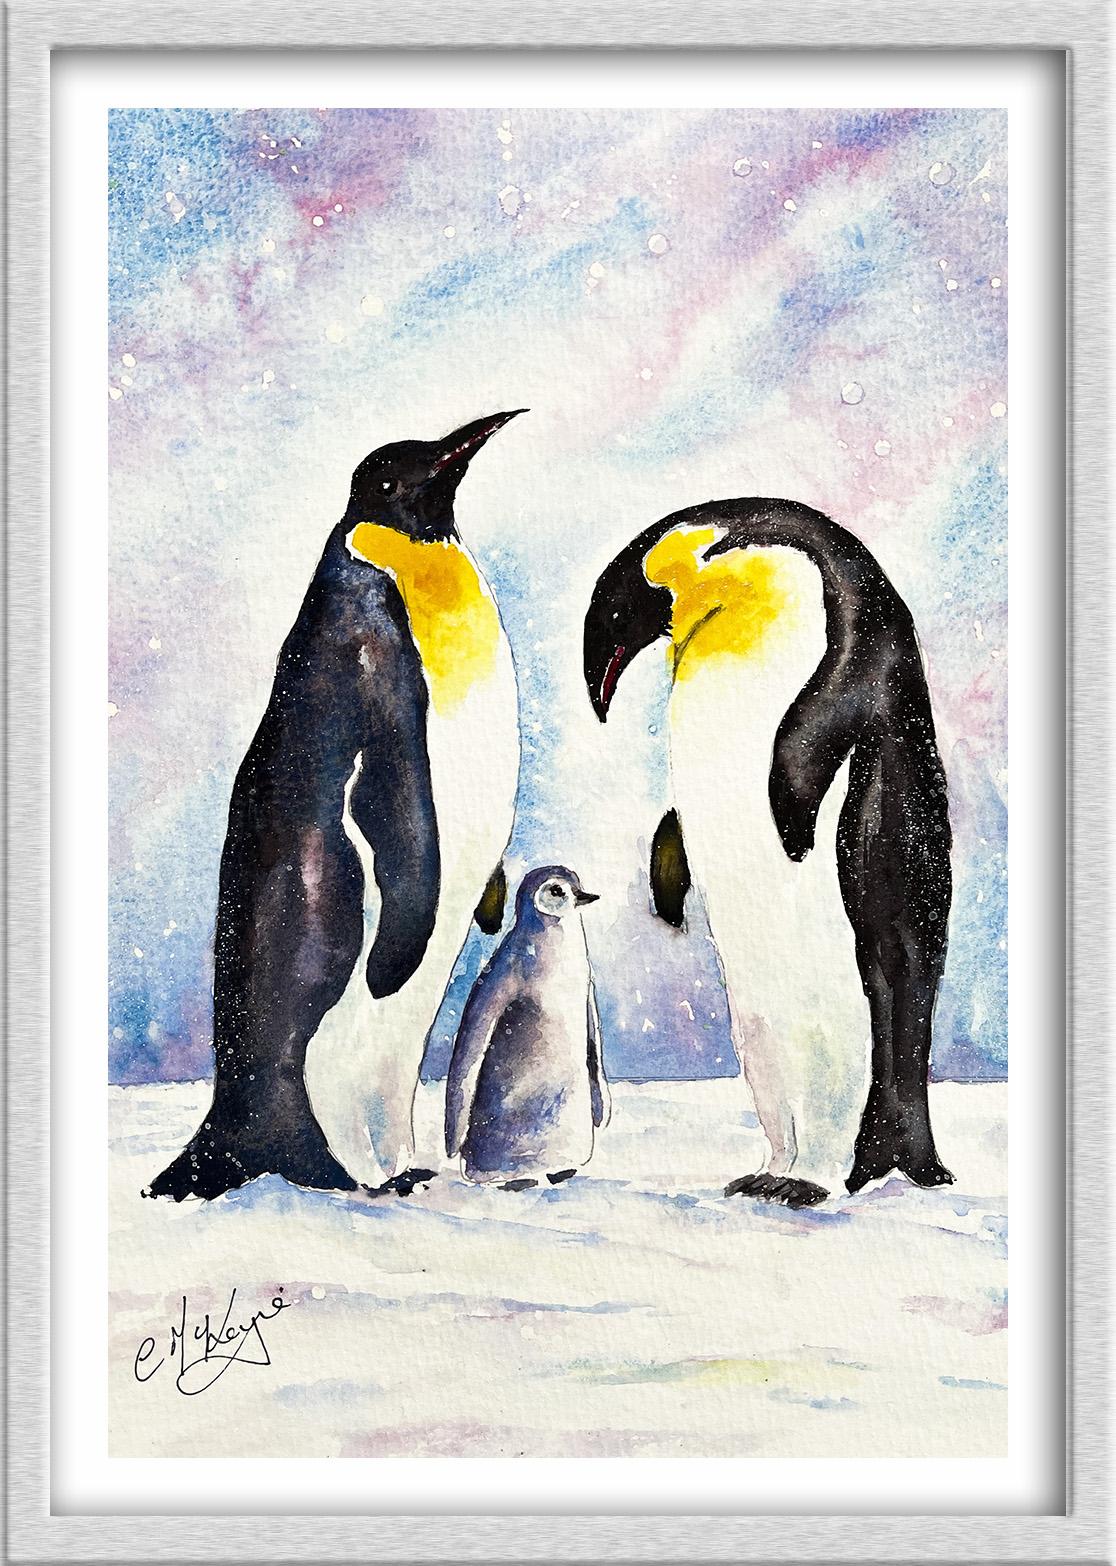
to be painting this lovely little
family of penguins. This is a great class. It's jam packed with
watercolor techniques, tips, and tricks, and I know you're going to find it
really inspiring. You'll learn how to build your
painting in gentle layers, gradually adding texture,
depth, and detail. By the end of the
class, you'll have a finished painting full
of glow and atmosphere. It's suitable for all levels, including beginners because I'm going to be guiding you
every step of the way. I'll be sharing all
the techniques, tips, and tricks that I use in
my own professional work. I've included a copy
of the drawing in the project resources section so that you can download
it and trace it, and then not worry
about the drawing because this is a
painting class. I am a professional artist, author, and tutor,
and over the years, I've sold a lot of work
across the world and helped hundreds of people to
learn more about watercolor. You can see examples of
my work on my website. My style leans
towards impressionism and contemporary rather
than photorealistic. I like to explore loose approaches that bring
out the colour, light, and essence
of my subjects. I've tried to
replicate this across all the many other videos
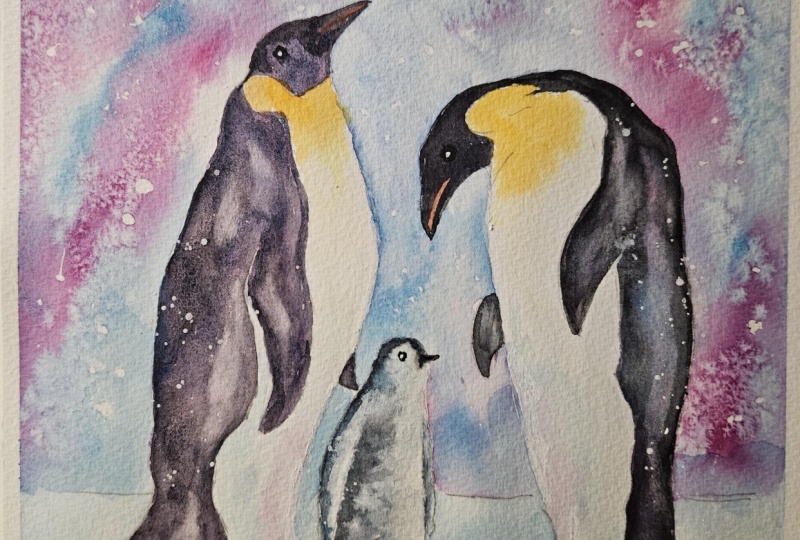
that I have on Skillshare. I'd love to see your
own finished painting, which you can upload through the project and resources tab. I'll give you some
personal feedback on it, and you'll be able to
see the artwork of other students and
get their support. At the end of the class, you'll have your own beautiful artwork to be very proud of. So let's swizzle our brushes and get on with the painting.
2. Materials & Drawing. Spatter Masking Fluid to preserve white paper snowflakes. Paint Sky wet-on-wet.: I know you're going to love
creating this painting, and I'm sure it
will put a really big smile on your face, too. For this class, these are the colors and materials
that I'm using, but do feel free to use
any that you already have. For information on brushes
and paper, et cetera, do check out the basic
materials document that I've added to the
project resources section. Now you can see that I've
kept the drawing very simple, minimal detail so
that we get a nice, loose free flow painting. And I've included a
copy of the drawing in the project resources section so that you can download
it and trace it, and then not worry
about the drawing because this is a
painting class. You can apply masking fluid to the shapes where you want to reserve the white of the paper, either for highlights or to
paint over by hand later on. Now, you do need to
wait for the fluid to dry fully before applying
paint over the top of it. When it is properly dry, you can just rub
off the hard gum either with a clean finger
or with a putty rubber, and you'll see that it leaves behind crisp defined
white shapes. If the white shapes
are a bit too stark, you can soften them
with a damp brush, or you can even paint over it. Now, don't use your
good brushes for this because the gum
will spoil them. So use an old brush or even
the handle of the brush. I also use rubber tipped applicators because the gum is very easy to clean off them. You can get a ruling pen, which varies the
thickness of the line, but I tend to use an unwound paper clip for
very fine lines and dots. As you can see, I've used
the point of the paper clip to add a tiny dot of masking
fluid to each penguin's eye. And I've used the ruling pen and the handle of an old
brush to spatter on some masking fluid over the background sky and
the foreground snow. Spattering is a technique where
paint or masking fluid is flipped onto the
painting surface to produce some interesting
textural effects. Using it here will
give the impression of some snowflakes when
we paint the sky. I'm using the wet-on-wet
technique to paint the sky. The wet-on-wet technique is
simply putting wet paint onto wet paper or paint that is still wet and let it spread
into the wet wash. This results in a lovely
diffused effect with soft edges. Because the paint mixes into
the wetness of the paper, the colour is diluted
and the tone is paler. I've got my sky colors
ready mixed in my palette, cerulean blue, ultramarine
blue, and permanent rose. But first of all, I'm applying some clean water with
a large clean brush. Well, to go over the
masking fluid because it is completely dry now,
so it won't smudge. I do want a nice, soft, diffuse sky without hard edges, so I am thoroughly
wetting the paper. I've got quite a good
point on my large brush, which means I can get into all the little detailed areas
relatively easily with it. But if you need to
switch to a smaller one, then by all means, do so. I'm starting with
the lightest blue, the cerulean, and I'm just dropping that in to this
top left hand corner. It's a bit hard to
see on the video, but I am kind of just tickling the paper with the
tip of my brush and letting the wet water that I put on previously soak
up the color from it. I'm using diagonal brush strokes
because I want to convey the impression of
the snow drifting down in the sky
behind the penguins. You can see how the color is spreading and diffusing
into that wet wash, but it's not going over onto the penguins because
I kept them dry. Now, when you're
painting the sky, don't worry about getting an exact copy of what I'm doing. The watercolor is
quite unpredictable, especially when
you're using it like this in a very wetting,
wet technique way. So don't be afraid to let the watercolor do its own thing. And although you can follow along with the principle
on what I'm showing, it's likely that yours will have a bit of a different appearance, and that's absolutely fine. Now, while that ruling
paint is still wet, I'm adding in a little bit of ultramarine blue in
places, not everywhere. I don't want to obliterate
the lighter blue, but I do want a little bit of variation in the
tone and the color. I particularly want
some darker tones, where the sky is around the penguins bodies
that are white. To encourage those two colors
to blend a little more, I'm moving my paper
from side to side, tilting it, and even
giving it a little shake. That's one of the reasons why I prefer not to tape
my paper down. I've added a touch of
ultramarne blue to my permanent rose just to give
it a more purply tinge. And I'm dropping
that color in now in between the
different blue colors. To vary the color
and tone even more, you can add a little bit of blue over the top of it because
it's still all very wet, so all these colors are going
to mix and diffuse nicely. And once again, I'm giving it a bit of a tilt and a shake to encourage that pink to blend
in with the other colours. Whilst it is all still very wet, you can also trickle
in a little bit of clear water here and there if you want to
lighten any tones. But do be warned that
if you do trickle in some water when the paint
is starting to dry, you will get some of those
unwanted cauliflower shapes. I'm actually adding the water
here whilst also holding the paper in the direction
that I want it to flow. When you do this, it's
important to mop up any little pools of water that have collected
around the edge. Just use your paper towel to
blot it so that that water doesn't run back in and
cause some peculiar marks. Looking at the result of
what I've done so far, I do need to add just a couple of darker toned
pinky purply color. Watercolor does tend to dry 20 to 30% lighter
than when it's wet, so you need to keep that
in mind and allow for it. The last thing I want to do on the sky is apply some salt. Applying salt is very useful for creating the
appearance of snowflakes, foliage or rock texture. Just sprinkle some grains
of household salt into the drying paint just as the sheen is going
off the wet paper. Leave it to dry,
then gently brush away any excess salt
with your finger. And you'll find that
the salt has absorbed the paint and left behind some lovely little
sparkles of light. And you can use different
salts for different effects. Try some rock salt or sea salt or even some
dishwasher salt.
3. Paint the adult penguins, bleeding colours into each other. Use a 'thirsty' brush to lift colour : Now that your painting is dry, you can brush off the salt
that you put on earlier, and you should see some
little sparkles of light that resemble abstract
snowflakes in the sky. I'm using the wet on
wet technique again, to paint the heads and backs
of the adult penguins. Starting with the
penguin on the left, I'm painting with clean
water around his head, into his beak, and down into his arm and the rest of
his body at the back. In fact, all the areas
that you can see in the reference photo are
shades of black or gray. In my experience, I found
that painting straight on with black does tend to
look a bit flat and lifeless, particularly when
the paint has dried. I'm applying different colors. First the ones that
we used with the sky, and then I'll go
over with the black and bleed those colors
into each other. I've dropped in
my permanent rose and now I'm adding
my two blue colors. You can let these
mingle and mix. And you don't have to fill
in all the white gaps because we are
going to go over it with some black in
a minute or two. Now, I have already got my
black mixed in my palette. You can of course, use a black
straight out of the tube, but you will get a more lively black through mixing
it with other colors. I'm the ultramarine blue with permanent rose and added
a little touch of yellow. Now you do want a more
bluey purple black. If yours is airing
on the brown side, just add a little
bit more ultramarine blue and perhaps a bit of
pink to purple it up a bit. Going back to the
reference photograph, you can see that
there is a sheen on some parts of
the penguin's body. I'm using a thirsty brush
to just lift off some of that paint where I need to lighten the tone
for the sheen. Then while that under wash of
blue and pink is still wet, I'm going in with
my very dark color. The consistency of this
dark colored paint is thicker than the pink and blue
that I put on previously. It's about the consistency
of single cream, which means that although
it's spreading a little bit, it's not absolutely flooding
the shapes where I placed it painting around
his little head, keeping the central
area around his eye a little bit lighter using
that thirsty brush technique. Again, although in the photograph
the head is very dark, I do want to keep
some light and dark tones in this area to
give it some form. And also so that when I
come to paint the eye, it will stand out a little
bit more than it does in the photo where his dark
head meets his white body. I'm just bringing down a few
little dark brush strokes where those dark feathers
meet the white ones. I think you'll be able to
see now how the brushes more or less sculpted the head with those
light and dark tones. I'm moving back to the body quickly because I
don't want that wet under wash to dry before I start putting the black
on these other shapes. You can see that it
is still wet because that dark paint is still diffusing into the
underlying colors. If it wasn't, I
would have to re, wet the shapes again by applying this
dark black color around the edges of each shape. That's going to
give it some form. It's going to show this three D, rounded shape of the body. It might look a little
bit odd at the moment, but bear with me, it's going to look okay, just it was with the sky. As long as that
paint is still wet, I can keep working into it and getting this
soft blended effect. You can just see here, the tip of his little
feet sticking out. I'm not laboring the toes or putting too much
detail into them. Just a suggestion of feet. I'm now turning my attention
to the middle of the shapes. Apart from adding a little bit
more paint here and there, I'm going to use some of
the paint that's already on as I drag it or pull it
away from the dark edges, it will naturally dilute
and lighten in tone. That will help again with getting this three
D rounded form. I do keep glancing at the reference
photograph and I've got to make this back area of
this shape much darker. That's what I'm doing now. I've also lost a bit of the dark tone at the
back of his arm. That's what's going
on there now. Then a little bit more
sculpting with a clean, thirsty brush to
bring back some of those highlights
because the pain does have a tendency to
flow back on itself. You do have to sometimes keep repeating these
little processes. The reason that I'm
not doing it with a piece of paper
towel and blotting it is because I would get a much stronger result and
possibly some hard edges. Whereas I do want to
keep everything soft and blended with the interchange
between light and dark. Subtle, Although I'm using
this dark black color, you can see the pink
and blue colors still showing through, giving it a bit of
a glow and adding that interest to what otherwise would be quite a
dull black shape. You can just see the tip of his other arm peeping out
from the side of his body. Now, it's a small shape. I'm not going to bother
with the pink and blue. I'm just going straight
in here with the black. But I'll just dip the
tip of my thirsty brush in the middle just to lighten
it a bit in the center. Going back to the head area
to paint his little beak. A line of black at the
bottom of his lower beak. A line between the
bottom and upper beak. And then over the top
of that upper beak, I have switched to a
much smaller brush. I think this is a number one because it is a
small area and I do want to get some of those lines very fine and
to a fine point at the end. I'm also just tidying up
the shape of his head, which has got a
little bit straggly and they are quite
smooth are their head, so we need to get
that bit right. You just want to
leave a tiny sliver of white in between
the two beaks, which is where the red
stripe goes later. Now, I'm going to repeat this whole process for the
second Penguin on the right. Now she's standing in a slightly different
position to dad. We do have to give some thought to where the shapes
are actually placed. Otherwise it's using all the
same techniques as before. So I'm just going to let
the video play along now. And I think watching
it again will help to reinforce what
you've just learned. 0 A B, B, B, b.
4. Paint the chick with downy feathers. Create a 3D rounded shape with different tones. Paint the di: Baby emperor penguins, called chicks are almost naked when they first
hatch from the egg. And it can take several
weeks before they grow their first coat of
gray, downy feathers. They don't have those yellow
markings when they're young, but they are amongst the cutest
of the baby bird species because they are so fluffy and absolutely full
of personality. I've mixed some blue grays and some pink grays in my
palette and I've pre, wetting with clean water
just as we did his parents. Important to note, I haven't wet his face and I haven't
wet the right side of his little body nor have
I wet the right side of his front arm because I want those areas
to stay very light. Indeed, we don't have the same contrast as we
had with the adults. We don't have that black
and white contrast. We've got to use our grays in a very subtle way to convey the roundedness
of the little chick. I've used my blue gray color to go around the
back of his head, the left side of his front arm, and the left side of his body. I'm now going over with
a darker gray color, dropping that in over the top, letting those colors bleed
and mix gently together. Notice how I've left the right side of his
front arm very pale, almost white, so that that
stands out against his body. Moving over to his other arm, I've just painted
some dark gray on the left of the arm
where it meets his body. Then to strengthen the tone
between his arm and his body, I've added some really
dark black gray. Also, a few more little touches down the left
side of his front arm. Then I'm just adding a
few tiny little touches of cerulean blue
down the center. So we get a nice
softish transition between the gray and the white. Continuing with the blue down
the left side of his body. Just like the adults,
we didn't want the black to be lifeless and flat. So we added bits of
coloring and it's the same here with the gray
for the little baby chick, building up the dark tones on
the left side of his body. With the blue, the pinky
grays and the dark grays. I'm using tiny strokes to convey the soft
downs of the feathers. Although the faces are
pretty much white, I am adding a little bit, just a touch of cerulean blue to the left side in order to
convey where it's in shadow. To keep conveying that
soft, downy appearance, I'll use a thirsty brush again to pull away some
of the color and ease that transition from
light to dark Emperor penguins breed and raise
these young chicks on a platform of frozen
ocean in the Antarctica. The female lays a
single leg in May or June and then passes it over to her male mate to incubate, and then she's off to spend about nine weeks in
the ocean feeding. The male then
balances the egg in a specially adapted
pouch on his feet to keep it warm and off the snow
for about 65 to 75 days, because they don't get
to eat again until Mum returns with the reserves
to feed the family. Coming back to a colony
of thousands of tuxedos, the female recognizes
her chick acoustically, the penguins call
out to each other, and amazingly, they recognize each other's calls
above the noise. To get back to my little because I think he's calling
me to put his feet on, I'll just finish
off by tidying up a few areas using
my thirsty brush, where I need some light tones, adding a bit more dark where
I need some dark tones. And then I think this little
chap's just about finished. To paint these distinguished
yellow markings on the adult penguins chest. I've got two yellows. I've got a light yellow
hands, yellow, light. You could use aureole
or transparent yellow. And I've got a new gamboge
which is a slightly darker yellow, slightly dark. If you don't have
a darker yellow, you could add a little bit of orange to your light yellow. I'm using the wet
on wet technique. Again, wet paint on wet paper. I've pre wet the paper with some clean water where I'm
going to apply the paint. I've taken the water a little bit further than I
intend to place the paint, so that I get a nice,
soft, blended edge. I'm starting with
the lightest yellow. I'm just touching it in
and around the head and the neck area and bringing
it down over the chest. Using little feathery strokes to blend the paint
softly into the water. See from the reference
photograph how much lighter the tone is as the yellow color moves
further down the body. Now I am exaggerating the yellow a little bit from
the reference photograph, but that's because
I want to inject some warmth into
what otherwise is, quite a cold snowy scene. It is thought by science
that the penguins use these yellow markings
to attract a mate. I'm touching in the new gamboge, the light yellow
paint is still wet. I am getting that nice
blend of the two colors. While I'm in this
area of the heads, I'm going to paint the red stripe that
runs along the beaks. Now I'm using Alizarin Crimson. You could use a cadmium red or any other
bright red, really. If by any chance you
haven't managed to leave a little sliver of white paper
to paint the red color on, you could always
add it with some red or even some red acrylic. I'm touching in a little bit
of yellow on the inside of their fire arms
because this will be lighter than the backs of
them that are very black. You can see that
this doesn't quite match the reference photograph. But that's the beauty
of artistic license, where we can add things or take things away to
suit the composition. I'm now going to paint
the shadows that are on their white bodies and
where the legs are. Once again, I'm painting
with clear water first, pre wetting the areas that
I'm going to add paint to. Again, to keep everything
nice and soft and feathery. If you're a slower worker, then by all means paint one at a time instead
of both together. As I am here, I'm using the bluey gray and
the pink mov gray that I used to paint the little
chickweight and a left over in my palette as well as a few little touches
of the cerulean blue. The consistency is very
thin and watery paint. We don't want really
dark shadows. We still want a nice
contrast between the dark black backs
of the penguins and the light fronts. A
5. Paint the eyes and the chick’s beak, blending and softening technique. Paint the snow. : To paint the eyes. I'm
using a black straight out of the tube because
it's just a small area. I'm using Mars black, but you could use
any dark black. I'm using a very small brush. I think it's a number
one and it's got a really good point for
painting such a tiny shape. If you do struggle
yourself with this, you could always use a black waterproof pen or
a black watercolor pencil. Now it is a very small shape. I'm not putting any detail
really into the eye. I have got that little dot of masking fluid that
I put on earlier. When the eye is dry, I'll be able to rub that away and I will get
that little highlight. I'm painting the little
chicks beak with the same black color and
then also his little eye. Now, although these
are only tiny shapes, I am taking my time to
just get them right. Not rushing it, because
it is a lot harder to remove black than the other
light colored pigments. I'm using a damp
brush to just soften the little chick's
beak into its head so it doesn't look
stuck on like a plug. I'm now going to just add a little bit more shadow to the left side, the little chick. It will be in more
shadow on this side because this is where his dad's standing, towering over him. I'm using a little bit of ultramarine blue
for these shadows. Because I'm painting
wet and dry, I am softening that color into the underlying colors
with a damp, clean brush. Simple and crisp. White is
actually a colorless color. Mixing red and green
and blue light together is what gives
you white light. Now, because it is white, snow can appear a difficult
subject to paint. With water color, it
isn't really a color, but some consider it to be so, because white light comprises all hues on the visible
light spectrum. Therefore, as it comprises all other colors in the rainbow, you can effectively paint snow with a palette of
all these other colors. Because snow reflects the sky, it can often incorporate
a lot of blue, particularly where
the shadows fall. However, especially
when the sun sets, the sky can radiate a variety of other colors that
you can add for depth and visual interest
to the composition. For instance, it can be useful
to add a touch of yellow to areas where the
shadows transition into the brighter areas. It may seem counter intuitive. Snow isn't meant to be
blue or yellow or pink, but it will all work
beautifully together. The end. Another point to note is
that when painting white, it's all about tonality. Don't be afraid to use some medium and very dark tones because this will
bring impact and emphasize your whiter areas before the different
colored paint dries. Sprinkle, just a little
household salt over it. As it dries, the salt pushes the water
color pigment away, creating tiny little
sparkles of light. A wonderful representation
of tiny snowflakes. I'm using the same colors
that I painted in the sky, so that's cerulean,
little touch of ultramarine and some
permanent rose. I'm using the blending
and softening technique that we looked at just recently for
softening a hard edge where I'm painting on dry paper. Now, you don't want to
lose all your hard edges. We want a mixture
of soft and hard. Really, we're trying to convey the soft dips and
shadows in the snow. But of course, there will be some hard edges where the
snow is firm and crisp. As I said earlier,
don't be afraid of using some darker tones
of color here and there, because it's that
contrast that will make the white of the
snow look even whiter. I'm also brushing on a few strokes of the
light yellow that we used when we painted the distinguished markings
on the penguins chests. Because as well as
the sky colors, the yellow color from there is also going to be
reflected in the snow. In addition, having a little bit of yellow somewhere
else in the painting, we'll help to give it
a sense of unity and harmony to bed the penguins
a little more into the snow. I'm using a darker blue, just immediately
underneath where they are standing to emphasize a couple of deeper drifts elsewhere
in the foreground. I don't want to put
too much color in the snow and obliterate
all the white areas. I think this is a
good time to stop.
6. Paint distant background shapes. Lift off paint with magic sponge to recover white highlights. Us: I want to add some background
shapes along the horizon. Now, these are going to be very abstract shapes,
Nothing in particular. Just to give me some darker
tone along that horizon line, which will also add a bit
of depth to the painting. I've turned my paper upside down so I can access this
area more easily. And I've this little shape
that I'm, first of all, adding some background shapes
to by pre wetting it first. Those background shapes will
be a soft and blurry as they would be in
the distance when you can't see the detail. Then I've added some
cerulean blue and just let that run upwards
into the wet wash. I've done exactly the same thing with the shape on the right. Now I'm concentrating on this little area
here in the middle. Now it's a bit of a tricky
shape going around, the little chick and the bodies and arms of
the adult penguins. Take your time and
use the tip of your brush to get into
those really tiny areas. I need to keep the paint on the background and
not on the penguins. By darkening the tone of the
background in this area. It will also help to make the white bodies of the
adults stand out more. Now that I've wet
this background area with water and with paint, I can turn my
painting background again and add some of the
pinky purple color that I also put in the sky and which will be reflected on these
distant abstract shapes. The cerulean blue that
I put on is still wet, so the pinky purple colors
blending into it nicely. I'm switching
between the blue and the pink as I work my way
along this horizon line. Penguins are the
star of the show, so I'm not going to do anymore. I'm just keeping it subtle, rubbed off all the masking fluid with a dry, clean finger. And now I want to recover a few white
highlights, the snow. For that, I'm going
to use magic sponge. Although you can use a brush and some water to lift off paint, I want to introduce you
to magic sponge eraser, because this little tool works miraculously to remove
unwanted paint, you can use it to lighten
an area that is too dark or even strip the color
right back to white paper, depending on which
color you've used. Because some colors do stain
the paper more than others, just tear a small
piece of the sponge, dip it in some clean water, then squeeze it to
just damp and rub over the unwanted paint until
the color is removed. Use a paper towel in
between to blot and get the last bit of
paint off and keep rinsing your sponge out
during use to keep it clean or even throw it away
and use a fresh piece. If you accidentally get a
blob of unwanted paint in the middle of your
painting or you just want to lighten
the tone of an area, give it some highlights. This little piece of
sponge will become your best friend because it's normally sold as an
abrasive household cleaner. It does tend to rough up
the paper a little bit. Take extra care if
you're painting over the area that you've
sponged with another color. I want to add some more snow
flakes in the background. I'm using some white
acrylic paint. You could use gouache
and spattering that on, just as we did earlier
with the masking fluid. I've pre wet some areas of the sky but left
other parts dry. Wherever I spatter the white
paint on the damp areas, I'll get little soft snowflakes where I spatter
onto the dry paper. I'll get crisper,
hard edged ones. I'm allowing some
of that spatter to fall on the penguins as well. To get a much finer
flurry of snowflakes, I'm using a toothbrush, tipped it into the
white acrylic paint that mixed with water, and now I'm just rubbing
across the bristles and letting that white paint
spray onto the paper. It's a lovely
expressive thing to do, but you have to be careful, of course, not to overdo it, dab off any unwanted
spatter with a paper towel, because unlike water colors, you can't remove
acrylic paint now, although I did use a
little dot of masking fluid to preserve
the white paper for the highlight in the eye. It's not really very visible. I'm just using my
Y acrylic paint to add a little dot
there and also on the beak to make the eye stand out a little
bit more from the black head. I'm using a black waterproof
pen with a fine nib to just strengthen the eye area and make it stand
out a bit more. It could be a bit tricky
on such a small area, but if you don't have a
waterproof black pen, you could use the same black
paint that we used earlier. The final touch is to strengthen
the eye and the beak, the little chick, and then our lovely Penguin
painting is done. I do hope you've enjoyed this painting and that
you've learnt some tips and techniques along the
way that you can incorporate into
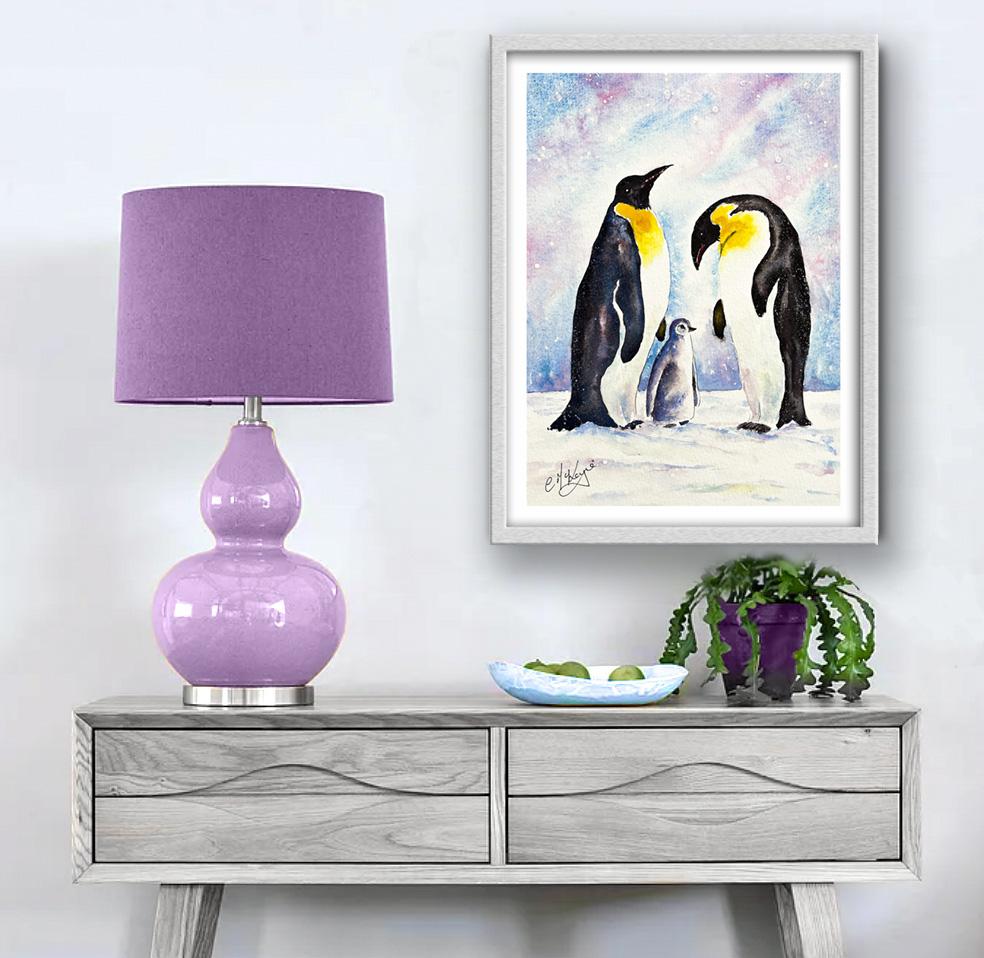
your own paintings. Why not pop it into
a mount and a frame? And you'll be amazed how good
it looks when you do that. I would really love to see
your own finished painting, which you can upload to
be your project section. If you could just take a
moment to leave me a review, that also would be really great. I do hope you've enjoyed this video and it's
encouraged you to have a look at some of my other
classes in the meantime. Thank you for joining
me and I look forward to seeing you next
time. Happy painting.
7. FINAL THOUGHTS: All done on completing the
class and also the painting, if you've been painting
alongside of me. We've covered quite a few
different techniques. We've simplified the drawing
from the reference photo. We've spatter masking fluid
to represent snowflakes. We painted wet-on-wet for a
lovely, colorful backlit sky. And we use light medium
and dark tones of color to convey a round
a three D effect. And we also looked
at how to lift off paint and
recover light areas. Finally, we added some
more snowflakes using the spattering
technique this time with white acrylic
paint or gouache. Now, don't forget to upload your own painting through the
project and resources tab. After all your hard work, I'd really love to see it, and I'll be sure to give
you some personal feedback. And if you've
enjoyed this video, do have a look at my other
classes on Skillshare, which are packed
with more tips and techniques to help you
on your own art journey. If you click the follow button, you'll be able to follow me, and then you'll be the first
to know when you upload a new video or any
exciting updates. And if you could
just take a moment to leave me a short review, that also would be really great. In the meantime, thank
you for joining me, and I look forward to
seeing you next time. Happy painting. H
 Carrie McKenzie, creating painted visions