Transcripts
1. Introduction : Hello, and welcome to
this Skillshare course. It's going to be a quick
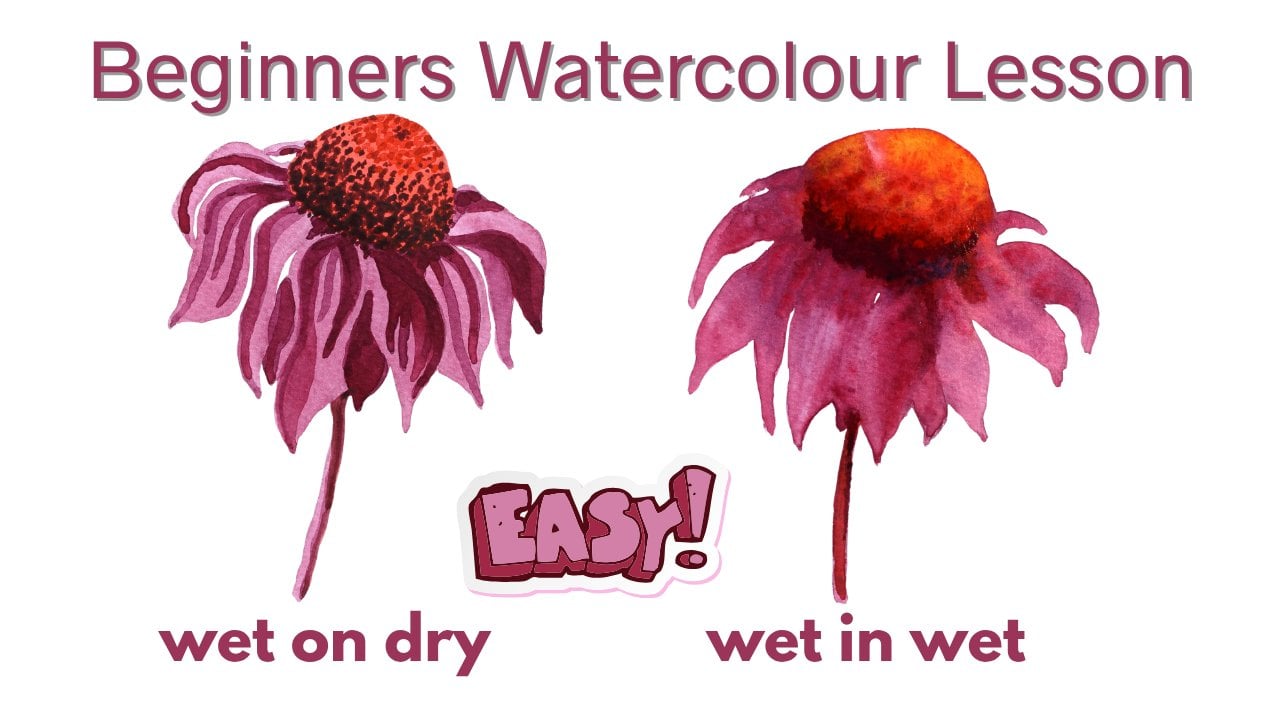
course looking at how to use watercolor
paints wet-in-wet. This simple exercise
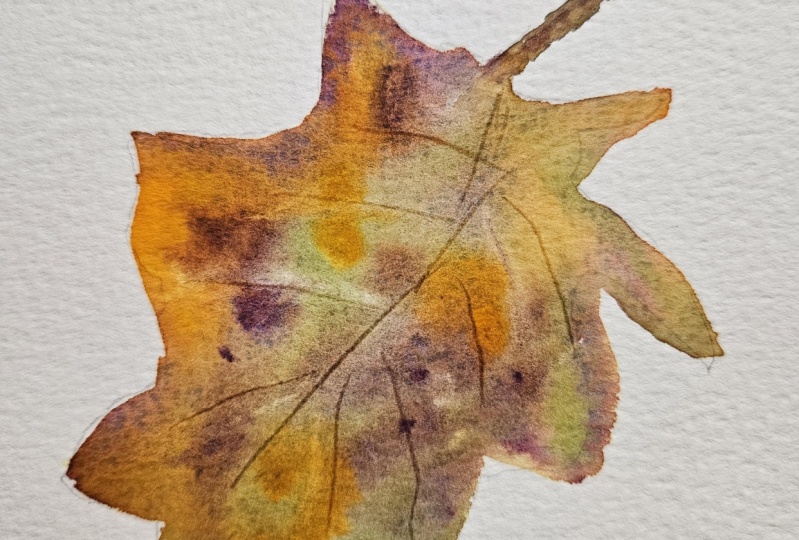
is going to be done using an autumn leaf so we can get some nice
bright colors and just focusing on how easy it is to work wet-in-wet
and that it isn't something that we
should be scared of as long as we know
a few simple rules. I'm Cally, a landscape
artist based in Cumbria, which is in the
northwest of England. You can see some of my own
works on my website here. So I'm using an autumn
leaf because, of course, we've got lots of colors
going on in autumn, and we can use our imagination. We don't have to copy a leaf. We can use all
those lovely golds, reds and greens mixed together, and that really lends itself
to a wet-in-wet technique, which lends itself to lots
of flowers and plants. So it's very quick
and easy exercise that you're going
to learn from and then take forward into your work at a later date
with bigger pieces. So just a little piece we're
going to be doing today. The one thing that we
really need to think about, and it's just one
very simple tip. And if you get this right,
you'll do really well with your wetting watercolors is that when you're
adding to the paper, more paint, you've got to make it thicker
than the last layer. So if the last layer
was just water, then your paint needs to be thicker than that water
you put on the paper, then your next layer of paint needs to be
thicker than that paint. So each time is less
water and more pigment. Very, very simple to begin with. Okay, so what we need to do now is make
ourselves comfortable, get all our equipment together. I have put in the reference
section what you will need, and we'll just
briefly talk about the paper before we go
on to doing any work. A really quick,
simple exercise of a lovely, colorful autumn leaf.
2. Paper : Pad that I'm going
to be using today is this Bockingford from
St. Cuthbert's Mill. And you'll see here it says
140 pounds not pressed. So that just means
it's not hot pressed. So I always recommend to
beginners, to anybody really, not to work with anything less than 140 pounds,
if at all possible. You'll find that anything below that doesn't absorb much water. When you're working wet-in-wet, the heavier the paper. So the bigger this
number is, the better. If I was doing
something to sell, I would probably be
using 300 pounds. I do use those quite often, but of course, that's
more expensive. So the heavier it is, the
more expensive it is. But also, you'll find that if you have good quality
materials to work with, then the whole process
becomes easier. You're not fighting with
the things that you have. So get a good quality
paper if you can. Whatever paper you're using, if you're using something
less than this, 100, if that's all you have, make sure you tape it down
when you're working wet-in-wet because as that paper
absorbs all that water, it's going to swell and move and you need to
have it taped down. When I'm using a pad like this, which has just got the
ring binder there, so you can get gummed pads. If you're using gum pads, that's also something
really good to use because, of course, then it's
already taped down for you. If you're using a pad like this, one thing one thing I
do is tape it down. This tape's a bit thin. It tends to snap quite easily, but it also means it
comes off easily. So I just get a
little piece of tape, pop it at the end of the pad. I'm just gonna move that
up so you can see better. Lightly push that down. Lightly go over the edge there. So that you've sort
of made a gum pad. That's not going to move
anywhere whilst you're working, and then you can just
take that off afterwards. Okay, so you work
with a gummed pad, a pad like this taped down, if you're working with
a loose sheet of paper, then tape it to a board. So I have this board. You've probably seen it in
other things that I've done, one that I've used for years. Put your piece of paper on there and tape it all the way around. Okay, so that's all you
need to know for now. So you need your paper ready. You need to make yourself comfy, and then we'll go on
to doing the drawing.
3. Drawing : Quick exercise isn't
about the drawing, it's about the painting and
the application of the paint, and it's a practice
exercise to get us used to using those
paints wet-in-wet. So I'm not going to worry
too much about doing a big fancy drawing
and spending hours doing a drawing. You
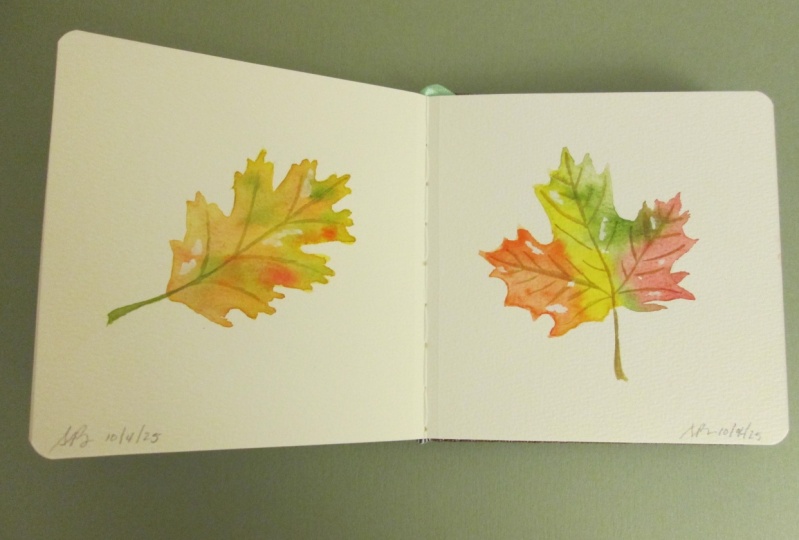
can, if you like. What I've done is I've given you some lovely reference
photographs of some nice autumn colors of
various different leaves, so you can give
any of those a go, or you can do it
out of your head, or you can pop outside and
get a leaf from outside. So I'm just going to completely do something out of my head, something a little
bit like a sycamore, so I'll just start with a vein, and then we've got
some veins going off, and maybe it's kind of coming
towards us a little bit. So let's just take
that out there. And we all know what leaves
look like, really, don't we? Bit of character, make it look like it's
a bit tatty maybe. It's been around all summer and now it's got
bashed about a bit. So you've got that
nice tatty leaf, very light pencil drawing
that we can erase later on. Like I said, if you
want, you can copy from a leaf or you could have a bigger piece of paper
and do three or four. It doesn't matter. Whatever you want to do with your
drawing is fine. This is all about the
application of the paint. So just get a nice
quick, easy sketch down. If you wanted to do it in ink, you could do and let that show through your
paints later as well. So whichever you want to
do, that's absolutely fine. But if you do use an ink
pen to do your drawing, just make sure that
it's light fast and that it's not
going to run. Okay.
4. Wax Resist: When working with watercolor, there are various ways of
preserving white on your paper. When working wet-in-wet,
and this depends again on the quality of
your paints and your paper. One thing you can do is lift
the color out where you want the white of the paper
back for some highlights. So that's one thing
you could do later on after you've done your
painting when it's still wet. Another thing you can do
is use masking fluid, which you put on allow to dry, then do your painting,
and then leave it about 24 hours before
you rub that off. Or you can use a wax resist. You can use just
a child's crayon. Any wax crayon will be fine, or you can use even a candle. But the main thing
about wax resist is you're not then going to be
able to paint over it again. So with your masking
fluid, if you want to, after you've removed
it and it's not quite how you want it, you
can then put paint with your wax cray and
you can't it's nice. You get a nice effect. It's bit textured on the paper
as it moves across. So whichever you want to do or like I said, you
can just lift out. So this isn't a necessary step. This is just something
I'm going to do to put one or two highlights in maybe along where
the stem is there, maybe the lights catching at the edge of some
of these as well. So just one or two
highlights, but not too much. Don't overdo it with your wax resist if you want to
put that on at this stage.
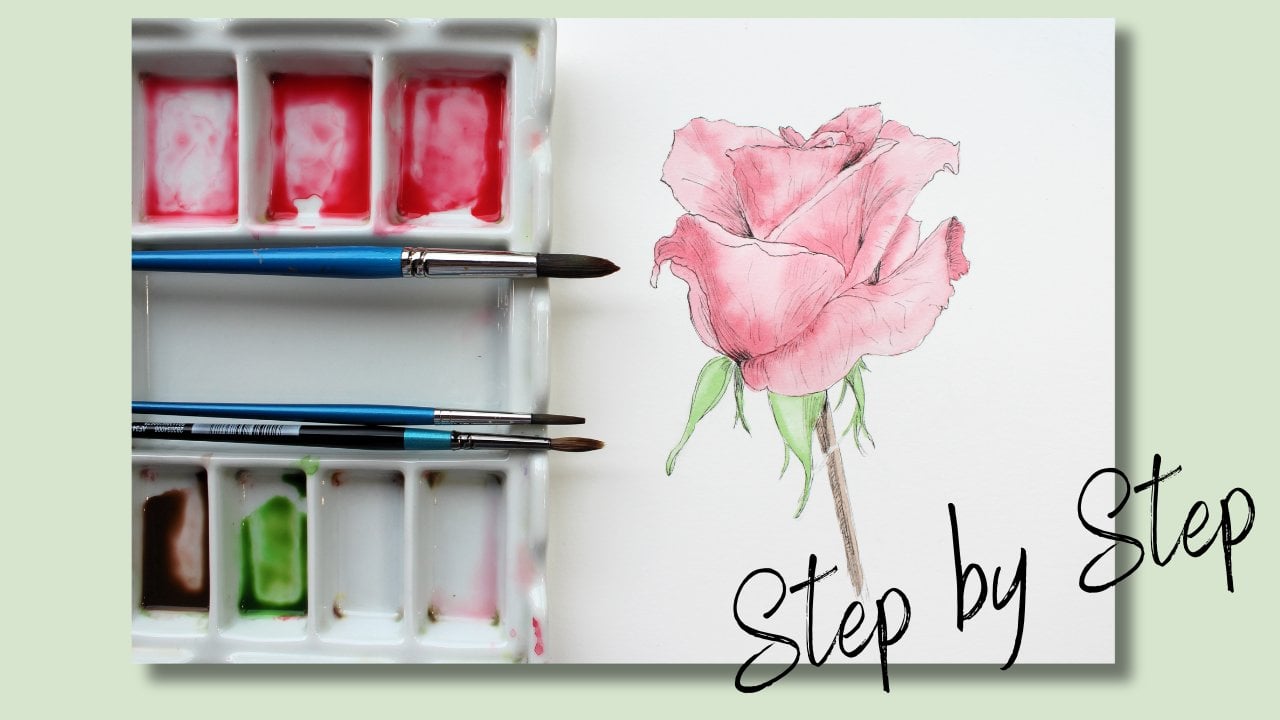
5. Preparing Paints: Preparation is everything when
it comes to painting with watercolor, especially
painting wet-in-wet. It's very difficult if you're
having to stop and start mixing up extra paint and
your papers drying out. You know, if you're
prepared, it's going to be less panicky if you've
got the paint there ready made up and you're not worrying about doing
it as you go along. So one thing with
watercolor is you always need plenty of water and
always have nice clean water. So if you can, do change
your water quite frequently. I've always got two pots
of water on the go. One for us in the palette to mix with your paints and the other for
cleaning your brush. So have two pots and change
them as often as you can, really, to have that
nice and clean. The paints that I'm using are
the Canela watercolor set. The reason I've chose
this is because we've got these
lovely reds here, which could be nice
autumn colors. I'm hoping I've got enough
of my yellow left there. I will have to
order some of that, but I'm going to use the yellow, the orange and these reds and perhaps some of the
sienna, as well, and some of the green
maybe because, of course, leaves at this time
of year, they've still got patches of
green here and there. And if we're doing it
from the imagination, it could be any of these colors. Okay, so this is quite a
handy palette to have. If you have something like this, if you don't, you
can use plates, you can use food containers. Anything that you've got. The main thing that
I would suggest is that this is always white. So whatever you're
using, if it's an old plate or an
old food container, anything at all, it doesn't have to be anything expensive. If it's white, you can tell the colors of the
paints against it, what they're going to look
like against your paper. If this was colored, and if you're using a red
plate or a brown plate, whatever, it wouldn't be as
easy to judge your colors. So always stick to
a white palette. Whatever you're using,
use a white one. Now, this is a ceramic one,
so it's nice and heavy. It stays where it
is on the table. So I would, you know,
advise something like this, but if you haven't is not a problem as long as it's white. So the good thing about
this is we've got different sizes of wells. So our first one, like I said earlier
in the introduction, the main thing about wet-in-wet
is that we're going from a high concentration of water to a low concentration
and more pigment. So we could start off with
our high concentration with lots of water in this one
here for our first color, then a little bit thicker in these and then
thicker still in those. So that's what I'm going
to do. I'm going to so I'm going to start with
yellow as a base color, so that's all of the leaves
gonna be this yellow, and then we're going to drop
the other colors into it. So I'll make a nice big
wash of yellow in here. Then some of the reds
and oranges in here, and then the same colors
again in here, but thicker. So less water, more pigment. That's all you've
got to think in that order as you go along, less water, more pigment. Okay, so I'll make those up now, and I will video it, but I'll stop talking now
whilst I do that. That will take me a little time. And how much water you're
having here is obviously all dependent on how much
water your brushes hold. So again, with
watercolor painting, one of the problems
that beginners find is when we get these
messes on the paper, it's because you've
introduced more water. So introducing extra
water to the water that's already on the paper is
going to make a mess. And what happens
with your brushes if you don't dry
it off in between, sometimes you get bits
of water on here, which will drip
into your painting. Sometimes you've
washed your brush, then you've got your paint out, but you've not really you've introduced a lot more
water into your brush, and so that's again making it a higher
concentration of water. So think about how much
water your brush is holding, as well as the water
that you're adding to the paper and the paint because
that's equally important. You could be adding more
than you really want to. So have a tissue handy, dab your brush off after you've washed it so that
you're just picking up the concentration that
you want and you're not introducing extra
water all the time. And do be careful
that you've not got water dripping off your
brush onto your painting.
6. Painting 1 : Okay, so you can see here, we've got the thinnest mixed, so more water in the yellow, a little less water in these three different
oranges and reds, and then even less, much thicker paint
in these last four. I've got the same red here, the same orange there. This one was made from this orange and the yellow
just to bring a bit of variety in and then the green again with a little bit
of the yellow in as well. So if you wanted to, you can wet your paper
first with just water. This again, depends
on your pad and how much water that's going to absorb. I'm not
going to do that. I'm just going to start
just clean my brush off, and I'm just going to
start with the yellow. And all we're going to do
is cover the whole thing. So carefully go around
those lines that you did with your pencil. Don't forget how
quickly this dries, how quick it's going
to be drying is going to really
affect your painting, going to make a difference
to the outcome. That is all going to be
affected by where you are. Are you in a draft? Are
you next to a radiator? Is it a nice sunny hot day? That's going to affect how
quickly this paint dries. And you can see there
where it's pooling, that's because of my wax resist. So my wax resist is
working there to get those highlights. So
think about that. Think about how warm your studio or wherever
you're working is and if your papers
dry too quickly. And if it is, then next
time what you want to do is put some water on
there to begin with. It's not actually that
warm in here today. Starting to feel very
much more autumnal. So I'm using a sable brush here, just use whatever brushes
you've got, watercolor brushes, but have one with a nice point
on then you can get into the edges of those crinkly
bits of that autumn leaf. So you always got a nice round
brush with a pointy end, and this one is a number six. Just gives you an idea.
And the pads an A five. So this is a number six
brush on an A five pad. Okay, so we've covered
the whole leaf, and you can just see there where some of those highlights
from that waxes. And like I said, you
don't have to do that, but it's just a little
extra something. Now, you'll see it's starting
to sink into the paper. Again, that's going to affect how quickly it dries as it sinks down and how it depends
on different papers. So what you need to do,
especially if you're beginner, is get used to your paper, your paints and the amounts of water that you need
for your materials. It's going to be different for everybody watching this today. We've all got different papers, different paints,
and that's going to absorb differently and
different climates. So allow that to sink
down a little bit, so it looks dull, not too shiny. It's still looking a little
bit shiny at the moment. Just allow it to
sink into the page a little bit before we come
on to the next part, but don't let it
dry out completely. One thing you can
do at this stage is put your head to
one side, bend down, put your head to one
side, and look across the surface and see if
they still very shiny. It wants to be less shiny, just starting to sink into the paper there and
get that shine off. So we'll just give it a moment.
7. Painting 2 : Okay, so when that's nicely
sunk in a little bit, not dry. It shouldn't be dry. It should just have
a nice sheen to it, but not really,
really shiny and wet. Okay, then we can go on
to these next colors. And this is where you
can have a bit of fun because we can just
pop them wherever. So this lovely red here we've got I'm going to start adding and you can see how
it's still wet because it's all coming to the edge there and just decide
where you want this red. And because we're allowing these colors to
mix on the paper, it doesn't really matter
too much at this stage. If you clean your
brush in between, you can just pick up
another color and carry on. You don't need to worry about the cleaning
your brush in between, and that way you can work
more quickly and also leave some little bits of yellow popping through if
you want, as well. Get a nice point on that end. So because we've gone
on with the yellow, what's happening when
you come to the edges here is it's not flowing over onto the paper
where it's not drawn, you know, onto the
background because it's stopping where
that wet meets the dry. So leave some of the
yellow if you want. Also, don't forget at
this time of year. You leaves can be a little
bit torn and tatty. So just get some of that in with that nice point of your brush, make them look a bit
of character there. And again, it's just
completely imaginary. I particularly like this color. I'll have to look up the name of it and pop that on
the screen for you because I really
do like that red that we have in the
sinie set there. And you can see how it's
carrying on moving, and I actually want to
pop a bit more of that. Let's get darker in places. By popping a bit more in you
can get a little bit darker in some areas because that's how these
leaves go, isn't it? And then I think we'll come
back on with this orange. See how those colours
are mixing now together on the paper and on the palette
because we've not bothered cleaning
this brush out. And by doing that,
we're not doing what I said before about
risking introducing. I'm just going to go
down there because quite often quite red,
aren't they the stems. We're not risking introducing more water because we're
just using what's on here and not constantly dipping our brush
back into there. Okay, so while that's
still completely wet, I'm just going to actually tidy up that line where
that pencil is. I mean, it doesn't matter. It was an imaginary
drawing anyway, wasn't it? But let's just go
with that pencil. Whilst that's still
nice and wet, we'll go on to these
colors and intensify it. So don't forget when
watercolors dry, they dry lighter
than they go on, depending on the paints again, but it will dry up to 50% lighter than what you put it on. So don't be frightened of going nice and dark
in some areas, and perhaps along
the spine here, we're going to go a
little bit darker where it's maybe bent over a
bit and down into the stem. So pick up some of
these thicker colours now and just dab them in. Go for the next one.
If you wanted to, you could clean your brush in between, but
I'm not going to. I'm just wanting these
colors to mix and merge on the paper. A little bit of this orange and a tiny touch of this
nice green here and there, get a little bit darker. I still got a little bit
of the green going on. And at this stage, I'm going
to clean my brush out. And I'm also going to dry it. Okay? So it's clean
and it's dry. And if you want, at this stage, you can manipulate some of
these colors a little bit. Just follow maybe the spines of the shape that
you've got there. Move the paint around.
But don't overdo this. Let it do its own thing, really. Okay. And we're not going to really know what
this is gonna look like until it's all nice and dry. So don't overdo that. Now, you know, I was
saying before about you can't lift colors
out at this stage. That's something you
might want to just do here and there.
8. Painting 3 : At this stage, if you do have any areas where the
paint is pooling, what will happen is as it dries, the paint the areas
where it's wetter, if you've got a dry
area and a wet area, it starts to go
back towards that. And that's when we
get what we call these blooms or cauliflowers. So at this stage, what
you need to do is stand back a little and take a
look at what you've done. Excuse me, I've got
a frog in my throat. Take a look at what
we've done and see if there are any areas
where it is pooling. And I don't know if
you can see, but it's pooling here a little bit. So get a nice synthetic brush. Doesn't work as well
with your sables. Your sables aren't
good at lifting color as they are
at putting it down. But get a nice synthetic
brush and just suck some of that color
up very, very gently. And that's just going to prevent that bloom that we
were talking about. So it's just a tiny bit there. Something or nothing
really, but it's just going to help prevent those mistakes. So it's all about patients
looking and observing. Again, if you did want to
lift color out at this stage, a synthetic brush is
better for doing that. So if you look here, you can lift the color out with your synthetic brush and just pop one or two
of those veins. But again, don't overdo it. And these lines, you can see the difference
between the wax resist. That's nice and
white. And this is, like, a little bit faded. So we've got
different highlights, different levels of highlights. Okay. And then leave it to completely dry or if you
want to at this stage, let's just move this
out of the way. Do not get rid of those paints,
keep those paints there. If you move that out of the way, what you can do is so we've
got the three concentrations. We went from the very watery yellow, and
then we carried on. What you can do if
you want is put some colour directly using quite a dry brush directly
out of the box there now. And that, of course, is much,
much more concentrated. So again, you want to put some extra colour somewhere
at this stage, you can. That's actually going quite nicely into those other colors. Again, this darker one here. So if you want to
kind of go around some of those vein areas and start to make
a bit of shape, you can do that at this stage
with these darker colors. Again, don't overdo
that. It's still dry. Let it do its own thing, and we'll come and have
a look at what it's looking like once
it's all dried.
9. Project : For your project, all
you need to do is a very simple painting
using that technique, make up your three
strengths of paint and put them onto
a simple shape. So a very simple
leaf shape here. You don't have to
do a leaf shape. You could do an apple in
some nice greens and reds. You could do anything as long as you keep it really simple. Take a look at those
reference photographs. There are some
beautiful colors in there or pop outside and
get a leaf if you're not too sure about your
drawing you want something to copy from or do it out of your imagination
as I have done. Your project is to do one simple item using
that technique, having a bit of fun
with that wetting wet, making notes of
what works for you, standing back and observing how those colors
mix on the paper, and then uploading what you've done for us to have a look at. So it'd be nice to see some different things
to what I've done, some different types of leaves, and maybe something, you know, you could do a little collage of two or three leaves
as well if you wanted to after you've
done this initial one. So don't just got to stick to exactly what I've done when
you're doing your project. You could expand it out and do an autumn scene perhaps with some fruits and leaves
together, even. Okay, so that's your
project to have a really good go up to
painting wet-in-wet. Make sure you take
that paper down, make sure that you've
got your paints prepared in advance and have some fun with it and get
some nice bright colors and plenty of pigment in there so that it ends up nice
and bright because, of course, it fades as it dries.
10. Conclusion : So in conclusion, I think
that's worked okay. I really like those
rich red colours. Like I said, from the Sini
set that I use quite a lot. You can tell by
the state of that that I'm using it all the time. That's a brilliant yellow
that you can pop in. And if you wanted to, if you wanted to make it
more yellow afterwards, you could obviously put
more over the top, as well. So there's nothing to stop
you putting extra layers over your wet-in-wet paintings
once you've finished. Okay, so, yeah, I think
that's worked okay. I hope you enjoy having
a crack at this, especially if you're not comfortable with
painting wet-in-wet. If it frightens you don't
be frightened of it. It's nothing to worry about
as long as you remember that rule of keeping adding a thicker
concentration each time. If you want, like I said, once you've uploaded,
if you want feedback from me, I
will give you that. I'll make sure I do that
as quickly as possible. Skillshare always let me know
when you've left a comment so I can come and answer those. And also, you can contact
me through Instagram. For those of you that
are on Instagram, if you want to tag me in
the work that you've done, and then I can see it on
there, that's great, too, because it's nice for
everybody else to see each other's work and we
all learn from each other. So in the meantime, let me know what
you think of this. Let me know if you've
enjoyed doing it, and I'll be back again soon with another skill shared course. But you enjoy what you're
doing and have fun with your painting and
drawing. Bye bye for now.
 Cally Lawson, “Paint like no one is watching"