Transcripts
1. Introduction : I'm Sarah Simon, the Mint Gardner. And today I'm gonna be teaching you how to paint with watercolor. Welcome to class one of my watercolors series at stay. We're gonna be talking about setting up your space. We're also we re covering what materials are essential. I really believe that watercolor should be accessible to as many people as possible. And by using the right materials, they allow you to play and actually have fun with the art. Uh and then also, we're going to be talking about making the magic sauce, as I like to call it. It's all about water management and how much water you get on your palate sets we're gonna be covering today in class one.
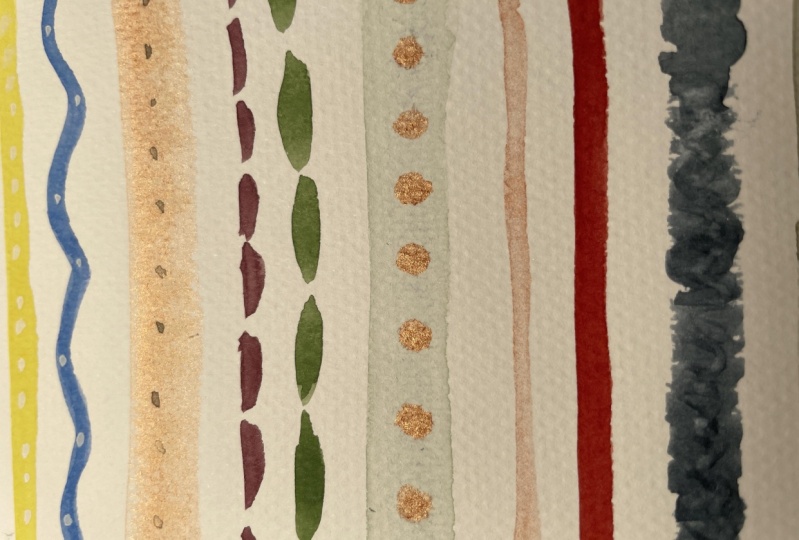
2. Projects : the fundamentals we're gonna talk about today are awash, wet and wet, and then a grated wash. And then we're gonna use what we've learned to do. A really fun project. We're gonna be painting some striped cards.
3. My Mission in Watercolor : the format of this class. I'm going to go through all of my favorite materials, But I'm gonna talk about setting up the space, and then we're going to dive into some water color fundamentals. So first to go through all of my materials. My mission with watercolor is very much a simplistic approach. I want watercolor and this art to be accessible to all. I love the idea that someone can sit down with a dinner plate at home and just a few inexpensive items that they confined online anywhere in the world and you can actually begin to create. I like the idea of removing obstacles, so accessibility is a really big thing for me, so there's some essentials that you do need to create. Ah, first of all, you do need to paint brush. So in this class, I suggest a round four and a round one. The round is only called around because it's where the bristles made the metal Right there . Next to the for rule is where it's round and so therefore around for so you'll see large watercolor pieces, and it's around 20 with people just spanning the entire piece. That's a larger brush, but it's still around. So with the Round four gives us a little bit more versatility and covering more space on the round one lets you do a little bit more detail work. The reason I love working with around is the versatility of the brush. With just one stroke, you can access simply the point of the brush and then, with a little bit more pressure, increasing the pressure broadens the stroke and therefore allows a broader war will paint to cover the paper. So that's why I love the rounds. Within one stroke, you can have very light lines and very thick lines all the same time. So round ones and round fours are my go to brushes on watercolor paint. Obviously an essential here. I'm. This is the res set of 24. The last time we checked on Amazon, it was $10. You get the access to 24 paints. This is how I started their student grade. They're wonderful. They've got beautiful pigmentation on. I really feel like in order for us to play as become artists as we create, we want our materials to be affordable so that it gives us the freedom to play, and Reeves really allows you to do that. You get tongues of colors, and in later classes, we're gonna play with these different 24 sets, and we're gonna make tons of different colors just from these basic kits that's paint on paper. Watercolor paper is the one spot of the one essential to aware you could spend a lot of money and have a lot of bang for your buck on watercolor paper at when it's handmade and hand molded is absolutely lovely, but not always affordable. Eso I suggest starting with straw for or cancel brands, and they have all different sizes. But what I would suggest is 100 and £40 weight. Don't go anything lower than £140 weight just because your paper will buckle. War £140 weight. A cold press a little bit of texture to your paper increases that, and really lovely blend ability of your paints in front of me, too. I have Han Gyul paper. You can find it online. They're blocks of paper are really great. I'm That's what we're gonna be painting on today. Um, and this is more professional grade paper. Like I said, if you're scared of a blank canvas, which who hasn't been right, it's always really nice to start on a student grade paper and then move your way up. And as your skill increases, you will notice when you update and make your paper just a little bit better. When you upgrade just slightly. How much putting your technique will all of a sudden become? It's very rewarding paper on the other things that I like to have on hand that are easy to find. Our HB pencils. HB is just the lead, but then it's actually just like a regular yellow pencil that we used in school. But these air nice you could get little packs of them. And then I really like to have a pigna micron on hand as well. These are We're going to be using these in our projects for upcoming classes and then, uh, erasers this guy right here. The art gum eraser is actually made to absorb I graphite, so it's a really fabulous eraser. You can get packs. Some people really prefer these other kinds, but these air great and it's just the prison of color erasures that you can find online and then paper towels we're going to be using. Most people have those lying around or a napkin, But the last one that I like Teoh really highlight is your palate. I'm These are actually our old dinner plates, So I, um, I love using a dinner plate to paint on, especially in a class actually all time. This is what I use all the time. The beauty of this is that every time I want to return to a specific color that was created with the blending of all the different paint, it's right there, ready to be reanimated with water. That's another thing I love about water colors you can you can constantly re animate and ray visit your paint on. Another reason I love working with communal pallets is the people sitting next to you might mix a few colors that you hadn't even thought of mixing, and it's really fun to play together. But then also with water. When the plane the plate is slightly slanted, the water rolls in and blends the colors together in ways that are unexpected and sure, sometimes it gets a little bit muddy. But of money can be really fun and really interesting in a really nice neutral to work with . The only other thing that we have on our table is also a mason jar. I had these laying around because we garden and we like to can jam and do canning and jamming, but they're they're fabulous. And really any water holder will work as long as it's safe here. So you can kind of monitor the color of your water. Um, I will work with a pretty muddy water. I'm there isn't a Dodge A or an old saying that says that if you wouldn't put your goldfish in it, you shouldn't be painting from it. Uh, but sometimes working from a muddy water can be really interesting. Um, yeah, it's art. Don't make too many rules for yourself. Feel free to approach these materials and play
4. Essential Tools : so there's some essentials that you do need to create. Ah, first of all, you do need to paint brush. So in this class, I suggest a round four and a round one. The round is only called round because it's where the bristles meet the metal right there next to the for rule is where it's round and so therefore around for so you'll see large watercolor pieces and it's around 20 with people just spanning the entire piece. That's a larger brush, but it's still around. So the Round four gives us a little bit more versatility and covering more space on the round one lets you do a little bit more detail work. The reason I love working with around is the versatility of the brush. With just one stroke, you can access simply the point of the brush and then, with a little bit more pressure, increasing the pressure broadens the stroke and therefore allows a broader war or paint to cover the paper. So that's why I love the rounds. Within one stroke, you can have very light lines and very thick lines all the same time, so round ones and round fours are my go to brushes on watercolor paint. Obviously an essential here. I'm This is the res. A set of 24. The last time we checked on Amazon, it was $10. You get the access to 24 paints. This is how I started their student grade. They're wonderful. They've got beautiful pigmentation on. I really feel like in order for us to play as become artists as we create, we want our materials to be affordable so that it gives us the freedom to play. And Reeves really allows you to do that. You get tongues of colors and in later classes were going to play with these different 24 sets. And we're gonna make tons of different colors just from these basic kits that's paint on paper. Watercolor paper is the one spot of the one essential to aware you could spend a lot of money and have a lot of bang for your buck on watercolor paper at when it's handmade and hand molded is absolutely lovely, but not always affordable. Eso I suggest starting with straw for or cancel brands, and they have all different sizes. But what I would suggest is 100 and £40 weight. Don't go anything lower than £140 weight just because your paper will buckle. War. £140 weight a cold press a little bit of texture to your paper. Increases that and really lovely blend ability of your paints in front of me, too. I have Han Rule paper. You can find it online. They're blocks of paper are really great. I'm That's what we're going to be painting on today. Um, and this is more professional grade paper. But like I said, if you're scared of a blank canvas, which who hasn't been right, it's always really nice to start on a student grade paper and then move your way up. And as your skill increases, you will notice when you update and make your paper just a little bit better. When you upgrade just slightly. How much putting your technique will all of a sudden become? It's very rewarding paper on the other things that I like to have on hand that are easy to find. Our HB pencils. HB is just the lead, but then it's actually just like a regular yellow pencil that we used in school on, but these air nice, you get little packs of them and then I really like to have a pigment micron on hand as well. These are We're going to be using these in our projects for upcoming classes and then, uh, erasers This guy right here The art gum eraser is actually made to absorb I graphite. So it's a really fabulous eraser. You can get packs. Some people really prefer these other kinds, but these air great. And it's just the prison of color erasures that you can find online and then paper towels we're going to be using. Most people have those lying around or a napkin. But the last one that I like Teoh really highlight is your palate. I'm These are actually our old dinner plates. So I, um I love using a dinner plate to paint on, especially in a class. Um, actually, all time, This is what I use all the time. The beauty of this is that every time I want to return to a specific color that was created with the blending of all the different paint, it's right there ready to be reanimated with water. That's another thing I love about water colors you can you can constantly re animate and ray visit your paint on. Another reason I love working with communal pallets is the people sitting next to you might mix a few colors that you hadn't even thought of mixing, and it's really fun to play together. But then also the water. When the plane the plate is slightly slanted, the water rolls in and blends the colors together in ways that are unexpected and sure, sometimes it gets a little bit muddy, but, uh, but it can be really fun and really interesting in a really nice neutral to work with. The only other thing that we have on our table is also a mason jar. I had these laying around because we garden and we like to can jam and do canning and jamming, but they're they're fabulous, and really any water holder will work as long as it's safe. There's a kind of monitor the color of your water. Um, I will work with a pretty muddy water. I'm there isn't a Dodge A or an old saying that says that if you wouldn't put your goldfish in it, you shouldn't be painting from it. Uh, but sometimes working from a muddy water can be really interesting. Um, yeah, it's art. Don't make too many rules for yourself. Feel free to approach these materials and play.
5. Setting up your Space : all right. Something else that I get asked very often is, How do you set up your space? Many people have come and asked me if they can see my beautiful home studio. And as much as I'd like to claim studio life is where I create all the time. Oftentimes I'm sitting at my great grandmother's old writing desk in the middle of our living room, or I am sitting in a dark bedroom painting so that my three year old will nap so on what I've learned is remove as many obstacles as possible. So I actually got a little rolling ikey Acourt and I take my my palate with me and all my favorite rushes, and I just kind of roll my cart along wherever I need to create in the room, Um, or in the house, even outside. I've dragged it out to the greenhouse, so it was really an interesting experience and wounded again, but it was a really fun. So I believe, setting after spaces really having the essential materials that you want to use to create, allowing yourself to play and not worrying about a perfect space, but worrying about what's going on. The paper
6. Creating Project 1 : so we're going to be talking about our watercolor fundamentals. These fundamentals are things their techniques that I use over and over and over again. Whether, like I said, you're creating a sunset or painting a pet portrait or just simply practicing awash, I find they're actually very mindful activities that when you don't know what to paint, oftentimes there's a painter's block. Just starting with, the fundamentals will actually get your brain engaged and of the paint flowing and ideas really do follow once you've taken a seat and you've made the effort to begin. So, uh, the fundamentals we're going to talk about today are awash, wet and wet and then a grated wash. And then we're gonna use what we've learned to do A really fun project. We're gonna be painting some striped corns. So to begin a watercolor wash, a lot of people ask me how much water goes on my paper. How much water is actually in my paintbrush and how much water is on my polit. And really the secret to creating a beautiful watercolor piece is starting with your palate . You need to make your magic sauce on your palate before ever touches your paper, I found as I've been teaching my classes over the last couple years. People enjoy analogies, especially when it comes to doing something maybe a little bit uncomfortable or foreign. If holding a paintbrush doesn't feel natural for you yet I'm I know most people eat so my analogies air usually revolve around food. I love to eat. I don't cook, but I love to eat. So, uh, what I've learned is we're gonna make some magic sauce on our palate. And my analogy with food is actually a soy sauce with with Stobbe. So it's really the amount getting the right amount of water from your mason jar onto your palate. And that's where the magic begins is on your palate, okay? And so the consistency that we're looking for we're going to be looking for We're going to bring water over to our palates on The consistency we're gonna be creating is a soy sauce with a touch of was Sasabe. If you imagine the dried paint on your palate that's already here, this is like a drying to paint. Or you could use your cakes, your dried cake paint if you imagine this is here with Stobbe. The water you're bringing to it is soy sauce. So if the soy sauce was so, everything's still feels confusing. You can imagine it's about 80% water, 20% paint. So we're gonna bring enough water over to our palates that if you were to take your palate and tip it one side to another, small raindrops would start to form and slide down the plate. And that's the wet consistency that we want on the palate that we will then make our magic sauce. That then goes to your plate or a tear paper. So to begin, you have to engage your paintbrushes. So if you have a brand new paintbrush, which all of my lovely ladies here do, you can go ahead and remove the protective cap. Some people really like to keep this cap so that they can then transport their paintbrush home or, you know, wherever they like to go. I also have used cup holders to store my paintbrushes. Straight up works great. The reason you care about your paintbrush point is because that really gives you that agility to get a fine stroke, so protecting the point of your brushes important you never want to leave your paintbrush. Just paper scare. You never want to leave your paintbrush in the water like this. You're the little point on the end starts to form to the size of your Mason jar, and you'll be really bumped because it's a lot harder to paint with when it's starting to curve off on its own. I like to hold it in a classic hold, which is just simply how you would hold a pin. All right, so if you were toe, pass it to a friend and then when it comes back into your hand weren't naturally falls. That's gonna be your best way. Most brushes have a bulb usually want to hold onto the bold of your brush so it's right behind the metal for rule on the bulb of your brush. This gives you the most control. However, spooking down if that's a little bit more comfortable for you is totally acceptable and can give you a little bit more accessibility for your for her. When you're making your finer lines, OK, that's how you hold it to prime your brush once you've got it in your hand and the paint cap off. So this is what I'm This guy doesn't have any water in it. This is what I'm doing with my brush. I'm actually scraping it against the bottom, back and forth. You never go straight down, right? Because you really do want to preserve the point of your brush. But working from side to side engages the paintbrush and allows water to soak up the bristles into the handle and really get your paintbrush primed full of water and ready to paint. So once your paintbrushes engaged, you're going to take it and go back to your palate three or four times. So the actual practical what we're going to be doing the actual stroke. So we're gonna be doing his paintbrush toe water, two palette. Engage in one of your colors and then back toe water and back to your palate. So you're bringing that water straight to your palate. It feels very foreign. I know to bring water away from a jar and into something dry. But that's how we're going to start and remember what we're going for. We want that soy sauce and with hobby texture. So we want we want the water to be running and moving. We want that movement and shine, Right? So if you were to borrow this from you, Samantha, if you were to take your plane your palate again and move it around you want those raindrops to form, So we'll get some water on our palates and I'll show you what we want. So here we have a completely dry palate. All right, so we're gonna follow that same technique, so I'm gonna engage my paintbrush and get water over here. You can see I'm not being timid about this. I'm really getting in there. I'm stirring it up. I'm engaging the bristles all the way down to the for rule, pressing down fully with full pressure so that I can really start to get some movement. I think that was four times I went back and forth. So now, as you can see, you see those raindrops coming down. So we have a nice we have a nice amount of water that's moving on the palate. This is going to be a constant renegotiation with water. So every time you're introducing a new color even while you're using the same color as you're painting, you're gonna be constantly going back to your palate to make sure that your magic sauce has that watercolor with Sasabe movement, so that when you bring this to your paper, there is that movement beforehand. But that enables your paint to actually move on your paper in a lovely way. I've been asked a good question. Why don't I just use an eyedropper or, you know, just jade a little bit through a little bit of water on here, and you absolutely can, especially if you're painting a really large piece. But for us today, we're not painting very large pieces. They're all gonna be on the 8.5 by 11. And also, if you introduce too much water to your pigment to your paints, you can water them down much quicker. So by slowly introducing water and kind of waking up each color as you go, you enable the paints to say more solid longer and keeping them to that true pigment less muddy quicker. So once you feel like you have that 80% water, 20% pain, you've got some nice movement on your plate. You're ready to start painting a watercolor wash, so a watercolor wash is simply a translucent layer of color on your paper. Make sure you some examples or some really lovely washes we've done right. Is there different washes, different layered washes? Here's some more washes, and here's one. What we're going to be doing with the class today is actually three different boxes. The wash, the wet and wet and then a graded wash. So for our audience at home, when you guys are wanting to do this, all you need to do is get a watercolor piece of paper's remember £140 weight cold press, and you're gonna drop three boxes, and then you can label them awash, wet and wet, and in graded wash that you can access that later. Okay, so that's what we're gonna be creating today in those three spaces. Here's my nice blank one. This is what you guys can emulate it home, and then add wash a wet and wet integrated wash so the steps for a watercolor wash again. It's a translucent layer of color on your paper, so you're going to engage your brush already wet. You're gonna soak in some water, Then you're gonna go to your magic sauce that you just created that has a lot of that movement and shine and shine is when you do this, see that reflection, the light right movement and shine and left to right strokes across your paper, back and forth until the paper starts to kind of show up between the paint's. Then you're going to go wash, or you're gonna go your water, your paint, your magic sauce and then back to your same watercolor wash. And then your next strokes are all going to be water to Philip, your box. You're going Teoh again be just adding more and more water. So getting those the steps were paintbrush to sauce to paper, paintbrush, toe, toe, water to sauce to paper and then water. And what you learn quickly with watercolor, is it all your paint will move toe where your water is. Your water quickly becomes the boundary where your paint will move. So as you are creating this wash notice to smooth lines, you add more water. Water is your boundary, so to create a flat wash, you want it all to be the same color. So as we're bringing water to our to our paper, you should be able to pick up your paper. Did you see how this raindrop iss forming right at the corner of my paper? And if I were to move my paper all the way around the raindrops stays within the water boundary that I've created. Okay, so there's not so much water on this that it's a biodome. I don't have so much water that it's going to run off. I have just enough water so that there's movement and shine. So as this begins to dry, the pain will move into the paper as the water evaporates slowly in an even way. All right, and that will give you a nice wash. Now, if you're if you're washes, not moving this this fluidly. The answer is always adding just a bit more water. Like I said, it does feel very foreign to bring water to paper on. But if you're using £140 weight watercolor paper, I have yet to meet anyone that makes a hole in it. So just add more water and see if you can get that fluid motion. Okay, so the next technique that we're gonna cover is ah, wet and wet and wet And what is just slang for what? Paint in what paint. So we're going to start again. Our base is going to be a wet moving wash. This is a great chance to test to see if you're using enough water in your wash. Because as we add a second layer of paint, it's going to move within. And I kind of do fireworks bleed in vain. This is a good example. Both of these are great examples right here. So this and this are good examples of wet and wet. So you had a wet moving wash that was a the blush base and then we dropped in a second dairy color that was also wet paint so wet and wet. And if you're things aren't moving, I'm gonna teach you how to make it move. Okay, so what you want to do is you want to start out with the wash that's in a lighter color and you want a lot of movement and shine. Okay, remember, we're working in that soy sauce with sah. Bee texture were grabbing. So what you're probably need to dio is reanimate your palates. Make sure your palate is also still moving as you create. Go ahead and get in there. Make sure that there's that rain drop forming if you need it right here for your wash. And then again, we're going to create a nice wash base. Ice it. Just using kind of a lighter color for this base wash as we're gonna drop in a darker color . So again we're going to do that base. Wash in a lighter color and again remember, awash is paintbrush, toe water, paintbrush to your sauce and then to your paper. However, many times it's going to take to get that really good color that you want is your base. And then remember, water water is going to be defining where your paint moves and how it moves and how it dries. It's going to smooth your lines. Okay, so look for that raindrop as your tip your paper again. If you're if you're having a flooding of water down below, that's just a bit too much water. That's a Biodome. It's finding that perfect balance between Justin of Water and a little bit too much so this is good movement. So now, continuing with our food analogy, we're going to be accessing a darker color that we're going to drop in to this paint, letting this technique be wet in wet. So I'm gonna engage a darker color. And like I said, the food analogy. It's a little bit more. With Sasabe, you could almost argue it's a bit more like ranch. All right, so you're gonna take again that consistency, this new sauce, you're gonna go water to new sauce and drop it in to your wash That's wet. If it starts to blossom and move like this, where it's vein ing and moving, that means that you have enough water in your base. So if you could envision this, this technique is so beautiful. When you're creating flowers or pedals, you drop in color, and then it just blossoms and moves on its own. If yours isn't moving, here's what's happening. You need a little bit more water in your base wash so that the top wash still moves. OK, there's another. There's another reason it might not be moving to. You have to have a decent amount of water in your top wash as well, that of the paint that you're dropping in to make it move so both need to be wet in order to mouth. Okay, if it didn't move and it's just kind of sitting there, go ahead and water the whole thing down, create another wash again, get some movement, and then watch it. Watch it move out, all right. And the cool thing is, too is you can feed these wet and wet parts right here. You could drop in more color, and it only gets more vibrance and brighter the more you drop in. But keep in mind, your bottom wash is starting to dry. So watercolor is always a bit of a race against time so you can wet your washes down to the point. The reason I like that raindrop is because it gets your wash wet enough that it enables you to drop in paint and gives you time to make change to your watercolor. So if you think about it, if your base wash is starting to dry, you can't drop in more color or add any color gradation because the change isn't gonna be smooth and flowing like water color paint. You'll get hard lines, right, so the key is again just using a little bit more water, and then you have more time to make changes. So that is the wet on wet technique. The last technique we're gonna play with is a great in wash. A grated wash is basically wash is built on top of one another. So we learned that first wash has movement and shine, which enables that secondary wash with a wet and went to be added so that you can add really beautiful grades and color. And then the great and wash just takes it one step further so you can see the base wash is that nice, creamy color peach. The secondary layer is another wash, but it's just a combination of Payne's gray and the peach. Just slightly reassure you had to do that. And then the third wash that's added is just a little layer of Payne's gray. So again, they're all that soy sauce and was sobbing mixture with a little bit of paint added in right. But they they blend together smoothly because that base wash has enough water. So all again has to come back to the amount of water on your palate that you were first creating. Okay, we're going to create a great and wash here. The steps do agreed and wash again. You start with that base wash, so it's water two pallet for your magic sauce to paper, and you're gonna want to get that base. Wash your lightest color and you're gonna wanna cover that whole square area. Then, for your secondary, wash your going Teoh, create a color in between both your light and your dark so bite to do that again. Magic sauce begins on the palate Water to your mason jar. You're going to grab a little bit of your paint of the light color and a little bit of the dark and combine them together on your palate by mixing water and animating and making sure that middle color is awake and then you're gonna add that Wash that secondary wash to your first wash. Okay, so workers gonna take it step by step. So your first layer is your lightest color wash. Remember, movement and shine for this guy Shine Check for that raindrop. There she is. There's movement. So now I know that I'm gonna want it just like this one. I'm gonna move towards the blue hue, so I'm gonna take a little bit of that peach and combine it with a touch of blue and mix it together on my palette. Mixing happens on the palate, and I'm gonna go water to that new magic sauce color and bring it down as a wash 2/3 of the way down. Okay, where you lift your brush is going to be the highest concentration of color, top to bottom again. And don't worry about creating an actual line to where the paint should stop. Because that bottom wash has movement and shine. The paint will naturally start to bleed into the lower colors, and then for that last layer of your grated, wash its water. Grab that dark color and go across the top and just about 1/3 of the way of a wash. And again, where you lift your paintbrush will be the highest concentration of color so that you have three. So you have the darkest the medium tone and the lightest. So you if you think about this again in relation to a really lovely leaf or flower, you've been able to add a dark tone all the way to light just within one wash space
7. Creating Project 2 : Okay. Now we're gonna use thes fundamental techniques to create some projects to create an actual actual piece. All right, you can go ahead and let these put place these aside, let them dry. That's what's really fun about order. Color. Things change as they dry on learning toe walk away and let it paint and move. It's really lovely and not not coming back to revisit it too many times is. Actually it's a learned skill, so just trust me, walk away. You will be happy it'll be It'll be lovely when you leave it for a little bit. I'm so we're going to use a regular watercolor paper again. So we have transitioned Teoh. It's just a small pace of 100 and £40 weight Watercolor paper. Uh, I like cold press because you can feel that textures. So you always know what side to paint on. Always helpful. You want to paint on the rougher side, and this is what we're gonna be creating. So one little lined pieces. Okay, I've can trace little things in the center lines. And if you're feeling like lines aren't your thing, we can do a bit more abstract. So we're gonna play and use all three of these techniques that we just learned and create thes. And what we'll do is we'll paint the whole thing. And then at the end, you confined a little folding point point and then vend it and it becomes a nice cart. Okay, Okay. So what we learned with creating these techniques, chief, is paint moves within whatever water boundary you've created. Obviously, these boundaries are rather small, right? So we wanted a watercolor drop that moved around the boundary of this space. Obviously for these smaller boundaries, because that's what this is. A long line is just a long boundary. Okay, We just want a little bit less water. So we're still creating that magic soft on the palate. We're gonna be accessing just the point of our brush so that we can make the smoother lines . Or if you want to switch to your round one to make a finer line as well. And then I also have rulers. I like to just eyeball it and go for it. But if some people are more comfortable having little rulers spots, that's absolutely fine on what I would suggest is you just told your ruler against your paper and mark out by centimeters. Or however you would like to space your lines. OK, so we have these communal pallets in front of us at home. I'm I would encourage you to play. Use whatever colors I'm or calling your name. We will get mawr into color, harmony and things in class three. So for now, just encourage you to pick two or three colors that you really enjoy on your palate and go ahead and began. Hey, Like I said, I'm not gonna make, um, lines with my ruler. But I have rulers if you guys need on. But if you're ready to just dive in, we can just dive in, okay? Okay? I'm actually gonna do lines short ways other than long ways, makes it a little bit easier. And again, we're going to engage the palate. Now, remember, paint moves to where the water is, so we're going to go water to my engaged palette, and we're gonna draw our our hand across the paper as evenly as possible. With the lightest pressure, I'm dragging my boundary all the way across. I was able to make it with just enough paint toe where I don't need t go back. So if you need to feel free to drop back in, and the neat thing is, this water boundary is still wet so you can use your wedding wet technique to simply touch where the the Linus and you couldn't drop in color in order to add paint while it's wet again. The key is while it's what you can, increase the thickness of the line, and you can also drop in a little bit more color so that you're lying becomes dark and light within it within its actual boundary. So these air nice, thin boundaries. You can alternate it with a thick boundary by pressing mawr on your brush. This is a great chance to play with your brush and get more comfortable with the versatility. So see here I just ran out of my my water and my paint mixture. Some go back to my palette, grab some of that magic sauce, and while this is still wet, I condemn up into the boundary that I'm creating and drag it across. All right now, sometimes you run out of water, and that's OK and seeing a little bit of the texture of the paper comes through, could be really lovely. Now again, my top boundary, my top line is still wet. The reason I can tell that is because it's still shiny, all right, so I can still drop in color. It's slowly drying, so this is the time you can make changes toe watercolor while things are wet, I'm going to go ahead and drop in color as I go alternating colors and thicknesses. And remember, leaving a little bit of white space in between the lines is lovely now, Like I mentioned, if you are feeling like these lines aren't your thing, go ahead and make some thicker boundaries. And again, it's just like you're creating awash in these boxes. So here's where we're going to create a little bit of a thicker of a boundary, right? More like my wash box. So I'm increasing the pressure of my brush, which increases the stroke, and you see, you can see the paper coming through. That means that's my signal that I need to go to my water into my magic sauce here and drag it along, pick up where I left off and smooth it in there's that nice, thicker boundary, Elizabeth, you said earlier. What if you wanted to do a washed with just Clearwater? Obviously, my wash is no longer safe for goldfish and is not clear, however, actually often like toe work out of just the wash water, especially when it's this color, because you can create some really interesting colors so following along of this being a wider boundary. I'm just using water and bought because my top wash that I just painted this red wash is still wet by adding a little bit of water to my paper and crossing over that boundary. It enlarges this stripe, and because it was all wet, it's gonna dry evenly. And it actually creates a really lovely grated tone because we added that pigmented wash first and then accented it with the softer just wash water, all right, And because this this boundary you borrow your paper tell because this boundary is wet, I can drop in color right right here. Here we go. Everything's still what I can tell. There's movement and shine. The most control you have is where your water is. The paint will often do its own thing. You learn by playing so being curious and going from, I wonder what will happen if I do this and then learning from it is the best way. But I can't predict 100% how the paint will move. Because as you're talking, as you're thinking as you're planning your peace, your waters drawing and so the peace can really take on a mind of its own very quickly. And then you just want to continue down your piece and create the lines. And once everything is dry, I suggest waiting about 24 hours. You can always tell a piece of watercolor is still wet, one because of the movement and shine that you can see if you were to hold it up, but to If you have your hand about 1/4 of an inch above your piece, it's cold. You feel coldness coming up off your paper, and that means it's still what? Don't touch it. Don't move it, Um, but yeah, Within 24 hours, your piece will be dry, and you can fold it in half to make some really cute little line guards. And that is your little project. Playing with boundaries and water color washes
8. See you in Class 2 : thanks so much for joining us for class one. I'm really looking forward to seeing what you create with your water color washes and your stripes. And I'm looking forward to seeing you in class too.
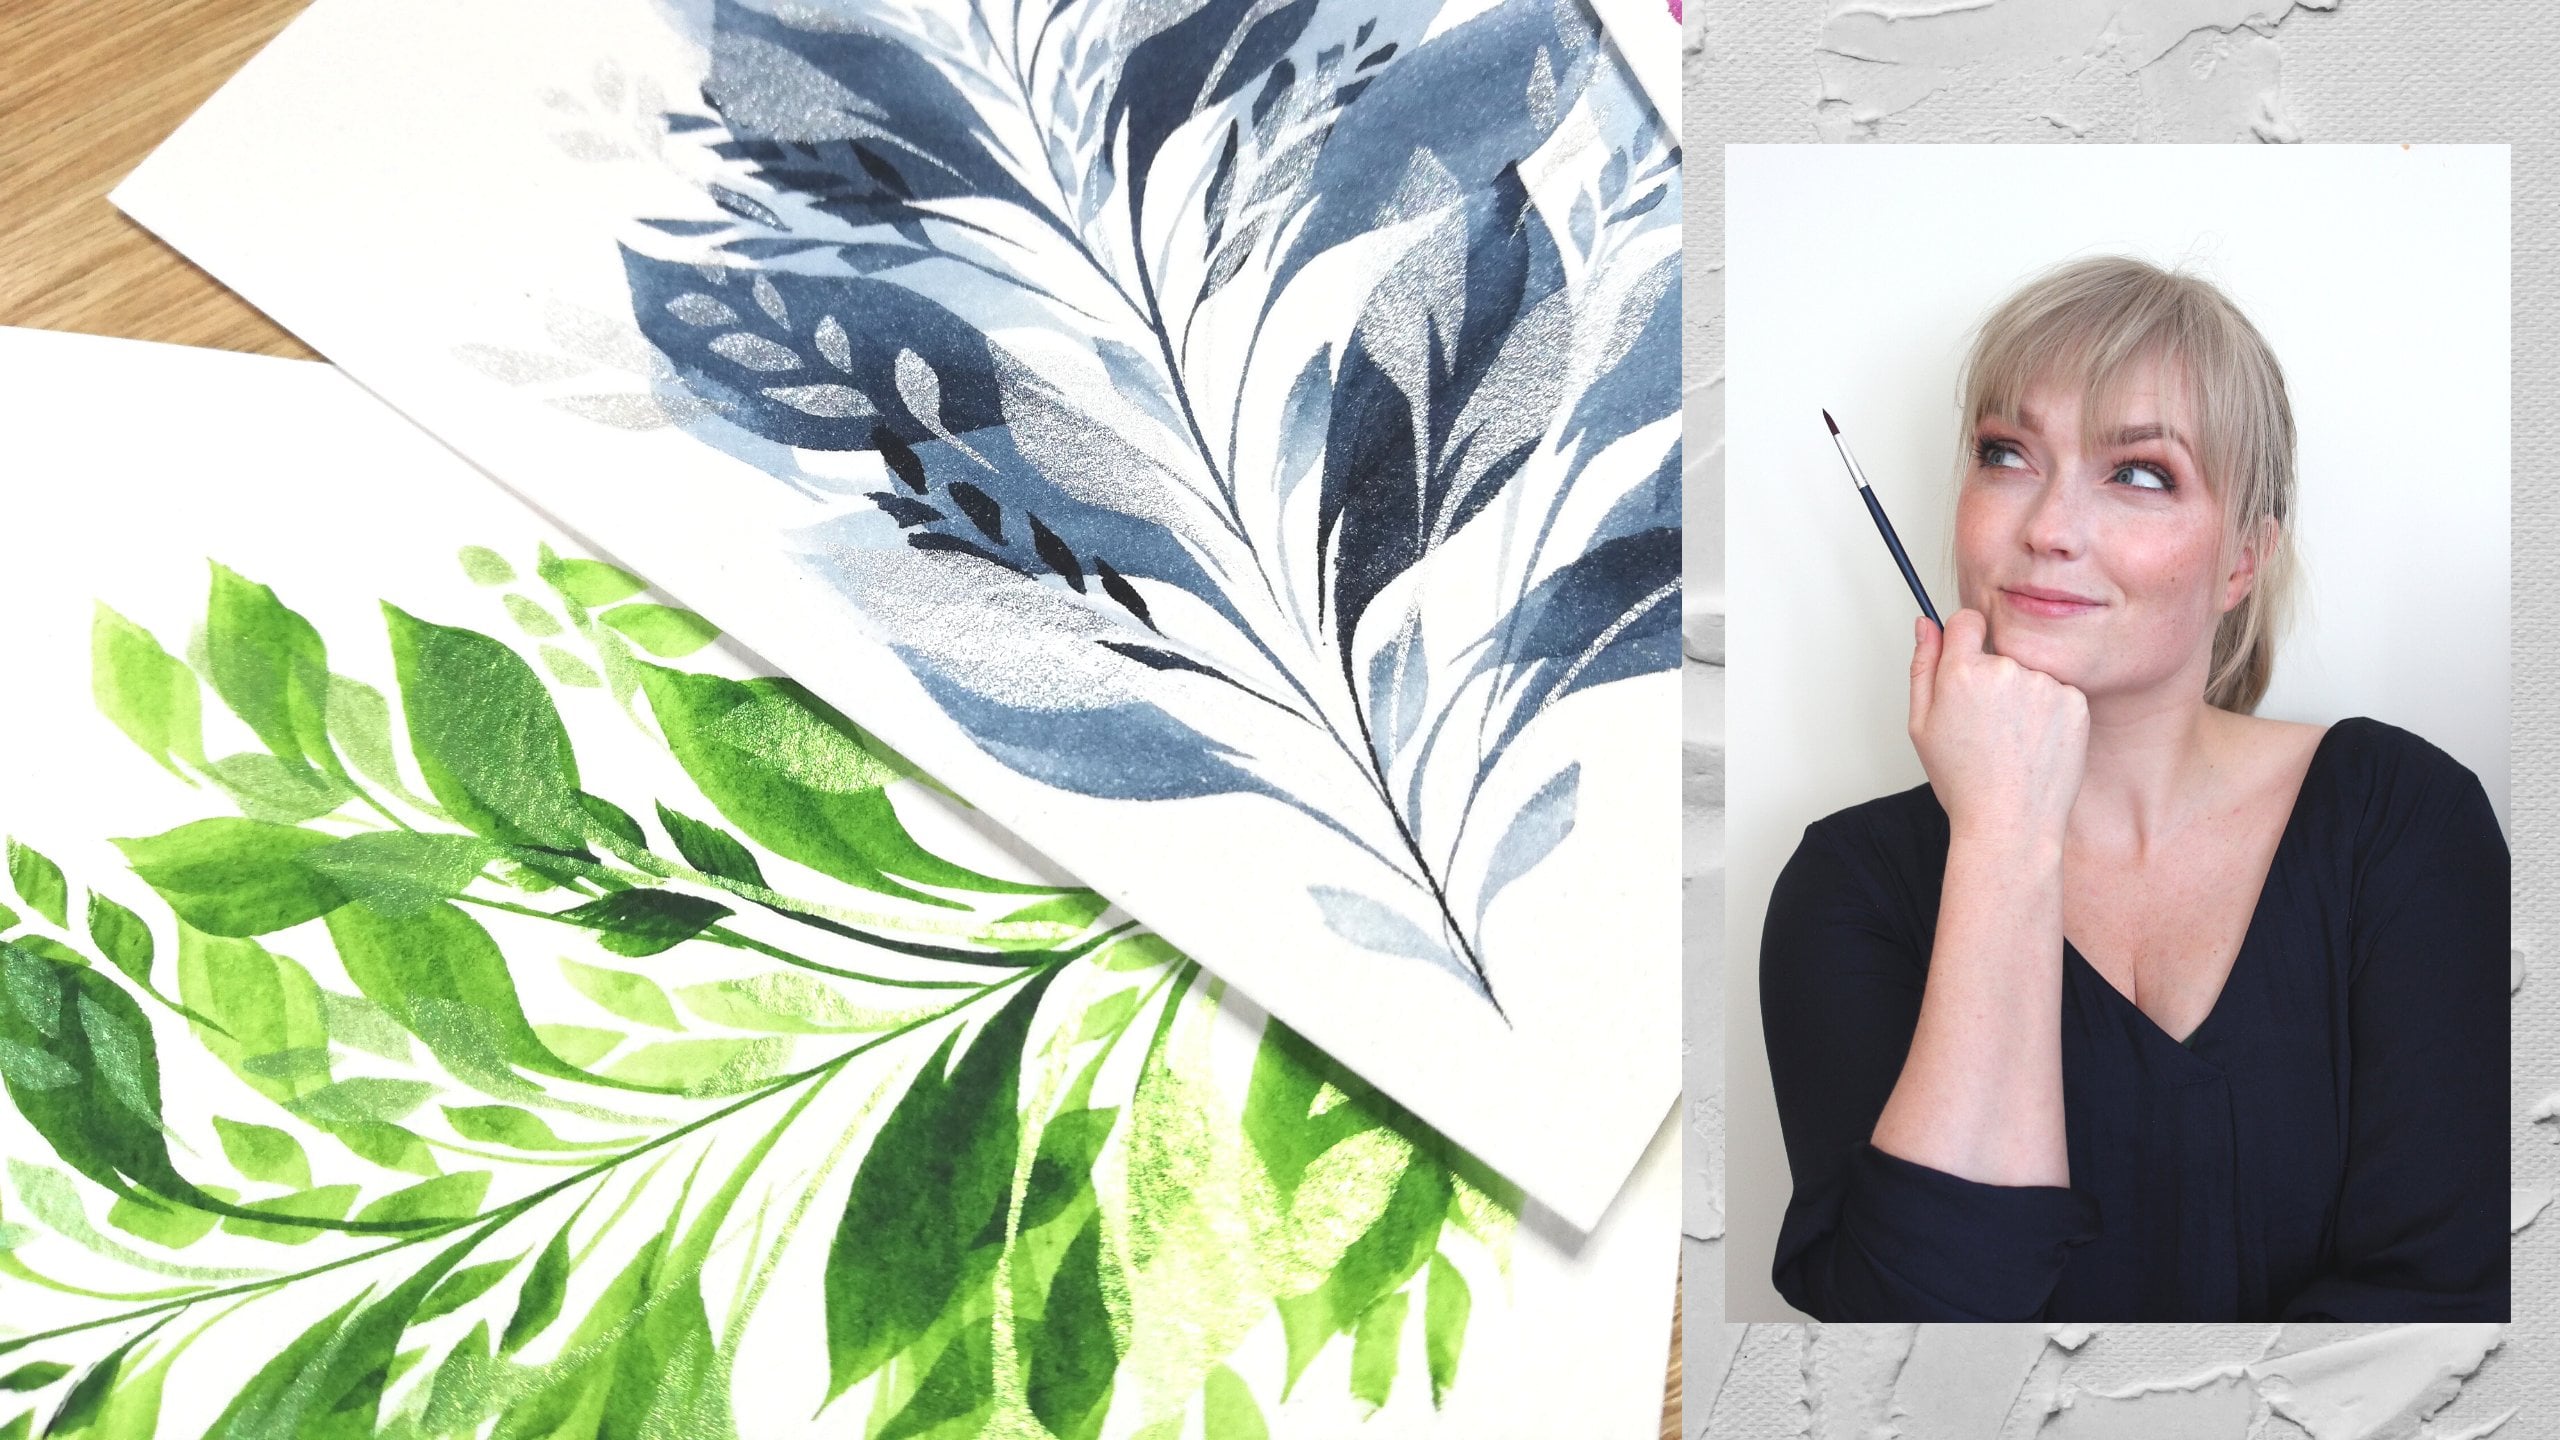
 Sarah Simon TheMintGardener, Artist, Author and Watercolor Instructor