Transcripts
1. Welcome to class! : Hello there, dear and welcome to class. I am Elise and I'm a watercolor artist from Norway. For those days where I don't have a lot of energy and I just want to do something that I know always works, I'll do these watercolor leaves. I think they look so beautiful, and they're layered, and you get that swoopy leaf effect, manipulating your brushes to get those really thin strokes, and then that leaf shape at the very end. This class is perfect for beginners because we'll also be going through some basic watercolor techniques, and tips, and tricks when it comes to supplies. We'll be working with values, which means we'll add light and dark leaves, and the only thing we change is the ratio of paint to water. The more water we have, the more transparent the paint becomes. It's something we can play with, especially with watercolors, which gives this letter of different effects and contrast in our piece. I find that art has a way of grounding me in time and it just takes the time that it takes somewhat like coloring or like puzzling a puzzle. It will just take that time. You can't take any shortcuts. Especially with watercolor, it's a practice and patience as well waiting for that water to dry and for those leaves to be ready. I also really like enhancing my leaves with little bit of metallic watercolor at the very end. That's also something we'll be addressing in this class because they became a little bit differently from normal watercolors. They need a little more time to activate and there are some tips for photographing those at the end of the class. So you can get that shimmery effect and really showcase those beautiful metallic watercolors. My hope is by the end of this class, this will be something that you can put in your tool belt for of those days where maybe you don't have a lot of time, don't have a lot of energy, don't have a lot of inspiration. You know that on your phone, there's millions of reference photos and maybe you're saved YouTube classes and Skillshare classes that you wanted to do, but just want to paint something with low pressure. I'm hoping that this can be that kind of thing for you as well. I hope you're ready and I'll see you in the next lesson to talk about our class project. I'll see you then.
2. Class project: Hello and welcome to your class project. We'll be creating a beautiful leaf painting together, or it doesn't have to be just one. You can make as many as you want. I'll be demonstrating with different brushes and then you can see how I combine them in different ways. Sometimes I'll start with a long stem, sometimes I'll start with the leaves and build my way up. You can find the technique that works the best for you. You might also want to test out different brushes, different kinds of supplies, different paper, different paints, different ratios of water to the paint. It's all a big exploration and I'm really excited to see what you create. Because I know it's not going to look the same as mine or not the same as anyones'. That's the whole point. On my paintings, I'll also be adding metallic watercolor, which I really enjoy for adding that little magical sparkle extra dimension. I'll also be showing how to photograph those for maybe your social media, maybe you want to add them somewhere and how to reflect that light so that magic sparkle shows in the best way possible. That's what we'll be doing today. You don't need any experience with watercolor for this class. It's perfect for beginners as well. I really enjoy this as something that I can do those days when I don't have a lot of time or a lot of energy or maybe don't feel super inspired. I can always just grab a paint, grab a brush and then just put that paint on the paper and create something that wasn't there before. I also really wanted this class to be something that you can pick and choose from. If you find that you like painting only to the right side, do that. Perfect. If you find that you like having more water, like to see the water flow more around, absolutely 100 percent. I think that's part of the point as well, to do different classes, different tutorials, and then finding your voice within it, finding how you can make it your own. Take everything I say in this class with a pinch of salt and just run with it. Take a tip, take a pinch of salt, and see what you come up with.
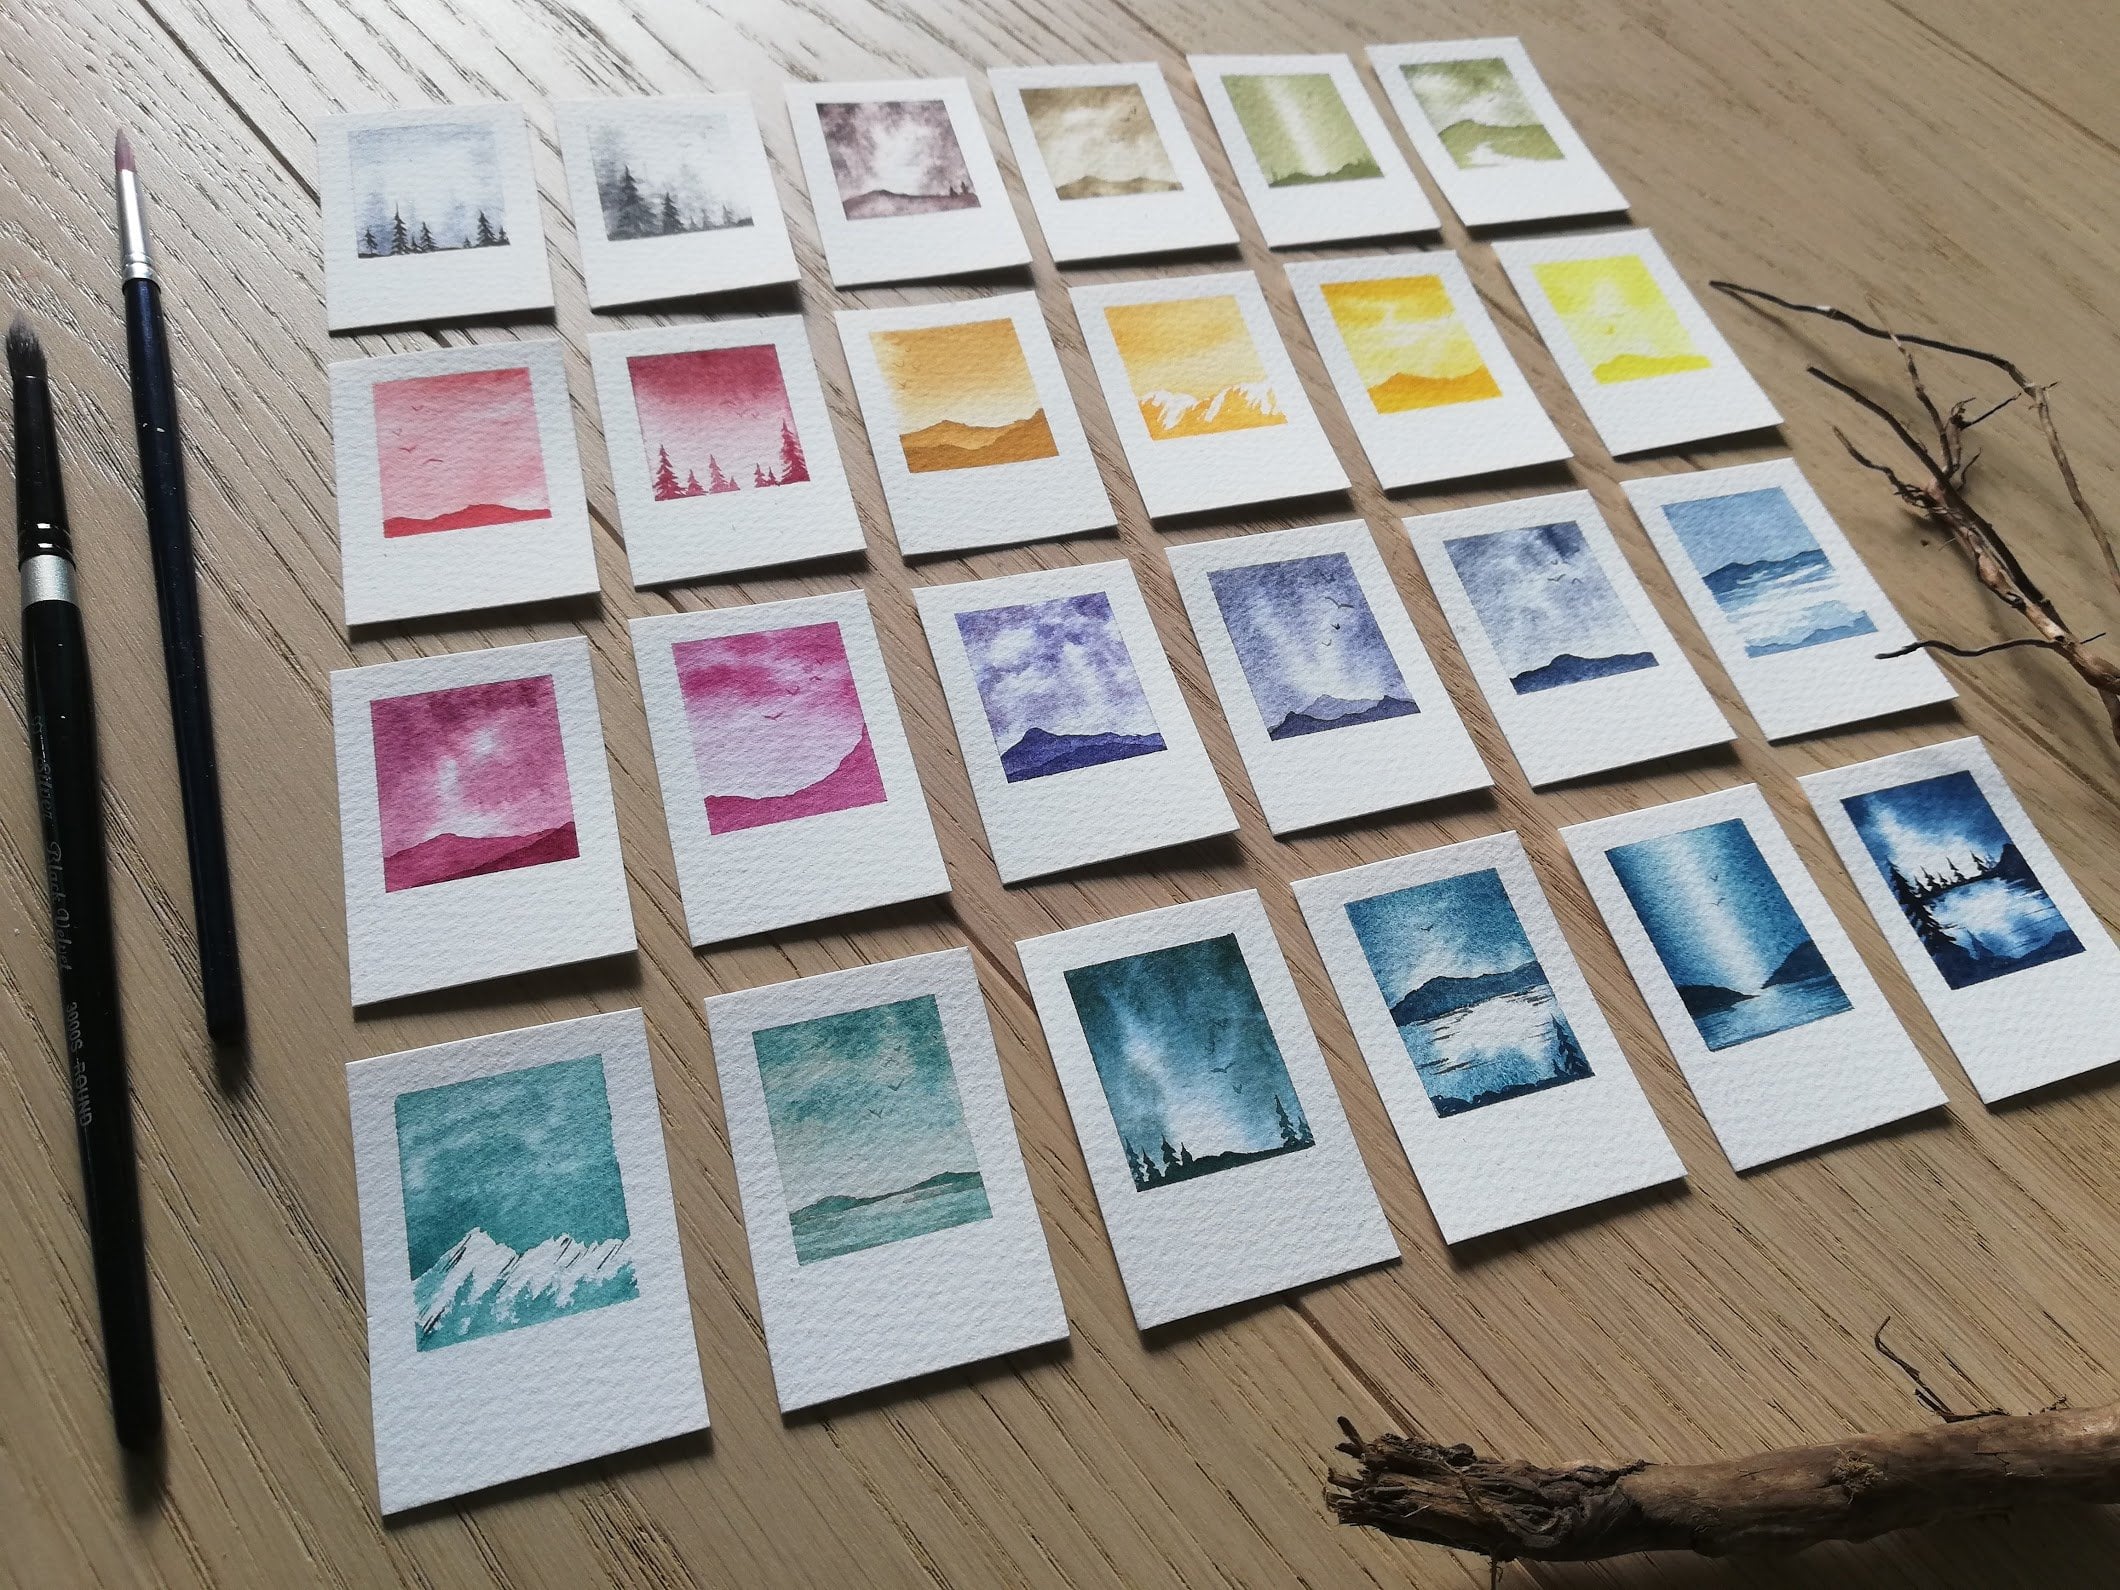
3. Supplies: These are the supplies we'll be using for today's class. Our first supply is water, and I usually like having two jars, that way one is for rinsing off brushes and rinsing off the color and the other one is for picking up clean water so that the colors don't contaminate each other. For this class though, since we're only using one color at a time, you can absolutely get away with just using one. You don't really need any clean water. What's nice about using jars is that you can also use the inside of the lid as a bonus palette to wipe paint off your brush for example. If you don't have a jar, you can also bring an extra palette or use the inside of your palette with paints, and I really like having a white porcelain one. This one is just a little plate and it's easy to clean and it's easy to see the color and the value darkness of your paints. Then you will need something to wipe your brush on so you can regulate how much paint and water is in your brush. This is a piece of an old t-shirt, as you can see, and I prefer having white ones that way it's easy to see if your brush is clean if you want to go in with a different color, especially a lighter one, so that they don't mix in between the colors. Then we'll need some watercolor paper and I have some cold pressed postcards, both cellulose and some fancier cotton paper. It's really nice to have cold press that has a nice fine texture on it. If you have other papers you'd like to try, go try a rougher one or sketchbook if you have it and I recommend 300 GSM, which is a great thickness for watercolors, so bring whatever ones you have. I like painting quite small, which is why I like these postcards. The reason it's so important that is specifically for watercolor, is that it needs to be thick enough to hold all the water that we'll use. Next up is our paints for watercolor painting. These are a mix of White Nights and Roman Szmal, really bright colorful ones and I'll be using some of these darker ones. You can also use tubes or liquid watercolors, whichever ones you have. You can also mix it up layering multiple colors if you want to. But essentially you only actually need one paint for this whole class as the range you get from adding more or less water to your paint gives a whole variety of colors to get a nicely contrasted piece. Then if you want to go very, very fancy, this is the treasure chest clearly with all this glitter on. These are my metallic paints. As you can see, using the inside of the lip as a palette is very useful. Here we have my metallic colors, beautiful sparkly one, some are more metallic, some are more glittery, some are more shimmery and pearly. Most of them benefit from having a little bit of water added at the beginning so they can activate for a little bit longer softening that binder in them, making them more opaque and more glittery so they're easier to paint with it afterwards and you'll get maximum magic sparkliness on your piece. Last but not least, we need paintbrushes. You can use round ones with a nice pointed tip. I would recommend you bringing those that are springy, they spring back into shape and have a nice pointed tip, so you get those really thin stains. I'll show you how to use these as well. But if you have it, I would really recommend using a dagger brush or an angled brush. It just makes it so easy and effortless to make leaves, and that shape with that nice pointed tip and that belly as well makes it really easy to make leaves. Finding tools that make it easier for you to create is always a good idea in my opinion. So I would recommend you go look through your brushes, find some nice pointed ones. I know also triangle brushes would work, wedge brushes, and I just say grab them all and try them out and see what works for you. That's what I did to find my favorite ones. That's it. Take a minute to get what you need and I'll see you in the next video to get started on our leaves.
4. How to use a Dagger brush : Let me introduce you to my friend, the dagger brush. It's a softly angled brush and a lot of different brands make these ones. I'll be using two different ones. This slightly bigger one and a smaller one as well. If you can find that perfect, If not, then the information in this lesson we'll still be useful for you if you're using a round brush or another type of brush as well. Now, what's great with this brush is that when it's wet, it comes to a super fine point, which is what we want for those thin stems. You might think this other one looks fluffy and soft, but then if you get water on it. Look at that. Look how pointed that is, coming to that super fine point. What we want to do with this one, we want to make our stem with the point. Barely touching just with that bottom part. Then, when we want to make our leaf, we press down more of it and twisting tiny bit, pushing down. See how now all of that's touching. Then we lift it back up again so that when it finishes, it's just that very pointed tip again. That's the whole trick. That's where we get that swoopy leaf-shape from. Let's get started with the stems. Just getting water on our brush, wiping it a little bit, so it's not super wet. Then let's go into this beautiful turquoise. Since we're here just a quick side note on a brush health. See how I'm dragging my brush across, not poking my bristles into the paint. That way my brush stays healthier for longer, and we keep that really nice pointed tip, so we don't damage our brush over time. It's nice with a slightly bigger brush that these watercolors are full pens and my big brush, I mean, bigger than this one. Just load up your brush with paint and not getting too wet. Then what you want to do is put your tip down and then drag upwards. Angling my brush straight down, lifting that back part upward, pointing up. Then it's just the very tip of my brush touching that paper. The more of the tip touching, the less precise your line will be, so we're only touching with the tip. Then this part called the belly of the brush is what makes the leaf afterwards. If you want to, you can just practice a little bit first making those thin horizontal lines, swooping, making those stems. When I drag the brush, I can drag my whole arm, and I'm barely touching the paper, just making them very neat and thin. Then keeping it this way, so that edge is in line with the stem, if that makes sense. Now I can drag it this way and get a thin line as well. But the moment I press too hard, see how that line gets much wider because more of the brush is touching, whereas every twist it back this way. Even if I apply more pressure that line still stays really narrow and close because the edges are so high. The second reason I'm holding it like this is, because this is also where we'll make our leaves from afterwards. We're already in the right position. If you have a round brush, of course, the angle won't matter as much because it's the same all the way around. But the principle for the stem is the same, lifting that back part painting with just the very tip to get those really thin lines. Moving on to our leaves. Let's start with a single stroke leaves where our paintbrush just touches the paper once. We can do this to both sides. Just getting some more paint on my brush. Now we're going to use that belly of the brush. Swooping to make that leaf, starting with a little stem with the tip and then twisting, swooping my brush to make that big shape and then the tip leaves the paper and last. So swooping in, and then lifting carefully ending with that fine point and here it is, you made a leaf. That's perfect, and we can just leave it at that. What you can do is just practice this a couple of times. Get it into your system, get it into your hand, figuring out what pressure your brush needs, how much paint you are leaving on the paper and taking it at your own pace. What I find is that sometimes depending on the pressure, I can also lift my brush a bit earlier and because that edge is so sharp, I can still get a nice pointed tip, but just see what your brush does and what works best for you. If you lift the back of your brush again, like we did for the stem, you have more control, and you can make those smaller leaves as well. I really like varying between bigger and smaller leaves, darker and lighter leaves and to make a bigger leaf, you just use more of the brush on the paper, swooping for longer, and then you can vary the shapes and sizes. I find that some brushes have a favorite size, a size of leaf that they really like painting that comes automatically out of that brush. But usually you can also go collide a bit larger in quite a bit smaller than what the brush automatically makes. Then of course you don't have to make them all to the right. I'm right-handed. The most natural for me to paint the way I would write from left to right. If you're left-handed, you might want to start from the other side, and you can also, if you use your brush, the other ways, swooping downward to the left, you can make those leaves on the other side of the stem as well. Just keep practicing, getting to know your supplies, taking this as an opportunity to get to know this brush and how it works before going into your final piece. These are all what I would call those single stroke leaves, where you just use the brush once on the paper. In the next lesson, I'll be going through some other versions like a double stroke leaf, where I used two brushstrokes to make one leaf, as well as making those tiny leaves that I usually put on at the very end. I'll see you then.
5. Double leaves and Transparency: Let's take a look at that double leaf. It starts exactly the same. The first stroke is that first stroke again. But then I go back down to the beginning of the leaf, not matching it up completely, but leaving a little bit of a split going up and over and meeting at the end again. Doing that to the other side, it would be swooping down and out to the left and then up meeting back up, leaving that split at the very beginning. I really like the way this looks and it's elegant. Going back to our practice page, you can add the second leaf on top of something that's already dry, but to get that seamless blend and get the whole leaf to be one color, you might want to do them both at the same time. That way, when the paint is still wet, it'll blend seamlessly into itself, making that whole leaf one color. It's really not something to worry about though. I still get those sometimes depending on how much paint I have in my brush or the type of paper I'm using. But again, you can just use this as an opportunity to find out what you like the most. You can test out if you'd like that split at the bottom or not, or if you like longer, thinner leaves, maybe you'd like to make them a little bit rounder and wider. You can just keep on playing, checking which ones you like the most. Of course, should you get an uneven line or perhaps something like this, like a split edge and you'd like to correct it, there's nobody saying you can't go back in and fix it up, neaten up those edges a little bit if you want to. As you can see, I'm still blending that out while the paper is wet. That way you can get that nice uniform blend still, while the paint is still wet on the paper. I think this is a good time to mention how important it is to control the amount of water that's in your brush, as too much water will make thin lines really difficult and too little, it means you might run out of paint before your leaf is done. There are different ways of controlling the amount of water you put on your paper. But again, this is such a personal thing and it really depends on what kind of brush you have, how much water that holds, how absorbent your paper is, what kind of paints you have and it's really just for you to explore and find out what works the best for you. At the very end of my piece, I usually like adding those tiny back and forth leaves. They almost look like grains, like wheat. Just practice those as well. Like with any of the elements in this class, you can use them in a way that feels good for you. Maybe you like these really long ones, maybe you really don't like the way they look and you cut them out all together. It's all just in the exploration of finding out what you like to put into your painting. These are actually all of the elements that we put together and combine in different ways to make something like this. This is one of my favorite finished pieces and I really like that rose gold against the turquoise, which was actually a suggestion from someone else, just to prove that inspiration can come from anywhere and outside of yourself as well. Seeing how those layers of different types of colored leaves, even though we're just using one paint. We get that really nice contrast by working with the transparency of watercolor. It's a transparent medium, which means it's see-through and we can play with how we can see those layers, layering on top of each other because they won't cover each other completely. There are a couple of different ways we can achieve this effect and I usually just rinse off my brush and then wipe it off, leaving just a very light, almost like a tinted water in my brush, which makes those really transparent leaves. You could also do different mixes on your palette, so pre-mixing a light and a darker shade and using those to create contrast in your piece. Just going back to our practice card and trying those out, making as light as you possibly can and as dark as you possibly can, trying to explore the range of the colors that you're using from the darkest value to the lightest possible value. This is the reason why watercolor is such a great medium for working in monochrome, just working with one color because from one single paint, you can get such a range of different colors using the white of the paper because you can see the white through that light paint, and that's what gives that contrast between light and dark. We don't have to mix any white in, we're just using our paper and the fact that watercolor is transparent. Just enjoy playing around and exploring the different effects that you can get from a single paint. While making this class, I knew that I wanted to show you these, which are some of the first leaves that I ever painted. As you can see, I also didn't nail it right away. If you feel discouraged by your leaves not looking the way you want them to yet, just give it another try. This is also why I encourage you to keep your practice papers because it can be hard as artists to see our own growth and see the progress that we're making. But if you keep some of your older paintings, you can always look back and be like, oh, okay, I didn't notice that I was growing and developing, but I guess I was because here is proof. Then one last tip for the stem before we go over to the round brush to just check in with that one as well, it'll be clear when we begin putting it together. See that stem at the bottom. When I make leaves that come out of the same stem, I try to follow the same organic curve. I don't make leaves that come straight out from the side. That'll get a different book and you can try it out. Maybe you like that one better. I prefer to follow in the same-ish direction, so moving outward, bending softly. The more I practice this, of course it gets easier going back into the water, getting different values. All of this gets more automatic as you practice. That's it. I know this was all demonstrated with just this one brush, but the principles are the same for using a round brush tool, just following where that belly touches. Again, you can always go back and adjust if needed. I'll see you in the next lesson where we go through how some things there's tiny bit different when we're using a round brush instead. I'll see you in the next one.
6. How to use a Round brush : If you don't know which one of your round brushes will work for this leaf painting, you might want to start out with something like this. A test paper where you can try out your different brushes first, getting the hang of that smooth, swoopy motion, those thin stems. I did this a while back and some worked really, really well, like this first one, the green ones are the ones I'll be using in this class and also the silvery ones down here, which is made with a slightly larger brush. As you can see, I can still get some really small leaves with it. It really comes down to that water control and also have pointier brushes. Then this page is a lot of fun, I wanted to show you this one as well. This was choosing brushes that I thought definitely wouldn't work and some still did and some, as you can see, definitely did not work very well for these. I can highly recommend doing some testing out first, seeing what brushes you like the most, which ones gather back up to that pointy tip at the end, you can get those thin leaves and smaller brushes, bigger brushes, whatever you'd like to use the most and then you can try those out on your own first. Getting this round pointed brush. This is the same one as the green leaves were made with, just getting some red on there and then it's going through some of the things that separate this from that dagger brush that we've already gone through so thoroughly. Just to get little close up of how this one works, which is surprise, surprise similar. Lifting that back to get the point straight down, making a thin stem and then pushing down, letting the bristle spread out then lifting back up and let them gather to their point again. Like so, similar leaf. Then just one more on the other side, push and lift. Here as you can see, you've got an uneven line. I'm just going to go back in and adjust and going to fill in that whole thing with red to make sure that color is nice and even because it dried very quickly. There's no shame in going back in and fixing things if they don't turn out perfect. On the first try, suggests pushing in, lifting, trying it out, like that's also really nice single stroke leaf. If we're making smaller ones, you can always adjust if you need to. Really nice way to get to know your brushes working up that fine is muscle memory. It's making the same, same way too and I just wanted to mention, as you can see, this brush makes leaves in this size really easily. I feel like brushes have a favorite stroke, a size range that they're really good at making and that means that we can just play with them, almost letting them decide what size the leaves are. Usually the rule is smaller brushes, smaller leaves and bigger brush, bigger leaves. But as we saw with the bigger dagger one as well, as long as the tip is really pointing, we know how to use it with a controlled amount of water. We can get really precise tiny leaves, even with a bigger brush. Just trying that out with some smaller leaves with the same brush, just using that tip again like before with our dagger moving left and right, with those soft strokes moving out from that same middle stem. It's making some for that bottom one as well. You can see that I'm holding my brush quite far down to the feral that middle part there and that also helps with control. The further back on your brush you hold, the more loose and flowy your leaves will be. The closer you hold, if you hold it almost like a pencil, you get really, really precise lines and really fine leaves. Kind of an in-between holding it at the ferroll. Then I just wanted to show what I mentioned before about following the curve of the stem. If I make a stem here and go straight out, it doesn't have them look as organic in a way, even though it's always an option to do whatever your want. You can try them out in different angles so you can find the ones that you like the most. I find that mine are quite narrow and quite like following the line of that stem. But you can also explore with them like palm and they going to go straight out from the side. Just before we get started, I wanted to show you what happens if we use too much water. For this, I'll use a slightly bigger brush for this paper and this brush and this paint. This is more or less than right amount of water to get maximum control for that in the stem, it's still have enough water and paint to get that swoopy leaf at the very end. To paint small and precise, sharp leaves and stems. One of the main things to consider is how wet your brushes, the more water, the less control we have and it will just release out on the paper. We can also get the effect of blooms are back runs, which are textured areas that happened when the paper dries and evenly in the water pushes the pigment around and makes those hard edges. Then I'm just going to dip my brush in water, not wipe off anything and it's holding a lot of heavy water on there and it just wants to let it go as quickly as possible. The moment I put it to paper, see how that just like releases all of the water on the paper, giving us a not very precise stem. You can also see how that water is going to flowing around in the leaf, making it less precise and also a wet leaf like this will take much longer to dry and there's more risk of putting our hands into it or if we start layering on top that that'll still be wet and they'll bleed into one another, not getting those clear layers if that's what we're looking for. I'm just going to wipe that off again, trying one more time getting back to that normal amount of water. But now since I didn't put in more paint on it, it's got a much lighter since I had a lot of water in that mixed in with that paint, that ratio is very different from that top one. Just one last one before we get started is just to say that it's not necessary to make a very curved first stroke that might make it more difficult to match up with that second stroke. Get that hook. The way I usually make the second stroke then is it's making that leaf a little bit wider and that's fine too. Just keep adjusting in paint. Spend as much time you want on this. Grab all of your brushes, and try them out and join me in the next lesson whenever you are ready to start making your final pieces if you found a favorite brush. I'll see you then.
7. Putting it all together! : Of course, there's no limit to how you can make a leaf painting like this. I have two different methods that I usually go to. One of them is starting from the bottom, making my way up, making leaves as I go. The other one is making a really long stem at the beginning, crossing the entire page, making leaves at the very end, and then working my way back down that same stem. It gives them a slightly different look, but actually, they always look different no matter what I do. I'm going to be demonstrating both of those versions with two different size dagger brushes. Then I'll also be going through how I make a complete piece with a round brush afterwards. I like going from the bottom-left to top-right, but you can also go from the top and go downward. If you're left-handed, you might want to start on the other side to move as seamlessly as possible, making sure you're dragging the brush comfortably as a general rule, dragging is better than pushing. Starting from the bottom using the very tip for the stem, and swooping out a little down and out, lifting slowly so that the tip is wood finishes the point of the leaf. If you want to, you can absolutely leave it like this, like that single stroke leaf, or go back in making that split at the bottom if you like, swooping up and outward meeting up at the very end, making that double leaf. There it is. We're just going to build from there, starting back down at that stem, going to the left, swooping, and lifting. One more time, going back down, I really like leaving that stem open and getting a leaf like this. Very fancy. This is cotton paper and it quite quickly absorbs a lot of the paint and water from my brush, which is why I keep going back to get more water and paint. Or I can be even fancier and put some ready-mixed paint on my palette here, which is easier to dip from. Then, I don't always necessarily go back to that original stem, just start close to that general middle area and keep repeating the same steps. Now remember if you move quite fast from one stroke to the next, you won't get that overlapping line in the middle where the first part of the leaf is still wet, you get a more uniform blended leaf instead of that double line there. Remember, you can always move that paper around so it's comfortable for you trying not to put your hand in wet paint, it happens all the time. As you can see, we're losing pigment off of the brush. When we're leaving paint on the paper, the leaves are getting a little bit lighter as we go. Since at the very beginning, I dip my whole brush in water, and then I pick up paint at the tip of the brush. As that paint gets left on the paper, we're getting more and more water into the mix. It's getting diluted as we go, so just keep going back to get more paint if you want a darker value for your leaves. Then as we go upward, we can make smaller leaves by lifting the back end of the brush up, that way less of the brush touches the paper. Then at the very top, I just do those single strokes. Then you could be done, you've made it, that's a leaf painting right there. I mean, I usually add more than this, so we're just gonna keep going and add more and more leaves. These bottom ones are already dry, you can just touch them lightly, just like this, and that means we can safely layer some more leaves on top. If the first leaves aren't dry, you might get that bleeding and that paint from the first leaves blending into the second leaves, which is absolutely fine. It's just something to notice since watercolor paints will go wherever it's wet. Oh, and also extra fancy, you can also add a little stem that crosses over the middle. Starting with a little loop on the other side of the stem, crossing back over, and then making the leaf on the other side, which I occasionally do. The reason I haven't sped up any of this footage is to show you how much time it actually takes. I didn't want to do a time-lapse for these first ones, just showing how I go back and forth, enjoying the process, not feeling rushed to do that finish line. I just need to get this finished or skipping any points where you might want to follow along and see how much time it actually takes. Then what's nice to do after a little while is adding in some lighter leaves, fixing up a lighter value over [inaudible] you can see that's much lighter. When we layer that on top, like mentioned before, we get that transparency again. You can see that that doesn't cover up the leaf underneath, we can see both of them, which is really nice, very unique for watercolor. Also, you can dilute gouache and do the same thing because gouache is more of an opaque watercolor, if you have that in your art supply stash as well. This is basically it, just going back and forth and then stepping back every now and then just to see if there's anything missing, you feel like there is somewhere you want to put more in. I'm noticing here and here and I want to add in some more, poking them in between. Since this is not from a reference or from a photo, you can just keep layering and adding until you feel satisfied with your piece. Here is also a place you could stop looking beautiful and be done. However, I'm also going to add those tiny ones that we practice at the very end, just using the tip of the brush to make those little back [inaudible] leaves as a final layer. Doing some longer ones, some shorter ones, some on top of the others, and some in that white space connecting more or less back to the same curve of the stem. Just keep playing and seeing if something feels like it's missing and again after a while, if the brush starts running out of paint, it's just giving some lighter leaves instead, you can always go back and get more paint on your brush. Just connecting that back into that middle stem, and this is also a process and trust, and trusting that you can tell when this is done. Also, if you don't, if you find that you go too far and you make too many leaves or where you think that you've ruined it, you can always just grab another postcard, another paint, another color and start over. Then you'll have that information for next time, knowing that maybe you would like less leaves, maybe you'd like a more minimalistic look. That's also just teaching you something about your preferences when it comes to art, and I think that's really valuable information as well and the whole point. Just enjoying that layering, the movement of the brush. Just finishing this off with some single ones in towards that stem in the middle. Even though I didn't make an entire stem at the beginning, it still looks like all of these leaves are springing from the same space. What's nice is that this leaf painting also works from every direction, so in case like me, sometimes you will happen to paint on your postcard upside down, you can always say that that was how it was meant to be the whole time. Then you can write a nice birthday message on it and give it to someone you love. Let's call this one done and swap to a smaller brush starting with that long stem first and then working backward from that middle stem. I'll see you in the next lesson.
8. Small brush magic: Let's get our smaller brush and another postcard and another color. I'm going to show you that other version doing that long stem first. I'm keeping my postcard vertical, just going into some sap green, and using that tip starting from the bottom left again, going up towards that top right right. Longs step and swoop for that leaf at the end, getting that pointed tip and that second stroke, and doing the same on the other side. Actually, I really like the way this looks now, but we're going to make some more. I'm going to work my way down organically curving, so not going straight out to the sides with the new leaves, following that curve of that stem. Starting at this stem then swooping outwards, making most of these double leaves, making it look a little bit more natural. Making sure again, not to put my hand in wet paint, it happens all the time. You don't even know. Just moving back and forth, making some longer stem, some darker leaves. This is cellulose paper, it's not as absorbent as cotton paper. Usually I can go for a much longer with what I have in my brush. For this one as well, I'm not going to use my palette like I did with the indigo one. I'm just going to use whatever that value in my brush is because it's not going to be wrong. It's just going to be a version of this same green that I keep going back and forth into, varying between going into paint and going into water. What tends to happen is I dip my whole brush in water first and then I get paint on the edge. After a little while, that dark deep green paint is left on the paper and more of that clean water from the top is coming down. That's why the leaves keep getting lighter as I go. It doesn't continue being that same darkness. That also automatically varies how dark leaves are. If you've noticed that your brush keeps making lighter and lighter leaves, that might be the reason why. As mentioned before, this is quite a small brush, so it keeps making these beautiful small, dainty leaves. Because I need more of them to fill a page, this branch, this leaf painting here, we'll see much fluffier and fuller than that indigo one because there'll be more leaves on this page than the other one, which naturally makes bigger leaves and fills out this postcard much quicker with larger ones. One of the most important things for me that you see if you can get from this is just enjoying putting your brush to paper. Just enjoying that movement of the brush, seeing those colors appear. Then if you layer your leaves on top of another leaf and that first leaf is already wet, the paint might spread or bleed into the new leaf because watercolor will go wherever it's wet. If that happens, that's absolutely fine. I just wanted to mention it because I have the tendency of them may be wanting to fix it or sort it out and make it better, make it perfect, especially if it's just one leaf that doesn't look like the other ones. For me, watercolor is also often a practice in letting go of that perfection in noticing more than judging, just saying, well, that happened, I don't really like that. Next time I'll try not to do that. I think often with art, we can say, especially with their own art, you could just say, I don't like that without really maybe noticing why, or noticing how we can maybe adjust that for next time around. For example, if you make a leaf you're like, well, I don't like that. Maybe it's a strange shape or a strange angle or strange size, if you have lots and lots of small leaves and you just have one gigantic one. Then you'll know that for next time. You can just keep that information. Then you can work towards finding your preference and the things you like the most, so that the more you do it, the closer you get to your style and your preferred way of doing this or any art. I think with art practice like with a lot of things in life, we have this fear of wasting. We don't want to waste our time. We don't want to waste our money when really the information comes from using them. Maybe that does feel wasteful. Maybe you bought a color that you never use or maybe you bought some paper that you thought you would like, but you never reach for because you have your other favorite. Then just trying to let that go, making sure that you consider that as information and then taking that information with you for next time. You can't skip those steps in learning, just getting past that mindset of being wasteful and get curious instead of, what if I do this and what if I do that? Then what have you really wasted? This might have taken you five minutes, 10 minutes, and it's just paper and paint. What you can gain from it I think is so much more than you would potentially waste. I'll just keeping that in mind as you practice, as you keep exploring different sides of your artistic self. Allowing waste, allowing there to be bad art or art that you don't like and colors you don't like and leaf paintings that you throw in the trash or paint on the backside, trusting that it's still had an effect on you and your development as an artist. There they are, all done and ready to be sparklifyed, not a word. But the next step for these two is using our metallic paints, doing the same thing, same brushes, same leaves, same layering, but with that added shimmery magic.
9. Round brush painting: Let's try to do the same thing with a round brush now instead of the dagger brush, just getting some orange on there. I don't know who this person is using warm colors, so I've never met her before. We're going to do the same thing as the green one with that long stem at the beginning, moving my whole arm. Then that's lifting at the very end. Letting the bristle spread out and then lifting. I'll do a double stroke, the same thing trying to get that pointy tip at the very end. Gathering back up again to get that nice sharp edge. Then we'll do the same on the other side outward this time, and then a double stroke on the inside. Perfect. Then we'll just do the same thing as the green one. You've already seen me do this one. I'm just going to get a couple of pointers in for this round brush. Then I'll speed this up and put on some nice happy music so that you can just watch and see that it is exactly the same as we did with that dagger brush. Now, since this one didn't sharpen up as nicely as I wanted it to, I just can go back in with my brush and keep fixing those edges and pointing those leaves a little bit pointier and that's perfectly fine. It can also be super fancy. Look at that, a third one. A double split at the bottom like so. Then we'll just keep going back and forth. Again, for this one, I'm not really using that pallet to put any extra paint on. I'll just go in with whatever darkness of value is on my brush, moving back and forth. Moving my paper, and my arm, and my hand trying to make it as comfortable as possible to paint these leaves. Enjoy this little timelapse, and I'll see you on the other side before we go into our metallics. There it is. All done with some big leaves, some small leaves, some dark leaves, some light leaves, some spooky ones, and layered beautifully on top of each other. Now, we're going to go back to the other two. They are dry now and they're ready to get their metallic paints on top of what's already there. I'll see you then.
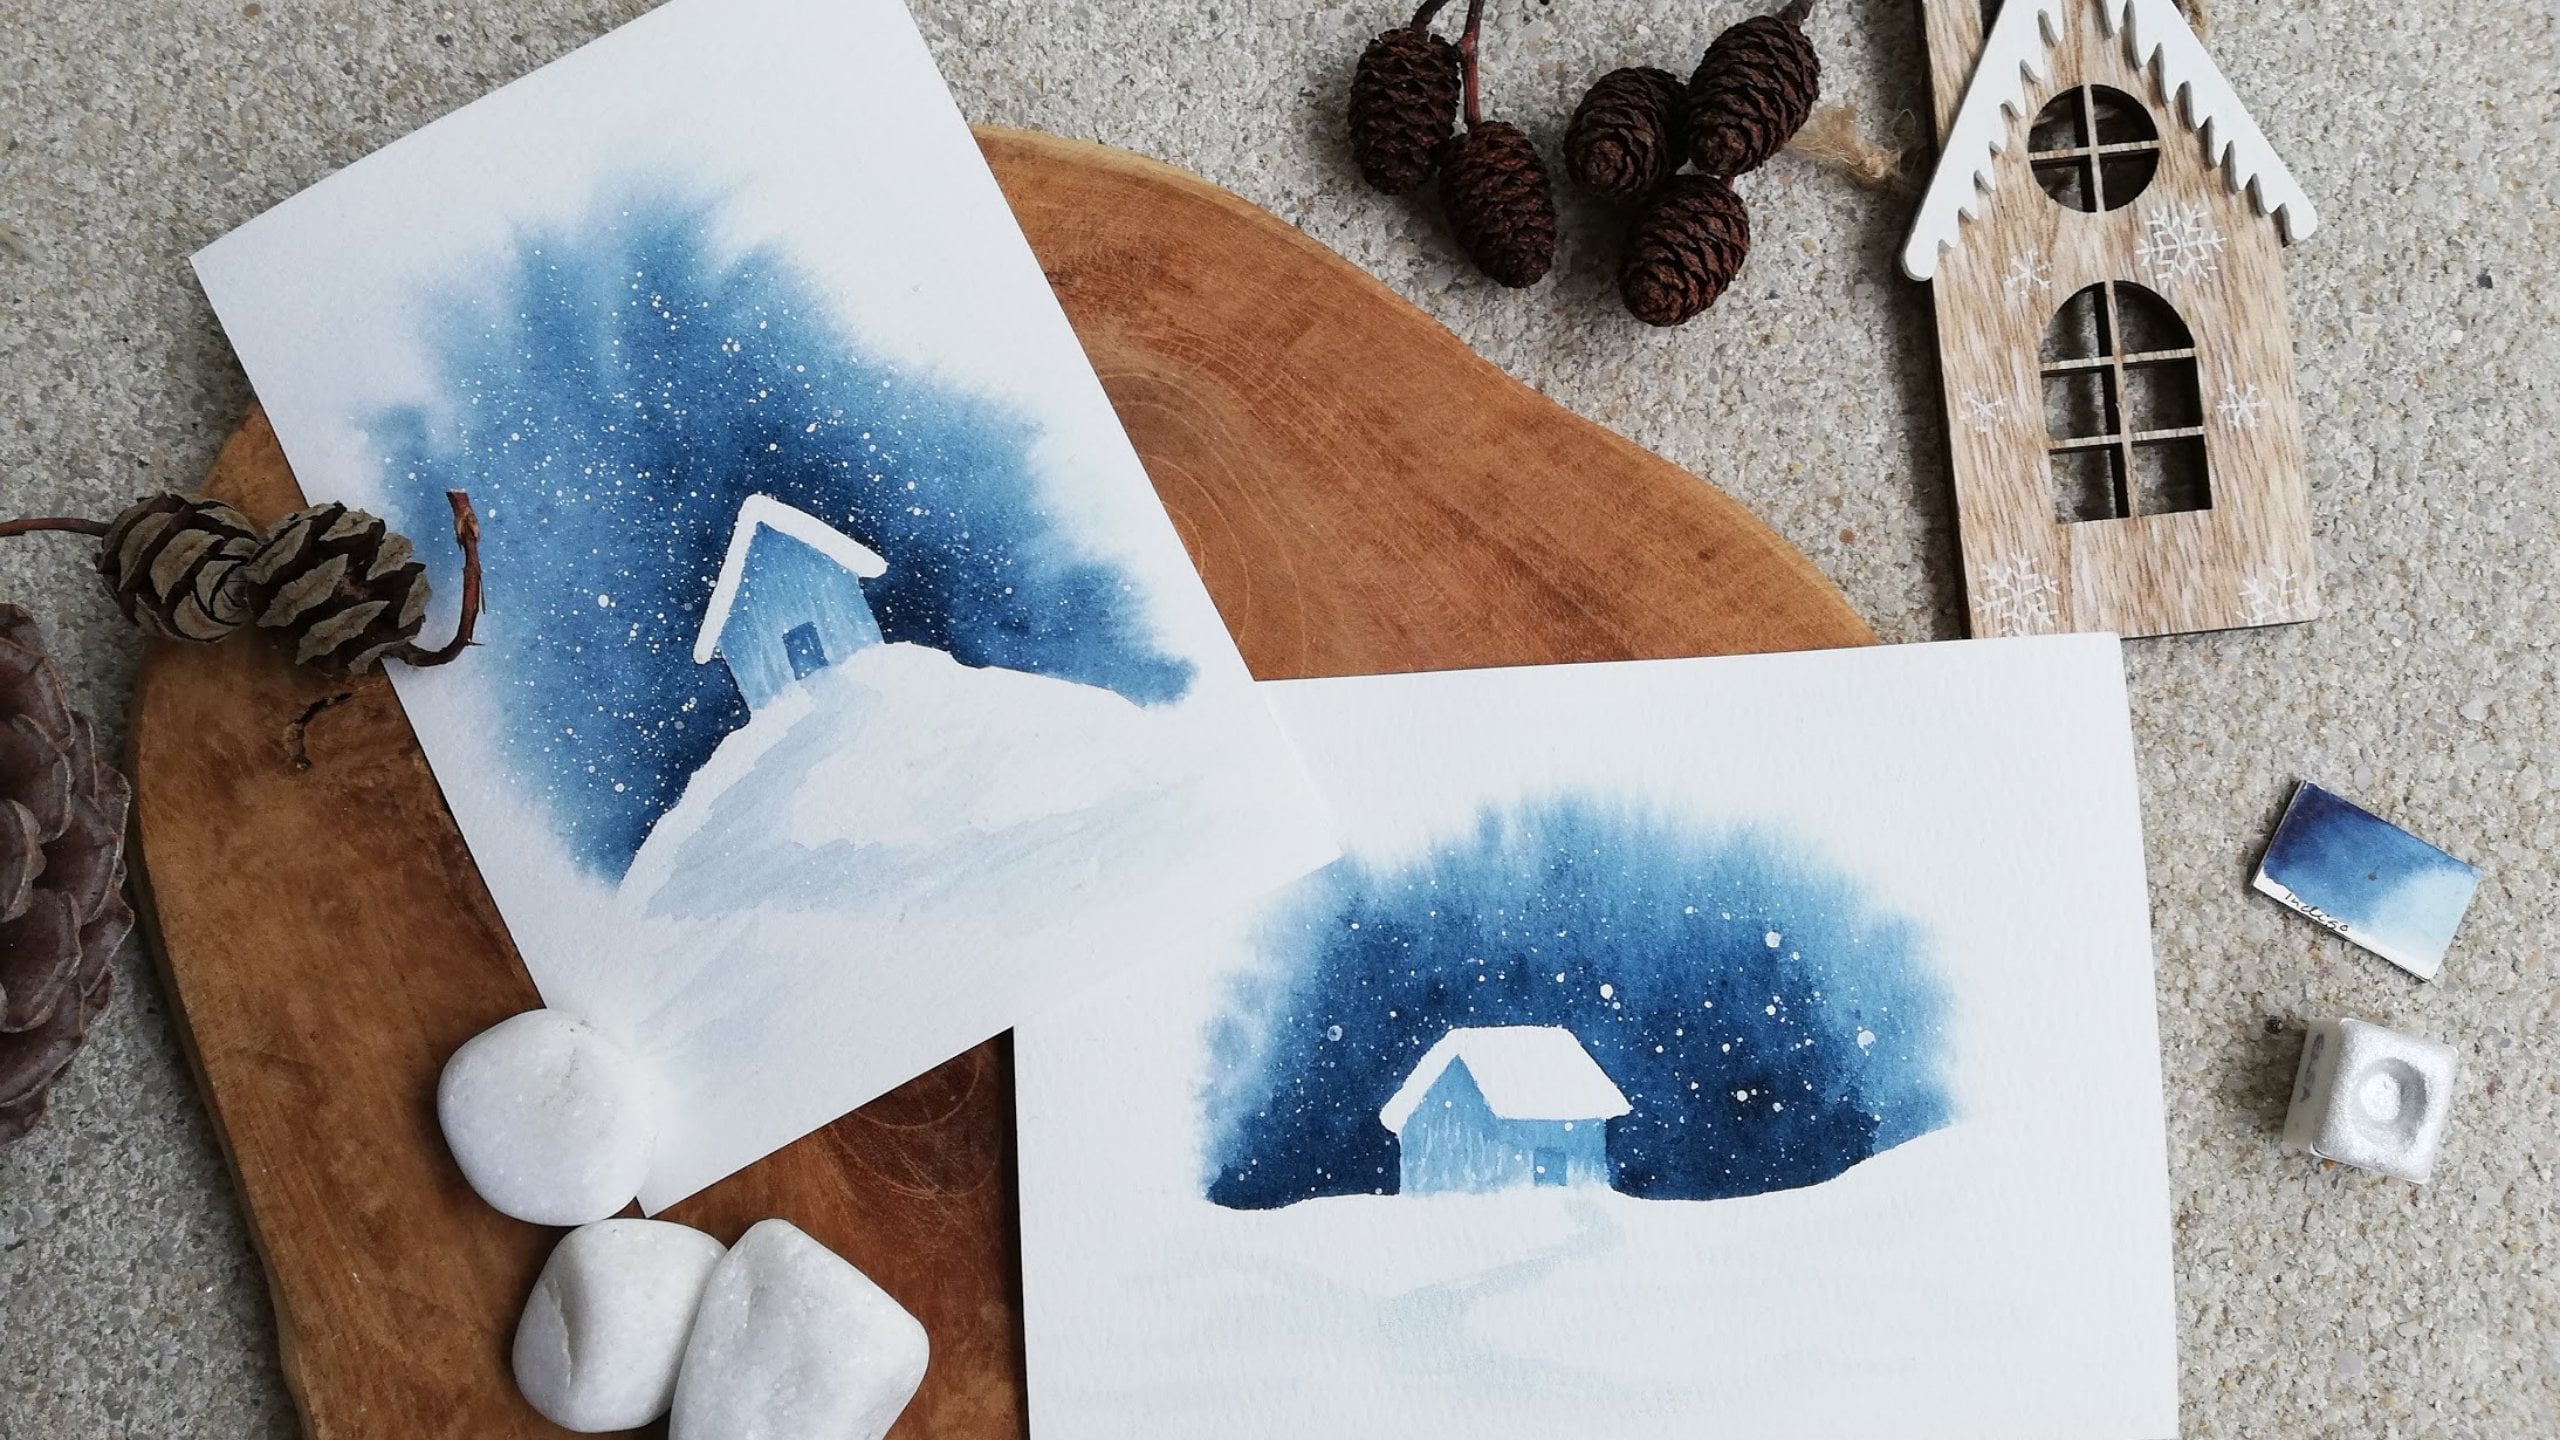
10. How to use Metallic paints: Time for some sparkle. All right let's go for our metallic details. So going in with the same brush and clean water, see how this takes a bit of time to activate. I already put a bit of water in this, but I still need to work it in with my brush. I want to get a lot on my brush so that I don't have to go back and forth as much. Then what we're doing is we're just doing the exact same strokes as before. We've already warmed up those muscles, those leaf stroke muscles. We're just going to keep layering, making those beautiful extra leaves. Some double some will be overlapping, not really following the leaves that are already there. Don't want to copy those I'm going to put them in-between. Since this is the light metallic shade, I like to check and then turn my piece in the light to see where the metallic parts are. This one is really light and not super easy to see where you put it unless you find that shimmery angle that lets you see where you actually put it down. Some sparkly paints have more of a color of their own like the green will be doing afterwards. If you make mistakes with this one, it really doesn't matter if you put them in a weird place. If you mess up a leaf you can just make it a little bit bigger, for example, I do that all the time. Just keep glaring following the same principles that we've already done with our normal leaves following that stem and that curve to make it uniform and neat. Like before some bigger ones, some smaller ones. Then stems this would be these double strokes, single strokes, tiny strokes, whichever you like. If you would like to decorate them in different ways, make those little veins on the leaves, for example, feel free to do so. If you want to do splatters, anything you like. Like with those first layers, like I've been saying this whole time and I will keep insisting on this, this is done when you say it's done. So just keep layering, going back and forth with your metallics. Maybe you want to go in with another layer of something else. Maybe you want to do two different colors. Maybe you want to do different colored metallics. Maybe you want silver and gold. Again, this is all a practice in finding what feels nice to you and what looks good, and just enjoy the process of putting paint to paper. Then see if you can just get lost a bit in the process. Keep layering, keep adding until you feel satisfied, until you feel like your piece is done. It would be like the way this looks. Anything blue and silver or pearl [inaudible]. Let's see just a couple more. I think we're pretty much ready with this one. I think we'll call that one done. All right, doing the next one swapping to that other brush. For this time I'm going to match it up with this green one, and this one I haven't added anything. So when I go in I could just do that green water since it's green, and I go in if I could just go in like I would in normal paint. See how that's not really putting much glitter on my brush. I'm not really picking up a lot of paint. It's going to show you this entire process because it does really take this long to activate it. Soften that binder, getting that in that pigment and that shimmer released onto the brush. Just being a little patient. Mixing that in and even though watercolors are often associated with transparency and being transparent, I don't necessarily want the shimmery party to be transparent. I would like them to be as perfect as possible. Like that, yeah that's already given me so much more color. That'll just go very neatly in with the other green shades on this. Because this already has a color of its own, it's actually easier to see where they're placed than with that curly shades or iridescent which usually don't have a color themselves at all. But as you can see, this one that has a stand-alone green color. So just going back and forth again just enjoying the process of the brush doing most of the work for me. This can also be a moment to see if there's any leaves that look a little strange, that might benefit from a little meek over some with some sparkly leaves on top of them. If you feel like there's a specific leaf that looks a bit wonky perhaps. Sometimes layering some sparkles on top just makes that one disappear. Now since you've already seen this once, we are going to speed this up a little bit and I'll show you when it's finished. Look at that. Beautiful and there we go. As you can see, when I'm turning it in the light it's really easy to see where those sparkly shimmery leaves are. That's also the trick we'll use for our photos as well. I'll show you some more examples in that lesson of how to get the most out of the sparkles for pictures so that they show up really well and it doesn't just look like another layer of green paint. Look at those two. I really loved the way both of these look. They're different and unique they never end up looking quite the same but that's the whole point. So in the next lesson for photographs, I'm just going to summarize some of the tips and tricks and I'll see you there. Well done.
11. Tips and Tricks for Photos : The difference between a photo like this with sparkly paints, and a photo like this, is the angle you hold your painting. I'm going to take a wild guess and say you have one of these, a phone, which is what I use to take all of my photos for my Instagram, and what's important is just to use it in the right angle. Just opening up my camera. It's difficult to see on the screen, so I'll just demonstrate with this green one. When I hold it like this, you don't really see that sparkly paint. But the moment I turn it like this towards the sun, the light bounces off those sparkles. Like with anything reflective, if the light comes onto the paper at this angle bounces off that angle and then my camera is here, it won't catch that reflection from the sun or that lamp that you're using for maximum sparkle. So I need to angle my phone and my camera so that it catches that light reflecting off of the sparkles or the metallic shades. Depending on what time of day you're taking the photos or if you're using natural light or a lamp light, you might have to use a different angle every time you take a photo. Like now it's not a super sunny day, but there's still a really big difference between taking a photo straight on and then angling it into the light. It's just for you to experiment really. Some paints are more in the literary, some are more shimmery or pearly, and some have more color on their own and some are really see-through and transparent. It's also for you to play around with, see what works the best. Like with this one, the indigo on which we already shown, it doesn't really have much of a color on its own, but then turning it towards the light, that pearly shade really catches that sunshine and bounces back into the camera. Like these small ones here, against the light, they look bright and white sparkly, and if not, they look gray and a bit dull. They're still really pretty, but they just don't have that same wow effect. Sometimes when I take photos, I'll just hold them like this, and that way I'm sure I can angle it anyway I like, I'm free to adjust as I go. But if you want to do a flat lay where the painting is lying down, you might need to adjust yourself more or you can prop it up with something so it's actually lying at an angle on the floor or your table, getting that shine without your hand in the photo. Sometimes it's really just the smallest adjustments that matter. If you put a pencil under or maybe an eraser or something like that, you can catch that light and still get that beautiful photo. Just a note on this last one. This one has now gotten gold on it with a round brush, and like the green one, this has strong color on its own and it's quite dark. It just gets so much brighter and lighter when it's angled to the light source, getting that gold instead of a bronzy, much darker brown shade. I really love paints that have a color on their own as well. That way it makes sense. The whole piece makes sense if you see it without that sparkle and without that light reflecting and sometimes unexpected color matches can be really beautiful like that turquoise piece with the rose gold shimmer on top. Hopefully, that can make it a little bit easier for you to get that beautiful shimmery paint on camera next time around, and you can also help out with the flash on your phone to get a light source if you're taking photos on a cloudy day or you can't find a light that bounces off really beautifully. That's it. If you'd like, you can take two different photos of your piece when it's done, showing both what it looks like without the light reflecting and how big of a difference it is when you get that light just right and you get those super sparkly, shimmery, beautiful paints showing off how pretty they are. All right, that's it. I'll see you in the final lesson, just to say goodbye
12. Thank you!: Congratulations, you've arrived at the end of the class and I'm so excited to see what you've created and how you like to paint your leaves. Maybe you've discovered a new favorite color, maybe you've discovered a new favorite brush. I hope you've reconnected with that inner artist and had a moment of, ''I created this, this wasn't here before and now it is, and it's all my doing.'' Pretty cool. I would love to see what you create in the class project gallery underneath the class where you can upload your own leaf works. You can also tag me in your work if you share it on Instagram. I love sharing my students' work there as well. Also, don't hesitate at all to reach out if you have any questions or even suggestion for future classes. I would love to know. I also have some other classes here on Skillshare and a common theme in them is to find ways to really enjoy your art practice, lowering that threshold to get started, getting to know your paints and brushes, and I'd love for you to check those out as well if you haven't already. Until we meet in another class, another time, enjoy your painting and I'll see you soon.
 Elise Aabakken, Voice Coach - Teacher - Performer