Transcripts
1. Introduction: Are you a beginner in watercolor and want to deep
dive into this amazing what do you find painting
water and reflection. Dante. Then this class is for you. Hi, I'm Chicago style, a business consultant by profession of watercolor
artists type fashion, and now a Skillshare teacher. I have been painting
with watercolors, but over the past few years now. And it's one of my most
favorite medium to work with. I love working with watercolors. Every artwork is
unique in its own way. Even if all of us follow
the same process, feet together, each one of the artwork would be
different and unique. I just loved the way how colors, reds with the flow of water
and creates the magic. I love painting different teams, like winter landscapes,
galaxies, clouds. But my most favorite is painting
watery and deflections. This was one of the
first things that I learned over time
with practice. And it's close to my heart. In this class, we will learn some of the basic
watercolor techniques, like wet on wet technique. Learn how to paint
watercolor again on medium and study the
different reflection anyone who wishes to learn
can take this class. The technique I explained
in depth and detail. And even a beginner can grasp. By the end of this,
we will be able to master the
techniques and apply it on the project for this class or any other
projects that you want to work. I'm super excited for you
to learn from this lab. Let's move on to
the next section. Understand the
technique to detail, and also look at the materials that we
require for this class.
2. Class Orientation/Materials Required: This class is divided
into two sections, techniques and the class project and other techniques sections. We will be learning wet-on-wet
to paint the gradient sky. We will learn to paint
the water ripples, which is again based on
wet-on-wet technique. And we will study
different forms of reflections on the
different types of water, bead, Stillwater or wavy. Learning these
techniques, we will apply the saving to
a class projects, which is again broken down
into smaller segments, is real-time, detailed
and easy to grasp. Now, before we move on to
the technique section, let's look at the materials that we require for this class. First is the paper. I would be using, Arches, 100% cotton, 300 GSM
paper for today's class. I have this paper pad with me. I will be using half of this
paper for the class project. For the technique section, I will be using this
block of Arches paper. This is again 300
GSM and 100% cotton. And I've taken one of these, making it as two sections to cover the techniques
for this class. You can paint on any brand
of paper that you have. But I would suggest
you go ahead with 100% cotton and 300 GSM paper. I understand as a
beginner, it's expensive, but it's better to
invest in people's first than on
brushes and colors. A good quality paper makes a lot of difference in the
outcome of the project. Moving onto brushes, I will
be using these four brushes. The largest one is
from brushstroke. It's a mop brush, size eight, and I will be using that to apply water layer to my paper. For the main painting, I will be using my silver
velvet size six brush from the welded prac CDs. For getting the minute details, I will be using my
Princeton long round brush in size four. It has a good tip. You can also use
a detailing brush for the minute details. This is again, for instance, size 12 by zero brush. So basically, you need
a large brush to apply water on medium-size brush
for the main painting. And our detailing brush to
adding the minute details. For the colors I will be using. Artists create watercolors
from different brands. I have here, Sinhalese, White Nights and
medulla machine. You can start with
whatever colors you have. I will share what
shades I will be using. Each of the class project
section highlights. You can either use a gouache or watercolor or even
a white gel pen. You can use whatever
is available for you. For mixing the colors. I will be using this palette. Next is, we would need
two jars of water. One is to apply clean
water to your paper, the other is to rinse
off your brushes. We would also need a tissue or a waist cloth to
wipe the brushes. And the last is the masking tape to tape down your paper
on a board or surface. As we would be working
with wet-on-wet technique and applying
multiple layers of water. This masking tape would
help the paper to not buckle and would also give crisp and clean
edges to your painting. Okay, so I hope you have
gathered all the materials. And now let's jump onto
the technique section.
3. Technique 1: Practicing Wet on Wet Gradient: Wet on wet is the most widely used technique
and it's my most favorite. I use this technique in almost 90 per cent
of my paintings. Wet on wet means you apply
wet colors on wet paper. That we break down that for you. By red colors, we mean, we activate our watercolors
by adding water to it. By wet paper, we mean we add a layer of
water to our paper. I'll be using this Arches
block and I'm just prepping the paper by adding masking
tapes on its edges. I just like to have crisp
edges to my painting. So just doing that. Now let me show you
how we wet the paper basically with the
brush in water and let the brushes soaked in water in and spread it all over
the paper like this. We do this multiple
times to make sure the whole of the paper is wet and we do not have
any waterproof. If you're not using
100% cotton paper, apply the layer of
water multiple times to keep your people wet for
a longer duration of pain. So my paper is ready. Knob here, I've taken some settling blue into my
palette. Very little money. Similarly, I will add water
to the color and activate it. Make sure when you add
water to your colors, the solution is not too watery. Now let's see what happens when we apply the paint
to this paper. See this. The colors automatically spread
as the paper is wet. This is one of the most
beautiful approaches to use watercolors. What we're gonna do is create a gradient which is
dark good at the top. And as we come down, the value of the color or
the shape becomes lighter, I'm applying the color to the
top of the paper and I come down blending the color in
a swift motion like this. As we come down, the
color consistency on the brush reduces and
we get a gradient, darker to lighter
shade of the color. Just make sure that you
move in one direction, top to bottom, so that
we have that gradient. If the gradient is not smooth, Let's take more color. And again, start
from top to bottom. In the similar manner. This process can be
repeated multiple times till you are very
satisfied with the gradient. This is how you can
create a perfect blend. We will use this technique
to paint the sky. So practice this
technique on your paper. It will also help you understand how long your
paper stays wet and how many layers of
water you need for the people to stay wet
for a longer duration of hope this lesson was helpful. In the next, we will learn techniques to paint
the water ripple.
4. Technique 2: Practicing Water Ripples: Repairs are always thicker and darker towards the eye
where we're standing. And lighter and thinner towards the horizon
or towards the end. Showing you some examples. As you can see, the ripples are darker
and thicker over here versus thinner and lighter
towards the horizon. Another example, darker
and thicker hair, lighter towards the horizon. This one gives the
perfect example of thicker and darker waves, ripples near the eye and
towards the horizon, they become lighter and thinner as another example of the same, thicker and darker near the eye and lighter as we move
towards the horizon. This is what we will try to
replicate in our painting. We will be using the wet-on-wet technique to create water
ripples for the project. I have my paper taped
down on the edges. And like we did in a
previous technique, will apply water to the paper. Move your brush across
the paper multiple times to make sure no
section of the paper, especially corners are left. Also make sure there are no water pools and we
have a uniform layer. Now let me take some
Sutherland blue on my palette. Now what we will do is
using the tissue paper. We would wipe the corners of the paper to remove any water. This is important, is once
your paper starts to dry, the water from the corners, move into the paper and
give a cauliflower effect. Okay, So we are now ready
and let's paint the ripples. I have wet the color
very slightly. We need thick consistency
of the color. Dab your brush on
the tissue paper so that the excess
water gets absorbed. As nearer to us, the ripples are
dark, good picker. And closer we would apply
thick and dark Stokes. Taking more colored, again, dabbing the paper to remove excess water and creating
the brushstrokes. Look at the brush movement. Press and release. Again. Press and release. Continue doing the same. Create waves data
close to each other. And as we move
towards the horizon, the waves become
thin and distinct. So just take a lighter shade of the color and release the
pressure from the brush. As we are working wet on wet
to get the ripple effect. The water content in your brush should be less than
that of the paper. Or in other words, the consistency of the colors to be thicker than the
water on the paper. If this is not done, then the colors would spread
and we would not get a defined repeating
the same process, darker strokes near to us. And as we move
towards the horizon, lighter and thinner strokes. As the paint spreads, the ripples tend to get blood. To avoid that from happening, we will use lifting
technique and remove the color from between the
repeats. We'll do that. Just clean your brush, dab on all the excess water
into the tissue paper. After that, just
move your brush to the area and lift
the color like this. Continue doing this from all the places where the birds might have
started to merge. To make the repeats
more prominent, I'm going to apply more
darker strokes at the bottom. You can apply as many
layers as you need. Just make sure your paper
has not started to dry. In case your paper
has started to dry, then the edges of the
strokes would not be smooth. The edges blurred and create a natural effect due to
the wetness of the paper. So make sure to
apply layers only till the time your
paper is wet enough. I'm here again washing
my brush to apply the lifting technique and remove some of the colors between
the blurred lines. This is how you can
create perfect ripples, which is darker and
thicker near the eye. And as we move
towards the horizon, it becomes thinner and lighter. Hope you enjoyed the lesson. In the next video, we will learn the different
techniques required. Paint, water, reflection.
5. Technique 3: Practicing Reflections: Let us understand how we can
create water reflections. Reflections can be off
go different ways. Maybe. Because of the
movement of water. Because the water is
still. In this lesson. We would learn both ways. Let me quickly show you
with some examples. Let me sketch a board first. And the board is
floating on the water. Now as the water is VB, the reflections would
be something like this. Whereas if we have Stillwater, the reflections would be the
exact opposite of the board. So here is the port. And as the water is still, the reflection would
be a mirror image. If the wavy section of the
board had these lines. The reflection
would be wavy two. Similarly, let's see how
reflections, or for a ball. In the baby's scenario, again, the reflection is wavy, whereas on the stillwater
it is a mirror image. Taking another example, let's see the reflection of a tree. The baby water reflection
would be something like this. And the stillwater would
be a mirror image. These reflection techniques
hold true for any object. B, trees, boats,
building, etcetera. Depending on the state of water, the reflections would
be either wavy. This was the last of
the technique section. From the next video onwards, we will start with
the class project.
6. Project: Sketching: Okay, so let's start with
the project for this class. Let's first tape down the
paper on a board or surface. I will be using this
writing pad as the board. And we'll be using
this masking tape. We will tape down
this paper like this on all the four edges. Make sure to run your fingers and see if
it's taped perfectly. So here we are ready
with that paper. Let's make the sketch. It's going to be a
very simple one. At about one-third of the paper. Let's make the horizon line. Above. This will be our
Sky Net sketch the boat. This will be the
front of art board. And as we sketch the urine, the width will be smaller as it's farther
from the eyesight. To get the perspective
effect into the sketch. Just adding some
details to the board. Good. Here's a rope
attached to our boot, so this will be our board. And as the water is wavy, the reflections will lie
somewhere at this site. With BB outline. We're ready with our sketch. You can take screenshot
of this scene or just stop the video here and sketch you bought
at your own pace. I'm just using the eraser to
lighten the pencil marks. So we're ready with our sketch. Let's move on to the next
section and paying this guy.
7. Project: Painting the Sky: We will be using the wet-on-wet technique
to paint the sky. Let's start by wetting the paper as shown in
the technique section. Let's take some time and apply an even coat of water
throughout the sky area. Be very careful
near the edges of the board and try not
to get watered on it. I already have serene
blue on my palette. Just adding some water
to it and activating it. Or k. Now, let's create a gradient with darker
value at the top, and it becomes lighter
as we move down. Move your brush top to bottom in a horizontal motion like this. In case you take more color, start again from the top so that we don't lose
the gradient effect. I'm just trying to get some
colored near the boat edges. Very lightly dabbing
my brush to remove any excess water and
just moving the brush, getting some color on
those empty whitespaces. So we are done with the sky. Let's wait for it to
dry and then move on to painting the water
ripples in the next section.
8. Project: Painting Water Ripples: Let's take a look at the
colors we need for this class. For ripples, we would
need turquoise green. Let me just take some of
it out on the palette. The next color is,
the color is blue. Next we need is viridian green. And the last one is indigo. So here I have all the colors
to move on the palette. Now, let's continue
with the painting. This will again be a
wet-on-wet technique. So let us take some water on
your brush and wet the area, leaving out the boat
and the reflections. Take your time and make sure an even coat of water is
applied to whole of the area. We might also have to go or the application multiple times so as to make sure the paper stays wet for a
longer duration of time. Okay, let's start
painting the repeats. I'm activating the
turquoise blue color by adding some water to it. Let the mixture B of
thick consistency. So here I am taking some color, dabbing the excess water
on a tissue paper. And as we load in the
technique section, we will now create the ripples. Darker and thicker, nearer to us and lighter as we
move to the horizon, as we will be using more than one color
to paint the ripples. Make sure you keep
some space empty. Like I'm doing here. Taking more darker,
turquoise, blue. Just keep on repeating the brush movement as
you can see on screen. Try to avoid painting
the reflection section. Okay, so here we are done with the turquoise blue triples. Now taking some turquoise green, fill in some of the white gaps. You can also paint over some of the blue strokes to get
the natural effect. Taking some more of the denser turquoise
green and reapplying it on top of some of the layers to get the distinguished
different strokes and colors. Now moving to the third
color, viridian green. And adding some strokes, especially near to
the reflection area. As you can see, the movement
of the brush remains same. The previous strokes that we did have bled and merged
with each other. And now, as the
paper has started to slightly dry and the colors
are not bleeding a lot. Let's again take some
of the turquoise, blue and a little of indigo and add some
of the watery boots. Now using the lifting technique, Let's take off some colors. This will give more prominent
effect to the reboots. Just adding fuel light
strokes near the horizon. So we are done with
water repeats. Let's wait for it to dry before we move on
to paint the boat.
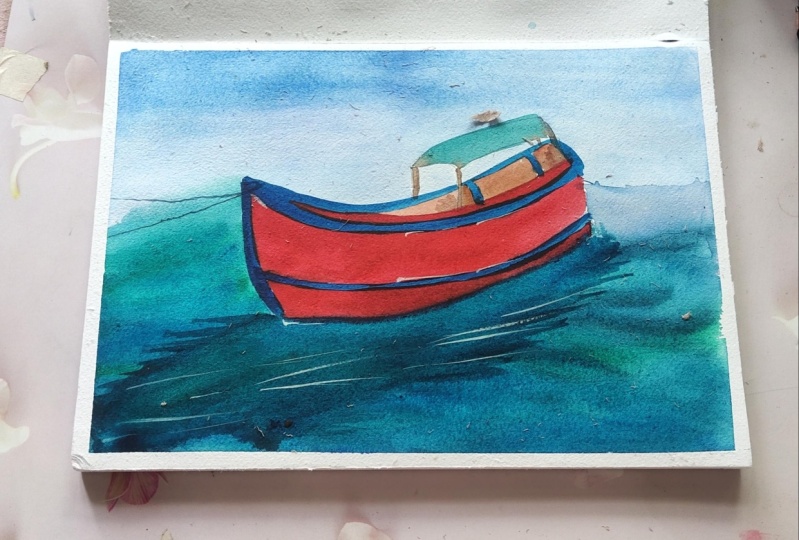
9. Project: Painting The Boat: Let's have look at the colors we are going to need
to paint the boat. First is permanent red. You can also use 1 million if
you don't have this shape. Next is burnt sienna. And then Scipio. If you don't have sepia, you can add little
pain screen to the burnt sienna and get
a darker shade of it. Now, as we are ready
with the colors, Let's start painting the boat. We will start with the
permanent red or vermilion red and paint the middle
boat area with it. I have zoomed in so you can clearly see how I'm
painting the boat. You can see I'm
being very careful not to get the red
color anywhere else. And you will paint
a flat wash up this tool whole of
the middle section. Similarly, we will paint the
below part of the board, flat wash of the red color. Now to bring some
depth to the board, we will apply very light shade
of burnt sienna on top of red in this section nearer to us and blend it
along with the red. So now I have taken
some burnt sienna and applied it on one-fourth
of the boot section. Once done, we
clearance the brush and take some red and blend
the burnt sienna with it. Just taking in some more
red and blending it all towards the end of the board so that we get a smooth blend. Okay, so we're done with
this section of the board. You can see the darker to lighter shade
blended beautifully. We will paint the interior part of the boat with burnt sienna. Once the boat is right, the lines we will use set
in blue as the first layer. And just like as we
did for the board, we would apply indigo and
blend it with the blue. Here I've applied the
sediment blue layer. I have applied indigo at the front end and blending
it with settle in blue. You can use a smaller
size brush or a detailing brush to get better while painting
this section of the book. Once the boat is
tried using sepia, Let's paint the block of foods, which is like the
seat of the board, as well as the routes of
the thing that we have. If you don't have sepia mix, a tinge of Payne's gray
to your bones sienna. This will give you a
darker shade similar to CAPM. For the cover. We will paint it
with a light shade of Payne's gray,
like a gradient. As you can see, I have covered half of
it with paints gray. And now using the water, I'll just create the gradient. Let's wait for it
to dry before we move on to paint
the reflections.
10. Project: Painting Reflections: For the reflections, we will
be using turquoise, green, turquoise blue, indigo, and a little
bit of viridian green. I have all the colors on
my palette except indigo. So let me just take some
more on my palette. For the deflections,
we are going to paint the part touching the boat with a mix of turquoise,
blue, and green. And as we move towards the
end of the deflections, we will darken it with indigo. Let me show you how
we will do this. Activating the turquoise,
green and blue. So I'm going with turquoise blue and painting euro to
the boat section. Now I'm cleaning
off my brush and applying water to the
reflection sections. This makes the turquoise
blue to spread, which is all okay. And now just applying
some strokes of viridian green to give some depth
to the reflections. Near the edges of reflection, we will use the indigo color. Those are to be darker
versus the reflection body. So applying indigo at
the ureter, reflections. You can see I'm just playing
with turquoise blue, turquoise green, and viridian green to get the
reflections body. And as we touch at the
end of the reflections, we make a belief
like structure with indigo continuing the same steps and building onto
the reflection area. Okay, so now let's just make the deflections
more prominent. For that, I'm going to use more indigo and extend the
deflections like this. We will do this
in all the sides. So we are done with
the reflections. We are almost done
with the painting. Let's wait for it to dry. And in the next section, we will just add in
the few final touches.
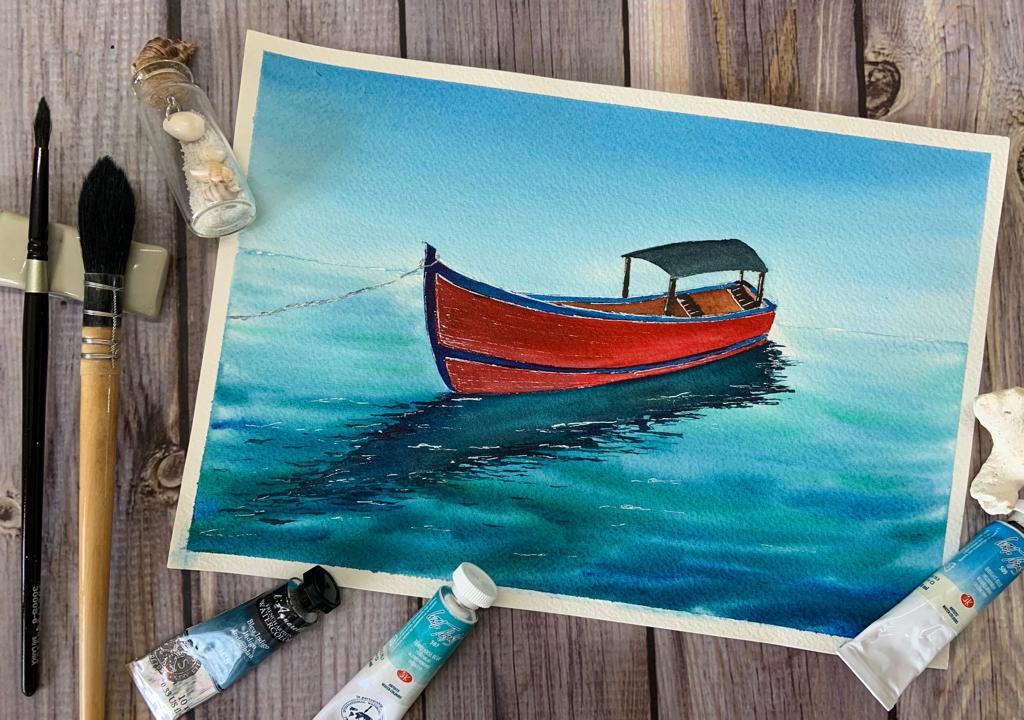
11. Project: Adding Highlights: For the final touches, Let's use white
gouache or mockup in whatever is
available with you. I will be using this marker pen and make the rope
connecting the boat. Not super visible, but you can use gouache to
have that effect. Let's also paint some highlights on the water and the boat. Like this. Make sure we
don't add too much of them. Just randomly add some
lines in the water. Next, adding some
highlights on the board. As the loop is not
quite visible. I'm just adding some
strokes of Payne's gray, very light shade to give
the depth to the rope. Adding just some additional
white highlights on the board body to get
that rustic look. Once your painting is dry, remove the masking tape
from the corner and at an angle to white the
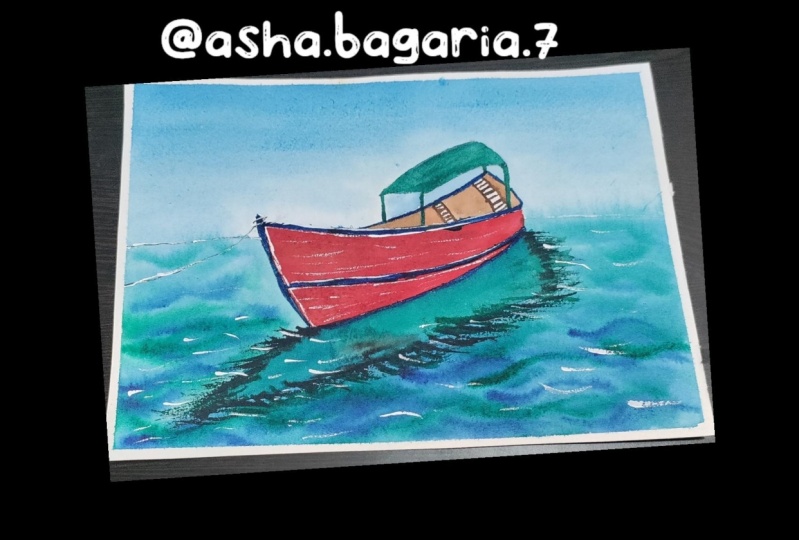
people from getting tone. Here is the final artwork. Look how beautiful it looks.
12. Conclusion: Congratulations on completing
the class project. I hope you all enjoyed the class and learn
something from it. We covered some of the important watercolor
techniques like wet on wet. We'll learn how to paint
water ripples and had an in-depth study of the
reflections and it's tight. You can apply these
techniques to paint different teams like
gradient skies, galaxies, or you will now also
be able to explore the different water bodies along with different
objects of reflections. We eat, trees, walls,
buildings, etc. For any questions and queries, please drop a note on
the discussion thread and I will respond to it. Also, do upload your
class projects. I would love to see
your creations. I hope you enjoyed the class as much as I loved
by creating this. Hope to see you soon. Bye-bye.
 Shalika Gupta, Watercolor Artist