Transcripts
1. Introduction: The autumn season all
around the world is a major transition season between the summer
and the winter. Lush, greenery of the summer
can be seen fading in the trees as the leaves
wilt willdlness. The weather every day is
a mix of mild sun and setting cold that brings about a pleasantry matched
by no other season. End of autumn brings in the magical time of
the year, winters. During this time, the landscape is covered in a blanket of snow, turning ordinary scenes
into captivating vistas. The beauty of both
these seasons. What I have tried to
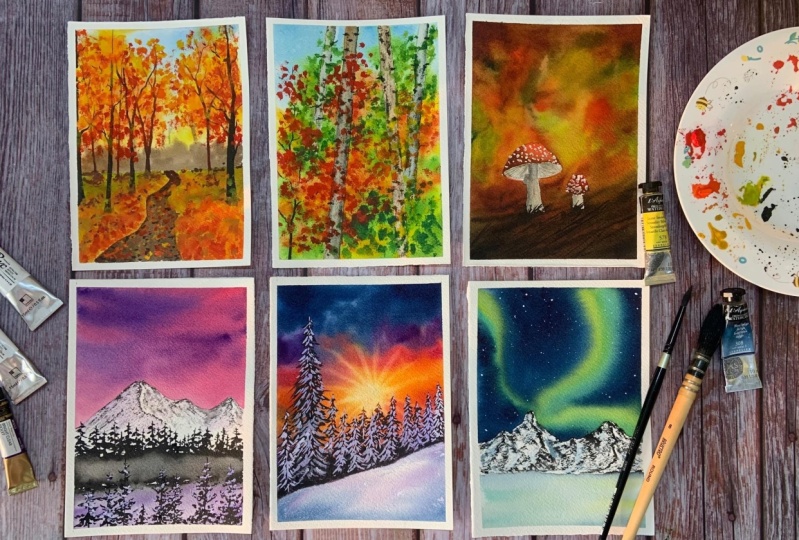
capture in this class. Hi everyone, I am Shaka, a business consultant, watercolor artist,
and art educator. In this class, we will
be capturing the essence of autumn and winter season
through watercolor paintings. We will learn the
art to paint on, wet paint, on detailed artworks. And also learn how
to use mask fluid, a mason tape to your advantage. Let's gather all the material as discussed in the next section
and get on to this journey. I am super excited for you to take this class and
paint these beauties.
2. Materials: Let us have a look
at the materials that we require for this class. First is the paper
I will be using, Archie's 300 GSM,
100% cotton paper. I have this paper pad with me. One sheet of this paper pad I cut into small four
sheets of paper. We will be using this for
painting the landscapes. Next are the colors. I will be using colors
from different brands. Furnace, class brands like PWC, Gill, Mission,
Seniliar, et cetera. You can go ahead and use any brand of color
that you want. Next we will be using
or white watercolor. Here I have used Winsor and Newton designer Gah
for this class. Moving on net other brushes, I will be using these three
brushes for the class. One is a large size mop brush to apply even coat of water. This is from the brand brustro. Next is a medium size brush, size six to paint
the landscapes. This is from the
brand silver velvet. Last is a detailing
brush of size two round brush from
the brand Princeton. Next is a board. I will be using this
board for one of the paintings to leverage the free flowing
nature of watercolors. Next is two jars of water. One to clean your
brushes and the other to apply even coat
of water onto the paper. Then we have masking flute. We'll be using the masking
fluid in one of the paintings. I'll be using it from
the brand seniliar. Along with this, I
will also be using an old brush to apply
the masking flute. Next is a masking tape. To tape down the paper onto the surface or onto the board. After that is a pencil eraser. Next is a palette. I will be using this
plate as a palette to take out colors and mix them. Last we need is a tissue paper or a
rough cloth. That's it. Gather all the materials
that you have and let's move to the next section to paint our first landscape.
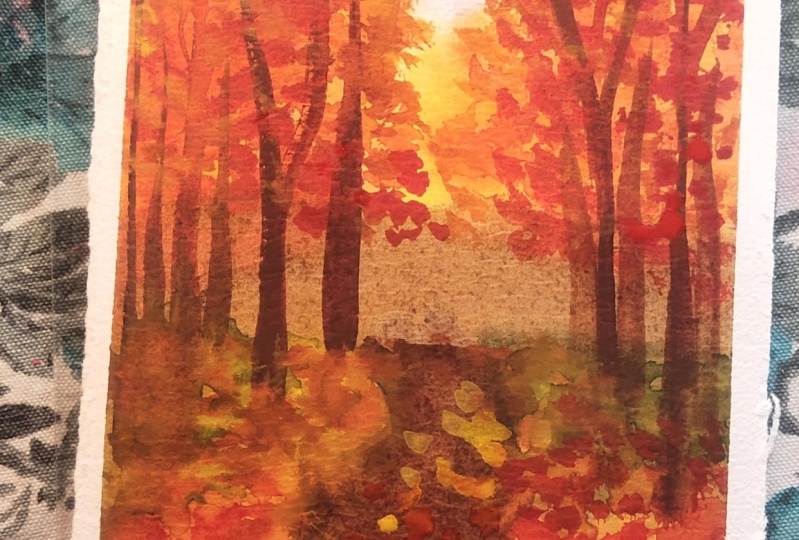
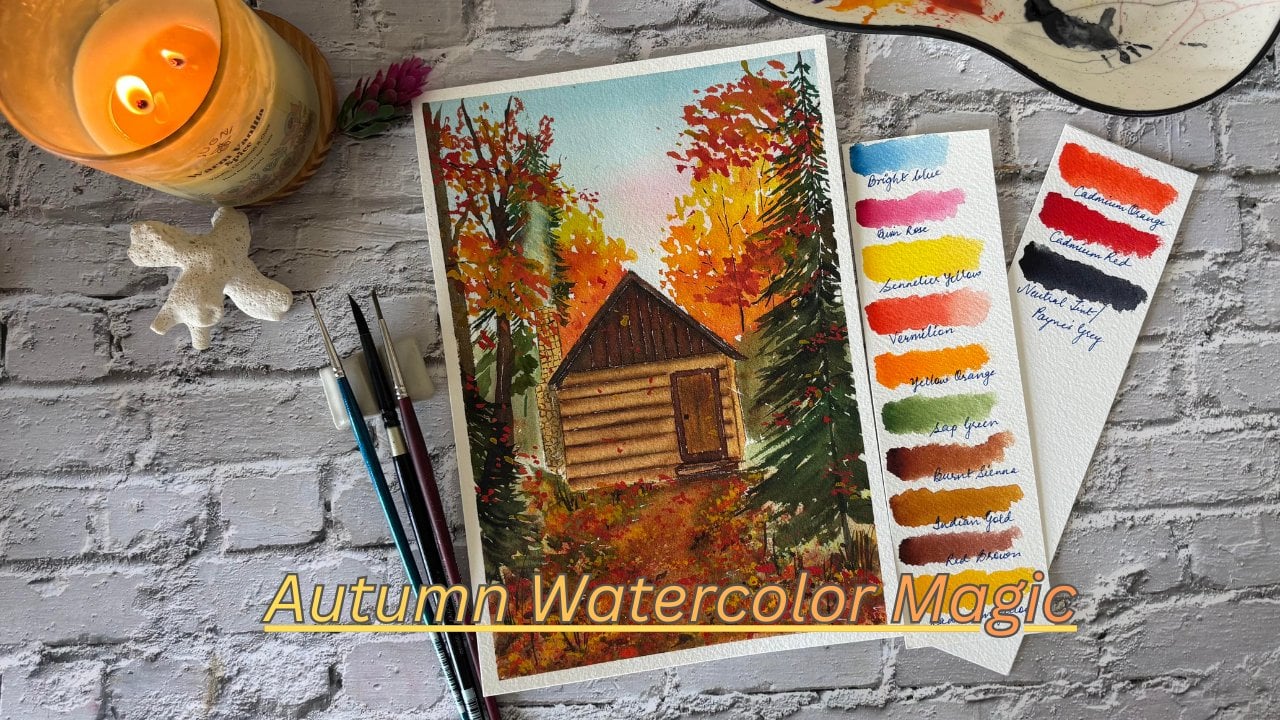
3. Autumn Landscape - 1: These are the colors we
require for this class. Okay, let's start here. I have my paper
taped on a surface. We will start with the sketch
for the painting somewhere. Two third, draw a
horizontal line. We have a curvy road and it is narrow near this line
and broader towards us, drawing out a few of the trees. Okay, so we are done
with the trees. That's a simple sketch for
this one using eraser, I'll make the graphite
marks lighter. Okay, So for the first layer we need cobalt blue.
I have it here. Next is Seneliar yellow, taking some out on the palette. Next, taking out permanent
yellow, deep or orange. Then we have burned Siena. Last we need is sapiaowaking
in the big brush. Let's supply even coat of water to the area above
the horizon line. Take time. In this step, we need to keep our paper
wet for a longer duration. And hence apply the even
coat of water generously. Now taking in cobalt blue
in a very diluted form, let's drop some of the color using a clean brush,
spread the color. Now dropping in India yellow, we will be showing the
background trees now. Now taking in permanent
yellow, deep or orange. Drop it on top of the yellow. Make sure you don't
cover up the whole of yellow and the blue that
we have already painted. Now for the bushes, we
will use Burn Siena Spa. You can use paints gray
as an alternative to Spa, showing you the color we
get once we mix them. Using this, in some places, just the burn Siena, we will paint the bushes. Dropping of burned Siena in some places gives
it a natural look. Using just the bigs
of Ena and Sapia, we'll give a flat look
to the background. Now before the background dries, let's drop in vermilion
to the trees. Again, don't cover the previous applied
colors completely. Now using spa and
almost nill water on the brush let supply strokes to depict the
branches of the trees. Now let's wait for this to dry. The paper has dried. To paint the ground, we will
additionally use leaf green, which can be made by mixing
sap green and lemon yellow. Olive green, which can be made by sap green plus burn sienna. Now using the medium size brush, let's supply the colors
starting with leaf green. Be careful while applying the color around the
border of the road. Next we apply olive green in some places. We also drop in the vermilion
and the yellow. Okay, just reapplying
and blending the colors. Let's wait for this to the
painting is right now, taken my small size
brush and burn Siena, we paint the background trees. For some of them
we add in tints of Sapa or just use Sapa as well. Let's take out the
next set of colors, which is cadmium red, orange, cadmium red, deep, and cadmium yellow for painting
the leaves of trees. Now I will be using this
Princeton brush that I have. Its edges have gone, and I use these to
paint the leaves. You can use any old brush
that you might have, starting with cadmium yellow
dropping in the color. As we are painting in layers, try to not cover the
background completely. Now going ahead
with cadmium orange and repeating the strokes, Okay, so switching to my small size brush and shades
of sapia and burnt sienna. Let's paint it, the
remaining trees as well. As you can see, the trees
are not all straight, they are curved, and they
have protruding branches. This gives a natural
effect to the trees. The tree trunks and
branches are ready. Now let's paint in the leaves using my
Princeton brush again, or any other old brush, starting with cadmium yellow. We paint in the leaves added strokes of
cadmium orange as well. Now taking and cadmium red, we repeat the strokes now Let's wait for this to dry before we paint
on the details. The painting has dried now
using in the burn sienna. Let's paint the
road starting with a lighter value and building on as we move away
from the horizon, add in streaks of
sapia or paints gray. Try to replicate
the brush strokes like I'm doing it right now. The strokes once
tried can be seen on the paper and it gives
the effect of the road using cadmium yellow. We added leaf like strokes to depict the fallen
leaves and grass. We continue with the
same order of yellow, cadmium, orange, and red, similarly adding the strokes on the other side of the road. Add in some of the
green strokes as well. Now, some of the leaves would have also
fallen on the road. So using the same colors, we will add spot like strokes starting
with cadmium orange. Let's paint the spots. Now add in cadmium yellow. So this is the beauty
of cadmium colors. The lighter shade
can be applied on a darker background as
they are opaque in nature. Now using CPA, adding
some dots on the road, this could be old leaves,
small rocks, anything. Just one last thing. I feel the horizon line to
be a little empty. Taking in burned Siena and just adding in
leaf like strokes. Dots. Okay. So we are done with the
first landscape. Let's wait for it to dry. The painting has dried. Let's peel off the masking tape. This is how the final
painting looks. I love the autumn
feels on this one.
4. Autumn Landscape - 2: These are the colors that
we require for this class. Okay. So my paper
is taped and ready. Now for this painting, we will use masking tape to mask area for
the birch trees. Here I have taken my masking
tape and using scissors. Let's try to cut the
tape into thin strips. As you can see, it's
a challenge here. Okay, finally I have
the two strips ready. Let me place the strip
here at the back. Now, for another set of strips, I'm just going to use my
paper cutter and make a and then tear off
the tape into two. This one is much
easier than a Caesar. This tree is also
behind and same way, let's place it here. The tree is somewhat
far and we can only see the top
of the tree below. It is going to be covered
with grass and leaves. These two trees
are at the front. Let's keep one here and
the other one here. Now using my large brush, let's apply an even
coat of clean water. Again, take time. At this step, we will be painting in layers, tapping off excess
water from the corners. Okay, let's take out Erlin blue. Now, using my medium
sized and cell in blue, let's drop in the diluted
color for the sky. Now, taking in sap green, let's drop in the diluted
color on the wet background. Now I have spent time to
wet the paper and that is why I can spend a few seconds
to squeeze out the colors. You can keep your colors
ready from the start itself. Now taking in senivia
yellow and drop the same overlapping the green color and the white spaces as well. Next, taking in
permanent yellow, deep drop in the colors like
we did for the other two. Now let's take on E million
and tap off the excess water. At this stage, your paper would have started
to dry a little, so make sure you don't apply super diluted
version of the color. Tapping off excess water helps in balancing the water
control on the paper. Apply this color at
only some places. I'm going to apply this
majorly for the front tree. Now, my paper is still wet. Just reapplying
some of the colors. If your paper has dried, please do not apply more color. If you want to have
another layer, let your paper dry
completely and then apply an even
coat of water again. And then work on reapplying the colors
with higher density using a tissue or rough cloth. Just wipe off the water or colors from the masking
tape on the trees. If they will have water, then this water will
seep into the paper once dried and cause
cauliflower effect. Now let's wait for
the paper to dry before we start
working on our trees. The paper has
dried. Let's remove the masking tape from this tree. Here we go, using indigo of
grey tinge, or paints gray. We will paint the trees on the left side of the tree. Apply a thin layer of the color using clean brush.
Let's blend this out now using spa. Drop the color at some places and blend it out
with a clean brush using small size
brush and indigo. Apply dry strokes to depict the roughness
of the tree drug. To achieve the dry brush stroke, take P color with
minimal water on your brush off the excess
water on the tissue, and then move the
brush on the paper. Let's also apply the spots with in ***** color on
the tree trunk. There are random spots that
we see on the birch trees. You can make them
the way you want, just highlighting the trunk. Now using sapia from
some of the spots, let's paint the short branches
protruding out the tree. Okay, So done now using
my old Princeton brush, which has gone rough, you can use any other old brush
data you may have. And if you use a new, apply the strokes
softly using sap green. Applying the strokes like
you see on the screen. These strokes are similar
to the glass project one. So basically we're trying to depict the foliage
around the birch trees now removing the masking
tape from the other tree. And again using indigo
or paint Scra we paint the trunk slide darker, shade along the left side and then blending out
with clean water. Now taking in small
brush, minimal water, and concentrated
paint, we work on the dry brush technique and create strokes on the tree trunk in some places, add in some spots some
protruding shot branches. Okay, now for the foliage, using the old brush
and sap green, let's start creating them. Strokes are similar to the way
we painted the first tree. Here, we will add
in more colors. So after green, let's take in sendal yellow and
apply the same. Now taking it permanent yellow, deep and repeating
the same strokes, you can also paint some foliage around the mask trees as well. On with this tree now taking off masking
tape from the third one. For this one, let's paint
the tree trunk differently. Taking in burn Siena
less a tinge of sapia, apply a diluted layer of
the same on the tree trunk. Now taking my medium
size brush and spa, adding the strokes on the trunk. Just add some dark and then blend it out
with clean brush. Now using small size brush
and concentrated CP color, adding the spots and
flu treating branches in some places, you can also
add in the dried re strokes. Okay, so now we're done
with the trunk for foliage. Again using my old brush
and same technique, starting with Sat pleat, we would apply the strokes. Adding in, sending the yellow. Now adding strokes of 1 million as well, using cadmium red,
apply similar strokes. Ok, so now removing the
tape from the last tree, using mix of burned
Siena and indigo. Apply darker shades to the left, and then lend it out
with clean water. Adding just bone, Siena as well, to give the different color
texture for the trunk. Drop an indigo in some
places to get the texture. Because of blending,
there is water. Let's wait for this
to D. We will add in the spots and plotting
branches after it dries, Okay, so the trunk has dried. Using small size brush and
Zpa ad in the details. And also adding the dre strokes. Going ahead with the foliage
in a similar manner, starting with cadmium red deep. Now adding in strokes
of cadium yellow, as this is the final
layer, adding it, cadmium colors pop out with
the background colors. Now using Spa and
small size brush, Let's add in a shot
tree at the corner. This area seems little empty, just adding some
branches here and there and some loose small
branches at the top. Okay, so we're done
with the painting. Let's wait for this to dry, removing the masking tape. Now this looks so beautiful, I just loved it. Hope you all enjoyed this class. Next would be the last one
for the autumn season.
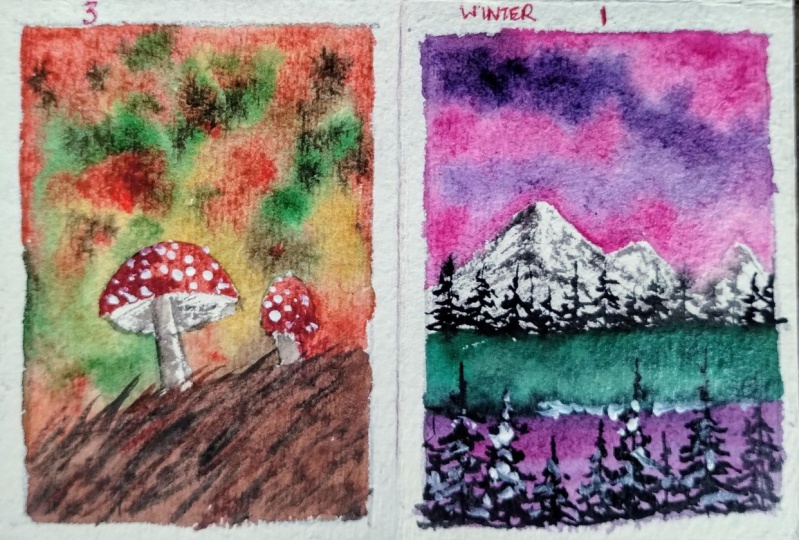
5. Autumn Landscape - 3: These are the colors required
for this class project. Okay, so I have
taped out my paper, now let's sketch
out the mushrooms. The big one, we'll
sketch towards the left. Now let's sketch
the smaller one. Okay, done just sketching
out some leaves, outlines, you get
skip this step. Now, the sketch is ready. In this class, we will mask the mushroom area with
the masking fruit. I have senilia masking fruit
here using my old brush. I'll just take out
some on this lid, adding in few drops of
water to dilute it. And then let's apply the
same to our mushrooms. Now here you can apply the fluid to only
the border areas, but I usually like
to apply it across the surface just in
case by mistake, some color flows in. Okay, so let's wait for
the masking clue to dry completely before
we start the project. Now let's start painting the background using
my large size. More brush and clean water. I will apply an even
layer on the paper. Take time on this
step and ensure your paper is wet across
all corners and edges. Now starting with
Senilar yellow, let's paint the background. We apply the color
at some places. Now taking in E million, we continue with a background next, using burnt sienna. Let's darken the upper
corners of the paper. Let's also apply the same at the bottom of
the paper as well. This is the ground, we will
paint it with earthen colors. Now let's apply leaf green. Adding in another
shade of green sap. Green. Now adding in diluted version of neutral tint or paints gray to the
front of the ground. This brings out more depth. You can also add in a mix of burn sienna and neutral tint. Trying to build up the
background with mora for mullin, burnt sienna, seniliar,
yellow and green. Now my paper has started to dry. I'll wait for it
to dry completely and then work on the second
layer for the background. Okay. So the paper has tried reapplying
even coat of water. You can see I'm
applying the water very lightly as I don't want to
disturb the background color. Now, reapplying the same colors, again starting with burn CNA, using sapia or neutral trint. Try to depict the
branches of the trees. Adding in Vobillan to
depict the leaves, you can play around
with the colors that we had used previously and added to create more depth to the background as well
as the front ground. Now for the front ground
using neutral tint or paint, scray added strokes depicting the fallen branches,
twigs, et cetera now using clean brush. Lift off some color
from the background to give effect of highlights
or lighter shades. Every time you pick up color, wash off your brush,
dab off excess water, and then lift off the color. Now let's wait for this to try before we paint
in the mushrooms. The painting has tried removing the masking
fruit from the mushrooms. Now because of masking fluid, the sketch marks
have got removed, just adding some rough
sketch on the mushroom. Now on mushrooms, we have white spots again
using masking fluid. Adding the drops again, Let's wait for this to dry and then we will paint
on the mushrooms using vermillion paint, a
flat wash on the mushroom, and then using burn
sienna or paints gray. Adding the shadow blended out with the vermillion. Similarly for the
other mushroom, paint a flat wash
million and then add in shadows using
paint sky or burn Siena while the top of
the mushroom dries Using diluted neutral
tint or paints gray. Lets paint in the mushroom stem applying darker shade
on the left and then using green water
to just blend it out. Similarly paint in the
inside of the mushroom. Now painting the stem of
the other mushroom as well. The mushroom top is right. Using tissue, lets remove
the masking fluid. I'm already loving this one now using small size brush
and to down neutral tint. Adding the lines, these are the lines which
we see in the mushroom adding in more debt. Now on the white
spots, just drop it. Neutral tint or paints
gray and blend it out using the same small size
brush and neutral tint. Adding the strokes like you see, this would be the twigs and branches that would
be on the ground. Okay, let me just darken
this mushroom lines. Okay, so we are done. Let's just wait for this to try. The painting has tried. Let's remove the masting table. This is the last
autumn painting, and I just love this one. From the next class project, we will start with the
winter themed ones.
6. Winter Landscape - 1: These are the colors that we
will use for this landscape. I have my paper taped
on the surface. Let's work on the sketch now. It's going to be a simple one with just the mountains
on the two third of the page separate the mountain with the zigzag line like
you see on the screen. Now using large size brush, let's supply even
coat of clean water on the sky area
above the mountains. Now using a medium
sized and quin red, let's start painting the sky. You can also use crimson
red as an alternate color. Now let's take in the violet
and add it to the sky. You can add in the strokes and blend the two colors easily. Quin rose or crimson
blends well with violet using the two colors. Alternatively, add
in the strokes and blend the sky till
you are happy with it. Add in darker tones
of the two colors. Add the darker tone on the top, and as you come down
towards the mountain, have the lighter tone. Okay, we are done with the sky. Let's wait for this to dry. Now, the sky has dried. Doesn't it look gorgeous
now for the mountains, we will have the
reflection of the sky now, taking in diluted violet
and almost dry brush. Let's add in the
strokes like you see. Remember we made a zigzag line. Our strokes will be
in the direction from the line starting
with the left. You see the strokes
I am making is somewhat flowing down
from the curve line. Similarly on the right paint
it downwards from the curve. You can see I am using super diluted version
of paint here. Remember to dab off excess water before you touch
your paper with the brush. Now for the other
mountain, similarly, the brush movements
will be left from the curve and opposite
for the right side. The mountain here
looks super short. I am just adding
the violet strokes, similar to how we painted. Okay, let this dry. Now, using the small
brush and black color, we will add in details
to the mountain. The snow capped mountains has
rocks along with the snow. With the black color we
will depict the rocks, use very less water. Dab off the aces on a tissue or cloth and then move the
brush across the paper. You will get the
dry brush strokes, highlight the curve
line with black color. Continue with the same technique for the mountains across. Now to add in more depth, again using diluted volt. Add in strokes for
the mountains. It's okay if some of them
are on top of black. Play around with black and wallet to shape
up your mountain. Now for the trees using
the small size brush, draw a vertical line with black. And then paint
horizontal small strokes to depict the leaves towards the bottom.
Using medium size brush, add in thicker leaves. Repeat it to get as
many trees as you want. Now once the trees are
done and still wet, using the medium size brush, spread the color
from the middle of the trees like you
see on screen. Using the lifting technique, we are going to get
the effect of mist. The mist is somewhat
between the trees, Clean the brush of excess water, and move the brush horizontally
across all the trees. Lift off the color.
Repeat the step till you get the misty
effect in your trees. Okay, so done now
for the front crown. Using my large size brush, I will just apply
even coat of water. Wipe off excess water from the corners using the
medium size brush, adding strokes of
violet and black. The mist area, as you can see, is again covered in black, flowing in from the trees. Taking the clean brush, again lifting off the color, adding more of violet
to the ground. Let us wait for this to dry before we paint on
the front trees. Okay, so the paper
has dried now. Using my small size
brush and black. Let's paint in the front trees. The method remains the same. Vertical line and then horizontal strokes
depicting the leaves. You can paint them
anyway you like, together or in some distance. Okay, so it's a snowy landscape. Let's add some
snow to the trees. Here I am using white quash. You can use in white
watercolor as well. Mix in the white with violet, dab off excess water, and then add dot like
strokes on the trees, adding in more of white
to get the snow effect. You can also add in just
white in some places. Our final painting is ready. Let's wait for this to okay, so the painting has tried
taking off the masting tape. Now this is the first winter landscape. Hope you all liked it.
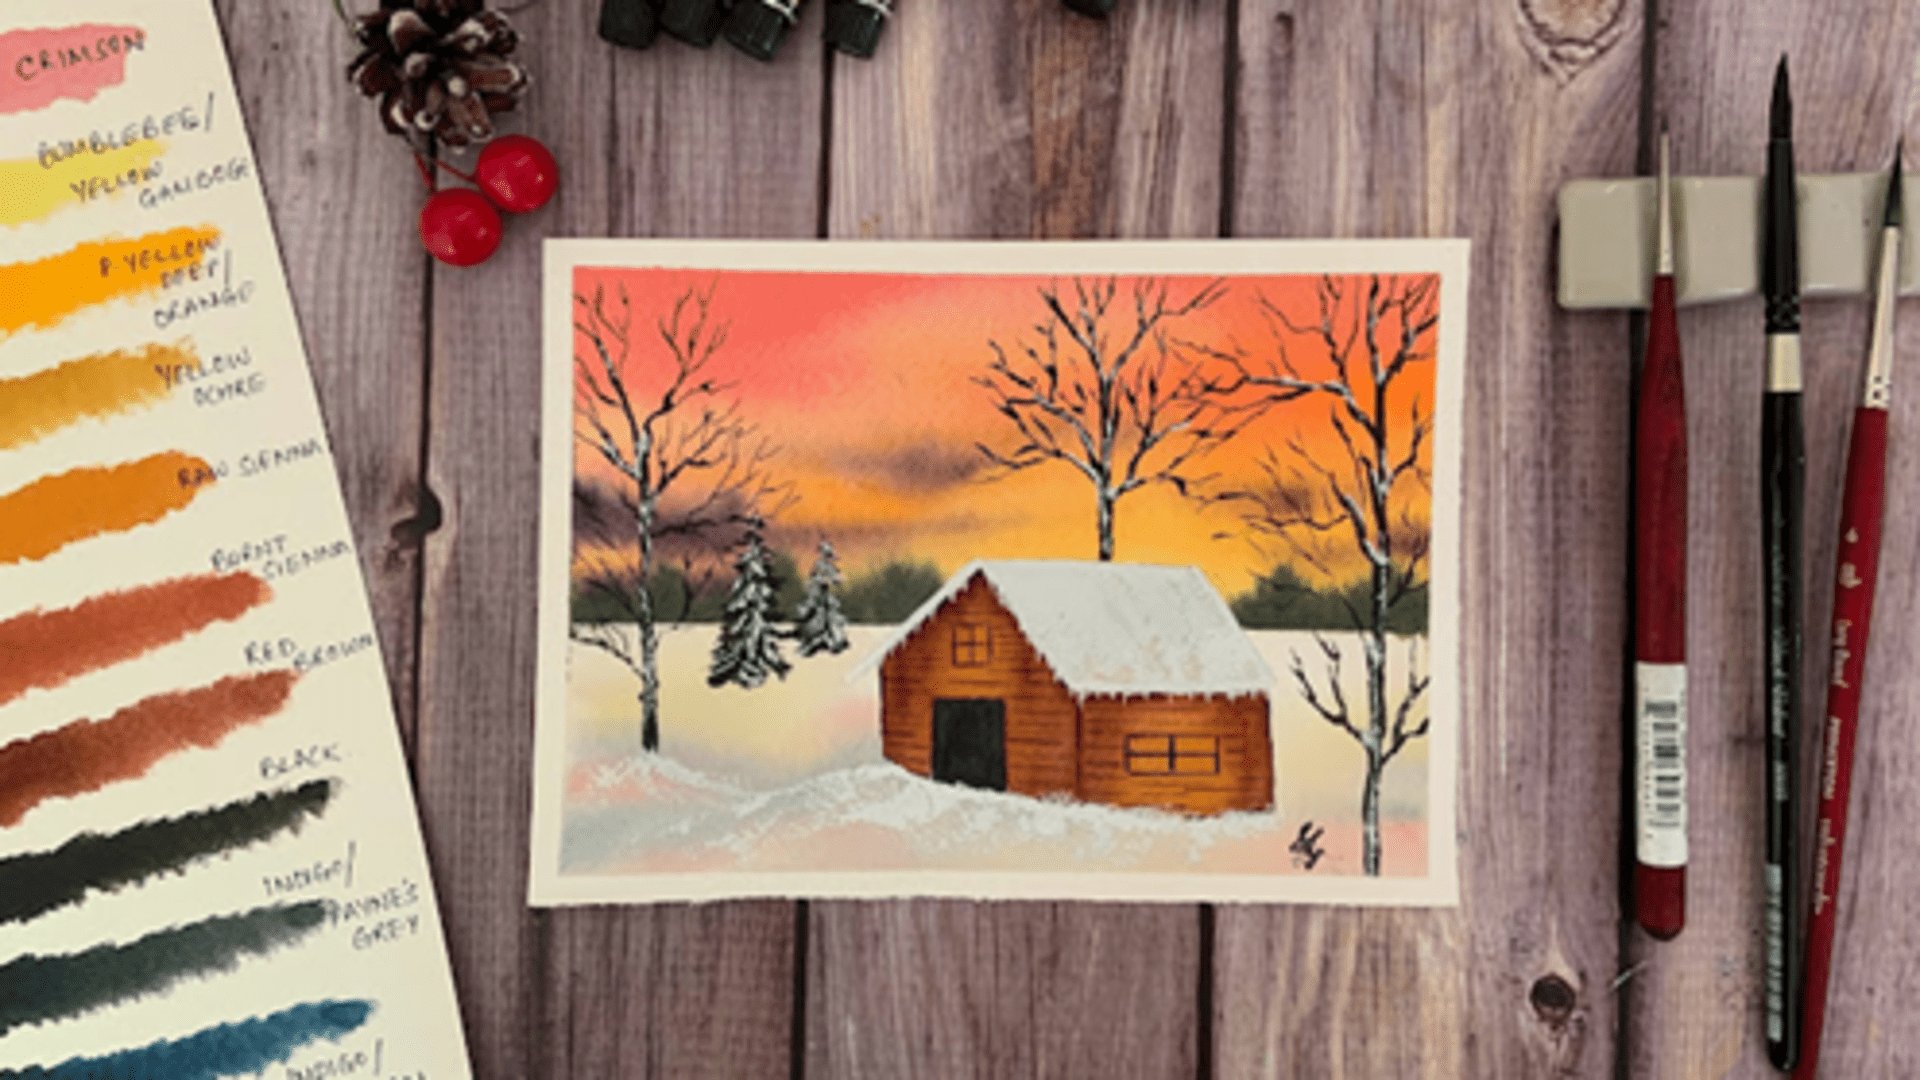
7. Winter Landscape - 2: These are the colors that we
will use for this landscape. I have my paper taped
here on the surface. Let's work on this sketch now. It's going to be a simple
one with just the slant. Take horizon line now
using large size brush, Let's apply even coat of
clean water on the sky area. Wipe off the corner of the paper bit tissue or cloth
to remove the excess water. Starting with Senillo yellow, apply the color to
the bit of the sky. Next, take in permanent yellow, deep or orange, and apply
it below the yellow. Apply some of this to the
upper of the yellow as well. Now take in bright,
clear violet. And apply it, as
you see on screen, above the slanting line and below the yellow orange applied next, take in quin
rose or crimson and apply it near the
edge of yellow and volet. Crimson will be
the blending color between the two shades. Similarly apply Pinrose or crimson at the top of yellow
as well, and blend out. Now take in bal blue and paint the top of
the paper with it. Blue when mixed
with pin rose gives violet which works
perfectly for a background. Repeat the color and increase the density to get older
and brighter output. Reapplying yellow. Now permanent yellow,
deep or orange. Similarly, reapply the
quin rose or crimson to darken the blue section. Mix a little indigo
with blue and reapply Play around with the colors
as you see on screen, till you are happy
with your sky. Work only till your
paper stays wet. If your paper has
started to dry, let it dry, completely, reapply the even coat of water, and then continue
to work on the sky. Now clean your brush, dab off excess water and then lift
off colors from some places. Preferably where
two colors meet. This gives a shadow and light
effect. Continue to do so. In some places I'm just adding in some
dark indigo shades in the sky to darken
the blue section. In some places, this
is an optional step. Now use clean brush, dab off excess water, and let's lift off
color to depict the sun rays clean off your brush. Every time you lift
off the color, move across the same area. Again, As you can see, some of the color has flown
into the area where you had lifted the color of initially
as the paper is still wet. This will happen, repeat
this step till you see very less or almost nil color
flowing into the ray area. Here I am just increasing
the round area a little bit, adding more rays by lifting off streaks between
the existing ones. Okay, so I think these
are enough rays. Let's wait for this to dry. Paper has dried. Taken ivory, black, and small size
brush to paint trees. Make a vertical line and add in small horizontal
strokes depicting the leaves thinner at the top, thicker at the bottom. Paint in as many
trees as you want. Now the sun rays will fall
in some of these trees. So painting the leaves
of such trees with Burn Siena randomly in some areas which are
in line with the rays, paint the leaves in burn sienna. Continue painting the trees in a similar manner with a mix
of black and burnt sienna. With the same concept, paint trees of different sizes. Okay, so we are almost done. Let me just add in
one more tree here. Okay, now using the
large size press, let's supply even coat of
water on the area below. This is the snow covered area. We will add in
streaks of sky color, mainly violet and
indigo as reflection, adding the darker
tones in the corners. Okay, so now we're
done with the ground. Let's wait for this to dry before we add in
snow on the trees. Now take in white quash, a white water color
to paint the snow. I have mixed a very
little amount of boil it similar to the leaf stroke. Apply the white on the trees, adding for all the trees. Okay, so in between the
trees near the ground, I will just add in more
of black to depict that there are trees at the background which
is not visible, but it's at the back. Adding some finals, no touches on the ground using the white color, no water. Adding some brush strokes. This is the dry brush stroke. Now let's wait for this to dry before we peel off
the masking tape. The painting has dried,
removing the masking table. This is the final look. Doesn't this look magical?
8. Conclusion: Here we are at the
end of this journey. We navigated from
autumn to winter through these six
wonderful landscapes. Hope you all enjoyed this class and learned
something from it. I would greatly appreciate if you could leave a
review feedback for me. Also do upload your class project on
the discussion forum. I would love to have a look. And if you upload on
Instagram, do tag me. I go by the handle at the rate. Charles Chronicles. Till then, bye bye. Happy painting.
 Shalika Gupta, Watercolor Artist