Transcripts
1. Introduction: [MUSIC] Do you know what soap bubbles and cookie
cutters have in common? Right, you can use
them to make art. Hi, my name is Cornelia. I'm from Austria and I have a background in graphic design. Recently, I pivoted to becoming a full-time abstract artists
and online educator only. When I'm teaching, I'm most
passionate about using everyday materials to make
art fun and accessible. In this class, I'll show you an amazing technique
that you can use to create finished
designs for greeting cards, affirmation cards, or
pieces of wall art. Working with soap bubbles is
both playful and relaxing. It helps you to unwind, focus on the process, and embrace happy accidents. I've already shown the basics in one of my previous classes, but this time we'll
take it one step further by giving the
bubbles constraints. After mixing soap,
paint and water, we'll practice different ways of getting the bubbles to
print on the paper. Then we'll use cookie
cutters to give them form and round off the composition with a few splatters and spots. Finally, we'll add an inspirational quote using
an image transfer technique. At the end of this class, you will have a
finished card that you can frame or use as
a greeting card. You could even digitize
your creations and use elements for other designs like, for example, patterns. What I love about this technique is that it's so approachable. You only need a straw, dish soap, cookie cutters,
paints, and paper. I've had the best results with liquid watercolor
and photo paper, but I've also tried
other paints and papers. This class is great
for beginners and anyone interested in
mixed media techniques. What are you waiting for? Let's get started and
make some bubble art. I'm excited to see
you in class. [MUSIC]
2. Class Project: [MUSIC] Welcome to class. It's good to have you. This is a short
project-oriented class where we will learn two
mix media techniques: soap bubble texture
and image transfer. We will not be going
into any detail concerning color
schemes or composition. As a class project, you will create a card
with a greeting or an inspirational quote where you can apply the
learning techniques. Playing with colored
soap bubbles is something I absolutely enjoy. It puts you in that childlike, playful state of mind, that is so good for
your creativity. I know it can be annoying
if you can't get the paint-soap mixture to work for you the first
time you try it, but I assure you once
you get the hang of it, it's a really fascinating
and also relaxing technique. Now, let me give you
a short overview. We will start by mixing dish soap,
paint and water. I'm using liquid watercolors as they give the best results. Then we'll take a
look at how to get the bubble texture
onto the paper. First, we'll drop a piece of paper on top of our bubbles. Then we'll transfer them with a plastic card and the straw. Lastly, we'll make them
directly on the paper. Once you feel confident
with your materials, you can already start
the class project. We'll use cookie cutters as a barrier to constrain
the soap foam. As a contrast to the
constraint form, you can add a few
random splatters and spots to round
off the design. Finally, we'll add an
inspirational quote using an image
transfer technique. You will need to print
out the template I've provided or
design your own. Since the bubbles need
a few hours to dry, it would be great if you can
find a small workspace where you can leave your materials and let them dry undisturbed. For your class project, please upload at
least one image of your finished card or cards. To create a class project, select the menu
Project and resources, and click on the green
"Create Project" button. It is important to upload a cover image and
enter a project title. Then you can add the same or another image in the
project description area. There, it will not be cropped
but shown in full size. Don't forget to write a few
words about your project. Mention what you
enjoyed the most or what you struggled with. If you would like me to
give you detailed feedback, make sure to ask for it here. Finally, you click
the "Publish" button. Forgot something? No worries. You can edit and update your project at any time. Before you get started take
a few minutes to watch the next video where I'll talk about the different
material choices you have. It might be that you have materials already at
home that you can use. See you in the next
lesson. [MUSIC]
3. Get Your Materials Ready: [MUSIC] Let's have
a look at what you need for this project. You don't need everything
you see on my table, but it's a selection of
different materials that work. The first thing
you need is soap. This is normal dish soap. I have tried liquid
hand soap as well, but sometimes it doesn't work. Maybe it has some kind of
moisturizer in it, or it's the pH level
that's good for your skin but bad for making
bubbles, I don't know. Dish washing liquid is
definitely the best choice. From my experience,
watercolors work the best. They are available in liquid
form, in pans and in tubes, but you can also use gouache, acrylics, drawing
ink, or Indian ink. The later two just differ
in the type of binder. The next thing you need
are cookie cutters. Maybe you have them at home
already. If you don't, I guess you can get very
cheap ones in dollar stores, but the most economic
version is to cut up a yogurt
container like that. You also need a bit of water, and I have an eyedropper
tool to get the water out, but this is totally optional. Then you will need a brush, and a plastic spoon, a plastic card, or anything
that doesn't absorb water. It also doesn't hurt
to have a piece of kitchen paper to
wipe things off. We also need straws. If you want, you can use a
needle to poke some holes. This helps a little bit against getting your mouth full of paint, if you accidentally suck
in instead of blowing out, but it just reduces the
amount of liquid coming up. If you're doing this
with small kids, make sure to use non-toxic materials and punch a lot of holes into the straw. If you want to do
an image transfer like I did on this card, you need to be able to print
out the template somewhere. Laser prints or
copies work the best. You also need a pair of
scissors to cut out the quote, and some kind of glue to adhere
it to your card. Acrylic mediums work
very well for this. They are basically the
binder of acrylic paints, and are available in
matte and glossy finish, but you can also use white
glue or school glue, which is chemically a PVA glue. It's white, but dries transparent
with a glossy finish, and it works as well. Now, all we're really
missing is the paper, and that is really
the challenge in connection with the
different paints. I've had the best results
with photo paper. It really has consistently worked best with
all types of paint. I use a high-gloss
250 GSM photo paper for the inkjet printer. It has exactly the
properties we need. We want the paper
to ink up quickly, and at the same time
keep the color from soaking into the depth
and bleeding as a result. Another type of paper that works is glossy laser printer paper, which is a bit coated and keeps
the paint on the surface. It works pretty well
most of the time. Strangely, it didn't work with the liquid watercolor
on this page. Probably it was just too wet. On uncoated laser printer paper, you can see that the inks and the liquid watercolor
bleed like crazy, and you don't get
any bubble texture, but gouache and watercolor
from pans work pretty well. You can also use
watercolor paper. I was a bit surprised that the most expensive watercolor
paper I have at home, which is 100 percent cotton, hardly worked at all. It soaked up the
paint pretty fast, which resulted in a
very blurry effect that might be great for
watercolor painting, but not for this technique. Here you can see three inexpensive watercolor
papers that I've tried. Depending on the paint, the results were quite
different on each paper, but one of those
really stood out as it worked very well with
all of the paints. It is from the own brand of a European art store
called boesner, and it shows off
that you can get great results on a small budget. Last but not least, you need a dish or a small container for your
soap and paint mixture. I use these recycled
take-away containers, because they come with a lid and allow me to keep the
paint for a few days. You also want it to be rather
flat so that the bubbles can come up over the top
where you can scoop them up. Go and grab your materials and we'll meet again in the
next lesson. [MUSIC]
4. Prepare the Mixture: To make our bubble paint, we need a spurt of
dish soap and paint. I'm using about 20 drops
of liquid watercolor, which is about the same
amount as dish soap. You really want to start to mix just a small amount because if you don't get the
proportions right, you can easily
adjust the mixture. Now, I'm thoroughly mixing
the paint with the dish soap. This step is
especially important when you are using less
liquid paints like acrylics because otherwise
you would get lumps when adding the water. Once you have a smooth mix, you want to double
the amount of liquid you have in your container by adding the same
amount of water. The approximate recipe
is one part paint, one parts soap, and
two parts water. That's it already, so let's move on to practicing bubble
blowing techniques.
5. Practise Bubble Transfer Techniques: [MUSIC] Some bubbles are always popping and making splatters. So it's a good idea to cover your working surface and protect your clothing before
you start blowing. Now let's dip the straw into the mixture and start blowing. You don't want to blow
with all your might, but control your breath. If you are getting
bubbles that are somewhat stable and don't
pop immediately, you have gotten
the mixture right. You can even move your
wet straw through them in a stirring motion
to make them smaller. If you had too little dish soap, you would not get
such nice bubbles or they would pop very fast. On the contrary, if you
have too much dish soap, you will only notice later on
because it will take longer to dry and your artwork might
even stay a bit sticky. How to get the bubbles
to print onto the paper. Once the bubbles come over
the top of the container, you can just drop a piece of paper on top to make a print. This is also a great way to test the brightness of your
colors because you can immediately see how a thin layer of bubbles will end up looking. If the result is too light, you can now add more
paint to your mixture. The second way to
do it is to use a plastic card or
anything smooth, non-water absorbent to scoop up some bubbles and transfer
them to your paper. Bubbles pop when you're touching
them with something dry. You can dip the plastic
into water first, but after the first attempt
of picking up some bubbles, it will be coated in
soap and water anyway. Now, you have to figure out
how to slide the bubbles onto the paper with the help of
the spoon or your straw. Once the bubbles are touching the paper and I'm
moving them around, you can see that they
won't leave an exact mark. So if you want to
clear edges and even white spaces in-between, you don't want to move them around once they have
touched the paper. Obviously, you don't have
complete control over that. Sometimes it also helps
to stir up the mixture, especially with gouache
and acrylic paints, because pigments tend to sink to the ground and the bubbles
become less colorful. The third method is to blow the bubbles directly
onto the paper. Basically, it's the same
thing you did as a kid. You are trying to
get a thin layer of soap over the opening
of your straw. Now you can control
the placement and size of the bubbles
to a certain extent. The bubble either
built on the tip of your straw and drops onto the paper by itself or you can make it first
and then put it down, which can give you a
slightly different result. In this case, you get
more color in the middle. You can also start blowing the bubble very
close to the paper so that it sits on the paper
and builds a growing dome, and you can even draw in your breath again
to make it smaller. This is a matter of
controlling your breath. But it's a very playful
and relaxing technique. Lastly, try to exhale in a short burst to
make some splatters. Now that's really quite
unpredictable. Finally, you can also
add a second color, but be aware that the longer you work on a piece and
the wetter it becomes, the less defined edges you will get as the bubbles are sliding around quite
a bit. [MUSIC]
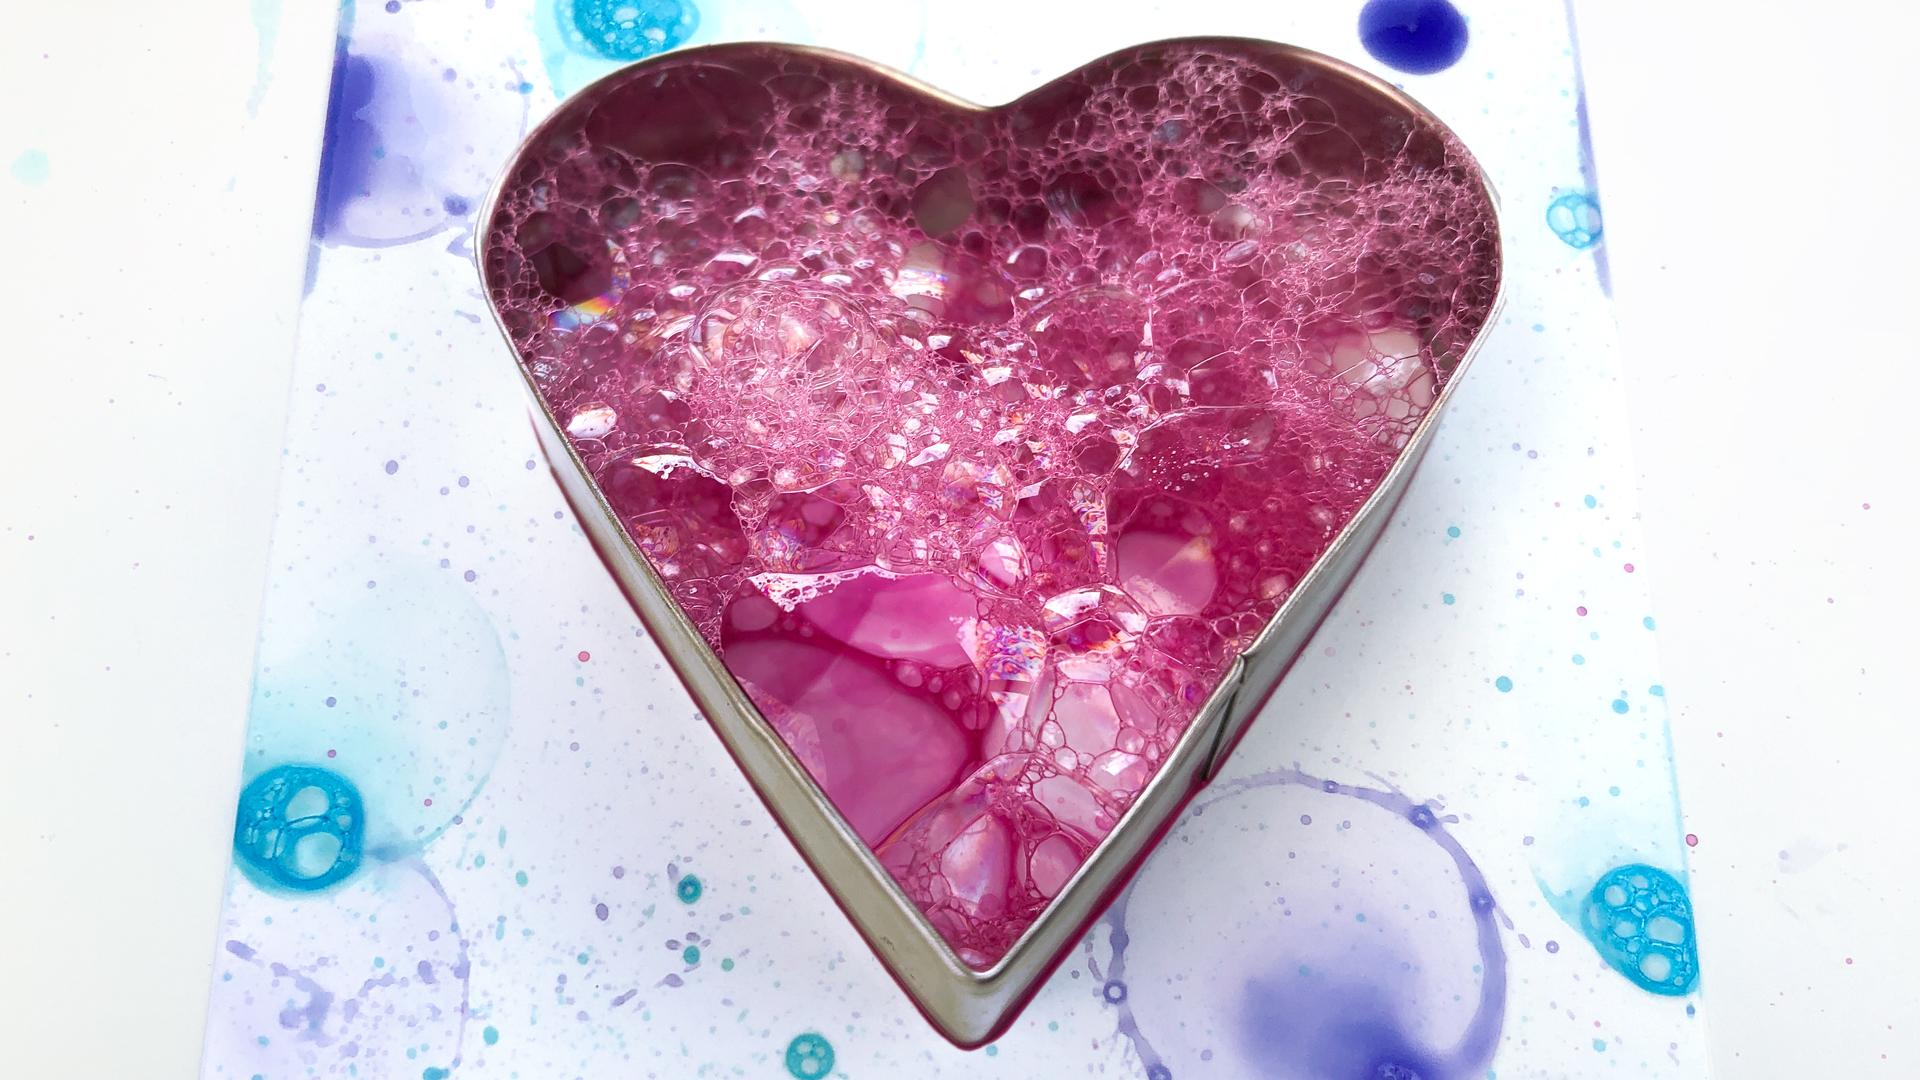
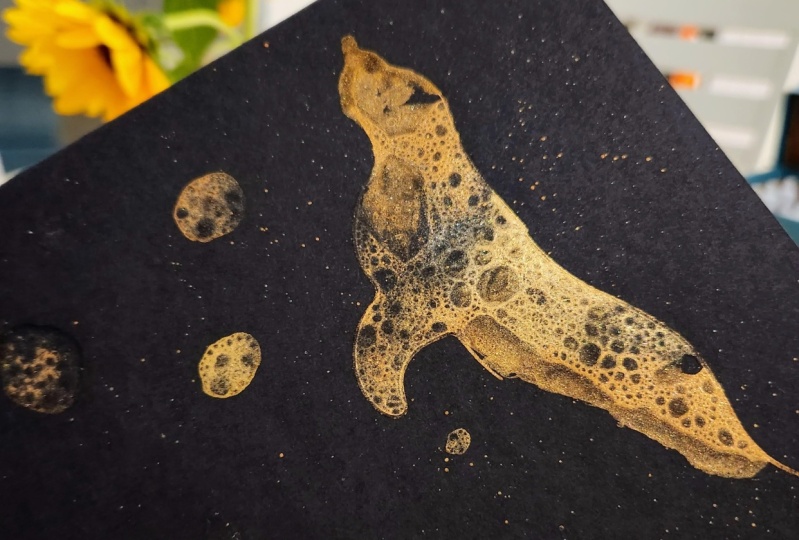
6. Control the Shape of the Texture: Now, it's show time for
the cookie cutters. We will use them to control
the shape of the bubbles, while still generating
the bubble texture. I'm using liquid watercolor
and photo paper. First, we'll place a cookie cutter in the
upper two thirds of the paper because we
still want to have some room for the text element. Once you have your
bubbles ready, you can fill them into the
form of the cookie cutter. At first, they tend
to pop where they touch the form because
it is still dry. I'm trying to get a fairly
thin layer of bubbles and not move them around
too much in the process. The more layers of bubbles there are on top of each other, the denser and darker
the result will be. If the layer of the
foam is very thick, the top layers are preventing the bottom layers from drying. As a result, the bubbles
touching the paper will slip often and
change position when bubbles in the upper
layers burst and you will therefore not
get very clear edges. With photo paper,
you'll still get some texture even with
a thick layer of foam. But generally, the result
will be darker and denser. When using paper
that doesn't absorb the color as quickly
as photo paper, it might happen
that you hardly get any bubble texture if the
bubbles move around very often. You can also
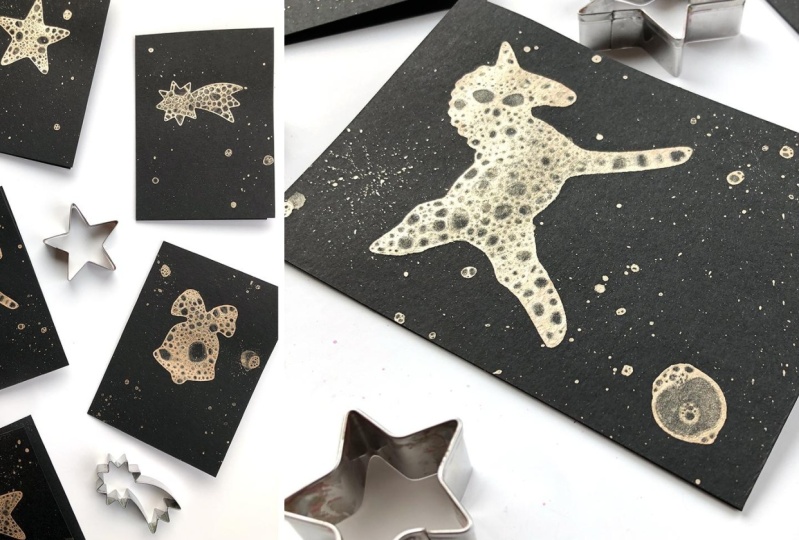
experiment with using differently colored
soap bubbles at the same time to get
a multicolored shape. Just have fun. [MUSIC]
7. Add Splatters and More Bubbles: [MUSIC] Once the bubbles
are inside the form, you can add some splashes and single bubbles to round
off the composition, but as you know,
you can't control the placement and
shape completely. Therefore, it can happen
that you accidentally get some unwanted overlaps as
has happened to me here, this overlap is a bit
unfortunately placed. If I'd use a different color, it wouldn't have been so bad. This time I will try to add the splashes before the
bubbles in the form have dried and I will also use a different color so that when I hit the
inside of the form, the colors will just blend. I will also do a
series where I'll start by creating a
background first. It's a great opportunity to
practice the different dots, bubbles and splatters, that we've talked about earlier. My first two cards have
now been drying for over two hours and the
result is really amazing. I decided to let this
one dry before adding the splashes to see how that influences the outcome
but we can do that now. As the background is dry, I'm trying to find the best
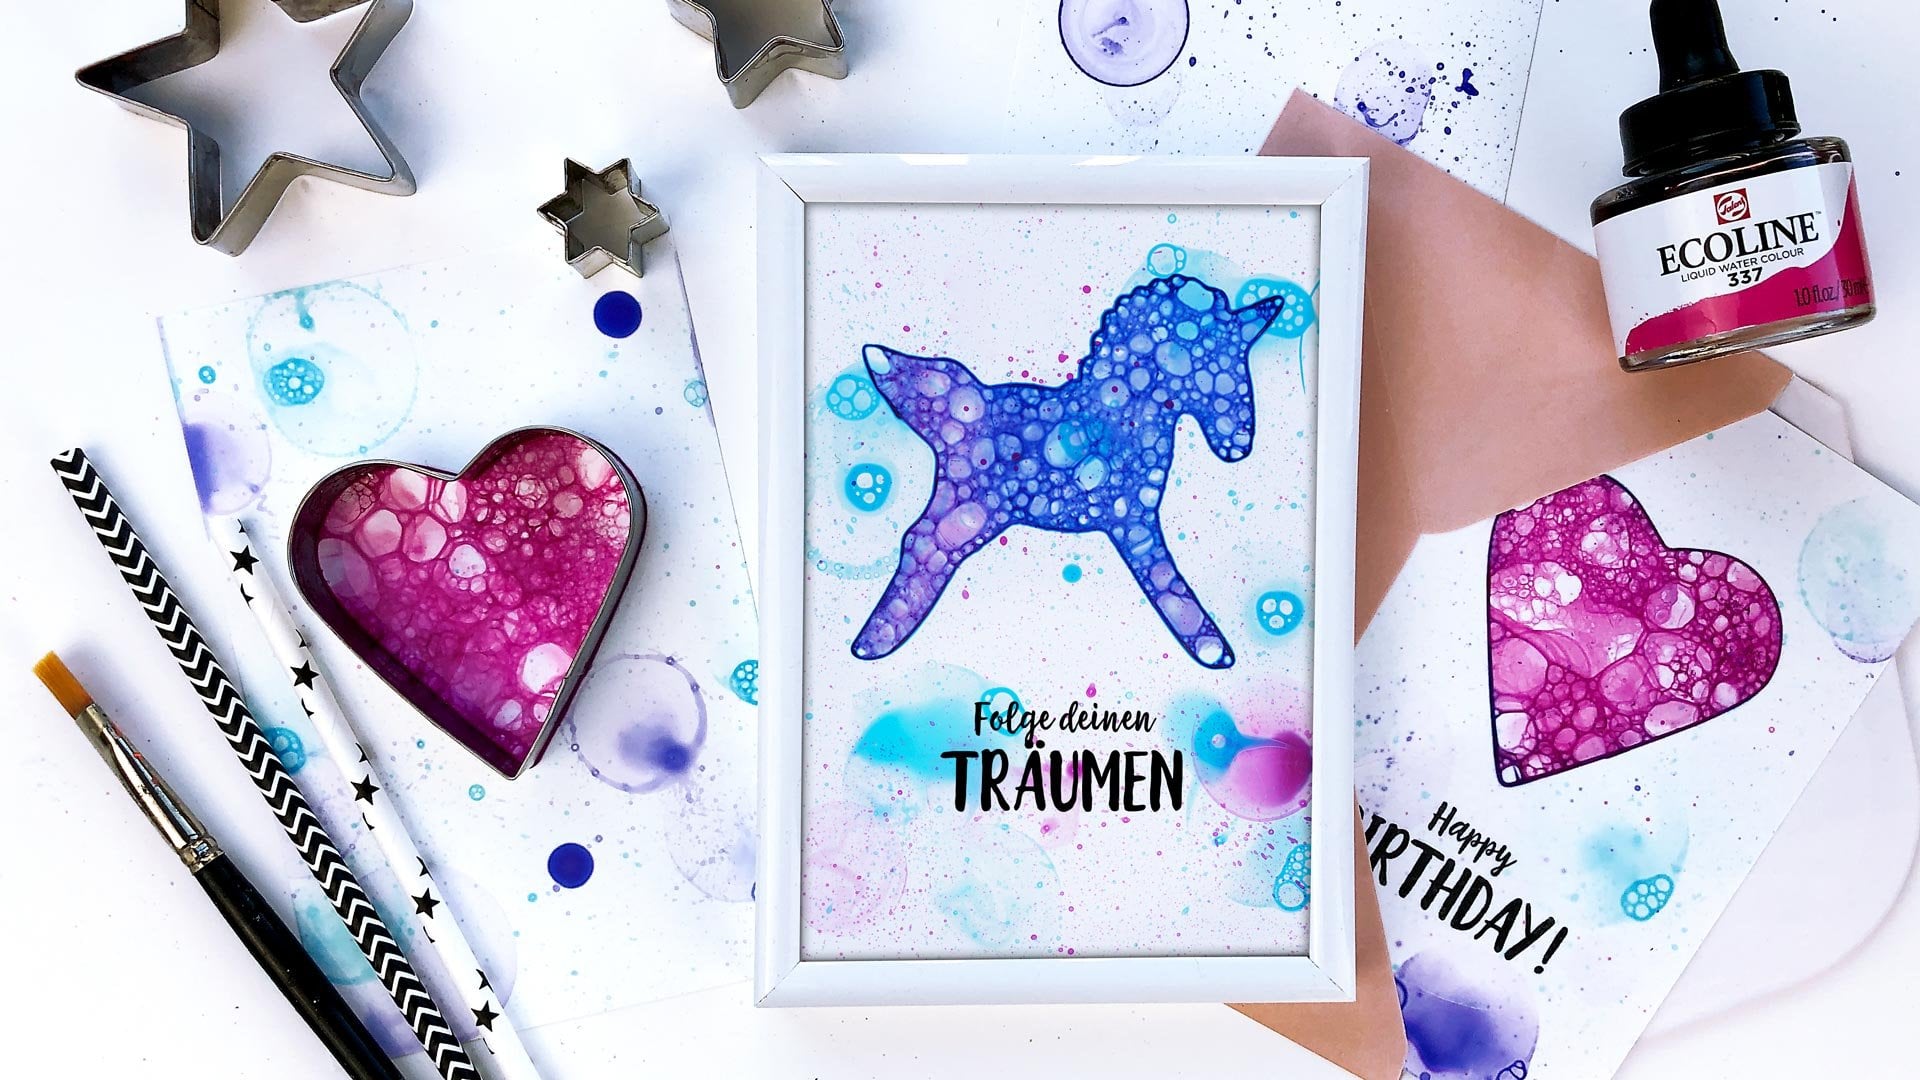
place for my unicorn form. It's so funny to watch how the bubbles get sucked inside, if the form is already wet. Now with the heart, I'm getting
really playful by adding all three colors to get
a multi-colored texture. Finally, I'm adding a third layer of paint.
While these are drying, I can show you a close-up
of the first set of cards. Aren't they gorgeous? I'm kind of afraid to ruin them. Before I will add some texts using an image
transfer technique, I'll scan them at 600 DPI
so that if I ever want to, I can make prints in
the future [MUSIC].
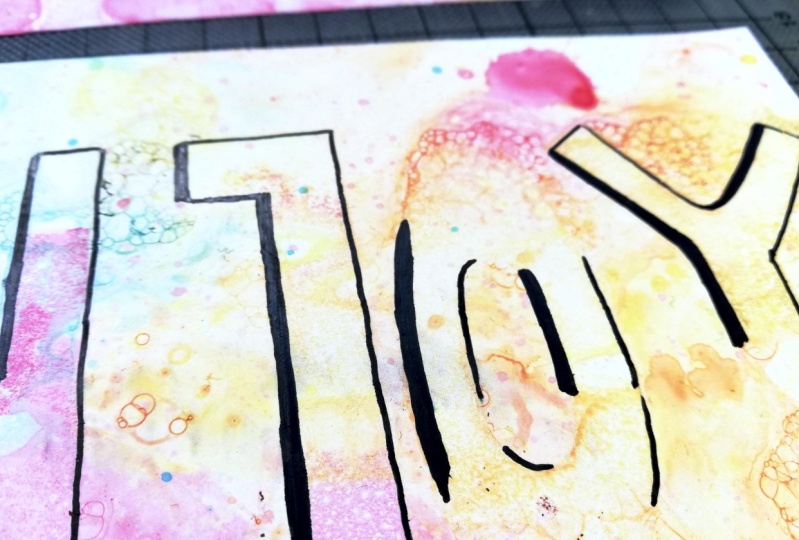
8. Use Image Transfer to Add Text: [MUSIC] When using photo paper, we are facing the
challenge that it doesn't agree with water at all, and would get totally sticky. If you want to make an image
transfer on photo paper, you need to coat the paper with a transparent protective layer that makes it water resistant. Make sure to dry off your
brush before you start. I have tried this
with matte medium, gloss medium, transparent
Gesso, and PVA glue. You can use a blow dryer to
speed up the drying process, but it dries pretty fast anyway. As you can see, you get
a matte surface with the matte medium and the Gesso, and a shiny surface with the gloss medium
and the PVA glue. Here I've done an
image transfer on watercolor paper using
different transfer mediums; transparent Gesso, matte medium, gloss medium, acrylic
paint, and PVA glue. The difference
between the left and the right side is that
on the left I removed the paper immediately and on the right I waited
for about 10 minutes. It didn't make much
of a difference. Here you can see very well that the gloss medium ends
up with a shiny finish, as does the PVA glue. An advantage of watercolor paper is that you don't
have to coat it beforehand because it
takes water quite well. Although, of course, you do have to be
careful not to rub off the watercolor
paper when you are removing the transfer paper. I have provided a
PDF template with different quotes and affirmations
for you to print out. But if you design your own, make sure to mirror the
page before you print it so that the text is
not mirrored on the card. Laser prints or
copies work the best. I cut my paper into a shape that integrates with the
design because you will see the area where the
paper was glued down and that way you make sure that you're in control of the final result. Now, we are coating
the paper and gluing down the transfer
at the same time. I'm pouring out some
gloss medium and trying to cover the
surface pretty evenly, as we will see the
brush strokes to some extent in the end result. Make sure that the area where you want to
place your image is wet and well
covered with medium. Now you can put down the paper and press it down
with your fingers. You can also use a
plastic card to smooth it out and get rid of
any air bubbles. But make sure you don't get any glue on top of
your transfer paper. Now, we'll leave it to
dry for about 10 minutes. Then you can wet the printer paper with a brush and clean water. You can start at
the edges and use your fingertips to
gently rub back and forth or in a circular
motion to get the paper off. If it becomes too dry
again, reapply some water. Now you have to repeat the
process several times. But in the end, you
have to rub very gently to not get
the ink off as well. Here you can see
that the area of the transfer has remained matte. But as we have used a circle, it fits the design well. If you don't like the difference between the shiny and the matte, you can add another layer of the medium you've used on top. Sometimes you think you're done, but as soon as it's
completely dry, you can see some
whitish areas again, and then you just have
to wet it one last time to get the last
paper fibers off. Finally, the card is
finished. [MUSIC]
9. Final Thoughts: [MUSIC] Congratulations,
you have made it. Thank you for embarking on
this creative journey with me. Before wrapping this up, I want to take a
minute to talk about the mindset that I find useful when doing
mixed media work. I like to prepare myself
mentally for some experimenting. Because as soon as you are
mixing two media together, you can get quite
unexpected results. Most likely your exact process has never been tested before, and I get it. It can be totally annoying if it doesn't work out
the way you want. But on the other hand, this is a great opportunity
to make new discoveries and find something that is completely unique to your work. I want to encourage
you not to give up if you don't get perfect
results on the first try. Start by switching out one
of the main things you use, be it paper, paint, or the dish soap brand. Those changes can
even be as little as switching to a different
color from the same kind of paints. Because sometimes it's
just that one pigment that doesn't work with
the whole process. Apart from having to
print out the template, you can keep this
project totally analog. But if you're familiar with
image editing software, you could scan your cards and
change colors, make edits, take out parts for patterns, or adds to the text digitally. If you're working
with photo paper, your cards are perfectly sized for standard picture frames. This is a great way to showcase
your work beautifully. If there's one thing I hope you take away
from this class, it's the ability to
stay curious and enter a childlike
playful state of mind. Because that's the sweet spot where your creativity thrives. If you liked this class, you might also be interested
in my other classes. Feel free to click on my name
and check out my profile. Also, don't forget to
hit the Follow button so that you'll be notified
when I publish a new class. If you have any questions, you can either post them in your class project or in
the discussion section. If you have enjoyed the class, I would love for you
to leave a review. Please don't leave
any questions in the review though because
I can't reply there. Also, don't forget to upload a class project so
that we all can see what you have worked on
and admire your creations. If you're sharing your
work on social media, make sure to tag me
@cornelia_zb_design. I'm so glad you've
joined me and I'm looking forward to seeing
your class project. Thanks for watching. Until next time. [MUSIC]
 Cornelia Zelinka-Bodis, Mixed Media Artist