Transcripts
1. Introduction: We live very busy lives, and most of what we do seemingly has to produce a result. But what if we tried to break out of that cycle and take time to just play and explore and get into the flow state. In this class, I will take you on a seven-day journey to reconnect with your creativity. I will challenge you to create seven abstract paintings using everyday materials. Hi, my name is Connie, and I'm a graphic designer and artist from Austria. Being in nature helps me to unwind and inspires me with its textures and colors. I approach abstract painting very intuitively by being in the process and open to any outcome. A few years ago, I had these two misconceptions. One was that I needed 2-3 hours of undisturbed time to get started on an artwork. The other misconception was that I was waiting for a creative spark of inspiration as if it was a limited resource. Things began to change when I participated in a 100-day challenge. I stopped pressuring myself over the outcome and started to enjoy the process. This class is a more manageable seven-day challenge to jumpstart your momentum. We'll start by gathering the everyday materials in your home. A short exercise will help you understand your paints and how you can use them. Each day, we are working with a different unconventional material and focusing on a principle to reconnect you to your creativity and foster a sense of exploration, wonder, and relaxation in your practice. The time requirement is 20 minutes per day, and each day we'll focus on one of these principles. Like for example on Day 2, we will use very fluid paints. It's all about the flow state. Not being able to control the result helps you get into flow because it forces you to focus on the process and be very present. Then on Day 6, we'll use soap to create bubbles and talk about the benefits of play in our art practice. This class is for everybody who needs a little self-care time and something to do with their hands. But also for people who are stuck in their art and are not experiencing joy from creating anymore. Painting abstracts with everyday materials is a relaxing way of creating and it opens up a lot of space for chance and experimentation. Are you ready to get your creative practice going? Then let's get started.
2. Class Project: This class is designed as a seven day challenge. So you're not going to create just one piece of artwork. Instead, you're going to work a little bit each day with a different medium to create seven different abstracts. For the class project, upload a picture of what you created each day. It can be a process picture or the final result. So at the end of this week, you should have uploaded seven images. If you're comfortable, you can also share your personal thoughts and experiences on the different topics I'm addressing. Challenges can help you stay motivated and to gain momentum, but they can also be quite overwhelming in terms of needed time and expected results. But in this class, we will focus on enjoying the process and getting into the flow. So don't feel pressured over the results. It's not the destination, it's the journey that matters. As for needed time, 20-30 minutes each day would be perfect. But if you have less time, just do less and if you have more, go for it. The main thing is to get started and to create a little space for yourself. I would encourage you to figure out which time of day works best for you and even enter a date into your calendar. It helps to treat it as if it was a meeting with a very good friend you wouldn't want to miss out on. If you can't manage to do this challenge every day for a week, you can also do just one or two prompts a week and spread it out a bit longer. Now, let's have a look at what we will actually be doing. On the first day we're going to use baking paper. This is a very easy technique to get you warmed up and I will be talking about why we have this longing to create. On day 2, we will be using film and tissue paper and hopefully not only our paints will flow. We'll use cling wrap on the third day while talking about focusing on the process. On the fourth day, we'll address the subject of resistance and we'll work with wax using a technique called resist. On day 5, you'll have to raid your food cupboard. We'll need salt, grains and other foodstuffs for our creations. I will be talking about building a habit. Day 6 we'll be very playful and we'll use soap to create amazing bubble artworks. Keeping with the theme, I will talk about the importance of play. On the last and seventh day, we will use ribbons to create prints which could represent our creative journey and I will share my thoughts on finding your way. So that was an overview of what we're going to cover in the following days. The next step is to prepare all your materials we're going to need because it will make it a lot easier for you to get started each day. See you in the next lesson.
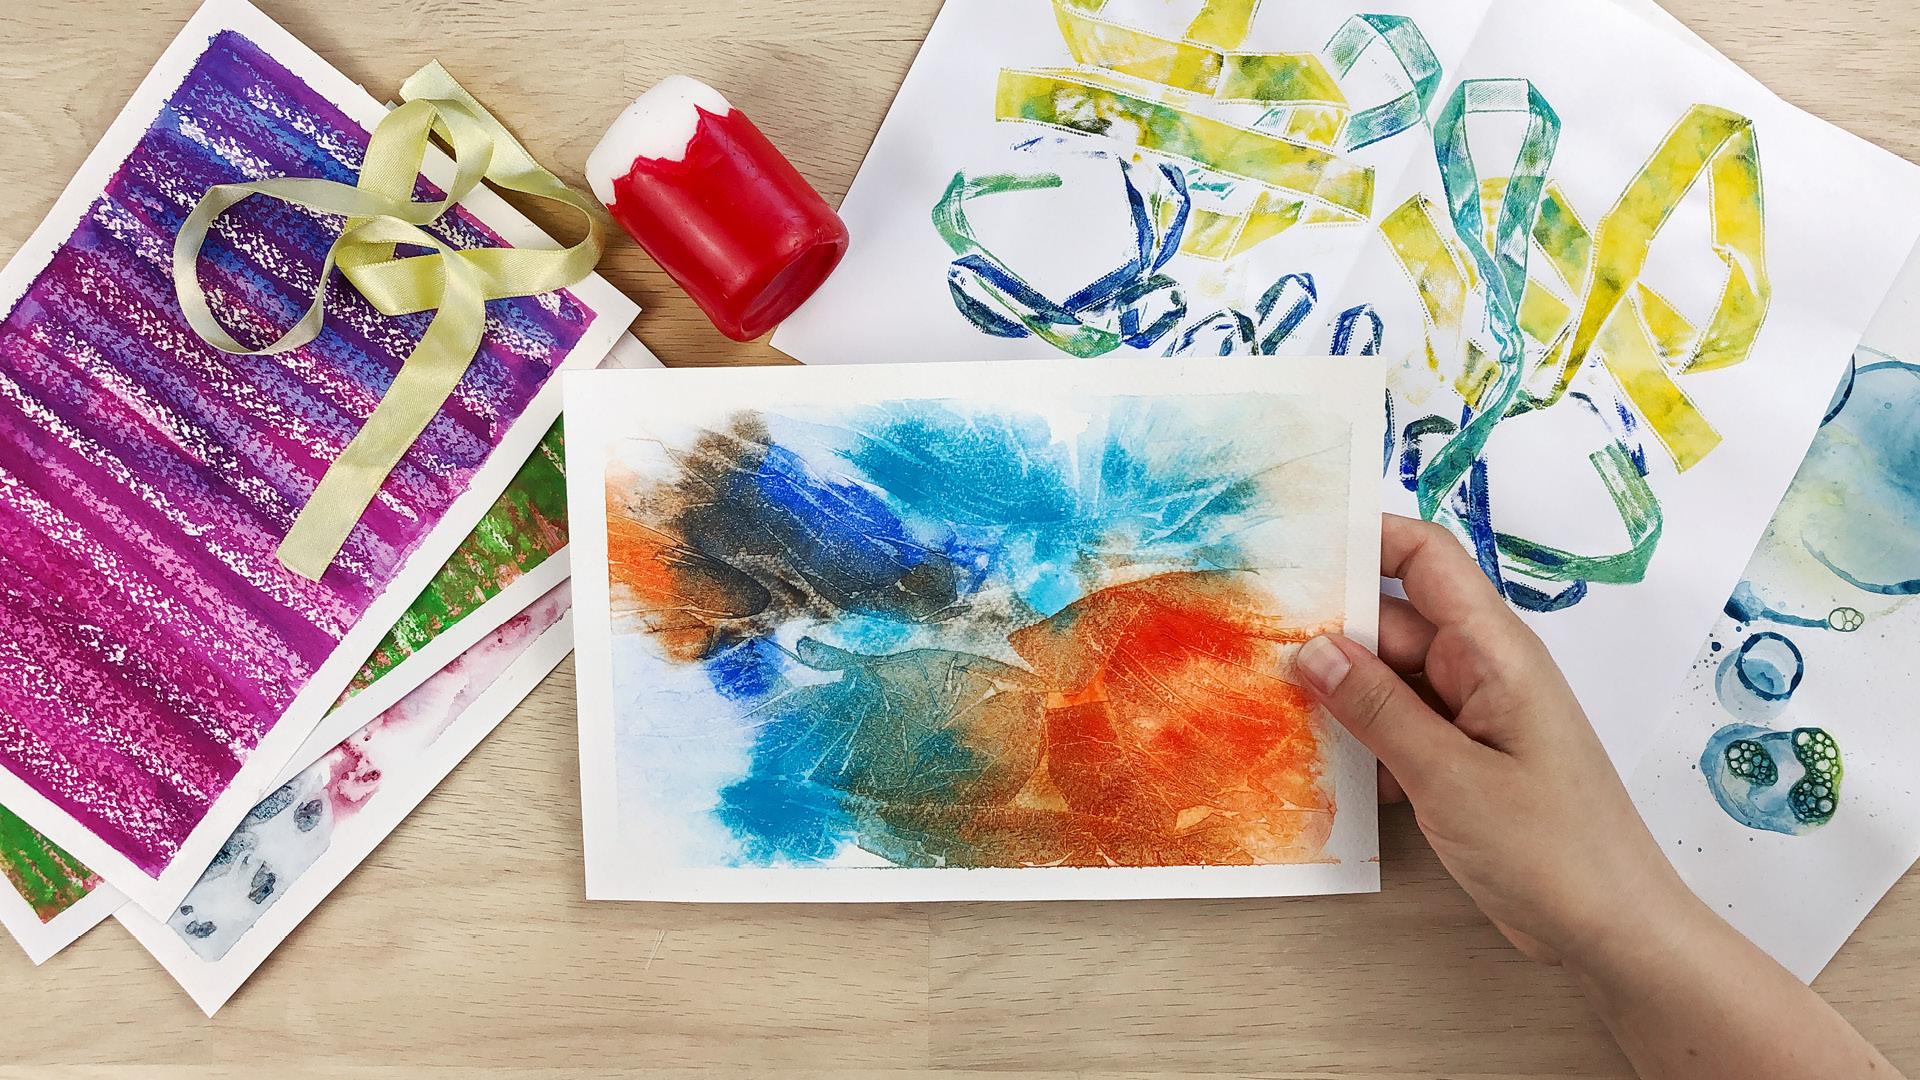
3. Gathering the Materials: Hello and welcome to Lesson 3. Today we are going to collect all the materials we need for this class. It really helps to have everything ready in advance because it lowers the barrier to entry and helps yourself to get started more easily. To help you furthermore, I have added a PDF file in the resources section of this class. You can download the document from your computer. I've listed all the materials we are going to use for each day. Hopefully, you have most of what we need already at home. These other things we need for day 1, we need baking paper. For day 2, we need tissue paper. Any tissue paper will work. I have a selection of art tissue paper, regular tissue paper, you get that at the office store, or even packaging materials. Then you also need clear plastic sleeves or document folders. What doesn't work in the way I intended it were transparencies, that are used for printing because they seem to have a textured surface and you will not get the paper off again. But it's pretty cool as it is because now has a water resistant surface. Then we need for the next day cling wrap. Or if you don't have cling wrap, you can also use thin plastic bags. Let me put that away. Then we are going to work with wax. You can use any kind of candle, it should be white. Here I will cut off the red cover. You also need a plastic card to scrape off additional wax, and also for the next technique with the soap bubbles. For the soap bubbles, you need liquid hand soap or dishwashing liquid. You need a straw and a needle to poke holes into it. You can use a spoon to transfer the bubbles, or you can use a plastic card. You also need containers where you are mixing your soap with your paints and are blowing your bubbles in. But that could also be a flat big dish. But I'm using these takeaway containers. Then for the next lesson, we are using salt and other foodstuffs. I have two different kinds of salt. I use quinoa, rice, and soup noodles. But you can try whatever you have at home and then for the last lesson you need ribbons. I like to use the soft ones because they are very flexible and make very nice folds. Apart from the everyday materials, you will need regular art materials like paper, brushes, and paints. As I'm a bit of an art material addict, I do have a lot of paints at home. I've tried all of the techniques with the different paints, acrylic, gouache, and watercolor. For the different prompts and techniques, different paints work best. I will indicate in each lesson which type of paint works best for this technique, I mainly use watercolor paper for my art store's own brand, which has 200 gsm and it's not very expensive. You really don't want to be precious about your art materials for this project. I would definitely feel some pressure if they were too expensive. Then I also use a coated glossy laser printing paper, which is very smooth and a bit shiny. I don't know if you can see that. For some techniques I also use regular printing paper. As for the brushes: It helps to have one big brush for larger spaces and also for water. I use this one for water. This is my big watercolor brush which is already a bit old, but it's still fine. I like to use these synthetic flat brushes for color mixing. I always have more than one brush because I don't like to wash them out so thoroughly between changing colors and it helps to have a few. To mix your paints you can use a palette or an old lid, or even ice cube trays, whatever you have. I like to use a dropper when I'm mixing my paints because I can easily get the right amount of water. But you can of course, also use a water brush to get more water into your paints. Always have some kitchen tissue ready if you're making a mess. Since we are working with a very wet, or with several very wet techniques I like to tape my paper to a piece of cardboard, and I use regular painter's tape for that. It helps to have a few pieces of cardboard because you will be working on several pieces at once. I almost forgot the most important or a very important thing, actually two and that's water jars. I use two, one is supposed to stay clean and the other one is here to wash your brushes. Now it is time for you to go and collect the required materials. It is a good idea to put them on a table or in a box so that you just have to pick up what you need each day and get started. In the next lesson, we are going to have a look at the three different paints. I'm going to use Acrylic, gouache, and watercolor. See you there.
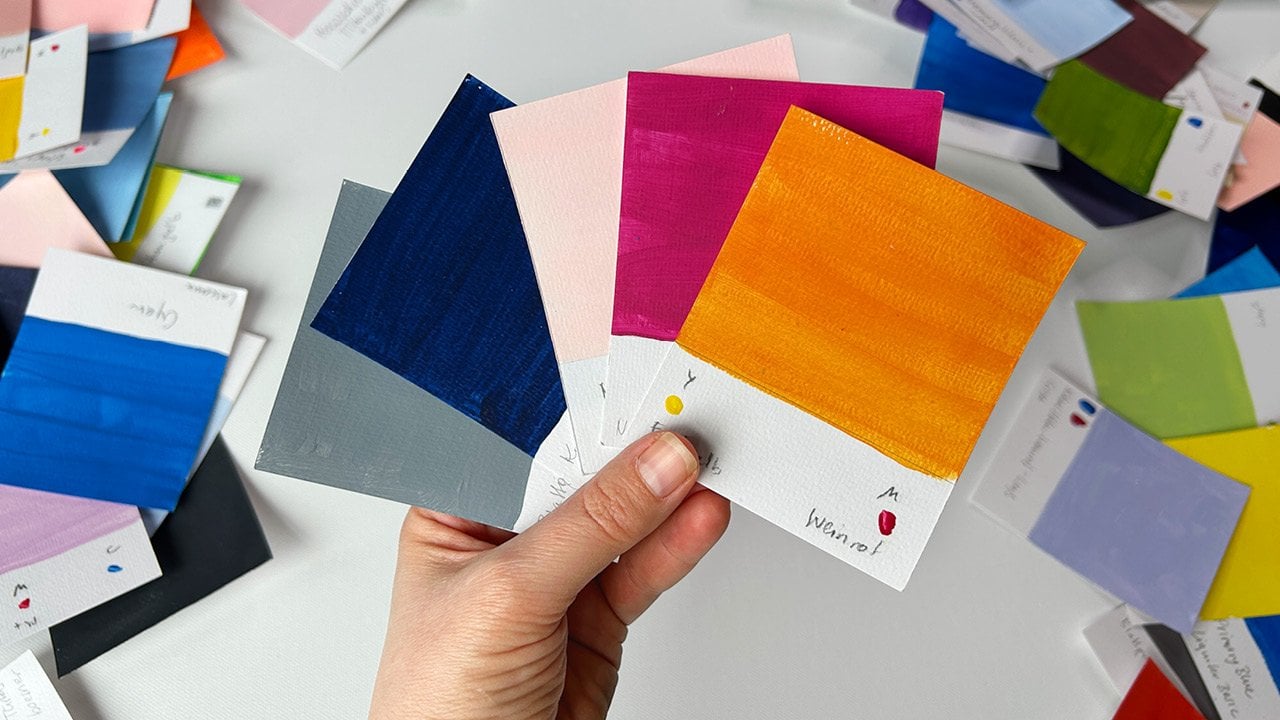
4. Paints to Use: I find it very frustrating if I don't have the right art materials at home. I have tried all of the techniques with acrylics, gouache, and watercolor, and since this challenge is also about playing and experimenting, I want to encourage you to use what you already have in your home. The reason for this lesson is to show you that you can use the different kinds of paints in a very similar way. Those are acrylics, these are gouache, and these two are watercolor paints. Acrylics and gouache are usually more on the creamy side. But for this class, we will use them very fluidly. I've already squeezed them out onto my palette. First of all, I want to show you the acrylic one in a very pure state, then I will try to blend it out. Next, I will do a wet-on-wet technique. My water is a little bit dirty, but that doesn't matter for our purposes. For the wet on wet, I need to have my paints already fluid. Now, I will do the same thing with my indigo blue. Again, I have to dilute my pains to make it fluid before applying it to the wet paper. Lastly, I'm trying to do a blend between two colors. Now we're doing the same thing with the gouache paints. What I want to show you with this exercise is not the best way to make gradients and blends because I'm actually not that well-practiced in it. But I just want to show you that you can get all of the effects to some degree even with the paints that are not exactly meant for that purpose. Watercolors are definitely easier to blend out and they also bloom very nicely. There are strengths and weaknesses to all of the paints. Although it didn't work perfectly on this sheet, I've seen acrylics bloom very beautifully as well. The important thing is that you have to dilute those creamy paints very much before you apply them to your wet paper. One more thing I want to show you is that acrylics are waterproof. Now that they are dry, they cannot be reactivated. Gouache can be reactivated and also watercolor. It's really dependent on how dry they are already because I tried it here first and they were very easily reactivated and I'm having a hard time now, but you can still see that I'm getting some pigments off. To get to know your own paints and as a little warm-up exercise, you can make a color chart like the one I did, and then you can start this challenge by creating a new project in the project section of this class and uploading your image. In the next lesson, I will already give you the first prompt for this week and we will get this challenge going.
5. The Need To Create: Baking Paper: Welcome to this week of abstracts with everyday materials. It's good to have you here. Let's get started with day 1. Today, we're going to create with baking paper. I will first show you the process, and while I demonstrate some variations myself, I will share some thoughts on why we humans need to create. First of all, what is baking paper? Baking paper, also called bakery paper or parchment paper, is a cellulose-based paper that is covered with silicon, and that makes it withstand heat, moisture and grease to some degree, and we will put that property to use in our technique. We will put a sheet of baking paper on top of our wet paint and leave it there to dry. This technique works very well with acrylic, gouache and watercolor. The process. Your paper needs to be fairly wet and will buckle. Therefore, I'm taping it to a piece of corrugated cardboard. If your tape is too sticky, you can reduce that by lightly touching it to your clothes before applying it. You can either wet the paper before you apply your paint, which is what I like to do or you apply very fluid paint directly onto the paper. If the paint gets too dry, you can add additional water with your brush. If you look from the side, the surface should be very shiny and can even have a few puddles of watery paint. Then you place the baking paper on top. If needed, you can use your fingers to press it down in places where it doesn't touch the paint, but you can influence it only a bit. Then the paper starts to wrinkle and do its magic. Now, it is time to wait. Depending on how much water you use, it will take an hour or more until you can remove the baking paper. With watercolor and gouache, the baking paper usually starts to come off by itself. With acrylics, it tends to stick more. The taped paper can still be humid, but the paint should be dry enough so that it doesn't move around anymore. There are a few things to experiment with. First of all, it makes a difference in which direction you place the baking paper. That has to do with the machine direction or grain direction of the paper that happens during production, and that fiber direction influences the direction of the folds and creases we get. You can also vary the pigment to water ratio. Here, I'm using acrylics in a very diluted way. Another option is the partial application of paper and paint. You can use cut-out pieces to cover only parts of the page with the baking paper or you don't use paint on the whole page in the first place. Now, you can watch me experiment while I tell you about the need to create. Humans have an innate need to create and to invent, basically to call into existence something that did not previously exist. This is of course not restricted to creating art, but art is one aspect of it. Being creative can be risky, you're trying something new and it may or may not work. But our human brains have evolved to award us for trying, therefore, making creativity fun and exciting. Creative aha moments can invoke the same activity in your brain's reward centers as for example, delicious food or positive social experiences. That means, many of us feel good when we are flexing our creative muscles. Unfortunately, a lot of people stop creating when they are growing up. That's a real shame because creativity has so many benefits. For example, by bringing things into existence, we experience our own creative power and a sense of control. We literally have it in our hands. These small situations may sound insignificant, but they still can contribute to your overall feeling of well-being and achievement. I'm always excited when it's time to lift off the paper and see the results. Were you surprised by your results? Please share some pictures in the project section. Maybe you also want to share a creative insight or discovery you have had in your life. I would love to hear your thoughts on that. Tomorrow, we're going to let the paints flow even more while I talk about the flow state. See you there.
6. The Flow State: Film & Tissue Paper: Hi, and welcome to day 2. While at times being very stimulating, creating can also help you to mentally calm down. If you completely immerse yourself in the process of creating, you can get the feeling of spacing out or being in the zone, which is basically the state of mind that is described in psychology as the flow state. I will talk about that in more detail later on, but now let's get started with today's technique. This technique works best with acrylics. It can work with gouache if a lot of pigment is used, but you won't get the same effect with watercolor. Here I have all the materials I will use. I have some transparencies and different kinds of tissue paper. Some little containers to mix my paints in, and a selection of acrylic paints from different brands. I have a big brush which I sometimes use for water, as well as smaller brushes for mixing the paints. A dropper is also very handy to dilute the paints. It helps to have two water containers. You really want to keep one very clean, and use the other one for rinsing your brushes. The process. First you need to mix your paints to a very watery state. Start by adding a small amount of water so that you can get the lumps out easily and then add more and more water until the paint drips off your brush readily. Stir up the paint and apply it with your brush or pour it onto the transparency. This part can be really meditative. The final effect depends on the kinds of paints you use and the kind of pigments. Acrylics work best and they dry with a smooth, shiny surface. Try different colors because not all pigments react with each other in the same way. Make sure you have a good amount of paint, even a puddle on your transparent film. You can add more water with your dropper or your water brush if necessary. I really love this part of blending the paints into each other. Once you're done, place a piece of tissue paper on top and leave it to soak up the paint. Use the smoother side of the tissue paper on the bottom so that it touches to foil. I have tried different tissue paper brands and also papers found in packaging, such as shoe boxes or clothing and it worked for all of them. For this page, I'm using some packaging paper and as it doesn't absorb the water very easily, I'm helping the paint spread with my fingers. You can tilt the film if you want the paint to mix even more. Taking a sneak peek can have the same effect. Then leave it to dry for a few hours or even overnight. Make sure it is completely dry. Otherwise, you might rip your paper when pulling it off. Carefully and slowly pull off the tissue paper. Isn't that satisfying? Look at these beautiful textures. Now, I will experiment a bit more while I tell you about the flow state. Have you ever started an activity and become so enveloped by it that you lost sense of time and when you look at the clock, you were surprised by how much time has passed? What you have experienced is called the flow state. It is an optimal state of mind when you feel your best and perform your best. Research has shown that there are changes in brain activity during flow states. Several neurochemicals like dopamine and serotonin are released and the prefrontal cortex, which is the part of the brain relevant for conscious thought processing, self-awareness, and time recognition reduces its activity, which is why you are losing sense of self and time. You can't push or fight your way into achieving flow but there are several things to keep in mind in order to make it possible. Let's have a look at a few of them. First of all, it most likely happens when you are relaxed and are losing yourself in an activity that you find intrinsically rewarding. Secondly, your skill levels should match the task at hand. If the activity is too challenging, you might be anxious, but if it's too easy, you might feel underwhelmed or bored. Thirdly, flow requires strong focus on the present moment. You need to remove all sources of distractions, such as your phone from your environment. Also, you should not think about failing or succeeding, just concentrate on the task at hand and on the process. You have reached the flow state when you're fully immersed in a feeling of energized focus, full involvement, and enjoyment in the process of the activity. So how did it go? Hopefully you got so hooked on this technique, that you didn't only get your paints to flow. I'm looking forward to seeing what interesting effects you got. I would also love to hear what activities you can lose yourself in. Please share them in the project section along with today's pictures. Tomorrow we're going to talk about creating just for the process while we're using cling wrap. See you there.
7. Focusing on the Process: Cling Wrap: Welcome, to day three. In this lesson, we are going to use cling wrap to create amazing wrinkle textures in our abstracts. We will be talking about focusing on the process. If you don't have cling wrap in your home, you can also use thin plastic bags, or in my case, eco plastic bags that are used for fruits and vegetables in the supermarket. Let's get started. This technique works very well with acrylic, gouache and watercolor. The process. Paints have to be very wet and thin for this technique to work. You can apply the paint directly to the page but I like to wet my page first. I'm not wetting the whole thing I'm just making a blotch. I'm applying the paint. I'm just recreating what I've before I'm done by chance. Which is like a butterfly-ish form. You can tweak the line. If you have too much paint like here, you probably won't get the pigments to move. That's a butterfly shape. Now, let's experiment while I tell you about focusing on the process. Recently, I got asked what I was going to do with all the artworks that I'm making. That really got me thinking because I didn't have a plan in mind when I created so I really couldn't answer the question. There are a lot of things I do that I create just for the sake of it. I don't have a result and a purpose and a goal in mind. I just take my time to play and for me, it's very relaxing. When I'm doing my abstracts with everyday materials, I give myself time to play and explore and just be in the moment and in the process of working. By focusing on the process, I'm opening myself up to any outcome. I don't have a certain result in mind, and because I'm not consciously creating something specific that can lead to some chance discoveries. That's also the way that I discovered the butterfly I showed earlier in this lesson. I was just making a splash of paint and putting on the cling wrap and when it was done, I saw the butterfly. That was the learning and that's something that I can use later on. It was one of those creative aha-moments that I talked about. That is really the beauty of just being in the process of working because you're not focused on the outcome and beautiful things can happen. So how did it go? Did you enjoy experimenting with cling wrap? Putting it to creative purposes is really the only time I enjoy using it. Please share your thoughts and pictures of today's work in the project section. Tomorrow we'll be using candles and talk about what keeps us from starting a creative practice. See you in the next lesson.
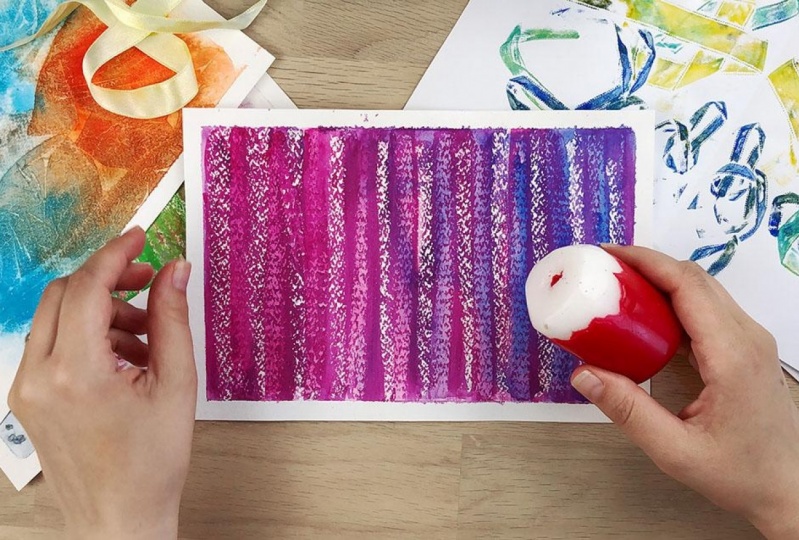
8. Resistance: Wax: Today is already Day 4. We are going to use wax and a technique called resist, and we will be talking about resistance and how to overcome it. This technique is called resist because on the spots where you apply the wax to the paper, it will resist the water in the water-based paints. You can use old Christmas candles or birthday candles like a drawing tool to make invisible marks on your paper. Let's get started. This technique works with acrylics and gouache if they are used very diluted and it works best with watercolor. Before we start with today's technique, I just want to show you a few examples of work where I have combined different techniques. Here I have used the resist technique with the wax, and I've used a cotton pad to stamp. This is something I talk about a lot in my second Skillshare class, which is about mark-making with everyday objects. On the second example, I want to show, you can find the resist technique here, the white is the paper white, and then you have a layer of pink and then a last layer of green. And on the pink layer, I used a sponge to create an additional texture. You are completely free to experiment. There's one more thing I want to tell you about, and that is if you tape the paper to the cardboard before making your marks, you will transfer the texture of the cardboard. Here I was drawing circles and I got those striped circles. That is just something to keep in mind. If you don't want that, you could use a piece of wood or you just draw on the table and only tape it to the cardboard after you are done, and that is what I will be doing today. The process. First of all, I'm making some random marks with my candle. Then I'm wetting the whole page because I like my paints to flow. Now, I'm applying the first layer of gouache paint. You can use as many colors as you like and work very loosely. Once your content, leave it to dry. Now my first layer of paint has dried completely. I can add my second layer of wax marks. I like to cover interesting spots on the page with the wax so that they are protected against the next layer of paint. Then I paint over it once more. I have to make sure that my gouache paints are thin enough so the resist technique can work, so I am adding some more water. You can do more layers like this if you want, but I will leave it at two. Once my paper is dry again, I scrape off the wax with a plastic card. Sometimes, the paints stay on the wax and this will remove both the wax and the paint to reveal the colors below. While doing some more experimenting, I will tell you about resistance. What is it about resistance? Do you know or do you even say those things like, "I don't have time. I don't have the right materials. Well, I don't even feel like it today," and then you end up in front of the computer or TV consuming and just passively sitting around and doing nothing and maybe feeling bad afterwards? I'm a big science lover. In a second life, I would be a scientist. The science fact for this is that resistance, probably has its roots in our brains and we are hard-wired to avoid discomfort and new experiences. Even great ones are risky and, therefore, on the uncomfortable side. That's maybe an explanation where this resistance comes from, but resistance mostly happens when you're doing something that is growth oriented. When you're doing something new, you're stepping out of your comfort zone. It is really worthwhile to overcome it, to get to the point where you can grow, where you learn something new, where you can be your most creative self. There are a few things that can help you and that help me to overcome that initial resistance and to get into the part where I enjoy the activity. What helps me is to make myself a welcoming space. I have my small table and I have all the materials ready, I even have more water jars filled. It also helps to approach it like an appointment. Thirdly, I focus on the process and I'm not bothering with results. You can also define what means successful. Maybe, if you don't have a lot of time on a certain day, you will define it as a success if you managed to make marks for 10 minutes with your brush and when you're done, you have achieved your goal. How did you like working with wax? Did it speak to you? Not all the techniques are easy for everyone. For this, I have to overcome some initial resistance because I like to see what I do. Creating marks that I can see is not something that I immediately enjoy, but it also helps me get into the flow state because I have to work a bit harder and focus a bit more on the process. Today, I would love to hear what helps you overcome resistance and get started. Please share your thoughts along with today's artworks in the project section. Overcoming resistance once is the first step, but doing it again and again, is quite another pair of shoes. That is where building a habit comes in. We will talk about that tomorrow, while we will use salt, grains, and noodles. See you there.
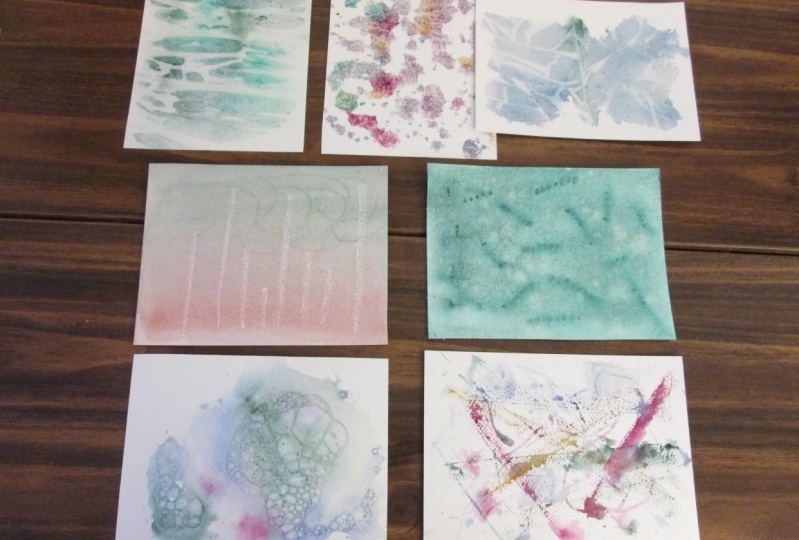
9. Building a Habit: Salt & Grains: Hello. Welcome to Day 5. Creativity is like the salt in the soup. Without it, everything tastes a bit bland. Today, we will be using salt and other foodstuffs in our creations, and we will be talking about building a habit. Let's get started. I will be using salt, rice, quinoa, and soup noodles. This technique works okay with acrylics and gouache, but it definitely works best with watercolor. If you don't have watercolor, you can use very dark coffee instead. Using instant coffee works best because you can get it as dark as you like. Using salt is a very well-known watercolor technique. But here, I have tried it with acrylic and gouache paints. The effects are not as dramatic, but they are still here. Just make sure you use the paints very diluted. With the grains, I did have a bit of a problem with acrylics because I couldn't get them off again without ripping the paper. But with gouache, it worked fine. The process. I like to work with a wet-on-wet technique. First, I'm painting a shape with water only. Then I add color and watch it spread and mix. The paints need to be very wet for this to work. You can experiment with the wetness and the amount of pigment. Then I add the foodstuffs. You can also add additional paint once you have put down the foodstuffs. Of course, sometimes it helps to remove puddles of water. Once you have finished, leave it to dry. When it's completely dry, you can either brush off the materials with your hand or if they are hard to get off, just use a plastic card. Now you can watch me experiment while I tell you about building a habit. I think we all have things we want to do in life that we put off to some future time because we think we don't have the time right now and we're so busy with our everyday lives. Then sometimes we have the energy, and we do something, and we are excited and happy. Then days and weeks pass and nothing happens again. How do we keep onto that momentum, that energy? That is where building a habit comes in. The benefit of a habit is that you don't have to think about it. You don't have to decide if you feel like it. It's like brushing your teeth, you just do it. Challenges are a good way to get started building a habit. Because you are making a commitment, it helps to keep you motivated. But there are other things that you can do as well. First of all, it helps to have a goal in mind. That could be even a big goal like changing your profession. Then the second thing is to set yourself micro-goals. They have to be really small so that you don't need motivation and you can't even say no to yourself. I'm going to make marks for five minutes every day with a different pen. Then it helps to commit to a schedule. Because when you're not used to doing something regularly, it really helps you to get started if you have a fixed time on a certain day where you are going to create. That could be like, I'm going to create every Monday from 8:00 to 8:30 PM. Also, keep your workspace ready and have everything prepared so you just have to sit down and start. And now for the science fact because I need that. I have read that missing a habit once, no matter when it occurs, has no measurable impact on your long-term progress. That's a nice thing to know, I think, and it takes off some pressure. Lastly, don't forget to celebrate each small achievement. In the long run, short periods of time add up. If you do these exercises for 30 minutes each day, you will have created for 3.5 hours this week. That would add up to 182 hours a year. That equals one month of full-time work. That is quite amazing. Now that we have talked about how building a habit makes it easier to get started and to keep the momentum, let's not forget the fun and the importance of play. That will be the topic for the next lesson where we will be playing with soap and bubbles. See you there.
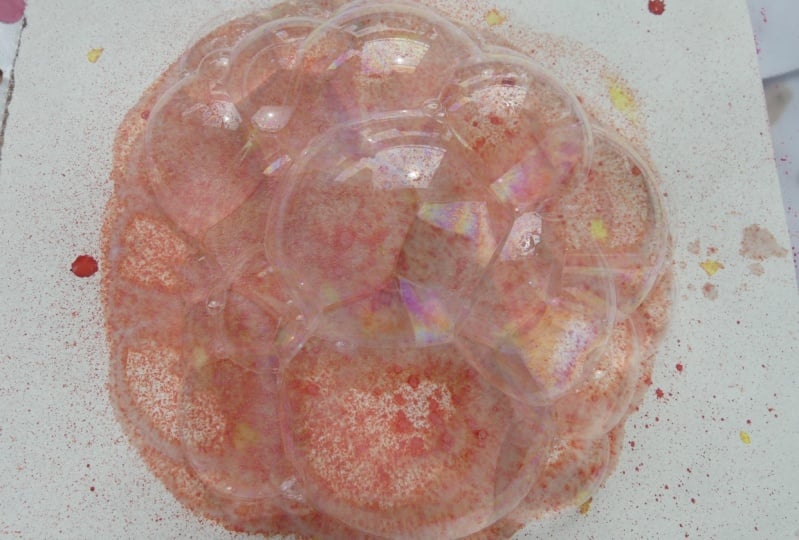
10. The Importance of Play: Soap: Bubbles are so much fun. They get me into playful mood very easily. Welcome to Day 6. Yesterday, we have talked about building a habit, and that is important concerning time. Taking time for your creative play. But when thinking about what to draw or paint, it is important not to get stuck and to get new inspiration, and that is where play comes in. Play is your path to creativity. For today, we're doing a very playful technique. Let's get started. This technique works with acrylics, gouache, and watercolor. The result of this technique depends largely on the kind of paper you use, but it is also influenced by the kind of dishwashing liquid or liquid soap, the soap to water ratio, and the pigments you use. It generally works with watercolor paper. But depending on the paper, I didn't always get very clearly defined marks. Sometimes the bubbles turned out very blurry as the paper soaked up the paints. Coated paper instead can give you very distinct outlines of the bubbles. I use a glossy laser printer paper, but a photo printing paper would probably work as well because it doesn't absorb water so much. The process. To prevent you from accidentally sucking in some paint, it helps to poke a few holes into your straw with a needle. This is not working perfectly, so try how well it works with a glass of water. Next, add dishwashing liquid or liquid soap to your container. If you're working with gouache or acrylics, it helps to mix them with the soap first. Then you can gradually add more water. Transferring the bubbles. Now, you can start blowing your bubbles. The bubbles should be stable enough so that they don't burst the moment you touch them. If necessary, add more soap. I am transferring the bubbles directly from the container to the paper using my straw, but you can also use a spoon or your plastic card. My rose color really didn't work well at all, even after I added the indigo blue, which I knew worked very well by itself, so it is definitely worth trying out a different color if you are having troubles. Putting the paper on top. As pigments sink to the ground, it helps to stir them up before you start blowing. Once the bubbles come up higher than your container, you just put your paper on top and lift it straight up again. Voilà, a wonderful bubble print. Blowing onto the paper. With this variation, you dip the straw into your liquid so that the opening is covered with a thin film and carefully blow to create a single bubble. You can even try to carefully blow it up as big as you can. This tends to work better if the paper is already a bit wet and soapy in that area. Very often the bubbles just explode when touching the paper. That way you will get a lot of cool splashes. One thing that is important for all of the variations is that if you have bubbles or even foam sitting on your paper, you will only get distinct marks if they are not moving around too much or popping too quickly. That part, you can, of course, not control completely, and it involves some experimenting. Now, you can watch me experiment while I tell you about the importance of play. If you are thinking about play, you most likely will think about children. But why is it important for us to keep that playful spirit? Because play leads to creativity. When you are playing, you are immersing yourself in the process. You are exploring. You are not worrying about the outcome, and you can be bold. That almost sounds as if I'm talking about the flow state. Nowadays, we often take the play out of work and we forget to be creative. But play is a way to solve problems and also to experience joy. That is something we grown-ups need too. Now, comes the science fact. Play is self-controlled, and it's important to have control in your life. Because if you're not having this internal sense of control, that can set you up for anxiety and depression. How can we integrate that inside into our creative practice? It basically comes down to adopting a mindset of abundance and possibilities. There's this quote by American poet, Maya Angelou, that says, "You can't use up creativity. The more you use, the more you have." Playing is a great way of boosting your creativity, so let's not forget to play. How did you like playing with soap bubbles? I love watching them almost as much as I love the results. Sometimes they make these architectural structures that are seemingly held up just by the pigments, and I find it so mesmerizing to observe. Please share your pictures of today's play session in the project section. Tomorrow is already the last day of this week, and we will be using ribbons and taking a look at how to find your own creative way. See you there.
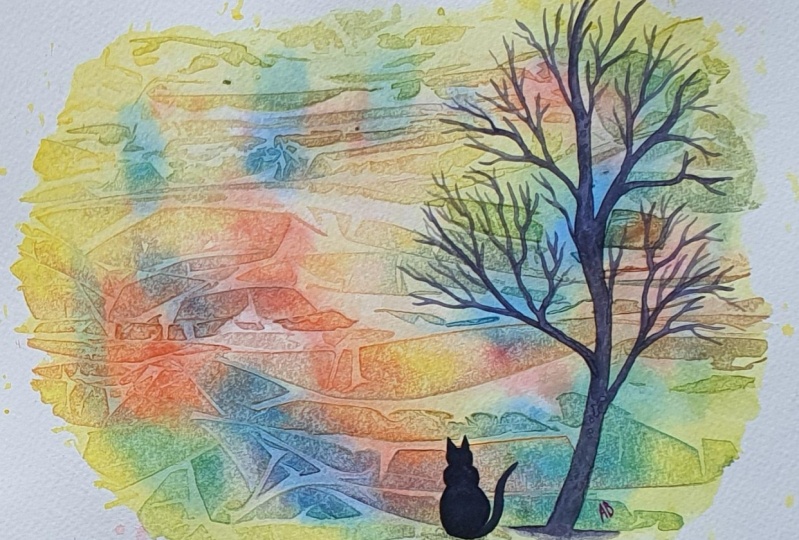
11. Finding Your Way: Ribbons: This is already Day 7. Today we will be using ribbons and talking about our creative journey. I think that fits quite well because our journey doesn't go in a straight line and often we take turns and turnbacks, and there are different paths to take. I think it will be a nice metaphor. I like to use the ribbons from gifts or some that are used from cloth hangers. I have different sizes which make a nice contrast. Let's get started. This technique works with acrylic, gouache, and watercolor. The process. You can approach this technique in two different ways. You can either use a second sheet of paper to put on top of your artwork paper, or you can make almost symmetrical images by folding the paper in half. Let's start by using extra paper. For this technique, I'm using gouache because I like how it dries very quickly. I have my paints already in my palette and I get a sheet of regular printing paper ready. Then I start by wetting my brush. Now, you have to get the paint onto your ribbons. That can be a bit tricky, especially in the beginning when your ribbons are still dry. Then I arrange it on the page and cover it with another paper. I am tracing the ribbon with my finger to completely transfer the paint to the paper. You can experiment with the wetness of the paint. If it is very wet, you will most likely just get solid lines but if it has the right dryness, you can even transfer the texture and the folds of the ribbons very nicely. I repeat these steps several times. The second option is to fold the paper. Putting the ribbons in my small mixing containers worked best to get them full of paint. When I'm placing the ribbon on the paper, I can, of course, try to get some interesting folds, but I cannot influence it completely because being full of paint, you shouldn't move the ribbon around on the page anymore once it touches the paper. Here, I am using watercolor paper with a pretty rough texture. My ribbon could have been more saturated with paint. Later on, you will see me using regular printer paper, which takes the color more easily. You can use one ribbon at a time, or you can use several at the same time, then the images will look less symmetrical because of the ribbons going over and under each other. You will also see an example of that later on. Now, you can watch me experiment while I tell you about finding your way. Finding your way as a creative person is a hard topic and one that I struggle with myself. When I was still at school, I have wanted to become a painter or an illustrator, but I didn't even dare to try. Sometimes I'm wondering where I would have been in my career if I had been painting and illustrating full time for 20 years now. But it is, as in this proverb with the tree, the best time to plant a tree was 20 years ago, the second best is now. But there's always time and it's never too late. Once you take action, once you start leaving your comfort zone, things will start to change. Once you start talking about your dreams and once you even allow yourself to dream in the first place, and then the next step is just taking a step, even a tiny one, to tip your toe outside of your comfort zone, to start a creative practice, and to focus on the process. Because when we are focusing on the process, we can actually enjoy the journey and the journey takes up the most part of your life and you really want to enjoy that I guess. Another thing I want to mention in the context of journey is speed. I think it is unrealistic to go at the same speed all the time. It is as it is with everything in life, there are seasons and things ebb and flow. There is time to plant the seeds, time to grow, time to harvest, and time to rest. Although it is good to get into a habit and have a creative practice, I feel that taking care of yourself is the most important thing, and following this rhythm in your creative work can help, even if that means breaking the habit for some time. When I did my first challenges, I was so excited and pumped up that I was always thinking about what to do next. I was stuck in planting and growing. If we stick with that analogy. I forgot to harvest and to cherish what I had already created. Having this picture of seasons in my mind helps me acknowledge these different phases and needs and I hope it can help you too, because you start where you start, and you go where you go, and you don't know if you're going to reach your goal, but your creative practice will always be worthwhile if you focus on the process and enjoy the journey. One final thing I want to share with you is a quote, and it's by a fellow Skillshare teacher and artist, Jane Davies. It really resonated very deeply with me. "It's a search and I'm not going to know what I'm looking for until I find it." She has put into words what I couldn't. I think it's very fitting in the context of your creative journey. Please don't forget to upload today's pictures. Maybe you even want to share with us about your creative journey. I would love to hear that.
12. Final Thoughts: Congratulations. You have made it through this challenge. I hope you have enjoyed it and taken away some new ideas to incorporate into your creative practice. We have covered quite a bit. The need to create, the flow state, focusing on the process, resistance, building a habit, the importance of play, and finding your way. When I was talking about finding your way, I mentioned the concept of seasons. Now it's your time to harvest and enjoy the fruits of your work. You could do so by pinning your favorite creations of this week to a wall where you can easily see them and enjoy what you have made. If there's just one thing to take away from this class, it is to take time to play. If you want to dive deeper into mark making with everyday objects, have a look at my first Skillshare class. "Unlock Your Creativity: Mark Making with Everyday Objects". To be more up-to-date concerning my personal art journey, you can follow me on Instagram. If you want to get notified about further classes, don't forget to hit that follow button here on Skillshare. I would appreciate it very much if you took the time to leave a review. I'm looking forward a lot to seeing your class projects. That said, thank you for taking the class and bye for now.
 Cornelia Zelinka-Bodis, Mixed Media Artist