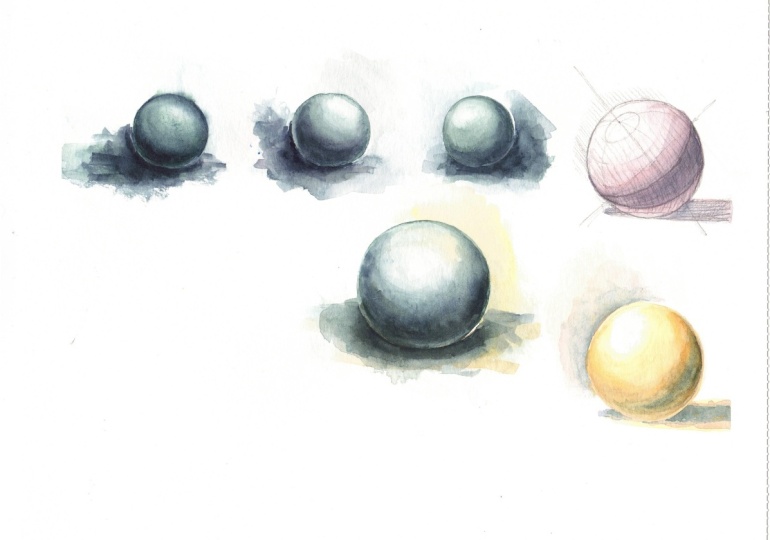
Transcripts
1. Class intro and Project: Let's all take a deep dive into a simple watercolor project and paint a dimensional sphere. Intermediate watercolor painters will be most comfortable, but beginners can
benefit hugely, too. Right now, here are the
supplies that we'll be using. Pause the video
and take a look at the list, gather
everything together. This simple exercise offers us an opportunity to be relaxed, mindful, and intentional
with our painting. In addition, it will
drastically improve our control and
our understanding of the watercolor medium. This low pressure
relaxing exercise can be done on little
scraps of cotton paper. But make no mistake. This is a powerful exercise
and drill that will improve your technique and
your control in watercolor. So let's create some
dimensional spheres in this simple
three step process.
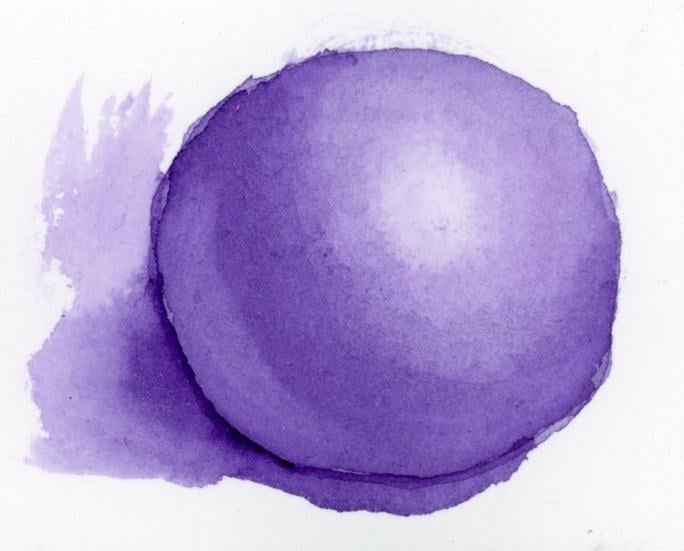
2. First Layer Spheres: And so to start our spheres, I'm going to use my brush
and some clean water and pull together
an estimated amount of the right purple wash using my dioxyxine violet paint and my size for soft
watercolor round. This is definitely
enough of my color in a dilute te consistency, light Te consistency wash for me to paint the shape
that I intend to paint. I'm going to patch in the estimate of the shape
that I'm going to paint. So making sure that there's
enough contiguous water to form a puddle that approximates the shape
that I want to fill. This should do it. Now
I'm going to switch gears using my brush as a
water facilitator, closing up gaps and taking the time to manage
the edge of my shape. I'm not allowing any of
these edges to dry out, and I'm not allowing my brush to become fully unloaded
at any point. My brush is always at
least a bit wet as I decide what the parameters of this shape are going
to be more or less. And now I can clean
up the shape, stitch up any open pieces of
it and manage these edges. Giving it a bit of that
precision, stitching things up, and when I'm satisfied with that shape and my
water coverage, then I'm ready to proceed
to the next step. This is to lift
part of this wash. I'm going to do that
first by tapping my brush twice on my paper towel and lifting color out of this top right hand
quarter of my image. I'm going to tap my brush again and remove paint
again from that area. Once I've completed this, I'm going to switch brushes, clean and wipe my
small craft brush, select a spot where this
strong highlight can go kind of in the middle of that lit up spot where
the lighter value is. And if I don't find this clean and bright to
my satisfaction, I will take just
the smallest drop of water just touching
the tip of this brush to some clean or cleanish
water at this point and tapping that into place quickly removing water
from this brush. And gently circling the
outer edge of my highlight. If my highlight has
rough jagged edges, it means that there's a little too much water on that brush. We're keeping that as
minimal as possible, the tiniest little droplet
and add it to my paper. Wipe my brush and before
these edges get really hard, I'm just going to swipe the
edge of this little circle, this little white circle of highlight with my craft
brush extremely lightly. A Okay, so we have completed our
first layer of our spheres. You will notice that some have some imperfections
in all likelihood, especially in these
early layers. This is not that important. It's also very important
to keep in mind that you need to wait until your
layer is completely dry, not just to progress to the
next layer of painting, but to evaluate how you did. The proof is in the dry paint. The jury is out until that
paint is totally dry. You will see that where
I took a little too long noodling with my edges and trying to
manage those edges, I have a bit of a hard line, a hard transition
between these two areas. This wasn't apparent
when my paint was wet, but it's very apparent now. This is not going
to be a problem for this image in
all likelihood. I think that it's
important to give yourself a little grace and also to take the time to try and reverse engineer why you think you've got the results
that you've got. So we will take a
short break and come back and add our second
layer to this painting.
3. Second Layer Spheres: I'm using my soft
watercolor round, adding water to my dioxyxine
violet wash. And once again, I'm creating an estimated amount of a T consistency wash
to add to my painting. This time, it's up to you. You can make this a little
bit darker than weak tea, more of a strong te
consistency and color. That's nice to
advance the value a little bit darker that way,
but it's really up to you. Once I've mixed up the amount and the dilution of
wash that I want, I'm going to think
about the direction that the light is coming
down onto my sphere from. It's going to angle down and hit here causing this highlight. This other half of my
sphere is not illuminated. So I'm going to
paint a flat wash of color onto this area. And just essentially cover
my shape with a flat wash. Again, estimating the amount of fluid that I'm
going to need to cover this area and using my brush to manage the surface tension and
knit those edges together. I'm going to bring this up
just ever so slightly at this corner and a little
bit more at this corner, so I have a very
slight C shape here. Once I've done this,
I'm going to take clean or relatively clean water and wash all of the
pigment out of my brush. I'm going to give my brush two or three scrapes along the side of
the water container, and then I'm going to work this clean brush half on
and half off of this edge. Then place my brush half on, half off that hard
transitional line and give it a bit of a wiggle
as I work my way down. I'm going to quickly knock all the pigment off
of my brush again. Give it that same three or
four wipes on the edge of the container and soften any hard transitional
areas that I see. The brush is half on and half
off this edge of the paint. And by dragging it across, I soften the edge if there's any more visible purple
I clean my brush, wipe my brush, and soften
and remove excess paint. Repeating removing the
pigment from the brush. The clean brush is the
key to these soft edges. This time I'm going
to tap my brush on my paper towel to really get rid of excess water
and close this up. I can even skim
over my highlight. It's a little bit
dangerous to do that. I can do a little bit of a lift. But what that will give me is truly smooth transitions
all the way across. At the very end of this process, I'm going to take this damp, clean brush and I'm just
going to wipe along here. This is the edge that is opposite my highlight
and my direct lighting, us this is going to be lighter than the surrounding edge
in our finished sphere. So that just is not
totally mandatory, but it's one of those
fun little things that really helps this pop. As long as this is damp, it will still lift sometimes
a little too happily. So as you see, it's hard to resist the temptation
to go back in there, no matter how long
you've been doing this, but it's a good idea
to resist that urge. Let these dry once again until they're ready
to accept more paint, we will come back and we will
finish off this exercise.
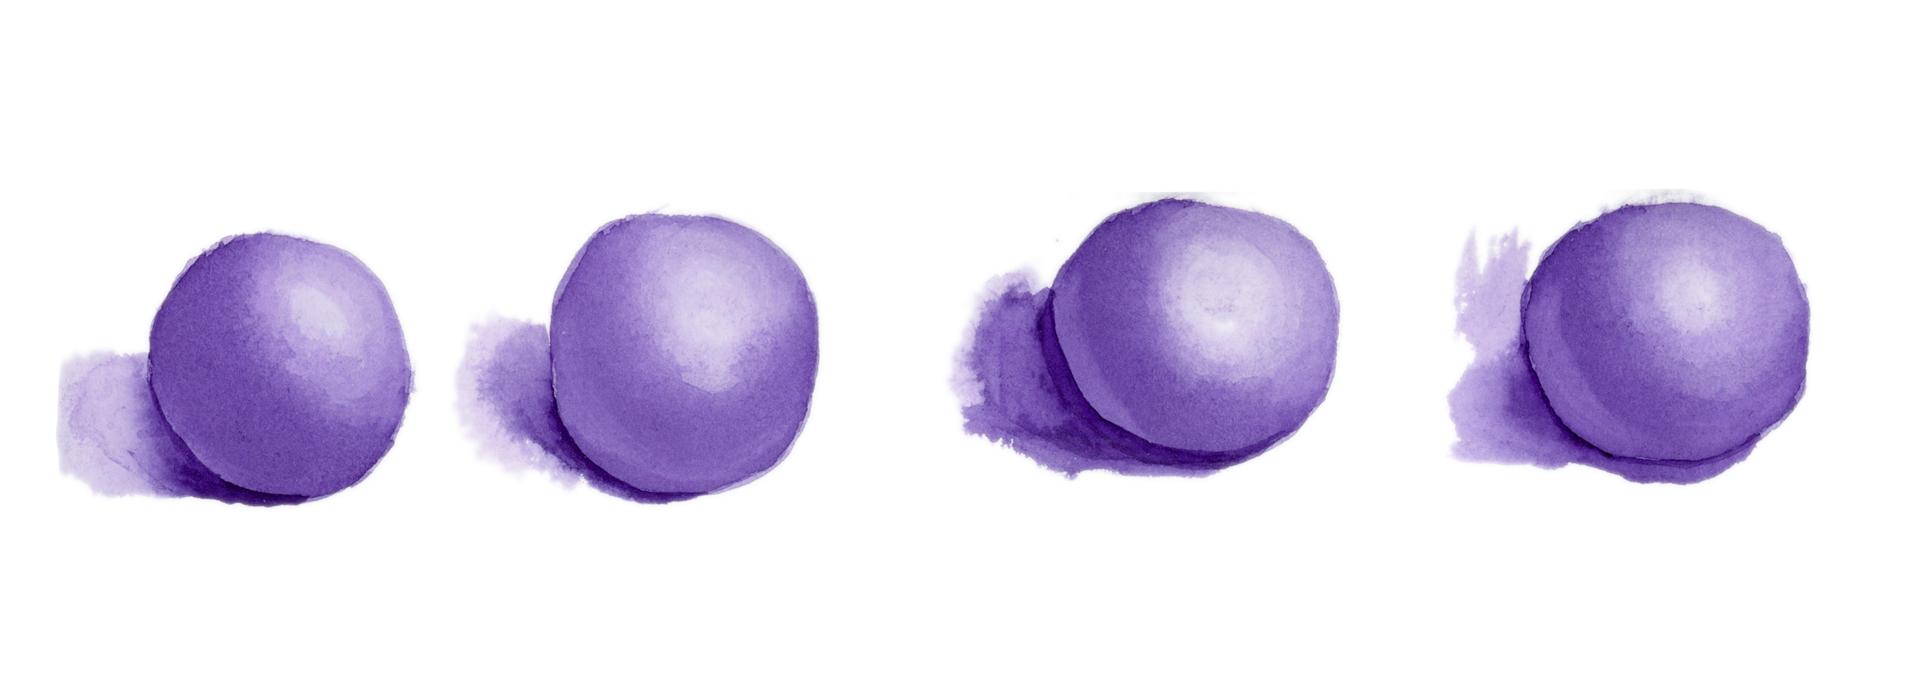
4. Third and Last Layer Spheres: Okay, so this sphere has
two layers of paint on it, my initial wash with
my highlight included, and a wash that deepens and darkens some of the values
as we head towards shadow. I'm going to add some
specific shadow areas to this sphere. And I'm going to start
with a wash that is either the same light tea value or perhaps a little bit darker, heading more into the milky
texture of watercolor paint, maybe still tea, but
rather on the strong side. And I'm going to patch in
some specific dark values. If the light strikes here, this part of the sphere is pretty blocked
from direct lighting. This part of the sphere
down here at the bottom is also pretty blocked off
from that direct lighting. So these are strong
shadow areas. Then patching those in
and connecting them. Moving towards this edge
just deepens and intensifies some of this shadow
area, rinse my brush, give it a tap, and use that damp brush to
soften that transition, tap the brush and repeat. M until that edge
really disappears. Same story over here. Clean brush, tap the brush, and help this shadow. Soften as it migrates over
to that distant edge. It's kind of like a lift. It's kind of like
an edge soften. Just wiping across
this pigment and what I'm going to wind up with is this nice dark area that's just a little bit lighter than
the values surrounding it. That's exactly what I
want to finish that off. To finish things off, I also like to add a shadow. You don't have to do
this, but I really love what it adds to the sphere, and it starts to just get me thinking about lighting
and dimension. It doesn't have to be perfect, but it's nice to kind of acknowledge some of these
physics a little bit. So if my light comes
down at this angle, my shadow is bounce downward
in the opposite direction. I'm going to paint the
darkest part of that shadow in with thick syrupy mask tone. This is just fresh paint with the slightest
amount of water, just enough to make
it fluid on my brush. And I'm using the
extreme point of my brush to carve this edge. With as much precision
as I can muster, you will probably do a little bit better at
that part than me. And either way, practice
makes progress. These are just exercises. It's not that important. But it is kind of fun
to lose yourself in the moment as you try to be
as accurate as possible. I find that that has a strange kind of calming effect on me
that I really like. So this sits on dark shadow. This sphere sits on a
surface that's very dark, and I'm going to take
this super dark paint, thin it out with a little bit of my dark wash and sweep
that along the edge, much like an edge soften. This just dilutes this
wash a little bit. Shadows get lighter as they extend away from the
object that casts them. And just for a little
bit of extra fun, why not pick up a little
more water and just kind of wash some lighter
wash onto here. And really pull this up, make it fluid, and you can have a little
bit of fun with it, get a little creative,
little playful. Don't get too caught up
in it, lost in the weeds. It's easy to overdo just
about anything in watercolor. But it is nice, I think, to just give this kind of
thing a little bit of context. For me, that's kind
of the difference between good and awesome. It's just that little bit
of context and background that makes this
really pop and really feel dimensional and
a little bit real. So that's just one way that you can finish these off and have a
good time with it. For proper lighting,
this shadow would probably pull away from
this a little bit. It would kind of, you know, be more circular in
this kind direction, but it's neither here nor there. We've had a good time
completing this motif, and this is just
an example of what this can look like when
it's totally finished.
5. Your Turn + Thanks!: Well, that's it. You're
ready to create volume, smoothness, and depth in
your watercolors with ease. Practicing these
round forms until it becomes etched in your
muscle memory will help you grow confidence and ability in painting dimensional forms
of all shapes and sizes. At those times that I
don't know what to paint, but I know I want
to paint something, it's always fun to return to essentials like
these spheres. I hope you've
enjoyed this lesson. Please post your spheres
under the projects tab and ask any questions that you might have
under discussions. I'm happy to try and help, and I love seeing the results of all of your wonderful work. Till next time, have a
great and creative day.
 Dena Adams