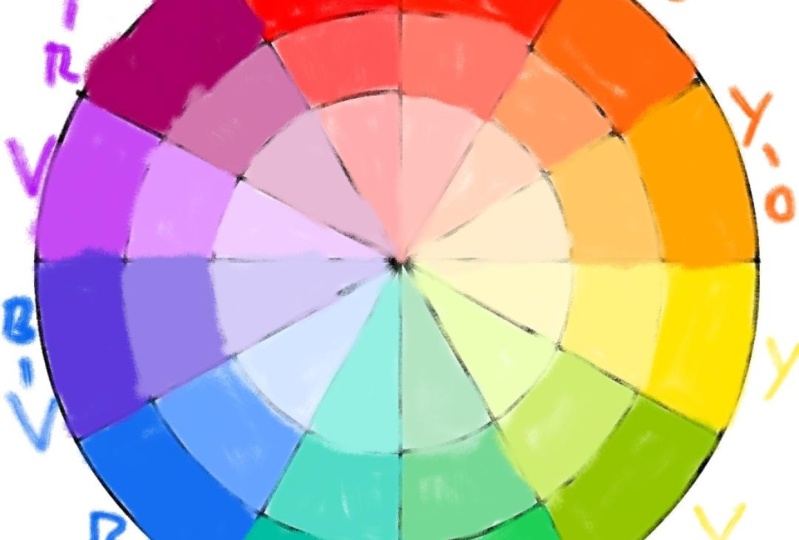
DRAW COLOR WHEELS - Draw charts with no angle math and enjoy the process
 Dena Adams
Watch this class and thousands more
Watch this class and thousands more
Lessons in This Class
-
-
1.
Introduction
1:53
-
2.
Materials and Framework
3:10
-
3.
Dividing And Erasing
2:27
-
4.
Labeling and Extras
2:33
-
5.
Project and Wrapping Up
2:27
-
-
- --
- Beginner level
- Intermediate level
- Advanced level
- All levels
Community Generated
The level is determined by a majority opinion of students who have reviewed this class. The teacher's recommendation is shown until at least 5 student responses are collected.
53
Students
4
Projects
About This Class
In this class we're going to focus on the drawing before the painting and DRAW the framework for color wheels by hand. Why? Well...
When you paint, color exploration and color management is really more fun and more helpful with consistent and clean charting. It's tempting to skip it, but you'll be happy you didn't! (I stopped skipping it and MIND BLOWN it helped.)
If you're like me - and you'd rather get out the paint, get messy and get to the good parts - check this out.
You can create evenly-spaced color charts with a serene compass-and-ruler method that feels calm and cool, and works perfectly each time. Let's do it!
This is a beginner class with beginner drawing - BUT the color possibilities and potential is definitely ALL LEVEL.
Whether you're a beginner in painting
whether you're team CMY or RBY
whether you're a realist deep into Munsell
or whether you're drawing a color wheel for your kid's first art lesson
- you'll love the sweet simplicity of a clean chart on a fresh sheet!
All you need is a compass, a ruler, a straightedge, and your intended work surface.
The end result is total color-mixing READINESS.
Meet Your Teacher

Hi there! I'm an artist and maker in Minneapolis, MN. I've worked in a variety of media for over two decades, from kinetic painted cut outs, to landscape in oil and monotype, to quirky watercolors for greeting cards and posters. I truly believe that anyone can make something amazing, and I love to design art learning projects and processes that embed many small wins on the road to exciting results.
I'd love to see what you do on social media, so feel free to reach out via instagram or join my creative community on facebook.
See full profileHands-on Class Project
In this class you'll walk away with everything you need to make plentiful, fill-able color wheel charts.
For your class PROJECT: share your favorite three or four color palette in the PROJECTS tab!
You can just type out paint names, color codes, share the manufacturer you love best, and why. A scan or a photo would be great. BONUS points for painting them all out in a newly drawn color wheel, but you don't have to do that. Share YOUR suggestions for other folks to fill their wheel. I'll be really excited to see everyone's faves.


Class Ratings
Why Join Skillshare?
Take award-winning Skillshare Original Classes
Each class has short lessons, hands-on projects
Your membership supports Skillshare teachers
Learn From Anywhere
Take classes on the go with the Skillshare app. Stream or download to watch on the plane, the subway, or wherever you learn best.