Transcripts
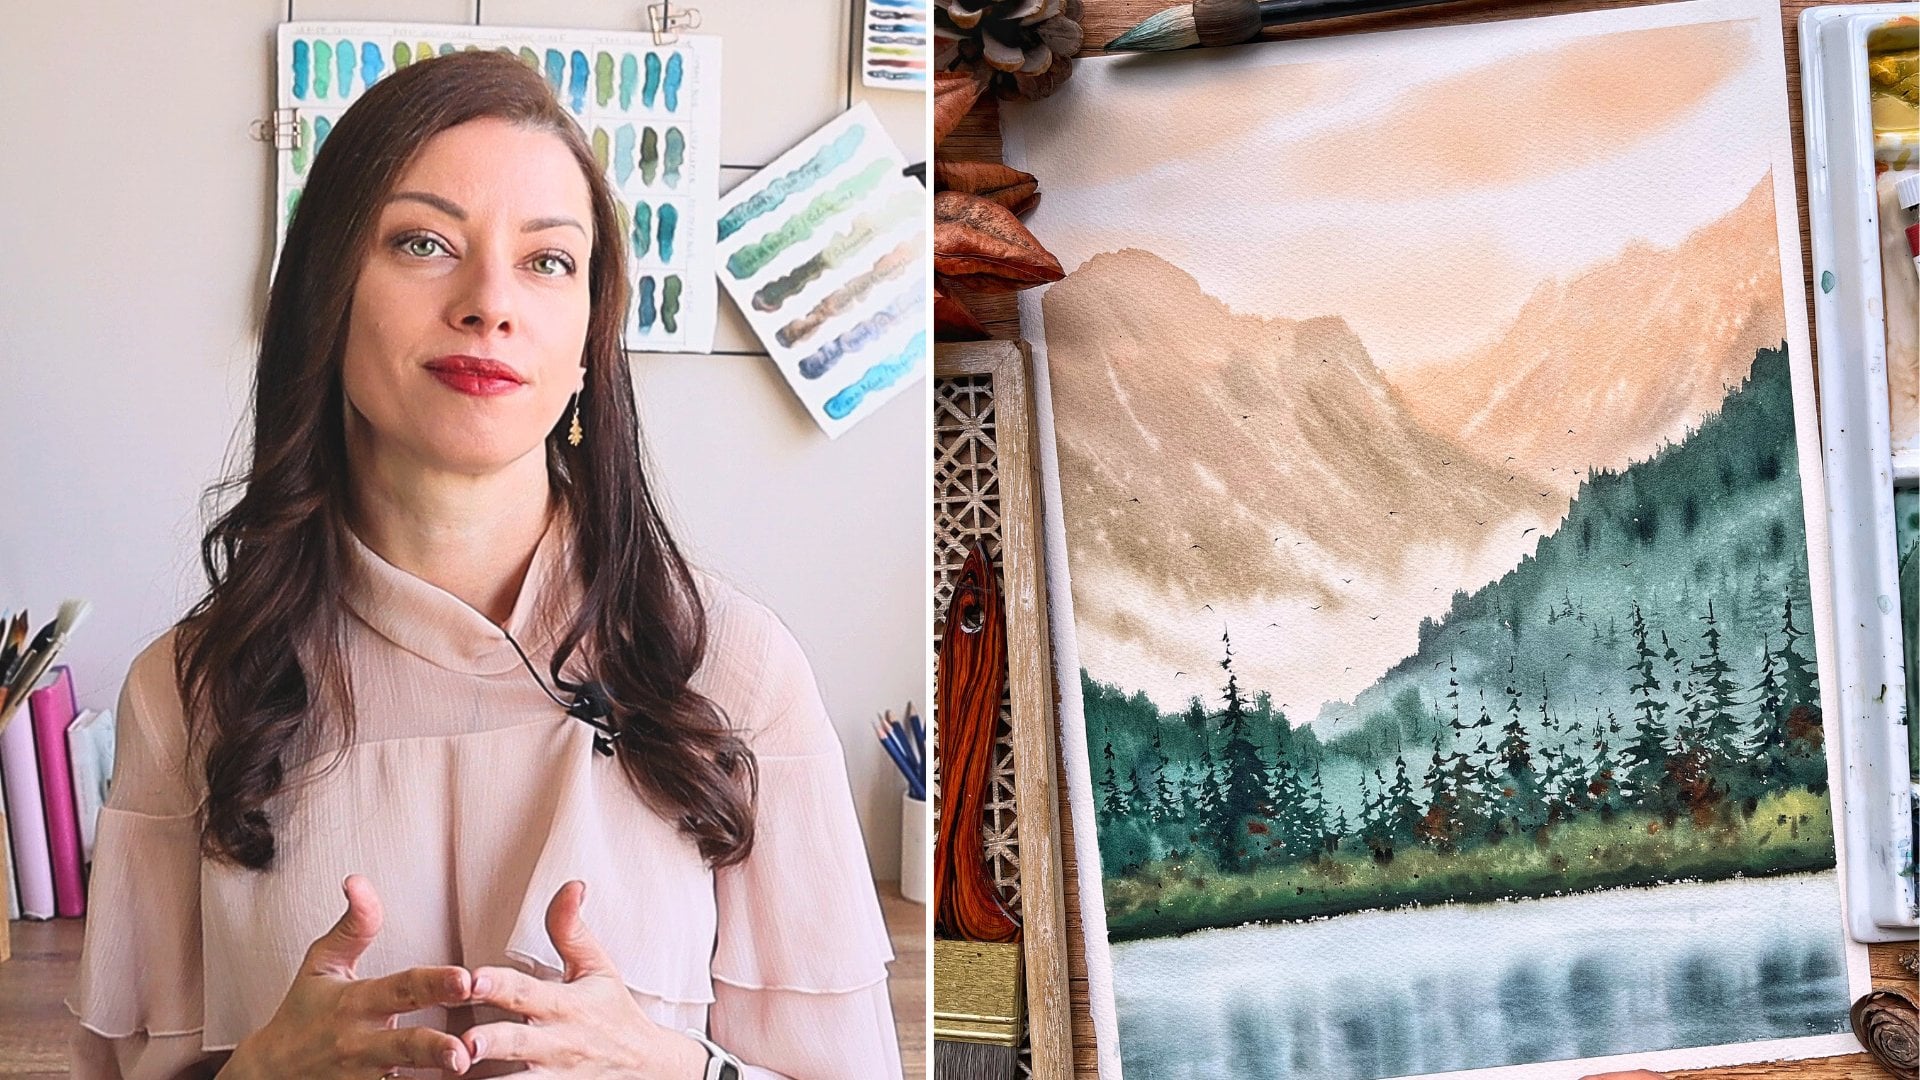
1. Introduction: Did you know that watercolor is considered to be the most difficult painting medium? It's unforgiving, unpredictable nature is making it hard to control, but aren't those the thing same qualities that make it look so magical? Hello, friends. My name is Elina, and now I'm going to share with you my watercolor secrets. I love watercolors for their fluidity and transparency, for the undeniable joy of watching those creating on the paper. I've been painting with this medium for almost three years now. Nowadays I get lots of questions about how I painted this board that. Today I'm so excited that I can finally share with you my favorite techniques. It wasn't that long time ago when I was a beginner too, and I remember very well the struggles beginners have. What I teach in this class are all the things I wish I knew back then and even a year ago. We'll start by going through the basic watercolor techniques that you need to know before we jump to the ones I call magic. We'll discuss the most important aspects of water control. This is the thing that can make or break your painting. It's really important for you to know how to use water to your advantage. I will give you some useful tips and tricks which can use in your future work, no matter the subject turns out. Finally, we're going to combine all the knowledge to paint a beautiful desertscape. I love painting deserts. They're some mystical, magical, and unpredictable exactly like watercolors. No matter if you're a beginner or if you have used watercolors for awhile, by the end of this class, you will feel much more confident and ready to pursue new horizons in your creative journey. I'm so excited about this, guys. Let's get started.
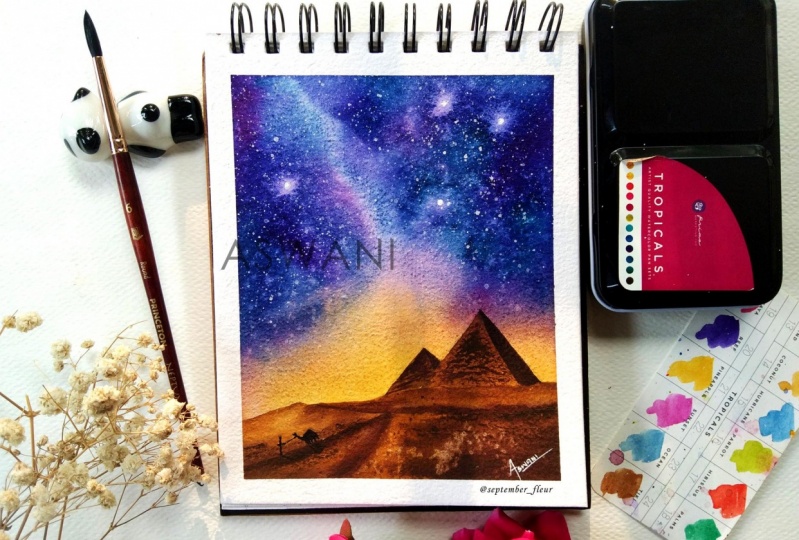
2. Project Overview: For the final project, we are going to combine all the techniques you have learned in the class to paint the beautiful desertscape. This is one of my favorite subjects to paint since I can easily make it look magical, like a scene from a fairy tale and I will show you how to do it. We'll start by going through the basic watercolor techniques that you need to know in order to complete the class. These are wet on dry, weight on wet, lifting, glazing, and dry brushing. After that we'll jump to the ones I call magical: splattering, pouring effect, the milky-way effect, and using salt. I strongly suggest that you practice these before you jump to the final project. Some of them require you to choose the perfect timing for a [inaudible]. In order to get familiar with them, and that's for your final painting, practice them on a separate sheet of paper the way I'm doing in the class. Choose a time of the day when you want to be disturbed, find a place in your home with good natural white. Maybe, prepare yourself a cup of drink and enjoy the process. We'll discuss the materials in the next video.
3. Materials: Here are the materials you will need in order to complete this class. First is paper. It is the most important of all of the supplies we're going to use. I recommend that you use 100 percent cotton, 300 GSM paper. Using cotton instead of cellulose paper is crucial for the techniques we are going to use in this class and will affect the results you are going to achieve. The reason for this is that cellulose paper can't take heavy washes and layers. I will be using Fabriano Artistico, but you can use whatever brand you have available. Of course, we will need water color paints. Generally, they come in tubes and pens and you can use whatever you have already. There are student grade paints and artist grade paint. The main difference between the two is the pigment concentration. Students grade paint have less pigment and more binders, and thus they're less pigmented and vibrant. I will be using the Tropical set by Art Philosophy. It has such bright shades which I love to use. I will show you some of my favorite mixes. You can see that I have used this one a lot. Next is brushes. For this class, you will need at least two watercolor brushes, one bigger and softer, and one smaller with a good [inaudible] and a good point. The soft hair takes more water and paint and is used when we need to cover bigger areas or make smooth transitions from one color to another and also they don't always have a sharp tip. They come in handy when you want to create more loose shapes and textures. I will use my Escoda number 10 for that, and probably my Escoda number 8. The smaller brush we'll use for more detailed and precise work. It's also helpful when you want to lift paint from the paper. I will show you how to do this in the next lessons. For this, I will use my Escoda number 6 and my Escoda number 4. I will also be using a big hake brush for wetting the paper. It has very soft hair, which takes a lot of water. This way, I don't need to go back and forth from my water jar to the paper. But you can use the biggest brush that you have. You will also need two jars of water. One we use to wash our brush and the other we use when we need to pick up some clean water. I will use a paper towel and a cotton towel. Also I will use this ceramic palette to mix my paints because it's easier to clean than the tin palette we have here and it's not staining. You'll also need white gouache or white acrylic paint for painting the stars. I will also use the spray bottle to spray my paints before starting to work because this will activate them and will make them easier to pick up with my brush. Of course, a pencil an eraser. I will use this soft eraser because it is more gentle on the cotton paper. If you want to erase something, you just dab on it instead of doing this kind of motion, which tears the fibers of the paper. Also I will use this paper tape which I got from a hardware store. You can use whatever you have in handy for this. I will use it to tape my paper to a board. This is just a simple board. Then if you don't have it, you can tape your paper to the back of a sketchbook or a magazine or whatever you guys have in handy. This is pretty much what we'll need in order to complete the class and just use whatever you have in your home. Don't go and buy new supplies. I will meet you guys in the next lesson when we are finally going to explore the water color techniques
4. Basic Watercolor Techniques: First things first, we are going to start with the basic watercolor techniques. This is by no means an exhaustive list of all the waste watercolor techniques, but these are the ones that you're going to need in order to complete this class. Let's just start. We are starting with the wet and dry technique. This basically means that you take wet paint, which is always the case with watercolors, and you just place it on a dry paper. The more water and paint you have on your brush, my brush now is dripping wet, the less control you have on your strokes. If I dab this on a paper towel to absorb the excess moisture, I can be much more precise with my lines. So this is wet and dry. Wet and wet is the most fun technique with watercolors and this is where the magic happens. Let me show you. This is just clean water. In wet and wet, we take wet paint and we are putting it on a wet paper. The pigments just flow wherever they want, and we can play with the shapes they are taking. We can have different colors and they will just mix on the paper. You can also have wet in wet with not wet water, but wet paint. Again, the colors we will just mix on the paper. For these techniques and for the results you are going for, it is really crucial the amount of water you have on your page and the ratio between paint and water on your brush. But don't worry, we are going to explore this in detail in the next lessons. Now we continue with bleeding. Bleeding means that you have two wet spots on your page and they just touch, and you see how the paint from the one spot is bleeding into the other. Usually, it's the spot that has more water that bleeds into the other. This can be desired effect or this can ruin your painting depending what you are going for. So you should always be aware if your painting is dry before going with another wet layer. Next is the dry brush and this is one of my favorite techniques. I remember how impressed I was when I learned about it. You can use it for adding texture or if you want to paint water surfaces, like this one. Here I did the dry brush technique. I will show you how to do it. Again, you take some paint, you dab your brush on a paper towel, and you just do these light movements with your brush and the texture of the paper is helping you to achieve this effect. It's why I used cold press because it has this beautiful texture and if you use hot press, you won't be able to achieve this texture because hot press paper is smooth. You can also smudge some of this with a down brush, and you can see how beautiful results are we getting. Next is lifting. It means that we are going to lift some of the paint that is already on the paper. You can lift wet paint and you can lift dry paint. In order to lift wet paint, you wash your brush, dab it, and just go over the place where you want to lift the paint, and then wash the brush again, dab again, and do the same. You may have to do this multiple times in order to achieve the results you are going for. But it depends on the pigment and on the paint because some of the paints are harder to lift than the others and some of them are almost impossible to lift. For the dry paint, I'm doing the same. I'm cleaning my brush, I dab it, and I'm just going over the dry paint. Then I wash my brush again, and I'm just pressing, and I'm going to take the paint. The stiffer the brush is, the easier this is. This is not very stiffer, but still, you see I am managing to lift some of the paint. When you're done, you have to blob this with a paper towel. What is glazing? This is very useful technique. You can use it to make a slight color change to adjust the value or to add shadows to a subject. Let's say that this is a sand dune, which we are going to paint in our final project, and I want to add shadow to that sand. I will just take this color I have here. This is dry. You should always do lifting once it's dry. I'm taking some paint and I'm just going over the previous layer. Now I wash my brush and I wet again, and I'm going over the lines that they have. The goal is to make this line disappear so that we have smoother transition. You can do this multiple times, but every time, you need to wait for the previous layer to dry. Practice these techniques, and I will meet you in the next lesson where we'll discuss water control.
5. Water Control I: The Paper: Water color is known to be an unpredictable medium. How can it be otherwise? You can't always know where the pigment will flow and how it will work when the water evaporates from the page. But there are things that are in control and knowing how to do it is one of the most important steps in your watercolor journey. It takes a lot of practice and patience and there will always be surprises with knowing the ways to control the water and the pigments on your paper will make you much more confident and will take your paintings to the next level. I will share with you the tips that helped me along the way. I'll divide them in three sections controlling the water on the paper, on your brush, and in your paints. We'll start with the paper. In the previous video, I promised you to explore a bit more the wet-on-wet technique, and now I will show you how the different amount of water on your paper is leading to different results. This way, you'll know what you need to do when you're aiming for a certain effect. I have prepared my sheet of paper with three separate sections. I'm going to weigh each of these three sections using a different amount of water and then I'll use the same mixture I have prepared over here to try and create a wet-on-wet effect. This way you'll see the different effects that occur got depending on the amount of water on the paper. Let's say we want to paint a blue sky and leave some white spots for the white clouds. Starting with the first square, I'll show you a mistake beginners often make and I used to do it too. With cotton paper it's very absorbent and when you cover the surface with liquid, it's soaks it in a matter of seconds or sometimes a few minutes depending on the humidity of the area you're living. Here I will just cover the square the way I used to do it when I was a beginner. I will start without paint and I didn't want to waste any time in preparations, so I just took some water, placed on the paper, and now let's try to paint our blue-sky with white clouds. I'll leave white gaps, which will be the clouds. You can already see that I have spots that I missed to water. This way I achieve this hard edge and here I have a soft edge. Here I have some white spots which are not covered with water and my edges are also almost dry. This can be desired effect, especially for a sky. Sometimes you may want to have a cloud which is somewhere soft and somewhere hard, but it's important to know how to achieve it. This was the first square. Now, I am going to add the second one. For this, I'm going to use a lot of water. Even after I've covered the whole surface, I'll continue to add more and more water. Now I have pools of water on my paper. Let's see how the blue sky is going to look. You see that I have so much water on my paper that the paint is flowing everywhere and I just can't control it at all. This can also be a good thing if you want to achieve some super small blends, and I will show you how. But for our sky, apparently this is not the way, so I would just suck a bit of this and I will continue with the last section and here I'll water it the way I am usually doing when I am painting. I am taking the water and I cover the entire surface. I'm going back and forth in different directions, and I make sure that my whole page is covered with water and I don't have pools in. If I have pools of water, I can dart my brush and just soak some of the water and continue to water my paper. The goal here is to have a nice even sheen, like that. I can even wait a few minutes or a few seconds and wait for the paper to soak. I will just remove this to soak some of the water. This is what we're going for. We don't have pools but we have a nice even sheen. Let's see now. You see that now we have some small transitions between the blue and the white spot. We don't have hard edges and we don't have dry corners and we don't have this white spot. This is how I usually start. When I'm painting, I'm wetting the whole surface of the paper, and I will show you exactly how in our final project. But now I want you to practice this with your own paper and in your own environment when you're painting, because every paper is different. You just have to wait and see how long you have to wait before you go with your paint. I'll see you in the next lesson.
6. Water Control II: The Brush: It's not enough only to control the amount of water you have on your paper. The amount of liquid you're introducing with your brush on wet surface is crucial when you want to achieve a certain effect. The general rule is that you don't introduce more water than you already have on the paper because this will create cauliflower effect, and I will show you how it looks. Because this section was semi dry and the water from this section washed the pigments away. This is how a cauliflower effect looks. Here we have two sections, and in the first one, we are not going to control the water we have on our brush and in the second one, we will, and you will see how we are achieving different effects with that. For the purpose, I think we can paint a simple sky and a mountain. For these two sections, what we want to achieve again with the background is that nice even shin we have here on the third section. I'm trying to do that, and it's looking more or less like that. Now, I'm going to prepare the mixture for the mountain. I will mix it over here. Over to our second pool. I'm washing my brush, and my brush is dripping wet. I'm going to the first pool, I am taking some of the paint, and I'll try to paint the mountain. For the second one I'm washing my brush. I take off excess water, I'm dabbing it. Then I'm taking the paint. Again, I will try and paint our mountain. Let's dry the two sections, and we'll see how they look. In the first one, we have these pigments that are pushed away because we introduced more water than we already had here, and we have these watermarks. Here you can see that more or less everything looks smooth. We have smooth edge like we want it to be when we paint a mountain in the distance. Try this with your own brush, because every brush is different and it can take different amount of water. So try it with your own brush and I will meet you in the next lesson.
7. Water Control III: The Paint: Watercolor, we vary the color value by adding less or more water. It's important to know how much water we should add in order to get the shade we want. This happens with practice, but you could also exercise it and I will show you how. This is also a great way to explore the colors you have. You can do that with all your colors and keep your practice shades for reference, or even make them in a sketchbook to which you can refer in the future as I will show you, I have here like this. Basically, we are going to explore the value range by adding more and more water to the colors we have. We'll start with almost no water in very saturated color. Let's try again with this one. It's almost more water here. I will just place it over here. I have water just enough to pick up the pigment. This is how the color looks. Now I wash my brush and I add a brush full of water to the mixture. This is what we get. I am repeating this again and again until I have the lighter value possible of this color. You can try this with your favorite or most of your colors. It's a great exercise that helps you to know your paints better. In watercolor, we paint from light to dark, which means that we can't use lighter values on top of the darker ones. We can't use this one on top of this one, it won't be visible Every time you paint in layers, you have to use darker and darker values for every new layer you're putting on top. Generally, water control is to always be aware of the amount of water you have on your paper, brush, and in your paints. I know it's a lot to consider when you're just starting and it can be really frustrating, but don't worry, in time you will start to do this automatically. Until then, just follow the steps and tips from the previous lessons and you'll be all covered. I will meet you in the next lesson, where we're finally going to explore the magical techniques.
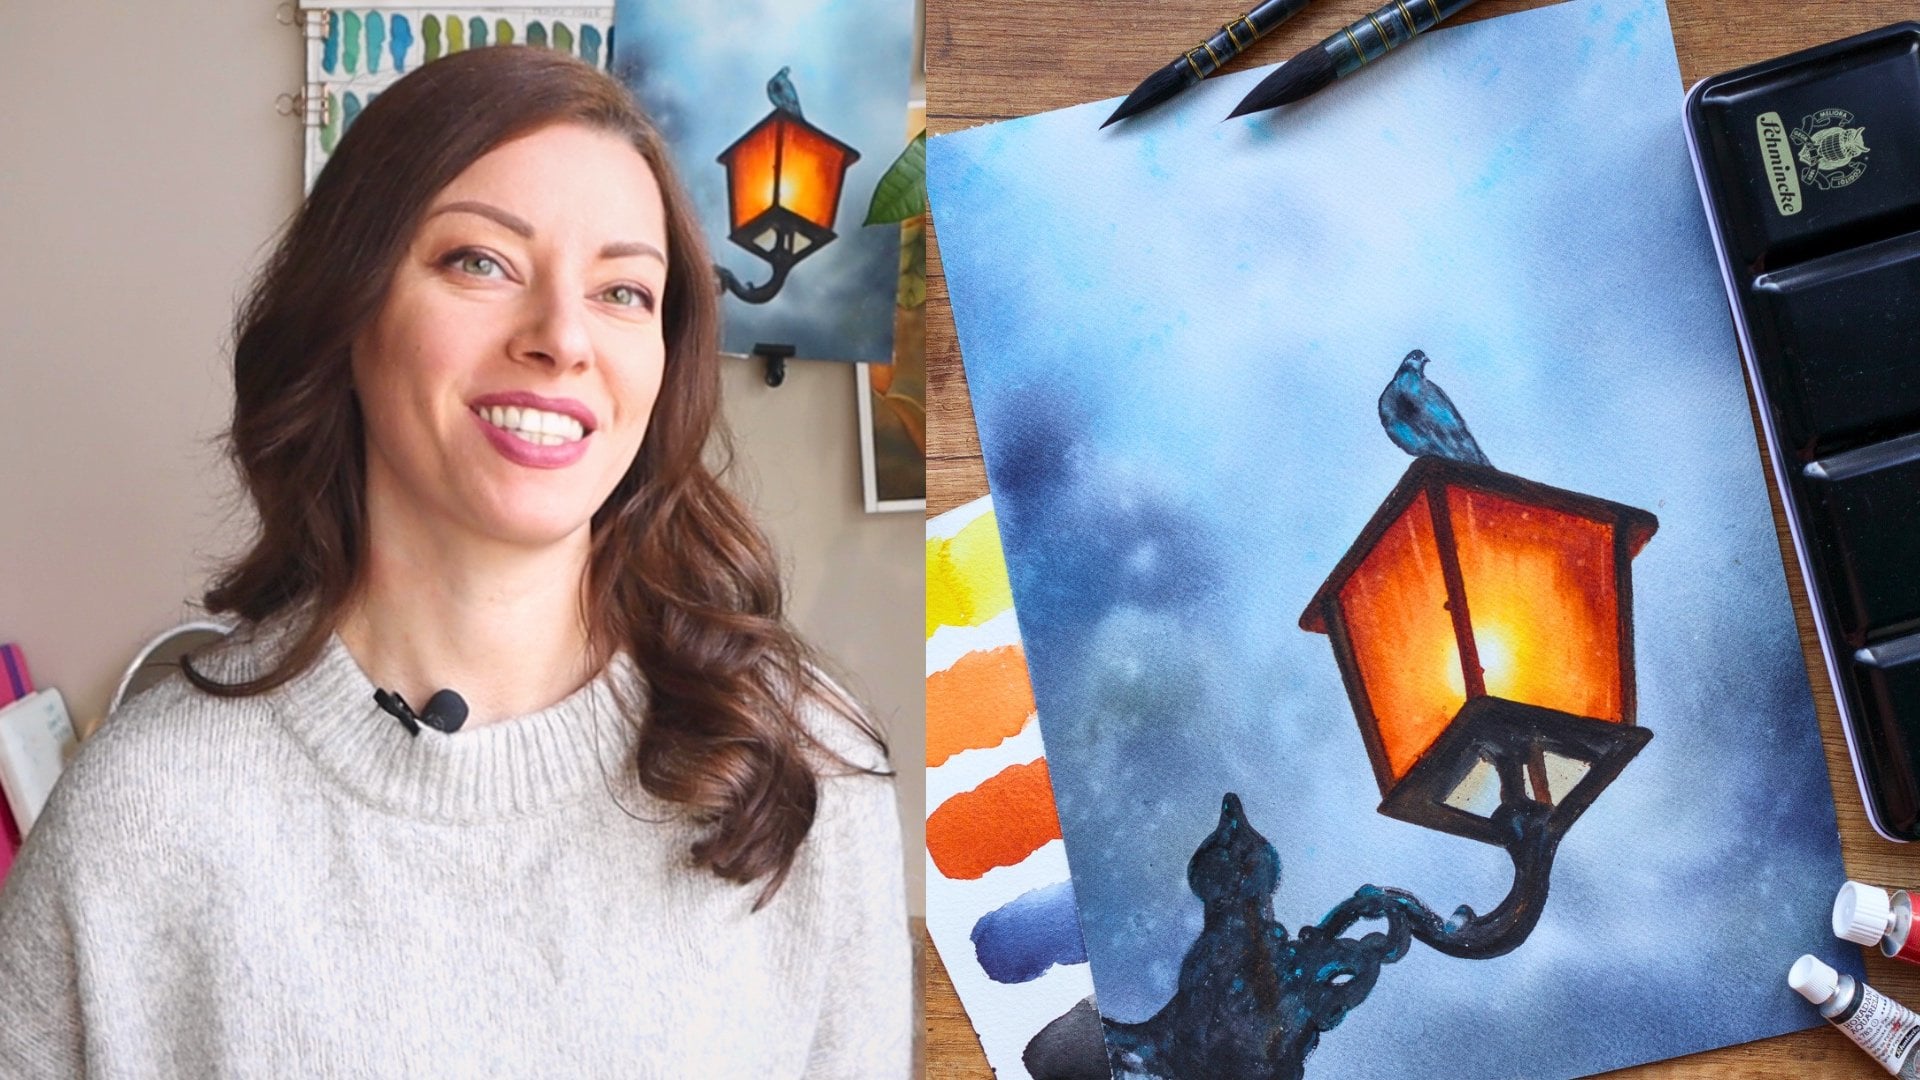
8. Magical Techniques: Now that you know how to control the water on your paper, it's finally time to learn some of the magical techniques. I will show you how you can use these to make your paintings look more magical, more interesting, or just to add texture if you want. We are going to start with splattering, and you can splatter paint and you can splatter also water. Of course, the bigger the brush, the bigger the splatters you get. I'm going to load my brush with some paint and I get these big splatters. If I take my number eight, I will get smaller ones. If my brush is loaded with lots of water and lots of pigment, I will get bigger splatters. Then if I just dub it on a paper towel, you can see how tiny splatters I get. You can also use your finger or you can use another brush to help make the splatters. Of course, you can make splatters on already wet background. Here's my background. If I take a different color, I can make these soft spots, which can be flowers or something else. For splattering water, you also need to have a wet background. I will wait a bit for this to soak in because otherwise the water will just mix with the paint and our splatters won't be visible. Meanwhile, we'll do the milky way technique, which is probably having some professional name, but I don't know about it, at least, so I use it a lot to paint milky ways, and this is how I am calling this technique. I am putting some water on the paper. Now, I am just going to put some paint and I will leave a white space for the place where I want my milky way to be. Like that. Let's say that this is my milky way. Now, I can introduce more water to the place where is my white space and just push some of the pigment away and you can even lift some of the pain the way I showed you in our previous lesson and shape a bit our milky way. Since we have a lot of water and a lot of paint on our paper, we can continue to work with it and play with it until we are happy. The more the paint is drying, the more we are going to have these blooms or the cauliflower effect I showed you earlier. It's something to consider depending on the results you are going for. Maybe now we can splatter some paint. Can you see the soft spots we are getting? These can be flowers or maybe stars or fireflies. I will show you how I use these techniques. Here, for example, I used splattering of paint on a wet background to get these spots. Here, I use splattering of water on a wet surface to get these beautiful glowing stars. Here, I splattered some paint on a dry surface to emphasize the sand, Here here, I used the milky way effect to create this beautiful white space, which is representing the genie coming out of the lamp. Here, again, I used splatters of water on a wet paint to get these tiny spots. Then they can be flowers or they can just add some texture to the field, which otherwise would be boring. The same here, these can be flowers or reflections of the sun, but still, they made the painting much more interesting. Now, we're going to use some salt to get some beautiful effects. Again, we need a wet background. I will have to separate spots. What we want is that the background is glistening. It has this nice sheen we talk about all the time. In order to achieve this effect we're going for, what I have here is just salt, like a lot of salt we all have in our kitchens. Here, I have some bigger crystals and I will just sprinkle some salt while the background is still wet. Here, I will use these larger pieces. Now, I want to leave this to dry on its own.I won't use a hairdryer. Let's put some of these here also. Let's wait a bit, and we'll see what we'll get. Now, our paper is dry and we can remove the salt to see the kind of effect we've got. I'm using my finger to do this. This is the effect we got. We have these tiny crystals and you can use these for flowers or stars or when you're painting snow or ice. The darker the background, the more visible the effect will be because now I use this light blue, but if we use this on a dark blue or some other dark color, this will be more visible. Now, we are going to try the pouring technique and this is super firm technique and messy. We'll just wet this area. I'm just going to take different colors and place them somewhere on the paper. I don't have anything special in mind. I'm just putting some color on the paper. Because we used wet on wet, we already have soft edges, but we can do this even one interesting by tilting our paper. Since we have lots of liquid, the paints are just going to mix on their own. Of course, we can help them by having more water or more paint. You can play with this for a really long time until we are happy. This is a great technique when you want to achieve some super soft blends. I like to use it when I paint Northern lights and galaxies. You can even leave the paper to dry on a certain angle. The paint will continue to mix on the paper while the paper is drying and you'll get these beautiful soft blends. We're going to use this technique in our final project, so I will meet you in the next video when we are finally going to paint our magical desert escape.
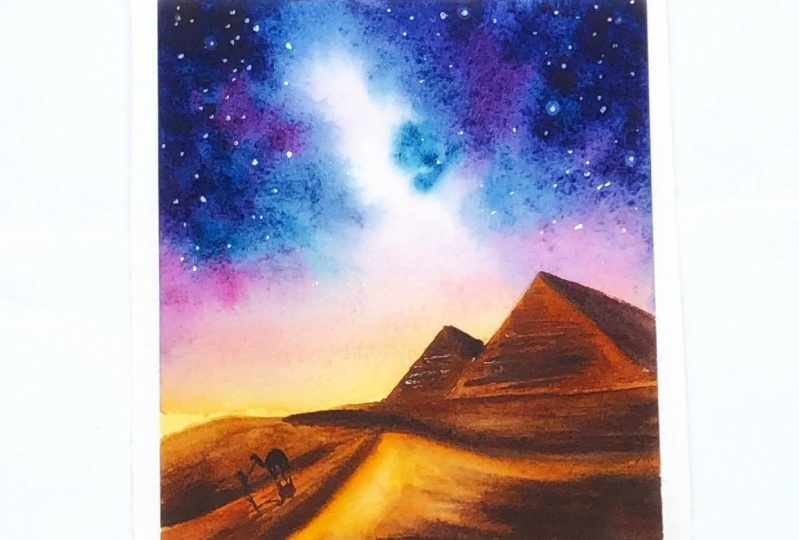
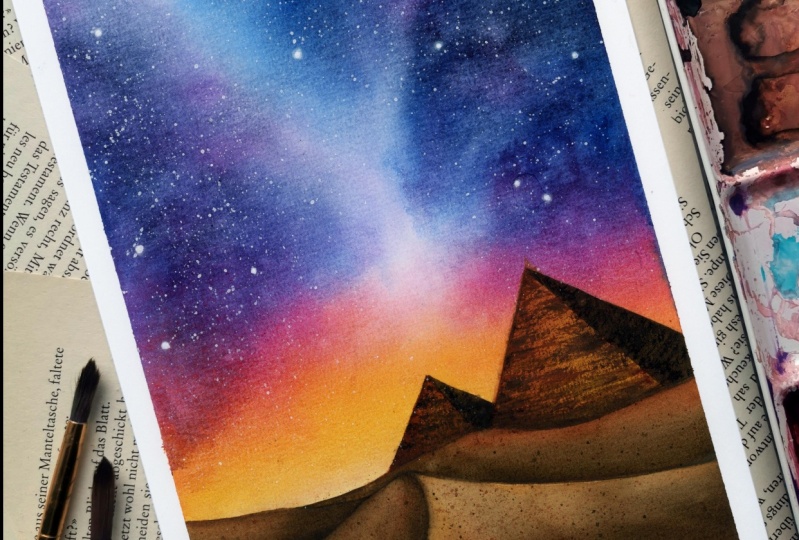
9. Night Sky: Base Layer: Finally, we are going to paint our final project, magical desert scape using the techniques you have learned in the previous lessons. First I'm going to show you how I set up my workspace. I have my paper here, tape to a board with a paper tape and what I do is I place the tape first on the top and on the bottom. After that, I place it on the left and on the right and this way it will be much easier for me to build off once when the painting is done. After placing the tape I run with my finger like this and I make sure that it is well taped to the paper so that I have no gaps and the water can still go under the tape and mess up my white border. I have my paints here and my water jars on the right because I don't want to go with my brush over my painting and risk to have drops of water or paint on my work and I also have here my towel, my palette and my tray with brushes. I will spray my paints to activate them and meanwhile we're going to prepare the sketch. It is going to be a simple sketch. First, we're going to start by drawing the horizon line and in our case, we want to have a lot of space for the sky. Our horizon line will be pretty low. I see some where around here and I'm just going to start by drawing some sand dunes. Here is one. If you want you can check for photographs, but I'm just going to paint from my head because I have painted a lot of sand dunes. Here, I want to have another one, like that, and maybe another one over here. Now we're going to draw our pyramids and if you want, you can use a ruler. I am just drawing a triangle and I'm pressing very light with my pencil and here's the [inaudible]. Here we will have another one, smaller one. Now, I'm going to repeat the lines and I'll press a little bit harder. Finally, we're going to draw our tiny person with a camel and they're just going to be silhouettes. I can make them really dark and again you can check for some reference pictures. I think that's enough for now. Now we are going to wet our paper. I am taking water with my big brush and you can use the biggest brush you have. Now I'm just trying to cover the entire area evenly and I am going back and forth. I am taking my time making sure that I'm not rushing this stage because it's important one. We want our sky to stay wet for longer. I will use a paper towel to take the excess water that's here on the side because otherwise it will go back to the painting and it'll spoil our work. This is how my paper looks, it has this nice, even sheen and we are ready to start painting. First, I'm going to use my bigger brush, number 10, and I'm just going to take some of these orange bright color called pineapple to paint our sunset sky like that. I try to work fast. Now I am going to take some of this nice pink color, It's called sunset and I'm just putting it at some random places. I'm going to drag it a little bit down to our sunset sky and they just mix sandpaper and we have this beautiful reddish orange. Very nice color for a sunset. After that, I'm going to just add a little bit more of this nice pink color to some random places and I'm trying to keep this area white, because here is where I want my Milky Way to be. Now I'm going to use some of the dye blue, which I have here. I want my galaxy to be mostly blue and purple. I want to have the cold colors because I want to have this contrast between the cold and dark universe and the hot desert, but you can use your favorite colors. Just make sure that they mix well like this, I mix the blue with the pink and I am getting this nice purple color. Next, I'm going to introduce a little bit water to where my Milky Way would be like that. Again, we are going for very smooth line over here, a very smooth transition from the galaxy to the sunset sky. Otherwise it will look strange. Next I'm going to clean my paper thing, because again, I have some water and paint and I'm going to take my small brush number 9. I am going to introduce more pigment here and I'm concentrating the dark colors in the corners and in the upper part of the painting. Maybe some purple. Again, I'm trying to smooth this transition I have over here and maybe now is a good time to tilt our paper a bit and see what happens. I'm doing this in different directions and you see that the colors are mixing very nice on the paper. Again I will smooth this part a bit. Maybe I want to have a little bit more water over here, because except for the Milky Way I want to have few bigger, long stars. This is just clean water and I will add again, some of the blue, like that. Maybe now it's a good time to splatter. I will splatter some of this pink color over here, like that. Then now I will splatter some clean water, especially when I have these dark areas. Now I will wait a bit more and splatter again so that I can have this more defined white spots. Now maybe I will splatter again, but this time I will splatter some blue paint, I'm taking very dark paint. I will try to clean this up with my damp brush. Let's try again. Now we will wait a bit for this to dry and again, we will splatter some clean water. Now I will repeat this white spots where I want to have my glowing stars. I am just going to add some water there, take some of the paint. Now again, I'm going to splatter some water and see if I'm getting the results I want, and see we're getting this tiny light spots, which can be glowing stars. I will wait a bit more and repeat this again. Finally, the last around the splatters and now I'll leave this to dry.
10. Night Sky: Second Layer: Now our sky is dry and what actually happened is that it dried pretty white because watercolor always dries whiter than what we see on the wet paper. I really want this part here to be very dark, so I am going to make another layer for the sky. If you are happy with yours, you can just leave it as it is, but at least you can see how I'm going to do this. I am using again my soft brush and I am watering my paper very carefully because I don't want to smudge the colors, you see, it's already happening. I am being very gentle. Now again, I'm going to add a little bit more color to my sky because I want to be really dark here at the top. Again, I'm trying to leave this space white. Now again I'm going to take care of this part where I want to have smooth nice lines. Now we're going to make some splatters. I need a bit more water. Then again, some clean water to define our Milky Way. Now again we're going to tilt our paper and see what happens. I'm almost out of blue but I'll try to add some more. Now again for these light spots, I'm going to put a little bit of clean water and lift some of the paint. Now some splatters with clean water. Now we will leave this to dry again.
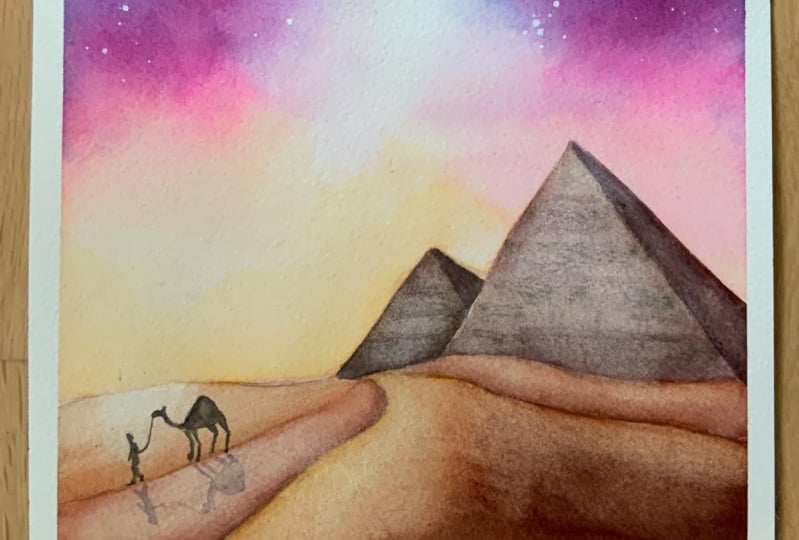
11. Pyramids: Now our sky is completely dry. Here I got a harsh line which I'll try to fix by lifting some of the paint the way I showed you. Now we're going to paint our pyramid and for that, I will use my paper tape again just to help me achieve nice clean edges, and I'll just place a piece of paper tape around my pyramid, like that. We will start with the distant one, and for the distant object, we are using colder colors. Now we'll use these coconut color and if you don't have it, you can take your ocher or Naples yellow. Maybe I will add a drop of purple. Now, I will just paint the front side like that. Now, I'm going to add even more purple, and I will paint this side and even if they bleed a bit it's not a problem because we're going to have another layer. Now I will use a hairdryer because otherwise, we will have to wait after every single element. Now I'm going to use the dry brush technique to add some texture. Again, now I'm going to be using this color that I already have here. Maybe it's not that dark after all, we'll make it darker. I will add some of this brown. Again, I'm dabbing my brush and I can see there's hope on a scrap piece of paper. Now, I'll mix an even darker color. Now, I'm going to use the hairdryer again and I'm going to repeat the same on the side but first I am going to protect my whiter side with paper tape. Now I want a really dark color otherwise it won't be visible. Now let see what we have. I am doing this very carefully. Unfortunately, here our edge is not very clean so I'm just going to repeat this bit. Let's see now. Now we're going to repeat the same step with the bigger one. For that, I'm going to mix again coconut with a little bit of this orange and maybe a bit of the brown and I will paint this whole side with this color. Again, I'm drying this part, and I remove the paper tape. Now I'll just fix. I'll see you in the next video where we will find paint the sand dunes.
12. Dunes: In this video, we're going to paint our sand dunes. For that, I am going to be using again coconut because I think it's a very nice color to paint sand. Now, I'm just going to mix it over here. I will add a little bit of pineapple, just to make it brighter, and a little bit of purple. I will test my color, maybe a bit whiter. Let's try with this one. Let's see. First, I am going to paint the distant one, I'm just covering the top with this lighter color. For the bottom part, we are going to mix a darker one because this is where the shadow falls. I'm just taking some more of this purple. I'm just going with my brush, and I'm adding this color while the paper is still wet. Fixing this edge a bit. Now, I am washing my brush and I will try to make this line smoother like that. I'll add a little of this over here. I will test my color. Back to this one and trying not to make this one too dark because here we'll have our silhouettes and if we paint this one too dark, they will not be visible. After the last one, also [inaudible] to us. We will make this one a bit brighter. We'll not wait for this to dry completely because even if they bleed a bit, that's okay. Again, I'm going in with some darker tone. Now, we can color this part of the painting and make some sparkles. We're almost done. [inaudible] we will sparkle this first, and we will paint the things with the person with the camel. See you then.
13. Final Touches: Now we're going to splatter the stars and for that, I will use my whitewash. I am just washing my brush and I'm taking paints straight out of the jar and I will not be adding water to this because I want the paint to be thick and the splatters to be really tiny. Again, I'm covering the part of the painting where I don't want to have stars. This is our sunsets sky and this is where we don't want to have stars so maybe they will start somewhere here. Now I'm just taking some paint and splattering some stars. I am focusing on the dark spots that I have and I don't want to have too many stars, so I'll just paint some bigger ones, on the light spots that we created with the splatters and that way they look like they're glowing. I'm stopping now. Finally, we're going to paint the person with the camel and for that, I am taking some from the purple. I want really dark concentrate paint. I will mix it with the brown I have over here and I'll add a bit more, maybe a little bit of blue to make the color colder. This is too wet, I'm just trying to repeat their shape and I actually want to add a little bit more color here, like that, just to add some interest and now is the time to step back and look at our painting and think about if we need something more and a good way to do this is to take a photo which you form and look at the photo because this way is much more easier to see the places where we need to make some improvement. In my case, I think I am happy with how this looks. It's finally time to peel off the tape and if you think that the glue of your tape is too strong you can loosen up a bit with a hair dryer. But I'm just going to peel it like that and I'm doing it at an angle away from the painting and I am starting with the ones that are on the left and on the right because I remember that I placed them last. Here we have some spots. Again, I am just taking whitewash and now I'll try to fix these. We are finally done. You can see how beautiful our sky looks. I will see you in the next video for our final work.
14. Wrapping Up : Congratulations, you've completed the class. We went through many technique and I hope by now you have some new favorite tricks to use in your future work. I also hope that from now on you will feel much more confident when you've got the water control thingy. Now you know how to use water to your advantage. Don't get discouraged if not everything is turning out great. We all have piles of failed paintings, but this only means you're trying and improving. Don't forget to post your project to the project section of the class. I'm so excited to see all your beautiful creation. If you post your project on Instagram, don't forget to tag me and I'll be happy to share your work. If you have some questions for me, just post them in the discussion section on class and I'll get back to you as soon as I can. Until the next class, guys, happy painting.
 Elina Zhelyazkova, Watercolor Artist