Transcripts
1. Welcome to the Class!: Hello, this is Leha. I am a watercolor
artist and instructor. Over the years I have
had workshops in different countries and I teach watercolor in person and online. I've been painting scape
for the last five years through the play of lights
and shadows on the water, Taking advantage of the
transparent nature of watercolor. It can be sea, river,
lake, or ocean. But painting the water with watercolor is very challenging. It is a puzzle I have
been solving for years, and I will share with
you how to solve this puzzle and capture
the secret of water. I use four essential
votercolor techniques in all seascape paintings, and these techniques are
your key to capturing the beauty of water
in your own artwork. We will start with the materials needed to paint the seascapes. We will uncover the secrets of four fundamental
voricolor techniques needed to paint any water. With the first technique to wet, you will understand how to paint a good and smooth base
layer for sea paintings. Moving on, the second
technique, dry on wet, you will learn how to create soft ripplese With
this technique, you will understand how to
control wetness on the paper and depthness of the brush to create the perfect
shape of ripplese. With our third
technique, wet on dry, you will learn how
to easily paint the reflections of
objects on the water. Finally, with the fourth
technique, dry on dry, we will discover how to create texture on the objects
such as bot sheep. So in the S games later
we will understand how to create perspective and that by working from light to dark, from ten to tick, to achieve a
realistic sea image. After gaining a
solid understanding of the techniques
and nature of water, we will apply our
knowledge through two wonderful
seascape paintings. We will learn how
to create that by emphasizing the contrast
between the light and shadow, change the form of ripples, and paint different
types of reflections. Moreover, we will learn how
to easily paint the box by going from white to dark
and from large to small. And you will understand how to create sparkles on the water. By the end of this class, you will have the
skills and knowledge to confidently approach
any water seen infusing your arm with the beauty and fluidity that
watercolor is re on to. Let's get started.
2. Class Orientation: Welcome to the class. I am happy to have you here. I think the C is an
source of inspiration, offering the infinite
possibilities for artistic exploration. It's a great starting
point for those who want to push the
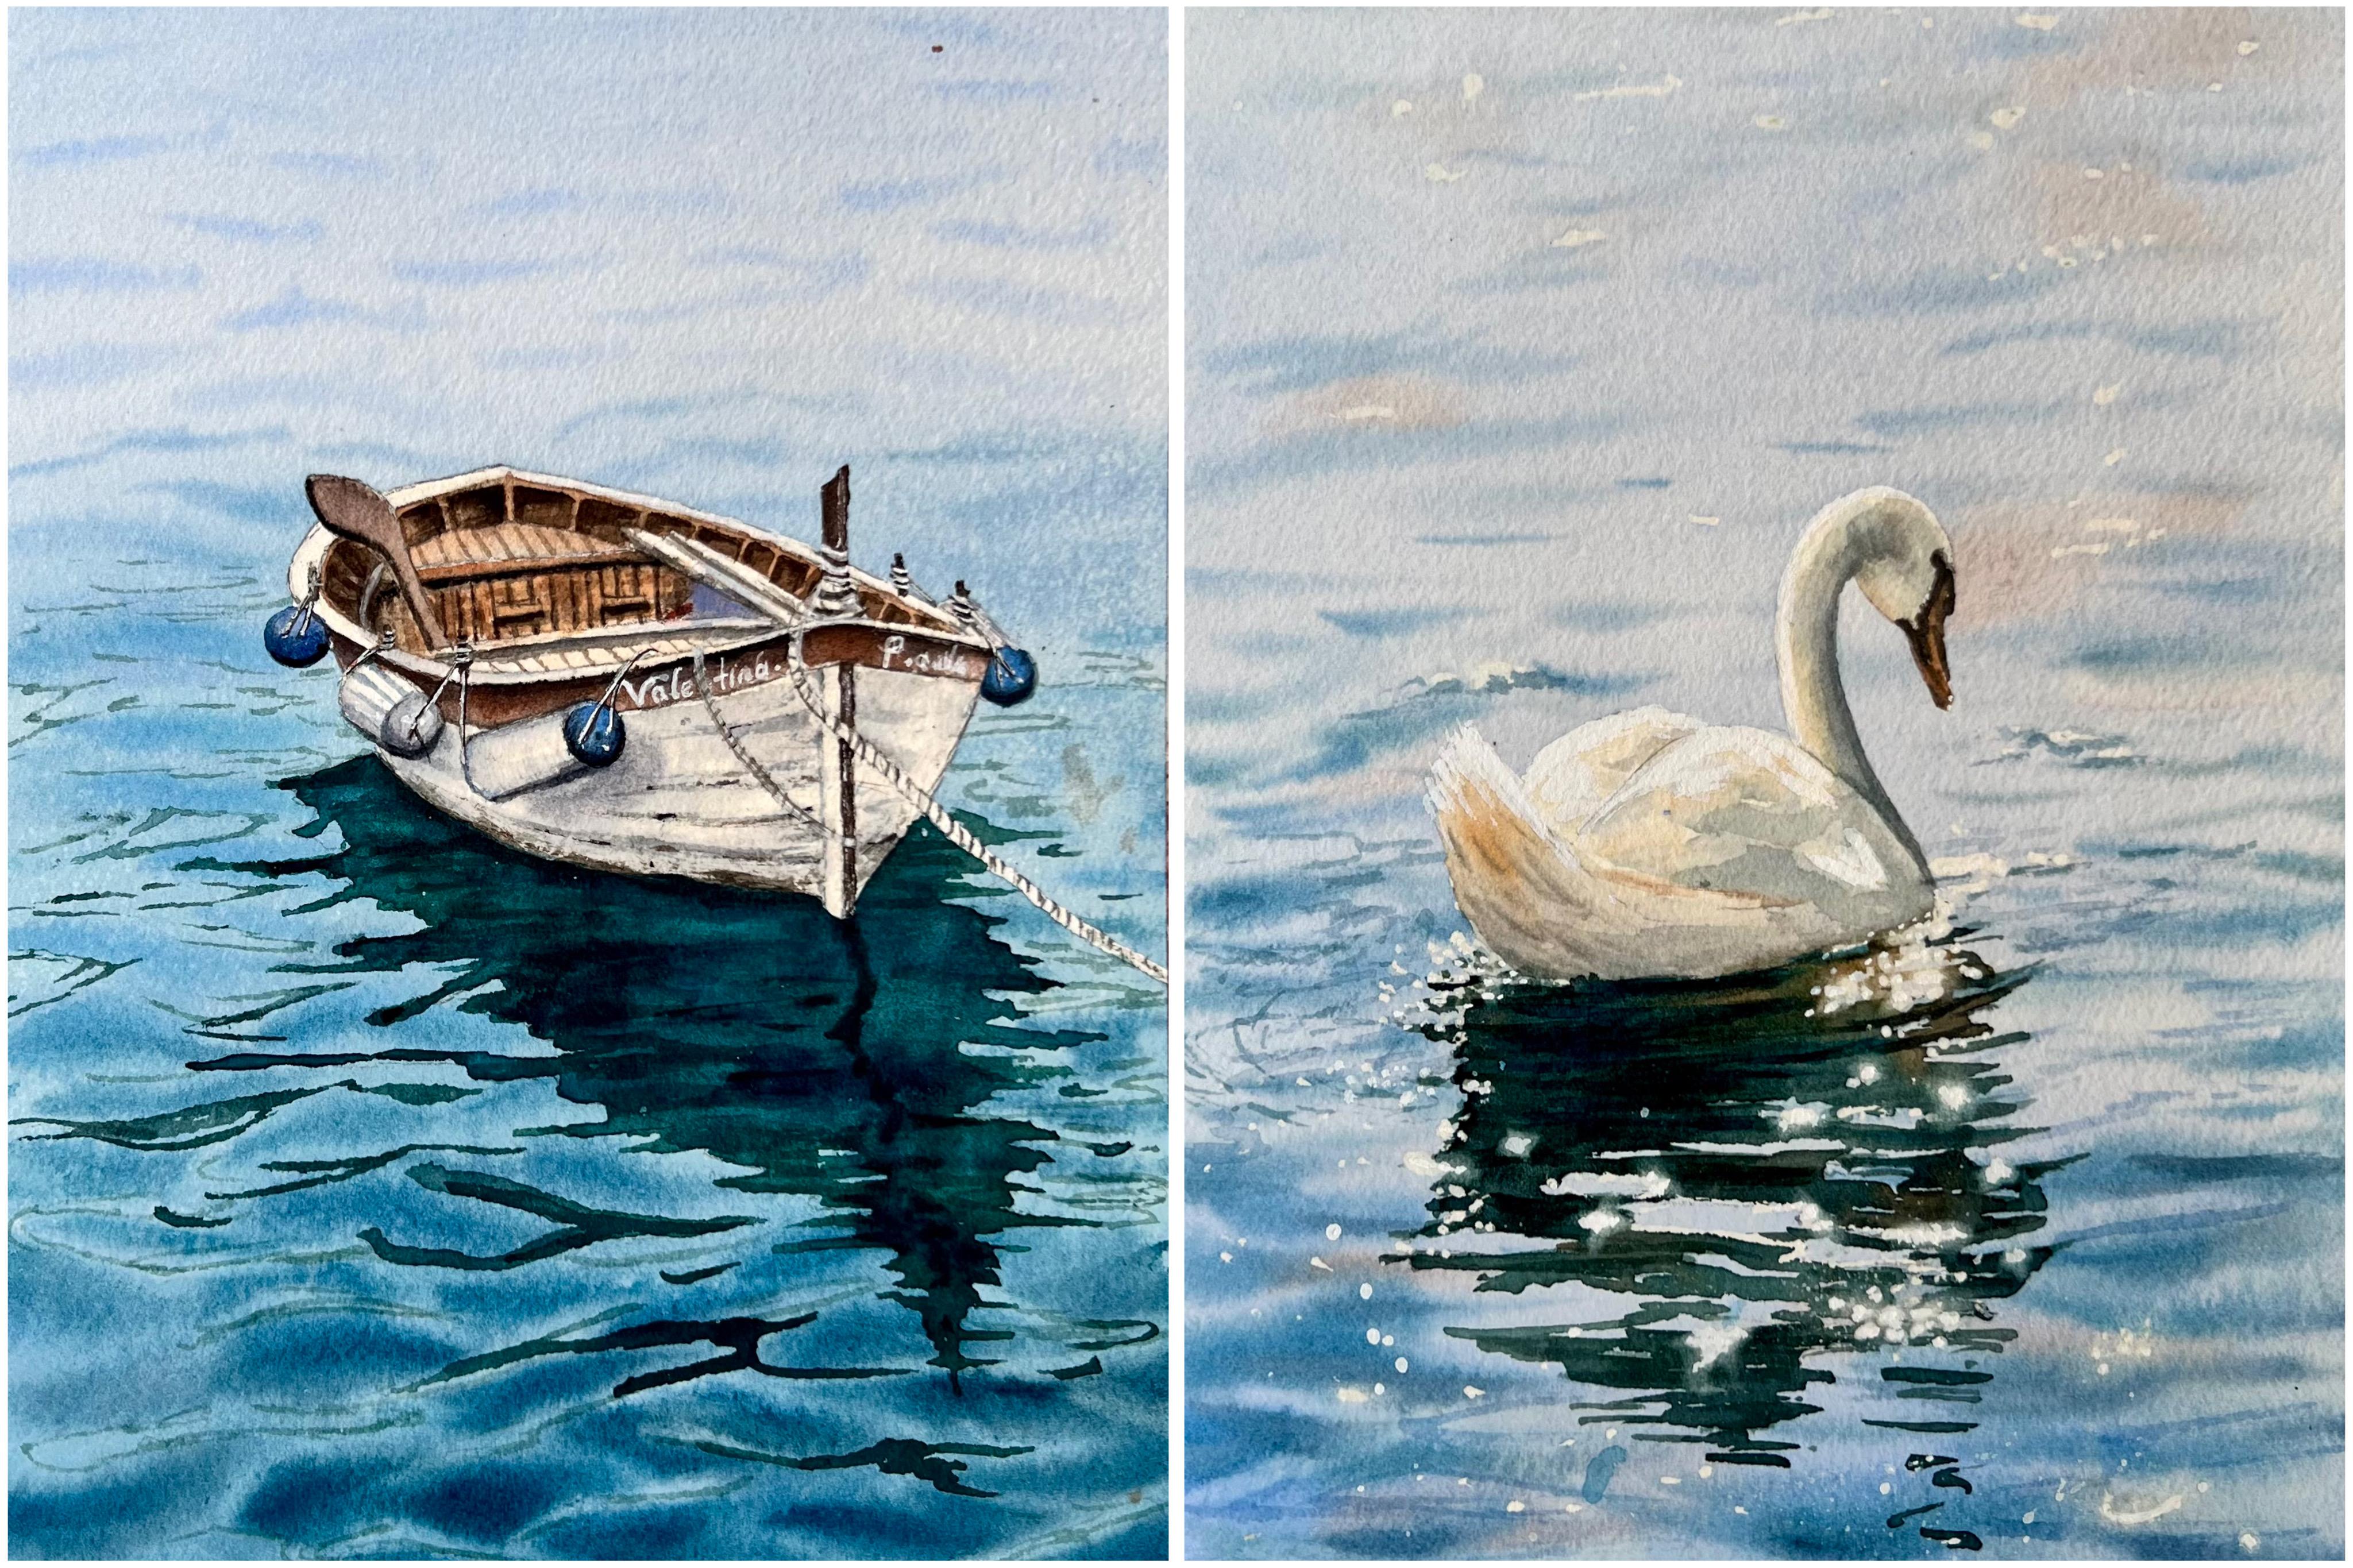
possibilities of watercolor. Your project for this
class is to create a CK painting using the four fundamental
watercolor techniques. I highly recommend
that you paint and share the exercise
of water techniques, perspective and depth studies. In this way, you
can reinforce what you have learned
in your projects. I will be looking
for how you use the watercolor techniques
you have learned and the color tones you use for the water base, ripples
and reflections. How you reflect light and
shadows on the water. I'm excited to see what you
have come up with and I will provide detailed feedback
on each project you share. I will also at the sage of the paintings and reference
pictures we will paint in the class and the images of the watercolor techniques to the project section
of the class. You can always look
back for reference. Now let's told materials, we first need watercolor
papers, preferably 100% cotton. For the paintings, I choose Cobot blue Persian blue pines, gray orange region, Barcena, Alison crimson and sepia. If you have similar colors,
they will work too. As a brush, I will use one
natural bracess, Rom brush, one scan Rom brush, one rigger brush,
and one large brush. We also need a cup of water, some napkins masking
fold pencil eraser. So prepare to be
inspired by the sea. And let's get started.
3. Wet on Wet: Base Layer: Welcome to the class. In this class, we will learn the four techniques
required to paint water. These four techniques
are wet on wet, dry, wet, wet on dry, and dry on dry techniques. You may know these
techniques before, but I will show you
how to adapt and maniplate these techniques
painting water. First, we will start with
the wet on wet technique. We will use this technique
for the base of the water. Now we will use a large
brush for this technique. First, we completely
wet our brush with clean water and cover the area we want to
paint with this water. You can understand
the area you wet it by the brightness
level of the paper. Now let's start
painting as a color. I choose cobalt blue. We'll paint the inside
of the area we just wet. In this technique, our
brush doesn't need to be too wet because the paper
is already wet enough. It's important to get enough
pigment on our brush. Another important thing is that the paper should have a
good chen of wetness, but shouldn't be too wet. At the same time, if
the paper is too dry, you won't get a smooth wash. If you add too much
water, don't worry, you can remove some moisture
using a paper towel. In this technique,
the drying time of the paper is longer. We have more control
over the area paint. We can make more changes
and add the colors we want. The main source of
control is using moisture to guide and
concentrate paint pigments. We need more time when
painting a large areas, such as Sea, Ocean, River. This technique is the
most useful technique we can use on the
base of the water. Now we get a flood
wash. You may be thinking that we can do this
without wetting the paper, but these techniques offer us different advantages than
the wet on dry technique. Now let's try it to compare. We will use our paint directly
without wetting our paper. As you can see, our paper
will start to dry paint. We will not be able to make
changes on the right part. If you try to paint the parts
that are starting to dry, R will appear on the wash. But we need more control
for the water base. That is why the wet on wet
technique is the best. In this regard, we learn how
to paint the water base. In the next lesson, we will
learn how to paint ripples by understanding the
two important rules of the dry wet technique. See you in the next lesson.
4. Dry on Wet: Ripples & Waves: In this system, we will
learn the right on wet technique to paint
waste perfectly. Before we satire
showing this technique, we need to create a
water base for this. We will use the wet on wet technique we learned
in the previous lesson. We painted a water base and now we can move
on the ripples. The first thing we need
to pay attention when painting ripples is the
wetness level of the paper. If the paper is too wet, the pigments will
disperse within the layer and we cannot
get the ripples. If the paper has to start, the eights of the ripples
will not be smooth. That is why our paper
should be moderately wet. The second thing we need
to pay attention to is the witness
level of our brush. There should be very
little water in our brush and plenty of pigment. Now we are preparing a dense
paint mixture for this. As you can see, the
brush is almost dry. It creates a texture paint look, The pain doesn't disperse within the layer and
maintains its shape. We can even play with the
shape of the ripples, and as you can see, the edge of the ripples will be solved because our
paper is still moist. To understand the wetnous
level of your paper, you can drop the paint mixture you have prepared on
the edge of the paper. You can tell if the paint
will separate on the layer. If the paper is too wet, the paint will start to
separate immediately. In this case, you can
wait a little longer. We said that the second
most important thing to create perfect ripples is the moisture level in our brush. Now let's see what
result we will get if there is too much
water on our brush. Now we will quickly prepare
a water base for this. Now we are preparing
a paint mixture for the perse I
added some pines, gray, and more
water than before. As you can see, now my
brush doesn't create a texture look because
there is more water in it. Let's start the paint. I'm using the same technique, but now there is more
water on my brush. As you can see, the paint immediately started to
disperse within the layer. It couldn't keep its
shape at the bottom. As the paper started to dry, the edge of the ripples
look hard edge. It didn't become solved. Yes. In this lesson, we learned
how to paint perfect ripples. In the next lesson,
we will learn how to paint reflections on water, see in the next lesson.
5. Wet on Dry: Reflections: Our third technique is wet. On dry, we will use these techniques for the
reflection on the water. Reflections are captivating
visual phenomena that occurs when light interacts with the surface of the water and creates
a mirror like effect. The reflections are not
always a synthetic image. It can be dynamic changing with the
movement of the water. As you can see in this picture, we see the reflections
of a tree, tree branches, the
branches of the tree created reflections
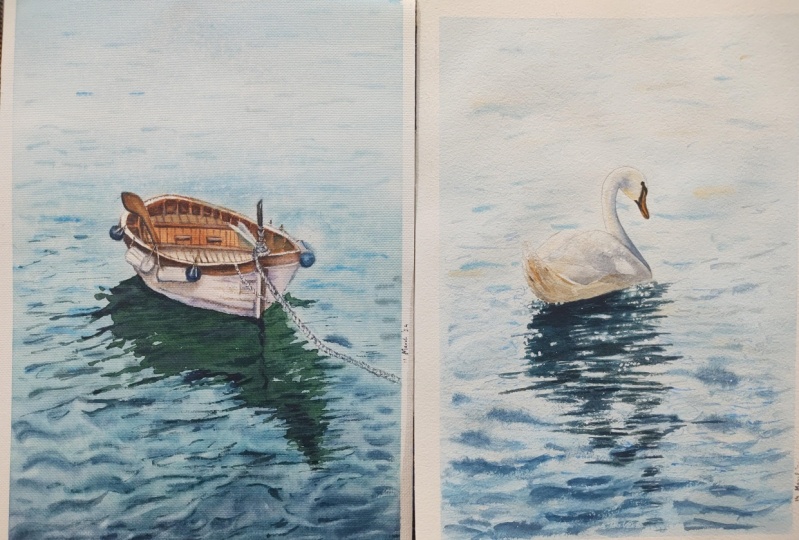
in different shapes with the movement of the water. In this picture, the
appearance of reflections can be influced by various factors such as
the angle of the light, the smoothness of
the water surface, and the presence of any
objects or surroundings. For example, in this picture, since the water is very calm, the colors of the boat are
reflected in the water. Likewise, since the
water was very still, the water act as a mirror. The shape of the reflection
was the same as the boat. To learn this technique first, we must prepare a
water base quickly. Now we prepare the water base and our paper was
completely dry. The paint mixture we will use for reflection is
very important. There should be plenty
of water in the mixture. I mix cobalt blue with
a little bit brown. As you can see, there's plenty
of water in the mixture. We should use a fine
tip brush for this. You can see the loss
of water in the brush. Let's start to paint. You should use the
tip of your brush. We are making zig zag thin lines using the
tip of our brush. Since there is a loss
of water in our brush, the area we paint
doesn't dry immediately. We can change the shape
of the reflections. Again, if there is not
enough water in our brush, the reflection will dry immediately and the edges
will become textured. And the second player occurs
when we try to make changes. Sometimes reflection on
the water form in rings. We can use this technique
in this way also. Now I want to show
you what happens if there is not enough
water in our brush. For the reflections, you can
see my brush almost dry. The form of reflections
are very textured. When I try to change the
shape of reflections, the second layer will
emerge because there is not enough water in
the paint mixture to paint perfect reflections. We need lots of water
in our brush and a teen te brush In this esson, we learn how to make
perfect frictions. In the next sesson, we will
learn a new technique. And with this technique
we will explore how to paint the details in scapes.
6. Dry on Dry: Details & Textures: Our last technique is dry. On the dry, we will
use this technique for detailing painting
objects on the water. This technique is really
useful and in our painting, we will use this technique
on the wooden areas, on the boat, on the rope, and on the writings. What is important in this technique is the
water level on our brush. To get the best results, there should be almost no water in our brush, only pigment. Now let's see what
kind of texture we can get by using
different water levels. Now we have a cool part water
and paint on our brush. You can see there's no texture. Our brush has too much water. The paper absorbed the water
immediately because of that, we couldn't get textured. Look, Now we will
use less water. This time, I will dump my brush onto the napkin
to take the excess water. You can see it's more texture but there is still
too much water. Our brush needs
to be more drier. Now we will see how can we make dry brush
totroks perfectly. We are taking less water and
more pigment to our brush. As you can see, there is no
water and it's a texture. Here is a tip for you. If you are using a smooth paper, you will need to create
brush ttroxs more quickly. The seped of yourtrox impacts the effect
of the dry brush. Try moving your hand at a different speeds to practice getting the
effect you desire. Your paper plays a big role in how fast and slow
you should move. Now let's try this, why our brush is completely dry, and see what effect we will get. As you can see, it
was very difficult to paint and our brush
needed some water. With a little practice and
experimenting with your tools, you will become more comfortable with using dry brush techniques. The type of brush is totally up to your
personal preference, but I prefer natural restless, it creates more texture. I really like this technique. We can create texture, highlights and broken edge. With the simple brush drugs, we learned the techniques
we will use when painting scapes and
in the next lesson, we will learn how to create perspective on water
see in the next lesson.
7. Perspective & Transparency: Transition From Light to Dark: In this system, we will learn how to create perspective on water by using the transparency
feature of water color. When you look at the sea, the distance waters often
appear light colored, while nearby waters seem darker. This happens due to a phenomenon called
atmospheric perspective. The contrast in color
between distance and nearby waters is a result of how sunlight interacts
with the atmosphere, affecting our perception of the sea's color at
different distance. As we know, waters such as Sea, river, and Ocean are
three dimensional. But we will depict them on paper which has two dimensions. For this, we will use
graded wash technique. The distance water will
be light colored and the waters will become darker in color as they approach us. Before you start the painting, first we need to
wet our paper with a clean water completely
at this site. You should be careful, there shouldn't be any
puddle on the paper surface. Now we are mixing
our blue color. I use combat bolu. There should be less
pigment in our brush. As we move to the middle
part of our paper, there should be more paint
and less water in our brush. To get the best result, we should use our
brush horizontally. We will use loss of paint on the bottom part of the paper
to get a dark blue color. By moving our brush
horizontally, we will combine it
with the middle part. In this way, we will achieve
a smooth transition. To get more harmonious wash, you can that your
paper in this way. Pins, we move downwards, we will get smooth transition. Now I will dry the
paper completely, so we can see the final version. As you can see, the paper
dry completely and we get a water base that
progresses from light to dark. Since we use the wet
on wet technique, we do not see the brush
marks on the paper. It was a very smooth transition as you can see in our
project painting. We use this technique
for the water base. Since water color is
a transparent medium, it also reflects the
color of the paper. By taking advantage
of this feature, we can create a
perspective on the water. In our next lesson, we will learn how to create on water by changing the color, tone, and techniques
of the ripples. See you in the next lesson.
8. Adding Depth: Ripples from Thin to Thick: In this system, we will learn how to create death on water. We can create depth
in water by changing the color tone and the
thickness level of ripples. When you see ripples in
water from a distance, they appear light and tin because the sun Lights
reflex of the water surface. This reflection makes the
ripples look brighter. However, when you get up
close to the ripples, they appear dark and
thick because you are now seeing the shadow caused
by the ripples themselves. And at the same time by changing the color tone
and thickness level. Ripples create the
lesion of depth by wearing the patterns of light and shadow on
the water surface, making it appear more textured
and three dimensional. Before we start learning
how to create depth, we need to paint a water base. For this, we will use the technique we learned
in previous lesson. We finish the water base
and our paper is still wet. The ripples at the top of the
paper so be light in, and. Now here we are using
on wet technique. There is not too much
water in our brush. As we move to the middle
part of the paper. The ripples should get slightly larger in size and
darker in color. We need to take more
pig man to our brush. Please do not forget to take excessive
water from our brush. As you can see, the ripples get thicker in the
middle and in again. With practice, you can
create better ripple forms. At the bottom of the paper, we need more pigments to
create more bigger ripples. I added slightly pins gray to paint mixture
to make it darker. As you can see the ripples
form are very big. If your paper is, you can change the ripple forms and you
can play more with them. I'm adding a little bit
more in the middle part. In this part, the ripples have hard ages because the
paper has dried a little. To fix this, we can slightly wet a clean
brush and use this. And here is the final result. If you want to add
that on water, you need to work on ripples. The ripples should be
light and tin on the top, and they should be more bigger and darker in
the middle and bottom. And here we painted the ripples on the water
base was still wet. However, it can be a little
difficult to maintain the wetness level of paper
in larger size paintings, and this is why I want to
show you another method. If you need more time why
painting the ripples, you can't write this method. After the water base
is completely dry, we wet our paper
with clean water. And after the paper
absorbs some water, we can start painting
the ripples. Likewise, we use the dry wet
technique for this ripples. Now we are repeating the
same steps for the ripples, and the advantage of
this technique is that if the bottom part of
the paper starts to dry, you can wet that part
again with a clean water. In this way, the water
base will not be changed. However, you should
be careful not to press your brush while
wetting the paper. If you press too hard, the paint in the lower
layer become active again. In this lesson, we use two different methods
to paint ripples. In the first one, we
painted the ripples directly on the water base
while it vastle damp. In the second one, after the water base was
completely dry, we wet the paper again
and painted the ripples. You can use whichever
method it is there for you. We also learn how to
create dp on the water by changing the color tone
and the size of the ripples. In the next lesson,
we will learn how to mix our colors for different types of water and what kind of color
palette we can create.
9. Water Tones: Mixing Your Palette: In this system, we
will learn how to mix our pins for different
types of water, such as ocean, sea,
river, and lake. For this, we will use
different shades of blue, warm, cold, and natural. Let's start. Our first
color is cobalt blue. The second color is chen green. It is a clear green. Now we will mix it together in this way we can
get a clear turquoise color. Now we will add a
little bit orange to the paint mixture to make it
a little bit unsaturated. And we can use that color
in the reflections. Our second blue is
ultramarine blue. It is a warm blue. By mixing it with the green, we can get a warm Tcas color. Ultramarine has a purple
paint inside of it. Because of this,
we can get a warm, I added a little bit
orange to mixture. Our next blue is a ftelloblue. It is a cool blue. There is green inside of it. Now we will mix it with green. In this way, we can get more
greenish to cast color. We can use it in the ocean. Now we are adding a little
bit orange to maint mixture. Next blue is Persian blue. It is also a cool blue but
different side of the blue. Now we will mix it with the
different side of green, which is yellow green. Now we are mixing it together. Persian blue is a darker blue. Because of that,
we get more darker green and little bit orange. In this way, we can
get unsaturated color. Now, we will mix
the balu with pines gray to make the
balu more darker. The first one is teal blue, this is pines gray. And let's make together. As you can see, we
get more darker blue. We can use it on the ripples
for this paint mixture, we use tal blue. It has green tone inside of it. And because of that, we
get greenish darker color. Now we will use cobalt blue. We will mix it with pines gray. Cobalt blue is a natural blue. In this way, we can get
more natural blue tones. These are the color mixture. We can use painting water. We can use dark blues
painting the ripples. We can use greenish blue
painting reflections. You can get different shades of blue by mixing the blues and greens in your palette and adding little
bit orange to them. In the next son, we will start our project and paint our
water base and ripples. See you in the next Ess.
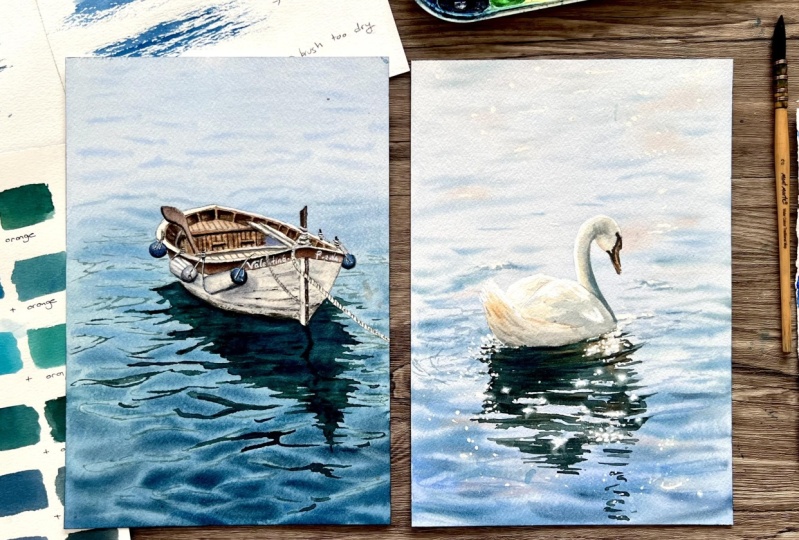
10. Seascape: Water & Waves: In this lesson, we
start our project and put the techniques we have
learned into practice. Before I started painting, I drive the boat.
And reflections. I will add the image of this driving to the resources
section of the class. You can make your
driving by looking at it or by putting the driving
on paper and trace over it. Before we start
painting the water, we will cover it
with masking fluid to prevent paint from
getting into the boat. Once the masking folid
is completely dry, we will start painting. Masking fluid is
completely dry and now we can start
painting the water base. For this, we need to wet the paper with clean
water completely. Be sure you wet every
part of the paper. We will use cobalt blue for
the upper part of the sea, it should be light color. We need to separate
the pigments on the paper with a horizontal
brush to trucks, we are getting more pigments to our brush for
the middle part. Now we will add a little bit
green to the cobalt pue, a little bit pin gray color. For the middle part, we are painting with a
horizontal bright strokes. In this way, we will get a smooth transition For the
bottom part of the sea. We will make spines gray, cobalt blue, and little
bit green together. In this way, we will
get more darker blue. Again, We will use horizontal bright strokes
to blend each other. We finished the painting,
the water base. Now we will start
painting the ripples. I will paint the
ripples directly on the water base while
the paper is still wet. If you wish, you can dry your paper completely
and then wet it again with clean water and start painting your ripples. Now, for the ripples, we are using dry, wet technique. Our brush should be dry. You can take excessive water
with a napkin if you want. The ripples on the
top of the sea should be very light in
color and very thin. For ripples, we will
use combat blue. But there should be less
water in our brush. Now we are making them a
little bit bigger and thicker. Now we are moving on
to the middle part. For this, we are mixing combat Polo with a
little bit green. Your paint mixer
should be very dry. In this way, the
ripples will not be dispersed in the water base. The ripples should start with a thin line thick in the middle. And by thinning again. And now we need to change
the color tone a little bit. We will mix cobalt
wudu with green, and we are adding a little
bit pine, gray, and orange. As you can see, we get
more greenish color. Now my paper start to dry and I spray water on the bottom
part of the paper. If your papers
attached to the dry, you can spray water any time. As we approach the
bottom of the paper, the size of the ripples is
getting bigger and thicker. Now we are adding
more pins cray to our paint mixture
to make it darker. Now we will make it more darker. And mixing pins gray with green and adding a
little bit cobadle, I think my paper start to, I spray little bit more water. Now our paper is ****. We can play more with
the ripples form. We can change the size or
color tone a little bit. Bottom part of the paper
start to dry again. I think I need to separate
more water there. Now we need to prepare
more darker tones for the. We are mixing pines, gray green, and
little bit orange. Now we will use these
dark tones under the ripples to make more
controls on the water. We finished the
painting, The Ripples, and now I want to show you a cool technique in this way we can create highlights
on the water. For this technique, we should
use a clean, wet brush. We will take the paint from the paper and clean
the brush again. After every brush,
you should clean your brush and take the
excessive water of it. You can use this technique
if your ripples are not what you wanted or if you do
not like their shapes. However, when using
this technique, you should be careful not to have too much water
on your brush. Your brush should be almost dry. You should remove excessive
water with a napkin. And if there's too much
water on your brush, you can cause water
color balloons. Now, I want to
highlight here a little bit I clean my brush. After this, we finish this part. In this lesson, we learned in detail how to paint the base of the water and the ripples and how to correct the
mistakes we encountered. In the next lesson, we
will paint the boat.
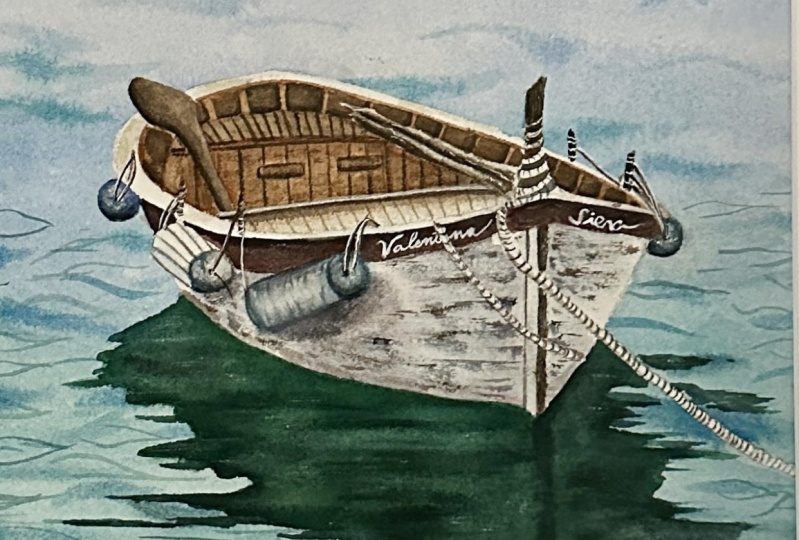
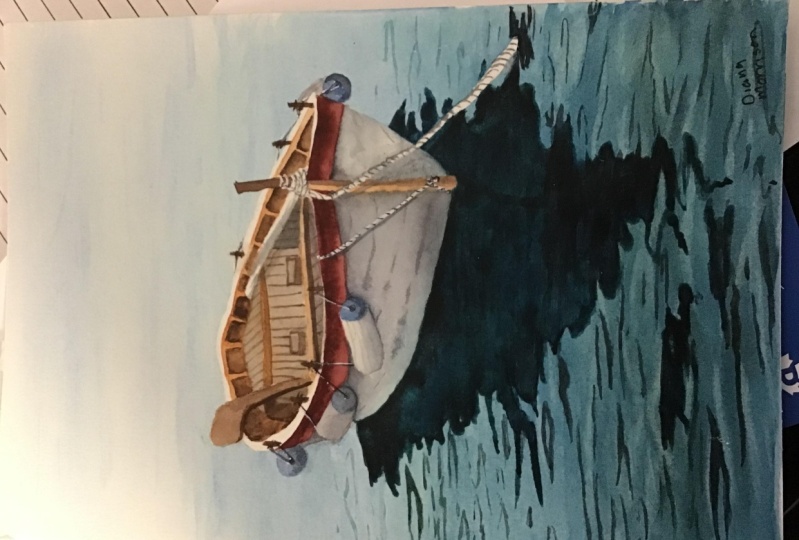
11. Seascape: Painting the Boat - Big Shapes: In this system, we
will paint the boat easily by moving from large
shapes to small shapes. Before we start painting, we must remove the
masking fud completely. You can use an eraser for this, we remove the masking fulid. Now we can start the paint. To paint the object easily, we must first start with
the large shapes and then we will move on the small
shapes, that is details. First, we will use ErcenaI' mixing bercena
with loss of blue. And we paint this
part as you can see, there's lots of
water and pigment on my brush and we need to
carefully paint the whole area. In this part, we will
use only braciena, careful when painting
the edges of this part a little bit here. Now we are moving
on another shape. This part should be a
little bit lighter. We take ultramarine Udu
and mixing it with Arcana. We cover all over that part. For this part, we
will use Verciena. Again, we need to
carefully paint the edge. For the bottom part, we will use on the water and
pigment will come there. While this part is drying, let's move on to
another big shape. We will use sepia and
needle bit is crimson. In this way we will get reddish brown color
starting from here. We are starting from the edges. Be careful, do not
paint the rope. Now, with a clean, we will
soften the edges of the panes. Here, I think we
need to add a little bit ultramarine to
change the color tone. Now we are moving onto
another big shape, which is the bottom
part of the At. Before painting, we
need the wet water. We will use wet on wet T, we will Mt blue with a crimson
to make a grayish color. Now we will add a little
bit shadow under this area. I mix cobalt with you with Alizan crimson and
a little bit sepia. To paint mixture, we need to soften the
edge of the shadow with the crush little bit Here I want to make it
a little bit darker. Here we are painting
small shadows. We finish this part. In this Estm, we learned
how to simplify an object by separating it into large
shapes and small shapes. We finish the
painting, le shapes. In our next eston, we will move on to small
shapes and finish our bots.
12. Seascape: Painting the Boat - Small Shapes: In this system, we move on to
painting the small shapes. We will start from the here. For this, we will
use sepia directly. We are going to paint small
scars inside this part. The paint mixture
shouldn't be too dark. There should be enough
water in a paint mixture. We need to leave space above
and between the scars. As we move towards the
front of the boat, the scars we painted
should gradually become smaller and
closer to each other. In this part, we will paint fine lines to create
wooden texture. We are using sepia again, you can use a fine
brush for this. Now, we will paint the
wooden part under this part. In this part, we
will use a color. The bottom part
needs to be darker, so we will use sepia there. The colors will mix to
each other a little bit. We need to draw some
fine lines here. Now, I will draw two small
rectangles in this section, because I forgot to
draw them before. In this part, we will create
a wood texture for this, we will paint thin lines from
top to bottom using sepia. The distance between these
lines should be equal. Now we are painting
small shadows under this rectangles
and this wooden area. In this part, I will
use love under color. It will be as if there
is a fabric here. Now we will get the gray color by mixing sepia and cobalt blue. We will only paint the
lower parts of the woods. Now here we will use same paint mixture and
paint the under this line, it is the shadow of
the wooden part. Now we will use sepia and draw diagonal lines to
create wooden texture. I think the shadowed area
should be more darker. Now we are adding more pigments. And a little bit here and here. I think we need to add
more shadow on this part. On the bottom, on the
right side of the scares, we need to add
more shadows here. For this part, we will use the brush technique to
create a wooden texture. Now it is time to
paint the shovel. For this, we are mixing
Rsiena and little bisepia, renewed the little bit shadow on the left side of the shovel. For this we are using sepia and little bit pins gray to
make it dark brown color. Now we are only painting the
left side of the shovel. Now it is time to paint this. We will try to keep it white. We mix gray, little bit sepia. We are painting thin lines and this part should
be more darker. We are using pines gray there on the bottom of
this should be shadow. For the shadow, I use combat
blue and is in crimson. Now for this, I will
use ultramarine blue. We can choose another blue. It's okay. The bottom part of this should be more darker because it's
under the shadow. We are adding a
little bit pin gray there to create highlight. We are lifting the color
on the top of this. Now we are moving on this. We will keep this white to create three
dimensional shape. We will paint on the bottom top part of
this with pin gray. The middle part
should be solved. We are using clean brush
to soften the areas. For this part, we are using Prussian blue for
the bottom part. Again, we are
driving small lines and adding pins gray
to create shadows. The center part
should be lighter. I'm lifting the
color from there. Now it is time to add more
layers to carry texture. We are using pins gray on
the bottom part a little bit here and fine lines on this. Here we will use Si. We are painting the
completely wooden parts. And be careful, do
not paint the rob. Here we are painting
a straight line. We are using sepia and
ultramarine together on the boat. We will use dry brush technique. I am using pink for this. For dry brush technique, there shouldn't be
water in our brush, just we are using only
the tip of our rush. Now we will use dry
brush technique again, but our brush will
be much drier. In this part, we will paint in tiny dots and lines
using sepia color. This will look like peeled
part of the wooden area. Now I'm adding a little
bit shadow here. I want to make it a
little bit darker, the edge of this wooden part. It's time to paint rope. For the rope, we
will mix sepia and ultramarine to make
grayish color on the rope. We are painting
small and thin lines to emphasize the rope structure. In this lesson, we
learn how to easily paint objects such
as both shapes. By painting small shapes
after painting large shapes. And in the next lesson, we will paint reflections.
13. Seascape: Adding Reflections: In this system, we will
learn how to paint reflection using wet
on dry technique. As a brush, we need to use a fine tip round
brush for color. We will use Persian blue, lots of Persian blue, a little bit light green, and lots of water, a little bit orange. We will add, we had previously drawn the shape of the reflection with a pencil, and now we will paint the inside of this
area with our brush. What we need to pay attention
to is that there should be plenty of water and
pigment in our brush. The area we paint must be
wet enough so that we will direct the water with
our brush on the edge. You should use the tip of your brush in this
way you can get fine lines by painting. We need to change
the color tone and for this we are adding a
little bit piney s create to our paint mixture
on the edge. We will use more darker colors. Here there is ten line. Now we will add more
darker colors using pines, gray with our paint mixture. We are using wet, wet technique. Here we will only paint
lines inside the reflection. In this way, we will create deeper waves within
the reflection. Now we will paint the thin
reflections on the water. For this, we will use the
same paint mixture again, but this time the tone of our
paint will be very light. This is why we add plant of
water to lighten the color, we paint these reflections only on the light
areas, on the ripples. You can change the tone of
your colors you use from time to time by adding
orange or pin gray. Now we are adding a
little more details inside of the reflection
and it's finished. In this session we learned
how to paint reflections on water and in the next sesson we will paint the final details.
14. Seascape: Final Details: In this system, we will paint
final details on the boat. First of all, we will use sepia. We will paint small
cities on the boat. The second one here, I am adding a little
bit more Persia. Another one here and here we will draw small ropes and connect
them to the cities. For this we are using
and another one here, and another one here. I want to add a
little bit texture using dry brush technique. Here we will draw another rope for the highlights. We will use white gel pen. We are painting the top of the ropes adding
little highlights. Now we are going to
paint another rope. Next to this rope, I want to use white
gage for this. You can also use
white water color. We use the paint
directly from tube because if we dilute
the paint with water, it becomes a transparent paint. We use it directly from tube because we want
more opaque look. Now we are painting
the second layer using white gage again to
make it more brighter. Now we will start
writing the text on the boat and we are using
white all pen for this. We don't write all
the letters clearly, we just make it clear that
there's a text there. That's all. After writing
with a white pen, we will go over it
again using our paint. For this time, we deleted paint with water because it
will be difficult to write using the
paint directly from the tube because the
paint is very solid. Now we are adding small
details on the rope. We are using sepia for this. Now we will add small texture
on the bottom of the board. We are using sepia for
this and that's it. In this system, we have learned how to
enhance the painting by adding the details and
we finish our painting.
15. Swan: Masking Fluid & Water: In this lesson,
we will learn how to create suparclus on water. I drew the scag before I added the sketch to the
resources section of the class. You can easily draw it
by looking from there. Our first step to create suparclus is to preserve
the white of the paper. We will use masking fluid. For this, we will drop
masking fold in small dots. Starting from the
top of the paper, we will just drop small dots
at the top of the paper. These little dots will be
farther apart from each other. There should be more shine at the aids of the
swan's reflections. And this is why we drop
the musk in fluid, small and closed together
to get sparkles. In this part, we finished the sparkles and now we will cover
the so one with musking filud to prevent the
paint from getting on the, so the musku filud has dried completely and now
we can start to paint. First, we will wet our paper
completely with clean water. At this stage, we
need to make sure that every part of
the paper is wet and that the papers enough
water for the water base. We will use combat polo. We are starting from
the top of the paper. At this stage, there should
be less pigmnt in our brush. When painting from
top to bottom, we should slightly increase
the pigmentt density. The middle part should
be slightly darker. The bottom part of the paper
should be much darker. Now we will add little
bit orange painting to the water base. We need to mix Rstiena with
little bit arises in crimson. This will look like the reflection of the
sunlight on the water. Now while our paper
is still wet, we will add ripples for this. I mix cobalt polo green
and little bit orange. The paint mixture
should be very thick. There shouldn't be too
much water in our brush. It should be almost dry for the ripples in
the middle part, I mix cobalt bullu, little bit orange and pine gray. In this way we can get
more darker blue tones to make more darker ripples
On the bottom of the paper, we new the a little bit
Pinsky to cobalt blue. We finished the painting, Your water base and Ripples. In the next lesson,
we will paint on reflections and sparkles.
16. Swan: Painting the Swan & Reflections: In this class, we
will paint the swan, and it is reflection. Now we will remove
the masking foliate from the sparkles on
the top of the paper. And on the swan, we remove
the masking float from swan. And here, top of the paper, the lines were slightly as when I tried to remove
the masking foliate with I need to draw the
swan's and ink lines again. Now let's start the paint swan. The swans color is white. Because of that,
we will just paint the shaded areas for this. We will mix cobalt blue, sin crimson and little bit
sepia to make a grayish color. Now we will paint under its tail and adding little bit vercena. After that, we will soften
the edge with clean water. Now we will add darker shades
using Vercena and pines, gray, trying to get fur texture. In this part we will
use pin gray little bit to change the
color tone and leaving some highlights
With clean water, we will soften the s here
little bit light blue. We shouldn't forget
to leave highlights. We will keep top of
its wings white. We are moving another
wings using little bit light orange for its neck. We will use the
same paint mixture. We will paint the right
side of its snack, and then we will
soften the eggs with clean water and
adding a little bit orange after the
softening the eggs. Now we will add a
little bit orange under his neck because there
are lighted areas. Now we are adding
the second player. While the neck is
siluette for its peak, we will use sepia and little bit natural tint
to make darker color, we need to some white areas
on the white eyed rails. We will use orange color. We finished the
painting, this one, and now it's time to
paint the reflection. For this, we will
mix cobalt blue, orange, and green
color together. I want to add a
little bit pin here. Starting from the
bottom part of the one, I am painting the ads of
the reflection first. To get the best result, there should be loss of paint and water in
your paint mixture. In this way, you can
keep your reflections we longer and you can
make changes on it. And we finish this part, and in this lesson
we learned how to paint and its reflections. And in the next lesson, we will paint the sparkles.
17. Swan: Creating Sparkles: In this lesson, we will paint the separcalus on
water and Reflections. The first stage of creating the separcalus is
using masking fullid. Now we can move on
the second stage. In this stage we will use a clean and dump Santitic brush. First, we will start with the separcalus at the
top of the painting. We will soften the
sharp edge created by masking follid
with a damp brush. We just need to
rub the paper with the damp brush to
create the soft edge. Before moving on to
spags on the reflection, I want to just create tiny
waves on the water base. We are using cobalt
blue for this. I changed the brush. Now I am using a rigger brush. It has more finer
tip cobalt bolu. We are creating tiny waves
on the water base now. Now we will move on the
sparkles on the reflections. Before that, we need to remove the masking fluids completely. By rubbing it, I remove the
masking fluid completely. Now we can move on. Again, we will use a
damp and clean brush. We will just rub the white area. The brush should
be slightly wet. In this way, we can create smooth edges around
the white area. At this stage, we
should use a napkin. And after rubbing
the white area, you should use a
clean napkin and press it to take the
excessive paint. Additionally, we can use a white quash to create
sparks on water. To use this technique, we need to dilute the paint
with a little bit of water. After that, you can the paint on the reflections
on the water based little bit the thrstage for creating separclus. To use the white gash paint in the middle of the separclus, we just need to add little bit white paint in the
center of the white area. Finally, we need to add
little bit highlight on the swan and its tail. A little bit on its head. And that's it, we finished to paint this
bit of fill swan.
18. Conclusion: Hey everyone. A huge congruous
on finishing the class. I hope this class has not only boosted your watercolor Seqs, but also sparked a new avenues of creative expression for you. Let's take a moment to reflect on what you have
learned and achieved. In this class, we learn four fundamental
watercolor techniques to realistically reflect
all the newness of the water wet on to create smooth water base dry on med to paint triples
in a perfect shape. Wet on dry for reflections and dry on drive for
details and textures. Later we understand
how to create perspective and depth by
working from light to dark, from ten to tick to
achieve a realistic image. Moreover, we discard how
the mixed water tones for different types of water. Lastly, we put what
we have learned into practice in the two
different scape paintings. Your commitment to learning different artistic techniques
is admirable and I am confident that the
knowledge you gained with this class will continue to
enrich your artistic journey. If you have any questions, please don't
hesitate to ask them on the discussion
page of the class. I will be happy to answer. I would appreciate it
if you leave a review. I would like to know what
you think about the class. Finally, be sure to share your
paintings in the project. I will look at each
painting you share and give feedback If you
like this class, hit the following
button by my name. You can also watch my
other classes on portrait, landscapes, and
watercolor salt effects. I'm super excited to see the incredible things
you have created.
 Züleyha Aydoğdu, Artist, Instructor