Transcripts
1. Welcome To Your First Landscape Painting: Eon, my name is Dinesh, a watercolor artist
and instructor. Happen, by the way,
if you always wanted to paint with watercoloor but
didn't know where to start, this class is just
made for you and it's a perfect way to begin your first watercolor
painting of the year. You don't need to be good at drawing or word fancy materials. By end of this 1 hour class, you will complete your
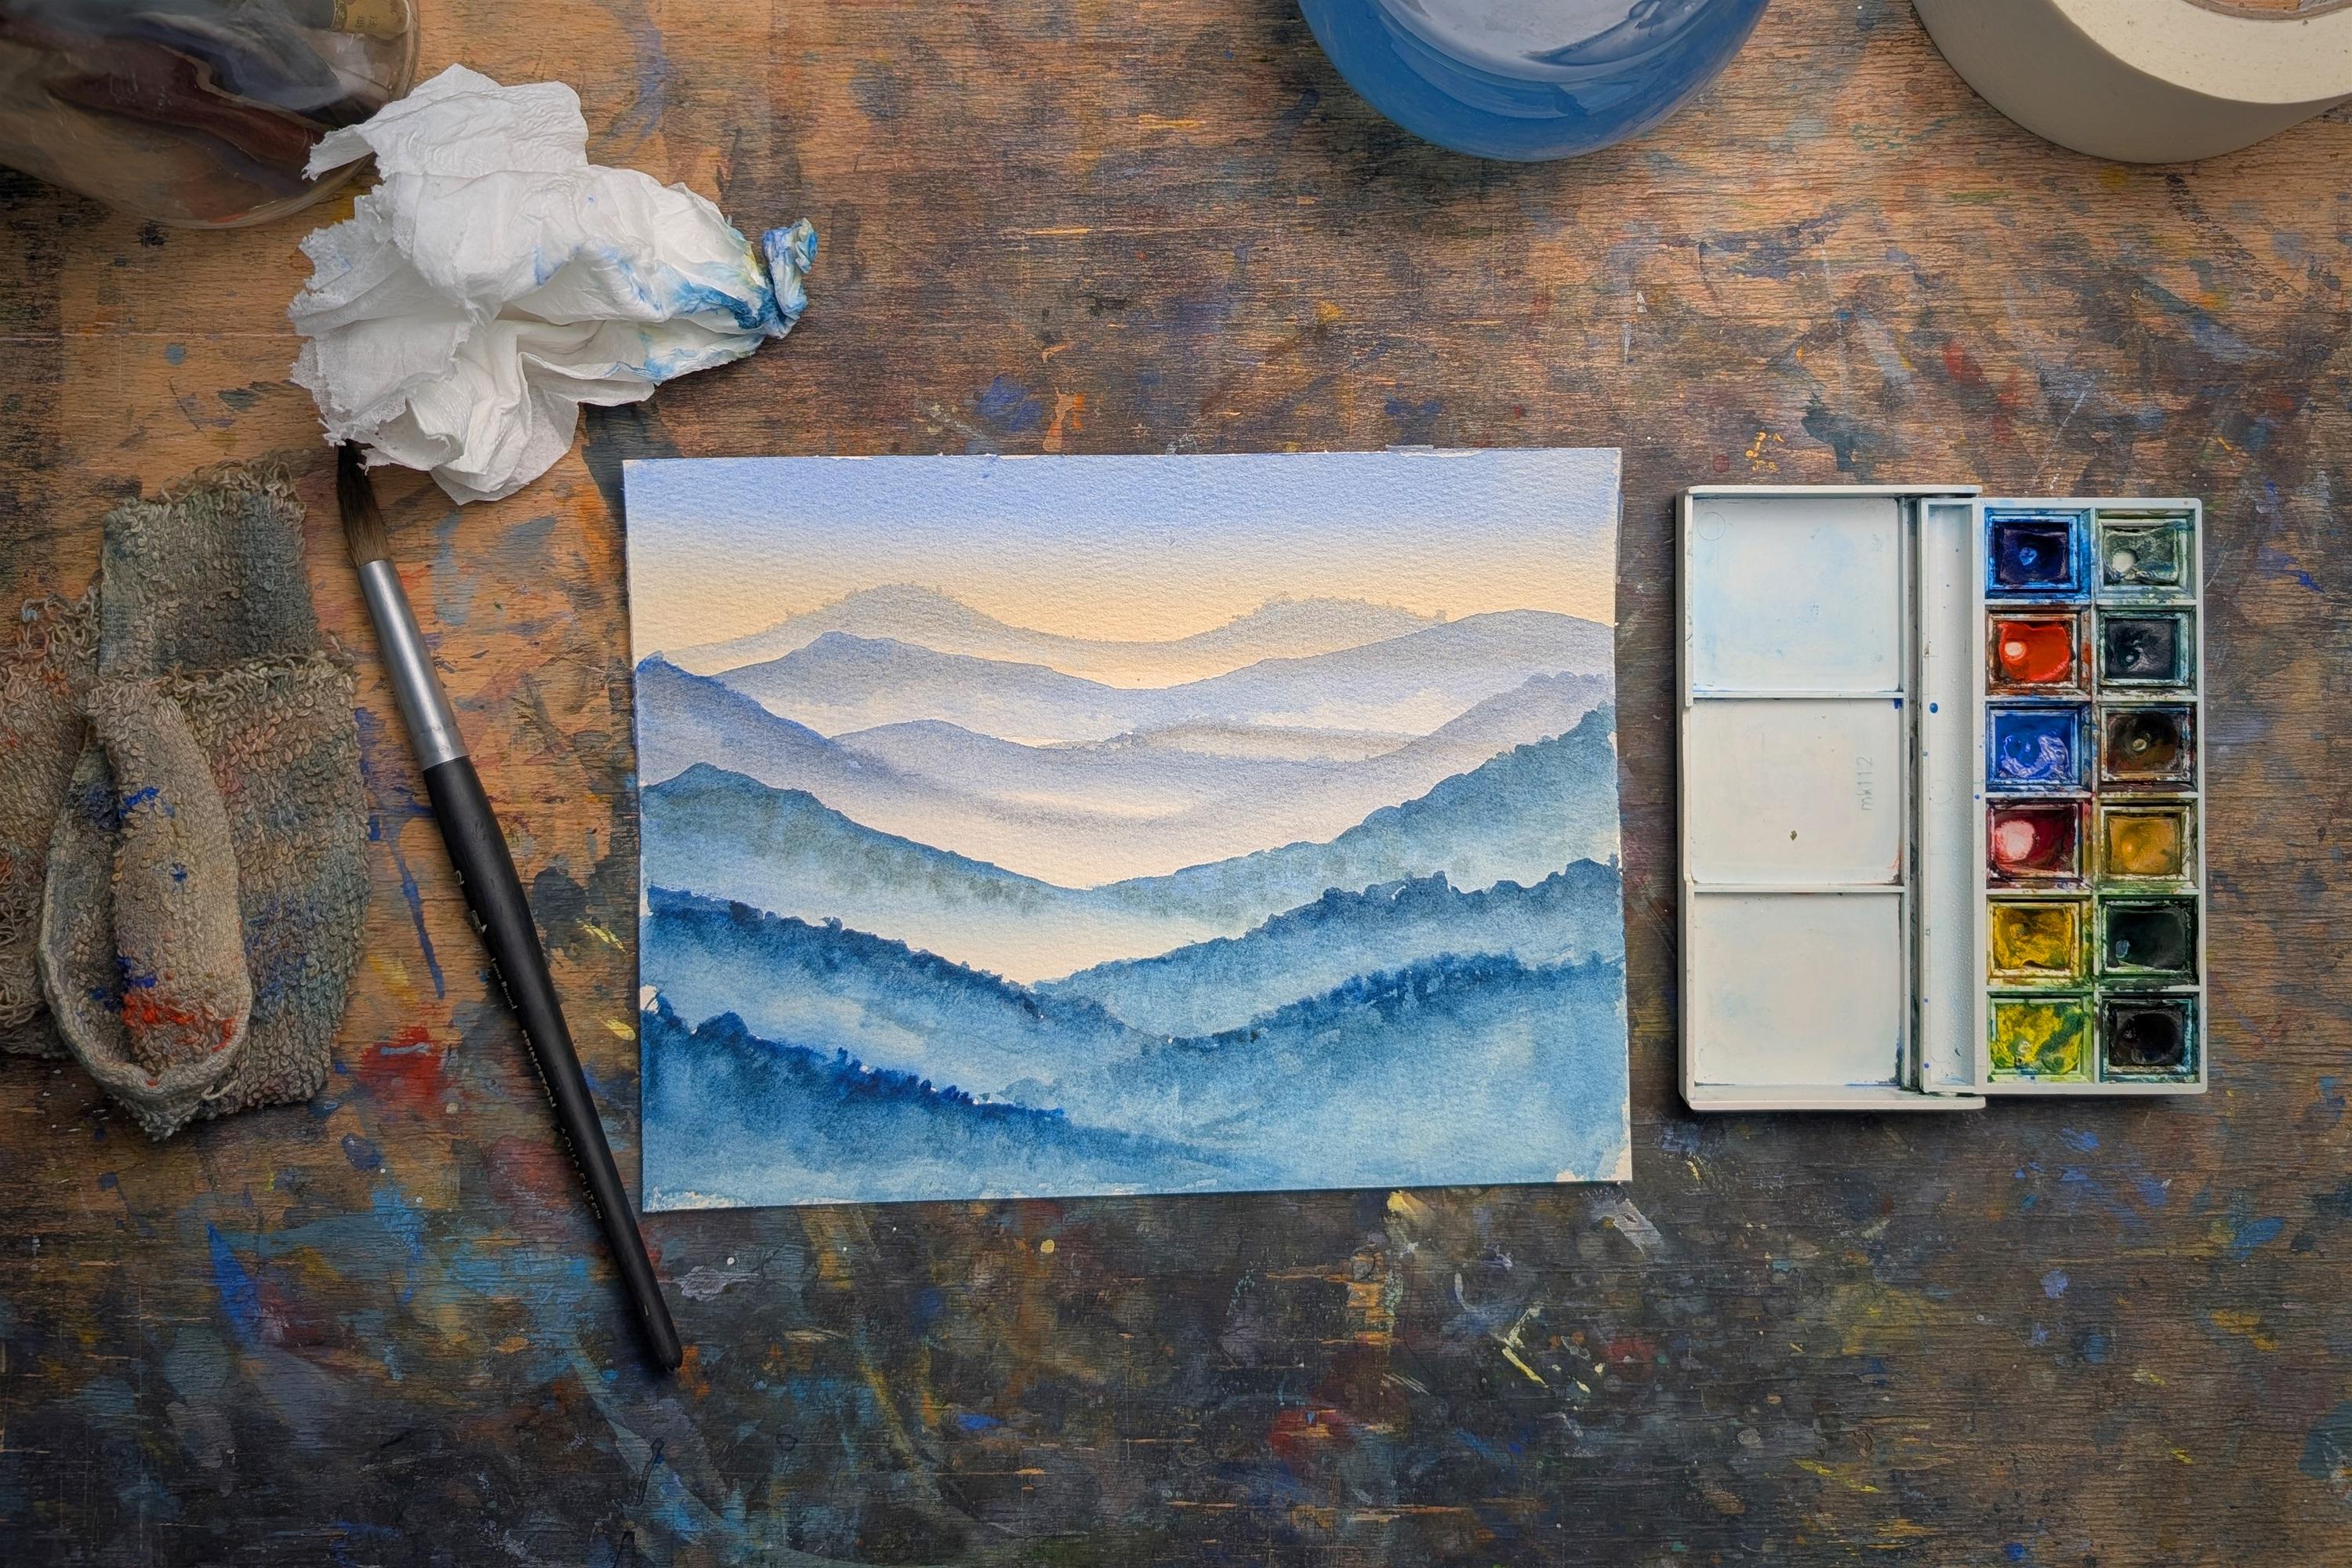
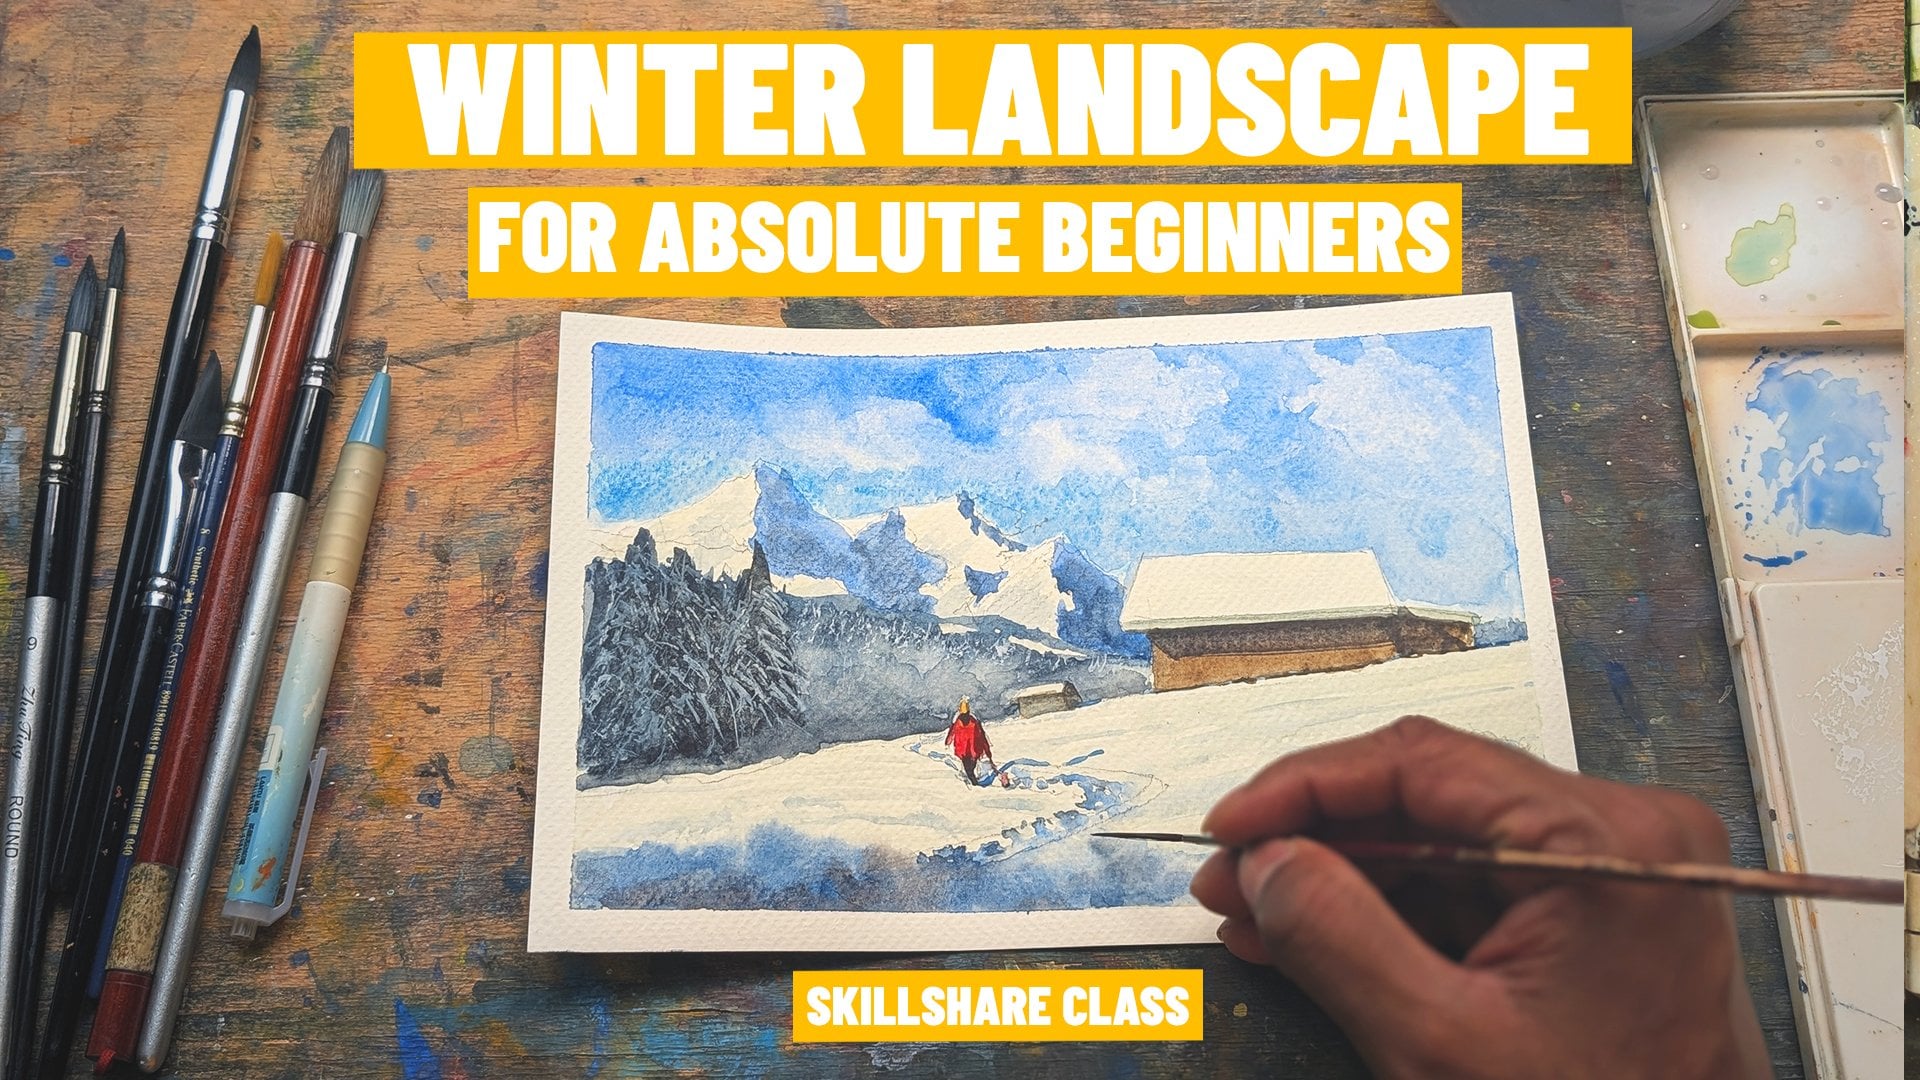
first watercolur landscape, a peaceful misty mountain scene. I will guide you through
the basic supplies, brush and water control, a few simple techniques like
soft gradients and layering. Then we'll pay
together step by step, no stress, no pressure, and no perfection required. 20-46, Skillshare Only
supports teacher, we have at least 50 followers. Even if you have made only
this one on the video, I would really
appreciate if you could follow me before
taking the class. Creating tutorials like this takes a lot of time and energy. Your support helps me
to continue giving back to the community and
improving your Watcle journey. So grab your brushes
and let's jump in. You're about to paint your
very first watcal landscape.
2. Materials&Supplies: Before we jump
onto the tutorium, let's talk about the materials. Here's what you will need. The first one is a brushes,
which is really important, and I'll be using fewer brushes, and the one brush I'll be using for this tutorial
is a round brush. So I'm using a round
brush, which is 12. It's called long round. You could use any other
round brushes if you want. So the next one comes
the waterclo paper. So I'm using Boong
Waterclo paper and make sure it is 300 GSM. And this is really important
because it would give really nice blending and it also gives a really
nice transition. And I'm also using cold press. You could use any surface, but make sure that it's 300 GSM. And next thing is
watercolur paints. And since it's a beginner
friendly course, I don't want you guys to spend a lot of money if you can go and get this Vincent Newton
pocket watercolor paints. And it has fewer palettes. It has only three palettes
and fewer colors. And this is more than
enough for this tutorial. And the next one is a jar
to put some water for us. And we'll put some
water and we'll use this for mixing our
paints in our palettes. And the next one is a rag. So the rag I usually use to wipe off the paint
from my brush. And you will see once we start painting, I'm going to use this. So the next one is paper towels or any kind of tissue
paper works as well. And these are the materials
we need for this course. Apart from these,
you can also use a pencil to sketch our drawings. If you're using a
student gray paint or any other watercolor paints, that's perfectly fine, too. The key is to learn how watercolor behaves
and not the brand. And now let's how to
control water and brush, and it is the foundation for everything we'll
paint in this course. And let's move on
to the next one.
3. Basic Wash Practice In Watercolors: Before painting our
full landscape, let's practice three
kind of washes. We will use these washes to
create your first landscape. So the first one is
called flat wash. So I'm going to load my
brush with water like this and I'm going to take
some colors from here. And I'm just going to
start from the top, and I'm going to bring all the
way at the bottom and make sure you have a
little bit of water in your palette like this. So you can easily bring
it down like this. And you can see that
I'm also holding a brush in a way that it's flat. So I was able to create a lot of areas when I'm
bringing this down. And this is called a flat wash. And there's also another
way of doing flat wash, and you can try this too. So I'm going to take a
little bit of water and a little bit of paint and you can use the brush
folding this way, and you can also bring
it down as well. And you can see that
we are able to create two flat washes with different
kind of folding the brush. And you can also use both
in consection like this. So since I have
painted this already, so I can also bring it
down like this as well. And you can see that we
can create the flat wash. So the next one we're going
to is called gradient wash. So what we'll be doing is we'll be starting dark at the top, then add water as we move down. This is perfect for
creating depth and skies and other things
in watercolors. And if you want a
detailed tutorio, you can go and check
out this tutorial how to do blending and washes
in my Skillshare class, it goes really deep, and
it also shows how you can use these washes to create beautiful
paintings in watercolor. Now let's jump on to
the gradient wash. So I'm going to
use the same color so we don't get confused. And you can see that I'm
going to go a little bit take more pigment this time. And I'll just bring
it down like this. I'm using side of my brush,
it's a little bit darker. So now I want a
little bit lighter. So now we learn from the previous chapter that
if you want lighter colors, you can put some more water here and you can
slowly bring it down. And if you want even lighter, so I'm going to put more water, and I'm just going to
bring it down like this. And you can also lift as well. It's just going to go back
and just blend it like this. And you can see that
now we can create this really nice
gradient wash from dark, and we slowly added
water and added water, and we kept on bringing it down. And you can see that it gives
illusion of sky already. So I'm going to do it again. So I'm going to take
some more pigment and less water because I
want it darker at the top. And this is called values. If you want more pigment, you go a darker pigment, less water, more
pigment in your brush, and you can see that
how dark it looks, and I'm going to put
some more water here. I'm just going to bring it tear, and I'm going to take
some more water, and I'll put it here, and I'll just rub it
slowly like this. And now you can see
that we kind of created three
variations of dark, a mid tone and a lighter. And now you can also use a
lifting technique as we learn. So if you want a lighter tone, you can just use your
your tissue paper, and you can see that I made
it a little bit lighter. And this is a flat wash, and this is a gradient wash. So now let's go to a color wash. So the color wash is nothing but we're going to
take two colors, and we're going to
blend the colors into each other.
So I'll show you. So we'll be using
combination a flat wash, as well as a gradient wash. I'll just move a little bit
here so you guys can see it. So I'll use the same
blue what I have here. I'm just going to bring it down. You can also use two
ways to do this. You can bring down this, or you can use your
brush like this, too. But the only thing you
have to keep in mind is after some pigments should be depositing
at the bottom. And this is where I can
able to mix two colors. So I'm going to do this red. And wherever it ends, I'm just going to keep
rubbing it like that. I'm just going to show it
again. I'm just going to, and I'm just going to do
this wherever it stops. And now let's introduce
a different color. And what I will do is I'll
go this Persian blue, which is a little bit
of a darker blue, and I'll just mix it from here. And now you can
see that we cannot create a really nice car wash. So you can see this,
there is a sudden rustion happening because
once we paint flat, the water the color
doesn't flow through. Whereas if I paint
in a 45 degree, the colors flow, and it will
have a nicer transition. So I'm going to show an example, but it's up to orders per
friend to paint it flat or paint it in a 45
degree. So I'll show you. So I'm going to start
with the same blue, and I'm just going
to put the cour here and I'm just going
to bring it down. And you can see that
when I do this way, and you can see
that the color kind of depositing at the bottom, the kind of gravity kind
of brings everything down. So now, I'm going
to clean my brush. Now let's put the same color and you can see that
it mixed by itself. I don't have to do anything. And you can see that there
is no start on transition. It just mix by itself. I'll just still bring it here. I'm going to clean my brush, and I'll just take
the Persian blue again and I'll just
blend it like that. And you can see the transition which is really
nice from this one. So you can see the
difference between painting it flat and
painting in a 45 degree. And you play with it and do this exercise and pick
something which works for you. And there's not
one way to paint. There's a lot of
different ways to do it. And you can see that this
is a waterclour magic. It looks better when it
let it move on its own. Next, let's apply these ideas into our first
complete painting.
4. Brush And Water Control In Watercolors: Secret to watercolur is learning how much water is too much
and how much is just right. Let's try three key
techniques in this exercise. So the first one is wet on wet. So what I'm going to do is I'm going to wet the paper like this with clean water, and
you can see it here. And you can also
take excess water just by using the
brush like this. And you can see that
I wet the paper now, and I'm just going to
put a color there. And you can see that I
would spread softly. That's great for sky and fog. If I bring it all
the way down like this, I'm going to
take some more. I'm just going to put some here, I'm just going to bring it up. And you can see how nicely
it created a gradient, and it also looks
like a sky already. So now let's do wet on dry. So I'm going to clean my brush, and this is where I was
talking about using a rack. So I'm going to clean my brush, so there's no water. So
I'm going to do it here. So now paint on a dry paper, and you can see that
it's really dry. So I'm going to take
the exact paint, and I'm just going to
make a stroke like this. And the edges are
crisp and defined. Perfect for details like trees or buildings or
anything like that. So for example, if I want
to make a tree like this, and you can see that it gives a lot of variety of
textures for us. And I can also make a house and buildings And this
is wet on dry. So now I'm going to show another technique
which is really easy and which we'll be using quite a lot when
we're doing this exercise. So I'm going to rinse my brush. So it's the same
thing. This time, I'm going to mix
something in a palette. I'm going to take some paint
and mix it here like that. And what I'll do is I'll
simply bring it down. Take some more I'll
just bring it down. So now what I'm
going to do is I'm going to take a tissue
paper like this, and I'm just going
to load of it. And what I will do is, I'll just gently use my tissue paper
to create this texture. And I'm also wearing my rotating my tissue paper here and there to
create a texture. And you can see that now we
use something called lifting. So this way, we can able to create something that creates a natural eyelids
for the clouds. So now we can also use the conjection of wet
on wet as well as this. So if I go here and
if I paint here, it also spreads, and it also give another
variation for us. And if I keep on doing this, and I'm using dry
brush strokes now, and you can see that it kind of created this cloud texture. Remember, watercolour has a mind of its own. That's
why it's fun part. And don't fight to control
the water or the brush. Once you learn the
three techniques, you'll be able to do multiple
paintings in watercolors.
5. Step01 : Paint the Sky (Wet on Wet): Let's create your
first painting a softy, misty mountain landscape. So the first one we going
to is paint the sky. So we're going to use the
concept we learned wet on wet. So what we'll do is, as I said, the wet on wet,
take a clean water. And I'm just going to put
some clean water here, and you can see, I'm going
to wear it with the paper. I'm just doing the top A.
I'm not going all the way. Now we can see that
we wet the paper. Now what we're going to do is load the brush with this blue. This is cobalblue, by the way. And what we're going to do is we're just going to
put it like this. If you want a little
bit darker sky, you can also just go
and paint on it again. And I don't want to have
this just blue there. So I'm going to clean
my brush again. I'm going to take my rag. I'm just going to
clean my brush with the rag because I want to
use a different color, I'm going to take this red, maybe a little bit
of this yellow. I want to take it. I'm just
going to mix it like this. And you have to be really
subtle and faster. I want to take more red
because I don't there you go. Now you can see that we kind of blended two colors in the sky. I'm also using
side of my flat of my brush to blend
it really nicely. And now you can see
that we kind of create this really nice sky. And make sure to
don't overwork it. Let the water do the blending.
Don't go and touch it. So I don't like the sharper
edge at the bottom, so I'm going to
take a clean water. What I'm going to do is I'm just going to rub it at
the bottom like this. So we are not getting
a sharper edge at the bottom. And now it's wet. If you put something on it, it's just going to bleed
and do everything else. And you can see that there
is a shine on the paper, and you have to fade, then we can mix a
different color, then we can start painting. So I'm going to wait for
a bit and let it get dry, then we can add the next layer.
6. Step02 : Distant Mountains (First Layer): You can see that there's a
little bio wetness there. The shine is gone, so we can
start adding our next layer. So I'm going to take
this blue again. And you can also make it gray with using a little
bit of gray in it. This a littra brown
there and blue. So what I'm going to do is and you can see that as
soon as we put it, it kind of blends and
give this thing here. So what I'll do is I'll just
do the exact same thing. So I'm going to
clean my brush now. So what I'm going to do is I'm just going to take clean water. I'll just bring this
down like this. Then you can also go again and make the shape of
the mount a little bit better. I just bring it down. Now we can see that we
add a distance mountain. This is our first layer and make sure that you paint a
soft line across horizon. So this kind of looks like
edges slightly blurred, and that's why we add the water. I'm just going to wait because if you apply something else,
this is going to bleed too. So I'm going to let it dry, then we can add the next layer.
7. Step03 : Far Midground Hills: Now we can see that
it's dried quite a bit. So I'm going to go
to the next step. So let's add some
midground hills. So I'm going to use
this libra bron to make it gray, and
that's what I'm doing. And I'll just go to here. And you can see that it kind of gives a libra a darker thing. And this one I'm going to show a different technique
for you guys. And I want to make
sure this mountain not exactly looks the
same as this one. So I want to create
some character to it. So I'll do the same thing here. Maybe it goes like that.
And I'll just do this. And you can see that
we kind of create it like another mountain, which is kind of a little bit
darker than our foreground. So if you want, you can also mix a little bit of a
darker pigment, and you can also put it at
the top of the mountain. So this kind of gives,
there's a fog underneath it. As I promised, I said that
I'm going to show a trick. So this is where we
can use the lifting. So I want to create a frog
underneath this mountain. So what I'm going to do is I'm going to take a tissue paper. I'm just going to slightly dab it to create this really
nice foggy texture. Don't overdo it and
just let it as it is. So minus, well, I
have another one. What I'll do is I'll add
another one like this year. And I'll connect this
mountain with this one. And what you could
do is if you want a darker pigment,
the same thing. I think I went a
little bit darker, so I'll put more water. And I'll just do this like that. And I'll clean my brush, and I'll slowly
wipe off like that. You can see that
now we can separate this mountain with
this mountain. It also gives us really nice
foggy things at the bottom. For the next mountain,
what I'm going to do is we're going to use
a different technique. I'm showing each way of
doing different things. So this one, it's the same thing what we did for the sky, it's a wet on wet. What I'll do is
I'll wet the paper. I'll wet the paper
first here like that. Now we're going to
do the same thing here and we're going to put another mountain
coming from this side. And since we wet the paper, and you can see
that kind of create this really nice foggy thing what we did on the other side. And I'll do the other
mountaineer as well. I'll just bring it all
the way down like this. And we'll put some
darker value at the top. I'm going to take some more Now I'll use my sd of my
brush to create this, and I'll bring it all
the way like this. And the same thing here as well, there's another mountain,
which is kind of sitting at the
top. There you go. And now we can see
that we kind of create another froggy thing just by wetting the paper at
the bottom of the thing. And I'm just going to
leave this white bits because it looks like a fog. Again, when you
do this exercise, you don't have to be doing
exactly what I'm doing. Come up with your
own way of doing as well, and you know what? Let's add one more
mountain here. And I'll just let it do this. So it kind of looks like a
foggy mountain at the bottom. And there you go. So
now you can decide what kind of technique you want to use to
use the next one. So one thing in art or
drawing or painting, things are far looks lighter. As things come closer to us, it gets darker and darker. So this one, I'm going to
let it wait for a bit. And you can also
do another thing is soften this edge by using
a clean water like this. And you can see that
that's what exactly we did there as well.
So I'm just doing it. And now I'm going to let it dry. Then we'll add the
midground mountain, then we'll add the
foreground mountain.
8. Step04 : Closer Midground Hills: So you can see
that I let it dry. So now I'm going to add
the midground mountains. So for this one, I'm going to
show a different technique. And I'm going to go a
little bit by mistake, I use Persian blue,
but it's fine. So we have a different
variation. That's good. So what I will do is,
I'm going to have a darker mountain like this. And I will just add the
tip of the mountain. I won't add anything else. And I'll just put
the line like this. And I also want something
kind of like this. I'm going to define it
a little bit more here. So now you can see that it's
already coming in the front. So now I'm going
to clean my brush and clean my rag, so
there's no paint there. So now I take clean water, and I'll just bring
this down like this. And I'll do the
same thing. And you shouldn't wait long or else you'll get this really
hard edges in the mountain. I'll just combine it like that. And now you can see that
I kinda created this. Let's say you want the
mountain to be more stronger. So what we can do is we
can do the same thing. You will take some more pigment. Since it's wet, so I can just make some
strokes like this, like what we did for the sky. So we have some
pigment there as well. So now what I'm going to do is I don't want this odd
edge at the bottom, so I'm just going
to clean water. I'm just going to rub
it off like that. And if you want
more Persian blue, this is I'm just showing
how to make it even darker. Since it's wet, it's going to create these really
nice details. And you can play with
it. It is really fun. And wherever it's wet, you
can play with wet on wet. And this kind of
looks like trees. And I just want to show the
transition between this and this and you can do all those things like this,
and you can see it here. And there you go. So now
I'm going to let it dry. Then we'll add a couple
more foreground elements, and I think that painting
your first painting is done.
9. Step05 : Foreground Silhouette: This is dried quite a bit. So now I'm going to put all
the foreground elements. So I'm going to take
Persian blue and this koba blue and this libra
brown, so to make it gray. And I'll just start from here. I'm just going to make a stroke
really fast on my side of my brush and make
some shape like this. So it kind of looks like there's kind of trees at the
top of this mountain. And this is what I'm showing is the dry brushing and what we
learn in the first chapter. And you can see that just by using wet on wet and wet on dry, we are able to create multiple
things at the same time. I'm going to do the same
thing here as well. And I'll use that dry brush
for you guys to show. And it kind of goes like this. And you can see that I left this white bits here and there, and I'll show in a second
what I'm going to do. It's the same thing what
we did there as well. So that's what I'm going to do. And I'll just connect
it like this. Mm. You have to do it
a little bit faster, and don't worry
about the strokes being exactly what I'm doing. It can be different too. So now what I'm going to do is I'm
going to take this blue, put some more water. I'm going to rub
it off like this. And what will
happen is if you go close to the foreground trees, it will also blend in
two, but it's fine. And it gives a really
nice transition too. I'll do the same thing here. I'm just bringing it down,
using my side of my brush. I'm painting faster because
we put a dry paint. And I'll do the same
thing here as well. And you can see that I'm
just bringing that down, just taking away
the white parts. And same thing here as well. Using my side of my brush
and just bringing it down. You can see that since
our paper is wet, and this gives a really
nice transition. So now everything is wet. So what I can do is I can do the same things
what we did before. Now we can do some things like we can go on the
top of these mountains. And since it's wet,
it's going to give this really nice softer trees
and whatever you call it. And I'll do the same
thing here as well. And it's going to
give this really nice transition for us. I'm also going to show some lifting technique
for you guys, and I'll show the lifting
technique for here. So I'll just bring this here. And you can see that I'm not
following any reference. I'm just going as I wanted. And I'm going to show
the lifting here on this forgram and I will
do the same thing here. Take this darker pot
and put it here. There you go. And now we
can do the lifting part. So what I'm going to do is I'm going to take this tissue paper. And I'm just going to
keep on rotating it. And you can see that
it kind of gives this foggy detail for us. It's the same thing for us, and I do the same thing here
as well. And here as well. Now you can see that
we created depth from all the way from the
background to the foreground. So we kind utilize
the techniques of wet on wet wet on dry, and we kind create this
really nice misty mountain. And when you do it,
make sure to let it go. Don't try to control
the watercolor painting and layer it slowly, use different techniques
to do different mountains. The beauty of watercolor
is suggestion. You don't have to
paint every mountain and every tree in the mountains. You just have to let it go and let the watercolor
does what it does. So I completely dry
it, then that's it. Now you have finished your
first watercolor landscape.
10. Bonus Chapter (Sunset) : FirstWash: If you enjoy the misty mountains and your first
landscape painting, try this short bonus
project, a Sunset lake. And I'm going to go a little
bit faster on this project, but I'll just give a commentary
what my thought process, and I'm going to show
what are the techniques we used and learn from
the previous chapters. And I'll try to go as slow as possible so that you can learn as well,
and you can try too. And if you try, this will be your second
watercolor painting. So as we learn in
the first chapter, I was talking about the wet on wet. So that's
what I'm going to do. So what I'm going to
do is I'm going to wet the paper like this
when I clean my brush. And making sure that
I have a little bit of a little bit of water there. So what I'm going to do is the last time we start at the top, this time I'll start
at the bottom. And I want this to be
a really nice sunset. So what I'll do is I'll
take a lot of pigment. I want a darker
orange at the bottom. So I'm just kind of doing that. I'll just go it. You can
see that I'm using side of my brush to cover a larger area instead
of painting like this. I'll go a little bit darker
at the bottom, as well. And I'll take some more pigment, and I'll do this as well. But as it comes down here, and I'll just wait
here like that. And you can see that I covered the top part at the bottom part. So now I'm going to clean my brush with a rag,
as you can see. And I'm going to take this blue and make sure it's a little
bit lighter than our orange. So I'm going to put
some more water. And I'm just going
to since we wet the paper already at the top,
I'm just going to do this. And I'll use my side of my brush to blend it really nicely. And you can see that we kind of create this really
nice gradient. And I will do the same
thing here at the bottom. I'll use my side of my brush. And what I'll do is
I'll hold my paper, and I'll go a little bit
darker at the bottom. And I'll just blend
it with our things. And I'll use my side of my brush to blend really nicely
like that, and that's it. And you can see that
we kind of create this really nice transition
from top to bottom. One thing in watercolor is
we can't leave some eyelids. So what I'm going to
do is we're going to use, we guessed it. We're going to use
lifting technique to create a sun for us. So what I'll do is I'll create the sun, not
exactly in the middle. I'll just do it here. So it's
not exactly in the center. I'm just pressing
it and dabbing it. That's it. I'm not
doing anything else. So what I'll do is I'll take it, and I'll just put
something here. Okay. And comes all the
way down like that. And what we can
do, we can also do a couple more things like
that next to the horizon, and you can also
make some streaks wherever that happens as well. And there you go. So
now you can see that we cannot create a dark orange
with wood down width, and we cannot create the same thing at the bottom as well. And what I'm going to do
is I'm going to draw it, then we can add the
details on top of it. And that's the
exact same thing we did on the misty mountains
on the foreground. So we're going to do the
exact same thing for this.
11. Bonus Chapter (Sunset) : SecondWash: Now you can see that
I dried quite a bit. So now the colors also
got a little bit lighter. That's fine. So now I'm going to add some kind
of trees at the back. So I'm going to use a brown. You can use any kind of brown
you want in your palette, and I'll use this Persian blue. But make sure that
when you do this, make sure it doesn't
have a lot of water in your palette because we
want this to be darker. I'll put some orange too. Put some orange, some
brown, and there you go. So now what I'm going to do is where we left the eyelds from? So I'm going to do some marks. Kind of think of you doing Os. Maybe we can establish a
line. This is ours on line. So make some Os like this, like a small semicircle
or like a mushroom. And making sure that
it's bigger here. And as it comes to
closer to our sun, it's getting smaller
and smaller. It's kind of like a ramp
we are trying to do. And I'll I'll do the
same thing here. The ramp gets bigger, and again, make
some os like that. So it kind of looks
like a tree for us. And you can see
that I'm only using one brush and a smaller
stroke, and that's it. And if you get some eyelids, some white bits here and
there and leave it as it is, and making sure I'm putting
a straight line like that. And again, I'm going to put
the straight line here. And there's one thing
I'm going to do is I'm going to use the
lift technique again, since the light is heating here, so you'd have to really
fast. And that's it. So that the light is heating,
the sun is heating here. So it's kind of
like a little bit lighter at the top,
at the bottom. Maybe I'll just make a
couple more dots here and there and make some Os. So it's not looking
like a mirror. So now you can see
that we can edit it. So since it's water, it's going to what's
going to happen is, it's going to reflect exactly. And I'm going to do the same Os. It's kind of like
you're mirroring the exact same thing from here. And I'll skip it here and
I'll leave some lines here. And I'll take my tissue
paper. What I'll do is. I'd have to really
fast, and there you go. So now we kind of create
that light there. So now we can blindly go and mirror our trees at
the bottom, like this. And think that you are mirroring the exact same thing
at the bottom. And even if you're wrong, it doesn't look
right, it's fine. But onely thing you have to
make sure that it's a darker. It's the same value as this one. And you can see that I'm
kind of mirroring that. I kind of have a bigger peak. And what I'll do is I'll take a tissue paper and really fast. And there you go. So now
we kind of mirror it. It kind of looks like
it mirrored there. And it's easy step, right? So
what we did the wash and we mix something really
dark and we kind of created this for us.
12. Bonus Chapter (Sunset) : FinalDetails: Now we kind of created the
sunset with a reflection. So we can add some
more reflections and you can leave the
painting as it is. But I'm going to show
one more technique where you can add ripples
in the foreground. And it's really easy to do. So I'm going to clean my brush, make sure there's no paint in my brush. I want clean water. So what I'll do is I'm going to make some lines like
this. It's wet on wet. I don't know where
the line goes, but I'm going to have a bigger
lines in the foreground, and as it goes to the midground, I'll have smaller
lines. So now it's wet. So I'll take this blues. Not that much water. You
can see how thick it is. And I'll just do this. And make sure it's smaller here. I'll take some more
darker pigment and I'll just because I want a darker
pigment in the foreground, and as it goes in the
midground, it gets lighter. But now you can see
that we kind of create this really nice sunset scene using the principles of
wet on wet, wet on dry. And there's one more
thing we can do. And again, this is optional. So we could take the same blue and we can just put it
at the top, like this. And I don't want to waste that blue there, so I just did that. And there you go. This
step is an excess strap. You can avoid it, but you can see that if you
show this painting, it's already looking good. And there's also one more
thing you can add as well, is adding some birds and make sure I'll
use the same thing. And I'll add, like, a
couple of birds. That's it. And now you can see
that we can create a really nice sunset with
the techniques we learn. And make sure if
you try to post on the class section
and project section, I would love to see what
you guys can come up with. And until then, if you have
any questions or anything, post in the classroom chat, and I'm happy to help you guys.
13. Paint With Me Again: Congrats. You did it. You have just completed your very first
watercolor landscape. Now take a moment to look
at what you have created. Even if it's not perfect, you learn the most important
watercolor lesson to let go, relax, and paint with flow. I would love to see
what you have made. Share your painting in the
class project section. When you're ready
for the next step, check out my other
classes in Skillshare, especially how to
do value studies and how to do washes
and how to do blending. This will help you how
to paint light, shadow, and depth, taking your
watercolor skills to next level. Thank you again so much
for painting with me. And remember, it's not about perfection, it's
about expression. And I'll see you
in my next class.
 Dinesh Subramanian, I love painting!!