Transcripts
1. Introduction: Oh, this doesn't look
right. What about This? yes, like This looks much, much better. And to doing that, I just needed a couple of
extra steps after painting. That is exactly what you're
going to learn in this class. Hi, I'm Fio, an artist and
teacher based in New Zealand. I have three previous
classes here on Skillshare, where I teach about watercolor
techniques and tips. But this one is a
little bit different. In this class, we're going
to see how to embellish our, artwork after painting
with watercolor, you can use even a
practice sheet or an illustration that you
are not a 100% sure If you want to frame it. We are going to explore
two main options. Making a collage and using
a previous illustration. We're going to see how
to prepare our panel for pasting watercolor
paper on it. How to protect our artwork, and how to add the resin
to have an unique piece. We will start with
a brief explanation of the materials
needed for this class. This class is suitable
for anyone who wants to give an extra touch of
beauty to their artwork. If you're new with
resin, no worries. We are not making a super
difficult project here. We're just going to coat our illustration and our
collage with resin. And if you want to
explore more about watercolor before
doing this project, you can take out any of my previous classes and
then return to this one. Is going to be a fun journey. So see you in the next lesson.
2. Class Project: Thank you for
choosing this class and decided to spend
your time with me. The class project
will be a piece of art coated with resin to
share with our community In the project section. I would love to
see how you apply everything that you
learn in this class. You can choose if you
want to make the collage or use a previous illustration
that you already have. The sky is the limit. So let your imagination
flights. Share your final piece to the project
section is key for you, as it will embrace you
to put your hands on after watching each lesson. You can also be able to receive some feedback from me and from the community and also inspire others to share
their artworks as well. For example, my
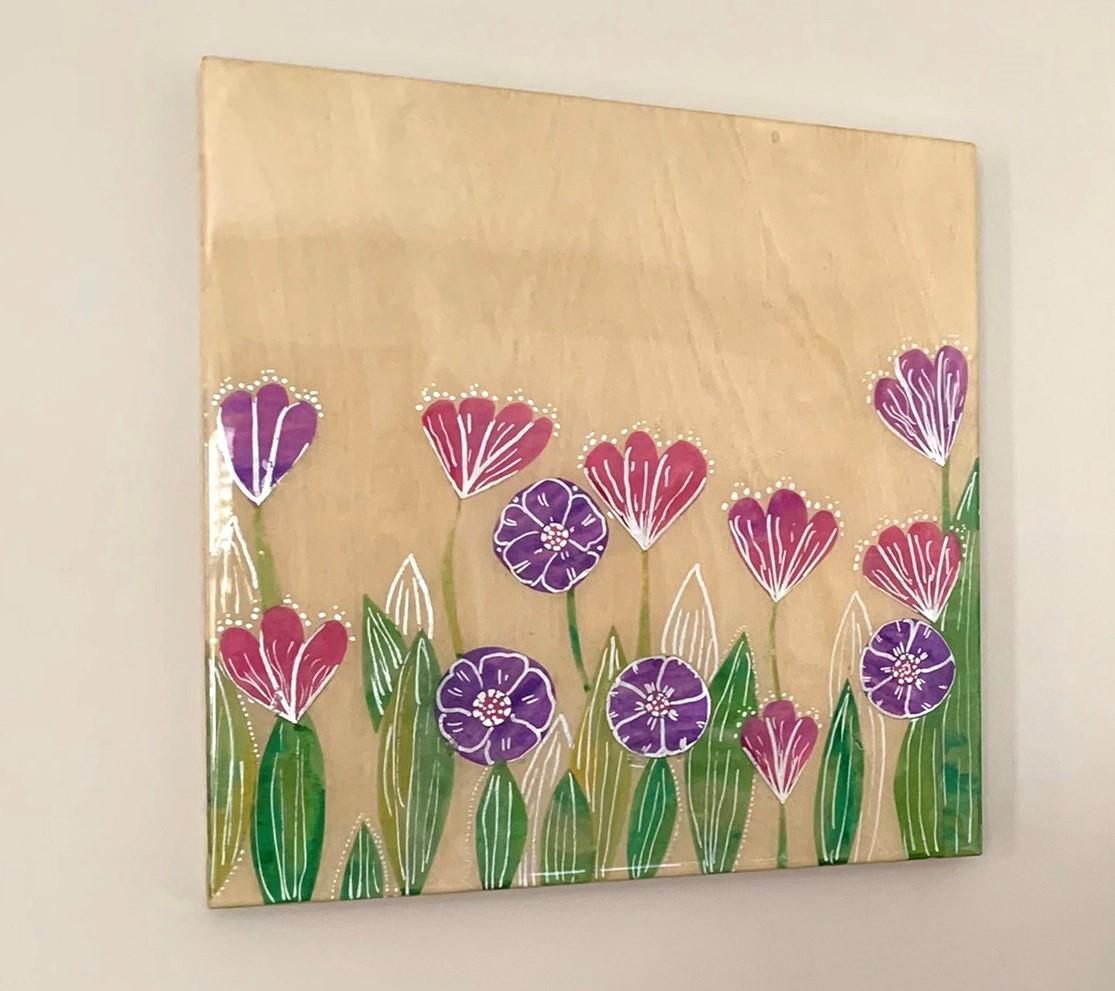
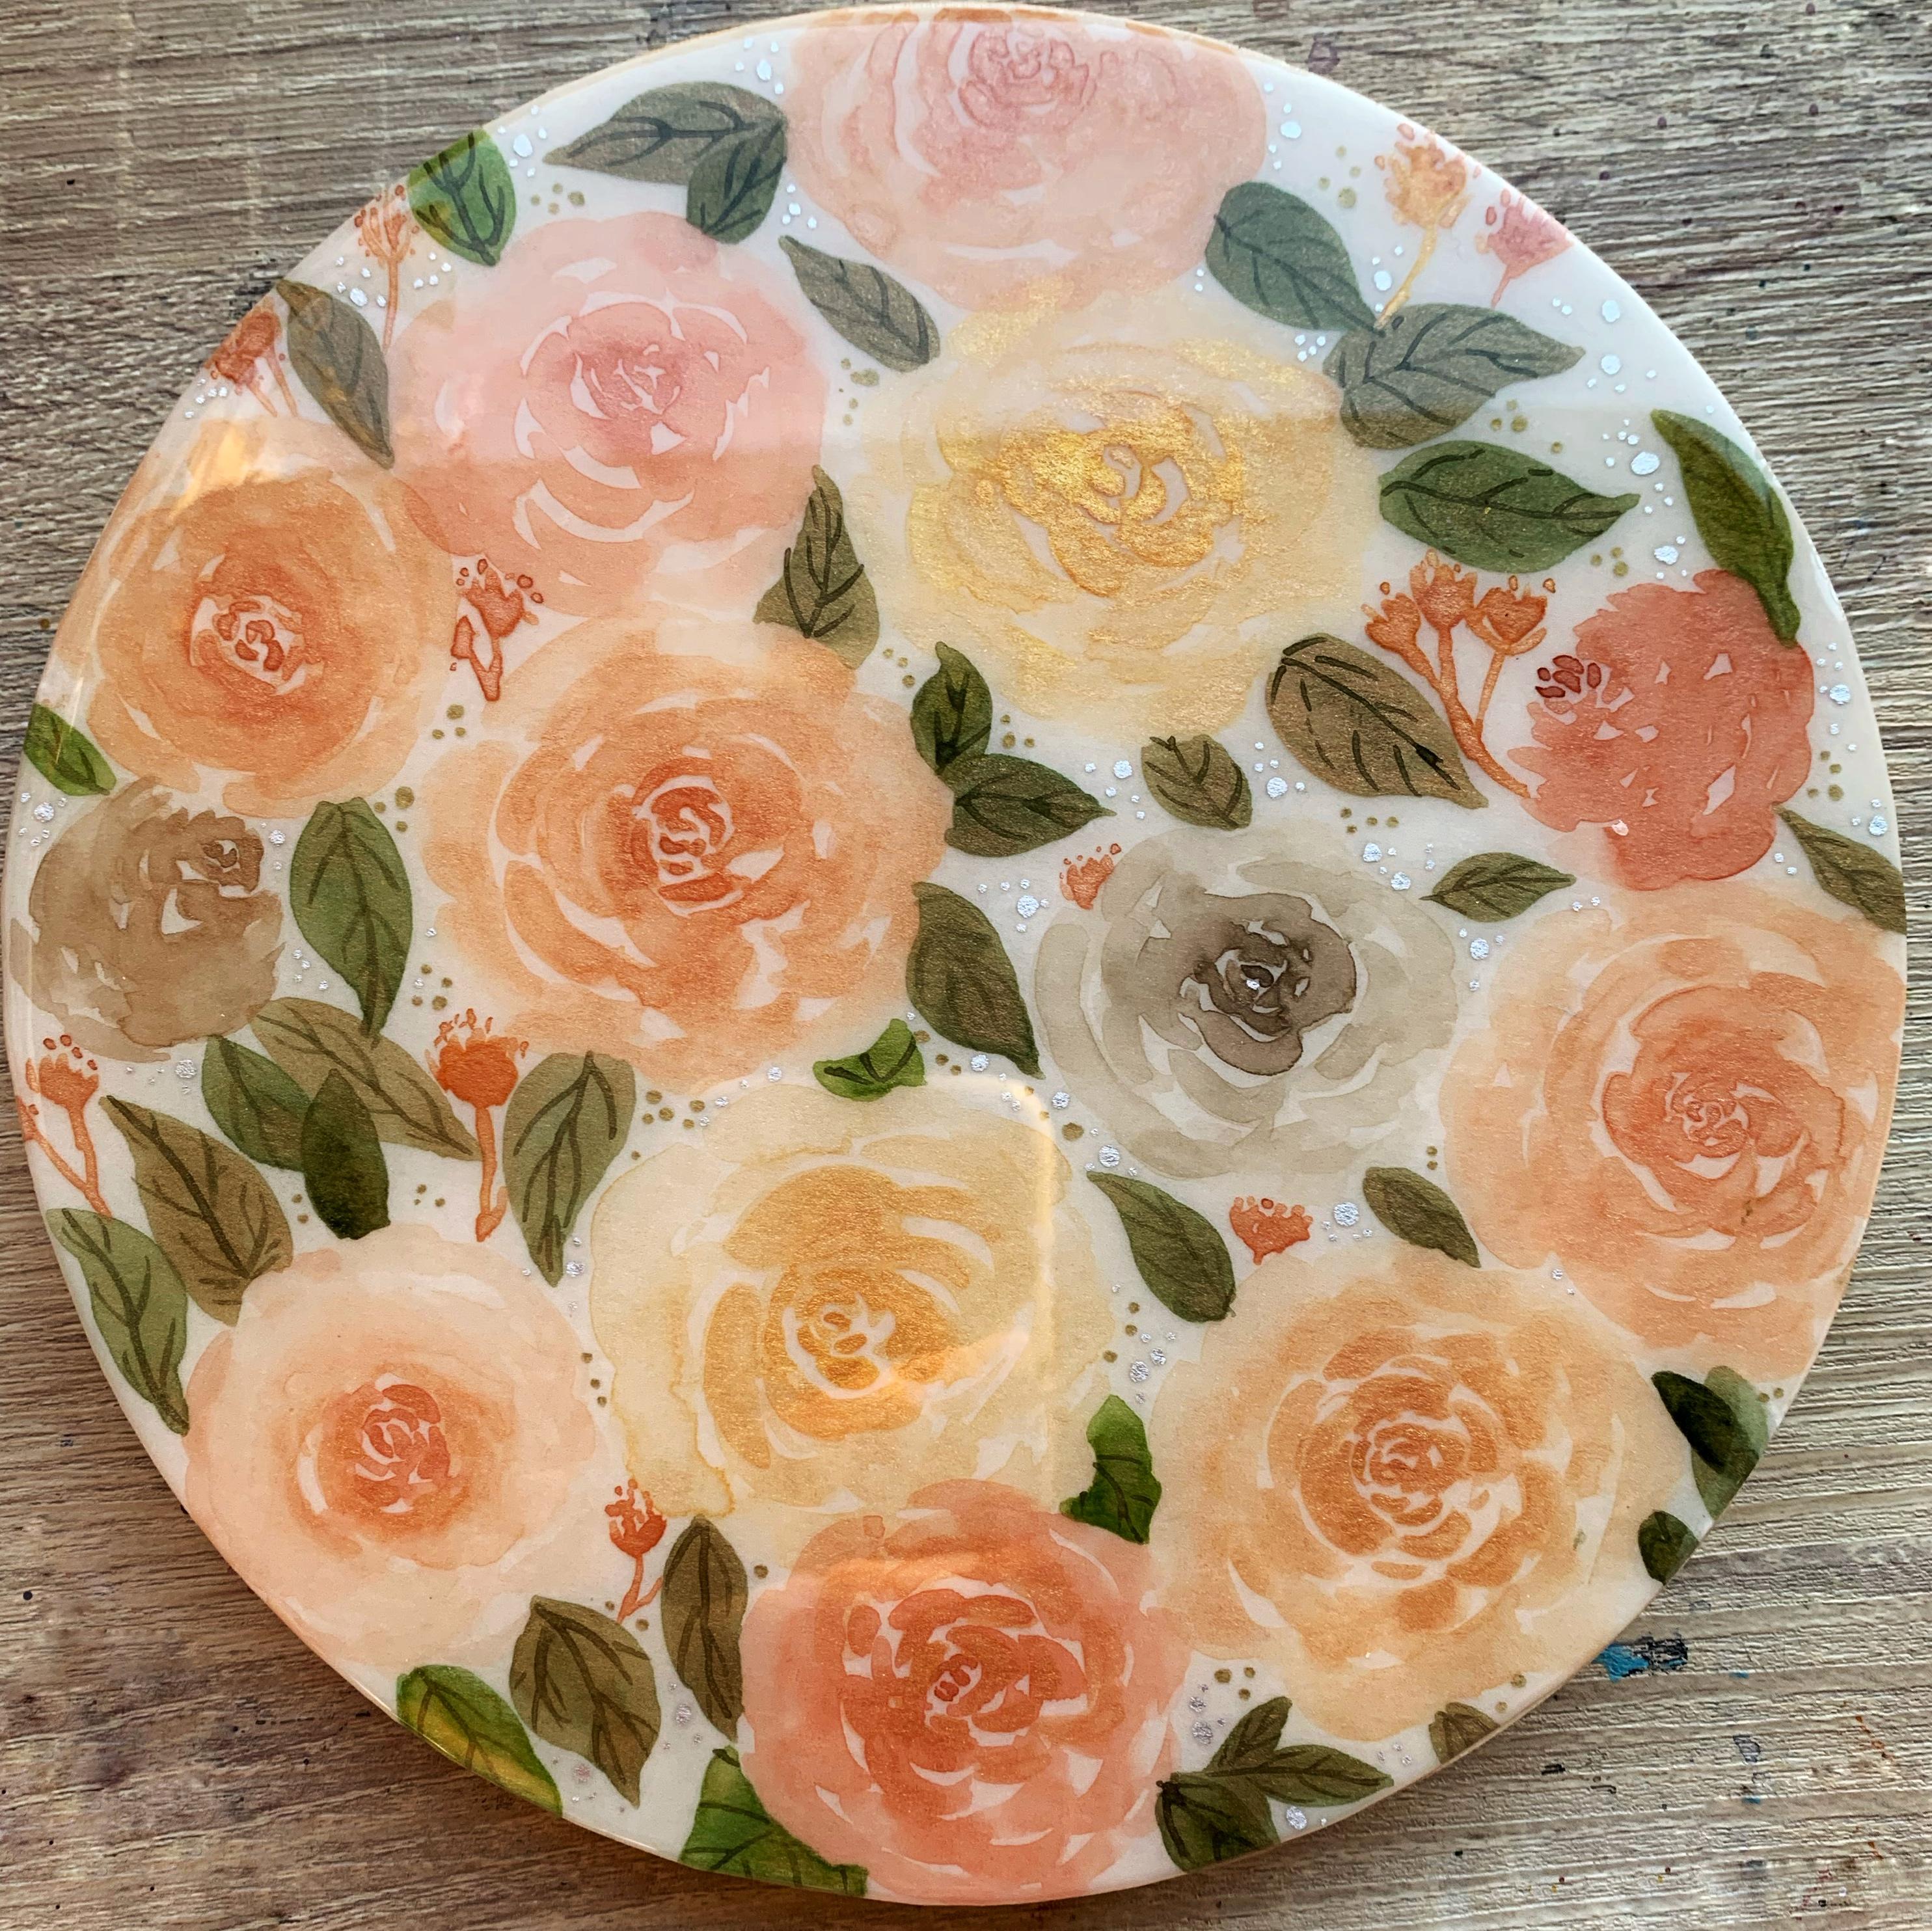
final project are these two pieces of
art coated with resin, the illustration
and the collage. And I will take a picture of them and upload to the
project section. See you in the first lesson.
3. Materials: For this class, you will
need resin and hardener. I want to take advantage
here to mention that resin is just
one step of the class. The goal of this
class is about making a collage and use an
illustration for adding resin. You will need a previous
watercolor worksheet and or any previous
illustration. Also, you need a wood panel. The shape is your choose. I like this type of panel that gives you the option
to hang on the wall. Also glue, this brand
is really good. Scissors and x-acto knife. You will need a masking tape. This one is a
really good quality one and one thing to keep in mind when buying the
tape is making sure it's thickness should cover
the border of your panel. Metallic pens for details, I found this brand better. Actually, this is my
favorite as it's very shiny. But the golden one is ok.
Also a thick brush. Please, please don't use your watercolor brushes
here as this brush, we're going to use it
for applying the glue. You also need a watercolor
protector spray. I found this Schmincke
brand. It works. Also something to
spread the resin. A mixed container, a torch
for getting rid of bubbles, a box big enough to
cover your work, a cutting mat for
cutting our papers. See you in the next lesson.
4. Prepare the Surface: Before I start anything, we need to have our
surface ready to pasting watercolor paper on it for
that with the same glue? Yes. This glue works
as a sealer as well. We cover all the surface. You can use the thick
brush for this, not a nice one. We need to let it cure
for at least an hour. If your surface is
not very smooth, you may need to add
an extra layer. In the next lesson,
we will start working in our
collections. See you then.
5. Collage: First, things first,
we need to have an idea of what do we want
to achieve in our collage. So we need to sketch it. Don't worry, you don't have
to be an expert drawing. This is just to have an idea
of how we want our collage. So let's start. First. I draw a square because the wood panel that I
will use has this shape. If your panel is a rectangle
or has another shape, you have to keep those
proportions on your sketch. It will make your life easier later, I will make a collage inspired by a flowers garden. So I'm going to draw some
flowers and leaves here. I make two options. But actually I liked
the first one. So this is my sketch. Alright, so in the meantime,
our panel is curating, we can start cutting our paper
for our collage project. It's important to think
about the shapes first. So keep your sketch
handy for this step. Here I'm cutting with
the X-Acto knife and also some scissors to get the shapes that I
want to achieve. It doesn't need to be perfect.
Now remember, this is a
collage is nothing realistic. Once you have most
of your shapes cut. If you wood panel
is already curated. You can taste now how you want your flowers
and leaves on the panel. You have to do this
before paste your shapes. Because once you paste
your shapes on the wood, then it would be a miss
if you're not happy with your collage and
want to remove any shape, it can look easy, but actually it needs
a lot of organization. Remember to check your sketch so you can have a better idea of how and where you want
your specific shapes. Once we are sure how we
want our collage, we can start pasting our shapes. Don't forget to clean your brush as soon as
you're finished to use it. And also don't forget
to close the glue. Once you have everything, paste it on the wood, you can use the
metallic pens to add some details and texture
to your collage. I just do these
to make sure that the pieces are well pasted
it on my wood panel. I like to add some dots
on the petals and leaves. and Voilá! Your collage is ready
to the next step. See you in the next lesson.
6. Illustration: For this option, we will use an illustration that
we already have, but that we are not a
100% sure about it. So let's give it some
life with resin. The process is very
similar to the collage, but easier as it already
has a design on it. We just need to cut the illustration with
the shape of our panel. And just based on eat after
the panel is curated. If you're interested in
painting this design, you can find a bonus lesson
at the end of this class. There, I show you how I paint this type of loose
flowers and leaves. So after you paste the paper, you can remove the excess
with that exact of life. And also you can add more
details with a metallic paints, saying us in the collection. And done! piece of cake. You have your second option
ready for the next step. In the next lesson, we will see an important
step before adding the resin to our
pieces. See you then.
7. Protect your Work: Here we have our pieces
ready for the last step. But first, we need to do
a couple of more things. We need to add this product to protect the watercolor
for the resin For that, please open
your windows as it has a strong smell and
maybe toxic, I'm not sure. But just in case.
Shake it and apply it from maybe 30 centimeters
distance, at least. Apply it to all your pieces,
if you made more than one, applied to all of them. Also, we need to protect
the borders of our pieces. So for that, it's important
to use a good quality tape. Just cover all the borders. And our pieces are now
ready for that resin.
8. Apply the Resin: After your work is sealed
with a spray that we use before and also the edges
are protected with the tape. We can pour the resin on it. Prepare your workstation, and protect anything you
don't want to damage. I love this table. I think that it's
really beautiful, so I place some newspaper
here to protect it. Remember, to have
enough space to prepare the resin and also to leave your pieces for the
curating process. It is key to have a box big
enough to cover your work. It will protect it during
the curating process. I wanted to share that
website of Art Resin, which is the resin
that I used. Here. You also have a complete
tutorial, helpful information. So I highly recommend you
to check out this video. You can check out
that a step-by-step here and also find
the calculator. So you insert here
the measures of your surface and get the amount of resin
you will need for that. So here I start
preparing the resin. It's important to wear gloves
since the very beginning. Mixed in equal
proportions that resin on its hardener and
pour on my panel. After pure the resin,
you can use the torch for minimize
the bubbles you can get. Particularly, I like to see
a few bubbles of my pieces. After 24 hours. Your piece is cured. Wait an extra couple of days
to hang it on your wall. See you in the next lesson.
9. Finishing touches: As a final touch, you can paint the
borders of your pieces. I use acrylic paint and I made my own color mix to match with a color palette
of my illustration. For the collage, I
didn't paint the borders because I think that it
looks beautiful like this. So here you have your two pieces of art coated with resin. Don't forget to upload a photo of them on the project section. And also, if you want to share it on Instagram
don't forget to tag me so I can share it with my community as well and
give you some feedback. Talking about feedback,
you can leave me a review about this class
if you enjoy it or not. And see you in the next class. Bye.
10. Bonus Lesson!: For painting these
loose flowers, I will use just one brush. This is a number
six round brush. Remember, if you're
new with watercolor, you can check out any of my previous classes where
I explained for materials, basic techniques, and much more. This is just a
quick bonus lesson. I like to use
metallic watercolor for this kind of illustration. So I start with a row, says For that I paint
like little moons shapes with the tip of my brush very close
one to the other. And then I take more water and start painting
with thicker strokes. You can choose different
colors in the same rows. For the day, see
kind of flowers. I start with some dots
in a different color and then long strokes with the color that I
want for the petals. And just start
filling your paper with these two kind of flowers. You can also add leaves for that I made another
type of green. You can also add
some detail with different colors and with
a tape of your same brush. I hope you enjoyed this quick lesson and
see you next time.
 Fio Ortecho, Watercolour Artist & Teacher