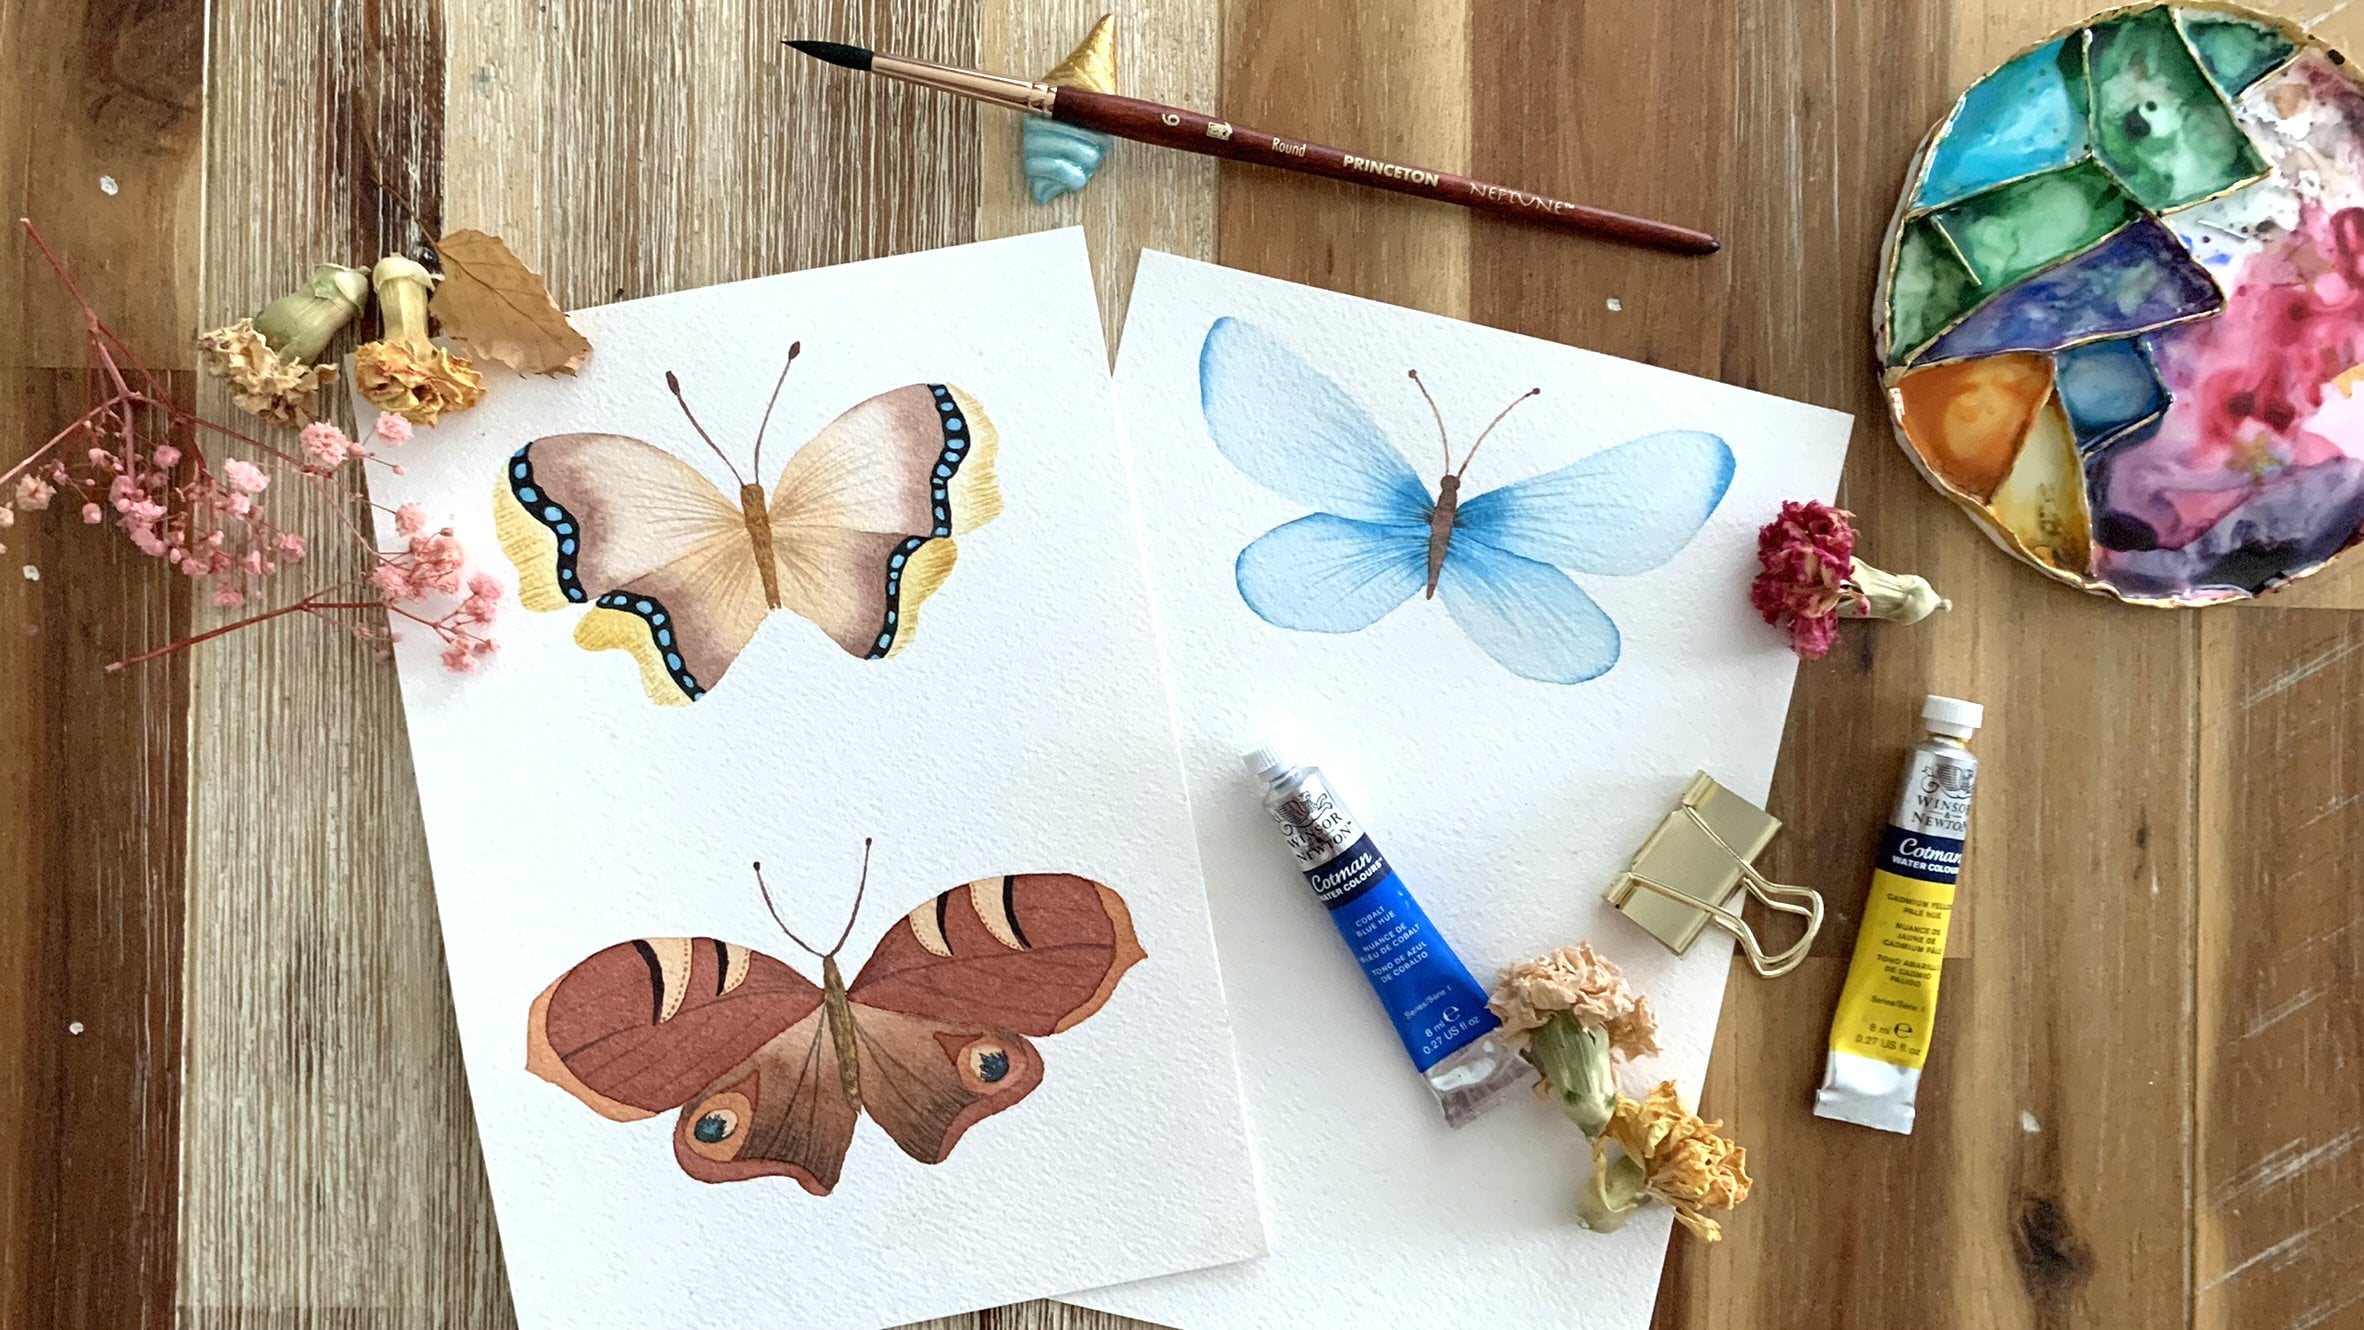
Transcripts
1. Hello!: What better for this
Christmas season than hand painting ornaments
for our Christmas tree? For those creative folks that enjoy to create things
with their own hands. This is a class for you. You don't need experience
for taking this class. If you are new painting
on wood or you have serious experience painting
in general, no worries. We will explore many
options and you will be able to paint the ornament
according to your level. We will have an abstract
painting option and also another figurative options for those who enjoy
more detailed things. I will show you how I paint each example step by
step from scratch. You will be able to make your very own design
before we start, don't forget to follow me
here on a skill share, just clicking the
follow bottom up here. You don't miss any of my
next classes or giveaways. Okay, enough with a talking. I will show you in
the next lesson. What are the materials
that you need to complete today's
projects? See you there.
2. The Projects: You will have different options
of Christmas ornaments. After completing today's class, we will paint through
all the class, each example, and we're going
to complete four projects. You will choose your
very own color palette and design with all the tips that I will show you and share with you
through this class. If you feel happy to share, don't forget that you can allow a photo of your projects in the students project gallery so other students can feel
inspired by your design. Remember that this is a
community of creative people.
3. Materials: Creating Christmas
ornaments with wooden slices can be a delightful and
festive craft project. Here's a list of materials you will need to complete
today's class. Wooden slices. Purchase pre cut wood slices. Ensure they're smooth and
free of any rough edges. You can get them from Wish
I bought mines from there and they came out really good
anyway, When buying online, I'm suggesting to
check the reviews and photos from
previous purchases, Ribbons or strings to hand the ornaments on
the Christmas tree. The wooden slices that I got
came with these strings, so I didn't need to buy them a drill in case the wooden slices you
get don't have a hole. You will need a drill
for creating holes, to attach strings or ribbons, for hanging a notebook
for sketching. As you can see here, I've already done a
couple of sketches here. Craft Ems or beads. These are optional embellishments
for at decoration. I do recommend you
to get some of them. Markers or paints for drawing finer details or even
writing messages. I like the golden pen and it goes really well with
a Christmas season. For this class, we will use word color wash
and acrylic paint. Now is the time to try
them and get used to them.
4. Try your Materials: Okay. So first we're going to get used to our materials Was colors in tubes and
also colors in pants. Let's see how this works. I'm going to use
for this big brush, really simple brush,
nothing fancy. Well, I already have
some color here. Keep handy tissue so you
can clean your brush. I don't want to
stay my towel that I usually use for
when I painting, that's why I'm using
this paper now. This tissue. Okay. So first things first, let's check on more wash here. You can notice that only, not even painting,
only feeling here, when you are adding water that is more opaque than
water color wash, just filling with the
bristles of your brush. Let's try now with color. Let's activate this palm here, maybe as a mix of
different colors. These colors don't mind. We are still not choosing our final colors
for our projects. You can notice only in the
texture sees more watery. Going to put this close to the camera that is more watery. Even that I didn't
add much water, but it's way more water than the wash you want to feel when you try
your very own materials. Now let's try the acrylic paint. I'm going to put this here. You see text clearly, we don't need to add water. Just clean your brush
because this is white. We want it very clean and feel sees nothing like war color or was nothing
similar, really thick. And we're going to use
this to add some details at the end of our projects,
like final pouches. But also to add different
things of one color. For example, we want
to use maybe red, but then we're going to use
a different tint of red at that's why we want
to use white acrylic. White acrylic because we want to paint on wood, not on paper. If we add why water
color or more water, Usually that is what
we do when painting. When we want to get a different, them from the same
color of water color, we usually add more water. But in this case, it
won't work because it's like we are not painting
on paper as I just said. So your colors, try this now. On a piece of carbo, we don't want to damage our, we don't want to paint
on our piece of wood because you're going to be really a waste. It
will be a waste. So we're going to
practice on carbo and you don't even
need fancy carbo. I'm going to use
this box that is pane carbo box going to
cut it and practice here. You can also reuse any
carbo that you have. I think that we have enough. I'm going to reserve this
part for different things, but this part I'm
going to use it for my materials. I
recommend you to. The same. If you have more brushes, this is the time to
try them as well. You're going to figure out which one you need for
different strokes. Let's try just a brush stroke. Just paint and see how we get. This is quite watery. This is war color. Just war color clean. Now we want to try to wash. It's a little bit
more opaque than word color now before it dries. Because when acrylic dries, you can't use again, it's not like word color that
you can activate it again. Let's try. You see here, I didn't dry my
brush really well. I didn't even cling well. I want to do this again, cling and dry my brush. I want to get acrylic. You see that? This is thick, it has even a texture. Now I'm going to
try to do this just mixing the why that I have
here with a water color. Use this piece to play and practice and get
used to your materials. That's what I want to get
used to your materials. Remember that if you
are picking white, clean your brush really
well, clean and dry. See that you can mix the
paper on your surface. In this case, in the piece of, on the piece of card. Also, you will be able to do
this on the piece of wood. Practice with different
brushes as well. Because you don't
know what kind of strokes you want to
make you want to do. So you practice already a lot, you can't believe it, but you already get used
to your materials. See you in the next lesson
where we're going to practice.
5. Practice some brush strokes: Practicing on carbon before moving onto wood
is a great idea. It allows you to experiment with different shapes, brush strokes, and techniques
without a commitment of working on a more
permanent surface. First, outline the shape of your wooden slices
with a pencil. Make sure to cling any dust from the surface as it can
go into your paint. And we don't want
that. I'm trying to mix the color a bit fast as I don't want to let the
acrylic paint to dry. So just start painting a
background on the first circle. Try mixing colors directly on the carbon surface to
see how they interact. I find that mixing colors on the surface gives it a
really cool texture. Now on the next circle, let's try something different
and with a different color, tie out various brush strokes. Using different brushes. Pay attention to how the brushes handle and the
textures they create. For the next circle, use a pencil to lightly sketch the shapes or compositions
you want to paint. This step will give you a guideline as you practice
different brushes. Straws paint some areas with a figurative approach, like this star, and others with a more abstract style like
the previous example. This will help you find your preferred painting
style and technique. Experiment with
different compositions, color schemes, and techniques. The goal is to build your
skills and gain confidence. So if you want to practice on additional pieces of
carbard, go for it. Once you feel comfortable
with your practice on carbar, you can transfer your
skills to the wood surface. Remember that practicing
is an ongoing process and each piece you create contributes to your
growth. As an artist. Don't be afraid to
make mistakes as they often lead to valuable
learning experience. See you in the next lesson.
6. Colour Palette: Choosing a color pallet for
painting is a crucial step in the artistic process as it sets the mood and
tone of your artwork. Let's explore some
color palettes. I suggest you to
check on painters and pay attention to color
combinations that appeal to you. Look for images that
have a similar mood or atmosphere to what you
envision for your painting. You can create a
moodboard, collect images, color swatches, and other visual references
on your moodboard. This can help you see
how different colors work together and give you a visual guide for
your painting. Consider working with a
limited color palette, especially if you
are a beginner. Start with a primary set of colors and gradually
expand as needed. Explore the use of things. Adding white and shades. Adding black of
your chosen colors. This can a deep and
variated to your palette. Experimenting with
different tones can also help you find
the right balance. If you want to
explore more about color theory in my
previous class, paint a very positive
illustration, you have a very complete
lesson about it. Feel free to jump into that lesson and then
come back here. Remember that choosing
a color palette is a suggective process and
there are not strict rules. Allow yourself the
freedom to explore and discover what works best for
your artistic expression. See you in the next lesson.
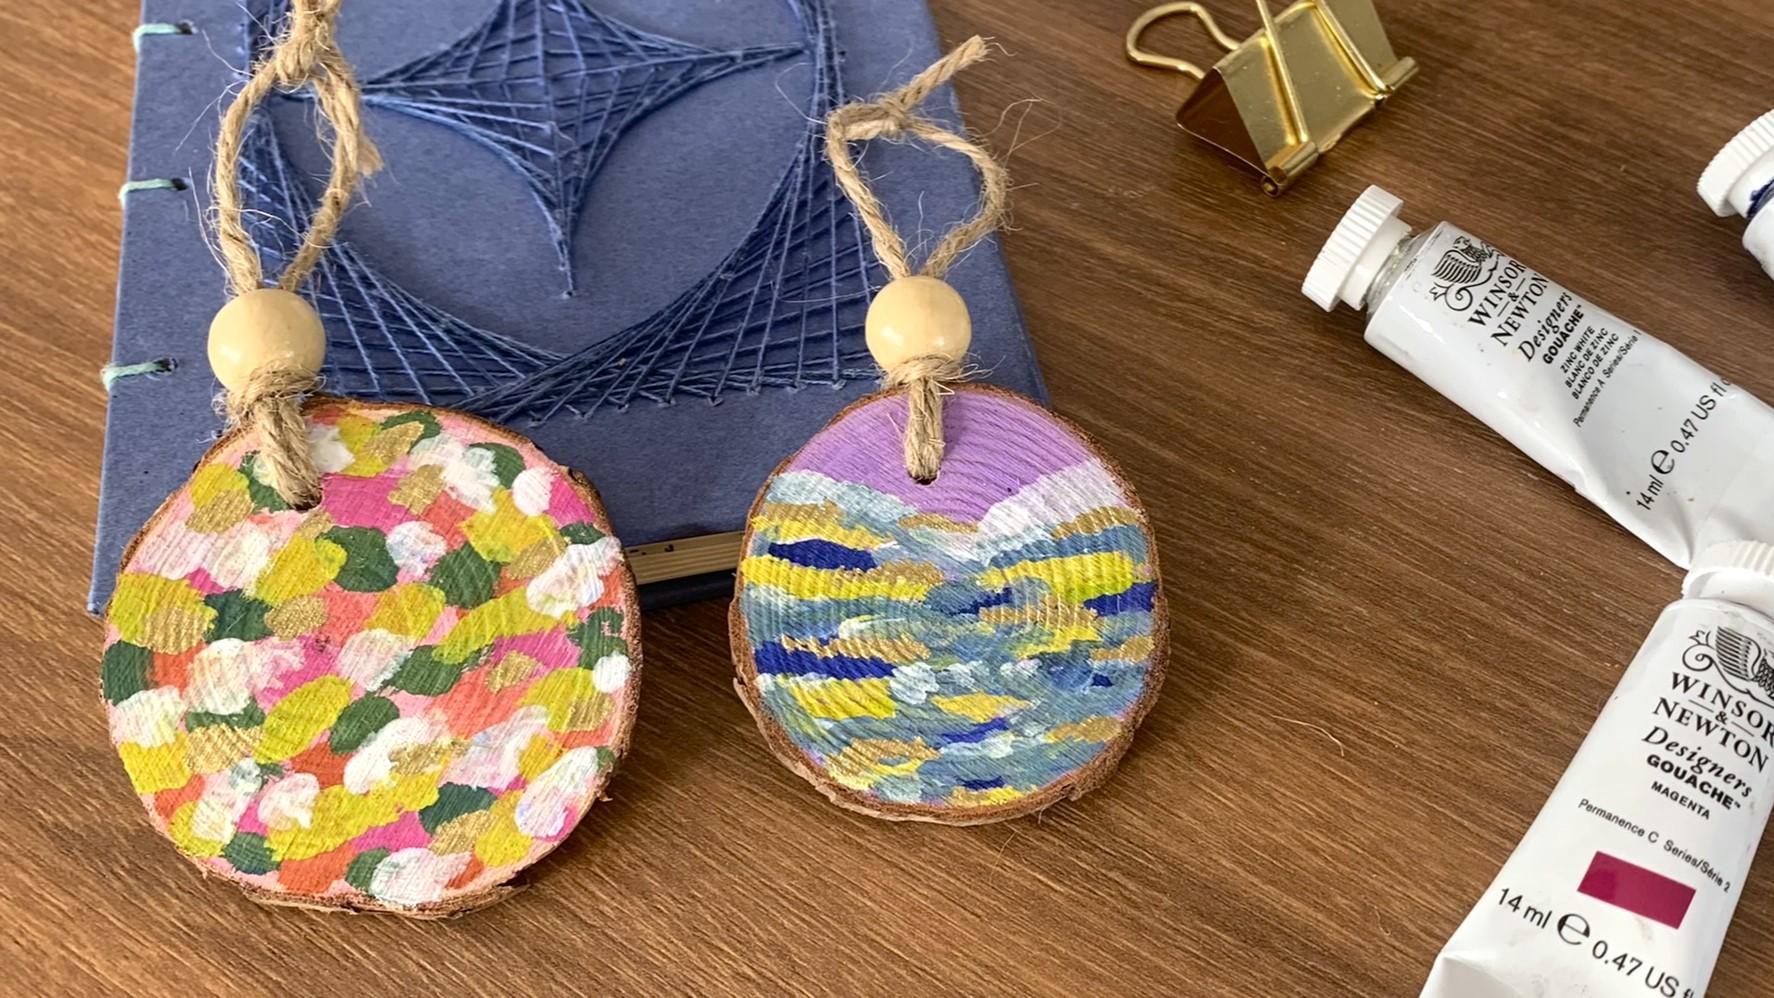
7. First Layers: For the first slide, I will use this color palette. Let's start painting
with this pink. I want to paint just
irregular circles. Remember to use a brush that
has quite hard bristles. Do not use any fancy brush for any of the projects
of today's class. Now, I will add a
bit of white to my current color just to create a different tint
of the same color. And apply it to cover any part that doesn't
have color jet. You can see that there are different ways to paint
these abstract options. The goal here is
to go with a flaw. Try to take advantage
of this process and use it as a meditation time. Just paint without
following many rules while the first slice is drying, Let's start with a
second abstract option. First things first. So clean the brush to remove any pigment of the
previous colors. I have my color ready. This time, I will paint
all the background first, so when it dries I can add
other colors on top of it. Try to don't paint
over the edges as that wood texture of the edges looks really nice
on the Christmas tree. Now, I will continue
with the first slice, and we use orange that is part of my color
palette for this piece. And paint more
unperfected circles. I will let them dry and
continue with a second piece. I will paint a different shape, irregular as the
previous circles, but this time they
look more like waves. And I will leave them dry and carry on with a first slice. Again, I will mix my final color that I have for this piece and paint the
same shapes. One more time, we almost finish
with this piece. It only needs some final details that we will add in
the next lesson.
8. Final Layers: Here. As you can see, I only added more layers of the same shape to each piece as we did in the
previous lesson. I will show you now how I add white paint to
the second piece. I take some white
acrylic paint and paint some strokes between two
waves of different colors. I think that adding white gives an extra bright to
our Christmas ornaments. Remember that most of the
Christmas trees are dark green. Our ornaments contrast
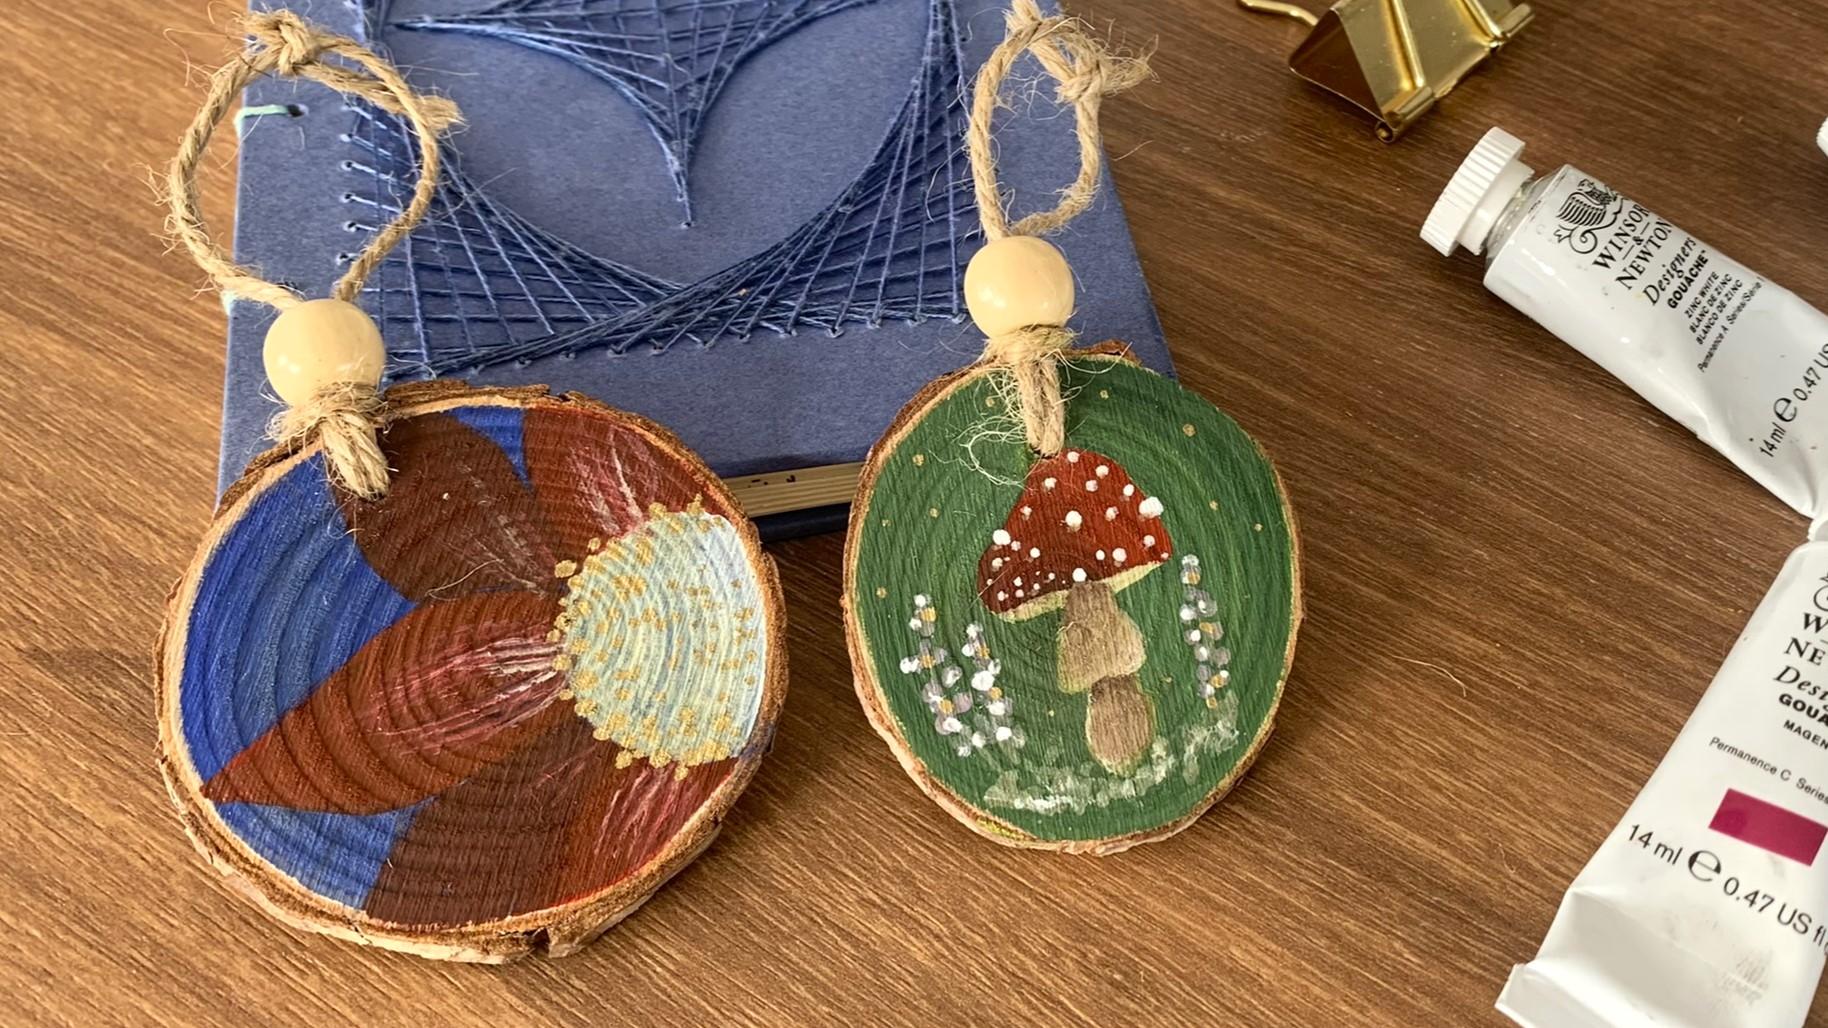
with the tree. In the next lesson, we will sketch a flower and a mushroom. So you can also
make ornaments that are not only abstract
shapes, like the ones. If you are not interested
in the next projects, you can just jump to the
final details lesson, where we will add final touches
to all of our projects.
9. Sketch: Now we are going to
sketch. Before painting. For that, I do
recommend practicing on my sketch book before
draw on the wood piece. Here a sketch, a
couple of designs, you can check some photo
reference for your own designs. But remember to
sketch many options. For example, here
I'm sketching also A because I like the idea of having a B on my Christmas tree. In my Word color classes, I always mention to do not put much pressure on the
pencil when sketching, But for this class we
don't need to think about that as we are not
painting on Word color paper. Let's paint the pat ground. Remember to leave the
edges without paint. Choose your color palette and
when the background is dry, sketch on the wood. In the next lesson,
we will paint this mushroom and the red
flower. See you then.
10. Painting a Mushroon and a Flower: I've chosen to do a mushroom, which is one of my favorite
elements to paint. I mix up a very
intense orange, red. I want to use water
color for this. Just controlling the
amount of water. Remember that we
are not painting on paper so we don't
need much water. I'm going to block out
the shape of the cap. First, I'm leaving this
video in real time. As in many of my
previous classes, you ask for that so we can paint together
at the same time. Food data. Food data. I will take some green to give a shadow to one
side of the cup, so it looks more artistic at it slowly with short strokes. So you will be able to control the intensity of this dark part, let it dry, and in the meantime, you can paint your other
piece, the background, and let it dry when the red cup of
the mushroom is dry, carry on with a stem. For that, I'm using some
acrylic in the mix of my color. In this part you can add a
line under the cap to give it a look of some gills that are
the inside part of the cup. Remember to change the
brush whenever you need to. Now the white scales, take your time to paint them. Mix the sizes of them as well. Remember that they are
not perfect circles, so just relax and try to
make them really white. Use acrylic for this now. As we add a
shadow on the cap, we can add some light to the stem again with
short strokes. After finishing the mushroom, I noticed that the
background was not helping to
highlight a mushroom, so I decided to paint
it with a darker green. You can see that it takes
some time to paint. Just enjoy the process
and take this time to disconnect yourself from
devices or other distractions. Why our mushrooms lie is drying. We can sketch the flower in the Oder slice and start painting when
your sketch is done. Food, food, Food, food, Ted. Remember to let dry the paint before paint
another element, the petals in this case, so we can add some
details to our mushroom. Let your creativity guide you. Mix colors. Use acrylic paint to get different tens of colors, and also change to a different
size or kind of rush when you want food. Food, Food. Food. Food. Food. Food, food. Carry on. With the petals of your flower mix different shades of red between the petals, so it will give us the idea of which petal is
behind the others. Food nodded. In the next lesson, we will add final details to all of our
four projects. See you there.
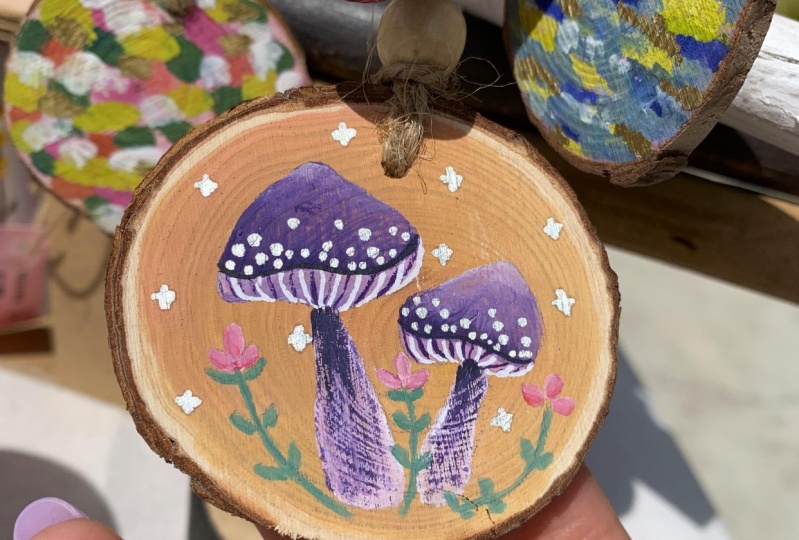
11. Final Details: You can add more light to your illustrations
with white acrylic. Feel free to use your fingers
like I'm doing here to remove some extra paint if you feel that
it's too intense. Also with a flower, we're going to add
some white details on the petas to give them some bright With a fine brush and
taking just a bit of paint, make a stroke from the center
to the end of the peta. Lifting the brush
with the movement. Adding final details with a
golden pint to our ornaments can give them a touch of elegance and highlight
specific elements. Choose a fine tip, metallic gold paint
for precision. Ensure that your
illustration is completely dry before adding fine details. Use the golden pen to outline or trace important elements
in your illustration. This could include
borders, key objects, or part of the composition
that you want to emphasize. Remember to approach
this process with creativity and have fung experimenting with
a golden paint to enhance your ornaments
in unique ways. See you in the next lesson to add the hangers
to our ornaments.
12. Adding the Hanger: Adding a hanger to your
wooden slice ornaments is a simple but crucial
step to make them ready for hanging on the Christmas
tree. Let's do it. I will show you
an option without bits in case you
couldn't get them. And a second option using a bit cut a length of ribbon
or string for the hanger. The length depends on how long you want the
ornaments to hang. A common length is around
4 " or 10 centimeters. You can just insert one end of the string
through the hole, or you have this
option that I think looks nicer and is
the one that I use. Fold the ribbon or the
string into two equal parts. And insert this tiny part
through the hole from the front side of the wooden slice where you
have your illustration. Pulling it through until
you have enough space to insert the ends of the
string to the new hole. Pull the ends of
the string bola. You just need to tie a secure knot at the top
end of the ornament. This was the option
without bits. Now let's do the same, but adding a bit that
makes it looks nicer. Food. Food. Food. Food. Now your wooden slice ornament is ready to hang on the Christmas tree or
wherever you want to display. Repeat these steps for
each ornament you create, and feel free to experiment with different ribbons
or string colors. See you in the next lesson.
13. Thank You!: Thank you so much for
taking this class. I hope you enjoy it and
complete the final projects. Don't forget that you can share them on the students
project gallery. And I will also
appreciate a lot. If you can leave a
review on this class, you can follow me
on social media. And if you share
your project there, you can also tag me. See you guys next time. Bye.
 Fio Ortecho, Watercolour Artist & Teacher