Transcripts
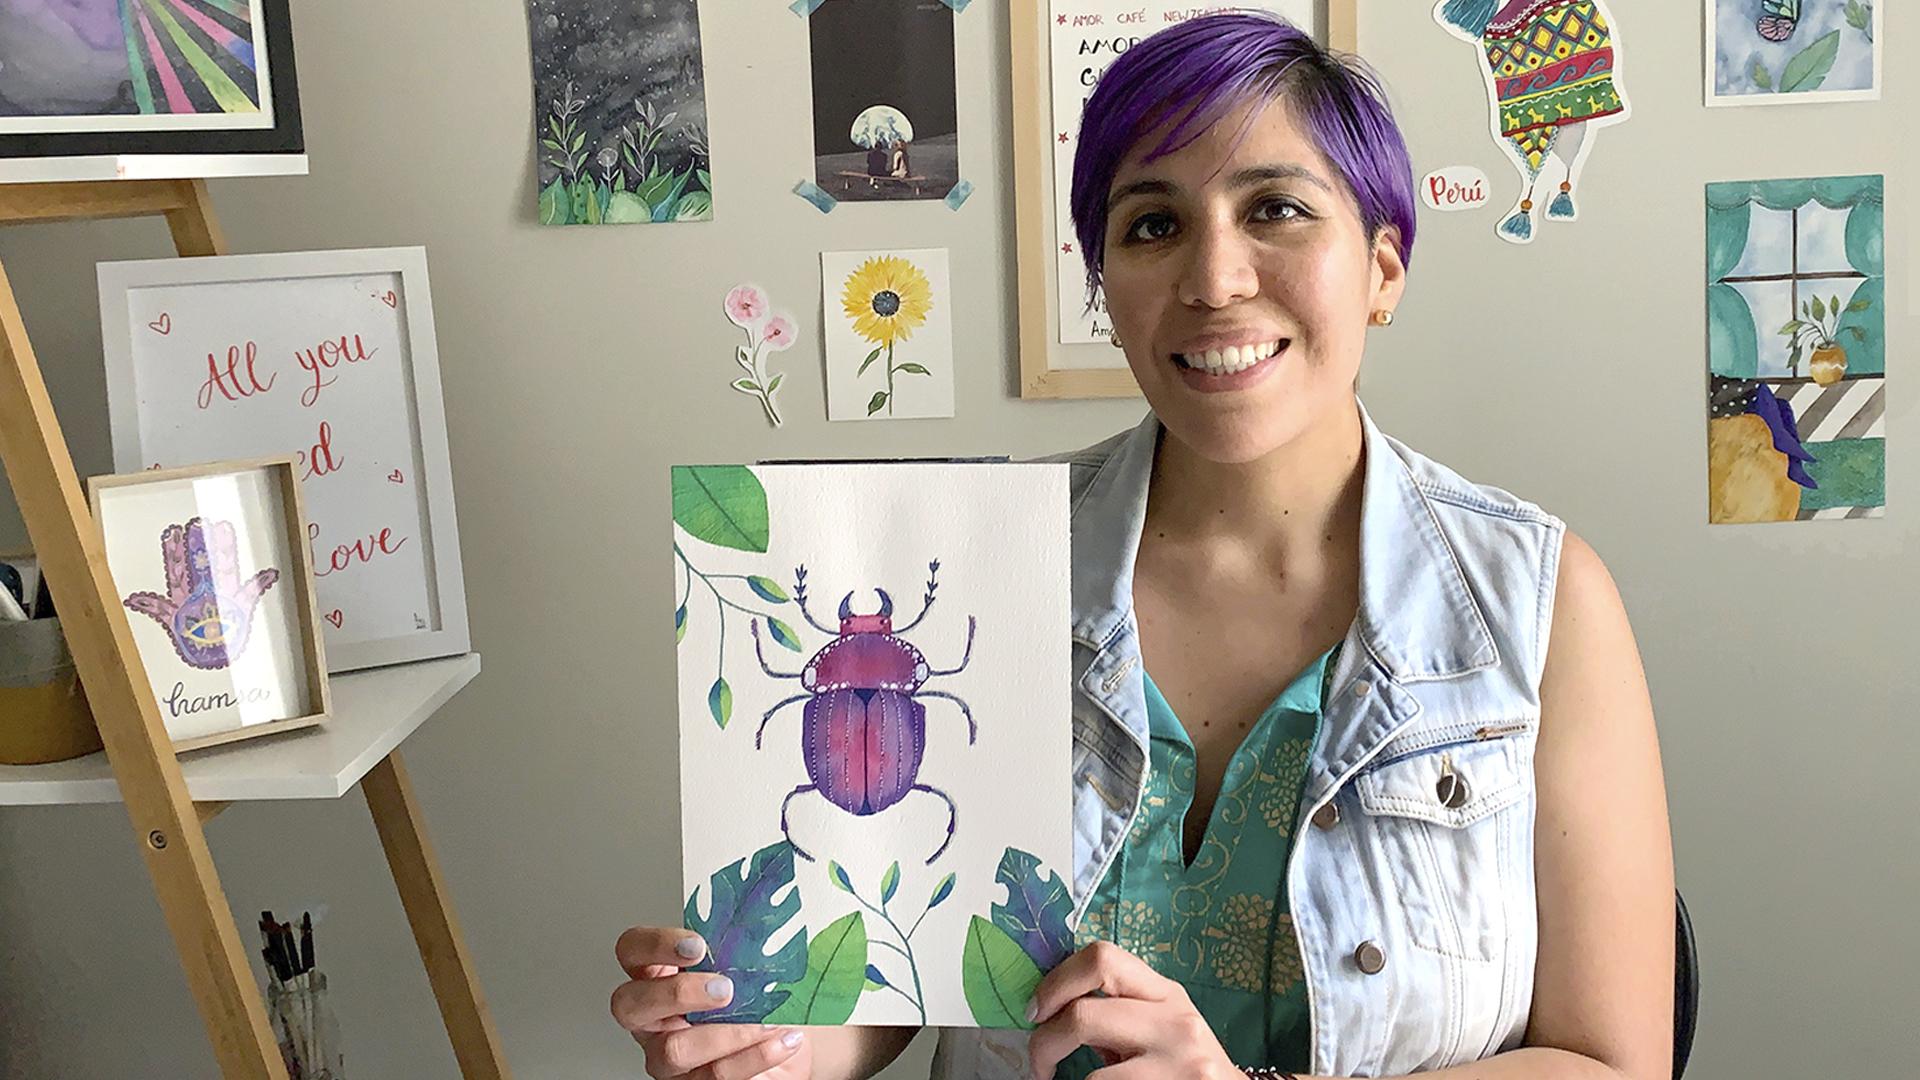
1. Introduction: Hi, everybody. I'm Fio, I'm a watercolor artist based in New Zealand. I work with watercolors since 2019. I make art prints, also greeting cards, and I have worked with New Zealand companies to make them their Christmas cards for their staff. Also, I participate in some art and craft local markets in New Zealand. Today, I'm going to teach you how to make a beautiful composition in watercolor using just two simple elements that would be botanical leaves and a lady bug or a beetle. It's up to you which one will you like the most to use in your final project. We're going to explore a bit about color theory that will help us to choose the color palette for our final project. This is my very first Skillshare class, so I'm really excited about that, and I hope you enjoy painting with watercolors as much as I do. Thank you very much and see you in the class.
2. The Project: Your project for this class is create a simple composition in watercolor with the elements, techniques, and color theory that we will learn in the lesson. If you complete all the lessons of this class, you'll be ready for the project. I will show you the main techniques of watercolors. Choose a color palette and add details to your project. I really hope you complete the project, as it will give you the confidence to make compositions in watercolor. The project that you create from this class can be used as a piece of art to decorate your studio room, or as a present, or even as a greeting card. You can upload a picture of your project in the project gallery. I'd really love to see your creations. Of course, feel free to ask for feedback. Join me next to see the materials that we're going to use in this class.
3. Materials: For this class, you will need a few things. Let us start with watercolors. There are different kind of watercolors. There are palms and different brands also these ones were my very first ones. You have this round the [inaudible] also these Japanese brand [inaudible]. Water coloring tubes like these ones that are Winsor and Newton, Cotman line or these that are Daniel Smith, they are more professionals. Finally, the liquid watercolors, these are the same brand as these ones, just different type. The liquid ones are more vibrant and intense colors. Brushes, these are Winsor and Newton Cotman collection, one that is Davinci, Casanova collection. Number 4, number 6, and triple zero, and also a one. This for some details. Of course, pencil, eraser. Just to add details, white pens. This one is really cheap one gel pen, and this one is acrylic pen, that is posca. We'll need a pallet to make your mixes. Also, I use, and I recommend two glasses of water, one with clean water and the other with dirty water. Just this one for activate and to use as in my paint, and this one just to clean my brushes. Papers, you will need watercolor paper. That is very important. Watercolor paper. This option that is really good and cheap. It's up to you which one would you like to buy. I just recommend that if it's possible, a 300 grams acid free and if you can afford like this one, these are really fancy paper, but it's really good, 100 percent cotton paper. That's for papers. The extras that you'll need would be a towel, I use it to clean my brushes, tissue paper, and just for this lesson, you can buy one or print one from Google images. A color wheel, this one I bought a year ago when I took color lesson. You don't need to buy one of these. As I said, you can just print one from Google. In the next lesson, we will explore the basic techniques of watercolor. See you there.
4. Basic Techniques: We're going to explore the techniques of watercolor, the basic ones. For practicing as I mentioned before, this paper is really good because you don't feel like you're wasting an expensive paper and it's a really good quality. Let's practice in this one. I'm going to use this number 4 Winsor & Newton brush, so I'm going to wet. As you see, I already have this brush that is an old cheap one, I use this just to activate my watercolors. Just place some drops of water on your watercolors. I already have here leftovers of watercolor, so I don't have to use my banks for this exercise. I'm going to activate this color. I use this brush just because of this, because I can put pressure on these and I don't damage my expensive brushes, not expensive but more professional ones. I think though that it is still wet. For me, I feel that is too light this color, so I'm going to add more pigment from my bank until I feel that is the color that I want. Your can feel the texture on your brush, of course you can see with your eyes if the color is too light or the color type you really want. Once we get the color that we want, we can start with our first technique that is wet on wet. We're going to start painting just with clean water, I'm going to make a square. Just be sure that you are filling all the parts of your shape with water. You can move your paper to see if the water is covering all the shape because sometimes the light is not helping. Now it's time to add the pigment and see how the magic starts. See, you can add more or just one drop, you can repeat this technique with other colors, with just one drop or with many drops. Also, mixing two colors in your same square in my case, so practice, practice, practice a lot. Now, we move on to the next technique. Next to our first square or any shape that you make, we're going to start painting with the technique wet on dry. It's wet on dry because the painting is wet, this watercolor, and on dry because our paper going to be dry, not wet as before. So just take some pigment from your palette and start painting your shape. Maybe it's too hard to see in the camera the difference between these two techniques, but I'm pretty sure that on your paper you are going to see the difference. In the second one, wet on dry is like you have more control of the watercolor, so practice this one as well with many colors, with many shapes. Now we're going to explore the most important quality of watercolor, which is transparency. We're going to build down color, we're going to start from a saturated paint mix and going to a really light color. Start painting with your color, with your saturated color, and then add a tiny bit of water without cleaning the brush, and repeat this. Just add more water, add more water, and very slow add more water. Now you can see a nice transition that you start with a really pigmented color to almost just plain water. The goal in this exercise is go very slow, so it looks very smooth. Just repeat as many times as you wish until you feel comfortable with this exercise. Gradients; we're going to do the same as in transparencies, just instead of water, with another color. We're going to start with the magenta that we already have and transitioning go to green. Try these techniques as many times as you feel necessary. Explore the techniques that we just learned, you can try wet on wet with different colors in the same shape. Of course practice wet on dry transparencies so you can see what you can do with just one color in watercolors and the different amount of water gradients. Practice as much as you can, you might get new ideas for your final project. In the next lesson, we're going to explore how to give volume to our elements. See you there.
5. Volume: Creating volume. For create volume in watercolor, we need to work with light and shadows. Let us start drawing a circle. Don't put too much pressure on your draw. In my case, I'm doing like this as I want the camera captures my circle. We can start painting our first layer. It's pretty much the same exercise as in transparency. But in this case, we have a circle, not just a rectangle. Let it dry. When you are sure that your first layer is completely dry, you can start deleting the pencil marks and paint your second layer. For this second layer, you can use the same color, just more concentrated or also you can use the complimentary color or a darker one. In my case, I choose a purple color that is darker color than magenta. So let's see how it goes. Be sure that you are completing all the circle with water. I know that maybe now you think that it's okay leaving like that, but it is important. Believe me, you have to fill all the circle even if it's just transparent as water. I don't want to make the lessons too long, so in this case I'm just painting one circle, but you can make many of them, at least two or three. It will help you practice and gain confidence. In the next lesson, we're going to practice some fine lines and thin strokes.
6. Fine Lines: Fine lines. This is very important when we need to add details to our project. For this exercise, we will need a triple zero brush that is the one that it has very fine tip. I always keep my brushes like this because they're more protected here. I also keep this thing that they give you when you buy them. My fancy brushes I keep like this. There are other brushes that I don't care much, like this one that I use for activate, I just keep in this. Let's activate one color. We want to start with fine lines. You can move your paper to the position that you need to be comfortable. Try to keep all your elbow on the table because it really helps to maintain the position in this exercise. Let us just start with lines. Don't breathe. This is just about practice. It doesn't have to be perfect, especially if it's your first time. I didn't practice this before, I mean, not before this lesson. Before in my life, of course, I practice this a lot. Just keep practice, and remember that if you put your brush like this, you're going to make a thicker stroke, but if you put like these,90 degrees, you're going to make it thinner, the stroke. So try and be familiar with your brush. Keep practicing in this with a wave like this. So practice, practice a lot, any shape that you want. This activity will help you a lot when you finish your project, but you're going to add details. I do know the importance of details. This one, we have a lot to our final project, I mean, for this class, so let's make a oval, something like this, doesn't have to be perfect. Just rub some paint and make a line in the middle just like this. Now try to add copes, lines in copes like this, maybe two or three. The sun, the sun is very active now. As I said, move your paper to that position that we have here. Try to keep the same distance between the lines. Try to make organic shapes maybe like a leaf, but practice with this hat. Just play with this brush, this is triple zero, in my case I'm using round Winsor and Newton, and as I mentioned before, don't keep your brushes here, clean well and put your brush again horizontally like this. See you in the next lesson.
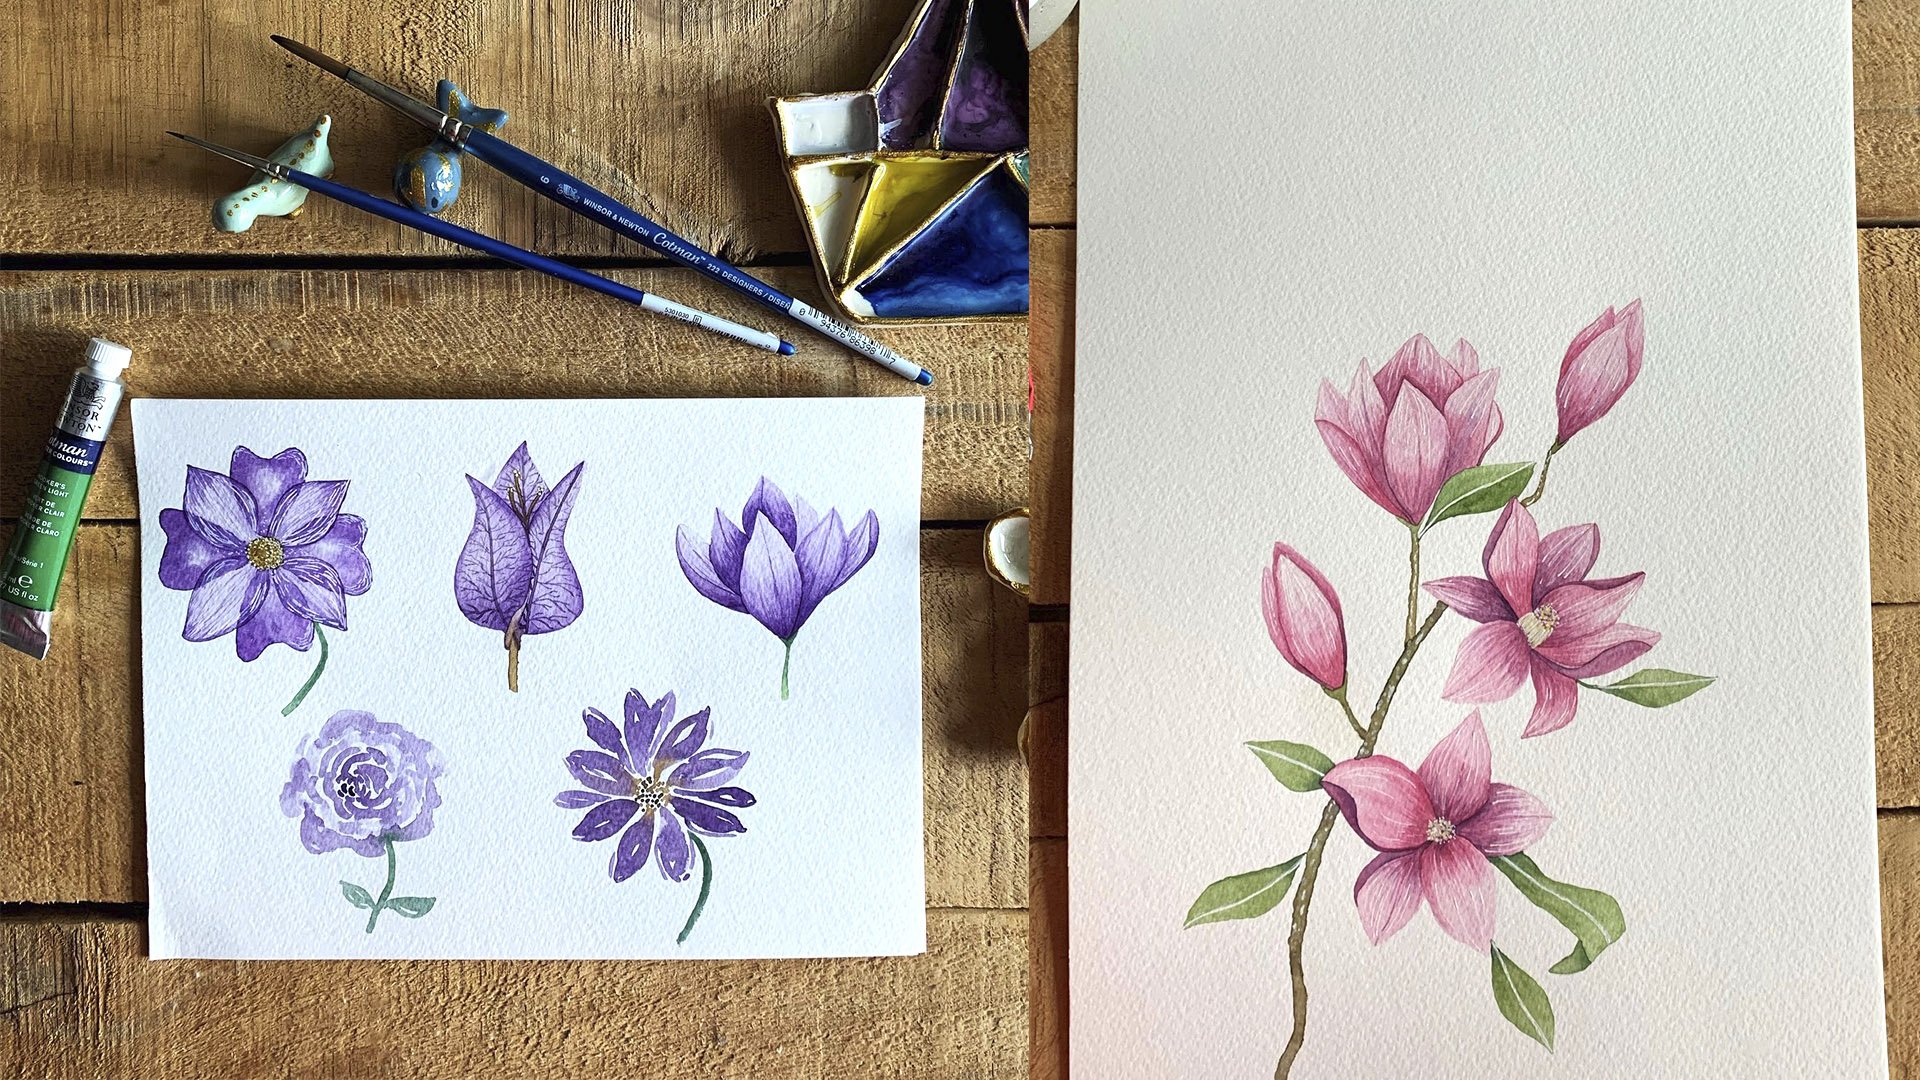
7. Color Theory: Color theory. I really recommend to all one of these color wheels. It's really important to familiarize with this wheel. Not only if you're painting with watercolors, but also with acrylic or with another medium. We learned when we were kids that there are three primary colors: blue, yellow, and red. If you pay attention to the color wheel, you can notice the triad. Mixing any of these two together makes secondary colors. For example, blue plus red, violet, blue plus yellow, green, yellow plus red, orange. With these three basic colors, we can make all the other colors in the color wheel. Another important thing to know is the definitions of the colors. We have warm colors and also cool colors. The warm colors going from red to yellow, red, orange, yellow, and the cool colors, green, blue, and violet. This part of the wheel are cool colors and this part of the wheel are the warm colors. Another thing that is important is the complementary colors. Complementary colors are the opposite colors on the color wheel. For example, the complementary color for green is red. Is really good to know that the complementary colors are colors that really look good in a composition. Of course, you have to use your intuition, your feelings, but just use this as a tool. In the next lesson, we're going to start painting the botanical leaves.
8. Botanical Leaves: At this point, we can start using what we just learned. I'm going to teach you how to paint these three types of leaves. The first one is a very simple one. Just draw it and just try to put not much pressure on your pencil. Our second leaf going to be, maybe here that we have more space. We will now draw monstera or similar leaf like the monstera one. Just start drawing the same shape as the first one. But we're going to delete some parts. Just like this. Draw the gaps of the leaves and then we can just delete those pencil marks that we have on the gaps just with eraser. Our third option of leaf, actually is a stem with many small leaves. Just divide it in two, because I will like to paint with two different colors. Now that we have our leaves drawn, we can start painting them. I'm going to use number 4 brush and just prepare my colors. I just want to use two different kinds of greens, and I'm going to start painting my first leaf with the lighter one. Let it dry, and we can start painting another leaf. I'm going to start with the one that has two colors. Try not to paint over the pencil marks, especially in this leaf that has a line in the center. Just paint very close to the pencil mark, but not over the pencil mark. Again, let it dry and we can start with another leaf. For this one, I want a different kind of green, a different hue. I'm going to use these color from Daniel Smith, that is a masonic [inaudible]. We want to paint this leaf with two colors, green and purple using the gradient technique. Let us start painting our leaf with the green one. I'm going to paint the borders with the green and in the center with the purple that is the darker color. Please don't paint over the stem, over the center, pencil mark because we're going to leave that part as a window. You're going to see really beautiful to have light part in the middle. Now our first leaf is completely dry, so we can start painting our second layer with darker green. Again, start painting as we did it before in our exercises. Just the paint and then just add water, and more water-like transparent as we did in our volume exercise. Our second leaves are still a little bit wet, so we can start with our third one and do the same as we did in the other half of the leaf. As I mentioned before, just leave the stem without painting. You can see on the camera what colors I'm taking every time. Sometimes, purple, sometimes green. Just check and practice this exercise. This leaf is definitely the most difficult one of the three leaves that I'm teaching you now. But it's totally worthy, so practice this technique. Now we can continue with our second leaves, the small leaves, so just start deleting the center pencil marks. We can paint with the other color that we're going to prepare for the other half of these leaves. For the other half of these leaves, I want to use a lighter color. I'm going to activate this yellow that I have here, and also I going to use different size of brush, in this case a number 1. Prepare your color maybe a little bit of green to make it like olive green, and start painting your other half. Now we can paint another layer to our first leaf. Again, the same process, just different layers. You can add more layers, or just leave it like that. But it gives the leave volume. So it's important. This is still wet. This is still wet, so we just need to be patient. I don't know if I said before. When you are sure that your leaves are completely dry, you can add the stems with your thin brush, and also if you want, you can add more details. In the next lesson, I will show you an easy way to paint a ladybug.
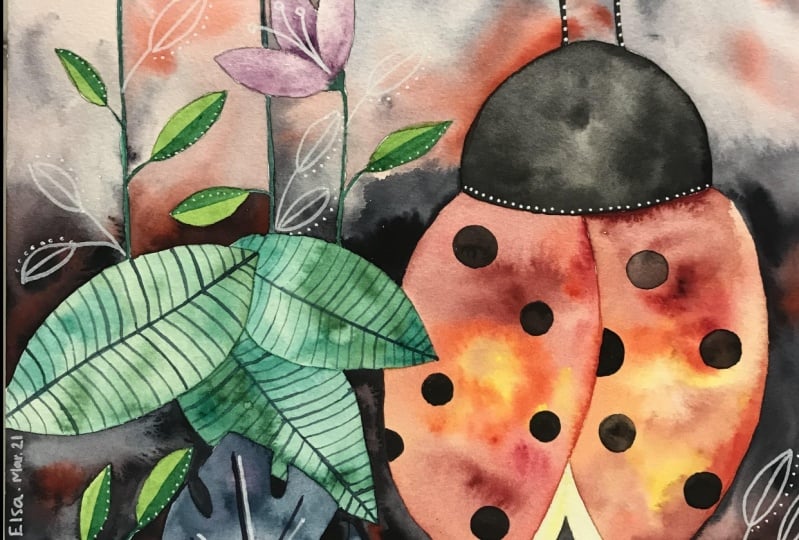
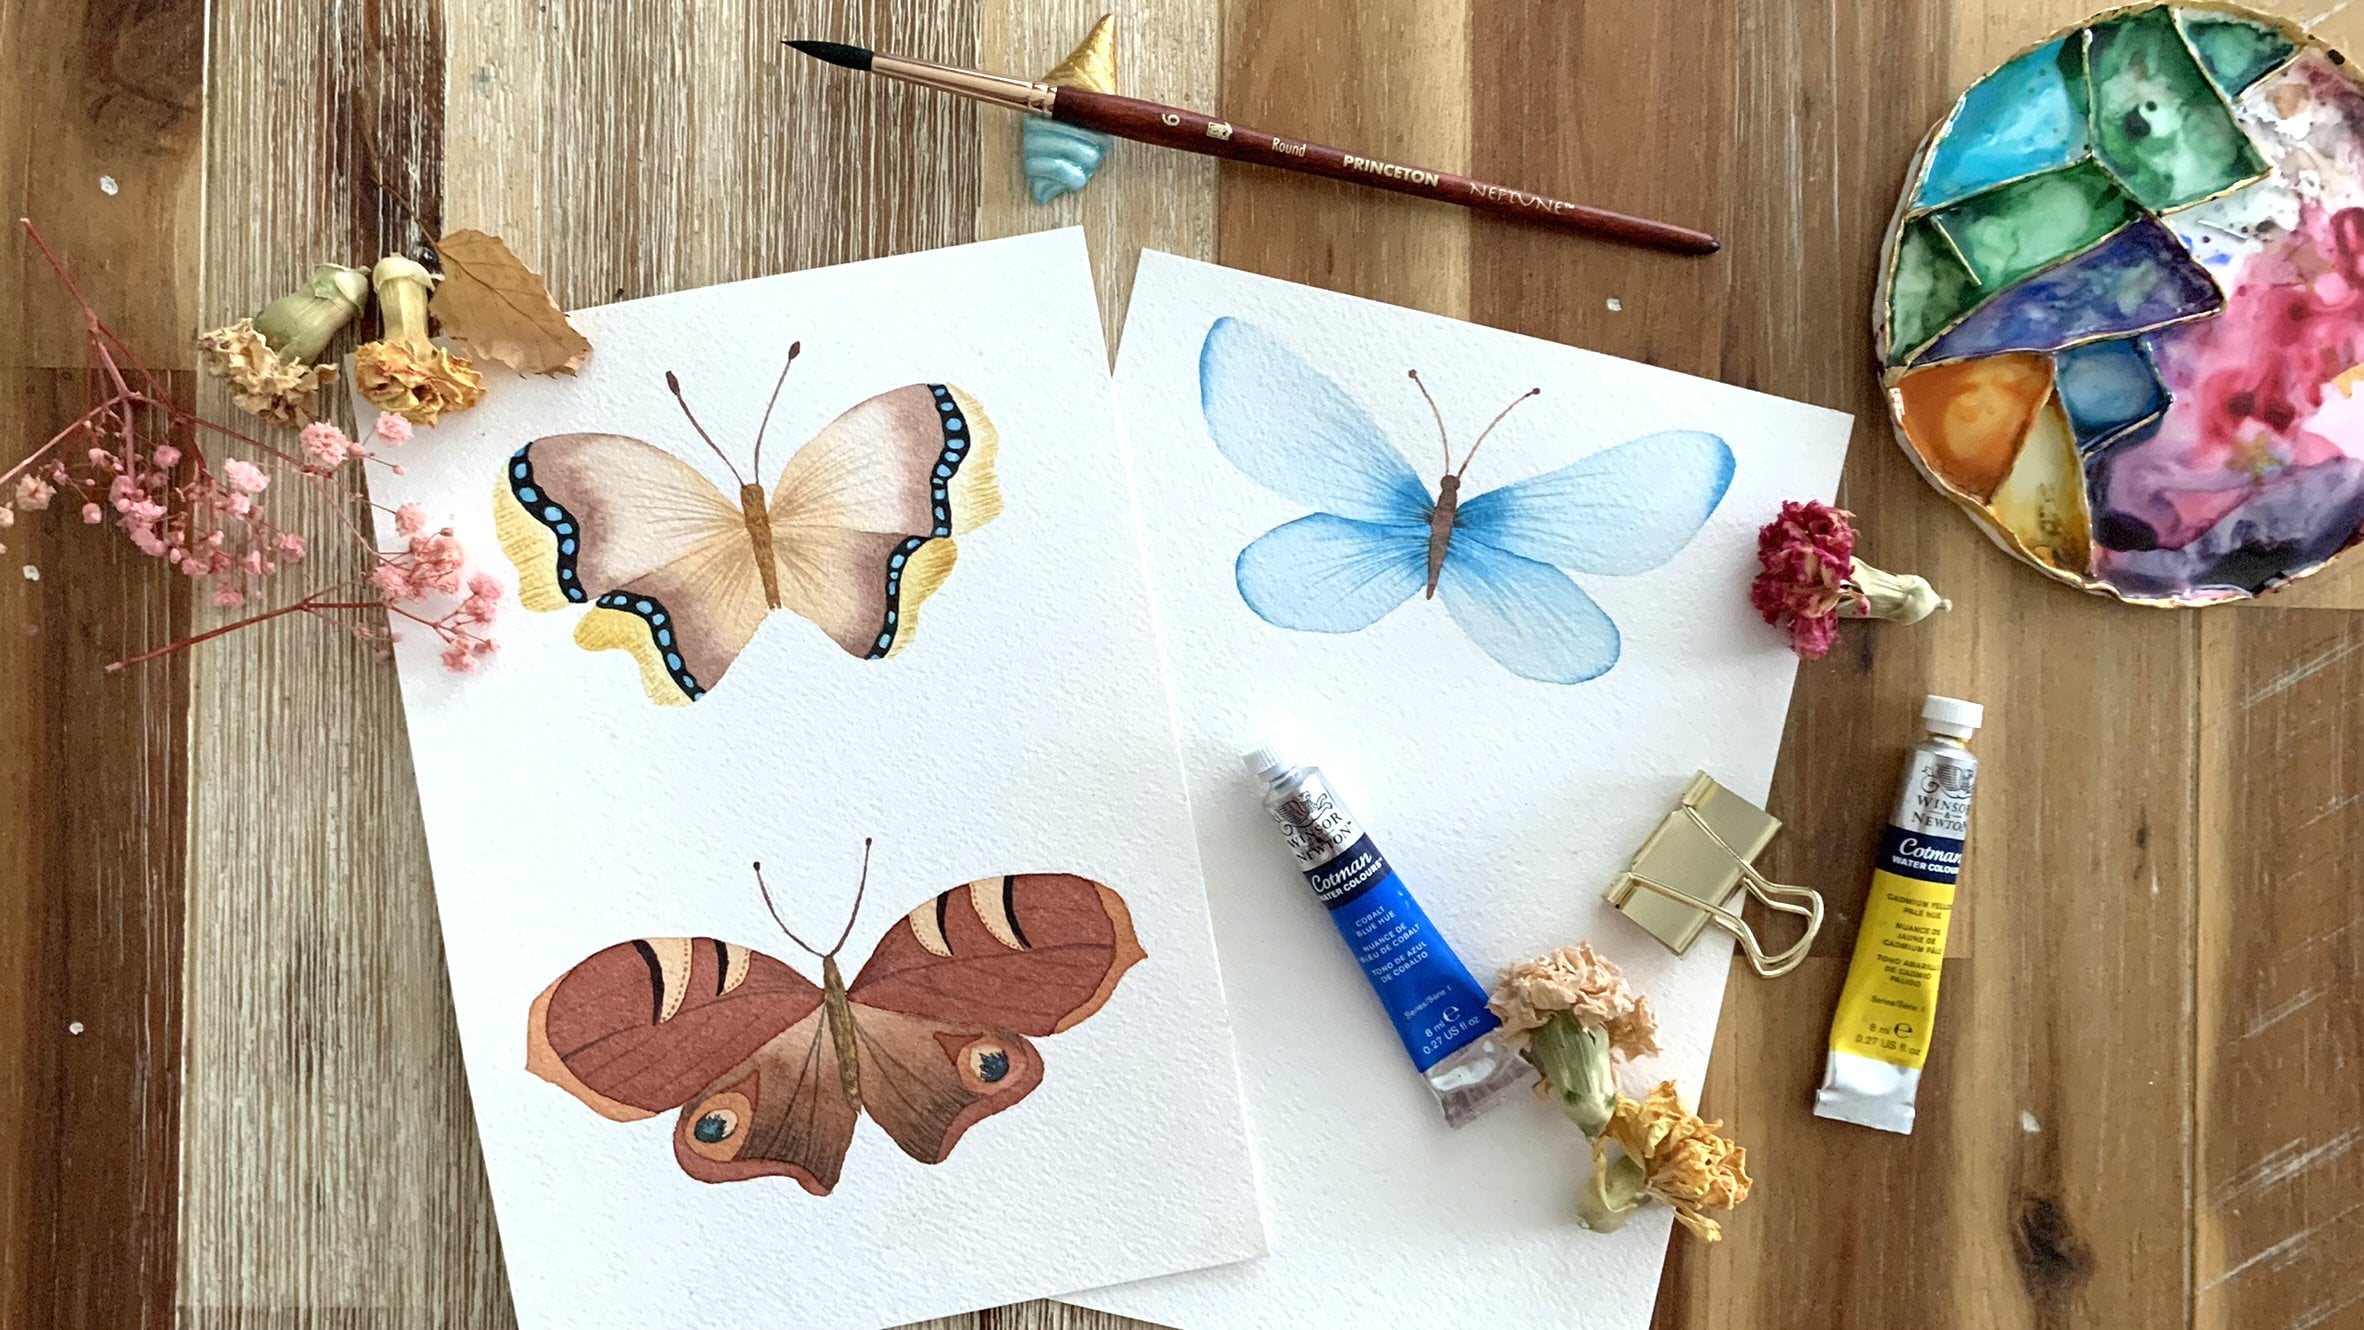
9. Ladybugs: Let us start drawing our ladybugs. I'm going to use this bookmark that I paint before as a reference to see the different positions of that ladybug. Let's start. I think I'm going to use different piece of paper because in this one I don't have enough space. In here, I have space for painting three different position of ladybugs and below I can show you how to paint beetles. Let us start painting our ladybug. Our first one, just start with the wings. You can use images from Google or from Pinterest as a reference, is up to you, but I really recommend to use real photos. In my case, I am using my bookmark because when I paint that bookmark, I already use photos. So I just going to repeat the exercise to show you, but you can draw your ladybug using real photo reference. Just draw the main shape of the ladybug because we're going to add details later with watercolor and with white pens. Let us start painting our Ladybug. I'm going to use this number 4 brush. I'm going to paint the first ladybug with red. For our second ladybug, I'm going to use magenta. Let's activate it and then just add water to work like a transparency. For the last one, I'm going to use two colors. I'm going to activate my yellow. I'm going to start with red and then go as a gradient to yellow. Just again, please remember to don't paint over the pencil marks because we're going to wait until the first wings are dry and then delete those pencil marks and paint the other wings. Now I'm going to change my brush to a number 1 brush, and I'm going to activate my black to make the head of the ladybugs. Here this wing is already dry, we can start with the other one. With the same process, the gradient. Just add the yellow slowly. Adding, you can see a transition from red to yellow. Now we want to continue with our second ladybug. I want to start with purple and then I'm going to take a bit of magenta. Now just continue painting the other ladybug. Again, we're going to take the black for the head, and then yellow for these underwings. Now with our triple zero brush, we're going to paint the ladybug's antennae. Now it's time to use our white pens, the gel pen, and the Posca. Just shake a little bit your Posca pen and clean the tip, and just start making the dots on the wings of your ladybugs. For the other two ladybugs, I'm going to make dots with just black watercolor. Again with our thinner brush, just to start painting the dots. For this ladybug, I'm going to paint the wing that is on the back just a little bit darker because it doesn't have much light as the other wing that is closer to us. Again with my brush, I just paint this wing. This is a result of our three ladybugs. They look very cute. It's a very simple, the process. For our composition, we can use one of these ladybugs or maybe the three of them, with one or many of our leaves that we learned before. In the next lesson, we're going to paint beetles.
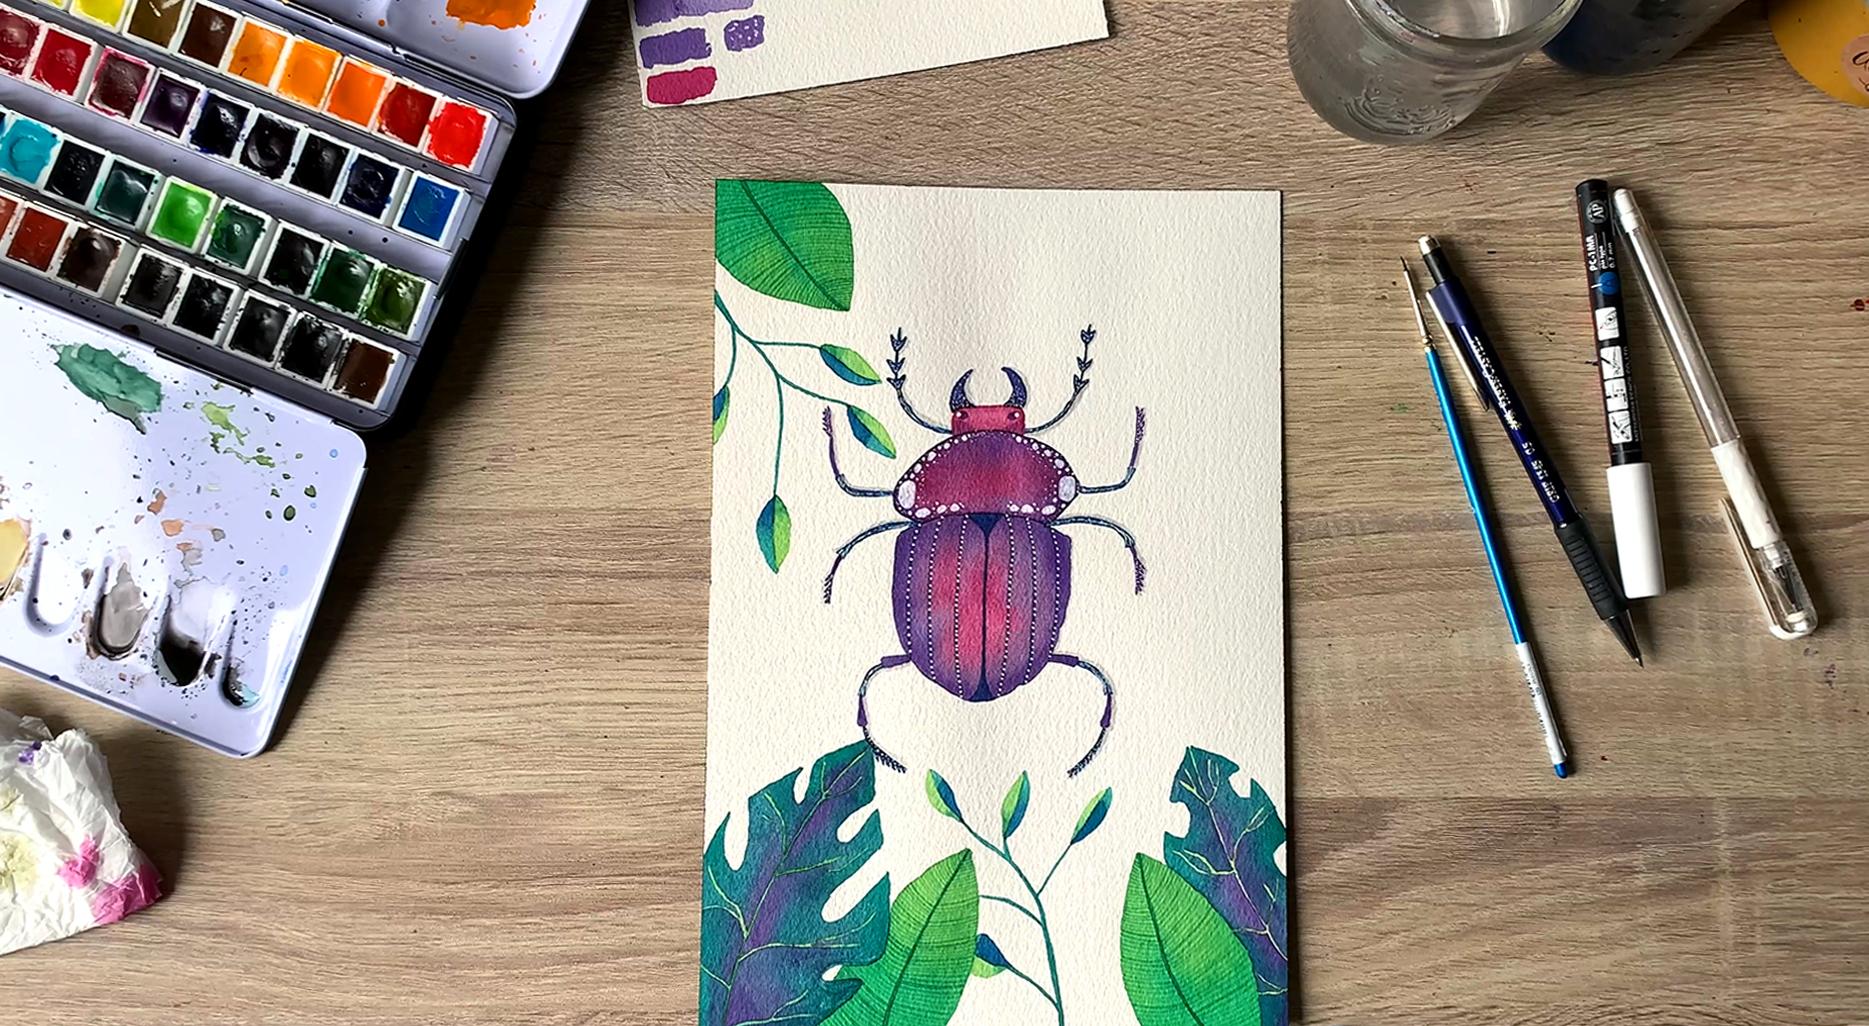
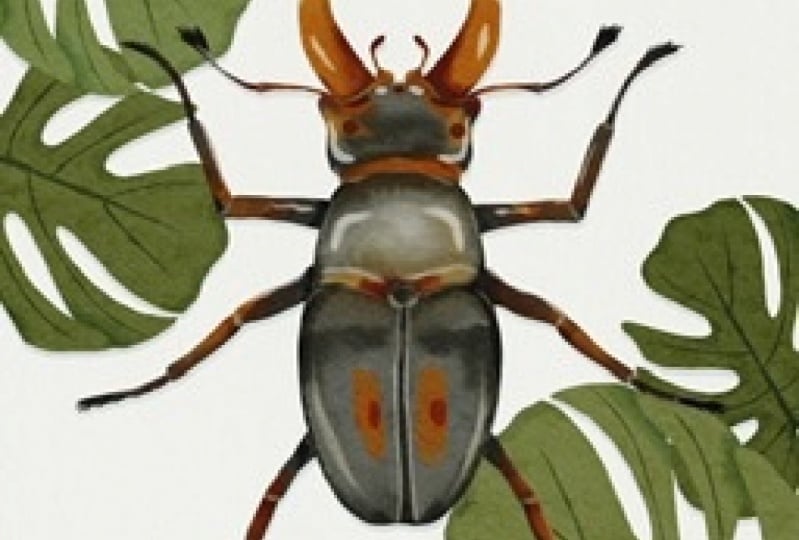
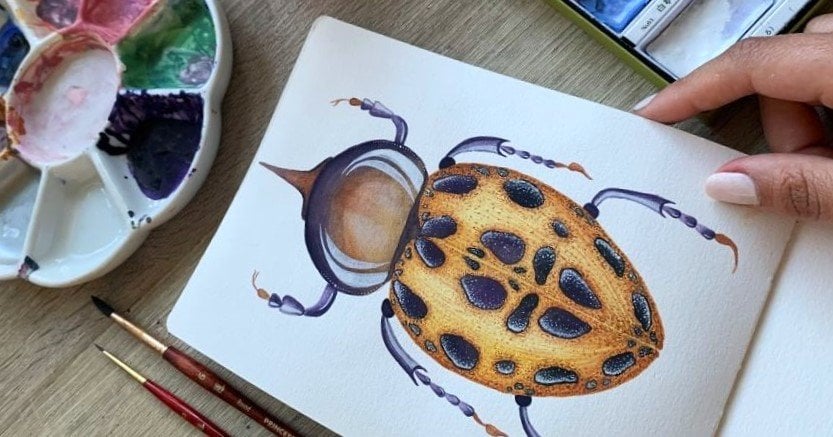
10. Beetles: Let us start with our first type of beetle. First, draw without pressure on your pencil, start with the body that has a shape of a heart but not that fat, then the head, and finally the antennas and legs. Now that we have our first beetle drawn, we can choose the colors. For these, I'm going to use a cool palette using two colors that are next to the other, green and blue. Let's prepare our palette. When you are sure that our watercolor is dry, just delete the pencil marks and start with the other color. In this part, grab a thin brush. While the first beetle is drying, let's move to the second one. For this, we are going to use the wet on wet technique. It is more challenging, but you need to practice and explore as much as you can. For this one, I'm going to use cool colors again but two colors that are not next to each other. So instead of blue, green plus violet. Now, it's time to use our tissue paper or paper towel. Just grab it and with a little bit of pressure try to absorb the watercolor in the center. This is to give our beetle some light. Now we have to wait until this part dry. In the meantime, we can continue with our previous beetle. Here you can add details to the legs and also white details with your posca pen. Now that this part is completely dry, we can paint the bottom part of this beetle. Again, wet on wet technique. For these lines, you can draw first with pencil to use as a reference and then the lines with watercolor. In my case, I don't want to use a continuous line so I'm going to make just spots. In the next lesson, we're going to start drawing our final project.
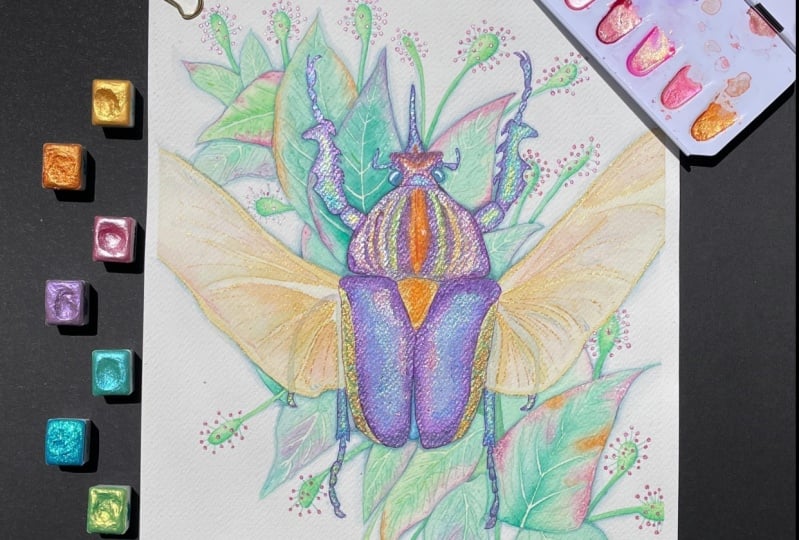
11. Final Project: Drawing: For the final project, I will use this paper. It's 100 percent cotton and it's one of my favorites. Let's start with the drill. I want the beetle in the center, so I'm going to use a ruler to identify the center of the paper. But you can draw yours on one side of the paper that it also looks great, so this part is totally up to you. You can use your previous works as a reference here, all that you learned in the previous lessons. Add a mix of different kind of leaves to your composition. In the next lesson, we're going to choose and prepare our color palette.
12. Final Project: Choosing Colors: Choose the colors to your final project is totally up to you. In my case, I'm going to use really vibrant colors and in a cool palette. You can use warm temperature, cold temperature, you can play with complementaries, it's totally up to you here of your intuition and of your faith. We need a piece of the same paper that we're going to use in the project. To choose the color that you really want, sometimes it's necessary to mix two or more colors of your watercolors. That is what I usually do because sometimes the original color, I don't like much, so I add a little bit of another color to make the color that I really want. Spend the time, but just get the color that you want to use to your final project. You can mix watercolors in pans, in liquids, in tubes. Just explore the different options and get the hue that you want. In the next lesson, we're going to start painting our final project.
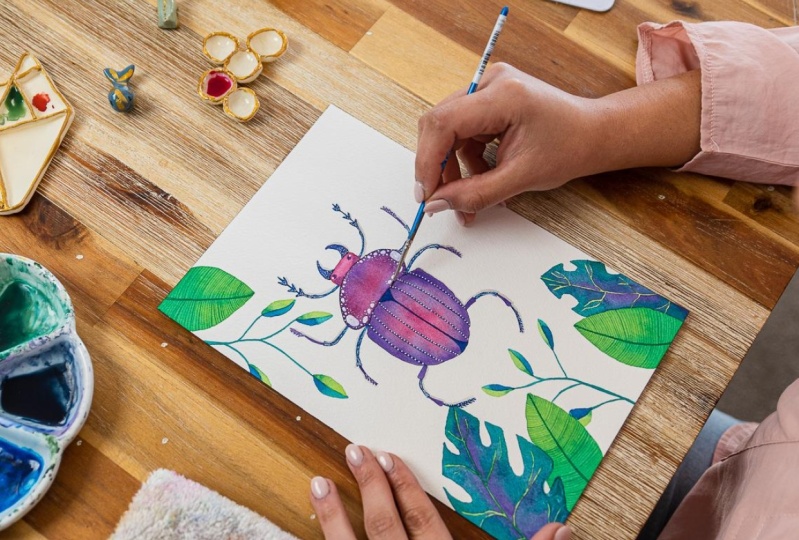
13. Final Project: Painting: Now, that we have our color palette ready, let's start painting our insect. I'm going to wet on wet again. I want to make the center of it lighter, so I'm going to use my tissue here. Now, I notice that I need a lighter green for my leaf, so I'm preparing a new green. I'm going to start with a darker green close to the center of the leaf and then continue with the lighter one by the end of the leaf. Let's repeat this technique with other leaves of the same kind. Continue painting the other part of your insect. Now the other type of leaves as we practiced before. Use the brush that you're seeing will help you the most. Now, with our thinner brush, let's make some fine lines. For this half of the leaf, I'm using two colors, green and blue, just to play with the shadows. Let's continue adding details in our next lesson.
14. Final Project: Adding details: I will find that project is not ready if we don't add details. Add the details of the head of your insect, in my case, my beetle. Add texture to the leaves. We can add more texture here on this part of the legs. Finally, we can add some light with our posca and gel pens. The gel pen has a thinner tip, so I'm going to use this for smaller things. You can add more details if you want, it's totally up to you, now you're done with your project. Congratulations.
15. Final Thoughts : This is our final project. I hope you guys enjoyed this class and I really want to see your work so please be sure that you upload into the project gallery. Let me know if you enjoyed the process of painting Joe Biden or your lady bug. Thank you guys again, and please be sure to check out my Instagram account, @fio.artjournal, where I go live every now and then. See you next time.
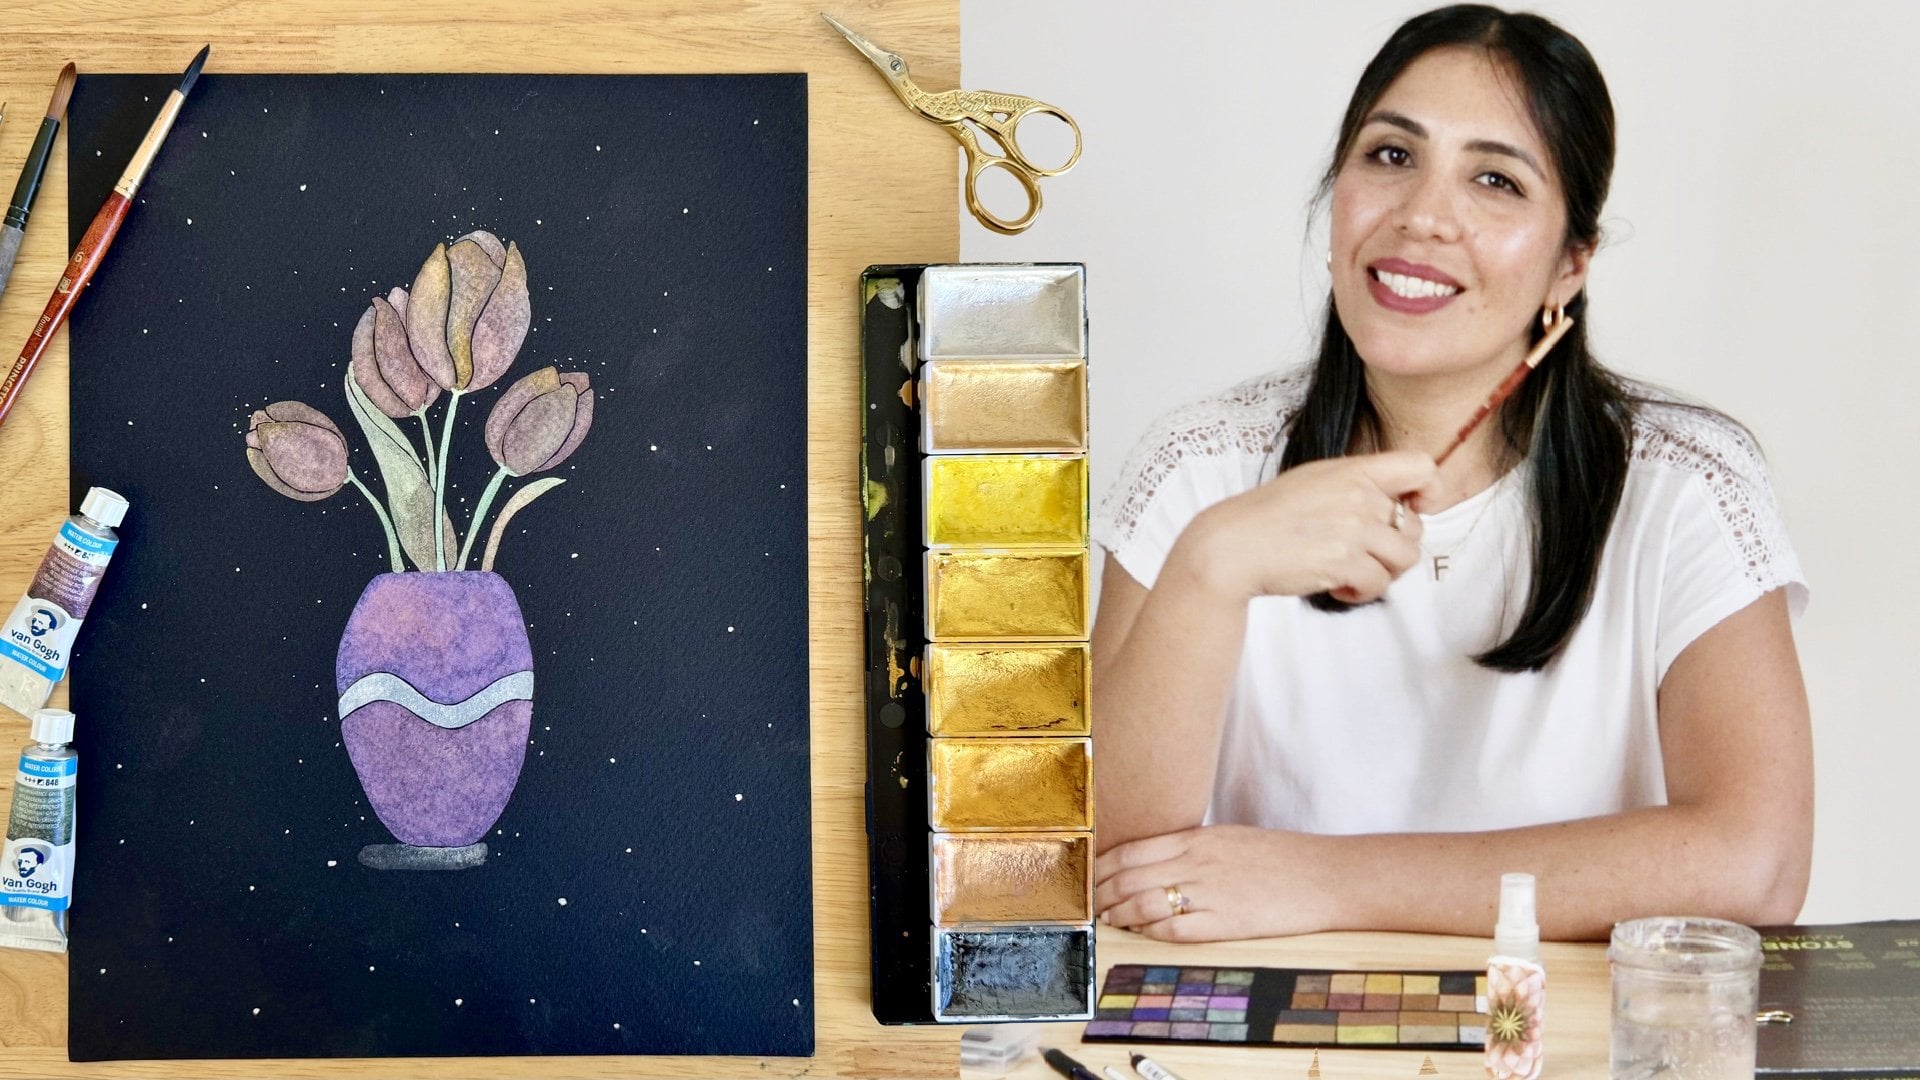
 Fio Ortecho, Watercolour Artist & Teacher