Transcripts
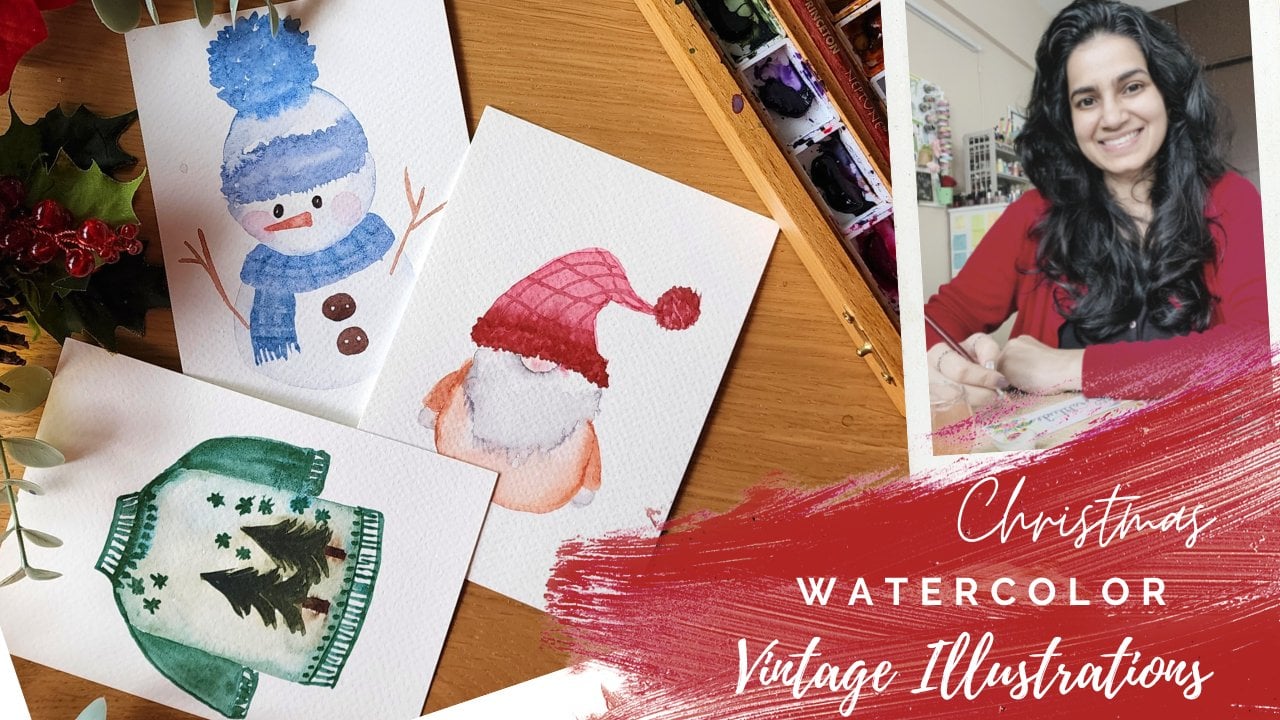
1. Intro: Hey everyone, This
is Megan and I'm a watercolor artist based
in Bangalore, India. And I have taught around
700 students globally. And today's class, I bring to you a seven day
Christmas challenge. If you want, you can
do it altogether, but if you want to devote a little time each and every
day and learn something new, Have fun with it and just spare as lenses 10 min
per day than you. Let's go ahead and start this class and
you're going to have so much fun because we are
going to paint not one or two, but seven different
Christmas cards. So we're going to
include all elements of Christmas ornaments to read, to bury scandals,
all those things. And you'll be having so much
fun painting these elements. You can later on use
these techniques into your own ideas and come up
with your own illustrations. So for this class, I suggest that you
go day by day. But if we are excited and if
you really want to try them, then you can paint them all. In the end of the
class. I will let you know about your
class project. Also, in this class, I'll be going to show
you step-by-step process of painting all
these in a really simple, easy and fun way. And Christmas is just
around the corner. You can make
postcards out of it. You can make gods out of it. You can make gift
tags out of it. And so many creative
ways to use these. And let's go ahead and
start with our class and try these cute Seven
Christmas postcards. So let's hop on
and have a look at all the materials that you will be needing
for this class.
2. Materials: Alright, so let's have a look at all the materials that
we will be needing. I have my seven postcards here. So these are four by six. So you can either use 100%
cotton watercolor paper cards, which are pre gotten the size, or you can also go ahead
and cut your own because it's the perfect
size for a postcard. So we will be using this. Then I have my number
eight round brush. So this is the single
brush that you'll be using for all of the project. Then I have my watercolors here. So this is Daniel Smith's set, which has all the
colors we need. So mostly we'll be
going with green. So I have three greens here. I have two Nice
bright reds here, and I also have opera pink in case you want to mute
the red a little bit. And then we have two
beautiful cobalt and ultramarine blue here. So this brown or black or a mix of all these colors
that we will be using. And then I have two
jars of water with me, one for washing the brush
and one for the clear water. And lastly the
tissue which is also important for soaking up that extra beyond our extra water. So that's about the materials. And let's hop onto
the next part of the class and start
with our first project.
3. Day 1- Gnome: Okay, So at this, as
discussed before, these are going to be really, really quick postcards
which you can just grab your paper paint and without much
stress or anything, you can just paint them off, just using your brush. Really want them to be simple. So we'll start with acute norm. And I'm using the pirate radio, which is really, really bright. And I will just go about
and do the gap first. So just like this, I'm just going to go with a very basic point D
triangular shape for it. And just going like this. So I will start with
an outline like this. And then just wash the brush. And then we'll be filling
this in using the same paint. A couple of new color. And then falling phase and
just use some ocher yellow. And first, do a nice like this. Once the leaving a little
white space in here. You can hop onto the beard. So I'll be using black for that. Just like this, very light. Just the basic shape like this. We are not overdoing any thing like strokes like this. And then maybe for the
rest of the feast, take some more yellow,
the wind. Dad. Yeah, so that's all for now
and then do a lesson robe, slightly like this. And then once this dries, we can do the gloves. The gloves also, we'll just do some little black highlight. The same thing for
the bump on as well. So just keep washing
your brush and then put this little color that
you already have. The black is more, you can
always lighten it like this. A few more highlights. And then for the shoes. Simple. Then we have to add a little bit of like
a Christmas element to it. So it can do anything
that you want, like maybe add a
Christmas tree or the other thing for me and just add a
tiny Christmas tree. Yeah. We'll do asleep, one that is in his hand. And then some wet on wet. I'm just putting
some photo here. And then I'm taking
my this nice green, the sap green men, like this abstract
style of tree. Some more green. Save that. And then if you want to give
our normal little piece, stand, a little abstract
ground like this. Yeah, so just like this, very simple and very
quick, under 10 min. So this is our first postcard and then you can personalize it. You can write whatever
message you want on the top. And you can write
personalized messages, or you can just like some
holiday greetings or anything and then
make it your own way. If you know calligraphy, then you can also do
some nice fancy text on it to make it look
even more attractive. Okay, so that's about
it for the first one. And then let's hop on and do the second one in
the next part of the class.
4. Day 2- Berries: So the second one for
us is the berries. And as soon as you
think about Christmas, we think about varies. So let's do a very simple
illustration for the berries. And again, I'm using
my pyrrole red and doing some freehand
varies like this. Leaving this white gap. So you can vary the size. Just using the tip of the brush. Circular motion. Leaving the white gap. You have to work fast
before it dries. So before making anymore, we just blend in the color here. And then we just
pick the color up. The nice shine. You can also do this one by one. If you feel that at home, try really hard to
pick up the color. Just like this. And then we can also
add a little darker. I'm mixing very little black, the same color, and then
I didn't get darker. And then you can wash your brush and keeping them very
simple and easy, friendly, but not very basic. Then we can add some, use some burnt sienna and
add some stems to it. I'm just using this
random strokes. Let's clean this up a little. Then we can add some leaves. So again, sap green because
it's really muted and nice. I really love using that. So very simple brushstrokes that the tip apply a little pressure
and then just lift up. I'll get this uneven
going off a look, then a few more. You can also overlap
in two parts. We are doing playing a little pressure and
then lifting it up on the top, we can
put smaller ones. Patient and then lifting up. The leaves are not very
geometric or symmetrical guy. Just keep them a little
flowy, very easy. Don't worry too
much about getting a perfect kind of a
symmetrical shape. We go on through the Dr. can
become a little smaller. And then it's up to you how
much green you want to add. So when you think you're done, you can just stop this one. I think it's good enough. As of now. And in the end we'll be adding some
more detail into this with our golden color. So for now that's about it. Again. It is done in hardly
six to 7 min. Again, a very easy one. And you can give it a try. You can personalize it with
whatever text you want here. So let's hop onto our third one.
5. Day 3- Border: Okay, so let's start
with our third one. So let's do something different
for the, for this one. So we'll start with the greens. I'm mixing a little blue, the ultramarine blue
in the sap green. To get a leaky mutant and
bluish green from the top. We can start like this. And the same thing we can
do on this side as well. Then, just the pine cone leaves. So I'm starting from the from the stem and then
just moving out. Which is going, my hand
is going like this. And once you do it all one time, then we can start again, as it's not flat, the lease. And we just want to
make it look like that. Yes. So this leaves like they have to go in different
directions and you can change the amount of
pain to get lighter and darker and add a little bit more blue to get a
different shade of green. Just like this, we
have to complete all of these and make it look a little bit random
instead of very symmetrical. Few more coming out here and
there seem just connected to the corner theme we can do with this one as well. I'm mixing some sad chromosome just like this. And then we can add in a little bit more
Christmas elements. So just to add the pine cones, I'm using this ocher yellow here and just doing little pine
cone shape like this. Here, also. A very basic oval shape like this. And then we'll take
some burnt sienna mixed with a little black. If you want to make it darker. Then just using the tip of the brush and adding these dots. So it's a very, very simple and easy technique
of adding pine cones. Your Christmas illustration
and all the doubt. Much detailing or
spending too much time. That's about it. And then we can add
in some more greens. So let's start with that. Adding a little more blue. So any type of greens
that you like, you can add, start
with the stem. I'm just adding some
basic leaves like this. Again, try to keep it loose and flowy instead of trying
to go for symmetry. This little white gaps, maybe they look nice. So here, maybe one
you can put here. One can go here. Simple and flowy. Little bit of white gaps. We can go ahead and
add some berries. You can put in a little
bit of stems like this. So forth. Just you can add stems
like this as two therein. You want to put your varies. So need to balance
out a little bit. Here are a few here, a bit here as well. Then just take a pyrrole
red and just make round, round very easily,
very wide gap. And we'll see if we
need to add more. So let's just do that first. Okay, So for the berries, I'm going to use
the pirate read, but I will be
mixing a little bit of blacks because
I don't want very, very bright theories,
but lead you kind of maroon niche or
crimson. Again. Not too much water on the brush. And just using the
tip of the brush. We doing varies like this. And leaving a little
bit of white gap. Also. In this, we will not be lifting up
the color as we did before, but instead of just leaving
a little bit of whitespace. So you can add like this
randomly or set of two. Like any way you want. Just using the tip of the brush. So when we add the red, it also starts giving more
Christians see feel and also adds a little bit of contrast with the green and
the brown that we did before. And again, this is
a very simple one, which you can do under 10 min. And the empty space
we can utilize later to add a greeting or a personalized message
on whatever you want. Maybe do a calligraphy. So not worrying too much
about getting it all right, and very uniform or symmetrical. Yeah. So here it is. And I think it looks
quite good with a, quite a nice balance of greens and reds and all as simple, yet not very, very
kind of blend. Blend, but nice and simple. If you want, you can try one
more layer on the berries. Maybe a little more
darker this time, little bit more reddish if
you want it to pop a little. Because sometimes the colors
they tend to get very, very dull and light.
Once they dry. You can always add a
little more color, add a second layer. I'm just checking up on. The pine cones are also
really looking nice. If you want to add a
little bit more highlight, you can use a little black
or brown and add that. I think no, the red
looks okay and you don't want it to look
very bright also, like a cherry red or something. For now this is done. So number three is also done. And later we'll
personalize and see what what do you
want to put here. And this is the third one. And in the next part, we'll hop on and do our fourth
Christmas themed postcard.
6. Day 4- Wreath: Okay. So we are on a fourth one. And we'll know that
Christmas that reads, are really, really crucial bar, important part of the
Christmas decoration. So maybe we'll go
ahead and do a very, very simple and
very minimal kind of maybe read for
Christmas for this one. So I will be starting
with the brown, which is the fund Santa yield. If you find it
lighter or oranges, you can always add a
little black to get a darker tone for
it. So here it is. And for the round shape, this starting like
this with some twigs. And from here as well. So basically we want to
get a shape like this. Then it's coming out of it. Then we can just go ahead and be leaves and berries and all
the nice Christmas elements, whichever you want to see more random, then you can double this
original one, also. Christie Anthony. Okay, so that's
about it for Part B. And then we can add some greens. You can mix your own
greens or you can use if you have nice
greens in your palette. Again, I'm mixing
the Emerald, sorry, does sap green, this little
blue, ultramarine blue. And then doing those fine
leaves that we did before. Then a few more random is
to give it that 3D look. Firstly, do it flat like this. Then you change the
color tone a little. Maybe darker or
lighter or darker is better because
you'll be over it. Then. A few more strands, few more leaves like
this coming out. That's about it. And then
maybe LNG lighter green. And we can do a few leaves. So just using the tip of the brush and just painting
this simple leaf pattern. Believes that my, sadly, it's a very basic. Again, remember to
keep it a little flowy and natural. One heel. I think that's one small
one we can add here. So that's about the green
leaves and more we can do. And this time we can have
a little bit more blue. And we can just use the whole
brush and decode the stem, and then press the
brush and lift it up. Press the brush and lift it up. So this kind of lie Gs, one can go here. So these are similar
to what we did before. The true strokes. Leaving a little
white gap and keeping them a little bit asymmetrical
land will naturally. And then maybe one smaller one. Last one we can put here just like I can only
have enough of Glean. And now we can add
to three types of berries or maybe
two types. We'll see. First I'm starting with
the viral read and mixing a little
black. Not too much. We want it more
reddish. Be doing that. And we can add like this, tiny berries like this
using the tip of the brush. So these are not symmetrical
and just loading dot, dot with a brush. So maybe kind of
wild berries are some fiery red flowers
or something like that. Just using the tip of the
brush and doing the Stat tab, you can evenly divide it and balance it out
on both the sides. Maybe one last one here and then we'll see if we need
to add anymore. So this gives the illusion of a flower as
well as a battery. So we can add a little
bit more because red and green are then
we always look good. But yeah, you should
not overdo it. So here it goes. So I think there's
much is enough. And then we'll add
a little bit more black to get a little darker. Then we can do big berries. So for that, we can use the tweaks that we did
before, like this. So on that you can add these
bigger ones at a few places. And then again, I'm using the white thing
here for the shine. So we're not doing anything
like beers or anything, just adding the baby's life
feel there's a lot of gap. Mainly using this trick
that we did before. Just to fill that one heel. So like this, I think it looks quite even though
we have red also, we have green also, have neutral brown also. So it looks balanced to me. If you want, you can add in a little bit more
elements here and there. For me now, I think it's done and will hop on
to our fifth one. And I hope you're
enjoying the class so far and see you in the next one.
7. Day 5- Mistletoe: Alright, so let's start
with the fifth one. So again, a typical Christmas
thing which is mistletoe. So I'm going to do that. And again, I'm taking
my pyrrole red and darkening it a little
bit with a hint of plaque. And we'll do the bot first. Let's start like this. Like this. Very simple. Then be sick. Give it a nine. That's about to
get through them. This is doggy now using
the sap green hill. Then you do the main
stem like this on back. A few branches coming
out of this. Very basic. And then we'll do
some basic like this. Slightly rounded leaves. Start with the corner by me and just use medium
amount of water. And then you will
just naturally be getting this kind of
effect on the leaf. You don't have to
do anything extra. Overlap the leaves a
little bit if you like. Maintain this nice round shape. Let them be a little bit random. Instead of like a fairly
symmetrical design. And then we can
add a few varies. I'm just taking out a
few more stem like this. And then again, we'll be using
the same read if you want, you can add more red to it and follow the same
thing for the berries. The same technique, I mean, which we did before. So it will be a tiny white dots and round
shape, basically like this. Yeah, so very, very simple. Mostly I'm just using
the tip of a brush. If you want, you can keep
the very slightly oval, or if you want them to be
nice and round like beads. Like round beads are jellies. Then you can go with that. Then we'll just go ahead
and add tiny stems. These. Yes, I think
it's good enough, simple enough yet cute. So I hope you enjoyed this. And let's hop on to the sixth one and see
what we are doing.
8. Day 6- Blue Ornament: The sixth one, and
without the ornaments that you can think
about Christmas and the bubble is
the most common one, the most basic one
that comes to mind. Let's do a simple bubble. What I'm gonna do is first, make a nice string. Okay, and then dog bark. I'm gonna use a little
bit of burnt sienna. You can also use the yellow. This will be the top part, the gap that goes up like this. Yellow and brown. And then you just these lines here that will give
you a nice texture. Once it's a little dry, we'll fill this up
with some yellow. Again, it is not going
to be perfect since we are doing freehand and
you're not doing anything. Now you can choose
whichever color you want. So I think I'd go with blue because we have
done a lot of red. Let's go with this
nice cobalt blue. And you can also do a circle one and the
round one if you want. But since we are not drawing, and if you're not very great at drawing very nice
symmetric and silicon, then you're going to avoid that. And instead do the sheep. The sheep, which also looks
good and you always have the scope to fix it. Make it symmetrical. Yeah, I think it looks okay. For a free hand drawing. Let's fill this up. I'm washing my brush. To get that nice glossy effect. You're just going to bring this color inside and spread it. Maybe lift up a little
bit of color from here. Give this a nice shine. Bleeding a little bit so
we can just clean it up. Good happens with watercolor
unless you are very, very patient and do
it really slowly. Quick watercolor, this
happens sometimes. To avoid this, you
can also leave a hairline gap in between
the two, like very slight. So that will help
you avoid this. And then we'll take some yellow and just fill this up lightly. Just like this, you can leave
a little bit of white gap. Also. You can keep blending the color in here so that you don't get
any hard lines. You can add more. If you want it to be brighter. We can mix this up a little bit. Lift up a little color. If you want. You can
also go ahead and do a nice little bow here
using the same blue. Creating a loop like this. Just feeling a little twist. You can hide the string
mining little more blue. So you can darken this top part. Yes, I think it's good enough. If you want to make your
ornamental a little bit more darker than you can keep
on adding more blue to it. Otherwise, if you think that it looks nice and good enough, then you can just stop. Just going to do one last. And don't worry too
much about perfection because this is just
some freehand watercolor that we are trying here. I think good enough. We
have the shine also. And the boot also adds a little bit of
more elements to it. And it's very simple
and very, very basic. And yet it looks nice
and sucrose and z so that we are going
on to our last one. Let's find out what
that is in our next, next part of this class.
9. Day 7- Candle: Okay, so here we are, The last one and let's do something a little bit
neutral as well as bright. Let's try to mix in some
more colors and let's see. So I'm taking some
ocher yellow and brown sienna like this. Going for an oval shapes. And young you're doing candle. We do only the top part like this and then
wash your brush. And then you mix it in
and get this beautiful. And I stick a look, lift some color up. So this is giving a
very nice natural look. And you can add like this. You do this inside part later. And this nice yellow lift up. A little bit more
color from here. This had a very slight
hint of blue here. Very Dad. He'll like
this to the flame. And then this inside part. Just blend this color
only a little bit more. Mixing like this. Lifting up. Once it dries, it'll highlight
this a little bit more. I'm adding more color here. Adding some more brown. Yeah. I think the
let it dry a little and then a few more
elements here. Using the sap green. Then just doing those kind of leaves like little bigger this time that we did before. First to be
symmetrical like this. Then we'll change
the color a little bit darker or a mixed
some blue and then you add a few more
random ones here and there to just give
it a nice 3D look. That's what you're going to
do for all four of these. When you add these in-between, then it looks 3D. Don't worry about the swan. You can also wait
for it to dry if you are really bothered
about this bleeding. For me, it's just a
part of watercolor, so I don't mind it that much. Unless I'm doing something very realistic and I don't want it to go bad or
anything like that. Just using tip of the brush. Nicely like this. Then a little bit darker. Some more random strokes in
the front in the sample. So we are not going
to overdo it. And for this, but I think we'll wait for it to be a little
dry and then we can add more. Looks nice, and we can
add some berries and he'll gain slightly
darker or lighter, whichever you
prefer, you can use. This time. Let's change
the batteries a little, Let's make them a little bigger. And this time I'm skipping that white part and we add
some more detail into it. Different sizes like this. So that's what the biggies. You can add more elements. Anything goes smoothly that
you feel like if you want to add a little bit
of variation to this, then I'm using the black, then freestyle kind of stems, berries. And then for the details, I'm going to add on top
like the rules hip. So this is a slight variation of the berries from
what we did before. And I think Let's clean this up a little bit
because I think bleed has seen a little much
like this and just cleaning it up a
little and lifting, mixing, blending,
lifting the color up. So it looks slightly
better known. Now we have two options. Either we can have this green leaf to be
behind the candle, which in fact, it looks nice. Let's go with that and we'll
add some more brown here. And just to finish
the candy like that, this little bit of green
that is coming in is okay. So it's not bothering
me that much. Bit of ocher heel up a little color from you. This one which has gone inside. Just clean that up. Andy, little bit more
dark here on the brim. Then blend it a little. Yeah. Also, it's up to you, like when you want
to stop because sometimes they need watercolors. It's just like, well, we feel like adding more
and more and more and more. So This look at it and I think
it looks quite good now. And maybe it because
we added some berries, Let's add some leaves as well here and just
finish this one out. I'm just going to do
those little holes that are around leaves
that we did before. And you can add them here
as well just to balance out the look like this, maybe one here. When we can do here on the side. Again, the camel is wet and I don't want to spoil
it the second time, so let's wait and then
we'll do 1.2 here as well. And then this one will
be complete for us. Meanwhile, you can just go and
fix the leak a little bit. Darken it a little. Like this. Also for me, this one looks really great. Let's read for a few minutes for this one to dry
and then we'll do more leaves here at the last
part and then we'll be done. I'm taking a little
bit more pigment and trying to keep it
less watery so that it doesn't bleed or
anything like this. One leaves can go
here on the side. One more. We can be like this. Yeah. Yeah. I think maybe one. Balance this a little bit more. Yeah. I think that's about it. And as I said, like sometimes we just can't
stop ourselves, you think? Okay, let's do a
little bit more. Let's add something. You're, it's up to you. When you feel that it is done, you can just stop. And I think I should too. And here's the seventh one. And I hope you have
enjoyed this one as well. And since it was supposed
to be a little bit light, I think this one is the one
which has took us most time. And then in the next
part of the class, I'll let you know about you.
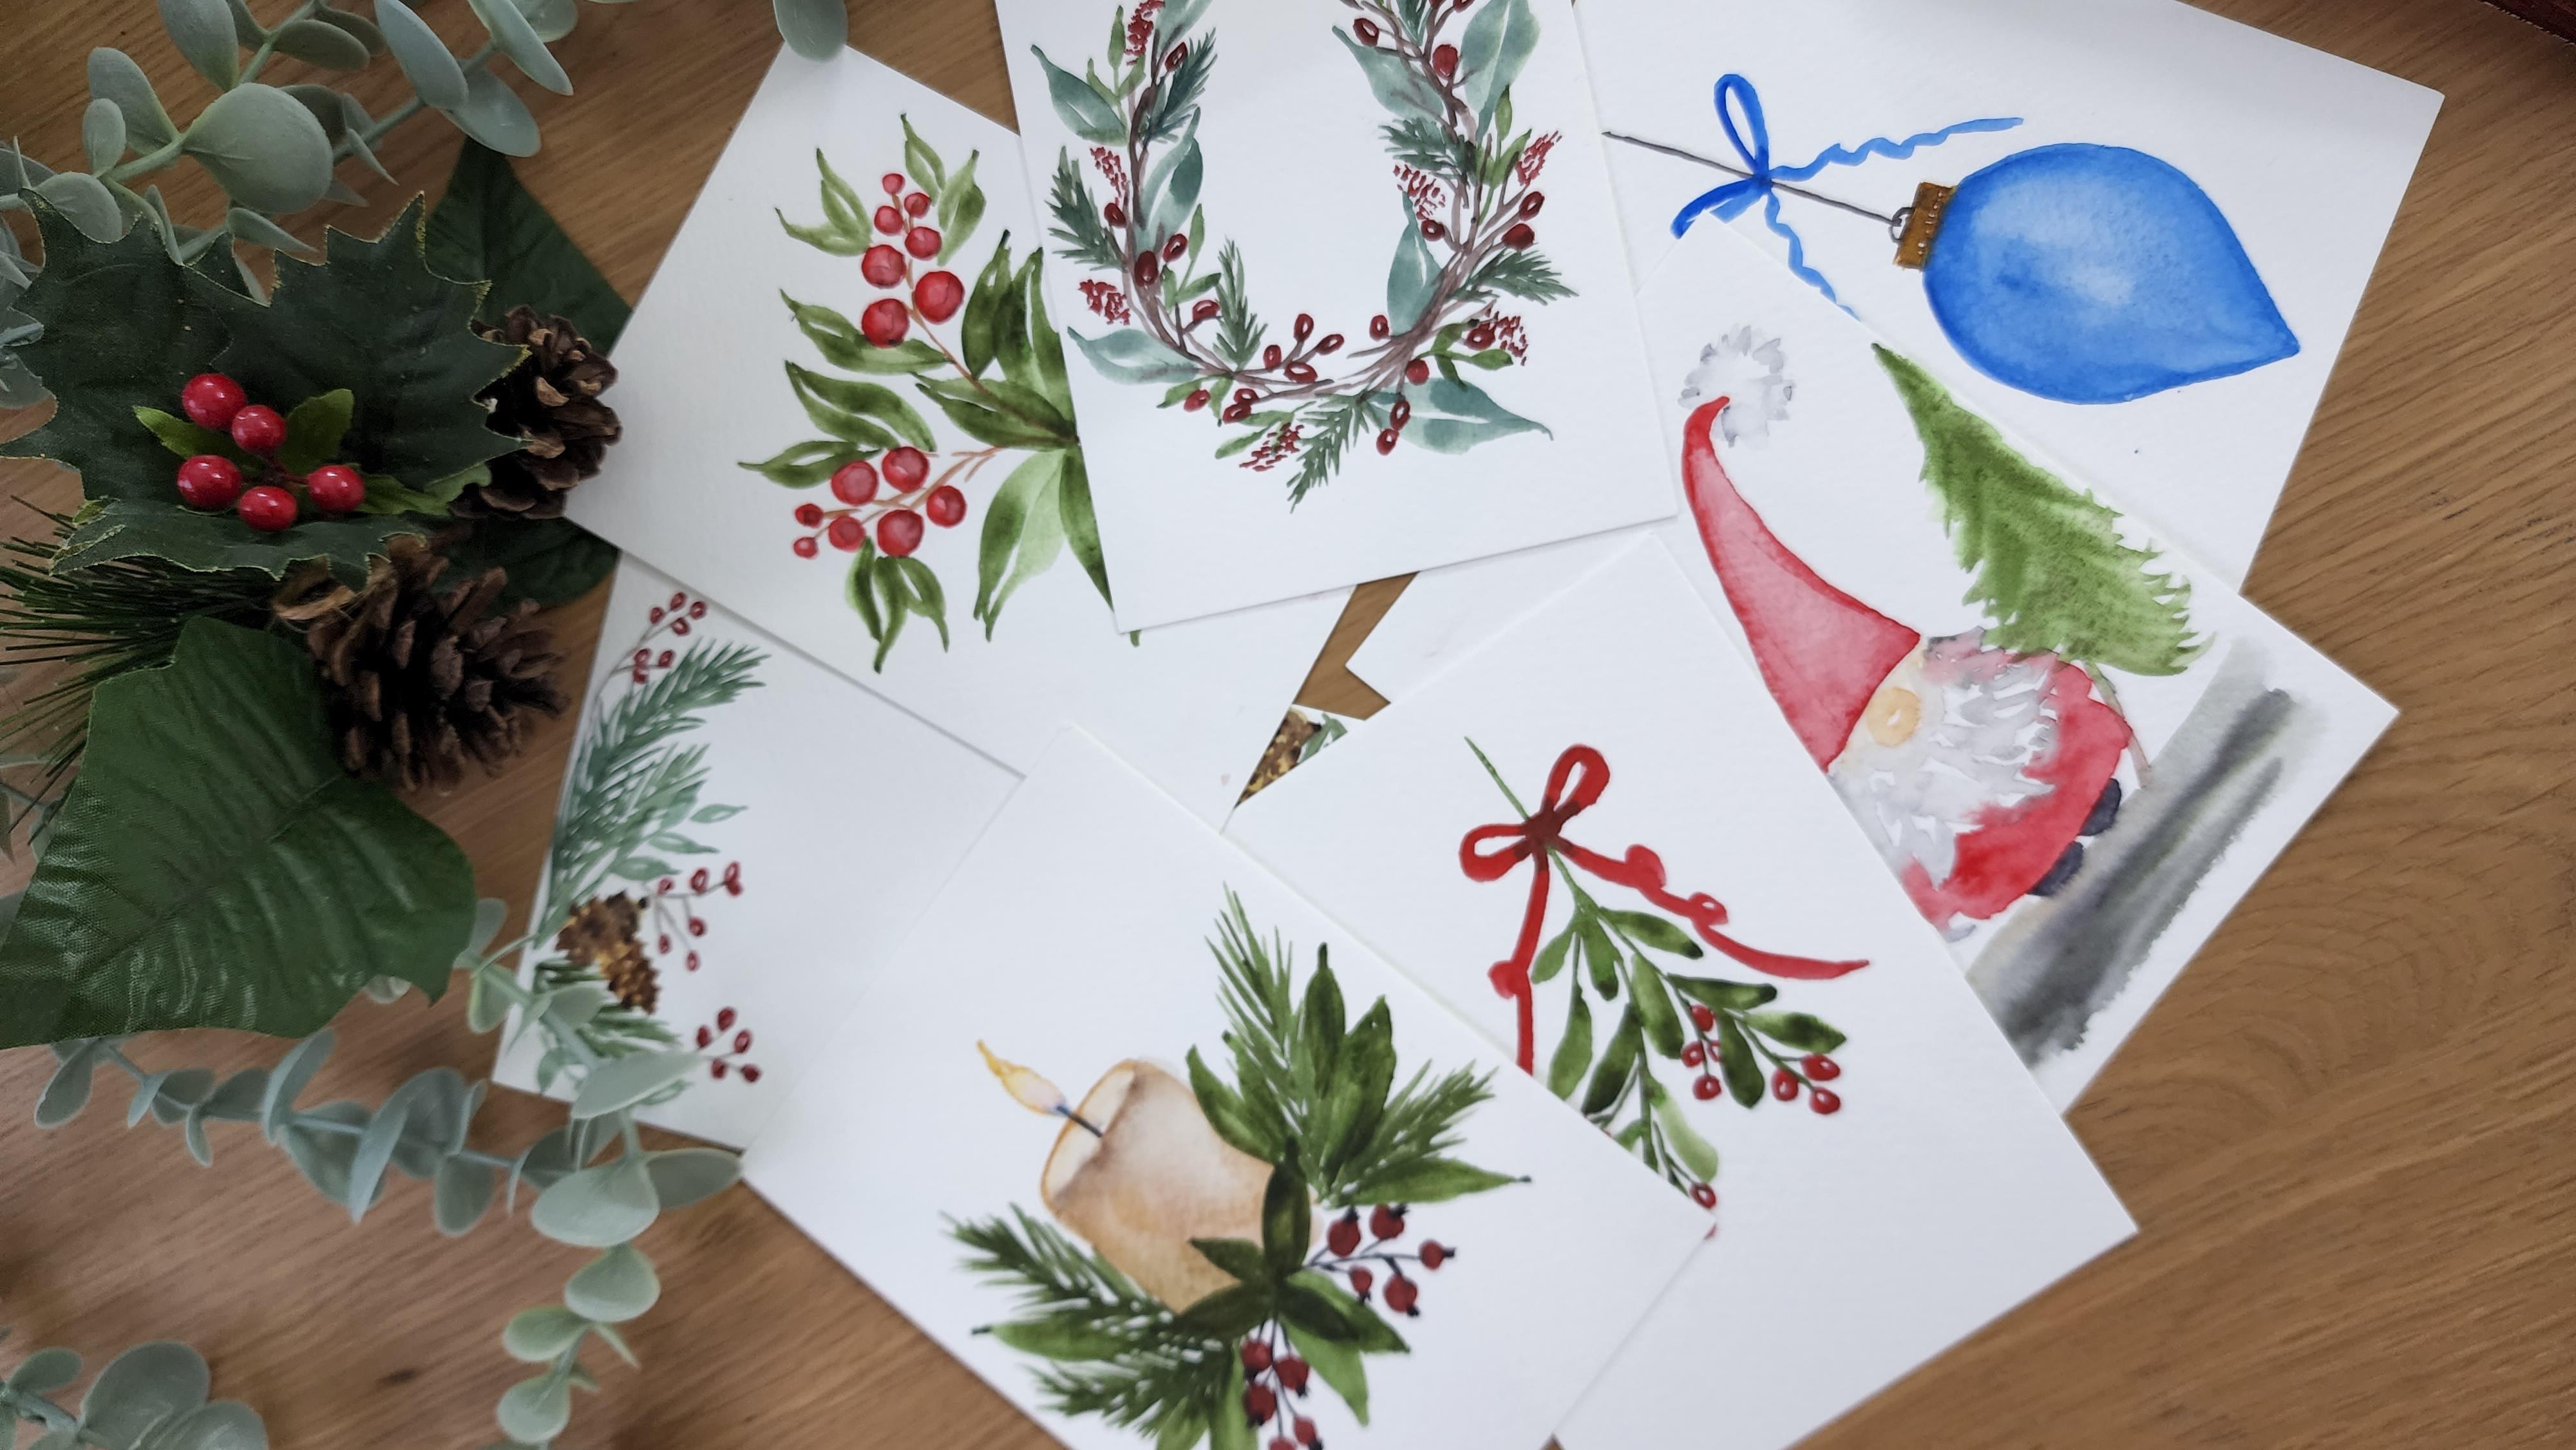
10. Class Project: Okay, so here we are with our seven Christmas
streamed postcards, and I hope you have
enjoyed them all. And few of them are
really, really simple. A few of them with
adding details, but all of them speak
Christmas out loud, and so many different ones we have done like
this is bordering, this is a read. Then this is a very
basic berries which is important part of
Christmas and then also acute and fun
norm like this. Something very, very elegant and rustic and vintage style. Something very, very simple, and a variation from
the red and green. So this blue ornament that we
did, mistletoe, of course. I hope you enjoy painting
them all with me. And if you have watched
the whole class, then please don't forget
to leave a review for me. As for your class project, I want you to pay all
the seven card you can post and post your work,
your class project. As all the seven projects, try them all, you believe me, you will be learning so
many new techniques and so many new ideas
you will be getting. And later on you can use this
in your own illustration. So for the class project, I want you to do all
the seven day by day. Some of them are
really, really easy. Some of them are easy, but may involve a little
bit of more techniques. So all in all they are all easy. So try them, do it as a challenge every
day for seven days, I will look forward to your submissions and if
you have liked this class, then don't forget to leave a review for me and I'll see you in my
next class till then. Thank you and bye-bye.
 Dr Megha Cassandra, Art Therapy Coach, Watercolor, Handwriting Expert