Transcripts
1. Watercolor Brushes Introduction: You love to paint with
watercolors and loose style and NJ observances,
gorgeous color bleeds. But when it comes to practice, something goes wrong and you
cannot work out what it is. The reason my b is the
brushes which you are using. There is a huge
choice of brushes and you don't need
to buy all of them. But how to know which one to choose in which
properties you are looking for when choosing
a new brush will save you money and avoids the
frustration from the process. It is such a huge difference when you use the right brushes. Did it, did it? Did
it, did it then. Hello, I'm Nina, also
known as music out on Instagram and watercolor artists specializing in loose style, who also loves her
digital watercolor art, both online and in-person. Painting. Loose style without
pencil sketch is a pure magic which
allows you to work on the fear of blank paper and to bring life to your
watercolors, make them unique. My mission in all my
watercolor classes is to share with you the joy of
painting with watercolors. There might be several factors
which affect this joint, and among them is brush control. In this class, I will
teach you how to test and explore different
properties of your brushes. Look which ones are great for
painting in a loose style. For certain watercolor
techniques. More hour you will put in
practice as I obtained knowledge by painting
loose floral compositions. This class is suitable
for all levels, especially it will be
useful for beginners. No prior knowledge is required. If you're new to this channel. Welcome, Professor Follow
button on the top, the gentleman's is
creative journey visa. First to know when my
new class is released. After taking this class, you will know whether you
have the right brushes, for which purpose you
can use each of them, the range of brushstrokes and brush marks you can
create using them. Where do you find
the perfect match your watercolor practice turns into J4 and
relaxing process. So what are you waiting for? Grab your brushes, and
let's dive into painting.
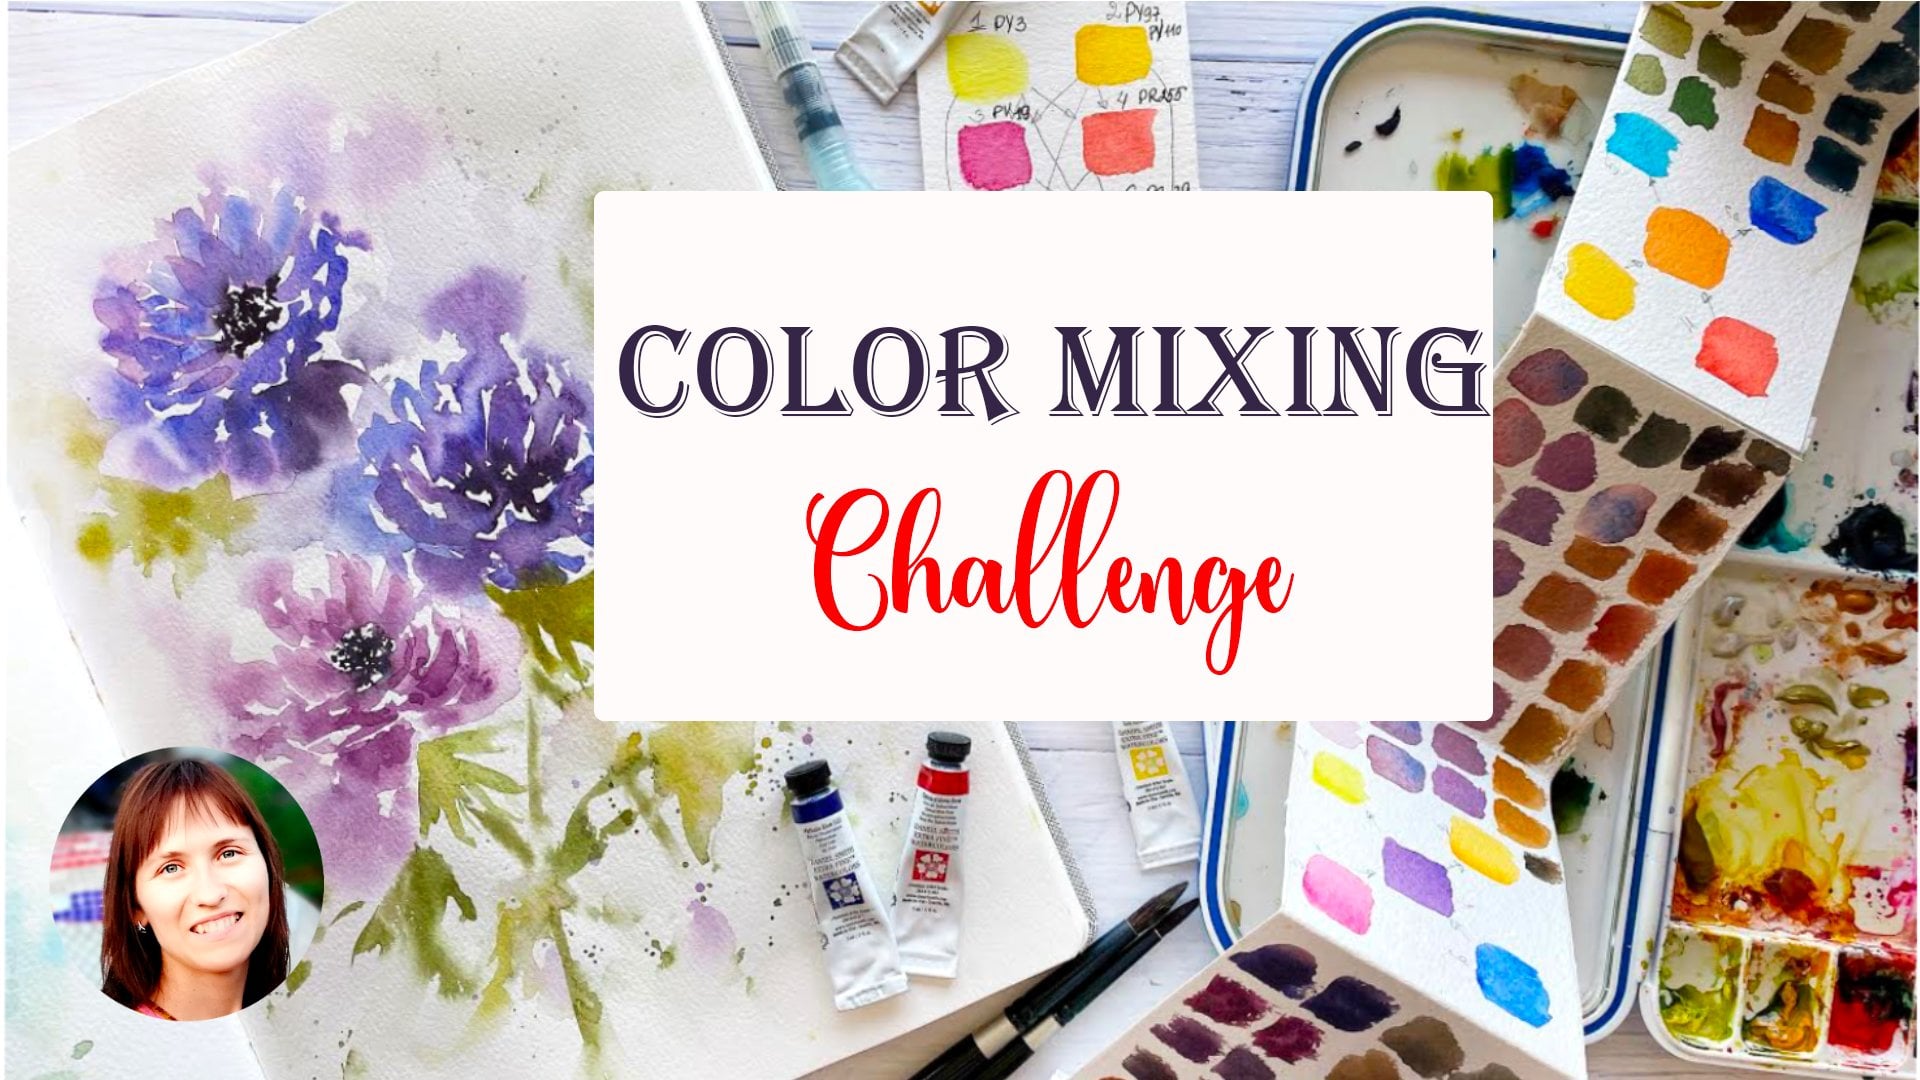
2. Supplies: Welcome to the class. I'm really excited
about this class. So let's prepare the materials
which we are going to use. We will need watercolor paper for practicing and explorations. Lead to more A4 size
pieces of paper. This is 100% cotton
paper, cold press, one. For painting. Our beautiful class projects will need watercolors
or the color palette, water, paper towels to
remove extra moisture. And we will need
brushes because it's the main focus of this class
is going to be brushes. If you have few brushes, they exert ones which you have. If you have many
brushes and make a selection and choose the ones which you aren't sure how to use them or have some doubts
and your favorite ones. So this exercises will
help you to know why you like those brushes
which you use. So let's prepare the materials
and let's dive right into painting and Joseph process and see you in the next lesson.
3. Class Project: Your class project in
this class will be to make a selection
now, or 57 brushes, which are usually used for watercolors and
also take some of them which you usually don't use for painting
with watercolor. So then it could be quite
interesting experiment and maybe you will find out also some re-discovered for award. You can use them using
these brushes first makes a tester on
water absorption. Next part is going to
be to make washes. And once as I will get dry, you can practice with a brush marks and the
next exercise will be to test your brushes so on,
elasticity and pressure. Once you have
finished with this, we will move to our
first-class project. That is the brush marks on the
next class project that is dedicated to explores
their brush marks in movement with pressure. I hope this sounds
exciting for you. Forward to see your
class projects. Please upload your
class projects and the process of testing your brushes and do the
class project gallery. I'm looking at fluoride to see your experiments
and explorations. See you in the next lesson.
4. Brush Selection: Welcome to a new
lesson where we are going to prepare our brushes. I have prepared a quite
big range of brushes. So answer which
usually your face or when you are painting
with watercolors are. So let's have a look because
this brush is a size eight and it is squirrels
imitation hairs. It squeal. So you can see that
it's connected this way and it has
a quite long hairs. Next one is also
girl's hair imitation brush size number eta about the difference
compared to this one. You can see that it
has really fine tip and we will see how it works
in action next, brushes, that is a calligraphy, Chinese calligraphy
or so Mayo brush, which is made from really
softer goat hairs. And you will see that
though also is used by many artists to paint
with watercolors. This one is size six or
synthetic quill brush. And you may notice it's
a bit is that you cannot transmit the filling of texture and stature this
brush through video, but it's more resistant. And the hair, so they are quite, this ones are really soft
and this one quite hard. And other brushes that
is also squirrels, imitation synthetic
brush, size number ten, and it's round brush. E.g. you can see the difference. This one has a really fine tip. This one isn't a lady. We'll see how it affects
our brushstrokes. That is different.
Material, that is natural Kolinsky sable
brush and a size six, the hairs are more resistant
and we'll see it in action. This brush, actually, I
wasn't going to take it. But then I have remembered that when I started that
it was my mistake and I noticed many people face
I exhaust ones who are just starting with the most
available art supplies, which has usually quite cheap. I would like to show
you the action. You may notice that
these brushes is usually size 6810 and this
one is size two. It's saying Daddy round brush. It's really hard and resistant. You can see that to bend it, you need to press quite a lot and you will see it
why I have chosen it. Because sometimes when
you start a yo-yo, you tend to use a
really small brushes. And brushes, which aren't really perfect for watercolors
because it actually, they don't hold really
a lot of water. And you will see why. And then you may
recognize yourself or no. And then you will
find the solution. How to improve your
watercolor skills just by choosing
the correct brush. So now prepare paper. Let's move on to breakfast
you in the next lesson.
5. Water Absorption Test: There are three main
points which we consider a while choosing
watercolor brush. First one is water absorption. Second is elasticity. And third point is brush marks, which we can get
using this brush. Let's have a look first
at water absorption. It, this means is
that how much water your brush is going to hold and for how long it's
going to release that water mixed with paint. For sure, it's clear that
the more bristles are, your brush hassle than
its capacity is bigger, as well as the materials used for making these bristles
also will matter. You can see that this
one is really like soft. This is really hard. And this is a bit like a
mix between these two. Let's see how much water
absorb our brushes. I start with Mach brush, which is a really famous
for good water absorption. And you can see that
it holds quite well. They're deep. That is another important part, depending in which position
you are holding the brush, whether it's a totally vertical, then you can get
really thin lines and you can control it better. Or you can hold it a bit bended as this also will affect
the line which it lives. So let's check whether
with this brush we can get really thin lines. Seems like yam. Let's press a bit more. Now. I'm applying a
bit more pressure. You can see that I still
have got that brush. Also, you might notice that my brush has changed its shape. Now it's like a skirt. It means is that it's
run out of water. And again, let's try to get, I'm applying a bit more brushes and let's apply
even more pressure. Then we will get really,
really thick lines. And what you can see is that still hasn't
performed its shape. So it means is that it
keeps water quite well. Let's see what we will get
with our next brushes. This is also imitation of squirrels here,
vertical position. Maybe more pressure. I will speed up the video
while testing or other brushes from time-to-time command in
some points to take in mind, but that is quite
meditative or exercise. The exit slides or so, I encourage you also while
watching to do this exercise. After applying a heavy pressure, whether they're tip of
your brush holds back. So it's also really important
so that after pressure, your brush will hold
their fine tip. This calligraphy brush or
with gold really soft hairs. This, you can see that e.g. with the previous two brushes, I had four second line. I have painted it with the
same brush and you can see it's quite smooth and
it gives quite well water. But this one, it has
already started to give me this dry brush texture. This means is that
this brush holds less water than
two previous ones. However, you can see
that by size this and this as they have
quite similar size. My next brush is
completely different because this is a synthetic and it's quite hard brush so you can see that it's quite stiff. Let's see how well
it absorbs water and which kinds of
lines so we can get so it's in this brush
keeps her quite well. Water that you can
see that here. It's still, we have got quite
smooth line next brush. This is also imitation
of squirrels hairs. So you can see that
this brad holds really, really well water. Next brushes, this is natural
hair, Kolinsky sable, and they are quite hard compared
to my previous brushes, which were quite soft. You can see that this brush
doesn't have a fine tip. It's quite round ones so
we don't get the S thin lines as we have managed together with the
previous brushes. And my final brush
is a synthetic one. It's really hard one first day, it's smaller than
previous brushes. And you may think that
with being smaller, we will get seen a lines. Let's check this and let's see
how well it absorbs water. Here you can see
that first thing, that it doesn't have fine tip and it doesn't give
really thin line. First thing and second thing, it doesn't hold water because
you can see that here. The pain has finished
before they're just almost in the
middle of the line. And then it was
dry brush effect.
6. Watercolor Wash Test: Let's do another desktop for water absorption
of horses brushes. And let's see how good they
are for making washers. So that is good reader
when you are e.g. a. Painting, some
background, or you have to fill with color
big areas of paper. So just prepare a
paper and separate it in eight squares
or seven squares. And let's see. My first one is going
to be mop brush. So you can see that
it holds quite well water and you can create quite smooth wash. What
about my second brush? Let's see how it behaves. As you might notice, is that generally it holds less water and it starts
to run out of water. My general again, then we
have got quite a nice wash. And the things that probably I would take
bigger size of this brush, then it will like you will feel that
you will have enough. What I have here, a new brush. Let's see, this one. I would say the same. We
have got quite nice wash. This brush is going to
be interested in to test is that the synthetic one? How well it holds water. Let's see how it will behave. Kolinsky sable for
making washes. This brush isn't
good for any worse. That is clear. Let's have a look
at our washers. And so you can see that mainly the only brush
which has completely failed, it was this one that this wash, it's impossible to
create any wash with this brush as some more
less smooth for me, is there a best one? Is this one which is
made with more brush. And actually that's why
for better results. For washing is recommended
to use mop brush. It holds lots of water, releases gradually and you can get really smooth,
beautiful wash.
7. Brush Elasticity Test: Let's check our brushes
are for their elasticity, how they are pressure sensitive. I am holding the brush
in vertical position. I start with light pressure and then I'm making it heavier, heavier, the whole pressure. And then I start to release it. Meanwhile, lifting my brush. So you can get really big mark. You can make also a bit
shorter and smaller. So that is, it will depend how
much body of the brush you are going to press and lift. Press, lift. So it could be like this
big one depending on the length of their body
and also the pressure, which part you're pressing. So this would be, this brush is really good for. You can see that heavy pressure, less pressure, light
pressure and egging. Just do this exercise
and see how big, how small this, Let's say, leaves you can get
with your brushes. Let's check this one. Also, it helps our Winsor
brush has a fine point. The whole brush. Then I start to release. Or smaller, bigger and release. Just practice heavy
and light brush here and try to dance
with your brushes. These brush quite cute shapes. This brush is very soft, so it's very sensitive
to the pressure. You can see, you can get
a variety of leaves. E.g. this brush, it gives me
a really, really thin lines. And I would say like it
gives more like spiky one. But when I want to press as
a whole body, it receives. So it's not so easy and
it's not so soft, e.g. compared to the previous brush. But it's great for
getting this kind of leaves, like bamboo leaves. It could be nice to
paint with this brush. This brush doesn't
have fine tip. It's really rounded. So let's see what we will get. Let's test this is final brush. It doesn't have fine. Deep. Here is our pressure
tests of our brushes. And you can see that's
a bigger brush. You can get bigger and wider, fresher and for sure
like the length of their brush stroke. I think this technique is really great for painting leaves so you can pressure and
later it would be useful with a brush
mark, so with movement. So this is really great so that you would practice it before.
8. Brush Preassure Test: Let's see how we will
change our lives, which it was alive just
straight line now, how it will change it if we
will add a bit of movement, this part is going to
be quite challenging. So let's see. The first thing, what we are going to be, well, we are going up light pressure and when we're
going down heavy pressure, light pressure, heavy pressure, light pressure, heavy pressure. You can see it releases
so much water when you press going down. So you can get quite nice. But this brush is really
impressive that it holds so much water that it's
quite challenging. I hear the checker, the pressure even more because
there's this brush holds lots of water if
you don't release before excess of water, just with some paper towel here, you remove the excess of water and let's see
what we will get. No light when you are going up and heavy
when you are going down. So here is with
lots of water and this is when we have
removed one part of water. The same. You can see that
this brush holds water while it's getting to the point when it holds enough water and
you can play with pressure. It's really perfect to play with this brush
from the beginning, I will remove excess of water. So you can see this
is a really great, this is calligraphy brush and it's very
sensitive to pressure and you can get really
beautiful variation of thick and thin lines. This brush, I find
it to Steve because when it's really gradually
release the pressure. So when you are releasing, you can get really
beautiful thin lines, but you have to make an effort, really an effort compared
to the previous one. So in order to get
their sick align, you can see that this
brush holds really well water and I find it, it doesn't have fine tip, so I find it a bit
too complicated to get really thin lines. So clearly you can see that this brush doesn't
give thin lines. And that's why it's quite complicated to make
beautiful contrast, very thin line and seek one. So this brush isn't really
good for flexibility. As far as this
brush, I think it's the only one with quality
because other ones, so they are good brushes
but for different purposes. And you can see that
I doesn't hold point, that at some point it starts to separate almost immediately. You can see that it's
already started for here are two separate resource. It's not really good
pressure sensitive. Once you have practice
with this lens said how to make with
these brushes some leaves. That's what we are going
to paint our first, our first class projects. So just practice and play with different,
different shapes. Change the pressure
all the time. And this time, add movement
to your brushstrokes. Just have fun and play route. How flexible in movement? You can play with your
brushes and what kind of thick or thin lines you
can get with your brushes.
9. Brush Marks Test: And that's a great way to dusty your brushes and what
you can get with them. Try to check what they can, which marks as they can leave. So just simple dots, some lines the same. You can know how
thick they can be, what else that
moving towards you. And also depending
on the pressure. And then away from you. The marks already are different. And finally, some marks
with some moment. One more thing, what you can
hit check that is splitters. How good your brushes
in making splatters. This is also a great
to know because sometimes not every
brush makes it the same. And sometimes you need to know which brushes
better to use. I hope you have made many
discoveries about your brushes. So for what could be good ones and the ones which you can get really rounded dots
or like the ones which have a quite thick and
rounded lines, thin lines. So as I say, with a splitter. So the one which gives them
more like in one place, all of them or like spread it. So let's move on and put this
knowledge into practice.
10. Gestual Brush Marks Test: Welcome to the next lesson. And this is the most exciting, already starts more
and more exciting. And it will be about brush
marks. What does it mean? Brush marks are actually
that when you are using the body of your brush,
different parts, different pressure,
and also it depends on speed and direction of
your brush strokes. Let's see, and let's experiment
tells the most typical, it would be like this. Then you can do it vertically. This brush strokes, brush
marks that you can try it. What will happen if you will? Don't press really strong and lift quite quickly your brush, then you can hold a bit longer. Now. And all this brush marks,
they differ actually. Also you can add some direction. So then you're pressing. You see, just
experiment with this. You can create really
many different things. E.g. you're pressing and
then your aging some woman. So you can do it this way or
you can do it the opposite. So also the direction towards
yourself or, or outwards. Then you can make some
lines and also great. So add some leaves now. And also depending
how fast you will move and how strong you
will press your brush, you would be able to create
different brushstrokes. Pressure lethal
in and like this. That dislike those techniques
which are used for painting loose style leaves. But actually you can experiment with breast or leisure
and see what you can get. Also, you can make
foster brushstrokes. And it could be Also e.g. this way towards the center. So just or it could be also this one or in the
opposite direction. You can press is a whole
body like z is going down. Or you can press only some part. So you can see that your
brushstrokes will be different and also the
direction up or down. So this is really, really
exciting and I suggest you to desde and to see what you
can get with your brushes. And one more thing to
test your brushes. I think that I find
it all so excited. What kind of splitters give your brush first thing
that you need to have, puddle of water and color it. And then you can add
like this, splitters. Know, it's my way
of hitting them with fingers or with the help of another brush or fingers so that you can
try to like this, then there would be more random. Or also you can do
it just with them. So this is for me is
more complicated. So here we can already a water splitters
and bolts of fun. I hope that you have
got the idea that now we are having
finer and discover which brush marks we can
create with our brushes and just experiment and enjoy. This is a really exciting and lift as the rest of brushes. Here's my brush number two. And the difference
of these brushes that it has a really fine tip. And then you can
change the pressure and get smaller ones. You can add the moment. You can add dots. You can add the brush, share your breaths
and then lifting. You can add the movement. You can create some
really thin line and then do it some leaves. Long one. So this one, e.g. the
deep and the results are really flexible and you can
control them really well. I really like brush marks
as these, this brush. Okay, So then let's see how
we will get this effect. Let me add more water. Okay, So here it is, outside. Then. Nice towards me that you can press towards yourself so that also
you can squeeze. Great. That is also
the way how to create the shapes of flowers. You can add the movement. Actually, there are really
many things which you can do, like these ones, To
outwards, inwards. So just practice
and also the speed. So all these brush marks
they are interested just in, let's see which ones you will know which ones
that you will discover. Let's see how this
brush grades splitters. So it's quite nice. Ingredients, splitters,
tiny ones, and beautiful. E.g. if you need big ones
here with a bigger brush, you can create bigger splatters. That is also, you know, when you are practicing
your brushes. This one is interesting. Let's see what we will
be able to create. Which brush marks we can
create with this brush. Here. This one's also you
can make like outside. You can move, you can add the print and movement
and movement, rest and moment and moment. So this is also a way
how you can create. Those are the things
that it depends on whether your brush allows you to to press
it and to move it, because it depends on how
flexible are their results. So let's see if the pressure
is small with moment. So you can create these ones. This one is quite soft. It's really nice to
make soft shapes. This brush, this kind of, you know, sometimes you
need this side leaves or moments of this brush is quite nice if you don't
control it really well. But when it's like a wizard
brush and with the speed, you can create some
interesting textures. Now, press several ones. You can create this one. So it's, it's beautiful, the beauty of this
brush that you can control, press Control, and then create some
interesting textures. And the brushstrokes,
which would be different in a
degraded brushstrokes, which would be
different in size. Let's see how this one's, this brush mark is
quite complicated for this brush because it doesn't
halt really a lot of water. But you can create
some dry brush marks. Here. It will allow you to create some another different e.g. I. Really like this moment as that. You can add some body
and you will have already butterfly with
just awesome brush marks. Yeah, it's really beautiful. I think this kind
of brushstrokes, I would say it's compared
to the previous brushes. It gives less letters. So e.g. if you don't need so
much and they are in water, you can see that they
are quite well defined as ands's brush is great for
this amount of splatters. Let's see, this one
holds really well water. And you can move and create
some interesting textures. This brush is really nice
because it holds water really well and you can
control the pressure. But the only thing
that probably the deep that you need to control it if you want
a really thin lines, I think with this one is more complicated because
it's soft and it doesn't allow you to create a scene line as the
previous brush. Let's see what we can do
with Kolinsky sable brush. You can see that it's
really rounded and e.g. with this one, I would
create the flower outside. Not inside. However, you also
can make inside. But here you have to
control more the pressure. Then you will get them
thinner and smaller. But also that is
another point of bigger brushes that you
can get bigger petals. If you need, you can
get smaller petals. And you don't, with
a small brush, you have only this variety. That is, besides
that bigger brushes, they hold more water and paint
that they also provide you variety of brush marks compared to the small one, small brushes. So this brush gives a quiet, beautiful, big brush marks. But e.g. if you need something very detailed
and really thin lines is quite difficult to get because it doesn't
have really fine tip. It's it's quite big, e.g. compared to their previous one. And this is small
brush and you can see that it has round tip, but actually like e.g. for creating flower. But also I would move it
outside rather than inside. As far as this brush, I will say that it's
more convenient for dry brush marks rather
than on the grid, something like some shapes and petals because it's
really limited by size and it doesn't hold
water so you won't get a really beautiful
brush marks. So with this brush
in terms of petals, but you can get
beautiful textures. Here are my seven brushes. Experiments are the holes that it has been very
useful for you there. I'm really looking
forward to see your discoveries
about your brushes. So just to take
the ones which you have started to experiment, I'm sure that you will have many interesting
discoveries which you didn't know that you have.
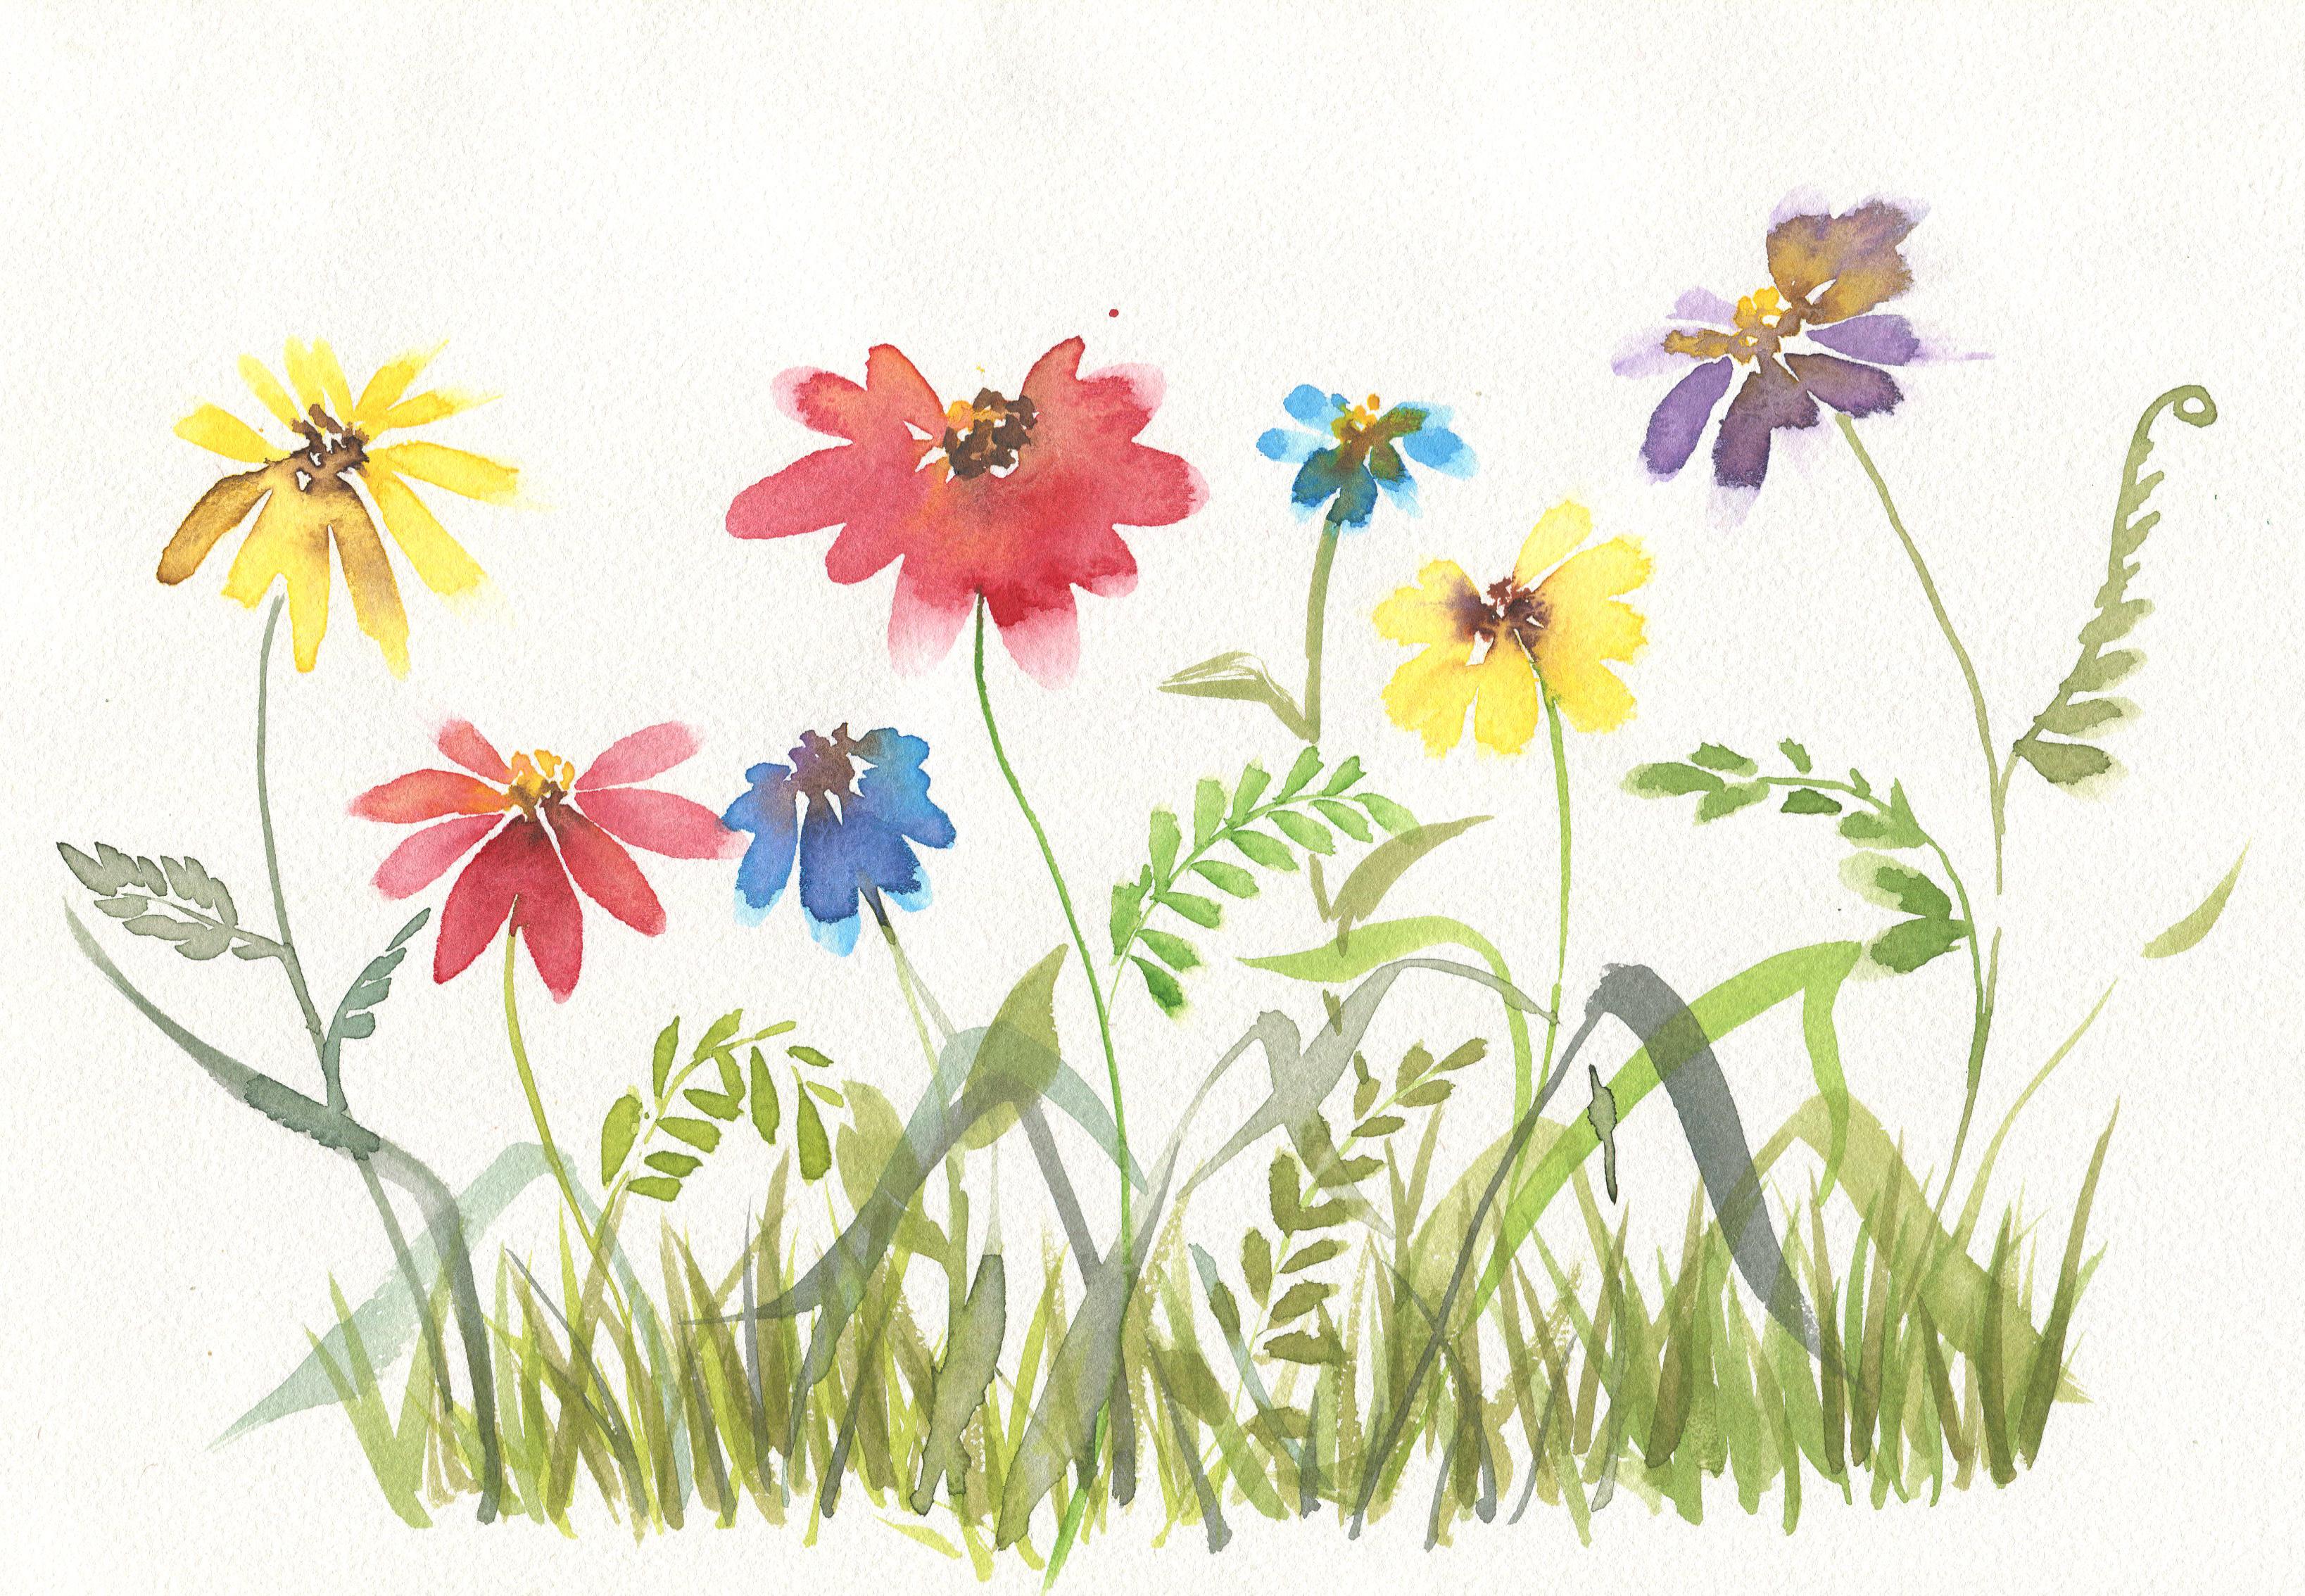
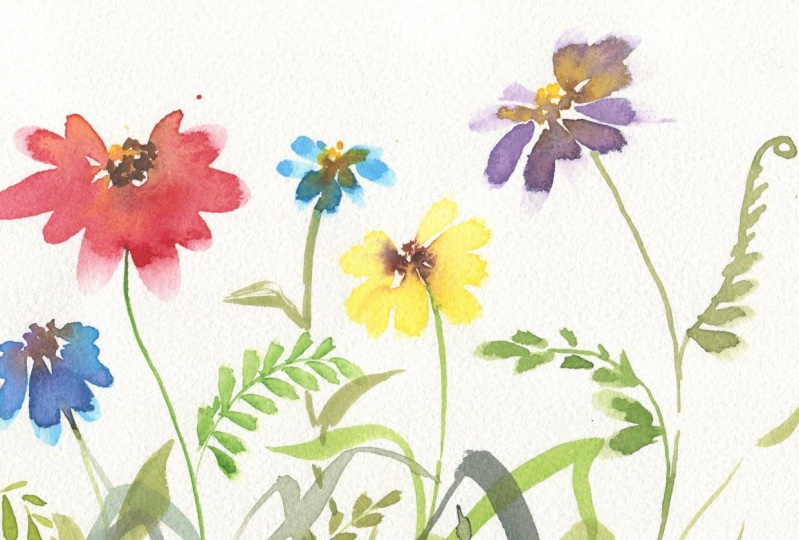
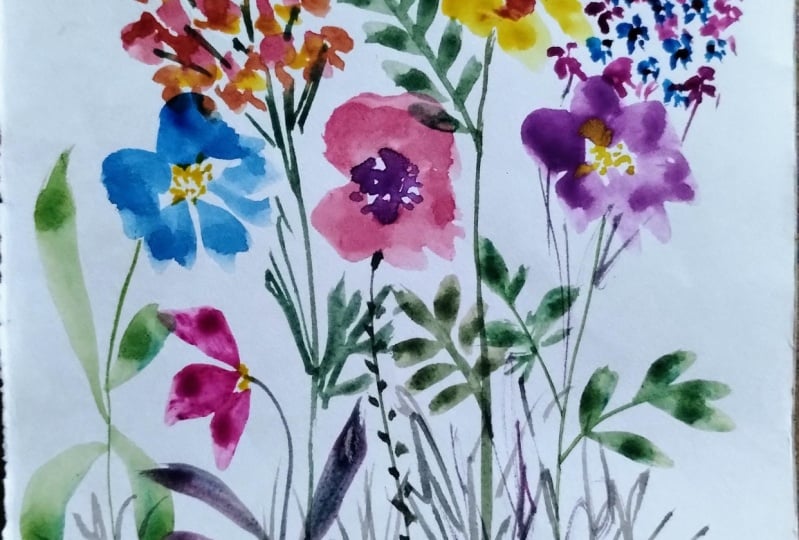
11. Wild Daisies Project: We are going to paint today, they say using,
using brush marks. This way, tasting our brushes. I think it's a great
way to get to know. So just with this kind of drop exists and would be nice to introduce
more concentrated color. In this case, I remove
extra moisture. I take more concentrated color and add somewhere
for year four year. Let's add some yellow
flower center. Some kind of brown also could be beautiful, dead
more contrast. But you can see that e.g. this brush isn't so good for
adding tiny amount of paint. So because it keeps
a really a lot of water and then you get this kind of water or the color
bleeds, let's say legacies. But then e.g. in order
to add stem yeses brush, it may give you a
quiet, nice same stem. And really beautiful this part. And we can add with another
brush, brings some leaves. So here we have our first Daisy. Let's paint another one. Just tear drop shapes for here. And then I add some
another color. So here e.g. you can
see with this brush, you can add also small
amounts of paint. And it will want to
make it really like bleed here a bit of brown. Perfect. And some green. I will mix my green
with a bit of yellow, so that is going
to be warm green. And I will add one
more stem probe. So here you can see that
you can get really, really thin lines
and also variety of different brushstrokes,
smaller, bigger ones. And another thing, what you
can try as well is to add some grass so they
are going to win. And there is some grass. So in our field of daisies. Okay, so here we have
these two daisies. This time I will add
one more yellow. So you can see that this brush, it doesn't give me a really beautiful this teardrop shape. And for this one, I will add some brown color of brown. It's probably a bit of wildlife. Because the contrast
in some parts here, that is that with
this brush you can make like z some leaves. And we're going to add one
more leaf going over there. We can see which
shape it will give us Some, let's add some more grass. You can see that this brush, it adds quite nice dry brush
strokes with some texture. This brush is good for
creating textures. Does this same yellow. I will add it here. So you can see that
when I'm making this, it gives me totally different. Brush marks, is not
teardrop brush marks. It's more like. Race, I would say we
get different way. That is completely
different flower, the same, maybe dark brown and a bit of violet. Here. I add this one. It was, this brush was beautiful
in creating long leaves. So I will add some long leaves
to my painting here, e.g. we also can add some leaves always different marks to play with pressure and to add different types of
leaves, like long ones. Also we can add
some darker grass. Okay, next brush. Let's add some violet. I think it also could be nice. Until we can add some
yellow center green stem. Then I think it
could be nice here to add some kind of Z slips. And then we will practice
also with a bit of pressure. And from another side,
another one here. And let's add also
some pressure. And let's add some more grass. Was this brush. So that is a way how you are
testing your brushes and see which brush is
better for what? For which purpose. Here I have one more brush. First. I will add awhile it center. And here we can add
some more leaves, but you can see that this brush doesn't create so
beautiful leaves. And our final brush here. But you can see this
one doesn't give a drop shape at all. It just like different shapes. So this one doesn't give
any drop shape brush mark. That is great to know. And also it doesn't
hold so much water so it doesn't bleed green stem. You can see that this brush doesn't get really thin lines, so our stem is pretty heavy. Hopes that this is
fun and easy exercise has helped you to get
known better your brushes. Let's have a look at another project where we are
going to play with movement.
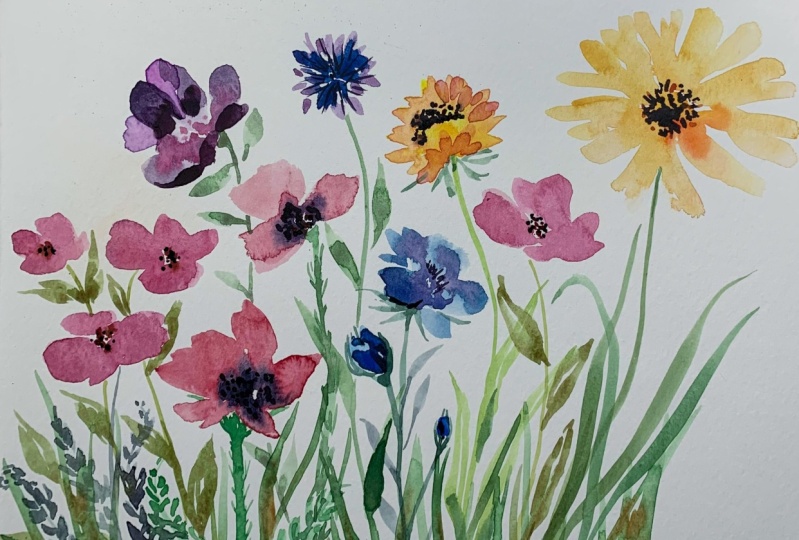
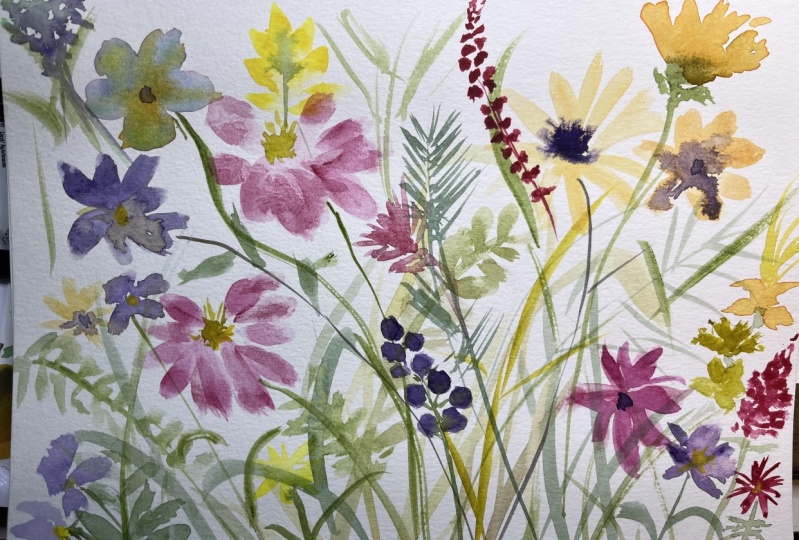
12. Wild flowers Project: We will paint some florals using this brush mark that
I placed brush mark, and then I start to move my brush and then in
the opposite direction. And then I drop some other
color in the center. It's already looks gorgeous. That is sound while some black. This is Payne's gray, I think. And then let's add some stem. So here we have one flower, the brush with this
kind of moments. How do you find this flower? We can draw up some yellow
ones, a flower center. Some yellow and probably
a bit of brown. I'm sorry. Let's add stem. Like this. We can add some leaves
on the breakfast more from another side. And this color is
really beautiful. And in the flower center we can mix a bit brown with
a bit of violet. And to add some more, we can make another flower. Let's use another brush, fancy. That's how we experiment
with different brushes. Let's create these
kind of flower petals. So here it is. That I'm moving
towards the center. I can draw another
color in the middle. Hi bit of brown. Dark brown that
these burnt sienna. And a bit more of a dark brown. And you can add even a bit of
violet here in the center. Here, gorgeous, gorgeous flower. And then we add a stem. For here. You can add some
leaves like this, these kind of leaves
until we can drop some darker color so that
they won't be so boring. And would have some
kind of shade. You can add violet brown here. And we can add some grass. Let's see what we will
get rotating this brush. So we can get quite nice flower. We can add some dark
blue in the center. The top part. We can add a bit of yellow. What do you think? This looks gorgeous? Green stem and some more grass. I think it's really exciting to paint flowers is this way. And I hope you're
enjoying it with me. Let's play something
yellow. Here. You can add these
kinds of brushstrokes. Bit more of yellow
in some areas. You can add a bit of, this is quinacridone
rose for some parts, and dark brown in
the flower center. You can mix green with
different red row scholars. And we'll get off with this
one is really beautiful. Let's think that it's
also puppy or something. They can add some. Another brush marks. Don't just really,
really loose flowers. And I think it could be
nice to add some smaller, something smaller like for here that we have covered
already everything. So but I think that we are here, we can add some with
moment batteries. Let's add something. Just always clean water. I'm just move your brush and see what you
can get to play. Let's add a bit of orange, drop of orange in
this or yellow. And also it could be nicer, quite a darker shade. So in some areas I
drop a bit of violet. So this way, now we will join all these tiny flowers
into bigger one. And let's add a stem. Now, you remember
that this brush, it wasn't really good
for painting thin lines. But anyway, so here we have one more and we can
add more grass. Here. We are left with
one final brush. I think it could be nice
to add something blue. Some tiny flowers. Like forget me not know. Because this brush is
really great for painting. Small, for live in
small brush marks. So this kind of leaves
could be really great idea. That'll send this tiny flowers. You can add a bit of
violet in some areas. I think it would be nice to
add a bit of pink color. So Canuck we don't
arose in some areas. And then with bright green, again, we will add, is this brush also doesn't
make really thin lines. But anyway, so this like this. I had some leaves and we can
made some are final touch. We can make wet some
areas. And guess what? We can add some drops of
splitters to make it. If it's too many, you
just remove with some. I think that it could
be nice also to have some green ones. Really bright green. Yeah, like it's a joy. They have dropped
to another places. You just I hope that these projects have
helped you to know better your brushes as
they are possibilities. Now you have also more ideas. How to experiment with your
brushes with brush strokes, brush marks with pressure
with more amount. And I do hope that I
have transmitted here all the excitement to play
with different brushes. And then like all of them, they teach you something. And if not, you still
need to explore and find out for what this
brush could be good to use.
13. Final Thoughts: Thank you for joining
me in this class. I do hope that you have
enjoyed the process and now you're amazed with the possibilities
of your brushes. And if not, now you know
how to choose a new brush, It's true that you can
paint with any brush. With good brushes,
you will paint good. Great brushes are expensive, but they skyrocket your skills and they bring times more
joy from the process. If after tasting your brushes, you come up to the
conclusion that any of them is suitable for
watercolor techniques. You like. Don't rush to buy
all brushes at once. Take your time to
choose one grid brush. Better to buy middle
size six or eight, and see which range of
brushstrokes it gives. If you're happy with it, then you can go forward and complemented with
smaller or bigger sizes. My advice would be try to change brushes throughout
your painting process. This will make your artwork more dynamic and to look more alive. And when you are enjoying, the process actually motivates, inspires you to keep your
daily watercolor practice. I encourage you to share your creations and possible
difficulties or which you might have faced during the glass in the class
project gallery. I'm here to help you and support
you in your art journey. I'm super excited to see
what you have created. Please share your class projects in the class project gallery. And I will be happy to leave you my feedback if you are going
to share your artwork. So on Instagram, please do
not hesitate to tag me and to use this hashtag so that
I won't miss your artwork. I will be thankful
if you could take several moments at the
leave a class review. This is a really
huge inspiration, support and motivation
for me to create new classes and to improve them. I'm very thankful for
your kind support. If you feel like you've
been exploring loose style or you can check out
my other classes. Here on this channel I
have huge collection of watercolor classes are helping you to loosen up your style. Once again, thank you for your kind support that and
see you in my next class. Bye.
 Nina Nyusikart Watercolor, Artist| Art Therapist | Loose Watercolor