Transcripts
1. Class Intro: Are you ready to warm
up your creative side? Right now, we're going to do some watercolor rush warm ups. So get your creative
juices ready. This is the perfect class for people who are brand
new to watercolor, want to practice their skills
in a light hearted way, or for more experienced artists that just want to do a warm up before diving in to a
more in depth project. My name is Marley Pifer. I'm a recovering perfectionist, and I've been teaching
people watercolor, nature journaling,
and how to get over their creative blocks
for over ten years. The supplies for this
class are really simple. All you need is a sheet
of watercolor paper. It can be in a journal or a loose sheet like
the one I have here. It doesn't really
matter how heavy it is. You know, I would actually
recommend probably a cheaper watercolor
paper if possible. I usually teach classes using these water brushes that
contain the water inside. But for this class,
it'll be better if you have traditional brushes. It's possible to do the
class with this brush, but I would recommend
having a traditional brush. I'm not going to be
using anything very small especially if
you're a perfectionist, I wouldn't use this
for the class. This is a size one, so I'm going to put
that one aside. A size six round would
probably be pretty good. A size eight could also be good. I'm going to be using a size
six and a size ten round. Those will be our main brushes. These are really
cheap synthetic ones. I recommend cheap
synthetic ones. I have purchased fancy expensive watercolor
brushes in the past, but I don't actually
really recommend them. Here is a half inch. These are called
squares or filberts. One of these would
be fun as well. Those are the brushes
that we need. In terms of palettes, I'm going to be using this cheap plastic
palette right here. It's also possible to
use a ceramic plate. This is a plastic thing that came with some
mochi ice cream. These things are
actually really useful, something like that
for your palate. I'm only going to be using two colors straight
out of the tube. These are Daniel Smith colors, but feel free to use
whichever ones you want. I'm going to be using
napamide maroon and quinacridone gold
from Daniel Smith and squeezing them straight out. A palette knife could be useful. If you really like geeking
out on art supplies, you could get a palette
knife for this, I'll help you get the texture
of the paint really nice. It's not essential. Another
thing that's not essential, but I like to share with my
students is if you've ever had the problem of trying to open these watercolor
or other paint tubes, it can be really annoying and
they can get really hard. They can be impossible to open. In my box where I keep
all of my watercolors, I have this mini channel lock. This will be all in
the supplies section. You can check the resources
and see my full supply list. These channel locks are amazing. They allow you to grip these lids without hurting
your hands and without hurting the watercolor tube and very precisely unlock them if
they've gotten tough. It's just the perfect
little tool here. You can adjust the
opening here and just perfectly loosen these up if they've gotten tight over time and save your
fingers a lot of work. It's a very small tool, very light weight, very slim. It doesn't take up
that much space. You can just put it in
with your paint box and never hurt your fingers again opening up. Old paint tubes. That's the supplies we need, get your area ready, and don't forget, you're going to want a lot
of paper towels. We're going to need
something for water. This ice cream mochi
container would work for putting water in here because it has
multiple areas, I'll be able to have really dirty water, less dirty water. But you could also use something like this, just one container, a little cup, anything
that you have for water, you're
going to need that. For in detail information
about the materials, go down below the video to the Projects and
Resources section. Within resources. There's a document with all of the links and
all of the info.
2. Get Your Colors Ready: Choose the two
colors that you're going to use and
we'll just squirt a little bit out here on our palette or plate or piece of plastic,
whatever you're using. I'm going to put a little bit
of my napamidemroon Rumer. This is really strong when
it's straight out of the tube, especially if it's
quality pigment. Get some of my
quinacridone gold. Now you could use
your palette knife, but I'm just going to use my larger brush
as a mixing tool. I'm going to come
in here and create two different
concentrations of this. But don't get too worried
about this part right now. If you're a recovering
perfectionist like myself, this is where everything
can get messed up if you overthink it too much
and we have a blank page, a terrifyingly blank page
here in front of us. I'm just going to play
around and actually try to have fun with the
feel of the materials. The water, the consistency
of the pigment, it should be fun watching it. Try to be more playful about it. Imagine how fun this part would be if you
were a little kid. That's all I need for that one. I'm going to do the
same with my other one, clean this off here. If you want, you could use
one brush for each color. I'm not going to worry
about cleaning it too much. Load it with water and do the same with my
quinacrino gold. Basically, what I'm doing
is I'm just getting a wash pre made in advance. These are really nice colors. They're not cheap.
They're considered professional or whatever. But they are good and they
do last for a long time. If you use them this way, you'll use your
watercolor a lot faster, but you'll learn a lot
and you'll have a lot of fun and you'll just get to
know your colors better. Okay. Once you have something
that looks like that, you're ready for
the next step. Mm.
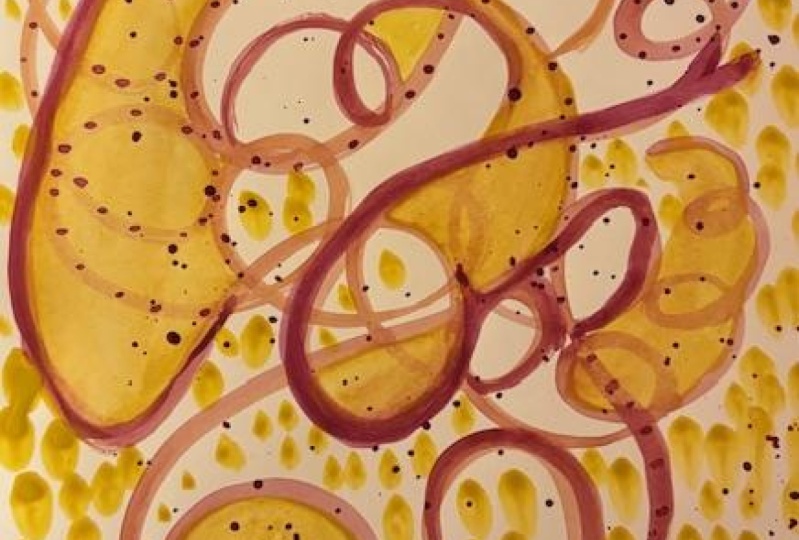
3. Diving In!: The most fun part and
also the scariest part because we still have a
blank page facing us. So let's try to change that, and we're just going to
do some loop de dos. And so this is probably
something you've done as a kid or maybe
you've done doodling. And what we're going
to do is we're just going to load the brush up, try to make sure there aren't any chunks of pigment on it. It's not super critical
because we're just doing a fun watercolor
brush warm up, but it's best if there aren't big chunks
of pigment on it. I can see that my brush is a little bit wetter than I want. I can see a drip of water on it. One way to control how loaded your brushes is to take the edge of your
paper towel like this and you can actually
suck water out from this side of the brush and it'll take mostly water and less of the pigment in a
more controlled way. Now I'm just going to come
here holding my brush semi upright and I'm just
going to do some loop de do. This is the first thing
that I've drawn or painted all day long and that's
always the hardest. Don't let your inner
perfectionist come out and ruin things right
now. We're just playing. Try to be loose, try
different sizes. Notice how strong or
weak your pigment is and how much the watercolor
paper absorbs it. If you're using
multimedia paper, the paper will absorb it less and you might get
more of a fluid look. I'm adjusting by making my brush a little
bit more loaded. I usually work with 150 GSM and just a medium grain
mixed media paper. This paper that I'm using
right now is a lot thirstier, so I'm just adjusting by loading my brush a
little bit wetter because I want these
smooth fun strokes. I'm just doing loop de dos. If you're feeling
really uptight, one thing you could try is
using your non dominant hand. We're just going to
cover the page in these. If you want to switch to your
other size brush, you can. But the most important
thing now is just to fill the page with these loop
de dos, have fun with it. I'm going to make some of
these a little bit darker. I'm going to come
back in while this is still wet and do
some overlapping, can get some interesting
wet effects. Feel free to play around with some wet effects and
some overlapping now. If you want, you can change
to your second color. I'm just going to keep
going with the same one. Whoops, I dropped a
big drop right there. I'm going to do some
bigger strokes. I got a dry brush effect because this paper
is so thirsty. Interesting dry brush effect. I'm just going to do
a little bit more of that with a
stronger pigment so I have some of that variation
of darkness in here. I'll actually try dropping it in here while
this is still wet. Not quite working. A
little more water. This is just playtime. Don't take this too seriously. One thing that can happen with warm ups like this is you
start really loose and you make something
that's really nice because it's so loose and
you were just playing. Then you start getting frozen because then
you don't want to ruin it and it
ruins the feeling. It stops being play and you
get too serious and precious about it and you stop
learning and experimenting. Try to just don't get too attached to it
if it starts coming out, I'm starting to notice that
feeling in myself, wow, I should just leave
this like this because it actually
looks really cool. Don't get obsessed with
those details right now. We're trying to do
watercolor brush warm ups. We're not trying to make
something to go on the wall.
4. Coloring Warmup: This side is a
little bit wetter. I want to keep going, and what I'm going to
do is I'm going to flip it around so that wet part is a little bit
further away for me. Now I'm going to
clean my brush and I'm going to do the next part. We did these doodly does. Now we're going to
do a little bit of basically coloring in. This is good practice, and it's a fun combination with this
other warm up exercise. I'm going to go into my
quinacridone gold here. And let's see where
should I start? That looks a little
bit wet still, so I want to have a little more control
on my brush so I'm going to dry out
a teeny bit here. Now we're going to
be trying to do just bigger washes and don't get too uptight
with coloring. It's okay if you go
out of the lines here. That whole obsession
about coloring within the lines is a little
weird sometimes and I think some people have trauma around that from
their childhood because other kids made fun of them
because they couldn't color inside the lines or whatever. Now you can just experiment, see what happens
if you color over the lines and see what happens
if you stay within them. Also play with how much water
you have in this mixture. Since our paper is
not taped down, you might need to hold it. But what that means
is you can also tilt it, and when you tilt it, you can experiment
with what happens when the wash comes more
towards the bottom, and you can see there's a
little bit of settling there. If you're using
granulating color, a granulating watercolor
and a very textured paper, you'll get some cool effects. Don't get too obsessed
with those right now or uptight about trying
to control them. I think that's one of the things that challenges a
lot of people with watercolor is there's aspects of watercolor that
you cannot control. That actually is the
part that is usually creating the things that people are drawn towards in watercolor. So you need to learn how
to roll with the lack of control and use it
to your advantage. If things are feeling really
scratchy and not flowy, it might mean you need a less textured paper or
a larger wetter brush. Just experiment with
coloring in some parts, not coloring in other parts. If you want, you could
just do a huge wash over everything with this
color. The second color. We're not thinking too much
about the brush stroke. We're just filling in areas. Because next, we will experiment and find joy in
the brush stroke itself. Do to do. Okay,
that's good for that.
5. Pro Tip for ADD?: On pro tip, especially
if you're ADD like me, is to have a sheet of paper, even if it's just copy
paper extra so that while your fancy watercolor brush
warm page is still drying, you can use this one. I think that this is
something that's helpful in a lot of art practices
is to have a side project, and this is a trick also for perfectionists or people that are starting
to get precious. If you start getting all
tense about this one, even though we started it with the intention of it
being a loose warm, if you start getting all tense and perfectionist about it, get a little side paper and
just do some stuff on there, do some doodly dos on there, and while the other
one is drying, just stay loose on here and remember that
we're just playing. Remember when you were a kid, you would just grab
a new sheet of paper, do something new. You didn't force yourself
to make something perfect and you didn't keep doing something even if it
wasn't fun anymore. Follow the fun keep a side sheet of paper
on the side project, and while this one is drying, you can keep your creative
juices flowing over there. You can also test things out. Here's a little preview of
what we're going to do next.
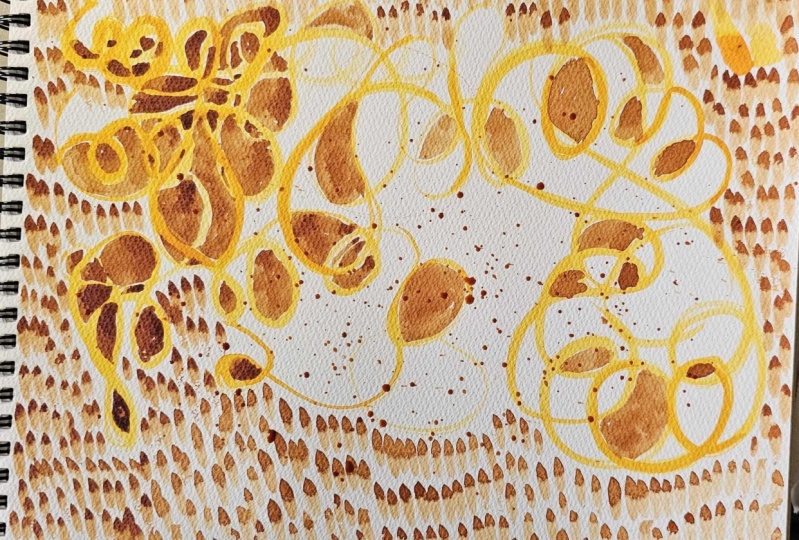
6. Brush Shape Fun!: All right, this one is dry enough for me to go
on to the next stage. I'm just going to
get my brush and I'm going to go in here
with my second color. This time, the type
of brush you're using really matters because
we're going to be using the shape of the brush
as our main interest point. I'm just going to do these
little things where I place the brush down
just like that and you'll learn what shape your brush makes when you
basically print with it. I'm just going to
create a repetitive design using that pattern. Notice how my brush
got a little bit dry, you're going to get
practice maintaining a consistent load
with your brush. I should have created more of a wash first. Let's
create a little bit. Let's get a bigger zone
of the wash going. A little more water, a
little more pigment. Let's just keep
printing basically. Mine come out looking like
feather or leaf shapes. You can experiment pushing it down slightly different ways. This will definitely work better if you don't have
too small of a brush. I'm using a size ten. If you're using around like me, you'll end up with
a similar shape. Let's just see if we can fill this whole bottom area
with this pattern. We'll get to practice
space filling as well, which is one of my
favorite concepts in art.
7. Overlapping Gets Wild!: While those are still drying, I'm going to go back to my
first color and I'm going to get a stronger mixture, stronger washer and
I'm going to go back over some of
my original lines. This way we'll get a variation in tone of that first color, a couple levels of darkness. This is something that
you'll learn how to do in watercolor painting is to
have these built up layers, and that's called glazing. Of increased value, darkness and pigment and saturation.
Don't go over everything. If you go over everything,
then it's all the same. And try to keep it loose still, and we'll have some variation is what we're looking
for in that first color. This is a place also where you could experiment
with more dry brush. Loading it with more pigment and a little bit less water and
seeing what happens there. You could also be experimenting
with a little wet on wet. If some of these
when you go over it, you'll get some interesting
wet on wet effects. Remember, don't go over everything or else
it'll all be the same. I'll just do a teeny
little one here. You could also experiment using your smaller brush
at this stage. Oh, yeah, yeah, yeah. All right. This is getting messy and it's going to
take a while to dry. Good thing I have that
side sheet of paper. This would also be a good
time to get a snack.
8. Loose Brush Lettering: While we're waiting for our messy masterpiece
to dry over here, I'm going to keep the
warm ups going on my loose sheet of paper and we're going to do
the next warm up. Make sure you have
a second sheet of paper and we're going to do the next warm up or
if your first one's dry, you could fit it on there
and I'm going to get a slightly more concentrated
version of my color, similar to what I was just
using on our main project, and I'm going to
do some lettering. I'm also using my
slightly smaller brush, but feel free to do some cursive which is very similar to the loop de
dos that we were just doing. Fun, fun, fun, fun. You can see how your printer
paper reacts differently. I'm also going to try
some bubble letters here are really fun. Doing letters also helps
you practice all of the different shapes and
potential brush strokes. It's a really good warm up. Because the loop de dos are fun, but they don't make you practice all of the
different angles and different other shapes and strokes that you're
going to have to do. Doing a bunch of
letters, writing out the alphabet with your brush
can be a good practice. Now I'm gonna try a
different style where I, um, sort of use the
width of the brush. So try that. That's something we haven't done with the doodles.
9. Sprinkles on Top!: All right. I love
how this is looking, but there's one thing we can do that will make this even cooler. Go into the bathroom and get
your partner's toothbrush. It's going to be perfect
for this exercise, just kidding, you can do it
with a regular brush as well. What I'm going to
do is I'm going to do a little bit
of sprinkling. This is something
that's going to take a little bit of practice. You need just the right
consistency wash. I'm going to use
my second color. Quinacridone gold there. I'm actually going to test
over here real quick. I'm going to hold my finger like this of my opposite hand and I'm just going to hit the
brush against that finger. What you'll notice
is you're going to get some back splashing, so make sure you're not wearing your fanciest clothes right now. I'm going to go here and I'm
going to splatter like that. That's supposed to
be the second color, but it looks like it's gotten a little bit of the
other color in it. This is the thing
you can overdo it, but remember, we're
not creating art. We're doing a fun warm
up, we're playing. If you feel like overdoing
it because it's so fun to do these sprinkles, go ahead. Go crazy. Don't
hold yourself back. Now, I think this would look really cool if we
had had some type of sparkly metallic acrylic ink, perhaps, that would have
been a really nice touch. But this was a great exercise. We did a fun watercolor
brush warm up here. Yeah.
10. You Did It!: Hey, I think that turned
out pretty cool, don't you? I hope you're proud
of your project, post it in the projects and
resources section down below. That way, I can check it out and give you
feedback if you want. And now that you've gotten
over your procrastination, you've gone over
some perfectionism and you're all warmed
up for watercolor, this would be a great
time to tackle a more in depth project or something you've been putting
off for a while. It would also be a
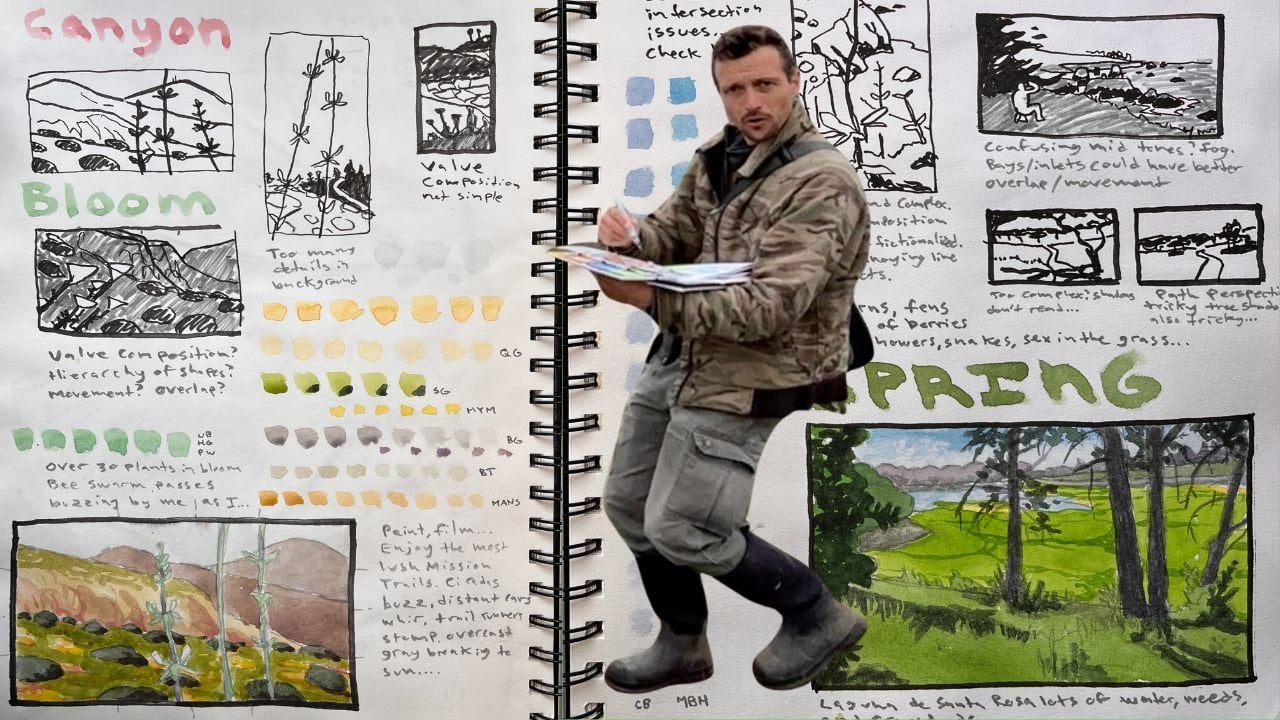
really good time to dive into one of my More
in depth classes such as one of my nature journaling virtual adventures
where it feels like you're going with me on an actual artistic
adventure in the outdoors. Check one of those
out. Or dive into any of the other artistic projects that you've been
procrastinating for a while, because now your creativity is unblocked and you're
all warmed up. Did you say Virtual adventure
here on Skillshare? What does that look like? Right now, we're gonna go on a Nature Journaling Adventure in the CloudF together. Let's go.
 Marley Peifer, Journal for Life