Transcripts
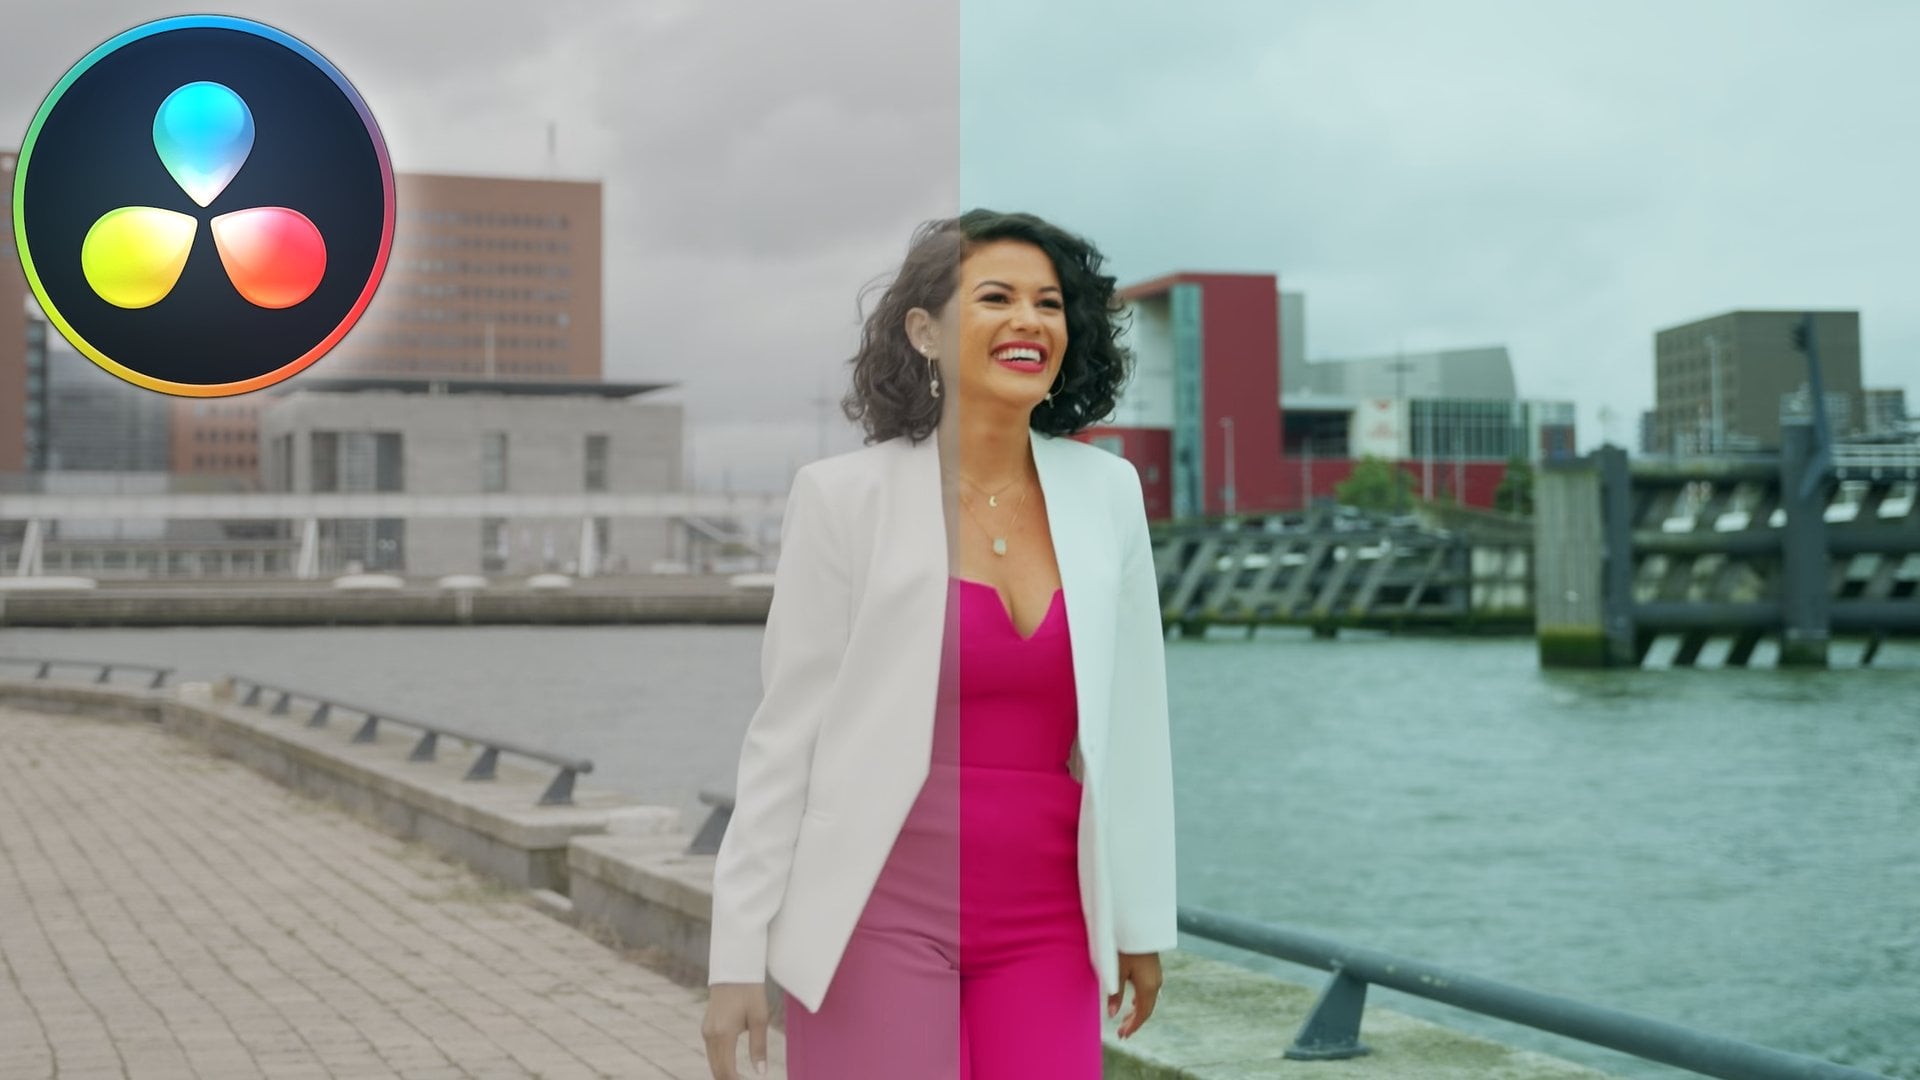
1. Intro Video Editing DaVinci Resolve 18 : Hello everyone and welcome to
a W2 resolved masterclass. In this class, I'm going
to take you from not knowing anything about
video editing to be able to edit your first
professional project in Da Vinci Resolve. I'll show you how to
edit, color grade, do some animation and sound
design in this free software, this class is made for keeping absolute
beginners in mind. And I've gone through
each step in detail and I provided you
with tons of examples. Then by end of this class, you are quantitative
enough to know everything about the software we
will be editing together. That's why I provided with you all the raw video files that
I've used in this class. And why you should listen to me. My name is Eddie saying I'm a professional
videographer and a YouTuber for all
my video projects, whether it's a client work, my online film-making courses, or my YouTube videos. I'm using this free software. I've been using
Dmitry result for the last six years of
my professional career. And in this class I'm
going to share with you everything that I've learned
for the last six years. I'm really excited to
share this class with you. So let's get started.
2. Class Project: This quick video is to tell
you about the class project. After you've done
watching this class, I want you to make a 40 s
to a minute long video. In that video, I want to see some creative video transitions, some beautiful color grading, and also some animations. And don't worry,
all these things would be taught in the class. You can make that
short video from the raw file data provided
in the description below. Or feel free to use
your own video clips. And once you're done
making the video, posted down in the project
section of this class.
3. Project Settings: Alright guys, so
first thing first, let's open the Vinci resolve. So I'm using DaVinci Resolve, the studio version, which is not the free version,
but everything. What I'm going to teach you, you should be able to do
that in free version. So really don't
worry about that. So as soon as you click, the demonstrators are
likened, this thing opens up. I have previous projects here, but I'm going to
start a new project. So I would just click
here as a new project. Let's say Vinci. There's all 18 class. Let's do create. Then this whole page opens up and I'm going to make
it full screen yet. Because in this section
I'm gonna be teaching you just few things
which is really, really important, such
as Project Settings, system setting for Da Vinci resolve some color
management technique. I know it sounds horrible
thing but just bear with me. So as soon as this
page opens up, I am going to go here in the corner saying
Project Settings. And it's going to take me
to master settings here. So the first thing,
what we're going to check his timeline resolution, a lot of beginners, they do this mistake even if you
have filmed in four key, your timeline should
be in 1920 by 1,080 P in high definition, because the timeline
resolution shouldn't be same as the original video. So if you are putting in for k, then it's going to be more
taxing on your computer. But if you put in
high definition, it should be playing fine. Or if your computer is not
that strong graphics wise, you can also play the
timeline in seven ATP, but we can just go
to high-definition here and then frame
rates per second. So you really have to check what frame rate your
videos is shorten. But all the videos
for this class I have shorted in 25
frames per seconds. So I am going to put here
25 frames per second. And I wouldn't change anything because
I'm using Mac here. The proxy media
format is ProRes HQ, but if you're using videos, it would be something different. Then Working folders,
this is important. So wherever you have been
saving all the other media, you can choose the
location according to that proxy generation location. So if you are using proxy media, you can choose the location
of that cache files. You can choose the
location of that because as you're using
resolved more and more, the cache file would fill up so you have to keep deleting it. So I have put it here. And galleries stills, I will
teach you how to take still. So this would be here. So this is just to
let you know that if you find this folder
somewhere in your system, you know where they are
and what they're for. So now we are done here. I just change the frame rate. And it's really important
to change the frame rate in the beginning because once you have imported all the files, then you cannot change
the frame rate. So if my frame rate was
24 in the beginning, even if I have imported
25 frames per second, the frame rate would be 24 and I wouldn't be
able to change it. So it's really important to change these things
in the beginning. Next thing, what are
we going to do here? I don't change anything. Color management. If you're using Windows, this color management is fine. But if you're using
Mac, bear with me. If you're using Mac, you should be using this color management. And this gives the most
accurate color output from resolve to your computer. Because sometimes
what happens is that you have edited a
project and resolve. You have exported that. The colors looks the same
as how it looked in result. But as soon as you upload
that on YouTube or any other social media platform or anywhere on the Internet, the color fades off. So that's why this color
management setting is really important
if you're using Mac, especially the output
color of space as the rec seven or nine here. Because I used to
just leave it at rec seven or nine scene and it
would just look super faded. So really remember to choose these color settings while
you're editing your project. And so I wouldn't
change anything here. This is all just
general settings. I really don't change
anything for light, nothing. So what I also do is that if as soon as I have
chosen these settings, what I do, I go to preset
and then I save that preset. So let's see, Addie
them into Rachel class. So I have saved that preset, that project setting
in a preset. So every time I'm
going to open it up. So every time I'm going
to open a new project, I would just go to
Project Settings here. This page will
open up initially, but then I would go to preset. I would go here,
I would go load. So by doing that, what's going to happen
is it's going to save me time and then I'll be sure that I have the
right project settings. So if I go to color management, all the, all the
settings are there. If I go to master settings, this is 25 FPS
high-definition, not in for K. And all these things
are the same. That's why the project
settings is literally one of the first step which you should be changing when
you're using result. And if you're using Mac, there's also one more thing
you should be changing. You go to DaVinci Resolve
here in the corner, you go to Preferences, and then here you
should just do auto. And I would go here,
Media Storage. So this is like the
export file settings, so I have put it here and all the other
medias from resolve, all the cache folders
and everything. They just go to RD and movies. But you can choose
your own path. You can just put add here and
choose your own path here. And the most important setting, what I'm going to
show you is this one. This, I will just leave
here we go to General. If you're using Mac, you should do use Mac display color profile for our viewers. And also take this
one automatic, automatically tag or
x 7.9 seen direct seven or nine a and yeah, if you want to let the system check for updates,
you can do that. But these two are really important to take if
you're using Mac. Because again, everything
would look really nice and crisp and Da Vinci Resolve
really nice and saturated. And if you don't take this on, as soon as you export the file, the files, the output files will be a little
bit desaturated. It has happened with
me so many times. I spent so many
hours researching. Why is my project
looking so desaturated while it was looking really
pretty and resolved. So yeah, that is
because of this, but if you're using Windows,
don't worry about it. So yeah, that was the
project settings.
4. Overview DaVinci Resolve 18: So after the product settings, I'm going to give
you an overview of Da Vinci Resolve
18 because there's so many things in the software and everything
just looks so intimidating. But if we go step-by-step
really slowly, then everything would
be super clear to you. So let's jump into the computer. So as soon as we're done
saving the project settings, this is how da Vinci
result looks like. So first thing, what
are we gonna do? You see these things
at the bottom. I am just going to
make it full screen. So you see these
things at the bottom. So there is media,
edit, cut, edit, fusion, color,
firelight, and deliver. So what I'm gonna do,
I'm just gonna give you a brief introduction about all the tabs here
so that it's more clear to you that what is
coming in the future sections. The first section where
we're going to go is media. This section, the US generally to import all the
media from the system. And you have all the
media files here, and then you go forward. So by forward, we
go to Edit Page. Edit Page is mainly used to trim all the clips and
then put them together. But sorry, Cut page, but I do that in the edit page, so I do not use the Cut page. I jumped straight to
the edit page because all the cutting and trimming the clips and putting
them together, you can do that in edit page. So why should we go to Cut page? And then after editing, we go to the Fusion tab. In Fusion tab, we do a
little bit of animation, a little bit of
texts tracking is like an After Effects for Adobe. So here you do more
advanced work. Something like Sky
Replacement or something like text behind the object and things like that. So yeah, we would also
discuss fusion as well. So yeah, Wait for it. And the next one is my favorite
section, color grading, which is going to
resolve this famous for, so we're going to go in super
in-depth and color grading. And after you are done
with color grading you here you would have everything
clear about the software. And then we go to far light. So far light is a page where
you sort of edit audio, make your audio little bit
more crisp in far like page. And then we go to Export. Export paid out. So
it looks a little bit intimidating because there's
so many different formats, there's so many
different settings. What you should be knowing to have the best output
from the winter resolve. And we're gonna go through
each tab in detail. So don't worry. So these are all different
tabs and we make use of all different tabs one-by-one to have a complete video
project in the end. So yeah, that was
the introduction to all the tabs and I
hope it's clear. If it's not clear, don't worry. In future section,
we're gonna go in East tab in detail and we will be editing our
entire project. Say it would be super
clear to you by the end. So in the next section, I'm
gonna be teaching you how to import the media from your computer in the
most efficient way.
5. Importing Clips: We are here in Media tab and here I'll show you
how to import clips. So I'm gonna be importing a
lot of raw clips and I'll show you how to import all
the raw clips at once. So I go here. This is where I've saved all the raw files
for this class. So I go to Users, I go to RD, I go to
Documents, I go to current. You don't have to memorize this. And then we go to da Vinci
resolve and then raw clips. So if you have to go
through all these steps, so what you can do in Dmitry
resolved next time is that I keep all my projects
in current projects. So if I'm editing of log, if I'm editing for a client. So I have all these
raw footage of separate projects in my
current project folder. So what I do is I
just right-click and I just do add folders
to Favorites. So as soon as I do it, I have my folder
here so I don't have to go through RD users logo. I am just going to minimize
it so I don't have to go through all that
step to find my files. It's always gonna be there
in their favorite tab. In my favourite type, I
have put current projects, deck stop downloads because a lot of times I download
it from Google Chrome, so I don't have to go through
user downloads, blah, blah. I have just set up Download
folder here in my favorites. So let's go to current project, and then I've also
put documents. So let's go to current
projects here. And I have all the
files here, raw clips. So this is a folder. It has some sub-folders
and some sub sub folders. So what are we going to do? We have to drag and drop
this in DaVinci Resolve. So these are the folders, they are still in the system. They are not in the
winter resolved yet. So if I drag and drop here, what happens is that all the files which was
inside this folder, they have opened up and all
the sub folders are gone. So I organize everything according to how it
makes sense for me, but it's not there. The folder send out here, so I'm just going to go Alt
and Z or Control and Z. And what I would do now is that I will drag
this iraq left flow folder from the computer
to here under master. And now you see what happens
master raw clips here. And all the folders are in
same manner as how I have saved in the computer edit
page. This, this, this. So I hope that makes sense. So you don't have to
drag and drop the main for the main raw folder
of your project here, just drag and drop
under masters. So this is the most
efficient way where you can import the folders
from the computer. And don't forget to save
here and favorites. So that's going to say and
he's just so much time. So I can you can also go
through all the clips here. But what I do is I go to edit page here and then
we start with editing. So let's move on to
the next section.
6. Cut, Trim & Add Music in the timeline: So now we are in
the Edit tab where the magic happens to
Edit tab, in my opinion, is the most important part
of Dove interiors are very useful out of mold
the whole project. And there is a lot of things that you should be
learning in Edit tab. But what I've decided is I would divide Edit tab in three parts. So we will be starting with a really basic things so that
it's really clear to you, the basics are
really clear to you. Then being an ADU, some here
and there advanced things. And if you have any questions while you are learning
this project, comment down below, and I would be really happy
to help you with. So let's go to the Edit tab. So the first thing what
we're going to do is I would be just giving you an
overview of the edit tab. Here. As you can see, we have all the clips here. You can see all the
thumbnails of the clips. And for some of you, the timeline and everything
would look like this. What do you need to do? In my personal choice? I just do the shrink
option here in the corner. So I just shrink it so that
I have more space here. In my timeline, there
is the media pool. So under media folder
is all the rock lifts. Then we have effects that you're going to be using these effects. Then we have edit index. I don't use it. Sound
library we have, which is also not
that important. So if I unclick everything, we also have this much room. As soon as I press media pool, this whole thing comes here. I am just going to shrink it. And let's see. So maybe just, I would just play some clips
and see this clip. If I, if I just
double-click here, it would play here. So as easy as it is. And sometimes what
happens is that if you see here in the corner, I've clicked the inspector. So this is not here and DaVinci
Resolve looks like this. So here what's happening is that one playback would
be the playback from the raw clips and hear the playback would be from
the videos in the timeline. But I really don't
do it that way because I don t think
that's very efficient, especially if you have a
small monitor to work with. So I just go single viewer mode and I go inspectors,
single viewer mode, whatever you play, it's
going to single-player mode, whatever you play
it's going to play. So these are the raw clips. And in my opinion, the most efficient way of just organizing everything is I
just put media pool here. And then my media, I can see here you
can also collapse it. And you can also change the
size of the thumbnails. And you can also just make it a list or make it like that. But I just put it here. And this is 30. You can also zoom in and out. To zoom in and out.
You can also just scroll your mouse and
it's sort of zooms and, but I just put it to fit. And this is the
name of the clip. I have named it stabilization because we're going to stabilize
this clip if obviously. And then here is mixer. Mixer is the audio
mixer, here is metadata. It's going to show you the
information about the clip. So if I click on this
clip here in metadata, it's going to show me
all the information about the eclipse. It's going to fill them
in as two-sixths for the color space is four to
two is 25 frames per second. It's not a fork, a clip. It's 1920 by thousand 80. And if you've got an
inspector, There's all different options. What you can play with to get the best output
and Da Vinci Resolve. And just, there's just so many features what
you can do here. And then we go File here. You again get the information
about the footage. So I will just
leave it to video. And then down here
is the timeline. Let's drag and drop the footage and we'll
see what we can do. So that was the overview
of the edit page. Now what I'm gonna do, I would be just dragging
and dropping the clips in the timeline and show you how to edit them for
dragging and dropping. I have kept all my files
in the basic edit clips, so I would be just opening here. So all the files would
be in the description. You can just click the link and you would get all the files. And I would really
encourage you to have same folder structure so
it's not confusing to you. So what I'm gonna do, I would
be opening this first file, the A33, C7, third daily
ferry ticket inside again. So we just got our
ferry tickets. It's in its day tickers
for €15 per person. You can travel unlimited to all the main places
here around Lake Como. So say e.g. I. Just wanted
this clip until here. So what the long cut way
is that what I'm gonna do, I'm just going to
drag everything. So let's try it again. So I've just clicked here. And I'm just going to drag this whole thing
in the timeline. And I would just make
it a little bit bigger. So I have the audio graph here. And then also one more thing. What I'm going to
do, I would do just clicking here. And you see. Easy. Now, it's like by just by
clicking these options, you can change the
graph of the audio. So I would just increase
the audio graph here. Just by clicking here you
see you can change the view. So I don't like this view. I just keep all my
graph in the middle. I just leave it like that. And you can also change
the view of this bar. So I like to see
the video thumbnail throughout the whole bar so that I know that what
video clip is it? Or you can also just leave, it's solid, but I
just leave it here. And with this audio waveforms, I turn it off. So if you cannot see
the audio waveform, which means that you
have not turn this on. And this is for the subtitles which we're going to
talk to you about later. This is just stacked timeline, so I would be also
showing you later. So here is, so here I have dragged and dropped this
clip in the timeline. And here there are
lots of options which you can see just
above the timeline. I'm going to talk
to you about that as I go with the editing. So let's watch this clip again. Our daily fairy
typically start again. So we just got our ferry
tickets isn't as we can. So as we can see from the
audio wave form is that this part was where I
said, Can you start again? And here the actual
video starts. So I just want this part
to be in the main video. So what I'm gonna do, I would just select this. And then I would go
here to the blade tool. This is the blade tool and
the shortcut here is C. So I would go here, I would just cut this, and then I would also
just cut the bottom. So now if I just come here, you can see that there
is a little cut. And then what I'm gonna do, I'm gonna go to this arrow here. And then now it's arrow. If I click on the blade, blade as soon as
you go on the clip. So I'll go back to the arrow, select, I'll select these two. And then I'll just press
Delete or Backspace. So yeah, and then
what I'm gonna do, I'm just going to
drag this whole filed to the beginning
of the timeline. So yeah. So we just
got our ferry tickets. It's in Vegas for
€15 per person. You can travel unlimited to all the main places
here around Lake Como. It's just not going to, it's just not going to. And from the audio
wave forms I can see that I just want the
clip until here, it's my personal choice. So just for the
sake of this class, I will just cut it here. So I'm just gonna go here to the blade tool
again, just cut it. Also got the audio and then I just make sure that
the cut is there. And then I go here
to the cursor so that my cursor has
switched back from the blade that I select these
two and I press delete by backspace or delete
depends on your system. So I deleted that. So now we learned how to trim the unwanted
parts from a clip. But in my opinion, it's a
little bit of slow process. You have to go here. Then you go cut the clay, then you go here, selected
this, that blah, blah. It's a little bit
tedious process. And how we can make this process faster is by using
shortcut. I'll show you. Shortcuts are something which
is going to save your life and it would be a little bit intimidating
in the beginning. But the more you
practice on results, there would be a
point where you don't even have to look at
the keyboard and you're just editing like
crazy enough flow to get access to the shortcuts. What I'm gonna do, I go here, Da Vinci Resolve
keyboard customization. So of course, if you're using
results for the first time, your customization would be completely different than mine. So let's go here and show you. So for me, I just use
very few shortcuts. And those few shortcuts
are lifesaver for me. So I'm just going to discuss those shortcuts just in brief. And then I'm also
going to give you a preset what you can
import in your computer. So me and you, we both have the same shortcuts. So as we are editing
throughout this whole project, I would be just telling you, okay, So now we're pressing I, now we're pressing 0 to have this command. You
know what I mean? So yeah, if you just
import my own preset, you and me will have
the same shortcut and I would tell you how to
import those shortcuts. But the most important
shortcut here, if you go click on C, which was the cut button, see, if I click here, it
is Blade Edit Mode. In your computer it might
be completely different. V was the normal edit mode. So as soon as the press V, the cursor comes up. And then a here is
zoom out, zoom in. So this is like zoom out and
zooming in the timeline. And Q trim start w trim. And I know these things
wouldn't make sense, but I would really
encourage you to import my shortcuts so that as we're
going through the class, the both are on the same page. So at how to import my shortcuts here is that I would just
go and export this preset. I would export this
one. Davinci Resolve. And I would go to tech startup and I would
just save it here. And now what I'm gonna do, and I would also leave this preset in the description below. So what you should
do be doing is that as soon as you open
keyword customization, you go here, import preset. You go to deck Dexter, Da Vinci, resolve dot TXT, open, enter name,
mapping preset. I already have this. I'm just going to keep
it to a different name. So now we both have
the same preset. So now you have all the preset. Let's jump back in the timeline and now
I'll show you how much faster you can do everything what we did and it took Asia's. So I'm just going to close it
and I will just delete it. So now if you have to
delete your press X, That's going to
delete everything. And now if I had
the raw file here, so if I play here, I've just clicked here. So now we have nothing
on the timeline. Let's listen to
this audio again. Daily fairy typically
start again. So we just got our
ferry tickets. So from here, so this
is my girlfriend. From here. I'm just
going to start like this because I know that she has started
talking from here. So we just got our
ferry tickets. It's in Vegas. You see what I did here? Say? If I know that this
is the input point, what I have to use
for this project. I'm just going to press. So as soon as you press it as a little dot here and
this part is unselected. Now if I just drag, because it's been a timeline day tickers for €15 per person. You can travel unlimited to all the main places
here around Lake Como. And I just need a clip here. So to put an end point, I pressed, I end. If I went to press an out point, what do I press? You can set right? So now
from this entire row clip, we just have this
section selected. Yeah. Now what,
now what do we do? The move this timeline bar here. We go to this raw clip. It is still selected. If I want the audio and video to be in the timeline together, I'm just going to
drag this from here. Or if I just want the video, then as soon as you go
on this rock lip here, you have this video option. So you can either drag the video or if you just
want to drag the audio, there is a waveform option. You can just get the
audio from this raw file. So there are a lot
of cases where sometimes we just need the video clip or we just
need the audio clip. So just by clicking on
either of these two, you can either drag the video or the audio in the timeline, but in this case we want both. So just so how am
I deleting this? I'm just pressing Command
Z. I'm just going to drag this clip here
because I need both. And you see this thing, the link there is like a little link sign here because these two things are
from the same clip. That's why there's a link here. So if I click here link section. And now if I move this, now if I just click
on the video bar, it's going to also
move the audio. But if I unlink things, it's just going to
move the video file, not the audio, because they were the part of the same clip. Here, it would say that my audio is lagging -4.12 s behind. And if I keep them together, you see as soon as I drag, it says here how much the audio or the video is
lagging or their forward. And if I just go here,
now they're together. So that's also a
really easy way to just see if by mistake, if you have moved your audio or the video, then you know that, then it's going to
show you the red sign that this is how much the audio or the video have moved if they're
from the same file. And you can also link
different clips together. So say e.g. this video clip and this audio clip was
from different files. You could also link them. So you go here, then
you go right-click, and then you go Link Clips. Yeah. So because the clips were
linked, now they're unlinked. So if I just go here
and you can link them, so now they're together. But if I unlink them, now, it's not going to
show that red mark. I hope these things make sense because these little things, they're going to save
you so much time and sometimes they also save so much work because if I'm editing
like a really big project, and sometimes by mistake, I move like an audio file
a little bit this way, or a video of a
little bit that way, then I have to
manually sync them. But if I have the
seconds mark there, then I know exactly how
many seconds I have to move the audio or the
video left or right. So I will be linking them again. So that's how you drag and
drop by the shortcut method. And now rebel unlimited through all the main places
here around Lake Como. So now what I want to do is
that as soon as I'm done. Importing the talking shot, I would be just putting
some B-roll clips. So if I see this clip, if I just want from here, and then I keep playing
slow motion clip. This clip is already in
slow motion because I have filmed this in S and Q
mode in my Sony camera. But in the coming sections, I would also show
you how you can convert a normal
clip in slow motion. So just bear with me. From this clip, there's no audio because it is filmed
in SYM-Q mode. So you can see there's
no audio here. If I zoom in. So from the shortcuts, you can also zoom in and out of the timeline from the shortcuts
that you have imported. Say if you press S, you
can zoom in the timeline. If you press it, you can zoom out
of the timeline. So I will just zoom
in and I would see that there is no wave forms. Unlike There's no wave forms, like how we had in
the first clip. So then we can also
just delete the audio because it's just taking
room in my timeline, so I'll just press X. And then what happens is that in the beginning I decided to
import this whole clip. But now I've changed
my mind and I just want just this clip from here. Yeah. So now what I would do, you can either go and press C code with the plate
to then press V, select this, and then
press X to delete yet. But there's also a
shortcut for that. So I'm just going to
go Command Z, undo. If I want my clips to
be citing from here. And if I want to trim
this part, what do I do? I press Q. Q was the
shortcut called trim start. Soon as I press Q is
just going to trim everything on the left
side of the timeline. And if I go here, and if I don't want this part, then what I'm gonna do,
I'm just going to press W. And by pressing
W, magic happens. So it has just deleted the
right side of this clip. And now if I want
to drag this here, I can also do something else. So as soon as I
click in this gap, there is like a
light gray bar here. And I press X. This X is also acting
as a delete button, and x is also acting
as a ripple delete. So what ripple delete
does is that it's sort of closes the gap
between the footage, so I'll just press X and then
it sort of ripple deletes. Or there is one
more shortcut way where you don't even have
to press ripple delete. So I'm just going to show you. So I'm just going to
undo, undo, undo. I would delete the audio,
you don't need it. So now what I would do, you can see that here. My cursor is in the selection mode
because we have pressed. But there's also one more mode. If you press B, you can see that this red
thing moved here. And this is called
Trim Edit Mode. So in this mode, what
happens is that you can see that my cursor change from Arrow and I press
V again to this thing, that is parallel looking thing. What's going to happen is that
you would be able to trim this part and my clip would
also move close to here. So I'm just going to press Q. You see? So before
what we're doing is we're just going to trim with q and then we
do ripple delete. But if you are in
Trim Edit Mode, then you can just
press one button and the clip would automatically move to the clip on the left. And same thing goes
for this side. So I'll show you. So if I want to download this
clip also in the timeline, I'll just start from here. So I'll just set up input point. I'll press play. And I just want the
clip until here. I'm just going to drag the video because there's no
audio in this file. So I would be dragging here. Yep. Let's go back to
the previous clip. So in this clip, if I
don't want this section, and if I am in the Trim Edit
Mode because I pressed b, now if I press W, which is the trim end, it's just going to trim
things on the right. And also it would move
the clip what was behind that to what's left. So imagine it just going
to save you so much time. And if I go here again and say, if I want From this part, I don't want this part. I am still in the Trim Edit Mode because you can see
these parallel lines. I would press Q, these
clips move here. How easy it is to
destroy him and cut by just using
these few shortcuts. And I will just press Command
and S just to save it. So yeah, this is how you can import the files
in the timeline. And then you can just trim them by just pressing two
or three buttons. Now what I'm gonna do, I'm just looking to import
more clips in the timeline. So here I'm talking again. So let's see. So guys 2 min of walking. So guys 2 min of
walking into a village. And we already found
a nice photo spot, video tripod or
camera on the bridge. You have this whole village
in the background, so-called. But if you come in the morning, then only can get
nice views because I can imagine this place in the afternoon or
even around like ten or 11 every super-fast. So what I want to do so
guys 2 min of walking. So guys 2 min of walk it. So I would be starting here because I did some
mistake in the beginning. But guys, 2 min of walk in village and we already working, so that's 2 min of walking. So guys, 2 min, I'm not sure because I don't
see the audio graphs. It's really hard for me to track where I have
started talking. And that talking is right. So I'm just going
to drag from here. I just press I and
I'll just press 0, and I'm just going to drag
this file in the timeline. So guys, 2 min of walk in. You see, I'm just
zooming in and out by pressing S and a game. So guys, 2 min, 2 min of walk in minutes, 2 min of walking. So yeah, I want this
clip from here. So what I'm gonna do, I'm
still in the Trim Edit Mode. You can see the parallel lines, so I'll just press
Q, easy peasy. And let's see where do I crop, but leave your tripod or
camera on the bridge. You have this whole
village in the background. So cool. But as soon
as I say so cool, then I want to end
this clip, so-called. But you can already check from the audio wave forms
where you have to cut. So if I want to cut here, I'm just going to press W. And I also want to do
one more thing here. So as you can see, all these clips are on
this video one line, and all these audio clips
are on the audio one line. So what I want to do, I also want to put
a clip on top of this clip where I'm saying
that it's beautiful. Leave your tripod or camera
on the bridge village. And we already found
a nice photo spot. Video tripod or
camera on the bridge. You have this whole
village in the background. So when I see you have this whole village
in the background, I want to put a clip
on top of this clip. I'm just gonna do it so
it makes more sense. So I want to put this clip here. So there's also a slow motion Clippy that audio
because I felt minus MQ. So maybe I just want this
clip from here play. And then I press 0 output point. And then I'm just going
to drag this here. So I still have this thing on. So now what, what's going to happen is that I still
have this thing on, which is the chromatic mode. So now if I want this
clip to start from here, so now if I press Q, it's also going to cut
the bottom part here. So now what we have to do is that we should be going
back to the selection mode. So I would just press V, I'm, I've gone back to
the selection mode. I press on this clip
and then I press Q. So it's going to
depress Q. It's not going to move forward. It's going to be
trimming at its place, unlike how we were doing before. So you don't get
confused between the selection mode and
the Trim Edit Mode, because Trim Edit Mode
is to cut the clip in-between and move the
entire clip to cover the gap. But I just zoom it
in the timeline. You have this whole
village in the background. And I just want this
clip until here. So I'm just going
to press W because we are in the selection mode. So you can see what's
happening here is that there are two
clips on top of each other and whatever clip
which is on the top, the software would
be displaying that. So if I had, if I had put this
clip on the top, the clip underneath
would never be visible. So whatever is in the tub, Da Vinci would be showing that. So yeah, I'll just
leave it here. I ground so-called. So that was the basic
trimming of the cliffs and also just basic way of putting
all these clips together. So if I'm doing like
a YouTube video, I select in and out
points and I just drag and drop them
on the timeline. And then I'm using the
selection view mode or the Trim Edit Mode just
to sort of put them together and keep the
best part from the video. This is how you drag and
drop in the timeline. So you also might be observing if you're wearing headphones, is that if I already found
a nice photos layer, this footage, the audio is just coming from
the left-hand side. That is because
every time when I'm recording or filming of log, I keep a setting in my mic that the audio just records from
the left-hand side. And to make it correct. What do we do? That's the case for both
of these audio files. So what I'm gonna do, I go here, I press right-click and
go to clip attributes. I got the audio and then hear the audio is coming
from channel one, channel two, There's nothing. I would also link the
audio here to channel one. And by doing that video tripod or audio from both the files. And if I want to increase or decrease the
volume of the audio, if I just zoom in by pressing S, as I'm dragging
on the audio bar, I have my cursor turns
into something like this and then I can just
increase or reduce the volume. So you see 7.50 dB, ten dB decibels is
like a unit of sound. So of course, the higher it is, the hardest sound basic
us for 15 years too high. So I'm just going to leave
it to maybe 2.50 per person. You can be a little bit louder. Yeah. Three points. Yeah. Let's do five or unlimited to all the main places
here around Lake Como. Per person you can
travel unlimited to all the main places
here around Lake Como. And if I had to do
the same thing here, I am just going to
increase it to five. So you have to remember which decibels you have
put this volume two. So now this is how
our clips look. So in the first clip
there is some audio. We're talking. Second clip, no audio clip know or you're in the fourth
clip, there's audio. Again. What I want to do, I want to put a music
track in this entire clip. And I want this
music track to be a little bit of sort of
running in the background. And then hear the
music track becomes a little bit louder
because there's no voice. And then as soon
as they come hear, the music track becomes a
little bit lower again. So what are we going to do? If you see here in the folder, I go to music and this is the audio track.
What are we going to use? What I would be doing
in audio as well? You can do the same method in, press in and out point and
then drag it on the timeline. So what I would be doing, maybe I need the clip from here, so I'm just going
to press endpoint. And then I know how, how is it going to play? And drag the cursor and
maybe plus 0 point here. If you just drag it. There's no audio or video option because this is
just an audio file. I'm just going to drag
and drop it here. And I'm also just going to bring this a little bit bigger so
that I see these graphs. Well. So now you see my
audio to his music. Audio one has all
the voices here. There's also get U2 with u1, v2 hat this file. And if you can also just add
anything on video three, video for video five. So as you add more videos
on top of each other, this thing in the corner, they increase it in a
break project file. We do that sometimes. So you see what I want to do? You remember here the
BTE picks up around. I also think that the audio is a little bit too loud
as compared to, because it's in its basic as for fifth as compared to
our talking voice. So I'm just going to reduce the zoom it in the
timeline by pressing S and reduce the
volume maybe -6.12 db. And I can already see here that the beats
sort of picks up here. So I'm just going to drag
this audio file here. Oh, I think that is the
starting point of this audio. So that's why I couldn't
drag it further. You see the starting
point at this audio. And now what I'm gonna do, I'm just going to make
it a little bit bigger. And now what I'm gonna do
is as soon as you go here, if I drag the whole thing down, the audio of the entire
thing goes down. But I just want the audio to be running
in the background here, a little bit louder
in this section and running in the
background again here. So what I would be doing, I would just make the
audio go until here. And then as you can see, This, my cursor is changing
here what I would be doing. I'm going to put
some key points. Here. I would be
pressing Alt or Option. So you see there's this red dot. And I'm going to be putting
all the an option again here. Red dot again. Yeah. Now, by selecting this red dot, you can increase the volume of everything after this part. So the more gap you
leave, say e.g. there's this much
gap in the red dot. It's going to take
from here to here to get your volume until 7.14 db. But if I want the Euros, but if I want the audio to go
up drastically really fast, I'm going to reduce this gap. But I wanted to kind of
fade in a little bit. Don't be like not
to be too harsh. So here my audio
is 17 -17 db here. I'm just going to leave it to -8.33 and see how it sounds. So let's hear it. So we just got our ferry tickets and they take us
for €15 per bird, just going to drag it a little. Firstly, you can
travel unlimited to all the main places
here around Lake Como. So this is also the mistake. A lot of even
professionals they do is that sometimes if
someone is talking, they still put this audio, the background audio
a little bit louder, which can be really annoying. So I think that it is at
a good spot, probably. So I'm just going
to hear it again. So we just got our favorite
places here around to all the main hear
the audio is clear. Here the voice is clear. The audio is also clear
in the background. And hear the audio sort of
pixel here around Lake Como. So here, if you observe it, I'm just zooming
in the timeline. There is a beat here and
then there's a bit here. So you really don't have
to rely on your listening. You can just see all the beats. And it can be nice to
cut the video on a beat. So let's hear it again in
place Around Lake Como. So I also want this
got to be here. So what I do, I'm just going to move my timeline cursor in
the beginning of this beat. And what I do, the
easiest thing ever, I'm just going to drag this clip here and
done so it's going to delete the end part
of this clip and now we have a cut on the beat. So let's see, let's
see it again. I think it's a little bit, I think this is the actual beat. So let's go again
and then I can also just increase this
clip until here. Now it looks nice. And now what I want
to do at this speed, I want to lower this volume. So just going to press
Alt or Option again, we have a red dot,
maybe until here. So maybe the red dot here. So the audio fades in
a little bit slower. So I'm just going to put
it to -20 db or maybe 21. And then what I would be doing, I am just going to drag, select all these things. And I'm just going
to drag it here. So let's see how it looks. 2 min of walk in religion, we already got a
nice photo spot, 2 min of walk-ins village, and we already found
a nice photo spot, video tripod or
camera on the bridge. We have this whole village in
the background, so-called. See how cool it looks. And now what I want to do as
I am ending that clip here, I also want the audio to
fade out a little bit. So there's one way
is that you have two points by pressing Alt and you can let it
go down, down, down. But we do it a little bit
different on do that. So as you move until
the end of the clip, you see this white thing here. So what I'm gonna do, I'm just going to hold it, click it, drag it until here like this. So what this would be
doing is this would let the audio sort of fade out. So let's see. Leave your tripod or
camera on the bridge. You have this whole
village in the background. So cool. So when the
audio fades out, you don't even realize. So this is a really cool thing. What result has to offer is that you can choose when
the audio fades out. And you can also
do it like this. So audio fades out in the end. Or you can also do it like this. So audio fades out
already in the beginning. So let's try this
walk-ins village and we already done
a nice photo spot, video tripod or
camera on the bridge. You have this whole
village in the background. So-called audio fades out
and we don't even realize, so this thing is
these little fast. Soon as it go here, you
can just drag and drop. You can just drag these
things to change the volume and you decide when the
audio fades out the desert. Like these are really cool
things about resolving that. All these things are just
there on the timeline. And it's like, it's like a play. That's a really cool thing about Resolve is that all
these things are just on the timeline and
you just have to know what everything does. Once you're done
learning resolved. There is endless
possibilities for creativity and the same fade out we can also do for video. So if I go here, there'll video, we
can also fade it out. Background, so-called say if you want like a shorter
fade out, so-called. Yeah. So these are a few little things to make your footage
look more amazing. So now we added music, we sort of dragged and
dropped everything. I also showed a few shortcuts
for you to trim that, to trim the clips using selection mode and
the Trim Edit Mode. So now, as I told before, is that I also want to show you how to convert a normal pace
video in a slow motion. So here we go in this
folder called 50th peers. The reason why I've
written in 50 years is because this footage was
shot and 50 appears. The only time footage
can look nice in slow motion is if they are recorded in
higher frame rates. If you want to know
more about it, you can watch my class
about camera basics there. I've taught everything
about frame rates, making slow motion, making fast-paced video
and this and that. So I would just, let's just see this clip. It's like a gourd Dora. It's like a temple
for sick people, sick of the religion in India. And it's a footage in Gregoire. Walk towards me a little bit. So you see this footage looks in a normal pace and
how do we know it's 50 frames per second
is the Click here, so the video is selected. Then we go to File here. And in the file,
you can see here the other footage was
25 frames per second, and this is 50
frames per second. So if there's one way to do
it in slow motion is say, if I want this part
to be in slow motion, I go in 0.0 point. I don't want audio
in the background. I'm just going to
drag the video. There's still a
normal pace video. What I'm gonna do, I'm gonna
right-click on this one. And I'm going to go
change clip speed. And then speed. I would
reduce it down to 50%. Because this is in a
50 frames per second. It can look nice if it comes
back down to 25 frames. So let's go here. Let's increase the clip length. This looks nice,
but there's also, this is not the most optimum way to make afforded slow motion. I'm going to show you, so
I'm just going to delete it. Press X, go to the clip here, right-click on the clip, go to clip attributes here. And then I go to video. And here you see a
video frame rate at 50 frames per second. You can turn to to
242-052-34974976. So if in the beginning, if I have chosen the frame
rate of the project to be 24, then I would have selected 24, but we have chosen the
frame rate to be 25. So I'm going to press
25 frames per seconds. So now I'll show you the magic. So I'm just going to
press the raw clip here. So you see now the raw clip is already playing in slow motion. So you don't have to go to the timeline and then
reduce the speed. Here, you are sure the video is playing it
25 frames per second. And I'm going to,
I'm just going to press in point here
because I want this video to hear
and out point here. So I'm just going
to drag this here. And same thing we can
do for the next clip. So every time, even before
selecting any point in a, in a higher frame rate
video, what do you do? Clip attributes,
video frame rates to 24 or 25 depending on what have you chosen as
the timeline Setting. So I will just drag and
drop the video here so you see what we did was went to clip attributes and change the frame
rate of the video. So you see, now when I
click on this video here, now it, you see it's
25 frames per second. So we did like in a proper way, the changing of speed. So this has really good, That is how you should do it. And if I reduce a 25 frames per second
video into slow motion, so say if I drag
this video file. So also one more easy
shortcut is that if I want justice video file
to be here, what do I do? Press this video file, press Alt or Option, go here, and then
just drag it here. So you literally have the
duplicate of this thing here. Same thing we can
also do for audio. Or if you want, we can also
do audio and video together, but this was a 25 frames
per second video. And if I reduce the speed
of this thing here, Let's say 50%, you have
to see how it looks. You see there's how much
blur is in the video now.
7. Video Transitions and Text Animation: So I hope you learned some basic stuff in
the Edit tab Part one. So now we're gonna be
doing a little bit of advanced stuff in
Edit tab part two. So let's jump into a system and I'll show you
some really cool stuff. In the last section, we
did this basic edit. And everything we did was just dragging and dropping
in the timeline. We didn't touch anything
from this side. Yeah. So there's also
want something really important in Dmitry result
is the Inspector tab. So what I'm gonna do Avi, we're in file
because we wanted to see what type of file is, the frame rates and all
that sort of stuff. But we're gonna
go to video here. So let's choose a clip. So if I want this
clip again here, as I told before,
what I'm gonna do, I'm gonna press Alt, click on the clip. And I have duplicate
clip of this one. If I want this clip
to be a little bit longer than I have it here. So it's just a normal
slow motion clip and width without any audio. So then I'm going to now I'm
gonna be showing you from this clip what we can do in the Inspector tab,
the transformation. These things are really
straightforward. Here. Zoom, you can
zoom in or out. If I zoom out, there's
this black bar here. So if I just type one here, sort of zooms back
to normal position. You can change the position
of the median x-axis, y-axis. Just pressing undo
rotation angle. So this is something
what we need now. I'm just going to scroll
back from the mouse, so I just would see
the whole image. And now if you see here, the video looks a
little bit tilted, the horizon. It's like this. You can also hold this and
change the rotation angle, but it's, it's, it
just goes like crazy. So what I'm gonna
do, I'm just going to press these numbers and just drag my mouse
now the other way. So I think here
it looks neutral. That rotation angle. What do you guys think? Yeah. So I have rotated this clip, but the problem is here, there's some black bars. So what I'm gonna do to remove
that, I have to zoom in. So I would say zoom
in until here. Yeah. So what did they
do? Well, we did some rotation and zoomed in to avoid the black
linings on the side. So that's how rotation works. And then anchor point is
just the anchor point, like the central
point of the video. You don't really need to change anything with that sleeve
anchor point to zero, then pitch and yaw. If you do pitch, the video goes like this. If you do, your video
goes sideways like this. I would show you when can we use this later in this section? Flip up. Cough course. You can flip the direction. If I flip it, you see the rotation angle
sort of becomes more. But yeah, this is how you can
flip any image like that. I'm just going to
press Control Z and then you can
horizontal flip as well. And then smart framing is
something as if the software would decide what
frame is more optimum. So you see my subject
is in the center. That's why the software have moved to subject to the center. But if you choose a
reference point Here, let's say I'm just going to put the reference point
of this object here. Let's do re-frame and see
what the software does. So it has, just put it here. Let's, I'll put the
reference frame here. And let's see. So you see, now, wherever I put, that thing becomes
in the center. That is just by moving the
position left hand, right. So I don't really use it. But it can be handy
if you are filming any set of real from
this big video. So I don't want this, I would just sort of zoom in. And cropping. Cropping is really
important in two ways. So say e.g. I. Need say this
a video on top of this one. But I want this video to be in the corner a little bit cropped. So what I would be doing, I'm just zooming in,
in the timeline. I sort of zoom this out. Say put this video here. Here. Yeah, just in the corner. Now with cropping because
I've selected this video, I am maybe I cropped
something from the right. Maybe crop also
from the left here. And then I can also
change the position. So you can use cropping
in 100 different ways. So maybe I'll just put these both the videos together
and see how it looks. So cropping is not
just for this huge you can just use
cropping for anything. Yeah. So that was cropping also
with Inspector page. You'll have done cropping if
changed all these values. But if you want to reset
it, what do you do? If you want to just reset
the crop left, you go here. And if you want to just
reset crop right here, yeah. But if you want to
just change this, reset the whole crop in, you just press here on the top. And if I want to change. The whole transformation,
what I did here, I can go here one
by one then here, or I can just press here
so it's going to reset everything what we
did in this section. You see, I'm just going to press Control Z or I would
just delete it. That was cropping
for use or anything. But whatever change you do, you can always just reset
it with these icons. Dynamic Zoom. The software does it by itself. It just looks a
little bit weird, like look at it. The software did the Zoom by itself nights kind
of zooming out. A little bit weird. I don't use it. Composite. I
would teach you this later. Stabilization how to
stabilize a footage. This footage looks a little
bit more stabilized. It yeah, it's it's a
good stabilize footage. But I have a
stabilization example. Good example. The audio would be
really loud in this one, so I'm not going to import the audio
because that's not important to learn
stabilization. So if you see here, I'm just going to make it fit so that I have enough
room to work with. I can also drag this down so I can see this footage
a little bit more. So I'm going to click
on stabilization. And then versus here. I can stabilize the footage to just for stabilization
and does a really good job. So you see how much
it cropped in. So if I have to
deselect stabilization, this toggle here,
stabilization off. Now it's on. So let's see what happens. It is stabilized because if
you see the non stabilized, when you see how much
shake was there. But there's also a
few different ways also you can stabilize. This was a perspective. If you go to similarity, the software takes him to reference some other
things to stabilize. But in this case, let's say now it's sort of
doing all the work and stuff. But in some case,
similarity works. Then same. You can also
choose translation. But in this case
I'm just going to press stabilized like this. And cropping ratio, as you can
see that it cropped a lot. So if we reduce down the cropping ratio
and stabilize again, then we see what happens. Cc, it's not that stabilized, but if I just do
cropping ratio here and stabilize again better. And also the strength
of stabilization. If I just maybe go here
and then stabilize again, the crop is a little bit less. It's not doing anything if I just maybe press
it here and see. You can just play with how
much stabilization is needed. But what I do, I just use the
default option from the DaVinci Resolve
because they know the best which what is needed for
which footage to stabilize. It is a usable footage
because if you see before, you is just garbage. And now if I just toggle it on, stabilized Lens Correction,
lens correction wouldn't be in the free version, so I'm not going
to talk about it. So these are a few
things what you can change in the Inspector tab. So all these things can give you some limitless options to
do some video editing. And I told that I would be
also showing you, compose it. I'll show you now. So
let's jump back here. Yeah. I just need to
show you something cool. Like leak. So this is like a
light leak effect. Let's, let me do it. It's gonna make sense. So I'll press endpoint here. So I'm just going
to press here and directors drag the video. Now if you see here, I just drag the
video, not the audio. So I just need this
clip onto here. Yeah. So now if I
play that clip, See what happens is
here around Lake Como. So you see this clickers literally overlaying
on top of these two. So this was the normal
composite mode. If I do add. Now, if I play it,
see what happens. They call it. It looks good, but
it's not the best. Where did it go? Composite add or
color Color Burn. So these are just
different types of how you can manipulate the tougher it and let the
bottom footage be visible. But in this case, I just want the fire to be going like this. So what I would be doing
is I go to screen. The screen sort of gets
rid of all the blacks, what we had here. And it would just let the
brighter part to be visible. So let's see again. Places here around Lake Como. And I can also
change the opacity if you think that it's
a little bit harder. So if I just go here so you see, it's almost vanishing anyway, so I would just leave it sit here and see here
around Lake Como. So yeah, that's what
compose it does. So it would literally
just change the way how the top video would look
over the bottom videos. Or if I just go subtract, it's going to look like garbage. If I go soft light, it
looks a little bit, it looks a little bit better. But you see here, all the blacks are also
sort of still there. Like opacity hundred, you see all the blacks are still there. But in this case,
screen would work best because all the blacks are
going just a bright area. Is there an I just need
the brighter areas are the main places here
around Lake Como. So that was it from
the inspector section. But we're going to come back
to inspect our section. In the next section, we will be learning
about keyframing. But before learning that, I have some other things
to show you on this side. So inspector section done. Let's come here to Effects. So now we have dragged all
the photos this and that. There are a lot of
really cool effects in DaVinci Resolve, which you are, which everybody should
know because back in the day people would
buy presets pack, effects pack online, and
then they drag and drop. Sometimes it works,
sometimes it wouldn't. But now there's already
so many effects in Da Vinci Resolve inbuilt. So first, we're going
to go to Video Effects. So for Video Effects to work, I'm just going to keep
my cursor in the middle. This is just a
video transitions. So how V01, the transition from first
clip, the second clip. Easy. If I just drag and drop here, is going to come in
between the videos. And I can also change the
duration of the effect and see if I can also
delete it to deselect the transition period
here and press X. Same blur dissolve. So you can just play
with everything. It's just so much yeah, you can just play
with everything. You just so much fun
and it literally takes not even 1 s. There's all these different
ways you can do the transition from first
clip to the second clip. Just Melians away, look at it. Live as getting
stuck a little bit. So using these transitions would also be a little bit
taxing on the system. And I'm also doing screen
record at the same time. So that's why it's a
little bit taxing, but you have to be
mindful that it could be taxing and burn away, look like just by dragging
and dropping this cool. How cool is that? So yeah, that was video
transition or your transition. We're going to come back later. Titles and text. So simple titles, like it's literally just drag
and drop all these titles. What I'm going to show
you is something basic. You can just drag and drop here. Hi, you know what? I'm just
going to mute this audio. It's a little bit annoying. So how do you mute it? Just press here. So I'm just
going to mute this track. So you track. So if I mute this track, everything on audio two would be muted if you're
making a big project. So basic title, I can
just write maybe text. Here. You can change
all the fonts and everything color,
font, type, size. Tracking is just a gap
between the texts. Line spacing. If we text texts to if you
want to change line spacing, you can change the line
spacing between the text. If all the font-style, all these things you can change. It can change their positions, zoom, rotation and everything. You can just do everything
with the text here by just one-click and stroke is you can increase that,
reduce the stroke. I just leave it to zero. I use this thing a lot. Drop, shadow. Drop shadow. If
like now the shadow is literally behind the
text so you cannot see it. But if I bring the
shadow here you see. And you can also change
the opacity of the shadow. You can also change the blur of the shadow now it's
like super blur. Now it's super harsh. So these things like
they're just so easy, they can also change the
width of the background. So if I just go here, and then I can just go here so you can just
set up a background. You could also change the
position of this background, change the color
of the background, change the opacity
of the background. So yeah, there's like tons
of options discussed. You can just customize
everything with the texts. So I will just delete it. I'm just going to show you
something also really cool. So these are some. These are some fancy tech. So let's see how it looks. You see if you want to say
zero point something out. These are all inbuilt and
resolve like how cool is it? Like? I go to settings and
I can just move this here. I can just zoom in and out. So you've got a title here. You can change all the texts and if you go to setting here, you can just change everything. So let's check it out. I would delete it. There's so many like lower third or just different title
blocks and look at it. These are all crazy
customizable, so you go to Title so you can
just change all the text, all the sizes, settings. You can do everything
in this one. You can do a lot of things
with this title here. There's already so
many cool stuff like look at this video tripod
or camera on the bridge. We have this whole village
in the background. Back in the day, you have to buy these things online and now
it's already in result. These are things you
can do with the texts. Now we go to generators. Generators. Here. Generators, as the
name suggests, you can generate these
textures on your timeline. You see, I'll give
you a good example. So you can just generate
all these things. Maybe put text on this one. So what I want would want to do, maybe I want this
clip or maybe not. Maybe I want this clip. I'm just going to bring
here on top of this. And if I zoom this out, so if I zoom this out, I can see the bottom clip. Yeah. And I can also
do some drop shadow. So now if I go drop
shadow in Open Effects, and then I go to effects here to reduce the
shadow strength. So you see everything just comes together and meet the
whole thing. Look cool. So now we go back to generator. I want to show you some
other things as well. So you have gray scale, you have these effects. I usually use solid
color for my projects. A solid color. I'll click here. I go to Inspector and then I
can change the color type. You can change to here, or you can have
different selector. You can also put
the color number if you know the color number. Just experimental with
this soft produced, like so many things to learn, you can choose any color here. It is just insane how many
things are packed into software and how easily
available it is everywhere. If you want like
a paper texture. Just drag and drop here. How cool is that? You can also maybe
zoom this out. Put this clip here, and maybe also put
this clip here, and then maybe zoom this
out and put this clip here. How cool is that? So now you can put like
forklifts in one picture. And it maybe if you
want to put text here, there's like limitless
options with these effects. Then you go to Effects
after generators. And now we can do this
by Nicholas effect. You can do this cctv effects, like in some video editing. According to the project, you might need these effects. So say, if I put it here
Fi effect on this thing. So you see how cool it looks. They don't have to do any work. Just drag and drop color border. So if you want a border, Let's go in this one. So if you want a
border like this, or if you want a
glitch like this, if you want to draw an overlay, like these are all
these crazy overlays which is just
available in Resolve. If you want night vision, if you want a video call effect, if you want a video
camera effect is just there and resolve
how cool is that? Nothing really fancy.
Just drag and drop. And as soon as you say if I
just drag and drop the cctv. So these were from
the Effects panel. Then I go to the Effects panel. Then you can also
change the text. Write texts. Maybe I just write my name, ID, or I don't know, just
whatever you want to put. And you can also change
this timeline if I just press just
something random. So I would just
delete this effect. To delete this. I go here. Delete it. Yeah. So we're back
to our normal footage and then I go to Open Effects. So here you can do blur if you want to
do blur of this video. So I just go drag and drop here. And then we go to Effects, go to Video Effects. And then you can change
the blur strength, how much blur you want. So anything you drag
and drop from here, then you go to
effects and change the settings from whatever
you have dragged and dropped. So I will delete this. Zoom blur. We need zoom blur. You will be needing zoom blur
in the upcoming sections. So watch out for
that radial blur. Just play around with this guys. There's so many things, a lot of things
that would be not available in the
Resolve free version, but there's also tons of things available in the free
version as well. So these were a
few other effects. So just play around with these
effects guys and you would learn a lot and
everything you can just change in the
effects section here. So here what we have
is the audio effects. So we would be using all these effects when I'll be teaching you about
the firelight page. Because this page is dedicated
to enhance the audio, change the audio settings, Just improve the quality. Get rid of some
errors and stuff. Totally getting in detail. Then I'm using far light effect, but far light tab. But here I'm going to
show you also something cool is hang on. I would be dragging
and dropping. So I have this clip where I have to do some noise reduction. Because if you hear it, I would just do Philip
attributes audio, put it through audio channel
one so that we have audio on both the channels that you don't have to do
on your personal clip, but you have to do
on the clip from this project if you are
using my project files, press Okay, and get ready
for a large nights. So if you have this map, you see all kinds of hiking
thrilled with numbers. And you can choose
which number to get up. You see there's a
river in the back-end. Because of that, the mic is also picking a lot of
noise from the river. So what do we wanna do? We wanna do some
noise reduction. So if we go to effects, the just press noise reduction, make sure your audio
effects is selected. That's how you would see
the noise reduction option. So what I'm gonna do
just drag and drop here. So here what they do, the option is default if I
just play, hear the audio. So if you have this map, you see the volume is not gone from the river in the back. If I go the hiss, then the software would reduce all the audio of this frequency. I can thrilled with numbers. You can choose which
number the noise is gone, but it also kind of
damps the voice. So the easiest way what I do
is I go reset noise profile. If you have normal, then I press auto speech mode. So here what it's gonna do, the software is
gonna do its magic, and it's going to
choose only the speech to be audible to the audience. Of course, it's going to do its best to get rid of the noise. But it really depends
on the scenario and we'll see how it sounds
in this scenario. Epc, all kind of hiking
trails with numbers. You can choose which
number to get up at. Every number is
more steep or it's more here we can here
before and after. So if I just do this, decide if you're going
to have here before. So let's, let's play
from the beginning and see if you have this map, you see all kinds of hiking
trails with numbers. And you could choose which
number to get up at. Every number is more steep, or it's more like
going like this. And we choose to go for
14th because it goes through the forest
and off the 14 Hugo. So search for number 18
because you see I was just pressing on and
off and you can see how much difference
it is, right? So just by doing noise reduction and just go to auto speech models software does a really great
job in detecting your speech and getting rid
of the background noise. But obviously it depends on the intensity of the
background noise. Sometimes if it's too much, the software cannot help. You just have to fill me
in a quiet environment, but this helps
until some extent. So yeah, that's really
great for results. But all the other thing
that d S or the D hammer, some local channels and
all these things reverb, all the things I use
in firelight tab. So this we will discuss
in the upcoming sections. But this was it for the
edit section, part two.
8. Advance Editing Techniques: So the Edit tab part, I hope you are learning
well and if it fits a little bit intimidating,
It's really normal. If I had to watch this
course as a beginner, it would be a little bit
too much as well for me, but what I would do is I would just watch
this class again. If you voted for
the second time, you're going to cut
something more important. If you want it. Again, you're going to learn something which you missed
in the first and second row. That's the learning process. But let's jump in the system and start the edit tab part three. So now we're gonna be learning something
called as keyframing. So if you are editing with me, go to basic edit clips. We have some clips here. We are hiking here, so I just need a clip from here. So I'm going to press,
I maybe press 0. So yeah, and then I
have another clip here. I just press, I I press 0. So I'm just going to, maybe this clip is a
little bit too long so I just reduce it down. So what I'm gonna do, I press B. So B would switch to
the Trim Edit Mode, and then I'm just
going to press W. So this part also sticks
to the first claim. So as you can see that these
both are static clips. I've just imported the video, not the audio because
we don't really need it for the
sake of this class. So what we can see that
this is just a static clip. It's like I've said, the camera on the
tripod, then we walk. And sometimes it could
be a little bit boring. So what can we do? We can introduce some movement in the clip and
how do you do it? I would go to the Inspector tab, select this, and then we're gonna do something
called as keyframing. So what is keyframing is, is that Let's go to
the Zoom panel. Here. I just press this icon
here, this diamond button. So you see as soon as I
press it, it becomes red. So what does that mean is that the zoom property of this clip, one is recorded
at this position. I'll do the same thing
for the position as I am going towards
the end of the clip. Let's end of the clip here. I am going to zoom it in. And as I'm zooming it in, I'm going to position
my footage until here. So by doing this, you see that red
icon appears again. So by doing this, what
did I do with that? I have set the zoom and
the position parameter at this point at end of the
clip to these values. And in the beginning
of the clip to 0.1. So as I'm going
to play the clip, you would see that
these numbers are changing to what we
have set in the end. So let's play it. So you
see how cool it looks. And we can do the
same thing here. So maybe we can do,
maybe zoom out. So in the beginning, I'll just put position here and maybe make this clip
a little bit longer. Position here. And zoom in and maybe
change the y-axis here. Oh, not too much. You see that black bar. We don't want to see the
black bar until here. And then as we move here, I want the footage to come
back to its original position. So I'll just press one because one was the original position. I press the position of the clip y-axis to be zero because that was
the original position. You can change it to any number. So let's go here and now. Samsara, how cool it looks. So this is called keyframing. So you can do this
keyframing for everything. Also, I'm just going to
show you one mistake. What I was supposed to do. You see, my cursor is here, my timeline cursor is here. But if I crop it, Let's see, Let's see if
I crop from the top. I don't see any change
in the footage. The reason is because I have
selected the clip here. You see the orange
highlight around this clip. So the changes would
be in this clip. So that's why I'm just
going to press Control Z. So that's why whatever
clip you want to change, make sure to click
on that so you have the clip highlighted. Yeah. So I would be showing you something really cool with crop. You might have seen
it in some movies. Some of you might know what
I'm gonna do, So yeah. And also crop from
the bottom here. Maybe to us and to hear. Yeah. And so, yeah, let's choose the keyframe here. So I'm just going to
select the keyframe here. And here. Which means that I'm
telling the software that I want these parameters at this point and
maybe move here. I want it to be zero. So now you see what's
going to happen is How cool is that? So with keyframes,
you can do anything. He can do the same thing
for pitch and yaw, which I'm going to
show you later. So yeah, keyframing
can be really handy. It's really cool
because just by even, even with a static shot, you can just do so much. And you're gonna be
doing a lot of key framing in the
upcoming sections. The next thing, what
I'm going to teach you is speed ramping. Speed ramping. You gotta speed ramp folder
and you have this five clips. Speed ramping is a
really cool thing, which is going to separate the beginners and professionals. So that's why I taught
you all the basics. So that once you reach to
the speed ramping section, you kind of know what
is going on here. I'm just gonna give you a
little bit of brief here. All the footage, what we have, especially from the camera, never shot and 50
frames per second, but I've converted them
into 25 frames per second. So you say it's a slow motion. So maybe I want this clip
from here or maybe from here. Yeah, I'll just drag and drop because there's no
audio, any values. And maybe I'll just
drag and drop. It can be really cool if
you can also edit with me. So you can just
watch what I did. Pause the video and
then edit yourself. And then maybe some
drone footage. I go here. Maybe in point here, point here, and then
just drag it here. And the fourth drone footage. So here we have four
slow-motion clips. Are now, these drone footage
are in 25 frames per second, but the first two clips
are in slow motion, but he can do speed
ramp in any footage. It really doesn't matter,
but it kind of looks nice if the flourishes
in slow motion. You see, now we
have transitioned from the first clip
to the second one. From second one
to the third one. So here, the foot it looks okay if they are pretty footage, so they look okay. But we have to add
some speed ramp first, let me explain you.
What is speed ramp? The speed ramp, what
it does is that it would let the footage play in a normal speed and then you can wrap the speed wherever
you want in the clip. And then you can slow down again and then ramp it again
and then slow down again. But speed ramps can
be nice when it is at the end of the clip and at the beginning
of the clip. So let's show you
this clip here. And I'll just show you
a basic speed ramp. So I'll go right-click
here real-time controls. And then you have to also
check real-time curves. Let's just have enough room. So I would just add a speed
ramping this footage. Maybe from here I
want the speed to be a little bit
faster until here. And then maybe slower. Yeah. So from here I want the
speed to be faster. So what I would do, I
would press this arrow, downward arrow at a speed point. So now I'm just going to
zoom in with pressing S. So now we have two
different section. In this section, the
speed is obviously 100 per cent here also
speed is 100 per cent. And then maybe I'm going to
add one more point here. Three sections we have, all the three section have
different speed points here. And what I'm gonna do
go to change speed, maybe let's do 400. So let's play the clip. It looks a little bit here. Maybe we have to increase
this V to 800 and C is the speed goes
up and then down, but it's not looking
that smooth. So what do we do now? You see this point. I just select this point. I'm just gonna get rid of
either select this point. And I'm going to
select this thing. So what this would do, it would lead it would let me increase the speed of this footage a
little bit small. So you see there's a
little bit of curve here. You see, here it's just a point and straight lines,
straight line. But as you increase
more curve, the speed, what we have changed the 400s, so 100-8, sorry, the speed
what we obtain is to 800. From hundred to 800. It's going to go a
little bit slowly, a little bit smoothly. Yeah, I'm gonna do
the same thing here. So we are making like
an S curve here. Yeah, So the smoother
the S curve, the better the
footage would look. So let's see again and see. It's a little bit smoke. And then we can add another
speed ramp, let's say 800. And that would be until
the end of the video. So here what I can do, click here and make a bigger
curve so it's more smart. And just end the video here. Yeah, that's exactly what
we're gonna do here. Because it can look
really cool when we are putting the speed ramp
at the end of the video. So you go here. We ticked real-time control
the real-time curves. And I would be doing a speed
ramp at end of this clip. So I'll just go, you know what I did right? At a speed points or
the speed point is here and maybe say 200. So I want the clip speed to be 200 after here and just make
it a little bit smaller. So I have drawn like a big line. You see, it's already
ramp up from here. Or maybe make it
400 ramp up here. And then I also want the
speed ramp to be maybe here. Real-time controls,
real-time curves at a speed point and
then change speed to this footage is already
a little bit faster. Maybe I will do it to 200 and Sie sagen a bit slower
and then see how you go. So also smooth it out. Maybe, or you can also drag and you can also drag
the speed points. So we shouldn't make it too big. Just keep it until the end of
the video, end of the clip. Now, I just want this
clip until here. Now I'm going to
introduce the drone clip. So I'm just going to
increase another speed ramp. Let's go 400 this time. Smooth it out with this line. You can also change the length, maybe until May or
maybe just here. The drone footage. I'll put the speed ramp here. Real time curve. No, that was not the plan. Real-time controls speed 0.800, I would I would be doing just make it smooth
as smooth as possible. Because if it goes
suddenly 800-100, it's going to look really bad. So let's play and see. And then again, we
should be doing, maybe I'll do 800 again. Well, you know what I did, I change the speed of
this whole thing to 800. You shouldn't do that. You have to first put add speed point and then
change the speed to 800. So it's just in the end. Reset 200. It is just in the
end, just over here. Maybe I'll put it again here. It's a little bit of work, but the end result
is really cool. So I'll just go 800, make it smooth,
smooth as possible. Maybe a little bit like that. Let's see. You see, and before it was just a simple cut
between these two clips. And I see we have all these
beautiful speed ramping. And if you cut it on a beat, it looks even better. And you see now, so now this clip is
taking so much space. So now what do we do? Check the cross
here, cross, cross, cross and take this, and take, and take, and take. And also do the
cross here as well. So now you're back to
normal because we cross it, that doesn't mean
that our speed ramp would go away and look at this. It's still there, still looking
pretty so speed ramps is something which can separate
you from beginners. And I need to show
you something. Also really cool
because you might have seen a lot of
people doing it, which is kind of like a
drum drawn zoom out effect. So I just have to
find that clip. I think yeah, it's in
edit page on Zoom. I have named it. So here the clip is just me
flying the drone backward. And I'm sort of revealing
where I wear VR actually. But what I want to
do in real life, in reality is as soon as
my girlfriend says buy, I want to zoom out and go until here. You
know what I mean? So I would press an eye point here and then zoom out
and maybe go until here. So let's drag and drop this. It's gonna be a really big file. So here we have to do
some speed ramping. And we're going to also do a
little bit of blur effect, what I showed you before. So I would just go here, real-time curves,
real-time controls. You don't need audio, so I need the speed
ramp from here, starting from here,
and then goes up, up, up, up, up. Maybe it stops here
at a speed point. So here's the thing. Even if I do this 800, it's going to look really
weird. Check this out. Takes ages to come here, but I just want a quick zoom out for that water.
What am I gonna do? Look here carefully. I would just press, I will just select
I get rid of this. I will just select this point as one of them bringing it up, you see the speed
here is increasing, but speed here is reducing. But don't worry about
the speed reduction. My main goal is to
reduce the gap. Yeah. And now let's see what happens. Yeah, and I would just change
the speed reset to 100. So for this effect
to be working, you have to make
sure that you have a drone clip or some sort of camera movement in one direction and no change in the angle. So look at this. A bit of drastic change. 100-400773 back 200. So what do we do? Make an S curve. So make it here. Make it a little bigger theater. So you see it's a little bit
smoother. Let's check this. It looks nice. But to make it even better, what are we going to do? We're going to go
to the Effects tab here and then maybe do zoom and zoom blur CC, V1, this effect on this clip. But as soon as I dragged
and dropped here, that effect is throughout
the whole clip. Yeah. So what do we do now? Keyframing. Let's go to Effect here. Zoom amount. No, we don't want
any Zoom amount. So you see how this works? I have to put it to zero
to make it look neutral. Yeah. And then I do Keyframing. And then as soon as I
sort of go in the middle, while this Zoom is happening, I can also just press arrow key to scroll through
the each frame. Here, I can increase
this zoom effect. Here, the value was zero, as you can see here. As we came in the middle, at this point, you
see it turns red. Here we have input the
value of this much. Then as we go until
the end here. Or maybe you have
until the end here. I want this value
to be zero again, so it's going to turn red. So we have three key points. One here, one somewhere
in the middle, you see it turns red,
and then one here. So let's play the clip
and see how it looks. You wouldn't see the difference, but if you go like each frame, then you see that it
actually looks really nice. So all these little
things add up in the final clip and now it
looks a bit more smooth. If you add like a
whoosh transition, it's going to look even better. So Wolf's transition, you can just add it in the audio file. That was like a drone
Dynamic Zoom out effect. So yeah, How cool Are
these effects like? You really don't have to drag and drop any sort
of effects preset. You can just create all
these effects by yourself. So the next thing, what
I'm going to do is to show you how to make
a compound clip. So let's get back to
this image and I'll show you how to use
a compound clip. So here we have this clip. If I want to add
one more clip here, I sort of sort of zoom this out and maybe put
it in the middle. Yeah. So now you see that in this timeline there's like
four different layers. Yeah. If, if I, if I want
to make a change in n in all the four
at the same time. I have to go on each
clip one-by-one. Yeah. Say e.g. if I want
to zoom everything, I lead a bit like this image, this image, this
image a little bit. Then I have to
change the values in each of them one by one. What I can do with
compound clip is that select here new compound. You can rename it. I'll just leave it
to compound clip. Now what happens is that. Whatever the clips
were in four layers. Now, DaVinci Resolve would
treat those clips as one. So now if I want to
zoom in, in this image, what I would be
doing is if I have to set a key-frame off, zoom in, I just go here. Maybe zoom in until here. You see. Now whatever change you're
going to make on this thing, WE will treat the whole for
clipped layer as one clip. So that's what compound clip is. So say e.g. we had this
drone footage here. Like we have all these
effects on this one. But if we want to treat
it as a normal clip, we just clip, click here. And now we cannot change. Now there's no Zoom effectors. So like if we go to
real-time controls, real-time curves, all
the curves are gone. So now it's like a brand
new clip for resolve. So yeah, that's what compound
clippers and sometimes compound clip is really useful, which I can show you here. So say e.g. we go to Effects. And let's go to
video transition. Yeah, Video Transition. Let's go to brightness flash. So I want the brightness
flash transition in between these two clips. Yeah. But I also want some
other transition as well, which I'm looking for. Maybe this transition. But if I put this transition, it's going to get rid of
the brightness flesh. But I want the
brightness flash and the other transition
at the same time. So what I'm gonna do, put the brightness
slash, this slash here. But now you see,
watch carefully. What I'm gonna do is select these two Clip,
new compound clip. So now these two
clips or one clip. So it's like a one
proper footage. And now I can put
the camera shake, but there's no gap, but there's no cut in
between these two clips, the previous two clips. So we have to find
the cut ourselves. Maybe. I think the cut was here. You have to find
the cut ourselves. And now we put the camera shake. So now we have the brightness and the camera shake together. You see, I can just put another compound clips and now it's a brand new
clip for results. Again. Now what can we do? We just have to
be really careful with finding the other clip. It's gonna be a little bit hard, but I think it's like
the brightest part here. Let's cut it. And then maybe I want
to put this transition, or maybe Let's just
do this transition. So now we have three clips, one order each other with
the help of compound clip. But it's a little bit
taxing on your system. You see that's the
job of compound clip. It assembles whatever
clip you have selected together and treat
them as one-click. And that can be really helpful if you're
doing any sort of graphic stuff or
if you have like ten clips piled
up on each other. And if you want to
put the same setting and treat them as
a one single flip. So then you just
put compound clip and you have a whole
brand new clip. And if you want all the four layers here
back again, what do you do? Right-click. Decompose in place,
use clips only. So now we have all
these clips back again. So now there wouldn't be any zoom effect because
all these clips are here back again because the zoom effect we only
applied on the compound clip. But now by doing that, decomposing in place, the
compound clip is gone. And now the next thing what
I'm going to teach you is copying and
pasting attributes. I'm going to show you here. Let's go back in the timeline. So you see here the audio. I press, let's say if I choose it to be four
or five decibel, and I want the
same setting here, then I want the same
sitting on this audio. So what do I do? I press here, I press
right-click, I do copy. So copy can be Command plus c, or you can just copy here. And then if I want to paste the same setting on
these two clips, I just select these two clips. I go paste and then
pressed attributes and paste attribute would
be old plus VR, option plus v. So
Paste Attributes. And then da Vinci would ask me, what are the attributes
you want to be copied? So I can do audio or attributes, or I can just do
volume because volume is the only thing I
want to be copied. You see now all the clips
are in five decibel. The wavelength looks
bigger because the volume, original volume of this clip
was a little bit bigger, but they all are at 5 db. And same thing we
can do for videos. So if you see here, the size of all these clips
are little bit different. So I want the size of this
clip to be on these to clip, those are the size of this
clip to be on these two clips. What do I do? I press Command
C, which is copy. And then I press select these two and
then Command, or sorry. Then I select these two and then press Alt or Option and v. And then it's going
to ask me what are attributes I want
to paste from this, from this file to hear. I want Zoom. I don't want position because they both are
at different positions, so I just want Zoom. So now all of them are
of same dimension. And you can also
do with cropping. You can do a lot of different, you can paste a lot of
different properties. So if I do crop, if I had cropped to just this thing on the
left a little bit. Now if I go, now after
we have cropped, I press Command C. And
then here Option V, also crop, everything
is selected. I go here, Stacy now has
cropped all these footage. So it's going to save
you so much time. And you can do this. Paste attributes, what we just did now in
your whole project, like you did everything,
you can just do it. And same thing we can do here. If we want this
setting on this part, also the zooming and everything. I just go Command C
plus Alt V scale. I also want position
crop top, bottom. Does that apply? And let's see what happens. See it's going to save
you so much time. So yeah, that was it
from the Edit tab. I know it's a lot of things, but yeah, any
questions? Let me know. If you master the Edit tab, then everything is easy
in DaVinci Resolve. And of course I've taught
you a lot of stuff. But if you are confused, just go back to this lecture
and watch again and I'm sure you will understand
the whole thing.
9. Color Grading Introduction: Hello friends. I hope you're enjoying
the class so far. Now let's talk about my favorite
section, color grading. Da Vinci resolve
with the software, which is by far the best color grading software
in the market. There are so many
tools and techniques in the software that can make even a simple looking footage looking like straight
out of a movie. And that is why I want you to learn color grading in detail. So for the next ten lectures, I'll be discussing
about color grading. I'll be teaching you a lot of different techniques
to collect grid. I'll provide you all
the raw video clips so that you can
calibrate with me. So let's get started
with color grading.
10. Introduction to Color Tab: We're going to go to Color tab, and this is our first image. But before that I'll
give you a little bit of introduction
for the color tab. So for the color tab, this is how it looks. If it's not looking
the same way. You might have
selected clips here, you see, you might have
selected timeline. So I just get rid
of that so that I have more real estate
here to work on. And there's also some lots from DaVinci Resolve or my own lots. So they're all here, so we're not going
to use them now, so I'm just gonna get rid of it. There's also media pool. So yeah. You can just
change the layout. Just basic things which
is not really important, which these things you can
just experiment yourself. I don't want to waste your time on something which is
not really important. This is a timeline
and this would be if you turn on
and off this one, this is the setting for
whatever you have used. It's going to be, I'll show
you so it makes more sense. So whatever settings I have put, it's going to disable that and
show me the original clip. And this brings you to kinda, more full-screen is kinda
gives more real estate. Here there's more options. There is this option, hand option where you can use move all the notes and stuff. Here. Timeline option
this that affects, these are certain
effects which is available in the colors,
in the color page. And so we're going
to use some of them. So lightbox is just going to
show the frames and stuff. So what are we going to do? Click, click on light box again. I would get rid of effects. Yeah, if you get rid of
no notes also go away. And here you're going
to see two things. There's 11 dot here, which gives me the
overall view of the node, node system for this
particular clip. But if I click here, this is the node system
for the entire timeline. So if I want to do like a little setting on
the entire timeline, then I can use this to I just, I'm just going to
add a new node here. So how do you add a new node
in the Vinci Resolve is by pressing Alt S or Option, and S depends on what
your system using. So I'm going to press
all the ns that gives me a new node and
whatever setting and we're gonna do on this node, It's gonna be the setting
for the entire timeline. So I am just going
to delete that and go back to the
individual node. And this is Clips
is just going to change the size of my nodes, which is not really important. Then we're going
to come down here. So this is how I'm
going to leave it here. So we have more room
to see our image. And this is not available
in the free version. This is the color
matching which is not really important if
you are studying out. And yeah, so now you're going to come
to the important part. So these are the
primary color wheels. This is one of the most important section
of the color page in result. And we're going to
be changing a lot of exposure values using Lift, Gamma, Gain and offset. And then there's HDR panel. I'll give you maybe in one section I'm going to
use this because it's not as important
and I think it's going to make it too
complicated in the beginning. We're going to be sticking
to primary color wheels. And we're going to be also
sticking to the Log Wheels, which I'll show you in a bit. So this is also just RGB Mixer. So if you just go like this, if you lift the greens up here, lift the green, Live
the greens down. That's how it works.
So that's kind of showing how the image
is looking right now. And this, we're going to
have it not be using it. These are the Custom curves which you're going
to be using it. And under curves there's a lot, a lot of section here. There's Hue vs Hue occurs. There's Hue vs Saturation. I think there's Hugh was as luminance,
luminance saturation. So I'm going to go through
all these curves briefly, and I'm also going to show you the function
of these curves. So everything, I don't want
to explain them already. It makes more sense that when
we are actually using them, then I can show you how, what is the function of that. And these spiderweb think we, I'll show you how to use it. It's not as important
if you're a beginner, but I'll show you how to use it. This is the selectors. If I'm selecting any thing, any, any color it's going
to select in my node. So you see there's
the selectors. If I selected, if I select blue is going to
select the year. If I select this. And then you can do all sorts of changes. You're going to use all
of this and don't worry, this is like a shape creators. You can create a shape and sort of do all sorts of
effects in that shape. So I'm just going
to go reset node. This is the motion tracker. You're going to
use this as well. These things are
not that important. This is a blur and
sharpness scale, so you can change this. This is kind of the Opacity. I'm going to go
through everything. I'm going to go
through everything in the tutorial to
read, don't worry, these are just some
little options which is going to
make more sense when you're actually doing it. Here is, here is just a color or a different representation of the primary color wheels. And this is the log watch. If you are coming from
Premiere Pro, you would have, or if you have been using
Lightroom Photoshop, you would be already
familiar with fewer terms like shadows,
mid tones, highlights. So these are here, log fields, but we're going to go
back to primary views. And there's color
boost, saturation, shadows, contrast,
like all these things. We're gonna, we're
gonna be using it. So it's gonna, it's
gonna make more sense. Then on this side, you might not have
the same layout, but you just have to click here. So this is kind of the, the keyframing, which I'll
show you how it works. And if you go to sculpt, this is really important. And then there's also
different types of scopes. There's waveforms, there is
histogram, this vector scope. So you're gonna,
I'm gonna show you the function of all the scopes. And yeah, I know it might
look really overwhelming, but as we would go through all the examples and everything, it's all going to make sense. So yeah, that is it for the introduction
to the color page. In the next section,
we're going to learn about nodes because
for some of you, from, for most of you it's
going to be a new thing. So yeah, let's switch to nodes.
11. Introduction to Nodes: In this section, we're gonna
be learning how node works, what our notes, first of all. And just, yeah, Just like how can you build efficient
node structure? So nodes, these
are called nodes. This is one node
to node like that. And you can sort of
buildup nodes according to what type of color
transformation you want on your image. So say e.g. you can also sort of disable
and enable node. So say e.g. if I click all these three, and if I press Alt and D, or Command D or D, It's going to disable
that these nodes. And if I press this, it's going to enable this node. If I press Alt and D are, if I press, press Option and D, it's going to disable
all the nodes. So you see, this is like before. If you want to see
before and after, you can just go here. That kinda shows disabled
and enables all these nodes. So what are these nodes do? So in each node, you can set up a different
setting, say e.g. in this node, I can just do
the white balance setting. So you see if I disable this, you see I'm changing white
balance in this node. In this node I'm
changing the contrast. In the next node, I'm sort of changing the color of the sky. In this node, I think. Yeah, in this node I'm changing the color of some sort of enhancing
the color of the image. So that's how you can put different nodes in
front of each other. And all the nodes, they have their
different function. And how you sort of put them together is also a
little bit of pattern. So what happens is that what do I do
personally and how it, how it should be done is that, so if you have any image, what do you do first is that this immittance
is in front of me. It's image from a GoPro. So what I did was first step was to get the white
balance right, get the exposure right, and get the colors
right until here, until the first three nodes. My set of footage
looks a little bit neutral how it would
look to normalize. So say e.g. if I also
disable these three, this was the original photo. You see it's kinda washed out. And with these three nodes, I sort of made it look
a bit more neutral. And after this, I am sort of also doing
sort of color boost. The left here, D or Command D. So this is after this I did it. I did a little bit
of color boost. Color boost is here. And that is helping me to
give a really neutral look. Once we have a basic
neutral from the image, because from each camera, sometimes it could be shot
in a wrong white balance. Sometimes it could be shot in a completely wrong exposure. Sometimes they shot in a
completely different format, like a log format. So it's like a raw file,
really flat profile. So we have to get
them in something called as rec seven
or nine colors space. So this is Rex 79 color space where everything
looks really neutral. And once we have achieved those looks in the
first section, indirect 7.9 colors phase. So I'm calling this
the first section. Then we would go to a
different node structure where we can change the colors. And that sort of is
like a color grading. So here what we did
was color correction. And now here what we're gonna
do is color grading with all these three nodes which
are parallel to each other. I'll show you, I'll show you how can you
make notes parallel? How can you, how can
you make notes and layers with an example
so it makes more sense. So with these three nodes, they are giving a color of a
certain look to this image. And after that, the final thing was a little bit of vignetting. So I'm sort of making the surroundings a
little bit darker. I just kept it
extra so that if I want to do some last
minute changes, so that's what the
node structure is. So it's like literally
like how in Premiere Pro, if you're coming
from Premier Pro, there's like different
layers and you just put layers on
top of each other. And in each layer you
made a different setting. So that's how, that's
what the notes are. These nodes would
make more sense obviously when I started
bidding example. So what we would do, Let's just start with the
codon creating process. So in the first section as the, as I mentioned before, I'll explain you how to
get the neutral look. And then in the next section, we'll be doing color grading.
12. Introduction To Primary Color Wheels: Before going straight
into color grading, I'm going to explain
you the tools, what we are using and
why they are using, and what is their function. So it's going to take any, barely going to take time. But it's really
important to use that. So what I did was I
got a gray background. This is a background
which you can get. If you are in Resolve, you go to Effects, you go to generators. Then you go create scale. And then once you have gray
scale here, what do you do? Right-click new compound clip. I had this compound clip
and I want to show you some things so that It's going to make more sense when we are doing color grading. So here we have this
gray, gray scale. There's one side is fully white, one day will fully blacks. And here we had the parade, which was looking super colorful when we were
in previous clips. So you see how
colorful it looks. And now here there's
just a straight line. So we're gonna go to
waveform and see that how, how these things, how the, how these tools are changing the colors are changing
the brightness level. Because with these tools gonna be changing the
exposure of the image. This is the most widest part, and this is the
most darkest part, and that's what this
line is representing. Everything is linear. And what I would do with Lyft
is that if I increase lift, so you see all the white
parts are disappearing. And if I go all the way up, the whole screen is wide. So that's what lift does. It sort of lifts the blacks and try to push it more
towards the whites. If the image looks super dark, they didn't, then we
can increase the lift. And this is the gamma. So let's see what
gamma is doing. So gamma is sort of increasing
the exposure of the image, but not all the way as
how lift was doing. It's mostly increasing
the mid tones. That's why there is a
little bit of curve, but the curve is a little bit inclined towards the dark side. These are the shadow,
these are the blacks. So that's what gamma is doing. And if I reduce the Gamma down, if I go the other way, so then it's sort of darkening the image is not going
to darken it fully, but it's going to do
its best to darken it. So you see, that's how
much grandma goes. It has dark and all the blacks, all the shadows, but the whites
here, it remains intact. Yeah. So then what is gain is doing? So if you see again, it's sort of increasing all
the white areas. But if I go here, it still cannot get rid
of the whole blacks. It's just going to go until
here and sort of stops. So that's what Lift
Gamma and Gain does. Guinea sort of
brightening the image. Gamma is sort of helping that image to go a
little bit darker, but not as harsh as the lift, because lift can make
the whole thing black. You'll see how
harsh lift can be. So if I just go, this
is how you reset. So whatever value
of tools and you just click here and reset, you see how lift, how
harsh that lifted. But if I go all the way up, it can make it wider. So we just going
to leave it here. So that's what lift is doing. A lot of you might have moved from Premiere Pro or some
other editing software. And there you had
these log views, the highlights, mid
tones and shadows. So what is the difference
between log and primary wheels? So the log v, what our primary wheel is doing
is that it's sort of taking all that instead of
taking the whole image together and making change
in the entire image. And that's what Lift, Gamma and Gain is doing. And what are the difference
between these two? So now if you see the graph, What's going to happen
is that the highlights, if I swear, if I just
increase the highlights, which is also for the whites, you see it's only going to
go until a certain point. And if you see my craft, it looks like there's
a lot here and now highlight cannot go
past this point. You see with our gain, with our game, it could
just go until all the way. Same with the mid tones is
only going to go until here. It sort of clamped
here and here. And this is the shadows you see, say it's not increasing, the whole thing is just, just taking care of the
shadows in the image. Whereas these color wheels, they're taking care
of the entire image. So that's why I find
it easier to edit with my primary wheels than
the law of built. And this is also the reason
why color grading is more efficient and more
natural and resolve. Because of these kind of small, small tools, they
play a big role. These tools are not really available in all the softwares. And in this class, you will be learning exactly how this tool works and how can
you just change little, little values to get
a big difference in the image and everything would just look so natural still, in the end, if it's still not
making sense, Do not worry. We'll still go through
everything in depth.
13. Color Grading Using Curves: Let's start with
our first image. So you saw in the last section that I had
a lot of great on this one. So I got rid of everything and I would just
put parade here. So the first thing what we would just do is to
observe the image. So what I see is that this
image looks kinda flat. The exposure is good. It's not super exposure
is not super dark. So that's a little
less work for us. But I'll still show you if you want to bump up the exposure,
how you're gonna do it. So what do we see here? If you see up here, these are the highlights or
the whites in the image. And if you see down here, these are the shadows
and the blacks. So our goal with every
color grading is to get our colors
in-between these range. Because if it goes
super like this, you see how the blacks looked. Save, I'm just
reducing the left. And you see all the blacks
is going past this point. Or if I go all the gains, you see all the whites is
going pass this border. So our goal is to keep our
image in-between this. Here what we see is that
the reds and greens are, here, are kind of in
the same level in the, in the highlights,
in the white part. And you see blues, it goes a little bit higher. So what we can do, so what we can do is that
if I go to my curves, and if I go here, just one curve and if
I go to the blue line. So as I told in
the curves before, that this part is
all the whites. This part is all the shadows, and these are all
the middle part, which is not supervisor, which is not super dark. And our images sort of
lying in this area. So you see it, just look at the graph
when I'm bringing this down. So let's see. Now I'm bringing the blues in the same level as
the red and green. So if I press Alt
D or Command D, you can see the
change in our image. Usually, naturally, the image should have
looked like this. A little bit higher. So naturally the image should
have looked like this. But because of some
cameras setting, the blues was a
little bit higher. So that was our white balance. So now we need to
get more nodes. So how do I structure? My note is that I have, if it's a GoPro footage, what I have is that I have four nodes and then
I add on later. So here you can do a node
labels white balance. Here, I would be
doing primary curves. Primary here. I would do. Here, I will do contrast
and we just go here. And you can also do all these three things
in just one node. But just, just what
explanation of this video, I'm just putting it here and
when you're new to resolve, I think it's really important
to just get a separate node for everything so that
if you have to go back, you exactly know which
setting was where. If you want to change it, you exactly know where it was. So after contrast, then
what are we going to do is that I'll just leave a note
for some final adjustments. Maybe you say color boost. So if I want to
enhance the color, color, if I wanted to enhance the color,
I'll put it here. Then after this. After this, you
can also just get a new node here
at a Serial Node, or you can just press Alt S. So I'll just go all tests and
this would be the node level. Then look for what look we want. So that's how I'm going
to structure it here. And first thing what we're
gonna do is we're going to be just gonna get
some pop in the image. So what I'm gonna do, bring
the lift a little bit low. So you see the blacks
are coming down. But I'm also making
sure that I don't not going past this point. So I would be just
going until here. And then I would also start
off expand this game. So all the whites are sort
of has gone up a little bit. And then what I
would do TC name, it has a little bit of pop, a little bit of bright, a little bit of contrast. If you can say that, then what I would do to add
a little bit more contrast. So we took care of all the
bright parts by gamma, we took care of all the
dark parts with lift. Now what I want to
do is that I want to bring the overall
image a little bit lower. So everything which
is lying between the most brightest
and darkest part, I'm going to bring
it a little bit low. So it goes. So I'm still going down. But I'm also making sure that
I'm not passing this line. So I would just go a little
bit higher with my lift. This is how you play. So just because I set up my
left in the beginning there, that doesn't mean that it should be there throughout
the whole time. It really depends on you, how you want your life to be. Tonight you see
the image, there's a little bit of contrast there. If you see that here, if you see here
the shadows are a little bit more visible. If you see here, you can
see like it's more visible, it just looks a bit more lively. Now, I would see
if I need to add contrast or null just to
get a little bit more pop. So what contrast does
is that you see this, just, just look at the graph. It's going to open Lewicki, it's going to open the
graph a bit more. Contrast. We would increase the
whites a little bit more and reduce the
blacks a little bit more. So you see it's sort
of opening the image a little bit more
but still staying, still in a kind of control
the way that my blacks there. I'm just looking at
her hair and just seeing if the blacks
are not popping out. So I'll just go a little bit. Not really too much. I think it's already yeah. I mean, it kind of looks okay. Oh, maybe not sometimes you just I would just reduce it down or sometimes you just not even like it's not a hard and fast rule that you really have to do it, but I'm just showing
you all the functions, then what you can do. And next is that what say If I increase
the contrast here? And I'll show you a
really good use of contrast in the later sections. So I would just leave
the contrast here. I don't think they
really needed. Yeah, I will just
reset the node here. I don't think we really need it. Then what I would
do, I would go, oh, I press all day because
it got this selected. Here. I still see that the image is a little bit desaturated. So what I'm gonna do, I'm going to increase
the color boost. I am not touching
saturation because you see, look at the graph, what happens if I
touch saturation? Saturation is only it's, you look at the sky. So I did saturation,
say until 100. But if you look at the sky, the sky was barely, The sky was not as much
saturated as how her skin was. Like, really doesn't
look that balanced. So what I'm gonna do here, I'm just going to
reset the node. I would do color
boost and really gradually I go color boost. Cc here it looks, the whole image looks
kind of more saturated, so I'm just going
to do color boost a little bit until here. Yeah, that looks about right. Maybe just until here
should also look natural because we still have to add a few
more colors later. So yeah, that was color boost. So now we have achieved
a neutral look. Could have also done
this in just one node. I think it is just more clear and let it
looks more clean. So if I just go Alt and D, so it's just going to
de-select all the thing, deactivate all the nodes so you see how much we have gotten, how far we have gotten. So everything just looks how because I was there
I felt in this video, so I kind of remember that
this is how it looked. Actually. This was a little
bit desaturated. This also I felt in
a flat profile and GoPro film in a flat profile, then I have more flexibility
to change the image. But if I already filmed
in a neutral profile, then I wouldn't have
that much flexibility to do male more changes
with any camera. Try to, try to
film in the, more, in the most raw profile as
possible so that while, while doing color grading, you have more options. So just activating this lookout. It already looks so cool. What I would do is that
I would go to looks, I'll just going to put here. Then first thing I was thinking is to get
these colors out, the, get these, get
these more popped up. So what are we going
to do if I go here curves and then
here versus here? So what is the hue? Hue, if you change
the color, here, it sort of changes the
color of the entire image you see because now here
all the image is selected. You see huge changes, goes through different shades. So if I select blue and
then change the hue, is going to show me all
different shades of blue. So that's what we're
going to go in this curve and see
what colors of blue for the sky or what colors of this
orange thing we like. See if I just personally
I went to Hue vs Hue. If I just press here than it already shows there
in the graph, does this color lies? So I would go a
little bit higher. So you see now instead of
showing all the colors which was associated with
the same color or pattern associated
with orange. So I can get, I have the option to get all these fancy colors. But what I would be doing, so this is going to
more green side. I would sort of get it a little bit like very
little pinkish. You see the color difference. Now what I would do, I would also get more
saturation just, just here. So then what I would do here, I was here versus hue. I have to search for
Hue vs Saturation. So here what would
happen is that if I increase the
graph like this, the whole graph
saturation goes up. So I just need to
select this part. It selects here as well. I'm going to ask that off,
make it a little bit more broad so it's looking
not that harsh. As I go up. You can see that the saturation, this thing is increasing. You see, and if I go
before and after, Here's our gain more
colors out of the image. So yeah, that looks about right. And now what I would do, I want to change the
color of the sky. So I can probably
do it in the same, I can probably do it
in the same node. But then this whole things
would look a bit messy. Because if I do a sky as
well, It's going to be here. You can obviously change
the color of the sky. But I don't want it to be messy because if I have to
change some settings, then I know exactly
where my colors are. So what I would do, I would make up parallel,
parallel node here. So add a parallel node. And what parallel node
does is that it's kind of taking the output
from this, from this notes. If I just put these two here, just to avoid Can you, just
to make it be more clear. So parallel node is taking
all the information, not after we have
colored graded here. It's taking information
from this node. So whatever our final
color swatch here, that's what inflammation
is going to this node as well. I'll
give you an example. So if I select the
color of the sky here, and if I just make it say pink. So that was information which
is stored in this node. And this one here, the information is
coming from here. It has nothing to do with here. So even if I go here
and select the sky, it will still select
the blue area. So it doesn't matter what color it changing
because technically it should have selected the
red area or pinkish area, but it's selecting the blue area because that's how the image looked when we when
this was not there. Yeah. Does that make sense? That's why we use parallel
node to change the colors. But later in this section, I'm also going to show
you we use add layers. If they add layer that has a completely
different functions. So we're going to, I'm
going to tell you later. So here I'm going to change
the color of the sky because it's looking
a little bit dull. So I select here, I'm just going to
broaden this so that, so that it can also change the color of similar blues
and all over the image. So we are in hue versus hue. So we have to change
the shade of blue. So I would go up to make
it a little bit more teal to see if I go down
instead of going this way, a little bit more teal. So all these changes has
to be really subtle. It does not have to be crazy, or the color grading
looks really bad. So we just go here and
let's go before and after. You see we are getting
teal in the sky. And the next one,
what I want to do, I also want to maybe
change the color of the water or maybe sort of enhance the
color of the water. So what I do, add node, add another parallel node. And I would go here, but we don't have to go
in here versus here. We have to just
enhance the color. We don't have to change
the color of the water, so we're gonna go
Hue vs Saturation. I go here. And then I'm going to
increase the saturation. This is going to expand
it a little bit. So all the different shades of blue there color
is also going up. You feel before
and after you see how much color we are getting. Say, if I just deselect
everything, we have changed. This one. We have changed
the color of here, and we have changed
the color here. So we are sort of kind
of getting somewhere. So I would just go here. I would also look, these were, what was these reds, I can say or I'll
just do a read. This was blue sky, can say non-labeled hot. This was sky and this was water. We have each node four
different for different things, whatever color we have changed. Here, it looks good. I just think that her skin is getting a little bit
too unnatural color. Just maybe what we can do here is that I'll
show you a new trick. Now we are getting the output
from all these things. And because we have
changed these reds that also kind of changing her
skin color a little bit. And it's not really it's looking
a little bit orange-ish. So what I would do, I just wanted the huts
to be orange here, not her skin color. So what I would do, I would just add
another parallel node. And then now I would
select her skin. So we're gonna go to
this selector here. It's a new trick. So you have to see this. So it's a selector, it's kinda selecting her
skin I just pressed here. But how do we know
what is selected? I can see my note that
something happened. But to see what all things
it has selected, I go here, you see it's selecting her
skin but not all the way. It's not like super
proper because I'm just pressing and dragging so that it selects all the skin. And see, I'm just pressing
here and dragging that. Now you see what happens. I have this whole chart. So here what we would be doing is I am going to expand
this a little bit. So as I'm expanding, you see all these
all these edges. I'm not worried
about anything else being selected as I'm expanding because I know that her skin would have gotten
different shades. So now I have just
her skin is selected. And I want to also get, because you see now they
are all the same color. So it's also selecting the
other things in the image. So what we will do, we'll try to play
with saturation. So if I go here, it's sort of selecting
more things. If I were just going to play around with this and
see what all things, if I make it a
little bit smaller, they are literally
the same color. So in this case, I really don't think
we can separate them. What I would do, at least
I don't want the floor. I want a full body. And now what we will do, we'll just play
with the luminance. Luminance is just the
brightness value. So this is going to select the brightest oranges
in the image, and this is going to
select the darkest. And our image lies
somewhere here. So you see the roof is more
brighter than her skin. But now at this point, a lot of her body is
coming as well too. They are literally, they
have the same light. So what I would do
this kinda nodding and Butler about it. Just let her my main priority is that her skin is
selected or not. So skin looks good, kind of. Skin looks good. And here what we're gonna
do in an odds ratio, so the blur, instead of
add a little bit of blur. So these edges are
not super sharp. And likely clean whites does increase everything
a little by little. So now we have all
our skin selected. But then the problem is we also have these
things selected. So what are we going to
do? We're going to draw a mask around her body. So, so what we can do now
is we have to draw a mask. And for drawing a mask, we need another
tool which is here. So I'm just going
to zoom out and use this pen tool to draw a
mask around her body. Now, it's only going
to select this area. So if I choose this, you see, it's only selecting whatever was selected from the
qualifier in this area. But if I go here, you see the thoughts are
sort of selecting the hot. But I would just
keep my image here. And now. I just need to
change the color of our skin to get rid
of these lines. You can just press this, you can just press on
some other node. Go back here, it's going
to stay there. I'm sorry. What what are we going to do? It looks a little bit orange. So we have to reduce the orange. So there's a few different ways, but the easiest way is
to do this in offset. Our skin is somewhere here. Yeah. Like somewhere
here, orange-ish. So what do we do? We push this metal button
in the opposite direction. It's gonna kinda
compensates and keeps an, brings the orange back
to on the bluish side. So it's going to make,
it's going to make it come in the middle. So now if you got
before and after, It's not a lot of different, but it's a really
minor difference, but now skin looks a
little bit more natural. Yep. So that's what, so what we
did was we selected our, selected the color
from our image. Then we moved hue, saturation and luminance
to select the perfect, to select everything what
we could in her skin. And then with this
to reserve draw with the pen around her body just
to put it in the middle. We sort of drew around her body just to select
this path, not the huts. But now the problem is, if I play this video, she is running around. So at this point half
of our bodies there, half a body is not
there. So what do we do? Yeah, you heard it right? I would just go
in the beginning. And now we're gonna
do some tracking. How so tracking what tracking would do is that this shape, what we have created. This is going to track her
throughout the whole image. The tracking is here. And I would keep my clip here all the way
in the beginning. And then I will try to see
if it could track or not. In most cases, they do, in most cases they don't. So let's try it. So I just press the play button. You see, after this point the movement is so bad
that it couldn't track. And I also think that
why is it zooming out? So let's de-select
3D and rotate, and let's try to track again. Yeah, that looks pretty good. So that's what we have to do
if it's not tracking well, you can select the select these things and see
because I was seeing that, because our body is changing, the track was also sort of
going this and this and that. So that's why I sort of
got rid of the 3D and now it's kind of a
bit more simple. Yep, She's not going out of bed. There's maybe 11 frame. That's a different clip. So there's maybe one frame where she goes out of the picture. So now we did all the tracking, but I still find that
there's something missing. So this was our hear frame. I just wanted to add
a bit more contrast, but I also don't want her hair and these
things to be super dark. So what do I do? What I can do is that I
can add another mask. So I see that the image
looks pretty good. But I also see that
in these areas, there's a lot of it's not that, it's not that popping, There's
still a lot of contrast. What we can add. So that would be the last step. So what we can do is that
I'm just going to make another sort of big
circle around doors. And now we don't drink
to track because it's gonna be like
kind of a rough thing. Because all these shadows
are already a bit too much. But all the things up here, they need a little
bit more juice. I would just keep my shape here and I will just
increase this to, I will just increase
this to get more blur. Do it probably here. And now what I will do, I will just reduce
the brightness. So I just go in the curve here, select y because
that's the luminance, that's the brightness value. I'm just going to pull it down. Now what is this doing it
that instead of pulling down by instead of pulling
down the girl. So I will just go back,
back, back. Then. I selected this. You see my note, it's
showing that it's selecting this
part of the image. But what we want to do is
completely opposite of economic changes in these parts. So then we go here in Word. So now if you see here, you see that all the
other parts are visible. Let's go a bit more
up. So now we go here. Or what we can do, just let the, let the blacks
down a little bit, get the brightness
a bit more here. So you see now just
with that tool, I'm getting more
detail in this area. I'm getting more shadows here. There is a little bit of her
hair also in the shadow. But I don't mind because
if I if I go here, I'm just scrolling in and out from the mouth
screen to do that. If I go like that. Then it just looks, it just looks like a
little, a little sphere. A little sphere. So that's why I am sort
of increasing the blur. And I would like it to be a bit more darker, not too much. Because I don't
want I don't want these things to be super dark. Then maybe I have to
expand my shadow. Probably go down a
little bit here, maybe. Yep. And now I see
before and after. It looks a little bit
nice, more popping. So yeah. I think what
do you guys think is, does this looks good? So let's see before and after. So I'm just going
to press Alt and D or Option and D. Yeah, we got quite far. There's just a GoPro image so you can get so
much out of it. So yeah, let's go
through again and see what all things we learned. So I'm just going to
deselect everything. So first thing what we did was white balance because I didn't want it to
match everything. You wanted to get the
most neutral image possible in the beginning. So we did the white balance now that selecting everything, because I selected this, the first thing what we did
was change the white balance. And then we went to the primary curves in the second node and
change the exposure. So, yeah, so sort of the image
looked a little bit flat. The blacks looked a
little bit lifted. So I sort of brought
the blacks down, sort of gave more pop
with that again here. Change some things
with the offset, with the, change the
exposure with the offset. And then next one I tried
something with contrast, but yeah, I don't have to do it. So if you don't have to
do it, you don't do it. So that's why color grading is a lot subjective because there
is no hard and fast rule. Whatever depends on your
taste. You should go with it. And then here I did
some color boost. Is so much difference already. So this was just like how neutral it was
looking through my eyes. And mind you the color of
the water that was the same. I didn't do any color grading. That's how it was. Like. You see the sky looks
kind of neutral. And then we did
some color grading. So here we went to the huts, just popped the color in the
Hertz needed a bit more to the orange side with
these Hue vs Hue. Didn't go too far. And because I was doing that, that also changed the
skin off the girl. Then X to change the
color of the sky. It's the angle before and after. These are all really subtle, subtle changes, but they still
make a lot of difference. And then I enhance the
saturation in the water. I didn't change anything because the color of the water was
already looking so nice. And all the things what we
did was from these curves. Here we isolated her skin
first with the selector and then set off with
the help of the offset. We have sort of
brought it opposite to the orange side so that it can counteract and make
it look more neutral. And then in the end, I added a little bit
more contrast in these areas without changing
anything on the subjects. If I go before and after, easy to just buy
these little tools, there's so many possibilities. And in the next section we're
going to change the colors with the help of
just this selector. And I'll show you a
few more techniques to get the best color
from your image. So let's move on
to the next image. And meanwhile, if you
have any questions, please write down in
the comments below, or just reach out to me on my social media so that I'm really happy to
help you out with. So yeah, let's move
on to the next one.
14. Color Grading Using Qualifier: So guys, in this section, what I'm going to show
is completely different and how we color graded just using curves
in the last section, this would be
completely different. So let's start. So I'll give you a little bit of background of this image. That is short on DJI
maverick pro to. This is shot in decent, unlike decent it like at a different format in which
the drone requires the video. And it sort of, it, it makes the footage
a little bit flat, so that in color grading, we can choose our own
way of collaborating. But the only problem with
these flat images are, is that it looks flat to me. So I don't really know. In reality, how exposed was it that because whatever exposure
value I'm going to change, it would only be very
subjective because that's what I think how bright
it was that day. So to avoid these confusions, that result gives us a tool called color space
transformation. And that would transform the decent unlike photo
or decent unlike video. To wreck seven or nine, that's going to help us to
obtain the original image, how it looked while
filming this. So what I would do, I would make 45 nodes here. White balance. I'm not sure if we're
going to need it. Primaries. Here, here would be the
kernel space transformation, color space transformation. And here I will just put extra, if I need some extra changes before the coolest
race transformation. And once we have this
transformation done, then we're going to
start going into looks. So here we were gonna go say
Look, whatever it comes. So whatever comes. So, yeah, I would start with the
color space transformation. So in these cases, you
always first start with color space transformation
because you want to see how the
image actually is and how the image
actually looked that day. So you go to effects the third color space
transformation. This drag it on this node. Here. Here we have input color space. So input color
space is the space. What lot this image
has been shot at. So this was DJI D Gamma. So to use this property, you should really
know what settings that camera has
shot the footage. So these are like, and we're gonna input
gamma is rec 709, which is the same
as our timelines. It's not really going
to change anything. But you see just with one click, how much we are changing. So you see just
before and after. So it's still really neutral. Look how it would have
looked through our eyes. But I see that there
could be a lot done here because the rates
are all over the place, but we can still get a lot
of our greens and the blues. And red is here out of the
place because if you see this area that's a
little bit dark. So we also going to take
care of it in a bit. So first, let's just change the exposure
of the overall image. So to change the export
of the overall image, we're gonna go to primary color leans cause that's what
we learned before. So what I am going to do, I would go to My Parade and you have to see
these settings. Sometimes your graph
is not that bright, or if it's like this, you
can go all the way here. Yeah, I want wire RGB curve. The reason is that because here, if I am changing the exposure, this thing going down, it's going to annoy me so much
because it's already here. So I'm going to take
care of this later, but I still want to see where
my overall image is going. So keeping this in mind, I would bring the
lifts down just to see if I'm not
crossing the line. I know it's getting
super dark here, but we're going to take
care of that later. But you see, just with this, you see how much blacks
we have gotten in. And then next one, what we do, we're going to increase
again because I think that the overall image is
looking a little bit dark. So increase the image. So we're not going to
be bothered about this. We are mainly bothered
about this one, so I don't want this
to clip over this. So I can push this
image maybe probably, you see as I go
just two or this, you see the clouds is
getting all blown out. So I am just going to leave
my image here probably. Yeah. And then I'm going to bring
the camera down just to get the blacks a little
bit more pop out. Yeah, probably here. I'll just lift it a little bit because I see that my image is going to low here
in the shadows. Yeah, that looks about right AC. If I go before and after, just look at the luminance, how it was like this. So how it was like this before. And our main goal was to expand it to throughout
the whole exposure, expect from it without sort
of blowing everything out. So let's go before and after. So this was before and
just many do after you see how much we can get
information out of our image. So that's why it's
really important to film in log profiles. So now we have got like
a basic kind of look. It still looks pretty good. Just for commercial work. This already looks so nice. And we're gonna do
few things extra. What I would do, I still think it's
a little bit dark. So I would just
increase the exposure. Quiet more probably until here. And then if you see
this whole thing is clipping, so don't freak out. Now I would go to extra
here and do something. Well maybe I'll do node
level extra one, extra one. And then because we're going to add one more
extra after this. But you'll see that my sky
is clipping like crazy. So what I can do is that
these are all highlights. If I reduce my gain, the whole image goes down here. This is the time where I
would use my highlights. So I would go to
the log profile and all the bright areas are where
my highlight is clipping. I will just reduce
the highlights down. So it's, it's barely doing any
sort of difference in the, in the, in these areas. But it's making my clouds
come back to neutral. And if you see the graph, it's not doing, it's
barely doing some changes. It's doing some changes here. But our main goal is
to bring it back here. So that's why we use highlights. So before it was all blown out and I brought my highlights back so
I can bring it down. Let's say until here. Let's say, Yeah,
so it looks kind of still be here because I want this image to be like
really poppy sort of commercial look. You see, what's happening
is that we're sort of losing the contrast
in this area. Yeah. But by Beach also
sort of blows out. So what I would do is that I
would do another selector, and this time I would
go to my selector here. I would go to my selector here. And what I would do is that
because I just want to put highlights in the
most brightest area. So I'm going to select this. And I'm going to choose
the luminance value. So I'm going to choose a
luminance. Just select this one. So I see that what's happening, the dominance is also obviously the brightness of the image. So illuminance would
only help me to get down the highlights in the most brightest
area of this image. I don't want the highlights
to be down everywhere. I just want my
highlights to be down in these areas because
they are the brightest. What I also did was I sort
of increase the softness. That helps me to select
the images better. So I want my oldest
sky to be selected. So now you see, now what's going on
is that I am just retaining the information
just in the sky and a little bit of sand, you see. But my graph still looks
a little bit blown out. So what I'm gonna do, go back in primaries, reduce the gain a little bit. Probably here. You see the, what they did here was I
would just go in brief, so I was changing the
highlights of the image. But he was also affecting the highlights everywhere
because this is also, There's also a bit
of highlights here. There's also a
little bit brighter, brighter part of the image. So what I did was with
my two selector tool. And luminance is the
brightness value of the image. So I just selected
with this tool, I just selected the
brightest part. And I use this tool, the soft, to select it better because it's
gonna be super harsh now. And it's sort of selecting
even the sky a little bit. It's not just
selecting the clouds. They thought selecting a
little bit of the sky as well. So yeah. Now you've seen
before and after. So we're still retaining
all the information. This is the kind
of natural look. From this image. And later on we do
the color grading. But let's see how
far we have come. So if I just go Alton, D or Option and D, You see my changes in the image. And I know this area
is a little bit dark, but we're going to take
care of that later. So now the color
grading process. So here, what are we gonna do? We're gonna do color grading in a completely different day. It's gonna be kind of similar, but maybe not similar
at the same time. So you have to see that here, I'm going to enhance the values of reds or change
the color of this one. So let's see what we can do. So node label, all those go red. And now what I would do, choose the selector
tool and just rub it around here and see
what all thing it can select. So I just go ahead
and highlight two. Yeah, it's selecting
all the huts. And I would just move around and see how far I can go. Not so easy if I'm
going this far, then selecting more things. We just go until here. Then I will just scroll on
my saturated because I think it's already selecting
it pretty good. Yeah, I think I'm
selecting all the hot, probably throughout
the whole image, but you see all
these little things which is also selected. So now maybe our luminance
can do the magic. So if I try to go more
this side so that it selects only the
brighter parts. Just do it a bit more soft. You have to really like
just play around with these three tools to select what you really
wanted to select. Maybe this is going to close it. Yeah, yeah, yeah. I think we are getting there. So here I have just selected
just this much color, whatever is in displays that can only be
celebrating the screen. Now to make it a bit more clean, what I do, I increase the ratio, increase the blur ratio, increases all these a little
bit so that there's no like a harsh line next to the things. Cilia. Now what we do, whatever changes you're
going to do is only going to change the
things which is selected. So we are going to be
changing the hues. So we change the hue last
time with this graph, but we already have
all the selections. I can just change the
colors with this one. So let's see. I want it a little
bit more orangeish. Maybe. Let's do 51. And these are all subjective, like you can just make it
how you want to make it. Then I would do a little bit of color boost is easy
if I go all the way, It's making it look
a little bit fake. So maybe I go say 75. Yeah. So if I go before and after, you see It's sort of just like it's like literally
coloring a box. I'm just coloring the huts. Yeah. So that was one
that was the reds. Now what I would do, I would also change
the color of the sky. So I'll just go parallel, say node labels, sky. But I think if I select the sky, there would be other
things which are similar color to the sky
that would be also selected. So I really don't mind if I
select this guy just here. But I also want to open this up. Now, just until here. I think that was
really good selection. Oh yeah. If bagels saturation
a little bit, it also selecting the ocean, but I don't want it
to select the ocean. Then maybe the luminance
can do their magic. So you see, you just have to play around with these things. You know what I can do? I can select Yeah, I have just my sky selected. What I can do to get
rid of this selection, I can just put a
mask or the sky. So it's sort of just
choosing my sky. So what I would do, I would go here, get my mask on. Let's go down C30. And now I can just change
the color of this thing. So sky, we go towards
just changing color here. Not too much, maybe 50 psi. So let's see. Where
do you see there is a little bit of a boundary
here which looks super weird. So what I'm gonna do, I go here. And then inside and outside. Get it a bit more soft. You see? Now, let's go before and after. It's still looking
a little bit weird. So what I'm gonna do
is change the yeah, Just make it look a
little bit more neutral so not let it select. Yeah. Let's see, before and after. You've changed the
color of the sky. Now what we're gonna do, add node, Let's go parallel. And we're going to
change maybe the color. We're going to just enhance the color of this whole thing. So let's see. I want to make it a little
bit bigger. Go a bit more. This side. There you go. Just, you just have
to play around with these things and see what all
things you can select it. I don't want my sky
still be there. Just go in and out ratio
black glaze, clean whites, clean blacks, everything up
and let's see what we can do. So here, I don't want
to change the color, I just want to give more juice. You know. I also want to increase
the highlights here. Let's just call it
before and after and see I changed the color boost
and the highlights. Now if you see the clip
you see before and after, you're getting so many things selected in the thing. Yeah. So these were the three color
things that we changed. You see, the whole
image kinda changes. Because our main goal was here to just get the most out of this image and make it look more poppy and
more commercial. Like. Yeah, that looks good to me. And what I would do, I think that here there's a bit more, too much highlights. So what I would do, I would just reduce the
gamma a little bit more. Yeah. See, one node can make so
much dear friend Jess, our primaries can make
so much different. So whatever you're doing here, you can always just go back
and change these values. And then next one, what are, what are you gonna do? Is we're going to take
care of this part. So I'll just get one more node. And I'm gonna go
to the end here. We're going to select
something called a gradient. So what would a gradient do? All the things
which is not great. That's gonna be all the
things which is not great that we're gonna
be working on them. They want a softer output. So you see, now what we can do. We can increase the exposure. So I just go in the middle. It's increasing exposure
completely out of the screen. So what you're going to, let's
bring it more in and see. Though. I would also go here
because it will select, I can do whatever I
want in this section. I would be increasing
the shadows probably. That's a bit too much. So I am gonna go maybe here and probably tilt
it that way. Yeah. So what do you guys think? This is before and after? I think that's a little bit
too much or you know what? A little bit too much. So I'm just going
to reduce my show. Yeah. Or yeah. That looks that
looks pretty good. So what I would do, I still didn't track my sky. It's not a super crazy
movement in this image, but yet I just, just
for the sake of it. So yeah, that was it
for this collaborating. So I will just go through
it again and see. So the first thing, what we did was I'll just deselect everyone. So the first thing
what we did was color sprays
transformation because I wanted it to be in
rec center line. So I did that. And the next one, what we
took care of was primaries. Primaries just
boosted everything because that's what
I wanted to get. Here. I went a bit too much
because I want it like the pop the image
and white balance. We didn't do it
because it already looked kind of okay
even with the crafts. And then the next thing
what we did was because I saw that the sky is blowing out. I sort of reduce the
highlights also from the sand. If you see here, you would see that there's
more details coming back in. And then we did
the color grading. So that was the image which is a proper XOR line width,
contrast boosted. And so next thing what we did took care of the
red on the huts, increase the highlights there, increased the color
booths there. And we took care of this guy, made it a little bit
more teal Tracy, with collaborating, you
don't have to push it too much or it just
looks so artificial. Especially with sort of travel images or
commercial images. Not too much. But I'm also
gonna show you later In which situation where you
can push or if you have a client which demands to
be like a dramatic image. There is a specific type
of videos that you can do. Obviously you can
do on this one, but it's not really
going to look good. We took care of this
guy, coming back to this image, take
care of the sky. And here I totally
forgot or the water. Yeah. You see? If I don't know,
I would never know. So here, the water yeah. We took care of the colors. So this is what
colors we did after our rec seven or nine
transformation, this. And then lastly, we took care of the shadows
in the corner. So yeah, that is our complete
image before and after. So let's play it and
see how it looks. It looks pretty good. I hope you're learning a few
things from this section. In this section we did color grading by just
the selector tool. So we didn't use the graph like how we use in
the first time, we use the selector tool. So I hope all these
things are making sense. But if you have any questions,
please reach out to me.
15. How To Use Contrast And Pivot Tool: I'm going to show here
a tool which is going to help you to reduce the
brightness or to gain more, gain back a bit more
information in the image. There's not a
collaborating tutorial, but if your camera has the ability to retain
the highlights, we can take care of
that and result. So here, I would
increase the contrast. And then if you see pivot, what I would do if I
increase it to zero, towards zero, it's going to increase the
contrast a bit more. It's going to make the
brightest part more brighter. It's going to make the
darkest part more darker. But if I go up, but if I move the pivot
to the other side, it's going to bring the brighter part and the
darkest part on the same level. So you see, I went to zero, it was like that
and I went to one. It is like this here. But now there's also
one more thing what we can do, you just hold this. That's all I'll bring it down. So if you're going to
bring this side down, you're going to bring
more highlights. And if you're going
to bring more this, they're down, you're going
to bring more blacks. And so you see, I would just sort of bring it in the middle and then
just change the x. Plus I'm showing you
all these things in one because in one node
because I just want to show you how much exposure
and everything you can just retain by just
looking at these graphs. So it was in the beginning, look, it was like
here all the way. So we have already gotten this much information from
this little information, what we got in the beginning. So what I would want is
with the help of left, I'm just going to
bring down a bit more, bring down Gamma a bit more. I know it's getting a
little bit darker here, sort of pushing it
a bit too much. And just increase the
highlights a little bit. Dizzy if this goes above this, the highlights already
sort of blows out. So I am just going
to leave it here. And now I would go to the log
curve because these areas, they still look a
little bit dark. They will go to the
locker when I would increase the mid tones. Mid tones are, as I showed
you in the graph before, it's just going to increase the exposure of specific region. And I think these things, they all belong to
that specific region. So I'm just going to increase the Midtones until it
starts to blow out. So you see, our
image was like this. We got it here. If I increase the shadows because there's no shadow
in this image anyways. So I would go, I think I put you
in a bit too much. I would go just until here. Still we got so much
information from this image. Just by these tools, you can increase or
reduce the exposure. But obviously in
the end depends on what camera you have shot on. But yeah, I hope it
all makes sense. Now let's move on
to the next image and I'll show you one quick way to color
grade and this one. Let's go.
16. Color Grading Using Qualifier Preset: So this is a new image. So here we see it
looks kinda balanced. But from the parade, you can see that there's
a lot of highlights, a lot of exposed area, super exposed areas here. So what we can do make for now it's probably white balance. I would do primary. Just extra overall. If there is something wrong. Here, we'll do look,
maybe another node. Just overall. If we want some other changes. So what we can do here
first is I would reduce, bring this back in the picture. So we are in log v yields. I will just reduce
down the highlights. They see, reducing
down the highlights. It's only affecting
the highlighted area. It's not affecting
the image at all. That was the good part
about also this tool. If I just go all the way down, you see just the
highlighted area goes down. But if we go and
reduce the gain, is it brings the
whole image darker. Yeah. So what we can be doing here, there's not much really
to do because it's already a little bit clipped. But I want to, but I wanted to have a
little bit more contrast. So what I'm gonna do,
I'm just going to play with Gamma and Gain. Reduce it down here. Increase the gain. Probably here, and reduce the
highlights a bit more. So let's see how far we have got enhancing all the colors instead of making the
darks a little bit darker, the brights a little
bit brighter. So my subject is also
great in getting brighter. Yeah. It looks good to me. So I will jump straight
into the looks. And then in the end we can
do some global adjustment. Because I, my goal is
to get kind of like a dark theme in this image. So the image goes like this. Maybe. I'll choose this as
the hero of frame. So the image goes like this. And I want it to be like how they have in the
horror, horror movies, but a bit more
suspense kind of look, suspense film looks
so for this one, the graph is still
green, too happy. So what I'm gonna do, We can
use the selector from here, or we can use the graph, the hue versus hue. I select the grass and
then do the changes. There's also one more way. So I go to color, I go to preset, and then I select greens. So yeah, so if I go here
just to see the selector, it only selects all the
green in the image. And if I go to the selector, you see it has already done it's own work and select it all
just the greens in the image. But I can obviously
move it here and here obviously depends on
how I want it to be. And if I go more this way, it's going to give
more saturated look. Yeah, So that's how it's
selecting all the greens. It selected all the reasons, but I can always just change the values and get
more out of the image. But I see that it's also
kinda selecting my subject. So I would go sort of softness in
probably until here. That looks about right. What I want my greens to be is I can just
change the value of greens from here, from here. So I would go a bit
more this side. So I don't want it to
be super dark green. We want to have a little
bit more yellowish look. Yeah. That looks about right. Yeah. And then I also I see that her jacket is looking super
saturated, super dark. Wilson wanted to change the
color and change the values, change some values in
that I go to parallel. Now, I will just
select a read from here and let's see if my
tracker and select it. Looks like it did. It
did all its value, then it's just selecting red. That's the only
reading the image. So now what I can do
is that I go here. And now what I can
do is that I can reduce the highlights
in the red, so I can just go here as well, get the highlights
down so you see. And I also want to change
the color of the red. Not green, but something which
is not super popping up. It looks a little bit
weird because I think I've pushed my greens a
little bit too much. Maybe around if T2 is fine. Yeah. I'm here. They're
probably lead dilates. Go up a little bit easy. You just have to see the image
and see how it looks. You. Yep. That looks good. And now what I would do, I want it to be like a bit
more moody, a bit more dark. So here I will just reduce
the overall exposure of the image here. And then I also want it to be that blacks to be
a bit more black. This just the look
what I'm going for. That's why I'm pushing this
image a little bit more. But it's totally subjective
and it depends on you. So this was a global adjustment. Maybe I want it to
be a bit more dark. So what I'm gonna do, I go to my SDR curves,
don't freak out. And just toggle around. So these are the weeds or
you can just toggle around. I'm looking forward to lie. This one is here. So what I'm gonna do, I'm
just going to try to reduce down the light and
see what it does. If I play from the beginning, the reds are looking at
a little bit too much. So I would just reduce down
the saturation and say, yeah, let's see
from the beginning, Let's totally subjective
how it's looking, but it depends on how
you want it to look. So just by changing few values, if you already
have a usual clip, you can, just by
changing a few values, you can get the
colors, how you want, how you, how you want
the mood, Turkey. This was the before. This is after. You can go through
it one by one. So we didn't really
change the white balance because I thought
it was pretty okay. I took care of this highlight in the primaries and
sort of reduce the, reduce the gamma a little bit, increase the gain just to
get more pop in the image. And then extra, I didn't
do anything for the look. I changed the color
of the grass here, manipulated some
color of her jacket. And overall, I wanted to have a bit more dark
and moody look. So I just reduce the brightness with the help of these curves. So I reduced the
highlights from here, I reduce the whites. And I also went to
HDR panel and reduce, and reduce the here the light. And then we ended up with this. I think it looks pretty good.
What do you guys think? It's from here. We
got until here. So yeah, that was
it for this one. And in the next section, I'm going to show
you how you can transform this image to this.
17. Color Grading Using Offset Tool: This image was shot
from the Sony A7 S3, and I was filming
in log profiles. So first thing what
I need to do with the color space transformation. So this label the node what? White balance primaries. First thing cause
phase transformation without asking any
questions as we go, this input color space was these things you
really have to know. Because if you don't know, then the whole image can be something
completely different. Input gamma was
Sony as log three. So you see them with
one-click. It's easy. Just with one click,
I can already get how my image was looking exactly on that day and how I filmed it with all
the recordings and stuff. So you see the white balance. It is super spot on. So that's why every time and
you're filming really makes sure that the white in the image are white,
are looking white. This will just add
some extra step in the post-processing. And sometimes if it's not shot from a
good-quality camera, it might be really difficult to just get those natural colors. So if you just have to
make a commercial look without any sort of cinematic
look than what we would do. As you can see here, we still have a lot of things, what we can play around, kind of we'll see, we'll see because this
is the overall luminance over our light brightness image. I think I can just
give a little bit of pop and bring the shadows and the darks down a little bit so that her hair is a
little bit more black. So I'm in the primary.
Let's go here. Let's try to bring the left down until here and maybe
gain a little bit up. Let's see before and after already adding a little
bit of pop in the image. Yep. And then our next thing, what I can do is I'll just
increase the gain a bit more. Yep. It's giving like a really
good clue on her face. But then I also
see that this part is a little bit more bright. So what I'm gonna do, I would just make another
or just to wait an extra. So we're going to reduce
the highlights on this. So just as how we did before, I'm going to select
luminance and it's gonna choose the most brightest
part of the image. Probably this. And then I'm going to make a, make it a little bit softer. And then from there I
reduce the highlights. So I have all these paths selected with the
help of luminance. And then what I'm gonna do, I go to the log curve, I reduce down the highlights. You see my image was here, that my image was not my
middle of summer here. With the help of this, I can reduce down
the highlights. And did it change
anything you see? It's that are bringing more
details in her clothes. It's sort of bringing
more detailed look at the clouds binary. Or maybe I reduced it too much. Maybe just suddenly. It looks kind of okay. So if we go to just, if you just deselect these two, let's see what we have done. This is what the
image looked up, the color space transformation, and we have gone here. So if you just want
a commercial look, this is already like
it's looking super nice. And it's also because how
we shot it in the camera. So it's always really
important to shoot it with the most neutral
colors as possible so that you have less drama
in post-processing. So now it looks pretty good. What I would do now is that I want to make it a little
bit of cinema kind of look. So what I want to do is I want these to be kind of blues
and a little bit dark. And I want the overall image
to be a little bit dark. And that's it like
more like a joker. Look if you, if you
know what I mean. You might have seen that
look in a lot of movies. So what I would do for that is I am going to
bring my offset down. Yeah. Because I want more
blues in the background. But if I select this, this, this is just
a white color. So it's not really going to
select anything specific. So that I can change the color. Or even if I go with the graph
with the hue versus hue. If I select here, it's like it's barely going to do any difference
in the thing. So that's why I'm
just going to go to Offset and bring their overall
image to the bluish side. Let's see what we can do. So I am bringing not
like super blue, but a bit more towards the teal and a bit more towards the
teal and green each side. So let's see if we
can make that happen. Yeah, that looks about right. Let's try to as the green side. Yeah. That looks about right. What I also would want to do, I would also bring down
my gamma a little bit. I'll bring down my
grandma and increase the weight any to see the
picture without anything. So primaries, I would bring down the gamma a little bit more in this case. Because now we are
going for more sort of drama, more dark look. So overall, it kinda looks okay because also if you
see her whole body is, her whole face is also greenish. So now you're going to use a layer node and water
layer node does, is that you're gonna, you're gonna see
if I do parallel. Nothing happens. If I do layer. What is, what it's
doing is go over here. What it is doing is just
adding an extra layer on this image so that they
don't see this image at all. So it's like an OpEx subject, which is sort of just
sitting on top of this node, just not letting me see
what this node is doing. And if I select
something in this node, then it's only going to affect that thing and leave the
overall image like this. So I'll explain you. What I would want to do is
that if I deselect that, I see that her face is also
kind of greenish and it has blended so much in this image and I don't
want that to happen. So what I wanna do, layer node, and I would just select her
face and see what we can do. So the first phase is selected. If I go here you see all the other things
are also selected. So what I would do, I would try to get rid of this thing by
the negative selector. But if I get rid
of the building, It's also just going to move it around her face because because we want this
face to be selected, that's like the most priority. I really don't care about the outside things because that we can take
care of that later. I can still move around and see what are the things
that you can just get out. Let's just zoom in. Faces good. With the saturation. Let's see if we can
just move around. Oh, no. Yeah, maybe saturation and
luminance is going to help. If I go more this side, because her face is the
brightest in the video. Maybe you can help
me to select that, but there's a few things which is not really helping me to
select everything. Video. I think this is good. We can always just put a mask on her face and just let it track, but the roads are fine. It's not really in the picture. I will just increase these two. Everything is nice and soft. It's not sort of blown out. And now if you see it just
looks a little bit vague here because we're going to take
care of the buildings later. But if you see it, just her face just looks a little
bit kind of odd one out because also I think that the face color is
not really proper. And that's also a
problem with Sony. That the face is more
towards the face. Colors are not
supernatural in Sony. So what do we do right now is
that we go to vector scope. And this is a really
good tool just to get the perfect face tone. So what I'm gonna
do, I just go here, show skin tone indicator, safe. Our skins are somewhere
here on this, exactly on this line, which means that we have
selected the perfect skin tone. So what I am going to do, I'm just going to
move the offset and see what's changing. So if I move it here, you see this little thing. This little guy is moving
away from this line and my main goal is to bring
this little guy on the line. Would just go a bit more
towards the pink side. And it looks kinda okay, but it still looks like it's
sort of kind of popping out too much out of the whole image. So what I'm gonna do
now is that I want to, I want this node to be blended
in, in the background. But first, I need to
just select her body. So what I'm gonna do, I'm just going to make
a mask around her body. Let's go, go, go here. It's only going to choose
what's in the image. So I'm just gonna go
here and let's see if it can tracker because that's
the most important thing. So I would go to
the tracking panel. Let it go track. That kind of does an okay job. Let's drive it to rotate in
3D and see what it can do. Yep, I see that her face is kind of Let's go track
backwards and see. Oh, I think we have
to get rid of that. Now. Let's go here. Let's drag back again. Sometimes these tracking
can be really annoying. I think that looks pretty good. Her hands were moving out, but it should be fine
for the most part. So now that we have
her face ready, her face is kind of
popping out of the green so we have to blend
it in the background. So what did we do?
You go to here, to the key legal here, and then c0 output gain. I'm just going to
reduce it a little bit. So you see now her face is kind of blending
in the background, but it's not popping
out that much that how it was
popping out before, you see, it was
like this before. Then we have when we
raise it to say one, that's a bit too much. Maybe if we reduce
it down to 0.5. So yeah, if he just
with these two nodes, we changed the whole image. You see it's like a more
sort of commercial, not a commercial look, but more sort of cinema look. And if you wanna do take care of her clothes so you
can do another node. But I'm not going
to explain that in this tutorial because you
can just do it by herself. Choose another parallel node, and just take care of this closed so you can
change the exposure, change the color of the change. With change the color
of the clothes, it heals and you can do
just everything. Here. Let's start again. What did we do? So
first thing we did was color space
transformation to get into rec center
line color space. That with this one
already looked so good. The next one we took, we went to primaries, just brought the blacks down. We made the gain
a little bit up, also brought the gammas
now in just to get more details around
her and on her face. And then the also
sort of increase, the reduced the highlight because her clothes
was popping out. Just a little bit
of minor change, but we sort of reduce the
highlights a little bit. You can always just
go a bit more lower just to see how it, how it was. Probably here. Then what we did, we went to the loop section. So I didn't do
anything in this note. I don't know why an overall
we wanted this look. But then the problem was
her face was also sort of getting this color. So I went here and I
made her face pop out. And I can do one
more thing because we have her skin selected. And I think that what I
can do is I can go here. So this is a tool which canal, which is going to soften your skin or it can
add more detail. If I go the other way, you see that instead of adding
more detail in her skin. But if I go a little bit back and go a bit
more this side, some sort of adding a bit
more softness in our image. If I go back and forth. Yeah, that looks about right. Yeah, so this is how we can achieve a
cinematic look as well. So just by going into
just making it first, maybe just bring the image
back direct 7.9 curve space. And then when you go to overall, and then when you go to
just make two nodes, you can bring the offset to
whatever value you want. And then you can
select the faces of people so that it's also not
about blending in the image. So here we're going to move to the next image and then I'll show you something really
cool in this image. I don't want to, I'm not going
to explain you everything because it's literally the
same thing what I did before, but I'll just go through
the image really quickly. So here I changed the color
space transformation, so it brought it back
to wreck seven or nine. I would just go to the parade. So in the beginning I just had this much inflammation and we expanded the image to this much. But I wanted to expand a lot because there's a lot
of room in the shadows, quite a bit of room
in the highlights. So I went to the primary color wheels
and I did something, brought the lifts down, brought the highlights down
because it's a little bit too bright outside and a
lot of light coming. And then I still thought that I still need to give more
juice in the image. So I said I've used my contrast to make it a bit more brighter. But here I'm rotating the
pivot to get more contrast in the image so you see how much just this contrast is
helping this image out. The blacks are becoming blacks. And there's more, the brightness
is becoming a bit more. The next thing what
we did was brought my image to more sort of greenish tones of you
not going blues at all. And then selected my
subject out of this. And here, here what I'm doing is I'm sort of using
complimentary colors. So here, because my
image was all green, I'm going the
opposite way to make a bit of contrast in
between the image. And then what I did was I
still thought that there's a lot of light here outside
for coming from outside. It looks a bit weird. So I sort of reduce
the lights down with the HDR panel
of the whole image. I think it's a
little bit too much. But yeah, it's
really subjective. So I went here and I chose the light to come
down a little bit. I think I went a bit too much. And one thing I
didn't do probably here was too soft and
our face, I think. Oh no, I actually did. So I soften a little bit more. I just thought. So usually it would
look like this. You see all these some
sort of pimples and stuff. So I would just reduce it, make it a little bit more soft. Yeah. So that is how the image looks. And this is how
it looked before. So yeah, this is how it looked before the
colors phase transformation. So this looks like
a commercial loop. Really popped really
high contrast, district seven or
nine colors space. But I did something
to put more colors, put more drama in the image. So this is how we can
color grade the images. We're going to move to the
next section and then I'll show you also something
completely different.
18. How To Get Perfect White Balance: One thing I also
wanted to show you just an easy white balanced
tree because we have not really learning
about white balance because I had barely any images with the wrong white
balance, I found one. So here there's
two different ways to change the white balance. The first and the easiest is you go to the
primary color wheels, select this thing
because you can also change the white
balance with this one, the temperature and tint. But I would go here, this is a selector
and this is going to automatically choose
the best white balance. But the only thing you need to do is to select the widest, select the whites in the image. So that in an ideal world, what part of the image
would look white color? I think this was why it's if
I just select that color, just with one click, you have chosen the
perfect white balance. And there's another way to
get perfect white balance. What I explained you before, I go to the, I go to
the Custom curves. I can already see that the
rates are a bit too much. Green tea is kind
of in the middle and there's no blues at all. So I can just increase the blue because I want to make the
blue go a bit more higher. So I'm just going to
increase the blue and make it come to the same
level as my red. So you see now there is
a bit too much blue. So I'm just going to increase
the greens a little bit. Make it come to the
same level as I'm just going to make it
come to the same level. So now you see the whites are kind of getting a
bit more closer. But here, bring the red
down a little there. So now you see all of them are
kind of in the same level. And we go from this
to this though sometimes the auto white
balance don't work. So that's when you
can use these curves. So yeah, now the
image looks balanced. Do you see the red star here, the greens are here
and the blues are here and before it looked like this. So that's what I was
saying, that even if your screen is not
color calibrated, just by using the scopes, you can already sort of
color correct the image. Color grading would be a
little bit of problem. But you can still color correct? All the images that you see before it looked like this
and now it'll look like this. So now we're going to move to one of the last
section of these. So now I'm just hoping that you are following
the whole thing. And yeah, I'm really glad that you are enjoying this course
if you're still watching.
19. Color Grading Using LUTs: In the next lesson,
we're going to talk to you about how we can color grid using lots soil. So that is in this section,
what are we going to do? I'm just going to
put four nodes. White balance looks pretty good. I am not going to
do white balance, but I would still leave a
note before node level. This would be primaries. This would be something extra if I want to take
care of something, this would be the lot. And this would be three or bot. And this would be over. Here. My image is sharp, pretty good. I think there's everything, all the reds, greens, and blues are in the same level. The highlights is pretty good. So this is how, this literally how an ideal
parade should look like. But because I didn't shoot
it in a log profile, I really made sure that
my exposure is on point, my white balance is on point. So yeah, this was
not shot in a log, this was just shot in an S in a tone in my
camera and I have just made an auto
setting so that I could get the best
output from the camera. So yeah, that is a primary veal, but I would still want to get
some contrast in this one. So what I would do, I can see that there's
a little bit of room left here for my
blacks to go down. So I am just going
to push it down, maybe just until here. And then I'm gonna go down with my gamma and see how far I can push it down
before it's sort of crossing the line
here, but it is not. So let's see how
far we have come. They can already kinda bring
a lot of inflammation here, a lot of information
on the mountains by just reducing the gamma is the. And now what I'm gonna do, I'm just going to
put a load on top of this and see how it looks. So I have a lot of lots specifically for
rec seven or nine. I can give a few. Let's also in the comments, also in the description below, so you can download
that and also use an collaborated with me. So what I would do, I would set off, choose a
different one than usual. So I would go here. What do you guys
think of this one? That's a little bit
of strong light. Or maybe let's
just try this one. So I go with this one. I know it looks awful. So what we can do, as I mentioned before, I go here to the keys, maybe make the gain to 0.5. It looks pretty good. It's sort of changing
the color of the sky. Here. You should already understand what the light is
actually doing. So it's sort of changing
the color of the sky, is also sort of changing the color of the
greens a little bit. I think that's it. Sort of bring this leg
is a little bit boring. So let's try some other load. Let's go with blood 16. Yeah. This is kind of okay. Yeah. I think this looks pretty good. So it sort of also bringing the contrast down off
the whole image as well. And the sky is kind of greenish, you can say, yeah. So overall, instead of making the image a little bit green, but also increasing
the colors and stuff. So yeah, that's how you
can just edit with a lot on all this change the opacity
of the load by c0 output. I'll just show you
one more example of how we can use lots. Here. I'm just going to quickly, do you see how perfect it is? Let's just look so beautiful. So what I usually do, I put the lot first and then image and then I change my primaries
according to that. So I would maybe just
put this lot already. Looks so cool. What I'm gonna do here, I'm just going to bring the lights down a
little bit of room, or maybe the Gamma down. I want it to be black and I want this to be
super dark and moody. But this lot, it's
kind of giving it. I'm liking what it's doing. But I want to do something
more on this one. Yeah. I'm really liking what
it's, what it's doing. What I'm gonna do because I want a dark and moody look so I might not touch the exposure because you see if
I touch it again, instead of making it
more happy image, I'm just going to leave it here. Yeah. So even if you have
applied a lot, after applying the lot, if you just like
what it's doing, but if you want to add
something extra, you can. So what I would do, I would sort of make it a
bit more dramatic here. So I would bring it more
towards the green side. Yeah, that looks
really, really good. Yeah, I really like that. Not super green, maybe. Just until here. So here my overall
image is kinda green, but I also want, but I also want
green in the sky. And all the bright areas
is controlled by gains. So if I just increase
the green here, instead of increasing the green, you see it was before and
after how dramatic it looks. And I just want
her jacket to pop out because it's just
getting too much green. So I'll do add layer and then maybe either select
through this way. Oh yeah, that's
not bad actually. Or maybe let's try
to select it via the preset and see
what it can do. Mirror was it color? Preset,
Preset treated here, red. So easy now it's also selecting
the whole of the ground. That's why sometimes it's
just nice to do it yourself. Yeah. I think that was the only part of her
jacket which was visible. So you see now her jacket
is a little bit visible. What I can also do is increase the gamma to make her
jacket a bit more visible. But sort of reduce the saturation because they
shouldn't pop out too much. But just a little
bit tonight I see how or maybe a little bit
more saturation though. So you see how cool it looks. So what we did here are lots, we applied the lots are just
gave us until this part. But we also wanted to
add something extra, adds some more
drama in the image. So we sort of went to the offset and the offset down
to degree two, broad the opposite
down quite a bit. But I was still
missing some greens in the shadow, in
the highlights. So what I did, I pulled some greens down
or I'm going the other way. I pulled some greens up in the image to make it
a bit more dramatic. You can make it,
you can just push it as much as you want to see. And then what we did because my I want it to person
the girl to pop out. I said off, pull the
green a little bit here. And then what I can
do one more thing. What I can do one more
thing here is that I want the subject to be a
little bit bright enough. So I would do it here. Maybe go a little bit like that. And now what I can do, stickiness and bring the
brightness a little bit higher. So what I would do, let's see if it's
doing anything. Yeah. It's kinda but I don't
want it to be too much. I just want it to be here. Yeah. I think that looks good. Because I don't want my subject to be blended
in the background. And what I can do, I'll just go here. I'll try to track it. Dragging it. The most tricky part, because
it doesn't depend on u. If the image is
super sort of weird, JavaScript, save the
image a superset of view, then it's not going to track. So let's look at again. Yeah, that looks pretty good. So we had this simple
image like this, really simple and we got some
thing like this out of it. So now you know, this
tool can do what? We can do what? So now the only
tricky part is to use which tool where to get
the perfect output. So yeah, it's more
about practice. You just have to
keep practicing. And if something, If one way doesn't work,
try the other way. If that doesn't work,
try the other way. Even for me. Sometimes getting a look. It just takes so much time because I have the
look in my mind. But just getting that
and just getting to that final position is
just takes so much time. Can be frustrating sometimes, but that's how you
learn when you are trying to achieve
that look next time, then you're going to do better. And one thing I want to show
you is that because say e.g. I want to put this grid
on some other clip. So what I would do is I
would do go grab still. I have my gallery. I already
saved all these things. And if I want to put this
look maybe on this image, then I go here and I go Apply Grade C. It's the same look, but because we have
a super sunny day, the location is
completely different. It just looks so different. So that's why one light cannot work with all the other images. If I want to put this, if I want to put it on here, it just looks so bad. I want to put here, or this kind of
works, but yet still. So that's how you can just right-click and apply
grade to everywhere. Or if you want to
export this screenshot, or if you want to
export this screenshot, you just go right-click
and you go Export. And then you can just export the screenshot as a JPEG file. So there's a lot
more other things to be learned in Resolve color tab. And yeah, it's just
an amazing tool. And once you just
know the basics, you can just do so
much out of this. So yeah, I hope you enjoyed the class and for the project, I want you to select
any three clips from whatever I have showed you. I just do your own color
grading and submit it to me. I will be glad to give my input. Maybe also help you to get
more guidance in the loop, what he wanted and
how it will get it.
20. Fusion Tab: So Fusion tab, it is a little bit complicated
than the Edit tab. Then the color paste tap. It is not that complicated. It's just not that much used with the da
Vinci resolve user. But Fusion tab has so many cool features which can just take your videos
to the next level. So to go to Fusion tab, I'm just going to drag and drop one clip in the timeline
in the edit page. And then we're gonna go
to the fusion to go here, I'm just going to click this
clip because they would be doing few things on
this clip, infusion. And for fusion, you
just go click here. So I would be just giving an
overview of this whole page. So Media, I'm just
going to bring these two things down here. So it has the same node system at how we had in the
color grading page, all the media pool,
how you had in the edit page affects clips
and all that sort of stuff. Clips, we don't need nodes. We can get rid of the nodes. Click on the notes, the notes
up here and here are just, here are things which
is not that important. All the keyframing is here. We are not really
going to use it. These are a little bit
too advanced things. Buddy, I'll give a few more
examples of everything, what we're going to use infusion as we go through this project. So this is a node and I'm just gonna get
rid of the effects tab. I'm just making
more room so that we have enough room
to play around. Here. What we're gonna do, if you see here media out, there is media in, media in. If I just press here, this dot, this is the media in, and this is the media out. This is the final output. They both are the
same now because we have not done any
effects in-between. So this is the input. We put all the effects
here and then the output. So what I usually do, I just make it as one
page because I don't really need to see how my
footage looked before. It's not a color grading paid, so I don't think there's
a need for that. But if you scroll
here on the timeline, you see that this whole thing is the clip from here until
all the way in the end. And all these numbers, they are denoting the
frames in the image. So each image would
have certain frames. So here it is at 40 friends. Then it goes forward t1 and
t2 83 848-058-0805 like that. And these yellow dots, these yellow lines are the
lines which is the end point. What we selected
in the edit page. Here. That yellow line is this point, and this yellow line
is the output point, which is this thing. This is the raw clip. Fusion is also showing
the whole timeline. And yellow line,
and yellow line is here in this timeline. So what are we gonna do? You're gonna go all the
way in the front and I'll start with
something really basic. But you can also do an edit tab, but I'm just going to show
you here that you have a little bit of better
idea of how fusion works. So I would just
de-select anything. I'll make sure
nothing is selected. Then I'll press here. So here are also some commands. Its background,
fast, nice texts. Let's start with text,
something really easy. Here's a text node
which is open, but I have to insert it
in between these two. So what I'm gonna do, this is the end point
and this is the output. So I'm going to drag this output to the
output of median one. So as soon as I leave the mouse, it makes a merge node. So my merge node is
here and text is here. So the input here
and the texture is merging here and then
it goes to the output. But I don't see anything here because I have to
press inspector. Inspector works the same as how it works in the edit page. Let's I'll just write text here. Caps Lock is on. You can change whatever
font you want. Let's just try this one. It really doesn't matter. Yeah. So with text, you can just
change the size of the text. You can change the
position of the text here. I'll just keep in center. And let's do a few animation. To do an animation,
what I'm going to do, I would select the text
node and then I'll go here. So this is called rectangle. Select here, the
rectangles sort of attaches itself on
top of the text. And what is rectangle is doing is if I move the rectangle, everything inside the rectangle would be visible,
whatever it takes, I'm going to write, if
it's inside the rectangle, then only it's going
to be visible. So what we can do, we can do some
animations from this. So let's select the rectangle. And here it's like
all the dimensions and stuff for the rectangles. So if I change the height
of this one, Let's go zero. And if I make a
keyframing how we did in the Edit tab, let's do here. And if I go here, and then if I want the
height to be here. So now if I go all living in the front, the texts appears. So if I go to the edit page
is going to show you more clearly see the text appears. And we can also do a lot
of other stuffs to say, if we do say soft edge, you see, so now it's going
to fade in and go up. We can also do something else. If I hear AMD can also change position of
that triangle here. Let's put it here. If I go here, then I make it here. You see why it didn't change? Because I have not
keyframe the center, the position of the rectangle. So I'm just going
to move it here so you see the red dot up here. So it means that this parameter is applicable at this frame. And if I go here, then I am going to move this rectangle
here. So let's see. We see in adult period is
going to be more clear. To see this is just
a basic animation. And if I want to do
maybe say a drop shadow, what I can do is that I select Text and then I press
Shift and space. So as soon as I press
Shift and space, this whole new section of
effects stopping the frame. So what I'm gonna do is
maybe a drop shadow. Drop shadow. Now it's sort of under the texts
that drop shadow. Drop shadow. I can just change the in fact, I can just change the
setting of the drop shadow, how we used to do the edit page. Now, even better. So all these things you
can do in the Fusion tab. So this effect is fine, but now maybe we want to do something a little
bit more advanced. So let's jump into that. So we are back in edit page. And you might have seen
a travel map animation. A lot of YouTubers, they use it and they
do it in fusion or any other video editing software like After Effects or so. So let's see where the map
animation, map animation. This is my screenshot. So I have just downloaded the screenshot from Google Maps. And I would, well, I have to select this
screenshot and go here. But after I've selected
the screenshot, I'll just also maybe
increase the duration. Deselect the screenshot
go to fusion. So in fusion, What's happening now is that this is the input, which is the map, and output is whatever effects we're
going to put it here. So the first thing,
what we're gonna do is why is it two legs? Yeah, there is
actually two legs. So the first thing
what we're gonna do is choose this option
called background. So if I select the median
and then I press background, the background comes
here with a merge node. So input and background
are coming together here, and then they go to output. But with background,
It's a whole, the whole image is black. So what we should
be doing to make, to draw lines on the map is
you press shift and space. And then we do mask. We just type mask and then
add mask paint effect. So as soon as I do
mask paint effect, the background disappears. And now if I click
something on the image, there are like I can draw, I can draw my own lines here. But we don't want to do that. We want to draw straight
lines and stuff. So what we would be doing is we're going to choose
this polyline stroke. So maybe we want to draw
something from here until here. Yeah, So what I'm gonna do, I'm just going to
zoom in in the map. So I had selected
the polyline option. And what I would do, I
would just press Command or Alt and scroll in the frame. And then now I've
left the command and then I can just
scroll up and down. And here I have drawn
the polygon here. So what I would be doing, I'm just going to make a
line on this road like this. But you see that there is, I don't like this
color first of all, and there is a lot of blur here. So what can we do? You go to mosque paint, brush controls and
reduce the softness. It's totally subjective. But I don't like the
softness and I can also, I also want to make the brush
stroke a little bit thin. And I want to change
the color because it looks pretty ugly to me. So what I'm gonna do, I would go here and maybe choose some bright color, maybe red. Red looks good. So I would choose red. So the background is
under the mask paint. And we are painting this
map with the mask pain. So we go up, up, up. You can also make turns
in the polygon like that. And then we go maybe here. You can also zoom in
a bit more if you want it to be super precise. We have our drawing
on the map here. So now what we're gonna do is I want this line to be starting from here and
should go like this. There's this until here. I just want to show like I'm going from point a to point B. So then what I should be doing is I go all the
way in the front. And then what I should do, I should go here to
Stroke Controls. And you see this
write-on effect. If I go back, it's sort of rights on
and off, I go back. Then what do I do? Keyframing. You see, you see, once we know the
basic of keyframing, we use it everywhere. So I'm just going to select
this parameter at this point. So it really depends on me how long I want this
animation to be. So maybe until 100 frame. Here. I'm just going to do
finish the right tone. So let's play this. Go up. And then it goes there. Yeah, sounds good. It was that easy. And now what I'm going to do, I also want to do some drop shadow just to
make it look more 3D. I'll select mask paint, I'll just press Shift and
space and then drop shadow. That's one another
press drop shadow. You see I did a little
bit of mistake. I shouldn't have done
drop shadow here. I should have done drop
shadow under the background. So the more you do, the more you're
going to know how this fusion thing works. So I would go to
drop shadow here and then I would reduce the blur just to see
where my thing is. So the shadow is a
bit further away, so I'm just going to
reduce the draw distance. So now it looks a
bit more better you see before and after. And then, once you go here,
what are we gonna do? We're gonna put some
and he mentioned here, so we're going to put
some location icons. So I will just drag
and drop here. I'm just going to,
I'll just increase the because we don't
need the sound panel. So I'm just going
to increase this so that we have enough room
to see what is going on. Then just going to
press the lower, I can reduce the size
of the location. I can maybe put it here, maybe here at the
starting point. So the IFG in the
size of this icon, but I also want the
same size on this icon. So what do I do? Go to Copy. Go on here, right-click Paste Attributes and
what do I want to paste? I don't need crop. I don't need position because the position of that
icon would be different. I just need the
zoom and the scale, scale x and scale. Why? You see it has the same
size as the bottom one. And now I can change the
location of this one. It's that easy. And then what do I do? I'm just going to reduce
the size so that it's not taking enough room because I have some other
thing in my mind. I go to Effects. I go to titles. I'll just choose a
basic title here. Maybe say point a and 0.0, 0.1. Let's say I'll just
change the font. It really depends on how you, whatever font you want. Here in drop shadow, you
can see that it's I cannot see the point the
texts really clearly. So I would just yeah. Just by moving the
shadow at minus four, you can already see
so much points. So here is without and
with the drop shadow. And now what I'm gonna do, I'm gonna change the
position of this point to maybe here, 0.1. Maybe you reduce the size, or maybe just put
it under the thing. We just put it here. I would just, I want this, I want this for the
entire animation. And then what I want
to do, I just want. Another text of the same size, and it should just say 0.2. So what am I going to do?
Just make a duplicate. So I'll just press Alt or Option and then click
this point and move up. So it's just going
to make a duplicate of this whole thing. Yeah, so now there
are two points here. And you're going to see it. If I move it up, you see 0.1 and 0.2. So easy, just by using these little shortcut is going
to save you so much time. And I just need to write
a point to and done. It would have the
exact same setting, exact same size, and also
the drop shadow effect. Now if I play it
easy, It looks cool. But I personally think, and I just want that
animation until here. So I'm just going to select
all of them and just press W, which is the trim out. It's going to trim
out everything here. So yeah, let's watch the
animation once again. Yeah, that looks nice. So I just want to
give some dynamic movement in this animation. So what I would do, I would select everything
Right-click, new compound clip. Yeah, just name it map. And he mentioned Create. Now it's an independent clip for results so I can do
any changes on this. So what am I gonna do? Keyframing the best thing ever? I would press Zoom,
maybe position, maybe pitch, and your view, you have to see what am I doing? So I would leave
everything like this here. And as I'm going here, I'm going to maybe
zoom in this March and maybe change the your point. Change it like this. That looks like
kind of a 3D map. Maybe a little bit
more, change the pitch. If I do a little bit more, you'll see these black
things coming up. So I would not push it too much, maybe just under layer and
see what how it looks. See how cool it looks. Yeah. I can also change the
rotation angle, the position. It really depends on me. But this already
looks really nice. If you want to
watch full screen, you just press P. Because he how cool it looks. So we have taken the
help from fusion. We did the initial animation, and then we did compound clip. And now this is like this. So now let's move
on to fusion back again and I'll show you
something really cool. But before that, I need to
get something from here. So you go to raw clips, raw clips folder go to fusion. And I need this photo. So I maybe need this from
here or maybe from here. Not too much, probably
just round here, that should do the job. So I would select this clip
and then go to fusion. You see this entire clip. This is the end
point and this is the out point. This is a clip. I don't want it to be too long, maybe just around here. Maybe a little bit long. So what is our goal in this
project is that here I want to have a text that is
attached to the water. So it should look like
the text is underwater. And this is you can
do on the infusion, not in edit page, not
in color grading. So that's why we need fusion to just do these extra stuff, extra animation stuff, which can take your
footage to the next level. So press Shift and space. Then we do planar tracker. That's the planar
tracker is chosen. So yeah, that is
a planar tracker. And we are also making sure that our timeline is all over here. So timelines crawler,
and here what do we do? Add them on the first frame. I just press set. Yeah. The second thing,
what I'm gonna do in the pattern at Cracker, I go to hybrid point areas. I'm not going to track
with just single point. I want to various different
points to be tracked on this image so that I can
attach the text on that plane. So I'm just going to be tracking the surface of the water. Maybe just here. And then what do I
do? I just track it. So this you just press which
says truck to the end. Let's go tracking and
see what's happening. So sometimes it wouldn't track because the motion
type is perspective. Sometimes perspective works,
sometimes it doesn't. Usually in my situation,
I prefer translation. I'm just going to
select translation and hopefully tracks. Oh yeah, it goes until here. So you see all these
white, white, white. Well, these are the key
points of this track. So I would go all the way here just making sure that
everything is tracked. This truck is easy if the
surface is not moving too much, but it cannot track sometimes if it's like a lot of crazy
movement in the frame. So once my planer tracker has tracked the
water, what do I do? I go here from track, I go to corner pen. And what Corner Pin would do
is that corner twin would make a surface on which
you can write the text. So I would just make Corner Pin of the same dimension wherever I wanted to, right? And then here, I'm just going
to press text and text. I'm just going to
drag the output of the texts to here to input. And then I just
write maybe text. So yeah, do you see
texts written somewhere? Icu? It's here. So what am I going to do here? You see that there's
not much option to move the text, which is here. So what do I do? I choose another option, I choose another tool
to change the dimension of these texts which is lying here. So what
am I gonna do? I press Shift and space and
I go trans form transfer XF. And this, what is this
transform is gonna do? It can help me to change
the size of the text. It can also help me
to move the text. I am not going to do pivot. I'm just going to
move the text here. So you see if I go further here, the texts that of disappears. That is because the Corner
Pin is just until here. But if I move them,
maybe corner pen here, then I can move the
text also here. So you see I can move the text and the
position of the text. If I think that it's not
layered on the water properly, I can change the angle
of the text by going to plan our tracker and just
moving the corner pen. But I think it looks
pretty decent. And one more thing,
what am I gonna do? I would introduce drop shadow. So again, shift and
space, drop shadow. So it's really not that
technical like fusion. A lot of people get
scared from fusion. So I'm just changing
the text parameters, just changing the drop
shadow parameters so that it looks more real. I'm just going to
change the distance. Maybe here. So it looks like it is in the air and the
reflection is underwater. So yeah, that's what
I was saying is that some people are really
scared of fusion, but it is not that scary. Like if you understand
the basics, you can do a lot of stuff. So now it's the time
to play and see if it actually
tracks on the water. Food is a bit jittery
because it's taxing on the computer and I'm also
recording at the same time. But let's play again
so you see how cool it looks like the text is
floating on the water. So this is how you can
attach objects to anything. I could have attached
this text on this sand or I could have attached
this texts on this one. And I'll show you
one more example so that you are sure that what
am I saying is correct. And I will select this thing
and then press Shift Space. Play in. Our tracker. Tracker is here. And now what do we do? Go all the way in the
front and this press set. And then here I need
hybrid point area. And then I'm just
going to select this church and tracking
it does a really good job. Then you have a lot
of contrast between the subject you are tracking
and the background. So you see now the background
is a little bit faded, a little bit desaturated. These things sort of
pops up in the middle. So that's why it's really easy for the software to track this. But if it's something
really complicated, the software would be
struggling to track it. So we have to be really mindful of the thing which
you are tracking. So here what I'm gonna do, I will change it to
translation and then track to the n. Should
be fine, I guess. So you can use
like these effects in any of the videos like
tracking to the object. And it can look
really, really cool. So I would go in the front and then I would
just press text. I would go to Text here. Texts and I'll just type owner. Once it has tracked, you have to go here
and go corner pins so that then you can select the surface on which you
have to write the text. Then I go to Text, just right. Maybe text here. Yep, text is a bit small, so I would introduce transform, key Shift Space transform. And with the help of transform, I can increase the
size of the text. You see that? I don't think it's a bit aligned because my corner pain is
acting weird so I have to keep them together or my text is sort of going
all over the place. We see if I make a
proper rectangle, then my text is proper. Then I would just do
like a drop shadow. Drop shadow looks pretty good. I reduce the blur. Maybe reduce the drop distance. And then maybe I
can move the text. Oh no, not pivot. I can move the text maybe here. Maybe attach it to the
Church and we'll see how it looks. Can be so cool. You can attach anything. Do this. Instead of text. You can also attach
something else. So I would maybe
just delete this. I go to media pool and let's go to map
animation and drag This. Anything you drag would
be like a node here. So you see as soon
as I drag the arrow, it has this weird shaped because my planer transform is
a little bit weird, but I have to reduce the size of this thing a little bit
taxing on the system. If you reduce it like that. And then you have to play with corner pen to have like a normal
shape of the things. This looks okay here. What am I gonna do? I want this location
icon on top of a church. So we can attach anything. You can also attach a video
which is playing here. So transform. Maybe on top of the church. I want just here. And let's see if
it tracks so easy. Just by plane or
truck or you can just attach anything to anything. So you can also attach a
video or attach any sort of animation anywhere in a video as long as
it's tracking Good. So yeah, that was
it for tracking. But if you want to
learn a lot more about Da Vinci resolve fusion, I have made a DaVinci
Resolve at once class, which is in DaVincis 17. But it's still everything
is the same where I teach you about Sky Replacement. Where I teach you about
green screen effect, where I teach you some
crazy stabilization method. So to access that class, go to my profile and check out my Da Vinci resolve
at once class. But this was a
basic introduction. It's going to give you a
good starting point to learn everything about fusion and to be excited about fusion, to be wanting to learn more.
21. Fairlight Tab: In this section, I'm gonna
be teaching you how to use firelight tab to get the
best audio possible. So what I'm gonna do
in the edit page, I have this, so I would select this and then
go too far light. And I'll see that this
audio is in audio one. Yeah. So what happens is
that whatever changes, I'm going to make an audio one, which is audio one here. All the audio in this section in this
line would be changed. Does this setting would be
applied to all of them? So what I recommend is that what I do with my
YouTube videos is that if I have to do a
voiceover and if I just want the audio of the
voice-over to be edited, I sort of put them in
a separate audio line. So here I would just
make it audio three. And I'm just going to zoom
out of the timeline to see if there's any other
audio and audio three, that is not the case. So I'm just going to zoom
in again by pressing S, go too far light. And now my audio is in
audio three, this one. So let's listen to the audio first and then I'm
going to teach you what all things I'm doing to enhance this
audio a little bit better. But if you're not
a cycling firm, don't worry, you can get a
day pass for the theory. And with this path,
you can explore almost all the villages around Lake Como will share with you the most beautiful town to
visit in our upcoming videos. So that's the audio and
it's really simple. Far light tab. I don't have to
do anything here. Everything is gonna be here. So here I see audio one, which is for the
first line of audio, or U2 is a second. But we don't see audio three. So if I drag it here than
it is for audio three, so we're gonna be doing
a lot of changes here. So how do we change any setting? Because I don't see any
graphs, I don't see nothing. Very easy. First thing I'm going to
be doing is the order. The order I want is
effects EQ and d y. Because first we're going
to change some effects, then we're going to
change the equalizer. Then we're going to
change the d, right? So I'm just going
to set it up here. And then how do
you put effects on the audio is by
effects panel here. So you see this plus, as soon as I press plus, it shows me a whole
range of options, whole range of settings, what we can tweak on this
audio to get the best output. Then we have some dynamics,
some audio enhancer, compressor, expander, limiter, all this stuff which we're going to
go through later. And then we also have equalizer. So that's exactly what
we're going to do. First we're gonna
use some effects. Then we're going to
use some equalizer. And then we're going
to do some dynamics. So that's a sequence
what I've set here. So for ethics, the first
and foremost thing, what we're going to do
is press plus here. The first and foremost thing, what we're gonna do
before going anywhere is go to my Edit tab and
press normalized. So what normalize does is
that It's going to increase my audio level until the extent where the
audio is not blowing out. So if I go normalize here, but if you're not a cycling fab, don't worry, you can get a
day pass for the theory. And if I check on the audio
bar in all your three, you can see that the
reds are very less. But if you're not
a cycling firm, don't worry, you can get a
day pass for the theory. And with this path, you
can explore almost. So that was a system normalizing the audio
until certain level. But in my opinion, I still think that it's a
little bit loud. So I am like the
software literally just increase the decimals
until how they wanted, Until how much they want is I'm just going to go into 3.14. But if you're not
a cycling firm, that sounds, the level
is pretty decent. So I have just normalize the audio and then I go
to the firelight tab. Go here, select a
three. First setting. What we're going to
change is go to here plus then we're going to
look for restoration. So we go to restoration, and then we go to d'Azur. So what does the hazardous? So DSR will reduce all the S and all the
harsh from the audio. So first thing what we can
do is listen to S only. But if you are not valid, Let's, let's, let's play again. But if you're not
a cycling firm, don't worry, you can get a
day pass for the theory. This is just playing
all the essays. But if I just press, if I just leave this S here, I can also change the intensity of how much it's going
to compress the essence. But if you're not a cycling fan, don't worry, you can get a
day pass for the theory. And with this pass,
you can explore almost all the villages around Lake Como will share with you the most beautiful
town to visit in art. We can also change the position here and keep listening to the audio and see that
at which position. Your essays lie. So at 2,000 hz or 4,000 hz. But if you're not
a cycling firm, don't worry, you can get a
day pass for the theory. I think in my opinion, my voice lies somewhere
2000-4 thousand hz. But if you're not a
cycling firm, yeah, I think it's looking good here, especially for a female. If you praise a lot of than the software would
sort of compress it and would not make it super hard for the
audience to hear. Because sometimes
if someone's voice, there's a lot of essays, it can get really
annoying in your ears. So that's what the hazard dose, the first step is
that the second one, what we're going to do
Vico here to Dynamics, figure too far light effects. And then we go to soft clipper. And soft clipper, what
is it going to do is just going to give a bit
more body to your voice. Let's listen to it. But if you're not a cycling fan, don't worry, you can get a
day pass for the theory. And with this path, you can
explore almost all the way. And let's go to soft Dr. But if you're not a
cycling firm, don't worry. You can get a day
pass what it has. It has given my voice a little bit more
base, a bit more body. Because if I hear
before, check this out. But if you're not a
cycling fan, Don't worry. Yeah, let's do with
the soft clipper. But if you're not a
cycling fan, Don't worry. Yeah, that's what soft
soft clipper does. It sort of increases the base
and your voice and makes it just gives it a bit more body so it feels a bit more complete, a bit more neutral as
soon as you see here. You also check here
that you can see the list of all the
effects you have had. So you can just click on this, you can just click on
this little icon here. Then you can just
change the values. So it's like really you can
just go back and forth. And after putting
these two effects, this was the effects. Then we go to the equalizer. So we're just going to click this blue line that
opens up my equalizer. And here I'm just gonna give
you a brief introduction. So all the areas
here is the base, and all the areas here is
the soft voices like this, and all the high pitched voices. So what are we going to do? We're going to keep
everything in control here. So we go to band one. So as soon as I press than one, it already sort of
clips out the audio, the extra base from here. And normally you don't
have a lot of base. You see the frequency. Normally my voice, everything below 80 or everything
even below hundred. I don't need it because my voice is not
going to go there. But if there's anything
in the background which is a bit more
lower hertz than that, then it's going to remove it. So let's listen to. But if you're not a cycling firm is not
going to do, don't worry. You can get a date part. It's not gonna make
any difference. But anything above that, which is not my voice, it can just get rid of that. So that was that. And then the second
point here or maybe I'm just going
to keep it to 98. And maybe the second and
the third point here. What are we going to do here? Is that for the second, I would just make
it like this. Now. I would make it like that. So here what do we do? We have to reduce all
the harsh sounds here. So how do we listen
to heart sound? You have to keep
this all the way up. Then you listen to
the heart sound and wherever you can catch
that harsh sound, you pull this down. So let's play the audio here. Yeah, this looks a bit better. But if you're not
a cycling firm, don't worry, you can get a
day pass for the theory. And with this path,
you can explore. Obviously, there's a lot
of harsh voices here. But if you're not a
cycling fan, Don't worry. I'll just reduce this part. And to reduce this
part, what do I do? I would just pull this here
and then the Q factor. You see, if I do
the Q factor like this is just sort of
reducing this point. You see? So let's, let's
listen to it again. But if you're not a cycling fab, don't worry, you can get a
day pass for the theory. And with this, at this point, I'm just going to reduce it
down a little bit and listen. But if you're not a cycling fan, don't worry, you can get a
day pass for the theory. And with this, it's getting a bit more clarity to my voice. And the same thing I'm
gonna do for the three. I would just go the queue, increase the Q
factor a little bit. But if you're not a
cycling firm, don't worry. But if you're not a cycling Pfam thing
is the harshest here. So what I'm gonna do, bring this point a little
bit lower as well. Don't worry. But if you're not a
cycling firm, Don't worry. It's a really minute change. But if you are listening
on a big speaker or if you're listening
on a big home theatre, then you're sure that your audio is not
going to blow out. And then here also, what am I going to do is increase this a little bit
and see how it sounds. But if you're not a cycling
dislike that don't worry, you can get a day
pass for the theory. And I can feel that it's giving a bit more
clarity to my voice, but it's not that noticeable. But if you're paying attention, then you can say that there
is a bit of difference. So this is the basic structure. I keep my equalizer too. And I think you
should do as well, because all of our voices are lying somewhere
between these regions. And if you take care
of these points, your audio would sound
a bit more crisp. So that was it for equalizer. Now, we're gonna go to dynamics. Dynamics is this one here. What do we do? All
the way in the front? Turn on compressor
and see what happens. But if you're not a cycling fan, don't worry, you can
get a day pass for n. We can also do the expander, just turn on the expand or
maybe turn on the gate. And now it's going
to take care of all the other noises
which we don't want. But if you're not a
cycling fan, Don't worry, can also change the
value of these things of the compressor with the threshold
and the threshold here. But I sort of leave it in this structure because
in my opinion, it just sounds very neutral and I don't want to
experiment to March, then my audio is going
to sound more edited. And here now my audio
sounds pretty crisp. It sounds like it's recorded
almost in a studio. But if you're not
a cycling firm, don't worry, you can get a
day pass for the theory. And with this path,
you can explore almost all the villages around Lake Como will share with
you the most beautiful. You see how cool it sounds. So guys, that was it
from the firelight tab. And if you have any
questions, let me know. And now we're going to
move to the last tab, which is the export tab, because that is also
really important because you have worked so hard
on the entire project. And now the export time, and if you choose
the wrong setting, then that might be a problem. So I am going to show you the most optimal way to
export any video file. So let's jump into the system.
22. Best Way to Export Videos: Now that you have
to export the file, so what are we going
to do is say e.g. if you want to export the first sequence
that we had before, just from here to here. So
what are we going to do? Press here and go here. So this is the in
and out point for the video files which
we want to export. So once we have
selected in and out points and we go
here to deliver. And you see there's
a lot of options here as those X4 custom exports, H.264, hypertension, these are all things which
you'd really don't need. Prores know, YouTube or Vimeo. Youtube and winning Vimeo
their own settings. Dropbox, they have
their own settings. But you really don't
need to use any of this. The easiest and the
best possible output is what am I going
to show you now? So you go to H.265. So as H.265 is a video
codec where the video, it does not loses its quality, but the file sizes are smaller. So say e.g. if I export
something in H.264, the file sizes is
almost two or three times more than the
file size of H.265. So I'm just going to go
to H.265 and then browse. So browse, I, I've saved all my files in
DaVinci Resolve exports. I just save it here. So here in this file I'm just
going to make a new folder. Now Vinci Resolve class Create. And then here I can just
name the file test. Yeah, I do save. So this is the location, this is the name of the file. Single clip, render. I don't change anything. Export Video, it's
really up to you. I do it for QuickTime, but if I have to use the
video for Instagram or so, then I use it for mp4. Because sometimes I don't know
if I export in quick time. I don't hear the audio if
the video is for Instagram, but usually I use it for
our use QuickTime here. Codec I do is to o65 here. And then I just
keep this as it is. Resolution what I do. So you might remember this, all these videos, they
were in high definition, they were not in Forky, but I still export
in for k. Why? Because as soon as
you upload it on YouTube or any other
social media platform, The software is already
going to compress it. The platform is already going
to compress your videos. So why not give the
best quality as possible so that even
if it compresses, you're not losing
too much quality. So yeah, that's why I fill them all my videos
in high definition, but I upload all of them
in for k. Ultra HD, frame rates is 25. What we had before and quality. So here what I do, I have a rule of
thumb that I restrict the quality to 50,000 if I'm filming at 25
frames per second, if my project was at
50 frames per second, I would restrict the
quality 200,000, So I would just go
50,000. Is it 50? It is 50,000. Then I don't change
anything here. I don't change anything
in advanced setting. I just leave everything colored space tags same
as project gamma attacks, same as project,
because we chose all the right settings in the
beginning of this project. Remember the rec 7.9, AN
all that sort of stuff. So we chose the
right setting there. That's why we don't have
to do anything here. Then here, then this
Add to Render Queue. This is added and then
you can just do render. And if you want to export
multiple projects, say e.g. if I also want to
export this file, I can also just press in
and out here. So say e.g. if this was a complete
separate video project and you also want to
export them together, like render them together. Then you just do test one. This, so this would
be exported as test, and this would be
exploited as test1. I would leave the setting the same Add to
Render Queue add. And then if I want both of
them to render together, I just press Command or old, select both of them
and then render. And they're gonna
render simultaneously. And if I go into the system, I can show you the
video properties. We go to Exports,
DaVinci Resolve class. This was test one. I'll just go get info and C. So you see it is 76
mb and it is for k, 30 s clip, and it
is H.265 as well. So yeah. And this file
is also for k and H.265. This it was just 136 empty. That was it from
render settings. You really do not have
to use any of this. Just go to H.265, master and export in for k, not in high definition. If you have to
export an Instagram or TikTok than in
high definition. But other than that,
YouTube, Vimeo, and all the other platforms
exporting for k, trust me.
23. Conclusion DaVinci Resolve 18: That was it for video
editing in DaVinci Resolve, I really hope that you enjoyed the class and got
a ton of value. If you have any questions, please let me know. You can also connect with me on my socials and link
them down below. And don't forget to post
your video projects as well. I'll see you in the next class.
 Adi Singh, Videographer and Youtuber