Transcripts
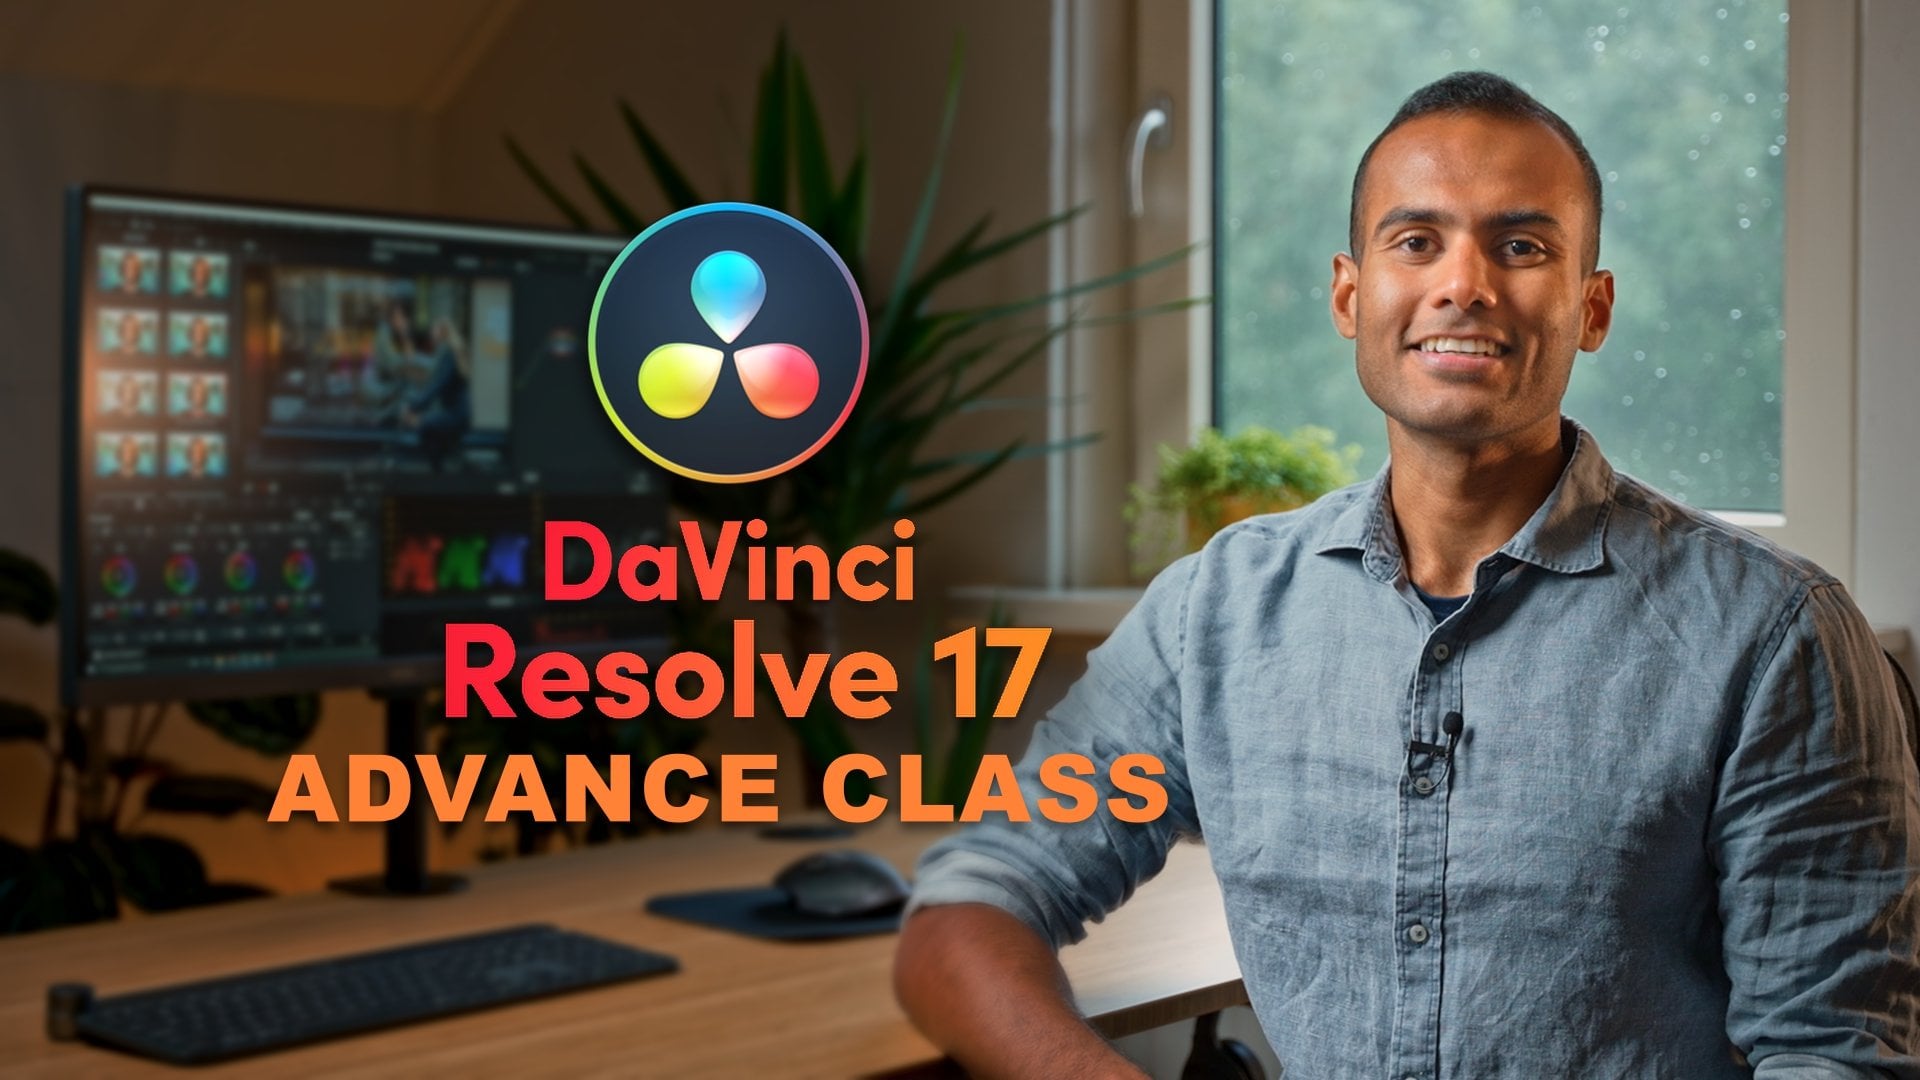
1. Introduction: Welcome to a new beginners class of how to edit your first video project in DaVinci Resolve 17. And why you should listen to me. I'm a professional videographer and a photographer, and he also make YouTube videos for 99 percent of my work where there is a professional color grading or implementing those crazy transitions, or making professional sound design. I'm using this software all the time. And you know, the most crazy part is, it's absolutely free. And this class is made especially for beginners, whether it's your first video project or whether you are jumping from some other software to DaVinci Resolve, it would be really easy to follow along because in each module I'm teaching everything from scratch. So you literally do not need any sort of experience to follow along with this class. So enough talking, let's get started.
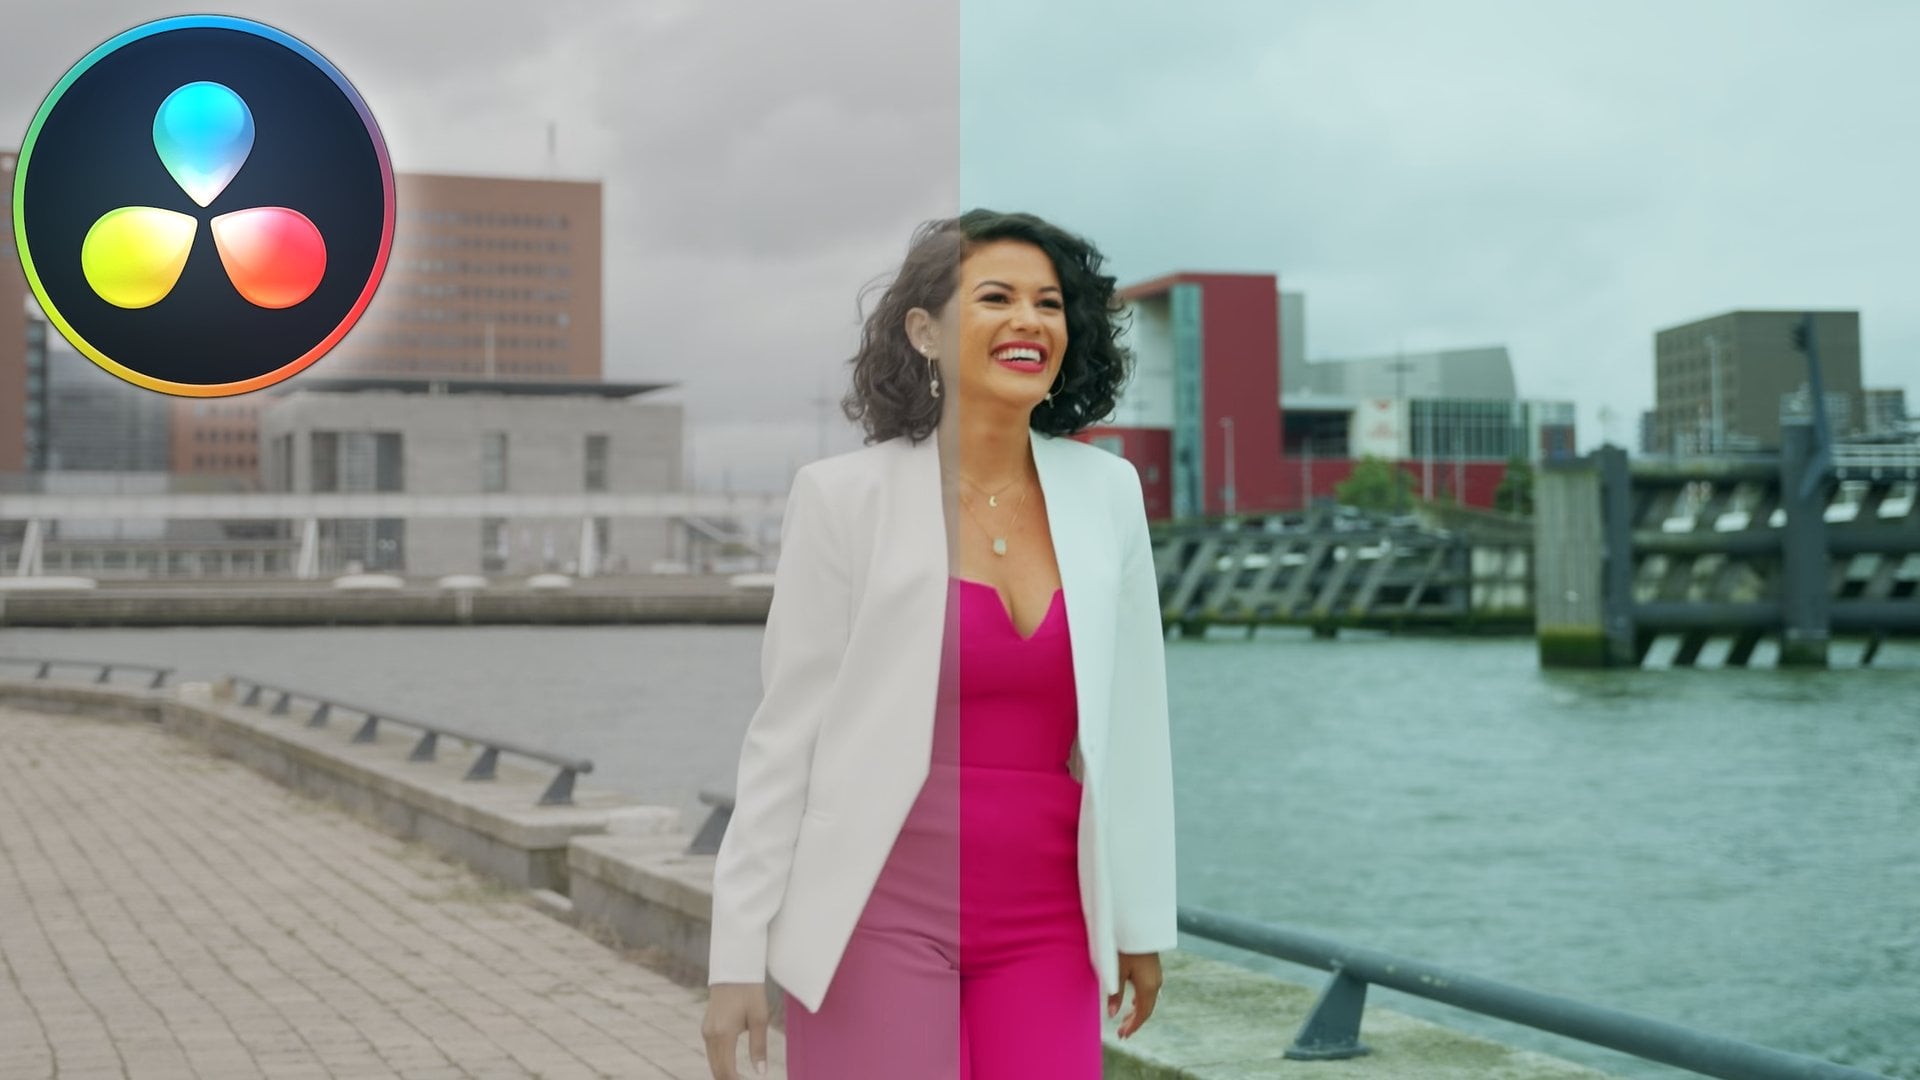
2. Contents of the class: So before we jump on to the computer and start editing the videos, I also wanted to give you an overview of Portal things you will be learning in this class. So first thing you will be learning is how to efficiently import the footage, the raw clips, from your computer to the software. And then moving on from that, I will be teaching you how to trim the clips, how to use few shortcuts to make your life easier. And then import that clips on the main timeline and put the clips together next to each other. And then you would be using few inbuilt transitions and a few inbuilt function to make those footage look more cinematic, look more cool, look more interesting, whatever you referred to that. And after that, once we have a basic structure of the video, then we would move on to the color grading section, a color grading section. It might look a little bit intimidating in the beginning, but I've gone through each step really slowly and have explained about each step really in depth so that you know what you're doing and why you're doing that. And I would give you a basic overview of how to use lots in the video to make your footage look from this. This. And I will also share with you a few lots which you can download in the description below. And there will be also a link in the description below of how to import those lots in DaVinci Resolve. And after we had done calibrating our footage, then we would move on to the export section where I can show you how to use different templates, what's already there in the software to import the social media, YouTube, or your first freelancing. We're, so now we get done with talking. Let's jump on the computer and start editing some videos.
3. Introduction to all pages: So I've got my coffee ready. Yes, it's a pink cup and it's not mine. So anyways, let's focus on the class. So first thing, before wasting any time, we're going to open them into results. So I'm just going to start my screen recorder. That will be really important. So starting my screen recorder them into Resolve. Yeah. As you can see here, I am using the Vinci 17. And yeah, like that's the cool part about this software is that it literally not taxing on your system and it would start fairly faster if you're editing in Premiere or After Effects. So that's really a cool thing. Yeah, so what I would do if you're starting with the first time, you can just start a new project. That's literally what I'm gonna do. What I would do is Skillshare class and then create it. So it's going to take a bit of time to load up the software. So here this so for me, whatever page whatever page I was left with last time, that's what the pages open. It might look everything might look super unknown to you, but let's go one by one on each page and see what's happening. So with page what I mean is these things. So say here it says media, cut, edit, a fusion, color, fair light, and deliver. So that this project, like, especially if you're a beginner, I would recommend you not to freak out too much about these pages because in reality, we'll be using only edit page, color, page, and deliver page. Literally, just these three can do all the job and I am actually, I'm not even kidding. I'm actually doing everything with just these three pages. And it just makes life so simple. So what I would do to begin with, I would just give you a little bit of introduction about all the pages, so at least you know what's going on. So media pages, of course, you can see all these folders in your, of your computer. And you can just, if I have to drag any project I can distract the folder to here. And that's why media pool of all the projects, what I'm going to use. And then next is the cut page. So cut is whatever video files you have imported in the project. You can drag it there and he can cut all the videos and put it in a timeline. But in reality we can do the exact same thing in the edit page. So in this page you can do literally the same thing. And you can do a lot more features you would be talking about because in this class VOD, spending a lot of time in edit page because that's where the whole project is built up. So you can do a lot of cutting and everything. You can do a lot of effects and everything. You can do a lot of zoom in, zoom out, transitions and all that sort of stuff, all in this page. And then fusion. Fusion is a page where you can do a bit more graphic stuff. Like if I have to replace the green screen, if I have to, you know, like really technical stuff, what you would be doing in After Effects if you are using the Adobe suit. But for this class we are not going to be using a fusion because I think that if you're a beginner, it might be super overwhelming for you. But I would be making an advanced course and Da Vinci result. So we can then I will be showing you a fusion in that class. But usually like honestly for me, whatever projects I do, I don't like you really don't need it if you just want to make YouTube videos, if you just want to make a simple basic edit. And then next one is the color page, which is my favorite. In this page, you do a lot of color grading and it is so cool, like since I started collaborating and resolve, I just don't look back at Premiere or any other software for color grading. And the next one is firelight. So with this page, you would be doing a lot of audio tweaking and all that sort of stuff. But the audio tweaking you could also do on the edit page. So there's literally no need to go in for light unless you're gonna do a really advanced, advanced audio editing. And then the last one is also really important. Does it deliver page? So in this one you can choose what sort of format you're going to export the project in a lot of different settings. So we would go through this later in this video.
4. Importing video clips in Resolve: So I think you would understand all the pages better if I really show you that real life example. So it would make more sense rather than me just talking about the pages. So why not just let actually start the project and then I'll show you how everything works. So as I told you about the media media page, it helps you to import the footage, but you can also do the same thing in the edit page. So I can show you literally two different ways to import your video files. Individual result 17. So let's go for this class. I have made a folder of projects and I'm not sure where they are. I think it's incorrect product Skillshare, Sony. So you see, you see all these folder. So you can literally just download all the photos from the folder. So you see now what's happening is it's sort of copying all the video files from these folders. But if you literally just want to copy that folder, what I will do, I will just select all these folders, drag it here. And I see this is my project file. And there you have all the folders here to go back. I just go like this, or I go here like this. And then you have all the, so you can literally just drag and drop the folder here in the master section. And that would give you all your footage. So that was one way of importing all the folders. The second way is just drag, the second way is just drag and drop. So what I would do, I would go here and then I will just open wherever my folder was. In. Skillshare, Sony, I will just drag and drop all these folders here. So what's happening? You sell, It's just copied all the video files from these folders. To make it to make my life easier, I would go back, control X Delete. And then what I would do, this one, my computer is getting stuck. I don't know why. So I would drag and drop all the folder under master. So you see now I have all these folders and that's why I also encourage everybody to sort of subfolder your videos as much as possible. Because if you have a really, really big video file, you literally no, they're each footage. It's sometimes so that helps a lot, especially with me. I can make some folders like day 1, day 2, morning shot, evening short drones, music, audio effects, video of like extra videos, old videos, all that sort of stuff in. I can actually show you one of my yeah. So you see this video project, I had GoPro footage After Effects files, extra more old clips, music mirror photos, like, you know, you get the gist, right? Okay, let's get back to results and to edit them in Resolve, I just drag and drop all the folders here in Master, and then the video, and then it's just there in front of me, you know. So that's how that's, so those are the two ways how you can import video files invisible.
5. Introduction to edit page: So now what we would do is introduction to edit page. So this is the page as I talked before, is that I would be doing 70% of the time I've IV would be spending on this page. So it's really important for you to learn everything about this page. So let's get started. So first thing obviously you see the usual result here. File, New Project, then edit. Like we barely use these sings. And then after that, if you go to Media Pool, that's the media pool, that's where all our folders are. The effects to the library. You have all the inbuilt effect where you can find into Vinci Resolve or if you have downloaded any effect, or if you have bought any effect online, you would find it here. Obviously, once after you install it. And then edit index. There's nothing in the edit index because we haven't imported anything on the timeline yet. But once you import it, then you would see all the list. But it's not really important. And sound library is if you have any template audio in the sound library that you have saved in Resolve, it would always be there so you don't have to go to the folders all the time. It would always be there, but I don't really have it yet because you don't really need it. So in this 12 things are really important media and effects library. And if easy is see this little thing right here. What it does is that it sort of shrinks my sort of shrinks this whole thing. If I do that, Oh, if I do that, you see the whole thing has shrunk and I have a lot of space on my timeline. And that's really important if you are editing like a 10 or 15 minute video, or if you have a lot of layers on top of each other, it's really important to use that. And then if I click that, it just sort of an shrinks it. So that's literally this side of the screen is. And then if you go to here, if you have your resolve open, you might see that you have dual screen here. So one screen could be for the source file, which could be this. And one screen would be four. And on if I import that, so I just dragged and dropped from here. And one clip could be from here. You know what I mean? So if I just import one more clip Altis to something, don't freak out. I'm going to teach you all this. So you see, this is a video from my timeline. And then this, and then this could be the video from my source. So I can just select the input and output from my source and drag it onto my timeline. But more on that later. So let's delete this first. And so that's why you have two screens. But if you want to make it one screen, you can just press that and it brings you to one screen. And then if you go on this side, you have few different options. So this one is an option for the audio, but not gonna, we're not gonna use it too much because you don't really, you, you did, you wouldn't really use it a lot. But when we would edit the project, I would show you what's literally the function of this mixer thing in the corner. And then thick next one is metadata. So it's sort of it tells you about your footage, what's unfolded as it is and mobile. And then next one is the inspector. This is really important. So you would learn more button specter once we start the project. So that's the Inspector and then eco in the bottom here, then you would have different sort of timeline. So this is the timeline. So here you have different video layers. You can always drag and drop the videos on different types of layers. See if I drag it here. It's on video layer one. If I drag it here, it's on video layer two. So yeah, and you see my timeline. So there's also wait, I would drag and drop normal clip and then you would see. So I have dragged and dropped this one. So now if you click here, you will have different sort of timeline options. So you see our timeline has changed a little bit. You have this timeline one saying here, but I don't really need it, so I just put it back so that I have more room here. And then we have this option audio waveform, which in my opinion is really important. Because if I click on that, you see you have audio waveforms. And if you sort of enlarge this a little bit more than you see what's going on in all these audios? Yep. So what I do is I usually click it. And then here is the type of video view options. So what I do is I let the video show in the entire bar so that I know that what video it is and no video. So you can just play around with that and see what happens. And then audio waveform options, this, this, I usually sort of put that like that. I usually I usually select that. And yeah, that's my choice. But yeah. And then you can also choose the video track hide. You know, it's, it's circled. It looks like you can select an increase or decrease the audio. But he can also just do that by dragging this. You don't really need to go there. And then here do they will video track if you're not disable any video track, if you're not disabled any audio track, you can just press mute. If you just do a solid drug, it's really easy. And then if you want this to be the master video, then you click it here. Yep. So I hope everything is clear on this side. And then let's move on to more sort of in the middle. So this is the cursor's selection mode. I have chosen to selection mode as the button V on my keyboard. But so these are the shortcuts. Shortcuts are also really important. So I've made a whole separate sections on shortcuts because that's going to make our life so much easier. Shortcuts. That's the selection mode, that is trim B-mode, I would show you, I will show you in a bit by the US these, so these are all sort of dynamic trim mode sleep. I would These are all sorts of techniques and tools. What would make your life easier if you wanted to sort of cut, if you want sort of cut and import all the fives. In the meantime line in short duration of time, it just makes your life so much easier. And this is the blade tool. So if I select the layer, you see now I have laid here. So I can literally just cut the footage. And then if I go here, I bleed to it, it's gone and then I can sort of move the footage. So what I do control the and this thing Insert clip. I have chosen SP. I will tell you how it works and this is snapping to. Then I've ended with edit the video that I would show you. So it would make more sense. You just have to trust me. All these tools would make more sense, so just trust me and enjoy the process. And then here you have different timeline views. So if I want full extended zoom, it has like proper zoomed in. If I go here, it's going to show me more detailed look of the timeline. And if a flow here, it sort of showing me the overview of the timeline. So you can also zoom in and zoom out on the timeline with using the plus and minus button here. Or you can use a shortcut, zoom in and zoom out, which I will show you in the shortcuts. So I hope that's the basic overview of the edit page is clear to you. But I'm sure there will be a lot of confusion because there's also a lot of things in the inspector channel, which we would go through in the next section. Because as I edit the video, then I would be using all the tools. So it would make more sense for you that why do I use all the tools and when do you use that? So let's just edit the video and see what happens.
6. Cut/trim and import clips on timeline: So I hope you are clear with the edit page. So now what we will do that we would actually make a whole segment. So for the whole segment, what we can, what we are going to be doing is that fizzy these folders, I have different footage from different places of my travels. Some drone shots, music I've already selected for this video. Some shots from Nepal and some slow motion shot because I also wanted to show you how the slow motion would work. So what I would do, I would make like a little edit for say, 30 seconds. You can also download these videos from the link provided below. And then we can edit together. Or if you are the person who wants to learn everything first and then tribe herself, You're welcome to do that. So let's start the video. So what I will do is that I will just go through all the footage and C. So in my opinion, I think I would go with the same sequence. I will put the chili clips first and then the drone, and then some from Maple and then some slow motion. So what I would do, I would select this one flip. And here, you see if I have to just play it, because first, I just press Spacebar and just raise. So it's a pretty long clip. So what I would do here, imagine if I just want like say 34 seconds of this clip. First way of doing this is I can drag this whole clip in my timeline plate here. And then I can select what clip I want and then I can delete the rest. So to delete it, to go to the blade tool here. So we can delete the blade to the, can also delete the blade from the US are now youth you see here. If I zoom in the timeline, if you see this, this partition, and then if I have to delete it, I just go to Selection Mode. Again. I press this, and then I go Control plus x. So that's sort of deletes my whole video, which was, which I didn't want in the first place. And then if I just want to put a force, Let's do five seconds. So if I just went up, put it for say five seconds, then I will go here. Got it. Got it. So you see, and then what I would do, I would go to Selection Tool here, Control X deleted. So that was a tedious process. There's an also, there's also an easy way. So what I do, delete this. I go to the source file. I just place it from here. So if I want three seconds from here, I will press I. So I would set you the input point from where you would want the video. So i, and then you see what's happening at the screen here of selecting. And then what I would do if I just want the clip onto here, I would press all, which is the output point. So you see I have selected the segment from here to here. And if I want to drag this on the timeline, few different ways, I can just drag this clip from here and it's just going to drag this section. That's the first way. So you see that happened. Control Z. I go click, it's still selected. Second way is if I just want to drag the audio video, you see, oh, if I just want to drag the video, I select this thing. And that would just drag the video file. So there's no audio here because we also cannot see the audio file here. Or if I just want to drag the video, I would select this, drag it here. So now if I zoom in, you'll see the video files. Or the easiest way is I go here. Yep. And then if you see this button, Insert, clip, right? I've also made a shortcut for that as p. But you might have different shortcut in your computer. So that's why it works. It's really easy for me. I select I in point, I select o out point, and then I press P. So I'm pressing it to see the magic. It just comes to my timeline. So you see what happened. So I would do the same thing for the other one that we drew. Just drag it all the way to the front. All the way to the front. Or, you know what I will do, I will just first this ripple deletes AC what repeatedly. So that closes the gap. Ripple delete. So now the video starts from here. And now what I would do is that I will open second clip and do the same thing. I press I for the endpoint over the out point, and then we just press P, which we take me here. To just import the video. So long clip. This clip was actually from Chile. It was this boss abandoned truck was literally lying next to the highway. And I was like, Man, that is so cool and English's neither the scary because I had my camera gear. But it was also really interesting at the same time. And this, all these cliffs, they are like 23 years back because that time I was using Sony a 6600. So I'm assuming that if you're a beginner, you will be using same, similar type of camera which produces the same colors. So that's why I chose the clips for this project, which most of you might be having of the same quality and of the similar colors. I hope that makes sense. So, yeah, clips from two years. Vacuoles are really cool journey. Let's see what's going on. So first clip was me walking their second clip, what I can do and we'll just print I and I opened the gate. Press. Oh, yeah. The gate was locked so nothing happened. You can see I've just spent back, but I will just leave it all here and then I would press P. So it's just going to bring the video and x, x to the first one. And now if you see the audio difference between the first, second clip you can submit and it's, there's a lot of audio difference. So what I would do, I have two options. Either I can reduce this audio or I can increase the audio of this file. You see the wavelengths. So what I would do, that's how you increase the audio volume. You don't go to the volume there. You just, you see my cursor is changing. I just drag this a little bit up and I can drag this a little bit down. So you have audio kind of sounds a little bit similar them. So yeah, that's how you drag and drop and cut the clips and drag it on your timeline. So I will do the same for this one. Let's see how cool is this way. So I would just see, I've seen these clips so many times, so I would just press I will. Something happened there. So I'm going to start from here then. Is really cool. It's a place called San Pedro data comma in July. It's one of the driest place on Earth and it's like that it'll barely rains there. That day. We were just on the bike images, so dry and so on. So this is the drone shot. Obviously there wouldn't be any audio, so I can't So do you see it? There's no audio. There's no options for me to even drag the video or audio because there's no audio. So I can just drag this file from here or just press P shortcut to no audio there. Yeah. So that's why you drag and drop. And you see every time I'm sort of going in and out here to sort of zoom in and zoom out of the timeline. There are a few shortcuts that can make your life easier. So if I press U, C, a, if I press S instead of Zoom since tomorrow. But this, I have made the setting by myself. You can choose your own settings. How to do that? Just give me a second and we'll go through that.
7. Editing video clips using shortcuts: So in this section we will be learning about how to use keyboard shortcuts. So we already imported three clips in DaVinci Resolve. What we would do. You'd go here saying da Vinci resolve the kowtow keyboard customization or law. So that's how it opens. So the important ones, what I usually use, I will show you in point and out points. So I would tell you the command, you can also just save it in your computer of whatever keys you want. So the first one is Mark in and mark out. So if you just press mark in, Mark in what we selected was I that would mark the video and mark out you can select it as o or pick and choose whatever keys you want. So that's where, that's the command name Mark in and mark out. The next one is selection mode. So you see the selection mode here. So every time we don't want to go to here, then press the selection mode and then go here and then cut, then get the blood to, to make our life easier. What I did was I made circles. So normal edit mode, that's the selection mode. So if you just go normal, so you see edit mode, just try edit M. And it would show you the normal edit mode, which is v. So that would bring your cursor back. And did the Blade Edit Mode, see that would switch between the blade and the cursor. So if I go Press, see, my blade is on. If I go press and then I'm done cutting, then I go press V, my cursor is on, so Cp, Cv, just first Control Z. Let's go back to keyboard customization. So that was that those were also one of the important tools. And the next one, what we would do is trim edit mode. So Trim Edit Mode is so trim mode, I have chosen as B. So it could be something completely different in yours. Actually know what it would be in yours. Cremated mode is t in your computer. So I have chosen as V. So next one, what we would do is we have already learned the market and Mark, mark out points that trim in and out points. And I would show you why these are really important. Trim end is stopped you. And trim stat is Q. And why it is important? I would show you what's the use of this one. So whatever is in this one, you can choose that same button. I have chosen a to my own preference. So I'll show you what tremendous. Let's say if I have selected this clip and if I want to cut it from here. So I have two options. I can either go to C and then cut it. That's two steps, right? But with trim stat, I can just press Q and that would cut my that would cut my clip from that point. So that's really handy because it's just one step as two. And all of these steps, i'm I'm sure you would be thinking that it's not a big deal and it's just two steps. But if you are editing for a really long time, It's just going to make your life so much easier because you're just not using the mouse so much and you're not swapping vision keyboard and the mouse. So that's what it does. But now we have also one more step because I forgot to change it to V, which is the selection mode. And then we have to drag it back, right? To make our life easier, what we do is go that VR in the selection mode, we go to click Trim Edit Mode. Then we say if you want to trim the clip from here, and then we want to drag this clip all over here. So because we are in Trim Edit Mode, which is also shortcut, be for me, it could be different for yours. I if I just press Q, which is the trim start, it would literally bring me to the first, say, for example. And if I want to trim from the end, then I press W, which is, um, I don't know why I'm I going to preference if h is trim and say if you just search trim, end here and see what key is for trim. And so what I would do, I'm still in the selection mode, trim edit mode. So what this should do is that this should trim all this section and bring this whole section closer to the first one. So if I press W, You see it in one step. Your whole editing game can be so much faster. So that's what I do. I just drag and drop the clips. And then once I put the sound on the system, once I put the sound clip. Then I sort of still trim all the clips according to the sun. So I hope that makes sense. So after this one, I think this is going for a little bit longer. So I would still be in the trim mode. And I will just press W, which is the trim out. And then I have one more drone shot this within Sydney. Very nice and sunny day. I press I now I should probably pressed I hear when the drone is in leg full speed, my computer is lagging a little bit. Just central here. Press O and then press insert, clip. Either press stat of press P comes here. Yep. Now you know how to drag and drop the audio. What is the easiest way to sort of trim the clips and what is the easiest way to put it, put them together. Now, I would show you a little bit about what would happen if you're sort of logging into camera. So instead of trimming it down here in the Himalayas in unapproved our circuit. And the plan is to walk for five to six hours in the mountains, just walking next to the waterfall. I think I will just leave it too. It's the best place. So this was actually a track what we did in Naipaul in 2019 critical. So I would start from here just before I say so so press I and I would leave it to when I say it's the best place to be, I faked skies clearing up. It's the best place to be 0, 0, and then P or no. So you see what happened here was my timeline. Here. This thing, what might this thing was in-between this clip. So it's sort of inserted that clip there. But what I should be doing is I just leave it there. Then it should insert. At the end. They see what's happening now. The audio is so low here. So day 2 here in the Himalayas, node u is super high and it's also sort of exploding. And how do I know if exploiting, if I see the mixer here, which you can turn on and off by this one, you would see a lot of reds in unapproved our circuit if you see the red emitter. So if you see, if you see a lot of radio, which means that that's no good. So either you can reduce the volume of the master channel, but then that would also reduce the volume of the other videos. I will just leave it here, which is the recommended. And I would sort of zooming in the track and then coater. Yep. So yeah, that's how I would reduce the audio. And before going any further, I have forgotten one more really important shortcuts. And zoom in and zoom out because every time I am going like this, this is what I have done in my computer, is I have press a for zooming. Know if we zoom out and zoom out. So I will show here is you must if you just search, zoom out. Why it's nothing is showing. Just put it on Zoom. Yeah. Zoom here. Zoom in, S and a. So I would I just press between those two to zoom in and zoom out up the time timeline. So it just makes my life so much easier. So you can just choose the shotgun according to what do you want. So you see if I want to go to this clip here and then I want to reduce it. I cannot just press zoom in. And then if I go a, yeah, I just first zoom out. So yeah, these are things which makes my life so much easier. So yeah, those were a few shortcuts that I use. And okay, let's move on to this block thing. So here, there's no audio. Here in the Himalayas. I think I would just, it's still on this trim mode. I would just go to the Selection Mode. I don't know. I just like having cursor. I would do it a little bit here. So this value, what you see right now, minus n 0.79 decibels. These are our unit to measure sound or volume. So ideally it should be at 0. But I think the mike off my camera was too loud that so I'm going to have to put it a little bit like 6.82 to make it a little bit more Nice and easy as in unapproved RefSeq. But if you see there's a lot of noise in the background from the found it and from the really crazy river variables. Walking next to the plan is to walk for five to six hours. So what I would do increase the volume a little bit. I would go to the Effects panel. So now we're going to effects finally see. And I would go to Audio or I would just go here. And then search. Noise. Now let's go here. Open FX. So this is the, yeah, all the filters you go noise reduction. So you see, I cannot use this because it's not a paid software. But if I go to audio effects, it has no noise reduction tool, which is absolutely free. So why not use it? So I go here. So it has already reduced the background noise, which is the default. Let's see. Day2 here in the Himalayas. Unapproved our circuit. Then do anything. Because there's not much bass in the video which needs to be reduced. I think there's more sort of the site which needs to be reduced. So I would just go D his CC is going to filter out this end. So let's see. So day 2 here in the Himalayas in unapproved after kid and the planets to walk or so my voice also sound a little bit more damped. So I'm going to reduce it. So day to threshold maybe around here, here in the Himalayas are maybe a little bit here in unapproved our circuit. And the planets to walk for five to six hours. So I'm turning it on and off and see the audio difference. Here in the Himalayas in unapproved our circuit. And the plan is to walk for five to six hours in the mountains, just walking next to the waterfall. The weather's perfect. Disguise, querying up. It's the best place to be. So you see how these little tools can help your audio to make it so to make it sound so much better. So yeah, that kit that we can do to just adjust the noise reduction. And there's also different options here. 50 D rumbled the histo that's going to reduce some Clip, some sound from here, Samson from there. So you have these kind of stuff. So that's what you can use and you can just play around with these two. There's no like rule that you can only use it this week and only use it that way. I just want you to show varies what, what is the basic, basic function of those tools. And then after that, just play around. I feel that I've been using this for three years, but I literally know like maybe 50 and 55 percent and still, which just knowing that much, I can still edit so many cool videos and get paid from that. So how cool is that? So yeah, you really don't need to know everything but about whatever you know, you should really try to make use of that thing a lot. So that was how we do noise reduction. So what I would do, I would just play around with these clips and sort of edit more because I also have some night clips. So I would go out and then P, I should put my thing here, an empty. So I'm just, I'm just doing like some really. So you see, it's going like that. But in reality I wanted to go the other way. So what I would do, I would go pee and then I would sort of right-click, Change clip speed, and then reverse. So now it's sort of more sort of revealing the street. I mean, it's good. That has no people locking, otherwise it would look awkward. Yeah. And then the slow-mo slow as a really important. So if you see this clip, how to make a clip slow motion? First of all, if you see this clip and if I go to File, you see the frame rate, that's 59.940. But if you see the frame rate of this one, but I'm talking as 29, 24 frames per second. So if you reduce on the speed of 24 frames per second, it wouldn't look that good, safe, I make it say 50 percent. It would have looked at pleasant here and you see, you see how much Iterators. But if I sort of reduce down the speed of these clips, the 59, the 24 frames per second, the 50, 60 frames per second would clean 24 frames per second. So there's a really cool way of doing that. I'll show you to play in slow motion what I would do, right-click here clip attributes, and right now it's set at 60 frames per second. I go here. I want to play at 24 frames per second. So now it's going to play in 24 frames. Here. The audio is still in 50, 60 frames per second, but the video is in 24 frames per second. So I just want to drag that. I'm not sure if I want the audio or no, so I will just put it here and then maybe one more. Yeah, I'll just let these people pass. Just start here. Click Attributes, put it to 24. Then drag and drop here. So that's our history. See I'm zooming in, zooming out. So now we're sort of building it somewhere. The timeline is going somewhere. And I'll be left with anything I've used these clips is a That's why it's really cool to have folders, cardboard if he had like 10, 20 clips, you have to scroll down. I have used these clips, I happen to use this. And also one really cool thing, if I move from one clip to whether you would see something. And that is harsh starting of the sound clips, what I would do, I would sort of just drag it a little bit here. And then you see these things. If I just do that. So that would let me introduce the sound clip really softly. So you would know, just check. And you can do the same thing for the final wave here. So that's how clips can fade out. So I use these technical lot in my videos. Because if I just increased, if I just let the audio play like that, it just looks very abrupt and it sort of fades out. So I think our video would be around. I thought it would be just slightly seconds, but it's turning out to be a one-minute video. But yeah, so these were the really basic these you can import the clips on the timeline. So I hope it's clear until now, if it's a lot of information, I would encourage you to just pause this class, go for a break, come back, come back again and just come with a new energy. Yeah. So we also learned how to make a clip slow motion. You can do the same thing to make it fast. So I can show you that drone clip example. Or maybe let's just try this on. So I would press Alt and keep pressing Alt and radical here. So it's just going to copy this clip from here to there. And then I can also just increase a clip from here. But it's a long clips. I wanted to show you something. So it's already going really fast. But if I want to increase the speed of this one, you go here. Change clip speed. Is it a 100? I can do say 350 and see what happens. Yeah. It's not bad. And then if I were to chop it, that if I want to trim the end part, I just press W, that is the trim out. So yeah, that was a bit of lot of things. Okay. Now you can go on a break.
8. Basic video editing tools: So in the last section we saw how to put all these clips together. But we are sort of forgetting that one of the most important section, which is the inspectors section, which is on the right-hand side of results. So I will just give you a brief introduction and then we would do some things in the videos that would make more sense where to use what to. So if you go from the starting, zoom in, zoom out. Pretty straightforward. Yeah. Just press Control Z position. You can just set up the position of the video footage, rotation angle change the rotation pitch. You can also make it a little bit of 3D. I'm just first control z like that. And flip, change the direction of the video. So I have done it so many times and it works. Not the horizontal flip, but you can use it sometimes it works. Next one what we have is cropping. So if you don't want something in the videos, is crop from the left, That's crop on the right, things like that. Brother, I will show you how we can use cropping to make it look cool. Or now I even forgot where the clip was. Yeah, flip. Compose it. Here. You can change the opacity of the image if you don't really need to use it. But if you have like say 23 images on top of each other. So then if I reduce the capacity of this one, That's not cool, but that's the job of capacity. But sometimes you might need and then stabilization. Stabilization is really cool. I can just literally show you right now. So then you would know how it works. So stabilization. So we see this thing is sort of moving a little bit. It looks like a handheld footage widget laws. And if I stabilize it, Let's see what happens. Or that was stimulus actually I did stabilize it in our mind, but if I stabilize it, increase the smoothness a little bit more. So if I stimulate it, it's also going to crop in a little bit. You see cropped in Kind of Okay, let's see how compared to the previous one. Super shaky, turn on the stabilization. A little bit less shaky. And there's three different types. You can choose any and then stabilize and see which type works the best. But it's actually worse, better, or transition stabilized and see how it works the best. And then we have camera locks or Camera Lock is a property in DaVinci Resolve. If you are not sort of moving your camera at all and if you have the camera in your hand and you sort of want to make it look like a tripod shot. You can use Camera Lock. And that would sort of reduce all the minor jitters and make the and it would make the footage look like it's sort of decade. The camera was placed on a tripod. So yeah, that's why we use a camera lock for lens correction is for the paid version. And even this. So how to use zoom in and zoom out. So either you can use a Dynamic Zoom. I forgot to show you. Oh, Dynamic Zoom. You can just go here. Really easy to just go ease out or ease in. Let's say. How cool. If I go ease out and just go there. But here we don't have any control over how the Zoom is, what's the pace of the zoo? Was the position of the Zoom? Yeah. So to be more in control, what do we do? We go to the Zoom panel. So here I can zoom in and zoom out. But I can also set keyframes, which can set the zoom point at the impact of the video and out points on the output of the video. So zoom in. I've also set a keyframe for position. So the Zoom and in the claim, What's it doing is that it's sort of saving the position of the clip and also the zoom level at the beginning. And then if I just want to zoom in until this point, and if I change the zoom position to here, and if I change, said this was a one here. So she, there's also one more point. So these two points are there because I selected this keyframe button in the beginning. So let's see how the footage looks now. That's a little bit too much harsher zoom-in. And it also stops here too. It looks weird. I can just do that. Go to enter the video, and then zoom in here and here. So it looks a bit more smooth. So you see there's a little bit of zooming, but we don't see, but it's there, but there is. So that also gives a cool effect because I'm sort of going to what's the truck. And instead of making the audience feel that it's sort of pushing into a syndrome. You can also do the same thing here with the drone effect. So it's all white shot. The drone was not coming close to us. So I can just sort of assuming a lot. And that would also give the audience to feeling that drawn this sort of rotating, but it's also going close to us. So that was the thing, what we learned with the keyframes. So yeah, keyframes, we just set position, save the position at that particular point. And we can do the same thing for cropping here. So I can do, you might have seen this affecting movies or you might not have gone to here. And then I'm going to, so that's the beginning of this clip. And I'm going to set the keyframe of top and bottom. And then what I would do is that reveal shots at the whole screen opens like that. And I want the baby here. That says Then I put press zeros, this whole thing opens up. So even if you see, if as I'm moving from here to here, the value of these things would change as well. See how cool and I can always move this point here. Or if I move it here, it's going to open really fast. That is not looking good. So you see all these kind of things I can do. So these are just the magic of keyframe. And I told the dynamic zone stabilization, yeah. So that was it for the inspector panel. And what I would do, I would I would show you because we can also do few things in audio. Let's just refresh that because I did it. So yeah, day to hear it. You can change the quality of the model as in four or five to six hours in the mountains, it's walking next to the waterfall. The weather's perfect. So yeah, you can change the volume and then pan is you can sort of choose what side two of your head points, what side you want to put the audio ad, and then semitones. I'm not sure what these are shipped on Franklin needed, trust me, equalizer, this is the important one. So you see if I'm playing this audio, the audio sounds a little bit damped. Day to hear in the Himalayas in unapproved our circuit. So what I would do, I would just lift a little bit from here and see what happens here in the Himalayas in unreported and lift up, maybe you go a little bit more here and that was a bit too much. In our circuit. I'm also going to reduce the base a little bit from here and see what happens here in the Himalayas in unapproved our circuit. And the plan is to walk for five to six hours, the in-demand and just walking. So I'm not sure if you can feel the difference between you can hear the difference between different audience, but I can for sure. So these are things you can play with to sort of reduce the audio. And then there's like few. You can just get rid of these points or no. Let's see, there's few different ways what you can improve your audience. So just play around with this one. Like my job here is to just show you what is the function of what. And then just play around and eventually we'll figure out and because there's literally no limit in using result, there's so many things what you can do with this software. It is insane as free. That is crazy. So yeah, that's the things what you can do for the audio is as well. I'll just see if I have anything else. What can be told. I think we are basically done with this inspector channels. So we are almost done with the edit tab before moving to the color. But then we also have one more thing left, which we will discuss in the next section, which is the effects library. Because there's also a lot of inbuilt effect in the individual resolve it. You can just drag and drop on the clips and you don't need to buy, they're literally in the software. And then you can just make really cool transitions. So yeah, let's do that in the next section.
9. Use inbuilt video transtions: So here we are. So we did quite a few here we have cut, we've come quite far. So if you are editing with me, that's really cool. Or if you want to edit later, That's also fine. We have come quite far with the edit page and until now you know how to put all the clips together. You know how to sort of play the audio little bit. You also know how to use the Inspector tab, how to zoom in and zoom out how to set up keyframes and all that sort of stuff. Which is pretty cool. And just by knowing this, you can still edit so many cool videos. But yeah, you have to get the most out of this result thing because it is insane. So what we would do is that next thing we would be going its effects library. Let's go to toolbox here. Crossfade is sort of fade between two clips. Just go and drag and drop here in the audio because it says minus three. So instead of fading between one audio to the other, so there's no like harsh caught between these two. So few audio effects, which is not really important, additive dissolve. So what I would do is that to show you this clip, I'm just going to put my timeline bar in between these two clips a day can literally also show, see how the transition keys. If I just put it here. Not the coolest transition, but it's there. Same blur dissolve. I don't use this. Just to show you. It looks cool. Some of them are good. Some of them there's kinda look really cheap. Yeah. You have an option, you know, this is cool. This is cool. If either there is a lot of possibilities. That's what I said in results. Smooth cut. It sort of still life fading in and fading out. And then these are the general transitions what you saw in the videos from like ten years back. But it's there. Yeah. Just play around. It's really fun to just see what all things all look at it as hard. If you're making a Valentine's Day video for your girlfriend or your boyfriend. Again, you can use this transition for free. How cool is that? So why? There's like crazy amount of some rubbish. But the cool ones are, assure you. If you want to do like if I want to go into past or something, see camera shake at school. It can be cooled. For the music videos are so circles just play around. Yeah, film strip is really cool. I use that in one of my videos, like literally last video, we're going to put it on YouTube. How cool is that? Just one click and done. And if you want to increase the transition time, you can also do that. So just drag and drop from here. You see anything, um, I wanna make it really short. It depends on you. And then the glitch transition. This is also cool. I'm much risk. Yeah, never plays in the first group. Kinda play it in. Well, that's a bit too much for my computer, I guess. Yeah, that's cool. And these are a few what I downloaded from some YouTube videos, which I barely use, but yeah, it's there. Zoom-in, zoom-out. This is cool. This is like one of the transitions. What YouTubers use, zoom in and zoom out so it can be cool in this one. So I would just put this there and see cool air and then zoom out. Yeah, that was cool, but it's there. So those were a few transitions. And the next one, what are we going to do is the title. So there's a lot of title options. I would show you a basic title, but there's also like a lot of different sort of titles here. You don't even have to click it, just put it there. So it's gonna, it's just going to play how it should be playing. Some title animations, the call center veal. And just looking for a cool one so that I can drag and drop and show you. Let's try this one. It's going to use a little bit of the graphics of your computer, but they're cool. Or there were 23 things going on here. You see, so because this thing is there. And if you see here the blue line and the red line, the blue line is sort of rendering the thing, the effect. So how do you edit the text? Just go in inspectors. That's why inspector was really important. Skill share what's happening in the sample versus them. So this is for this one. I'm not sure whether the other one sample. And maybe I should write Skillshare. Skillshare. So let's play again. Obviously this is going to jitter a little bit, but when you export it, it's going to be fine. Maybe I'll delete or not, just let it be. And you can obviously change everything here. I would make maybe make it black. The colors ages go here and then make the thing back. So that was just for class. And if you go down, I can maybe two. Let's choose a really ridiculous color. Red. It can look really cool and yeah. So these are things you can choose the size, you can tell the track, tracking you can choose. The line spacing is just a lot of things here. You can choose what type of font you want. So yeah, it's really straightforward and just play around. This is cool. I can just type Naipaul here. This was a Naipaul circuit. Really don't have to do any animation, just drag and drop down. And then you also lose a lot of things. And that's why DaVinci Resolve 17 is really cool because they have put all these things in the 17th version. These other things, what you can do with these things. And then also a lot of things. That was video transition, audio, not really important generators. So these are few generators. You can just put it there. But what I sometimes uses that say, for example, if I want this drone clip to be played like that, and if I want the background to be like that, so I can just put it like that. Oh, I increase the speed in this one. So you know, these kind of things, what you can do in the And then yeah, affects few cool effects that you can do by inoculants. If you're going to show someone spying on you, cctv, ooh, I need to buy it. There. There are few things which you need to have in the paid version. But this is just play around and see, this is cool. Video call. Yeah. So did other things, what we have in the edit tab. So I hope that I've explained you everything in the Edit tab before moving to color section. So and if nothing is clear, Just comments and just comment down below. And I would be happy to help I take my Skillshare almost every day just to reply to the comments and just tap talk to you guys. So yeah, let me know if it can be really cool that if you can learn something new. And Yeah, it's a good investment, really good investment to learn things like this.
10. Color grading basics: So next one we will be going in is not diffusion because you really don't need it. If you're a beginner, I will be making an advanced class soon, or by the time you're watching that van class is already there. So just check out my profile and check out the classes what I'm teaching and you would find that eventual resolve advanced class. So let's move on to the color tab and let's see. So this is the color section. It might look a little bit intimidating, but let's start from the beginning. So I would explain you. I will give you an overview of what's happening here. So this is the gallery. You can just click that unclick, unclick the gallery and you will have more screen, more room to move around. But gallery I'll show you later What's happening. Lots. There are few inbuilt lots in DaVinci Resolve. I'm not sure which ones because I've also installed a lot of lots from my friends where I bought fuel lots. But I think film looks is there in DaVincis. I could be wrong, but it's there. And if you want to get rid of this less distress that I'll leave the list. Their media pool is again, the media pool, which we don't really need it. I don't know why it's there, but I'll leave it to lots. And here is the timeline. Here, I'll show you why we need these. If I go here, that just gives me more room to move around. And then here is the timeline. If you press that, it would show us the whole timeline. But obviously you can't see anything what clip is, what. So to make that easier, to scattered up the timeline and then we can see all the clips here. So if u, v, So if we want to do any color grading, you can just choose any clip you want and do color grading on that and then the node system. So I'm not sure if I should tell you to notice them now or later, or maybe just tell you now. So what I'll do, I'll get rid of the clips because we don't have a lot of clips so that we have to navigate everywhere so that we just have more. So note system. The Vinci resolve uses note system For consecrating. It's very different than Premier Pro, but not the we have different nodes. For example, I'll show you an easy way to make notes, but you see that whatever settings I do on this node, say for example, if I just meant testis this, and then if I do some colors on distance this. And then if I do the S curve on this, this, this. And then if I do the saturation on distance, it looks ridiculous, but I'll show you what I mean. So you see this node I literally just chose for saturation. You see it says saturation. Bobo, custom cursed this node. I just chose four curves. This note I just chose four primary balance, which is this one and this node. I just chose four also to some primary balance. So to see an overview of what's happening, if I just get rid of this. So my saturation, what I used is gone. My curves are gone. My primary, the temperature is gone. And this o'clock. So now this is back to them basically. So let's do some color grading and then it would give you more idea of what's going on. I will explain. I don't know if I did a good job of explaining notes, but trust me, it could be really clear. So the next thing what we would do is I will show you the difference between because you might have if you have to use Lightroom or if you have used Premiere Pro. There are highlights, mid tones, shadows. There's no Gamma curves, there's no gain Lift Gamma and all. But if I give you an example, if ego, the next clip, the problem it highlights is say for example, this is the highlight section. If I increase that, you see, you see the whole picture blows out. If I increase the highlights here, Let's just reset. And then if I go here, that takes me back to the left. Come again. Gain is sort of the highlight thing in this, in gamma curves. If I increase that Cause, cause, it takes a, really a while until the picture blows out. Do you see peaches blowing out now? Then the event to 1.24 and in highlights, the only event 2.41 before it blew up. So that's why the gain Lift Gamma Gain curve is much more efficient to work with because it's a little bit smoother. If I want to brighten the image, it would be a little bit of smoother journey from studying to the end point, rather than highlight, just drastically changing the highlights and blows out the whole image. It's a bit softer from the transition between highlights to midtones to shadows in, like in, in overall conclusion, it's much more professional and it's much more. It looks much more better on the image. I'll show you. So what we would do in the first node is, first thing we would do is get some contrast in, get some colors in, gets some work on the contrast here. So what I would do, I would node labels are not. You can now play the gamma curves here. And if you see this one, if it's not there, if testing is not there, these are called scopes. I would just leave it to tear. There's a lot of different types of scopes, but I would leave it to there and bear with me. This might be a little bit of advanced thing, but I would try to explain. So if you see blues, the blues in this thing is a little bit lifted, but that's not a big problem because the red greens and blues, they are almost on the same thing. But if you see they are sort of more towards upwards. So in this picture, what I can see, what this is telling us is that the highlights and the brightness is a little bit too much. But if I go on the shadow side or the black side, there is really nice shadows and blacks. So a good image would have good amount of highlights, good amount of brightness, but at the same time good amount of blacks as well. So that's why the blacks in this whole image is not really black. It's a little bit more sort of lifted. So that's what we would pull it down. So to pull the blacks and the mid-tones down, you would just reduce the comma. And then you see the blacks are sort of coming down. It's a little bit smoother. Yeah. But then if I put it until here, and, but then at the same time I can also lift my gamma so that this whole spectrum is full. Here. It takes the entire image. It's going from here to here. And now if I go back and forward, what do you need to press Control? D CC retained a lot of inflammation visually attend a lot of shadows. So that's what we did here. And you can also, if you want the blacks to go a little bit more black, then you can play with the lift. So you see it's sort of bringing the blacks a little bit more, but we don't want our blacks to go past 0. So E just going to leave it at this point. Or sometimes if you want to increase your blacks, increase the shadows you see is sort of going up. Again, like how it wasn't the beginning. So I am just going to leave it there. So yeah, it looks pretty good. So I, if I press Control D, then this node would activate and deactivate. So you see before and after, sorry, look so cool. Yep. So this node was just for the Gamma curves. And to make a new node, what I can do is add node, add a serial node, which is this one, Control Z or I can press Control plus S or S. So in this one, what feed would do is that we would play with the saturation a little bit. So here's the saturation really going slow. So I go to a 100 and then I sort of reduced down from there. And if I go Control F, that shows me the full screen. And then if I go Control D, then it's going to de-select the saturation, know it and see what changes we have made. So you see how cool it looks. Just be two steps. The Son of God, the image to look a little bit cool. And then if I want to have a new node, I can just go here. Add node at Serial Node, or I can just press All S and then that will open a new node. And now what I want to do is that either because this is like in a desert, I want to make like a warm look. So what I can do is that you can also see these colors here, right? So I would sort of move my camera to a bit more yellow sides. So all the midtones would be everything except the sky would be yellow because that's all the midtones. But if I also go yellow in this one, in the gain, then the sky would also turn yellow. So I will also want my sky to be yellow like that. To see I just move really, really slightly towards the yellowish side. Let's go full screen and see how the image looks. Press Control D. So you see the difference. Which one do you like more? Is it this one or how it was before? Yeah. And then what I can do is that to complement this, I can sort of reduce. It, can make it more dramatic. I'm sort of bringing my shadows. My shadows are here. More sort of greenish side. So you see nothing would be changing nano sky, nothing but all the shadows would go towards more that are green. So it gives like a bit more dramatic look. So if I go, You see So this was the saturation and this was so I don't think the cream looks good. Let's go. Yeah. So I hope this looks good. Or what we can do, we can deselect this node, yeah, make another node and then put a lot from this one. So if I put any light, it's going to make, it really is going to make the image look really bad. Because these labs are for the professional cinema cameras, which is shot in really flat profile. Then from that flat profile, you use the slug to make a normal image. But because our image already had a lot of colors. So let's kinda look blown out. So what I would do is that I can also reduce the intensity of this lot. So I don't know if it's too much, but I can reduce the intensity of this led to two. So to do that, I go key. And this is the gain. I can reduce the cane to say point 33. And now when I scroll down to all these lots, it can give them a certain kind of look. But obviously depends on your preference. Yeah. This looks better. So you just hover around to each look in and see how it looks, you know. Or I actually had this is my own personal lots. This is a lot water use. But do you see now the gain it has this lattice made the whole image a little bit dark because you see all the gain has come down. So then I would go to the Gamma curve and increase the gain again. And then if I go here, I press Control D. You see how easy is that. But even if you didn't want to do, if you didn't want to have any changes, you want to, if you prefer this one. What do you do? A reset or I would just de-select for now. And then Control Alt D, O. Control the, sorry, I messed up Control D, and that would change the whole image. So you see, and I can also reduce the incentive intensity of this one. Nothing happens and then a 100 percent to 100 percent. So that was it for the adult, that's basically it for the color grading. But I personally think that this is much better. So I will just delete this node and activate this one. And then what I would do if you want to copy the same settings on my next image. And we just label it as lot. And if I want to copy that in the next image, grab still. Yeah. Then I go to next him. Oh, no. First image, which was this one. Then you go to gallery. So it's sort of saving the whole setting here. You see that angle, Right-click, Apply Grade. How cool, How easy was that? And from here, if I want to change the saturation, I have the basic color. And then from then on I can just start editing each photo. Yeah. So that's the clip from the desert. So I think the steam lead could look cool here. You see just changes everything. Here. If I think that you see the gain, it's just blowing up so much. So I can just go down a little bit. Yeah, Just leave it here. And here. If I put this on the this is completely different. Vibe. Could look cool, but it's looking a little bit and a little bit sad. And this looks like a really cool view. So here what I would do not label. So you see this, I will just go up the cane, go down with so that we have enough shadows and C. And then I press Alt S, get a new node, increase the saturation. It looks pretty good. And if you want to see all the changes, what we have made until now, press all the so that's going to deactivate both the lats, both the nodes, and then you see the changes. And then if they want to make one more, and in this one, this is really cool. So in this one safe, I want to change the color of the water to make it more, more like sort of teal. What I would do go Color Presets. I go blue. So you see it's sort of selecting the whole sort of blue area. And if I go here, then it's going to show me what area does the selecting. And if I want to select a little bit more area than I can always increase the selection. So I want 00 shin and the sky to be selected. And then I want these edges to be a little bit soft. Yeah. And then if I thought that too, now what I would do just this area is selected and not the green ones. I can increase, bring it a little bit more. I'm bringing a little bit more towards the teal side. So now if I press Control, D See how much change what you have made. So cool, well, just to get a little bit of changing the colors, you can just make it so good. That's basically it for the calibrating. I'll show you a few more things here. So these are the S curves you can declare on with S-curves. This, I think it's a little bit too complicated for now. I can show you how to increase or reduce the sharpness. If you go here, if I go a little bit down, then the sharpness sort of increases not too much. 48, then that increases the sharpness. If I go here, makes the image a little bit software, you don't need to play around with these too much. I would say if you want to make a little bit sharp, just go 0.49 or 0.47 is the max. Yeah. So these are few things what you would be doing in the color panel. What I would do, it was grabbed still again. I will try to see maybe everything is not looking good here because it's a completely different environment. But if you are editing one single project, all the footage would be from the same place, right? So we can do similar type of collaborating. They're in the night. I'll show you something. So I would go here gamma. I'm not going to put it to my star because it's already dark. But here you can increase the shadows here. So you see can increase so much shadow. How crazy is that? If I go front and back. But that looks a bit too artificial. I'm just gonna put it in the middle and then I go on a different node for the colors. So I'm just going to increase the saturation a little bit more. To make it a little bit traumatic. What I can do is I can go my left a little bit to the bluish side. And I can go my mid-tones are little bit to the orange side. And again as well. So that's going to give a little bit of film look. It's not that obvious. It is obvious. You see this looks like a normal footage. And then if I do that and if I want this to be on the same one. But here we did stabilization on this one rice, if you go apply grid, that's going to get rid of the stabilization. So what do we do? Right-click, reset all the nodes. We go append node graph. So that's going to lead the stabilization naught here. And all the three changes would be here. If that makes sense. And then here in the slow motion, so you see how much brightness it is here. So firstNode, I'm just going to Use the brightness easy it was, it was like that was the starting. So easy it's only going up. So that's my list. When I reduce the gain and push down, the gas is already looking so good. And then all of this in the beginning I would say, have a good practice of labeling the nodes. So node labeled this was more sort of the Gamma curve. This one I would increase the saturation and you didn't have to increase the saturation in all the images. But I just felt that with the camera setting I shot, I reduced the saturation in the camera settings so that I can always add or reduce in post-production. So yeah, it only looks so cool. See, and if I hit and it's a bit of mourning, so I would put like a bluish tones. I'm just pushing the lift of it more towards the blue side. Cc. And then if I go on that a bit more there. This already, That's the thing we dove into. Result is sort of pushes the colors. There are that and brings the color in. But then you wouldn't really know it like it's not that harsh. So let's see from the beginning. So this, this image turned into this image. If you don't like too much, yeah, you can just reset that. So these are a few basic color things, what you can learn in result. And there's also a ton of different options what he can do. But as a beginner, I would recommend to just practice more with these things and also play with lots a little bit more. And also you can just download lots from anywhere you know. Or if you want to have a few lattes, just let me know. I can give you some free ones. Let's go 2.4. I have just reduced intensity of this one, and I would use the results to see how it looks. Now, this could look good. It's good. Keep that teal and orange look. But then what I need to do is that I need to get rid of my own color. Yeah. And then I also think that as soon as you put the luck, that also you also have to be careful about the Gamma curve because I think the lexer a little too black, so I'm just going to go a little bit higher and put this here. So you see before and after, I would just delete these two. Oh, this one is the log file. So let's see from the top. So you have cool, restores all the colors. And just by using the leg from result, it looks so cool. But there's so many. Yeah, This is also I like this one better. So yeah. Like if I go with colors and resolve, I can go for ages, but yeah, more on the colors would be in the advanced course because I also don't want it to be too overwhelming and I want you to make your first video as soon as possible. So yeah, that was it for colors. So now what we would do onto save this out is because they were in the same environments. We see if they're filmed in the same environment, it can look cool. And also try to look at that. How cool this, the same setting looks, how we look, how much information that we have caught him. Beautiful, love it. See, this looks good here. This can also look good in my video. Yeah. No. I mean, this this one, what I would do, I will just increase the saturation. And I would reduce though. It's a bit more overexposed, which I should have kept in mind while filming. But I can make it work, but it just needs a lot of time. But Stella's the overview for the color tab.
11. Cut/trim video clips with music: Next thing what we would do is that we, after doing the color grading, you should do it before color grading. That was my bad. At some music, it is so important. So I've already selected a music. What I would do, just drag and literally just drag and drop. Or with music, you can do the same thing if you want, like a certain part of the music. You can choose that, buy in and out points and then wrap from there. I can literally just show you if I just want to have the music from here, I pressed in two. If n, If I want to in, and then I get is 0, go here. And that part of the music is selected. But I want this whole music to be there. So now it's going to drag and drop the part that I selected. So what I would do the whole thing and let it be. So also the most, also, while cutting all the video clips, you need to make sure that you are cutting on a beat so that it looks cool and looks like we are more in the rhythm. So let's hear the music and see what happens inside. So, so here what I want to do is that at this point, I want this clip to be hit there. So you can do by two different ways, either eating, just drag this clip and go there. But then if you're just moving disc clip, this hasn't moved. This hasn't moved. So what I would do is that this is where this two comes in handy, frame mode. So I go B, yeah, and then I press this, and then I'm sort of doing that trim out mode. Remember, trim out key, and that's just going to frame that and move all the clips at the same time. Let's play that again. So you see what's happening now is that I'm talking and then the music is playing really loud. So what do I need to do is you're going to use this thing so many times, is standing to get rid of this mode. So I'm just going to press B again. I'm sorry. I'm just going to press V. So that's going to bring the cursor back. And here what I would do as I scroll to the clip, what do you clip? You can see this thing e, right? So I would just go here, press Alt, and then press the mouse. All this one. So now I'm not forcing anything. I can just drag the volume of this audio clip here. So let's play that again and see. So here in the Himalayas in, I think the audio is a little bit louder than the actual audio when I'm talking. So I'm just going to increase the audio here as well. Yeah. So it's sort of matches with the volume of the music. Day two here in the human. So you also see what's happening here is that there is a abrupt, abrupt beginning of this audio. So I'm just going to do that so it's a bit more smooth and let's play again. So here in the Himalayas in unapproved our circuit. And the plan is to walk for five to six hours place to be. So here we want the audio to be back on track. All Preston mouse-click, year old. And then let it go to here. So the reason why we're doing this rather than cutting the flip and increasing the audience so that it's more smooth. The best place to be. This clip is a little bit too long, so what I will do. So it's even you add music, then you also know, how can I put the cuts even much better so that it sort of goes with the music. So what I will do, I will select this, press B, trim, endpoint, this one for a skew. I want to have the endpoint here. Could that cause with the beat of the music? And you can always zoom in to see the beats. So now let's see if it goes in. And then I would also cut it here. Yeah. Just make it a little bit more fast. So go here. Cc, so easy to discard. Just scroll days and press one key and it's all done. I'm just going to delete this. So preg bring the cursor again. And I also think that saturation, and this one is a little bit too much. So I would go back again. So if you haven't laid low, if you haven't labeled the node now you would have a problem like how I'm having. So I don't know where the saturation in. So I'm just going to click on say, imagine if you have ten different nodes, then you have to check where the saturation is here. So I'm just going to go maybe 55, That's much better. But here you see it's a static site. It's looking a little bit boring. So I'm just going to introduce a little bit of zoom in. So you know how to do it, right? This is, I'll go until the end, looks much better. And when I show more of the crown, go here as well. Again, I don't know why I was listening to all the time, all the whole video. But what then we can do is that sort of delete that lead because we are ending it now. I'm going to just fade this out the audio. And I'm also going to write something in the end, like thanks for watching Earth. So psi go to effects library. It was titled here. Let's try a different title this because it is used in LH. Lh. Yeah. Next one. So I will just write down or well, or maybe discuss a little bit closer to see the Audi also fades out as the video is done.
12. Exporting the video clips: So now what are we gonna do to export this video? What part of video you want to be exported at. So say if he had like 34 video clips here and you just wanted some specific video clips to be exported. It pressed I here, so you see it's selecting the whole timeline. You go here, press O. So it's just going to export that particular portion of the timeline. So you go to deliver. So now if I zoom in here. So you see, this is also really interesting page. Though. These are all the same. These are all the Render Settings. Tape is like internal recording if you want to record from result. It's complicated, don't worry. Clips is the cliffs which is here, depends on you if you needed to know. But that's not important. The important part is this one costs them. The cool part about Resolve is it also has different presets of different softwares where you want to upload or if you want to move this project file into different softwares, like Final Cut or Premier. But what we're gonna do here is filename. I will do a Skillshare class. And then video settings export the video. You can choose QuickTime or MP4. I'm going to choose MP4. And I can also choose if I want to export informed care or I am honored to lead the project export in HD. I would choose for k quality. Just leave it to automatic subtitle setting. If you choose Subtitle, You don't really need to do it at the moment. And then once we are done with this ego to add to the audio, like I don't want to change it this much because they already are really optimized. So the little video, and then you can choose where you want to paste. Export the video. I would choose that sticks stop. I would do save to scroll through again MPEG-4 H.264. And then I will go to Add to Render Queue. I showed you want to add the robot. And then it's not going to start rendering until you go render 0. And that is going to render pretty quickly. It has zoomed in because you chose the 4k resolution. It is pretty quick. Also, the thing with the rendering is that it's pretty quick rendering speed as compared to Premiere Pro or After Effects. I'm not sure about Final Cut Pro. I've never used it. But it's way faster than Premier Pro that renderings feel like imagined. What one-minute video it's going to take my 40 seconds with color grading, with color correction, with all those sort of transition, some title animations and all that sort of stuff. But it also obviously depends on your computer, but I've also edited on my laptop and it's mine, my laptop alter its result of the survey faster than Premier. So once our video is done, we can actually have a look and see what have you made. So it's on the desktop here. And let's see. So day 2 here in the Himalayas in unapproved our circuit. And the plan is to walk for five to six hours in the mountains, just walking next to the waterfall. The weather's perfect. Skies querying go. It's the best place to be. So you see it's that simple. Am so happy she turned out really cool. It's that simple to edit the video in result, and it's absolutely free. And especially if you're using DaVinci Resolve 17, you still get a lot of these text animations. You a lot of these crazy transition where you don't really need to learn anything. For a beginner, I think it's the perfect software to start at and just drag and drop. And you also get to learn so much about color grading. But I would teach a little bit more in a, in my advanced class. I will be posting that in a week. So yeah, and maybe by the time you're watching the advanced class is already there. So.
13. Conclusion: So here we are. So I hope you learned something from this long, long tutorial, and I really hope that you enjoyed this. And if you have any questions, please, please, please feel free to comment down below, because that would be the worst that you spent so much time learning the class. And you still have some doubts because that would be the last thing I would want. So yeah, please comment down below if you have any questions. And soon I will be making at once version of this tutorial. So if you're interested and if you are willing to stick around to the Vinci Resolve, just wait for the class. It would be uploaded probably next week or maybe by the time you're watching, you can already find that in my profile. So if you're not following me, you can follow me on Skillshare and all different social media platforms. I've linked them down in the description below. And I've also made a lot of different classes based on filmmaking. And I would be making a lot of classes this year based on, based around filmmaking. So if you are interested in that topic, consider following me on Skillshare. Consider following me on all different platforms. And I will see you in the next class and thank you again for your time. And I really hope that you got some value from this class.
 Adi Singh, Videographer and Youtuber