Transcripts
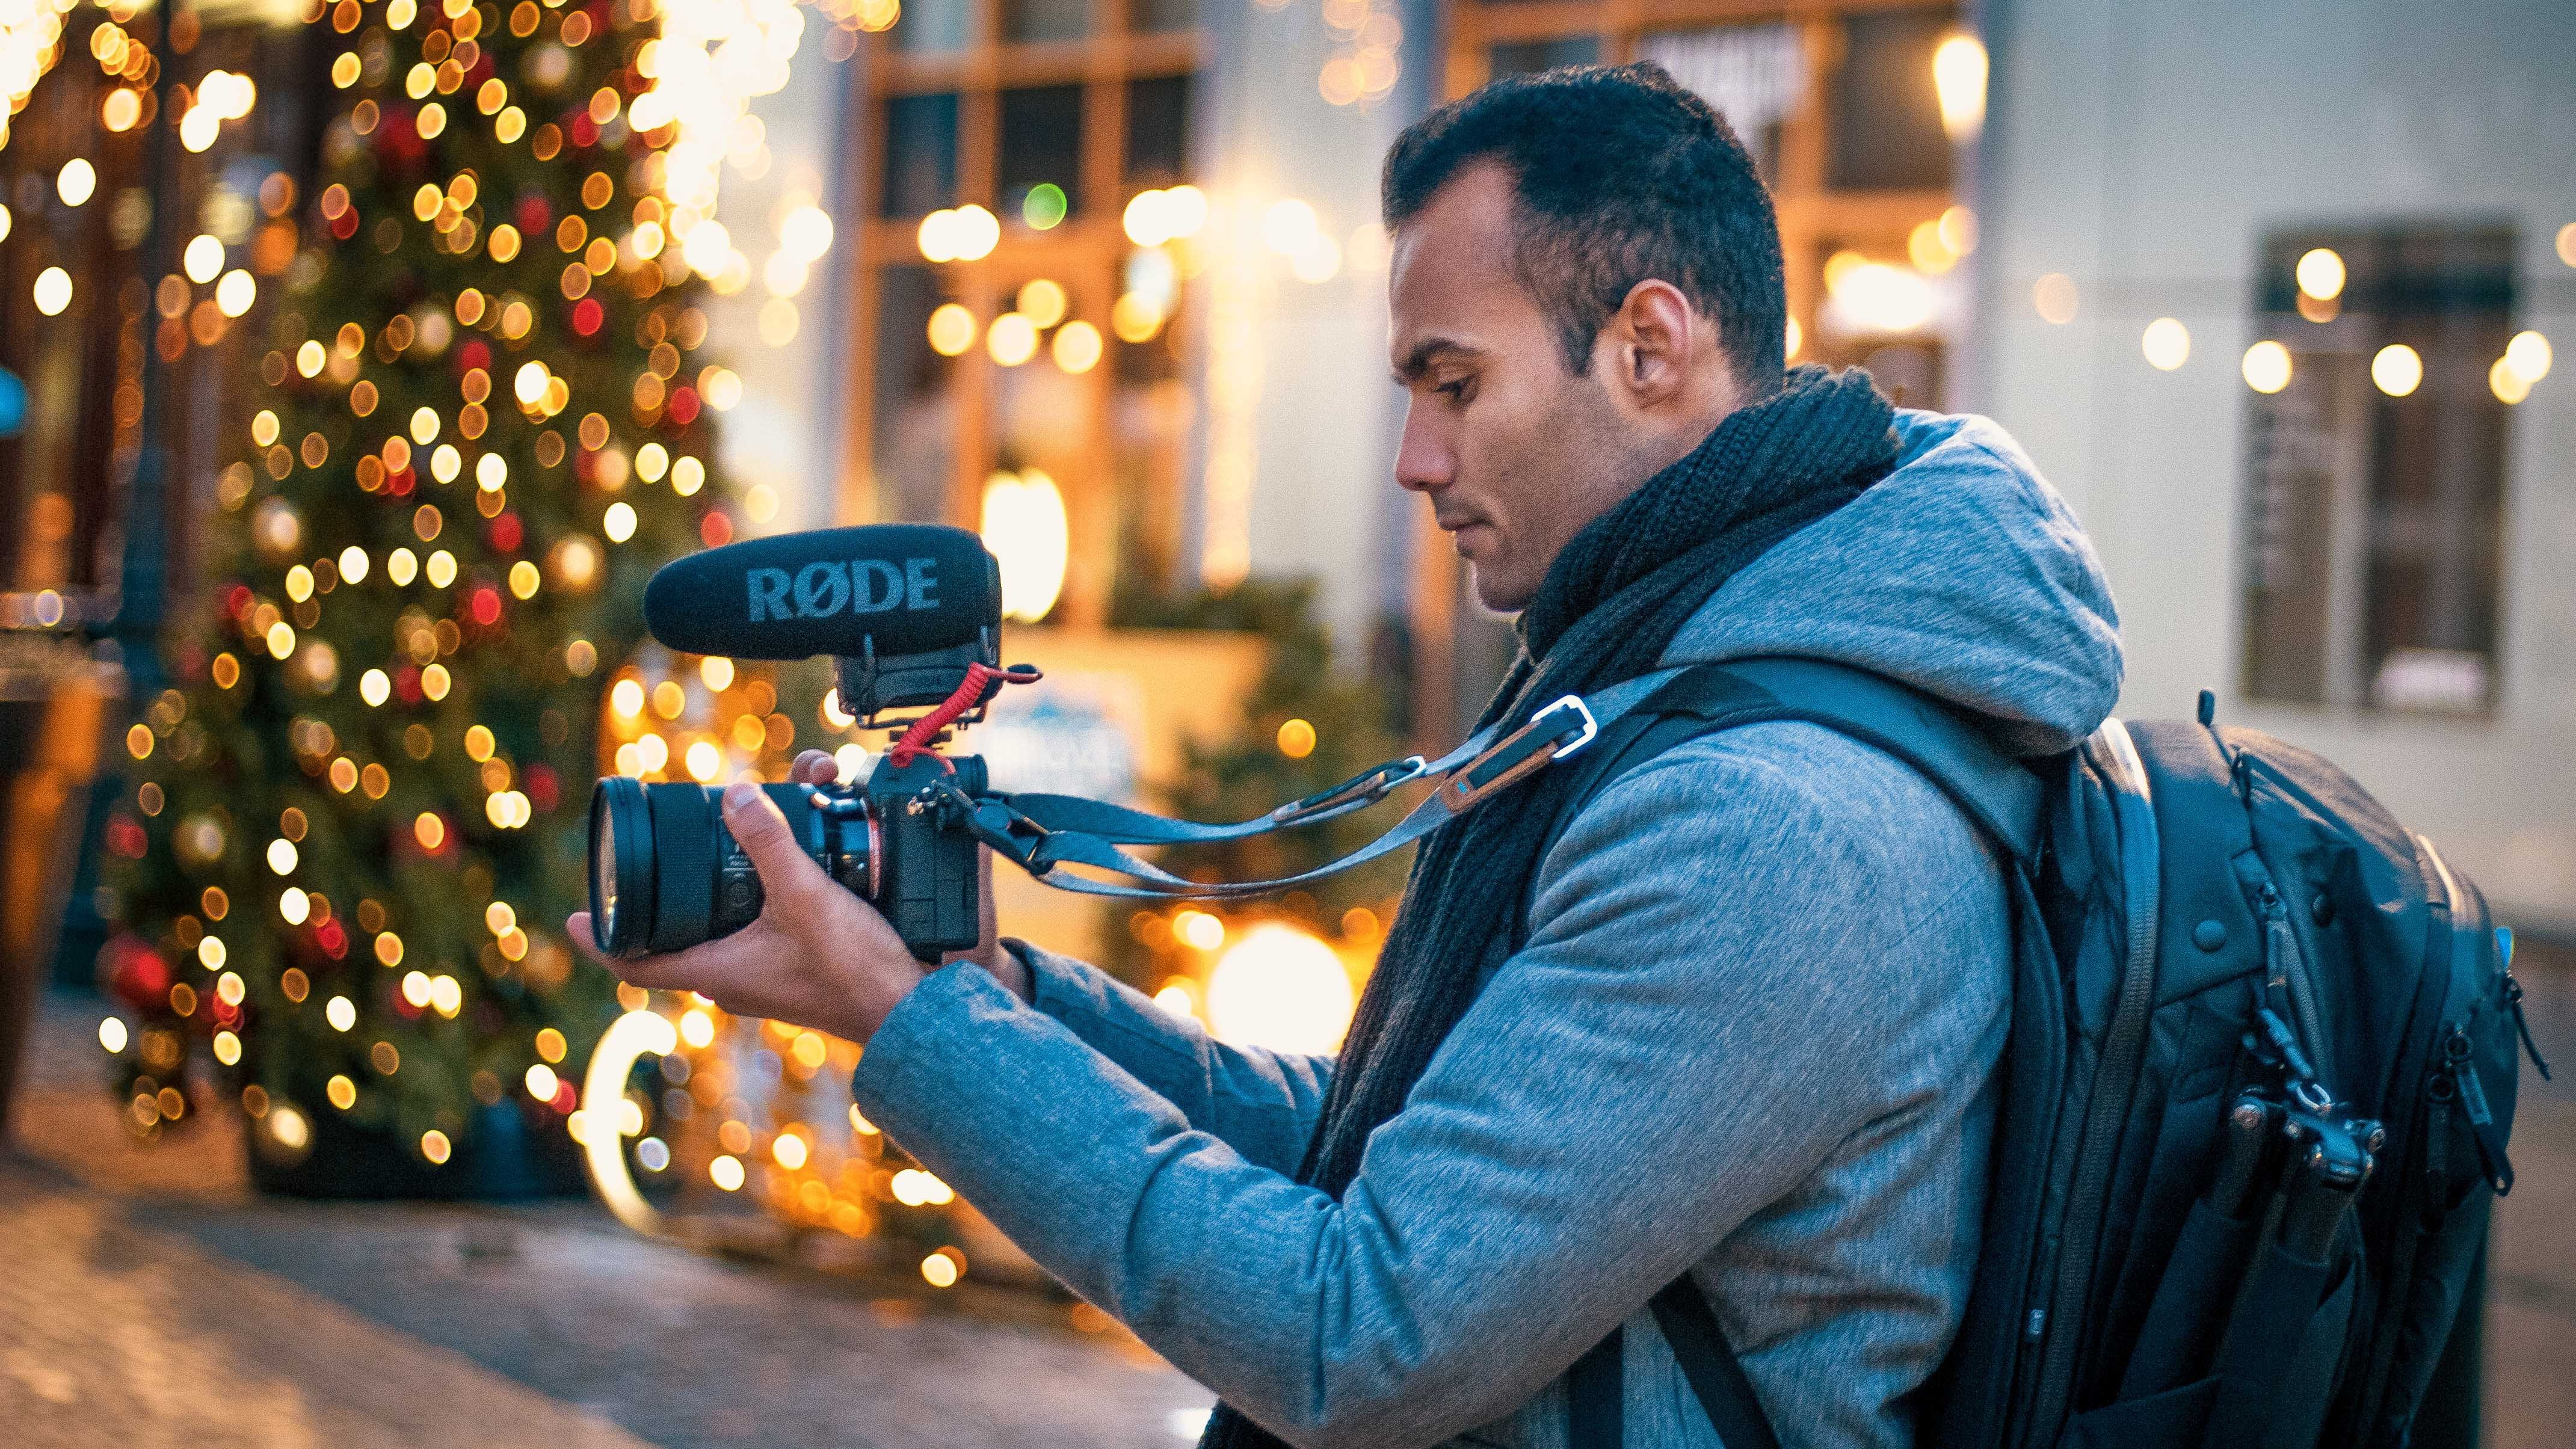
1. Introduction: All right, so thank you everybody for joining and for this class. So this class would be specifically for beginners who have no idea what Premier Pro is. Or for someone who have jumped into premier throw a couple of times and they found it really intimidating. So by end of this class, you would be able to make a travel video like this morning, I think Croatia. And for the early, I have to go to the ferry because at least at 740 and I have to be there on time because something your ticket yet. And my name is Eddie Singh. I'm a freelancer, videographer and a photographer, and I've been making travel videos for the last couple of years on my youtube channel. So enough of the intro and let's get started with the class.
2. Structure of the Class: How did we structured this class? So I wanted this class to be very simple and straightforward because obviously it would be your first time learning the software. So I didn't want it to be so complicated. So what I did was I stole few clips from my girlfriend's last travel vacation. So she rented crazy as she bought a new GoPro. It was her first time using a GoPro. So I took few clips from her holidays and made a decent video out of it. And how you guys can follow along as I would put all those clips in my Dropbox and I would put the link in the description. So you can only download all those clips and you can edit along with me. Or if you don't want to edit along with me, you can just download this clips. And between each section you can just pause the video, edit until what I have taught in the class and then just go along from there. I hope it makes sense. So yep, I would jump on the computer where my stupid headset. And let's start with the class.
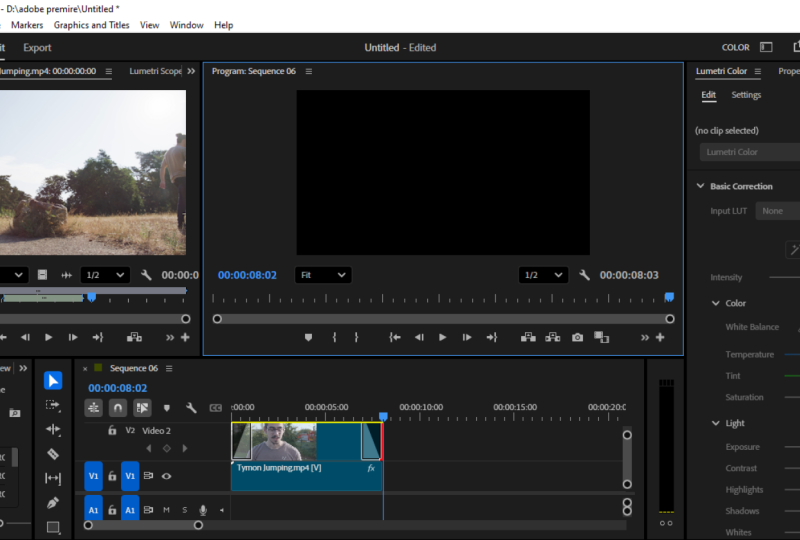
3. Importing videos on the Timeline : Alright guys, I think they are good to go. So the first and foremost thing why learning Premier Pro, so it is the most use software for video editing. And the thing that this software is, it's really easy to learn and all the components of the software. It's very clear so there wouldn't be any confusion for the new beginners anymore. And you would exactly know what panel to go in to do whatever effects you want to. It's not as complicated as you might have heard After Effects and all other different types of software. So there's a reason why everybody uses the software. So without having any delay, let's jump on straight into the software. So i have Premier Pro right here, so that is how it would start. So these are the previous projects, what I had from before. So what I would do that I would just click new project. So it would ask me the name. So what I'll do, I'll say skill, share, editing video a year. And you don't have to change anything. If your setting is like this, that should be fine. I am saving all my projects, my E drives or it's not in my C drive. So it's not filling up all my C drives faith, it's in a different drive and you can always change very can save the project files. So yeah, let's stop. So as soon as you enter, this would be your window. Or if it's not like this, you can go here. You go all panels. So, so it might look like this as well. So what we need to do first thing is it might, it might look really intimidating that, oh my god, there's so many different sections and there's so much blank space. What do I need to do? So the first thing what we would do is create a sequence. So how do you create a sequence? Is you go here, go to files, then we go to sequence. And you don't have to do anything here. You go to settings and you select custom. So customers. Yeah, that would be your setting. The frame rate. What I would choose is 23.976 or 24. And just to get that cinematic look, and because I would be editing a 4K video, but I want my timeline to be this. So what do I need to do is I will just leave the frame size as it is. And I'll explain you later that one of the things you need to change if you are editing a 4K video into a high definition video timeline. So let's jump on to this. And so, yeah, that's the sequence. So we have a blank screen here. So this would be the main playhead. So the our video would be whatever video we would play, it would be here. So this would be the display off our main project file. And the second thing what you should do now is this one. So that's the timeline. If you see v1, v2, v3, this different video, there's different videos which you can put on top of each other sanely the audio. So if you want to use like different sound effects, you can use different sound effects on top of each other. So that's what you need to know about this panel at them at the moment. And then this one. This is very, you import all your files and if you also want to make different folders in that, so say for example, if I go here, that's the bin. So I can just do video bin. And then next I can make is music so I can put all the music, sound effects, whatever I'm using for the software. So let's, let's just import the files and see how we go from there. So as I told you before, I'm using the videos or my girlfriend filmed. Where is it? Yeah. So these are all grow GoPro footage as we discussed before. So what I've done is that, I mean, there were tons of videos, but what I have done is that I've just chosen three different days. So day one day would be what, 77 video files? The two Yes. Same seven or ten video files day three cm. So what we would do is he would edit the day one section, then we would go to day two, day three. And then I also choose that I've also chosen a music. So let's, let's just import day one. You obviously Premier Pro would take some time to import this file, so it all depends on the speed of your system. I will just import day-to-day three as well. So yeah, it's gonna take a bit because I think it's like 1520 files. So obviously if you are filming all these videos, you would know that what all videos over there. So this section, as I told before, this section would feel have all your raw files. So yeah, and if you end up in these things, just go back to your project skill share video editing. So that would be the master section. And then this folders would be there with the subfolders. Alright, so how do I watch this clip? So if I just double-click on this one, this was B, this would be the source file. So if I have to watch this bit, I'll just hold this, take it at the front on display here. So I'm playing it now. Morning. I have to go to the ferry because at least at 74. So this is how the video looks. So with this video, I think that just the first bit is important. So what I would do it, I will just clip the endpoint and the out point for this video right here. So what I'm gonna do morning, so that I can also, this is the video section. This is the audio frame. Good morning. So you can see various. She said, good morning. So I'm just gonna I'm just gonna go here. I'll press this one so that, that chooses the input point. I'll go to the video and I think here I need to cut it down time because I've not taken jets at 740 and I have to be there on time because I don't think it yes. And I think yeah, after this, the information are not that necessary, so I'll discarded. I hope she doesn't get mad. But I always forget about the mountain. Yeah, I think yeah, that's it. So what the so that's what we would do with the further clips. So I have what, seven cliffs in this. So I would just see the second clip and see what's the best pot. So the first clip was she was saying that I am going to vary to catch a ferry. So I would show the doc here. So I think yeah, it looks like I mean, it's all of your personal preference. It can choose any bit year. So that is literally what I would do for all the sections. So my first section, it's already there. Input-output point that I go to. Second clip is already there. And why I would do it in the beginning is because that would help me to edit. That would help me when I'm editing it on the timeline. So just have patients, I'll explain you in a bit. So that's the third clay. So I will choose this as the fourth clip because they're all sunny here and that's an overcast. So I will just put this way. It looks like yeah, it's on the same day. Yeah. And that's how it that's good. So I'll just take dissipate from here. So I think we have selected this one's left. Yeah, so what I would do as I have selected all the input and output points for each clip, I will just drag whatever the first clip I want. I want for this sequence. So I'll just drag this one. So it says that do you want to change the sequence setting because the sequence is a high-definition video setting. It's a little bit smaller than the four key, which is our actual footage. So I'm not going to change the sequence setting. I'm just going to leave the sequence setting as it is what we chose, what we have chosen in the beginning. So now you see that that's the source file, that's the our main project file. It's looking a little bit bigger. So because it's a 40 file, it's twice as much sizes this one. So what I would do is to make it fit to the timeline, I will go to effects controls. So don't freak out. I'll go to a flux control. So this is the sizing of the video. So the scale position rotation. So what I would do, I just reduce down the scale. So i would reduce it down to 50. So now it would fit the timeline. Good morning. I'm in Croatia. And similarity. I have to go through the ferry because it leaves at 740 and I have to be there on time because I don't think it yes. So that's the timeline? That's yeah, that's how you drag the footage to the main timeline. So as we have imported this clip, what I would do, what I would want my second clip to be is where she's standing at the dog. So yeah, this one. So Bali chosen the important output point. I'll just drag it here. So that would be zoomed in a solo. I'll just choose it 50. Yeah. And then the third clip I would want is this one. So I'm just going to drag it. Same thing. I'll just go 50. Later on. I'll also tell you an easy way to do it. And then next one, what I would want is yeah, this sunny clip. So this also goes here. And then I can probably put this clip or maybe I'll just drag it a little bit here. Yeah. I know. I'll put so many options, so many choices. Then I would move this here. And then the last clip for this segment, I'll put it here. So that's one way of importing all the videos on your timelines. You can always select the in and out point for the video in the source file. And then you can just drag from there to the main timeline. So that's one way. And if we play here, as you can see that until third clip, it's it's, the clips are fitting the timeline better if we go here. That's still at a 100, this one. And we don't wanna do for everything. We don't wanna do it 50. I don't want to do 50-year 50 or 50 or so. What I would do is because I've already done 50 here, what I would do, I would just go right-click on this one. I would go copy, and then I would select all these clips. I would go paste attributes. So with paced attributes, what I would do is if I would have done any editing in videos and audios, it would paste the settings to the falling clips. So I would just select motion. I-i don't want my if I would have done any audio settings and if I don't want to have the audience sitting change for the next flip, I would just choose motion and then I go here. So now they all would be fitting the whole screen. So let's watch them from here. Alright, so that looks, that looks pretty good. That's how we can import all the raw videos on the main timeline. And it's, it's a really easy job is just that you have to know what clips you had while you were filming. And if you just distribute the clips according to the location or or according to what time of the day you filmed. And then you make the subfolder similarly to how you shot in Premiere, it would be really easy. Like if you see our sub folders, we know that like first, first 30 seconds would be videos from day one. And if I, even if I have, say, 20 videos from day one, it would be much easier to choose the raw clips from day one rather than if I had put all the cliffs in one folder. So yeah, that's the one clip. And so now we're done with importing. Let's move on to the next section.
4. Importing Music : Or I guess in this section I'll teach you how to import music in Premier Pro and how to get that music on your timeline and how to sync that music according to the video. So yeah, let's get started. So this pause how our project was looking. So I'll go to the main folder, so that's the master folder. Then I'll go to music. And yeah, obviously I made a separate folder for music. So you save I'm using say, if I do like 20-30 minutes video, I use 5-6 different tracks. So that's why I would want all the music to be in one folder. So I've already chosen the music from music bed. Yeah, they're not paying me to do this. But yeah. So yeah, that's the music. So yeah, obviously, if it doesn't have an audio there in the source file, it would just show the video. So you can also listen to the music here. I'm just going to play. And if I zoom in into the source file timeline, you can actually see, you can actually see different beats in the graph. So it would be much easier for you to Cut and Copy in post. Alright, so yeah, that's a, that's a really good music. So what I would do is I would start from here because yeah, I don't want this pot. You can just put it there. Yeah. Are just for the sake of this project, I'll just cut it from here. So same, I'm gonna choose this point. And then, yeah, let's see if I'm using the music until here. So I'm just going to choose this. And either I can hold this and drag on my timeline or delete that, or I can just drag this clip. So it would be, it would always import the clips would have chosen. And if I want to see the crafts a little bit bigger, I can always do that. And then I can zoom in, in the timeline to see where the beats are and all that sort of stuff. So I would obviously make big as how much we have and then we see how we go from there. So now we have our raw clip, we have our audience, we have our audio from the clipping the Timeline, and now we also have the mean music for the video. So let's move on to the next section and we'll see how we can match this music, how we can match the beats of the music to make it really cool with the video. So let's start from the beginning that morning. So now you see what's the problem is. The problem is that if you see the crafts, the graphs of the music, they're too high. And the graph of the audio that's not too high. So what I'm gonna do is I would have to reduce I will have to reduce the size of the aircraft. So meanwhile, she's talking, I want the music to be a little less. And as she's done talking, the music goes a little bit higher again. So for this one, what I will do is I'll just choose this tool. So it's a pen to ligon Also press p for this tool. So I'll press P. See if you see this line, I'll just press it here. So it has a blue dot. Are present. Harriet has upload r again. And then what I would do without this hole, this blue dot, I'll drag it down. So if you see the number here, there's a number changing, which is minus 12.6. It's minus 9 now, so that's the decimal numbers. So that's the unit of sound. So, yeah, obviously if you go higher, it would be much louder. So that's how, that's the unit for sound. And that would be easier for you to see that how much negative you can go so that the audio is also audible and little bit in the background, but then we can also hear her voice. So let's go back and listen to it again. I make Croatia. I have to go to the ferry because at least at 7.5 Twitter Alzheimer's. I think this music is a little bit loud. So what I would do is go down to until say six, until 6.7 db. And then what I would also do is I would go here, so it's my Normal cursor. And then if I go to the audio file off the main source. And if I just want to increase this a little bit, I am dragging my mouse a little bit high so you can have a go to 3.2. We'll see how it sounds. So I want the vocals, I want her vocals to be a bit more clear. So let's see. Good morning. I'm in Croatia. So clearly I have to go to the ferry because at least at 740. And you can always check the audio levels with this graph. So if it goes too high, if it goes around 0 minus three, minus six and it would turn red, the graph would turn grip that, which means that your audio is clipping. So if someone is watching on there speaker is somebody's watching on their phone, the audio would clip and it wouldn't sound really good. Sit always makes sure that the audio levels are around minus six to minus nine or even minus 12 decibels. So, yeah, that's what happened with here. So if I play it here, It's almost clipping, but it's not clipping at the same time, so it's r1 minus three. But if I move this a little bit higher, if I go into 0, how much it was in the beginning, how much the default sound was. You can see the graph. You see it's clipping really bad. So I'm just going to push this down to 6.3, say, and we'll see now if our audio's improved OUT, increase it a little bit more. So 7.4. So they usually had used, had to find a fine balance that it shouldn't clip too much, but it should also sound Good morning. I'm in Croatia. And so in the early, I have to go to the ferry because at least at 740 can have speed. Our all-time concessional ticket just slight looks good. The first clip looks good. So what we would do for I think the second clip also looks good. So what do you do? I think the second clip also looks good, but I feel that the, this clip is a little bit longer. So we have a room over here, two cut this clip because I think this is where the beat troughs. We listen to it again. And I'll just zoom in into the timeline. Yeah. So I think the next bit starts here and listen to it again. Yeah. So if you literally zooming in the timeline, you can see really super clearly that yeah, that's fair. That beat starts. So what we will do now, we can select this blade to raise IT tools. So what, it's going to just chop the eclipse endemic interleaved Eclipse. So you can either select this thing or you can press C. So if I press C, Look at my cursor, it just changes to the blade tool. I'll cut here and then I will go to the normal cursor. So selection tool, it's v, the sharp cuts, I'll just press heavy so it comes back the Selection tool. So now you can see that this clip has been chopped off into two halves. So I don't need that. I will just select that and I'll press Delete. And then if I want this clip to come here, I would click on this timeline, let it become wide, and then I'll press repeatedly. It's all to do that. Cc. Now let's have a look. Yeah, so that's what I would do for this entire sequence and I'll show you how it looks. So here, in this case, I feel that the B drops here. So what I would do is I would just drag hold here and drag it here. So I want this clip to start from there. And then I can also just hold my end of the clip and I'll just drag it here. So now, so now it would start here with the beat drops. Yep, there. So I'm just going to, so in this part, what I would do if I don't want to go through the tedious process of this, cut here. Delete. If I don't want to do that, what I can do, I'll just press undo what I can do. I'm just going to drag this clip and, and drag it here. So it is there. Alright, so it looks like our sequence is looking a little bit better with the music. Select start from the beginning and see how it looks. Good morning. I'm a Croatia and becomes really early. I have to go to the ferry because at least at 740 Can I have to be there on time? Cassandra Vertica jets. So yeah, that's how much easier it is to make this sequence with the audio. So in the next section, what I would do is I would just fast forward this video, edit a little bit more from day to just to show you guys that how we can move from first section to the next one and indeed to Villa also use some slow motions. So I'll, I'll show you how you can make your clip. Hi, can make your normal speed clip either slow or fast. And then we would also do some color grading, will do a lot of stuff. So stay tuned.
5. Edit Slow motion videos : So as I was editing the second sequence, which was the TE two folder, I came across this clip. So if you see the source file and if I just put it from here, you see the pigeon flying. So what we would do is we would use this slow motion here. So for the slow motion, you have to already do something while filming the video. So what do you need to do is you have to fill in 60 frames per second. So our timeline is 24 frames per second. But if we would have filled in higher frame rates such as 50 frames, 60, one-to-one hundred T2, 40, whatever your camera allows. Then in the post we can change that 60 frames per second to 24 frames per second. So that would reduce the speed of the video by 40%, now, by 60% actually. So I'll just drag this clip here. And how do we know that? What frame rate, what frame rates it's shot in? So if I go here, if I go modify, then you go to interpret footage. Here, you can say that that's the actual frame rate. And if I put it down to 24, then the footage becomes a slow motion. See if I play the source file, you see. And it's actually a smooth slow motion. That's because I've used a 20, I've used as 60 frames per second video to film this. So, yeah, so I need this pigeon, it looks really cool. So I'm just going to drag it here. So now you see that was our previous clip. That was the main clip what imported, you see the length of this one and that's the length of that one. So we have reduced the speed by 40%, by 60%. Um, I don't know why am I saying 40% all the time. So I'm just gonna delete that and then what we do, we tripled to lead. So yeah, that's going to come here and obviously, we will have to reduce the size. But as I was dragging these files, I haven't reduced the size because we would do it all together how I discussed in the last section. And there is also a bit of hyper lapses in this one. So if you guys know Jaipur laughs, I'll show you in a bit. You just have to be a little bit patient. It's going to look really good here. And if you see the, these shots, they are not like crazy cinematic shots. They're just simple shelves from GoPro which anybody can make. It's not from a professional super expensive mirrorless camera or a DSLR. So it's just from a simple small GoPro which anybody can get. So, yeah. And so now I've imported all the clips on my timeline. So in this section we would have some hyper lapses, we would have some slow motions as well. So out so let's start from the beginning. So yeah, I have to reduce the size. So I'm just going to copy from here the properties and denied just paste here, paste attributes, then I just need the motion to be copied. So I'll go in there. And then you would see that they're all here. So first one is a hyper laughs. Don't freak out as it's super easy to fill this in GoPro. So I haven't done anything and post this is a raw file. So if you see the raw file, that's how it looks to do. And obviously there's no audio in this model. So yeah, so it's a little bit of B, but I just want you to see the raw files, Ferriss. Yep. So let's let's just chop the eclipse first. So I'm just going to zoom in into a timeline. You can also increase this as well, but we don't really need it. But if you really want to, you can just yet that it will also show a little bit of thumbnail from the clip. So that's good. That looks good. So now my job is to cut all the cliffs on a proper beat. So it looks in a sequence and it looks like the whole video is in a flow, so it's sort of synchronized with the music. Yeah. So what I, what I would do here is that I have to so what I would do is you here is that I have to cut this clip here, but then I also want my hyper laps to go until the end software to do this. What I'm gonna do is if I cut it here, then I'm missing these clips. Right? So I'll just press control plus z, that's undo, and I need to cut here. So this would be approximately RNA 1 fourth of this video. So I would just right-click on this one. I'll change the speed and then I'll go say 125. Oh, yeah. So it's still not there. I'll just do this speed. 150. That's too short, maybe 130. So that's the percentage how much you can increase or reduce? How much it can increase or reduce the speed of the clip. Yeah. Let's do or let's just do 127 and C. Yeah. So it's, yeah, that should be finite. So now, yeah, I'll just do ripple to lead. So here what I would do, I still want the whole thing to be there. So I will just increase the speed to say, I don't know, 250. Yes, I'm just going to drag it here. Probably crop it from here. So you're gonna want to slow down this clip as well. So what I'm gonna do is I can also change the speed from here. So I'll just double-check that what frame rates what frame rate this has been shot at. Yeah. So that's 60 FPS as well. So I would just reduce it down to 50% and see how it looks. So yeah, the beat drops here. I will just cut here. And then I would press ripple to late. Yep. So you want the next cut to be around here to smoke this Morpheus? And yep, that's, I think the sequence looks pretty good. So I'll tell you one more trick. So if I see this last clip, it might be a little bit advanced, but it's really good. If I see this last clip, you can see that the camera is a little bit verbally, so we'll try to stabilize it. So let's just see it again. Yeah. So it's a little bit wobbly. So what we would do is that do not freak out. So v would go to Effects section. Let's press effects here. So that's the search box. So you could just type stabilize. Oh, so yeah, if it is tribe stabilized, East selected wrap stabilizer, we pressed the mouse, drag it to this file. So now what this software will do is that the software will try to stabilize the footage. Obviously, it's not gonna be as good, but that's the best option we have in post. And then if we go more in depth, there's so much you can do interrupt stabilizer. So because we have applied wrap stabilizer on this clip, that would come here. So that's the motion sequence. We scaled it to 50. And another effect, what we have used on this one is wrapped stabilizer. So yeah, it has almost done stabilizing. Let's see how it little bit better I think do a really good job at yeah. Let's try to put the stabilizer here. I mean, it is table. Let's try to put it on this one. So I'll just drag it down here. Okay. So what happened here was I did bought up anti-hero, but it's hyper Laughs Video I guess. So you can't really use the wraps, the letter on this one, you because there is a way to use it, but it might get really complicated for beginners, or maybe I should tell you guys. So what we need to do is, let's go here. Let's go on this one. You right-click, press nest, next sequence, just press OK. So now, now you can use RAF stabilizer and this one's a. Now what nesting would be doing is that nesting is letting this software now that this is a brand new clip with 24 frames per second. So there's no speed ramping, there's no hyper laughs. That's what it's telling the software. So now we can use the rough stabilizer. Let's just drop it so you see now it's working. But the question is, would the software do good enough job to make it stable? So it's August hit or miss. If it wouldn't do a good job, then we can always reduce the smoothness NC, ooh, that's really bad. You see, it gets really crazy sometimes. So what I will do, I will just press Control Z. So that's the thing in some of the footage that wraps stabilizer. It wouldn't do a really good job. So you just have to be good at filming and you just have to hold the camera really steady while you're filming. But yeah, that's the second sequence. So in this sequence we learned how to use slow motion. How do you make a clip fast? And yeah, so we did what we did here as well is that we are cutting everything on the bead. So that is it for this section. Let's jump on to the next one.
6. Colour Grading : But I guess in this section I'll be teaching you to calibrate the footage. So if you see this footage, they look really flat. It's, the saturation is not that much and they don't really look really nice and crispy. So that's what we would do is that we would go to the cemetery colors, the control panel, and then we would change the colors of this footage and really improve the colour of the footage and see how it look. That's not going to be really complicated. I'm just going to teach you the basic colouring techniques so that we can make a, you can get a decent look from your footage. So I would select this clip and then let's start from here. So I can always go to the limit recolor from here. But if it's not visible, what do you need to do? Workspace go to all panels, and then you see the whole outlook changes. You might be viewing this one. So now what I will do, I will just press color. So if I press color, so that's the clip and thus the clips properties. So if I go to basic correction, whatever exposure, if I change anything, that would change my Clip. Yeah. So I would just do reset. So this is the setting just for this clip. Okay? So with this clip, what we can do is, I mean, it's, it's, it's not that it's not a rocket. It's not a clip from mirrorless or DSR. So you can't really do much editing on this one. But I learned that the brightness, the field, that the brightness and the shadows there pretty good. I would increase the saturation and little bit CC the skins at the skin tone, they're coming, they're popping out a little bit. You can also see the trees, the greens are becoming more greener. And the next one we will do is increase the contrast a little bit. So you see IP just did, we just increased it. We just did a really minor change and you can see the footage at all. They look so good. Let's do a before. You can see the changes before and after. And if I want to obviously make this foot a little bit warmer and you can do that. Or if I want to make it cooler, that can do that, I would try. I would prefer to put our warm look, just justice space, so not too much, and that looks pretty good. I think we can increase the shadows are a little bit down here. Instead also increases the contrast. And obviously before and after it, this is how it works. So you see it was complete flat photo from a GoPro and now it actually, it already looks good. I don't know if you, if you know a lot about lots, but I, in the next section, I'll teach you how to use lots. But in this section we'll just do a normal collaborate. So if I want to copy this whole setting in the next photo, it might, it may or may not look good, but let's have a look. So I would just go copy. And then same thing. Yep. You guessed it right. Paste attributes, but this time I'm not copying the motion. I am just copying the geometric color. So whatever fx0 put on the video, it would come in this list. So I'm just copying this luminary color. And then when I go all k, you can see the change in the videos. You can see that all these changes, what we made for previous clips is literally here. So let's go before and after. Yeah, if I'd actually looks good. I'll just zoom in into the timeline and I'll see if I can change something else as well, because I feel like the exposure is a little too much on now. I'm gonna mess this up or maybe a reduced the highlights. Now, it was looking really good. I don't want to mess it up. Let's bring down this night. I honestly, I think this looks so good luck. Yeah. You see can see the water. It's a bit below. Its a bit lewis. Well, let's increase the contrast to get those colors popping out. Yeah, that looks pretty nice. So I'll copy these and probably paste it here. Say Vico paste attributes. Yep. I think that the skin sad little to yellow in this one. And then I would also reduce the contrast. And also one more thing you can see in this clip is at the horizon is tilted a little bit, right? So we would correct that after color grading in this one. So yeah, are what I can do. I don't know what I did, so what I can do it, I'll just put this color grading on all the clips and see how it looks. This paste attribute pates on everything. So even on this one that looks pretty okay. We'll do some changes as well in this one, or maybe this would look better. The colors from this would look better on this one. So because it already has few colors, I will just reset that. And I'll paste this attributes so it color grading either you can individually calibrated all the clips, or you can just color grade them in bulk. But the thing is that it each photo they are at different location, there's different colours. There is yeah, the brightness is difference. It would be very different. So I would put it here, but if I put it on the next one, it's not gonna look as good because it's an overcast day. And say, oh my god, this is really viewed. Yeah, let's do reset. It looks a little bit pinkish. So what we can do is a good example for us to change the white balance. If I just go this side, if I just go more towards the screen, it should look normal. And then if I also go little bit bluish, look normal. And then we'll do the same thing so it's a little bit darker so we can increase the shadows. And then we can also increase the saturation is already increased. And they will also increase the contrast a little bit. But if I increase the contrast, you see that the purple, the, yeah, the pink line is coming. So that's an example of a bad footage. How we can calibrate a bad footage and make kind of make it look, okay. Well, I'm trying really hard to but it's not really coming together. I don't know by Yeah, I think the wide balancing the camera changed. So let's just leave it as it is. And let's move on to the next one and see what we can do. Because I've already done everything in here, right. That's why, you see, I didn't do a reset on this one. I didn't do I didn't change the saturation. And this one, that's why it was looking really bad. You see, now it's looking okay because that's why you shouldn't colocate all of them in bulk. Volley puts some colors and they look, they don't look really good. I'll increase the contrast. It's still going towards the pinkish adults just increase a green a little bit. Queasy saturation maybe. Yeah, I think I don't want to touch it anymore. You see that it's actually better than what we had. And the next one we can increase the saturation a bit more and then increase the contrast a little bit more. Cse before and after. So it's actually doing a good job. And then the last one that can be the master shot that increase the saturation a little bit more. May be reduced. Little bit nip. It kind of looks good. Let's start from the beginning and see how it looks. So go to the theory is because at least at 742 left feet are uptime consumption per ticket test. That actually looks good. I just remembered I told you guys that we would fix the horizon here. So that's the bonus tip for this class. So to fix the horizon, you click on this, select this clip, and then we'll go to effect control. So this is the scale. So now you know what I'm gonna do an x, I would go to rotation and I'll try to rotate. Yeah, that looks good. Yeah. So I have rotated it to four degrees. You can obviously, I do hold three cc thing. Or if you want to be really precise, you can just do like 4.2. Yeah, if you want to be really precise in their rotation, but then how you can also see that our footage has tilted a little bit. You can see the black bars on the side. So to reduce that, v can scale in and nobody would know that it did this rotation thing. So that's why I, if your camera can shoot in 4K, always make sure that you're shooting N4 k. Because if you are editing the footage in high definition timeline on premiere, then you can always zoom in and not lose the quality. So yeah, we fixed the horizon. Let's move on to the next one and see how what we can do about it. So yeah, and with collaborative and can do a lot in this one. So in this one I'll teach you how to use lots. So that was the normal color grading. But lots, What does a lot or not is a preset of different types of colors. And you can just put that light on top of the clip and it would give you a good output. So up, I'll just, I'll just do it and explain you say it's much easier. So we were doing basic color correction here. So if you go to creative and you have to download fuel lots, if you really need some free, let's just d email me, I can give that to you or you can find free lots on YouTube. A lot of people are just giving away for free. So I have a few lets us, well, they might or might not look good in the scenario, but we'll see. So let's go here. You can also choose these lots of HR from Adobe. They're not the best. C, there are not the greatest, but here I can get something out of that. I mean, it's not that bad. But I yeah, without wasting time, let's see what I've got. So so I have a variety of lots. So let's go to the steel and orange blood and see how it works. Let's check this teal and oral does leak classic. Everybody does that. Sam Calder, of course you guys would know Sam corner is I had is sluts as well. Now. So you just have to try and see which, what looks good. I'll just give an example from the Adobe. I'm really sorry for that. Yeah, I don't really use lots. But he had that. I don't really use lots, but lots in an easy way to calibrate your footage. So let's try. So that's really bad, but you see, it looks really bad. But what I would do is that if I reduce the intensity down, I say until here, that can give a decent looked at the foot it so if I go before and after, you see I mean, it's not the best, but if you do it with any other lot, it might look a little bit better. And let's just do this for the sake of this tutorial. So even if I increase this, it looks a little bit good. But then even if you apply the lucky, you might have to do few changes in the basic settings. So we if we go to saturation, I will increase the saturation. I yeah, I think the contrast is pretty good. I can go a little bit black. I can also reduce the highlight a little bit CSE, how much even the basic correction is helping. So that's what he can do. He can also import a lot on your clip and you can do basic corrections as well. So if I want to copy paste this on everything, I'll go copy. I would do paste attributes, the metric colors that would, that would copy the whole setting. So that would copy the basic settings and the lot setting as well. It may not look good on everything. So let's see how it is. I mean, it's not that bad. So if you go to creative, you can just change the intensity. It's still doing a little bit. It's giving that pinkish look. But yeah. Here, yeah. If I reduce that, you see, it's giving us really good. It's giving a good look. Like that's the thing with lots as that. It might, it can look good on one clip and it cannot look good on other clips. So yeah, that's the thing. Alright, so in this section we learned how to calculate your footage and how to apply lots. And in the next section, I'll show you how to use text and how to import text in your timeline.
7. Adding Texts in the Video : All right, so welcome to this another section. So this was how our project was looking. So in this section, I'll teach you how to put text on a video. So if I want to put text here, say day one, what I would do this two different ways. The first way is ego New and then Ego to legacy, I almost forgot. And then you go to legacy title. So that title is same. Size was the size of our timeline. So I'll press ok. So you can see that there's a title in the main folder and there I want to use it can just go day one. And obviously you cannot see there it is. I will just increase the size so you can increase the size from here. I would like this font as good day one. And if I want to go all caps, you just go here. Now I think I'll go all calves to DAY. Yep. And then space one. Let's see what we can do with that. So, so now we have made the title here. It's not going to be on our timeline, so we just have to drag it. So it's, it's a small clip. So we just drag it here. And if I want to put it in the center, yeah, it's actually looking good. But yeah, this but stake of the video. Ego a little bit down so you can change the law, change the position from here. Good morning. Good morning. Or maybe let's just put it in the side. I still get really ugly in the center. So either you can go here and change the size of the text, or you can also reduce the scale from here. So two different ways. Day One, morning, I go to the, So if I want the day to come around here, let's see. I think I have to go to the Pharaoh. And if I want to end it here, let's see how it looks. And if I want to make it a little bit, if I want to make it look good, what I can do, right-click select here and then right-click, and then you see applied deform transition. So now you see the magic gratia feeds in the frame. So we can also reduce the timing of this bit cyanide fits in a bit faster. If I go like that, you get the tissue. So what I would do is put it here and then I would also make it apply default transitions. There would be a fade out here. And then I would also want a text to go here. So now I would show the second day of how we can use takes. Uh, you can also see a text icon here. So I would go a disco caps on. So yeah, that's how simple it is. And yeah, I would also want this to sort of fading. Let's go fill in a little bit. And then I would wanted to yeah. Just go off as soon as the video starts. Or yeah. I need to put it in the center because it's I don't know, it ceased. It's your preference. And let's go here. Let's go understand too and see how it looks like. Actually it looks good. So that was the sequence. Alright, so it looks like we're getting somewhere. So we had to small sequence one from day one obviously, and one from day two. And we had put a little bit of text in-between the both the days. And so I think they've got a small sequence. I think it's what? One-minute sequence. So yeah. Feel things but I forgot to fit. I forgot to tell you in the beginning is that say if you, if I just zoom in in the timeline of day one, you can see that each raw video it has, it has its own audio. If sometimes, if your video has really an audio and if, and if you want to delete it, what you need to do is press here and delete, but then the whole video gets deleted. So I'll just press Control Z. So just to delete this, I can unlink both the video and audio files and then I can just go here or delete. Okay? And also one more way of not having audio in your timeline from the original video is that I'll just show you an example. So say for example, you see so you can hear the boat. So what I can do is that this two different ways to import the clip. There was one way that I import both of them. It's added, it's all, it's already attached to each other. And the second way is I can just import the video file magic, or I can just import the audio file. So if I import them separately, they're not going to be attached to each other. So if I just don't want the audio, I can just import the video file or the audio file, whatever you want. So yeah, that's gonna make your life so much easier. So anyways, thank you for sticking alarm. And yeah, it has been a really interesting process to make a video and yeah, and if you see on YouTube, there is a lot of videos out there. There would be a lot of affects what people are using. What I would recommend to master this first and just play around with the software. It's really, it's really straightforward software. And also one more tip. Always make sure that Premiere Pro, it crashes very often. So you can always make sure that you are saving the software. So you just have to press Control and S every five to ten minutes, just keep saving, keep saving, or you're going to be in a big trouble. Imagine we are editing distinct for last half and r, and if the program crashes, I would lose everything. I always make sure that you're saving it every five to ten minutes. And also one more tip, what fade out we have used in the audio. We can also use that for videos as well. So if you go, if you can just click here on the end, apply default transition. And we can do the same fade out here in the end. And yeah, obviously we can change their values. And if I, if I just want to write The End two in today, and obviously I don't want to put it in the center, so I'll go position. Probably go here. And yeah. I would do this. Let's see how it looks. I think I'll just end the video here. So now we have a whole sequence from start to the end. It is one minute. I'll also fade out the music, so yeah, you can do the exact same thing with the music as well. Or good morning or, or, or you can also do this bit. So if I just go down, what we did for what we did in the beginning when we had few vocals in the video, we chose the Pen tool, selected two points. And then if I go chairs like this, so the audio would fade out really slow. So that's much smaller. So yeah, that's it for the clips. And in the next section I'll teach you how to export the clips.
8. Exporting the Video : All right guys, so we're almost done with the class. Thank you for sticking by. So in this one what we will do is that we have our whole sequence. You can see the V2, it has all the text. The v1 has the main video file. The same Aldus reduced the size of this one. Say I'd just make sure that you're keeping the timeline as clean as possible. So I'll reduce that, I'll zoom in. So let's see. So that's text's main video clips, the audio from the videos, and that's the sound. So you can also add more sound effects like the whooshes and other transition sound effects or whatever you want. And the same thing can also add more videos. But then the thing with Premier Pro is that if I put, if I put this video on top of this, you will not able to see, you will, you will not able to see this video. So I'll display and show you at 740 and I have to be there on time because I think that ticket jets. So it's still playing the audio from the previous clip, but it's not going to show the video. So whatever clip which is on the top, the software which showed that. So let's put it back here. But sometimes if you wanna do a voiceover, you can always put the B-roll cliffs on the main voice clip. So yep, and let's talk about exporting. So for exploiting, what do you need to do is that you need to select the whole sequence. What do you need to export? So Aldus go in the beginning and then I'll press, I see You see, I is selecting the initial point, the end point. And then if I go here, I'll just zoom in to see that if I'm selecting the actual point and then I'll press o, say if I zoom out, you can see that our whole sequence has been selected. So to export the video, what you can do press Control M, That's the export setting. That's the, that's the export setting x H.264. So always choose that. Here are different preset. So you can either go you to your 4K of rice D, Vimeo 4K. I usually do match source high bit rates. So that would be the same frame rate, same size as my timeline. So for this one, I chose the high-definition video timelines on suppressed that. If I have to choose a sequence, I would go say skill sure. Skill sure. Video one. It's going to be an MP4. And then where do you want to save it? So you can always choose the settings of safe and I want to get it exported on deck. Stop. I can do that too. Let's go save. That's all good. You don't have to touch anything here. And then as we go down effects, nope. That's yeah, Match Source. You ramp to touch anything here. Don't make it too complicated. And then we go here, that's the estimated file size though, that's 87 MB. And then you go export. So the export timing that would depend on how powerful your PC is. All right, so we're finally done with the video Export. Lets go to a deck SOP and see how it looks. I'll play. Yeah. Good morning. I've made Croatia springy early. I have to go to the ferry because at least at 740 can it have to be there on time because I think that ticket jets. That actually looks really good. So yeah, that was it for the export section.
9. Final : Alright guys, so thank you so much everybody for sticking by me and I really hope that you got some value from this class. So for the project of this class, I would want to you to make a similar decent travel video. The land can be one to two minutes and post it in the link below. And if you have any feedback for the class, how did I do if I can improve something to slow amino? So yeah, thank you again and thanks for your time.
 Adi Singh, Videographer and Youtuber