Transcripts
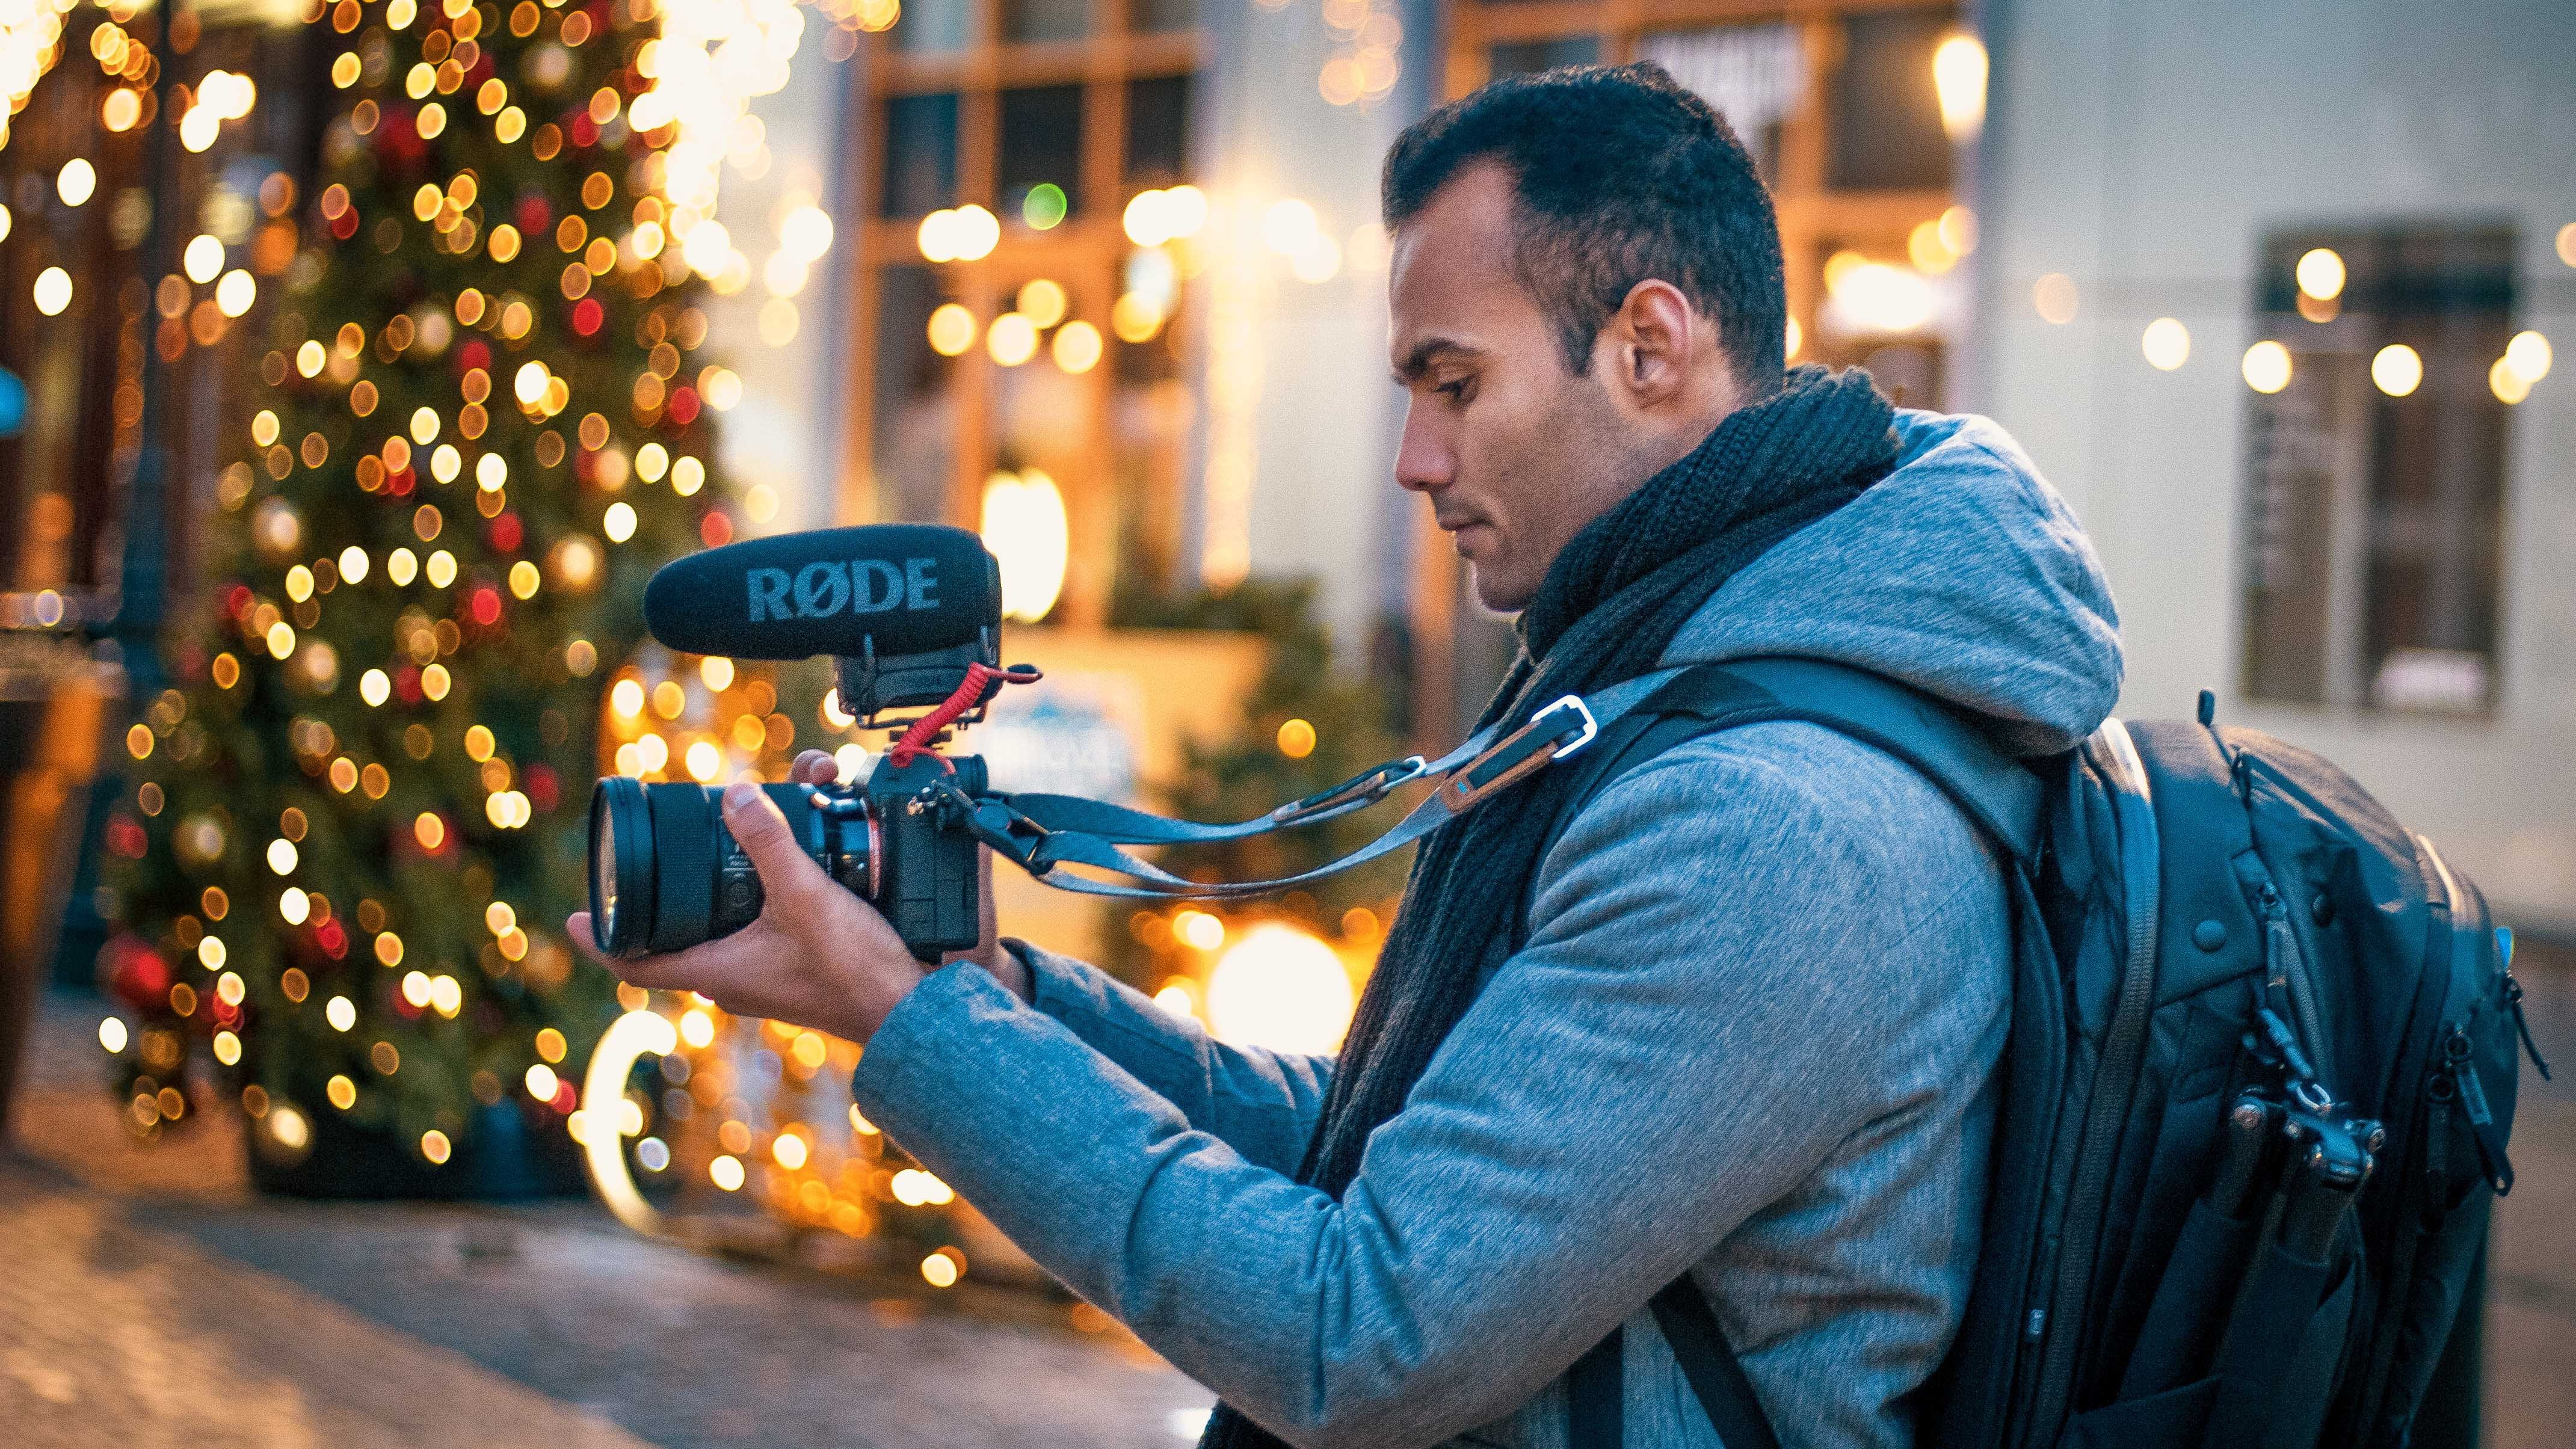
1. Introduction: Alright guys, so welcome to this brand new sculpture class where we would be talking about the new Sony S7 S3 camera. So I have had this camera for the last four months. And in this class I will be talking to you about the best video settings and the photo settings where you can put in your brand new Sonya seven S3 to get the best results. So let's get started. So my name is Ali saying I'm a freelancer, videographer and a photographer, and I also make a lot of YouTube videos online. So and why you should listen to me, I bought this camera for months ago. And since that they, I am filming from this device every single day, almost every single day I'm filming all my Youtube content, all my Instagram, all my freelancing work, this camera. And by filming that much, I have tried so many different settings. Most of them didn't work, and some of them they work extremely good and that surprised me so well. So those are the settings what I'm going to share with you in this class. So stay tight and let's get started.
2. Contents of the class: Or a guy. So I'll just go through what all things we will be learning in this class so that it's worth your time. You're not wasting your time in this class. So for the first thing I would be talking to you guys about the 4K video settings and the high-definition video settings. So there's so many different video formats and this camera to be filmed. So I'll just compare all the different video settings and give you my take on what's the best setting for what type of video you would want to firm. And then we would jump onto what picture profile you should be using. For this camera. I think there's ten different picture profiles. So I'll just compare all the Peter profile side-by-side and then you can choose which one is good for you. And then in the end, I'll show you my best pitcher profile setting. And then we'll also talk about how to change as log three video files into rec 79 in DaVinci Resolve. So we'll also do a little bit of color grading in this course. And the next thing we're going to talk about is the custom buttons. So there's one thing which can make your life easier with this camera is the custom button functions. So there's so many different custom buttons in this camera, and you can customize them according to what? According to your youth, it's all to also show you what's the best Custom setting for my usage and make your own custom settings. So we will go through all the settings and stuff as well for the video and photo. And then we'll jump into the photo section. So I'll just explain you What's the best setting for the photos, how to take time-lapse and stuff. So yeah, let's get started with the class.
3. Video resolution size settings: Or I guess in this section we will be talking about the different resolution sizes to film from this camera. So there's two different resolutions. Of course, you guys know 4K HD, but in 40, there's three different types. So let's jump in in the cameras and compare all the three types of 4K video formats. And then in the end we'll do a conclusion that what type is best for you. It will go to the menu button. So yeah. And then you press okay again and you go in image quality. Any press okay, again, and then you go to file format. And that's the thing, what we're going to talk in this section. So as you press okay, again, you would be presented with five different types of files or five different resolution. So of course, you see 4K at three different places for k edges, 4K, UHD, 4K, SI, and SI. So the main difference is four k edges. That's the mode in which if you film in that mode, the camera would give you the smallest file size while thumbing, while filming in 4K. And if a filming in 4K AS they file side would be quiet average. And of course it would film in 4K. And if you film in SI, the file sizes would be the largest. But with that being said, the thing is if you are filming in hs, which has given you the smallest file size, it would compress the file so much that those files would be really hard for your system to decode. And it's also filming in dot H.265 format. So long story short, if you filming in HHS, of course it's going to give you a smaller file size, but it's going to be so much taxing on your system because your system is decoding a large, large number of information from that small file size, if that makes sense. And same thing goes for 4K s. So this is sort of, this sort of lies in the middle of both the file types. So it also gives an average file size and also the file and also the video quality is pretty good. 4k and 4K SI Yeah, it is in all I4 case, of course the video quality is the best and the files are also super easy to edit on your system because they are already decoded. But then the only problem is your file sizes, you're 40 file sizes would be the biggest. So here's also a side-by-side comparison of all the three files. So this is four k SI. This is for k s, And this is for k edges, which is supposed to be the smallest file size. And if we compare them side-by-side, have zoomed in, I think 400%. And if you compare them side-by-side, in my opinion, they all look very similar. And of course, if you're uploading on YouTube or if you're uploading on any social media. I don't think people would be able to tell the difference that what what file format you have shot at. So that's why in my opinion, I would prefer for k s Because I've tried filming in edges, which is the smallest file size and it's just so annoying for to edit that in debenture, resolve from this side-by-side comparison and keeping in mind the memory space and how much system usage each file has. In my opinion, XA VCS 4K is the best picture format. But then again, I'm making YouTube videos. I usually film everything in HD, high definition and then export that video into Apple progress and then upload it on YouTube and that gives the best quality. So for all my YouTube videos, I'm, I'm never filming in 4K as I did. I did film in 4K and the beginning, but then I saw that when I'm uploading it on YouTube, there's not much difference because even the high definition video quality of this camera is amazing. Why would you want to waste so much memory? And an also like with 4K files is just gonna be so much taxing on your computer or on your laptop. So yeah, save some space, save some time while editing and filming high-definition if you're just filming for YouTube. So your iPhone, all different I film and all different frame rates in high definition from this camera. But yeah, if I have to do any commercial work, if I'm making like any short film which has to be broadcasted on TV or on a big screen. I would yeah, film in 4K or the length what I'm using. If I know that I might crop in later while editing, then I'll film in 4K. But yeah, even the high-definition video quality, it's absolutely perfect.
4. Best memory card for Sony a7sIII: So with the memory card, there's a lot of questions and a lot of confusion on the Internet. But this memory card is what I use to film their videos. And you can still get away with like even if you're using a normal memory card, which is this one, you can still get away with filming it for k 60 frames per second. But if you're filming in all I format, you have to get the foster COD, which is this one. And even with that faster car, you cannot film in all I4 K12 TFP s. So you have to get the CFP express cotton, that's very expensive. So I would just avoid that. And I would film in EECS for K12 and with the Sony COD.
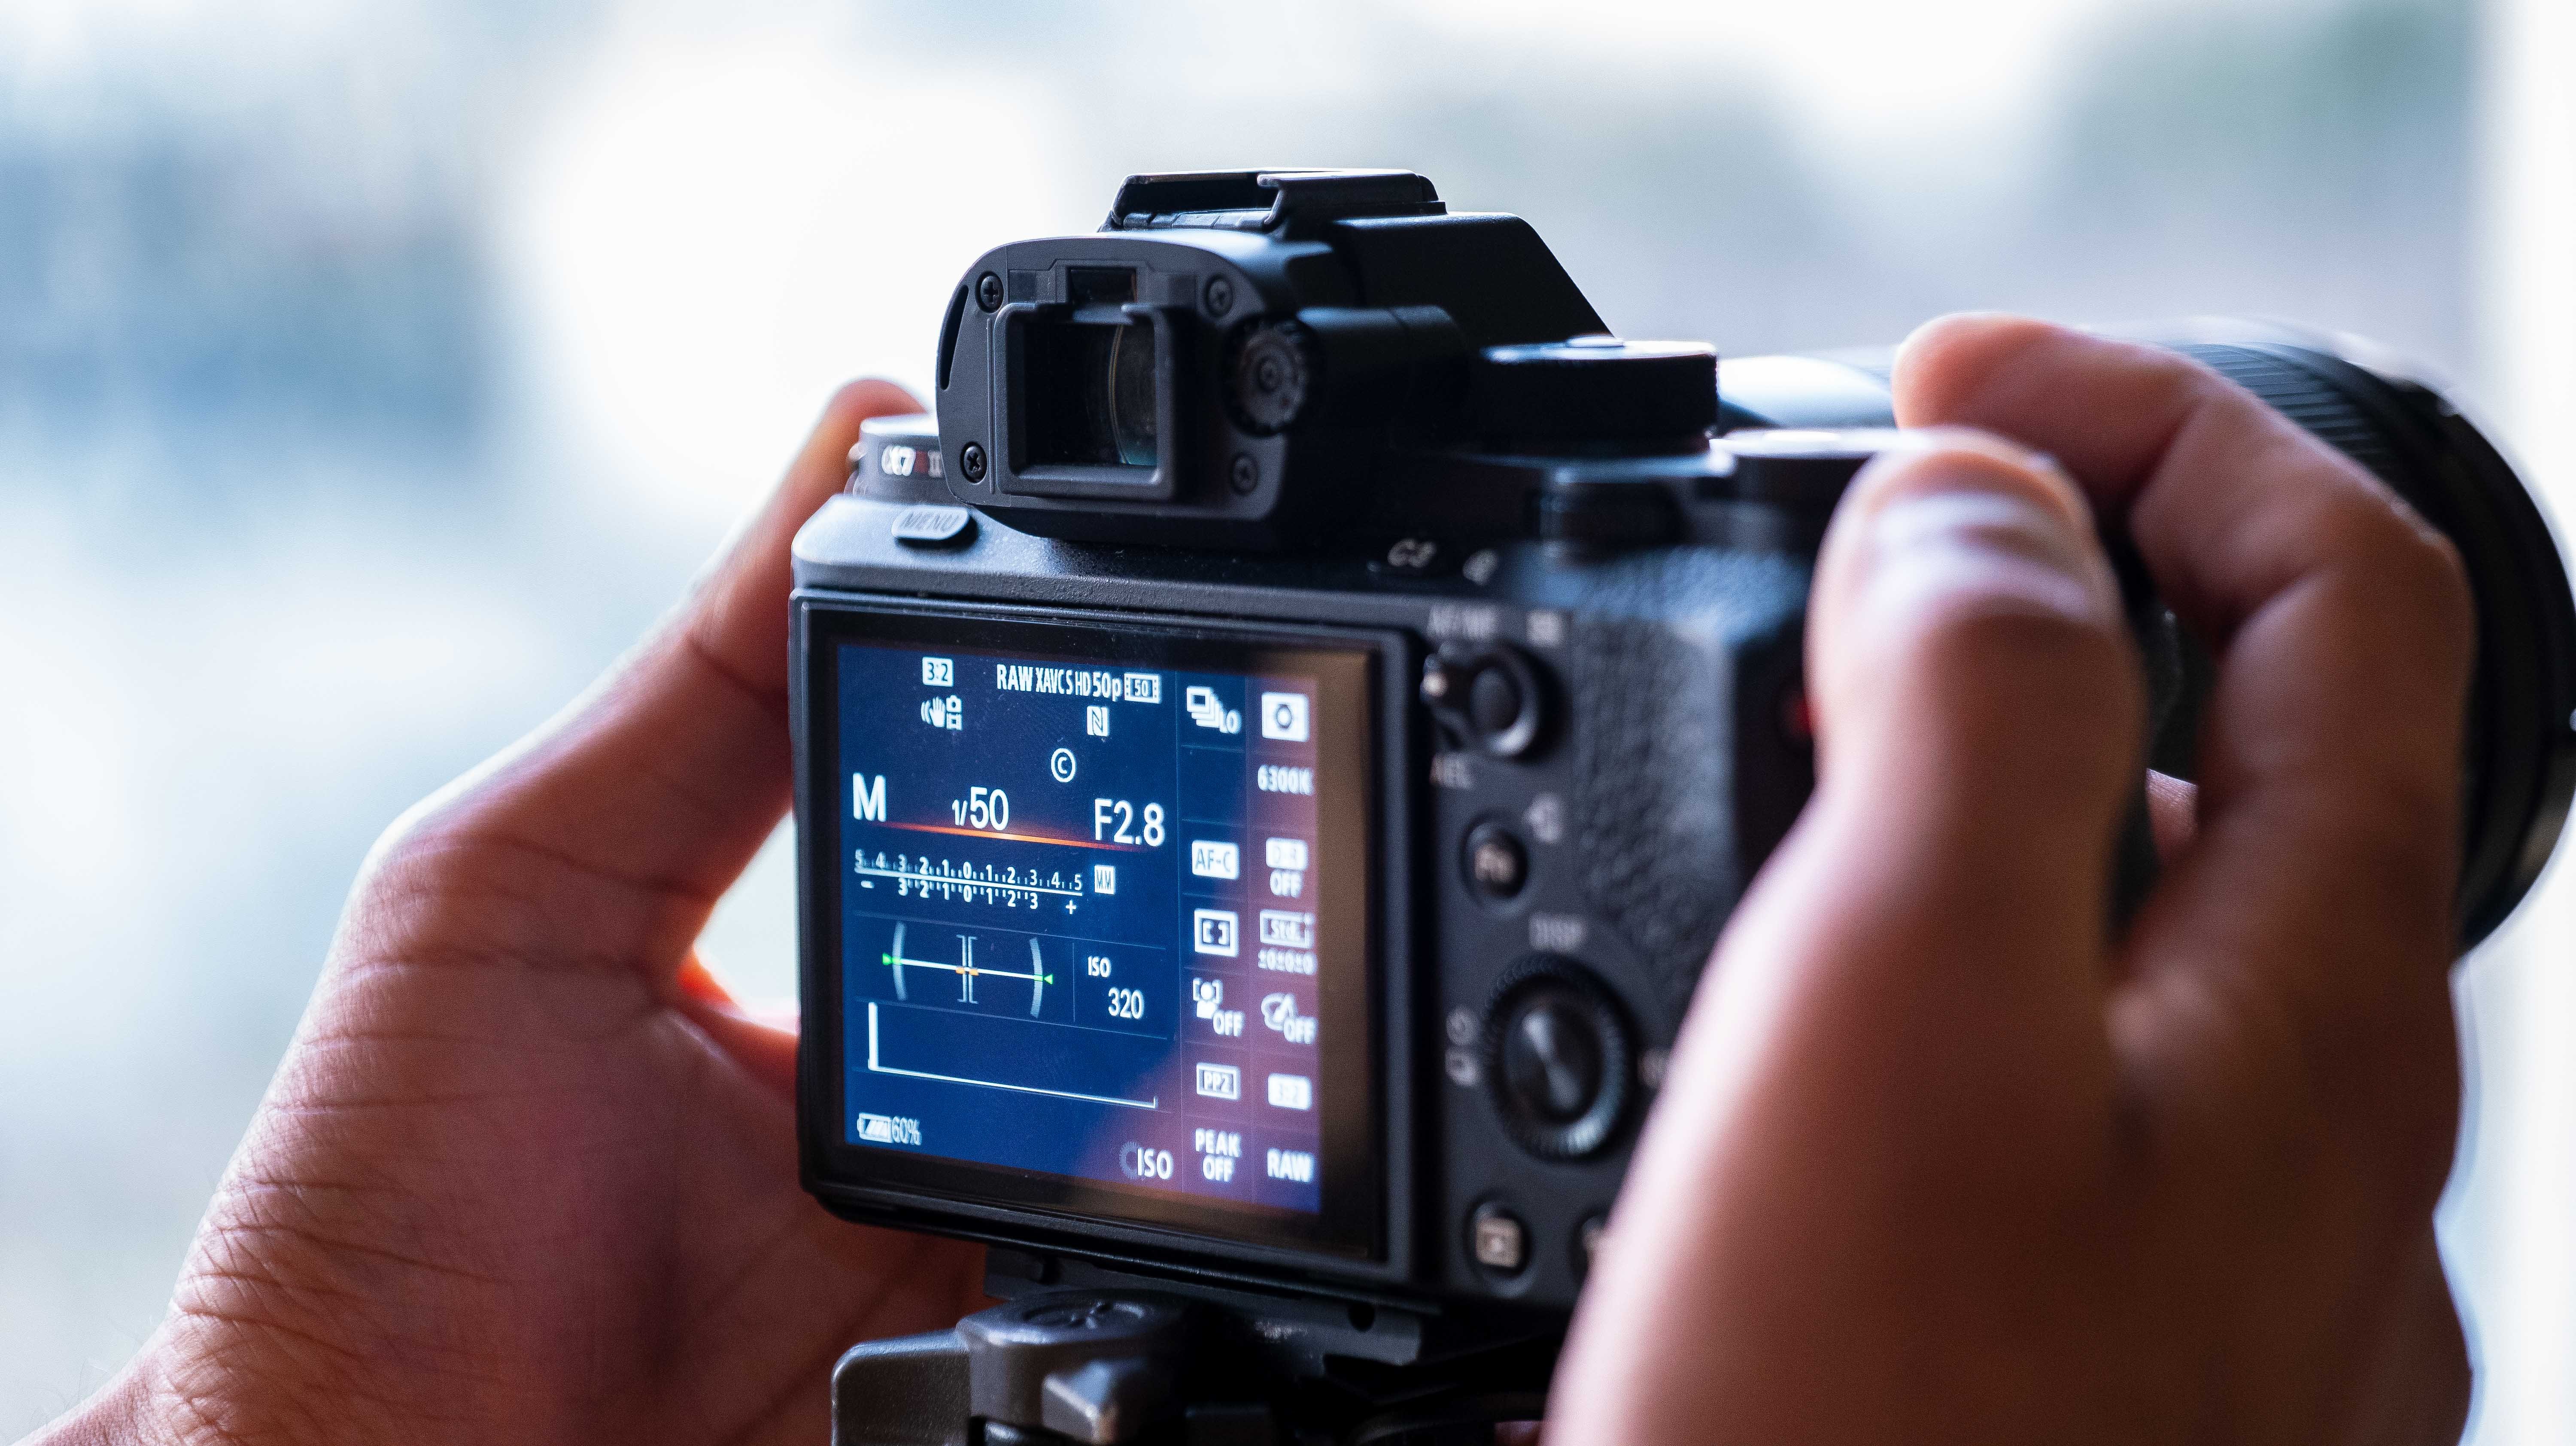
5. Picture profile settings: So the next section has different picture profile. So that's the thing with me. If I'm given a lot of options, I am really confused. Sometimes I would want a filament that setting, sometimes that I'll want to film at that settings. And then in the end, I'll come back to the settings what I liked in the beginning. But then also I'm glad that I tried all all the other ones and I know that they're not for me. So I watched like a ton of YouTube videos on pitcher profile. What picture profile I should use while vlogging, what pitcher profile I should use while making cinematic videos. There were different opinions. There are different options preferred by other people. But in my opinion, the S log three, which is the flat picture profile is good for everything. And why am I saying that? You would know after you would see this video comparison. Alright guys, so in this section we will be talking about the different picture profile. So I'll just show you a bit of things on my screen of the cameras ritual profile was off and the ISA or put it to 125 and the exposure If you see it's 00. So that's why even if the pitcher profile is off, you can see the decent amount of shadows. Blacks are good. You can still see the outside its explores a little bit. But then we would, as we would go through more pitcher profiles, I'll show you what exactly I mean. So Sony has this ten presets of pitcher profile and you can always change them. So if I go into this picture profile, I have changed it to black levels plus four. Just lifting their black saturation to minus 5C can just customize anything in these in these picture profile depending on your usage. And let's go back. So yeah, picture profile, all different picture profiles they have like the colors can look a bit different. So if I go here, yeah, you can customize it. Can change the settings. You can yeah. Name. Yeah. You can just put any type of color pattern in any picture profiles. You can change the black levels you can do. You can change it to SCLC, whatever you want so you get the point right. So let's go and compare all the pitcher profiles. Yeah, so that's how it looks in pressure profile and it's off when I go to PP1, blacks out or little bit dark, or would the blacks are, that the blacks become much darker? Pip3, the blacks gets lifted, shadows gets lifted. And it looks, it looks like a decent image. And yeah, if you see it's ITU seven or nine people before, it is not much difference between these two. We go to pp flight. So you now you start to see the profile becomes a little bit flat. So this is yeah, filmed in Sydney. Vigo PP seeks. Let's have a look what this is. So here the black livers are minus ten, the gamma is sin2, and if easy, the saturation, it's plus ten. So I saw this video for YouTube for and he wanted to try this picture profile out. He recommended that. But yeah, it didn't the skin tones, they were looking terrible in this picture profile, so I just gave up. So yeah, let's go back. So now if you go to Peter profiles seven, so now if you see it is I think S log t2. So what Peter profile you had in Sony is I'm an S3. So yeah, it gives you a little bit of flatter image. And yeah, everything is 0, v goto, PPA it, so this is one of my go-to Peter profiles, of course, the gamma S, S log three and the column mode is S gamma three, S gamma three dots sinner. And then if we go to saturation that 0 caliphate zeros, I'm not changing anything here. The only place where I'm changing is the details. Detailed has called the sharpness of the image. So the reason why I put it to minus seven is because this is, this is also my low-light mode. So every time I'm filming in low light, I want my saturation to be as low as possible so that the less sharp the images, the lower the amount of greens I would see in the video. So that's why I put it to minus seven and it does a decent job. So here are a few examples of that. And now they go to P, P9, which is my main go-to picture profile. So same thing as log three as lot three. Dots in a saturation is 0. All the other setting as 0 but the color, sorry, but the details that's I've set it to minus three. So, and if you would ask me that why I don't put it to 0, the answer isn't always make the footage more sharp in the post-processing. So why not just make it a little bit softer in the beginning and then work from there. Because the thing with mirrorless cameras is that the sharpe method doesn't look too natural if it's at 0. So that's why I reduced the sharpness from the beginning. So these were the pitcher profiles. And now if we go to pp ten, that SGLT-2, I've used a child G30 in the past with my Panasonic cameras. They are they do a good job but they're not as flat as a slug three and they wouldn't give me enough room to play with the colors, enough room to play with the whole dynamic range. And now we'll play a little bit of game. So what I'm doing now is I am increasing the exposure. I'm putting the ISO 2 thousand, my fortune is plus two. So you see S log three is still holding up. Let's go from the beginning. So as log three, it's still holding up with the image that's shadows. Rod can still see outside. You can still say inside, still as log three, LIGO two ppm and that's as log two, that's still doing a decent job. But if you CPP seeks, which is the senate to it's, the image completely blows out. And the reason why I'm showing you these is that if I go to any other picture profile and for some reason if my exposure is plus two, it's just so hard to reduce the highlights because it's just exposed so much. So yeah. And the only time where it's not exposed so much is when I'm filming in S log three. And yap, that's why it's my go-to pitcher mode. And after seeing all the results in my opinion, I think that S log three works best for me. First thing it just that dynamic range I get is so good. Sci-fi film a video in 10-bit NFL filming that video in a normal picture profile. I'm not really making use of that 10-bit colors. So it's good for me to film that NS log three and then do the color grading on that so that I can make use of that 10-bit color range, my videos. So I can just get the most out of the dynamic range from the videos. So that's why I choose within minutes log three. And then also, like in most of my videos, I don't just stop at rec seven or nine colors. I want to also put some really cool lots on that. So if i film that video in a flat picture profile, the lots, they look ten times better in the flat ones rather than the already set pitcher profile. And there was a time variables using pitcher profile one which is the Sydney I think, which is the Senior format. But yeah, I mean, I like the colors in the camera monitor, but then I when I came home and I was editing you in my computer, I didn't like the colors at all and I regretted that I should have just Feldman S log three and then I can put any colors on my camera. And now your question would be that, but then if you fill them in as log three every time you have to convert that a slot three indirect 709. But then in the next section we'll solve that problem. So I'll just give you I'll just give you a quick tip in DaVinci Resolve software, which is absolutely free, you just have to follow two steps to get your NSLog three-foot age interact 79.
6. S-log3 to Rec 709 in Davinci Resolve: So in this section we'll go to the DaVinci Resolve software and then I'll show you how to convert the SLR three footage in direct 709. So let's go. Alright guys, this is the wp into his own work flow. So here on this Edit tab. Now, if you want to go, if you want to convert this footage, you have to go to the color tab, so you just click here. So now you see our footage and that's the first null. So you don't have to do anything here. You didn't literally you don't have to touch anything. It is go right-click on this one. And then I go to lots. And then I can either go to Sony as log three to nine. But then I see that my Heiner, so Highlights are blowing out, so I'll just control Z. So you have to choose this option. So if you go to Sony and I'm gonna choose S log three, 3.1a, cause that's all I will still make at. And that's to rec seven and ions, I do that. And now if I go full screen, you can see the color change. Say yep, that's how you convert the flooded into 79. And in this one, you can still see the highlights are pretty conserved. The shed, is there a good that blacks are good. So yeah. Or there's another array which you can do better. You can do everything manually, scientists reset this node. And first thing you might wanna do is as you can see that there's no saturation. So I'll go to saturation tab. This step can be a little bit complicated, but it just gives you more power to play with the footage. Psycho to oop. Yep. So I'll go to such person tab. I'm just going to change the saturation 200. So we have a little bit of change. And now I'm going to play into contrast. As I'm turning of the contrast. You can see that if I, how much contrast A1, it all depends on me. So I can either go here. So if I go full screen to 19, see literally the same. So it all depends on how much current you want. If I want it to be a little bit p saturated, I can go like that. So a little bit of faded look. So yeah, it's all up to you and if you see the goals, so now there's so much Connor from highlights to shadows. But if I go before, you see, there was so unless color and ve got and we've got so much out of this footage. And obviously if I go more contrast that's going to cover the blacks would go closer to the blacks and the highlights or peak a little bit more. But I think for me this is, but then I if I go ahead and add one more tab. And if I want to put any other lots, say for example, if I heard a lot and if I had to put a joker a lot. So I can just put here, say a knife I go before and after you see how cool it looks. And I can also change the intensity of this slot. So I go here, that's the key. And they can change the gain. So maybe that's the sweet spot. So let's see it on full screen. So you see, so first step features mute these. So I'm changing, I'm locking and unlocking the loads by control. And d, c, if I just go here chains to rec 79 and I go here, chains a joke or not. So yep, that's it for that's it for the color grading window into resolve. And that's so easy to change the S block three footage to RX M nine and I showed you to three different types of yeah, it's all up to you.
7. Custom button settings: So custom buttons. So this can be the most confusing part of this class, but custom buttons are the lifesaver with this camera and that is such a good option to use. So now what happens with me is when I go and shoot, yeah, I don't even have to look at the camera that I'm pressing and I have customized it so well according to my needs that I don't even have to look at the camera body. I'm just looking at the screen, changing the settings with just one touch. So let's get started. We're gonna do is custom buttons. So yep, so you go all the way down, go to operations and Customize settings, and then you have two different types. One you can do all the custom button settings for photos, you can do for videos. So let's jump into video one. So as you can see now, there's six different custom button settings in the rear side of the camera. So if I go in the menu, yeah, the first one with the scroll ring, I just put it to ISO because yeah, I can always change just by scrolling, lecturing. And second one is steady shot, which I would explain later. The third button I have set it to white balance. God, it is so handy for me. Four to one is display my menu. So I would also explain how to use my menu, APIC and full-frame camera set memory. I'll go through all this. Just hanging for a bit. So guys, yeah, I can always train my ASL just by one touch. So that was the first custom button, which was the center ring. Second one is the stabilization. So why I've set it to like if you would ask me that, why not? You just keep to the normal stabilization, then my answer is, every time, every time when this camera is doing stabilizing is using the active stabilization, it crops in 1.1. but then there are scenarios when I'm setting up the camera on a tripod, so I don't want the stabilization. But then at that time I would want my shot to be much more wider. So that's when I change my stabilisation to standard. And you can see the difference how much it zooms out. This is the normal zoom length of the lens, but if I go to active stabilization, it crops in 1.1. so next button is the white balance button. Edit is a lifesaver for me. So I knew that like all the time. And I'm not going to make it too complicated. I just used, I just use these four types. Of course, the first one is worldwide, so you have to use it when it's like super yellow light. And the next one is kind of I use that in the evening when it's like blue our this one, I use it all the time. So if your son if it's cloudy, use it and this one, you use it when it's like super blue. So yeah, I mean, I just scroll between all these four why balances. Yeah. I'll just put it to Autolite buttons just to see how it works. And next one is my menu. So you can always set my menu settings and you can choose your own favorite one touch. You can choose your own favorite settings in this one. So I have put it two. Movie settings and movie settings would have the different frame rates and record setting. So if you want to shoot in ten bit, eight bit, the next one is file format. So yeah, as we discussed before, so it's just one touch of this one is SAN QC can also change the S and Q mode. And the next one is monitor brightness. And the monitor of this camera is pretty bright, so yeah, I all has changed it. According to the situation, it also consumes less battery if I go to less amount of brightness in the night and I don't need it to be too bright. And next button is a game changer. So this is, this is the button where the camera does switches to full-frame from APS-C. And you can only do this in high definition, not in 4K. But yeah, like my this lens is I think 70 m. And if I zoom in all the way, it goes up to a 100105 with APIC. And if it was just one button, I'm getting this range from 2124 to 105 in a 24 to 70 MM lens. How cool is that? And of course, the quality is a little bit of reduction in quality. But you can't really tell. And this is the memory setting button, so I will talk to you about this button a bit later. So anytime if I am doing any sort of changes and if I want to set it on a specific memory, I just press the menu. I was I just pressed the memory recall button and save the settings on that button. So there's seven different types. Very can film. So yeah. And the custom button settings in the second page is yeah, I put it to the center 12 main menu finders, or this switches between the viewfinder and the LCD and audio record level. Because when I am switching between the MAC of the camera and the external Mike, I changed the audio record level because when I'm filming just from the camera, the audio record label, I put it to at least like 20 ish. But when I'm filling with the external Mike, I put it to minus 11 or ten, minus ten. And then the last one is pitcher profile to just with one touch. I can change the picture profile. So just, just one touch I can change the picture profile. How cool is that? You see that there's also a few buttons on the top. So the first button, the main button, which is the record button, and second second button is the gamma display assist. So with this one, I, I have put it there because every time I'm filming in Islam three, I can just put the XML nine lot in camera and see how the image would look later. So, and, but it's not actually going to put the lot on the video file. The video would be still shot in slot three, but it's just a good way to see where they bury exposure lies, how the colors are looking, and all that too. That's why it's really handy. So next setting go is Dr. mod, ISO and create lines. So this is for a fertile than Yaffe course. He can do all sorts of different settings for our photos. Yeah, there's like a 100 different types, so yeah, I saw it's all up to you, but I just gave you a basic idea of how you can set up your menu. And it's just such a, such a game changer. And then after the custom buttons, there's also a really cool feature what this camera has introduced. I think it was also there in a 7S three del function menu. So in the function menu you can just choose all the different, all the different settings which you want to change in just one go. And then you can put that in the function menu. And the good part is you can have a separate function menu for the photo settings and the separate function menu for the video settings. So that's, that works extremely good for me, and it just saves so much of my time as a function menu. That's how it looks. I don't want to change anything, but that's how it looks for. There's so many different shortcuts I have saved here as well. And it just works so good. And how do you change this? So let's jump in the menu. So the goto yep, function many settings. So the good part is this different function menu for the photos as different function menus for videos. And yeah, I have set up to all different types of shortcuts. And I would show you some of the handy ones which are so good to use. So this is my function menu. So yeah, of course, audio record level gamma assist, focus area, memory recall is the important one. So with one touch, you can go to different types of memory options. So right now my memory setting is high-definition one by 50, a high-definition 24 FPS in, but in M1 is forecast 60, m2 is four. K 24, no, M1 is forget. 24, m2 is forgetting. We'll talk about this later. We'll talk about these settings later. But yeah, it can be so handy. I have set up my focus speaking to on because if I'm filming in manual video settings, I want to know what are things which is focusing then the zebras, they are the lifesaver. So I have set up the zebras to 98. So if my foot ages too much overexposed, I can literally see that. I mean, I can see my cameras monitor, but I don't know for some reason I cannot see in this HDMI recorder. But yeah, the, if you see the window which is all explores the like, there's a lot of zebra lines there. And 98 is a decent numbers. It's not going to show the footage which is a little bit or exposed. But if it's too much, they were explored which cannot be recovered even in the ten bit. It shows that. And this is the what slot you and record that says you guys know there's two different memory slots, so yeah, you can change that and memory recall again because I didn't know what else to put it. And the same thing for our photos. So I have put yeah, it's not too it's not too fancy because I don't really use this for too much for photos, but yeah, it's up to you can change anything but the interval shooting, that's the game changer. So that's the time-lapse mode. So we would talk about this later in this video.
8. Memory recall settings: The next one is the most interesting and the best team which saves so much of your time is the memory recall settings. So there's seven different memory recall settings in this camera. So you can choose whatever file type you want to fill out, whatever formats you want to fill that, whatever slow motion you're gonna do, whatever colors, even a put. You have seven different types of your own template which you can make in this camera. So how would you change it to say, for example, if I go to a movie settings, I want to do like a high-definition, just normal without any picture profile image. So yeah, I want to choose at 24 frames per second. And this is just an example, by the way, is I go ten bit and then I want my file to be high-definition. Yeah, just a normal one. And then I want to set that to the custom setting one. So yeah, I wanna put PP1. Yeah, all these settings. And I wanted to set it up to the custom mode one. So what I would be doing is I would press the memory recall setting option and then I would go to one and then I press OK. And that's sitting Would it be registered on one? So every time I have to go there, I can just toggle my button to one. And I had that filming mode. And same thing I have done for all my different settings. And for my shooting more to, I have 60 frames per second, shutter speed one by 25, filming NPP nine, cause that's the classic slow-motion setting, what I use for my videos. And for three, it's like the normal vlog mode, but this time we are filming at pitcher profile nine so as log three, so we're not filming at the colorful picture profile. So that what I've said it to the custom settings in three, in the memory called three options. But if you see there's four more different options which you have access to any can change that. So obviously the first one, I have set it to 4K so I use it when I have clients shoots, I can always change that, but I don't use it super regularly. So that's why I have I haven't put it. So how do you use these ones as well? So you see I can just put any settings and register. Yeah, my slot. And then if I have to go to here, it's forecast 60 on the memory called three button is fork a 120 FPS. But this time we are filming in SAQ mode. That's like the best quality. And of course I use it when I have to do any client work. But how do you do as Enqueue mode? So let's change the camera button to S and Q. And I'll show you how. So. Yeah. You go to Menu. You gotta S enqueue settings and the record frame format. Record. Of course that's the frame rate, what I want to fill that. And if I wanted to film at 24 frames per seconds, adopt playback would be at 24 frames per second, but it's actually recording at a 120. So the video coming out of the camera would be in a slow motion. You don't have to do it by herself. And of course the record setting is 10-bit. So in file format, I want it to be for k. So that's what I want to put it on my custom settings. Three meters, not the from the buttons, but from the, from what I've saved in my memory. So m3. So if I just press OK, so it's registered there. And I can always access these slots by just going to function menu memory recall. And I can go to any h1, I can go to any settings that you want. And how cool is that? And my M4 is a hundred and twenty, two hundred and forty frames per second filming in 10-bit and shutter speed, I have put it to one over 500. So yeah, that's why you don't want to change the shutter speed all the time. You don't want to change the white balance. You don't want to change the picture profile all the time. So this thing is so heavy and like I use it all the time and it's just saves so much time that I can't even imagine.
9. Timelapse settings: So for the photo settings, of course, I film in raw format. It's a twelv megapixel cameras. So every time I'm taking a photo, I just make sure that I'm framing the camera right? Because I cannot do a lot of cropping, but then I, I don't do a lot of photo works. I usually do video works. But then with the photos I usually posted on my blog channel or I posted on my Instagram. So that works. That 12 megapixel, in my opinion, is still enough for Instagram or for any social media. So yeah, here are some settings for photo. So I usually film in PT-109 color format, which is epsilon x3. So yeah, it just gives me the flattest profile. So after that it's just so much easier for me to put any light on that or it's just so much easier to for me to just get so much colors out of the camera. So yeah, that's why I choose the log three profile. And then I also sometimes they also film in JPEG and rho so that the JPEG photos, I can directly transfer it to my smartphone. And the time-lapse option, it took me literally a month to know that there's a time left option in this camera. We'll jump into camera and I'll explain you the most efficient way to get a really beautiful time-lapse from this camera. And now let's go to the time-lapse option. So obviously first I have to toggle back to the photo settings. I go to function Menu button and I turn on the interval shoeing. And then I would have to go to the menu to decide how many shots I want, what is in total and all that. So I go all the way and then I go to drive mode. And then you can see in troubleshooting option, ooh, I'm going too fast until the shooting options I've put it on on. You can always turn it on here and then start shooting times. Of course, you don't want to touch the camera as soon as you start, so you just let give give some time to the camera, give it for four seconds and then I go to what's the integral time like just the classic time-lapse setting thing, whatever you want to put. Number of shots. Yeah. I mean, it's all up to you. I usually set it up to minor focus and then I set up my shutter type to electronic shutter because I don't want my manual shorter to make so much noise. And I also don't want my shutter to be old and I want my shorter count to be less. Yeah, I chose electronic shutter while doing the time-lapse auction. And it also says the shooting time, so you will have to spend two hours for this timelapse. And what else do I change? Nothing much, so yeah, and if I go to aperture priority mode, like I usually if I have to film a sunset or sunrise, I film in aperture priority mode. So then my aperture is fixed, but then my shutter speed and ISO, they're doing all the work to maintain the exposure. So why not just let us start this time Lab and show you guys how it looks. So yep, that was the first four seconds and that's the first click. And now you have to wait for 20 seconds to get the next clip. So yeah, that's how the time-lapse option worse for first, I thought that there's no time-lapse option because it's like a video centric camera. But I'm so glad that they did it and I have no idea why this operation some areas coming up NACLO. Maybe because I'm also maybe maybe because I'm recording this video on an external monitor. So yeah, that's why it works so good. But always make sure that once you are done taking the time-lapse, you should turn off the intervals shooting option, or it's going to be such an artist gonna be so much pain while taking photos. So yeah, always make sure that you're shutting off the interval shooting option, off.
10. Conclusion: Alright guys, so that was it for the class and I really hope that you enjoyed and you got some value from that. And I really hope that I say it's so much of your time just scrolling through the menu and doing all the mistakes, what I've already done it for you. So I really hope that you enjoyed this class and it saved so much for your time. And if you have any more questions about this camera, comment down below and I'll reply to you. I'm I'm always Octavian, my skill share. So yeah, let me know what do you think about this class? And if you also want to learn more about videos and photos, I have tons of other classes which are related to mostly videos and few for photos. So yeah, I hope you check them out as well. And yeah, thanks for your time and I'll see you in the next class.
 Adi Singh, Videographer and Youtuber