Transcripts
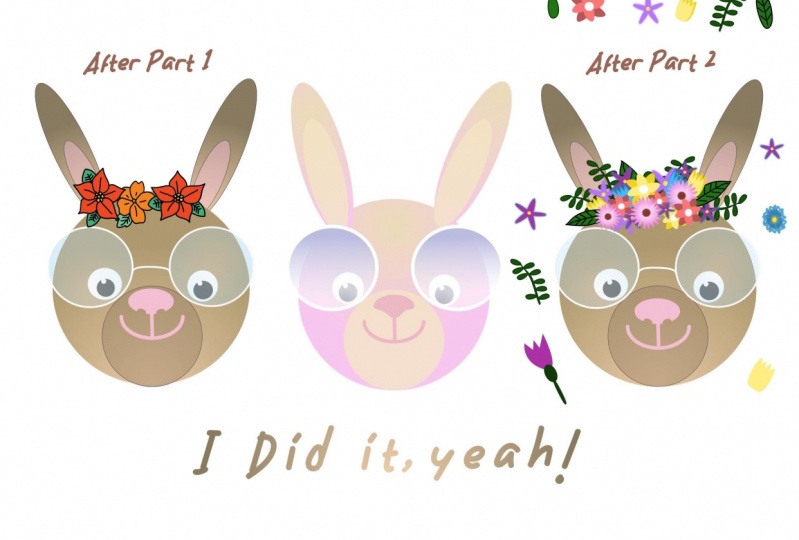
1. Welcome to Vectornator for Super Beginners, Part Two: Hi. Welcome to my skill share clothes Vector native for super beginners bars, too. My name is else on. I am here to teach you how to work with vectors. Factors rs capable without any quality loss, you can make a really small or really big. What do you need, of course, is an iPad, an apple pencil and effectively toe app that you can download for free from the app store. If this is your first time with vectors with Vechten ater, I recommend that you watch part one first in Part one. I explain about the interface on tools on how you can make drawings with basic shapes and use colors to do so. If you've already done that, or if your confidence enough that you will succeed without that first class and please be welcome, let's dive in thing in this class, I'll explain the mental barstool on the pencil tool three very powerful tools that you can use to draw practically anything. Also, I'll show you how to work with bullion commands on how to work with combined and separate at what influence they have on each other. Your assignment. What your assignment is actually easy I don't have a specific assignment. I just want you to have fun and to learn how to work. With these tools, you can use the image that you might have made from the previous close. But you can also start something new. You can follow the example far, which I will put in that downtown section right there where you control something from scratch. Just let yourself go and surprise me. Put your artwork in projects gallery. And if you have any questions or remarks, please let me know. And now, without much further ado, let's go.
2. Let's start with a straight line: Let's start with a straight line. Select a pencil. Now go to the inspector tab and set the fill to a solid yellow on the stroke to black. Now step once. Lift your pen, then step elsewhere. This will give you a straight black line. The yellow filled doesn't show simply because there's nothing to feel. Yet The two points you just made are called anchor points. The line you made is called a curve, and it's also known as a path. Let's make a triangle with the same settings first de select and then tap four times and make sure that the last step ends on top of the 1st 1 is so triangle with a yellow Phil. But hang on, it's a triangle. Shouldn't it be three taps? No, because the shape must be closed on DSO, a connecting point on the 1st 1 is needed. A rectangle works the same way, of course, and if you took more times, you will get a polygonal shape with straight lines. Sharp edges a black stroke on a yellow Phil. If you draw three anchor points of filled triangle will show, but since it's not closed, one side doesn't show a line
3. How to make curved lines: Now that this is clear, let's make some curved lines first, clean is up. Drag to select and delete Step. Once now step again and holes move you a pencil up tip again and moved a pencil down the fill shows a bit. All right. If I repeat this process and continue to move back towards the starting point, my fil will be on the inside to get the fill in the correct sport. You will need to make closed shapes, and you will need to steer your anchor points in the right direction. There's knitting needles you see appearing are called handles on. They control the direction off the curve since I just tapped and dragged. My curved lines are symmetrical, but if you need a sharp curve like let's see a saw blade, just step hold and put one finger on the screen. This will change the symmetrical corner into a sharp corner point, and it allows you to change the direction of your path. This all becomes clear when you place the next anchor point, but my go to way is just to taps on the anchor point for the same results
4. A closer look at anchor points: Let's take a closer look at anchor points for a minute in the inspector tab on a style, you'll see the type off anchor point for your current selection. Make sure you have an anchor point selected or this area won't show it all. I'm not sure they actually do have names. There was nothing in the manual, but the following seems logic from left to right. A straight cornered curve like, for example, square a rectangle, a polygon, then a symmetrical curve. For example, oval or an egg shape, an asymmetrical curve like a banana and a sharp asymmetrical curve, for example, saw blade or a crescent moon. In each case, the anchor point behaves differently. You can convert one type to another by selecting it in this area. Alternatively, you can select an anchor point and select a handle, then hold one finger on the screen. When you drag now, you will only move the selected handle
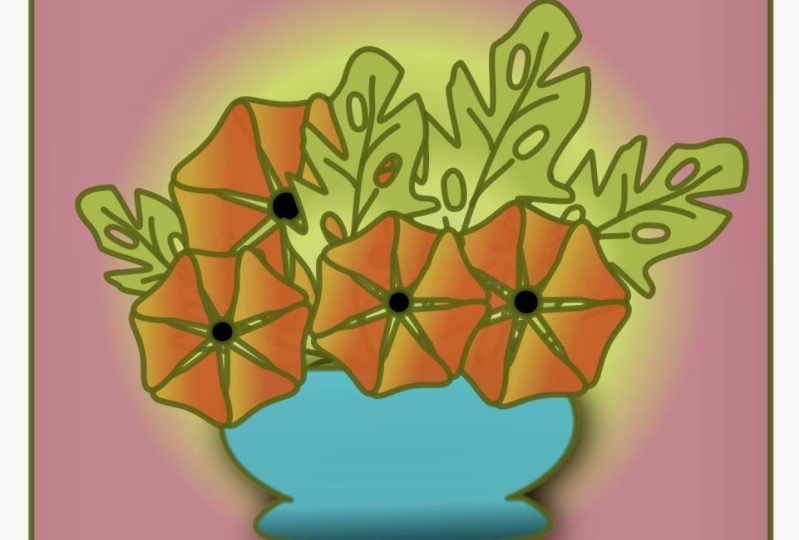
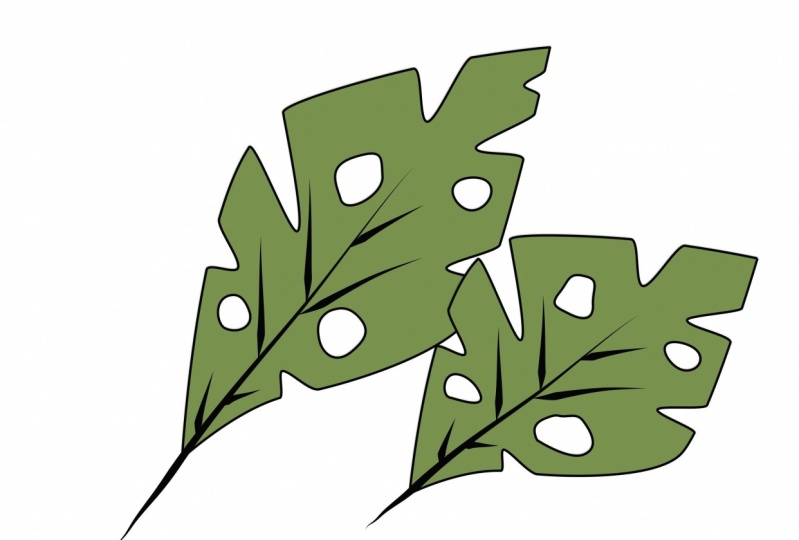
5. Drawing the leaf, two ways: drawing a Swiss cheese blunt with the pencil. Now that we've got this covered, we can draw a leaf. There are different ways to create is so I will start with the pencil because that's what I'm focusing on right now. The Swiss cheese plant, also known as a monster, Delisi Rosa, is a popular, well known plant with big green leaves that have decorative holes and cuts. This is ideal for drawing, experimenting, and practicing with most others depends all. If you want to, you can import the example file from the down of the section, put it on a separate layer on the reduced capacity to approximately 40%. If you do so, don't forget to add a new layer for your own artwork on that away. To draw, start with a pretty fine shape instead of drawing the shape entirely with the pencil. You can also start from a pre defined shape and added that for this method, go to the shapes icon. Select the circle to on draw on over with the nude selector, grabbed a top anchor point, hold a finger on the screen and pull the handle down. I can change to curve in any direction I want. In fact, the leave has a very basic shape, so it's not that hard to girl from circle to leave in this case. By the way, there's no best method. Just go what feels best to you.
6. Make the cuts and the holes: to make the cuts. Let's start by selecting the note tool. Step three times closely together on the outer lined to make three notes. While a large is a little. Now, select the middle node and put it in words until you get the right length off the cut. Repeat this process a couple of times all around the two other notes that I made ensure that the corner off the cut is nice and crisp. You can make a holes in different ways. The easiest way, by far is using the razor. Select an appropriate size on erased the shape of the whole. It's fast and it's easy. But what if you want a specific shape? Maybe the razor isn't suitable for that. Also, the A razor has a circular shape, and there are no sharp edges. In that case, you want to use the pen tool on, draw the shape exactly like you wanted. When you use this method, your whole will be a new, separate path. You need to make this path part of the path off the leaf. Why? Because the holes must form a see through shape. I like to do in real life. When you place the leaf over college background, you must be able to see that background also through the holes
7. Make one object from multiple paths: this is done in the bullion area under the past tab. Select a leaf on holes with the selectable, then head over to the past time in the Inspector and the Intersect function under bullion. Now, if I give the leaf of Phil, the holes will behave like real holes. Let's go for a dark grade and Phil and no stroke. And there you've got your leave. With the cuts on the holes on, you can see through them.
8. Time for the brushtool: time for the brush to. It's time to add some veins. Of course, you can draw them now that, you know how is he used a pencil. But in this case, going for the brush tool makes more sens. The brush tool will help you to make the veins smooth. A natural mind you. This tool will always have a fill on a stroke to start with, even if you've selected none. In both cases, you can see that even though the stroke was set of none, I got a stroke. Once I started using the brush to while still selected, I can make the stroke thicker, changed the color or change the color of the Phil. I can pick up notes on, move or delete them. In a way, you're drawing a sort of a shape with a varietal stroke and Phil, both of which you can alter or even delete after you're done. So this is quite different from what you've done so far, I said. The stroke with 28 on draw a slightly curved line, apply more pressure together. Thinkers. True, if you move faster, your curve will be more smooth. Moving slowly will pick up more motion from your hand. It will result in a more bumpy line. Give it a try. Repeat this a couple of times until you're pleased with the results. Then when you're done with the selectable, select all the veins you made on group them. Finally group everything. You can now duplicate your leaf to produce more leaves. If required, you can re color resize. Move. Don't rotate them. It's also possible to give him a drop shadow to get a bit off depth in your drawing.
9. The pencil tool: the pencil to now. Did you know how to work with the pencil and the brush tool? There's really not that much to tell about. The Bansal, unlike the brush to a pencil, can have a fill on a stroke, one or both, or even known with the slider next to defense liken, you can determine smoothness of the line. If you need a rough style, move the slider down if your strokes need to be completely smooth moving all the way up, which was a value in between. Bensel Tool doesn't have pressure thickness.
10. How combining affects properties: Phil's instructs. When you combine past with different fills and or colors, the new combined path will always get the properties off, the one that is on top. This doesn't only go for the film cover on the stroke with and a stroke color. Also, for transparency ingredients. When you combine two or more past, the result will be one path with its own unique properties. Grady and feel that was applied to one of your parts will now be applied overall, but a starting point will be in its original position, so you might want to change the direction marker for the radiant a bit. By the way, if you press separate after you've combined up off, you're combined. Past will break apart, but it will keep their new properties. So if you need to combine two or more past but also want to maintain your original shape with its stroke and Phil, it's a good idea to make a copy
11. Edit curves in a combined object: changing a curve that was made from combined curves. At first I thought I couldn't make any changes to anchor points anymore. Once shapes were combined after combining curves. I didn't see any notes when I selected the path, but it is possible. First, select your shape with the select tools, then tap de select. Now select the no tool and step on the path. You'll be able to make changes now if it's a bit hard to get there or if you can't get it to work. You can also use the select tool first, then tap the sister stool and try again. The anchor points will now show.
12. Boolean actions: you can combine pass in the Boolean area. If you've ever worked with Adobe Illustrator, the name Pathfinder will probably sound more familiar working with bullion commands. Sound creepy, but it's not that hard. It'll now let's move over to the inspector Tap on. Take a look at the little Aiken's. I'll use a rectangle and a circle to show you what happens. The first Aiken is unite. This will join the two shapes together and well to the overlapping parts together. The result is a rectangle with a bulge. The color will be taken from the upper shape. The 2nd 1 is subtract. The front shape will be cut from the one below. Try it the other way around. What happens if the circle is a little rectangle? Do it one. It's called difference Onley. Overlapping areas will remain. All that is outside. The overlapping part will be deleted. Number four is divide. Both the overlapping as well as the remaining parts, will become individual shapes. Number five is intersect. The boat that overlaps will fall a gap in the entire path
13. Outlining: the last option in past is outline. With this command, you can change a stroke to an outline. This will significantly change to properties of your shape instead of one shape with a phylum stroke, you will have one shape with a stroke and what looks like a white Phil. But in fact, there are two shapes now on. The one in sight is white and still connected to the outer shape. The stroke with where you came from will have determines the amount of overlap. You can change the fill off the biggest shape, but automatically the smallest one will follow. This is visible when you move the smallest cheaper bit you can. If you won't separate these connected shapes from that moment on, they will act like independent shapes. If needed. You can apply stroke again and keep repeating this process as much as you like. When would you use this outline? Option? Well, for one, a stroke won't have a Grady INT. If you want a Grady int in your stroke, you need to outline a stroke first in order to give it a grade Ian Phil. But more well known is this. When you're making icons Once you've got a Nike already convert all strokes to outlines. This will ensure that your Aiken will always have the same appearance in whatever platform , application or size it will be used.
14. Whoop whoop! You made it!: you made it. Congratulations. You've reached the end of this class and hopefully you're more familiar now with the pencil , The brush tool on the pencil toe with the bullion commands on with the combined in separate options. I hope this was useful. I hope this was helpful. And I hope that you've gained confidence in trying to draw with defectives. Thank you for watching on. I hope to see you next time by
 Els Ruiters, Graphic Designer from The Netherlands