Transcripts
1. Vector Illustration Masterclass: I built my whole
creative career by switching from pixel
art to vector art. Vectors give me much
more flexibility and allow me to work faster on
multiple client projects. I never have any problems with pixelation or preparing
client work for print, and having a big library of reusable vector assets makes me much more efficient
in my freelance work. And now I'm here to teach
you how to harness the power of vector art so that
you can work faster, create more flexible designs, and take your creative
projects to the next level. Hi, my name is Veronica. I'm super excited to be your
teacher on this journey. Welcome to my biggest and my most comprehensive course
about Vector Illustration. You might actually know me from my other affinity
designer courses. I'm an illustrator,
surface pattern designer, and currently I'm working predominantly in children's
book publishing. I designed this online course to give you all the tools that you need to take your vector illustration
skills to the next level, and to help you in building
your creative career. In this course, I will
teach you everything you need to know to master
vector Illustration tools. Whether you're a beginner or already have some experience, you will learn intermediate
and advanced tools in both Adobe Fresco and affinity
designer on the iPad. You will master tools like the rectangle tool,
the alignment tool. We will have a look
at Bleion operations, the knife tool,
and so much more. Plus, we will explore a Dob frescos vector symmetry
tool and learn how to transfer vector
assets seamlessly between Fresco and
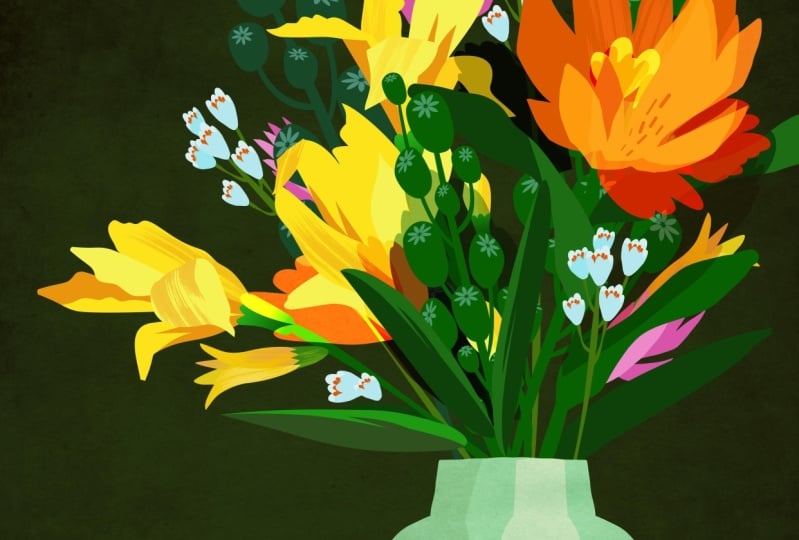
affinity designer. Together, we will build a complete library of botanical assets in
affinity designer, and by the end of this course, you will be also able to
create a botanical poster, which then you can
either upload to your POD shop or print it out
for yourself or as a gift. This course is very hands on. I've prepared exercise sheets
where I will guide you step by step through
practicing each vector. You won't be just
learning the theory. You will be applying
everything right away with practical exercises. See you in class.
2. Getting Started: Oh. Hello, everybody. Welcome to my biggest and my most comprehensive
course about affinity designer
vector Illustration. This time around, together
with Adobe Fresco. This was really requested
by many students of mine. Please don't feel intimidated that this course is so long. You can take it
at your own pace. There is a lot that I
wanted to teach about, mainly because affinity designer is such a powerful software. It was really hard
for me to edit it down and to cut
out any material. On top of that, we're doing a
lot of practical exercises. There's really a lot
of hands on material, not just an affinity, but also adobe frescos, it's like double material, and there is a lot to learn. To get started, all
that you will need is actually your affinity
designer software and your drawing pencil. I'm recording this course in August and September of 2024, and my affinity designer
version is 2.5 0.5. Using Adobe fresco for this
course is actually optional, but highly recommended because you can get it from the
App store for free, at least at the moment of
recording this course. There is a free version
waiting for you to download, so why not try it out? I will be showing you
my demonstration, of course, in infinity designer
version two on my iPad. However, you can definitely follow along regardless
of your version. The steps that I'm
demonstrating in this course, they can be applied
to both version one, in case you have the very old
version and to version two. You can also apply the
principles that I'm teaching to the iPad and to
the desktop version. But you have to
bear in mind that Being a big fan of
drawing on the iPad. In this course, I'm
teaching as usual, a lot of useful hand
gestures for the iPad. I think this will
be the one thing which you unfortunately won't be able to replicate on
your desktop version. But nevertheless, it's
not a big deal breaker. The goal of this course is
to make you more skilled in using vector tools and to make you basically
a vector art pro. The biggest focus is
an affinity designer with some help of Adobe Fresco. Simply because I think affinity
has much more to offer, especially if you
compare it with the free fresco version. I also wanted this course
to be super practical. There is literally a ton of practical exercises really hands on that we will be
doing together. Plus, there is a real life deliverable after
taking this course. Namely, we will be creating a botanical vector art poster that you can print
for your home, you can print it as a gift, or you can even turn it
into different formats. For example, you can
turn it into postcards. I will be showing you my
whole process from creating vector assets all the way to preparing your
poster for print. Now, if you're
feeling, you would first love to take more of an introductory course into the infinity designer interface. But at a slower pace, you can consider taking
my beginners course and this course is for
both affinity version one and affinity
version two users. But in this very course, I am also going again
through the interface explaining things
like the basics, how to create a new document and where you can find
what in the interface. Or task is to build a new vector assets category
with botanical elements, and then to design a vector botanical posters
to put it into practice. This botanical poster, you can
upload it to your POD shop or you can print it out
for yourself or as a gift. This course will
be very hands on, lots of practical exercises,
hardly any theory. And at the end, you will still have
something that you can take to the real world. You can put the
design in your shop. We will be talking
about printing it, exporting it, about the
color profiles for print. So it will be very actionable. A friendly disclaimer,
you can draw my exact vector poster
really from A to Z. You can copy me exactly, but please use it
only as an exercise. Since this is my
intellectual property, you are not allowed to
sell the exact copy of my botanical poster or to
present it as your own. But this course is
so fun that I am 100% sure that you will
not have to copy me. You will go into creating something of your
own right away. All right. Let's get started. Thank you so much
for being here and for taking my course
and enjoy watching.
3. Affinity Designer vs. Adobe Fresco: In this video, I wanted to
talk about the differences between affinity designer
for the iPad and AOB Fresco. Also to answer the question, why am I using both? Why don't I just stick
to affinity designer? There are also
some advantages of using other software
simultaneously. You might have taken my other
affinity designer courses, but I wanted to
quickly run through the interface of both
affinity designer, and also the interface of
Adob Fresco to show you the individual feel of
each of those softwares and how the navigation
looks and what is the ease of moving
in those programs. Let's quickly start
with affinity. I'm assuming that you already have some knowledge
of affinity designer. Perhaps you have taken my
previous courses, like I said, also have a beginners course
for Affinity Designer users. What you got to know
is that you have your home page that is
also called live Dogs. Right now I'm actually in another folder of mine
called Botanical art. But when I click on
this arrow here, it will bring me back
to my main interface. This is your life Docs area, which is basically
like your home page. In that home page, you can have either individual
documents or you can create projects which
are essentially folders. We were just a
second ago inside of my botanical art folder. Whenever you want to create a new document, and of course, we will be doing all that in the course together in
the lessons to come. You just select new
and new document, and then it pops
open a new menu. We can, for example,
work in pixels here. But how to create a
document in particular for this project for this
course, we will do that in. The next lessons to come, but this is where we
create new documents. Then under the open menu, you can open a
document that you have maybe saved on your storage
or in your cloud storage. Under templates, you can open templates because
you can also create kind of like pre saved documents with an affinity
designer extension. And if you find yourself using a certain document setup
over and over again, this is really really handy. When I click on templates, it brings me here on my
iPad internal storage to my templates folder, which I created
manually for myself, and this is where I have
some client templates, some templates for products. This is, for example,
a template for a puzzle design for
my red bubble shop. And if you take in my
pattern design courses, I have quite a few repeat
pattern templates, even though I have
to admit that I use most of the time the
diamond repeat template. So when you click on this
template, it will open it. And the template that we have seen here in this
templates folder, it will not be
overwritten, essentially. So now we created
a new document. It's not saved anywhere. If I just want to get rid of it, I click this X symbol and I
just close it without saving. Under lessons, there are some tutorials that you can
find within the iPad version. I also take advantage of
this help section where you basically you
can find everything. If you type in, for
example, vector brush, you start typing, at least, you get a whole library of
topics and you can do that, of course online, but you
can also do that within your iPad within your software, basically, you can
look for some answers. Then under account, that's also very handy also
for this course. Under account when you register, you get some free brushes, free pixel brushes, and free vector brushes
and some textures, and anything that you also connect through the
infinity Designer store. For example, I bought
this El Malo Illustration kit by Frankin Ton. You can also manage
it from here. I actually have it on
my iPad storage and I save all the goodies
that I bought in shops, later on also on my
desktop storage. That's why there's
this cloud icon because I didn't download it. Through this interface here. Account and under settings. You have a few general settings
here that you can change. For example, in your
user interface, you can change the
background gray level. Usually your Canvas that you
start with will be white, but there's also this
background area. We'll head into one document to show you an example
in a second here is where you can change
the gray level of this background area. You can also switch to
the left handed mode. You can set the undo limits. This is also too safe. Um, maybe to optimize better
said your iPad storage. This is, for example,
where you can also upload extra funds
because affinity designer doesn't come with a fully
blown library of funds. This is where you
can add those two. One thing that is a bit of a difference between
adobe and affinity is that all this artwork that you're
creating in affinity, it's on your local storage. So there is no cloud connection. It will not be synced
to any Cloud account, which I don't mind
because I have I'm pretty consistent with saving up my
backups on my iPad storage. You can also have such
a solution as dropbox. Now, we will be using a lot of basic and intermediate
and even advanced tools in affinity designer as we
proceed with our project. All you got to know that is that the majority of your tools
are here on the left side, the move tool, the node tool. This is where you find the
pencil tool and the pen tool. In case of doubts, there's this small question
mark icon here. That will give you a bit of a preview and a bit
of a cheat sheet. Super important
affinity designer. Both for vector art as
well as for pixel art. Over here, you have this
blue affinity designer icon, but when you click on it, you can also change to
the Pixel persona and use combined pixel
art with vector art. As you switch personas, the interface will change a little bit because
you will get access to the tools that are specific
to aster art basically. There's also the export persona, which I don't use that much
because I lately, at least, I don't create super big files with multiple artboards where I want to export a lot of
things at the same time. But if you needed that, there's the export persona. So we're just going to go
back to the designer persona. When creating an
affinity designer, this is what we will stick
to 99.5% of the time. Because we'll be
focusing on vector art. Then here on the right side, you have some studio panels. This is where you have
your layers, for example, here you access the brush studio when you're using symbols, this is where you
can access them. This is what I use a lot when
I create repeat patterns. This is where we have
our assets library, for example, this is
my assets library. This will be the
focus of the course. This is where the
good stuff begins. Here, also question mark. You have your asset studio. Then I also often use
the transform studio, and from the navigator, this is where you can check
the gray scale of your art. This is what I also use most of the time whenever
I create something new. Over here, you have
the context toolbar. This all looks a little
bit maybe intimidating, but this is actually one of the reasons number
one reason why I like this synergy between
Adobe Fresco and affinity designer is that Fresco has some things, just a few. That affinity doesn't have. And I still keep coming back for my final art to Affinity Designer just
because it's so powerful. It takes a little bit of
time to get used to it. That's why I like teaching affinity designer
based on a project. You just tackle a
project, for example, a botanical illustration
or a botanical poster. And as you create it as you go, you learn all the tools that
you got to learn basically. Now, let's move to Adobe Fresco, so Adobe fresco, let
me show you the icon. This is the icon
for Adobe fresco. You can get the software
from your app store, and this is what the
interface looks like. If you're familiar
with adobe product, then it might look familiar,
looks very similar. One difference between
affinity versus adobe is that It's all saved
in the cloud. Fresco has this seamless
integration of adobe cloud, and for some people, it's super super useful. If I was creating anything
here on my iPad and then I went back to work
further on my computer, then all those files would
show up there automatically. Fresco is also a painting and
a drawing app for the iPad. It's developed by
adobe, obviously. And it's available for the iPad for iPhone and for windows. I had a question in one
of my Facebook groups why they cannot find it
on their MC books or Max. It's because there
is as far as I know, there is no desktop version. I think they target
mainly iPads. Now, the good news is that and I don't want to pass
on any judgment here, but Fresco is for free, which yeah, I was
surprised because basically adobe puts a
subscription on everything. And of course, for
Fresco you can also get the subscription version, which has a few more options. But you can start with
Fresco right away. I mean, even Procreate, I think I haven't
checked lately, but I bought I bought
Procreate for 999. Fresco is for free,
and it has everything. It has vector tools, and it has pixel tools, and it's completely
usable for beginners. So I was really positively surprised that it's a nice tool to work with for the iPad, which I personally love. You can also get a
standalone subscription for some extra features
for WB Fresco. Then it costs 999 but per month. And you can also get it in
case you're using a photoshop, you can get it as part of the
photoshop and Fresco plan, and then it costs
something like 20, 21 years, I think. What is the difference?
The paid version has some additional features. I cannot really tell you because I never had the paid version, so don't be surprised
if you have the paid version and
things look differently. But I heard that it has more brushes and more
customization features. It also gives you the ability to export high resolution exports. Here for those artworks
that I created, I would have some limits, but it never really
stopped me because I worked just in one
particular dimension, either 3,000 pixels or
4,000 pixels square, and this dimension is
fully it's working. So I can export it. So for me, it's not
a problem at all. The paid version also has
an increased cloud storage, and I think you also
have more things like more blending modes and a better layer
management option. But for me personally, the free version is enough and I don't insist that you have
to buy the paid version. This is our interface. Whenever we will be
creating a new document, we will be doing that together
in one of the lessons. You can create your
custom sizes and you can just hit this plus
icon or over here, it create new and create a
new document very very fast. Then we can, for example, open this monsters gardening illustration
that I was working on for my portfolio
so that I can show you the inside of the interface. It's a little bit more limited, maybe because I have the
free version compared with affinity designer
and actually, I started so I started this Monsters
illustration in Fresco, but then through I brought it
to affinity just because I, you know, The interface
is a little bit simpler. You have fewer options, but maybe it's even better for beginners because you might not be feel as intimidated compared
to the affinity designer. What I like about it is that
it also has vector brushes, which you can access here
and all the other tools, you can access them
here on the left side. It has pixel brushes. It has very praised
live brushes, watercolor and oil for
the free version that behave pretty much
like the real deal, the real watercolor
and oil paints. Here you have things like
the eraser, the smudch tool, the move tool, what is it
called the bucket tool? This is how you fill
your shapes with color. We will be doing that too. Then here you have your
layers panel by tapping it, you can just close
it and open it. Here you get, the second icon, you get some extra
layer properties. For example, you can
lower the opacity, here lowered the
opacity of my sketch. Over here, this is what will be applicable for our course. You get access to
the symmetry tool, which we will be using
as well to create our vector assets with the
symmetry option in Fresco. This is it. Then
the plus symbol, this is how you
create a new layer, the symbol, you can make a
layer visible or invisible. Here is the clipping
mask symbol, and that's pretty much everything that I'm
using in the Fresco. We will see that in
action together. This icon here allows you to publish and to
export your artwork. Now the question, the
good question is. Why do I use both? Why can't I just stick to
using Affinity Designer? First of all, the symmetry tool. This is at least a
recent update, I think, either from July or even August, this month, 2024, at the
moment of filming this course. I can very quickly use
the symmetry tool. While using the vector brushes that I like. That's
already a plus. You can go around that in infinity designer
but you can draw just one side of your object and then copy it and then
flip it and mirror it. Yeah, you can also
work with symbols. But I like the speed of work with the symmetry
tool here in Fresco, and it's not a problem
at all to then just Export everything to
affinity and I will show you how to
export and work on the compatibility of what
you create in Fresco so that it fits and it's
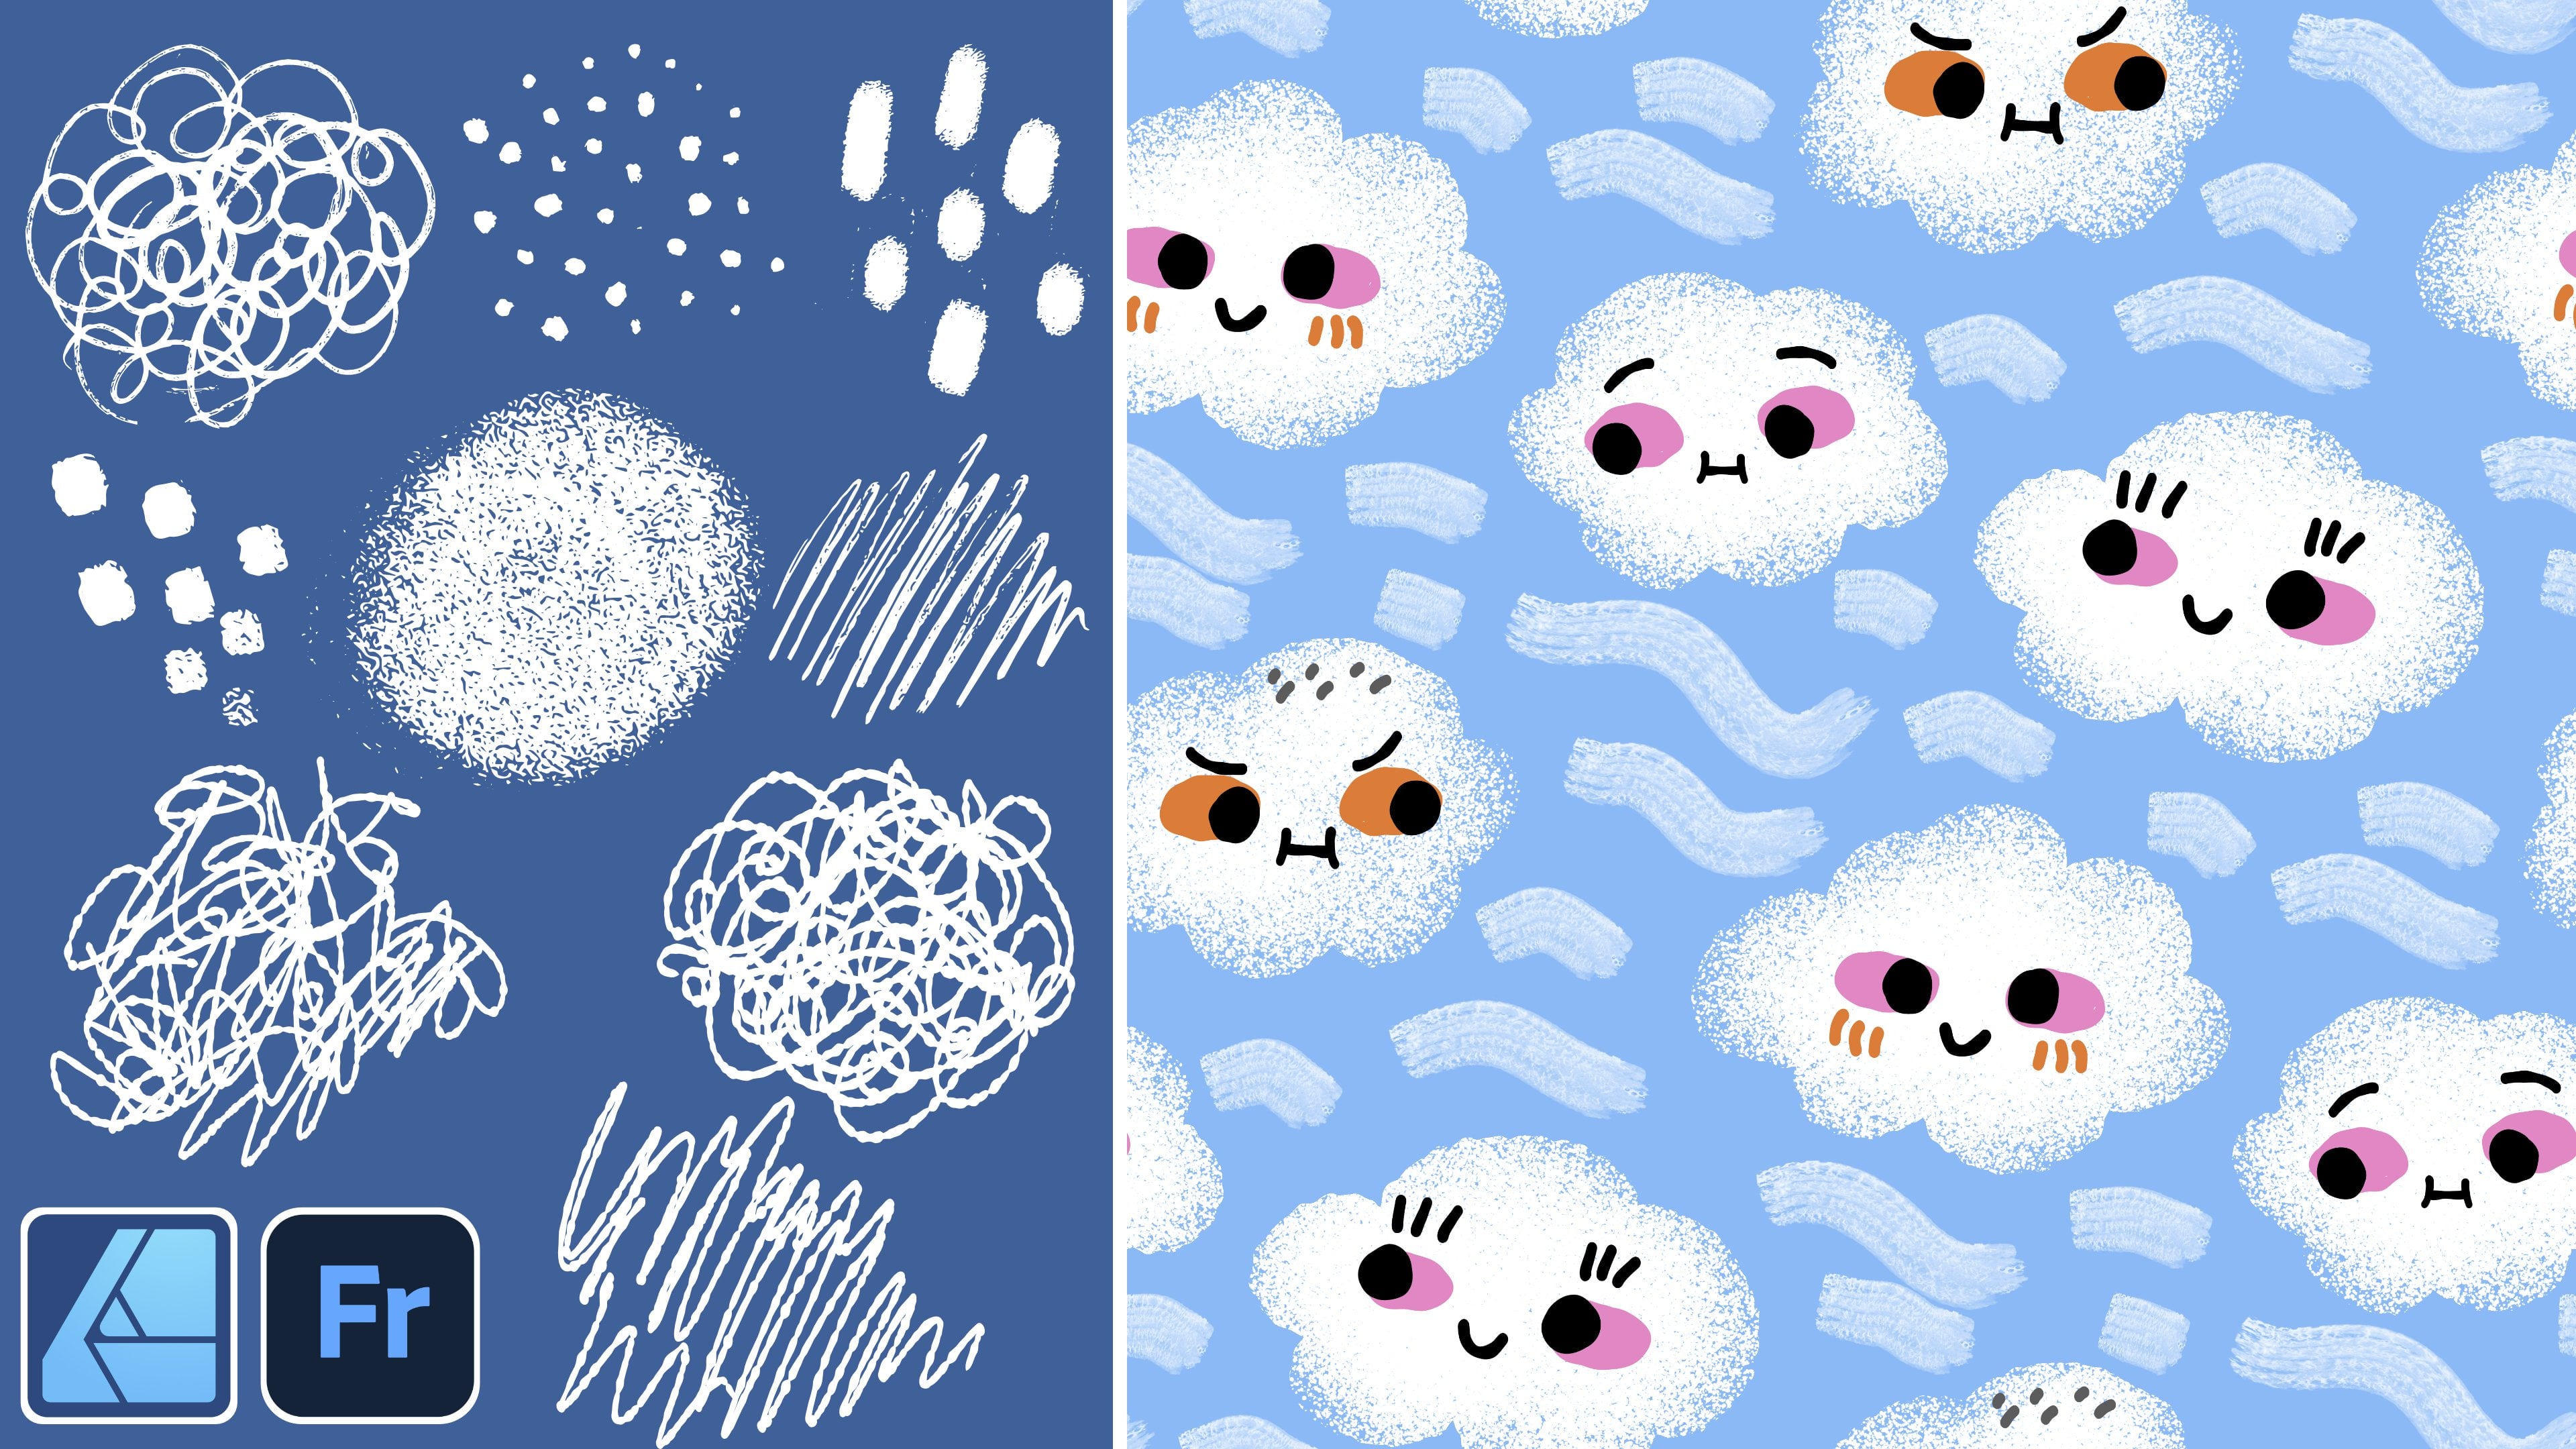
workable in affinity designer. Number two is brushes. I focus on using vector
brushes here and there's one category under all
that is called Jitter. And this is what I
really really like. I saved pretty much all
of them to my favorites. Vectors tend to be very rigid and very
smooth and they look very polished and some people don't like the feeling that they give. For me, using those
jitter vector brushes in fresco and then
exporting them to infinity is just a
perfect synergy, an example of a perfect synergy because I can create
something very playful, especially here for
children's book illustration. The lines are not so polished and they're a little
bit unpredictable. For example, there's this
very heavy jitter brush. Let's go here, by the way, you have the color panel, and you can see what I mean that those brushes
are very fluid, and they give a little bit
more unpredictability. Also those brushes, you can
fill shapes in real time. I think such brushes are
called blob brushes. When I import
everything to affinity, this shape, for example, will not have any
stroke element, which means it will
not have an outline, but it will only be filled. This has quite some
advantages for me. Light Jitter. Here you
can adjust the size. We will be working with those brushes together as
we're working on our project, so don't worry if it's too much information
at the same time. Is it two reasons? Yeah, it
turns out it's two reasons. Why I really like
combining affinity together with Fresco,
the Jitter brushes. And the new symmetry tool. Then I export
everything to affinity. Color changes are much easier. I have my pre saved
color swatches here. I can use, for example, the same fill color or the
same stroke color option to select the same color across the entire artwork if I want to change it or
slightly adjust it. I can also use global colors. Also, when I choose one global color and I want to change it, it will adjust across
my entire artwork. I can use gradients here
and transparencies, just like on the slide
from this little B UFO. And in general, textures. Also, I have my
favorite textures that I also bought
from some creators. For me, personally, affinity
is much more powerful. That's why it's a software of my choice for the end effect. These were the main
differences between the interface of affinity and the interface of Adobe Fresco. We also briefly talked about the pricing that
fresco is for free, affinity is for a
one time payment. Then I also told you about why I like using both sometimes, at least, why using
both programs.
4. Vector Assets Explained: In this lesson, I wanted to talk about vector
acids in general, what are vector assets and
why you should be using them. Essentially, vector acts
are reusable elements. You can store it
in your software. They are not shared across
devices, by the way. The assets that I have
saved on this iPad, in order for me to have them on my desktop version of
affinity designer, I would have to export them and then import them on
my desktop version. But the import and export, I will explain it
in a few minutes. A while ago, I also released my very first online course with a big focus
on vector assets, in particular hand
drone vector assets. The difference between
this first course and this volume two course, is that the first one was indeed a very soft introduction. It was also targeted for
pattern designers to create assets that will be then later on used
for repeat patterns. Also a big focus of this previous class was
hand drawn vector assets, especially using
the pencil tool. In this course, I will be
using some other tools. I will be also mixing affinity
with Frisco for starters. You will also see
that in this course, we will be learning some
more intermediate techniques with the shape builder, with the rectangle
tool over here, and I will be showing you some extra vector tools that will help you
speed up your workflow. The previous course put a little bit more impact on
this hand drone feeling. Which you can achieve, especially when you're
using the pencil tool. In this course, we
will focus much more. You will see it's
going to be fun. We will focus much more
on the shape builder, on the rectangle tool, and also on the
alignment options, which right now you cannot see because I need to
select one element. In this context menu, now we have a few more
options lightening up. We will be also using quite a lot the alignment
tool in this course, which we didn't use so
much in the first one. And we will be using Boulan operations to
create our vector shapes. At the same time this
volume two, so to say, this volume two course
is both dedicated to general illustration artists and also to pattern designers. Whatever you create
in this course, you can use it to create with me a botanical
vector illustration, but you can also
take advantage of those assets and build
your own repeat pattern. Example, I've done that. I have taken this very
abstract looking flower or berry and very quickly, I was able to create
a new repeat pattern. With this berry design. To say and also
the leaves that I created for the purpose
of this course. I was also able to reuse them to create
this repeat pattern. This is the essence
of vector assets. These are elements
that are reusable. You can access your assets on the iPad here in
affinity designer. On the right side, you
have your asset studio. Those are all the flowers, for example, that I saved. I created them only one time, for example, this
barrier over here, and now I will be able to reuse them across all
my other projects. With the small exception, if I wanted to switch now to the desktop version
of affinity designer, I would have to import them
first because there is no cloud connection between
the different devices, the way it is
probably for adobe. But no problem. So also, those leaves that you see here, I was able just to when
you click on an asset, you either have an option to
delete it or to insert it, or you just press and hold and you can drag
it onto your Canvas. So if I wanted to build
this parent, let's say, I'm going to select this other leaf because
it has a different color. I can insert it and I can
work with it further. You can create different assets. It all really depends on
your individual needs. You can create some icons. I think I even have
over here, by the way, I clicked on this title here, and this shows me my
entire library of assets. I just clicked on the title
of the assets category, but you can also
see small arrows on each side of this title, and I can just move
between my assets. By selecting those arrows. But I wanted to
quickly check if I have maybe it's under shapes. I think I had a category
that was called a icons. For example, I have some
social media icons here. I also have some icons that are branded software icons for affinity designer
and for a Procreate. You can also if you're
designing websites or using affinity designer
for graphic design purposes, you can save up other design
elements such as buttons, arrows, whatever you might need. I again, depends on your needs. I use it a lot also for
general illustration. I was actually before in my
kids illustration folder. I wanted to show you one
example I was working on this really big search
and find illustration. As I was working on it, let's go back to assets. I created a whole was it space? I created a whole
space category, and I saved up a few planets. This one is also the
fabrican of my website, by the way, this
quirky planet here, and the Here, there's
a long list of all the elements that I saved up as I was working
on this illustration. Sometimes those were completely completely complete,
that sounds strange. But complete objects,
for example, here you see a spaceship, which is already finished and another spaceship
that is finished. But sometimes I was saving up even small bits that took
me some time to create. For example, this
little shape here. Sometimes I found that I was
needing it a lot to create, for example, elements
for spaceships. I'm going to delete
it so that it doesn't stay here by accident. To create all those elements, it takes a little bit of time. Maybe a minute, maybe or two. But if you find yourself creating something
over and over again, and it's no fun,
it's repetitive. It's a really good
practice to just add in those elements to really
save yourself a lot of time. Then all those elements, I was also able to recycle
them, so to say, to build this illustration sheet for different robot designs. Or when I was on vacation, I was inspired to
create some assets that had to do with the beach
and some sea life. Let's find it to do
sea beach, underwater. That was actually created
for another illustration. But as I was building this bigger search and
find illustration, which contains a lot of details. This took a lot of time. I don't even know exactly
how much because affinity does not record
your creation time, the way procreate does. But if it did, then wow, it would be many hours, and sometimes you just need
to fill out an illustration. Let's say, 90% of your design
is completely original. You've never drown it before. This is the pure creativity that you translate
onto your Canvas. But sometimes you just
want to fill it up faster. Maybe you have multiple
client projects and you just need to speed up. I have friends in the
publishing industry who get such tight
deadlines and They know that I also work or
help myself working with vector assets and
they're really envious that I'm able to grab
all those assets, and when I'm running
out of energy, I can just drop them
and fill in some gaps, for example, this small fish. It's basically the same fish that I saved somewhere
in my library, I could drop it or there was another fish
that I recycled. I think those two guys. Yeah, they were also here. They were from another
project or some seaslls, So underwater
plants that I used. I think I had another
illustration with Marmad Where are those guys? Yeah, this one here. I think
this is how it started that. I created a few algae and coral reef acts,
exactly there here. They really help you to be
much more efficient and to spare yourself
this repeatable work. Then vector acids are
also very adaptable. I can show you one more
example if we were to work again on this
vector illustration. Let's go back to our
botanical category. This flower was actually
built from this flower here. This was an asset that I
created at the very beginning. It wasn't that detailed
and it served as a base for this other flower
that you can see here. This was my starting point. Sometimes you will
create something basic that you might find
useful for the future, you will save it up and
you can still modify it. For example, on this
flower, we can duplicate This circle, make it
a little bit smaller, and position it in the middle. We can also create a copy
of this element here. Let's check in the layers if it was copied yet it was copied. We can go to the
one at the back. We can change the
color to something completely different and
then from the move tool, we can also resize it, make it completely different,
place it in the middle. Then we have a completely
different flower that we can also save
into our library. Then to save an asset, you just have to go
to the subcategory that you want to save it into. Then each of the subcategories. In this botanical main category, I have a subcategory
called flowers. Complete flowers, leaves,
some extra details and vases. Now this new flower, I would like to save it again
to my flowers subcategory. I go to the three horizontal
lines, the Hamburger menu. Click on it. Here you can
also rename your subcategory, or you can completely delete it. Here you can also add
asset from selection. This entire flower is selected. You see the thin blue line. Add asset takes a
little bit of time. Now this new flower
is already added in. I just realize this
one was not added. I can also add it because
it will be just so easy to insert it
into another project. Let's save this one too. And this is how you
are slowly step by step building your
library of assets. I already mentioned a little bit of naming that is
important here, we can go under assets to this
other main hamburger menu. Here you have a few options that are important to know of. When you want to
start a category, a category is a
name for a folder that holds all your assets. Then if you want to create
a complete new category, you just have to
select at category. If I'm on desktop
and I want to import a category that I
built on my iPad, you go to import category. Here you also have
an option to create all those sub folders like
flowers, leave, stems. You just click on
ad subcategory. If you build
something on the iPad and you want to back it up, or you want to export it and then import it on
your desktop version. You have the option here
to export category. You can also rename it. If I click on rename, right now, I am sorting
it alphabetically. That's why I also
gave them numbers. You can also delete it. And here, you also have an option to change
the background. I really like this dark view, but in case you want
something else, you can choose the light
one, but you see this is not working well
for what I created. And sometimes the checkerboard
is also a good option. It all depends on your
personal preferences, but I like the dark mode, so I stick to the
dark background. You can also sort
categories by date added. And when you select that, it switches itself
to the other option, which is sort
categories by name, and this is the
option that I prefer. I like to sort them by name, so that when I click on
this library review, I see all my asset
categories alphabetically. And the ones that I use the
most, they have a number. So the most important
one is also the zero branding
category where Oh, my new logo, where I
could, for example, just drop my logo over here, which I don't want, so I'm
going to delete it for now. I also have some textures. You can also save your
color palettes as assets. If I wanted to use, for example, this color palette, I just click on this
asset and I click insert, and now I have this
new color palette. Another good example
is that you can, for example, save up all those little elements
that build bigger elements. For instance, here, I
have a whole selection of mouths and noses and
smiles and hands. I have some animal
head shapes and also accessories like sunglasses
or hats or little bags. This is the one that
I used the most. That's why I just named
it as number one. Your assets can be vector based, but they can also
be raster based. If you have any
pixel based assets, you can also save them in the same way in your
assets library. Do you remember where to
export and import your assets? You go to this main
Hamburger mania, import category or
export category. That's important to know. And when you're exporting
category, for example, if I wanted to back up
this category here, I click on Export. On my iPad storage, I have a separate folder
called resources, affinity assets, and this is
where I save all my assets. They have this file
extension point AF assets. That's how you can
recognize that it's an affinity assets file. Then in general,
it's a good practice to export your categories every now and then and to back them up somewhere
on your storage, either on your internal
device storage or in your Cloud storage. I think this is all
that you need to know about assets, in
affinity designer. In this course,
the extra material will be about Adobe Fresco. We will be also exploring
how to create vector assets in Adobe Fresco and then import them and save
them up in affinity. Those vases, for example, they were not
created in affinity. They were created in Fresco. Here when I go back
to my home page, all those vases they were
created in one document. You can see here all the layers. And then later on, I exported
everything into affinity, and I saved it up here directly as an extra subcategory
of different vases. Now, I hope that I don't have to convince you any more about the huge advantages of using assets in general
in your workflow. Sum it up for you, vector assets are reusable elements
that you can store, organize, and access
across all your projects. They can include some
icons or logos, buttons, illustration elements or
individual components that build something bigger. They improve your efficiency and speed w working on an
illustration because you can simply just drag
and drop them onto your document instead of
creating them from scratch. In this way, you
can spare yourself repeatable work and save
time with bigger projects. Now let's move to
the next lesson.
5. Symmetry Tool in Fresco: All right. We are
starting learning about vector design tools from Adobe Fresco as a
warm up exercise. Also, in order to learn quickly
how to work in Fresco and then export and import everything into affinity
designer properly, which will be our end software. This exercise, we will be
creating vector vases. Those are just a
few vases that I created as I was preparing
for this course. I will show you how
I created them in Adobe fresco and then imported them into
affinity designer. We first have to start
by creating a document. Instead of a square format, we will go for the
rectangular format because vases are a
little bit longer. This is the file that I
was working in previously, but we will create
a new document from scratch to create a new
document in Adobe fresco. You either Click here on the
plus symbol custom size, or you create here in the
lower left corner create new. Then you can either
choose the sizes that you use previously or you
click plus custom size, and this is where you can adjust your dimensions for
your document settings. We will stick to pixels, and we will choose a width of 2,500 pixels and a
height of 3,000. This just comes from
my personal experience that either 3,000 pixel square or this type of rectangular format work the
best for my asset sizes. The orientation is vertical. Under print size, we make sure
that we change our DPI to 300 instead of 72 because it will be possibly also
important for print. We leave background as white. And in case you're using
this size more often, you can also click on safety size and you
can rename it here. And now we're done and
we hit Create document. By now, you already
know a little bit of Adobe fresco interface from
my introductory lesson. All the tools that we
will be using to draw our vector assets are in
general here on the left side. The most important one
are vector brushes, so we will be creating
vector assets. So we can create on
our vector brushes, and over here on top of
this vector brushes window, there's like a little spot
here with a horizontal line. When we click on it
and hold onto it, we can position this vector brushes window
anywhere we want. We basically just
want to dock it. So we press and hold it and
we release it and this docks, so to say, our vector brushes
in the window permanently. Normally, I also open the
color studio button over here. This is not so important for this particular exercise because we will be drawing in black. But in case you need
a color palette, you can also just press and
hold and also dock it here. Now our color palette
and our brushes are docked and they will not
disappear as we are drawing. From the vector brushes, you can go to the all category, and for the free version, you have a few categories
to choose from. There's basic brushes. If you don't want any texture or jitter around your shapes, then I recommend
that you just choose this round simple
vector brush without any taper at the end over here
in the lower left corner, you can also adjust the
size of your brush. The next icon is for smoothing, how smooth your line
is going to be. If it's super smooth, then your line will be
very flowy, so to say. The same gestures apply just like in affinity
and in Procreate. If you tap twice, you do the
the undo and redo buttons, you can also find them in the upper right
corner over here. This round brush would be good. Make sure that you test
out your brushes so that you see which one
is to your liking. If the streamline is too, you can always lower it down. I think it's
streamlined in affinity and smoothing in fresco. Too much habit working
with affinity. You can also reduce
this smoothing. This would be the round vector
brush that I recommend, but I personally like to create vector assets in fresco
with the jitter brushes. Under Jitter, you have
the heavy jitter brush. If I just draw a straight line, you see that it has
some irregularities. Here, the last icon also
lets you set taper, so we can also set
it actually to zero. Taper means that
the end line and the start line are more pointy. Medium jitter, create a
lot of lines right now. By the way, as I
start to drawing a new vector layer is created. That applies at least to the first stroke
in the document. This was medium jitter, I can also make it a little bit bigger so that you
can see better. It's also a little bit more unpredictable
and spontaneous, but not as dramatic as
this heavy jitter brush. If you really want to
stay on the safer side, you can go for the
light jitter and this is what I will be
using for my vases. I'm just going to
check if there's any. No taper is off,
so it's all good. This is the brush
that I will be using. You can also make it bigger. And my smoothing is at roughly, I think, somewhere half
the line like 50%. Another tool that
we got to know in abi fresco for our
purposes is the fill tool, this little bucket icon
over here to the left. Whenever we draw shape, instead of you can also color it in like this in abi fresco, but this will take ages. Instead, you switch
to the fill tool. And then you just
fill your shape. My brushes were not docked,
I will dock them again, and then you just
got to remember to go back to your brushes icon. Again, if I was to
create this flower, I just draw my outline with
my light jitter brush, select the fill tool, and just fill this shape. If I were to export everything
to affinity like this, all those individual shapes, as long as they are not joined, they will be recognized
as individual shapes, and then you will
see later on when you import it into affinity, they will be on separate layers. So that's super handy. Theoretically, all
those lines and all those shapes could go
over the ho vector acts, but of course, we want
something more pretty. When I click on this layer, a few more options show up and here I can also
clear the layer. Other options are you
can hide the layer, this icon, or you can do
it here on the right side. You can delete the layer, or you can also select
multiple layers when you have a few so that you
can group them. So Let's draw something. Another thing that
will be useful for creating our vector acids
here is the eraser. You can see that the eraser also has the same types of brushes
for normal vector brushes. For example, you can
use the round brush, but if you're drawing with
the light jitter brush, you can choose the same brush
for your eraser so that you can erase elements of
your shape in a similar way. And the same gestures apply to finger tap on the
screen and you undo. We have our vector brushes. I will be drawing with
the light jitter. We will be drawing
in black so that we can see the silhouette
of our vase better. You know where to
find the eraser and you know where to
find the field tool. All your layers will be
here on the right side. This is where you find
your layers panel. And now the most important
tool for this lesson is the symmetry tool
in Adobe fresco. You can find it here
under this third icon. There are a few more
options, snapping grids, perspective grid, and
there is symmetry. It might be close,
so you can open it by clicking on this arrow, and then you toggle on symmetry. By default, you have this beautiful
vertical symmetry with the line going from the top to the bottom
of your document. Let's stay with this
light jitter brush just to show you what I mean. This is very similar
to procreate. For example, we
were learning about symmetry in procreate in my procreate online course
about drawing vector ts, and this was basically
the same system. You can have this type of symmetry with the vertical line, horizontal line, the
same like in procreate. I think this was called
radial in procreate, if we wanted to create a crazy flower shape and
then fill it with a color. Then we would use
this radial symmetry. This is super easy, as you see. There are different
types of symmetry. In here, you can play around
with it as much as you want. There's also some
rotational variations. The same like in Procreate. At least the principles are the same like Procreate because Fresco has a few more options with those rotational options. We will stick to this
first type of symmetry, the vertical one, so we
can close this panel. I'm going to t on
this layer and it. I will also i sheet
with the ases that I created before and we will do the exercise together. How to gain an inspiration
regarding what to draw. First of all, you can use either Pinterest
or Google images to find interesting
shapes for your vases. I created a special
dedicated board called vintage florals, where I tried to find some
interesting vase shapes that have a bit of a
retro or vintage feel, and they have very
interesting shapes. You can also work
in split screen. By dragging the
program to one side. You can minimize also
your pinterest board here and you can look at
different vases simultaneously, you can do the same
with Google images. Another alternative
is that you take some time browse through the
web or through Pinterest, and you do a few
warm up exercises where you're drawing
vases in your sketchbook, just to explore
different shapes, and again, as a
warm up exercise. If you like ceramics like me, you can also look
around your house for the vases that are already there standing somewhere
in your window sill, and then you can also practice drawing them either
in your sketchbook or directly here in Adobe
Fresco with the symmetry tool. Now we discuss the theory, the tools that we will be using a bit of a refresher
of the interface. We talked about how
to gather inspiration about finding interesting
shapes for your vases, and in the next video, we will get into our
actual practice.
6. Practice: Vector Vases in Fresco: Now we are ready
to start drawing. I will show you a few
examples of how I've drawn my vases and then exported and imported them into
affinity designer. Feel free to draw the
same vases like mine. But I would also
encourage you to look for your own shapes and
to do a little bit of research and to
draw your own assets. Instead of pinterest, I
would like to take advantage and see my little cheat sheet of the vases that I've
already drawn. So I'm going to take
this photos app and drag it and drop it
instead of pinterest. Vector brushes, I have
my light jitter brush. I think the size is very good. Symmetry. As long as
you see this line, you know that it's
on and it's working. We don't really need
the color studio because we will be
just using black. Now I will show you how I draw a few of those vases
that I created before. Let's start with the one here in the uppermost left corner. We will be using the first
layer that was created, but every time we want
to work on a new vase, we will have to hit
the plus symbol to create a new layer. Let's get started. If you
draw and hold in Fresco, you will draw a
perfectly straight line. That's also very useful. I'm going to hold it
for a second so that it snaps into this perfect line. You see that the
slight jitter brush creates for me a bit
of an uneven outline, and this is what I
want to achieve. This vase over here also
has a rounder shape. You can also create a circle shape by drawing
and then just holding your apple pencil on the
screen and will snap into a rounder shape and then
you can also move it a little bit to see
how you like it. For my outline for my shape, I like to draw a little bit like inside into this shape
because it will be easier to color it in and I
will be preventing any gaps between the lines because then later on when
I'm using the fil tool, and there is a small gap, I might be overflowing the ink onto the
rest of my canvas. I also start inside over here. Draw a straight line,
have a look here. Once you're holding it here,
you can still edit it. This is good. And then I'm drawing the
line at the bottom. This I would like to fix. Maybe it's cosmetic. Maybe it's not really even
necessary to fix that, but I cannot see
such small things. I'm going to use the eraser
to adjust it a little bit. The eraser can also
change size over here. Can also rotate your canvas
to make your changes. Sometimes for the eraser, the round brush works the best and then you can just make the
size a little bit smaller. And then adjust your shape. Then I'm moving to
this field tool and I'm filling everything
with the black color. This is the advantage
of using black. You can zoom in and out and you can see if you're
happy with your shape. I'm pretty happy. I
doesn't have to be the same in the photo that
I created before. I just want to demonstrate
how I've done it. Light jitter, if I know
I'm using this brush, I can also close
the brush window. And now I will make
this first vase invisible by hitting this icon. Then plus new layer, and now I can deal with this vase over
here. More or less. It's going to be a shape
like this perhaps. Then you can always fix that, but you have to be
very mindful of any gaps in between the lines
that you have to color in. That looks good and
now the bottom line. This is my personal preference that it doesn't have to
be perfectly straight. And now I fill this shape
to see if in general, I like it or if I
need to fix anything. In this vase, we
have an element, which is the little handle
that belongs to this vase. It has to be first of all, on a separate
layer, so I'm going to hit the vase underneath. Create a new layer
and now I will have a new layer underneath
my main vase shape. You see which layer is selected because
once it is selected, it has this blue
outline around it. Then I go back to
my precision panel and I switch off symmetry, and then I click on click
on it again to hide it. Now I'm going to
draw this handle, but this time without using the symmetry on the other side. I'm going to hold it so that
it creates a rounder shape. And then I'm going to
switch the visibility of my main vase shape so that I can see better where I
have to close it. In case you want to
make it smaller, you have to select
the layer that you want to and over
here you have the. Actually, it's called
a move to infinity and here it's a transform panel. You can move it
around as you like. You can also rotate it in the
same way like in affinity, and once you are done and
it's adjusted to your liking, you have to hit done
back to my vector brush. Then there are two ways in which you can group your layers. Theses one is just to grab one layer and to drag it
on top of the other one. Now you see a little stack in Fresco and when you
double click on it, you can access the
layers that belong to this group and then you
can hit the arrow to go back. We're going to make it
invisible again, it plus. Now let's maybe try to make
Which one is interesting? This one is nice. Let's
create together this one. A new layer that is empty, switching on symmetry again. The line is here,
so it's all set up. That looks nice. Now back to the vector tool. Remember that you have
to switch between the fill tool and the
vector brush tool, creating another
layer underneath, and now we will draw
those little elements. Let's start from this side, and it's a bit of a trial
and error with this one. I fill it with color. You have to do it on both sides. To see better, let's go
to the color studio. Hue saturation
brightness laters. Let's make this black into gray by pumping
up the brightness. Now let's fill it again.
Again, this is cosmetic. You could change all the colors again in infinity designer. This is just to see things
better. That looks good to me. I just have to remember to
switch back to my black color. And then I'm dragging the layers on top of each other so
I can create a group. We make it invisible plus. Once you get into this flow, you do things very very fast.
This one looks interesting. Let's do this one together
too. That looks good. What else? This one plus holding so that I
get a straight line. This is a little bit
too close together. Tapping twice on the
screen to go back. I want it a little
bit more narrow. This one is ready. We make it invisible to see
better new layer. Let's create maybe one more that is a little
bit more complex. It includes symmetry elements and nonsymmetry elements.
For example, this one. This will be the last
one and then we will be importing everything
into infinity. Let's start with this
basic straight line. The the base of my vase. That looks good. Let's
fill it with black. That looks a little
bit different, but I'm okay with that. Now, this little
mouth over here, I'm not sure how to call it
is part of this basic shape. I will be still drawing
on the same layer. But I am switching off the symmetry tool and then I have to hit it
again to close it. Making sure I'm on
my vector brush. You'll get used to that. Then I'm going to draw this
little mouse or a beak. In Polish, we call it e Beck. It's like a little beak. Our jeu Beck is ready, and now we need our handle. You know the drill ready
back to my vector brush, a new layer, and then I'm
going to draw this shape here. That looks good. Switching off the visibility of my main shape. Now I just have to make sure
to be on the right layer for starters and to
close it properly. Let's fill it. Bring back the visibility of
our main shape. Going to choose the
transform tool for this shape over here and
position it a little bit lower, so that it looks a little
bit more seamless. The reason why I included
the handle for or the grip. I'm not sure how it's called
the grip of this vase on a separate layer is that it will be easier
for me to recolor it. Just like here, I use different shades of
pink and it adds a little bit more dimension and depth into the piece.
Now we're hitting done. There's another way
to group our layers, especially if you
have more layers. Instead of just dragging and dropping one
layer onto the other, I click on one layer and
this extra menu opens, and then I can choose
select multiple. This makes more
sense if you have really multiple multiple
layers that you have to select and then group them fast. But I just wanted
to show it to you so that you can learn
this extra trick. Now those two layers
are selected, you see the blue selection
line around our layer symbol. And here we have the folder icon will allow
us to group those layers. Now they're grouped. Now we will be exporting everything
to affinity. But please feel free to take your time to
sketch your vases, draw as many as you want. By the way, when
you hit the arrow to go back to your home page, let's bring back
our full screen. You will see that the system, W fresco software will be saving your document and
also saving it in the Cloud. The dots menu also give you
the option to rename it. We can rename it to vases. That is different than
this document here. But I can show you the original document that
I was working on. I think I've drawn 20 vases. You can judge just
one. You can just save time and judge just
one that you like. But the purpose also
of this course is to teach you a bit more
speed and efficiency. I suggest draw a little bit
more so that you can create a nice asset category and nice asset subcategories
in affinity designer. This will help you
to save time in the future for future projects. We have renamed our document. We can go back. Now
for the export. We have to make
sure, first of all, that there are no
clipping masks. But we weren't using clipping
masks are over here. You can see this icon with the Canvas symbol
and the arrow down. We were not using clipping
masks this time around, we might be using them later on. We have to turn on
back the visibility of all the layers because
otherwise they will not be taken into consideration
when we export them. And this little picture icon here is just the
white background. If you don't want to get
it exported into affinity, then you can also turn off the visibility of
this layer over here. As you are working
on your document, you can always go here to
the title of the document, arrow down, and you can
also save it as you go. Then the export icon is in
the upper right corner here. So we had export,
publish an export. And now we will
specify to export our document as format PDF. In my experience, PDF works
the best because it will also preserve the layers and the groups that you set
up in your document. So PDF export, my recommendation
is to save it to files. Files is application on your
iPad, can show you the icon. This is the icon for this app. If you've taken my
previous courses, you already know that I am
in this habit of saving some work in progress and my working documents
in the files folder. I have a separate
folder called Exports, and this is where
I will be saving my PDF document with the
vases, save to files. It's already pre selected,
but in case it's not, in case I have something else, go back to the folder
that you need and then hit safe and done. You can also exit
to the homepage so that everything gets
saved up automatically. Now this PDF file is saved
into this exports folder. Then we go back to affinity and I will be basically replicating
the same document here. I like to work on a Canvas 4,000 pixel square to create a
new document in affinity, we hit new new document, and I also have this pre saved, but it's very easy, in general, you just have to adjust
here your dimensions to the 4,000 pixels and make sure
that under document units, you have pixels selected. 300 DPI, no art port, and color mode RGB. Here we can also set up an
infinity margins and bleed, but we don't need that, so
we just stick to general, and then we hit okay. Step number one is to create our pixel based document
in affinity designer. Then by hitting the arrow
in the upper left corner, we go back to our
live dog interface, and now we have to open our PDF document
from Adobe Fresco. Here we have the
icon open document. We have our exports
folder selected, and we select the
document with vases. We keep 300 DPI. This is the previous
and we know, it's correct. That's
the one that I need. We keep our GB, and the rest
pretty much stays the same. We hit k. And this
is our document. The reason why we have
two documents now is the difference in
measurement units. The document that we created,
which we can also save, by the way, here,
Hamburger menu, save us. You can, for example,
name it as assets, ve, and then it's going
to have a name, and then you can I
will also save it into this exports folder
just as an example. Now it's going to have a name. You can also see
all the details of this document in the
upper right corner. We see that the document
that we just created in Affinity designer has 4,000 pixels square and it's in RGB, Was the PDF document
that we imported from Adobe Fresco from our
exports folder is in points. It retains RGB, but
it's in points. The reason for that is that
PDFs follow print standards. Pixels as a measurement unit is specific to digital
media basically. PDF, they are meant
to be printed out. The unit of measurement
for PDF files will be point by default. PDF files, by the way, can contain both vector
and raster graphics. They can mix and match. Whenever you export something as a PDF or give a PDF
file to your client. They will most likely
open it in points and not in pixels or in
centimeters or in inches, which is a little bit annoying
and you just have to be careful about the scale
differences between the two. That's why I am opening
the Fresco PDF separately, and I am creating my
affinity document like here also separately. Then I go into my
original PDF document. See, this is what I like.
Everything is retained. There is gesture that you most likely know from
my previous classes, you select the group or the
layer that you find on top, and then a two finger
tap on the last layer or the last group and everything is selected at the same time. This is what I like and this is what I'm missing in Fresco. That's why I keep coming back to affinity
designer because there's more tools to choose
from and the gestures, I find more advanced and they help me to
speed up my work. Now all the vases are selected. We go to the three dots menu. And we hit copy. We copy all the vases. We hit the left arrow to
go back to the interface. We click on the document
that we just created, again, three dots, paste. Now our vases are here. I can tap somewhere outside of my document so
that nothing is selected. When I go back to the live Docs, you see indeed that I
created everything one to one and in the preview can tell that the dimensions
are completely different. Right now, I can get rid of it, I can just close without saving. I'm not going to be working
in this PDF document anymore. I will be working in
my affinity file. Now we have to tidy
things up a little bit. The first thing that
you can do if you would like to be super tidy like me, is you can rename your assets. The easiest way to do that is to swipe to the left with
your Apple pencil or your finger and a
small menu will pop up and here you can
rename layer two vase. I'm going to copy it. This is the work that you just
do at the beginning, and you do it one time, and you don't have to
do it ever again. I was doing some
vector based work for a client last months
and they were very specific about having
all the layers named as much as possible. If I was using this
pre safe vector assets for such a client project, I would do the work initially when I create those
assets at the beginning, but then I would not
have this work in the future to have to
rename those layers. That's why basically I am
in the habit of renaming, especially the top group
layer accordingly. Now we have to check can do
that from the move tool. If everything looks okay. Now that everything
is spread out more evenly wherever I click. That's what I also
like about definity. It will find this
shape and it will just select it super fast. Then I'm opening my shapes because sometimes this
is this fase here, sometimes we were
working on the shape by fixing the outline and
some new shapes were created. We will have to
merge those shapes. We can do it on the group
level from the Move tool. We will be talking about blean operations in a separate lesson. But for now, to merge
the entire shape, all you got to know
is that you got to select this group,
go to the Move tool. Blean operations are here, and then you have to select add. And now it's only one
shape that is merged. I'm keeping the separation
because maybe I will want to change the colors. We can also change the
color to this blue, and then this handle also blue, but on the HS L sliders
from the color studio, I can make it maybe
a little bit darker. Now I move to my next
phase, I can close it. Here everything looks good, so I'm just going to give
it to this blue color. Can also choose a
completely different color. This shape is also
supposed to be one color, but because I was fixing
the outline so much, some extra vector
strokes were created, and even though everything is grouped nicely as one shape, they were created
on separate layers. We just need to tidy
it up and select this upper group from the
Move to bul operations ad, and it's merged and also
our name is retained. Let's give it another color. This one is also supposed
to be one shaped. There are some unnecessary
strokes that were made. We select the entire group, and we merge it with
the add function and give it another color just because it's more fun this way. I will switch of
the visibility of this shape so that I can
first work on the base. This is meant to be just one
shape from the group level, bul in operations ad and
let's give it a color, and now I will switch
off the visibility of my main base and bring
back those little handles. I open the group, I click
any layer that I find here, and then I'm just going to drag this one shape
to select everything. You see that I was fixing it. That's why some extra strokes or extra vector objects
actually were created. Using the add function, I am merging them.
You have to move it. I mean, you have to do it
from the move tool and sometimes it switches
itself into the node tool. The other handle
in the same way. Add. Now we only have those two shapes and we can recolor them from
the group level. Also make it darker so that it's a little bit
more two dimensional. Now we have this vase
left. Let's see. Yeah, we have to merge the
main shape of the vase. Recolor it into something happy, and also recolor this handle. Get out of the swatches
panel, HSL sliders, hue saturation luminant,
luminans down, which will make it a
little bit darker. Now our vases are ready. They have this nice
uneven shape because we were using the jitter
brushes in fresco. It's less polished. It's a matter of personal
preference, again. Feel free to draw your vases also with the
smooth vector brush. I the differences maybe
not too dramatic, but I can see it anyway
that it's a little bit uneven and I like it
a lot. All right. In this lesson, we created
our vector vases in fresco, just to prove that,
those are vectors. Let's select this vase
and go to the Node tool. You see that it has nodes and it's basically
a vector path. So all good. We also exported our PDF file from W fresco
to our exports folder, and then we imported it
to affinity designer, we created an extra
affinity document. We shifted all our vases
into this new document, and we polished them
off a little bit. Now those vases are ready to be added as our vector assets, and this is what we will be
doing in the next video.
7. Assets Studio in Affinity: Great. In the previous lesson, we created our
first vector assets and now we had to
the asset studio, which you can find here on the right side
right in the middle, and we will be creating our first assets category
and our subcategories. In order to do that,
we have to go to the main assets menu over here. And then we select add category. For simplicity, I will just
name it as botanical assets. This will just be
a dummy category that I will create
for the purpose of the scores because
I already have my own assets category
for botanical elements. Case you change
your mind, you can always rename your category here and you can make a copy of it or you can delete
it altogether. Once you created it, when you click on the title
and you scroll, you see all the other
asset categories that you created before. And you can imagine
them as little folders, which will be nesting your vector assets
or just assets in general because you
can also create raster assets and populate
your library in this way. My advice is to sort it by theme because
sometimes, for example, the kitchen treats, cooking, category, they tend
to grow pretty big. For this course, we will be focusing on botanical
assets anyway, so we can stick to one category. Then this main folder has to be populated with subfolders. We cannot add in those vases right away
into our category. We need to go again to this
menu and add a subcategory, which will be like a
subfolder or a mini folder. At least for the iPad version, you cannot reshuffle those
asset categories freely. That's why I will create
a few subcategories in advance basing it on which elements I will
be using the most. Now we have this new
subcategory called assets. We can click on the sub
menu here, Hamburger menu. You can add assets
from the submenu. You can rename the subcategory, which we will do, and you can
also delete it altogether. I'm going to hit rename, and the elements that I
use the most are flowers. I'm going to create
one subcategory in advance so that I have all
my flowers right on top. Back to the main menu,
add another subcategory. Then the sub menu again,
rename the subcategory, and I will rename it as complete florals or
something like that, which will be floral
compositions that already include some
berries or leaves or stems. Next, another subcategory that I want are leaves, rename, leaves. Different leaf shapes will
also be working on those together, and What else? Sometimes I have categories
for berries or for stems, but I'm going to skip that and I will create one last
subcategory for our vases. You can also name it as you
want in your own language, however you want vases,
is going to be mine. Now we have a category and
a set of subcategories that are ready to be filled
with our wonderful assets. There are two ways in which
you can add your assets, and I'm going to show you both. When we go to the
layers panel over here, can add assets individually, and the system will
recognize that it's an asset from
the group level. If I wanted just to add
this one as an asset, it's enough that it's
selected from the move tool. You see this selection area. Then I go to the respective
sub category, Hamburger menu, add asset from selection, and then it takes a few
seconds, and there it is. You can also select the
rest by either swiping to the right or you select the top layer to fingertap
on the last one. See that everything is selected. And the group level, the top level will be recognized
as an individual asset. Add asset from selection. Then all of those are added in. This saves you a lot of time. Let's create a copy of this vase and having
this vase selected, I will go to this group icon. There's also an
option to ungroup. And I'm going to
ungroup those elements. Having those two
elements selected, you see there's a
bluish selection. I go to the studio, add asset from selection. Sometimes, I am saving
up as elements twice. The first time I saved up this purple vase one
time as a whole. It had its basic shape and
it had this little grip. Sometimes I want certain
elements separately. For example, I want
maybe to be able to use just this base separately without having to
delete this grip. Another time, I just clicked on this circular like grip area. I'm going to click insert. Sometimes you just want
individual elements, which will be components, so to say for other elements. From the dropleor tool, I'm selecting the same
color of the vase, in this way, I created
a completely new vase. And then I could group it again. And from the group level, I can add it as an extra asset. This way, I have this
little grip separately. I have two vases with a
slightly different shape, which have this circular grip, and the two bases, the yellowish green one and the purple one are
also saved separately. I'm going back to this
original document with my vector vases. I've mentioned before that
I created 20 of those. Again, two finger
tap on the last one. Everything is selected and I wanted to demonstrate
again how easy it is to create a lot of assets and to add them into your library
at the same time, add asset from selection. We'll take a few seconds. Boom. This is really satisfying. This is what I
meant. Don't create just one or two, go for it. Have a coffee, have a tea, create a few more because it really looks good to the eye when you have a little
bit more in your library. Now we also know how to
create a new category and how to create those subcategories
and how to add your assets. Remember also a reminder
that from this main menu you can also export and import your asset categories or
little folders with assets. This is what I do on a regular
basis to back it up so that nothing gets lost in case something
happens to my device. Now, we had a pretty
good introduction into the asset studio.
8. Rectangle Tool & Alignment Tool: Before we start creating
the rest of our assets, the florals, and the leaves, and a few floral compositions, I wanted to introduce
you in the lessons to come with the most important
basic shape creation tools in affinity designer. I'm just going to recycle this assets with vases document. In this video, I
will be showing you the basics of using the rectangle tool and
the alignment tool. Grouping, you already
know how to group. You have to select everything
that you got a group. It doesn't matter if
you do it from top to bottom or from bottom to top. Here you have the grouping icon. And you can switch
off the visibility of your shapes over here by toggling on and off
this little circle. Then I'm tapping somewhere
else outside of my document. For building our minimalist geometric looking vector assets, we will be using the
rectangle tool a lot. In case you cannot locate it, you can always press this
little question mark and we'll show you this
little cheat sheet. A rectangle tool is named
in a pretty strange way. I don't know if it's
the same in adobe, instead of a shape tool. It's called a rectangle
tool because this is the very first shape that
you see in the menu. There's another tool which we will be also learning about, which is called the
shape builder tool in affinity designer, and the icon for it is right underneath the rectangle tool. But for now, whenever you choose any of those tools that you
can find on the left side, there will be a new context menu showing up here on this
upper layer, so to say. Let's create a rectangle. If you want a perfect
shape, for example, a perfect rectangle, you have to hold one
finger on your screen. And then you will get
a perfect square. The same the ellipse. You can create leap ss, but you can also create
perfect circles, just holding one finger, and that's how easy
it gets triangles. Also if you want
perfect triangles, you have to hold one finger. And maybe let's take this
triangle as an example. When you stay within
this shape and when you stay within this rectangle menu. There are still a few options
to modify your shape. For example, let
me maybe zoom in. You see that there is
a small red dot which shows us there are
a few more options that we can do here
with this shape. For example, I use this type of 90 degrees triangle shape
to create my shadows. Now, let's have a look at the round was it rounded
rectangle? Yeah, I think so. This is the rounded rectangle. If we skip to the node tool, it will not show us much because this is categorized as shapes, and it's not curves. We can still transform something into curves and
we'll change it cycon, and it has ten slightly
different properties later on. We'll also talk about it. From the move tool, we
only see the selection. To go back to those
extra options that make this shape editable, we have to go back to
the rectangle tool, and this is where you see this little circle
shows up again. Look for a little
circles for any of the shapes from the library,
they will give you a hint, a hat, this shape is further
editable till it is a shape. You can recognize that it's categorized
as a shape because next to the layers
for those shapes, there's an icon with
the geometric forms. There's a square.
It's really tiny. There's a circle, I think
a diamond and a triangle. If we were, for example, to draw something
with the pencil tool, This would be a curve. It's even pre labeled
automatically as a curve, and it has a slightly
different symbol, which looks like a path
with mathematical nodes. It's like a symbol that is
typical for vector shapes. Going back to the
rectangle tool, we regain our access to the small cute little dot that will give us a few
more options to edit. There's also this
guiding line that shows us how far we can
go in this edition. For example, then if I want
to modify the shape further, I have to go back
to the move tool. For example, how is it called
again rounded rectangle? I use it often to build
stems for my flowers. Til it is a shape,
it's still editable. Sometimes I prefer to convert
this shape into curves. The reason for that is
that often when I'm rescaling, for example, stars. There is a bit of an issue
with keeping the proportions. That's why, for example, if I were to create a star, if I want a perfect star, again, one finger on the screen. Then I moved to the move tool and I wanted to
change something. Sometimes there might
be scaling issues. What I do is having
the star selected, I go to the three dots menu. And I convert it to curves. This is safer this way. Now when we go to the Node tool, it actually flip to the
node tool automatically, it's not a shape anymore. When I click back on the star, there is no option to edit the properties
of the star anymore. But at the same time when
I go to the Node tool, at least I can
create a wonky star, I can play with the nodes, which I would not have access to if I just kept
this original star. If I move to the node tool, there are no nodes because it's not a curve like this star, it's a shape, and it has
different properties and the options to edit it
are a little bit different. Here, we say, fine, I'm converting it to curves. I don't need those other
properties for shapes. I actually want
more flexibility to work with the nodes or
with the corner tool, which we'll be also discussing
in the next lessons. But if I still want to retain the editability of the shape
from the rectangle tool, then I'm not converting
it into curves. For example, this shape, I really recommend that you grab another coffee and you play
around with those shapes. This is for example,
how we will be creating some basic flowers because it has some really cool options. You can also create a star that is a little
bit more rounded. You can create,
is it a pentagon? It's crazy and sometimes when you play around
with this shape, sometimes don't
even remember how I created it because
there's so many options, and when you see
something that you like, then converted to curves so
that it stays set in stone. You know what I mean?
You cannot make a mistake by going again
to the rectangle tool and moving those tiny circles again and messing
up with your shape. If you like it, my advice, convert it to curves, and then I don't know. Maybe you have a category
for some wonky shapes. Save it right away because I'm guaranteeing you once you start playing
with those shapes, you can arrive at very spectacular and
unexpected outcomes. Okay. I hope that
now it's clear. Let's maybe create
this double star. I hope that now
it's clear what is the difference between
curves and shapes. This double star
that I just created has this shape symbol and
the remaining two stars, they were converted to curves. That means I have more
access to the nodes, which I don't have here. But from the rectangle
menu, again, I have access to those
cute little dots that will give me basically
some extra editability. Part of your homework when or after watching this
lesson is to go through the entire library and
to try out some shapes. I did mention that this
context menu also shows up when we select this menu. Let me show you what I mean
by selecting the star. I do sometimes use it
when I want to change the number of elements of a given shape, for
example, on the star. You can adjust here the points. I can for example,
say I want 15 points, and then they are
further editable. Or I can change it to what
will happen when I make three? Triangle. Stip question four. L et's change it too far. This is a cute little star. This is what you often see
in minimalist illustrations. If you like something, again, you remember the drill, convert to curves so
that you do not mess up with the shape that you just created purely by accident. And then go to whatever
category you want to populate and add
this extra shape basically as a new asset. So Let me remove those, and I just wanted to tell you which shapes we will be
using probably the most. I like the rounded rectangle for creating stems
for the plants. Of course, we will be
using the perfect circles to create the middles
of our flowers, for example, quite a
lot. This is easy. We will be building
some extra tulips, I think using the triangle. Star we will also
be using to create, for example, pointe
middles to our flowers. We will be practicing
everything together. Pi is very interesting. It looks like a pie chart to get one finger on the screen. I use the pie the
most to get see it snapped into a
perfect semicircle. If you're using
semicircles a lot, they could be like half a leaf. Create one, convert to
curves so that you do not change it by accident and you will have a
perfect semicircle. Speaking of semicircles,
there's also a crescent. You can create a moon
or from the crescent. The crescent shape helps us
to create perfect leaves. Then again, so that you
did not mess up with it, three dots and convert
to curves, move to. Now we have a basic leaf shape, two fingers on the screen, Holt, you create a quick copy, another leaf, and maybe
a very long leaf. But all those three
shapes that I just created, they are curves. But they were built on the basis of a geometric
shape, the crescent shape. Cloud. This is something that we'll be using a lot
because it's just shouting, I'm a flower, so In our demo, we will be creating it a lot. Also in the context menu, those are called bubbles, by the way, you can change. Let's make 25 the number
of those bubbles, and they're still editable
till you convert to curves. Again, once you convert
them to curves, you have more access to
play around with the nodes. What else will we
be using the tier? This also looks
like a pretty leaf or pretty petal of a flower. You can move it to
any direction and there's those
reddish guidelines. The tier is very interesting. The heart, we will
be using it to build some heart shaped
petals for our flowers. And I think this
is pretty much it. Maybe also the cog to
create a perfect shape, one finger on the screen. The cog is interesting
because you can just get rid of this doughnut
in the middle. Then you can build also
flowers like this. That's really interesting.
You can make them more pointy. Let's go to the Mt. If you like a shape and you're afraid you will mess up with it, just go to the three
dots, convert to curves. Then we go to the shape, which is another color. And we have a small flower. Maybe choose something
more bright. From the move to on creating a few more copies of this shape. The last thing that I
want to show you in this lesson is one
alignment option that will be very what's the
word very important? Let's maybe group
this and this one, let's group those two flowers. To make sure that the middle of this flower
is really in the middle. Let's say we want to position
it right in the middle. But we fail, and we cannot quite position
it in the middle, make sure that you select all those two shapes,
the middle of the flower, and the flower itself, over here, this icon, we have the alignment tool, and we can click align
center and align middle, and we will always be sure that everything is
nicely centered. Same here, this flower. I just have to make sure that those two
layers are selected. Since I have my snap like
magnetic snapping on, I will still have the
guiding lines that will show me, this is the middle. You don't need the
alignment tool, but see, it takes time. I don't want to waste my time. So I select everything, and sometimes you just go into this flow and you're
like, boom, boom, boom. Done. Everything
checked. For me, personally, it's much faster. In this video, we had a look at the library of our
geometric shapes. I really warmly invite you
to play around with them. Practice, converting
them to curves. You already know how to build
your librares of assets. If you would like to create
a few shapes like this, which are not geometric shapes, but they are already
converted to curves and add them
to your library, then feel free to do that. We also learned about
the alignment tool, which by the way, is
available from the Move tool. If you're on any other tool, it will not be there
given on the Node tool, you have to go to the Move tool, and as long as
something is selected, those options will be visible. We got a very nice introduction into the rectangle tool and
into the alignment tool.
9. Boolean Operations in Affinity: In this video, I
wanted to give you a quick introduction to
bullying operations. I consider this basic
vector design technique that everyone should know of. But maybe it's also a little
bit more intermediate. In case you haven't heard of
bleion operations before. I think that once you get
to know bulion operations, you will be using
them quite a lot. They're accessible
from the move tool. You have to have two
elements selected. You can also see
if your elements are selected from
the layers panel, you see this bluish selection. Then here under this square
and the plus circle button, you see all the bulion
operations, add, subtract, intersect,
x r, and divide. They're really cool because
they will help you to create very complex
vector designs, and the way they work You
have to have, first of all, at least two elements selected, and they will give you unexpected shapes or
let's say unique shapes, either by merging some of the overlapping shapes or
modifying those shapes. Now I will carry out a
few experiments over here on my Canvas so that you know how those operations
are working. For instance, if I wanted to use this circle, take
this semicircle. If I hold one finger
on the screen and take this rotation, I don't know handle, it will
go by 15 degrees increment, so I can bring it
back to zero degrees. Then let's say I wanted to create a geometric
barry like this. I can also select those two
shapes from the layers panel, go to the alignment tool and select align center
just to be really super sure that those are
exactly centered. Then let's imagine, of course, I could group this shape. But sometimes you want to be a little bit
more efficient with your layers and you want to
commit to a certain shape. Then the best way to
do that is just to merge the shape that you
are happy with, so to say. You can do it from the
individual layers level, or if you have some
end shapes group, you can also do it
from the group level. Right now, I have this very
random geometric barry shape. If I wanted to merge
it into one shape, I go to bulion operations, and then I can select add. Now also when we go
to the node tool, we see it's a single object and now we can also play
around a little bit with the nodes to manipulate this shape or to modify
this shape further. Now we have only one shape instead of putting two
elements into a group, and we also save a little
bit on the layers. Let me give you another example. I like sometimes to create my flowers, Simply from circles. I'm just making sure
that the circle has only this pink color. Sometimes when you're
creating directly from the rectangle tool,
I forgot to mention that. Let's check the star. Exactly. It will have the
color that you choose, but it will also have
this black stroke. So you just flip up
to get rid of it. Back to the move tool, back to my circle. Now two fingers on my screen, and I will be creating
some duplicates. I will be moving without any
symmetry in mind to create, let's say, a round shape. Of flower that is
not too geometric. Now let's say, let's select all those layers.
Maybe group them. If I'm happy with this shape
and I want to merge it. It's a little bit
more irregular. It will be different from the type of a flower shape
that you can, for example, create from this cloud option
from the rectangle tool. If I wanted this irregular
shape to be one shape. Now I can from the group level, go to my bulion
operations and select ad. This is the ad function. I use it quite a lot. Now, let's say I want to use this rounded rectangle as
a state for my flower. I can also maybe change or adjust the color a
little bit so that you can see better where I am
at. This is my flower. Let's say I want to take
this shape here as my leaf. I'm going to make it
a little bit longer. Now I will take
this extra shape. I'm going to change its color to black so that you
can see things better. Let's say, it has to be
on top of the other leaf. Let's say I would like
to make a few cutouts. I can do that by using the
subtract bulion operation. Subtract will minus the shape. Just as the name
suggests subtract, you take something out. This function you will
see in a minute is really good for cutouts
and I'm going to create a leaf design that will not be super, but
that's not the point. I just wanted to demonstrate how this bulion operations work. Let's say I want those
cutouts. On this leaf. First of all, I wanted
to be one shape. Without creating
any extra group, I can just go ahead and merge
them with the add function. Now, this has to be
obviously above. It will not work if
it's underneath. This cut out shape
will be above. I select this black cutout shape and the shape of the leaf. Now I'm going to use
the subtract function. It's only one single shape
of the original leaf, but it has those cutouts.
This is really handy. This is also something
that I use quite a lot, for example, in my
pattern design. One of the patterns that
I'm working on right now, I've shown you this
example before. Let me just switch
off the sketch. All those cutouts here, they were made by first creating this purple leaf
and then creating random shapes in another color that I could see things better, selecting both layers and then using the subtract function. Let's take a few other shapes. Maybe I can take this
flower over here and create a new ellipse and make
those two shapes overlap. Let's see what the other
Bulion operations are doing. If I select intersect, it will only leave
the overlapping area. Let me see. Let's see what an area I would
be interested in having I actually
have a nice idea. Let me change the color so
I can see things better. Maybe let me also change the
opacity just for a second. I would like to have a
rounded tulip shape. I'm just going to
make it more oval, place it in the middle. The shape that you see behind, this is what will be cut out. Now I'm happy, I'm going
to bring back the opacity. This has to be of course, I mean, this yellow
shape has to be on top of the pink flower. Now that I selected everything, the blue line shows me exactly the pathways
of both shapes. Now from the bulion
operations menu intersect. This little icon
will also give you a hint of what this bleion
operation is doing for you. You will see that parts
on the outside of the square and the circle are a little bit
more grayed out, and then the shape right
in the middle is in white, and this gives you
a hint that this is the shape that will be left out. Intersect. Beautiful. Sometimes you can experiment
without even planning any shape and you will come
up with really cool designs. I'm going to name the stop. I like this shape a lot. So my mockups category
popped up here. Let's go back to my
original botanical category and I will add acid
from selection, so I'm going to add this shape
as an extra flower shape. This was intersect. Let's
create another bubbly flower. We don't have much space left. I'm going to go back
to the move tool, maybe even use the star and see what's going to happen
when I use the rest of the functions by overlapping this star with this
bubbly little flower. You have to have the
two shapes selected, of course, and then you
go to Boulan operations. Now the next one in the line is the x or bleion operation. X r stands for exclusive or. It will retain the shapes
that do not overlap. What does not overlap is part of this yellow area of the bubbly flower and
part of this star. Let's choose this function. And the areas that
we're not overlapping. This is a bit of a crazy shape, but sometimes you might have a good idea of how to use
this function. I think. I use it less frequently
than the other operations, but I can only encourage you to experiment a little bit with your botanical
shapes because you might find some
really unique shapes to your library.
Now, the last one. I'm going to take
the bubbly flower, maybe an extra star, In another color, maybe
also the sleeve over here. I'm going to select
all of those shapes. Go to my bulion operations and then choose the last bulion
operation, which is divide. Divide will give you
individual shapes. A lot of individual shapes depending how many shapes
you overlap together, and those shapes will be based
on the intersecting paths. The paths that cross. As an outcome, it will give you a few smaller
independent pieces. Sometimes it might be
interesting to use. I think I used that a lot
for my mockups with clothes. I can show you that in a minute. Let's first apply
this divide function. And Let's group it because now they are all over the place. Like I said, the more
shapes you overlap, the more individual elements
you have, so we have. This is just one shape. You can also change the color
to something else so that you can see better so that
the colors are not the same. Let's maybe take this one, but make it contrasting. Let's make this one more purple. Let's make this one more blue. Now, you see that through
this divide function, we were able to divide all those shapes into very
unexpected and random shapes. Application examples,
you saw a bit of a sneak pick of my
other mockups category. I gave away a few of those mockups through
my other platforms. I have to have a
patron and some of those mock up resources are
also available on my Saptck. When I was creating them, I also used the divide
function quite a lot. But later on, I merged
everything together. I was covering, for example, the whole area of this T shirt. And then I use the
divide function to really divide everything
with the lines. The black lines made
the division for me so that I could get
the label separately. Let me group all
the other elements so that I can make them
invisible. This is the T shirt. Thanks to the divide function, I was able to get the
label separately, the inside of my t
shirt separately, the color is also separate. The sleeves are separate and the body of the
T shirt is separate. Again to summarize
the steps for you, I was creating the
t shirt mock up. I started with my
black linework. Then I traced it and I filled the inside of this
linework with color, which was more of a solid block. Then by selecting this block of a color together
with the linework, I used from the move to the divide bulion
operation so that I could get all those little
individual elements from the mockup separately. This would be a good example of an application for the divide bulion
operation that maybe I couldn't illustrate well
enough for you in here because I didn't give you a
super actionable example. By dividing all those shapes, I created a bunch of
random shapes that I will probably not make much use of. But sometimes it
happens that you do need this divide function and then My goal for you is
to know that it exists, and you can create such effects. That's pretty much it. This was an introduction to bullying operations that will help you to create more complex
vector shapes. We will be practicing everything together when we
move to our exercise sheets.
10. Corner Tool in Affinity: In the previous lessons, we gained an intro into the rectangle tool and
into bully and operations. Those are really really
essential tools. Now I wanted also to introduce
you to the corner tool, which you can find in this upper left corner under
contour, the corner tool. At first, I was pretty
oblivious of its existence. I wasn't using it a lot. But once I discovered it, I started to use it very, very frequently, and I think
it can come in really handy. I'm going to remove the mockup that I was showing in
the previous video, and I will also delete all
those messy random shapes. So To demonstrate what I mean, I'm going to create a star. One finger on the screen,
will make the star perfect, refreshing how the
alignment tool works. We can align it center
and middle and now it's positioned right in the
middle of our document. To be able to use
this corner tool, we would like to manipulate
the corners of this shape. If you create a shape
from the rectangle tool, you have to convert
it first to curves. Now, this star shape is not a star shape from the
rectangle tool anymore, but it converted into a curve and it has
the curve symbol. Now having this shape selected, we can go to the Corner tool. By tapping one or actually by pressing one
finger on the screen, and then tapping on all the
outside corners of the star, I will be able to select them. You see if a note is selected
if it turns blue inside. The ones in the middle
are not selected. Now I have this selection
here to round my corners. It says corner rounded. You can see that
already a little bit of roundness has come here
to one of the corners. If you cannot grab it, then you have to zoom
in a little bit. And then you can zoom out and things will get a little
bit easier to manipulate. In this way, you
can, for example, create such a flower shape or acute Kawaii star that is
a little bit more rounded. Another option is to
make the shape concave. Maybe this shape
doesn't look too great, but this could already
be a nice flower shape. I'm going to move
to the move tool. Again, go to the three dots menu and convert it to curves. Because now there is no
corner tool selection. This is again an
individual shape and we created some extra nodes. If I wanted to name it as a flower and also
save it to my library, then I can also do
that right away. This is what I mean that
sometimes you create very unexpected
shapes and before you forget how we created them because they were
a happy experiment, it's better to save them to
your library right away. Let's move this
one to the corner. Let's draw another star, give it another color. Perhaps this time we can also change the points to
eight points because we're still in the
shape category. It's still a geometric shape, so we can take advantage of
the rectangle tool menu. Maybe we can make it a
little bit wider like. Now we go to the
three dots menu and we convert it to curves. We don't have the options from the rectangle tool anymore, but at least we can work on it further by either going to
the node tool and being able to work on the nodes
or exactly by going to the corner tool and being able to do something with
all those corners. Other options that you
have are straight corners. This is really interesting. Or you can create
cutout corners. This is really sweet as well. Again, it's a little
bit of experimenting. I think this could look nice and You can then
convert it to curves, and then those
corner tool handles are not available anymore. The shape that we created it converted into
a path with nodes. Then if we like it, we can again maybe rename it to a flower. That might be even
like a snowflake. If you're creating a
library of snowflakes, and if you like the shape, and I think it's interesting, we can add it right
away into your library. Let's see again how this works, for example, on a simpler
shape like a triangle. Again, we have to
convert it to curves. Then we can go to
the corner tool. We can select all the corners. They're selected because you see that this little square
turned into blue, and we can make it rounded. You see those guiding
lines in red. We can make it concave. Then when you hold and zoom out, those guiding lines disappear and you can see
the shape better. Straight. Another triangle. But you can go even further, then it gets a little bit weird. Again, cut out. I would like to actually
convert now this shape from the three dots many to curves because when I
go to the move too, I think it can be an
interesting shape for the middle of my flowers. If I wanted to save it up, I can do that as well. Let's test maybe one
more with the crescent. First, we can create our moon. Then we can go to the three
dots menu, convert to curves. Now let's imagine that
we would like to make things a little
bit softer and we would like to have those corners here are a
little bit more around. We have to practice selecting just the corners
that interest us, one finger on the screen. Select. The two
corners are selected. Another option because
they're right on the left side is just to
do the selection like so. Now both of them are
selected as well. Then the first option
is to round them. Yeah, that gets weird. We just want a very
gentle rounding. Then we convert it to curves
so that it really settles, it changed into nodes
and a nice path. You can also see
from the move to if we want to change it
a little bit further. If you would like to
save up this shape as an extra moon
interior library, then you should also do that
right away so that you do not forget how you
created this shape. We will be practicing a
few extra shapes using the corner tool when we are doing the exercise
sheets together. But I hope that you can
take it for a spin, practice with a few shapes from the rectangle tool library. Just remember to convert
your shapes into curves and have some fun play around and if there are
some shapes that you like, make sure to save
a tier library.
11. Knife Tool in Affinity: All right. We arrived
at those shapes in the previous video where we were discussing
and practicing, using the Corner tool. You also remember bullying operations which are accessible from the move tool over here. I wanted to show you
another tool which is fairly new to the
affinity designer suite, namely the knife tool. I think it came
with an update from the end of the year 2023 and
it wasn't available before. That's why in my previous
affinity designer courses, I wasn't using it a lot because the tool
was relatively new. But now that we will be
working a lot a lot, a lot with complex
vector shapes. We will certainly be needing it and I wanted
to show this tool to you. The knife tool is right
under the vector brush tool. In order to cut something out, we know that one
way to do that is to use the Boolean
operation subtract. I created the circle
and let's say, I would like to align
it with the flower. Let's say it's a
flower flower shape. I go to the alignment
tool over here, Align center align middle, so that it's right
in the middle. If I wanted to cut out the
circle from this flower shape, then having the two of course
selected at the same time. I go to boolean operations
and I choose subtract. This works very beautifully, especially when you're using
the rectangle tool because the result is somehow very
polished and very geometric. It all depends on your style. For the project of this
course, my design, my botanical illustration will
be somehow more polished, vectory, maybe even geometric. But sometimes you want more of a hand drone feeling anyone to cut something
out spontaneously. Then the knife tool
will be great for you because it can basically behave just like
the pencil tool, but instead of drawing new
shapes like the pencil tool, has the same options also here. The pencil tool can
have stabilization. I always make a test blob. You can close your
curves with the auto close and you can make
sure that it has a fill. After the test blob, when I know that
all the settings are the settings that I want, I know there's no stabilizer. It will close itself
automatically and it will have just fill. I'm ready to draw. Then you
saw that this auto close gives you this red circle at the beginning that will
want to close itself. In this way, when
we go to the moved we see this shape
is fully closed. It has this light
blue line all the way around it and we know it's an individual close
shape. A is good. In the same way, the
knife tool works, but instead of creating a shape, it will cut out a shape. You also have an
auto clothe over here and you can
use stabilization. But just like in the previous example with the pencil tool, I'm going to use no stabilizer, stabilization by the way, is the same rope stabilizer,
window stabilizer. But no stabilization and
auto clothe will be on. Now I tapped outside
of the Canvas so that nothing is selected
and I wanted just to show you something that when I'm on the move tool here and nothing from the layers
is selected and I want to cut something out,
it will not be working. Ideally, you go to
the layers panel, you select see over here the flower that interests you or the element that
interests you, and now you can cut things out. But first, you have to select the element
that interests you. If I select this flower and I'm trying to cut
something out here, this will not work
because this is selected, I will only work on here. This is cut out. We'll see that in the layers in a minute. This is cut out. Auto close is working because you
see this red marking. Now I have exactly beautiful. Now I have cut out those,
I can also delete it, and I created random cutouts. But first, you got to
select on the layers panel, the thing that you
want to cut out, and then you can
start cutting out. That looks great. And why do we use the knife
tool in this case? Because it will give you more
of a hand drone feeling. I think this is the
biggest difference between using the knife tool versus using bulion operations. Now I can just delete all
the cutouts that I created. It's not very pretty, but I
hope you know what I mean. Let's maybe do something else so that you see
a better example. Let's draw from the
pencil tool leaf. Also very hand drum
looking beautiful leaf. Can change it to
some green color. Now we will move to the knife tool and we
will start cutting out the middle
part of this leaf. I think I said flower.
Auto closes on. You can also change the
color of this cut out, so you can also leave it. You can just make it invisible, but keep it because you
might want to use it. You can delete it all
together and just stay with the shape
that interests you. Another nice trick,
especially for pattern design is to take
this cutout element in a different color onto the top layer and
to offset it a bit. Sometimes it also works great
if it stays at the bottom. Then you can grip it
and you have let's say such an artistic
leaf shape that you can also save into your library. I hope that you
can see that it's a leaf back to the knife tool. You can also switch off
this auto clothe and sometimes you can just
cut through your shapes. Again, I didn't select it.
You select, for example, here this little moon and you
just draw a line like so. Without any auto close because you don't want to
create a closed shape, you just want to cut it
with a straight line. Now I'm going to
change the colors that you see that indeed, we have two different
shapes over here. One last option that I'm using sometimes is to use the
straight line option. Sometimes you don't
want the line that you're cutting through
a shape to be wobbly. And then you can use, of course, I didn't
select this shape. I had the yellow ones selected, make sure that you select
what you want to cut. In case you have
doubts, you can always go to this question mark. You will see also the
little cheat sheet for this context menu
that you see at the top. This straight line buttons
is exactly straight line. It gives you a straight line. Indeed, over here, when
I draw and just hold it, you will see the
straight line and you can put this line
wherever you want. Now this is also a
separate element. To fix the fact that the other line wasn't
perfectly straight. You can also go
to those elements and this middle node means that your movement was
a little bit more wobbly, so you can just remove the
node, go to this shape, select only this middle node, remove it, and now the line, you can fix it, so to say. But if you want a
perfectly straight line from the very beginning, then you have to remember
about this option here. When you switch it off,
then you have access again to create shapes
which have the auto close. So ****. Could cut this out. Also
remember about stabilization. If you would like to
have a smoother hand, you can always switch
on your stabilization. It will make your line a little bit smooth and less wobbly. You can adjust
your stabilization over here with the curser. I usually leave it at pretty low because it can get
out of control. And now we have the
stabilization and your line is a little bit
more flowy, let's say. Of course, my shape
wasn't selected. Yeah you have to get used to it. Let's do it again, and I'm
going to remove it right away. Now we practiced the knife tool. I think it will also come in
handy when you are creating your end botanical
assets for our project.
12. Shape Builder Tool in Affinity: In this video, I
wanted to give you a very quick introduction
to the shape builder tool, which you can find right
under the rectangle tool. It's a little bit similar to simply using
from the move tool the Boulan operations
because it will also have the add function
to merge certain shapes, and it will also have the subtract function to
cut out certain shapes. Also have an extra tutorial somewhere on my YouTube
channel where I'm showing how I am creating
my geometric vector clouds. To show you how this tool works, I wanted to create
another cloud here so that you see this
tool in action. From the rectangle tool, I chose the ellipses
to create circles, and now I'm also changing
the sizes of those circles, and I'm making copies of them. I'm also creating one
ellipsis that stretches like this. Very good. Now I would also like to have rectangular shape that will cut through the bottom
part of the cloud. That looks very random. Let's select all of the layers and go to the shape
builder tool. We are able to subtract certain elements by having
this minus selected. I had it pre selected
because I use it constantly whenever
I creating shapes. You will recognize that it's pre selected
when you click on it, the background behind this minus or behind this plus goes darker. Now the minus is selected, it means that we can
minus certain shapes. I would like to get rid of all those shapes
at the bottom. Here you also have an option, how you want to get
rid of those shapes. I had the line one in place because it
will move in a line, which I don't mind for
this shape it is working. But you can also start with the standard one
which is free hand. Now we want to merge all
those shapes together. That's why I switched from
the minus to the plus. Now this free hand is much more handy because I am
not moving in a line, but I can move in
this free hand way. Now I merge everything together. I have my cloud shape, which I can also
rename it to cloud and just go I think to my sky category and I can
add it as an extra cloud. I also have an environment
category and I have a few more
clouds over here. I just wanted to show you
what I created before. Those clouds were created in the same way using the
shape builder tool. This is all that you need to know for now about
the Shapehder tool. We might be practicing
it together when we're doing our exercise
sheets together.
13. Power Duplicate in Affinity: All right. In this video, I wanted to show you
a pretty cool trick from affinity designer that
is called Power Duplicate. For our exercise, I
created two shapes. All of them from
the rectangle tool. This is the tier shape. This is a leaf shape that we practiced before from
the crescent shape, and this is a bit of an
elongated diamond shape. All of those were
converted to curves. We see this curves symbol
on the layers panel. We're going to start from the move tool with
this shape over here, to make it a little
bit more interesting, I'm going to draw and ellipse, a perfect circle back
to the move tool, and I'm going to position
it in the middle. Snapping, magnetic
snapping already showed me this guiding line, saying that it's
exactly in the middle, so I don't have to use
the alignment tool. Now I'm going to select both
layers and F the move tool, I will go to my bulion
operations and choose subtract. Now I have this unique
shape that otherwise, I would not be able to get
from the rectangle tool. Now we go to the move tool
and from the three dots menu, I will create a
duplicate, a copy. Then this little
handle in my case, at least it's at the bottom. Sometimes it's on top. I'm going to start
rotating this shape, and I will hold one
finger on the screen. When you hold it on the screen, it will allow you to move left or right by exactly 15 degrees. I'm going to choose, I think it's 45 degrees
and then try to position it more or less towards
the middle here. Keeping the selection, this is very important, keeping
this selection, not deselecting, not hitting
the x symbol to deselect. I go back to the
three dots menu, and I select again
duplicate and it will remember my previous
setup, so to say. I created a copy, it
created a copy two, and I rotated this copy by, I think it was 45 degrees. I did exactly the same, but this time in relation
to this previous shape. Again, the selection is on, you see the bluish
line around my shape. I am not selecting.
This is important. When you select, the power duplicate will not work anymore. Again, three that's menu, being very careful not to drop your apple pencil somewhere
else onto your document, duplicate, and it's
repeating this step. Again, keeping the
selection duplicate. Create another duplicate
as fast as you can so that you do not make a
mistake of deselecting, and now I created this shape. Now I can deselect. If I did again, a duplicate. First of all, I have to get the previous shape so that I can show you what I
mean and I hit duplicate. It did create a duplicate, but it didn't duplicate the steps that I
performed previously, namely rotating my
shape by 45 degrees. Once you select, the power
duplicate will not be working. This is the new shape
that I created. I'm going to mark all the
layers and group them. This is the first power
duplicate unique shape that could be a flower that we created using this handy trick. Now let's take this shape. You already know the steps. Three, dots menu duplicate. This time my handle is on top. Let's maybe choose 30 degrees and move it slightly
to the side. You're keeping the selection,
duplicate, duplicate, and you keep using the
power duplicate without selecting so that the power
duplicate can do its work. I'll try to Zoom out without deselecting so
that you can see better. Suck suck. Suck. If you diselect
by accident, unfortunately, you have
to start all over again. We have another unique
shape that could be a flower and we will group it. This little trick with
the par duplicate enables you to create
vector designs, vector flowers in our case that are a little
bit more unique, that go beyond the
rectangle tool. Se back to the move tool. I'm going to put it here.
Now let's do the last one. What are we going to do?
Maybe? Again, experiment. Let's first create a duplicate. Just that you see it
creates a duplicate, but right now it's not doing
anything because we have to make our move. We're going to move it
by maybe 15 degrees, put it a little bit to
the side, and now check. It's very satisfying, isn't it? Keeping the selection. Once we select, this is not going to work. Three dots menu duplicates. Try not to make the mistake
that you hit, for example, your document or your Canvas because then the
power duplicate will be disabled and it's not going to remember
the previous steps. Trying to speak and focus on my power duplicate
at the same time. We have clip to Canvas. Let's clip it so that
you can see better. Si. Oh, this is really nice. We can also rename it
to keep our library tidy into let's
imagine that this is a flower shape or a flower shape component that could help us to build
the rest of our flower. For example, this could be
the middle of our flower. Actually, that's not a bad idea. Let's go to the move tool. We have this unique
shape, the Penguin. We can go to the rectangle
tool and then choose the standard rod flower
shape from the cloud shape. L et's maybe change it to a
nice lighter yellow color. Then we can put
this in the middle. I cannot seem find the middle. I'm going to select both layers, go to the alignment tool, align center, align middle. I think I want to change
the color of this cloud to being again a
perfectionist here. Since this is not
converted to curves yet, we still have this
geometric shapes symbol. Whenever we go back to
the rectangle tool, we can still make
some adjustments. I can, for example, adjust
the bubbles or let's maybe the number 12 to 24 to get a little
bit more bubbles. Now let's commit to this shape
and convert it to curves. Let's create a copy. Change it maybe to white, go to the move tool, retaining its shape by keeping
one finger on the screen, I'm going to make it smaller. Then I'm going to select
all the three layers, go to the alignment tool, align center, align middle. How does that look?
That looks interesting? Now we have another
flower shape. If you want to, by the
way, this flower shape, you can also having
this entire group level selected from the group level
and from the move tool, you can go to our bul in operations at and you
can merge this shape. Now, for example,
let's duplicate it, change it to to maybe
this purple color. Actually wanted to have it underneath the other way around, and we can rotate it maybe
again by exactly 15 degrees. That is great. Now I
actually wanted this green to be this
previous purple color. But we were in this
watches panel. You can go back to the
color studio and maybe I'm going to lower
the luminance, which is the brightness. That looks nice. This
is a lot of fun. I will be showing you a
few very random examples here of how I like to
build my flower shapes, but You will probably
have a lot of happy accidents as
you create yours. The same we can merge this flower shape
from the move tool, bul in operations at. Then we can make a duplicate and perhaps choose
another orange color, one finger on the screen
to move exactly by 30. Now, this doesn't
work. Oh, like so. Then from the rectangle tool, maybe we will just
get a normal middle of a flower without
anything fancy. Maybe something darker. Try to position this in the
middle, select both layers, alignment tool, align center, and align middle, and
we can also group it. And rename it to flower. This one, you can also merge by using the
ad bulion operation. Duplicate, maybe use
the same green color but make it either lighter, O that looks good or darker. Also creates a very
interesting effect. I think I want it lighter, Sne. We can group it,
rename layer, flower. You do the work one time. By that, I mean you
rename it as you like, and you have some
of the work that you are saving in case
you really need to be diligent for your client
work if the client really wants every single at least group
level to be named. Once you recycle your assets and they are named from
the very start properly, you can keep using
them over and over again and you're saving time because you
don't have to type, for example, flower, like
in this case all the time. What are we saving? I want
to save those main flowers. I'm selecting each and remember
every group level will be recognized as an
individual asset. So I want to save them
in my flowers category, add asset from selection. Two. But on top of that, let me open those groups. I want to save this
original shape, this one, and this one. I am selecting
those three layers, and I will be also adding
them as my assets, which will be basically
components to either use in their
simplicity as they are or to recycle them to
create and to build more complex flower shapes
from individual components, add asset from selection. I'll take a few seconds and see those original shapes that I created without the
fancy combinations. I also saved them as extra shapes because they might be interesting to
build something new. For example, I can insert this other flower that
I created before. We will be creating all those flowers together when we move to our exercise sheet. Now, I could, for instance, recycle this shape over here that we just
created together, place it more or
less in the middle. And I already have
something new. Can put it inside of
this flower group. Also here, I can use this shape, put it behind this yellow shape, make it, of course, smaller. Select all the layers that are involved in building this shape, alignment tool, align
center, aligned middle. This doesn't look
the best because this shape is a little
bit asymmetrical. I will just select
this middle and try to position it more or
less to my liking. Then this shape that
we just created, I think for a better contrast, I can move to the
navigator studio. Over here, there's like those three overlapping
circles icon. I can change everything
to gray scale, and you see this
color does not pop. From this gray scale menu, I'm having only this
one layer here with this green flower
shape selected, I go to the color studio, and now I can
adjust for example, the brightness of
this shape so that the contrast is also
to my satisfaction. That looks great. This was an
example of how it is worth to save up the flowers that are ready made and are
already quite complex. But it's also
really worth saving the individual components
because we can mix and match them and build
unexpected shapes and unexpected combinations. Great. I hope that
you liked doing those preliminary
exercises with me. In the next video, we will be moving to
our exercise sheet, and we will be creating similar flower
combinations that will become the assets for
our botanical library, where we will be
practicing all the tools that we were learning
about, the rectangle tool, the corner tool,
the alignment tool, the power duplicate, everything that you had an
introduction to before. We will be putting
it into practice.
14. Practice: Vector Flowers 1: We are finally moving
to our practice sheets. You can either keep working
in the previous document, let it be your working document. It doesn't have to be any fancy name because the
end goal is to have assets, which you will save up
into your asset studio. Later on, this document
is not that important. You can just close
it, delete it, remove it because it's not about keeping a good documentation
of your asset work, it's about getting those
assets into the library. It doesn't matter if
you're staying in the document or if you
create a new document. Just remember new document, you press new new document. And I recommend that we keep
working in the same format, 4,000 pixel square, RGB color
profile and no artboards. I have a separate document
here called Assets Florals. You can also create this extra
document if you want to. And now we will be
recreating those flowers, making use of the knowledge and hopefully some new tips that you learned in
the previous lessons. I'm going to keep this group of flowers as my cheat sheet, just because I told you that
whenever I'm creating acids, especially from the
rectangle tool. Sometimes I don't
even remember how I do them because they're
just a happy accident. Please allow me to have
this cheat sheet here so that we can do this
exercise together properly. Plus, I will be
able also to reuse the colors that I was
using here before. You can use any colors. Actually, you can even
work in gray scale. So this type of kind of setup. Sometimes when I work on
a bigger illustration, I start working
just in gray scale. So from the color studio, I make sure that I
start with 1 gray, and then I just lower, for example, the brightness
or pump up the brightness, and I work with
different shades of gray before I decide
on my color palette. So we can also do that
with the gray scale. And then I prepared for you the outlines
for those flowers, which will be available
in the class resources. So make sure to download it and save it somewhere
into your iPad storage. In order to place this
little exercise sheet, I'm just going to hide
the visibility of mine. You go to the Hamburger menu, and then you choose place. Then you either have it
saved in your files in the files app on your iPad or you selected
from your photos. I have a special
little folder for my vector botanical art class, and my exercise sheet for the Flowers is over
here. You select it. There's a little blue
tick once you have it selected and then
you click on ad. Then you just tap
onto your screen and you place it in the middle. Either by having the magnetic
snapping on, or again, you can use the alignment tool to position it exactly
in the center. Next, depends how
you want to work. You can just work
on top of it or you can switch over here, you can select the blend mode, you can switch it to multiply. Then also from this photo layer, you can also rename
it by the way to exercise or
something like lines, line work, rename
it to exercise. I have it on multiply, and from the three that's menu, you can also lower the opacity. And then you can work
either on top of this exercise sheets on the
extra layers or below it. If you don't want this to
be moving all the time, swipe to the left and
just lock your layer. Okay, now we are ready
to do our exercises. First, we will be creating
this flower here. You can also do this exercise by switching off the volume. Before I tell you
what I actually did, you can try to do it by yourself or you can
pause this video, try to do this
shape by yourself, and then keep watching my
video and see and just double check if I created
this shape in the same way. That will be a very
good exercise. So I'm going to take
the cloud shape. For now, I'm just going
to choose any color. Then one, two,
three, four, five, I want five bubbles. I change it here in
this context menu. Then I move it more or
less to my outline. Like I said, you can either work on top or you can
drag it underneath. I would like you to
practice creating those shapes so that they're
more or less the same. They don't have to be perfect. You can also adjust
this shape like so. Again, if you're afraid that you will mess
up with this shape, just go to the three me, convert it to curves right away. Now, the middle is pretty straightforward. It's
just going to be Our ellipse shape, and I'm just going
to select any color. Now I can select those two
layers, go to the move tool, align center align middle, and I can still adjust it
to how I have it here. You can put one
finger on the screen, make the circle a
little bit smaller, and at least make it
sure that it's right in the middle of this
vertical line, and you have to have for
that magnetic snapping on. Now we can grip it. You can also switch off your exercise sheet, and we have our flower. Next, That looks familiar. Another flower
shape, five bubbles. That looks about right. And another circle for
the middle of our flower. And we group it. Next one. Another cloud shape, one, two, three,
four, five, six, seven, eight, nine, ten, 11, 12. But we have 12 bubbles here. Let's make it a
little bit smaller to retain again the shape. You have to hold one finger on your iPad screen. That
looks about right. And now we create the middle, selecting both layers,
alignment tool, align center align middle. That looks good, and we
group it right away. Also for all those
previous shapes, for example, this one, this one, you can go to the three
dots menu and convert it to curves just to be sure that you're not going
to mess up with them. It's hard to mess up with a
circle, it's usually okay. But the more complex shapes, it's better to convert
it to your curves. Another bubble five petals. I'm going to move it
here to see my outline better back to the cloud shape. Three dots convert the
curve. This one is easy. As you pause this video, if you want to pause and first do the exercises by yourself, feel free to make those flowers also
more fancy as you go. You don't have to stick
to the exercise sheets. You can also make something more unique and add in some extra decorative elements as you go. Group. I'm going to
lower it a little bit, but still keep it on the middle line
perfectly in the center. That is perfectly
centered, all good. Now, this shape is a
little bit more irregular. The best way to do it will
be to use one circle. Go to the move to, and then to try to build
the shapes from its duplicate two
fingers on my screen. And I move around, sometimes making the
circles bigger or smaller to create
those round shapes. Maybe it's not
that visible here, but this shape is a
little bit irregular. Now, do you remember
how to merge? There are two ways in which
we can merge this shape, the easiest one,
the quickest one is from the move tool to
choose the add function. Another way is to go
to the shape builder, select plus, free hand and just keep adding
those shapes together. But it will be the easiest to go to the move tool and just to use
the add function? Those shapes are also
somehow irregular. We will do that with
the pencil tool. Before we use the pencil tool, we have to make a test block. I'm going also to
change the color. Back to the pencil tool. I'm not using any stabilization. I have to make sure
that my auto close is on and that my fill is on. Then this test blob,
I'm going to delete it. Make sure that I'm on my flower, and now I will be
drawing those circles. And you start to see this red circle that will give you a hand where
it needs to be closed. And I draw those irregular
val round shapes. With the pencil tool.
Then I group them. The rule of thumb is
that you want to group all the elements that of
course, are the top layer. The entire group has to be
a group and inside of it, you want to group
all those elements that have different colors. The best advice that
I can give you for your layers management
is to focus on your co management as
you manage your layers. In this way, you
don't have to select every single layer
to change the color, but you can do it from
the entire group level. That's going to be
the easiest way. This one will be interesting. This one, this scenario, we didn't really have it before. First of all, we need
a circle and ellipse. Going to choose a purple color. Make sure that it's not
in the previous color. Now those lines, you
can create them either with the pen tool or
with the pencil tool. I will do it again with the
pencil tool just like here, but we need to make
a small adjustment. I'm making a test block. Then I go to the color studio, and I flip the fill
up to get rid of it, and I go back to
select only stroke. I will select, let's
say the yellow color to make sure that it
has a nice contrast. I'm going to delete it back to the pencil tool and I'm going to see if the
contrast is nice, position this line next to
the lines that I created. Under the color studio, I go to the stroke panel. And I will adjust
the width so that it more or less corresponds to the width that I used before. Again, this is my test line, so I'm going to delete it. Now with a little bit
of stabilization, I am again on the pencil tool. There is no fill. I
can only draw a line. There's also no auto close. We have to get rid of it too, and I have a little bit
of a rope stabilizer at about 20 then I delete it. And I start to draw,
that's very important. I start to draw
outside of my shape. And I make one line, and I also finish outside of this shape. Now, I'll try to do this one. I finish outside of my shape. This one, I finish again
outside of my shape. When I switch off
this exercise layer, I am stuck with this
shape over here. You can still go to the
node tool and you can adjust your individual nodes. Right now, all the layers are selected so that you can see all the nodes
at the same time. Now this is where
the magic happens. That's something that we
haven't really done before. We go to the three dots
menu, and this time, we have to choose
the next option under convert to curves, which is expand stroke. Just as a reminder, stroke is exactly the circle
with the empty medal. It is basically the
outline or the line. The other circle that was filled is also called
fill respectively, and it means this filled
inside of a shape. Right now we're working
just with the stroke. That's why the path
that you see here, this vector path is just a line. Now, from the three that's man again, we want to expand it. And now it's not a line anymore. Also when we go to
the color studio, the stroke is gone, and
now we only have Phil. Great. So I will merge it. It's going to be
easier this way. From the move tool, Boulan
operations ad, and now, I will choose the perfect way to adjust this shape further, which will be the
shape builder tool. I will choose the minus
option free hand. I'm going to remove in this way all those little bits that I've drawn outside of my shape. That's why I said it's best when we had our exercise
sheet to draw outside because now the cutting of the lines that are
outside was easier. D. Ah, that's so neat. Yeah, this is
actually the scenario where I like to use the
shape builder the most. It's usually when I
have to cut something outside of my main shape. Group to the move tool and
now this barrier is ready. Let's move to our next shape. What do you think, what is this? Let's move back to
have only Phil. Change the bubbles
to four bubbles. Position it on the shape
from our practice sheet. Now the creation of this geometric star shape
is a little bit tricky. Let me show you how
I've done that. I create an ellipse. Let's maybe choose a color that is a little bit
more contrasting, a little bit darker or lighter. Now I will create
a perfect circle, one finger on the screen
that corresponds more or less here to this shape. Then two fingers on my screen, I will create a duplicate. And I'm going to see it snapped. I'm going to position
it exactly to the left in the same line. Now I can select
both two fingers on the screen or from
the three dots mean, you can always click Duplicate. But I do two fingers
on the screen. I make an exact copy. Again, magnetic snapping
helps me to position them stacked right underneath. I'm going to go to bulion
operations and select ad. And then underneath
this extra shape. I will switch of the
exercise layer so that you can see
better underneath. I'm just going to
what shall we do? We can also just do a rectangle. I'm going to create
an extra rectangle. Let's make it maybe yellow so that we can see
things better. Move to and position
it so that it really covers the entire area of the star that
we want to create. This we can switch off. We just want to have
the star over here. We select both layers. We can go to the shape
builder tool, and again, minus and we will be cutting out all the things
that we don't need. Perfect. Here it
wasn't the greatest, but I can still fix that. Now it's still one shape and then I can go to the node tool. And I can just get rid of
those unnecessary nodes. I don't think I
stacked it properly, but I'm going to leave it
in this video so that you see that sometimes things
also don't work out for me, but there's always a way
with vectors that are so flexible that you
can always go just to the node tool and fix it. And now we have it. It's also
a perfect shape for a star. In case you have a sky, for example,
category, over here, you can add it as an extra star. It can be an element for flowers as a middle
of the flower, but it can also be just a star, and then you can save
it to cross category. Now we're bringing back
the original flower shape. I'm going to select both align
center align middle just to make sure that they're
really stacked and group it. Now, this will be
super interesting. To create this shape, can you guess what
I'm going to do? I select the rounded rectangle. It will be easier
to see if I drag it underneath my exercise sheet. Let's change it to a
more reddish color. Now from the move tool, I will just position
it more or less at the width of the tip
that I want to create, I haven't converted
it into curves yet, so I can still go back
to the rectangle tool. And here I can still adjust the shape and make it
a little bit more rounder. We're already building
the base of our tulip. Now those cutouts will be created by using
the triangle shape. I'm selecting a triangle. I'm going to choose a
color that is lighter. And then I'm going to rotate it and I will
improvise right now. You can go back to your
triangle shape and you can also move it a little bit. What do I mean by move it? You can move the tip,
one of the corners of your triangle. That looks good. Now I'm going to create an exact copy of this triangle
by hitting duplicate. From this tool here, I can flip it horizontally. Making sure I'm
on the move tool, I can drag it more or
less on the same line, and to make sure that
everything is really geometric, I can first of all merge it
by using the ad function, and then I can
select both layers, go to the alignment tool, and just select a line center. Again, this doesn't have to be perfectly the way I built
it in the exercise sheet. Actually, you might even
build it in a better way. Switching of the exercise sheet, I moved again to the shape tool. I'm on the minus symbol. I use it quite a lot, as
you can already tell. I'm removing the selection
that I don't need, and I have my tp. This is so neat. I love
those vector two shapes. Now we created the first
part of our exercise. Feel free also to decorate all those
flowers to your liking, and then you can also save it simultaneously to
your assets library. In the next video, we
will go to Part two, where we will be making a
few more advanced shapes.
15. Practice: Vector Flowers 2: I really hope that you like this exercise as much as I do. In this video, we will be creating more intermediate
and advanced shapes, and we will be also practicing using blend
modes and affinity to create even nicer effects
using the blending modes. Okay. Now we're going to
start with this flower here. Just like in the previous video, I would encourage that you every time we are going to
create one flower, it would be great if you
could pause this video, try to make it by yourself, and then keep watching to see if I've done it
in the same way. First, we start with the
shape of our petals, and this shape is also the
perfect shape for our leaves, and it comes from
the crescent shape. I'm going to draw
my crescent shape. It will snap if it's
perfectly symmetrical. Then right away, I'm going
to convert it to curves. Now from the move
to, I'm going to drag it underneath
the exercise sheet. I'll try to position it
exactly where I want it. Now, we could use a
power duplicate here, but I want to be very precise
when building this flower, and I think that there is no need to use a
power duplicate. Instead, we will
see that one petal is right opposite the other one, so we will use
another technique. Namely, we will create first
a copy of this one petal. And then we will drag
it right underneath. I'm going to switch off
the exercise sheet, Zoom in and make sure
that it's really aligned. Just to double check, you
can also select both layers, go to the alignment tool and make sure it's
aligned center, but we zoomed in enough to see
that it really is aligned. Now, both of those
layers are selected. Three dots menu, Duplicate, one finger on the screen, and we will rotate
it just making sure that this is the
angle that I want. It's going to be 45 degrees. Now we can create a
duplicate again and make use of the power duplicate because
the previous step will be all remembered. We have a hybrid technique
where we first make sure that the original those two petals are really exactly
across each other. Then we carry out
the duplicate with the rotation by 45 degrees. Then without the selecting it, we keep hitting
duplicate duplicate duplicate so that the
previous step is repeated. That was very neat. Now we have this shape. We can even merge it that
would have advantages, but what we will be doing also with the flowers
in the last line. We will be taking
advantage of blend modes, and let's me actually
create a duplicate. You can make two variants, one variant of this shape, you can merge it with
the add function just to have this shape forever
and ever to use. Those are the same shapes. Then you can keep the second shape and
then you can open it. Select each of those petals. You see that when they overlap, they create a very
interesting star like shape. This is where you could take advantage of using blend modes. We have to have all
the petals selected, and then over here, you can
access all the blend modes, either by just clicking
on the first normal mode, and then scrolling
and selecting, see it changes, selecting
some other options, or you just use the arrows. Normally, one of the
first blending modes that is out there is the
multiply blend mode. Just wanted to show
you the advantages of having both variants.
Again, to repeat. This one is just a single shape without any blending modes. That means we could get
rid of this group level, and we could just merge it
with the Bolan operation ad. Whereas in this one, we're keeping the
entire group of petals, but we selected all those
petals and we change the blending mode to multiply to create an interesting
star like effect. Then both of those,
we can rename them as flowers and we can save
them to our asset studio. I'm going to remove this one. Keep the one that
we're working on. Just for the sake of just for
the sake of this exercise, there are no blending
modes applied here. Now, we can create the middle of the flower and
create another copy, change it maybe to white, select both of them, move to align center,
align middle. Get rid of this exercise sheet, group it, and now it's all done, the colors are slightly
different but. Now, let's do together this flower here by
starting from the middle. There's another shape that we haven't used that
much previously, which is the square star. Here we can already see that we are already arriving
at this shape here. To keep it perfectly
symmetrical also, one finger on the screen, and I'm going to position it underneath my exercise sheet, go to the move to back to
the rectangle tool and here, you can adjust the thickness of the arms of the
square star, so to say. That looks pretty good.
Now we have our middle, but when we go back to
the rectangle tool, then we still see it gives us the option to
change its shape. In order not to mess it up, I will convert it to
curves right away. We have the middle
of our flower. I am not sure if
you will be able to guess how I created this shape. Even I needed to
remind myself again. Namely, we need to
use the cog shape. We're creating this
perfect cog shape. Going to position it
more or less next to the shape from the
exercise sheet back to the rectangle tool. The first thing that we
got to do is you see here the small red circle
in the middle, we have to close this cog. This is the first step. Here. There's a bunch of other circles that you
can take advantage of. And that's why I found it
a little bit confusing. I forgot how I arrived
at this shape. But first, we take
the shape that is on this inside outline of the ****, and just like here, we drag it a little bit
more to the middle. Next, the topmost circle. We have to make those petals
a little bit more pointy, so we drag it to the middle. There's another change that we needed to carry out, namely, we have to switch to
one, two, three, four, five. It's called teeth. Five Ts. Now it looks better. Now we have to keep
experimenting with this shape. I took again the circle
that was more or less at the bottom. This is nice. This is super nice. This
looks like a daisy. Maybe you'll be able to create some extra flowers as you do this exercise
together with me. This makes it a little bit more. Let's maybe place it underneath, the exercise sheet
back to the move to. I'm going to just
keep it as it is so that I don't mess it up again
and it still says ****. It's a geometric shape. Three dots menu,
convert to curves. Now we have this flower. I
think it's super beautiful. Looks like some cute little
flower from the Alps. Just my impression. Now,
what about this one here? Let's start with the petals on the outside, and you guessed it, we need the crescent again to create more or less the
shape of our petals. Just going to change the color
to something contrasting. Once I have this shape, I convert it to curves
and go to the move tool. Now I can also adjust
it so that it's more or less similar to the one
from the exercise sheet. Very similarly like
with this flower here, I want this petal to
be exactly opposite. I'm going to create a copy. Switch off the exercise
sheet and make sure that see that they're
really aligned, and now I will do a power
duplicate as you can guess, but I have to have those two
selected at the same time. Both are selected, three
dots menu, duplicate. One finger on the screen, I move it by 30 degrees. I do not de select, I keep the selection, three
dots menu, duplicate. Again, duplicate, another
copy and another copy. L et's at least group it now. We're not using any
blending modes here. Now I'm going to create the middle of this
flower and to do that, I will be using the
rounded rectangle. I'm going to make it a
little bit rounder and change the color so
that we can see better. A, run away. Make it a little bit
smaller and thinner, just like here, doesn't have to be perfect. Just to practice. Go to create a duplicate, 45 degrees, and you guessed
it another duplicate. It makes a power duplicate
and another one, and I'm going to
merge it right away. There's no use for me
to group it because I know I want to merge
it in any case. This is merged back to
the rectangle ellipse. For an ordinary circle. Select everything, move to
align center, align middle. Does it look okay?
Yeah, it looks okay. Then I'm groping Nice. I hope that you're already
feeling much more confident. Okay. Now we're
doing this flower here from the rectangle tool. I am selecting the heart shape. I think you guessed it. I'm
positioning it position it. Where it should be more or less, and I can still go back to the rectangle tool so
that I can manipulate the properties of this
heart and when I know that I'm done with
manipulating its properties, I convert it to curves. Next, I make a copy. See here we have two copies and I will flip it vertically, switch of the exercise layer, and again, I'll try to position them stacking
them right in the middle. Select both of them. Three dots menu. We create a
copy by hitting duplicate. This is 60 degrees. Another duplicate,
another 60 degrees. There was again a
power duplicate. We group everything together. Now we need the star, which
is actually super easy. Because under the
rectangle tool, there is this double star shape, one finger on my screen so
that it's perfectly shapely. I don't know how to say that. Then you can still manipulate
adjust the properties of this double star by adjusting
here those red circles. Once you're happy
with your shape, just converted to curves, and from the move to I can still align it
center align middle. And grip it. Does it look good? Yeah. Now I wanted to
create those random lines. It's a line that I created
with a pencil tool, but it has a little
bit of a taper. We need to go to the pencil tool and we need to
create a test line. I'm going to start drawing. I can keep the same color like
the middle of the flower, but I have to flip the fill
and choose only stroke. Going to delete it, and I will just draw my first
line so that I can see everything better
on my exercise sheet. Now, having this
stroke line selected, I go to the stroke studio. The first thing I do is
here on the pressure panel, I add this middle point. And then the first one I drag it down to create
this starting taper, and I drag the third point down to create
this ending taper. I go to the node tool
and I still drag the starting node and the
ending node of this line in place because now I
can see things better. Again, still from
the stroke tool, I can adjust the width. Now the pencil tool will remember those adjustments
and now it will keep it. I'm drawing the
rest of my lines. To do? You can follow the outlines from the
exercise sheet or you can just freestyle and create
something that you like. This is just a suggestion so that we can practice
all those tools, but don't feel obliged
to stick to it. You can also freestyle
a little bit and create something
on your own as well, or just do it step by step, the way I do it so that you practice the vector
design tools. Now, do you remember
what we have to do now? I will always recommend
that you expand the stroke. And that you change
the stroke to fill. To do that, you go to
the three dots menu, expand stroke, and now
we only have fill. This will prevent any
problems when you're scaling your vector
objects up and down. If you have strokes and the scale with object
is not selected, then you will have
scaling issues. That's why I will always recommend just to
convert it to curves because it will save you up
some mistakes in the future. I'm going to drag those
extra decorative elements inside of this folder. Far more to go. How
to create this one? This one, already the
last flowers will have some elements of
using blending modes. For this petal shape, we will need a tear
or a tear drop shape. Let's go to our exercise sheet. Choose a tear shape. It remembers that we
previously were using stroke, so we have to flip it
up to get rid of it. Now I'm going to rotate it
perfectly with 180 degrees, and I'll try to resize it so that it fits the
exercise sheet and then three dots menu,
convert to curves. Now I think you know also the drill from the
previous flowers. I'm just going to switch
off the exercise sheet so I can see better and
then create a duplicate, flip it vertically and
position it underneath, really zoom in to
stuck them together, select both of them. Make a duplicate. I think I rotated it by also
was it 60 degrees? Duplicate and the
power duplicate will recreate this shape. Now we cannot see that it's
exactly the same formation. What we're going to do is
we're going to group it. Inside of the group, we will
open it and we will still select our petals and
change the blending mode, for example, to multiply. This is how you get
this effect over here. Now, remember we
were also talking about bleion operations
about divide. This is where I think it will
be nice for me to show you another example how to use
this you cannot see it. Let me select
everything, how to use this divide bulion operation. For that, I'm going
to create copy. Sometimes it's good to have a flower formation or any vector acid that doesn't use blending mode
because blending modes, they will interact with any other element of
your illustration and sometimes you want that
to create artistic effects, and sometimes you
don't want that. In order to keep those
extra decorative elements, but without the blending modes, we will take advantage of the divide function or the
divide bulion operation. I'm selecting all
the petals back, and I'm moving back to
the normal blending mode. We go back to our
normal blending mode, we select all the petals. Instead of merging them, we go to our Bolan operations
and we choose divide. Now, as everything is selected, one finger on the screen, and we can deselect all the petals that are on
the outside one by one. Before we make any mistake
with the selection, let's group this middle. Change its color so that you can see better that it
was really isolated. What did this
divide function do? It basically made a division where it saw the paths
are overlapping. That's another really
great example to see this divide Bolon
operation in action. Now we can group the rest of the petals and we also
have the curative element. Now we can keep
using this flower, but it will not interact with the rest of
our illustration, the way this one interacts because it doesn't have
any blending modes. I'm going to keep this one, but I'm going to make it invisible. What is missing for this
flower is just its middle. We create a perfect circle. And we see that it's snapped
right in the middle. And we group everything. Now, this one should
be easy by now. We go to the heart shape. I hope that you
guessed it right, and we convert it to curves. Then we create a copy and from the move we flip it vertically. We switch of the exercise
sheet to see things better. I'm bringing back
the exercise sheet, to see things better,
I create a copy, and it will be 45 degrees and another copy to make use of the power duplicate
and another copy. Now I select all the
petals, open the group, select them again, and switch the blending mode to multiply so that we have this
overlapping effect. Super easy and again, if you want to recreate it just like with
the previous flower, you already know how to do that. Let's move to this one. Do you remember how to create
this petal shape? Yeah, the crescent. Again to do it in
the cleanest way, I'm going to create a
copy of this petal, put it underneath, select
both and from the move tool, I only want to align
them in the center line. Next, I make a copy, and I move it by 45
degrees and without deselecting power
duplicate Zuck. I'm selecting everything and
grouping, opening the group, selecting all the petals, and we're again creating
this blending mot effect. What else do we have here? Put the tube so that you
can see things better. This has created an
extra shape behind. So to take advantage of the shape that was created
behind all the petals. We just have to position
it on the outside. Because we're using
the blending modes, all I want is to retain
just this original shape. I will take advantage of the petal shapes by
creating a duplicate. I will switch of this one. And then this duplicate, I will merge it doesn't really
have to be in multiply. Now this petal shape
will be right on top, and this extra circle will be
at the bottom, underneath. I'm selecting both and I'm
using the subtract function. Now I am only left
with the middle shape, and I bring back the
petals that have the blending mold
overlap effect. I'm showing lots of tricks here. I hope that you like this
exercise as much as I do. Align middle, and align
center two to two, we group it, we bring back the exercise sheet. Last flower. This one is fun. So
again, crescent. Now, the way I created
this one, obviously, I needed to offset
one of the petals, but it was pretty
random. Duplicate. The angle that I used
wasn't a perfect angle, I was just something
very random. But remember not to dissect. This is important.
Now power duplicate. Data, we group everything. Now I can switch it off and I'm going to create the middle
maybe with some yellow. I can also align it
exactly in the middle. Let's make it a little bit big. Okay. Now the rest will be
just those little seeds. Keeping two fingers
on my screen, I'm creating a
duplicate every time I move away my Apple
pencil from the screen, a copy is being made, and I'm keeping those two
fingers on the screen of my iPad to create
super fast copies, but surely you know it
from my previous courses. Two to two super convenient. That's why I love
working on the iPad. We group everything and
now I can switch off the exercise layer and I can
just scale it to my liking, and we group everything, and now we are done. We were able to practice
pretty much all the tools that we had an introduction to in the previous
videos with some extras. For example, we were also
practicing using the stroke, on this little flower here and this one here and then expanding the stroke so that there is no stroke and we are only
working with the fill. Feel free to follow
this exercise in exactly the same way that I did. But once you start to
feel more confident. I really really encourage you
to make your own creations. If there's something
that you like, you already know how to add all those creations
to your asset studio. This is going to
be so satisfying. You select the
entire group level. You go to the asset studio,
flowers, Hamburger menu, and asset from selection, to, and all the
flowers are here. You can still go to
the individual flowers and see if there's anything that you would like to
save up separately, for example, Maybe you want
to save up this element, the components of your flowers
because next time you, it will be easier
to mix and match. This middle of this sunflower, this could be recycled. Maybe you want to save up just
the middle of this flower. Remember we created
this star like shape. That could
be interesting. This is a shape that
you will not get that easily from the
rectangle tool options. It's a unique shape. That could be recycled. That's why I'm going
to add it into my assets as well.
This I can group. This, I have to go to the move
the middle of the flower. This is something
here as well we used a lot and it's
just repetitive. You keep wasting your time. If you go to create your circle
tool over and over again. Those precious seconds, you can just group the middle
of the flower. And you can also add those individual components
into your gallery. Those two guys. This is a very nice shape for a
middle of the flower, and then you can save it up
as an extra asset because it will surely speed
up your work for some other element in
the future or this one. It took some time from
the shape builder to create exactly
the star like shape. I want to have it as an
extra asset as well. Now in the next videos, we will be building
even more assets together. Stay with me.
16. Practice: Petals in Fresco: In this video, we will be
briefly going back to Fresco. I would like to encourage you to experiment with different
shapes for your petals. Since in Fresco, you can create both vector objects
with symmetry elements. This is why we will
be switching from affinity back to Fresco. So let me open my
Fresco interface. I will show you a document
that I already created before. It's going to be essentially the same document
as for our vases. It was 3,000 pixel square, so you can go ahead and create a completely new document here. In case you want to again
create it from scratch, just hit create new
and remember to input 3,000 pixel
square and 300 DPI. When I hit create new, it remembers my previous size, 3,000 pixels square, you
can go to custom size. And when you adjust your pixels, just make sure to open the print size and
change this to 300 DPI. But I'm going to
close it and open the document that I
was working in before. In this document, I was working on some
extra petal shapes. The visibility of all
the layers is activated. That's why it looks
a little bit weird, but if I were to switch
off some of those petals, this is what it would look like. This is the first petal that I started with as a reminder. I was using my favorite
vector brushes and to switch on or to switch
off your symmetry tool. You have to go to the third icon from the upper right
corner symmetry, and this is where
you can activate or deactivate your symmetry. For all of those petals, I was using the very first symmetry type, the vertical one. I will also use my
little cheat sheet here. Those are the petals that
I created in Fresco, and you can create your own, by no means, you don't have to create exactly
the same petals. But later in affinity designer, I'm going to take those petals. I will include all
those references in the course resources section. We will be using all
those petals to create extra floral assets with
blending modes effects. So I will switch off the
visibility of this one petal. Whenever you want to
create a new item, you have to create a new
layer that is empty. Then again, we will be working with a black color so that
we can see things better. So first in line
would be a petal. Doesn't have to be
again exactly the same. It probably won't be exactly the same, but
this is very good. Just for the first
petal in fresco, create a petal that looks
a bit like a hard shape, but it is more irregular. Normally, in affinity,
as you know, from the previous videos, for the hier shape petal, we would just use the hard
shape from the rectangle tool. But the goal of this
exercise is to create a few more unique
vector objects that we can use as components for our vector flowers that are a little bit more
spontaneous, so to say. So I try to recreate
this petal here and I'm going to include
a few random lines, making sure that
my shape is really closed both at the top
and at the bottom. I think you remember the drill
from the previous lesson, then we use the fill
tool to fill our shape. It's not exactly the same, but it doesn't really matter. It's just to do this
exercise together. This one, we switch
of the visibility, we create a new layer, we go back to our vector brush, and we draw our next petal. Something like this,
switch of the visibility, new layer back to
our vector brush. This one is a little
bit more elongated. To do. We can just try to
draw it, the initial shape, and then you can still
fix it making sure that everything is nice and closed. That looks good. Of
course, it's not the same, but it's totally fine,
filling the shape, and then because everything
is in black color, you will be able to evaluate
the shape much better. Switching of the
visibility, another layer. Now, this one is a little
bit more jittery and rounded on the edges
back to our vector bush. This might do, but I will fix maybe the base of this petal. Now it looks a
little bit better. I'm not going to fix that so that it matches
exactly the shape because you will be also creating shapes that differ
a little bit and it's okay. Now we have this shape. Then you fill it with
color and you still eye it and you zoom
in and you zoom out and you see if
there's anything that you would like to fix on this shape. For example, I can make the base of this leaf
a little bit rounder. This is a super
interesting shape. This is a shape that
you would not be able to create with the
rectangle tool in affinity. One part, and then
a bit of a tip. Pretty much for all
the remaining petals, I will follow the same steps. I switch of the visibility
of the previous layer, then I create a new layer, I switch back to the
vector brush tool, and using this very
first symmetry type, the vertical one, I
create my petals. Now I will only switch on the visibility of the petals
that I would like to export, just for you to
demonstrate one more time how I export everything
to affinity designer. Export menu publish an
export, export a, PF. It remembers our previous setup, and then I save it to files into my exports folder
on my iPad, safe. Then I can get rid of this
little cheat sheet now. I'm going to exit in
fresco to my home page. You see that it's
refreshing the document and it makes sure that
everything is in the cloud. Now we can go to designer
back to our home page. First, we have to open our
document from our folder. We keep the settings as
they are, we hit ok. Sometimes there's
a bit of a bug, then you have to go back
and click again, Live Docs. Now it's all open.
Remember that PDFs, they have different dimensions. They will not
translate to pixels, they will translate to points. The first thing
that we got to do is sometimes when we
were fixing a shape, those extra layers were created, we go to the group level, bul in operations at and
we just merge the shapes, so we don't have
those extra layers. If you see there's a symbol
that there's a group, get rid of the
grouping by merging all the little layers
within that group. Now we can select
all our petals, three dots menu,
copy. We go back. Now I can switch
off the visibility of those previous petals, three dots menu and paste. I'm going to group them. S. Spread them evenly
on your canvas. You can also change
their colors. It's because for
my asset studio, I use dark background. I I like pastel, I choose a few pastel colors
to also change the colors of those petals so that later on my library also looks
nice to the eye. What you're going to
do, you will wait. I have to go to
the color studio. You will just assign some of your favorite colors to those petals doesn't
really matter. They can be part of
your branding colors. Anything that will
be pleasing to your eye in your asset studio, so that we also have
a good visibility on this dark background. You can also rename them. I'm not going to waste
my time now renaming it. Just wanted to
show you that once you have everything
unfortunately you have to do it one by one, you swipe to the left and
you rename your layers, and when everything is done,
you select everything. We go to this botanical
assets category that we created together, and over here, you can either
save it under flowers, but you can also go add
another subcategory. Two to two. You can rename
it to two to two petals, for example, Then Hamburger
menu add acid from selection. In this way, we created another subcategory with
a few more unique petals. Now in the next video
from those petals, we will be building together
a few more floral assets, which also take advantage
of the rectangle tool, but they will be built from all those special petals
that we created in Fresco. This one is beautiful. Also,
what I'm going to show you is how I utilize blending modes to create
those floral shapes. Join me in the next video.
17. Practice: Blend Mode Effects: In this bonus video, there will be more of your own practice behind
the scenes, so to say. Your task will be to take the petals that you created
since they are grouped. It's very easy for me just to drag them outside of the Canvas. I would like to encourage you to create extra floral assets, which you can add
to your library. You can try to recreate the floral assets that
I have over here. I will include a bit of a cheat sheet of how they were done and I will
explain them in a minute. Alternatively, you can simply
experiment by yourself. But I wanted to take a copy of one petal and I wanted to show you how in general,
you would proceed. You take one of
those petals that you created in Adobe fresco and to see the unique effects and shapes that you're creating, you have to change its
blending mode and I would recommend that you
start with multiply. You can change it to
other blending modes, but multiply will be the
safest blending mode. You can also experiment with different blending
modes later on, but I would suggest that
you first start with multiply because this is where
you will see the shapes, the unique shapes that
you're creating the fastest. Number one, you take
the unique petal, you change the blending
mode to multiply. Next, three dots
menu, Duplicate. Remember the previous operation. That's why this petal
went somewhere away. Let's say you rotated
by 45 degrees, you keep the selection. It's important not to di select. You can Zoom and zoom out, but the selection has
to stay the same. Then you keep hitting
your power duplicate so that it can do the shape for you till your
flower is complete. And then make sure to group it and save it to
your asset studio. Again, to summarize the steps, you're taking each of those
petals and you're playing around with its duplicates and
different rotation angles. Also, before you do that, on the individual petal level, each of them will have to have
your chosen blending mode, and I suggest starting
with multiply. I'm going to remove
this. Now, how did I arrive at
those floral assets? Your task will be to try to recreate all those floral
elements by yourself. Because now you are equipped in all the tools to do that and all the
knowledge to do that. Even if you will not arrive
at exactly the same flowers, that's not the point
because it's not the purpose of this course to
copy everything one to one. What I'm doing in my
affinity designer interface. It's also to arrive at happy experiments and your
own unique floral assets. Of course, if you arrive at exactly the same
flower, it's also fine. Feel free to use it in your
botanical compositions, but there is no need to
copy everything one to one. Now I will just briefly explain how I created
those florals and I really warmly encourage you
to either carry out your own experiments
or to try to recreate exactly the same floral assets. This one is quite easy. I took the very
first petal shape that I created in Fresco, switched it to multiply, and then I did the
power duplicate, I think at about 120 degrees. Then the middle of this flower, I took it from the library. This little flower
that we created in our first practical exercise,
creating floral assets. It could be an individual
standalone flower, but I thought it will fit very well to be the middle
of this flower. Now, with this flower, the petals, I think this
is pretty straightforward. I created two copies, one to the left,
one to the right, and they were all
set to multiply. With the middle of this flower, I think you know
how to do the dots. It's from the rectangle
tool you take the ellipse. But maybe I'm going to show you how I did this middle
of the flower, namely I went to can
you guess, by the way? Where is it? I went to the Pi. Yeah. Perfect circle, one
finger on the screen, then I make a
perfect semicircle, three dots menu,
convert to curves, move tool, 180 degrees. Then I went to the Node tool. I removed this middle node by selecting it and
hitting delete. Then from the node tool still, with my apple pencil, more or less in the middle,
I dragged this line down. Oh. Then you can go back to the move tool and you can still
adjust it to your liking. Super easy, but you have
to get used to it a little bit to all those tricks and then it's all super super easy. This is done this third petal. I also took a white circle that I placed in the
middle of this petal. Then I used the power duplicate and the blending mode that I was using for this flower was
screen. That's pretty much it. I also created this
beautiful middle shape. Looks like a little cute star. This is also pretty similar, the middle is super easy. If you were also saving up your individual components
in your asset studio, maybe you already
have it there, see. The middle of this flower, can also just click on
it and insert it and This petal over
here, I created copies. Of course, I set it to multiply. The first copy, I
didn't rotate it, even though you could do that, you can rotate it by 90 degrees. I made a copy, I positioned
it at the bottom first, and then I flipped
it vertically, making sure that it's
perfectly centered. Then I took the pair
of those petals. I went to the three dots menu, I hit a duplicate and having
those two petals selected, I rotated them by 90
degrees. That's it. It looks like a poppy
flower, I think. Now, this looks as if we created this shape using from the rectangle tool,
the crescent shape. Remember, we used to create this leaf like shape
using the crescent shape. Then we were going to
the three dots menu and we were converting
it to curves. But if you look a
little bit closer, this shape is a little
bit more irregular because this is actually the original petal
that we were using. I'm going to remove this shape. It's again not created
using the rectangle tool, but our original petal shape
that we created in fresco. Then the blending mode
that worked very well, especially on this blue
color was linear burn. You can play around with
this shape further. I really like the star like formations that this simple
shape created in the middle. I didn't include any
middle for this flower, but feel free to experiment and add in any extra elements. Make sure to grip it and then
save it to your library. I will go back to show me my
original botanical library. I haven't saved them yet, but after this lesson, I will it's going
to be over here. Now, this one, I
used color burn, I used a white middle. This symbol stands for just a
white circle in the middle. Then this petal was
power duplicated, if I may say so a few times. You can see how many times by counting the tips of this petal. There was this
first one original, then two, three, four, five, six, seven, eight, nine, ten, 11 12. Again, if you wanted
to be precise, just create a copy
of this petal. Put it underneath,
flip it vertically, select those two petals, and then carry out the
powered duplicate. Now, this one, I
might actually have to open the layers to show you. But it was again a
happy experiment. I would really have to focus
hard so that I can remember how I've done that because
a lot of those creations, I mean, are very spontaneous. First of all, we have
this shape element, which I took from
the rectangle tool, the double star shape over here. Then this very first shape doesn't have any blending modes. It's just this
petal duplicated a few times and rotated
by 90 degrees. If you look inside, this
is a normal blending mode. I wanted to have a base with no blending mode at the bottom. Then the rest of this
shape so that we have those beautiful color plays is using the screen
blending mode. One, two, three, four, five, six, seven, eight, petals altogether
created this shape, and each of them
you will see here are in the screen blending mode. To have again everything
perfectly aligned. First, create a copy that will be positioned
right underneath. This copy again, has to
be flipped vertically, and then you keep rotating
it one time and second time, and you get really
beautiful results using blending modes and
powered duplicates together. For this one, I actually
combined two of my petals from this petal group
that I created in Fresco. The red one, which
is underneath, let's go to the layers panel, doesn't have any blending
mode. It's just the base. All of those petals were also rotated using
the power duplicate. Then with the color
dodge blending mode, I this extra petal. I scaled it down so that it fits in the
middle of this flower, and I rotated it only one time. I first created this
pair over here. Then from the three Ds menu, I created a duplicate, and then I rotated it by 90 degrees to arrive
at the second pair. In this way, everything is
really really centered. Then this one is exactly the same petal shape
from the previous flower. No base. This time, all of those petals were set to screen, and the middle of this flower is just a simple white circle. Let me show you also
the layers here. This is just the
middle of the flower, and all those
individual petals are set to screen and
they're also rotated. That's it. I'm going
to include the sheet, this sheet sheet with
all the explanations, including what petals I was using and what the
blending mode I was using, I will include it in
the class resources. In the meantime, I need to save them into my assets library because I
haven't done that. Once you're done with
your happy experiments, you can select
everything altogether. Go to your main botanical
assets library. I'm going to go to the
main one that I'm using. Add asset from selection to
add in those extra flowers. Can show you that again. Let me go to the category
that I created for the purpose of this
course, botanical assets. Flowers, add assets
from selection. You can also add the same
assets across other categories. I need be if this will make
your work more efficient. Of course, you can have
assets saved up even multiple times across different
categories as long as it's helpful
to you and your work, and it helps you to access those assets as fast as
possible within your project. In this lesson, we were
practicing or discussing how to create extra
floral assets. We refreshed how to
use power duplicates, and we talked briefly about utilizing different blending modes,
not just multiply, not just screen, but also
blending modes such as linear burn or color Dodge to
create interesting effects. Then your task after watching this video will be to carry
out your own experiments. Maybe you created exactly
the same petal shapes when you were doing the previous exercise
in Adobe Fresco. Maybe you created something
completely different. All I encourage you to
do is to experiment, and then at the end
of the day to add in all those happy experiments
into your assets library. Oh.
18. Practice: Vector Leaves: Okay, guys. I think that by now, you will probably
feel very confident using all the vector design
tools in affinity designer, as well as using
fresco and importing your vector objects
to affinity designer. But this will be the last
exercise that we will do together before we move to a bigger botanical
illustration project. What we are missing in our
library are the leaves. I already added in a few here. But those leaves that
you can see here, we can do this
exercise together. There's an exercise sheet
that I prepared for you, which will be available
in the class resources, which you can place onto
your document in a second, you can treat this
exercise in the same way, like the previous exercises that whenever I create
a vector asset, you can also stop this video, try to first do it by yourself
and then check if you are doing it in the
right way or if there's a better or
faster way to do it. So when you want to position an external image,
onto your document, you have to go to the Hamburger menu
and then go to place, and I have my exercise sheet simply saved to my
photos album on my iPad. You can also have
it, for example, stored in your Cloud storage or in the files
folder on the iPad. I'm going to place mine
again from photos. And here it is. It's just
a simple last exercise that we can do together to
repeat what we learned. We will be creating those
leaves together and three botanical
compositions that we can add to our
assets library. You can also rename this layer to something like
sketch or lines. Then over here, having
this layer still selected, we switch it to multiply. Then from the three dots menu, we lower its capacity
to roughly half. Then I already prepared
those assets before. They already in my library, but I'm going to just move them to the left side so that I
can also have a cheat sheet. We start with our first leaf and this is just a
suggestion of an exercise. You can do this
exercise with me, but you can also stop
or you can create completely new creations or even extra creations
on the basis of what you see here
because we will not be doing as many
leaves shapes as we were with the flowers because the goal was basically to get familiar with all the
tools that you can use, the rectangle tool,
the corner tool, which we weren't
using that much. The alignment tool, all the Boulan operations
and the shape builder, and now we will
just re establish our knowledge and make sure that we remember
everything correctly. Let's start with the
first leaf shape. We go to the rectangle tool, and then we choose
our tear drop shape. Just going to draw
this shape and maybe from my color palette, select this green color and then flip the stroke up so that we are only
left with fill. Then from the move tool, you can resize it and position
it more or less in place. It doesn't have to be perfect. If you want to create
something slightly different than what you
see on the exercise sheet, then you are more than
happy to do that. I'm going to commit
to this shape, three dots menu and
convert to curves. Now, half of the sleeve has either a darker
or a lighter color. You can do that in both ways. They have their advantages
and disadvantages, but it's more or less the same. The easiest one would
be just to clip it. Then you have to
switch off the sketch and position it in the middle so this will
be option number one. To be honest, this is the one that I do most frequently
because it's the easiest. You just have to remember
that if you want to recolor this green color, you have to open this group. Another option would be to
drag everything out to select both layers and to go to the shape builder
tool when you have the minus selected free hand
just to cut out this shape, and then you have to group it. This would be option number
one, everything is grouped, but at least all
those two objects, they are on separate layers. For this leave, two
fingers on the screen, I'm just going to create a copy. Let me show you one, let's say, small disadvantage, if
you want to manipulate Both of the layers. I mean the bright
green color and the darker green color by
cutting out this one element, you will have to do it
twice because you have two layers here instead
of a clipping mask. I'm choosing a round a rectangle and I'm
really rounding it up. If you want to see
this cutout better, you can change the color of the cutout element to the
color of the background, which in my case is white, only to be able to
see things better. Because then when you
zoom in zoom out, You can evaluate if
this is what you want. Do you want it a little
bit more narrow, a little bit more small. You can follow my exercise
sheet, but you don't have to. Then just making sure
that this is the leave. We have two layers here. Even if we cut it out
from this darker color, we still have to cut it out from the brighter green color. I'm going to select this cutout
element and make a copy. Now I have only the
first copy selected and maybe this green color from the move to bleion
operations subtract. Then again, the cut out element, the second green color, boolean operations subtract, and now everything
is cut out properly. As you go, I also encourage you just to properly
rename your groups. If you know, it's
all going to be leaf leaf leaf and
just copy paste. When you add everything to
your library in this way, it will be already labeled
and it might save you some work in the future when
you're doing client work. Here, one of the most
popular leaf shapes. How to do that. Say super easy, but where is it? Crescent. You create a crescent shape,
I think there was this. White color that I
choose for the cat out, and then I changed
everything to green, and then I adjust the shape, still from the
rectangle tool so that everything is symmetrical,
it has to snap. You will see those
guiding lines, and then three dots menu, convert to curves, move tool and I'm positioning it in place. Now this leaf again, half of it is a
little bit darker, half of it is a
little bit lighter so that this whole vector design
is not super duper flat, but it has a little
bit of weight. No weight, but depth
depth is what I meant. G to choose this darker
color and this time, instead of using
the shape builder, I will just use a clipping mask, position and position
it in the middle. Then swipe to the left, rename and paste because it remembers the text that
I copied previously. From the move to to
fingers on my screen. Hold on screen, make a copy. Now we will need
this middle line, which will be the easiest
to create with a pen tool. We just create a line, doesn't matter if it's
perfectly straight. Since we weren't using
the pen tool before, it doesn't recognize
any fill color nor any stroke color,
we move to stroke. Let's just choose
even this black color so that we can see
everything better. Going to the move tool, position it roughly, then
back to the node tool. Now I'm going to position my nodes basically
where I want them. And then they will
snap into place. It doesn't matter
if the original line was straight or not. Then I go to the
stroke tool and we need this extra pressure point. I just tap with my apple
pencil in the middle and we're dragging the first point and the last point
all the way down. We create this taper at the
beginning and at the end, then you just adjust
to your liking and you can still stay
with the node tool. And adjust it up or down so
that you're happy with it. Then three dots menu expand stroke that this line
doesn't have any stroke, and empty circle, but
it only has fill. I can also change it to this green color and then
make it a little bit darker. We make sure it's the right
leaf and we group it. This one is cute,
has a heart shape. We choose the heart shape
from the rectangle tool. It will also remember that we were We were having a stroke. That sounds funny. We had a stroke. We were
using the stroke. We have to flip it up. We go to the fill, maybe change the color to something a little bit brighter. Again, feel free to
follow my exercise sheet, but can also go back to this original shape and adjust
it here to your liking, and then you commit. We go to the three dots, to two, convert to curve. Before I create part of this
line in a different color, let's maybe do this cut out here by choosing a triangle shape. Can I make it darker so that
I can see things better, rotate it, place it more
or less where I want it. And then select both shapes and the easiest fastest
way is to go to bulion operations
and choose subtract. Now we want half of the sleeve
to be a little bit darker. It's a very subtle adjustment, but it can add, like
I said, more depth. We will choose the
original color of the leaf and make it a little bit and this
time we will clip it, this will be the easiest way. I'm switching off
the exercise sheet so I can see things better. Rename leaf to two and
rename again leaf so that we don't have any
extra work renaming our groups or our layers when we're working
on our projects. Let's do this one. I'm going to maybe rotate my
canvas a little bit, and this time, I'm going
to choose my Pi shape. One thing on the
screen, we'll make it like a perfect circle, and then we make a
perfect semicircle. Three dots, convert to curves. Can also get rid of
this middle node, selected and deleted. Then from the move to we can
rotate it to your liking. Then we go to the node to. We adjust the other node. Here you see those blue handles,
you can adjust them two, and you just manipulate
one of the handles to adjust the shape again to your liking. Now
we need the stem. The best stems are made
using the rounded rectangle. We just round it to the max. It will snap and you
cannot go any further. Then I make it a
little bit darker. From the move to,
I can make it also a little bit thinner, rotate it roughly to the
shape from my exercise sheet, maybe make it a
little bit thinner. That looks cool.
Then you can already make a copy two fingers
on your screen. If you're working on the iPad. This time I want the shape to go outside
of the base leaf. Now from the move to two
fingers on the screen, going to create copies. Now I am switching off the exercise sheet and since
it's around the rectangle, sometimes the roundness
will show at the end. The first thing that
I'm adjusting is to ight the srounded shape and I'm double checking that all my shapes really go
outside of the base shape. Then all those elements
that I created, I go to bulion operations
and I merge them, and then I select the lines. With the leave. I go to
the shape builder tool. I have minus selected free hand, and then I cut out all the
elements that stick out. Some of them came back.
Let's do it again. One, two, bye bye. This leaf is done, and
now this is super easy. We have our tier shape. Then we go back to
the rectangle tool, we make it er. You can basically adjust
it to your liking, then we commit to the shape, three dots menu,
convert to curves. Then I still go back
to the node and I take this node and position it down. Maybe change the color
to something brighter, and we will create our stem. We create our rounded
rectangle for the stem. We position the main
stem in the middle, maybe make it a
little bit shorter. This time we can take advantage
of the alignment tool. We select everything. We go to the alignment
tool Align center. Now we can make a copy of
the rounded rectangle. Rotate it a little bit and
place it where we like it. Going to already
make it a little bit longer because I will be
cutting some things out. Two fingers on my screen. I'm creating copies as I
go. They can be random. They don't have to
be nicely spread. I just wanted to
double check if I have any stroke on them, but I don't. Maybe this one can stick
out a little bit more. And now I'm going to merge them. From the move tool, add. Then I select the lines and the base color of my
leaf. You gust it. I go to the shape builder, the minus is pre selected
because I was using it before, and I get rid of those
unnecessary elements back to the move tool. Now those lines, I
can duplicate them, make a copy, and I can
flip them horizontally. And snapping will help me
to position them in place. I think now it looks good. Let me zoom in. Yeah.
That's about that. I am grouping those stems
because they share a color. One last thing that I got to do is to create this
extra dimension. Half of the leaf has a
slightly darker color. I'm going to with
the eye dropper, choose this original color,
make it a little bit, clip it to my leaf shape and then from the move position
everything in the middle. Now it's all done. I just have to make sure that
everything is grouped. We are done with our leaf, so I can select everything. Then I just saved a few before, but I'm going to do that again. You go to leaves to your subcategory of leaves and you then add asset
from selection, and then those leaves will be added into your asset studio. Now you see that
slowly, but Shirley, your library of assets is
really getting populated. Now, those were components that we were working on til now. We had individual flowers. We had our vases, our petals, and now we
created a few more leaves. In the next video, the
very last exercise is to practice creating a few full combinations
so that you can see later on that it also has advantages to save the smallest components, bigger components, but
also full compositions that will save you time when you're working
on your projects.
19. Practice: Botanical Compositions: Welcome to our last
exercise before we move to our full
botanical illustration. Now we will be going back to our exercise sheet
and what we have left is creating those ready
made floral compositions. The key to this exercise is to remember and to be able to recycle what you
already created. In reality, those three
floral compositions are recycled from all the
components that we created. You see, for example,
this leaf on the sunflower And this one, too, this is what we
created previously. This hard shaped leaf was also recycled and
those leaves as well. Now just wanted to demonstrate
how quickly it can get, how quickly you can arrive at those ready made combinations that can be safe
to your library. So I browse through my
library and I can already see the sunflower that I would like to use on
this composition, so I'm going to insert it I will tidy
everything up later on. This flower is this
flower that we also created together in
one of the exercise sheets. I'm going to drag them
underneath the sketch layer. The berries, I
remember they're here. We can also position
them in place. Those were the florals
that we can recycle. The work was done only once. Now we can just gather
the fruits of our work. Now the leaves, we will
need this leaf here. Then this one, we will need two of those
heart shaped leaves. I'm going to drag them
underneath our practice sheet. That's this one. We're
going to make copies in a minute and those leaves let's see it's this one here. As you drag and drop the assets that you want to recycle
for your project, they will also have the colors that you have pre saved
into your library. It can also have a lot
of advantages because You already probably have all those colors in your
library that you like using. Maybe they're part of your brand identity or maybe they're just your favorite
colors that are re occurring in your portfolio
and your social media. Every time you keep reusing
them in your projects, your entire body of art looks more consistent
because you tend to use similar greens and
similar purples or similar yellows and so on. That's why I do recommend if possible to save up your asset
already in a whole bunch of colors that are
maybe even taken out of your directly out of your illustration because then you can just drag and drop. Of course, you can adjust them. Now, for this exercise, I will keep them
as they are here, they don't have to
look exactly the same in my exercise sheet. It will just help you in your color choices if you already have a starting point in your library, is
what I'm trying to say. All right. Now we start
with the first flower. We can group them. It's going to be this flower here with this leave,
so we can group it. This berry goes with
this heart shaped leaf, and this little sunflower head goes with those two leaves. I will switch up
the visibility of those two guys and we will
start with this flower here. First of all, I'm going
to go to the move to and position this flower
more or less in place. To add ale bit more
dimension to this flower. I created a copy of this shape. I'm going to do that now. Having this layer
selected duplicate, and you can simply make
it a little bit lighter. Go to the move tool. One finger on the screen of
your iPad so that it retains the dimensions and you
position it in the middle. So that you get a bit
more depth in this shape. This is what I've done.
Do I like this color? Maybe no, I would actually
like to keep it this way, but then the middle
of this flower, if I go to the navigator, and I switch everything
to gray scale, then the middle of
this flower should be, for example, a little bit darker so that the contrast is good. Maybe also this pink should
be a little bit darker. And this original pink
should be darker too, and the middle should be darker and now I have to see
what I just created. Maybe the other way round. This looks a little
bit more dull. I want the middle to be bright. That's how I usually do
it with my illustrations. I have some starting
point that I like, and then I try to work on the contrast from the
inside to the outside. This contrast looks good, and then here we can also make
this a little bit lighter. What about the leaves? I think I'm going
to keep it this way. Let's bring it back. Somehow this yellow
doesn't stand out enough, so I'm going to choose
just some other pink. It doesn't have to be
exactly the same here, or maybe simply white. White is always a good choice. I can go to my
library where I have this subcategory that I have pre created called
Complete florals, I'm just going to add
acid from selection. And then I can recycle it in some other illustrations
of mine. Moving on. First, I'm going to position my berries and adjust
them a little bit. Sometimes when elements are recycled and they
are too similar, it helps to flip them. For example, this one is
just flipped vertically, and I also do this trick when
I'm creating my patterns. I tend to recycle quite a lot. At least I flip my
elements here and there, so that it doesn't
all look the same. Stick the sleeve, position
it over here more or less. To fingers on the
screen. We make a copy. What is left is the
stem and it's not this rigid regular
rounded rectangle stem. I created it by using
the pencil tool. First, I always
make a test line. I flip the fill because
when it comes to lines, we need stroke, can make
it a little bit darker. Then we have to go back
to the color studio, click on any of those pressure
points and reset pressure. Normally, I keep
the cap rounded. It really depends on your style. I sometimes also choose a cap that is a little bit more cut, but we can keep it
around it Cp cap. Dle it. You can also use a
little bit of stabilization. I'm going to position everything underneath this flower here, and I will start drawing. Switching of the exercise sheet, I see if I like everything, you can also select
those two lines. Go to the stroke studio and
play around with their width, and when you like
it, three dots menu, expand stroke so that
there's no stroke anymore. There's only fill group it, and now we can group
everything together. How long did it take? If
I wasn't talking so much, then probably less than
1 minute. Last one. You may remember
that this flower was created with
some blending modes. I really like this effect. As a reminder all those petals that you see here
on the sunflower. They're in the
multiply blending mode and I really like this effect, so I'm going to leave it. First, I have to adjust
this leaf over here, make it a little bit bigger. And then this sleeve over there. We'll be more or less here. Another thing that
I like to adjust is this stem to make it a little bit shorter because it will
give me more flexibility to join the leaves with
the rest of the plant. I'm also moving to the
other stem and making it a bit a bit closer to
the base of the sleeve. Then underneath from
the pencil tool, the pencil tool should now
remember our last settings. I can also select. Again, a
test line or a test block, we can pre select the
darker green from that leaf and apply this color and maybe already make it a
little bit more narrow, deleted, and now we
can start drawing. We try to join those leaves
with the rest of the plant. I can go to the node too. I just noticed that
for this flower, I guided this stem all the way behind the middle of this flower because it doesn't
have any blending mode, so it will not shine through. That looks good.
Now switching off, we have to fix a few things. The best way to do that is to select all the lines
that you just created, and then you get access to the nodes and you can
just shift them ever so slightly so that they really fit into place and then they
don't look awkward. Having all those lines selected, you can also still
adjust their width, but I think this looks good. Three D menu, expand stroke. Group everything. And we
put it into the same group, flip to the left,
rename layer, floral. Now we have those two
extra floral combinations, which we can add to
our assets library, add asset for selection, and This is it. Let's go back to the move tool. That was our last exercise. Together, we have created those three floral compositions, which we then saved
into our library. But you see compared with
all those flower elements, leave elements, vases,
it's not too big. My advice is give it time. As you work on your
illustrations, you might keep adding bits of new assets
into your library. Or take some time when taking
this course and create a few more combinations
at least one, two, three, three, six, more so that you can add them into
this category if you want, if you're having fun,
also creating them. Try to recycle all the flowers. Try to recycle the leaves or
create new leaves shapes, add them into your library, and then pre save them
into your asset studio.
20. BONUS: Pencil Tool 2.6 fixes: H Hello, everybody. Welcome to this update
video for iPad users. Zarif rolled out their newest software updates
across Affinity Designer, Affinity Photo, and
affinity publisher. I'm under the
impression that there's a whole bunch of videos
about the desktop version, but only very few videos
for the iPad users. And if you've been
following with me, then, you know that
I'm an illustrator. I predominantly
illustrate now for children's publishing and
for my illustration work, I always use affinity
designer on the iPad, and I always use
the Pencil tool. So I will be skipping
the rest of the updates. This video will focus
only on the pencil tool because this is the most
important tool for my work, and the changes that were part
of the most recent update, the 2.6 0.0 update will
really make your work easier, and I would like to highlight what exactly changed
in this video. So heading back to
the Pencil tool, I'm also going to use this
older sketch of mine, where I created this
illustration just to demonstrate how the Pencil tool changed and what you need
to take into account. There's also some icons
that you will see here in the contextual menu that have changed, so do
not be confused. Everything is
actually quite easy. In essence, there's no
more forced smoothing. There's also better
control over the stroke. So there's basically better control over what
you're drawing. And there are some new
auto close options that can really improve
your efficiency. All right, so the very
first thing that changed, luckily, is that there is
no more forced smoothing. Previously, the pencil tool would always apply some
level of smoothing. So we really didn't
have full control. And when I was illustrating
projects for clients, I felt very frustrated after the previous update because what I was drawing
was unnatural. And what I wanted was a feeling that is more organic
and less vector like because all my artwork, even if I use some texture, this is all vector
brushes or vector shapes, and vectors tend to look
a little bit more rigid. So the previous update
really destroyed my workflow and caused
me some frustration. And I'm very, very happy that Serv got rid of this
obligatory smoothing. So right now, you can draw lines that are more kind of rugged. Do I have an example,
for example, if I wanted to draw the man of the pegasus
in a more rough way? Previously, this whole
line would be more smooth. What does it mean? I
would get more rounded. And the shape that
I drew would not be reflected in the line that
the software would draw. And on affinity forums, I found that a lot of artists, for example, who were drawing
maps, illustrated maps. They were in particular,
very frustrated because when they were
drawing the outlines of the countries for the maps, then they needed all those
tiny little details, they didn't want smoothing. And in my work, it
was exactly the same. Sometimes I really
wanted this more hand drawn feeling and the smoothing
would destroy everything. Right now, this is fixed, and the only way to get smoothing
would be if you opt in, for example, for some
form of stabilization. Right now, if I click in here, you see, nothing
has changed here. There's a rope stabilizer
or a window stabilizer. Which you can also set the force of the stabilizer
here on the left side. So if I wanted my line to be, you see, more smooth, then you can use stabilization, and you can be more intentional, about choosing whether you
want this smoothing or not. So with this regard, you
have full control over here. Now, another thing
that changed in the contextual menu
are the icons. I didn't take any screenshot
or I would have to find some old screenshots from my old work to show you
what exactly changed. But those two icons
are different. You can also click on the question mark to
see what is over there. The one on the left is about using line,
using an outline. And the circle that is more
full is about using fill. So if you want a
line, right now, it's selected, you will just, let's get rid of
this stabilization. You will just get an outline. So for example, I could use this Let's increase the
width of the stroke. I could use this when I'm drawing or creating a project for a coloring book if
I only want outlines. But for me, more
often than that, I draw without any outlines. So we can also start by going to the color studio and then just choosing color
from your swatches. U and then you will
have no outline. And if you want a line, you can select this
use line symbol so that you can also
draw with an outline. Right now, both of
them are selected. You will recognize that
something is selected by saying that this gray background of
the icon changed to black, that means that it's selected. If I don't want an outline, I just deselect seline. And then another important thing that changed is the auto close. There's a whole menu
of options here. The first one obviously
means that there is no Autoclose then
there's close near, close far, and close always, which can really make your
work very efficient sometimes. So auto close basically connects the start and end points of stroke automatically. And before this auto
close changed behavior and you really needed
to come very near. So this will be
the second option close near to close a shape. And oftentimes I failed
to close a shape, and it was again another
thing that frustrated me. Right now, you can, for
example, choose close near. And you will have to
again come quite close. You see there's a small red
selection that tells you, Okay, this auto close
will be recognized and the shape will be closed.
So now it's closed. But I don't think I'll
be using this option. I think I'll go straight
to Either close far that you have
more wiggle room. You don't have to go super duper close for the shape to close. Was a small mistake there. Let's do it again. You
don't have to go super super close and the shape
will be still closed. Or clothes always is very cool. For example, if I wanted to
draw the wing of the pegasus, I would just go like this. And here, I just let it go
at it closes automatically. This is exactly what we had
before the previous update. So if I was drawing this cloud, I would start somewhere
outside of my canvas. Sorry, that doesn't look pretty. But I would just draw
what is essential without wasting my time to go all the way up here because
this doesn't matter. The illustration will
be cut here anyway. And now that we finally
have this close always, I think I'll get
back to it and I'll just get outside of the canvas, draw my cloud, release it, and everything is
closed automatically. If I wanted to draw
this tail, the same. Sorry, this doesn't look great. Depending how you like to work, you can choose among
all those options. You also don't have
to close it off. You have to switch it
off if you're just drawing with the stroke,
so just with the line. Personally, I would
recommend that you either choose close
far or close always, and I think I'll stick to close always because this
will just snap. Look at this. This
will just snap so fast and have me save so much time. I just have to make sure that the whole film selection
is where I want it to be and everything snapped in a
very pretty and fast way. So those new auto close options
are much more intuitive. They will give you
the ability to create more natural linework despite the fact that you're
drawing with vectors. You will have
better control over your style after all those
pencil tool updates. And the new Auto close will give you basically better shape
building capability. And the fact that
smoothing is off, this is, I think the best
news will mean that your vector illustrations
will feel less mechanical and you
will be able to embrace some more imperfection in your perfect vector
art, so to say. So what do you guys think about those new changes and
about the update? Let me know in the comments
or in our Facebook groups, what you and if you found
this video helpful, please give it a like and make sure to
subscribe to stay updated about any affinity news or new affinity tutorials.
Thank you for watching.
21. Task: Botanical Poster: Okay. Now we move back
to our home page. What we have so far
is a whole bunch of different flower assets,
leaves, different vases. We also learned how
to create assets in Adobe fresco and import them
into affinity designer. We played a little bit
with blending modes. But the big question for this
entire course is, so what? So what that we created
so many assets. I've mentioned
before that one of the biggest advantages of using vector assets
or assets in general, they can be ster to is
that they will help you save a lot of time
and you can use them for actual products. I wanted to show you
one example of how I can utilize my
botanical illustration. So for this particular project, we will be talking about using your work so that then
you can use it for print. Those are examples of
botanical posters and even one really sweet
botanical postcards that I actually
created in procreate. I printed out those
beautiful posters in through my red bubble shop. And then I used it basically
for my branding as a backdrop when I was creating my online courses so that
my studio looks nicer. And those postcards, I also used them quite a
lot as thank you notes. I don't know if you can
see it through this video. The colors are very saturated. We will also talk briefly about color profiles
in the next video. They actually look prettier than they probably
look in this video. And the goal of our project is going to be creating
such a botanical poster. I already created
one dummy poster, and I will be teaching
you exactly step by step how I
created this poster. You can take exactly
the same composition. And if you were following all the practice sheets with me, you have all those assets. I mean, the flowers
and the leaves and the vases already saved
up in your asset studio, so feel free, for the sake of practicing this
botanical poster, illustration, feel free to
follow exactly my composition. One friendly disclaimer
to not sell this design. This is my unique
composition that I created, and I would kindly
like to ask you not to sell it over your PODs or to present it to potential
clients that they are available for sale
because they're not because it's
actually my design. But for practice
purposes and also sharing in social
media and tagging me, naming me as the source of inspiration for this
botanical composition, then you can absolutely do that. Then I also wanted to show
you my own red bubble shop. For example, this very design, I already uploaded it to my
red bubble so that I can also see better If
things look good, I have sorted out all the other. There's a bunch of categories, so I sorted out any
other categories like backpacks or mugs
or shower curtains. I only focused on prints, posters, and I really like
this notebook design. I left it ticked as well. Even if you're not printing out your designs the way I
did with those guys here, you can still take advantage of this whole red
bubble interface. It's all I mean, I checked it you're allowed. Even though you're taking
the photos from Red Bubble, you are the author
of those designs, so you can have
easy mockup photos, which you can use for
your portfolio website. When you go to the
respective design, you see all the products that your design
was applied onto. For example, for the
spiral notebook design, you can just go to
those three dots menu. You can click on those
three dots and download all the images or view
the product page. Then you can see what the
end product would look like. I'm only showing you
my red bubble shop because I have a good
experience with them. I didn't sell myself
lots of designs. I think My all time profit from red bubble is
something like $3. So I personally don't recommend it as a reliable
source of income. But I did print out a bunch of things that
I created myself, and then I used it for
my website portfolio or to give it as
gifts to people. And also to see whether my designs make sense
on real products, and I just treated myself. I think I even
have a discount as a creator when I opened
my red bubble shop. I don't recommend
any particular one. There's other PUDs. I actually removed my shop on Society six because they changed the rules of
having a shop there. I think they added some extra
costs for the creators. I don't recommend them at all. I think Redbubble is quite cool if you want to
test out your products. Then another goal of our
botanical poster project, is to show you why we spend so much time
creating those assets. The biggest goal is to show you that using assets is super fast. It will save you a lot of time both for client work or
for personal projects, and all the elements
that you created, they are still very editable and they can really come in
handy in your creative work. Now that we discussed our
final project for this course, let's move to the next video
where we will be setting up our document for
the botanical poster, and we will plan out our
botanical composition.
22. Poster: Planning & Composition: All right, so we start working
on our botanical poster. I already created
a new document. It's going to be 50 by 70 centimeters in
RGB color format. When you create your document, just remember to go to
the Hamburger menu and to click safe as to save it
somewhere onto your storage. So I'm just going to name it as botanical botanical
poster number one, safe, and I will use the same extra exports
folder that I created. Previously. To create our
document just as a reminder, we hit new new document. I also have a whole
products group over here. If you want to create a completely new category
like a pre set, you have to choose the
second icon with the plus, and here you create
a new category. Then the design that you create, if you want to add it and
populate this extra category, you select the first
icon with the plus here, and here you can scroll to select the category that
this should lend into. For our preset, we need to choose document
units, centimeters. I am much more used to
centimeters than inches, but feel free to use any other dimensions
that you might need. Maybe you have a different
POD shop in mind. Maybe you already know that you want to create
postcards, for example. And you need
specific dimensions, then you don't have
to do 50 by 70, or you can just follow along and do exactly the setup
that I have here. I stick with our GB. You might not see that, but all those posters
that I printed out, let me show you one more here, the poster Here, the bigger one, the paper is very thick
and nice, by the way. The colors were perfect, and everything was in RGB. In case of doubt, you can
also go to Red Bubble. They have a special article about designing in
CMYK versus RGB. I will also link this
article somewhere in the class resources or
course description. Or you just go to Google
and you type in red bubble, CMYK, RGB, and this article will pop as one of the
first search results. They tell you the
obvious things that you are a little bit
more limited with CMYK, but the printing outcome will be more reliable,
which is true. But on the other hand, RGB, which is for screens, you can then use it very nicely to your
website portfolio. So if you are not
planning to print it out, I would stick with RGB. Plus, I already printed out designs that were in
RGB through red bubble, for example, and I was completely happy the
colors were saturated. And I had no issues at all. That's why I would recommend
that we stick to GB. Then also out of my habit
under margins and bleed, I set a bleed of half
a centimeter here. We're going to go with
5070 if you're with me, create this new
document and hit, and this is how we would create this completely new document. But because I
created mine before, I'm going to hit X and
close without saving and go to the documents
that I previously created. So this is the illustration
that I created before as I was preparing
to record this course. And I like this
composition so much that my project for you will be basically showing
you step by step, and I will recreate
this botanical poster, which might end up a
little bit different because this is how it is with assets and with
spontaneous work. It might be similar or it
might be slightly different, but it will be my a point
of reference, so to say. For our composition,
I suggest that we design a poster
with a tabletop. There will be some
wallpaper or plain wall behind our composition. We will also choose one of the vases for our
botanical composition. The best part in the next video, I'll will show you how
I'm just dropping. Different assets that we
created together doing all those exercise
sheets together, and I will be building my
botanical composition. On top of that, well, I want the goal of this course to be learning vector tools, how to create assets
and how to use them. I have a whole
bunch of resources about botanical
composition in general, I don't want to repeat
myself too much. I have a few other courses
that target procreate users, where the principles of composition can apply
to any software. They can apply to working simply in your
physical sketchbook. Right now, I can also summarize
those things for you. I have maybe switch off my iPad. I also have a free
YouTube videos about botanical composition. I will link those as well so
that you can have a look. I have written ages ago, blog post, which is still
very, very popular, especially on my Pin trust, titled Botanical Composition
and digital Illustration. In this article, I
am again summarizing my tips for creating well balanced botanical
compositions. Well, this one will
also have a vase, but the other principles
are the same. Namely, I allowed myself to do a few messy sketches
in the sketchbook. But those are all very,
very simple ideas. I recommend that you have some a bigger flower like a
star of your composition, and you have middle flowers. Next, you also have
smaller flowers, so you have a variety
of different sizes. This might actually sound familiar because I
was talking about those principles in my
first assets course for affinity designer. When we were drawing
hand drawn vector assets in affinity designer. Also in the Ds course, when we were doing the altro
repeat Ds pattern together. The, the same principles have different sizes when it
comes to your assets. Maybe have one star, have a few different shapes. Not just round flowers, but include flowers that are
a little bit more pointy. Maybe look more like triangles
or rectangles and squares. And then always include some fillers and use
arrows to indicate the flow of your composition in particular for the leaves
or for the stamps. I have another example here. Those are very easy thumbnails. But this is all it takes. You start with this and
you end up with that. But a little bit of
planning goes a long way. I create it, for
example, as I was preparing for our project, one, two, three, four,
different thumbnails. I set the table line, which is not exactly
in the middle. It's a little bit more below. In the middle, I have
different vases. This one is a little bit longer. This one is shorter,
this one is more around. I was just experimenting
with different shapes. Big flowers, middle flowers, fillers, and arrows
for some leaves. This composition, for example, has one star flower, which is not exactly
in the middle. It's a offset to the left. Then the leaves don't go up. I indicated with the
arrows that I want some cascading
leaves that will go more in this downward direction. And this composition would
be a little bit longer with two starve flowers, one round and one more pointy, maybe like a tulip,
and most of the leaves will go towards the
upper right corner, and there will be a few
more fillers that will go more towards the left
downward corner. For my sketches, it
doesn't matter if you do those sketches in Procreate
or in your sketchbook, I use at least two different
colors. You can use more. I make sure I use
different shapes, and I use a lot of arrows to indicate the flow
of my composition. This is the rough summary. I can also show you very quickly how you can
do that in affinity. That would be your next task to work on your sketch
in affinity because I also want you to make yourself more familiar
with affinity tools. I like to sketch in
the Pixel persona, so I go to this
affinity designer icon, and I select Pixel. And then here we have
the paint brush. And we choose the color
not on the fill side, but on the stroke side. For example, I'm going
to choose this pink. If you've taken my
previous classes, you know that I like
the acrylics category, which is completely for free. I will not be
encouraging you to buy any extra brushes because obviously you really
don't need it. I always always like to use
the met acrylic 02 brush. You can adjust the
size over here. And this is how it goes. You start by positioning the table line for
your illustration. Then I like to switch color. By the way, we made
the first line, and we created a
new pixel layer, which by default
is called pixel. It also has this little
icon for pixel art, which is this little
checkerboard. I stick to one layer unless I want some elements separately and I want
to move them around. But one layer is
completely fine. Then you can draw more
or less a placeholder for your vase and
you can already indicate the shape if
you want it around. Or a little bit
more rectangular. Then I usually draw some arrows. I want this composition
to look more or less like this and I tried not
to keep it too symmetrical. Then I swap the color again, maybe something more orange, and I know that I want one
star flower over here, and a slightly
smaller one there. And another middle one here. I'm going to change the
color to this hot pink. I knew that I want
some berries here. Se that I do not position everything exactly in the
middle of my composition. I wanted a few berries here. Let's go to a bit
of a bluish color. I knew that I want
some fillers there. Finally, I choose a darker color and I still think
about the arrows. I still think about the flow. This is where I
could, for example, do this on a separate layer. You go to the layers panel, you hit plus pixel layer, and now you're on
this new pixel layer. Now I can draw again
my arrows separately. I just want to see if
there's a good flow, it's going to go here, here, my cascading
flowers there. Yeah. It does look well balanced to be
and it's all Again, I guess a happy experiment. I'm happy with how it is, there's going to be a shadow. I know that my vase will be
positioned in the middle. It doesn't always have, for
example, in this postcard, it's a little bit more to
the left because I also have this extra element with
the fruit with the pairs. But I want some of this to
be centered like the vase, but then the rest of
the composition will not be perfectly centered. Because the arrows are
on a separate layer, I can then switch
off the visibility, but I like how it is, so I'm just going to
grop it and keep it, go back to the designer persona, swipe to the left, rename this group as sketch. Change the blending mode to multiply and lower the opacity. So this will be our preparation. My original illustration is just there for me as a
reference point. You can also take a screenshot from your social media
or from your website. For example, from your
Instagram account, and then through this
place menu here, you can place a screenshot
from your portfolio. Then as you are choosing the color palette for your
botanical composition. You can use this eye
dropper here and you can sample the colors
from your website or from your social media so that you end up with
a color palette for the spontaneous
project that will be consistent with your
branding basically. That's another trick that
I wanted to give you. Do we have everything? We
created our new document. It's in RGB. There's a little bit of bleed. And we worked on our sketch. Prepare this sketch stage very thoroughly because then
your work will be easier. Again, have a look
at my YouTube, have a look at my blog, and refresh the knowledge from my previous online courses, and do the rough sketch for your botanical composition
first as your task. In the next video,
we will be setting up the entire background
for our composition, and we will be finally using our assets and dropping
them onto our document.
23. Poster: Designing With Assets: We have to start building our illustration
from the background. First, from the rectangle tool, we choose a simple
rectangle and we start drawing a rectangle. By default, it might
have a stroke, so we flip it up and I'm just
going to sample this very, very light green color, positioning it at the back. Because I have
magnetic snapping on, I will be able to snap
it perfectly into place, taking into account this bit
of a bleed that I set up. Say the guiding lines
they have shown me that Everything is nicely positioned
and it snaps into place. Can always zoom in to make sure. This is my background. You can also rename it as
background, you don't have to, I'm going to lock it so that
it's not moving too much. Then we create
another rectangle. I'm going to already change
the color to this yellow, and we will we will
be positioning it to create our table. We drag it down. What
I like to do is I like to then select this table cloth
area with the background. We go to the shape
builder minus, and we will be removing
this unnecessary bit here. And we will lock it as well. You can also rename
this to table, wall, whatever is quick so that you're able
to differentiate. Since this is my background, I'm also going to
group it so that it stays out basically. Now the fun part is
choosing the vase. We're going to our asset studio. This is my favorite part. Obviously, I'm going to choose this vase for this composition, but you can insert it,
go to the move tool. Maybe change the color to
something contrasting, even black for starters. You can also put it on
top of your composition. I mean the sketch
that you created, and you can see if you like it. This would be my vase, but what if I want this
vase, for example? Of course, you can
change the colors. This would also be nice. Maybe I'll experiment with it and I'll choose another vase. This is the time to
make your choices. But I think I'm
going to go back to this original vase
that I wanted to see. If you want to clip
out anything that is outside of the Canvas, you just choose clip to Canvas and then you
can see things better. For example, I can
position this vase, make it a little bit bigger, switch off the sketch and also see depending
on the shape of the vase if it doesn't
go at a weird line, so to say with the table. I think this will look good. At the same time, we can choose an ellipse and create a
shadow underneath this vase. I'm going to make
it a little bit lighter and I will change the
blending mode to multiply, and I will reduce the opacity to roughly half and p I will
position it underneath. Select my vase and my shadow, go to the alignment
tool and align center so that I'm 100% sure that
everything is in one line, and I can also grip it. D. Step number one,
the background. We have our rough sketch here. You can also improvise if
you don't need the sketch, or you can even put
the sketch to the side of your Canvas and
just experiment. Then we have our vase and we can start
working on the flowers. Normally, We were discussing a bit those
compositional aspects. Normally, I start with the
stars of the illustration, so I start with
the main flowers. Now there's nothing that I
can tell you, basically, you can just choose
whatever you want, or you can go to the
complete flowers section. This is exactly what I did
for this sunflower guy here. So I have clicked on
it, inserted my flower. Obviously, it has to
be behind the vase so that it looks as if
it was in the vase. I placed it here and I
didn't overthink it. The whole composition
was done for me. I already have the main flower, I have the stems, and
I have the leaves. Why not make things
easier for yourself. Then I also like
those berries that we created when we were
doing our exercise. I also added in those berries. But I flipped them horizontally. I also have to remember to
position them behind the vase. But I think I wanted them
in front of the sunflowers. Let's switch off the sketch. This is how I added them
in. That looks good. Now, you can also recycle, so to say, part of your assets. They are not set in stone. For example, this little leaf here is in front of the vase, as well as this barry here. I'm going to find
those two elements. Going to open my layers. You can also click on this leaf. Drag it out, and then
click on this barry here. And also drag it out. This is this flexibility
that I was telling you about that your assets
are not set in stone. You can still manipulate them. I'm going to group them so that it's easier to manage them. Then I have the sleeve, I can still rotate
it nicely or move it so that things look better. Just because you
created an asset, does it mean that it
has to stay this way. You can change its size, you can change the
position of the leaf. For example, the leaf, I could rotate it
a little bit more. On top of that, I altered
those assets even further. Namely, I cut some
circles out of those leaves because I thought it would look
really interesting. Now, the way you're
going to proceed, you will just click
somewhere else onto your Canvas so that
you have a clean slate, and then you tap on the element that you would like to alter. Then we go to the
rectangle tool. We draw a circle, can also just make it white
and we have to bring it up. I wanted to cut it out exactly in this
position so that part of the stem is visible behind because it
at some nice depth. Keeping one finger on
the screen so that the circle is a perfect circle. I will position I
will be positioning the circle where I want
it, and then let's see. It's not the clipping mask. So we have to go to the
base of the sleeve. We select the circle we want
to cut out and the leaf. Then the fastest way
is to go to the move, bleion operations, subtract. Yeah, I added a few more cutouts on the rest of the leaves, and I also created a copy of I wanted basically
an additional leaf. So I'm going to create a copy directly from this leaf
to fingers on the screen. And it can stay the same, and I think I liked the fact that this cut
out was at the bottom, but you can position
it where you want it, so it has to be
underneath this barry. We will be talking
about the contrast for illustration in a second too. But if you already see that something should stand out more, you can click on
the color affected, go to the color studio, and maybe make it a
little bit der so that there's a better
contrast in general. This could also be a little
bit der, this green. I will also choose the color by tapping this vase the color of this vase to this
lighter purple. This color is applied so
I can see things better. Now to check the contrast, I go to the navigator studio. This little icon here will
give us a gray scale. I can stay in this gray scale
and then tap this color. This navigator
preview will still show you the colors
that are involved, but all the rest on your screen will be in gray
scale. You can also zoom out. Keep this color.
You know that it's green because you can also confirm it here
in the color studio, and then you can make it
a little bit darker so that you're happy
with the contrast and also this half of the leaf could be a
little bit darker too. So that the contrast is
better. Yes, I like it. You have to switch it off by
clicking on the cycon again, and I'm really
free styling here. You're dropping your assets
from your asset library, but it's not set in stone, then you can change the colors. You can add an extra elements. You can cut out and
manipulate other elements. For example, this berry, I don't want bow like all
of them to be pinkish. I will select this
one berry and from the HSL sliders menu, I will move it more towards being a little bit more peachy. Then I'm going to
select this one here, and I'll make this
one more purply. So I added some extra dimension here to this original
berry is pink. This one has more purple and
this one has more peach. That really looks
nice. No, it's a joke. That's not enough.
We have to add more. Now, another star color I wanted to be
behind the berries. Yeah, it's all a
happy experiment. You go to the library and
you see what you like. I think I chose
this flower here. Just make sure to go
to the move tool. Yeah, it's the same. See
the contrast wasn't good. You can sample the
colors from from where, from your portfolio or
from your social media. I will also switch of maybe
the blending mode to two. I'm going to select
all those petals and bring it back to
normal blending mode. Then we did this exercise
previously from the move tool. You can also go to let's
select all those petals. You can go to bulion
operations and choose divide. Then keeping the selection
one finger on the screen. We remove those outer
petals from the selection. We only selected
the middle here, so I'm going to group
it quickly right away so that I don't lose it
and I will drag it out, change the color
to this hot pink. L et's see is it the same, then I will make it a little bit brighter
here in the middle. Now this flower will
be behind my berries. I'm going to drag it in between the sunflower and
the berry flowers. To say, they look
like berries to me, and I will position everything. So it's not going to
be exactly the same. Now this extra flower, you can go back to your sketch and bring it all the way up. But or you can improvise your sketch can be
just your starting point, so to say, you can
roughly follow the arrows and you can
improvise as you go. I wanted to add
those two flowers that look a little
bit like stars. Those flowers are more round. Those are a little
bit round and pointy, and those two guys are a little bit more
pointy if it makes sense. I'm trying to stick to this principle here that I
was briefly talking about to have a variety of shapes
that not everything is super round unless it's supposed to be very
round on purpose. Then it's fine. Let's look for the flowers that I want to use. I think
it's this one. I think another variation of
this flower that I build on. If not, I will do
this with you guys. Yeah. When I was building
this illustration, I improvised and I did a few
alterations spontaneously. The asset that I pre created, it was just my starting point. Next, I opened this
flower and I made a copy. Three that's menu duplicate. Then I chose the duplicate
that is underneath. I changed its color. You didn't catch the color,
t's change it again. Then I positioned it somehow randomly
behind this red shape. I went to the alignment section, align center, align middle, and I also made a duplicate of this middle
part and changed it to white, and I adjusted its size and
also placed it in the middle. That's how I built this flower. Next, I created a copy, and to build this other flower, I started with this pink shape. I created a copy. I chose the copy that is
underneath, changed it to white, made it a little bit bigger, and then I tried to rotate
it so that it looks nice. Selected everything,
align center, a line middle, that looks good. Next, I changed this to white and I made
immediately a copy. Right now I have two of
those white elements. I changed the color to
somehow darker pink, and I rotated everything. I got rid of this white circle. This, you can also
make it bigger. I said, probably
this illustration will not be exactly the same. The petals that are around, I made them slightly bigger. You can select all the layers, alignment, align
center, align middle. Now those two flowers. We can position them
into our composition. Of course, they're
not exactly the same because it will
be difficult for me to replicate it in
100% the same way. But I wanted to show you
that I had a lot of fun experimenting with
those assets that were already in my library. This one we can put
a little bit here. Make it a bit bigger, but I still want to see the
outline of those leaves. Next, I wanted to add it
in some extra flowers because I wanted to keep
the pink bright colors. The nice green leaves can be a very good background
to my composition. You can still put the
sketch on top and now we can go to the
category of leaves. I chose basically just
this one leaf and placed it behind my vase
actually behind everything. The first leaf, went here. I made it a little bit bigger than the leaf that is on top. Then immediately two fingers on the screen, I made a copy, which I placed under that original leaf and I tipped it more to the side because
I knew from my sketch, I want to have a few of those flowers cascading
in this direction. I wanted those leaves, which will be on
the left side to be a nice backdrop for
those filler flowers. Now we will deal
with the fillers. For those green leaves, I'm going to group them
because otherwise you keep adding all those elements
and your layers, the number of layers is growing. I tried to keep track by
grouping everything nicely. Then I was looking for a nice simple flower
for my fillers. It could be this
one, for example, this one is really cute. Ultimately, I wanted
something a little bit more geometric and I wanted
it to be much brighter. The colors from my asset study
are just a starting point. Sometimes they match
because I'm choosing the colors that are my
favorite colors anyway. But you can change them right away so that they fit
your illustration better. I'm going to make this
middle a bit bigger because the flowers themselves will be a little bit smaller, so I want it to be obvious that there's some a middle
in those flowers. And now it's just a copy paste
to fingers on my screen. I'm making them also
a little bit smaller, I rotate them a pa, and I create a few copies. Sometimes I make
them bigger again, I rotate them, then I
make them smaller again. I rotate them so that
they don't look the same. This will look nice. It sticks out a little bit outside of the vase and it also goes beyond to touch
those green leaves. The last one will be the
smallest, let's say. Maybe one more because
I really like how they look on this green background, and I'll see if this is too they are a little bit too
much in line right now. I'm going to remove it and maybe change their
positions a little bit. But all of them are rotated and they are scaled
up or down so that they're not the same and then
all those filler flowers. I'm going to group them and
rename them as my fillers. Next, I thought when I was creating this
illustration previously, I thought that this
already looks quite nice, but I would like to
have something non invasive that is still
in the background. I opted in for those
super simple leaves. The ones we created together, this one I created
for another project, and I basically used them as
fillers for my background. I went to the Asset studio. I looked for those
super simple leaves. My starting point was
actually my background. I sampled the colors from my background because it
was also the slight green, and then I played a little
bit with the brightness. I'm going to go ahead
and sample it from my original illustration
to save some time. I also wanted them to be
a little bit more bluish, and I want the middle
of those leaves also to be nice and bright. So that those leaves
are not too heavy. They're supposed to
fill in some gaps, but I don't want them to feel too overwhelming,
overpowering the composition. That's why I kept the
color very light so that you see when they're
behind my main elements, they are not competing. Before I position the
leaves that stick out, I placed a few really
in the background. So that they fill in
some gaps. One was here. You can also change their
size in their shape. This looks quite nice. It's not exactly the same,
but I'm going to keep it. Then I was using
them up remembering my sketch that most
of my arrows were going in this upward direction. Switching of the sketch.
The sketch is just to have a nice starting point and then you don't have
to use it anymore. You can just improvise. Zooming in and out. I'm actually not going to be looking at my original illustration and I will see what I come
up with spontaneously. Maybe this one should also
be a little bit pointy, but not in the same direction
like the leaf above. In case it switches itself
back to the node tool, make sure to go back
to the move tool. That will look good.
From another project, I created this leaf shape. This will look very nice and I'm also going to cheat my way. I can also select
one color and from the move to go to fill color. See it selected
only this one color and select one of the colors
that I used previously, and then this color
from the move to, same fill color, and it
finds the same fill color. Now I can choose this other
color. Is this the other one? Yeah. This is actually a stroke. You can do the same
on the stroke. You just go to
same stroke color, and we will change it to
this super light sage green. This is how fast you can
recolor your elements. Those guys here, those filler
leaves in the background, I'm going to group them and
this extra filler leaf, I will bring it
all the way down. Now from the move tool. I think I'm just
going to use one. I will position this
leaf in my background. I think that looks nice. See this sunflower, the petals are in a
multiply blending mode. I really like this effect. I think it looks very original, so I'm going to
leave it as it is. I think this is it. This is my composition. Yeah, it looks the
same slash similar. I wanted to save a
little bit of time by trying to replicate the
steps for this composition. But I am very excited to see your botanical compositions
because now that you have this entire
library of options, you can build basically
whatever you want. In this video, I wanted
to demonstrate that the library is only
your starting point. You can still add
in new elements. You can make copies very fast. If you have ready
made compositions, like in the case
of the sunflower, just Don't be shy. Just drop it onto your
document, use it. This is why you were doing
all the work before. I know I'm talking here quite a lot trying to explain
things properly. But believe me, when I was creating this
illustration alone, I think this very step here took me 5 minutes or
something like that. It's not cheating
because everything was created by you anyway. So it's your original work. That you're saving a
little bit of time, and then you can mix
and match and you can have a lot of fun
with those assets. So join in the next video, we will be working on
some extra details and the beautiful, beautiful texture on some of the elements using texture
brushes in infinity designer.
24. Poster: Texture & Final Details: All right guys. In this lesson, we will be adding
some final details. I added in a very soft
wallpaper design, so to say that is so gentle
that you can hardly see it. I also added some texture
lines on my table cloth, texture and shadows on my vase, and that's pretty much it. Fort starters, I wanted to add this extra dimension
on the background. I found my wallpaper a
little bit too flat. What I do, usually, it's very automatic with
me is I grab a triangle. And I change it to
be at 90 degrees. Next, I get rid of the stroke, and I will pre select the
color that I had previously, but in general, you
take the color of your background and then
you make it darker. Then I went to the groups that contain my
wall layer and my table layer, and I clipped this extra
shadow onto the wall layer, and then from the move tool, I positioned it in
place so that there's a little bit of a nice
shadow in the background. That the wall is not too
flat if it makes any sense. The way we did also
with this shadow, which is underneath our vase, from the same triangle method, I will add this shape over here even though we can either use
a triangle or a rectangle. Let me actually show
you a rectangle. So I'm just going
to exit this group, click on the vase over here, back to the rectangle to. Now I'm going to
draw my triangle. And then what I did, I took the original
color of my vase, and you can either change the blending mode to multiplied or you can make it darker here. What I'm going to
do is change it to multiply because when
I apply my texture, the multiplier will also
work with this texture, so some of those dots will
be a little bit lighter. But the dots that are on
this multiplier shadow, they will be a
little bit darker. That's a nice trick. Multiply the same
color like the vase. I am clipping it. Now we can just rotate it
and from the move tool, you can position your shadow somewhere on your vase so
that it all looks pleasing. You might then also reposition your flowers a
little bit differently. For example, from the move
to I can tap on this flower, make it a little bit bigger, and I cannot explain it. It's just more pleasing
to my eye when it cuts a little bit of this shadow so that some of those
floral elements, they're not just in
this dark purple area, but also in this original
lighter purple area. I go back to my
shadow as a reminder. It's a multiply, but I think
it's a little bit too harsh. For now, I will
reduce it by half. As I add the texture
to the vase, I will see if I need to
reduce it even further. We have to shadow for what is happening underneath
the flowers. I will create another rectangle, and I'm going to use it to create this shadow at
the bottom of the vase. The easiest way to do that because it's basically
going to be the s, it will have the same properties like the shadow that
we created here. I'm going to go to the shadow
that is already created, three dots menu, that's a
handy little trick copy. Then I will move to this
new shadow rectangle. Again, three dots menu, and then paste style
and then it will basically paste in the same properties
for this rectangle. Now I will scale
it a little bit, change the dimension
su dimensions and positioning position
it where I want it. Now we have all the shadows. Before you add in any
other extra details, I recommend that especially
at this stage where you added your main elements for your composition and
all the shadows, the shadow on the wall, the shadow on the vase, and the shadow underneath
the vase on the table. I recommend that you go to the navigator and change
everything to gray scale. See, for example, this is
blending, this is not good. We cannot differentiate here well between the
vase and the sleeve. Without exiting this gray mode, I will select this one green fly green color and make it a little bit darker so that there is sufficient
contrast between the two. Now I see I also have to change the colors
for those veins. I will use the same color
and just make it darker. I forgot to group it, so I have to do it again. I will change the color
for this entire group. Then again, from
the color studio, from the HSL sliders area, I will make it
maybe a little bit darker so that the
contrast is better. Since I'm at it, I can do it
for the rest of the leaves. For example, this leaf is supposed to be
underneath this leaf. I wanted to be a little
bit more in the shadow, so I will make it
a little bit der. Then I think it would also
look nicer for the contrast. If the lines on this
leaf that is on top, where darker as well. Again, something is not
grouped. So I'm fixing this. I'm applying this new color and I make it a
little bit darker. Now I think things look better, so there's better contrast
between my vase and my leaf. Here it all looks good. This stem also has
sufficient contrast. Try to zoom in and zoom out. There's one petal that sticks to the background and maybe
doesn't have enough contrast. But from where I see it, maybe you can see it
properly in the video. It's still okay. My
background leaves. They're light enough. It's a lighter green
color applied, but they are still visible. They're not entirely merging. This looks okay, even though I could still select this green, make it a little bit darker. Yeah, now the contrast
is even better. Those guys, those leaves, I adjusted them previously. Maybe the middle of this flower. I can make it a little
bit lighter, see. The contrast improves, I
would even say dramatically. It's a subtle difference
because when you go back to your navigator
and you go back to color, it looks as if you didn't
do much, but for example, we adjusted this
leaf and in the end, it's more pleasing to the eye. Hopefully, when you
print everything out, it will also translate
to a good print. Okay. Texture. I think everyone who's watching
this video is like, Come on, do the texture already. So how did I make this
texture on the vase? There's a bunch of
vector brushes for affinity designer that
come absolutely for free, and they're absolutely
sufficient. In the meantime, I'm going
to go back to my home page. Hamburger menu and it safe
so that no progress is lost. I've mentioned at the
beginning that when you register with affinity designer, there are a few brushes that you can download
completely for free. For example, the Artista
affinity designer brushes, and they will be then
available from your account. Here, you will have
this download icon, you will be able to download it and once it is downloaded, it will give you the size of this download and
this green tick, which will be a confirmation that those brushes are there. Then when you go back to
the document view brushes. In your library of brushes, you will be able to find the
brushes that you downloaded. For example, those
artista brushes have really cool effects for
brushes for sketching, for example, but also
brushes for texture. And some nice shading. For example, there's
this nice spray brush. Now, the biggest tip that I can give you when you're testing
out those vector brushes is to switch to the vector brush before you
choose any of those brushes, and then to go to
the color studio, and then from the stroke menu, just to turn it into black. The vector brush
icon is over here. Color studio,
change it to black. This is where you can change. You see also the size
of your vector brush. Before I apply any vector brush, unless I really know it
intimately because I've been using this brush
over and over again, I test it out very thoroughly. For example, I see the
spray brush and I wonder, will it be a good
texture for my vase? I apply it and I already
see no this is no good and this brush is already
at its size limit. I'm going to go back and I
will look for other brushes. There is a super
nice hatch brush, which you could, for example, use on those leaves. I'm going to make it bigger. You can make this
hatch structure, and then you can
of course change its color and clip
it to your leaves. And I come at those
conclusions at what vector brushes I enjoy
using by testing them. Again, go to the vector brush, change its color to black
and first experiment with it by using it outside
of your shape in black color. Because once you know, huh, this is the effect
that I'm looking for, then you go back
to the move tool. You have to exit
your vector brush. I'm going to just stick it out here on top because
it's a random shape. Then you can go back to the
color studio, and then, for example, you can
take the color that you want and you can adjust
the color from here. You cannot make
color adjustments when you're directly
in this vector brush. That's why again,
my recommendation, vector brush, color
studio, start with black, just like before I'm
using the pencil brush, I do some test lines
or test blobs, the same with the vector brush. I have also a whole
YouTube video showing a demonstration for a children's book illustration where I'm using vector brushes and I'm explaining them in
much more detail there. With vector brushes, you have to experiment and test them out. Some of the brushes I
bought them, for example, this is the I'm not sure
how to pronounce it the Bazer body by true
grid texture supply. You don't have to
buy new brushes. For example, go to dry Media. This is completely for
free, and I don't know. Let's try this
charcoal dry brush, really see increase the size of this brush and start drawing. This doesn't look good, but to see what I mean, let's go back to the Move tool, select what you just created. This is all raster
texture on a vector path, but it's also
infinitely scalable. I have a whole article about the properties and the nature of texture brushes
on my blog post. I will also link it so that
you can read about it. I know it's raster. But it's on a vector path, the sin little line
that you see here. It retains vector properties. That's why I love
using those brushes. Then I can group this texture. I am out of the
vector bruh studio. I go simply to the move too. I apply this purple
color for the vase. I'm going to open the
vase and clip it in. I will position it
underneath my shadows, and now I'm going to
adjust the color. See, and this is how you
create those effects. Again, you go to
the vector brush, you change the color to black. Where am I switch this off for a second,
get completely out. You switch it to black. Of course, you can chos another
color, for example, here, green, if you know, you can already start
drawing in green. But the reason why I switched to black is that I
want to see things. Just like with our Adobe fresco shapes that we are creating, black silhouettes give you the best idea of the end result. That's why I really
recommend to get into this habit of testing out your vector brushes
in black first. Dry metes for free, I have a whole bunch of Franken Tune brushes,
which I paid for. I love them. Gua
super super nice. You can create gah effects. For example, take this a
little bit watery brush, and then do a few lines and then go back
to the move tool, change the color, clip
it to your shape, and then see for yourself
what it looks like. For this particular brush, I need to find it in the
library. It's also for free. When you sign up with your
affinity designer account, you can download those vector
shader brushes for free. They will be in your library. You can find them under
vector shader brushes, and this is one of
the noise brushes. I think it might have
been noise brush seven. Of course, I need
to make it bigger. The circle will more
or less show you. You can always change
it by the way. You can make it smaller. But first, maybe I go back
to my original empty vase. This is why I do everything in black because I can
see things better. That looks good, I can
make it even bigger. Again, I'm trying also to
go out of this shape and as evenly as I can to add
in this extra noise. This is the nose shape that I created with
this vector brush. I go back to the moto, then I clip it Underneath my shadows.
What else will I do? I will change it to the color of the vase
and I will make it darker. This is how I created
this texture. When you zoom in, you
will see also that this shadow layer is working
with this blending mode that some of those dots from
this noise texture are darker and the ones that are not in the shadow,
they are lighter. It's a very subtle
difference again, but This is pretty
much how it works. Now, let's work on the
texture for our table cloth. This is good, by the way, speaking of vector
brush properties. This texture here, I'm
just going to label it as vase texture so that I can
differentiate it better. You can still go to
the stroke studio, and you can adjust its
size and its width. So because it's
on a vector path, you can still work
on its properties. Sometimes you start
moving your shape, and then you cannot go
back to the original shape because the brush
went beyond its size. So that's why when I do this test block
in my black color, I already try to arrive at the shape that is my end
shape so that I don't have to change it here in
the stroke studio because especially
for bigger formats like 50 and 70 centimeters poster format is not
the smallest one. That means that even
those vector brushes will come at their
limits, so to say. It's better to do your test
and to already try to arrive at the size of your
texture as you wanted. Do. Now we go back to the table. Do you remember the steps? Vector brush, and then black. I wanted something painterly, so I go to the gash
brush and I will test out which one did I use? Maybe Dance. I think Dana 01. Ops, back to the vector brush, and I will be drawing a few lines for the pattern on the table
cloth for this illustration. This will be option number one
to already find the brush, which will be your perfect
brush. Back to the move tool. We group everything and then you have to clip
it into the table. Then from the move tool
on the stroke level, we change the color to the original color
of the table class. But in the layers panel, we can change it to, for example, to multiply, that it nicely merges also with the shadow and with
the rest of the table. If it's too much, then you
can lower its opacity. Multiply would be one choice. I also like those blending modes that make things lighter. Here the guage texture
is very, very subtle. But instead of multiply, you can also go for
either add or screen. I think it was add and color dodge a little bit too
intense, so I used screen. You see this nice texture. It's very, very subtle. I'm going to rename
it to table texture. Then I'm going to
make it invisible. I wanted to show you
one more technique. You can use the pencil tool. Make a test block. Maybe use white on the
stroke, flip the fill. Auto clothes cannot be selected
because we will be using lines and I don't need any stabilization and
from the stroke studio, I can make it a little
bit more narrow. This is a simple line without any texture. We can
start with this. We can draw the texture on
our table clos more or less. To. Then you can group
everything together. Change it to the original
color of the table cloth, go to the layers panel, change the blending
mode to screen. Now, from the move tool, we can go to the brush studio, and then you can experiment with using different
vector brushes. For example, I can
go to dry media, and I can see will
it look nicer? With the dry media, for example. Sometimes you have
to adjust the size. From the stroke studio, you have to make it a
little bit brighter. For instance, actually,
I like this quite a lot. In my original illustration, I use this squash brush. It's completely for free. You don't have to
buy any brushes. Also, those lines are created from the dry media category, also super super cool. So I think I'm going to keep it. I think I like it even more
than this one because it has this nice texture throughout
and on the edges, and it's a little
bit more visible, so to say, this one
is more wishy washy because it's a guash brush. So dry media texture. You can also take
your personal notes so that for future
illustrations, you have a few
brushes tested out. And for you to remember which vector brush
you were using, it's nice to take notes, so to say, on the group level
area for future reference. Okay. Move tool, I'm
tapping anywhere outside of my Canvas so that
I can see things better. Now I created this,
let's call it wallpaper, also using my assets. In my original
botanical category, I had a few details and
stars that I created. This one is super
easy. I'm going to insert it right away. But it's very, very easy
to create this shape. You basically need to go
to your rounded rectangle. It remembered my
previous stroke. That's why it looks
so weird that we're going to make the fill white. Make it super round. Then
we go to the move too. We make a copy. Tip two
fingers on the screen. They have to be
perfectly aligned, so we align everything center. Then we make a duplicate, and we make a 90
degrees rotation. It was a trial and
error, for example, for this one, I see the
distance has to be bigger. Now, I select both of
them. I make a duplicate. That's why I like to save
those things directly into my asset studio because
sometimes it was just a happy experiment.
I created this shape. I'm going to delete the extra, and then I built my
library out of it. I used actually another one. This one is built
exactly in the same way. You need rounded rectangles
and you need two and ellipse, a circle from the
rectangle tool. Then I made it bigger. From the move tool, I
went to hear the wall. We have our shadow there. I want to position everything
behind the shadow. I will put the
shadow as multiply. And take the original color of my wallpaper so that not the wallpaper the wall so that
I can see things better. Now what I did is, I took this shape, and I positioned it randomly
as if it was a wallpaper. Two fers on my iPad screen and I was just trying to spread them out evenly as if it was a nice vintage
looking wallpaper. That was also
something spontaneous. I thought that the background is a little bit too
empty for my liking. That's why I decided to
add this extra detail, which actually maybe is not
super visible right away. The toplict stopped working, then it's good to
deselect again, two fingers on the screen. I think my iPad is heating up a bit to be honest time to finish. Then I grouped everything
into a folder, and my wallpaper was
practically done. This is very optional. At a minimum, in this lesson, I would warmly encourage you to practice at the
texture on the vase. You can go even
beyond and you can add extra texture
everywhere all over, for example, the leaves. Try not to overdo it, though, because texture is also good when it's well balanced
and it's not too much. So always go back to your navigator as well
and switch to gray scale and see if everything
has good contrast. Then I would encourage
you to think of some a very light wallpaper, just to practice adding in some extra details
to the background. I would like to
encourage you to create the stable cloth
and experiment with using vector brushes for
your botanical poster. So now we have everything. It took me literally 15 minutes when I was
preparing for this course. Right now, I need to
explain a little bit more, but in general, this
process is very, very fast because the majority of our work was already done. For the class project, any of the botanical
illustrations that you would
like to share with me if you're taking
this class on Skillshare in the
project gallery, if you take this course over
Gumroad or my own platform, maybe you want to share
it on your social media or in our Facebook groups. I really encourage you to create as many beautiful compositions
as you can or as you want and to have fun with the
assets that you created and to see how easy it is to recycle the work that
you have done once. On top of that, we practice
adding vector textures. Remember again that to get
access to those extra brushes, the Artista brushes
and vector shaders, you will have to
download them from this interface when you register with your
e mail address. Also remember to
save your progress. C. Now we are done and
in the last video, we will be talking about
exporting our work.
25. Poster: Exports & PODs: So we created this
botanical poster with the dimensions 50
by 70 centimeters. I needed it for my red bubble shop because I wanted to maybe print
it out as a poster. In case you have
another POD in mind or a completely different purpose for your botanical illustration. Maybe you don't need
such a big format, and you will be okay with
a little postcard format. You can adjust it
to your liking. But I wanted to tell
you that because everything is in vector
shapes and vector design. Even with this vector texture, there won't be any problem
with your export at all. We export by going to the three vertical lines Hamburger menu and
we click on Export, and you probably know it from my previous courses
that we have an option, for example, to export as a PNG, JP, or as a Tiff. This would be the most popular
export files for print. I will stick to JPAC, and I wanted to show you that here under width and height, you will be able to
scale your illustration up or down and it will
not lose any quality. For example, if I wanted it for my social media or for
my website portfolio, I don't need 5,000 8,000 pixels. This was translated to pixels. I could, for example,
choose that the width will be 1080 for my social
media or for Pinterest. Then I hit Share to save
up this smaller export, for example, in my folders file. From here, I choose save to files and I can save it
to my exports folder. On top of that, we
can also scale up. For example, those dimensions, I can also save them up
from red bubble and I have the best experience
with my files for red bubble when
at least one of the sites is 11 than pixels. This is pretty huge. The export is being generated
one more time, so I could actually
say regenerated and it will have different size. Of course, the bigger
the dimension, the bigger the file size. But since it's pretty
much vector based, only the texture brushes add in to this weight of
the file, so to say. If we didn't use any
texture on our vase, for example, then this file
would be even smaller. We scaled it up and we chose 11,000 pixels
for the height, then we click share, and we
will also save it to files. Then I just hit cancel, and let's head to our storage. I wanted to show you first the export that we did
for our social media. I scaled our botanical
poster down, so I can tell that the
size is much smaller. Then when I click on this file, It still retains what's
it called its sharpness. It's a good quality
export there. The quality of this export
was not compromised. But what happens
when we scale it up and we blow up
the size even more? This is this
botanical poster one biggest with 9.6 megabytes. When we open it, we see it's exactly the same
quality of an export. Nothing is pixelated, and this
is what I am also writing about in my blog post
about vector brushes that, it's raster texture
on a vector pas, but you can recolor
it beautifully. You can still manipulate
it in the stroke studio, and when you're exporting here from the expert
panel in affinity. Even if you scale it up, so the original height was
8,200 pixel something, and we blew it up to
11,000. Look, it's okay. There's no pixelation.
There is no quality loss. It's exactly the same, but it's a much bigger
file that we can then use for our
red bubble shop. We want to upload,
especially to our PODs, bigger sizes because we will do the work only one time and
this bigger size will fit more products at the same
time without us having to upload different sizes so that they fit every
product perfectly. Also have the expert
persona here in affinity, but this makes sense
when you're exporting multiple files or slices
of your illustration. We're not going
to be using this. Again, we will export
through this export menu that you can access from
the hamburger menu. The biggest takeaway
is that because we are working with
flexible vector art, your expert will be
super super easy. The file sizes will
not be that huge, and you will be able to scale this design up or down
without any quality loss. I think this is the
biggest takeaway. We can create your design
one time and then you can resize it and
work on it further, and there will be no quality loss because it's all vector. That's why I'm such a big
fan of vector design. This is it. This was
the last lesson. We did a lot of work
in the asset studio, a, a lot, a lot of work. I really hope that you
will be able to recycle all those beautiful assets in your future illustrations
or for client work, and I hope that this will really speed up your entire process.
26. Final Thoughts: Yeah, we made it. Thank you very much for taking my course. We learned and refreshed a ton of information about
using Affinity Designer. This is also my very first
course where I am introducing Adobe Fresco and I'm
showing you how I like to use it together with
affinity designer. Both are iPads software. It was a no brainer for
me to try to check out and see what synergies I can create with
the two programs. I hope that you like
learning about it. I would love to see
your botanical posters. I am really really curious to
see what you come up with. For example, if you're taking
this course on skill share, you can share your botanical poster in
the project gallery. You can also show us your work in progress photos,
your sketches, how you arrived at your
final composition, or you can show us
a screenshot from your asset studio and show us the assets that you created
after taking this course. Then if you got my
course through Gumroad, you can share your
work, for example, through the social media,
like on Instagram, as usual, under the
Hashtag magical vectors, or you can find our
dedicated Facebook group for illustrators using Affinity Designer
and Adobe Fresco. You can definitely publish
your project there. It's a very, very
friendly group, and you can even
ask for critique and see what other people
think about your composition, about your colors, ask
any questions in general. I am also running a block
section on my own website. This is where you can read some knowledge articles
about affinity designer, surface pattern design, and digital illustration
in general. This is, for example,
where you can find my most recent article about using vector
brushes in affinity. I'm a big fan of vector brushes. And then if you prefer
a video format, you can go ahead and
visit my YouTube channel, where you can find extra free video tutorials
and speed panes, process videos and so on. Every now and then, this
is where I'm also hosting live sessions where you can ask me questions in real time. So hopefully, see
you on YouTube. Remember that you can
learn with me both on skill share and through
my gum road courses. Hopefully, see you
in my next class, bye bye, happy creating
 Weronika Salach, Art with MAGIC