Transcripts
1. Winter Cottage Illustration in Affinity Designer: Welcome to this series of fun project based courses designed to help you learn fast. I'm Veronica, a children's book Illustrator and affinity
designer expert. And in this tutorial, I will show you how to create a charming winter
cottage illustration using simple vector techniques. This class is perfect
for beginners and anyone who wants to level up
their vector skills in affinity designer. You will learn how to use
essential vector tools while focusing on two
powerful features, the gradient tool and
the transparency tool. By the end of this class, you will feel confident adding depth and lighting effects to
your vector illustrations, making them more
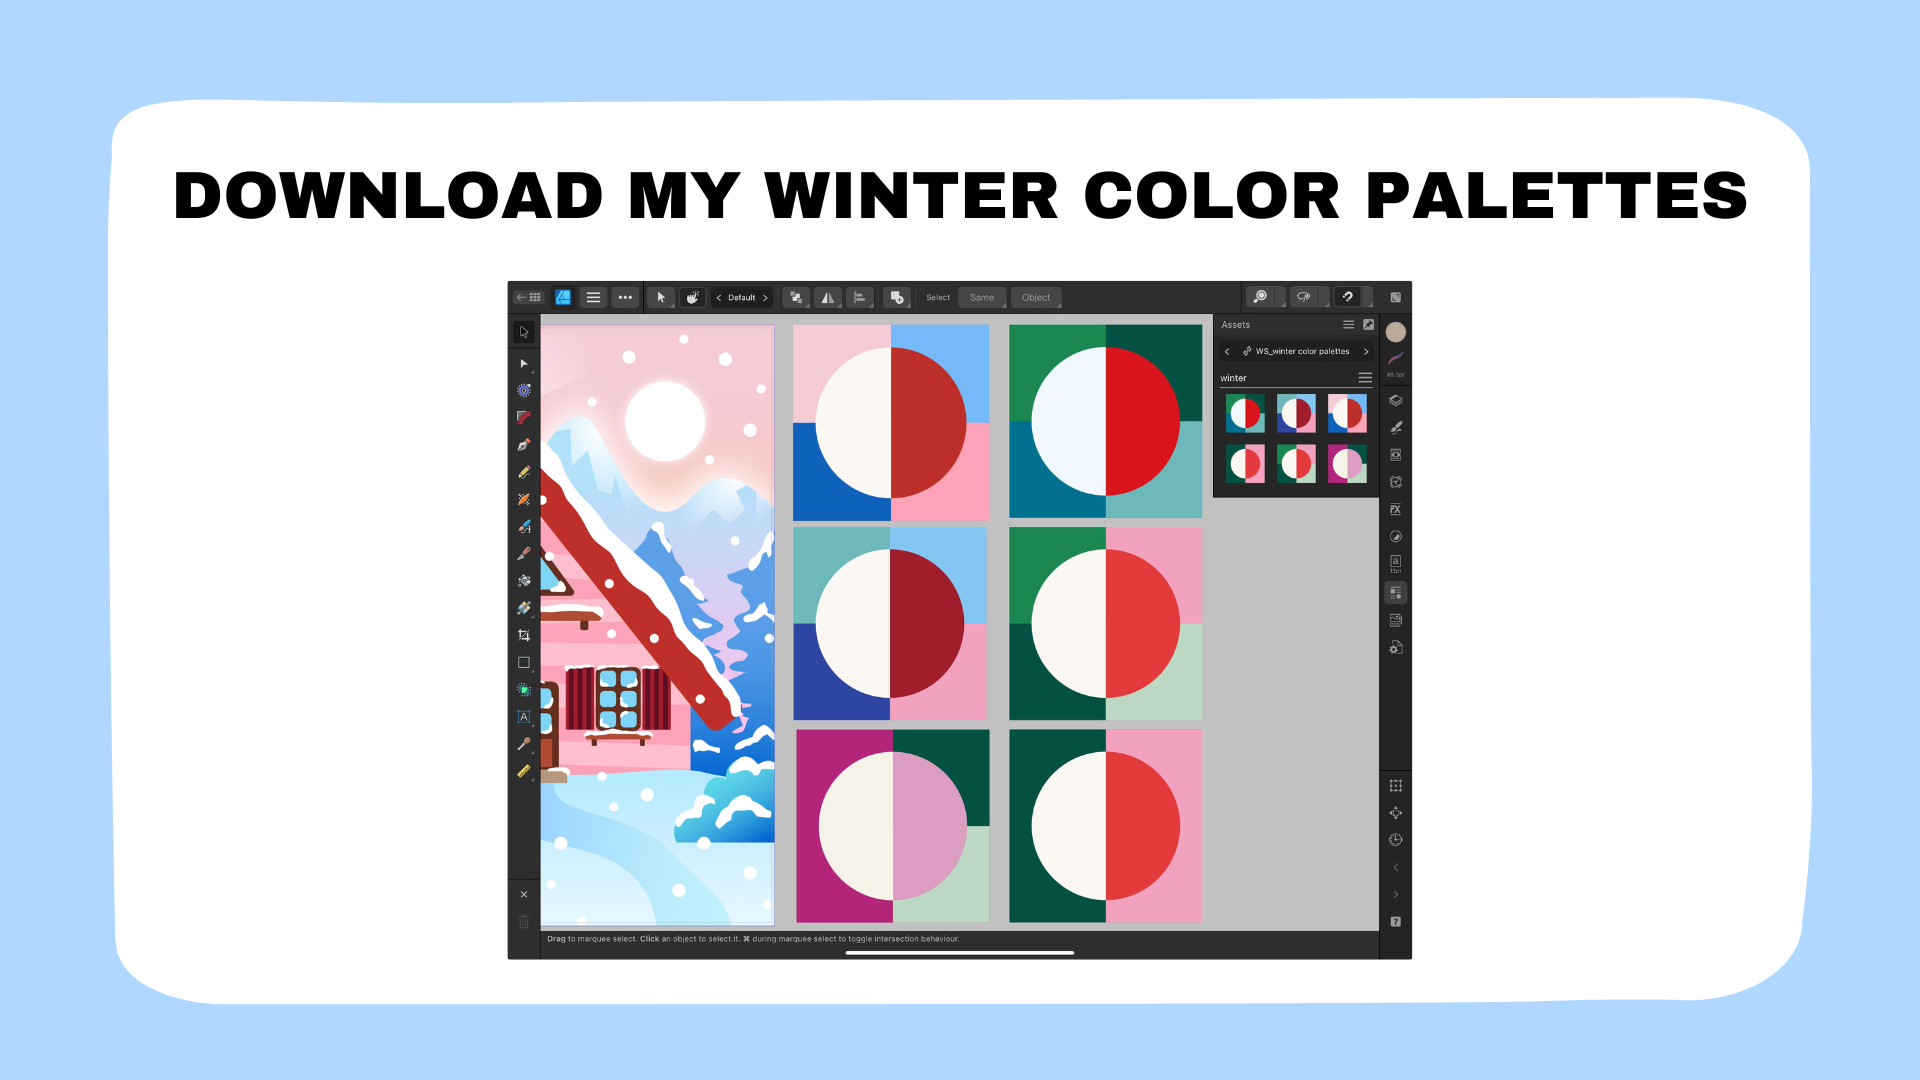
dynamic and polished. To make things even easier, I've included free color
palette resources so you can jump straight into
the creative process without worrying about
the color choices. So grab your iPad, open affinity designer,
and let's get started. O
2. Getting Started: Hello, everybody, and
welcome to class. To get started with this course, all that you will need is, as usual, your affinity
designer software and your drawing pencil. I am recording this
course in February 2025, and my affinity designer
version is 2.6 0.0. I'll be showing my
demonstration as usual in Affinity Designer
Version two on my iPad. However, you can definitely follow along regardless
of your version. Or you might even want to
draw on your desktop version. Please bear in mind, I'm a big fan of drawing
on the iPad. So in this course, I'm
teaching you as usual, a lot of useful hand
gestures for the iPad, and I think this will be one thing which
unfortunately won't be able to replicate on
your desktop version. The goal of this course is to offer you a fast
and fun project. To speed up your learning so
that you can become really proficient in illustrating
in affinity designer. Your task is to create at least one winter
cottage illustration in affinity designer and to
share it with our community. You can use any version
of affinity designer, and for an extra personal touch, you might even want to consider illustrating
a real house, maybe your own family house. We want to solidify
your knowledge of the most important vector
tools in affinity designer, and we also want to get confident using gradients
and transparencies. So in this course,
we will be adding in more depth into our flat
vector illustration by practicing using
the gradient tool and the transparency tool. If you're taking this
class on skill share, please upload a picture of your beautiful final Winter
Cottage illustration. You can do that in
the project gallery. Just remember you cannot
do it through the app. It's better just to do
it on your computer. And you can also simply just screenshot your whole
Affinity interface, and feel free as always
to share with us any of your work in progress because we always love to see those. And if you're taking
this course on GAM road, you could share your final work and ask for feedback
in our Facebook group. So that's one option,
or you can post your work on Instagram where we can leave
a comment under. Just don't forget
on Instagram to always include hash
tag in your caption, magical vectors so
that I can keep track and find your
beautiful final work. If you're looking
for further practice in illustrating with affinity, I highly, highly recommend
my big, actually, my huge affinity and Fresco mustard class in
Botanical Illustration, which is nearly 6 hours
of learning material, so you have to brace yourself. Or if you would like
to continue with a faster and a lighter
illustration project, something that
will help you draw more with the pencil tool and also use vector brushes for
more vector based texture. Then I really recommend my children's book
cover design course. This course is not just
for kid lit artists. It simply offers a fun and light project
to do with me step by step so that you can get more comfortable using
infinity designer. That's it. So we are now in the affinity designer
for the iPad interface, and I quickly wanted to show you what we will be doing
together step by step. We'll be creating this
Winter Cottage illustration. I will show you how I go about my messy sketch and how I
import it into the document. And you will also have in the class resources a
color palette that you can use and you can create
your own winter cottage, not exactly the same one. I would like to kindly
ask you not to copy it exactly unless it's just for the purpose
of this exercise, and then you will not
share it as your own work. But when you're feeling
more confident, you can draw your own cottage, and you're more than welcome
to use this color palette. It will be available in the
class resources for download. And you probably know it from my previous course the Botanical Illustration
Muster class. I like sharing color
palettes as Vctor assets, so this is a Vctor asset that you can save up to
your asset studio library and this will be available
as a downloadable resource which you can totally use when you're creating
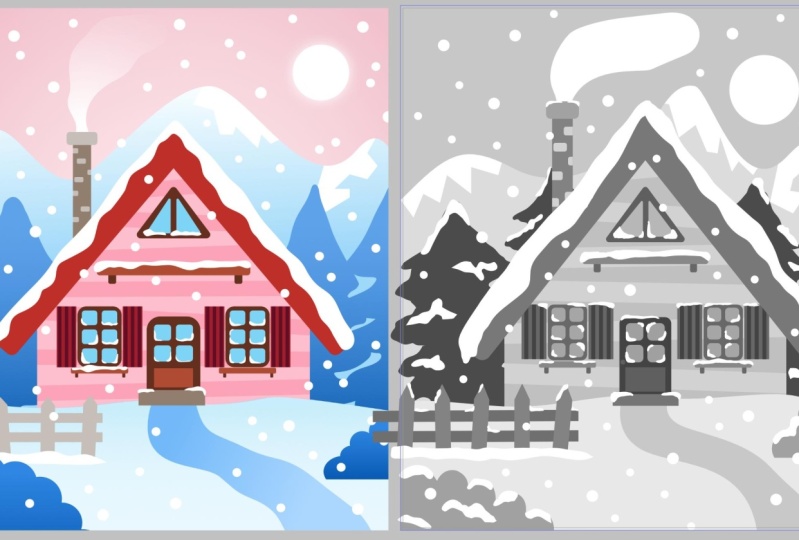
your own illustration. We will be also
working in grayscale. I will be teaching you my efficiency technique when illustrating for
general illustration, not just for patterns. I tend to start with gray scale, and I will also explain why. And then we will be turning this gray scale illustration
into a colored illustration. So I will be showing you my
techniques to color in fast. And remember that a big
focus of this course is to use gradients and
the transparency tool, which you can find
here on the left. When you click on
the gradient tool, you have the option to stay
within the gradient tool or use the transparent tool,
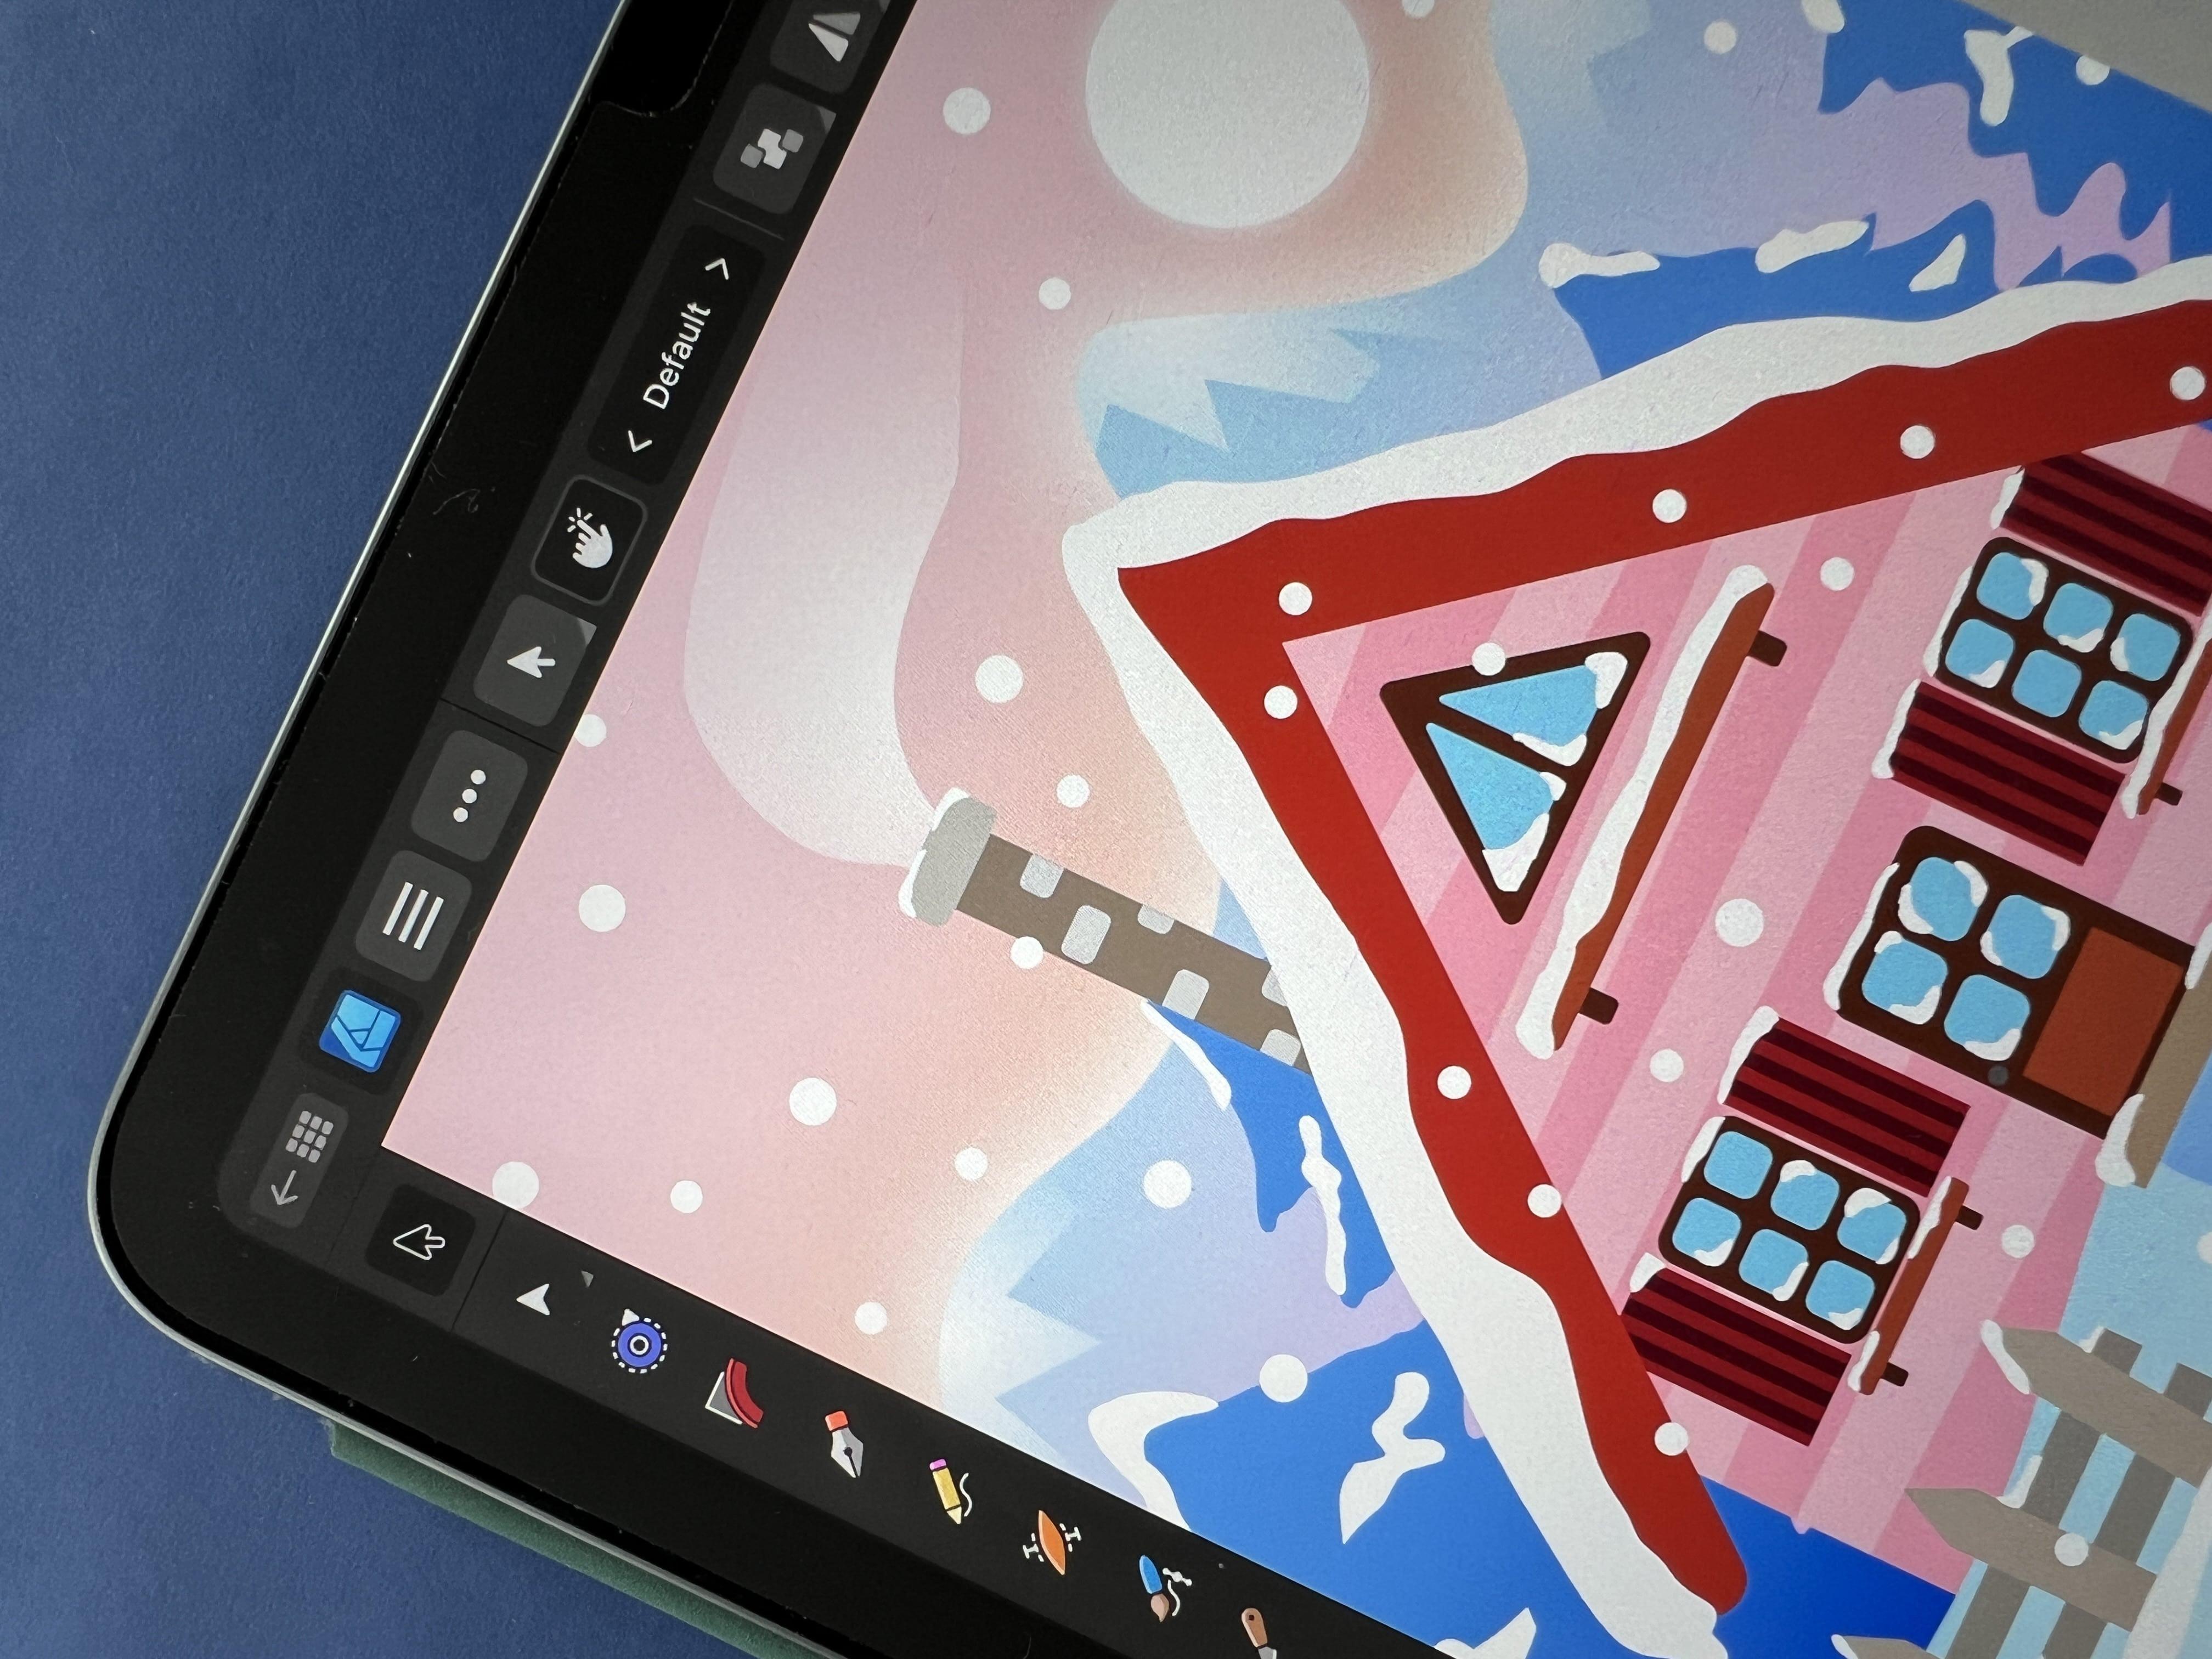
the transparency tool. So the smoke that is coming
out of this chimney, this is one example of using
the transparency tool. We start with the white
color and then it fades out into transparent part
of this element. We'll be also refreshing
our knowledge of using the Gaussian blur or the
Gaussian blur on the smoon Sun. And we will be using
gradients, gradients. There will be blocks
of color that turn from one color
to another or from lighter version
of this color to a darker version of
this color on those trees. We'll be learning that
together as well. And then as usual, we will be practicing using
the rectangle tool. We will be creating all those
shapes as vector shapes, and we'll be refreshing
all the other vector tools that are super super basic and very
important to use. So we will be using, for
example, the Shape Builder, and we will be refreshing using Boolean operations to
merge shapes, for example. Then on top of that, we'll be
also refreshing how to use the corner tool to change the corners of our
vector objects. I will also show you
how I work with layers, how I like to
organize my groups so that my illustrations and then
my files for the clients, for example, are neat and tidy
and they're not cluttered. Okay, really cool. I'm very, very excited that you
join me in this course. In the next lesson,
we will be talking about my messy sketch, how to prepare your sketch, and where to find sources of
inspiration for your sketch. I'll see you in the next lesson.
3. Sketching & References: In this lesson, we
will be talking about preparing the sketch
of your winter cottage, where to find inspiration, how to use reference
photos to your advantage, and also how to improve the composition of
your illustration. So right here, most of you
will recognize I am Procreate. I like using Procreate as my digital sketchbook
these days, only because I have my
favorite brushes here, I have this waxy dance
pencil that I bought. I think now years ago that
I really enjoy using, it feels like a real pencil
and you can smudge it, and the whole experience
is quite nice. And I like also separating
my final affinity designer work from my sketches because sometimes sketches
tend to get out of place. You get a lot of them. And then I use
basically Procreate to store all my sketches and
to keep everything tidy. So here in Procreate, I drew some ideas for
my winter cottages. This is the very first idea that I selected for
our fun project. But you will see here, I also explored other
shapes of buildings. So this one is
definitely more like this traditional classic
winter cottage that has those triangular elements
in its construction. This one is a little
bit more classic. It could be maybe not in the
mountains, but in the city. And I think I have
cottage number three, another one also like a classic little
house that could be somewhere in the mountains or in the forest, covered in snow. So I prepared my
sketches in Procreate. Each of the ideas is
on a separate layer. And then when you're done
with your sketch over here, for example, if you're
using Procreate, you can just go to Export
and share export it as JPEC, save it to your camera roll so then you can import
it to affinity. You can also sketch your house in a physical sketchbook, it
could be even just, like, doesn't have to be a
proper sketchbook, just a sheet of paper, and then you can snap a photo, and then you can also
bring it to affinity. Or you can use any other
software of your choice. There's also an option
to do everything directly in affinity designer. I will show you
that in a minute. But I also wanted
to tell you how I found the inspiration for this exact cottage shape
because we have to be really careful not to infringe anyone's copyright when we're
using reference photos. So one thing that you can do is to search for inspiration
on Pinterest. Over here, you can also use with Procreate split
screen so you can drag your Pinterest icon and you can put it, for
example, to the left. Here on Pinterest, you can add some keywords to search
for your reference photos. For example, I typed in Winter Cottage and
specifically mountains, and you have to be very
mindful because Pinterest, it's a visual search engine, and will also give you final illustrations
of other artists. So it's really important
not to look at the work of other people so that we are not
tempted to copy it. I would highly recommend
to look for real photos. For example, I yeah,
that was similar. I think I looked at
this photo and then this is still someone's
intellectual property. So I would also
recommend not to copy, not to reference
the entire photo, but only to take some elements. So, for example,
from this photo, I think I was using quite a
few reference photos here, and I was just taking small bits from every photo
to build together, like, a completely new cottage that doesn't exist
on any other photo. Like over here, I liked this triangular roof, for example. And then when you scroll down, you will get other
reference photos that are somehow similar. We see a lot of cottages here also have this
rectangular shape. On this photo, for example, I like the positioning
of the roof and that I can have a chimney with the
smoke coming out of it. I already had an idea, aha. This will be great to use the transparency
tool for the smoke. And I also like this line of you might not recognize
it on my sketch, but this is a line of
trees in the forest. And then in the background, we have some mountains. At first, I had a moon here,
but then I thought, Okay, it might be a full
moon depending on what color palette
I'm going to choose. I wasn't sure at
the beginning if my sky will be dark or light. So instead of the semi moon, I just drew a circle here to leave it open
for interpretation, whether it's a sun or a moon. And then a dog I
haven't even noticed, but yeah, feel free to add
in animals if you want to. I added in the fence and
be very careful because you will be also seeing
work of other illustrators. You might also want to
use a search engine. You can go to Google
Images, for example. You can also use split
screen here with Pinterest. You can go, for example,
to Google Chrome or whatever browser
you're using. Then go to images and type in something
like winter cottage, maybe snow, maybe mountains, maybe try searching
in your own language. I could have also typed
in Polish keywords in my own mother tongue
and then just scroll through and take
whatever inspires you, for example, mix up
the shape of the roof, have another shape
of your chimney, see what kind of
windows you can draw. I really like I don't even
know where I saw that. But for example, here, this is a very interesting
shape of a window. It's like a hybrid of a rectangle with what's it
called? With a triangle. So you can take inspiration from that and then
take bits from various photos so
that you come up with a hybrid of something unique. Pinterest number one
and Google images and be careful not to copy the entire photo
at the same time. Now, there's also an
option to work directly in Affinity Designer and to
get reference photos there. And it's actually quite
safe because over here, there's an icon, photos
tacked together. And those are free stock photos. You have pixels and
you have Pixabay. So you could experiment
with some keywords, winter house, winter village. Let's type in Winter Cottage and see what you're
going to find there. And unfortunately, this
view is a little bit small, but if there's something
that you might like, then you got to press and hold and drag it into your document. Oh, sheep. Go to the
Move tool and maybe put in a few reference photos that are they can be used for free. We have, for example, this cottage looks interesting. You can put them directly
here into your interface. I like or I prefer to delete
them when I'm done with them because they might make the size of your file
a little bit too big. When I'm not needing
those anymore, I just remove them by
pressing this trash icon. I get rid of it.
If you screenshot something that you like from Pinterest or from Google Images, you can also place it
directly here around. So this is my Canvas actually here. You
see the selection. You can place it
around your canvas for inspiration when you're still
in the sketching phase. To place a reference
photo that you screenshot to your device
storage, for example, to your Photos app, you go to the Hamburger menu and
then you select Place, and then place from photos. Over here, I have a few reference photos
that I screenshot. For example, this is
the one from Pinterest. You can still scan them, whichever you want, and
then by taking them, you get this blue
selection symbol that they will be selected
and then you go to click Add. And you just type
anywhere on your canvas, sometimes they get imported
in a very weird way, but you can still from the
move to you can resize them. I like this reference
photo because it was just a reminder that I can make it a little
bit more festive. I could go, for example,
to my Christmas themed assets and maybe turn
my illustration, not just to a winter
cottage illustration, but to a Christmas
cottage illustration and add in some
festive elements. This one obviously
I like because of this strong triangular shape. And I like the
overall composition that there's a
fence in the front, there's door, two
windows on the sides, and one windows balcony on top. So this is about
reference photos, and now just some words
about composition. Going to group those
reference photos. If I don't need them, I can
just delete the whole folder. Now, to talk just a little
bit about your composition, I would just leave you
with this general advice. Your cottage will
be in the middle, so this is the composition that I am suggesting here
for our fun project. The middle plane will
be your cottage. Then there will be a sort
of a fence that could be on either side or
just on one side, and this fence will split your middle plane into
the front lane also. So the front lane it can
have botanical elements. It can have some bushes.
It can have some twigs, maybe there's an animal
in front of your cottage. So this is the front plane, the middle plane, and then far away we will have
our background. By focusing to populate nicely all those three
planes front, middle, and background, our
illustration will be, so to say, rich enough. I lost it somewhere. It's here. This is our gray
scale illustration. So again, we will
have the front plane. You can add in even more
details in this front plane. You can add in some
berries, small animals, maybe a hedgehog, maybe a bunny is peeking
from behind this bush. You can make it more narrative. This is more of a
minimalistic approach here that I'm offering
you here because we will have a fast project step by step so that we can
learn in a fast way. It's a quick project, but feel free to develop
your illustration further. Maybe add it into your
professional portfolio. Perhaps you have an idea to make a poster out of it
and print it out. Or maybe you would like to turn it into a postcard or even include it into your
licensing portfolio. Maybe greeting cards, postcards for winter holidays
or Christmas holidays, you can definitely turn this cottage into a
Christmas cottage. So you can start with a very
basic project, a basic idea, and you can keep developing it so that you are
efficient and you save time in creating useful
things for your portfolio. And this is what
I wanted to leave you with regarding the
sketch and the composition. Just a side note, you don't have to sketch in
a sketchbook and procreate. You can sketch directly
in affinity designer. We go to the Layers panel, we hit the plus
symbol and we add a new pixel layer.
This is now Pixel. It also has a small pixel or raster symbol to the
left like a checkerboard, and by default,
it's called pixel. Over here in the
upper left corner, you can switch
between the vector or the designer persona
to the pixel persona. Then the toolbar over here
to the left will change and will give you pixel brushes or they're called paint brushes. You can access different brushes through this icon
here on the right. And I also made some dedicated folders
with my favorite brushes, but I always recommend going for starters to
the acrylics folder, and for sketching, I like
to use acrylic brushes. I'm going to mark
everything here, group it, make it invisible, and now we will be
on our pixel layer. This is where you make
your brush bigger here in this lower left
corner. Color studio. We can stay on the stroke site. I'll choose whatever
color I had here. And you can just test it
out here, make it smaller, maybe choose a lighter color and then start sketching what
we were talking about. Start with a lighter color, establish that this
is the front plane. Somewhere here
will be our middle and this will be the background. Then you can still create a new pixel layer if you
would like to divide it. This will be just my grid for the composition
with the three planes. Then on a new pixel
layer with a new color, something different,
something blue, you can start very roughly. To sketch your composition. For example, this
will be the fence, here will be the S
bush, maybe twigs. Maybe there's an animal here. It's just a placeholder. It doesn't have to
be very elaborate. I will bring back the visibility of my references, for example. Okay. There they are. Back to my pixel layer, and very roughly, you are
establishing your composition. Maybe you have, like,
a bigger tree here. Then with another color, maybe there's like a
line of trees here. Some mountains. You can start from
the front plane, then you can go to add in more details on
your middle plane. Maybe there's a chimney on
this side, there's a smoke. This is very rough
because I don't know. I think that you don't have to waste too much time in
refining your sketch. You can go on and
vectorize everything and refine everything as you go without wasting too
much time on your sketch. Maybe here I want the moon, so then you can again
start developing. This is snow by the way. Then you can start
developing the background. Then when you're ready to switch back to the
designer persona, you can switch from the
normal blending mode to multiply three dots
and also lower the opacity and this will be it. This will be the sketch
that you can use. So you don't have
to use Procreate. I think this is a really
fast method if you stick to using affinity from
the very beginning. So at this point, you have to
probably pause this course and head either to
Procreate or to affinity interface or to your sketchbook and
prepare your sketch. In the next lesson, I will
show you how to prepare our basic document for the illustration and also
how to input your sketch, set up your color palette and prepare everything
for vectorizing. So see you in the next lesson.
4. Setting Up Canvas: In this lesson, we
will be setting up the canvas for our winter
cottage illustration. So we are back from the document view to
our main homepage, which is called Live Docs. This was my original
illustration document. This is our exercise sheet. But I wanted also to
show you how I set up this document from scratch. To create a new document, we just hit New new document, and you might already have a few presets from some
previous projects. We will create a new
document from scratch. Over here, you can set up your dimensions and I recommend that for
this illustration, we set up a document
of 3,500 pixels. This will be the
width, and we keep the page height
with 4,000 pixels. It will be not square format. It will be more of a
rectangular format. This will be also
very useful for Instagram because
with the new update, we don't have a
square grid anymore. And also, you can turn this
illustration into a poster into a postcard and they tend to be rectangular
rather than square. We keep the DPA at at least 300. I like to work with pixels. This is what you're going to
see in most of my projects. And because I will want to
showcase this illustration, specifically in my
online portfolio, I keep the color
format RGB as RGB. But if you already know
that you would like to turn this illustration
into a postcard or a poster that
you will print out, then I do recommend that
you switch to CMYK eight. But since it's going to be for screens and for
my online portfolio, I'm sticking to RGB. Now, I like to head now
to margins and bleed. This is not selected, so the margins are not set. We're interested in the bleed. Right now, it is set at zero, but I would recommend
that you set a bleed of at least ten pixels.
It can be also 20. Let me show you how 20
is going to look like. Because you will prevent any white lines on the
edges and will also be safer to have at least some bleed when you want to print
out your illustration. So let's maybe see
how 20 will look. So we have a bleed of 20
margins is not selected, and we do not create any artboards so that we can also position all
our references, our color palette, anything
that we might need around our working canvas rather than placing them on
dedicated artboards. And then we hit Okay. We are
creating a new document, and I start right away by going to the rectangle
tool over here. The very first shape
is a rectangle and we create our
background layer. Then from the move tool, we have to see in
which mode we are. So this is the icon
for the preview mode. Our bleed was hidden, we unhide our bleed by
selecting the preview mode, and this is where it comes
handy to set up our bleed. This original light gray line is the actual line of our canvas, this a little bit
of extra space, this will be our bleed. You will not see it a
lot when you zoom out. But when you start zooming in, for example, to the other edge, you will see, uh huh, Okay, this white space is my canvas, so this will be the actual
cropped illustration or what you will be
printing out or exporting. And this thin blue line
will be our bleed. And this is what I do
for all my client work. Depending on the
client specifications, I sometimes set up an
even bigger bleed. But for personal projects, I go with at least ten or 20 pixels extra bleed
in the document setup. I think 20 is quite nice
because you can still see it. If it was ten, that
means it's half of it, it would be still doable, but you can give yourself
a little bit more comfort by creating this bleed a
little bit on the bigger side. Okay, so this is our
background layer, swipe to the right,
rename layer, and we can rename
it as background. And if you do not want right now to manipulate this
background layer, we don't have to right
now change its color. We can just set it as it is. Then we can also lock it. But first, every default shape when we go to
the color studio, we will see it will
have a default fill, the color that is
inside of this shape, and it will also have
a default stroke. I select the stroke,
the empty circle, and I flip it up to
get rid of the stroke. That's another
advantage of setting up a bleed because even
if you forgot about the stroke and you had a
thin one pixel black line, it wouldn't be a deal breaker. But the bleed will also protect you from
such small mistakes. So now we only have
fill. We have no stroke. We renamed our background layer, and when we swipe
again to the left, we can lock it so that
it's not moving around. And this will be the basic
setup of our document. Again, 3,500 pixels with
4,000 pixels height. Next, we need to
import our sketch. You either took a photograph
of your sketch or if you were a drawing directly in
affinity, it's already here. He created a new pixel layer and your sketch is right there. I need to import my sketch
from Procreate and I saved it basically to the
internal storage of my iPad. To place your sketch, we go to the Hamburger menu here in the upper left corner, place from photos.
Here is my sketch. But I can already select my original illustration because I will be using it as my reference so that I do not forget anything as I'm
teaching this class, and maybe, maybe, maybe I like those
two reference photos. I will include them as well. So I'm going to select now those four photos so that they get important into my interface, add and you can do the same
because affinity doesn't have the same split screen
option like Procreate and it can be a challenge or
something to get used to. And then making
sure that you're on the move tool, we can position. So maybe I'm going to
position my reference photos, the real photos somewhere above. I'm going to group those
two because later on, I might just want to delete the entire group
if I don't need it. And now the sketch
you can resize it. So I just noticed that I was using a slightly
different dimension, but it doesn't really matter. In case this sketch is
somewhere all over the place, you can make sure that
the sketch is selected, and then we can go to
the alignment tool over here and select a line center, a line middle, and it will
be positioned perfectly in the middle of our canvas. Okay, I'm going to have this colored version on
the other side. You can also drag it
somewhere at the bottom. We have our background layer. You can also rename
this layer to sketch, and then I like to change the blending mode to
multiply over here, and then three that's menu
and lower the opacity. You can also swipe to the left and lock it if you want to, but it's not
obligatory, so to say. Because this sketch layer
will be always on top. So if we want to
select something, we will be hitting the
sketch layer anyway. So if we want to manipulate
any other layers, we'll have to go manually
to the Layers panel and then search for the layer
that we would like to edit. The other thing that is missing is maybe the color palette. Since I already created
this illustration before, I will be able to use the color picker directly
from this illustration. You can also use from the Swatches panel here
in the color studio, any other winter themed color palettes that you like
that you created before? For example, here I have my own winter palette with some swatches that are good
for Christmas illustrations, and this is the winter
cottage palettes that I created when I was doing
this illustration over here. So you can either position all your swatches in a color palette in the swatches panel in the color studio, or you can make use of
the vector asset that I created for you that will be available in the
resources section. This is one way to save
up your color palette. Those are basically
it's a vector object. It's composed of vector shapes, squares and circles
or semicircles. To create such a color
palette library of assets, you have to go to the
main hamburger menu, and then you have to
add new category, then you can rename this
category, for example, to color palettes, and then you always need a subcategory. So I have two big courses about vector assets
specifically. I will try not to
repeat myself too much, but it's a little
bit of a refresher, all the other in depth
information about vector assets using
vector assets you can find in
the other courses. And then by adding
a subcategory, you can create
different subfolders. For example, here I have
summer color palettes, here I have winter
color palettes, and remember that was actually a small issue that my
students had before. They forgot that I'm sharing my color palettes
as vector assets, and they weren't sure
how to import it. So when you find the download
for the color palette, you have to go to the
main hamburger menu, the Asset Studio one more time
is over here on the right, the main Hamburger menu, and then you have to import
your category of assets. And to import it,
it has to be saved either in your Cloud storage
or in your device storage. And then you hit
Import category, and then depending where
you saved your assets, they will have this file
extension file extension point AF assets. You just have to click on
it and will get imported. And then you will have
your color palette as an asset, basically. So this is the color
palette that I want to use. You can either long
press and drop it onto your Canvas or you can click on it and you
can click Insert, and then it's going to be
inserted into your document. And then you can
place it somewhere on the side of your canvas. So this is our basic setup. We have our references
and our color palette, our sketch is also ready. And in the next lesson, we will be laying the
base of our illustration. We'll be vectorizing it.
5. Vectorizing The Base in Greyscale: In this lesson, we will start victorizing our winter
cottage illustration. The general advice that I
can give here is to start drawing your illustration by tackling the biggest
elements first. That would mean that
we need to draw this field or this snow
space in the front, we have to establish
the front plane. Then we can establish
the middle plane by blocking in the most
important shapes of the cottage itself, for example, the walls and the roof and the
chimney and so on. Then we can move on to the
background, for example, and start victorizing
the mountains, maybe the sun or the moon. And in this way, we will
have a good start to then continue going much
more into detail and victorizing the
more detailed parts. So let's establish the
front plane first. We will be using for that the pencil tool, which
you can find here. So we click the Pencil tool. And with the new
affinity update, which was in February 2025, the contextual menu
for the Pencil tool changed a little bit because there are new AutoClose options. So in here, I will show you the AutoClose options that I like using for
the Pencil tool. And before I start using it, you know what from
my previous courses, I like to make a
test blob that will help me to figure out the
settings for the pencil tool. I also mentioned that before
I color in my illustration, I like to work in gray scale. I also have the gray scale
variation of my illustration, and this is what
I will be using. If I didn't have this
reference photo, the way I would go about
it would be as follows. I would go to the color studio and then away from swatches. Normally, when I work on an
RGB color mode illustration, I stick to HSL sliders, hue saturation, I
think, luminosity. But because I will be first
drawing in gray scale, I will find here
the gray sliders. And this is how I created this gray scale variation
of my winter illustration. What are the advantages of
working in gray scale first? Sometimes we're not sure
about our color palette, and we would like to figure out the values of our illustration. We would like to see where
the brightest elements or parts of our illustrations
are and whether it has a good balance between those brightest part parts of the illustration and the darkest parts of
the illustration. I knew that I want, for example, the details on the cottage
to be a little bit darker. And I wanted also the
foreground to be a little bit brighter and the background
to be a little bit brighter and to have all
those botanical elements, the bushes and the
trees to be darker and then working on
gray scale would give me this very first idea of how I want the values
on my illustration. Then the biggest advantage
for me personally, the more detailed
your illustration is, it is way better to work in
gray scale at the beginning because then coloring in
will be really a breeze, and you have an excuse not
to think about colors yet, and it will gain you
more efficiency. It will gain you more
speed if you don't have to think about the colors.
Trust me on that. If this is a new
approach for you, I will be very interested to know how you found
this approach if you really felt that you're able to work faster by drawing
in gray scale first. So this is what we will
do in this course. Now, the new pencil tool, 2.6, what you need to know is that we have a new
smoothness slider over here. So by default, it will
be set somewhere at 50%. But if you would like to have more of a hand drawn feeling, draw more organically,
so to say, then I would recommend that you go down with the smoothness. Here, as usual, we
have stabilization. I don't want any
stabilizer right now. And over here we have
new Auto close options. Auto close is the possibility to automatically
close your shapes. Your victor shapes
should always be closed so that you can prevent
any future mistakes. Also when you're drawing or changing your illustration
to have stroke, for example. So stroke means the outline. My personal favorite
is to either choose close always
or close far. I also have a
dedicated video about those recent pencil tool
updates on my YouTube channel. Close near is not close
enough for me and close off, I don't use autoclose if I'm
drawing with stroke only. Stroke meaning
just lines and not closed shapes with fill
or filling inside. Over here, you can also, let's have a look at this
question, Mark. This empty circle
implies that this will be the settings for using
the outlines the stroke. It is called use line. We will not be using lines. It will be a flat illustration
with no outlines. This has to be deselected. Then we have to keep the
selection of use fill. That will mean that there
will be no outline, but there will be a
filled color inside. The best way to start is to start drawing and I can already see that
the fill is not on. I'm going to go to the color
studio and on the fill side, this full circle, I
will select any gray. Auto close is off. That's why this shape is
drawn and we see that the starting node did not
connect with the end node. But with all those shapes
in this illustration, we want all of
them to be closed. We choose, for
example, close always. This will mean that our shape will snap into be
enclosed wherever we are. Let's demonstrate that. I will delete the shape
that I just created. I will start drawing
this front plane. And if I finished this shape over here and then let it go, it's very, very fast, but it
snapped into getting closed. So it connected
this first red note with the last note
that I created. But I have to delete it
and I have to make sure that the shape that I want
is on the entire canvas, so I'm going to go
outside of the shape. And making sure that everything here is filled where I
want it to be filled, then I'm going to let go and
it will snap into closing. If this close always
is too much for you, if you would like to see better where the shape will be closed, then I recommend that you
test if you close far more. I'm going to draw a hard shape and
demonstrate that with this, you still have to
come a little bit closer to your starting note, and then you will see this red marking will show you okay, it's safe now to let go and
the shape will close itself. Let's go back again
to close always. If this was enough
to close the shape, I would just let go, and it would close itself. For me, personally, clothes always is the most
efficient one. That's why I will stick
to clothes always. And again, I will start drawing the ground in front of
the cottage. Let go. With this dropper tool, I'm going to select
this other gray, and then to polish
it off a little bit, I will select this
new curve that I just created and my background layer and go to
the shape studio. From the shape tool, not the shape studio,
but the shape tool, I want to get rid of some of those unnecessary elements that stick outside of the canvas. I will select the minus, and then I will minus the
shape that I don't want. I'll also go to the
background layer. And change it to
this darker color. But if you're on
the gray sliders, you can do it directly
over here so that you have good contrast between your front plane and
your background. Then the next big shape
that I would like to draw are the mountains that you can see
in the background. I will position again
myself on the background. Go to the pencil tool. It doesn't matter
what color I am using unless you want to
see things right away. You can make a test block and then from the gray slighter, you can change the color. Then when you delete this shape, it will remember that color. So I can still look at my original illustration
as a reference, but I can also
freestyle a little bit. And if this is too wobbly, by the way, you can also
choose to use a stabilizer. I personally like to use
the rope stabilizer, and to make it a little
bit more smooth, you have to go to the
slider over here to establish a bigger length
of this stabilization. For me, personally,
if I switch it to 21 on this strange
scale, this is enough. Now, I hit delete and I draw my mountains again
and you see that there's a little tail that
follows my pencil tool. And my line is less wobbly. Having this selected,
not deselecting, I'll go to my gray
lighters and I'll make it a little bit brighter so that it doesn't merge too
much with my front plane. Then I will select again
this new mountains curve with the background layer, shape tool, the minus
settings where remembered, so I don't have to change
anything and I will minus this. And this shape on the left side so that
everything is polished, and it will be all
cut to our bleed. So you see this very
light gray line is our actual illustration,
our actual canvas. But this is why we're
also setting up the bleed so that we have a
little bit more wiggle room. And even this cosmetic cutting out of the unnecessary bits of shapes will be
better if there's a little bit of bleed to give us this wiggle room
if it makes sense. And now another no brainer shape would be to go to
the rectangle tool, to the ellipse tool
and to draw our moon. If we would like
a perfect circle, we have to hold one
finger on the screen, and it will snap into
a perfect moon shape. And then we can change
it all the way on the gray sliders to
100% and make it white. Okay, then our next main shape will be the shape
of the cottage. So we can do that also by
using the rectangle tool. The way I see the
shape of this cottage is that we have over here, a rectangle base, and then
we have a triangle on top. So I'm going to first
select the rectangle. You can always drag it
underneath your sketch. You can also go to the color
studio to the gray lighters, make it maybe a little
bit darker so that we really focus on evaluating the shape of this cottage well. Then we need a triangle. We take the triangle tool. And we move right away
to the move tool. We will be creating a
completely new shape out of those two shapes using
the shape builder tool, and to really cut it properly, it's good with this new shape. It's good to create
them in such a way so that they go outside of
the shape that is underneath. This triangle shouldn't stop somewhere inside
of this rectangle. It should actually go more
outside so that the line of this rectangle will
be able to cut this new shape in a better way without any mistakes
if it makes sense. You will see that in
action in a minute. Then I am looking at my
sketch very roughly. My magnetic snapping is on, so I can see this green guiding line
showing me that those objects, the rectangle and the triangle are stuck together perfectly. But in case you want to
be super duper sure, it's enough to select the
triangle and the rectangle. And then go to the
alignment tool and select align center. Now those shapes will be aligned
perfectly in the center. Then keeping the selection
of those two shapes, we can go here to the
Shape Builder tool. We're still on the minus, so it does remember
our previous settings, and we just cut out all those
bits that we don't need. That's why it was
important that one shape overlapping the other, it also sticks out a bit
more on the outside so that we can make a better cut without making any mistakes. Then I like to go
to the move tool Boolean operations over
here and then add. Now if you go to the node tool, you only see the sharp
nodes of this one shape. Everything merged into a curve, which is just a single layer and this is the shape of our house. Those are our mountains. I will also rename them. So that I can recognize
things better, especially now in gray scale, I don't see things
too well just yet. This is the moon,
this is our front. One way, is to put our house shape
behind this front plane. This will be option number one. If you know that, this
is my house shape, you will not be
editing it further. Then you can also go to the three dots menu,
hit Duplicate, select one of the front layers
together with the house, go to the Move tool bullying
operations and subtract. And just to demonstrate, we will see that we cut the
bottom of the house with the unique shape of the snow that will be in
front of the cottage. But sometimes it's
just enough to make sure that the layers
are positioned properly. I might still want to move this house
around a little bit. Maybe I would like
to position it later on a little bit
more to the center, so I will not be cutting
anything out for me. It's enough that first, we have the front plane and
then the house is behind it. Okay, let's bring
back the sketch. Now we will create the roof. We will go to the
rectangle tool and choose the rounded
rectangle tool. Maybe to see things better. I'll make sure that I'm
on the right layer, but everything is good. So I'm just going to draw one rounded rectangle shape and make it even darker so
that I can see things better. And then from the move tool, I'm going to use this handle
over here to rotate it. And to double check
just to eye it to see how it would look good. Again, I will be
building a unique shape, so I will make this top part of the roop a little bit longer, and the part that
is at the bottom, I will position it
where I want it to be. So I think this is actually
looking quite good. We can also bring
back our references. So in my original illustration, this sticks out a
little bit more. Doesn't really matter. It's
just a rough reference. You can also make the roof a little bit thicker over here. You can manipulate those handles
here from the move tool. And now that I'm happy with it, I will go to the three dots, duplicate, and then I will flip it from
this sub menu here. I will flip it horizontally. And I will position
it on the other side. I have magnetic
snapping on and I see those guiding lines show me that they're on
the same level. I will still select
those two shapes and see that they're really
positioned in the middle. The best way also to do
that is to group them, and then to select
again our house shape, alignment tool over here, and then align center. And now everything is
perfectly centered. Next, we have the two parts of the roof and we go
to the Shape Builder, and you probably
already guessed it. We are cutting out the
bits that we don't want. The rest doesn't matter.
I could still make the tip of this roof maybe
a little bit rounder, but it will be covered in snow so we don't have
to focus on that. Then on the entire group
level from the move tool, Bolling operations, I hit at so that we have
one single shape. Before we draw any
further details, let's just make the chimney. We will draw one rectangle. At this point, I'm going to select the gray
from my reference. I will position it behind
the house, so to say. Make it a little
bit more narrow. And then I would like the top of my chimney to be
a bit more rounded. So instead of playing around
with the corner tool, I will go directly to the
rounded rectangle tool again, and I will create
this rounded shape, go to the move tool, and you see the guiding lines showing me that everything
is aligned in the middle. But I will also group it
and rename it to chimney. So we have the chimney. We have, let's name it, the walls and we have the roof. We can also group
the roof, the walls, and the chimney together, and rename it into cottage. Then all the other
elements of the house, like the windows and the doors, they can go right into
this cottage folder. The moon, the mountains, they're part of the background, so they're in the
right placement. Then when we switch
off to sketch, you can see that we already have a nice base of our house. I'm going to make this chimney. Now that it's grouped, I can do everything
simultaneously. I'm going to change its
shape a little bit. So it's good to keep
those two elements separate because we can
still edit them separately, making sure that
they really aligned. I'm going to grab the base of the chimney and
make it a little bit longer so that it resembles a little bit more something that I have on the other side. And then grabbing the
stop part where all the time in the gray
slider section, this is really, really handy. And when you're getting
used to this process, it's like sutta ta, ta, ta, you're
building your gray scale illustration in no time. Okay, so this is our base, and the main tip that I can
give you here is to always start from the biggest elements, namely the elements
of the background and the most important object in our illustration,
which is our cottage. So now that the base is ready, we can continue working on the details of
our illustration.
6. Vectorizing The House: This lesson, we
will be adding in more detail into
our illustration. So we still need to work
on all the windows, the doors, the paths. We will build the fence and also the elements of the
background and the foreground. So let's start with
getting back to our sketch and then
drawing our windows. So we will start with this
basic window over here. I decided that this window
will have a rounded corner. For the windows,
you can either use the rectangle tool or the
rounded rectangle tool. The rounded rectangle tool will help me save a little
bit more time. Since I'm on the gray sliders, I can go in right
away and also change the value of this gray color to something a little bit darker so I can
see things better. I can also drag
this first window inside of the cottage folder. Because we still have the
rounded rectangle setup. You see this little icon here. There's a square
circle triangle. It implies that it's not
a curve like this roof, but it's still a shape with
the properties of the shape. All the shapes can be created
through the rectangle tool. And before we convert
them into curves, they still retain some of the properties from this
rectangle tool menu. We also talked
about it at length in my Botanical
Illustration master class. So right now, this
rounded rectangle tool, it still has the option
to be editable further. Namely, you see this little
red point over here. You can manipulate this
point and either increase the roundness of the corners or make it a little
bit less prominent. And then always to
be on the safe side, what I would recommend
is to convert your geometric shape into curve. And you can do that by going to the three dots menu and choosing the option
convert to curves. And you can observe
what will happen here on the side of this symbol. Convert to curves. Now it's not called rounded rectangle
anymore on the layers panel, and also the little
symbol next to it change and now it's a curve. Which means that when
we go to the node tool, we can access its nodes. And before it was
a geometric shape, the nodes were not
accessible in the same way. So there are pluses
and minuses of both. If you feel that the
shapes that you're using, you would still like to
keep them more edited bow, then you can keep them
as a geometric shape. But if you like the shape, you think it's going
to stay this way, then I would recommend
that you go again to three dots and
convert it to curves. Next, I would like
to use, again, the rounded rectangle
tool to create the middle so you're
not going to see that. That's why I will
draw outside for now. You can keep it a perfect
rounded square by keeping one finger on the screen. That's
what I'm going to do. Then I will also make it
a little bit brighter, go to the move tool and
position it on my window. Next, two fingers on my screen, I will make a quick copy, making sure that they're
on the same level. I will select those
two elements, position them in the middle
more or less in the second, and then I want to
create one more pair underneath and you can also
use a power duplicate here. Without deselecting, you
can go to three dots, hit Duplicate, and the system will remember the previous
operation that you did. So you created a
copy of this pair, and it will also retain the same distance with
the previous pair. So that's something that
can help you save time. Now, I hope that
you remember also the gesture shortcut
that I'm using here. You can have one layer selected and then
with two fingers, you're tapping on the top
layer, and in this way, you're selecting
everything without having to manually select
every single layer. So that also helps us
to save some time. Grouping. Now we can select our glass elements of the window and
the window itself. Go to the move tool,
alignment, align center, and line middle, and we have a window. Does
it look the same? Yeah, it looks more
or less the same. We can group it and you can
still from the move tool, you can still edit
everything together. So you can make still, for example, the window wider, but I'm going to keep
it the way it was. Go back by tapping with two
fingers twice on the screen. Before I copy this window over, I would like to
finish everything that belongs to this window. So I would also like to draw those shutters and this
little window sill. The window sill, I built
it from a bunch of rounded rectangles
and my shutters are just sharp rectangles
without any roundness to it. But feel free to stylize
your windows as you like. First, we will build
the window sill. Roughly following the sketch. This will be my window sill and now another rounded rectangle that will be a
little bit darker, that will be also underneath. I'm going to place it over here two fingers
on my iPad screen. I'm going to move it
to the other side. Group those two elements, select those two elements, and again from the
alignment tool, align center, and then group everything and this will be I'm making an
abbreviation window sill. Group the window sill or select the window
sill with the window itself and also
line center to make sure that it is perfectly
centered, but I can see it is. And then from the rectangle
tool Copela it has to open, and then I'm choosing
just a normal rectangle, and I'm building the shutters very roughly
following my sketch. And then I'm creating
another Okay. Another longer rectangle. I'm going to make it
a little bit darker, and I will clip it into
this window shutter space. Clipping means that
it will be inside. There's a little arrow that
showed up and now this clipped darker rectangle is in the middle of
this other shape. Now I can also make a copy, position this one
first, make a copy, and maybe use a power duplicate
to create another copy, which will be exactly
at the same distance. I am grouping those rectangles and placing them more
or less in the middle. You can also collectively
make them a little bit more narrow and again place
it in the middle. Zoom in Zoom out to
see if you like it. Looking good. Now we will create another
one on the other side. We see the green and
the red guiding lines that showed us that the
distance is the same. Everything is symmetrical, Oki dooki then we need
to select the shutters, the window itself, and the
window sill, group it. From the move tool,
then collectively, you can also make everything
a little bit smaller. We will see if our
door will be fitting. So we can still
resize everything. That's why till I know
the size of my door, I'm going to leave this
window waiting for me, and I will leave it for a
second and do the door. I also want the door to
be with rounded corners. That's why I will use the
rounded rectangle tool. Make it less rounded. And then another
rounded rectangle. This one will be also
like a perfect square, so one finger on the screen from the color studio
selecting the sar gray or you can do it directly
from the sliders here, back to the move tool and
I would like to position it more or less here,
make another copy. And I wanted to have a mini
window here and like a door, a wooden part area
at the bottom. So first, let's select those
two rounded rectangles, make a copy to fingers on the screen, dragging
everything down. Okay. That looks good. Let's group it and also bring it to the
folder where they belong. We can still make them
smaller or bigger, select those glass elements
together with the door, alignment tool, align center because it was a little bit off and I didn't quite see it. Then we go to the rectangle tool and we
draw this other element. And from the gray slider, we can make it less prominent. So we're just testing
out the values here. Of course, everything
will be recolored later, selecting all the elements
of the door, alignment tool, making sure that everything
is aligned in center, keeping the selection, I am grouping everything
and we have our door. Now that I'm
thinking about it, I didn't create a
door handle here. How bizarre. So see, I'm going to improve
this illustration. I'm going to go to
the Ellipse tool and draw a perfect circle one
finger on the screen, going to draw a doorknob so that we can
enter our cottage. Everything is really
in the details, and I'm going to drag it
into the right group. This is my door.
This is my window. I'm just swiping quickly to
the left to rename my layer. Now definitely I can make
this temporarily invisible, this window, focus on the door. I want it really in the middle. So it's enough for
me just to use the move tool and see if the guiding line is showing me that the door is
really in the middle. You can also zoom in, make everything else
around invisible and see if you like the size of
the door. That looks good. Let's bring back the other
window and now we can see that it's a good distance. Now with two
fingers, we can make another copy of the
window and place it on the other side to make sure that the set of
windows is also centered, we can group them and again, search for a guiding
line to see that everything is nicely
in the middle. This is a minimalistic and
also symmetrical illustration. But if you're not into symmetry, then feel free to stylize your
cottage however you want. Now we can just recycle
one of the window sills. This one, two
fingers, make a copy. We can drag it outside and we can see if we can
recycle this element over here. We also want it in the
middle of our cottage. I think I would like
to fix those elements. I'm going to start a
new delete one of them. Make this one a
little bit smaller. It's easier to delete
one of them and just to make an exact
copy of the other one. That looks good. Making sure that everything is in the middle and maybe going to this element, making it a little
bit more narrow. Yeah, that looks great.
So we recycled something. Now, with the rectangles, we always have two options. We can have a rectangle
with sharp corners and we can already have a pre made rounded rectangle tool.
This is very handy. It's different with the triangle and all the other shapes. So when I'm creating
this other window, the window on top that has
this triangular shape, you can either keep it as a
triangle with sharp corners, but what I preferred and this
is also something that we can practice together so that we learn more about
affinity design, we can practice turning that sharp corner triangle into a triangle with
rounded corners. Right now, if we switched
to the node tool, we cannot access the nodes, and if we cannot
access the nodes, then we cannot use
the corner tool. See? This menu is blocked. We see the sharp nodes
but they're not editable. So having this extra
triangle that will be our triangular window selected,
you remember it right. We have to go to the
three dots menu, convert to curves so
that our geometric shape shifts itself in
its nature into a curve. Now we can go to the corner
tool, select everything. You see through the selection, the sharp nodes turned
from white into blue. And now we can drag one of the corners
and you will see that the other corners will follow and we can make them more round. Then because there might
be some resizing issues, once you're happy with the
rounding of the corners, I would again recommend you
go to the three dots menu, convert to curves and see everything baked
itself, so to say. Now I want the glass
elements on the window also to be triangles
and to be rounded. We select the rectangle tool. First before we convert
it into curves, we need the properties of this triangle from
the rectangle tool. By the way, this rectangle tool, for me personally, right now, it's called the rectangle tool. I think the name
of this tool comes from the fact that when
you open the menu, the very first shape
is the rectangle tool. When you hit this
question mark to see the names of
those sub menus, you will see that by default, over here, there is
a rectangle tool. It's a little bit confusing because we know that
when we open it, there are different shapes, different geometric shapes that are included in this menu. Anyway, through this rectangle
tool or the shape tool, you can still manipulate and adjust the properties
of this rectangle because you can
probably see that there's this red dot that
will give you a hint, ah, I can edit this further. And we want to shift the upper corner of this
triangle to either of the sides. So we have a 90
degrees triangle, and then we want to go
to the three dots menu and convert it to curves so that we get
access to the nodes, which then in turn, we can round in the corner too. So you can either select it with this blue selection by dragging somewhere outside of this shape and selecting it like this, or two to two. Let's find it again.
Or you can just select it takes a
little bit more time. You can select one
of the corners, and then one finger
on the screen. You can keep selecting
them manually one by one, and you will recognize
that everything is selected because it changed
from white to blue. So this is my preferred method. And by default, the
first corner alteration will be that you get
a rounded corner. Of course, you can go
into the menu and you can explore other corner
manipulation options. For example, this is a
straight change concave, cut out, but we will go
back to the rounded one. And then we bake it. So we go to the three dots menu, convert to curves because now
that we have the move tool, and this shape will resize properly together with
those new rounded corners. If we didn't bake it, if we didn't convert it into curves, there might be some
scaling problems. So let's make it a
little bit lighter. And from the move tool, let's position everything
into our new window. Oh, that looks nice, but we need the other
half of this window so that we can position
everything nicely in the middle. So duplicate and then
flip horizontal. We can also go and see if
we can space it better. Let's group it, open the group. Now we have to go to our
guiding lines to make sure that everything is spaced properly. Then from this group level, now we can position
everything or resize it in the middle, just zooming in and out, trying to figure out if this
is what we want. It doesn't have to be exactly like in my reference photo here, plus you will be styling your own cottage
in your own way. Anyway, you can always
go in, by the way, and maybe reduce the distance
between the two triangles. And if you want everything to be aligned perfectly
in the center, then you have to make sure you select everything together. Go to the alignment
tool and choose a line center and then group it. And one last thing
that we have to do on the house before we switch to the pencil
tool in the next lesson, we have to draw those wooden
elements of the house. So I'm going to switch
off the sketch, and I will do it a little
bit more spontaneously. I'm going to draw one rectangle and also go to the gray sliders and make it a little
bit brighter. And I will make sure that
I'm clipping it inside. And here, I don't want it to
be perfectly symmetrical, so I'm using this handle
to rotate it at a very Unexpected angle
so that it looks quite random and then two
fingers on the screen, I'm making a copy,
dragging it up, and also changing the angle so that it looks
more interesting. That's it. Another copy
to fingers on the screen, rotating it the
other way around. I think this will look good. Another copy, rotating, also checking that
everything looks good, better not to cut it at
those tangent points. Another copy, dragging it up, and one more copy
dragging it up, and I think that looks good. I am grouping
everything because we can change the color very
easily on the group level. Now let's draw the bricks that will be part
of our chimney. If you want to select
something very fast, then my recommendation
is to go to the node tool and to select this shape
from the node tool. Then we're going to
the rectangle tool, rounded rectangle tool, and we're drawing
our first brick, which is essentially
a rounded rectangle. Then we're dragging it
inside of the chimney, the base of the chimney. And from the move tool, we can create a
few copies fingers on the screen to
make a quick copy. So that we have a few bricks on this chimney and grouping everything so that it's
easier to recolor. I also forgot the
stairs that are in the front of our door. They will be also in
front of this snow area. What does it mean? Let's first
close our cottage group. Choose a simple rectangle, draw it somewhere here
from the gray scale, make it darker, right now, you cannot see it because it landed randomly in
the cottage folder. But even now, you cannot
see it because it's behind this front snow layer. We have to drag it to the
front and this will be a stair element or
a step element. Maybe that's the proper word
that will not be part of the cottage folder because
it has to be in the front. Okay, now this looks good. So our cottage is here. The front snow
area is over here, and right on top, we have our step. So this already
looks quite nice, especially when you
switch off the sketch. You can always switch it on and off and also zoom
in and zoom out and position your cottage and the cottage element
to your liking. We will split this
lesson into another one, and in the next video, we will be vectorizing the remaining detail elements
on our illustration, the fence, the paths, all the bushes, parts
of the mountain, and the trees that are also
part of the background, and the smoke on the chimney.
7. Vectorizing The Details & Assets: In this video, we
will be vectorizing the remaining details
of our illustration. I would like to still stick to the rectangle tool
and draw this fence. I drew here in my
example illustration, a very traditional
fence that is built from a rectangle paired
together with a triangle. To build this shape, it's enough to draw this
rectangle with the triangle, just like with the
base of our house. And then you can just
go to the shape tool. And first of all, make sure that the shapes are overlapping
so that you can cut them properly so that parts of this rectangle
will be sticking out. Can select it again, go
to the Shape Builder. It still remembers
that we were on the minus and we can just minus out the elements
that we don't need, and then we can also
switch to the plus and connect the remaining elements to merge everything
into one shape. We can, for example, use
this shape to be our fence. On top of that, you can also round the top part of the fence. I hope that you can see that. Let me maybe drag it underneath. And then let's go
to the corner tool. This time we are
not manipulating all the corners of this shape. That's why we only have
to select this one. And then by default, the very
first corner manipulation will be the rounded option. Right away, before we forget, we go to the three dots
menu, convert to curves. And now we have a building
block for our fence. So let's bring it over
here to the front. We can also change
on the gray scale, the value of this great color just so that we can see better. Also, I think this roof is
a little bit in your face. The reason to have
it a little bit darker is to see
the shape better. But once everything is good, you can also change it down so that it doesn't
hurt your eyes. Back to this fence area. Or this fence element
and back to the sketch. From the move tool, we will
be building our fence. I also don't want it to be perfectly symmetrical,
standing straight. That's why I'll be making
copies of this fence and I will be changing their
angle every now and then. And I will create a few more
elements than in my sketch. My sketch is only
a rough guideline, but I don't have to follow
it blindly, so to say. Then it's always a good idea
to switch off the sketch and use the preview mode exactly to see if everything looks nice. For example, this is
cut in an awkward way. I'm going to select
everything together. A group it because I
really like how it looks. And make sure that it's
positioned in a nice way. Then the other part of
the fence will be just to create a normal rectangle. Let me just see
how I did it here. It can be either in the
front or at the back. It might also look
interesting at the back, especially if you maybe make
it a little bit darker. Then you will see what I mean. If it's a little bit more dark, it adds a little bit more depth. But it can be also in the front. That's also a nice effect. But I like the other one,
so I'm going to drag it underneath and then I
will make another copy. I already see that I have to change
something on the width, I will position it at the
distance that I like, but then I'm going to select everything together and I will make it a little
bit more narrow. I want still to
change the distance, but I want it to
be the same width. This is the element that I need. I will group it and play with it a little bit
further till I like this fence. Next, I'm grouping
everything together. The reason why this is in a
separate group and this is in a separate group is that recoloring will be
much easier later on. This is our fence and
from the move to we can still I don't like how
this snow line was cut, so I'm dragging it a little bit more down so
that I'm not cutting this snow area here and
I'm making sure that it's also cut on one of the edges of the illustration
in a flattering way. To say, it's all very
subjective though. If you want to, of course,
you can follow the sketch, but you can freestyle and you can even make a
copy of this fence, flip it and put it
on the other side. It can be also positioned
in a different way. It could be more
below or even here. Oh, that actually looks nice. Just a suggestion
that your sketch is nothing that is set in stone. Okay. And let me see. I think that was the
last thing that I wanted to create with
the rectangle tool, and now we will be switching
to the pencil tool. So for example, we
have to go in between this step area and let me actually rename it to
front snow because front, if it's just front then it's not clear what exactly it is. And in between, I would
like to create my path. So it should also remember
the settings that I had on the previous
pencil tool action. But you can always
make a test first. I'm going to draw a path. And as auto closes, I have close always, so it will snap close
itself in a very easy way. And then I use rope stabilizer so that it's not too wobbly. You
can do the same. I usually have my
stabilization at about 20. From the gray sliders, I make it a little bit lighter, and you can still go
to the node tool. I'm going to select this
unnecessary node and delete it. And you can still manipulate
the nodes and the handles to see if you like the
shape of your path. So you can also switch
off the sketch. Okay. This looks a little bit weird. I would
like to change it. That's why it's very handy
that it's all vector based. Ah, okay. That looks great. And because I'm a perfectionist, I want to select this new
path with the background, go to the Shape Builder
minus and cut out this unnecessary bit and
then rename it to pass. Now, to create this
Bosch element, or botanical element,
I would like to show you how I like to use the pencil tool
together with sculpt. We will be drawing
this Bosch over here. I also want to focus. That's why I will switch off the preview of what is
outside of my canvas, and then I will go
to the Pencil tool. You can also double check
from the question mark what options you have in
this contextual menu, and there's a sculpt option
that you see over here. Right now it's
deselected because it's on a light gray background. But we will select it. So from the pencil tool, I would recommend that you
switch off the auto close. So you select close off
and then sculpts on. So we will be sculpting
our Bush shape, but then we will have to close it manual but it's
not a problem at all. So we start drawing our Bush
and then from the last note, we keep creating our shape. And here again,
from the last note, we create our shape further. And then here here and now we
need to close it manually. Node two, last node, we connected with
the first note. And if you're again,
a perfectionist, you can also select this new Bosch element
with the background, go to the Shape Builder and cut out this
unnecessary shape. Now, there is another
bosch in here, but I will show you
a little trick. If you've been
using affinity for a longer time, you
might have some, for example, botanical
elements that are already pre saved in
your assets library. Let's go, for example,
to my assets Library. I have a whole category of
assets called greenery, and this is where
the magic starts. When you're using infinity
designer for a longer time, you start building your
own unique vector assets and you will notice
that with time, you're gaining speed and you're creating illustrations
in a faster way. For example, over here, I had this bush that I
created for one of the books. For one client and I already
have a bush shape that is also nicely cut at the bottom. I can just change it to this gray scale so that everything is nice and neat and I can
recycle this vector acid. If I needed to draw
it from the start, I would probably do
something like this. I would keep using sculpt keep building the front or the
upper part of this bush, then I would just
close it manually, and then I would get
the rectangle tool, get the rectangle, and from the move tool position
everything at the bottom. I'm going to change the color
so that you can see better. Go to the note tool, bring this note down, fix any shape that needs fixing. For example, here I want
a little bit more round. Here it looks good. Then having those two shapes selected, you could, for example,
go to the Shape Builder, make sure there is a minus and just get rid of
the bottom part. And you have this Busch shape that you can use in
your illustration. So yeah, you can even
position it here or you can add it into
your assets library. I'm going to delete it. So I recycled something that
was already in my library. You can either create
elements from scratch, but it did take a little bit of time to create this fence. So right now, you could consider selecting this fence element, go to the asset studio. And for example, I
also have a category. So I've been illustrating a
lot lot to lot with affinity. That's why. I have a lot of groups do not
feel intimidated. This comes with time. I also have a category
called buildings, and I already have a fence. But I don't know,
this one looks nice, so I could add asset from selection and add
in another one. From one farm themed book, I created, for
example, this fence. This is also a very basic fence. It's basically just what's
it called rectangles? So I could just quickly recycle this fence from
a previous project. Let's actually see what
it would look like. Pa. See, that's also
very, very interesting. I'm gaining speed because I am recycling something that
was already created before. You can also keep it invisible, keep the original fans, and when you're finalizing
your illustration, you can make up your mind which of the assets you
would like the most. I'm going to keep
this one. This bush can also go here as part of our foreground and then those two bushes
going to make them a little bit darker
so that they're not the same color
like the path. It's just for the visibility, I'm going to group them.
8. Vectorizing The Details: Pen & Pencil Magic: It's just for the visibility, I'm going to group them. Bringing back the sketch. Now we can draw a very
rough shape outline of the trees that are or
could be in the background. For that, to keep this
very organic line, I'm going to go to
this mountains layer, switch off everything else, and then prepare my pencil tool. So from the pencil tool, I would like to keep sculpting. That's why my auto
clothes will be off. And then I don't want to use any stabilization because I want my shapes to be a
little bit more rough. I just make a test block just somewhere here to
see if I like the color. The most important thing is
that you can see better. That's why it's okay to
temporarily increase the saturation of this grade
to make it a little bit deeper so that you only see the shape and then you can
still change the color. Go to remove it. And now
I will start drawing like a rough shape of
the trees Usually, the very last note
is a red note. That's where you will recognize, uh, I have to draw from there. Then we have to
close this shape, but going all the way
to the back node tool because we disabled Autoclose and we have to snap it together. It turned yellow for a second
and now it's all snapped. Now we have this dark shape, we can go back to the pencil
tool and sculpt is still on, so we can keep S over here, we can keep refining this shape. If something looks weird, we can keep refining
those shapes. Apala this way is just to grab a note that already exists and just to keep drawing there. That looks good. This one
could be a little bit more pointy and sculpting
those shapes. Here, there's too much space, I would like to add
in some extra shapes, and now we can go back and change it to this original gray or just go to the gray sliders and adjust the color as well. But actually maybe it looks better if it's
a little bit darker. The gray scale is also there to help you see things better. Now we will draw the snowy
tops of those mountains. And for that, we
can use the Pentl. But first, we can go
to those mountains and change them to lighter gray. Then we go to the
Pentl first of all, we can make a test blob. I like to go then to the color studio and change
everything to white. Then I'm deleting my test
blob and I will be randomly creating whoops from the pentil I go back to the mountains. I will be randomly creating those top snowy parts
of the mountain. And then I'm clipping it
into this mountain shape. Now, everything is already clipped so I can
just keep going. I make sure to close my shape. Now everything is closed. When it is closed,
then I can just make a new note and it
will be a new shape. I'm going to follow
my reference here. Okay. That looks good. I can still group it in
case I want to recolor it. Next, we will be drawing the
snow, for example, here, the snow that lays on this roof and the snow that is
here on the windows. I have a quick look at my reference illustration
and then I will just switch it off from the
preview tool and I will simply
freestyle, so to say. I'm going to kick
out this fence, go to the pencil tool. First, I'm going to
make a test blob. For starters, I
would like to change the auto close to close far, for example, is
good for that and I don't want any stabilization. I already remembers
my previous settings that I want only
fill, which is white. You see here on
the gray sliders, we have 100% white and I
don't want any stroke. First, I'm going to
create some snow as if it was lying over
here on the window. There was a lot of snowfall at night and now it's
on the window. You see auto close is working, but I still have
to come relatively close so that the
shape is closed. I can already select this
snow over here and group it, and then open this folder, select any of those elements
that are within the folder. If I draw anything new, for example, this, it will already be inside of
this whole group. Let's imagine there's
snow over here on this wooden element
of the cottage. Let's of course, draw
the snow on the roof. There's also snow on
this little stair area. You can always double
check your references. There's a big cape of snow.
Can I say it like this? That is definitely on the roofs. What else? On the window sills. Let's also not forget the fence and maybe
the bushes as well. By all means, have a look at your reference photos and
keep adding in the snow. Maybe over here. Right now
I'm basically improvising. I also notice I
think those elements of the fans are sticking
out a little bit too much. I'm going to find the fence and make this not
sticking out so much. That looks much better.
Back to my original group, I can rename it into snow and
you will know what I mean. I open the folder, I click
any layer that is inside, back to the pencil tool
and I keep drawing. For example, let's
draw some more snow on this bush over here. And I would also like to draw
a little bit more snow that will cover this fence
area. See what I mean? This looks a little bit
more flattering as if this fence was really sitting deep in the snow, so to say. And you can also add in the
snow here on those trees. And here, and I'm missing
also those windows here. And maybe a little
bit on the chimney. And since we have this
white color pre selected, we can also go underneath our cottage and with a little
bit of rope stabilization, we can also draw with this white color the smoke that will be coming
out of the chimney. Okay. Then the last thing that we got to draw is
the actual snow. This is snow that
drop that has fallen and is on the trees
and on the house. And now we go and we create right on top of everything
else our snow drops. This will be just
a perfect circle. That's why one finger here. We keep creating copies using the gesture
with two fingers. Right now, I will focus only on one size of this snowdrop. Right now, I create a lot of circles and I need
to group everything together so that our
layers do not explode. Then I select the topmost
circle, for example, I make a copy out of it and keeping one
finger on the screen, I keep this perfect circle, but I make it a
little bit smaller. I add in a little bit
of size variation here. You will see that I'm keeping two fingers on the screen
all the time and I'm just creating copies of
the same circle. So now I can also move the sketch to the side because I don't need
it really anymore. And I can just double check if I have everything that I want
to have in my illustration, and everything is
pretty much in there. So right now, this is our
gray scale illustration. It was still a lot
of choices to make. We focused on, for example, the shapes of the windows. We focused on what
fence we prefer. We focused a little bit
on the composition. We made sure that we
populate this front plane, the middle plane, and the
background plane properly. Over here from the node, I feel I would like to add an extra node and also to change the shape
of the mountain. So that it feels a
little bit more natural, and we were able to focus on all those decisions without messing around with the color. So now that the
whole base is ready, we added in all the details. Now we are ready for the next step,
which is the coloring. And when you have your
color palette ready, this will be really a breeze. Alternatively, perhaps you have another winter illustration of yours from your own portfolio. You can also import it here. So that you can use the color
picker and you can recycle the colors that used previously for some other
illustration of yours. That's another strategy that I like to use over
and over again. So we're ready with the base. In the next lesson, we will be coloring in our illustration.
9. Coloring In & Color Palettes: In this video, we
will be coloring in the base of our winter
cottage illustration. So I think this is really
where the fun starts. So far, we were working on the grayscale version
of our illustration. So when we have a look
at all the layers here, they are all in grayscale. Just as a reminder, you can
work in gray scale very easily by exiting the swatches in the color studio in affinity. And over here, we already are in the gray sliders section. There's a sub menu of
different color modes, RGB sliders, HSL sliders. You can also use the color
wheel it's super handy to start working first with the gray sliders when
creating your illustration, especially regarding
the number of details. The more detailed
illustration is, you don't have to decide on
the color palette first. You can draw your detailed illustration
in gray scale first. This will save you
actually a lot of time because you will not get blocked thinking
about colors and the value of your colors and
the overall color palette. So for me, this strategy has proven to be the most efficient, and I'm quite fast creating my illustrations
using this technique. But now this is where
the fun starts. Like I said, we will be
coloring in our illustration. And I prepared for you a few color palettes that
are inspired by winter. I will be making
those color palettes available in the
downloadable resources. You can work with color palettes through the color studio. When you go to the color
studio, you go to Swatches, and this is where I also have my winter cottage color palette saved up directly
to my swatches. I created this color palette as an application
palette so that it is accessible across
all the documents. In my affinity
designer for the iPad. If I wanted to have
this color palette on my desktop version, I would have to export this
palette and then import it because this sharing of color palettes is within
just one given software. So within the iPad, for example, and then separately for
the desktop version. So this is option number one. You can save up your
swatches here or you can save up your color
palettes as assets. So here in the Assets studio, I prepared a new color palettes winter color palettes
assets category. I will make it
available for you. You can download it, and
then you can use any of those color palettes to
create your illustration. To create a new assets
studio category, you go to the main
Hamburger menu and then you have
to either import a category or just add a category if you would like to create it from scratch. In our case, I
wanted to show you, since I will be making those
color palettes available, I wanted to show you how
I would import them. I am going to go
ahead and delete it. Again, through the
main hamburger menu, I'm going to remove it, and then we will import
it back again. So to import the category of assets with the
color palettes, we have to go to the
option Import category, and then the color palettes will be available
for your download. You have to save it up
either to your Cloud storage or directly to the
storage of your iPad. So what I like to use for my iPad is simply the Files app. This is the icon
for the Fils app. And I have a bunch
of folders here with my backtup files,
various resources, and I also have a
dedicated folder for all my affinity assets
because I'm still working on all those
assets categories and every now and then I need to refresh it and
back it up again. Here I saved up this category
of winter color palettes. Very important, it has to
be on the device storage, and then you go to
Import category. And over here, you could
have, for example, gone first to on my iPad. You basically have to
find the folder where you saved this category of
assets, it's over here. It has a file extension
dot AF Assets. And then you just
select those assets, and they will get imported into your interface right
away. There they are. If you click on the
name of those assets, you will see the entire list of assets that you have
in your asset studio. And then if you would like
to use those color palettes, you can just long press and
drop them onto your document, or you can just click on the color palette
and select Insert. Pala. Go to the Mufto and
these are your color palettes, but I'm going to remove
those because I prepared the color palettes
that we could be using for this illustration
here in the middle. So you have a few color
palettes to choose from. I named them winter cold, WinterFest and Winter Green. They share this cool nature, so to say, that I
associate with winter. You are more than welcome to choose your own color palettes. Maybe you have color palettes that you used previously for your winter themed illustrations and the easiest way to
go about it is like, in this case, this is an illustration that
I already completed. This is just a JPEC of the illustration
that I created before. You go to the hamburger
menu and you place it, for example, from your photos. Any previous illustration that
you would like to recycle, you can import it through
this menu over here. Alternatively, you can also do some research on Pinterest. And then, for example, if you like a color palette, you can screenshot it, again, save it to maybe the photos, app on your iPad, and then go through
the same menu, place place from photos. On Pinterest, you
got to be careful because sometimes you see too many illustrations by other
artists and you are maybe too tempted to copy everything, so it's better to come up
with your own color palettes. One way to go about it
and to stay a little bit more neutral is to go to Google Images and to search for non illustration photos
that you can screenshot. For example, this one
looks very pretty. There are those winter blues and purples paired together with complimentary reds and oranges. So maybe you would like to
screenshot this photo like so. I would screenshot it like this. And then click Done and
save it to my photos. And then I could go to Affinity and search
this photo from the Photos app and bring it as my reference photo somewhere
onto the document area. I'm going to make a test swatch, and if I wanted to color
pick those colors, then I would use the
color picker tool, and this is how I could theoretically build my
new winter color palette. So three options. You can use your
previous color palettes or previous color
palettes saved as assets. You can search on Pinterest, but be careful not to copy everything from
a given artist, and then you can
also look through Google images or even
use your own photos. Okay, so enough about
the color palettes now, we can start coloring in, and I think I will be using this original color palette
with the cool tones. So I will deselect all the other color palettes so that I can stay more focused. Now, this will be
relatively fast. I always recommend to select the object that
you would like to color, not from the move tool, but actually from the node
tool because for example, if I wanted to select
this path from the MVTol, sometimes I would have
to click too many times. In this case, it was
relatively fast. But normally it takes longer. The easiest way see
is to do it from the node tool because
the node tool selects everything super fast. In case your background
is not selected, then maybe it is locked. Over here, you see this padlock symbol that means it's locked. So for the background, you probably locked it so
that it doesn't move around. For the background, you
would have to go to the layers panel sort of manually. And then for my background, I'm going to choose this
lighter pink color. The snow, the smoke
coming from the chimney, the moon or the sun
will stay the same. Now let's maybe select the
main base of the house. So the walls will be S, you can also use the colors
from the color swatches. I'm actually going
to do that. So I will choose this darker pink. And then because we grouped all those lines into one group, it will be very easy to apply a new color on the group level. Okay. That looks good. Now, let's also
color in the roof. Maybe this red or you
can select the color directly from your
reference photo. For example, I can select
this mountain and go here to this blue from the previous illustration
that you created. Let's also color in the trees. Maybe choose this blue color. In the next lessons to come, we will be also applying gradients to some of the
elements of our illustration. Now let's take this blue here, the same blue for this bush, the path, another blue. We will apply a
gradient later on. The snow shouldn't be gray, it should be a little
bit more bluish white. Then the elements of the fence, maybe the ones on the front
will share this color here. And then the element at the back will have
the same color, but then we can get
out of swatches. And now we don't need the
gray sliders anymore. If you're working in
the color format RGB, I tend to work with HSL sliders. So we apply the same color, but we can make it a
little bit darker. Okay, now this step can have maybe the same color
that is on the fence. And the same with the chimney, it can share the same
color or actually, this one is a little
bit more warm. So I'm going to apply
this original color from my illustration. The same here. The reason why those
colors are a little bit more yellowish is that I chose
this original gray color, and then from HSL sliders, I increase the saturation a
little bit so that you see, so that it's a
little bit warmer. Okay, so now I'm
going to go ahead and color in the rest
of the elements. Remember that if some of
the elements are grouped, it will be easier to
bulk color them in. The same for those
glass elements of the window and the same here. Again, I'm selecting or finding the element
through the node tool, going to the group level, applying this blue color. Again, selecting one element and then switching
to the group level, applying the same color. Now let's look at the
frames of our windows. I will choose the brown from
the original illustration. You can also choose it
from your swatches or play around with this brown
that you're creating. You can make it darker,
you can make it lighter. I'm going to choose this
original brown from this illustration and really do not shy away from recycling
your color palettes. So it's actually a really, really good strategy to have another illustration
of yours over here, the way I'm doing it. Because by re using
your signature colors, so to say, you are creating
a more cohesive look. You will be so to say, recycling some of the colors, and they will become eventually
your signature colors. Like, you will be
the person who likes a particular a particular
type of blue, for example. And then hopefully with time, you will become more
recognizable for that. People will start to
recognize you at aha. This is this artist. I do recognize their line or the colors that
they're using. Alright, what else is left? The shutters over here. So I can select both of them and choose this
basic red color, and then I can open both of them and select two groups and
apply this darker red. Yeah, I will have to
check after filming this video how long it took
me to color everything in, but it's actually really,
really, very fast. And with that regard, I think that working in gray scale first is
really worth it. It makes you more efficient. You are able to first focus on the illustration itself and then you can leave the
colors towards the end. I just switch
quickly to the node to so that I can as
I was coloring in, I saw some imperfections
that I would like to fix, for example, how
the snow is here. By clicking anywhere
on this line, you can create extra
nodes to edit your shape. I think this looks good. You can also use the privy
mode to cut out anything else. And via this could be actually
the end for this course. Our illustration is colored. However, in the
following videos, we will be adding
in even more depth and interest into
this illustration. So we will be still checking the values and the contrast
on our illustration. We will be applying some
transparency tricks. We will be also
practicing to add in the Gaussian
blur on this moon. And finally, we will be adding in more depth by
using gradients. I'll see you in the next video.
10. Transparency Tool: In this video, we
will be applying transparency to our
vector objects. So now we will be adding
even more interest to our illustration by
applying transparency. You can find the transparency
tool here on the left. The first option is
the gradient tool. We will be using it later, and then we have the
transparency tool. Let's bring the visibility
of everything else. Around and to demonstrate
how transparency works, let's create first
normal rectangle that will be also overlapping our original
illustration because before you can use the
transparency tool, you can change the opacity of
your object by manipulating it directly on the layers panel. Transparency will help us
to edit our objects and kind of edit them from
fully opaque to fully transparent in various scenarios that I will show
you in a second. But without using the
transparency tool, you can change the opacity of the whole object from the layers panel by going
to the three dots menu, and over here you have
the opacity slider. So you can make it more
transparent by using the slider. This is very light. And then
it's getting more opaque, and then at 100%, we have to full opacity. So let's maybe leave the square so that
you remember about it and create another square to explore other types
of transparency. Okay, so we have this
square selected, and then we go to the
transparency tool, and you start adding in
transparency by simply drawing a line you can manipulate
both of those circles. So the one on the left
and the one on the right. The very first type of
transparency which you see here in the menu is the
linear transparency. So this is the default
transparency that you start with. And I will just keep
this line at a diagonal. So that you can
see how it looks. Over here, you have
a little line in the middle that can
also be manipulated. You can bring it up or
you can bring it down. You also see that this
circle here is full. It means this is the
side of the line that will have the highest
opacity with the color, and this circle here is white, which means it's empty,
there is no color. It's not about color changes. It's about making the color
more invisible, so to say. Then you can use this slider to adjust this
transparency further. So this is how this looks. Then from the MO tool, we will copy this rectangle, go back to the
transparency tool, and now we will explore
another type of transparency. So we can go back
to the sub menu and move to elliptical. Okay. So see you already
have an ellipsis here. You can position, for example, this full opacity
color in the middle, and then you can
move both sliders. They're actually
quite equal here. You see they are both white, which means you will be moving towards more transparency
with those circles. And this created this nice oval or elliptical shape for us. And there's another slider
line that you see here. You can further work this
transparency by making it with more defined edges or less defined
more blurry edges. Gonna also leave
it in the middle. Actually, magnetic snapping will make it snap exactly
in the middle, and this line will turn red. So this is the
elliptical transparency. It looks like an ellipsis. Then again, to the move
tool, we copy another. It's actually still this
original rectangle. And then we go to the
transparency tool and from the elliptical,
we move to radio. The way I interpret radio is that it's basically
behaving like a circle. We have a radius here. I can also position it
here at a diagonal. And again, full opacity
is in the middle, which is represented by
this fully colored circle and less transparent
so more transparency, more invisibility, so to say, is represented by
this white circle. And again, we have
this line slider. We can also position this
circle outside of our shape. It will also help us create interesting effects
because the color will be still kind of captured in this original
rectangle shape. So nothing will
be op, see daisy. Nothing will be kind of falling out of this
original shape. I'm going to make it a little
bit smaller so that you see this radius and the circular shape as opposed to this elliptical shape so that we can see the
difference better. And then I will
make another copy. Back to the transparency tool. And the final type
is the conical type, which I don't really use a lot. It looks a little
bit like a cone. So I'm going to
position like this. Sometimes it works when you just position it on the
edge of your shape, and then you can
play around with it. But personally, I
don't use it too much. You can also manipulate
this line over here. It looks a little bit like a
cone when you deselect it. So I'm going to go
to the Move tool and the select so that
you can see everything. You can manipulate the
opacity on the layers panel, and then you can apply
different transparencies by using the transparency tool, linear, elliptical,
radio, and conical. Another thing that
you can change. So I'm going to select, again, this original rectangle. You can also rotate your
transparency by 90 degrees. So this is moving by 90
degrees. Let's bring it back. And you can also reverse it. What it will mean is that this full circle will switch places with this empty circle. You can also see it here. It looks very
interesting. See, now we have it the other way around. So the outside is more opaque and the inside
is more transparent. I can also show you that here. And again, the color
is still contained by this original
rectangle shape. Okay, so those are all
the transparency types. This is a very,
very useful tool. And in our illustration, we will add transparency to this smoke coming out of
the chimney so that it looks as if the most
dense smoke was right at the chimney and then it's kind of getting
more transparent. That's a nice effect. So I use the note tool to quickly
select the smoke, and then I go to
the transparency. And I never know which one is which one when I start
drawing the line. And now we can kind of experiment with what kind of transparency we would
like to apply here. When we go to the Layers panel, we see only the
smoke is selected. I will maybe rename
it because it's just named as a curve. Okay. The transparency
is only applied here. You can, of course,
explore here other types. I think elliptical would also
be very interesting here. But linear is very
straightforward here. If you don't want it
to be a little bit too roughly cut with a little
bit more variation, then you can either go for the I think elliptical
would be nice because it's not like this
clean circular shape. And then you can also work the slider to see if this is the effect that
you're the most happy with. So maybe I will drag
it a little bit up so that there's like bits of transparency also
here on the left side. And then I normally like
to go to the move tool and deselect to to see the
effect. I like it a lot. See, let alone this, add it in a little
bit more interest. Alright, so this is it. I don't think we have to add transparency to any
other elements, except except maybe here because those are the snowy
parts of the mountain. How would it look? Oh,
that looks also great. Maybe elliptical again. Mm hmm. Ah, I will show you
one more trick. Right now, we have this little
element on the mountain, and we could try to replicate this effect for the remaining
parts of the mountain, the white ones, the snowy caps. There's a better way,
which I absolutely love. So let me show you
the better way. Having this shape that is already edited with the
transparency tool selected, we go to the three dots
menu and we do copy. Then we can go to the next element three
dots menu, paste style. Look what will happen.
Uh. So the whole thing that we edited previously is
reapplied. Oh, I love it. And then we can go to the
last one, three dots. And where was that
paste style so fast. I mean, when you get used
to all those tricks, it will be like, boom,
boom, boom, super fast. You will be drawing
very, very fast, and you will become
very efficient. Oh, super Okay. This is where we stop, I guess. I hope that you like
this transparency too. It's super Duber interesting, and I hope that you
will like using it. In the next lesson, we will be refreshing our
knowledge about the gaussian blur and
we will be adding a glow effect to this
little moon over here.
11. Gaussian Blur: This video, we will be adding in the Gaussian blur
effect to one of the elements in
our illustration. Namely, we have this little moon or this little sun
from the node tool. I'm going to quickly select it. And I think it would
be very interesting to add a little bit of blur, and it's going to look kind of similarly to the
transparency effect that we were using in
the previous lesson, but it's still a
little bit different. The Gaussian blur will help
us to achieve a glow effect. If I bring back the
visibility of everything else that I have here
in my documents, this is the glow that I created on my original
illustration. So now we will try
to replicate it. How to do that? I'm going
to make everything else invisible so that we can
focus here. This is our moon. I will start by making
a copy of the moon. You can also group it so that everything belongs
to the moon, so to say. So this very first moon
has to stay opaque, so we are not touching it. And the original shape of
the moon that is underneath, it will be squeezed
out and blurred out. And this will be the building
block to create our blur. To go to the Gaussian
effect, and by the way, I hope I pronounce it correctly Gaussian Gaussian. I
think it's Gaussian. So we stay on the moon
that is underneath, and to add in the
gaussian blur effect, we have to go here on the right most menu
to the FX options. From all those options
that you can see here, from the layer effects options, you can go to select on this little slider
here, Gaussian blur, and then you click on it, and you have an extra slider that showed up here to the left. And then, you see, you have to use
the slider to make this glow effect bigger or
more subtle and smaller. Back to the move tool. And now the best way
to see if it made any difference is to
make it invisible. So we can also deselect, and we're bringing it back And let's zoom in so
that you can see better. So now there is no glow
and there is a glow. This is a very
subtle effect again, but we are adding more
interest to our illustration. The Gaussian blur effect helps you achieve this
diffuse glow look. So have a look at your
illustration if there's anything else that you
would like to glow. Maybe also you could duplicate. I'm not going to do that,
but just to demonstrate, I will duplicate the mountains. We can also kick out the white
elements on the mountains, just keep this blue shape, and we can experiment, what would it look like if there was a glow on the
shape of the mountains? And you can also change the
color of the mountains. Maybe we can change it to
this red just to demonstrate. You don't have to stick
to the original color of the elements that you
would like to glow up. You can choose a
completely different color for interesting effects. So now I have a copy underneath
my original mountains. Staying on this layer, I go to layer ex, Gaussian blur. I click on it, I get
access to this slider. And now I make the glow. So red looks a little bit weird, but don't worry because once
you selected a given color, it's not set in stone,
you can still change it. So, ah, oh, purple looks nice. Blue looks nice, maybe a
darker pink would look nice, or actually lighter pink. You can choose the new
color from the swatches, but you can also go
to your sliders. Maybe make it white. Oh, I actually like that. You can also go
to the moveTo and you can change this shape, so it doesn't have to stay within this original
mountain shape. I can drag it a little bit up, deselect, so that
it's a little bit more visible and I
actually really like that. So I'm going to
keep it this way. I just want to double check the blur on the moon
got deselected. Now it's fixed. Okay. So in this lesson,
we explored again or refreshed our knowledge
about the Gaussian blur. We added a nice glow
look to the moon and to the whole background
behind the mountains. We are nearly finished with
refining our illustration, but in the next video, we will move to I think one of the most fun parts
of this tutorial, namely using gradients to add even more depth
into our illustration.
12. Gradient Tool: In this video, we
will be applying gradients to our vector objects. This will be the final part of adding more depth
and more interest to our winter cottage
illustration. We will be adding so
called color transitions because this is what essentially gradient tools are about. They are very similar to
the transparency tool. We will be doing
the same exercise. I will demonstrate how
the gradient tool works by drawing another rectangle and adding in different
types of gradients. The menu will be pretty much the same with the transparency tool. The difference between
the transparency tool and the grading tool is that
here we moved within one color and just played around on this spectrum of its
opacity and transparency. And the gradient tool
will be a wonderful play between two colors or
even multiple colors. And to demonstrate what I mean, I'm going to go to
the gradient tool and start drawing my first line. So even though it's not super
clear right at the start, there is a different color on the other side of
this rectangle. So when I click on this
very first circle, this is this original
red color that I used when I was
drawing my rectangle. And when we have to click on this other circle
that is at a diagonal, this is the darker version
of the same color. So from my experience,
the default settings of the software is that when you create your first gradient line, the second color that will be chosen for your color transition will be the same
color but darker. However, you can of course, choose any other color. So here I added in just having selected this
other little circle, I added in another color
and you can really play around here to see what
effects you can create. The menu is pretty
much the same. So when we click on gradient
types, we have linear. We've got elliptical,
we've got radio, and we have conical. So I'm going to keep here at a diagonal this linear
gradient, make a copy. Go to the gradient tool, change to elliptical so that
you can see things better. So this will rather move within this ellipsis shape
and then another copy. Back to the gradient tool. Radio will be editable at
this radio line, so to say. And finally, we've
got the conical type. Here we can also move
on this editing line. Now, a fun thing
about gradients is that you can apply
more than one color. Simply click along this
line to create a new point. Now this new circle is selected, and then you can go back
to your color studio, you can move this point
and you can also move the sliders that will dictate how much of a color
you have along this line. I can also create one
more point here and add in something more
contrasting like this. And that means that you're not
limited to only one color. Now let's choose this one, make another point and
choose another color. That looks pretty
psychedelic and again, those sliders here,
they will help you to edit your gradient further. The same with the
radio gradient type. And the same on this blue line, create any new point. Let's really make
multiple points here so that you can see
it's really in action. This is where you can basically
play with your rainbow. I'll add in here on
this radial one, a blue color so that we have a little bit more contrast and the other options
remain the same. You can also rotate everything
by 90 degrees or you can reverse the order of the
colors on this spectrum, so to say. The same here. So with that regard, the
gradient tool behaves and give us all those editing options in exactly the same way as
the transparency tool. There's one more
interesting thing that I wanted to tell you about, and this by the
way, also applies to the transparency tool. We are going to create a circle, perhaps change the
gradient to yeah, bitmap. Bitmap, by the way, guys, I'm not talking about
it at length here in this lesson because bitmap is basically when you
get, for example, a pattern and static
image like a JPEC or a PNG and it can create a
gradient from that image. We do this technique when we are testing our repeat patterns
in my other courses, but in this course, we will not be
discussing bitmap. Where was that? We can
keep the radio one. I can also remove
one of the points. For example, I selected
this purple color. I can also delete it to
make things simpler. Let's, for example,
change this one, all the colors in here
to warmer colors, another new thing that I
wanted to show you is that for all those examples we were manipulating with gradients
on the fill side. The fill is what fills
the inside of our shape. But we can actually also add
in the outline, the stroke. I'm just going to add here a
standard black stroke line. We can manipulate its width
from the stroke studio, and we can add gradients to it. I cannot really imagine where
I would use that maybe for lettering because you can also manipulate text objects
with gradients. Maybe it will be interesting to use it for some
lettering experiments. Personally, I haven't
used this one because I rather stick to fill, but I still wanted to
show you this option. Then back to the gradient tool, when you select
the question mark, you can also see what
other options you have. We have, for example,
this full circle is selected and it gives
us the fill context. We need to activate the line
context, this one here. Then by just again dragging
a line on this stroke, we can create our gradient. I can also move
this first color to the top and the other
one on the other side. Now we can choose some cooler colors that will be on the stroke
side, for example. Oh, maybe this looks
contrasting enough. You can still have
all the options to edit your stroke
for normal stroke, except that this one
is with a gradient. If you would like to bake this stroke and convert
it into curves, you can do that too, and this
gradient will be preserved. You go to the three dots
menu, expand stroke. Let's maybe go to the Move
tool to stay neutral. Then you can see that we have this original ellipse shape with its unique grade and with the warm colors that I selected. We also have separately a new shape that was
created from this outline. But if we go to the Node tool, we will see this is not
just a line anymore. This is actually a new
curve that is further editable in the same way as any other filled
shape, so to say. Let's go back, bring
this, group it. You can, of course, resize it. All the other editing
techniques apply, so to say. So to sum it up, there's
a lot of similarity between the transparency
tool and the gradient tool. Not everyone knows
that you can create gradients with the whole
rainbow, multiple colors. Remember also, let me, for example, choose
this blue color. You just don't have to select
a color from your swatches. You can also use this
eyedropper tool. You can leave the
swatches panel and you can keep editing this
color through the sliders. For example, you can
change its hue completely. Green looks nice, or you can
manipulate its saturation. This is really psychedelic. So all those colors
within those gradients, you can also edit them like any other solid
color, so to say. Now, how to apply what we learned here to
our illustration. So let's maybe remove
this square so that we can see better and move back to this original
illustration that I created. So here the sky is the
limit, and normally, it's very common
to start by adding a gradient to the sky to create
some interesting effects. So feel free to
add in gradients. All over the place. This
is your illustration. You can add in a gradient
just to the sky to practice, or you can dit the
gradient even to all the small details
on the cottage. I recommend always to start with the biggest
planes of color. So I will add in a
gradient to the sky. And then this original
illustration, it's not so striking,
but actually, if you zoom them properly
or if you printed it out, you would see that
there's this pink color of the sky that gets
a little bit lighter. Here, we also use the
Gaussian blur effect, so this white color
will stay and it will not be edited if we change
the colors on the gradient. I think in this copy
of this illustration, I will use a slightly
different gradient to have not just the same pink color
with different brightness, but maybe different
hues as well. Then I will also
add a gradient to this snow area in
front of the cottage. It's again, exactly
the same blue color, except that here it's a
little bit darker, here, it's a little bit brighter, and I added in the
gradient to the path. To the bushes and to
the background trees, and of course, to the mountains. I'm going to switch off
through the preview mode, anything else so that
I'm not distracted and I will start in
adding my gradients. Okay. All those
happy experiments, I'm going to group them
so that they stay out. I will go to the
Layers panel to select the background layer
manually because it's lock, so I would not be able to
select it because it's locked so that I do not select it and move it
around by accident. Alright. We have the
background layer. Let's maybe zoom
in a little bit. We go to the gradient tool. And then we create a line. It doesn't matter
at the beginning what colors you're using, you might actually on purpose,
choose contrasting colors. The first circle, you
have to click it will maybe have your original color
that you have in mind for your sky and the second color just to see what shape
this gradient has, I can actually stay
some contrasting color that you can adjust later on. I would first recommend that you see what type of a
gradient you would like, but I think bitmap no, I think we're just Shop,
it lost the color. I think we will just stay. Within this original line
color with two finger tap, I'm going to go back and I
will keep a linear gradient. I will position
it in the middle, more or less at a straight line, and now I will be ready to even though this red looks
actually very interesting. But now I can go
back to my swatches, maybe to either the winter
cottage color palette or to another winter color
palette that I have saved. I was thinking actually to use this orange for an
interesting effect, but maybe make it a
little bit subtle. Oh, I like that. I think
I'm going to leave it, but you can, for example, still
select the bottom colors. In my case, it's this orange. And it's quite bright in here. So I can leave the swatches. I've got the selected, so I have to make sure that I'm
on the right color. And you can, for
example, keep it orange, but make it more pastel.
Oh, that looks lovely. I always go back to
the move tool to deselect the gradient
so that I do not keep editing it further.
Wow, this is great. I hope you can see
that on my camera. So there's this very
subtle pastel pink that kind of transitions
into this pastel orange. And this white glow, it's not a gradient. It's the gaussian blur. And that's another advantage of doing the Gaussian
blur separately. It will not be edited over
when I'm using a gradient. Doki now the mountains. From the node tool, I will find my mountains. I'm going, it doesn't matter how but I'm going
from top to bottom. My mountains are selected, and then I go to
the gradient tool. I think over here I
will also draw a line. I have this pastel blue and I'm thinking what to do with the color that
is at the bottom. I'm going to keep it
as linear as well. Maybe I make it lighter. And maybe I change the hue
to a little bit more purple. A little bit more red,
something warmer. I have full saturation here and I'm just playing
with this slider. Actually, that looks very
interesting and it's very, very subtle, but you can create your own effects, basically. You don't have to be
super subtle like me. You can create something
very contrasting. A depends what style you have. But I really like this because the more this grading
goes to the bottom, the more it turns
to this new pink, which also goes well again with the overall color palette. I'm going to deselect
it, deselect everything. Zoom in and zoom out
to see how I like it, and I think I do and
I'm going to leave it. Then I'm choosing the trees. It's also good to start
from the background because the background is like a canvas for the rest of the elements. Now the trees are more to the foreground and it will
be easier for me to do any contrast and
color adjustments on those trees because the
background is already set. To gradient. I think another
line and this time, I actually like what I'm
already seeing here. I think I would like maybe
to keep the same blue color, but the bottom of those trees will be
a little bit darker. Now I would still
like to explore this darker color. I
have to select it. You can also see that
the selection change in the color studio I
would like to see, maybe it would look even better if I make it even darker
and I think it does. Now, I think I like
this whole gradient a lot and I would like to simply copy it to those two bushes
that are in the front. If you find the
gradients that you like, you can just go to the
three dots menu, copy, and then I can go maybe first
to this push over here in the front and paste style
to copy this gradient. Then you can still
see if you would like to change this
further. That looks good. The same here, can go back to the gradient tool and then
three dots paste style. Maybe do it at an angle. I think I'm going to
select this dot here and maybe from HSL sliders. That looks nice. You know what? I'm going to copy it again, so I will overwrite this
other gradient that I copied. Then I'm going to go
to this other bush. Element and paste. Oh. Yes. Yes, yes, yes. That looks very nice.
This is a happy accident. That's how I like
teaching my tutorials. I prepare an illustration that I would like to teach so
that I can demonstrate, like, all the things that
I would like to teach you. But somewhere along the way, this original illustration
is altered anyway because I'm having some uh, improvement ideas that
are very spontaneous. Actually, I could have also
started from this snow area, the background because
the background will then change and
then I might come back to those bushes
to the front to tweak the value
again, the contrast. I think it's going to be okay. I'm going to select now this front snow area that
looks very messy underneath. Then I will use
another gradient tool. I think I'm going to flip it, it should be a little bit darker on this line where
we have the cottage. Maybe it's the shadow of the cottage and should be
brighter towards the front, but this is a little
bit too bright. I will go again to HSL sliders, make it more blue. Then the other blue is a
little bit too saturated. I keep switching between those
circles until I'm happy. This can be brighter. Maybe this first blue on top, maybe it can be more
blue purple, so to say. I'm on this other circle. I actually want to do it
the other way around, so I'm going to go back and make sure that I'm selecting the blue
that I wanted to edit. And maybe I'll change
it to more purple. Now, this actually
doesn't look good, but it's good to try things out. So maybe a little
bit more green blue. Yeah. I think that
looks very good. And now the path, I think
the bushes look okay, so I'm going to leave them. Another gradient on the path. Okay, that looks quite nice, especially this blue,
but I have to change this one because this
one is too saturated. Okay. Then I will select the circle at
the bottom and make this a little bit lighter and a little bit
more green spontaneously. Then I will also play around
with this middle slider here. Maybe like this. Maybe this angle will
be more interesting. Pala. Okay. That looks good. Back to the move to deselect, and I think I've got everything. The one last thing
that I want to do is to check the contrast. I will go to the navigator menu and next to this
vector view mode, there are those three
overlapping circles where you can turn
everything to gray scale. Just as I thought
this fans over here, it should have a different
value or those elements on the house because
it's getting blurred it melts in and
you can only see it. When you change to
gray scale. You see? I can go to this color here and maybe make
it darker so that the contrast is better
and I want to get back to the color and maybe pump up
the saturation a little bit. That looks good. Now just checking our layers, I think I can also
sort things out, the mountain should be
together in one group. Here we have the
moon, the snow fall. And then we can also group the entire
illustration together. So, guys, this is it. We finished our winter
cottage illustration. We used a whole bunch of
different vector design tools, and we also played around
with the Gaussian blur, with the transparency, and we practiced in adding grading. So we're pretty much
as good as done. Now you might want just to keep this illustration
in your portfolio. That's why we created it
in the RGB color format. But in case you would
like to turn it into a poster or a postcard, and you would like
to print it out. In the very last video, I will show you how to
convert this RGB document into a print friendly
document, into the CMYK.
13. From RGB to CMYK: In this video, we
will be converting our winter cottage illustration into a print friendly format. So imagine that you would like to print out this
winter cottage. Maybe you would
like to frame it or turn it into a postcard. The best way to do that
is to actually create a copy document so that we
do not overwrite this one. When you go back
to your live docs, you will also see that your document is not
saved for starters. And we have to do
that, of course. Actually, I should have done it a right at the
beginning, but I forgot. Luckily, everything is saved. You can save it as and
you can save it to your Cloud storage or to your internal storage.
This is what I do. I'm going to name it as Winter Cottage Winter
Cottage illustration. Then I'm going to save it
to my licensing folder, which is saved up
into my iPad storage. Safe and now also the name
of the document changed. Apart from checking whether your document is saved
and checking the name, you also see here
the information about the document itself. We see here the dimensions,
3,000 504,000 pixels, and you see the little
information here that this document is
an RGB color format. When you swipe
quickly to the left, another sub menu will open, and by choosing this
very first symbol, you can create a copy, which will retain the same name, but it will have this word copy. Uh, at the end of the name. This is exactly
the same document. If you want to tidy it up, you can also kick everything
else out. Like so. So now when we exit
the preview mode, there's nothing else
in the document, and it can be a
little bit lighter. And now we will be
changing from RGB to CMYK because CMYK is the
printer friendly format. To be honest, whenever
I'm working on client work for publishing
for children's publishing, I never work in RGB. This was pretty new for me before before I started to
work in children's publishing. I rather focus on my
social media on licensing, on patterns where RGB was
actually completely fine. And there were no
printing problems, and a lot of my art was
actually meant for screens. So either for my Instagram
or for my website. But since I started to
work with publishers, the prerequisite for the final
files was that everything is in the CMYK color profile
right from the start. So if you were creating
a new document by clicking New New document, you would be able to adjust
the color format right away here instead of RGB. You could, for example,
choose CMYK eight, and I always leave
this US web coded swap V two because it
has from my experience, the best compatibility with the printing outcome that
the publishers want. But since we choose
RGB, from the start, we have to overwrite this original document
and also see how the colors will behave because
print friendly colors, the colors in the CMYK format will be normally less saturated, and we have to see
what will happen to our final illustration when we convert it from RGB to CMYK. The conversion is super
easy and it's actually much more printer and publisher
friendly than Procreate. I heard a lot of times, but it's outside of
my experience because I'm not using Procreate for illustration work for clients. But I heard a lot that Procreate's CMYK profile
is kind of wonky, and you still have to import
it to Adobe Photoshop, for example, to tweak the colors because they
will be messed up. But I cannot say anything from my own personal
experience because I never use Procreate
for client work. And then affinity doesn't
have any problems. Everything is fine.
So another reason to use affinity instead
of other software. Converting, this document
will be super easy. Hamburger menu,
convert document. And here we can choose
instead of RGB CMYK, make sure that we
have US web coded Swap V two or however
I should pronounce it. And then we tick it through, and it's already applied. This entire document
now will reflect all the colors in
CMYK and not in SRGB. You could, for example,
go and export this photo, for example, keep a JPEC share and save this image into
your camera roll, basically. But I can already tell you that I can see that the blues
are less saturated. But I think for print, it
still looks quite good. Then you can go to this
original illustration. The copy says CMYK. This change, it
gives you a hint, this entire document is in CMYK. We can go back to our
original illustration. I can already tell o, the
blues are much brighter. It will be great for your portfolio and for
computer screens. That's it. And then we can export
this one also as JPEG, the same dimensions, share, save your image, and
then we can find both of those illustrations
exported into our camera roll and try to
compare it side by side. Okay, so this is my
winter cottage folder. And now I just have to find I
think I can make it bigger. Those are the two illustrations, and I don't know
if there would be a good way to zoom it in
maybe without the side menu, or what you can also do is
to take another screenshot. And so this is just to check whether those colors
are really different. And now I opened this screenshot and I can kind of compare those two illustrations
side by side. I will also include this
comparison on a slide so that you can see it better on your computer or on
your phone screen. But most of the colors stayed the same
except for the blues. So this blue is definitely
in RGB color format, the one on the left,
and the one on the right is in CMYK and it's
a little bit more muted. But that's because, you know, the paints that are
used for the print, they are also limited
in the real world, so they will not be able to replicate the colors that we
can achieve for the screens. Is it a problem? Normally,
it's really not a problem. You can still keep tweaking
your design so that you can achieve max saturation
for your illustration. So I will make sure that
I'm again in the CMYK. File, and then the way I would
go about it if I wanted, for example, to adjust
this blue color. I have to go back to this
gradient option to access gradients and if I would like to still try to manipulate
this bottom blue color, I select the circle
that is at the bottom. I go back to the color studio. But if you have a document
in the CMYK color format, I would rather not recommend that you manipulate
the HSL sliders, but instead, you go
to CMYK sliders. Yeah, this looks a
little bit different. And to be very honest with
you, at the beginning, I really struggled to
switch from my RGB thinking about colors to CMYK thinking about
colors if it makes sense. It's standard that you have
the sliders for Cyan magenta, yellow and black in here. Black is very straightforward. You will be able to
change the brightness. And oftentimes it will happen that your gradient
will disappear, so you have to apply it again. And now everything
gets messed up again. You can try to win back the same saturation
like you had before. From my experience, if you
already, that looked nice. If you already
converted something to CMYK that was
originally in RGB, once you convert it
through this menu, convert document, I would
not edit it any further because you see
that when you start manipulating those CMYK slider, sometimes things
get really messy. Unless there's a
big color issue, when you convert your
RGB document into CMYK, then just let it be and if you already know this is
client work for publishing, for example, or it's definitely
going to be a postcard. When you create
your new document, make sure that you
don't start with RGB. But you start with CMYK, and then when you're
editing your colors, you have to get used
to those new sliders. At the beginning for me
personally, it was quite hard, and I couldn't achieve
the same effects as I would achieve with the HSL sliders because this was just so easy and I've been
using them for years. So it was also
years of my habits. But now that I've been
working in publishing for a good year now, well, I think I got used to. And I'm getting
better and better in preparing my final
client work for print, and I'm getting better
and better results because I'm getting used to
the software that I'm using, and I can anticipate what
effects I'm going to get through those sliders
better by drawing a lot, by drawing lots and
lots of illustrations. This is how you gain practice, and this is how you gain this confidence in
using the tool. And then the final
basically the tool that you're using is just a medium through which
your creativity will flow, and the end result of this creativity will
be your illustration. Talent, ideas and concepts,
they're one thing. But knowing your software, knowing what your
software can do, all the little tricks or
how to adjust the colors, I think this is a big half of the success of your
final illustration to know your software. That's why I keep creating those new tutorials in affinity because the
more you practice, the better you get and the
final results that you can then present in your portfolio
to your potential clients, they will get better and better. Trust me on that. Now our final winter cottage
illustration is complete. Thank you so much, guys,
for drawing with me.
14. Final Thoughts: Thank you very much for taking my course and learning
Affinity Designer with me. We learned and refreshed a
ton of information about using vector Illustration tools and Affinity Designer
for the iPad. I would love to see
your winter cottages, and I'm really curious to
see what you came up with. If you're taking this
course on Skillshare, you can share your work
in the project gallery, and if you're taking
this course on Gum Road, you can share your final
art on the social media, for example, on Instagram under the Hashtag
Magical Vectors. We also have a dedicated
Facebook group for illustrators using Affinity Designer
and Adobe Fresco because Fresco also has
vector design tools. So you can definitely publish your projects in our
Facebook group and ask for a feedback or troubleshoot with us and ask any questions
that you might have. If you would like
to keep learning further about Affinity Designer, I highly recommend my
6 hours long affinity and Fresco master class where we tackle vector
botanical illustration. So it's a really fun project. Or alternatively, you can take my shorter Illustration class about illustrating book
covers for children's books. Last course is not specifically just for kidlit artists.
It's actually for everyone. It's just a fun
project so that we can learn some of the affinity
designer vector design tools. Remember that, the more projects you complete
an affinity, the more comfortable you will
become with the software. And this will translate directly into the quality
of your final work. Will also see on my
YouTube channel where I'll be sharing more affinity
tips and updates, as well as shorter tutorials. And if you prefer
the written word and you enjoy reading
knowledge articles, I would love to see you over
on my Substack block letter. Remember that you can
learn with me both on skill share and through
my Gum wrote courses. See you in my next class.
 Weronika Salach, Art with MAGIC