Transcripts
1. Introduction : One tool to unlock
your creativity, to know many art fun techniques, and to play with your art. Yes, it's possible. Hi, welcome to my new
class on Skillshare. If you want to unlock
your creativity in a playful and
not stressful way, then I invite you
to take this class. So the main protagonist of
this class is oil pastel. We will explore oil
pastels, how they work. Many different things that
you can do with oil pastels and also in addition
with other art mediums. All those exercises will be create a source of
creative inspiration. They will be a source of fun. And then can help you with
unlocking your creativity. My name is Anya. I'm an illustrator. I illustrate books. I teach you on Skillshare. If you follow me, then, you know already that
I love exploring techniques and play
with art supplies, experiment, through this class, we will explore just oil
Astels but believe me, just with this little tool, you can do amazing things. You can create many
different techniques. You will take off
all the pressure of making the perfect piece of art of creating
perfect illustration. And you will also
dirty your hands. This class literally
is for everybody. Even if you're totally beginner, you will need your
curiosity, creativity. Also, don't forget
to take oil pastels. I hope you will join
me if you want to play and jump in and
in the next lesson, I will show you better
what is the class project. I'm sure you will be happy. Then you will love this class.
2. Class Project: In this class, you will
explore oil pastel and all the different things that you can paint
with this tool. We will paint it in sketchbook. We will do many small drafts. In the end, you will paint the favorite techniques that you prefer the most and
make an illustration, small, simple illustration with the technique that
you have chosen. The beginning, I will show
you the art supplies, what you will need, then we
will explore oil pastel. You will explore how to use it, different
characteristics, and then we will test
it a little bit, scratch it, smudge it, blur it. We will see what you
can do with this. Then we will Try to
go a step further and make small drafts and
apply the techniques. At the end, you will pick one of the techniques
that you prefer, and you will just explore it by doing a bigger
illustration. I just want you to proceed
with this exploration from the basic to the smaller and to
the bigger and the biggest, but always in the playful
and unstressful environment. When you're ready, you can post the process and
your final project into the project gallery. Grab your sketchbook,
grab your oil pastel, and we will just unlock
your productivity.
3. Art Supplies: Let's see what art supplies
we will use for this class. I will mainly use my
sketchbook, nothing fancy. This is a mixed media
paper sketchbook. So that's what I will use. You can use some mixed
media paper, nothing fancy. You don't have to use watercolor
paper for this class. So if you have a cheaper
paper, go for it. Then we will use water mediums,
water soluble mediums. For example, water colors, inks. I will use the sparker ink, but you can use regular in
Indian ink as you wish. You can use eco lines. I will use acrylic inks. You can use regular acrylics. If you don't have any
of the acrylic inks, you just will have to
dilute it a little bit. As for the scratching, we will do some scratching. You can use different tools. Anything that is sharp that has a needle or sharp
ending will go. For example, I have the
tools that I use for the printing process for
engraving in plates. But you can use, for example, a circle or maybe a pen if you have or you can use
those if you have any. It's perfectly fine. They will do also
a brush and water. My tip for you. My
suggestion for you is to use not a good quality brush. Maybe you have a brush
that is already consumed. That is not so good, for example, this one, we'll do its work. So basically don't use good quality brushes because we will work with oil pastels. It can be a little bit ruined, then you will have to
wash it afterwards. So you just use the
low quality brushes. And oil pastels. So I will show you
more or less the range of oil pastels that I have. During the years. I collected a lot of oil pastels
from different brands. So you can use some lower
quality oil pastels, which are perfectly fine. Like for example,
panel, I love them. They have a high
range of colors, and they are fine. I mean, if you want to play, if you don't want to do nothing professional, they
are really good. I have classical from
this is Italian brand. I think I have Jackson's, which are also good
quality and low price. And I have some medium price
and very good quality. I personally really love them. Those are arana pastel. Those are oil pastels. They really high pigmented, they cover really well. So I really really love them. I really have
different brands here. You can also find Sena, maybe you heard of them. So those are really
great pastels. Those are super professional, high quality, but
also quite expensive. And they're very, are
they seem like butter. They really are a little bit different from those
ones which are harder. And those are really soft seem like really oil color
that is more solid. So those are great. But for this kind of exercises and playing like we
will do for this class, I wouldn't recommend it
because it's pity to use them for you to consume them for the things that maybe you want to you don't want to have the stress and to worry that you're using
good quality materials. We want to play and stress out. So nothing fancy If you have your collection of
oil pastels grab for it, you can also buy the lower quality or medium
quality sets of pastels, like for example, this one, This is a gift from my family, and they are great. Not very sure brands here. I know they are from China, Zakua Also, you can use
other types of ly pastels. For example, I have Those also This is also a gift from my family
that lives in China. So those are Chinese,
slow quality. But I really, really love them. I will show you them in the other lesson where we will experiment a little
bit, what can we do? They were in this kind of box. I'm not sure if
you can find them. I'm precisely those one, but I'm sure you can find this kind of pastels
and maybe shops for kids or some Chinese
shops, for example. Those are also water soluble. I think they are imitation of A BrianoGto which I don't have. I love fabriano gatos. Sooner or later, I
want to buy them, but I don't have it. So I think that's more or less the this kind of pastel but. Okay, so that's it. Just grab oil pastels
that you have at home. Take the materials
that you won't be stressed to consume to use, and let's get started, and let's get our hands dirty.
4. Warm Up!: Welcome to the lesson
where we will warm up our hands and
warm up the pastels. Prepare your pastels
for this exercise. Good tip is to use
different brands, different kind of oil pastels. If you have at home
different brands, then it's a good time
to test it to see the differences because every oil pastel is different here. I also have tips
that are broken. While working, you probably
will see that oil pastels can break really easily. So it's a good thing
to conserve to keep the broken pieces. So let's start
testing the pastels. There is no rule here. Try to make different strokes, different lines
that you can paint. Maybe you can try different
angles, sharp angles. Maybe you can also change the way that
you handle oil pastel. You can handle it a little bit
farther away from the tip. This is good exercise
also for other mediums like pencils to see what
kind of lines you can make. It's a good warm up exercise. Here you try to do two
things warm up your hand and also see different textures that you can create
with oil pastels. Just let your imagination flow. Don't think too much. It could be just really
easy quick exercise. For example, here, I
really like the textures that you can make with a
tip of the oil pastel. You can push it
lighter or harder, see what to do to
cover the page. Is the pastel hard
or is it soft? Is it more translucent
like here, for example, or is
it more opaque? Is the pigmentation
high or is it more ly. Sometimes the pigment is slow, so you will see that there is more waxy texture and
smaller amount of pigment, for example, here, I have this
really hard in oil pastel, I'm not sure if it's
really oil pastel. This is some very, very
old pastel that I have. So I don't really remember. I think it's wax pastel, but it's very hard and
it's still cool to play. So in this way, you
get to know your tool. Just be curious, try to understand what is happening
and maybe in the middle, in the meantime, you can
have some ideas what you can do with kind of texture
that you create, maybe with one kind of stroke. Even if not, it's still a good thing to do to play
and warm up yourself, warm up your hand. And also, why did I say that you can warm up your oil pastel? Because since it's
oil based art medium, then it will warm up Um, and change its consistency
when it's warmed. So when you use it, when you scratch it, when you paint over the paper, it will warm up and it
will become softer. It happens also when the
temperature is higher. So for example, if you leave
oil pastel on the sun, then it will sometimes it
can melt a little bit, it will become softer. Sometimes it's happened to me, especially when I draw with really soft pastels like
Cenelia during the drawing, they kind of melt in my fingers. Here, you can see that I'm
blurring with fingers. There are some pieces of
pastels that are on the paper, that happens with a
lot of oil pastels. So as I warned you
in the first lesson, It's often a messy process, and the pastels are
quite dirty medium. But I invite you to
dirty your hands, to use your fingers, to blur the pastels. Often pastels are used to
be blurred and smashed. Not only by fingers, you often use some medium some solvents that you
use for oil colors, This green pastel is very hard, so it's difficult to
pl it to smudge it. I will try Sanlia which I already told you before is very, very soft and battery
creamy pastel and, you can see that it
blurs very easily. It's really different quality, different kind of pastel. Here I'm layering over
it with other color, which is more translucent. I will try to blend
two colors together. As you can see, it's
really easy to do. You can also see the
texture, the pastel leaves. It really seems some kind of cream that you
leave on the paper. And testing other pastels,
my Chinese pastels, which I suppose they
are copies imitations of Haber Castel latos
I really love them. They are very soft, very light to apply. They create this
lovely smooth layer Another great quality
of this kind of pastels is that they
are quite translucent. I'm layering over and you can
see that this fluid yellow, which I really, really love,
is really translucent. Here, I'm drawing over
with the salmon or apricot yellow
color, and it's fun. I really like those pastels. Once you feel warmed up, jump into the next lesson, and we will start to explore
different things that you can make with oil pastels. Okay.
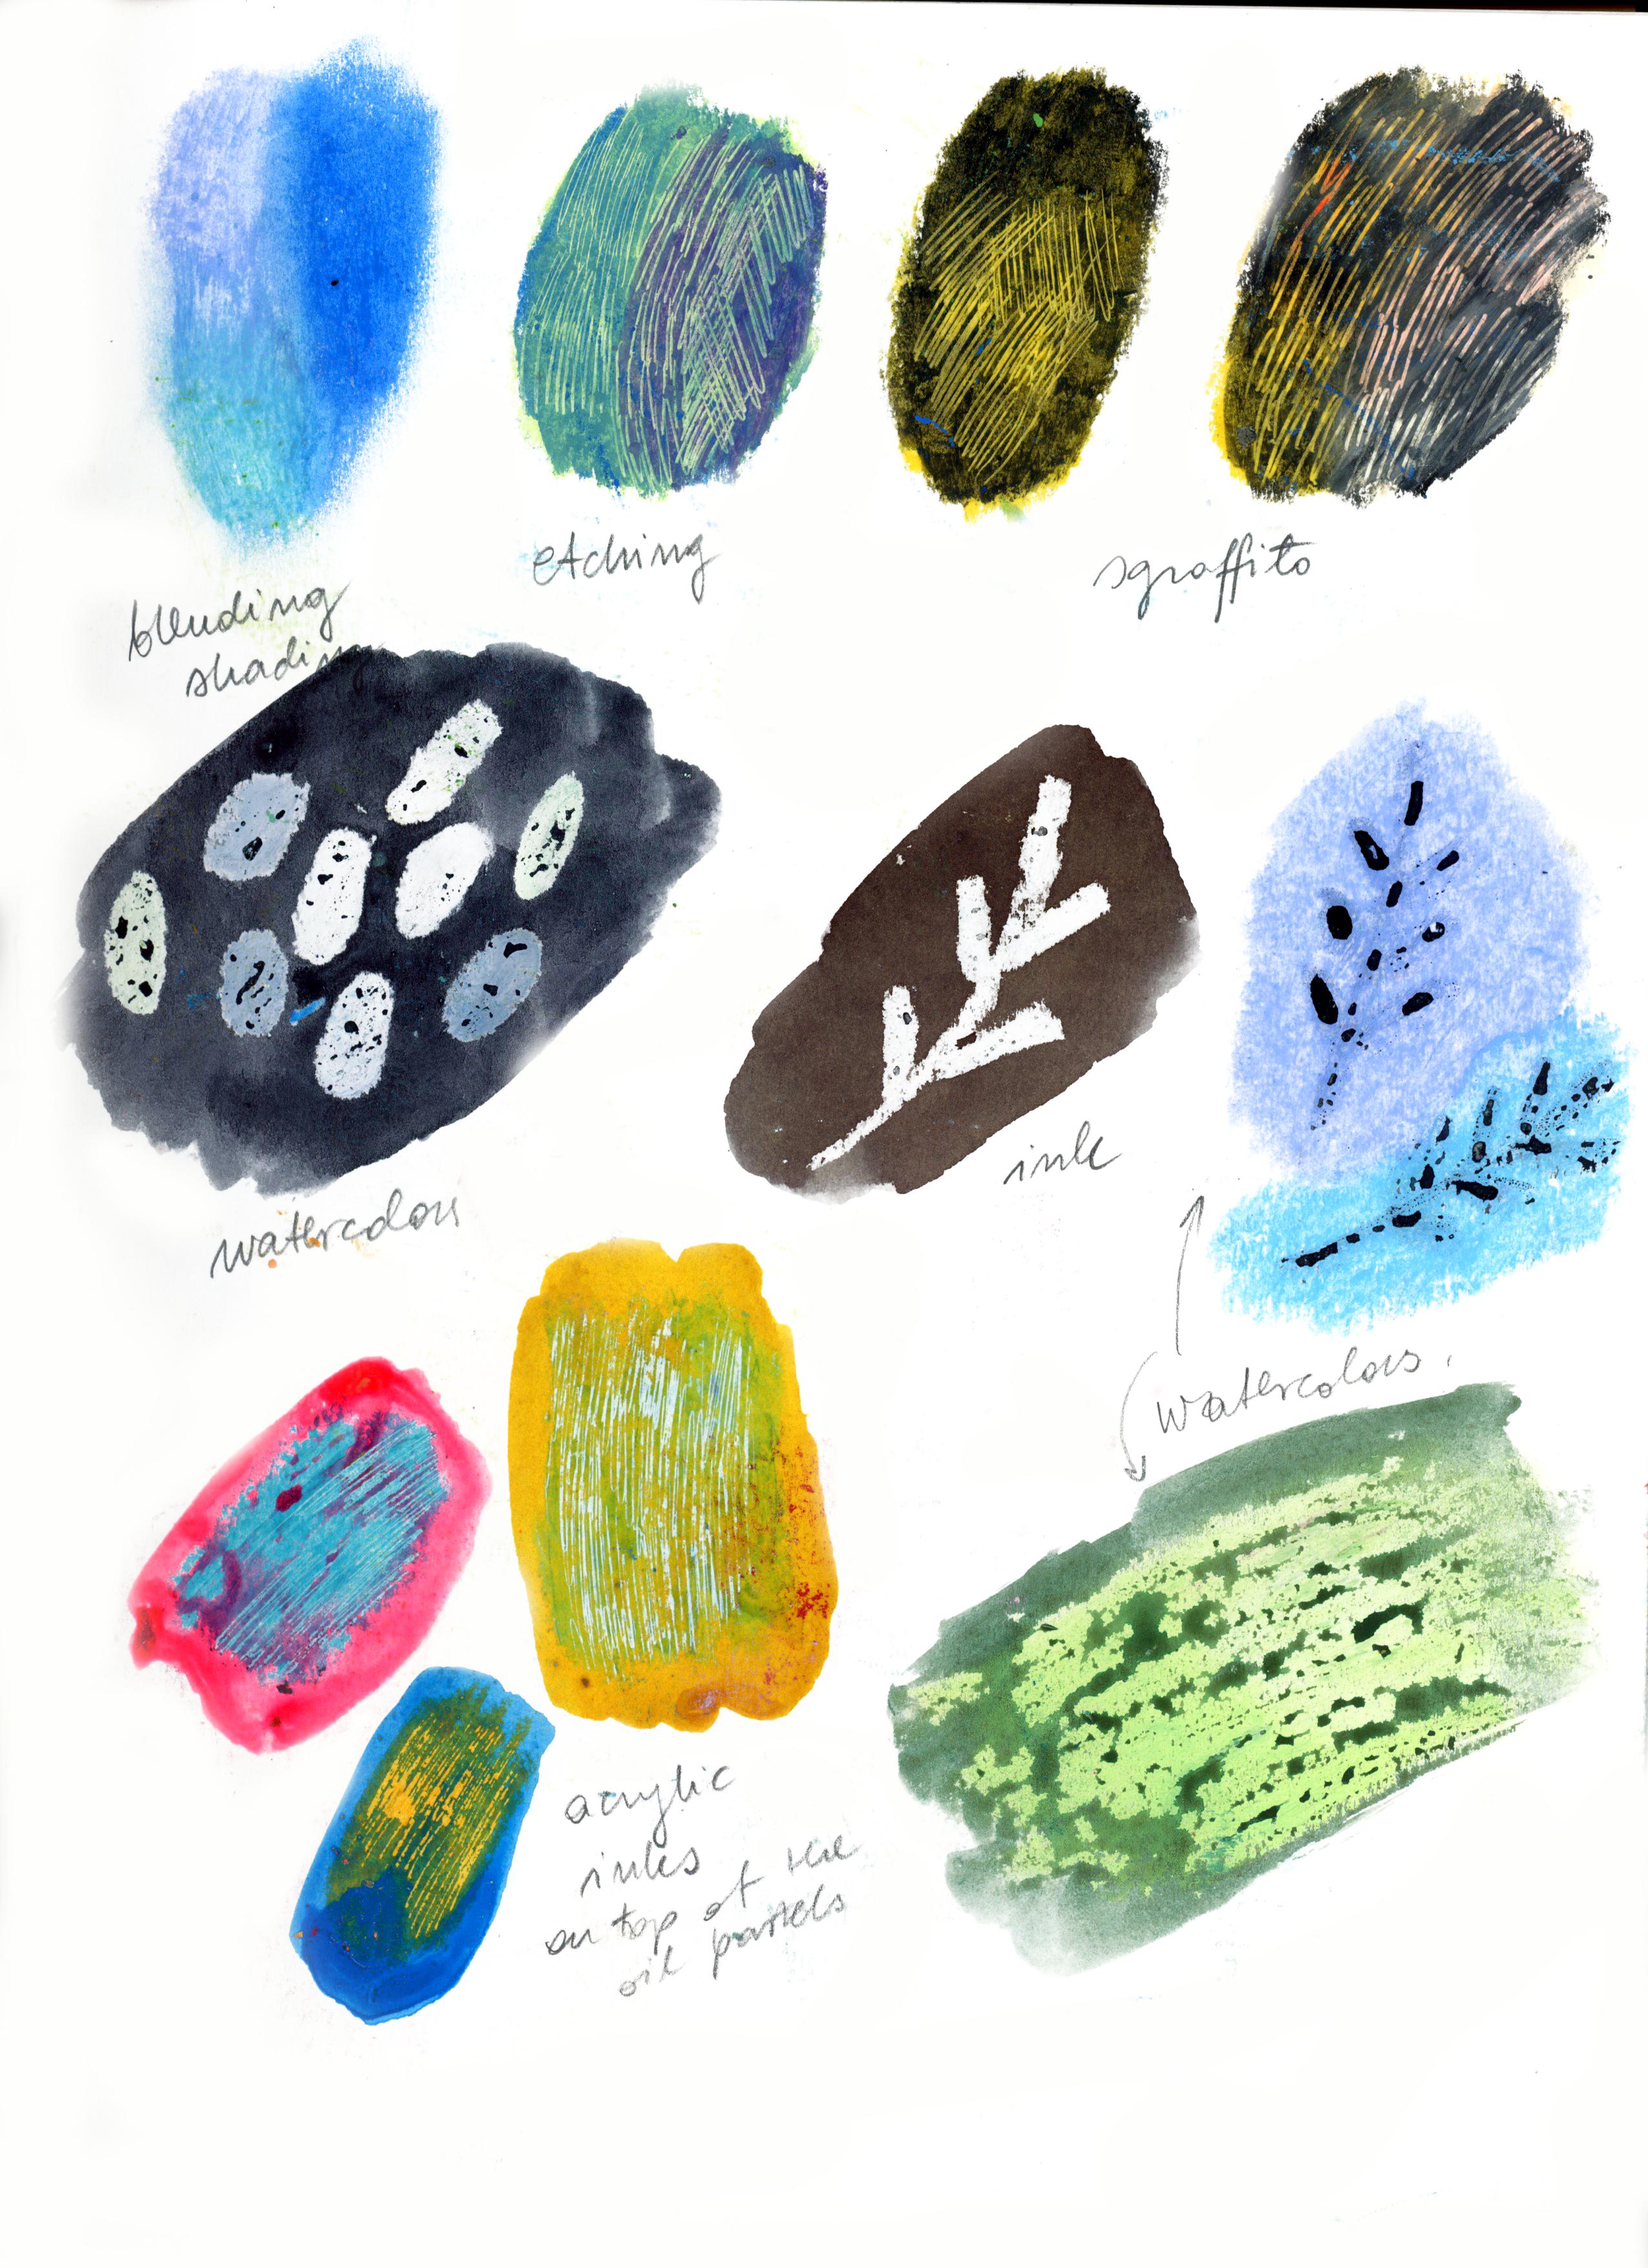
5. Test The Pastels: Let's start discovering
different techniques and things that we can do with oil pastels in order to apply them to art techniques
and illustrations. The first thing that we will do is the exercise that we already did in the
previous lesson, and this is blending
colors mixing, blurring, smudging
as you prefer. To do that paint with different colors
next to each other. And then blur with your finger and try to blend the colors together and
see what will happen. The next one is my favorite one. Probably you know this
technique from your childhood, but it's always cool. I think personally,
it's my favorite. It's so called etching. You can also know it as graffito from
Italian but graffito. You make the same thing
with black color. But you can obviously
use also other colors. The only thing you have
to remember is that the first layer should
be lighter color, and a layer that you paint
above should be darker. It's quite easy to
do with oil pastels. You can cover the color
that is in the background, but it depends on
the colors that you use and on the kind
of pastels that you use. Anyway, remember, first layer lighter,
second layer darker. Then pick a tool
that we'll use to scratch the layers,
the oil pastels. You can use a toothpick. You can use to. You can use a needle that you used to sew for sewing or a pen. Also, you can see that different tools will
leave different marks. This one, for example, those two are very thin and leave subtle, very
delicate marks. Now, I'm trying to
put another layer. You can do it as well,
some darker layer, this one covers a lot better
because the first one, maybe the contrast
wasn't so high, so I decided to try it with a darker
color, and here it is. Here you can see
a better result. And with toothpick you
can have different marks. A little bit larger. So you can test different
scratching tools and see what you prefer. Okay. And the second one is the one that I told before, graffito, and the logic, the philosophy is the same. But you use the black color
as for the top player. And again, you scratch. And obviously, here
the contrast is the highest because the color. Another technique
is the one that you also probably know
from your childhood. First, you have to
draw with oil pastels. I did some random dots. You can draw whatever you want. It's just about testing, and then grab or
ink or water color, it's up to you,
whatever you prefer and paint over the oil pastel. Al, you can see some of the thoughts that
weren't visible before because they were created
with white oil pastel, and it's always a fun exercise. For example, I made a drawing
with white pastel beneath, and here is the surprise. Besides the fact that
it's a fun exercise, it's also a cool effect
of the texture that is created by the
fact that when you paint with water colors
over an ly surface, it creates this texture and I often use it
in my illustrations. You can also revert the
process and first draw with oil pastel and then try to paint over it with water color. I don't know if
you ever try this. It's not the obvious thing. It's not the thing that comes to your mind because
you think well, obviously the watercolor won't
stick to the ly surface. It's not the thing
that you usually do But that saying that, this is the kind of thing
that I really love doing by combining art supplies that are not obvious by
testing and trying. As you can see, the water
color really it's really hard to paint with water color
because the oil repulses, I don't know if it's
the right word, the water they don't
work together, they don't combine together. Test and try. Maybe if you
use different oil pastels, the effect will be different. Maybe some of the
oil pastels are different and the effect
will be more visible, still I really
enjoy this kind of texture that is creating
with this kind of technique. I'm repeating the same thing with oil pastels and water
color, but this time, I will try to paint
over the whole surface, and also I will try different oil pastels and see
if there's any difference if some of the oil pastels
are easier to paint over it. And here is the result. There is something that I really love about
this kind of texture, and I really use it
often in my art. Now, let's do the same thing, but with acrylic ink. This should stick a little bit
better to the oily surface or maybe we should test it
before and see how it works. But since acrylic has a
little bit of plastic inside, the cover in a better
way the oil surface. Let's check it out. If you have acrylic ink, then give it a try. If no, then maybe you could use acrylic and try to
dilute it a little bit. As you can see the effect
is different, it's better. The oil color doesn't reject
the watery surface so much. Let's try it with
different colors. I will try this fluid orange
over the enlias oil pastel, and let's see how it works. This one is also
quite translutcen, the same as the yellow one. But as you can see,
it's rejected. It's quite difficult to cover the senilia maybe because
it's really really ly. So I will try to paint
another layer of ink, and it's better, but
it's still rejected. So I will leave it like that
because I really like it. And now I will try to use more opaque color,
more opaque ink. I will use this
acrylic ink as well. But I can already see
that it's more opaque, more covering the color. It's not so translucent. Let's see if it will
cover the yellow, and yes, it's more
or less covered. As you can see here, the ink wasn't repelled. It covered really well
the oily surface. I will dry it with a hair dryer. The second part is again,
etching and scratching. Let's see if we can clear
the ink from the oil pastel, and yes, we can do it. That's another technique
that I really adore. I really love the kind of
texture that it's created. Seems like an old wall,
some vintage surface, maybe So if you have acrylic inks or acrylic, you can try it with acrylic, give it a try, give it a try. I'm really curious of the
outcome and if you like it. We will skip to
the last technique that I wanted to show you, which is technique
with stencils. I will basic shapes. Feel free to cut whatever
shapes you want. And there will be two ways of applying oil pastels
with stencils. The one is just by painting with oil pastels inside the shape. So you basically mask
the paper in this way, you create sharp edges. The second way will
involve the blaring, so you can create blurred edges. To do that, just draw inside
the shape and then blur the oil pastels towards
the edges of your stencil. For this technique, be sure to use softer oil pastels
that will blur easily. You can also do another thing to achieve this light
blurry effect. To do that paint outside the
shape of the stencil and then blur the color
towards the cut out shape. Also for this kind of technique, it is useful to have
softer pastels. I love this technique because in this way you can
create soft effect, something that is slight, translucent, it's
not very obvious. I think it's cool to know
this kind of technique. Here are the things that
we did during this lesson. I'm curious if you knew all those techniques
or was it new for you? Or maybe there are
some other things that you know what you can
do with oil pastels. If, then obviously, let us know in the
discussion panel or within your project. Okay, let's jump into
the next lesson.
6. Draw And Play: Let's draw and play so. Let's draw small swatches, small illustrations
with the techniques that we explored in
the previous lessons. This exercise is cool
because you work in a small format
without stressing out, but also you learn how to apply the techniques into illustrations by
doing small drafts. But also, because
I would like you to train your creative muscle by thinking what kind of textures what kind of object can you draw with
different textures. For example, if you have
an oily bold texture, what would you like
to draw with it? What comes to your
mind when you scratch oil pastel What
comes to your mind? What would you like to draw with this scratched
texture or maybe this delicate smudged,
blurry texture. What comes to your mind
and how could you apply? So you will think
during this exercise, how to apply
different techniques. Let's get started.
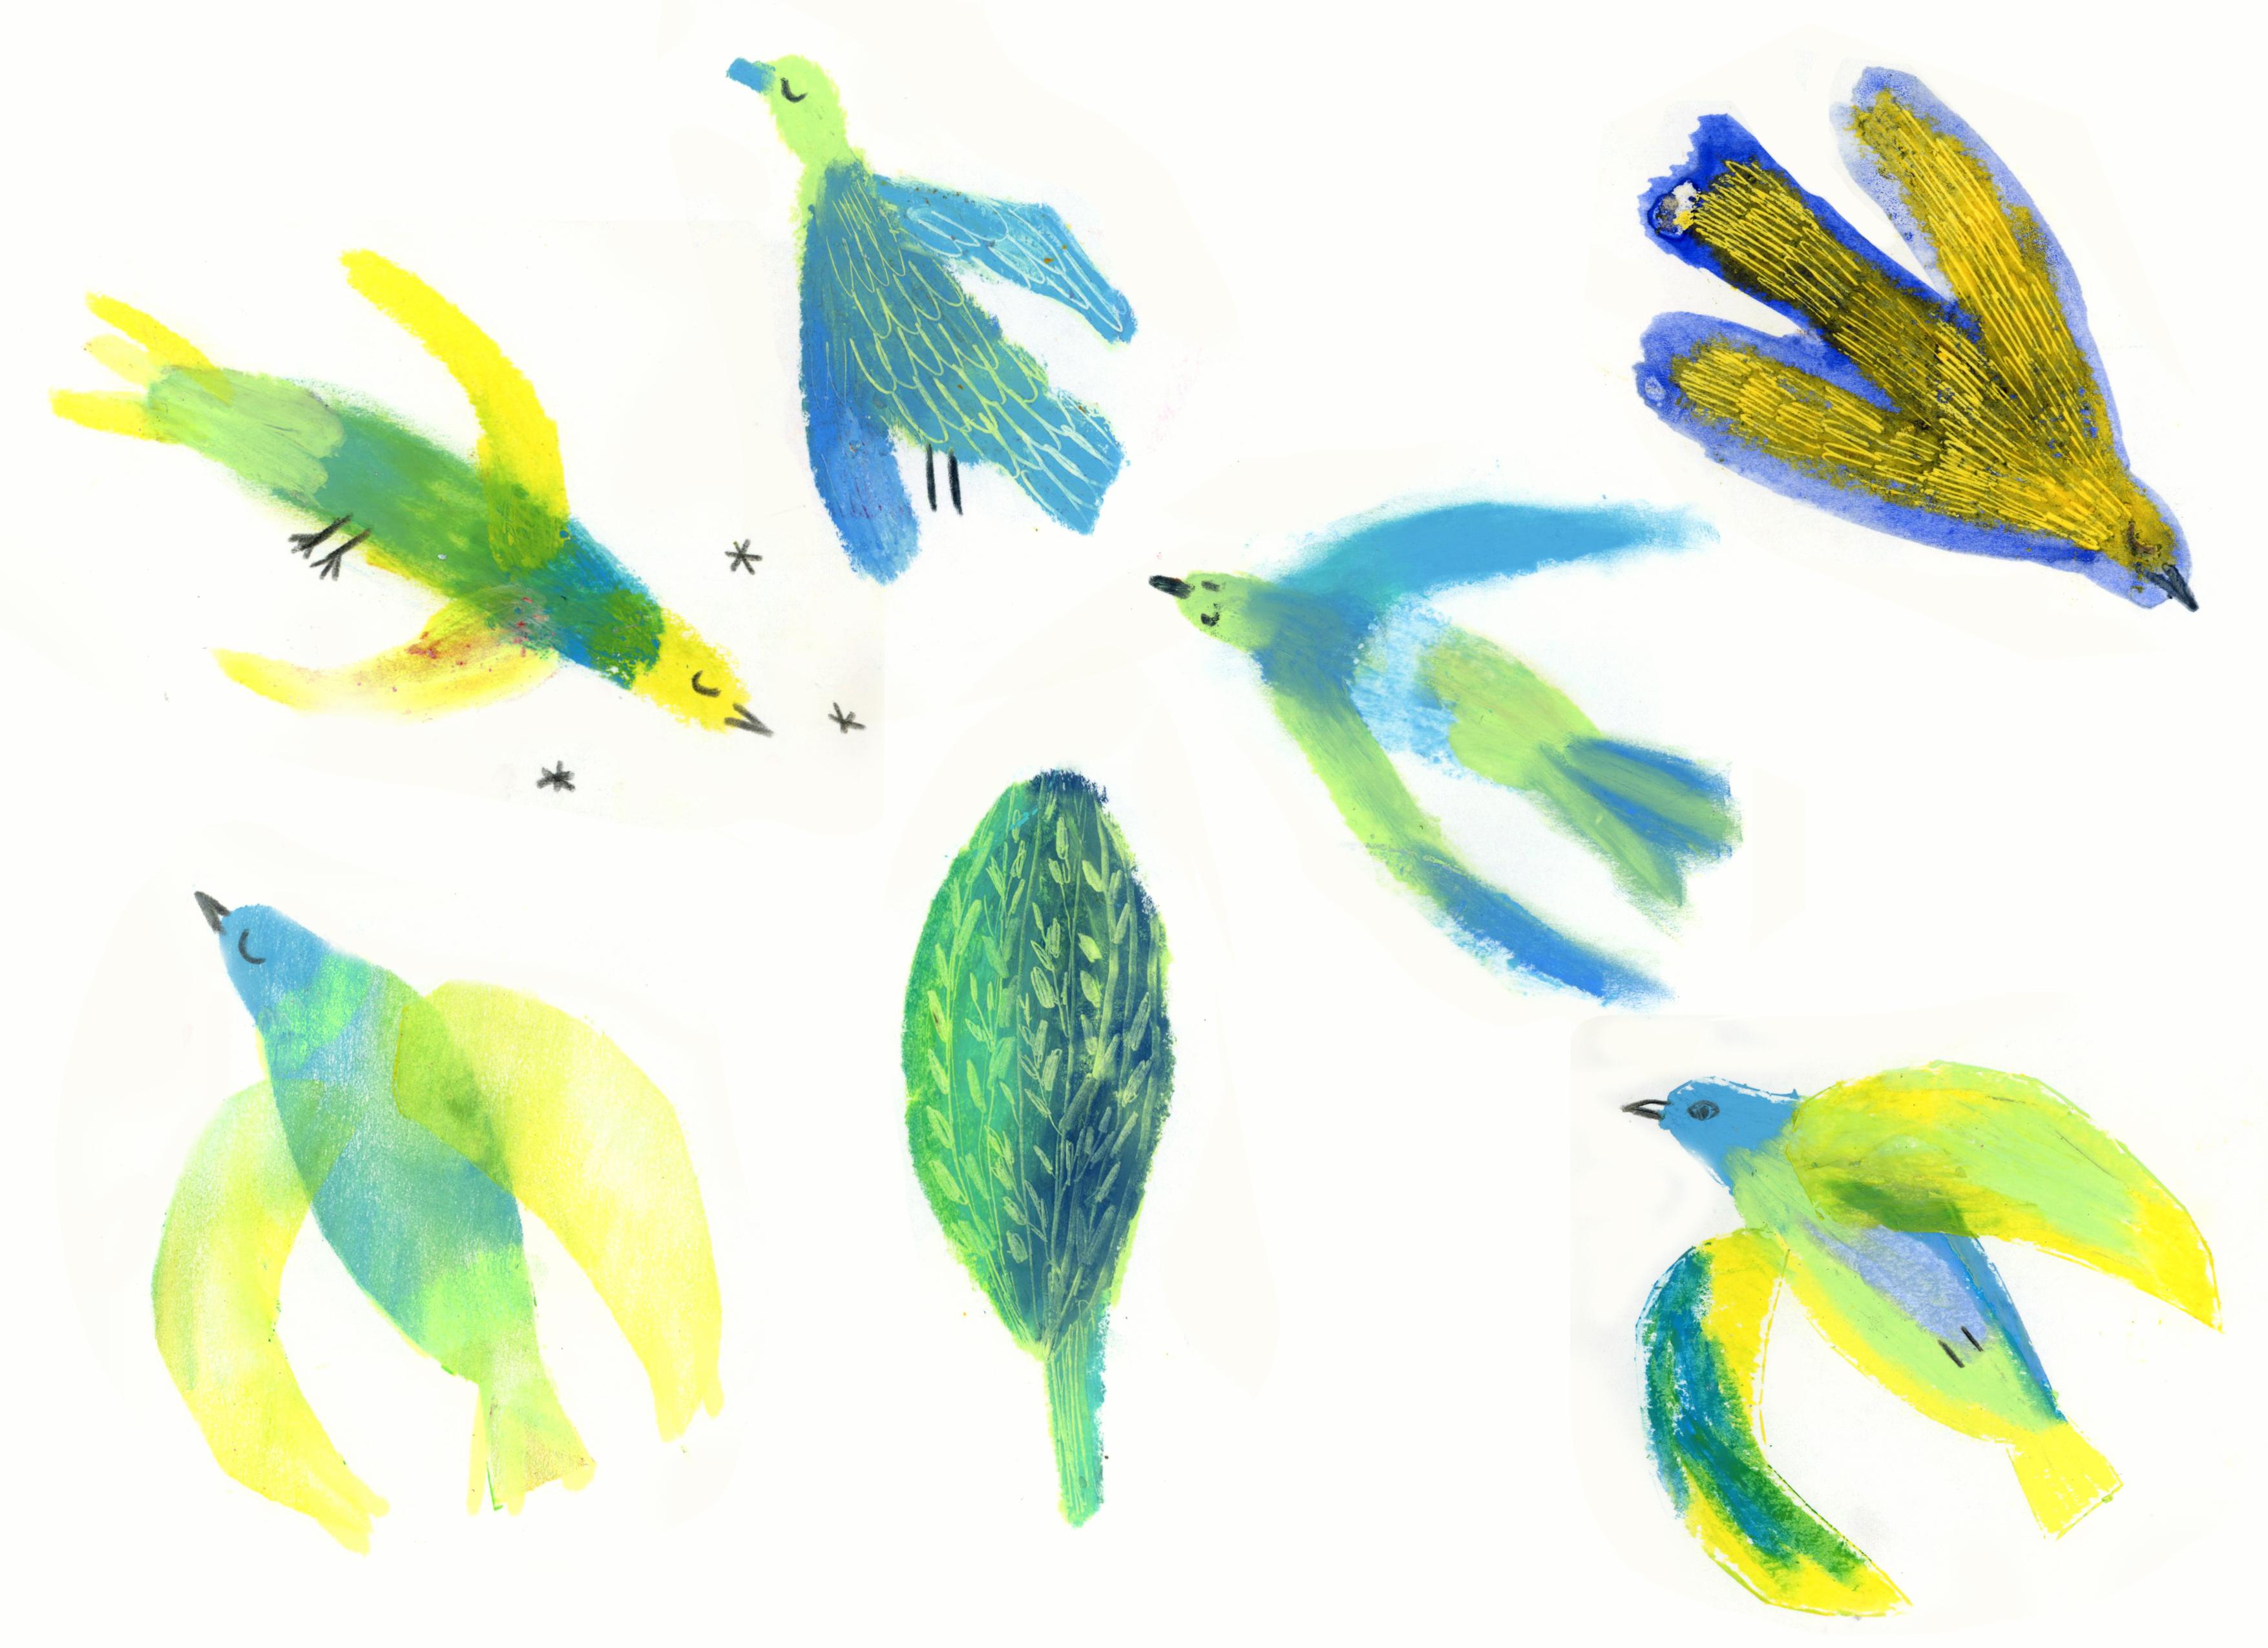
I will start with a simple drawing just
to again, warm up. So small illustrations, I will
draw fishes, maybe a bird. Just by painting, small
color. Color pieces. I will use different colors. I will try to blend
colors into each other and see what
kind of shapes, what comes to my mind. Maybe already have in mind
what you would like to draw, maybe a flower, maybe
something else. Or maybe it will
come to your mind during the process,
during the creation. I just give it a
try. You can try and test different oil
pastels, different colors. I will do I will do it for sure. So I will meet you at the
end of the illustration. So here I'm doing
the final details. As you can see, I'm
overlapping oil pastels. I'm painting past
details with pastels but also with the pencils. And here I'm doing
another technique. I will use stencils. As you can see, there's
already a birdy drawn with exactly the same technique
that I used for fishes. I'm cutting out the bird
shape with my stencil, and I will first start with
drawing inside the stencil. Let's see what kind
of effect we can create When I'm thinking
of this technique. I think it's cool to limit the the space. Also I can create sharp edges. But let's be honest, I'm drawing birds
on also because that's one of my
favorite things to draw. I will use the same
technique to draw wings. The bird is ready. I decided I will use
the same stencil to do the adverse stencil technique. I will also use the color, the oil pastel that was left. Yeah, because the paper was
with the previous drawing. So I will just add a
little bit of oil pastels on the edges and blur it inside. Again, it's bird
because I love birds. But when it comes to thinking, what could I throw also with
this kind of technique I think of flowers that
are very delicate. The one that you blow with air. I don't remember the name, or maybe a butterfly. I decided to do
also a butterfly. What comes to your mind? You can draw the same
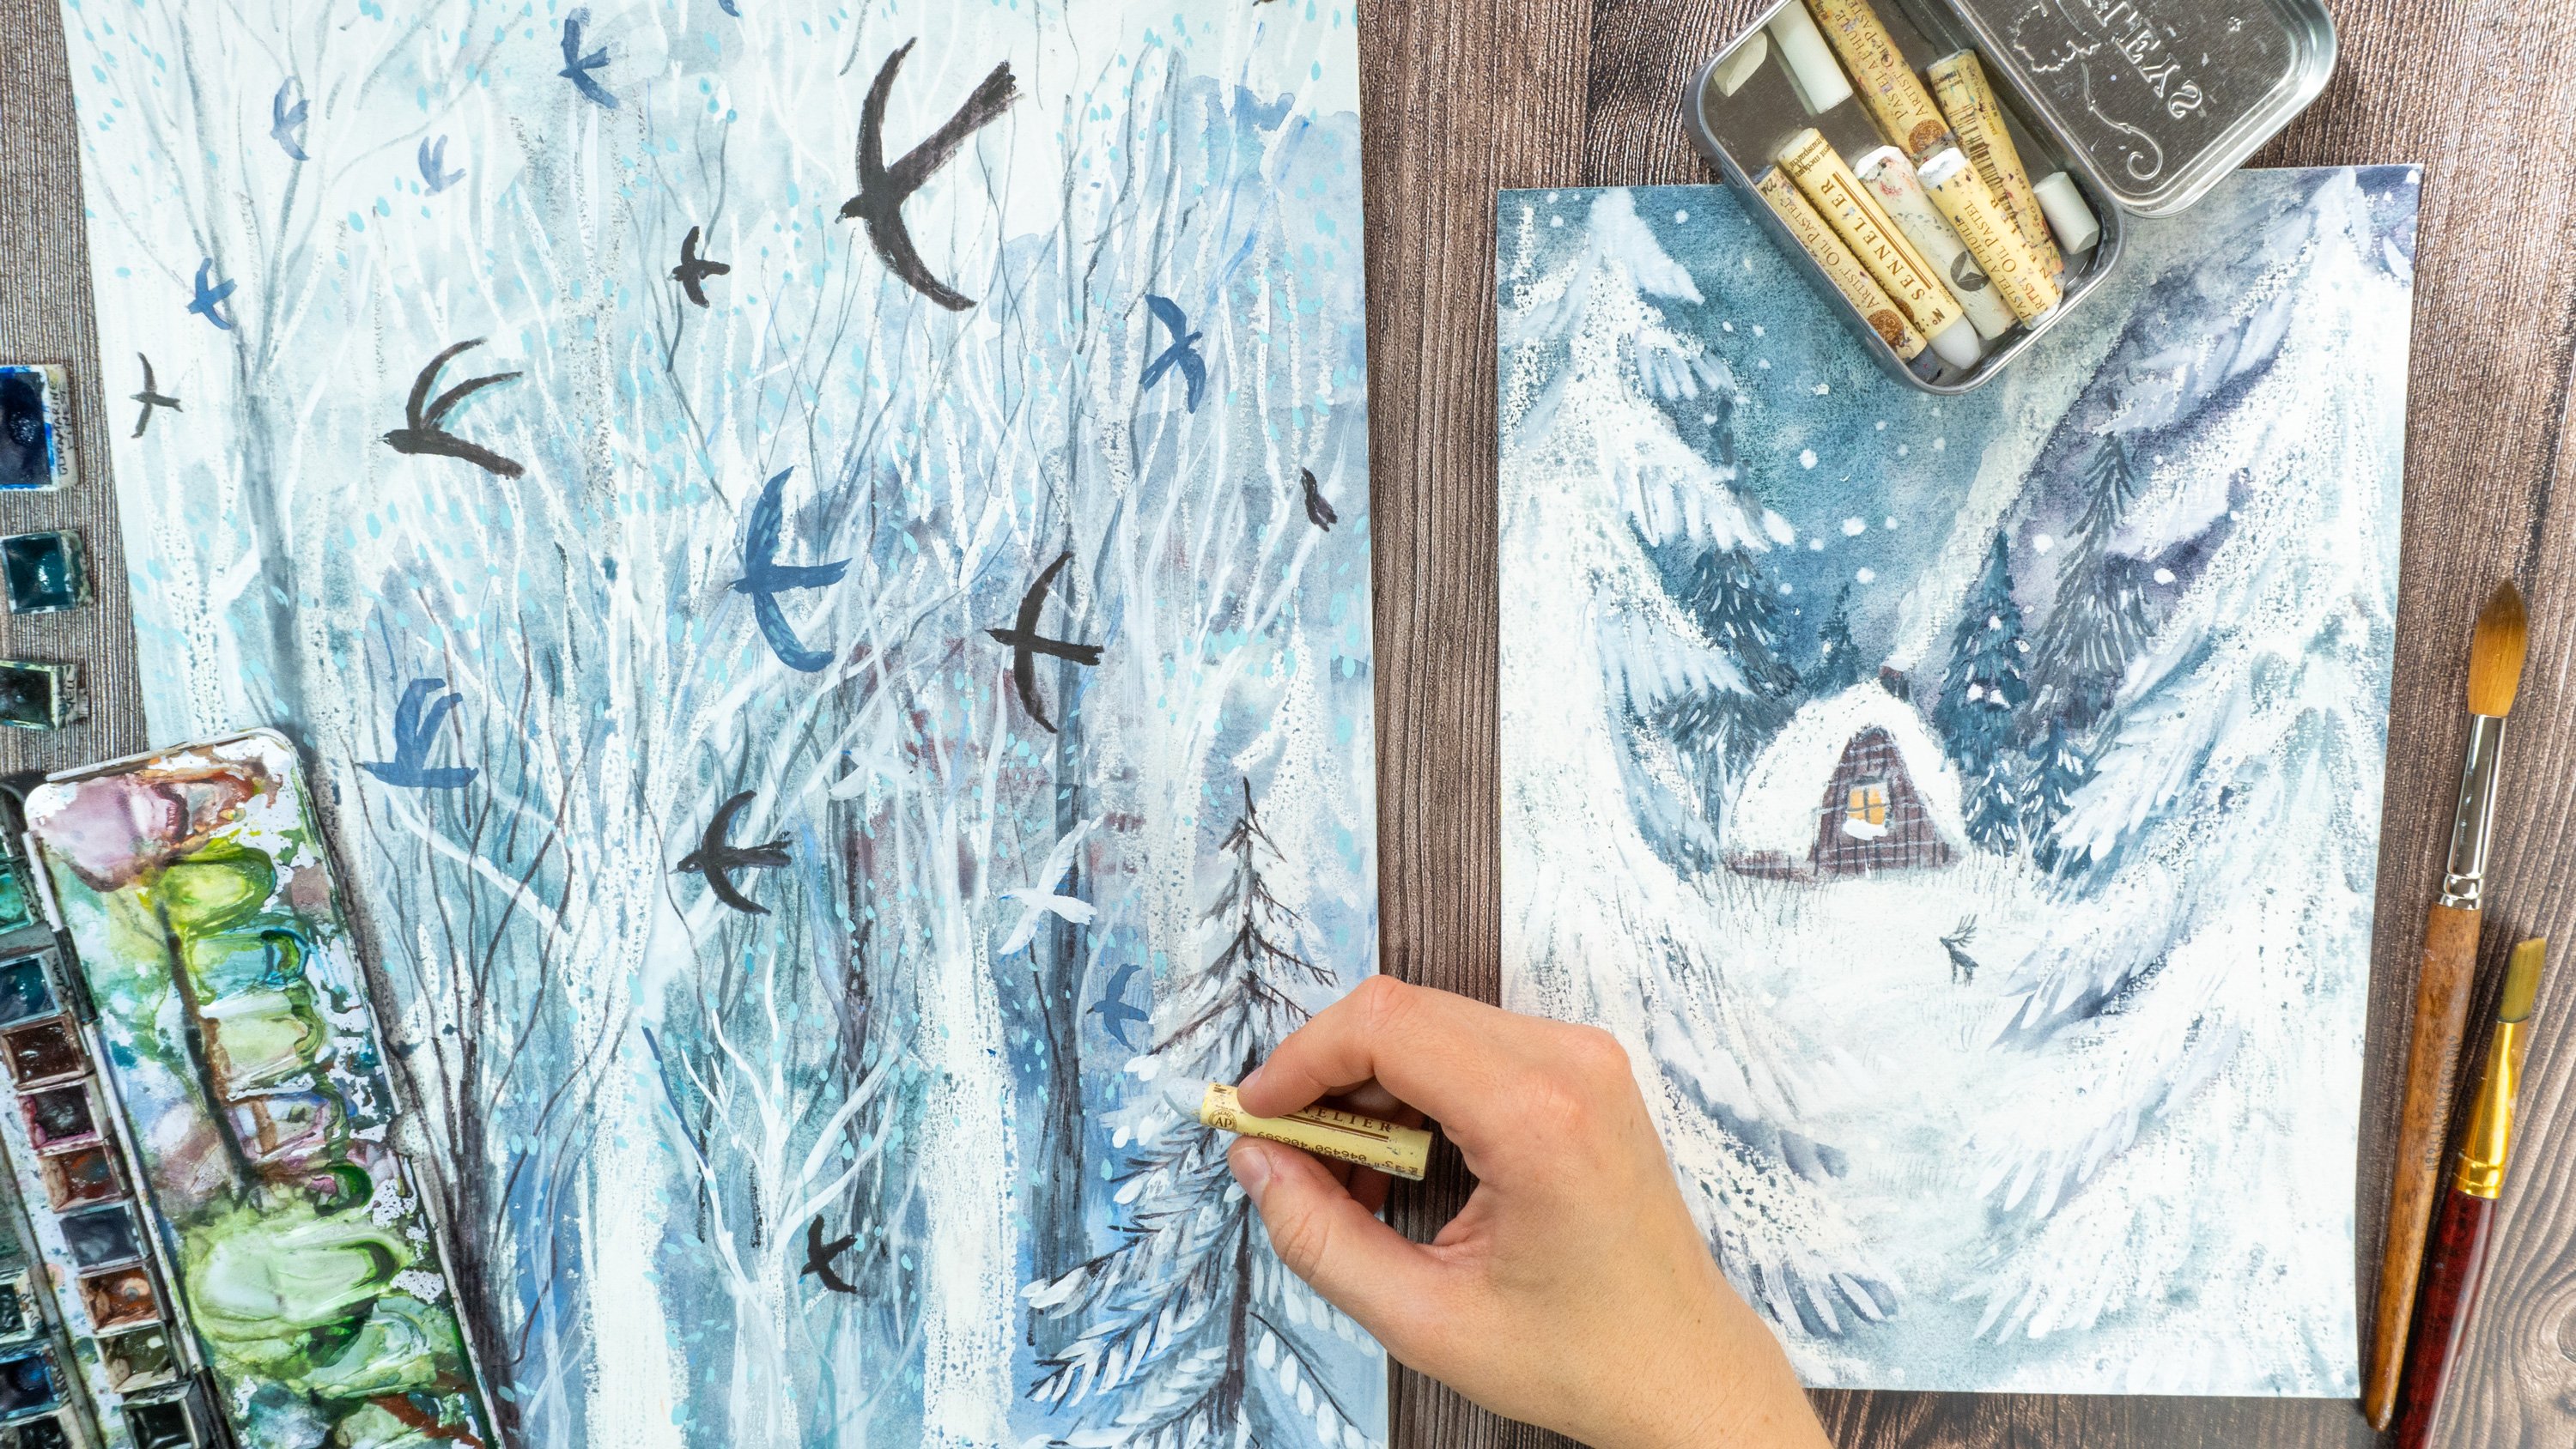
thing as I do, obviously, or you can think of the things that your imagination tells you. Okay, so now I wanted to paint
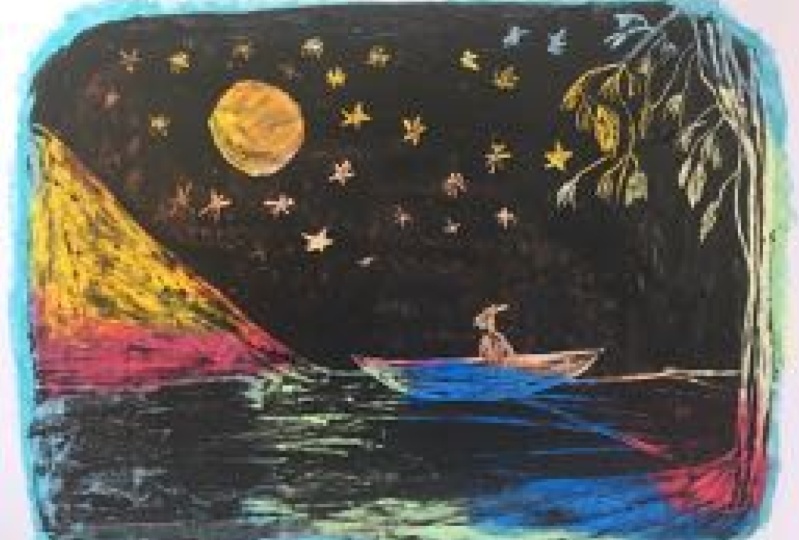
with watercolors as well, so I will try the techniques with watercolors
over the pastels. I love night scenes, so I thought to do a night
scene with the moon. And for this, I will use
darker water colors. I could obviously also use ink. I will use dark paints
gray and indigo color. So I will mix two
different colors here. And v here my night
scene. Simple draft. Miss ready, I'm happy
with the result, even if it's very,
very simple and basic. But it gives you
the idea what kind of things you can do with
this kind of technique. We tested watercolor. Now let's test acrylic
ink or acrylic, if you don't have acrylic ink. First to draw the shape that you want the object that
you want with oil pastels, I will draw house
because I really like the texture that you can
create with this technique. If you remember, it gives this vintage vibes,
scratchy old things. What comes to my
mind are old houses. Maybe a brick, maybe
old paint on the wall. No, maybe old object box, shoe, or Well, I
leave it up to you. I will use this bold
red orange color. I love this kind of combination between turquoise
and this color. As you can see, some of the
areas in some of the areas, the color didn't stick to
the surface, but it's okay. It even helps to give the
idea of old vintage texture. Correct. Once your ink is dry, you can scratch it. I will test different
tool, toothpick, a needle, and also
you can use a cutter. Just be careful because those
are all very sharp tools. See what works best. I find that this cutter is okay. But for example, I prefer to use toothpick or the needle
because they given lines. And we can continue the
scratching activity. As you can see, I will paint on a page that already contains
some of other birds made with techniques with the previous techniques
that we painted fishes. The third bird is also painted with scratching
technique. Let's see. You can begin with
a simple shape, something easy and small Amount of colors so you can
pick one or two colors. Just remember to use
a lighter tone for the background layer and the darker color for
the second layer. As for the subject, what comes to your mind
with scratching technique? Well, this time,
you can also think that this ttching technique is basically the same technique
that you use for print for aquatint when you scratch the plate
the printing plate. So you can paint
basically everything that comes to your mind and create details by
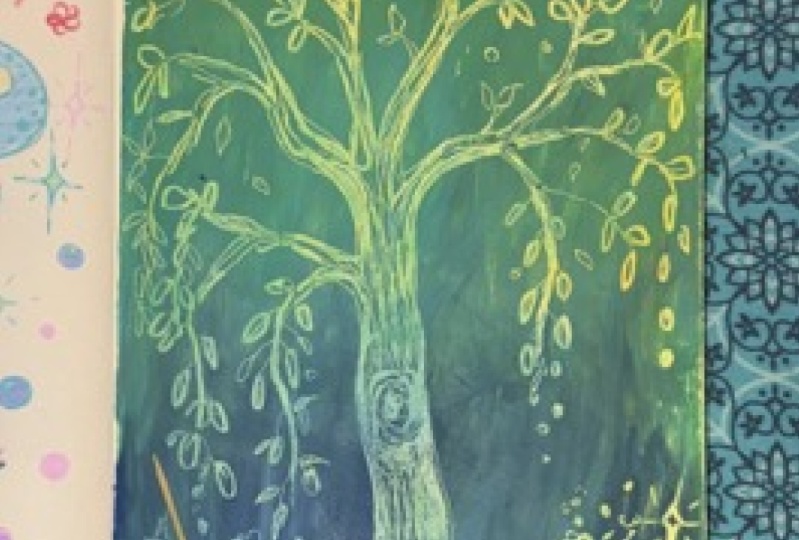
scratching them out. So I painted the tree, and I will scratch branches
and leaves and wood texture. Now we can use the
same technique, but we can develop
it a little bit. I will create colorful
background by painting different
colors underneath. As you can see, I did
it also for the tree above with the
black second layer, but underneath you can see different colors that
are spotting out. Also here, I will paint
randomly do different colors. If you have some colors in mind, you can paint harmonious
colors, but also, you can go wild and use many
different tones and hues. For the second layer, you can also use
different colors. You can use one colors, but maybe you would
like to test and create this patchwork also
as the second background, I will use different kind of
dark blues and green blues. Here is the result. In what comes to my mind is obviously a
night scene with birds, so I will repeat it. But by scratching. As the bonus, I
will leave you with the last technique that
I didn't show before. This is another thing
that you can do with pastel and it's a
way of printing, but not in the in
the traditional way. It's not a traditional meaning, but in the meaning that
you can transfer an image, a drawing, not directly but by transferring a
medium painted before. It is easier done than said. You will see what
I'm talking about. Prepare the background, prepare
a layer of solid color, a solid piece of oil pastel. Try to cover well the paper, doesn't have to be
really 100% covered. But yeah, just leave a
solid layer of oil color. Then bend your paper or you can draw on the other
piece of paper. And on the back of the page
with color that you applied, draw whatever comes
to your mind. You can use pencil, you can use a pen, And what you're doing is that you are
transferring the oil color. Here it is to the paper
that is underneath. I really love this
kind of technique. I usually use different
mediums to do it. Not necessarily oil colors. This is my latest
discovery before I used printing inks or
oil colors, not pastels. But since those are
usually oil based mediums. I thought, well,
you could basically do the same thing
with oil pastel. I will paint flowers,
really easy throwing. I love this technique because it creates different strokes. They are more blurred.
As you can see. They have a different effect. Here you can go with your
favorite subject to or you can think of when you could
apply this kind of texture. Maybe it could be a
fur of an animal. Maybe, again, some soft
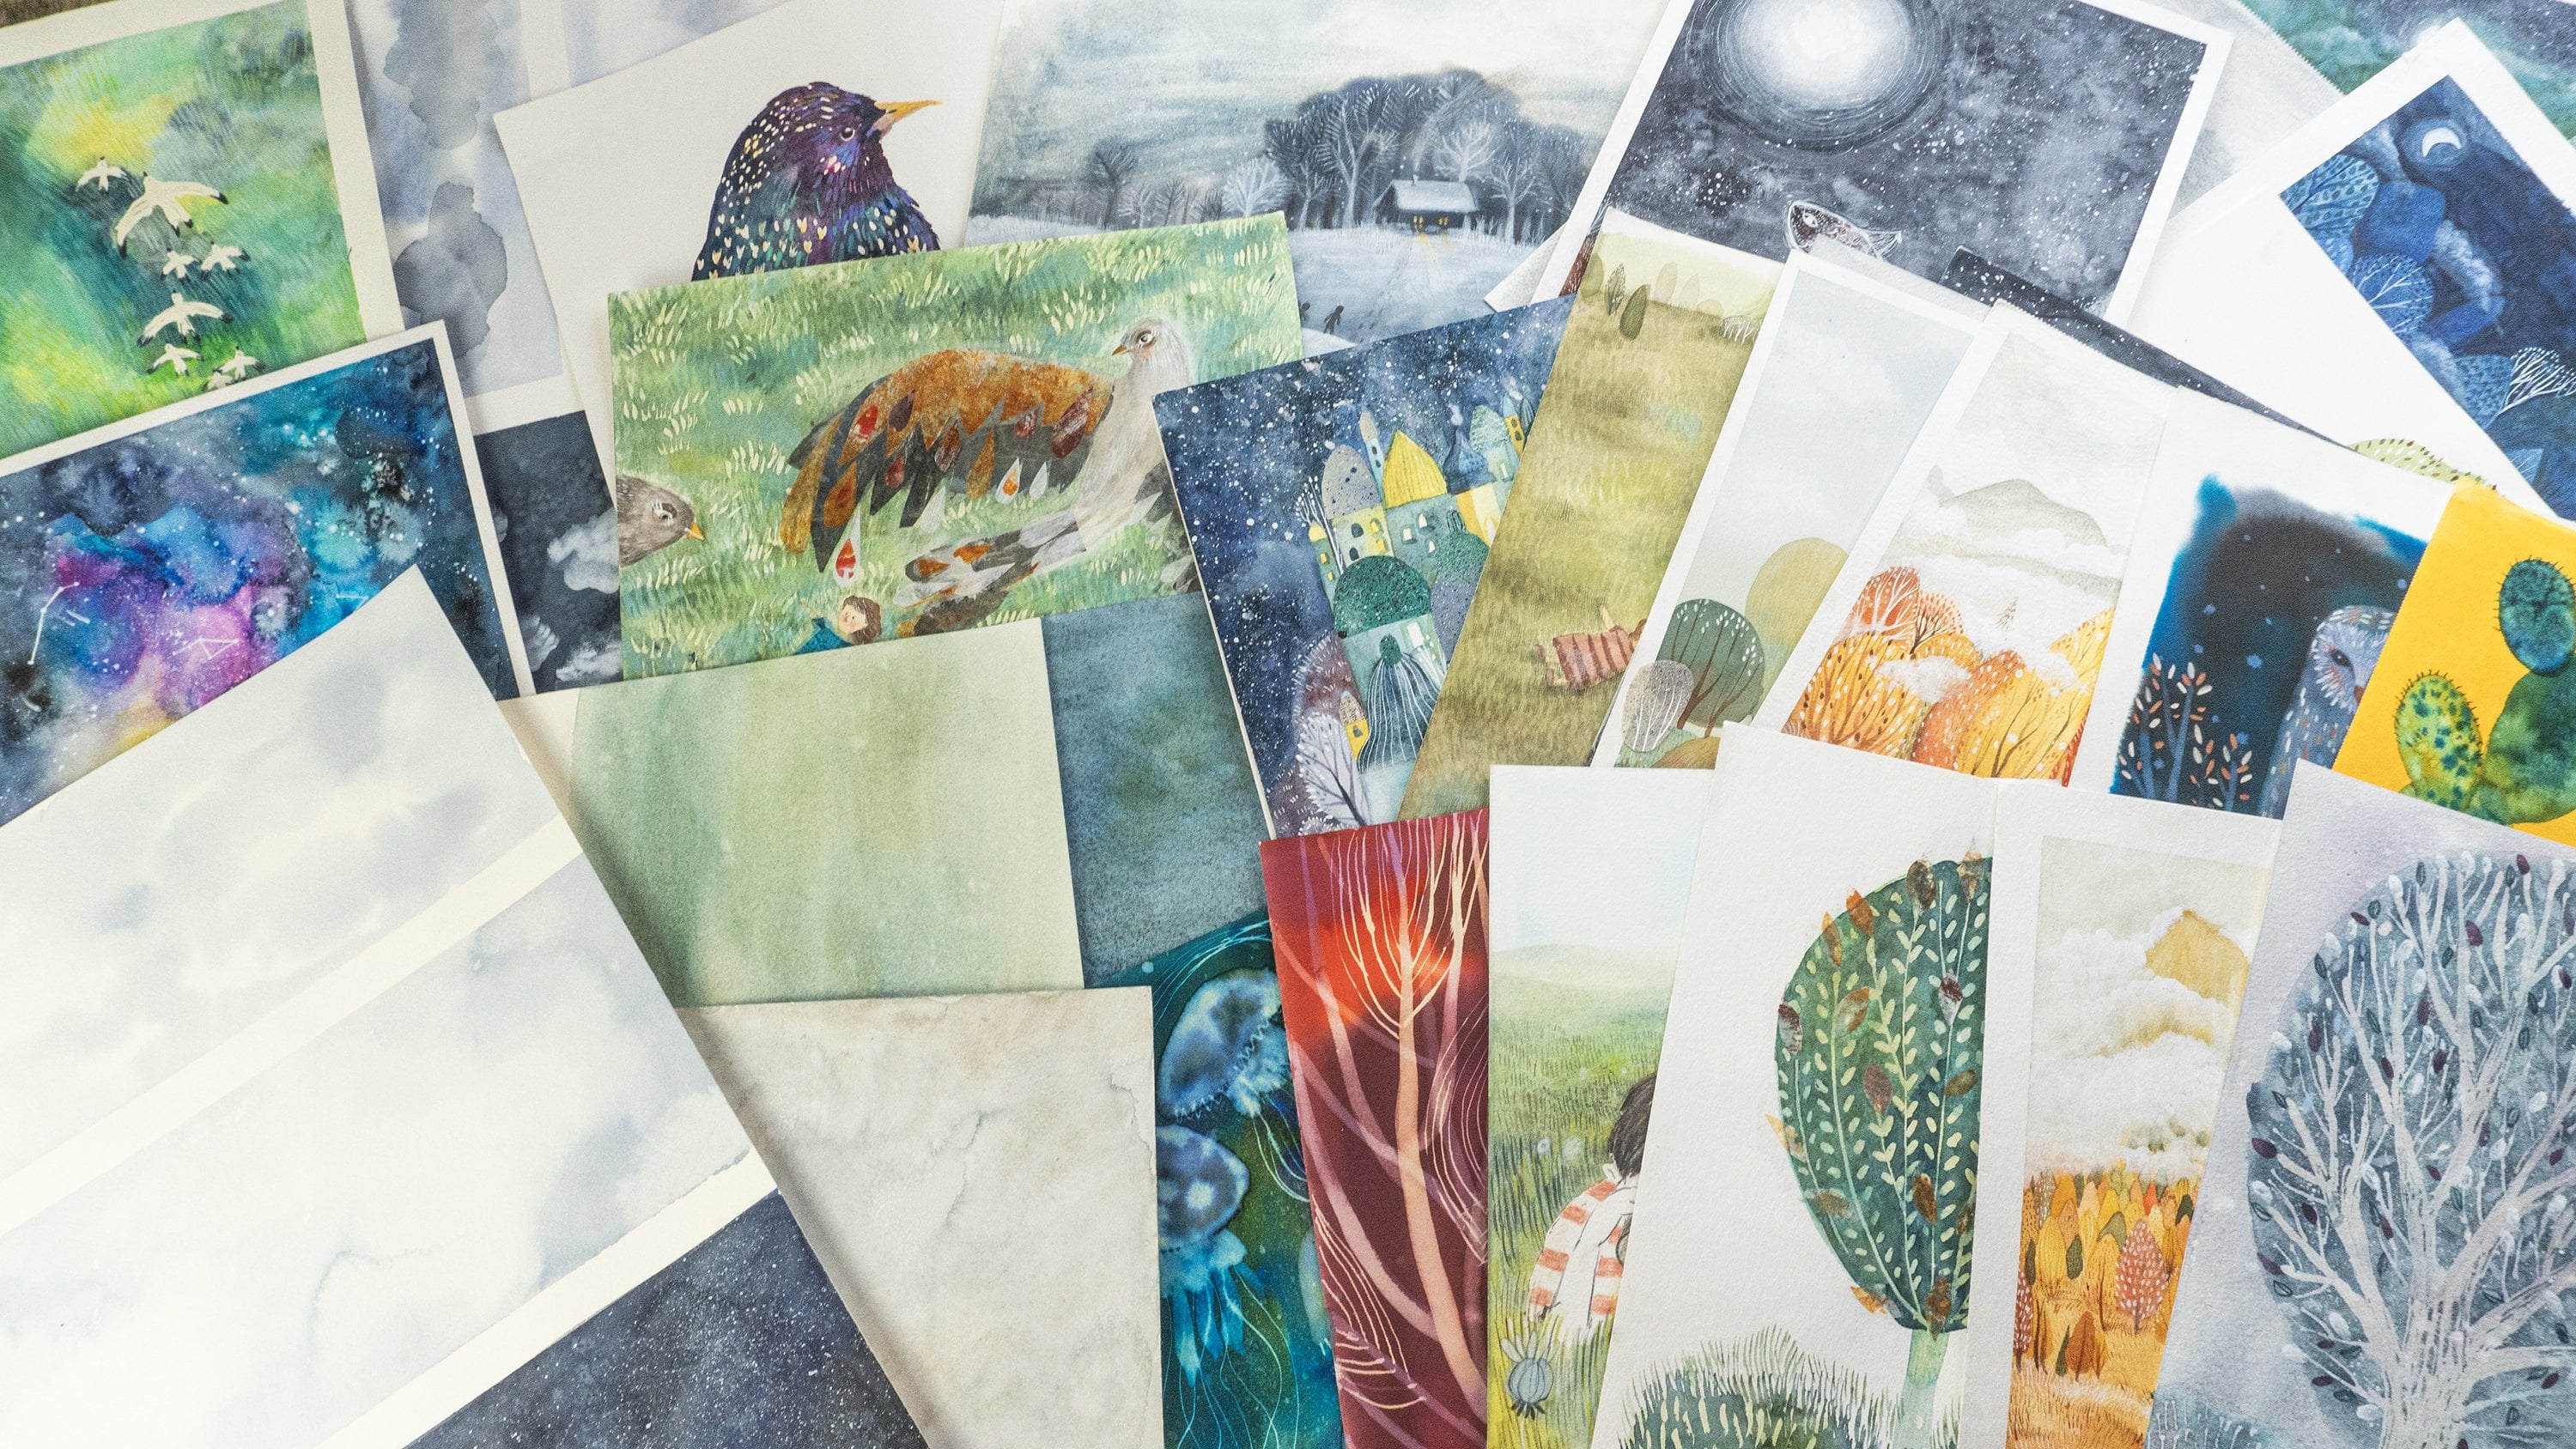
thing, maybe a feather. I decided to do simple flowers. That's it. I showed you everything
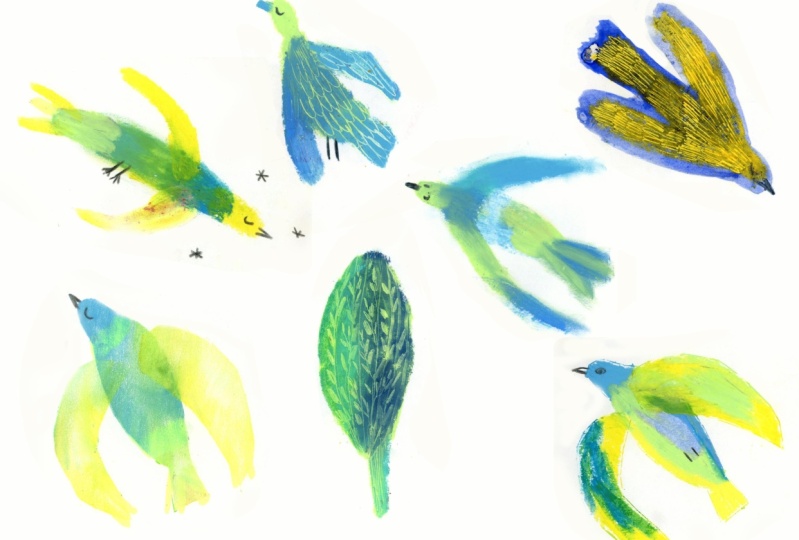
that I wanted, but in the end, I'll share with you some other examples of the same techniques, but different drafts,
different illustrations. Basically, some of
them we did together, some of them, I created before. For example here,
I painted it with masking tape, I create squares, small illustrations,
I hope you will fill your schedule book with many different draft
that you will explore. I hope you enjoyed this lesson that it was inspiration for you and let's start to think
about our final project.
7. Final Project: Welcome to the final
project lesson where we will pick one of the
techniques with oil pastel, and we will go a
little bit bigger and make an
illustration out of it. So if you already know
what you want to do, then great if no,
then I will leave you some examples of
my illustrations. So maybe it will be helpful
for you and inspiring. So you can go small. You can do just a simple, small object as you did
in the previous lessons, or you can go a
little bit bigger, which I invite you
to do so to do so and make an illustration,
maybe a scene. Within the technique
that you picked. If you go small, then I invite you to do maybe more examples, objects multiple objects
that you have chosen. For example, here, I painted houses with the
scratching techniques, or you can go bigger,
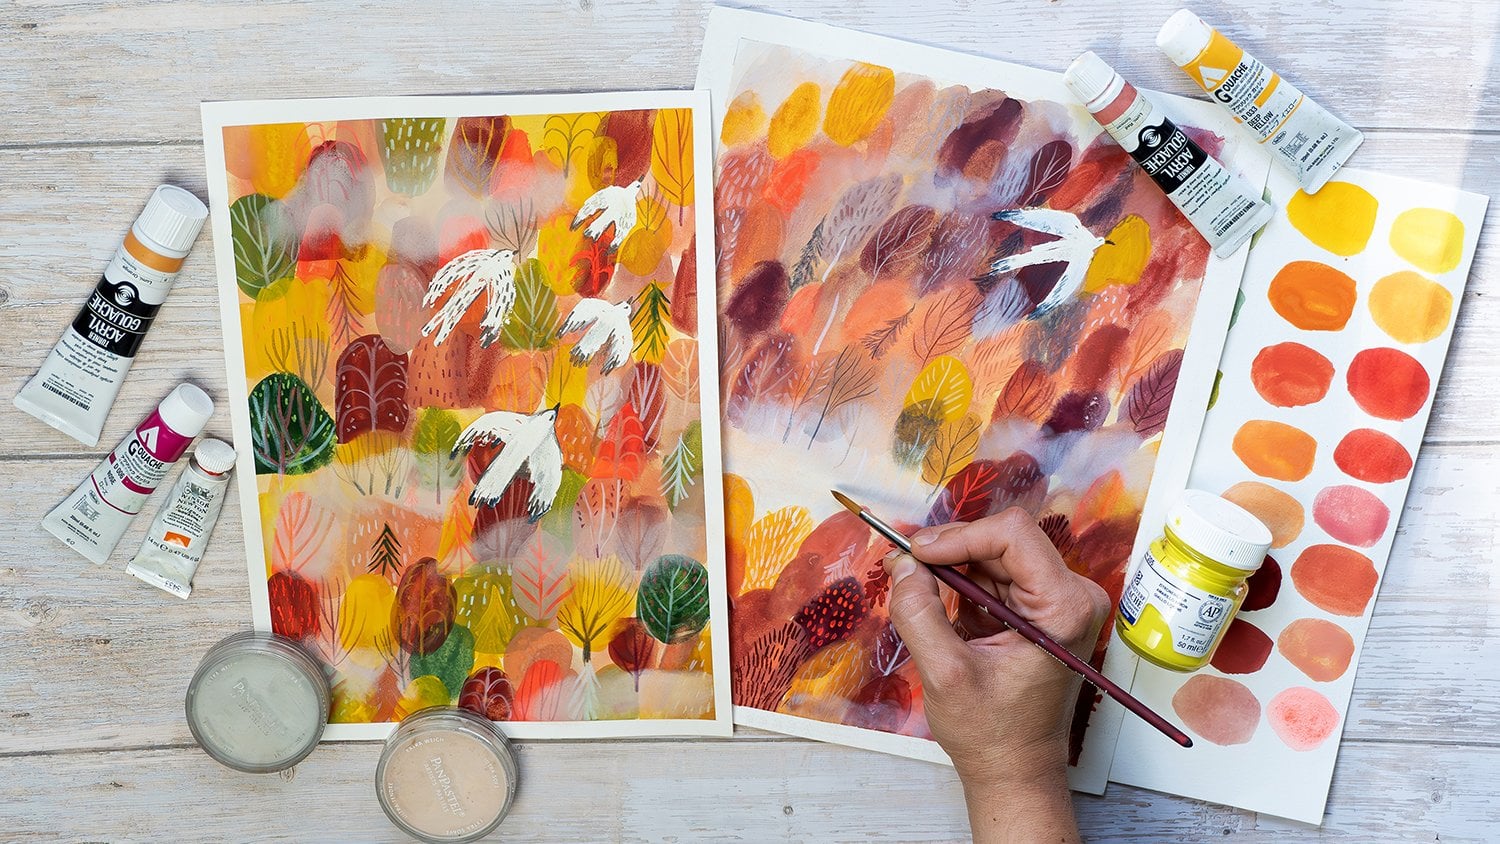
for example, here, I painted this bouquet with oil pastel story
and water colors. Also here, I use a water colors and ink over the oil pastel to
paint this scene, which is a little
bit more developed than the exercise example. Or you can go and do
something more elaborated. You don't have to, but if
you feel like you can do it. For example, here, I painted this man in a hat
with oil pastels, layering oil pastels and
guash and scratching. So I mixed several techniques
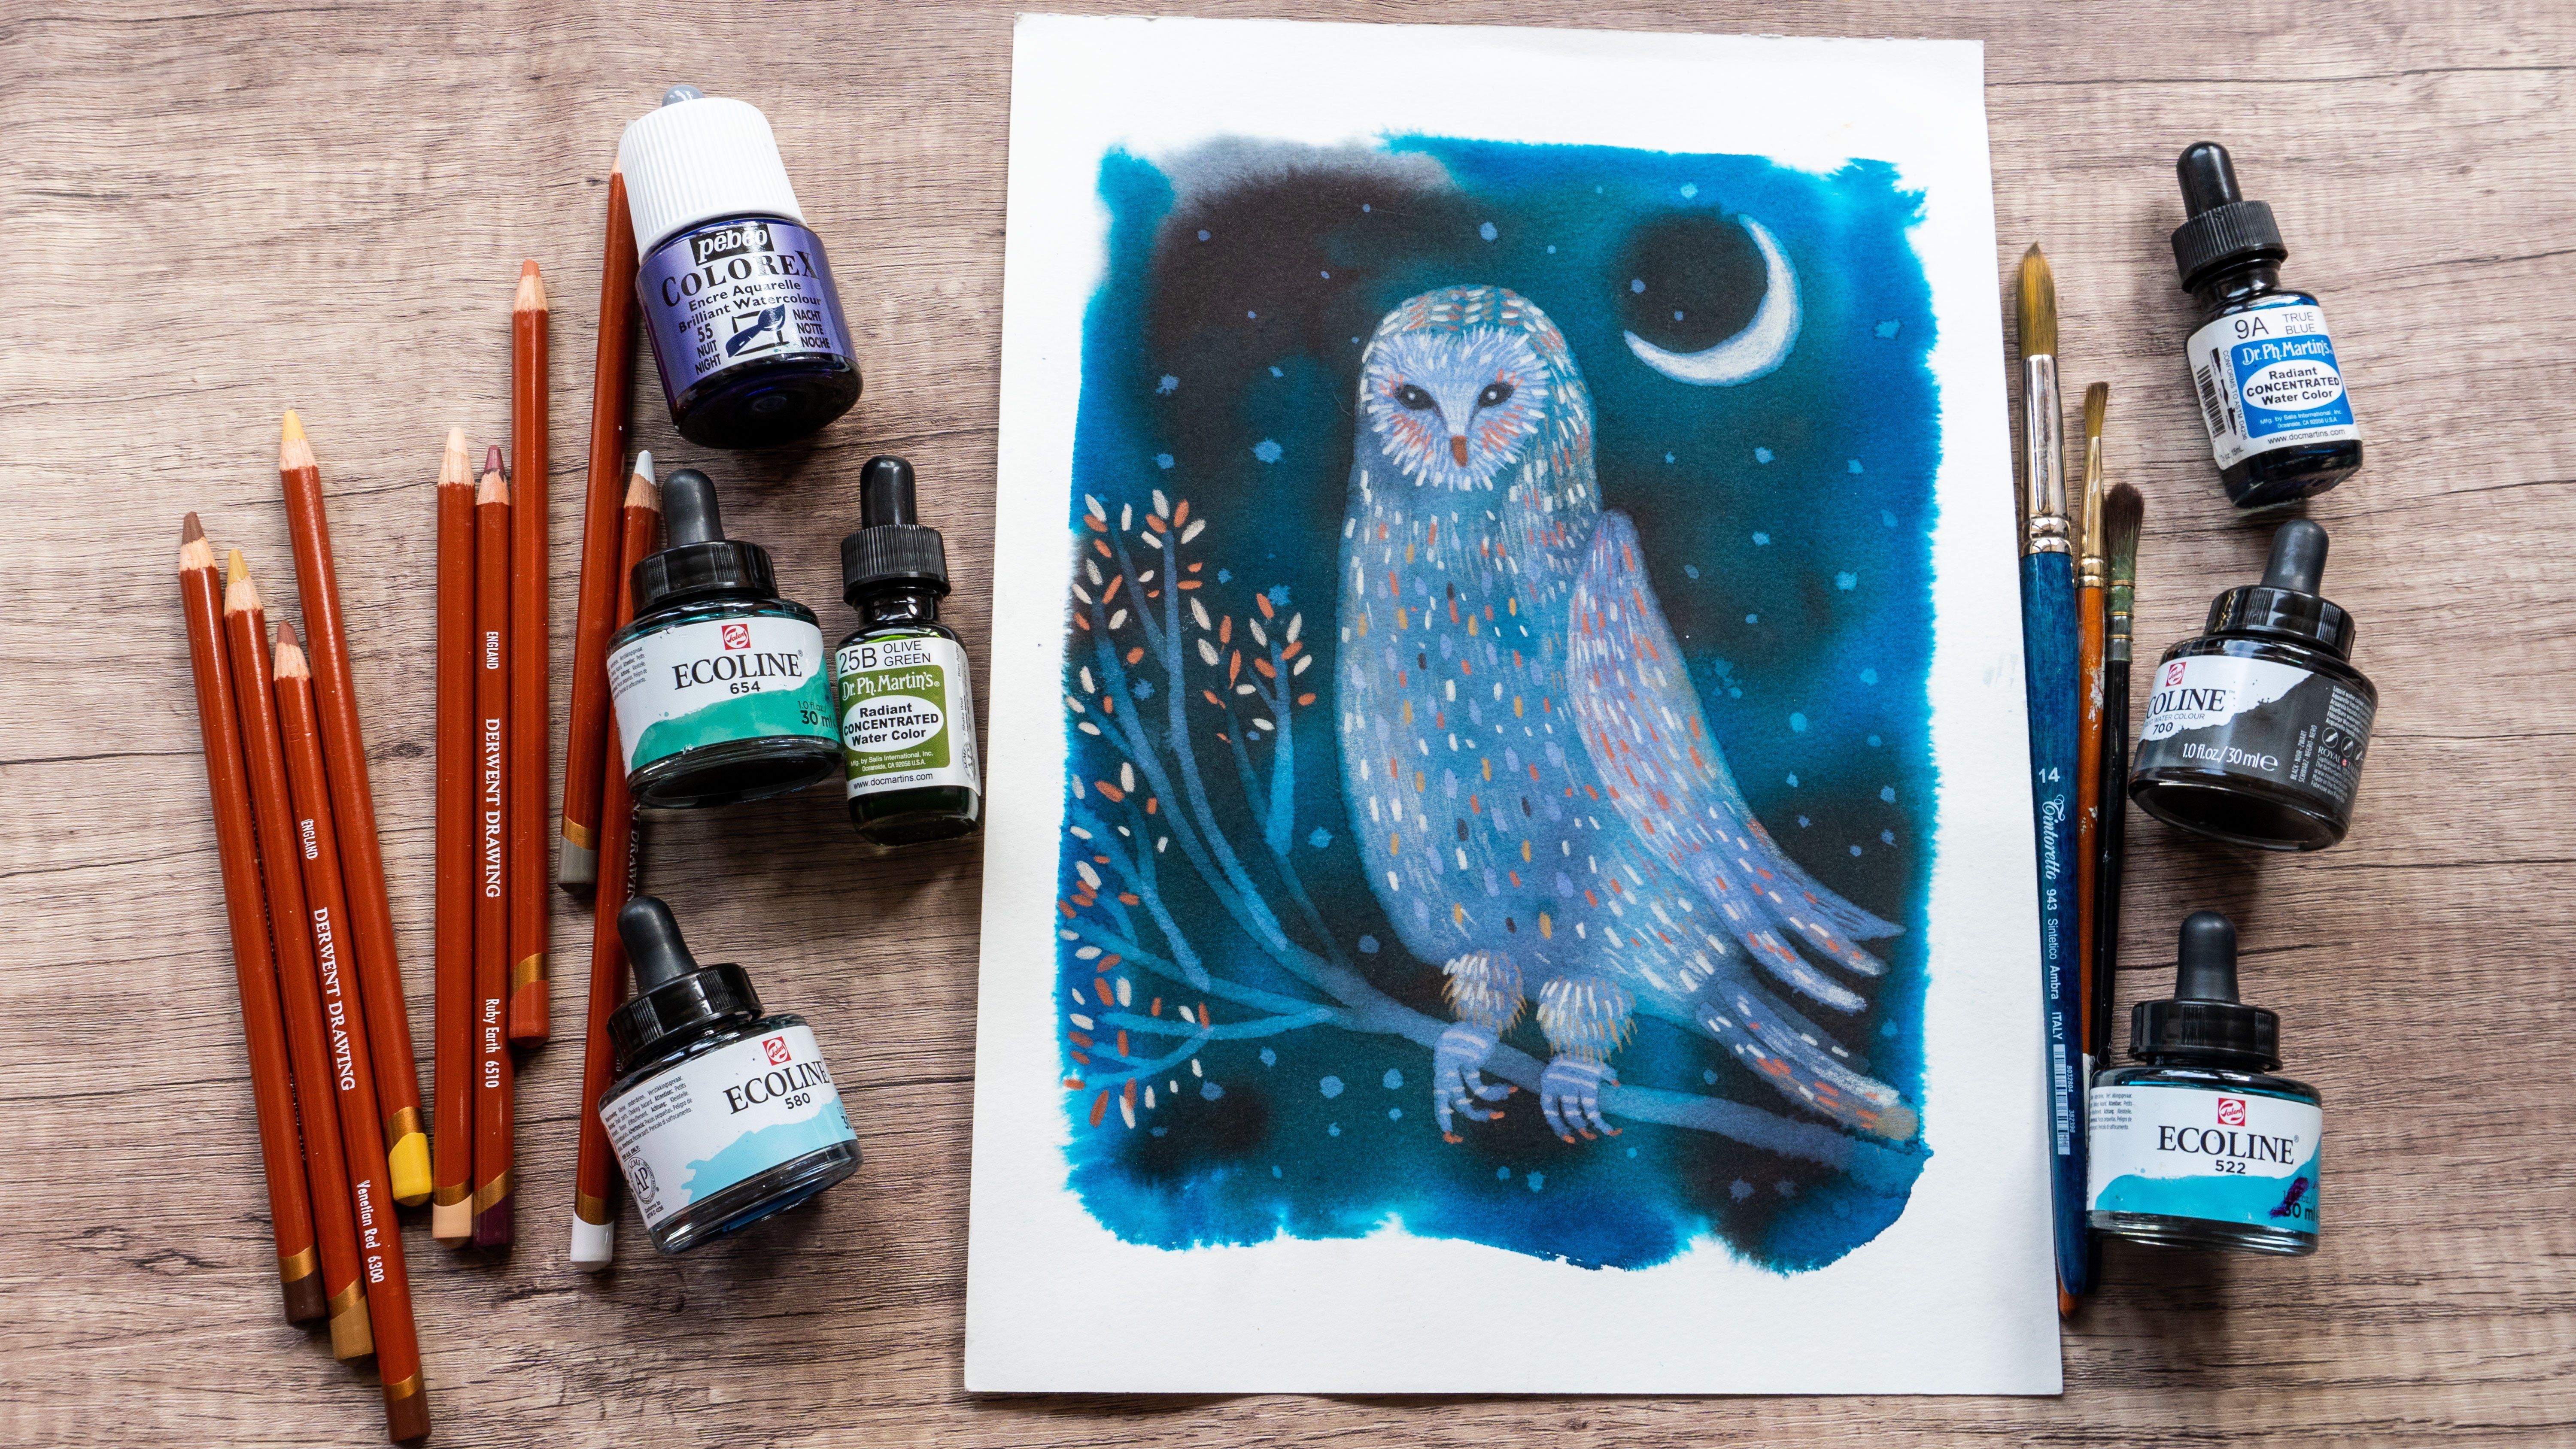
with this bird scene, I used oil pastels that I
smatched for the background, but I did it with
solvent for oil colors, and the bird and also the plants was painted
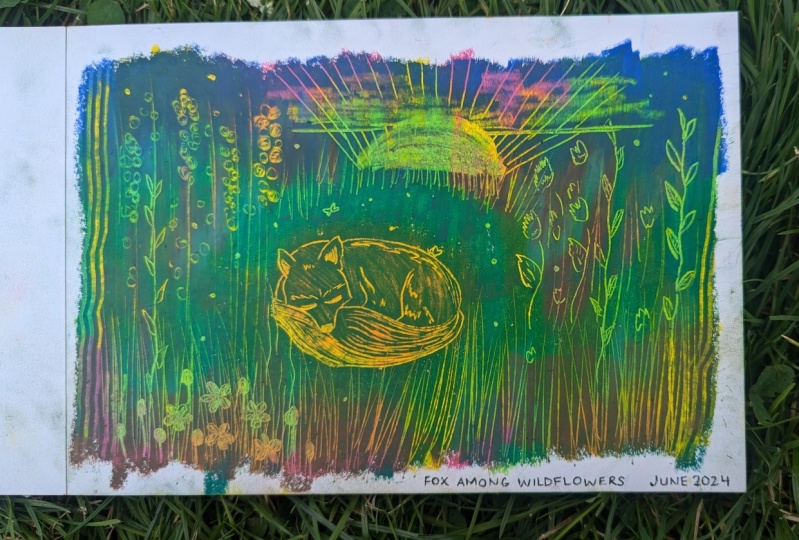
with oil pastels. For example, here, For
this illustration, I used oil pastels to create this background
for grass, this texture. I first painted yellowy
background for the grass part, and then I painted
with wash over it, so it created this texture. It's up to you, feel free
to draw whatever you want, both size and technique. If you want to have just one
technique, then go for it. If you want more techniques. You can obviously do it. But if you feel
overwhelmed and not sure, then I suggest you
just to go and pick a small subject and
just one technique. Without further talking,
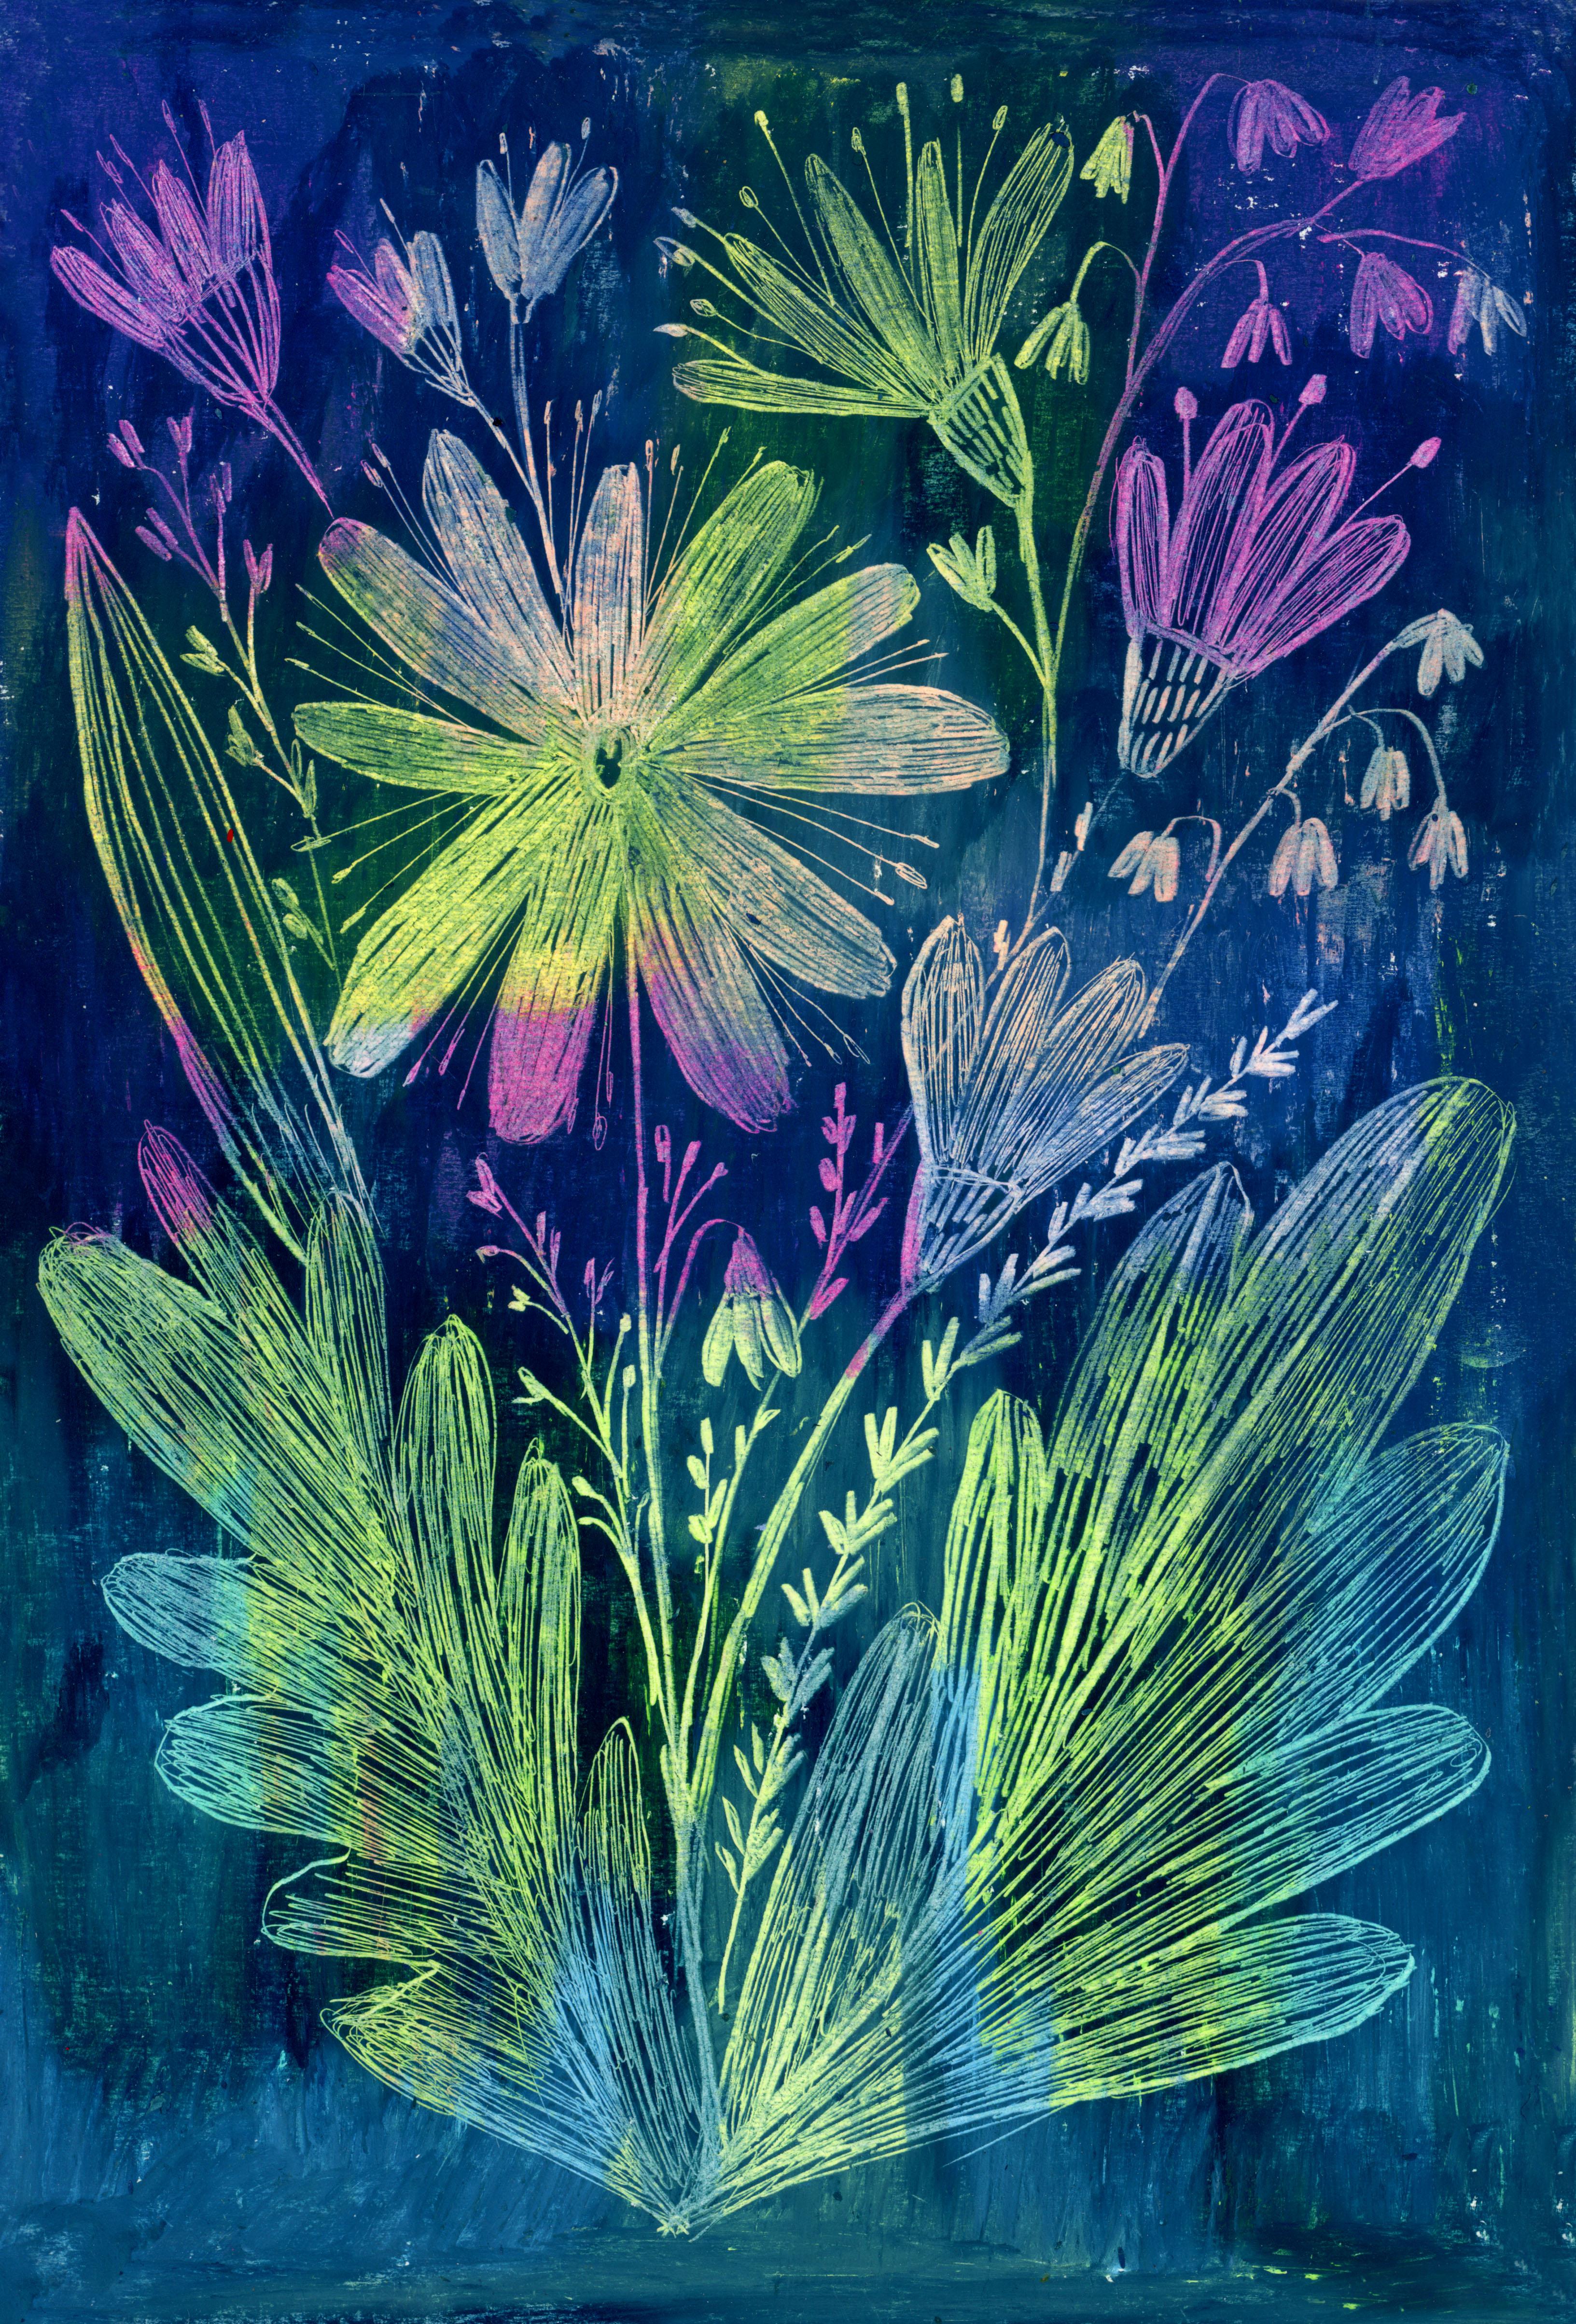
I will jump into drawing my final illustration and Since I really love this scratching and
etching technique, I will use this, and to make it simple, I will paint flowers, a bouquet. Another tip for you
is make it easy. So have fun. In
order to do this, don't over think it,
don't complicate it. You don't have to immediately draw something that
maybe you don't like. So if you want to have fun, Then think of something
that is easy for you that that it's really fun for you to paint and that you
don't feel stressed. Maybe it is quite obvious, but sometimes it is good
to remember this tip. I once heard that, your voice, your style, is there where where you
really enjoy the process. For example, I don't
really like architecture. I don't like realistic. I want to paint a city or
something super realistic. I will go for something
that I enjoy drawing. It will be some nature subjects themes in this
case, floral theme. You get the idea. Right now, I'm creating the background,
the first layer. I'm doing a kind of patchwork
of different colors. I'm swatching colors beforehand. I chose my palette. On the upper side of the paper, I will draw the colors that
will represent the flowers. And underneath, I
will use greens and blues for the leaves part. That's more or less
the logic, the idea. The process is the same as I
did for the for the sketch. But this time, I will
work a little bit bigger. I already feel warmed up. I already feel more confident. That's why I go a
little bit bigger. You can work as big as you want. I chose this A five format, which is which fits really good. It's not too big,
it's not too small. I suggest you to go A
five and bigger or if you are if you're in USA, then obviously have
your own formats, but you get the idea. I will finish the layering
of my background. Again, the same step
for the second layer, I will paint over with
the darker pastels, I will again pick
different colors, not just one colors
because I like this idea of creating gradients. Let's call it like that or
patchwors of the colors. I think it's more
interesting and colorful. But if you like then you can pick just one color
and then I'm going to paint all the
all the background with different colors
that I picked. In my case, those
are dark blues, green blues, and a little
bit lighter blues as well. You probably got the idea that working with oil pastels
is really messy. I talked about it before, but you really get the
idea when you work on the bigger formats and you
consume a lot of oil pastel. They tend really to leave
small pieces, small bits. Of oil yeah, of oil pastel. So just be aware of it. I don't give you a
really good example because probably
you would like to put some paper or something that will protect your
table underneath, especially be aware of the pieces that are
falling on the floor because They then attach to
your shoes to your socks, and you can dirty
everything all around. Just be aware and try to
protect your environment, your work space as
much as possible. Now, my favorite part
scratching and etching. As you can see, I prepared
a sketch beforehand. I have it on my left. I will try more or less to see this guide that I
prepared before. You can do it or you can just go and paint scratch directly
without a sketch. It's up to you, but
having a guide could be helpful just to
create a composition, something that will work better
rather than improvising. I will use this
etching tool needle, which is a little bit bigger, a little bit thicker to
create the initial outlines. And when the outlines are ready, I will fill them up with
details with lines. And, This is kind of
mindfulness technique for me. It relaxes me. So I'll just proceed
with the process. Here, there are no
right and wrong, no steps to follow. I will try to figure out what do I want to how do I want
to fill up the shapes. While I'm drawing,
for example, here, I'm making tiny flower details. Sorry, I don't know the
English name right now. So yeah, just enjoy the process and do whatever
you feel like to do. I can follow up my steps, but I encourage you to explore
your creative intuition, feelings, what you like,
what you don't like. It is time for you to and
to enjoy the process. It's time to discover what you really like and do
what you really like. For example, you
can ask yourself questions like what
colors do I want to use? Do I want to be
more realistic or more loose and expressive. For example, I like bold colors, and I like to be very
expressive and loose and quick. But if you want to make super detailed piece of
art like for example, Albrecht Durer, then
you can go for it. You know, just be
yourself and enjoy. If you want to use
some other technique. Absolutely go for it. I want do the final pieces for each and every technique because that this
class is not about it, it's about exploring
different techniques, and then it's up to you just to try to make a bigger piece out of
what you really like, but I will leave you
in the resources, some of my examples
with exation of how I used oil pastels for the illustrations
that I will show you. I'm about to finish
my illustration. I continue adding details. This is really fun when you already did the
big work and now you can enjoy and continue
adding small pieces. I really love this tiny details. I will continue with that. I cannot wait to see
what you came up to. I'm really curious
what piece of art you created if you chose the same technique
or some other thing. But before we will jump
to the conclusions, I will just clean up the table, and you can see there
are really a lot of dirty pieces of oil pastels. I advise you to to
clean your table. All the detergents
that you use to clean your kitchen that
clean the greasy surface. It it works just fine. With this information, I'm very happy to announce that we
finished the final project. Again, I cannot wait to
see what you created. Here is the etching
oil pastel technique for my final project. I'm really happy
how it turned out. I really love this scratchy
textures and strokes. So this is my project. I cannot wait to see
what you created. Be sure to upload it to
the project gallery, and tell us about a little
bit of your process. Be sure also to watch the final thoughts lesson where I will give you
some further information.
8. Final Thoughts: So we finished. I
already washed my hands, but I would like to see
her hands after the class. I wanted to thank you for
participating in this class, for taking my class. I hope you enjoyed it.
I hope you had fun. Obviously, I always
repeat if there's something that I would like you to take out from this class, it's almost always the
feeling that you explored new technique that you enjoyed
your creative process, that you learned
something new and that it helped to
unlock your creativity. I also hope that you enjoyed oil pastels and that you
liked this technique. And even if maybe
you didn't like it, if you decided, it's
not for you. It's okay. I mean, it doesn't have
to be your technique, but at least you tried
and you had fun. I wanted to remind you to post your project into the
projects gallery. You can applaud all the process or just the final delivery. Final project of the technique that you chose, but
it would be cool. It would be fun to
see all the process, all the techniques
that you explore. Obviously, if you have
questions, doubts, or thoughts, or moments, it would be also great if you would
share it with us. I also will be very grateful if you will leave
a review for this class, it is helpful for me. It helps my class to be more
visible for other viewers. So thank you in advance. And obviously, I will be
curious about your feedback. Also, I invite you to
follow me on my Instagram, on my YouTube and obviously
here on Skill show. I hope to see you in my profile and there
are other classes, so I hope you will
check them out as well, and I hope to see
you around. Bye.
 Ania Kropla Malinowska, Award-winning illustrator