Transcripts
1. Introduction: Has it ever happened to
you that you started with watercolor painting and it
got out of your control. It did happen to me a few times when I started
learning watercolors. So I started painting
smaller paintings, which really helped me gain confidence in my
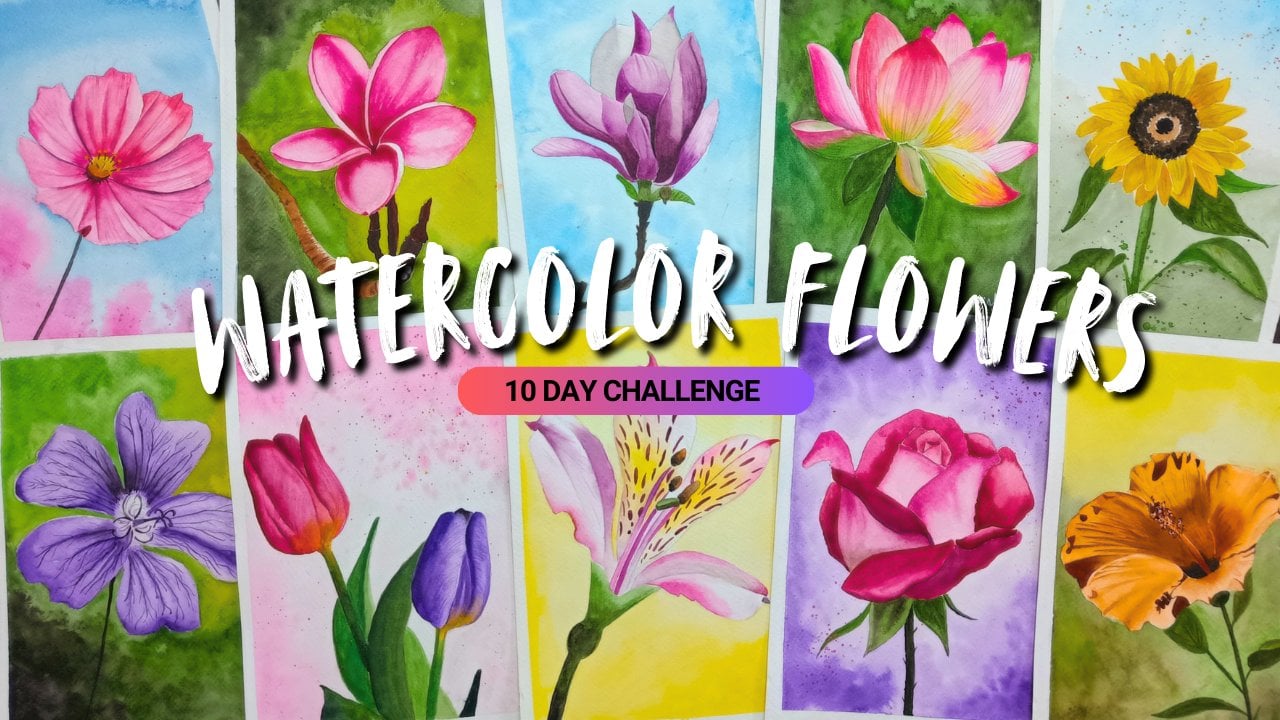
watercolor skills. Hi, my name is Trisha. In this class I will share a video for
watercolor practices, which will help you up
your watercolor game. You will learn to
paint gradients, boggles, floral patterns,
and negative painting. By practicing these,
you will learn so much more about water
control, brush control. And once you must
have water control, your master watercolors to the watercolor paper I'll
be using here is an E5, twenty-five percent
cotton watercolor paper. The brushes I would use would be synthetic round and
natural mop brushes. You don't have to follow the color pattern that
I use in this painting. You can use any color
of your choice. And all the paintings
that we will create, all the paintings
I will show you in this class would not
require any drawing skills. After practicing
these paintings, you will gain massive
confidence in watercolors and you will gain
confidence to create more beautiful
watercolor pieces. So let's get painting.
2. Gradients: Welcome to the first
lesson of this class. In this lesson, you will
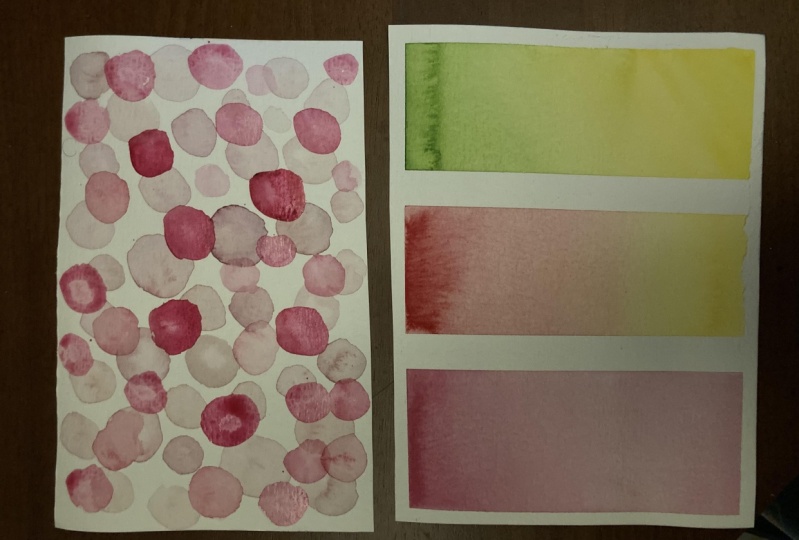
learn how to paint creatives. I'm going to show you how
to paint three types of gradients to the first one
would be a one-color gradient. The second one would be
a two color grading, and the third one would be to
Kotler diagnostic gradient. So we will start by taping
her paper to a surface. So I'm also going to add two
tapes in between to create three sections where we will
paint a tree brilliance. Your, I'll be using
a small brush. So let's add some
colors to a palette. The next I'm going to
fill my jar with water so it is ready and
let's get painting. So I'm bringing with
the crimson red color. I'm just going to
add a lot of water, do the rents in red and
create very diluted color. Next cell starts to
put the color on the paper and
gradually moved down. Midway through, I'm
going to wash my brush, tap it dry a little
bit and then move it across the lower
part of the paper. Now I'm just going to add a little bit more crimson
red color and then start adding it to the
top of the gradient. Here are just clean
my brush and mortar and then I'm moving
from down to up. Just move all the way
up without coming down. You can go with a gradient a few times to new achieve
the desired color. For the next creating, I begin with a yellow
color in the lower half and the crimson red
colored in the upper half. What do we need to do where the colors are meeting is going over that area of few times
so that colors mixed up. So we need to add a
little bit more colors on both sides and we get them in
the middle and march them. For the third gradient. Again, begin with a yellow in the lower half and sap
green in the upper half. Here we are creating a
diagnostic gradient. You can keep adding code
as in when you need. Maybe you started
with a darker color, so you may not need to add as many layers as
I am adding. That. It totally your call. Let it dry. So now let's peel off the tape, reveal
the gradients. I think the key to make a beautiful blended creating
these to go over the grading the few times with
the colors that you're using and let it dry. A few other examples of
gradients. You can create. These or one of the
first gradient they created maybe two or
three years back. In the next lesson, I'll show you how to be in bubbles lake. These see you in
the next lesson.
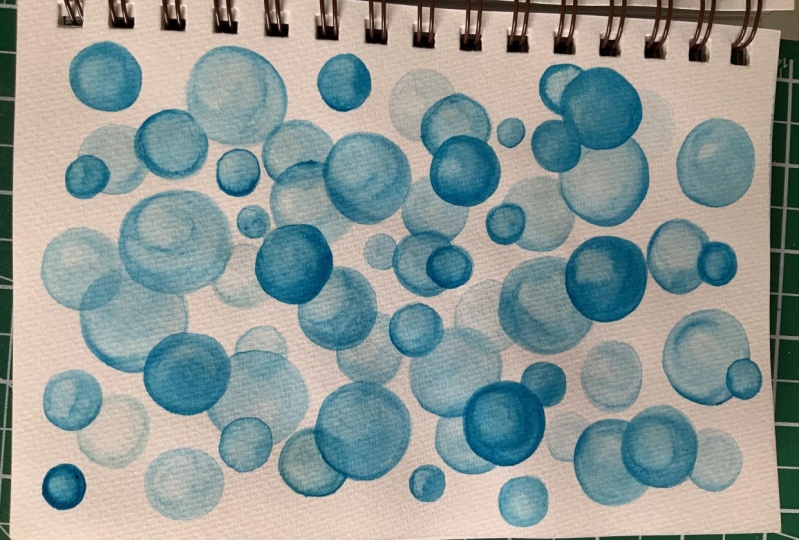
3. Bubbles: Let's dark bubbles. Bubbles are basically
sockets which are transparent in the center. The whole idea of how
to paint a bubble is to paint a circle and just lift off the paint of the center to create
a translucent effect. Again, I'm using crimson red because I truly
loved this color. And you can use any
color of your choice. You can even use two or
three colors if you want to, but make sure to use the lightest color first and then go to the darkest color. Here we are using a very diluted version of
the crimson red, create bubbles
Brucella in the back. I'm just beginning
by drawing a circle. Next, I'm washing the brush
off with a clean brush. I'm just bringing the color in. Then I'm just lifting off
the color of the center because you want it
to look transparent. Because circles are
not very easy to draw. This practice would give you a lot of control over the brush. Although it's a lot
of fun to paint, he wanted it was that
I took another brush, a clean brush for the filling
in part of TableView. With one brush I was making these alkyl end with Diana
under brush I was filling in. So I did this because
it was a hussy cleaning the brush
after each circle. Make sure when you
are painting over one bubble that it
is completely dry, otherwise the paint will bleed into each other if it's not dry. I'm just using the darker value of the same color
to create bubbles and talk to here we are making four or five layers
of different values. And if you go at the point
how to create the bubbles, go ahead and increase
the speed of the video. I think it looks really
good when the palpalis underneath the kind of peeking
from the bubbles over h, I'm going with another darker. And you can go as dark as you want to put
demonstration purposes, I'm going to add three or
four layers of purples. Quite literally that I'm just painting on 1.5 of the page. But you get the point right. Fun fact, when I painted these
blue and purple bothers, I was just so impressed
with me that I made that my lock
screen for the month. Hope you had fun painting
these publishers. And in the next lesson
we are going to paint my yet another favorite, flux. If you're interested in
painting watercolor flowers. See you in the next session.
4. Floral Pattern: In this lesson, that is the watercolor floral pattern
that we will recreate. You can go ahead and choose
any colors of your liking. You can paint the rules
is any color you want to. Start by adding a few
drops of water on the palette and mix
crimson red with it. Next, I didn't mixing
some vermilion red with crimson red. We'll start painting a rose. We'll start by using the
tip of the brush and me three squiggly lines in the
shape that I have drawn. It would be the
center of the rose. And then we'll start adding petals to the side of the road to create the petals, start with the tip
of the brush and then slowly add
pressure to create. What we want is that the
petals should be thin at the end and a bit
thicker in the middle. As you move out When make the
petals to be really thick, Can we want the leaves to wrap around each other
a little bit too? Now I'm going to take
the crimson red color and follow the exact procedure that I did to make another room. I think practicing
floral watercolors. Julie improves your brush work. And you understand a lot
about how your brushes look. Next I just made crimson red with a little bit of yellow
to create this peachy color. Now I'm going to draw another
flower with this color. I'm just adding a little bit of color in the center
of the petals. Now we had on to
making the leaves. For the leaves,
I'm going to make sap green with a
little bit of yellow. Here we are drawing the leaves. Start with the
brush on its tape. As you move out, start applying pressure and then slowly lift up the brush. And you can always make a pointed starting
end of the leaf. So another type of
leaf we're going to make would require two strokes. Whenever I see fit, I'm
just adding leaves. I just felt that the
flowers are very less compared to the leaves. I just took a little bit of
crimson red to make two rows. I'm also going to make
another rose bud, again, starting with the
center and then adding wider petals
to its sides. Darker leaves, I'm going to make fat green with a
little bit of blue. This is a different leaf pattern that we are going to make. It will consist on one line and small
leaves attach to it. Now we're using the same color to create some smaller leaves. I just realize I'm just turning my bedroom way to
imagine this one because usually I taped
down my watercolor paper. And in this one this is just free and I just feel
like if it's free, why not more granular bed? Because I feel less
crimson red has overtaken the pattern
a little bit more. So I'm making a flower
hair with crimson, sorry, with vermilion event. I'm also making a
different kind of flower, which is like a
three petal flower. It's not even a flower.
I don't know what it is. It's like a giant
bug or something. Now I have mixed sap
green with black with a little bit of black
to even more darker. The greens. And her, I'm just adding a few more very
dark colored leaves just to add up the contrast
to the whole thing. So it just brightens up. Few more leaves. Actually, I didn't realize how much fun it was to
draw the smaller leaves. It too hung up on the
big leaves that I didn't realize how much
fun these mottled leaves. And also just kind of bring
the whole pattern together. As you can see, I
just really enjoyed myself while making these
leaves hands like onStop. But you can stop
whenever you want to. Now with black
color and I'm going to make these little seeds. They are not seeds.
Seeds, right? This is the pattern
that we've created. And if you're interested in knowing about negative painting, then see you in the next lesson.
5. Negative Painting: In the last lesson
of this class, we learn what is negative
painting and we will create this beautiful pattern of hearts using negative painting
in this class, generally we paint
inside the object. In negative painting with paint around the object
to create doctor, we will go from light
to dark and create few layers of the object
that we are painting. Sudden begin by mixing some
crimson red paint to the law. Who photo to create
a very light color. You can see I've drawn the
heart shape and now I'm going to paint around
it instead of incited. The fun thing about this
technique is you can always go in and correct the
shapes that you have drawn. If you feel that
the hardship has been difficult for you to paint, then you can choose any other simpler shapes of your choice. Similarly, I've drawn
a few hard to know. I'm going to paint
all around it. Adding a lot of layers. We are increasing the depth. For the second layer, I'm using
a vermillion red colored. I will again repeat the
process in the first. So you can draw as many or
as less hearts as you want. For the title, I'm going with the crimson red color again, but it's a bit dark this time. There's this totally
opposite to how we painted the bubbles in which the lower most layer was the lightest and the top
most layer was a dog. For the next dark layer, I've mixed scripts and
read with wild color. Also make sure that
your painting is dry. When you're adding
the next layer. As you can see, I'm drawing
hearts who shot in the back. I am not drawing
the whole shape. I'm just drawing what
what we can see. Okay. All the paintings that we have
painted in this class will help you understand what
the colors even better. After practicing these,
you will learn how to control your brush and
how to control water. And these two are the
most important things when it comes to
watercolor painting. Okay? Okay. The last sue for the last layer, I'm going for a black color
to create one more layer of one good thing in bad thing of negative
fainting is at, at every layer you have an opportunity to correct
the shape, right? But that is also the disadvantage of this
painting because you can go ahead and draw in the shape that you
probably liked. Last but not the least, the most satisfying part for watercolor painting is
peeling off the day. It is just so
satisfying to watch me. It's so wonderful when the
edges are so crisp and clean. This is a painting
that we have created using the technique
of negative painting. Thank you for joining
me for this class.
 Trisha Jain, Art Educator & Art Lover