Transcripts
1. Introduction: hi and welcome to the course about skeletal animation and inverse schematic immunity. The course is made by Andrew Joseph. My name is Kate Mustafa. I translated this course to English. During the next hour, we will be learning skeletal animation basics in verse, Schematic or I K. What will animate the character by 18 and using bones. So if you are a designer or developer, all someone who likes to create games and unity and you want to Anyway to your characters and other objects, these course is for you. You will be able to use unity animation on your projects at full capacity. Well, if you already we're starting right now.
2. Getting ready: file format: all right, so we want to animate a character using skeletal animation. First of all, we need to understand in which four months we get the characters file and how to import it to unity. There are several options. It can be your spreadsheet when all body parts are in one file. Usually it's a P N G file with transparent background. The surprise are located separately from each other, but it is still one file. We can work with this file, but it is not the perfect option, because in order to conveniently use the body parts, we need to move them in a body shop. I mean, create a separate layer for each body part and move the layers to make the character. After that, you can import it to unity. On the other hand, you may get a single sprite. Here we have a character as someone whole picture on the transparent background. In theory, you can try to add bones to the character and move them. But since we don't have separates price here, the body will deform in a runway, so these option doesn't work for us, although there is a possibility that you will be able to create a good looking animation for this character, but it is a hard and inefficient way. Next you might get the following images. This is Sprite animation. We see the characters, movements, frame by frame or image by image. In this case, you don't need this skeletal animation because you already have the animation, which is great. The Sprite animation is not this course topic, so this case is not for us. Next. If you get your character like this, you get Hiss parts, and each part is PNG file. This case is kind of close to the 1st 1 when we get the spreadsheet, but this time you get the parts in separate files again. You need to use Fatah shop in this case to build your character from Hiss Parts. Finally, the best option when you get your character as a P as defile, the character is already built, but a shop allows us to work with layers so we can hide parts. Make them visible again, and this is the best way to get your character. If you are planning to use skeletal animation for it since I opened auto shop, I'd like to tell you again about those two options, which can work. So basically, you need to turn those files into this 1 40 should file, which consists off layers. Let's say we got this one. A designer who was drawing this character could each part in a separate folder, but he left all the details off his rowing like lines and colors. Unity cannot understand it. Unity needs one part as the one layer without any details. We need to merge this folder Breasts Control Button plus IV and you see, we have the layer instead of the folder. So we need to do the same for each folder for each body part. But be careful because, for instance, I don't need the ear as a separate object. I prefer to make it a part off the head. So I select all these parts and merge them. Merge. This call is okay. Also, do not forget to give the layers correct names so that you can easily identify them when working immunity. Here is the final result. Every part is on its layer, which will help us to create bones. You noticed that I use right for my right and left for my left. Although right is left for this guy. Well, our file is ready. The next step is to save it as a PSB or large potter shop for mint. Do not be confused. We have P as B and P S d for its on for unity. We need P as B. This is the former Unity understands. In our case, this file named Troll Ready is attached to the third lecture so you can download it and use it in the next lesson. We're going to import the character to unity and adjusted a little bit.
3. Unity Packages installation: Now we're going to create a new project in unity and imported the character. First of all, I have the following unity version. It is the latest version available right now when I'm creating the scores. But a few packages are still unavailable, so that can be a few differences between my unity on yours. But all the information and this and the next lectures are still relevant because all the basic packages with two D animation are available. Now. If you have the same unity version, you see the same icons and bottoms. If your version is not the latest one, please update unity. All right, let's create a new project to de Project. Let's call it. Here is the new project Click Window Package Manager. We need to add a few packages to you. Our project. These packages allow AUS toe work with skeletal animation. Make sure you have all packages here. Andi, If you click advanced, the third option should be chosen Show review packages. Why? Because I K package is still in the preview in my version of unity. So just sit in the list. I need to enable this. Well, we installed this package then check that the Judy's Bright is active. Andi PSD or Border to You can update packages if there are any updates available. Also, make sure to the animation and two D common are installed. All these packages unnecessary to work with two D's skeletal animation and Universe Schematic. All we need to do next is Dragon. Drop the character file from a computer to the Project folder. We see that the filed consists off sprites with body parts, and this brights held the names. I gave them info to shop on the inspector panel. We see that the PSD importer worked on helped us to import the character in the right way. All right, all set. In the next lesson, we will be drawing bones for our character.
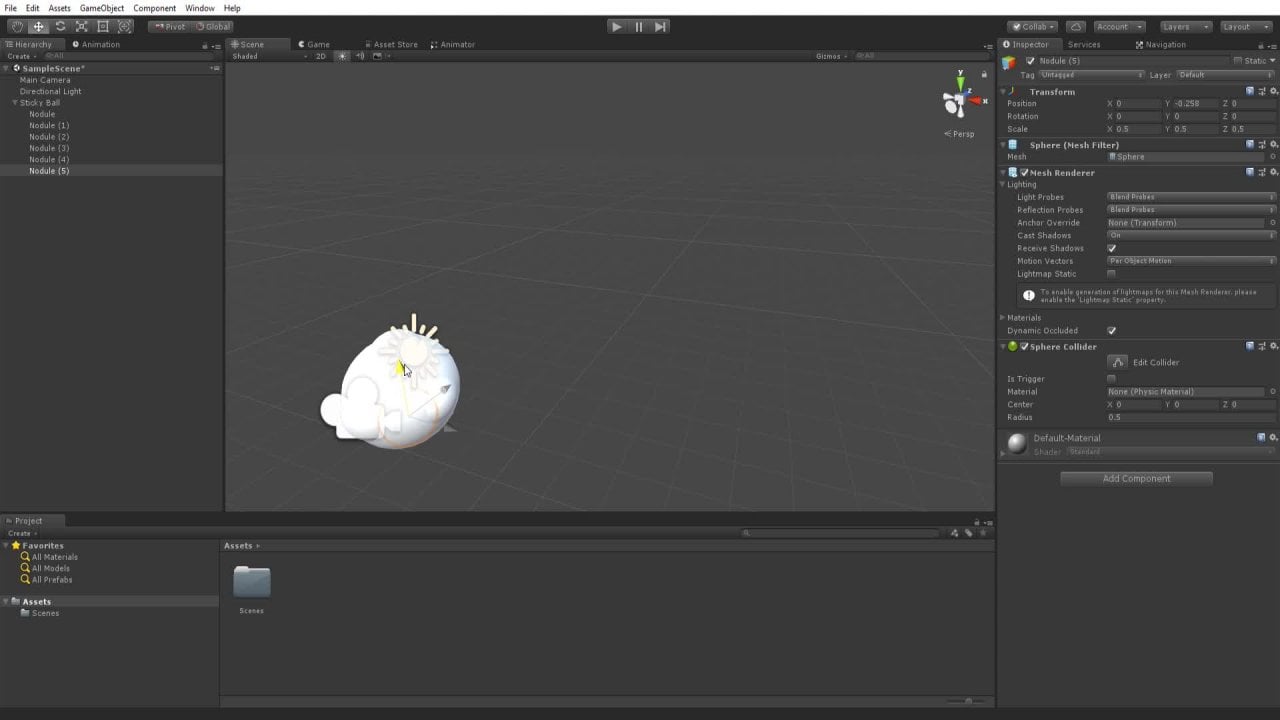
4. Skeletal: bones: Let's row bones for the character. To do this, I select the PSB file and click on Sprite editor. Here we see the Sprite sheet, which is created automatically. It looks like the first option I have shown you in the first lecture. So, yes, you can slice the character here, but it's way easier to do it in photo shop. Well, would go to the Sprite editor and then skinning editor. We'll be working in this window in a few next lectures. We have three parts bones, geometry and waits. Let's start with bones. I click on this button, create bones. Now we have this red circle and we can draw bones one quick to start the bone and another quick to end it. We can create many, many bones that way bones off any length. When creating bones, you need Teoh understand the character or object you want to animate. Yes, it cannot only be character, but you can also animate grass. For instance, in my case, I need to take anatomy into consideration. My orig has the body I had next jaw in order to end the bones chain and start and you bone press escape next pay you attention. I pressed escape on this semi transparent arrow is moving from this yellow bone. That means the next bone will be created from the yellow bone and B. It's child element, but if you want to make it from another bone, you need to select the bone. First I select the red bone and now control the bones for the leg. 123 Again, we need bows for the right leg press escape button, and if this big boat is selected, it's not correct. It's not like the rial bones are connected, so we need to select the red bone and now draw new ones. Next, the arms bones should go from the body to shoulder arm, hand escape again. Do the same for the right arm. 123 And we need the 4th 1 for the baton. Done. We've created the bones. Pay your attention. The child bones are connected with the parent bone. Do you can see this semi transparent color? This way, the bones hierarchy warmer tree is created. If you click on his ability, you'll see the main bone, this one and all the other bones. And some of these boats are parents to another boats. We will come back to it later. Now let's say we decide that body should consist off more than one bone. Find this split bone button and blind at a bone to divide it. Let's divide the spine into three parts like this. Click preview pose on. Move the bones to check. This way, you can change bones. You can also added bones, Move them, change their length. Correct. Um, in any way. Okay, I need to move this bone a little bit. All right. Now the arms are connected to the bottom bone, which is not correct. We need to connect them to the top body boat instead, or even better, to a shelter joint. Let's draw it. Create a bone from the top body bone. I'm drawing the shoulder joint, then escape and draw another joint. Arms need to be connected with the shoulder joined, not the hip joint. We cannot change it here. Let's go to the hierarchy. It is important to call the bones. For instance, this bonus spine zero. I highly recommend you to call the bones in the right way because it helps you a lot when you're managing the bones in unity. You will know where each bonus by looking at its name. Now I'm going to rename all these bones. Okay, Now the bones have names, which is great. Let's take a look at the left arm. It is connected. Teoh the spine. Oh, this one. I need to connect it to the shoulder. Left Children left is a child off spine to the top red bone. I take the left arm and dragon drop it to the left shoulder our right to the right shoulder . And now this salmon transparent connection shows us that we did it. Right now, the arm bones are connected to the top spine. Bone hierarchy is important. Spend sometime building a correct bone structure with names and connections, although you can come back to it any time. It is better to get a good skeletal first. Before we moved to the next step, Let's click. Apply to safe. I will work in the next lesson. What will be working with geometry and will we learn in how it is connected with bones
5. Geometry: All right, let's get to know the sprite geometry. It just this window Geometry geometry means a physical form off a sprite. If you didn't like, apply, do it now. Now I opened the Sprite editor to illustrate you see that the sprites are squares, but the geometry describes. It's really form without the transparency here in the skin and editor, we can generate the geometry automatically. Click ear Auto Geometry. The geometry panel is only visible when auto geometry is enabled. It contains the available sentence that affect how the geometry or selected sprites are generated. How strict the edges are, how many Vergis is or triangles will be created. We can live it as it is, but let's uncheck the weight box. Well, look at geometry. Ali. All right. The geometry lines were created. They called Bert Asses. Let's go back to these parameters by a Justin subdivide. You control the number off Versaces, for instance. Let's in crazy and you see the result. Why and when do we need it? We need it if we animate tiny parts. For example, if you need Teoh an image not only a palm but fingers. Bombs are connected with the geometry, so we need many dots. Many Virtus is, but in our case, 20 is enough. The next parameter alfa tolerance. Adjust the outline accuracy. Pixels with an Alfa value lower than the set tolerance value are considerate, transparent. Duren outlined detection when the geometry is generated, for instance, we want these spikes to be outlined, although we don't need it here. It doesn't affect the animation, but sometimes you might need it. Pay attention. Alfa Tolerance works together with subdivide. You need to have enough vergis ease to outline correctly. So if you said both them high, you see the difference in the outline off the edges. Use the outline details lighter to adjust their currency off the generated geometries outline to the outline off the sprite. Smaller values create simpler outlines, while larger values create dancer outlines that bid the sprys outline more accurately again . This parameter works with these truth. If you move all this lighters to the right, you'll get the best outline possible. But it doesn't mean that you need that outline. The more difficult your character is, the more a currency you need. In most cases, it can choose more optimal saddens in my case, these numbers are totally fine. Next, we can adjust their automatic geometry. For instance, let's take a look right here. Click. Add a geometry double click on the sprite you need. We can move the burgesses just like this full. The outline we can create new virtus is to adjust the geometry, then use at a geometry again to move it. This way, you can correct the geometry. If you select a line, you will be moving to dots on the line. When it does need it, you can create new edges. Let's greeted like this and use the attitude to move and edit. To deliver the purchases, press millet, and if you do something wrong and want to come back, select auto geometry again and generated for the selected sprite to dis elect double click on the anti background. In other words, you can generate geometry for all sprites or on Lee for the selected ones, all visible or selected full day a torso, for example. I need more accuracy for the spine, so I select to this right on adjust its auto geometry. Let's move this lighters. The split edge tool splits edges into two. We can create a Vertex or split the edge. New Vergis is were created. We can move it. Geometry is not a difficult part. The aim is to outline the sprites in the right way. And if you object, simple or if it's animation is not that important. For instance, it's one of the big round objects like grass. Then all the geometry works really well. One click and it is done. Double click on the empty place to dis elect the Sprite and auto geometry. I went back to my previous spine sentence. Do not forget to click. Apply in the next lesson we will be connecting the boats with Virtus is.
6. Weights: in this lesson, you will get to know the last part weights before we dive in. I want to tell you that you can click on preview post to move bones. Use the circle neon going to move it and irritated using the bone body. If you broke something, did this do not panic? Because in privy pose, you can click on reset pose and go back to basic pose. So to connect bows to John Tree, we need to generate weights. Auto weights do its job Check associate bones. Checkbooks generate all. Oh, character is colorized with the collars. These scholars are bones scholar, but the auto weight is not perfect. For instance, the baton works Ron Leg influences the arm and torso. Let's start with the weight slider. We see that it is affected by two bones. Do not afraid to move anything in this mode? Yes, it works incorrectly. Wait slighter Adjust weight. The US either control I select the turquoise bone and move the slider. And now its influence go down. The baton still moves wrong, but we can fix it. Select the dark blue bone and move this lighter to the right. Okay, Now the whole baton moves Good. I canceled all this to illustrate the second tool. Bone influence. Double click to select this right. We see two bones, influence it weapons and armed, right? Thus, we don't need the arm. Right. So I click on minus It is faster. In our case, you see, on Lee, one bone influences the baton. The third tool is weight brush. It adjusts waits by painting with a brush select color, adjust its size and hardness and start drawing like this If it take the turquoise color on draw Here you see how bad it effects this, right? In my case, I need this sprite to be dark blue. So I select a largest eyes on draw. All right. It is blue and moves correctly anyway. Even if you used weights lighter or wait brush, you still need to go to the bone influence on deal it The bones you don't need It should not influence this bright off course. In this case, bone Insulin's is the fastest way. You can select Sprite by double clicking on it or go to visibility, scroll through the bombs names and select the part you need. That's why it's important to give names to bones. Let's fix this hand. So I select the hence bride dill it these bones and I want to decrease the influence off this purple bone. It's shoot influence, though. So I take the weight brush and draw and vice versa. Decrease the pink bone influence. Now the movement is correct. Depends. Until you project the workflow can be different. Wait. Slider brush and bone influencer will help you. All right, I'm gonna fix all the other parts. The shoulder is okay, but Tom legs rooms. That's okay. But here, what awaits worked. Not good. So I take the weight brush and start trolling. I can draw like this or press control button on. Decrease the bones Influence. Hold control until you stop drawing to reply. - All right, Review post. Okay. Okay. We have problems with his head. I deliver the green bones. I need Onley. Yellow bone here. Next, this bone shooting influence that tell her so on. Don't forget about the jaw. It moves with the head for the jaw. I took the brush and at yellow color to connect the jaw with the head. Okay. It looks more natural. The shoulders, the shoulder moves. Good torso. Okay, reset pose. And we get the post from Punish up. Do you remember? It's our basic posts. Thus we have finished with bones, geometry and wait. And in the next lesson, we'll put this character on a scene. Don't forget to click on apply and then you can close the editor.
7. Animation basics: well, we are ready to place the character on the scene. But first of all, let's create the ground so that the character can stay on it way need as bright, let's change its size and then just put the character on it. You see that the object looks like a prefab, but the icon is different. All the bones we made by here If you don't see bones, go to gizmos and check this box is so inside this PSB file, we see the strides with Sprite skin component, which is necessary for bones. There is the main bone with child bones inside. Sometimes you don't see bows because the gizmos bottom is not active in this case, click on it to turn the bones on. The move tool allows us to move bows just like we did in the skin and editor Click and hold to move it like that. But I needed on Lee. If I make an animation with a full in baton while we need to choose and basic post to start any weight, let me move the jaw and head a little bit. All right, now we're ready to create animation. Go to the animation tab or window animation animation on, We need any major. So to create a clip, go to the animation tab, select the character on click Create. There's a pop up window prompts us to save the animator in the Assets folder. Let's call it head on. The window has changed. Now we have the animator on the inspector panel, and if you open the animator window, you see these elements. Let's go back to the animation window. Here we have the name off our animation. Now I'm going to tell you more about this window. First of all, it is the main window where you work while creating animation. The right side is timeline. You can drug the white playback headline on the rules panel. Use mouse will to zoom in and out. Here is the name off your animation. You can also click here to create new animation. This red button Start recording animation. Let's create a simple animation click on the red button. The red timeline means that recording is in the progress. If you move anything on the scene, new key frames will be created. Let me show you. Yep. Weapon rotation keep frames were created drunk the playback headline to choose the right moment and then move, or a Tate and object to create a key frame. Now we have to keep frames. And while I move in the line the animation displayed, the animation protests standard on is used in many applications, such as Spider and Fodder Shop. If you didn't know now you know when the animation is over, click the right button again. The timeline is blue again on our animation is ready. You can click play to check how the animation will look like inside the game. Also, you may choose any moment on the timeline and click preview to see the post before your actions. How it was before you moved to this bright. You can go from key frame to keep frame by clicking on these bottoms. The space bar placed the animation, but if you try to move us pride before he pushed the red button, nothing will happen. So the change animation. You need to click on the red button. Okay, it's easy this way, Ukraine animation for any objects, for instance, legs. Now we have more keep raves, but the work is the same. In the next lesson, we will be meeting in verse, schematic
8. Inverse Kinematic - Limb Solver: in this lesson, we will be talking about inverse schematic or i k. Let's delete the animation we have created in the previous lesson. We don't need it. I go to the animation tab, select this animation and dilated. All right, we have the basic pose again. You can also deliver the animation from the Assets Folder, but pay attention. This is the animation with the triangle Aiken. And this is any major you don't me to dilated. Okay. What the inverse Kenny Magic ISS. It is a way to automatically calculate the joint angles off a leg or arm, for instance. Right now the arm moves. Only the top bone stays still, Even though I am moving the middle bone, it doesn't look like an arm movement right in verse. Guinea magic is not unity. Exclusive feature. Many applications use it, but in unity, I K is organized in a different way. So let's dive in. Let's go to the character prefab and add and you component. I came manager I case over window was created cook um plus, to create here. We have three options to choose from. Chain is used for more than two bones, while loop is standard to both so over that is ideal for pose and joints such as arms and legs. I want to create limp for first to arm bones. Then you object. Waas created inside the character. Here it is. I rename it to left hand silver for this hand. It is left hand for me, not for him. It has the lips over a component. What do you need to do? We need just like the bone which will be dragon not this one on create an empty object inside it and call it left hand defector or wherever this object is, need a big hand bone and it is the child object for the second bone. Next, let's go back to the left hand Silver Here we have two properties a factor on the target. We have made the factor so we can drag and drop it here But before it we need to do one important stuff. Select defector and use the move to place it closer to the end in the end, off the joints chain. And now we can drag and drop it to the Ike. A defector. Don't select it, though. Just drag. We see this yellow dot It is in the right place. Take it and move it. You'll see the joint is moving two, although something is wrong. But that's okay. Go to silver and check this box lip to invert the movement. Now there are moves correctly. It looks more natural, right? We have the target property here. If you create a simple information, you may not need it Used factors to move body parts for animation. But if you want, for instance, to move the torso while having the arm on its plays, select the soul were and click create target to create it. Now the dog is green and there is the target object inside the silver so we can move it wherever we want, and there are will be aiming for the target. So let's leave the target here and try to turn the torso with us. The arm is trying to stay near the target, so if you need to create a Britain animation, you can use this tool and move on. Lee. One bone is it to all the Wellman's Let's do it one more time for the leg Slick. The last bone in the joint create empty object right leg extra. It is just an anti object. You can create it any time. Next, great on Yulo in like a manager, right leg loot. Do not forget to move the defector and drop it to the solver. Now we see that the torso is moving with the lag, which means I made a mistake and skin and editor, Let's fix it. Go back to this bright editor, skin and editor, and take a look at what bones affect the torso. Yes, the orange bone. It affects it. I take the weight brush. It's like the already bone in press control button. All right, now it is more than right. Let's go back. Torso is money, unless if you don't want to move bones and use on Leah factors instead, dis elect the prefab Onda. We have Onley these dolls visible, and you can move defectors to go back to bones. Select the character again. All right, now you know about Silver and defector. I want to say a few more words about the target. I'm going to create limp for the second leg. We have inverse schematic for both legs, so let's say we want the character to squat. I take this boat and move up down, but no result. Legs do not understand. It is the moment when target helps us. Uh, oops who add? Rename it. So I create two targets, and now the character. It squats. Not perfect, but it is better. And now it is way much easier to create the right information. If you want words about weights, select the right silver and here's the weights lighter to adjust the degree. The I key silver solution effects the original transform positions at the lowest value of zero the like. A solution is ignored at the maximum value off, one the like. A solution is fully applied. All right, this lesson is the most difficult in this course, so good job practice makes perfect. So it's a good idea to create several limps and animations to understand the whole process . In the next lesson, when were we talking about Chain universe schematic?
9. Inverse Kinematic - Chain Solver: in the previous lesson we were talking about limps over. Now let's take a look at the chain silver. We need the chain silver for inverse. Can you magic when we have war than two bones, for instance, Russ, I have already created its bones, geometry and waits. The protest is the same. Let's put it here and take a look at how it works. I added. The I K manager create the chance over affect er should be placed on the last bone drag and drop it to the silver. Now we need to identify the chain length. All right. The dolls are yellow. Good. Now we can move the object from side to side. Although the movement is different from the arms, it orations means the number off times the algorithm runs. Basically, it's how much we can deform an object. Low value allows us to do just smooth movements, but if we move it to the right, we can do something like this. If you need more smooth movements, use the velocity property. It works the same with target so the grass can move with wind. For instance, let's create an animation for it created any major name it ren dot First key frame, Then the next key frame. And next one, you can move the key frames and edit them. Let's select the first key frame copy and paste it to the end. You look with the animation this way, All right. I want the animation to be slower. It's too fast now, So I select all the key frames and use this line to move them. Okay, Now we can copy this grass change its size. Red state. Oh, okay. Now we have a bush. This is the way the chain silver works in the next lesson. Let's finish our character and create an animation for him.
10. Final animation for Troll: all right. Now we know all the basics. Let's work with the characters. Arms, silver rooms. All right, let's add another this over for this point. Spine defector. Move it on. This time we need change because the spine has three bones. Andi can bend from side to side drag and drop the factor. Rename it. I just the length to four, which means three bones and they factor. And now the torso bends to the a factor. If I decrease the length to three, the pelvic area doesn't move. It looks better, so I live it as it ISS. I don't need this target on these two. I think it's enough for a simple innovation that I want to create. If I click on create right now, the animation will be created for the selected bone. Don't forget to select the pre pap and now create, for instance, let it be a jump hit. First of all, we need to select all bones which take part in the animation, in my case, all the bones. Next, I create the first key frame so that the animation starts from this post. The next frame I need to adjust the ways for my legs. Rooms. All right. Bend him a little bit. Okay? He around before the jump. Next frame. We can move the key frames later so it doesn't matter. Straighten arms and legs and I want him to swing the baton. Next train. Move him higher. It is the jump. Oh, right. Next frame. Arm down rooms next as London on the hit. - Let's check it. Next frame And the final key frame should be the 1st 1 Well, it is the simple animation which I have been creating for five minutes or less. Off course it needs more time. Do not hurry. It is creative process. I hope you will create awesome animations with all the information. You know, I'd like to answer a few popular questions. Let's say you've created another simple animation, for instance, something like this. But in the game of you, you still see the first animation. Why? Let's open any major. There are two animations now, and if you need, you can assign it as a default state. Now you will see the second animation Second question is changing the animation speed. You can either move the key frames or go back to any meter and adjust this speed parameter . It effects all the animation, so if you need to speed up a part of you animation used key frames.
11. Thank you!: good job. No. You know how to import a character. Creed, bones, geometry, weights. Work with animation on inverse schematic for joins and chains. If you need more help, read unity documentation. You might find it helpful. Thank you so much for watching. Learning new skills. Develop yourself. See you.
 Andrew Usov, Game developer