Transcripts
1. Introduction: Hey there and welcome to my course on the basic
concepts of unity. Unity is one of, if not the most well-known
game engine out there and many incredibly successful world and the titles
including Cupcake, some Nonaka, Hollow Knight escaped from taco
and Ganesha impact. We're all made
using this engine. Needless to say, learning
how to develop games specifically in Unity isn't incredibly useful skill
to have in today's world. Whether you're planning on
working in game development, creating your own indie games, or just learning a new skill. That being said, you
already can be quite intimidating and loading
it up for the first time, you might get a bit
confused is how everything works
and what does what. In this course, we'll cover
all the basic concepts in Unity explained in detail to
allow you to become much, much more familiar
with the game engine. By the time you've
completed this course, you'll be comfortable enough
in the Unity editor to start working on your very first
game app or animation. It should be noted, however, that while this course will be a full tutorial on everything you need to know to get started. Unity, don't teach every
concept in a separate video. This will allow us to focus on every single concept
out of digestible rate. But please note that we
will not be creating a fully fledged complete game
at the end of this course. If this interests you, I recommend checking
out my other course, how to create your first
mobile gaming unity. As in that course, you'll make
game from start to finish. We would prefer to simply
learn all the tools you need to build your own
games in Unity hybrid, you've come to the right place as after completing this course, you'll be able to
build your very first game from scratch. The concepts we'll be covering
include how Unity works, the basics of unity, types of scripts,
feedback concepts, analysis tools, and
building methods. After you've completed
all of these sections, you'll be a well-rounded Unity developer
to say the least. So that's a basic summary
of what we'll be doing. I hope this sounds like an interesting and
educational course that I see you in
the next video, where we'll introduce
ourselves to the Unity Editor. Thank you for your
interest and I hope you have a great
rest of your day.
2. Unity's Layout: Hey there and welcome
to my course. Thank you very
much for giving me the opportunity to teach
you the basics of unity. As I've found in my experience, that knowing how to
use this game engine isn't incredibly
useful skill to have. As I mentioned in the
course is introduction, these basics will be split
into different sections. This video marks
the beginning of the first section
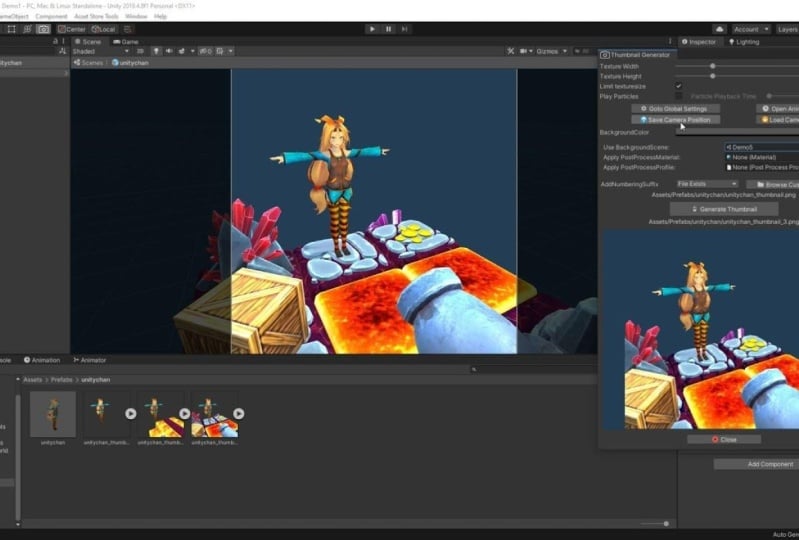
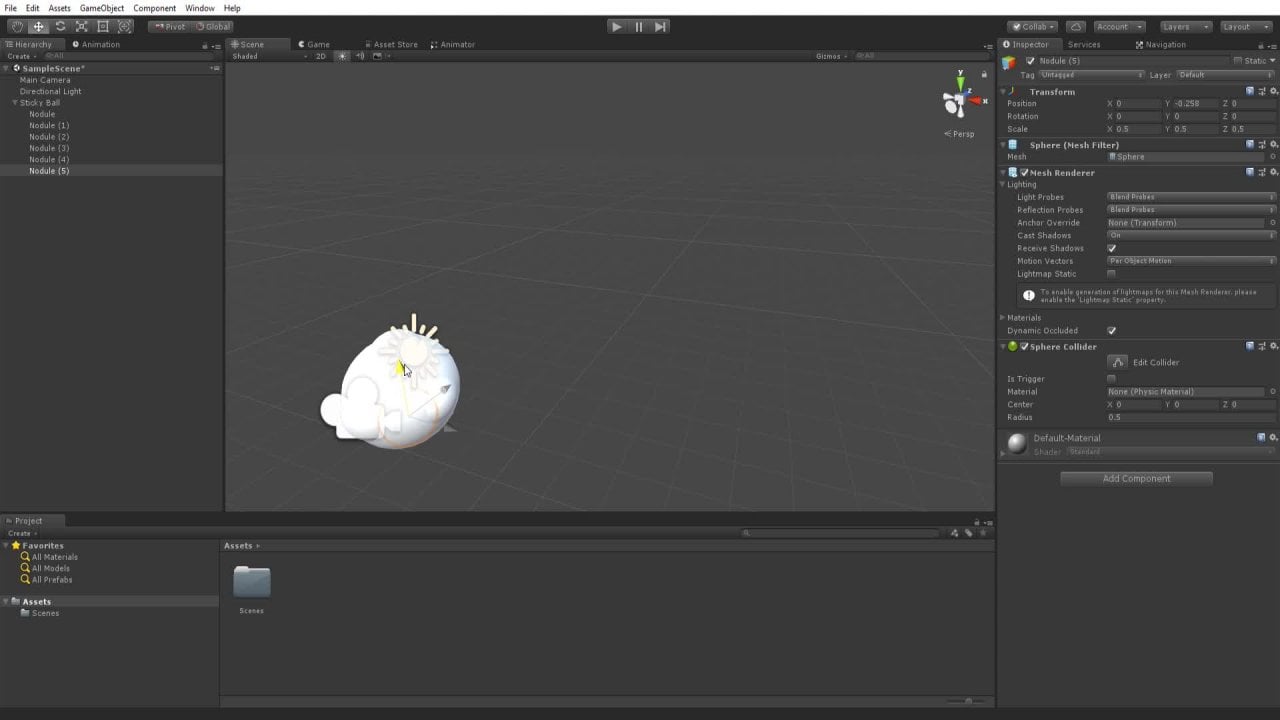
how Unity works. We'll start with Unity's layout. If you take a look at
the screenshot I've taken on an empty
project in Unity, you can see all of the
basic compartments of the Unity editor split up into different sections and
labeled on screen. In this video, we're gonna give a detailed explanation for how every single
one of these works and the role they play
in the Unity editor, starting with the menu. Now before we get started with all the different compartments
of the uterus, the layout, we're first going to do
a quick tutorial on how to download Unity and
create your first project. First thing you're gonna do is going to head over
to this website, unity.com, forward
slash download, and click on this download
Unity Hub button for Windows, Mac, or Linux, depending on what your
operating system is. From that, just follow the basic installation
setup instructions which will be present
on your screen. After that, you're going to
want to set up a code editor. So go to the following website, Visual Studio.Microsoft.com
forward slash downloads and download
the newest version of Visual Studio Community
as this will allow you to edit your code and
integrate perfectly into Unity. If this does not come
pre-installed with Unity, setting it up with unity
is incredibly easy. You simply need to go over here. Once you create your
first Unity project, click on here, edit,
select Preferences, good External Tools,
and make sure that your external script editor
is set to the version of Microsoft Visual Studio
which you installed. After that's completed, once you've downloaded the Unity Hub, go ahead and click here to
create your first project. Select the project template. I usually go with
2D project name, location, and click Create to create your first Unity project. Once you've downloaded
and installed Unity and created
your first project, you should be met with
the following layout. If your layout looks a little
different and you'd like to use the same one as I'm
demonstrating in this video. Simply go to the menu over here, click Window, select layouts, and select the default layout. And that should
reset your layout to the exact one that I'm using. Now, we can see at the top
of the layout is the menu, which we said we
would cover first in the uterus, the
layout section. And we're going to do so now. The menu of unity split into
many different sections. File, Edit, Assets, GameObjects, component, jobs,
window, and help. We're gonna be covering each of these sections in detail
over the next few minutes, excluding the job section, because the job section doesn't include a basic point of unity, but instead slightly
more advanced tools that are used to
enhance game performance, which we will not be covering. To start us off. The file section of the menu
is pretty straightforward, just like any other file in
any other application it has. Save, save as open, new, Safe Project, Open
Project and exit. However, the Unity file section also has two other things
which are quite important. Build Settings and
build and run. Now the build and run
command is basically a quick way of exporting
your game and running it. The build settings, however, is a lot more complicated
and a lot more useful in the Unity editor as this is where you're
going to edit all of the settings for when
you export your game. Obviously, we're going
to cover this in a lot more detail
later in the course. But just keep in mind
that this is where you need to edit exporting
settings for your game. Moving on to the edit
section of the menu, we have a whole list of
different procedures and tools which allow us to edit and navigate
the Unity editor. But to be honest,
a lot of these are not very useful
because they can be achieved using simple
keyboard shortcuts such as cut, copy or paste. However, down at the
bottom of the menu, we can see three
different distinct tools, Project Settings,
Preferences, and shortcuts. And these are incredibly useful to have in
the Unity editor. Now the shortcuts one, as I'm
sure many of you guessed, simply gives you a list of all of the different shortcuts, immunity, which you can edit
and C, reset or delete. This incredibly useful
to see how you need to edit our navigate things
in the Unity editor. But you can achieve most of the things we do in this
course without using them. To be entirely honest, I don't
use these **** of a lot, but it is the Tuileries
death. If you need to. Moving on, we have
the Preferences menu. Now the preferences menu is
where you edit things about the Unity editor that you
specifically want to change, such as the colors that
you're using over here. In the colors, you can change
all of the different colors which associates
with different tools or task being completed. For instance, if
I want to change the tint for when
I'm playing my game, I can change that over here. Additionally, you can
change things like external tools like
we covered earlier, or slow, more complicated
things like your scene view, creating objects at origin and line thickness,
things like that, which we will not be
covering extensively as they do not form basic
components of unity. Just know that this menu
is where you added all of the things about the
Unity editor that you specifically want to change. Moving on to the most
important section, project settings. This allows you to edit the
sections of your project, such as the name,
the product name, the version that icon the cursor you will be
using where the cursor is, hotspot is, and the
icon resolution and presentation Splash Image
and other settings. Moving on to the third session
menu, we have the assets. However, I'm going to
group assets, GameObject, and components all into
one different section. As to be entirely honest, these three sections
of the Unity menu, I do not find to be
incredibly useful. As many of the tools that we use throughout these three menus can simply be achieved throughout different place
in the Unity editor, for instance, the
asset's menu refers to pretty much everything we need when working with
assets in unity. However, the same thing
can be achieved by simply going down to
assets and right-clicking. Similarly, game object obviously allows us to create
new game objects, which we can also
do over here in the object hierarchy in
the similar fashion and components allows us to edit the components
which are currently attached to all of
our game object, which we can do by
simply selecting a game object and
arrogant component through this menu over here. Don't worry if this all
seems a bit confusing now as we haven't covered
these parts of units it yet, but just know that these
three menus of unity on not the most useful. You
can use them if you'd like. And the twos always there, but they basically just allow
a different space to do the same things
that you could do in different places
in the Unity editor. Finally, the last two
sections, window and help, are slightly more useful
as window allows you to edit all of the different windows you have currently open. As you can see in Unity, I have a scene window, again Window and
inspector window, hierarchy window,
project window, and the console window. But if I wanted to add new ones, I've simply click
up here window, and I can add Windows
gallon in this section, general rendering,
animation, audio. For instance, if I wanted
to open a tile palette, I can go here to 2D and
select tile palette, and it'll open a new tile palette window for
me to move around. Alternatively, I can change the windows by
right-clicking on Windows. I already have open and clicking Add Tab and adding them
in a similar fashion. Again, this might seem a little confusing as we haven't
covered all of this yet, but just know this window tab
allows me to manage all of the different windows in
the Unity editor that I currently have open
or want to open. Finally, the help
menu is incredibly self-explanatory and simply has a reference to about unity. Unity is manual scripting
references, services, the forum, ANSYS feedback, checking for updates feature, downloaded A-beta, managing your license release
notes, software, licenses, reporting bugs, and resetting your
packages to default. To be honest, none of these are incredibly useful features. You can find similar results by simply searching up
Unity on the exam. However, if you quickly want
to access one of these, you can do so via the help menu. Next step in the things we
encountered when we load up the Unity editor is
the object hierarchy, which stores all
of our GameObjects currently present in our scene. We can see right now
we only have a camera, and obviously, we don't
really know what the camera does yet because we haven't gotten to that part
of the course. But just know that this is a game object which is stored in our scene and we can access
it via the object hierarchy. We can also create
new game objects. Here Create Empty 2D objects, 3D objects, or we can affect, affect light, audio and video, UI or UI Toolkit
or another camera. Obviously all of these are
slightly complicated now, but we're going to
cover later on, just know that all of our objects which are
stored in our scene, which are basically
like the little things in our game that we're going to give CO2 are going
to be stored over here. For instance, if I
wanted to create a character, I could
go over here, click, right-click, Create Empty,
and create a new player. Player. And then add different
components over here based on what I
wanted them to do. If I wanted to add a sprite
or a visual representation, I would click Add
component sprite renderer, and simply select a
sprite from a list. Obviously I don't have any now, but if I wanted to make
one background layer, I could do so like
that. Re-size them up. And we can see that
our player object is now stored in the hierarchy. Moving on, many of you may have noticed that the minute
we clicked on an object, we opened up a whole bunch of new details in this
inspector window. This is the object
inspector where we inspect our different objects, qualities and characteristics. You see over here the transform is basically the
position of the object, the rotation and
the scale which we all edited when we
created the object. And we added a new component, just like in the menu of sprite renderer to
display the sprite, this object inspector obviously changes the minute you select
new object and it allows you to inspect all the
different qualities or attributes of the object you
are currently working with. Again, all of this is
going to be covered in much more detail later on. But just know right now, this is where the
objects are stored and this is where the details
about them are stored. Moving on once again, we have
our scene and Game Windows. Now, seen is where all of the objects are
visually represented. The scene view is where
you're going to be spending most of your
time working in Unity. And it's basically
where the building of the game actually
takes place. Alternatively, this
game would do, is used to test your game and see if you click the
Play button over here, you'll be able to play the
game is if you have planned, this will obviously
all be covered in much more detail later on. But just know that the
scene and Game Windows cover where the game
is built and tested. Finally, we have the project
and console windows. Now the project
window is where all of our asset workflow
tastes plus, and we're going to
cover this a lot more detail in the next video. However, just know
that every single file we need in our game is
stored under this project. If I wanted to make a new
file or important you file, I could right-click
here and go import new asset and bring
in whatever songs, artwork, audio files,
particle effects, anything into my game. Finally, the console
window displays all of the log or error messages
I get while playing my game. If I were to click
Play right now, I should see no errors because
I haven't done anything. However, if I had a bug
or glitchy my game, it would show up here
as an error or warning. Or I could add in
my own log messages which allow me to test my game. So that was a basic overview
of the Unity editor layout. Now, a lot of things
might've seen the little intimidating
and some things might not make sense
is we haven't actually covered how anything
works in unity yet. But if you have a
brief understanding of how everything in the
editor works together, That's all I wanted to
get across in this video. If you can understand
that the objects are the things we're
manipulating in our game. The inspector is where
we see that details. The menu is how we navigate
unity, the game and seen, or where we built the game
and the project and console windows are where we see error messages and
import all of our files. Then you've understood
everything that you need to. We'll go over acid workflow
in the next video. And after this, start working
on all the basics of unity, which hopefully will make
all of the things we've covered in this video
make a lot more sense. I'll see you in the next video.
3. Asset Workflow: Hey there, and welcome back to my course on the
basics of unity. Now, as we mentioned in this course is
introductory video, we're going to be covering
all the basic concepts of unity throughout this course. But before we go into all of the specifics of
every single concept, we first covering the
basics of how Unity works. In our last episode, we
covered Unity's layout, which you should
see before you in the sample project I've
created for this episode. However, in this episode, we're going to be
covering the basics of Unity's Asset workflow. In other words, how Unity
gets files that you want in your game into the project to be
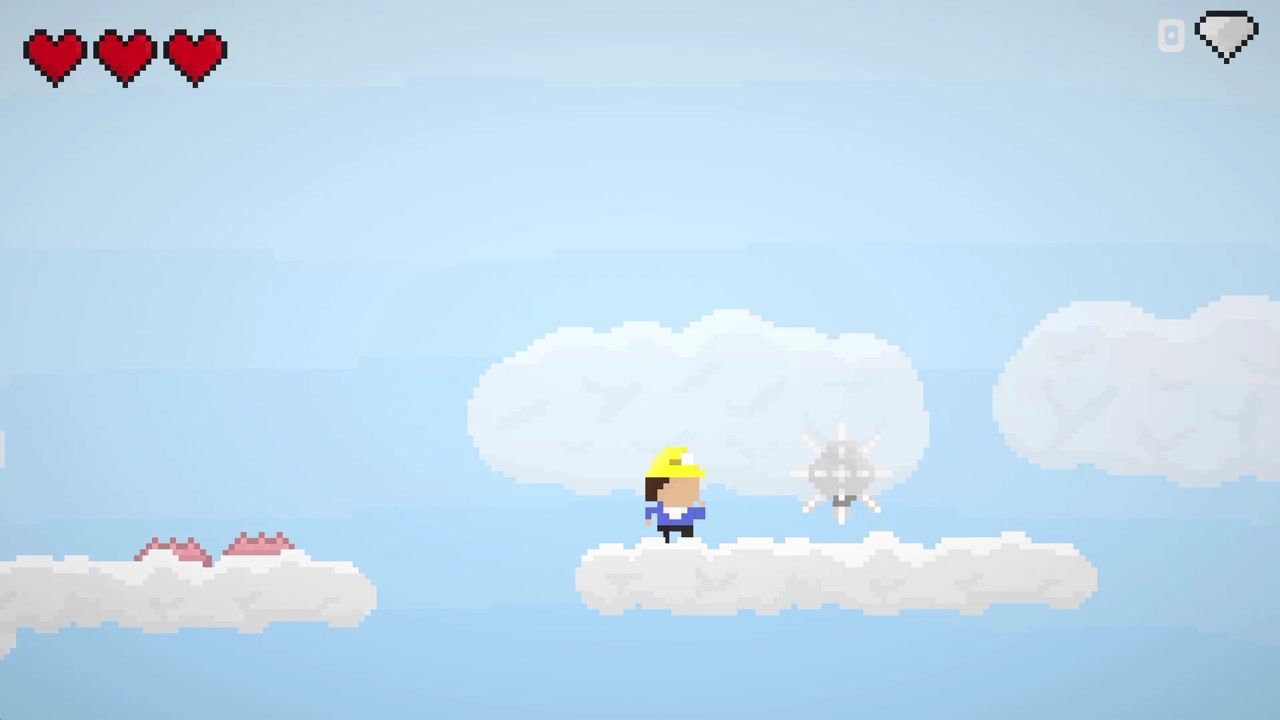
used in the game. In this project, you can
see I have two objects. My main camera,
which is obviously just displaying what I can see, and my player object, which I've created for the
purpose of this tutorial. This player has a
sprite renderer, a rigid body, and a box collider component
attached to it. You don't need to
worry too much about what these three things do. Like I said, that
will obviously be covered more later
on in the course. But just know that
together they form the basic shell of
a player character. The sprite allows us
to display an image, the rigid body as
physics to my object. And the box collider makes
sure that when I collide with another collider which are attached to the main camera, I will stop moving. If I go ahead and click Play, you can see what
this looks like. Now while this does all work, this is not an incredibly
exciting player character as there's no artwork to display the
player and there's no script which allows
us to move the player. Luckily, I have two files on my computer which I can
import it into Unity, which will allow me to
achieve these two tasks. I'm going to show you
how to do so now, this will demonstrate the basics of Unity's Asset workflow. So to import a file or
asset into your game, simply go over here
to the Assets menu, right-click and select
import new asset. Then from my downloads folder, you can see I have a
night dot PNG file, which I'm going to
use as my sprite. And a movement dot CSS file, which I'm going to use
as my movement script. I've obviously
created both of these beforehand and I'll
go over how to create your very own scripts and even the basics of sprites
later on the course. But since we're just
demonstrating asset workflow, I'm just going to use
pre-created assets for now. I'm going to double-click
on my nitrile PNG thing and simply change this
filter mode to point. Don't worry about why that's just because I'm
using pixel art. And as soon as I
have imported this, now, it allows me to
use it in my game. So if I go over
here to my player, we can see my sprite renderer. The sprite file is
currently set to background a default PNG file
which unity provides. If I instead go to
my assets and I drag it into that spot, we can see now we
have a full player, fully-fledged player character, which is now taken the
space of that background. I think we both agree
it looks a lot better. Now. The other thing we're going
to want to add is a script which is going to allow us to
move this player character. We're gonna do so in a
very similar fashion. Simply right-click again,
select import new asset. I'm going to import
by movement script. And this is a movement
script I created. It's very simple,
which allows us to move left and right and jump. Just simply go to my player. I'm going to drag,
it might have to reload the script assemblies
since it's a new script. I'm going to drag
this onto my player. And we can see here the
movement script has now been added by simply adding
these two files, one of them code and
one of them a PNG file. If I hit play again, we can see now that I'll play a note and it
looks a lot better, but can now actually move
left and right and jump, which is really, really cool. Now obviously, I haven't
gone over how to create this movement
script or how to do the artwork for creating
spreads like this, I did use a sprite and if you already know how to do
artwork, that's great. If you're not planning on doing
lots of Albert few games. Obviously, you don't need
to worry too much about it, but we will go over specifically
how to create the script and the basics of
Sprite Editor nudity later on in the course. But I hope that what you
grasp from this episode is simply how we can get
assets into our game. Now the last thing
I want to highlight before we end this video is where exactly this assets
folder is actually stored. Because all we're doing when we say an important
new asset is we're taking a copy from wherever their assets
important in my case, the Downloads folder
and putting it into our games project file. And you can find that based on where you saved your project. When we first
created our project, there should have been a select
project directory thing. I'll show an image and
screen right now of where we did when we selected
our first project. You just need to
remember where you saved yours or if
you can't remember, it's probably in the
default location. You can just go ahead and make a new Unity project and see
where that location is. So if I go up here to
where my project is saved, I saved mine and
E Unity projects and then basics of unity, we can see all of these
different folders. And there's the package is
one and the assets one, which are both viewable from the Unity editor
here and over here. There are a whole bunch
of other ones here, library logs and project
settings, temp user settings, but you don't need to
worry about those too much because those are
Unity's own folders, which we're not gonna be
tampering with this assets. One is the one where
we'll mainly be working. If you double-click it,
we can now see we have our new important assets as our neither PNG and
I'll move into CS. They've also created
these mesophiles. Now leave these metaphors. You're going to need
these metaphors for every single file in unity and metafile has
to be created as well. So make sure you
don't delete them. If you do, it will
just create a new one. But as a general rule,
if you're going to be deleting or moving files, you're going to want
to move or delete both PNG and the metafile or the CS and the
metafile as well. If I wanted to add a
new file into my game, all I need to do is loaded
into this location, either drag and drop it
or copy it or cut it. All. I can do it from
unity by importing it. It's all the exact same thing. So I hope that gives
you a basic overview of how Unity's Asset
workflow works. We need to do is import
assets into this assets file. You can obviously
organize this a little better if you wanted to
create a sprites folder, Scenes folder,
Animations folder. I usually like to do that. And then you can organize
your work a little easier. But all we're doing is
we're moving files from my computer into this
project file folder, and then it allows us to
access it in our game. I hope that makes
everything a lot clearer and I'll see you in the next
video where we're going to start drilling into Unity is actual specifics and how
the game engine operates. I'll see you in the next video.
4. Sprites: Hey there, and welcome
back to unity. Now in the last two videos, we covered Unity's layout
and Unity's Asset workflow, which means that we've
covered the very, very basics of how it works. And this allows us to
go into more specifics about how all of the different
tools in Unity operate. We're going to start
by covering sprites, sprites of bitmaps, which we use to visually represent
objects in our game. For example, if I wanted to make a player character
like I did last time, you can remember that the Mennonite added
that pixelated night. The player looked a lot
better than when I had that placeholder
background sprite. Sprites allow us to do so. They allow us to make
our game a lot more immersive and
enjoyable to look at. In this video, I'm
going to cover the two basic types
of unity sprites, how to use them, and the
sprite renderer component. To start, I'm going to
load up a sprite as this is the tool I use to
make my sprites in Unity. You can obviously also use GIMP or Photoshop, Microsoft Paint. The list goes on and on and on. I prefer to use a sprite. However, as I find it really, really good for pixel art, which is my medium of choice. Now, if you go here, you
can see I have a stick man, a sprite, and a blog. A sprite. And the blob is
obviously a lot more simple. The stick man is
obviously very simple, but it's a lot larger. You can see. And I'm
going to use these two to illustrate the
two different types of sprites in your teeth, namely single and
multiple modes sprites. Let's start with
single mode sprites. If I go ahead and
I expose my blog, I can then go into Unity. Right-click, just
like I did last time. Important new asset and
import my blog dot PNG. And now this file is
in my Unity project, which means I can
use it in my game. If we wanted to create
a player character, I can assign this blob, and then I can have
this blob as a player. Before I do so though,
I want to cover a few very important things about important
sprites in Unity. The minute you import a
spreading your teeth, you'll be greeted by
these import settings. And for the most part,
leaving these as defaults is generally recommended
with a few exceptions. First of all, the sprite mode, you're going to want to change
depending on whether you want a single or
multiple sprite, which I'm obviously
going to cover the minute we import
the next sprite. But this one said to single, which is exactly what I want. So I'm gonna leave that for now. The second thing
you need to note is if you're using pixel art, you have to change this filter mode and
there's compression. And I'll show you why. If I go ahead and I
create a new player, I'm gonna go Create
Empty and call it layer. Let's just imagine
for a second that the blob was my
player character. I'm going to want to add a
sprite renderer component, sprite renderer. I'm gonna go ahead and drag my Blob file into
my sprite renderer. And the sprite renderer
allows me to see the sprite. Obviously it's very small, but I'm going to show you
another tool we can use to change the image
size of my sprites. If I go into blob, this
pixels per unit allows me to change how large or small the sprites are in respect
to the Unity editor. I'm gonna go ahead and
make this ten hit Apply. And we can see our sprite
gets a whole lot bigger. But you can also
see that the sprite is really low quality. It's very blurred.
And that brings me to the second thing I wanted to
talk about with pixel lot. If you go over here
and you can see this filter mode and
this compression, these are currently set
for sprites through a lot more complicated
than my pixel, since I'm using pixel art,
I'm not going to want to use a filter mode and I'm not going to want to
use compression. So I'm gonna go over here
and I'm gonna say filter to point or no filter and
reset compression to none. Now you don't need to understand exactly
what's happening here, but just know if you're
using pixel art, you always want to
set this to point. You always want to set this to none, meaning you hit Apply. You can see I've sprayed
gets instantly clear. That is something that
I only learned wild later in unity and it helped
me a lot to know that. So just know if you're
using pixel art, you have to set those to two. I have. If you're not using
Fick's law, however, you can obviously play around
with these two settings. I generally find when
I'm not using Pixar, I want to set it to
bi-linear, all trilinear. But pointing out filter is definitely the
setting you want if you don't want any blurring
at all between your pixels. Anyway, we're getting
a bit confused as to why we are getting in depth about this specific
pixel out sprite. But it's because, to be honest, single sprites aren't
that complicated other than this particular setting
and the pixels per unit, all you need to know
is that when we import a spike with Unity, we can assign it to
a sprite renderer, which renders or
displays the sprite. This ordering layer component,
which we'll go into later, obviously simply
sets the order at which the sprite appears
in respect to others. Pixels per unit to displays the size of the
sprite in the editor. And we can change
that as we please. The bigger number is the smaller
the sprite would appear. And these modes, filter and compression change the
blurring between the pixels. If I set this to bi-linear, we can see that the
fixer is not blurred and if I set point
they are no longer. Similarly, compression
does a similar task. Now, the second type of Sprite is slightly more
complicated and it's because the second type of
Sprite works in a way in which we take all the components of our sprite that we want. For example, if I
wanted this sprite were very dumb example, but I could take the
left-half and the right-half. You split them up,
then your tea, you set them as
different sprites and put them back together. And I'll show you
why this is useful when we get into animation. Because if you think
about it, you have all the different parts of a
sprite as different objects. It is a lot easier to
animate that object. To start, go into whatever
program you're using to edit your sprites and split up every single part
of the sprites. I'm going to using a stick man, some springing up all
of the limbs like so, and the torso and the head. And by doing so now, unity is going to be able to recognize that these
are different parts of the sprite because they are
far apart from one another. So hit Export and
go back into Unity. And I'm going to import
my new stick man, which you can see is
very much split apart. I'm going to first of all
set my pixels per unit to ten because I want it to be
similar size to my blob. And that's the exact
thing I used on my blog. And I'm going to
set the filter mode to point and compression to none just because of the
stigma is still kind of pixel. Then to set my sprite so that unity knows that all of these different sprites
you can see right now, if I click over there, I can see that it's just one
sprite and you can click any sprites
there to see how many it's only one sprite. So if I go over here,
I'm gonna change my sprite mode to multiple, hit Apply and then open
up my Sprite Editor. And according to Unity manual, primary use of this
Sprite Editor is to split up different parts
of the sprite body, just like we're going
to do now. Not great. If you want to obviously
make your own spot, you can't edit the sprite here or change colors
or anything that, but if you want to split up the parts of
your sprites body, this is exactly
the tool you need. So go over here to slice. And we're going to
want to set my type to automatic because that is exactly one we're talking about, whether it's far apart
you need you can no. You can set your
method to delete existing smart and safe. They're all incredibly similar. I like to use smart, but obviously the difference between those is a
little higher grade, so you don't need to worry
too much about that. And set the pivot to the center. It's slice. And we can
see that it has almost perfectly cut all of my different sprites, but
there is a slight error. It's group the head and the torso together for some reason. So to fix this, all I need
do, I need to click on that? And I'm gonna move this up. Give you an idea, a
little assistance. And that is now my Head Start. And then I'm gonna go
ahead and I'm going to drag to make my own use sprite. And I've made my toaster,
and there we go. Now I have all my
different sprites and hit Apply and close it. And now if I hit this button, you can see all of the
different parts of my stigma and are separated into
different sprites. And this is because my sprite
mode is set to multiple. If I said back to single, they'd all be grouped as
one, just like this one, but because they're
different sprites now, now I'm going to show
you how to create a character using these and
piece them back together. So go ahead and
make a new object on a call this one
player, again. Instead of adding a sprite
renderer over here, I'm going to create a bunch of spiders and put them all
underneath this clay objects. I'm going to click
on the player and right-click them and
say Create Empty. And that's going to
make a child object or an object that's
inside my object. And recall this one head. Then I'm going to add a sprite renderer
to my head object. And then I'm just gonna go
ahead and copy that five times because I want
five different objects. I've had head, I'm
going to change this one's name on left. This one is going
to be on the right. This one is going
to be leg left. And this one is
going to be right. And then all I need to
do is I need to assign the different parts of my sprite which represent those things. And as we entirely
honest, I can't really tell which one is which. If I look back on my things, the legs are longer
than the arm. So I'm fairly certain this and this are the legs and
these two are the arms. And almost sudden That's right. So I'm going to set my
leg left over here. I leg right over here. My arm left over here. On right over here. And my head here. Obviously these are all
bundled up together. And you can see there are
actually quite large. I'm gonna change my pixels per unit for something like 15, and that should make it a little more manageable, perfect. Now all I need to do
is actually just move these objects to where they
want them on the player. Move my head up here, and I actually need a torso which I almost
forgot about something. Go ahead and create
another empty, call it the torso. And almost forgot about that. I'm going to add a
sprite renderer just like the other ones will
actually copied them. And I'm going to add that there. And we can see now
I have my torso. So since I forgot about that, Let's move the torso
down the head. Put it over there to say,
I think that's about good. My arm left and mostly going
to want on the left side, let's say they're my arm, right? I'm going to want to on
the right side around. There should be good. My left leg and my right leg. I'm going to want down here just moving in so
I can see them. I reckon that's alright. Obviously this doesn't need
to be perfect example, but probably won't be. But we can see over here
that is now a stick man. He has been reconstructed. And you might be thinking, okay, what was the point of all that? We just put it, took it apart
and put it back together. But that's actually
really good because now, because I've child at all of these objects to this player, if I move the player, all the objects are
going to move with it. So all of my code and logic, everything I can move with this main player object and all of the small little
parts of the sprite, I can change with this. If I wanted to add,
for example, a knife, I could simply put a knife
underneath this right arm and then the knife would be
parented to the right with childhood to the right arm. And then obviously if
I move to the right arm or rotated left, such the knife
would move with it. And that's actually a
really useful thing when it comes later on when we
get to animate an object. And I'll show you
obviously later on in the course when we
get to animation. Because if I wanted to
make this payer run, it's a lot easier
to make them run. But I control the
legs and the arms that if I can just
control the one sprite. And obviously there are
again for that reason, two different types
of animation. But those are the basics of
how sprites work in unity. All you need to know is that sprite renderer
displays the sprites. And if you're using
a single sprite, you just need to add
a sprite renderer. If you're using
multiple sprites, you didn't make
one parent object, then right-click on
your parent object and create empty objects
underneath them. Or you can simply drag them onto a player to make them
parent objects like this. That makes it all child
objects of this parent object. And then if I move
my parent object, all the ones underneath
it, move with it. And that's where I'm
going to set all of my different parts of my sprite. And that is exactly
how you're going to do sprites in unity. The last few things you
need to know is simply specifics of the sprite
renderer components. If I go over here to my blob, we can see I've
got a few things. First of all, sprite, this is why I set
the file at once. So obviously I've set
it to blob right now. If I set the stick man, I would say the
first sigma1 thing, which is I think the left leg. But I don't want do that.
So I'm set back to my blog. This flip on the x
and writes quite self-explanatory
you should use if you want to flip your sprite. The Draw mode, you don't
need to worry about Northern mask interaction
or the spread. So point, the material is quite a complicated part
of the sprite renderer. You don't really worry
about it for now. For now we're going to
be using sprite default for all of our
different sprites. If you want to make glowing
sprites or shader graph, more complicated things,
this is how you do that, but you don't need to
worry about that for now. And then just under
additional settings, the sorting layer is simply the layer on which
the sprite is. I wouldn't worry too
much about this, but the order and that
area is quite important. This is basically
where the sprite is in comparison to
all the other spreads. So I usually leave most of my sprites on the sorting
layer and then move the sprites in front
of each other using this order in S. If I
move this guy over there, you can see current is behind,
but want to move ahead. I can make this one. And now the sprite is
ahead of the other sprite, which is quite a useful feature. So those are the basics of how sprites in UT are represented. Hopefully if you're
trying to make a game, you now know whether you
want multiple sprites or single sprites or
combination of the two. If you're making pixel
art, I generally find single spice to be a lot easier if you're making not pixel, I think, would be very hard to do it without
using multiple sprites, especially when it
came to animation. But hopefully that
gives you a bit of a background of high
sprites work in unity. Obviously, we'll
have returned to spite when we get to animation. But I hope that all makes
a whole lot of sense. And I hope you
found the video to be informative and enjoyable. I'll see you in
the next episode.
5. Physics: Hey there and welcome
back to Unit. In this episode,
we're going to be covering Unity's physics engine, which allows us to add
a simple component to all of our objects. And adding this component allows these objects
to react just like they would in real
life to many of the laws of physics
we see before us. The way this video is going to be structured is I'm going to explain all the different
attributes of this component. And then secondly,
the attributes of another component which we use in conjunction with
the first component. These two components are the
rigid body and the collider. Have you seen the
scene before you, I've created a simple
scene with one object, which I've assigned
a dumbbell sprite simply for visual purposes, if I click on it, I can see the sprite renderer and nothing else is
added to the object. But I want to add a
second component, a rigid body, which is going to handle all of my physics for me. If I click Add Component, I can select rigid body
2D by typing up above. Rigid body 2D. Obviously,
if you're in 3D, is going to want to
use the rigid body. But for this project we're going to use the rigid body 2D. And if you click on it,
you can see that it has a whole bunch of different
attributes or qualities which we can use to
edit how this object uses physics and the physics that are applied to this object, most specifically the
specifications of this object. So we can mirror
exactly how it would act in the real-world
in our game. So I'm going to go over
every single one of these attributes and
explain how they work. Before I do that, I'm going to show you
what happens if we simply add a rigid body to
a component and hit Play? We can see my Dumbo falls to the floor
accelerating as it does. So just like in real life, that is based on this
gravity scale component, which I'll get into in a bit. But let me start
right at the top with all the different components of this great component,
rigid point. At the top we have a body type and there are three different
types of rigid bodies, dynamic kinematic and static. Dynamic rigid body. The one I use most primarily
is a rigid body which is basically doing
everything automatically in terms of gravity. If I hit play like
you saw I did. The rigid body automatically
sends it was in the air and not colliding with anything and
started to fall. If I use a kinematic rigid body, I would have to change
this object's position. Using rigid body does
move position or move rotation instead of just
applying forces to it, like account for dynamic. And a static rigid body does, is not designed to move at all. It's almost as if
it is an object with 0 gravity and
infinite mass, if something else will
take a light to it. For that purpose, we are
going to be primarily focusing on the
dynamic rigid body. As this is one I use the most often and in my opinion
is the one that most people will need most of the time when creating
physics-based games. Underneath that we
have a material. And this material is
basically the material which not the rigid body
but the box collider, which are used in conjunction
with the Richard Boyd, like I mentioned earlier.
That's the second component. We're gonna be covering The
box gliders which are used in conjunction with this that
refers to their material. So if I wanted to
change that material, I could go over here into my assets and I could right-click, go create 2D if I'm using
2D or if you're in 3D, good Physic Material and physics material
2D for my thing, I'm going to call this material. And we can see I can change the friction and the bounciness. Obviously, you're not gonna
be able to see this in action just yet because I haven't
added a box collider, but we're going to keep that
for later so I can show you exactly how that material
object affects everything. Thirdly, we have the
simulated attribute, which basically is turning
the rigid body on and off. If I turn it off, we can
see now when I hit Play, the rigid body does not
actually act on the object and the object does not move sort
of like an enable Switch. After this, we have
used auto mask, which basically estimates
the object mass based on the collider
attached to it. Obviously, I haven't
attached to any colitis and I can change my
mask over here by sliding this
back-and-forth or entering value using a massive one
is fine for my purposes. Following this, we have
linear drag and angular drag, which are the drag coefficient
is 0 means no damping. In other words, this is how
fast the object will react and re-stabilize itself will come to rest after collision, linear drag obviously refers to the position or how far
it will come to rest. And Angular Drag refers to its rotation or how fast it will stop rotating after collision or an external
force acting on it. After this, we have gravity
scale which affects how much gravity is
applied to our object. In other words, if
I set this to 2.46, my object will for 2.46 times as fast as
it did previously. If I hit play, I can see that in action fell slightly faster. If I set this to minus one, I can see that our object, instead of falling downward, felt the exact same speed
originally upward instead. And obviously, this affects how fast my object will
accelerate as well. Because if I set it to five, they'll accelerate down
much faster as it falls. After this, we have
collision detection, again applying to the collision or the collider component. You can see why we
need to use both of these when we're working
with physics and unity. As the collision
detection refers to how my object detect when it is
colliding with something. If I use discrete, it is a less thorough way
of protecting collisions. However, it is less intensive on the CPU and continuous
is a more thorough way, but obviously more intensive on your computer's power when
calculating collisions. After this, we have
a sleeping mode, which basically
refers to whether my rigid body is enabled or not. If I sit never sleep, it'll always be able to start. A weight means that
it will be enabled until I disable it or set it to asleep on Start asleep or obviously
the opposite. It'll be disabled until
I enable it awake. It. After this, we have intercalate, which basically refers to how much my rigid body is
needing to interpolate. Using this interpellate function is incredibly useful when my graphics refresh
rate is a lot faster than my
physics refresh rate. Because if I'm
refreshing every single frame lot faster than my
physics is being refreshed. It'll look quite blocky and
chunky as I'm moving along. And if I wanted to do that, I could obviously
set interrelate and that will base it on the previous frames or
extrapolate which will base it on an estimation
of future frames. And you only worry
too much about this. But basically know if you have very fast graphic refresh rate in your project or your
computer in general. And you're worried that the physics won't be
able to keep up with it, then I would recommend using either intercalate or
escalate to fix this problem. Of this, we have a
few simple things. Freeze position x and y are
quite self-explanatory. That was simply
freeze the exposition or freeze the y position and freeze rotation z will freeze the z rotation
by rigid body. If I were to set freeze
root position, why? We can see that my rigid
body no longer moves because their position in y is obviously frozen and freezing rotation z, if I were to fall off
something or have something angled so that it
would rotate off like in real life, it
will no longer do that. If I'm right the edge
of something over here, a collider, It's not
going to move this. If I do not have that, it will go like this. So those are all of the basic components or
compartments of my rigid body, which is pretty cool because
now that we've covered that, we should have a much
better understanding of how every single
one of these works. Go through a quick summary. Again, body type
refers to the type of rigid body material is
slightly more complicated. We'll get into that in a second, but that's the material
that are highlighted using simulated turns
on and off auto mask. Obviously sets are the
ones you base the mass on the collider or the mass
of the colliders attached. Sudden the mass
does this manually, linear drag and angular dr, how fast it comes to
rest gravity scale, the scale of gravity, collision detection with around two continuous or discrete, less or more thorough
sleeping mode. Start awake, never
sleep or start asleep is basically
referring to whether the rigid body is
always on or when it is on into blade to smooth out those graphic
refresh rates when they're not in sync with
physics refresh rates. And then we can freeze the
rotation of the z-axis, all position of x or y axis. Ok, we've covered all of this. You might think you have pretty good understanding
of rigid bodies, and I hope you do so. But there's one
more thing we need to cover before we
end this video. And that is colliders. Go up here and I
click Add Component, select a box collider 2D. We can see you might remember
this from our sprites video because we
don't actually use one before we'd explain it. But a box collider
basically allows me to specify which
area is my object. I want to be. A collider. Is this kind of
like drawing a line around the ocean, can say, Okay, that's the object and that's what I want to collide
with everything. So obviously you
can't really use a box collider unless
using a rigid body 2D, you can sort of, but
it's not advised. And you, similarly, you should really be
using a rigid body unless you have at
least one box glider because then you're not going
to collide with anything. But if I go over here, I can change my object
size, which does server. You can see that
doesn't actually change the size of the collider. So to chase size of Collider, I need to go here to
this Edit Collider, and this edits the
bounding volume of light. I can move these left and right, and I can make this a lot more accurate for my
current dumbbell, I can go like this,
this, this, and this. Depending on your sprite, your Collider might have
actually been perfect because it's based on the
size of your sprite. But because my dumbbell
was clearly crop, you can see over there
they're replacing the outside where the Dumbo has
transparency around it. That's why mine was
quite inaccurate. Then you can change using
this edit collider. Now the material is
very similar to this. If I can set them
tariff just that one. But saying the rigid
body will change the material of all of
the attached colitis, which will override any
global physics material. However, it will not override the one attached
to this box collider. So if I'm using a global physics tariff that is the lowest layer,
then on top of that, if I attach on the
taro to my rigid body, that overrides all of the global ones and
overrides if it's not sad. But if I said a material to my box collider that will
override the rigid body. So it's kind of like a
pyramid. You can give it up. If I want to say just this collided something,
I'll set it there. But if I want them all the same, I can just set it over here. Obviously because I
only have one collider. I can set my physical
terror over there. And that's not going
to change much because I haven't actually
edited these yet. That's just friction
and the bounciness. And if I go back to my boxplot, we can see a few more settings. Now there is trigger
basically refers to whether my box collider
is a trigger or not. In other words, whether I wanted to stop when it is colliding with something or
whether I wanted to just tell the computer later
collided with something, we would use a trigger, which basically means
that it only tells the computer collided for
something like a bullet. Because if you're playing a game and you want to shoot a bullet, you don't want the computer
to have to register a whole collision between
the bullet and the opponent. Especially in a simple, again, maybe in like an FPS show
you want to keep that. But for most gains,
you want to set that to be a trigger because
you just want them to be, hey, I touched an Emmy or hidden enemy, you
need to do that. Obviously, the task
that happens when take, make the enemy take damage. But if I'm using
something like a player, I would want to not set
as a trigger because I want the player to fall and land on something and stop moving less jacket over
here we have a dumbbell, we want it to stop
when it lands. So I'm going to
set that to false. Now after this, we have
two more properties used by effector and
use by composite. Now, these might seem
a little confusing, but these will make a whole lot more sense if you are using an effector or composite
to your object. So if I go here and
I type in defector. We can see I have
a platform effect, a plaintiff vectors
surface vector. And these are actually
used to obviously, if you want to use these
parts in your game, you would want to have
effect is, for example, if I wanted to make a platform of platforms and video games, sometimes you can pass
through and when you go up, but not when you go down, for instance, like interior area, you can travel platforms upward, but if you want to
travel downward, you have to click
the Down button. Similarly, unity
actually has created a component for us called
the platform effector, which simplifies this
process quite a lot. I'm not gonna go into that
too much in this view because obviously it's not going to be very useful without a dumbbell. But just know that if you
want to use a box collider, you have to define
that effector. For instance, you want
to use a collider. So you wanna make sure that
you tick used by effector to make sure that they effect a nose which Collider
it's working with. Don't worry about that too much if I didn't make a
whole lot of sense, just know that if you're
planning on using platforms, you can add a platform effector. And then if you want to make sure you're using
the right collider, you click used by effect
and that's based sent. Okay, yeah, this is the collider that must be used
by the effective. Similarly, if you want to
add a composite Collider, which is basically two
or more colliders added. I think it is primarily two. Then this is the same thing. It's saying, Hey, this is one of the polis, it
needs to be used. So obviously that's going
to change quite a few of the things you don't need to
worry about these too much. They're very niche things, but they're basically just ways of the computer identifying. This is the collider
need for the effector or for my composite Collider,
which is pretty cool. We have auto tiling in which
the colliders shape is updated based on
the sprite renderer is pixelated or
tiling properties. It says over here, based on sprite renderer
is tiling properties, the collider shape will
update automatically. Don't worry about that too much because we're not worrying too much about my sprite
renderer is tiling properties, but I would set
that off for now. And then after that we
have my offset which basically dictates how
far left or right it is, offset it and why as well. And then the size, which we said earlier
with the edit collider, you can obviously do these
using these styles as well. After this, we have the edge radius which
obviously dictates how thick or how
thin the bobsled is. Mine is going to be set to
0. But if you want to have a very thick collider
for some reason you can set yours to
something like two. And then obviously
underneath that, just like we had the rigid body, there's a whole bunch
more info about our component which
we cannot edit. We can see over here
if we click info, it has attached a body that
is the object rigid body 2D. So you can see they
are already working in conjunction without us
niches or anything. Now if we hit play,
you might think, okay, I've got a box sliders
now it's going to crash into something, but there's actually nothing for this object to crash into is the only other component in
our scene is the main camera. Hello, wherever I have
actually added in escalated to my main
camera already. Just so I can
illustrate exactly how this box collided works. For go ahead and hit
game and hit Play. We can see I'm going to fall and then crash into
that collider. And that's actually
the same collider we used in our sprite video. If you can remember
that last video, we had a collider
to make sure that our supply could fall
and jump on the ground. And this is the same collider we using the same one here to make sure that we can
fall and crash to the ground obviously with a
little more understanding, hopefully this time, I'm also actually going to use
this collider to show how this material can affect the object or the rigid body
the object is attached to. We can go ahead and
drag this up there. I've already said that and
we click material and then we can change the two properties,
friction and balances. If I hit play right now, we can see I4 and I
do not bounce at all. So the friction is not
going to be incredibly visual in this example because I'm currently not
moving left or right, but I will show that by
slanting the thing in a second. First thing I want to
show is the vastness. If I set this to
one and I hit Play, we can see we should have a bouncing
dumbbell, which is pretty cool. Obviously, if I set
this now to something like five and I hit Play again, we can see that
the Dumbo is going to go up into the stratosphere. And if I set it to 0.2, we can see that Dumbo
has a slightly more realistic like that,
which is pretty cool. You can use this for effects in your game or anything
of that sort. Second, all the friction
I can illustrate if I slant my main camera
slightly like so, which obviously isn't
gonna be great in terms of reviewing the game, but it's gonna be fine for now. Hopefully this will
show us that we can slide along with frictions. If I hit play, I'm
going to slide along. If I click on my scene, I'm not actually moving because
the friction is so high. So if I were to set my friction
to 0 and then hit play, I should actually see
myself moving along the scene like that because
the friction is set to 0, which is pretty, pretty cool. Obviously, you can
change your friction and bounciness depending on what you want your character or
object to move based on. But those are the main
functions of a box collider, the material, and
the rigid body, which all make up
Unity's physics engine. Obviously, there's
a lot more you can go in depth units physics, but in terms of the basics, these are basically
the rigid body. Obviously we assign
physics 2D object, and you don't need
to worry too much about all of the
things we changed. You can generally leave these as you'd like,
especially the drag. You can change the gravity
scale up and down if you want. And obviously that's
gonna be selling. You might need to change
the collision detection based on how fast or
slow you're going leave the body type is dynamic
for your purposes if you're starting out and
unity because that's probably the one you're
going to want to use. And then the material obviously
is quite straightforward, but you can also actually
leave that as I think the global physics material
is by default 0.40, which is exactly what
we had it set as. That is the basics
of physics in unity. And I hope that makes
a lot more sense. And hopefully the things
we did in the last episode with the sprites where it was falling and jumping up and down. It makes it a little more
sense now because we've explained how boxcars
and rigid bodies work. Hope that you enjoyed the video and I'll see you in the next one where we'll cover animation in New Jersey for
the first time.
6. Animation: Hey there and welcome
back to unity. Now, two episodes ago, we went over the two different
types of sprites AUG, namely multiple sprites
and single sprites. You can see I've set up both in a sample project for the
purpose of this video, because we're going
to show you how to animate them for the
first time in Unity, which actually might be a lot
more simple than you think. Now, many people like to use other external
tools for animating, such as blender or any other
third-party applications. But generally
actually has a pretty good in engine animator, which allows you to
animate your objects, both single objects or sprite based animation and
multiple objects. Or moving the sprites to
animate them to make it look like they're
running or jumping or attacking in many
different ways. I'm going to show you how
to do both in this video. To start head over to
your single sprite. In my case, I'm using the blob which we made
a few videos ago. And I'm going to want
to animate this blog to make it have an
idle animation. You can see if I go down
to my sprite's actually have two blobs right over here. The first one is going to be the first frame of
idle animation, while the second one is going
to be the second frame. So if I go here, the first frame and that's
the second frame, you can see if I got like that, it's gonna be bobbing up and
down, which is pretty cool. But obviously I need to
know how to make unity tell the object to go up and down
based on a certain interval. So let's do that. I'm going to click Add
Component and I'm going to add an animate tour, not
Animation Animator. And this is going to basically add an animator to my object, which is gonna allow me to
do exactly what I just said. But now I actually
had an animation. So I'm gonna go to
the top here and I'll click Window Animation, and I'm going to select
animation over here. Then it says to begin
animating single, which is the name of
my object, create an animation clips
I'm gonna go create. Then I'm just going to
name my animation idle. And that's going to
create a dot and m file. You can see it over
there, dot anime, and there is our
animation controller. So basically the way this works is this is the single clip. I can have lots of
these. I can have idle jump, run, etcetera. And then this is the controller, this basically the object that's going to be running
these animations. So in this case,
the single object, a single sprite, has this controlling in
single, which means, okay, I'm running these
set of animations and then a set of an image
is running right now is just the idle animation. So let's get started actually
making this idle animation. You can see once I did that, I went to Window
Animation Animation and clicked Create because
there was no animation there. It opened up this
little animation. Whenever you can see
I have my animation and the name of my animation. If I wanted to change
that, if I have multiple, I can click on this
drop-down and select multiple or create
a new animation. But obviously I just
want one for now. Then to start animating this, what I'm gonna do is
I'm going to click the record button. And basically what this
record button does is it basically says
that whatever I do now is going to be set at that point in the animation
is currently I'm at time 0. So if I start the animation by making times you're moving
it to save over there. Then move it all the way over
here to time of 1 second. I don't want to move
it all the way there. The animation is actually
just going to be that. And I'm sure you can
imagine it's just mirroring exactly
what I didn't upset. But because this is
sprite based animation, we're not too concerned about positions or anything like that. We're gonna be
concerned about sprites and the way this
animation works, the minute you click
this red button, any changes you
make an editor to this object like changing its position or
changing its scale, anything like that is
going to be set as a keyframe or what the object must be at that
point in the animation. Then if I'm moving along, I can do some of the
things I can make this smaller and
move that there. And then you can see
obviously that's exactly how bad animation looks, not the best animation as
I'm sure you can figure out. But hopefully it shows you
a little demonstration of how this record button
in the animator works. And you can see over
here, if you click it, you can disable it. And
now I can make changes. They're not actually
based in animation. What I'm gonna do is
I'm gonna hit this record button and
I'm going to go over to say 50.5 of a second. I'm gonna go here to blog
on a click on my sprite, and I'm going click blog to, and because I had
this record mode on, it recorded that change. So now it says, okay, I mean, loved one minute I reach this, go back to block two. But obviously the animation
is going to index. There's nothing. If I play this, it doesn't
actually change it or changes for one frame and then goes back
and that's not great. So I want to make it
so that it changes for exactly the same
amount of time. So it has half the time in there and half the
time in there. So I'm going to
actually go here to my keyframes and then
click on the top. On the top one is kinda
like select them all. You can see over here, I have one keyframe which is
selecting a single sprite. But if I click the top one, it selects all the
keyframes and the bad. If I had another one, I could select the top one
and select them all as well. Obviously I don't. Anyway, I'm going to click
on this one over here. I'm going to hit Control C
to copy it and move all the way over to the 1 second mark and hit Control V to paste it. And now we can actually see that my animation is
pretty much done. All I've done is I've made
two very small changes. I could have also achieved
the second change by going here and then change my
blog back to Blob one. Obviously, my way was just slightly simpler because
I can just copy it. And I generally
find that copying your animations from
the beginning to the end is quite useful
because you usually want them to end where
you started them in. Oftentimes, especially
with running animations or things like that. But with island nations, this one in particular,
I wanted the same thing, so I just copied it across. And now if I hit play, you can see that my blob is animated and it is
idling up and down. And that's actually really
cool because if I go ahead into the game and I hit Play, you can see that my
blob o p is invisible. That's not good. I think that the reason for
that is actually because my Z position flight blocked for some reason was set to
minus nine by default. That's just a bit
of a weird thing. Years he does. But if you ran into this
issue at any point, you can just go here
and you can set this to 0 and that will make sure that it is visible by the camera. The reason this happens is
because the main camera by default has a z
position of minus ten and any objects that
have a z position of lower than that
will be invisible to the camera as you
can see over there. If you can't see objects, just make sure you
set them to 0. It's a bit of a
weird glitch, but it's good that I got to
walk you through it. And then if not, we said 0, everything
will work perfectly. If I hit the play button. When you see now, my object is bobbing up and down,
which is really cool. And that's actually
exactly what I wanted. But you might be thinking, how did the animator know
which animation clip to play? Because obviously
we only had one, but what if I had
another animation, like a jump animation? I want to know when to play
that second jump animation. And the way that actually works is using animation controllers. So we'll go over here, window animation and click animator. And that's actually
going to open up this brand new Animator window, which is unity is animating. You can see it's
made up of a whole bunch of colorful blocks. And it currently has entry, any state, idle and exit. And you can actually
move these blocks around just by clicking them
and select name. Now, this particular
animator is based on whichever object I have
selected or is active. So obviously I was working with a single object and
the single controller. So this is the single animator. What we're seeing here is a representation of
this controller. And if I double-click it, I have the exact same effect that would close
the Omega and then double-click it
and you can see it opens up just like that. And obviously it,
What's happening now is it starts and entry mode and then it goes into whichever animation
state it wants to. Or in this case
there's only one. So it can only go into this MHC. And you can see it says default entry transitions
are not predictable. So basically what that's
saying is that I can't change what animation event
because I have an animation, I'm automatically
going to go into it. You can just disable animation unless you just say
what the animator, but that's an effect to
saving this whole controller. So what I could do
actually if I go to here and I wanted to make
a new animation or C, I could go here, click Create
New Clip underneath bottle. And I'm going to call
this one idle bossed. And is actually
gonna be the exact same as my previous one, except in two times speed. So we go here to 15, change my blob and back
to 30 and change my blob. And you can see
now if I hit play, it's the exact same thing
in two times speed. My idol one was
obviously a lot slower. But yeah, now I have
two animations. If I go back to that controller, you can see now there
are two animations, idle highlighted in yellow, and my new animation, idle fast. But I want to transition
between these two. Well, there's two
ways to do this, and this is getting to the same or competent part
of the animator. But it's all good. I'm sure that everyone in motion this
will be able to handle it. So just focus on everything
will make sense. If you get stuck, you can
just go back in the video because I'm gonna
explain everything in quite a lot of detail. Basically, the way I
can transition between these two states is
using this transition. So if I click Make Transition, I can drag it over or
at our chapter drag, I just move my mouse and I click one I want
to transition to. And we can see up
here now we have a transition between the two. If I click on this transition, I can edit the
transition properties. There's a whole bunch
of different properties here and conditions. And the way that this transition works is that it can either transition based on whether
this animation is done, not all based on a
set amount of time or can transition exactly
when I tell it to you. Now, the way you would
do that is via codes. If I were to have a script, I could create a script. And then at some
point in the script, I could make a reference to my animator obviously
will go into this a little more
when we go into script editing or script. And I can just make a
reference to my animator. And then I can say animator
dot set parameters. So I can make it
parameter here like a Boolean or into a
float or trigger. And I could change
that parameter, and that's going to allow me
to change that condition. Obviously, that might seem
a little complicated now. But basically the way
these conditions work is I can change my
state's via code, but a much easier way
to do it, actually, I'm going to show you now is
to just do it based on time. Right now we can see
it says Has Exit Time, which basically means that it has a time in which
it will transition. I uncheck that. It says transition needs
at least one condition or one x time to be valid
otherwise will be ignored. In other words, I haven't
set a time must be exited. I haven't given it
any conditions. So it's not going to
transition like oh, that back. And I set this to 0. That's 0 basically means it will exit at the end
of the animation. Then I can also change this transition duration and that's how long the
transition takes. So you generally want this to be something either very small, Let's hear from one
or actually 0 for our purposes because we're
using sprite based animation, we don't want to be
half transitioning from one SPI based
animation to the other, we're going to set that to 0. And then obviously
transient offset usually only worry about nor the
interruption source. But if I go to my
idols fast now, I'm going to want to
transition back to this one because otherwise
I'm going to be stuck in this one forever. I want to make another
transmission, drag it down. You can see this down arrow
is my new transition. I'm gonna make my exit time 0. In other words, the full
time of this animation, if I set it to two transition, offer two seconds,
but tending to 0 will make it okay after
the animation is done. And I make my transition
duration 0 again. Now what should
happen if I hit Play? We can see I should be going from the one
animation together. That's the slow animation,
that's fast one. Then I slow animation first one. We can actually see
this in the animated. If we go over here,
we're transitioning between the two animations,
which is really cool. Basically what
we've done up here is we've made a transition, we've set it so that okay,
it has an exit time. In other words, the
reason that it's going to be
transitioning is based on the time or how
much animation is done, not based on code. And then our exit time is 0. Or in other words, the full
duration of the animation, which I generally find to be
the most useful one to use. You can actually set this
to a value if you need to. But yeah, and then I have
my transition duration, 0 seconds because
I want to spend time transition in-between them. And then that's basically
all we've done. And now it allows
us to transition to and from these animations, which is really cool. Now the second thing I want
to highlight is simply just quickly that condition
thing I was doing or about because it is very useful
and it might have seemed quite complicated when I
went over it the first time. So I'm just simply quickly going to show you how it works. Basically, if I go over
here two parameters, I can create a new
parameter which is like a new value which is
stored in a variable. We'll go over variables in the next episode because we're going to get
introduction to coding. But if you already know
what a variable is, it's basically a storage
space for a value of data. I'm going to set
mine to Boolean. I'm going to call
my Boolean false. Now, when this Boolean is true, I want to transition from
that one to that one. When it's false, I want to translate from that
one to that one. So what we're gonna do, we're gonna go over
to my transition. We're going to disable
the exit time. In other words, I
don't want to change based on how much of
the animation is done. I want to change
based on condition. Go over here to my condition. And I'm going to say fast, it's automatically sex
is the only one I have. I can say fast is true
when false to true. I want to transition there. And over here, I want
the exact opposite. And I'm going to select
Fast to be false. And basically now,
whenever fast is true, I'm going to transition
from that one to that one. Whenever fast is false, I'm going to transition
from that one to that one no matter how far
my animation is, just meant to uncheck
exit time for both. Otherwise, you are also going to be automatically
transition. It's going to get a
little confusing. And now we can see I'll
default animation based on where we're going from entry or the start is actually
set to either. I could change this if I wanted, but I'm going to
leave it for now. So in other words,
if I play my game, we can see I'm starting
in my slow island nation. However, if I go to my animator
and I click this fast, but you can see I automatically transition to my idol phosphine. Go back here and I'm
in my first animation by set it to false,
we transitioned back. Those are actually
all the basic unit or know of how unity
is animator works. Basically, we have these blocks, which are our animation clips. We have idle, idle fast. Most games you'd
have something like jump attack, idle,
things like that. Then you would use your
transitions to go between them. So if I wanted to go
from idle to idle fast, I would make a transition. And basic, I can
either use okay, once I've done idle
once all based on a condition which is most probably what you're going
to use more of the time. And then you can just set
these transitions by a code. We'll go over that more
in the next video. When we start with our coding, I just showed you how
to do it in the editor. But basically all you need to do is once you create a
reference to your animator, you can say animation
dot set parameter and then set your parameter
just like that barcode. And that allows you
to program logic to change between
the animations. Don't worry if that's all
sound a little intimidating, like I said, we'll go over
it in the next video. I will show you implementations of the animator in
the coding videos. So that's all going to make
a whole lot more sense now. But basically just going over the editor and animator
in the editor. These are all the things
you need to know for making pretty complicated and pretty intricate animation systems, which is really cool. Now the last thing we need
to cover in this video is simply the multiple
based animation, which is actually a whole lot easier than what we've
just been through as if you've understood basically what we've just done
with transitions. How the transition work with the two different types
of transitioning, the exit time and conditions. And the way that
animation clips work, then you're pretty much fine. I'd say you'd be very fine to understand how
the rest of this works. If you look confused,
just go back, maybe re-watch them, things. Like I said, we will
go over that again in the coding video
when we implement code. And we're going
to be showing you how to implant animate it into code just as a little
side part of the video. So don't worry
about it too much. If the thing you
are confused about all the conditions
I was going over. But if you understand the
basics of how this works, then I'm sure you'll be fine for the next part of this video. You have understood exactly
what I wanted to portray. So great job on that. Now, if I go over
to my multiple, you can see I don't
have an animator here. Just like I added
one to the last one, I need an animator to
start animating objects. I'm gonna go to Add
Component, make new animator, which is going to create one
of these state machines. In other words, one
of those things that allow me to transition. Then we go window animation. Animation, just like
I did last time. Hit Create. And then I'm going to go over
here and I'm going to call this one the way because I don't make a simple waving animation. Now over here I see we've created my new
control and multiple. If I double-click
on it, we can see there is the exact same
like we had last time. It's going from entry into my wave animation because
that's the default. Can't really
transition to anything because there's no
other animations. But I'm just going to
show you how to do some multiple sprite animation. Other words, animating
the actual parts of the Sprite rather than
animating the sprite itself. The first thing you
do before we get into that however, is changed. The sprite vary so slightly
so we can see if you remember in the last video
or two days ago, rather, we set our sprite
mode to multiple, and that allowed us to
open the Sprite Editor and cut up all our different
parts of the sprite. But to make this animation
process a lot easier, we're actually also going to
want to set pivot points. You can see this blue circle
in the middle of the sprite. That is the pivot point
and I can move it. However where I want and it
will change based on that. So obviously because of this, because this is a body, I want the pivot
point of the lake to be around there
rather than there. In other words, when
I wrote it, it, it's going to rotate
from that center rather than from
its actual Center. And I'm gonna do this
for all of them. The arm, I obviously want
to rotate from there. The head I would
want to rotate from around whether next
post to be the torso. I'm not really going
to be rotating, so I don't need to
worry about that. Right arm. I'm going to be
rotating from there. And the right leg is
similar position. And if I hit Apply now we can see that
that's actually going to jumble all of my things
and move them all apart, but that's fine. That's
what's meant to happen. Just go ahead and move those all back to where
they're meant to be. I think mine is roughly there. There. And then here and here, I have to do a few adjustments. But for the basic stick man,
I think that's pretty good. And move this one to the
right slowly and up. And that is the basic step
nine we have reconstructed. And now we can actually,
if I go here to my arm and I hit this Rotate
tool and I rotate it. I'm going to be rotating
from that position, which is really, really
useful for animating. So go back to my parents object, my multiple hidden window,
animation, animation. And because I've already created my wave, it automatically opens. I don't need to
create a new clip. And now we're gonna do
exactly what we did the first time with the sprite. Except this time we're
going to be animating the object rather all the sprites themselves,
the mini sprites, rather than the main big sprite, we can see over here we
have the parent object, which we've added
the animation two, which means we can animate all of these little
things underneath it. Obviously, if I have the
animation of the head, I won't be able to
animate anything else. You can only animate
the object itself and objects underneath the
object. So keep that in mind. But obviously the way we
structure our sprite, that's not gonna be
an issue for us. Just go over to multiple,
I'm going to hit the red button just
like we did last time. And to make it simple
wave and animation, I'm just going to
raise the right hand, wave it and put it back. So I'm gonna go here
to the right arm and I'm going to hit
this Rotate tool, right, we had over
here rotate it. I'm actually going
to want to move this over because I don't want to
write it to rather be in. I want to write it
off to haul. Second. Some are rotated all the way up to around there, I would say. And then I am going to, I think that might
be a little high, but it's quite fit down a bit to the right just
so it doesn't look weird. And that's basically
going to be my first part of animation, maybe
moving it there. And then the second part,
I'm actually gonna be wave. And so I'm over here
a little forward and I'm going to move
this down again, move a little
forward and move it, copy it just like
it did last time. So in other words,
I go like this wave and then I'm going to want
to actually put my arm back. So the way I'm gonna do that is I'm going to go over
here and I'm gonna count this 2.5th and this 47 to go
another 2.5th over there. And this is actually how
that's going to look. Which is pretty, pretty cool. Now, the last thing I need to do is I need to actually
make sure that the rest of the body actually moves
away so it doesn't look so static because right now
it's not a very good way. So the first thing we'll do is I'm going to make sure that the left arm moves a little
bit with the right arm. So I'm gonna go over here to the left arm, slightly there. Then it's going to move
maybe a little bit there and a little
bit back there. And then obviously copied
the beginning and the end. They start ending
exact same place. Now I move my left arm up, but that's a little jerky. So actually going
to go over here and instead of
movement so much down, move it a little less than C. Now that will hopefully
look a lot better. Still quite jerky there. So let me just go ahead
and change that back. And that looks a lot
better in my opinion. I can go like that
and I can wave. And then the last
thing I'll do is I'm going to move
the head ever so slightly rotated to the left, just like we did with the neck
pivoting and then move it slightly to the
right over there and then copy that same thing
over there like that. And I think that was a pretty
decent wave animation. The only thing I
would say is maybe the head start moving
a little too early. So I'm going to go ahead back to my head and I'm going
to rotate it there still so it doesn't
move just so abruptly. And we can see over there,
that is my wave animation. And if I go back here to
my game and I hit play, we should be able to see both of these animations in action. We can see the wave animation on repeat because it's
the only animation in the editor or the animator
roller double-click multiple. We can see this
animation that was, it's not showing as much. I'm not sure why sometimes Unity has a bit of a glitch
where it doesn't show you the enemy to like it shooting game like it
was with the other one. But for whatever reason
it's not too important. It would obviously
just show us looping through this one wave thing. We can see actually that's
working really, really well. We can see we've got our two
animations now side-by-side, the one-way of animation and
the one sprite animation. And I hope this actually makes a whole lot more sense as to why we should use multiple
or single sprites. Because obviously if we're
making a pixel art game, this is oil we're
really going to need. It looks pretty
good, my opinion. But if you want to make an
actual fully-fledged team with more intricate
character designs, then having to do
animation baseball, you imagine having to
do a single stripe, every single one of those
frames, back it up. So that's a pretty brief
summary of animation in Unity. Hopefully everything makes
a whole lot more sense. We've covered how single
sprite animation works, how multiple sprite
animation works, and how the animator works with the transitions between
the different states. And we've covered pretty
much every single way to transition except via code, which like I said, go over
when we go over coding. You'd only worry
about that just yet, but just know that all
of the other things that we have covered raised
animation and unity. And that's going to allow
you to start animating the annuity and making your
games a little more alive, which is really cool. Thanks everyone for watching,
and I'll see you in the next video where we go
over code for the first time. We might not cover
animation code in the first code video just
as an introduction code. But definitely in one of the three coding videos
we have planned, I have done in the next
part of this course, I will show you how to implement the animator into
coding as it is, fits into one video is very nicely. So thank
you for watching. I'll see you in the next video.
7. Intro to Scripts: Hey there and welcome
back to unity. Now in the last few episodes,
we've covered sprites, animating physics, and a whole bunch of
other basics of unity. But we haven't actually
covered one of the most important parts of
the Unity game engine code. And it's very hard to make a mobile game or any game
for that matter, actually, without knowing how to
develop in C-Sharp, obviously there are alternatives
like visual scripting in Unity and Unreal Engine
also has a similar feature. But for the purpose
of this course, I'm going to show
you how to create scripts or C-Sharp files, which you can actually
use in your games. That's going to start in this episode where we're going to do an introduction to
C-sharp in Unity. Now, before we start
just as a disclaimer, it should be noted
that this video might seem a little intimidating
to someone who's never, ever programmed
before in their life. Now it doesn't mean that
you're not going to understand everything
and hopefully you still will gain all of the basic concepts I'm trying
to explain this video, but just note that the
purpose of this video is not for you to understand every single line of code
that we write, but simply to understand
the basic structure or blueprint that we use
to write code in Unity. I'm going to go over three
basic concepts of coding. And if you understand
every single one of their role in the Unity
editor or in C-Sharp. More importantly, then you've understood everything
you need for this video. Don't worry too much about
the specific code that we're writing and the specific
keywords that we're using. The main purpose of
this video is not to go over that in a lot of detail, but simply just to explain the basic skeleton of how
coding immunity works. With that being said, I hope you enjoy and let's get
into the video. So to begin, you're going to right-click over here
and this asset's menu, I'm going to go create
C-sharp script. And I'm going to name
my script in spirit. Doesn't really matter
what you name it. The one thing you do
need to note though, you cannot use a space
or any reserved words, so don't name your
script anything like camera or anything like that. Don't put a space in between
these two because the name over here is to correspond
with the name over there, which I'll show you once
we open this script. Once we open that script, just make sure to name
it a single word that is not at all reserved in any
way or wouldn't be reserved. Because this thing over
here, this public class, this class name,
these correspond with the script name, which
might obviously does. So that's all good. And when you open it up,
you'll have a little confused. It has a few things over
here using that has public class and then
void and void update. And I'm gonna explain what
all of these things are. So you can think
of first of all, this public class as basically just a hold of all of
the parts of my script. You don't need to
worry too much about exactly what classes are. Just basically think of it as a container for all of the
different parts of my scripts. I'm going to write
my entire script in-between these two
things over here. And that's all you really
need to think about. You don't need to
think about creating more class or anything yet. Much more complicated
code and concepts. But just use your right now, think of this as a container, the start and the
end of my script. And over here, this using, this is basically specifying which parts of my Unity
engine I want to use. So I'm currently using
system collections, system collections,
generic and Unity engine. You only worry about
that too much. Just note that if
you want to use, for example, like UI elements, I could go to the
top and academic using typing,
usually engine dot. And then over here we have UI and that's gonna allow me to use a whole bunch of more
features or code in Unity, which it will now recognize. Don't worry about
that too much yet. Basically using what
I'm going to be using and public class where
the script is written. Now, there are three main things that I'm going to simplify
this coding tutorial do. First thing we're going
to cover our variables, then we're going
to cover methods, and then we're going to cover
the actual code itself. Let's start with variables. Now, variables are ineffective, storage spaces for
values or data. If I wanted to store, you can think of variables like a box. If I wanted to store
a number or a word, or even a game object. One of these things over
here in Unity, obviously, I could do all of those
things using variables, and that is actually
how we do it. And I can declare
these variables at the top of my script. And that's then going to allow
me to use them throughout the script with the code known exactly what
I'm talking about. So for instance, I
could create a public. Now I'm going to need
to choose a datatype. So obviously, variables can store all sorts of
different types of data, but to make it a little
less intensive on the CPU or the
computer in general, it's better for us to specify which data type
we're going to be using so that the computer
can know what to expect. So in other words,
if I were to take a public variable and I can store numbers or
strings or anything. It makes things a whole
lot more complicated. I'm going to choose
one type of data. I'm going to use numbers or words or letters,
things like that. And I'm going to
choose the datatype. And the four main
datatypes that we're going to cover are booleans, which are basically like
true or false variables. They can either
be true or false. Integers, which are
basically numbers. They can be 1234 or five or six. Name, I think that's
my name is number, real or floats, which
are basically decimals. So I can do 0.3 or
4.5 and then string. And these are basically
words and I can install and name unity or clots or
anything like that. You don't really worry too
much about the declaration. I'm going to break
this down now, but basically know that
Booleans store true or false. Integers store numbers, floats, still decimals, and
strings store words. There's also other variable
types like character, which obviously
stores a character that's not one of the main ones. Then we're gonna go into all
of the Unity specific ones. But for now you can just
think about these first four. Those are the ones that
are most frequently used. Now the way you
declare a variable, you first have to specify whether you want it to
be public or private. For our purposes, I'm going
to make most of my variables public because the public
would basically mean that it is visible
from the Unity editor. Obviously it's not that simple. Public actually also
refers to whether other scripts can access
it from the script. But just to make it
easy for this tutorial, don't worry about that
too much because this is an introduction to scripting. All we're gonna do
is we're going to do public for a lot
of my variables. Then I'm going to want to create my first variable
to be a number. So I'm gonna go public int, which means integer, and
I call it my number. Then I'm going to save
my script and I'm gonna go back into Unity. And now we can see over here, my script has this
public integer number, but there's nothing to show
that less script is touched. My script isn't actually
in my project yet, because the way I get
scripts into Unity is by assigning them as
components to objects. So we go to the main
character here. We can remember over
the few past episodes, we've used this edge
collider component, will actually delete
that for now. But similarly, if I
wanted to use my script, I could attach it to my object and obviously
going to want to attach the script to the oxygen use if you're making a movement scriptural player, you would simply create
your player object or assign if you already had a clear object and
you're going to drag your moon script
onto your player. And that's going to
allow your player to access the movement script. I've just create
an intro script. I only have my main camera as my object because I don't have
anything else in my scene. So I have my interests script
and we can actually see my number over here
as a public variable. And we can change this number. It's an integer, all the way negative and all
the way positive. And I can set it to
whatever I want. I would use an integer
if I wanted to keep score or health or
something like that. And then I can change this value based on what's
happening in the game. But right now all you need to illustrate is that we've created our first variable
and we can edit it in the Unity editor,
which is pretty cool. Now, if I go back
into my script, I can create another variable. Let me call this
one string and I'm gonna call this text
very similarly, if we save, we go back
to the Unity Editor. We can see now once it's
reloaded my scripts, we have our new variable texts
and I can call this one. Hello, thanks that man. Over to three. And then that's actually
going to be saved. And this is really useful if you can think about
a movement script, for instance, I want to go
how fast the plaque can go. I can make a variable
called speed. And then in the Unity
editor I can change the speed and it's going to actually affect the
rest of the script, which is one of the ways
that I use variables, public variables in my scripts, which is really, really useful. Now, obviously, there are a whole bunch more variables
we can come up with. Like I said, we
have a car and we have Boolean and all
the other types. But more importantly, there are especially Unity specific
variables which we can use, which are incredibly useful. So if you go back to Unity one more time, we
can see over here, this main camera has a camera
component added to it. And it also has an
audio listener. And you don't need to
worry too much about these specific components, but just know that their
components and unity. And we can actually create
references using variables to these components or even
two objects themselves. So if I go over here
back to my script, I'm going to create
a public game object and call it myself
with a capital S. Some reason. Now if we go back
here, we can see my public game
object is actually referring to one of the
objects in object hierarchy. So I can drag this in there. And now I have assigned another
reference to my object. To make things a little
simpler, I'm gonna make a new object and I
call this one test. Just so we're not
overcrowd the main camera. Then I'm actually
going to go ahead and remove that script from there and I'm going to drag
it onto my test variable. It should have set these to 0, just so it's centered
in the screen. Then we can go over
here and we can set test to myself would set a number to five and we
can set the tails high. And that is pretty much the extent of our script right now. It doesn't
do much else. But we can see that
these three things we've actually created
references to. So we've created a
reference to a number, a reference to a word, and a reference
to a game object. Similarly, we can actually
create a reference, a whole bunch of other things. If you can remember
in the last video, one of the components
we covered last time was a rigid body. If I go public, I'm creating a rigid body 2D
reference and the coal mine RB. Never go back into Unity. We can see once it's
really read the script, I now have an empty
rigid body 2D, which I can add if I go and add a Rigid Body 2D component
and drag it in there, we can see we now have a
reference to tests rigid body. Now creating these
references is actually the basic core way we're
going to be coding in Unity. Because if you
think about it, if I want to create a
movement script, I can change the velocity
of my rigid body. Remember it, this is
what affects physics. So I can change the velocity of a rigid body based on events
happening in the script, I create a basic
movement script. We're going to get more into
that in the next episode. For right now, we're
just gonna go over very basic scripting. Next up, we're going to cover
these methods called voids. But just keep in mind that is how we're going to be
scripting or coding. We're going to be
creating references and then manipulate
the references. Now, like I said,
these things over here for its knees are
called methods. And the way these methods work is they happen at
a certain time. Because if you
think about coding, you want to know when
to run the code. And you can't just
expect the code to note what to happen
when obviously, if I'm playing a game, I want certain code to run
when I'm pressing buttons. But we haven't created any
reference or any way of telling the script what time
we want things to happen. Right now the only two
default methods we have all the start method, which is basically
the method that is called once before
the game starts, like right before
the first frame. And the update method, which is called every single frame, we can see there is a
comment above here. Obviously that was just explaining what the
update method does. But this update
method had a comment above it which basically expand
it is called every frame. So if I go to my update method, I'm going to write print, which is basically a short
way of saying, okay, print something to the
log unity console, you can see it there. I'm going to put an
open bracket and I'm going to say print test. Right now this
print tests you can run every single frame is
going to be quite noisy. I'm actually going to cut that and I'll put it in the store. Then if I go back to
Unity and I hit Play, we can see Tesco
printed once before the game started
at exactly 115930, whatever the time is now, I
don't know if I run it again. We can see it ran again at 115914 because there were
roughly ten seconds apart. Exactly ten seconds, but that's actually how
storm everywhere. So we can use the star method to do a
whole bunch of things. If you think again about
a movement script, we can use the star method
to set the start position of our character if we
make IT platform and gaming say okay, set
it here, here, here. Similarly, the update method we can use to update things
every single frame. And this update method is
actually one of the places or the place that you're
going to track user input. So if you think about
an update method, if you're checking
every single frame, when a user presses a button, the minute they press a button, that friend's gonna be okay, they press the
button to do that. And that's actually how we
track user input in Unity's, I could actually
write code of here. And go input dot, get key down. I can open bracket again and
write keycode dot space. Then every single time
I press the space bar. And if frame it's going
to run this code, you don't need to
worry too much about exactly what I've
written down here. Like I said, cover that more and more and more as we
get into scripts. But basically just know that this update method
runs every frame. So if I go back to here,
now I print a test, every single frame,
go back to Unity. And I hit Play. We can see every single frame we have a new
testing right there. Eight hundred, one thousand, two thousand and three thousand. And they are all
running 1 second, 1 second, 1 second. If I turn off this
grouping or if I rather make it so that they do not collapse
into one another. Over here, we can see
every single one of these tests being cold,
every single frame. It's pretty hard for that
system to keep up with it. If I go down, I can kinda
see them all come in. You can see obviously, there are already more than a
thousand of these, which is pretty, pretty bad for the computer if I wanted to run things every single update. So that's why we use
conditions to make sure, okay, only on these specific
frames won't do things like jump or move
or things like that. Now the final thing
I want to cover is the actual code itself. Now we've written over
here print command, which is an example of
a command in unity. And there are whole
bunch of these and we can use them to print
different things. Or not only printing can use them to do pretty
much all of our code. We're going to be writing
our code in these methods. Third thing I want to cover
is if I give it out here, I can actually create
my own metatag. Go. Boy, call it myMethod. Put parentheses to
show it to method, and then curly brackets. Once again, shirts and method. If I go over here
to my Prentice, I can put that in my method. And then whenever my
method is called, which obviously it is never
caught within the script, I will do the exact same thing. The basic way coding
works in energy, especially is we have these
variables which we are gonna be manipulated to make
our code work everyone, we have these methods which basically run at certain times. This one runs every frame. This one runs at the start, and this one runs
whenever we call it, I could go into my
update and I could call myMethod every
single frame. Then in effect, these are the same method
because every method, this one's like,
Okay, cool that one. And that's basically how
we are going to be using your T2 code, our games. And then inside these methods, we're gonna be writing
the actual code itself. Obviously, we didn't
go too much into depth about how actual code, what code we need to write. But just know that
most of the code comes from manipulating
these variables. If I go over here, I
could write my self, which is the game object. I could go dot that
could transform, which is basically like
the transform my object. Or in simpler terms,
the position, the rotation and the scale. I go dot position. I could go equals. And then I can just
set it to a random. I'm going to go to
new vector three, which basically
means I'm going to be storing three numbers. And I said to 000. Now what's happening is every single time I call my method, it's going to send to the
transplant in the center. So obviously I'm not
going to be doing that every single frame. If I go to Start, I
could call myMethod. Put parentheses to shrunk
calling the method. If I go back into Unity, minutes finished reload
my script assemblies. And I'm moved my test
object over there. And I make sure I have my
interests group desaturate. I can delete this rigid body
because we're not using it. And I have myself attached, then I can hurry
ahead and hit play. And we should
actually be able to see that the minute we hit play, we don't get to see
anything in the game because obviously there's
no sprite to touch. We can see we actually
got centered in the middle of the thing
because that method is called. Obviously this might seem
a little confusing and intimidating because we're
using quite a whole load of things like
transformed opposition and game objects
and rigid bodies. But as long as you
understand variables are the things we need to be
manipulating and the methods, all the places in which
we manipulate them, we can call our own
methods all we have these two stone and
methods which are called at the
pre-determined times, once it reframe or
the star thing. And then basically all
we need to do is we need to manipulate
different variables or properties of our objects to make it so that we do
the code we want to do. Then you've pretty much understood everything
we want to do. Like I said, this
is just a basic introduction to how
scripting works. In the next video,
where I'll show you how to write basic
movements script. Hopefully you'll be able to see these concepts lot more clearly and how
they actually work. And obviously in our
movements group, if you think about it, we're going to want to
use this update method to check which funds being pressed. And then we can use
the star method, maybe just set a start position always that what will be
covered in the next video. But as long as you've
understood the basic skeleton of how the script works, you've understood everything
you need to see you in the next video where
we'll get more in-depth into coding and good job.
8. Movement Scripts: Hey there and welcome
back to unity. In the last episode, we did a brief introduction to how
scripts and unity work. But in this episode,
we're going to create our first ever script, a movement script for my
player character over here, you're taking the view screen,
you should be able to see, I've got a pretty
simple scene setup. I have my player
object who just has a sprite in it and
a square sprite. And then if I've
got my main camera, I just have a collide on the bottom which can
act as my floor. So the first thing I do before I actually
create my script is I'm going to make sure
that this object applies. Physics students. I'm gonna go here. We go add components, and I'm going to add
a box collider 2D, which is actually
going to go exactly around my head just like that. Perfect. And the second thing I'm going
to add is I'm going to add a Rigid Body 2D as well. Leave all of these settings
pretty much exactly the same. So it doesn't need to
change anything there. Now if I hit play,
you should see that my object will fall and stop
exactly like an Eastern. Now the next thing
I'm going to do is I'm going to create my
movements script for this object and allow the
player to move left and right. And I'm going to allow the
player to jump as well. So I'm gonna go over here
to assets are going to go right-click create
C-sharp script. And I'm gonna call
this one movement. I'm going to
double-click to open it. And we should be able to see a very familiar thing
based on board. Last time we have my using class and i2 voids
would you start? I'm going to do actually
is I'm going to create my variables. So because I'm making
movement script, I'm first of all going to
want to k variable for speed. So I'm going to create an
integer and call it speed. And then actually going
to want another integer, I'm going to call
this jump height. And then third of all,
I'm going to want a rigid body
reference because I'm going to be moving my
character based on the rigid body is I'm gonna
create public rigid body RB. Now, these three things
are actually going to be all I need to create
my first movement script, which is pretty, pretty cool. So I'm gonna go here to my
update method and I'm going to create a few controls based on what I want
my player to move. Now firstly, I'm gonna
do is I'm going to set my velocity or my rigid
body based on whether the character or
the player rather is pressing the left
or right buttons on the keyboard and
use it actually has a very cool built-in
thing for this input. Dot get access. I'm gonna go open brackets, horizontal, covered
in quotation marks. And this is actually
going to give me a float every single frame based on whether I'm pressing
left or right. And I'm going to use
this to do my script. So the way I'm gonna do
this, I'm going to go RB, which is my rigid body dot, and I'm going to
change the velocity. Remember it's a
dynamic rigid bodies. I'm gonna change my
velocity equals new. I'm making a new one vector to which base just
means I'm gonna be using two different values. I'm going to open my
brackets and I go input dot, get access horizontal,
just like I did over here. I'm going to put a
comma between them. And then for my y velocity, I'm going to want to
change my y velocity, not based on whether I'm
going left to right. So actually to make keep
this remain unchanged, I'm just going to RV
dot velocity dot y. Now I close my brackets
and press the thing. Basically what
that's gonna do is I'm going to say
every single frame, I'm going to set my velocity or my rigid body to using
two different values. One, the input dot
get X is horizontal, which is basically
a fancy way of saying a value
that unity already determined based on whether
I'm pressing left or right keys and then
RB dot plus T Y. This is obviously a built-in feature which basically saying, okay, if I'm pressing the
left key, make it minus one. If I'm pressing the
right key, make it one, which is obviously very
useful. I use it all the time. And then our radar velocity. But why this is saying set the velocity to whatever
the velocity is, so don't change the
velocity at all. If I go ahead and I hit back to Unity and
they get hit play. Before I do that though, I'm just gonna make sure I've
actually assigned my script over here and drag my movement
scripting down to there. And then I am going
to make sure to drag my rigid body in so I know which rigid body
I'm talking about. Because we're not actually using either of these variables. I'm going to leave them,
they're gonna make no difference whatsoever. If I then go ahead and hit Play, we can see I follow
just like that. But if I press left or right, I move very slowly to
the left or right based on my input, which
is really cool. But I don't want to be
moving that slowly. I want to move a little faster. So I'm gonna go back
to my script and I'm actually going to multiply whatever value this is
by my speed variable, which is really cool if
I go back to Unity now, I'm sure many of you
will be able to predict that since our speed
variable is set to 0, that's actually going to negate what I've just
done because every single time we times it
by 0, in other words, getting 0, I'm not
going to move, but instead I'm gonna
change this to one. So we have exactly what we had last time timesing it by one. No, it's keeping it
the same number. Now we move to the
exact same speed. But if I were to change this to something even twice as fast, you should be able to see
any noticeable difference, which is really cool. And the great thing about
these variables in Unity, I can change this
as I like immunity. I'm gonna make this
five for instance. I can see exactly how fast. I think that's pretty good
speed for my first manuscript. I can now move left or right. Keep in mind any
changes I make while I'm testing my gain will
not be carried over. So when I click that again,
it's gonna be reset box. I'm going to set that back
to five in my speed thing. And now every time I hit Play, I'm going to move
in slave faster, which is really cool. That's the basic part of my
movements Script completed. The only other thing
we need to add is a jumping mechanic, and we're going to use
our own custom void or method for that and go down here and create a void,
call it, shrunk. The code for this jump voices that's going to be
very similar to this. We're again just going to
be changing the velocity. Go here, copy this,
and put it back in. And instead of making
this the input axis, I'm going to actually make this the RB dot velocity dot x. In other words, don't change my x velocity
at all when I jump. Instead, set my y velocity to a direct value and I'm going to set this value to jump height. So the way this is
going to work is it's going to every single frame. I'm going to set
my RB dot velocity to whatever my axis horizontal. In other words, if I'm
pressing left to right, set the velocity at
that base on going left to right and don't
change my y-value. And every single
time I'm jumping, don't change my x value, but set my y value to a direct velocity over
at my jump height is. So obviously this boy is
actually not being cooled. It, you can see it
has 0 references, which means that this method is not actually
called it all. So I want to call this
junk method every single time the player
presses the space key. I'm going to do that
because I'm going to use an input current. I'm going go if an if statement. So in other words,
if that is true, then run the code below it. Input dot, get key down. I'm going to open brackets
and right key code dot space. Then underneath this,
I'm going to say jump, because it's only one line I can write directly underneath. If I wanted a larger
if statement, I would use curly brackets and then everything under
that would be executed. But because it's only one,
I'm just using one line. And this basically means every single time
press Spacebar. I am going to run this code. Now if I go back to Unity, sure many of you will
again be able to protect because I'll jump out to 0
is not gonna do anything. You can see if I go
back into Unity and I hit the space bar,
nothing happens, not because we aren't
doing anything, but because we have
not said the velocity, we can actually see
if I go back here, I did stop him of x. I'm setting my velocity
is 0 and it was negative. So you can actually
see it there. But dominos, if I set this
to something like five, we can see now when I
press the space bar, I can actually jump. And that is the basic movements group we've
made complete it. I think since I've said
no limit to jump in, I can quadruple or
even quintuple jump and go back to Unity and reset this to
something like seven. Make sure it's saved
because I'm out of play mode and then go
back into play mode. And now we can see our
movement script in action, which I think is pretty, pretty cool For our first script ever. Now, this basic trope, which we literally
achieved using only what, four lines and
three variables is all we're going to
need for the basics of our movement script. Obviously, if you want to make a slightly more
complicated Moody's group, which I'm just going
to edit quickly. We're going to want to
only there for jump once the player actually
touches the ground. And we're going to use a
completely new method, which is new to us. It's actually called
by UT, not us. So I'm gonna go down here. I'm a right to void. Then I'm going to type the
words on collision enter 2D. In other words, every
time I enter a collision, you can remember we
added a box collider to our player and a collides with floats
every time these to touch That's going
to be triggered. I'm gonna go to here
and I'm going to say Create a new
boolean up top here. And I'm going to call
this one on the ground. And every single time I've entered a collision,
in other words, every time I've landed, I'm going to say
on-ground equals true. And then similarly
I'm the right to void on collision exit 2D. In other words, when
I've left the ground, I'm going to set on brown box. Then the last thing
we're gonna do is over here in my
jumps statement, I'm just gonna write
another if statement. I'm going to say if
on-ground equals true, then I'm only going
to want to jump. I don't even remember two
equals signs because that is the way you write if statements. And basically what
it's gonna do now is every single time
I entered the ground, I'm going to set
on grounds, true. In other words, if I
call the jump thing, it's going to work. Every time an on-the-ground,
it's not going to work. We'll go into Unity. We can see we should have an
on-ground variable here which will be able to
help us keep track of this in the
testing of our games. We can see right now it's false because we
learn it, it's true. And if I jump now, it's going to set to
false and then true. Now if I press the space
button a bunch of times, it's only actually going
to work when I'm on the ground, which
is really cool. This is almost actually a
fully-fledged movement script. And with the addition
of a few extra methods, we can actually program logic into our game for
the first time. Obviously with the addition
of our on-ground variable, we can now check whether the players on the ground and
whether they can jump on. And this is actually a pretty good jumps script
for our first time. Like I said, you can jump on the ground and only
when you're on the ground. And everything works
perfectly fine, which is really cool. You can see with these
simple lines of code, we've actually created pretty good jumps script
or moving script rather. And it allows us
to move our play around and jump when
one on the ground. Hope everything made
a whole lot of sense. And if it didn't, you can
just re-watch the video. I will obviously go
over these concepts. They should get more familiar
as we code more in Unity. But everyone great
job on the script. If you've copied along, give you some time to
write down all of this. Now, if you use the
exact same components, I did remember the
rigid body and the box collider and copy this code exactly
as it is on screen. You should have a working
code and hopefully you have understood how this
code works very basically, with the speed variable being what we're
multiplying this by just set it to a different
factor, the jump height. Similarly, we just setting
the velocity directly and then this on-ground thing to check on the ground
using an if statement. If I'm on the ground,
then you can jump. Otherwise it's not gonna
run this code at all. And that's basically
how the code works. Hopefully
that makes sense. And I'll see you in the
next video where we'll get more into coding in Unity.
9. Active Scripts: Hey there, and welcome
back to Unity. And then the last episode, we created our very
first script and movement script a
lot out there to move left and right
and jump up and down, which is really cool. But in this episode we're
going to do a bit more of an overview about active
scripts in general, an act of scripts
are a town refused, used to refer to
scripts that are used actively in a game. So just movement scripts are attacking scripts,
things like that. Obviously you can also
have passive scripts, such as scripts that
are acting like, okay, if this happens,
then take damage. You will have a passive
script, for instance, on an enemy that would say
if I collide with something, take damage, but you will have an active script
and a player that says, if I press this button attack. And today we're
going to focus on the former act of scripts and program this blob object
to have two abilities. One of them is going
to be changing the animation state it's in and the other one is just going
to be printing things. And obviously then after that, I'm gonna go a little more in
depth with how you can use these actors script to create
abilities using colliders. But we'll start with
more simple things. So I'm gonna go here,
right-click and go create C-sharp script. Now I call this actor script. And then before I forget, I'm gonna go over to my blog and I'm going to add this act
of script onto my blob, so that is added to the object. Then I'm going to
double-click and open it up in Visual Studio. Now because this is
an act of script, obviously we are going
to be programming in primarily using these methods. Whereas the passive
script would focus more on checking things
were being done. So for instance, fallen to make it passive script to make
sure that I take damage, I could have some
clothes like with credit earlier that says on
collision enter 2D. And then if I collide
this specific thing, take damage and write
code to do that. But because I'm focusing
on more active script, I'm going to create
my own method and these methods are gonna be
used to do it both ways. Firstly, I want to
create is going to be called void print. And this is simply going to
print hello into the console. Now what I'm gonna do is I'm
gonna go over to update. And I'm going to write another wireless input things we
use to edit it and say if input dot get key down, I'm going to open brackets
and use the same thing as the group focused
and code dot space. Then I'm going to want
to call my print script. And it's actually very similar
to what we did earlier. This is an example
of we're giving this character and ability every time you press
the space bar, we're going to print
this thing over here. I'll go back over here. And I'm going to go to my blob, and I'm going to click Play. And then every single time
I press the space bar, we should be able to
see in the console, hello gets printed, which
is really, really cool. Now, obviously this is not
the most exciting avidity. So we're going to add
another thing where I'm going to show you how to
use these active scripts, just like we do
we're going to talk about earlier with
the animation. Remember if you remember a few
episodes ago we were doing animation and we had these
parameters and I told you, I'll go a little more
in depth with how you can change this
using scripts. We're going to use a
very similar principle to use it as if you go
back into your script. Instead of having a print Boyd, I'm gonna make two more voids. I'm going to call this
one slowdown animation. I'm going to call
this one animation. Then all I'm going to do is I'm going to go in these
voids and I'm gonna set the parameter which I created to transition between the
animations to what I want. So if you remember a
few episodes ago we had these transitions
based on both time. And then we created this false parameter and have
the conditions, but we set up like this. I'm gonna show you
how to set that same parameter using code. So if we go over here, we
can see the parameters of this animator are
currently fast. That's the only one. So I first have to create a
reference to the animated. And obviously we're going
to use a variable to do so. But right to the top. And I'm going to type in public. And it may tall
and call it anime. And then over here, well,
I'm gonna do is I'm gonna go and'm dot set Bu, meanings set a parameter in their thing of Boolean
type, just like we have. And I'm going to set
my parameter chapter, go over here and find the name. It's called fast and put that
in these quotation marks. Fast. And I want to set it to true box because I'm going to
be slowing down animation. Then over here in this point, we're gonna do the
exact opposite, set it. Now, all we need to do is call these voids when
specific things happens, I'm a copy of this
input statement, but instead of using spacebar
me use two different keys. I'm gonna go over here and
I'm gonna write if input dot get keydown
and code dot one. And I'm going to use alpha-1, which is the one key on
top of the keyboard. And then I'm going to call
my slow down animation void. And if I do number two, I am going to do my
speed up animation. Now you should be able to see
if you go back into Unity. First, just have to assign my animator quickly by
dragging them in there. And then if we hit
Play, we can see we're starting on the slow animation. And if I had to go into the fast animation and then one back to the slow animation. We can actually see
this in the animator if I'm going to go
ahead and just drag that down over here so it's
on the side wooden tip. I have one. I'm obviously in slow motivated to
that gets true. And then I got to foster and I can change this
however, I please. And this might be, might be a little confused
as to why I'm focusing on such
arbitrary things like printing and animation. But this is the basics
of how you're going to create ability scripts
or active scripts. Because if you think about
it, if you want to make an attacking script
and I'm gonna go a little more in-depth into that
at the end of this video. We will obviously
want to do that by calling a specific void. When a key is
pressed, I would make my script and I'd
call it a abilities. And let's say I want to give my character three abilities. I would program for
three different keys. I would call different boards, and then I just need a
program liabilities in here. And obviously
depending on if one of the abilities just
maybe jumping, we obviously went over
that earlier with rigid bodies, you would
just make a jump. And if one of the
other abilities was maybe dashing forward, we could do the same thing
with rigid body velocity. We would just have
to set the velocity, the x to something very high up. And then I go, Neil,
pause the screen. So obviously those
are the basics of how we're going to be making
our active scripts in unity. And this is how you should be programming script if you want to give your
player abilities. Obviously there are
alternate ways of doing it. You can give certain
abilities happening when you collide with things
and things like that. But those were actually
going to focusing more on the next episode, which is gonna be
passive scripts, rather than when we
initiate things, we have to react to
things happening to us. This is going to be the
basic blueprint for how you build act of
scripts and unity. And I find to be a very
good way of doing so. You just simply have reasons
why you call your methods. Then you have your
methods and you can have your message do
completely different things. And this should actually allow you to a whole lot in Unity. The last thing
we'll do is quickly show you how this
can be applied to create a very simple
attacking scripting UT. So I'm gonna go over
here back to my game, and I'm going to make my tag
and script using colliders. So if I go here to my blob, I'm going to add a
circle collider, very similar to the 2D
box slide we had earlier. It's just this one is a circle and I'm
actually going to make it quite big and in
front of a blob like so. Then the second thing
I would do, I'm going to create a new sprite and we go Create 2D object sprite. I'm going to make just a square. Coolest enemy. Then mondrian was sized
dots and I'm going to add a box collider to my enemy. And I'm actually going
to make this one a trigger so that when
I walk into it, it triggers, it doesn't act
as an actual collision. Then what I'm gonna
do is I'm going to say when I place a specific key, if these two are
colliding, in other words, if the enemy is in range, then I'm going to want
to trigger something. I'm going to show you
basically how to do that now. I'm just gonna
go over here. First thing I do, obviously, I need to make some kind
of thing happened when they collide and we're making
on collision events void. This one is always
going to be on trigger into 2D instead
of on collision. That's just because
I'm using a trigger instead of a normal collider. And then I'm going to
have a variable up here. I'm going to call
it Boolean range. I'm just going to set my
range variable to true. Then I'm obviously going to
want to set it to false. When I leave that
on trigger exit 2D, I'm going to set my
enraged variable to false. And then after I've
done those two things, the last thing I need to do is instead of having
this printf void, I'm actually going
to replace this. I'm going to call this attack. And then over here, I'm
going to change the name, oversee some point
the right boy. And then I'm just gonna have
a simple if statement and say if I'm enraged, other words, if I have collided with my
trigger, which is the enemy, we were making it open
brackets in range equals true. Then I'm just going to print. I'm going to crunch
the word hit. This is hopefully
going to show us exactly how this works in unity. And then if I go
back into Unity, the last thing I need to
do is some way of moving the player in range and Outbrain so I can
actually make it. So I go in and out of room. So I'm gonna do that
using by simply adding in a rigid body to my
players so I can drag him and then having
fall into the thing, someone just going to add my
rigid body 2D components, leave everything else as it is. I'm going to make sure I have
my floor on my main camera. And then if I go ahead
and I actually hit Play, we can see that if
I fall like this, I'm going to stop and then I hit the space bar and
nothing happens. However, if I were
to drag it over here and fall through so I'm not
touching the play baseball. We can see I'll have
that kid variable obviously being hit
Command rollout, obviously being put out into the debug dot log, which
is really, really cool. This is obviously
a very simple way of showing an attack script. And if we had the
movement script that we made earlier in
the previous episode, we could obviously kept
that and there'll be a lot easier to move without having
to drag in the editor. And if we combine
those two scripts and moon script we made earlier
and this attack script, we will have the basics for
some kind of fighting game. Obviously, we need to add
in a few more effects, like instead of just printing
hit, we'd have to say, okay, maybe store
some variable on the enemy called Health and
then subtract that value. Obviously, that
would be a good way to track the enemies health,
and make an actual game. Hopefully, this shows you
the basic blueprint for how these active scripts
can help you when you're creating a bitter
taste for your characters. In the next episode,
we're going to create passive scrubs similarly to this one actually where we can keep track of
health with the enemy. And then instead
of actually doing something that enemy reacts
to things happening, which I'm obviously gonna go in more depth into next video. But I hope that you enjoyed
this one and everything made a hollow sense and I'll
see you in the next video.
10. Passive Scripts: Hey there and welcome
back to unity. This is gonna be the second
law of scripting video, where we're gonna go
over passive scripts. Obviously in the previous video, we went over this act of
script in which we went over blueprint how you can create abilities for
your characters. And the basic way to
program these abilities. In this episode, we're going
to go over passive scripts, or how you can program reactions to these
abilities by characters, specifically for
enemies or objects, anything of that sort,
even the play itself, if they are attacked by
an enemy, for instance. Now the main concept we're
going to need to get across to create
this relationship between two objects
and how they react one another is referencing scripts from one script to another. Before I can start showing
you how to do that, I'll just show you
some quick alterations have made since the last video, I have added a very basic
movements script to our player character allows them to move forward and backward. And you can see that
in action here, if I go ahead and hit Play, I can now move
forward and backward. And this obviously
illustrates the hitch thing, a little easier than last time, which is pretty, pretty cool. I'm gonna do in this
episode is make this enemy react to being hit. However, I'm going to show
you exactly how I do that. I'll first start by
creating a C-sharp script, call it passive script. And then I'm going
to double-click. And I'm going to delete
the first two methods, the start and the upper method, the resigns leaving these is because this is a
passive scripts. There's going to be based
on things reacting to it, not it creating
things happening, or it reacting to events in the games really like
starting or every frame, it's going to react to
stuff happen in the game, like if it gets attacked. So I'm going to create
a public void and I'm going to call
it take damage. The way this boy
is going to work is once this point is called, I'm going to take damage. I'm going to have a
variable up top here, int and call it damage. And I'm just gonna go
damaged minus equals one. Which case if Tim is damaged
equals damaged minus one. It's pretty cool. Then I'm gonna go,
Here's my active script. And I'm going to say over
here for my print hit, I don't actually
want to say printed. I wanted to call this void, but this void is part of a
completely different scripts. Or how am I going to call
this boy from the script, you can see if I take damage. It has no idea what
I'm talking about. It says does not exist
in the current context, meaning in this current class, but it does exist in this
class. So how do we link them? We're going to use a variable. So I'm just going over
here to the top and it's actually very easy.
I'm gonna go public. I'm gonna write the
name of my script, passive script, call it passive. And then over here, instead
of saying take damage, I'm gonna write the word past as my variable is called dot. And then I actually
have a list of all of the public components
in this group. So you can see over here I
have a public int Damage and a public void take damage. So I just need to go dark. Tape damage. You can
see it's ready with it. I can call it just
like any other method. And all I need to do to make this work is I need to
go back into my game. I, it makes sure that I've assigned the one
script to the other. So let me first go ahead and add my passive
script to my enemy. Then all I need to do is I
need to go over to my blog. And over here where it
says passive script, I need to drag in my
enemy because they have the past script and you can
see that actually works fine. Now if I go to my
enemy and I make my damaged start out at ten. Or health rather than if I
play the game like No more, you can see when I get hit,
it goes down, down, down. And if I move away,
it doesn't put down. And that's pretty cool
because that's actually the basics of how we can get
a health system to work. We can obviously improve
this a little bit. We could make some animation
where we take damage. So let's show how that
would look quickly. If I go public animation, I'm going to create an enemy animation on
the quality idle. And that already exists on both cheeks are old
ones are for idle to. This actually just gonna be a blank animation and
it's going to happen because it's the
normal animation I don't want to
play all the time. I'm going to trace
a kids animation. The Hit animation is just going to have a color change from red and go back to white. And so it looked like this. Maybe make it a little bit fast. I only get half as long. And that is a pretty
good hint effect in mind book all I
need to do now is make those transitions
we were talking about earlier between the
idle to and the hits. So what I'm gonna do is I'm
gonna create a new parameter. I'm going to call this one
a trigger and a trivia. It's kind of like a button. If you can think
of a Boolean like a switch or triggers
like Okay happened once I call the
parameter called Hit. The way it's going to
work, just like we did earlier with the Boolean where
we set to true or false. This trigger we just say, okay, work and then we'll work once
and then not work again. Which is perfect for us
because we want that to happen once I'll go ahead and
call that hip thing. So every time I call
this hip parameter, it's going to change
to that state. Obviously disabled exit time and make this
transition duration 0. And then over here
we do want to base an exit time because as soon
as we finish our animation, we want to go back
to the other one. So I'm gonna change that. Don't have any conditions there. And hopefully this
is a little more familiar because the
whole animation episode, we're using one
parameter to get there, but we using the normal time-based transition
to get out of it. Well, this is going
to look like all I need to do now is make sure that I call that
parameter in the enemy script. I'm gonna go here, creates a public animator, just
like we did last time. And then down here I'm
going to add some dots. Trigger, I'm going to
call the trigger hits. Now this is going to do
every time I take damage, it's going to set that hit thing and it's
gonna make it go to that Hit animation and then transition back once they
hit animation is done. This is just a pretty cool
visual representation of what we've already done, just so it's a little clearer. So I want to drag mine
and MH it back over here. I could do the same
by doing that. Now, what we should see if we start the
game doesn't happen. But the minute I take
damage, we can see, I actually can see a visual
effect of that happening. You can see that
in the animator to if I drag it across here, you can see I gotta
hit and then go back. And this actually
really cool because this shows us exactly how we would make an even
cooler health script. You can see my damaged and
I'll go into negative numbers, which we obviously wouldn't want your normal health script. But hopefully this gives
you a little bit of a better idea of
how these passive scripts are meant to work. Obviously, this passive
script is dependent on us calling this void
from another void, which is a pretty cool thing that we've only done
in this episode. But we could also have a similar thing with, for instance, of orange to take full
damage or they go void on collision enter 2D, just like we did last time and call my take damage
for it from there. Then all I need to do is
actually go back to my game. And then I need to drag this
player up right to the top. I'm going to disable this so it's none other triggers so that collision detection
will happen and then add a rigid body so
it falls to the ground. Now what will happen? You should be able to see the minute we fall to the ground, we're actually going to
take falling damage just like any other game, which
is really, really cool. That's another example of a
passive script because we're using events happening outside of our control and
reacting to these events. The way this one works is simply just by calling this void. So hopefully you have a slightly
better understanding of the blueprints were using to create the scripts
for our games. Act of scripts, obviously, you might not understand exactly every single line
of code in here, but that's stuff's
pretty easy to pick up once you just program
more and more in Unity. Obviously, I've tried to
use concepts that will make a lot more sense and
explain the ones we have done, like animators and simply using other scripts or
rigid bodies for instance. But if you want to
do in slightly more complicated things like
character controllers, things like that, that you should be able to
learn pretty easily. So you don't need
to worry too much. If this all feels a
bit intimidating, it will get easier
the more you do it. The thing that I want to get across is actually
in my opinion, a lot more valuable to know. Just simple blueprint we using to create the scripts that
act of scripts which are based on methods we're calling based on things that happen with our user and the
passive scripts based on methods we're
calling based on things that have an
eye environment. And hopefully if
you follow along is everything that
we've done this video, it will make a lot of sense and you're able to apply
this knowledge to your own games when you make
them bridge of everyone, the final script and
video will be in the next one where we'll
simply quickly go over how to save values
so that you can make sure your games progress is saved as it's actually a really, really simple thing to do. But everything should
have hopefully made sense to you and I'll
see you in the next video.
11. Saving Data: Hey there and welcome
back to unity. In this video, we're
going to quickly show you how to save values and unity and retrieve them for the next time
you play your game. Obviously, this is
a very useful skill to have in your toolbox. And hopefully you've acquired
quite a few of these so far with these videos. And you have a better
understanding of how everything in the Unity editor kind
of works together. But in this video
we're going to add one more simple thing
and that's just quickly how to save
things in Unity. And we're going to do all of this within a C-sharp script. So first I'm gonna do is I'm going to go
right-click and we go create C-sharp script
called a saving. And I'm just going to open
up the script right now. And then you just need to create a variable you want to save. So I want to save an
integer on the call it public int and call it value. Then all I need to do
is actually I need to have a void every single
time I want to save it, I need to call that
void now I see. Okay, save it then. And then I'm going
to want another boy when I want to retrieve it. So I'm going to want to retrieve it during the staff void, but I want to save it
during my own voice. I'm going to make
a voice, call it save this obviously a method. And then I'm just going
to call this method every time they
press the spacebar. So if input key down
keycode dot space, then I'm going to want
to call the safe. And hopefully that
will work perfectly. Now, all I need to do, and this is the one line of code that is required
to save a value. I'm going to go player
prefs dot set int. And this player
prefs is basically Unity's very simple way of saving play a preference
between game sessions. It says it can store strings, floats, or integers.
So keep that in mind. You can't store obviously
rigid body values, or even, you can't
even store Booleans, but you can have a store the three datatypes that
were listed there, floats, integers and strings, which is pretty cool
because you can actually use these to save
pretty much anything. I'm gonna go player
prefs dot settings. And I'm going to
first of all need to come up with a name for
what I want to save it. I'm going to call
this one value. And then I'm just
going to have to enter a value which
want to say it's obviously my value is gonna
be my value variable. Then the only thing we
need to do now and I want this is I'm gonna go back to start. I'm going to say value. So the variable I
want to say, oh, I have saved is equal to, and then play a prep stuff, get it, and then value. Again. This might be a little
confusing because I've used the same
name it all times. I'm just gonna change
this to local value. So things can just be a little
easier to differentiate. So obviously local value is the variable you want to save. And then every single time
we press the space bar, we're going to save that
value in another file with code name or key value
on the computer somewhere. Then when we click start, we're going to
retrieve that value by same flavors of getting value, and that's
the local value. And this is a very good way
of saving for mobile games. There are other ways of saving. For instance, if
you are creating specifically for desktop, there might be a slightly
more thorough way of saving, but when you start on YouTube, this can work perfectly fine as a fine method of saving
your data in Unity. Now, if this all
works perfectly, you should see when I
go into my game, well, not much of a game, but into my scene and go to
my main camera. It's the only thing I have in
the scene and I want to add this saving script dragging
down to the bottom. And now I just have my
local value variable. And every time I save it,
I'm gonna wanna retrieve it. So I'm going to set this
to something like 0. Obviously I'm not going to
change it in the editor now, but that's not going to
demonstrate anything. Then I misstated this
to ten, for instance. Now go ahead and
put this baseball and that's actually
going to save it. I'm going to close
the Unity editor. Now you can see it's set to 0. But if I stop the game again, it should actually be set to ten because that's what
we said it last time. And you can see even if I said something entirely
different in the editor, like for instance 50, and this should
override play mode. Now we can see when we start the game is how
I've actually set to ten because it's being
reset to what we saved it as. These are actually all the
lines of code you need. If you want to save
something, you should have a good player prefs dot set int, a key you want and the
value of trying to save. And then you need to
assign that value, which you see when
you start the game to whatever you
want to store to. Obviously, usually you want these two to be the same
thing if you want to save the same value and put
it back in the same variable, then obviously going to
want to use the same thing. But for instance, if
I had a high score, I can save my school variable and then I can set
it, save it in there. And then every time I
start the game up again, I want to treat my high school. High school is that, that is basically the basics
of saving and unity. These are all the lines
of code you need. And hopefully that's
another cool skill to have that will help
you make your games. In the next video, we're gonna be starting
with sound design, and we've actually
covered the basics of how scripts were community. Now as a result of this, hopefully you've learned a few cool tools to use in unity, and hopefully this is
going to help you a lot when you're making
your own games. If there's a few things that still might seem
a little blurry, like specifically what
player prefs are. You only worry about that too
much because like I said, this course is just on
the basics of unity. All you need to be getting is a basic understanding of how all these things
work together. And I promise you
it's going to make learning extra things on top of it a whole lot easier once you understand
these fundamentals. And hopefully, Yeah,
there's another tool to add and you've understood
everything in the video. I'll see you in the
next video where we get so on sound design. And thank you for watching.
12. Sound Design: Hey there and welcome
back to Unity. And over the past few episodes weaken covering
many of the basics, but we spent the last
four on scripting unity. Luckily, however,
moving past that to do something a little
more exciting, and we're gonna be
working on sound design, which is one of the
coolest parts of unity, in my opinion, as allows you to add a lot of life, your games. So if you're to look before you, I've got a pretty boring scene with pretty
much nothing in it. The only thing I have
is this main camera, which has nothing of
importance, altitude, and this sound object
where I've created, which has a whole
bunch of components, but they're all disabled. I added those because these are the four components
we're gonna be focusing on when we go
over sound designing UT, which is the topic
of today's video. Before I go over and start
with the first component, which is the Audio Source, I'm first going to play you the sound we're gonna be working with so you can hear it without
any editing whatsoever. I'm going to double-click
on the sound which I downloaded from a
royalty free sites. And it sounds like this. You can see it's one of those
retro death effects from old video games. Now, the way we use
the sound and UT is firstly using an
audio source component. You can find this
by simply clicking Add Component and it
is the bottom one. If you search up audio, when you open it,
you're going to be greeted with the
following layout. You can have an audio
clip which won't have anything assigned
to it as of yet, an output, and then a whole
bunch of different settings. Now, for the most part, a lot of these are quite higher grade and you'd only
work with them. For instance, these
3D sound settings down here are obviously quite complicated and you
don't really worry about them too much in our 2D environment. They are useful if
you are planning on going a little more in-depth
with your sound design. But since this is
the basics of Unity, I'm not going to
be going too much into some of these settings. I'm just going to focus on the first one is that
you need to worry about. If you go over here
and you can see this audio clip currently doesn't have anything
assigned to it. I'm going to drag in my asset, which I played a second
ago, old sound effect. And if I start my game, you can see because
I have both play on awake checked and loop checked, which is not checked by default, but I have checked it for
the purpose of this video. I just need to enable it. And then if I hit play, you will be able to hear the
sound repeatedly, like so. Now obviously this is the main feature of
this audio source, is who act as a device
for playing sounds. And there are a few
important things you need to note here. First of all is volume, which is obviously
very self-explanatory. You can change the volume
based on what you want. I'm gonna go ahead and hit play, and then I'm going to
show you how all of these different settings
affects a thing as we're in platelets and hit play slightly lower volume
so I can talk over it. I'm gonna turn that
down even more. And now you should be
able to hear both me and the sound which
has much better. Now the first thing I'm
gonna focus on is the mute, which I'm going to take now just so I can talk over the thing. The mute is ineffective.
Send the volume to 0. They're both the
exact same thing, but I'm just going to take
the mute for now so I can speak before
I play the sound. Now this pitch effects both the speed of
sound and its pitch. In other words, how high
or low the note is, and also how fast or slow. I'll show you how that
looks in a second. Obviously by simply
changing this value and then adjusting the volume
slightly so we can hear it. You can see there's a very drastic difference in the sound. And I actually often like to
use my pitch by changing. It's something like
0.9 to slow down my songs to make them sound
a little bit different. You can even use this and
repeat the same song and again, multiple times just by changing the pitch slightly so it sounds a little
more interesting. Now, out of these
all these settings, these are the main ones
and you're worried about the audio clip is the
sound is playing, the mute turns on that
sound on and off. Priority also affect how
important the sound is. You only worry about
this too much, just if you have multiple
sounds playing at once. You want to set high priority
to the ones that are more important and low priority to the ones that
are less important. And volume obviously we went
over as well as pitch and then stereo pan and Spatial
Blend and reverb zone mix. We're not going to
worry about too much either 3D sound settings, as those are all quite complicated for just
basics of sound design. The next thing we're going
to go over, however, is the audio distortion Filter. And this actually just acts
as a distortion Filter, as you might have guessed for how to store that we
want our sound play. Firstly, I'm gonna do
is I'm going to set the volume backup 0.5 so you can hear it and make sure mucus
off, Play on, awake is on. In other words, stop
playing as soon as I stopped playing the
game and lupus. And so we can hear repeatedly now in semi distortion
level to 0. So I can show you
exactly what it looks like as we ramp it up. Now I'm going to turn
it up all the way, but I'm going to turn down
the volume as this can be incredibly loud when social
phobia is set to maximum. Obviously not the
most useful feature and you don't really
want to use to sort and filter that
high unless you're trying to make some
kind of comedic game. But that's basically
the distortion Filter. You can always use this again to affect the sound
that you're playing. And similarly, the
microfilariae is slightly less obvious
and a lot more useful because you can
actually just use this to have cool ambience
effects in your game. If we go ahead and
make sure that my mute off and all my
settings and back. I'm gonna go ahead
and show you what this echo filter
sounds like in game. Obviously you don't want that
layer too much and you can affect this delay
and the decay ratio, which obviously will
affect the sound of echo. I'll show you exactly
what it looks like when we alter those. If I hit play right now, tend to delay write down. Obviously with ten, It's
almost unnoticeable. And if I set it to its maximum, it's a very obvious copy
that is very, very late. We can see actually
if I mute the sound, it keeps going for awhile, then the decay ratio is similar in that if
I turn it down, you can see the effect now. My leg and then if I turn it up, that affects how fast the
sound decays over time. In other words, how fast it
dies out underneath these, you don't really
need to worry too much about the dry
mix and wet mix as they just affect
how old are you is passed to an output devices. So that's a lot, like I said, not too important
for the community. But all you know is
that delay is backed. How the delays and
the decay affects, how fast echoed dies out. Once you've gone these
two, distortion and echo, you can actually make
some pretty cool sounding sound effects
in your video games. But more importantly and
more impressive than both. The other two is actually
this reverb filter, which changes all
of these things, all these different dry
level room, room, HF, LLF, decay time, all sorts of different things that
affect the sound. And you can actually use
presets to set these for you. If you said to user, that's
kinda like manual mode. And I can change
these whoever I want. Or you can use a whole
bunch of different presets Unity has actually created for you to give you
different effects. For instance, have a living room of offering a padded cell. I'm gonna go through
a few of these effects and I would actually recommend you use these effects when you start that immunity. If you don't know what all of
these different things are, I like to use these effects
as they actually are. I find in my opinion, quite useful and quite good effects to
have in your games. But if you go ahead
and hit play, I'll show you how I
would have them work. Make sure that your
audio reverb filter is set to on so you can
actually hear the effects. And I've turned it off for
now, so we'll just hear no sound. And padded cell. You might have been a
very slight difference, but it's not too obvious. I'm going to then
turn onto room. A slight echo there
as you can here. But if you go to the
more obvious ones, we have ones like underwater
drugs and psychotic, which are very obvious if
I change to underwater, you're here at now,
psychotic and drugged. Now obviously these have many cool applications in your games. For instance, if you
wanted to illustrate falling through some
kind of portal, you could use the psychotic
or the drug effect, or even underwater one
to a certain extent, these large create really
cool effects for your games. And with these three
basic components, obviously there are a few more
audio compounds over here, such as the audio cores filter and the low-pass and
high-pass filters of it. In terms of basics,
these three will get you in a whole lot of different
cool effects that you need, especially the reverb
one for your games. You don't actually
need a whole lot more. If you can also adjust
these pitch and volume controls to get
the sounds you want, which is really, really cool. The last I want to show
you is how to actually use these all your sources to
play sounds when you want to, not just on awake, on looping. So I generally find that plan awake lute is good
settings if you want music because
you want the music to always be playing and
you want to be looping. But since this is neither music nor something that we want to always be paying or looping. I'm gonna turn off both
of those settings. And then if I go ahead
and I hit Play it, we're not actually gonna
hear the sound at all because there is
no plan awake set. So actually I have to call
the sound from a script and then go ahead and create a
new script called a sound. And then over here,
under my start Boyd, I'm just simply going
to call the play sound. First of all, I'm
going to go and create a public audio source, which is going to act as my variable format
audio source notochord. As even mind if you
name it AIS like that, that's a reserved words and make sure you add a capital F. I'm just going to
go to a doctor. And that's the same
as saying, Okay, play my sound once. And we should be able to see that if we simply
add that script to our sound object by dragging across and assigning the
audio source over there, we should be able to
see this in action. The sound should play
as soon as we stopped. It will not loop, however, as we've set that to false. But obviously if you
want it to loop, you just check that box. Hopefully this gives you a bit
of an understanding of how audio can be used in unity
to enhance your games. I wouldn't recommend overusing these filters at the beginning because they can make your game sound a little bit oh, dramatic. And that's not something
that you necessarily want to have with the
game, especially in India. However, they aren't
incredibly useful features and if used at the right time, they can make your game seen
a whole lot more immersive. Obviously in terms
of actual sounds. To get the sounds,
there are a lot of great sites like
mix it online that allow you to get
royalty-free sounds from the internet which
you can use in your games. And that's actually where
I got this one right here. So hopefully you can
download some new sounds and try out how these audio
sensors work in unity. But audio source and these three fields as I've
showed you how to use. And obviously then you
can just call from the scripts by creating a
reference to your audio source. And then simply just calling this play method which
will make the sound clip. Hopefully that gives you a better overview
of sound in unity. And I'll see you in the next video where
we'll get started with another cool feedback
feature, particle systems. I'll see you in the next video.
13. Particle Effects: Hey there, and welcome
back to unity. Over the last few videos, especially with our
animation, sound design, and spray videos, we've shown quite a few ways of visually showing feedback
towards the play. Specifically, by now one example where we
were showing hit detection and we
changed the color of the square from red to white. That was a great example
of feedback to the player. And feedback is an
incredibly important part of game design as it helps
the player feel engaged. One of the best ways
to add feedback to a game is by using
a particle effect. And I'm going to
show you exactly how particle effects
immunity work as I find them to be one of unity
is most useful and versatile tools for
displaying particles, explosions,
collection animations or anything of the sort. You can even use them for
something like rain or snow. Now to get started, I
have a blank scene with one empty object I've created
called particle effect, which has absolutely
no components. The only component
I'm going to add for this tutorial is simply a particle system
which you can find by typing particle and you
will find it over there. You can see them and
I just click on that. Suddenly pink squares being
emitted from the center with no signs of stopping
and all going on for about five seconds,
people, they'd disappear. And this isn't the
exact particle effect. I want to, I want to
create an explosion, and this doesn't look
like an explosion. So I'm gonna go ahead and show
you exactly how to change all the things you
need to change to make an explosion
particle effect. As I find this to
be one of the most common ones that
people want to make. One of the ones I use most
frequently as you can use this if you want to
make an explosion or collect animation, or even a jump animation
when you leave particles behind
after a double jumps, something like that. All of those are very
similar and they going to use very similar
concepts and tools. In the particle
effect. We're going to use all of the following menus. Obviously the particle
effect, emission, shape, we're going to use
color over lifetime, size of a lifetime and noise. We're also going to use
texture sheet animation to make sure we're
animating the right sprite. All of the other ones, including these ones about velocity, these ones about rotation, size, and color by speed, collisions, triggers, lights, trails,
and custom data are all very cool effects and very useful in
the political system. But with these ones
I've selected, you can make a wide array of incredibly cool particle effects and you don't need to
use any of the others. And it actually makes
it a whole lot simpler. So by just using these
seven different menus, you can actually make a whole
array of particle effects. I've never need to
go any further knees and I've made quite a
few partly reflects. So if you can master these
ones, you should be fine. Before we start, I'm
just going to turn off this noise so that my particles
aren't moving so much. I'm going to turn my size over lifetime back to the
top so it looks normal. And that's all I'm
gonna do for now. Don't worry about what I did. I'll explain it all as I
get through the video. The first thing I wanna
do is I want to make sure we're animating the
right sprite because right now this pink square is actually the default
texture unix uses, because I haven't assigned
a texture to it yet. So I'm gonna go down
to my renderer, and I'm gonna go
ahead and choose Sprites Default as my material. We can see now we're
using white squares because that default sprites. But I want to use my own
custom sprite actually. And a lot of times I
find people want to do this so good at Texture
Sheet Animation. Make sure to check it. If it's not checked,
click on it and then select the
mode to be sprites. After this, just drag your
cervical spine in there as the selected sprite
and you will now be animated with a sprite
of your choice. I'm using a circle, but you
can use whatever you want. I find that shapes
generally do work the best. Triangles, circles, or squares, but you want to animate
with something else. It's completely up to you. I'm just going to stop
my particle system, so actually see what's going on. And I'm gonna go
ahead and explain every single one of these
following properties. The ones we're gonna
be using anyway in the particle system and
how are we going to use them? So since we're making
an explosion effect, obviously all of the things
I'm going to change, you're gonna be
centered towards that, but I'm gonna explain how
every single one works so you're able to change to
whatever you want to make. Now, starting with duration, duration refers to how long the particle system
emits particles for. Obviously I wanted was looping. So there was never ending. But if I go ahead
and uncheck looping, we can see that now this
goes on for five seconds, which is quite a long time, especially for a
particle effect. And then it's going to stop. And that's the end of
the particle effect. But because I want to
make an explosion, I wanna make this something
much smaller like 0.4. Obviously, like I explained, looping is referred to whether the mirror keeps looping or not. And then start to lay
refers to whether I want to delay for the
particle system starts, meaning which I don't
start lifetime refers to how long the particles are alive for before they dissipate. So this is obviously five seconds and then
they're gonna disappear. They go off screen
because it's so long, but I don't want that because
I'm making explosions. I'm gonna make this
something like 1 second. You can see all at 1 second
and then they disappear. Start to speed refers to how
fast they only start moving. I think five is pretty decent, but I wanna make mine something
like six just because I want them to be quite fast
because an explosion. And then start size refers to how large they are
when they're starting. You can also set a
3D start size if you want the X and Y and Z
values to be different. But because I don't,
I'm going to use normal standard size. I said
it's something like 0.4. Then start rotation.
Obviously it's not important to me
because I'm using circles, but if you want to
rotate your things, you can do so like that. Or if you want to obviously, you can also use 3D
star rotation and you can change every single one of the aspects differently. After this, we have a flip
rotation which will cause some particles to be flipped and rotate in
the other direction, is basically like a
randomizing thing. Then we have the start color. I obviously don't want
to have a wide explosion because I think most explosions or red or orange or something, it's going to make my starting
color something like that. And we can see now our
particles are all red, actually going to make
it yellow because I feel like that'll look
better in the end. And now we can see we have a yellow explosion,
which is pretty cool. Then obviously the gravity
modifier refers to where you want it to be gravity and
make this something like 0.2. So you can just ever
so slightly see that. But obviously if you
sent this analyte five, you can see it very clearly
because I make an explosion. I'm not going to be too
concerned about that. I'll set it to 0.1. Then the simulation space local or world
basically refers to whether I want the
particles to be affected by local
space or world space. In other words, if I'm moving this particle effect
and I've said to local, the particles will emit based on where the particle
descends it is. I'll show you exactly
what that looks like. If I make the snooping, go ahead and hit Play. We can see now the particles are being emitted from my space. And if I were to move this, particles, move with it. In other words, they
don't look very normal laws of physics. However, if I change
this to world, you can see that when I move it, the particles actually stay
exactly where they are. And obviously I use world quite often because I
think it's very useful, especially if you create
an emitting effects like a rocket going up into space
or something like that. But for the purpose
of this video, because I'm not
going to be moving at AMD because
it's an explosion. I'm going to use local. Then simulations
speed refers to how fast the particle system
basically plays everything. Documents, edit tool if
you go a lot faster and if I set it to something like
0.45, it'll be a lot slower. I'm going to set
that back to one just because I don't
want to change anything. After this. The next few things
are the most useful. We're going to skip over
delta, time and scaling mood because these aren't
incredibly useful. Play on awake just refers to whether I want
the park system, but start when I
start, which I do. After this, you
don't need to worry too much about
emissive loss team or to a random seed stop action calling action
or ring buffer mode. And then the last thing
is mass particles, which is just basically
saying, okay, if I have that many particles
stopped making others, which is good for performance, I'm going to leave
that at a thousand. Then down over here
we have emission, which basically
refers to how fast my particles are being emitted and how many are being emitted. I'm gonna go ahead and turn off looping because
I'm going back to make it my explosion effect, because I'm making an explosion. I don't want it to
be something like slightly more similar to a 100. We can see right now we have a bunch of particles
coming out at once. I don't need
a little more. Suddenly they get 150. And I think that
looks all right. You can see there
slavery in fact, by gravity, we can even
make it sound like 200. It'll look much better
when we actually use the particle
system properly. But that is basically
what the emission it refers to how many
particles are done over time. You don't need to worry too much about rate over distance, because that's basically based on distance rather than time. Obviously, I'm using time
and most people generally, time is the more
used feature highly, if you want to do
something like an emitter, you can also use rate
or the distance. After this, we have
the shape and this refers to the shape from which the particles
are being emitted. So we can see right now
if I click Restart, you can very clearly see
there being emitted from the smaller circle and out
into the large circle. And that's because it's a cone. If I were to change that
something like a sphere, you can see that
is quite similar. But if I change
to something like a doughnut, it's going
to be quite different. They're going in and out. Obviously you can play
around with these. They're all pretty
self-explanatory. I would avoid the
ones like meshes, Mesh Renderer are the
ones that are focused on those very useful or sphere, which obviously is
just a normal sphere, hemisphere, which
is very similar. Then we have cone, which is what we had originally. And again, it's very similar. These three you can kind
of use interchangeably. However, I would recommend using sphere or Hemisphere
rather than current, as I think it is slightly less
intensive on the computer. And then after this,
you could also use box, but it's not the most
useful for my purposes. Following all of the others. The only other one
that I find to be super useful is circle, which is actually the simplest
one of all in my opinion. And I were actually going to
use that for my purposes. And then Edge, which
obviously gets emitted from a single line. You could also
focus on rectangle, which is similar to the box. Of course it is rectangular
harvest it can change this position or scale of x to be slightly
more so like this. And then we can see
we have a rectangle. Now, I'm going to use a circle
like I mentioned earlier. So I'm gonna go ahead and
change my scale back. On this scale actually refers to scale up what I'm emitting from. So I'm going to change the
scale of x and y from 0.4. So it's a quite small, actually even 0.2 will be fine. I'm going to keep the z at one because doesn't
really make a difference. And we'd see all of my
particles now being emitted from roughly
the same pot, which is pretty, pretty cool. After this, we can also change the spread which isn't gonna be too noticeable
mine because it refers to how much of these particles are
spread around and these chest settings
will change based on which shape you
obviously selected. The radius also actually
affects the size. I could scale this
down and then they'd all be emitted from
the same place, but you can't actually use it the scale, it's
not too different. And the radius thickness is
also quite useful as you can zoom in and you can see how that changes the
shape we're working with. If I move it like that, we can change exactly
which part of the radius, how thick the radius
around it is. However, I'm going
to keep that at 0 because I think for my purposes that's
going to work best. Then after this we have a mode. We can either do random or loop, which case it's going to
loop around ping pong, which is going to
go forward and then back Latinos for now. But if I were to turn
on looping mode, you would see exactly
how that looks. Obviously, these
are not going to be very useful for my purposes, but we can also have a burst
spread where it is all spread out simultaneously
at the same time. But obviously going to use
random since I want to have an explosion and explosions
are random by their nature. So I'm going to restart and
that's going to explode. And all the other settings
around here are semi useful. You can use this to change
the position of the emitter, if you like, or the
rotation of x or y or z. Obviously, if I
rotate it by the z, that's not going to make
difference for a circle. But if you were using
something like a box, you, it'll be a lot
more noticeable. And then over here, lines
erection will align the particles based on their original direction of travel. Randomizing the direction
will override whatever direction are
currently in and kinda randomized little bit and
see if I turn that up. It looks a little
more explosion life, but I don't want that. I want mine to be
quite simplistic. And then spheroids direction. Similarly, if you hover
over it, you can see it says overrides the initial
direction of travel with the direction that
projects particles outward from the center
of the shape transform. So obviously that's very
similar to what we have now, if I click Restart wooden
table and set to 0, and when it's set to the
maximum, it's very similar. You can't see a difference. So that's not the biggest,
most useful feature for us, but it might be useful based
on whether you're using it. You can just play around
and see what it looks like. After this randomized
position is obviously just gonna
be randomizing where the particles start from. If I turn that way up, you should be able to see
that a little more clearly, but I don't want that,
so I set mine back to 0. Now obviously we have
changed three things so far. We've changed the
particle effect, which is just the basic
particles and the emitter, the basic settings,
the emission, how many particles there are, and the shape where the particles
are being emitted from. But still doesn't look like
a very good explosion. It's conscious yellow
blobs being shot out. So we need to add
a few more things to make it look a little better. The first thing we're
gonna do is go to this color over lifetime. And if we click on this,
we can actually make it. So it's more of a gradient. If you click on
these bottom ones, you can change the color. And if you click
on these top ones, you can change the office. I want to set this
over to 0 at the end. In other words, at
the end of the life, it's going to be
completely fading out. So it looks like
this, which looks a lot more explosion
like in my opinion. But I'm also going
to change it to be slightly more red
intent at the end. And you can see how
that looks over here, which looks pretty
cool in my opinion, it looks like an
explosion fading out. I'm going to actually
turn that up a little bit more so that you can see the effects slightly more exaggerated, pretty,
pretty cool. Now after this, I want to do a similar thing with
size of a lifetime. Remember, we changed this graph, but actually it's a very
simple thing changed. You just click on your graph and now you can choose from a bunch of predetermined or
pre-selected graphs. Or you can make your
own just by simply adding in points and
then moving it around. But for my purposes, this graph over here fits quite nicely as a cool explosion. I could have also used this one, which I think looks quite cool
as well, or even this one. Although that might be
a little too dramatic, but I'm going to stick
with my own over here as I think that's a pretty
decent exposure effect. After this, we can add in
noise and noise you can think of as kind of like
turbulence for the particles. I'll show you exactly what
that looks like if I turn on my looping effect again,
so it's always playing. And then I'm going to turn
my noise strength up. You can see particles start to shake and turn a little bit, which is exactly what we want. There are a whole bunch
of settings here. They do get a little
bit quite complicated. Like for example, if you look
at the preview over here, it looks a little bit
like Perlin noise. You increase the frequency. It's kinda how jittery the
park was asked if I turn it up to maximum articles
are like shaking. And if I turn it to 0, there, obviously barely moving. But I'm going to turn
it something like that. And you can see that
the particle is good. I said to 0 that
actually overriding their velocity is
based on the noise. So that's not what
we want. Either. Turn it upside down. You can see how that changes it. If I said something
like 0.5 for instance, we can see we have a
fairly shaking particles, but they're quite smooth. And then scroll
speed is basically going to be scrolling
through the noise. And so the particles
are going to change and change and
change as they go. Then enabling or disabling, damping enables or disables
the fact that the strength of the noise is proportional to the frequency of the
noise and octaves, we'll create multiple
layers of noise, that layer on top of each
other to create a final noise. All of this might seem
a little complicated. You can just think about
it as layers of noise. Turbulence which
make the particle is shake in this certain way. You don't need to worry too much about the rest
of the others. Obviously, the quality will just affect the noise actually. And what the quality
of that noise is. Obviously turning it up into 3D will make the
noise that I wanted. But I'm not actually going
to be using this too much. I will use it a little bit in my thing if I turn
off looping can see that is a little more
explosion like that. I just don't want it to be too frequently on a turn down
the frequency a little bit. And then hopefully that
looks a little better. It's a little too low now. I'll turn down the
strength as well. And that looks pretty cool. Maybe down the strength
a little more so they're not shaking
too much at the end. And I think that
looks all right. Now after this there, we've pretty much
done everything we can to make our
explosion effect. But we can see I'd still
don't think it's too bright, so I'm going to make
a few final changes. First thing I'm gonna
do is I'm going to turn the start size back up to see if I turn to one that's a little
bit too cartoony. So I will make my
something like 0.7. And hopefully that'll
look a little better. I'm also going to want to
randomize the start size. Rather, I can actually
go up here and I can click a random
between two constants. I'm going to pick my
in-between 0.40.7. Now you can see we have a
little bit more variation, which is pretty cool. And I'm going to turn
my stock color a little bit darker so you can
see it like that. Looks a little bit more
explosion in my opinion, alternate tiny bit backup. And then after this, I want to turn up
the emission slowly so it's maybe 300 particles. Looks a little bit
more realistic. Then the last thing I'm gonna
do is I'm going to turn the lifetime down a little
bit to something like 0.8. And I've tried to turn the
start size up a little from 0.6 to 0.9. I think that is a fairly convincing particle
effect for an explosion. If we go ahead and put the game down here
and we hit Restart, we can see how it looks in gain. I think it looks alright. It's a little pixelated. We zoom in now, but
if I go ahead and I set it so it plays on awake and then I hit
play in the game, you'll be able to see
it in full action. A frozen little there. So let me try and play
it one more time. You should be able to see at
least briefly the particle, okay, well, it's
jittering a little, but if you can kinda
see it in the editor, I think it's a pretty
decent particle effect. And the tools that we
use in this tutorial are actually two that
you can use to make completely different
particle effects. Like for instance, if
you want to create rain, I'll show you all you need
to do to change that. First of all, we need to change our shape to be
something like an edge. So it's all emitted
from the same place. And want to turn the
scale of my edge up. So it's something like that. Then I'm going to actually turn the rotation like so it is exactly a 180 or rather
negative 180 degrees. Or I can actually
just write 180, doesn't make any difference
and outs and getting down, then all I need to do is I
need to turn looping on. I'm going to turn
my stroke color to something like light blue. I'm going to turn my color over lifetime instead
of going to read, I'm going to go to
an even darker blue. Then I'm going to look, doesn't look very
much like range. I'm going to turn down
the scale ever so slightly start sizable quite
a lot actually, sorry. It's gonna be from 0.20.3 C. I'm going to turn off my noise completely so it's a
little more straight. And then on a turn up
my frequency to 500. And yeah, it doesn't
not the best rain, but you can see kinda
does look like rain. Obviously there
are still spheres, so it's not the most
convincing if I turn it above to the top
of the screen and turn my shape up so it's slightly higher scales, it's
going all the way down. You see that it looks a
little sort of convincing. If I turn up the lifetime to be two seconds
rather than 0.8, we can see the
rain falling down. I mean, like I said, it's
obviously not the best effect, but you can kind of tell how easy it is to change
these things around. And you don't really
need to use any of the other features of
the particle effect other than the ones
we've showed you here. Obviously the main one and
then emission shape you will definitely need color
and size of lifetime. I find to be incredibly useful, especially changing
this alpha components so that they can fade out. And then after that
just touchy animation, you can remember the
renderer to make sure your RAM rendering
your sprites, and using your actual spikes instead of the predetermined
default texture. And using those tools, you should be able to create some pretty cool
particle effects. So I hope that makes
a whole lot of sense, and I hope you are able to use
this in your games to make a lot more feedback for
your players to make a game is a whole lot more engaging, which is really, really cool. So I hope you enjoy it. I'll see you in the next
video. Thank you for watching.
14. User Interface: Hey there, and welcome
back to unity. Now, over the last few videos, we've covered quite a lot
of the concepts of unity, but there's one thing that
we've been neglecting so far, and that's UI or user interface. Whenever you play a game, there's almost every
single game out there has some kind of menu
or UI component. In fact, I go out to say, pretty much every single
game out there has this. When you don't have
the game, the massive big play button in the middle, all the settings, all of that. Those are made up
of UI components and unity has a great
tool for adding these in. I'm going to explain
this tooling, this video and show
you three ways or three components rather
of the UI and unity, which are going to illustrate exactly how this is going to work or how the UI in
Unity works overall. So to start, I'm gonna go here,
I'm going to right-click. I'm going to go create an
owner's shoes over here, a UI. Now the first I'm going
to do is create a canvas. Because if I create a canvas, this actually allows me. I can't just put UI
elements anywhere. They have to be
inside of Canvas. Actually, if I were to
create a UI element, you can see it
automatically creates both a canvas and events
system for me automatically. But because for the
purpose of this tutorial, I'm going to create
everything manually. So I'm gonna go to Create UI. I'm going to create a canvas and that automatically
actually creates an events as to for me now an event system
don't delete this. This basically
handles events like button presses or slide or slides or anything of
that sort and unity. So make sure you include this in your project when
you create a Canvas, it will create one automatically
named my canvas UI. Then you can see my canvas
if I scroll out, is a lot, lot bigger than my main camera, that's my main camera down there and there's my canvas up here. And that's because
of the random modes. So currently it's set to
screen space overlay. And to be honest, I
almost always use screen space cameras because it's a lot easier in my opinion, you can use screen space
overlay if you want, or screen space cameras. They are very similar. The main difference is
the screen says overlay. The UI is overlaid over the camera and
screenplays camera. It's treated as if it's part of the camera in simple terms, but I'm going to use
camera for my purposes. I'm going to drag in my
main camera and we can see now it goes and resize
it all the way down. It's the exact same size now as my main camera, which
is pretty cool. All I did there was I
changed the mood and that I dragged my camera as
the render camera. Now, I would go ahead and leave all the other
settings as they are, as there are quite a
lot of sense here. And changing these isn't
exactly the most constructive uses your time as when you're working in
Unity for first-time, all the defaults are pretty much what you're going to want
to use all the time. The only thing I would consider changing is this UI scale mode. And I would change this
to scale with screen size and then choose a
reference resolution based on what your
current resolution is. Mine is currently
set to free aspect, but if I change it to
something like 69, for instance, I would use a reference
resolution similar to that or preferably that. Then I would want to
match either the width or the height or a
combination of both. I would recommend going
for one or the other. They see what this
will do is if I resize my screen or
resize the resolution, everything is kinda
going to work and match with it or add to the
best of your ability. But we're not going to concern ourselves too much with that now because we're
obviously not going to be building our game yet, I would just keep this
either a const pixel size or constant physical
size if you want, it doesn't really
make a difference for us now, like I said, but when you're actually
building your game and getting ready for
different screen sizes, I would recommend
trying to scale with screen size thing and playing around with these
different values. As I've think that
could be quite helpful in terms
of UI re-scaling. Like I said, however, we're
not going to change that now. However, we actually just start adding in
some UI elements. So right now we have a UI
canvas which basically like the parent thing that everything in the UI needs to be inside. And we have an event
system which needs to be outside underneath you. I will not directly underneath, but needs to be its own
object outside the UI. And it will basically handle
all of our events for. So first thing I'm gonna do is I'm just going to
create a simple image. If I go right-click here, I'm going to go to UI and I'm, I create an image and we
can see that because I already create a canvas,
so just goes down there. If I hadn't created a canvas, it would create a canvas
and an event system for me. But since I had, I'm
going to create an image, I'm going to name this image just like it was already named. And you can see already
right off the bat, it looks very similar
to how a sprite would, and it is actually in
effect the same thing. The main difference
being is that an image is a UI components, so we use it for menus
and things like that. And a sprite is a type of visual representation
for our games. So I use that for characters. So obviously, for my image, I can actually even assign, I need to assign a sprite
as my source image. So you might be thinking, okay, well what's
the difference? But just trust me on this one, there is a very
distinct difference between images and sprites. You don't want to use images
where you need sprites. You wouldn't never want to
use an image to represent a player character
unless you are creating an incredibly
weird abstract game. Because of how images work,
because of their properties, because of the
fact that they are rendered in a different
way in the Unity Editor. And because of the fact that you would never want to
add something like a box collider to a UI
element in the first place. So just trust me on that one. You want to use images in UI and you want to use
sprites in your game. If it seems so right now, just take that as granted. But anyway, I'm dragging
my blog into my sprite. And that really doesn't help
our case in that it looks almost identical
now to a sprite. But that's just basically
the way images are. You can see it's actually quite blurry because I forgot to set that filter mode
when I imported it, just like we covered
in the first episode, but fix that quite quickly. Don't worry about
that if you forgot about that, just
remember with pixelate, you want the filter mode
to be no filter point and the compression to be none
so that it doesn't blur. And then if I go ahead
and hit Set native sides, actually going to
be a lot smaller because of the nato
size of the pixels. If I were to change
this pixels per unit activation like ten, and then the native size
will resize accordingly. So those are the basics
of images in unity. And one of the main
differences actually between images and sprites is that
if I play my game now, we can see the image
is in the top left. And if I were to
move my main camera, the image is actually going
to move with the cameras. This is another
reason why obviously you wouldn't want
to use an image as your game object or your player because you wouldn't want it
to move exactly like that. You can see, like I said, it's overlaid over the game. So obviously it's very
good for UI elements, and that is why
it is UI element. This is one of the features.
If I were to make this, for instance, a play button and say I didn't have a plan
to use, I'm using my blob. But if this was a play violin just for
the sake of this course, pretend as if that
was a play button. If we can build up the game, then you can imagine this
as a big play button that I can play my game. And if I move my camera, sorry, I move my camera and we can
see it moves accordingly, which is really, really cool. But there are quite a few more
interesting UI components that I'm going to
cover in this video. And one of them is actually
gonna be a button. So if I go back to my UI, I'm going to show you the first actually usable UI element, which has a button. Obviously an image is useful
but you can't actually, it doesn't have that
much functionality because it's just an image. But wanted to make a
button, however it does. If I go right-click
here, I can go UI and I create a button. And you can see over here, depending on your
version, the only option I have is button texts mesh Pro, which basically just
means it's a button with more text
options for the text, which is fine for me. I'm gonna go ahead
and click button. Here We itself, you might be greeted with
this pop-up menu. This is text niche Pro
is a packaging UT that allows you to do a whole lot more when you're editing texts. So just click Import. Everything's going to work. Fires can import this
onto your project. It's made by units, don't worry, you don't need to import the
extras if you don't want to. And that's just
going to last and our button, sorry
about that hiccup, but if you ran to it, just hit important and everything
will work perfectly. You don't need to worry
about it for now. That's going to create
a button for us. So we can see immediately if we click on our button,
we have this button, which is the button
component, and underneath it we have the texts, which is a child object. So first thing I'll do is
I'm gonna change this text. If I go to my text T and P, I'm gonna change this to me. Then we can see, if we
go back to my button, I can change the
actual components. The button actually has
an image attached to it, which is what we're seeing
over here, this white square. If I were to drag in a UI blog, we would see the button is now a lot, but I don't
wanna do that. So I'm just gonna change
the color to make it slightly cooler,
make it yellow. And I'm going to
change the color of the text to be white. So I can just go here to the vertex color and
change that to be white. We can see now we have a
slightly more customized button. And that's all good and all. We can obviously also change
the quality of the button. I can change the color
of the button over here and change the tint, which is very similar
to the image, but it's overriding
the whole button. But there are a few things
you didn't notice here. The image components are
all quite self-explanatory. That's why I didn't go
over them too much. It's just the source
image and the color. You don't need to worry
about any of the others. However, the button has quite a few things that
we need to focus on. First of all, the fact that it's interactable basically turns
the button on and off. The transition is
basically what's referred to when I play
the game right now. If I hover over it
and click on it, that's what it mean when
to transition to mind is currently based
on color tint. In other words, the
button is going to tint different colors
based on whether I'm hovering over it or clicking it. But if I wanted to
do something else like an animation, for instance, we wanted to get bigger
when I went over it, I could set that up over here. And then the way this
works is with triggers, like we covered in the
animation episode awhile ago. The triggers, what we use
to change the animation. It was just a type of
parameter over here. You could add it
over here just like a Boolean and you can use it as a condition for your
transitions between them, but I wouldn't worry
about that too much. Now color tint is a very
useful button feature and I actually we usually
use this one overall anyway. So you can just
use that for now. The normal color refers
to the color when the button has been
not in use at all. The highlighted color is the color when the
button is hovered over. All highlighted, pressed
color is the button that the color of the button or the tint when the
button is pressed. And then only the selected
color obviously changed the color tint
when the button is being selected and disabled. We can see over there
actually that's when the button is
disabled or enabled. That's the colors until I
make this something like red. Now disable it, we can
see the button turns red. So that's pretty cool.
Actually, those are all of the different tints
of the button. And those actually
going to be what is used when I hover
over the button. So go here into my game. And we can see we have
our image and our button. If I hover over it, we
can see the color tint. If I click it, wouldn't
see a colored tint. Again. Obviously it doesn't do anything when I
click it, however, and I'm gonna show you how
to fix that in a second. Now the way we're
going to program this button to do things
when it is clicked, is using this onclick event. And if you remember
throughout the course, as we've been working with
scripts, we've had methods. We create a save method and a jump method and all those
different types of methods, and we call them via code. Now this button is very similar except instead of calling
a method via code, this button calls a method
whenever it's pressed. I'm going to show you
exactly how that works. I'm going to create
a new script. First of all, call it button. And then I'm going to
double-click on it. Open it up in Visual Studio. And once it loads, I'm going to go ahead
and delete both of my void update and voice stops. So you use and create a new public void and call it pressed. Then all I'm going to
write here is print. Button was pressed. And we can see now if
I go back into Unity, it's going to compile
my scripts together. And then I'm going to go
over to my main camera and I'm actually going
to add this code onto my main camera
just so I can illustrate how you
do this tutorial. It is sometimes useful to have a menu script which
you add to your UI. That's usually what
I like to do, but main camera works just as well. It doesn't really make a
difference. Then we go back to my button and I'm going to
want to add an on-click event. So I'm gonna click Add. Then it needs an object. So it needs to know
where the script I want to access is located, obviously minds on
the main camera. So I'm gonna drag that in. Now when I click on the
node function and I'm gonna choose from the
different things. Obviously I have a bunch of game object functions and
transform and camera. You don't need to worry
about those too much. Just focus on the
name of your scripts. My script is called
button and we can see my name script over there. We can actually find
my custom method which I've created called
pressed over here. All of the other ones are
default methods in Unity. I wouldn't worry
about them too much. Generally, when
you're making menus, you want to use your own voice anyway because you want to
do your own specific things. But now, if this all works, whenever this button is pressed, it's going to call this click
event from the main camera. And it's gonna say, okay, print that thing that we said. What you said
button was pressed. And I'm actually going to
show you that in real life, if I go ahead and hit play,
we can see if I click it. It says button was pressed and
I click it multiple times. It says button was pressed all those times, which is
pretty, pretty cool. And that's basically how we're going to use buttons and unity. Obviously, if I wanted
to make a main menu, I would have to say, okay, whenever I press the button, start the game and I'd have to write code
for styling the gain. Would I generally
like to do is I like to have different states. So maybe if I want
to start the game, I would want to disable this UI. So all of the UI elements go away and then the game starts. That's one way to do it. Or you go to each image or
button and maybe move them up. The way, generally
what I like to do is actually when I'm
making the main menu, I make these components
move out of the way. So for instance, if
this was my Claiborne, if I can move my other
image of the way. This is my massive
Play button over here. And I made this slightly bigger so that you
can all see it. Then this flavor and
they clicked it. What I could do is I could
make some animation where I slide this out of the way
and then the game begins. So that's an example of how you would start making
your main menu. Which is pretty cool. That's all going to be done
just by this onclick event. Now the last UI component
want to show you just a bit of a more niche one
that's gonna be a slider. So if I put the self-aware,
create one more. So I click over here
to make sure that it's a child object of my canvas because I've
always not going to work. I'm going to go UI. I'm going to choose a slider. And slide is gonna be
very similar to a button. You can see that there's
these arrows forming. Don't worry about them
too much. That's just how Unity handles how the UI components are working in coalition
with one another. But I'm just going to use the
slider as the name slider. And then over here you can
see very similar things to the button and other
colored and thing and all of the different colors
and what they look like. They're disabled closely. We can see there. And then we can see it has a full rectangle or
fill transform rather, which basically refers to where the slider
moves to and from. And we have a handle
rectangles PC refers to where the handle is. We have a direction
left to right. We can also make it right to
left or bottom to top, etc. I would leave most
of these for now. Obviously you're going
to want to change, if you go over here to slowly, you're going want to change
the background because retina macrons pretty
it's just default. Unity, the fill area
at the same thing, you have to choose a
color for the fill. So if I make mine read, you'll actually be able to
see exactly what that looks like when I slide
this slide across. And then the handle
slider, I froze to where the handle slides. And the handle just
refers to what I'm using. So I could actually use
a blob as my handle. And that would be a pretty
cool slide if I then maybe scale him up a little bit,
making the scale 1.2. And I want to start the game. We can see over here, as
I slide my salary across, we can see that
red full we said, and the blob head is
used as the slide. If I make this fill area at the exact same side for
using this eyedropper tool, you can see it
looks even better. And now we have our
customized blobs later. See it looks pretty
cool in my opinion. And those are all the basics
of how UI works in unity. The last thing that we're
going to cover just is the value changed event, which is very similar
to the button event. I'm going to click over here,
add a thing I'm wanting. I'm going to drag
whatever I want, just like in button and
I'm going to actually call the same event. Except instead of calling this, I'm going to change
this void now. So instead of saying Okay, just print the
button was pressed, I'm going to print the
value of the slider. So I need to start by creating a reference, the
slide as public. And this is where you're
actually going to use that using Unity UI thing I mentioned
earlier in the course. Go to the top here and write
using Unity engine UI. And if we didn't write this, if we wrote slide,
I'll show you what happens right now. It
automatically fills. If we were to remove this. We can see now she
has no idea what this is a slide as not exist
in the current context. But with using UI, we can then refer
to a UI components. That's the other thing I
want to cover in this video. And then we'll just
call this one slider. And then when we're depressed, we want to say print. Instead of printing that
the button is pressed, which is going to print
slider dot value. That's going to print the
current value of our slide. I'll show you exactly
how that looks now. Just go back into Unity once
the scripts that have done reloading go to my main camera and I first need to create
a reference to the slider. So I'm just going to
drag that across. And then every single time we are going to
change the value, it's gonna give us an update
on what that value is. You can see that in
the bottom over here, or values it's
currently one, 0.40.7. It's actually updating
every single frame that this value is changed or every single time it's
value has changed. Rather, we can change what the value ranges from
there we see over here, Min value and max value. We want to set the
whole numbers. I can make this a
100 and that's 0. And then you'll be able to
see it slightly more clearly. Hopefully we can see
here 0123456075109900. Yeah, that's a basic overview
of how UI works in unity. Obviously, you just
need to focus on mainly these events because that's how you're
actually going to be programming your games. If you have button over here, you would obviously build all of your logic in this button
or slighted somebody, you'd want to build stuff
in the value changed event. And then over here
the image always doesn't have any code
associated with it that you just use it to make your game look a
little more appealing. You could use images to
maybe display hot as the player's health or
something like that and then disable them when you
pay lose yourself. Being good example of image. But yeah, those are the
basics of unity UI. And I hope that this makes
things a lot more clear. I find that Unity's UI system is pretty good and
thorough overall, and I don't run into any
issues with it usually. So if you can familiarize
yourself with this system, you should be pretty
good to start building your first menu
system, which is great. But everything that
it's a whole lot more sense and I'll see you
in the next video.
15. Analysis Tools: Hey there, and welcome
back to unity. Now we've covered
almost all of you in these basics at this 0.1 of
the main things that's left, however, is how we analyze
how our game performs. So right now we've created
pretty simple scenes and mini games and basically
just scenarios where we can illustrate
the basics of unity. But if you've been using these to apply it
to an actual game, you're going to want to
wait and see and how you can analyze your game
and make sure that it's building for the right platform and using the minimum amount of resources from
whatever system you're burning for that as possible. As if you're using too many, you're going to exclude
a lot of your market or lower NPCs or slow phones, whatever you're building for. The way we're going to
analyze this is using a built-in tool
called the profile. The profile you can actually
find a peer if you go to Window Analysis and then click on Profile that this actually
going to open the profile that hopefully you
should have all of the default things
I have up here. You should have a bunch of graphs that you can
scroll through. And then underneath, you
should have this timeline. Now we're going to ignore
this time like knocks, this timeline is pretty
complicated and requires fairly extensive knowledge about computer hardware and
how these routers work. I don't understand
fully everything on this timeline to
be entirely honest, and there's a lot
of extra detail. It's not the most
useful feature. In my opinion,
especially if you're building quite small games. But these five
things are actually quite useful as they
allow you to be able to analyze how
your games being used and to make sure you're
using the same models of me, just go over here and you
can make sure to check CPU, GPU, memory, and physics 2D. I don't know which ones are set as default or second restored, but it feels a different. Just go ahead and uncheck whichever ones you
want or don't want. I will be using these for because these folks are
going to be best illustrated based on the sample mini game I've created for
showing how this works. And actually also
going to select rendering just so I can show
you what that is as well. But these are going to be basically how
it's going to work. We have CPU, GPU, rendering memory,
and then physics. I'm going to show you how
this is actually going to allow you to
analyze the games on a clear that for
now and we can see everything is currently running at what does that 10
thousand FES, I believe. So. Let's go ahead and move this profile and actually
going to drag it out a little bit so
we can see more of it and want to move it down. I'm also going to move
this up slightly so we can see everything all at once. And that should we actually can make this
a little bit like that. So this is going to
be our scene so far. So I've actually created a
particle emitter which uses a whole bunch of particles
and a whole bunch of colors, just to be incredibly
GPU intensive. And then I've also created a
bunch of blobs which are all using Unity's physics engine to be slightly physics
intensive as well. If I go over here and hit play right now I've
disabled both of these. So you should see some
fairly standard graphs. You can see right
now, everything is running at a comfortable
1 thousand FPS. The CPU is currently, you
can see it's down here, it's running in a thousand
FPS and go down to the GPU. It's also using
absolutely nothing. And then there's
nothing going on rendering because now
it's being rendered. Memories using a little
bit OC and physics is also using practically will, actually nothing
because there's no physical and you can see
there's nothing going on there. Obviously, the key to what every single one of
these things means is on the left here that rendering
is green, v sync is yellow. Others are sort of this olive. And then like for
example, physics is orange and
there's no physics. So you can see it might be
very faint orange in there, but it's practically
not there at all. Global illumination, similarly, an animation, all
of those kind of things. Especially you can
see there's no purple because we don't
have any UI elements. Now and show you
what happens if I turn on this particle emitter. So if I hit and stuff that you can see my
particle emitter, Saltzman, whole bunch particles. And immediately we are
going to drop to 200 FPS. And we can see actually
the main usage was others. But if we go down to this GPU, we can see that suddenly
have all this blue didn't have before
if I turn this off, so that immediately
drops down and they used to be a whole lot of blue. Now there's none at all. So if I turn that back on, we can see that light
blue starts getting, which obviously we
can see over here refers to the deferred pre pass. And we can see that it
has these little spikes, but it's running at around two hundred and
fifty, two hundred FES. As a result of all of
these colors and lights, we can see obviously there's no post-processing because there is no yellow on the
thing but no shadows. We can see that this
deferred pre pass and the other are actually
being used quite a lot. Now if we go down to rendering, we can actually see these lines
at the top signified that my program is actually rendering quite a lot with
this particle effect. You might've been
able to see them go up when we start a
particle effect. But obviously they're
not moving too much now, but this does signify
rendering is going on. Then you can see memories also just got these
little spikes. And physics is once again set to nothing because there's
no physics going on. But you can use this to analyze how intensive
you'll gain is OC. You want us to be running? My computer's fairly fast and especially in
Bhutan and mobile game, I want this to be running
at around 200 years, at least on my computer if I'm going to be good
enough for mobile, obviously don't take
that too specific scale. Take it with a bit of a grain
of salt because it differs for every single computer
and every single device. But it should give you a bit of a landmark as to how
performance your game is. It's pretty cool
if I then actually disable that and see
everything dropped back down bachelor thousand
frames and the GPU no longer is
used nearly as much. And I'm actually
going to then turn on my blobs and they're gonna
start bouncing like so. This doesn't have
too much of a thing. We drop a little bit off
the frame rate maybe to around 800 or 500 even. But if we go down to Physics, we can actually now
see the physics is going to be stopped being used. You can see over
here we have spikes. You see those red
blocks that come up. That's because
contacts happening. We can actually
check it in the key and every single time they land, we have a new contact
that happens. You can see the red box appears. That's actually really
cool because that allows us to track our physics. For instance, if you're
using game where there's not many contexts and even noticing
a lot of these red boxes, you might have something
you need to check on it. This is an example of why the profile is so useful
for analyzing your VMs. Go back here to GPU. Obviously, we're using barely any because we're no longer, we're generally rendering
these five blobs. You can see there's a tiny
faint little blue line up top there and
certainly a CPU. There are few spice
here and there. They don't seem to be too based on where the
blocks are bouncing, not but mostly just importantly, these collisions
is a good example. And then if I turn
on both at once and now we have the blobs
and the particles. We should be able to see
that now we're dropping to there around 200 FPS, I think before it
was around 250. So might be slightly
less performance with these blobs bouncing. And then our GPU usage
is obviously going up. Lots of animals actually
cool is if I change this start lifetime
to something like 50, particles don't go away. In other words,
there's keep going out and that are now on out. We can see we should
get less and less. You can see that's
going up and up and up. And now longer we were at
200 and now we're going, We're actually almost
approaching 60 frames a second. Similarly here we're
going from 60 to 30 because there's so
much going on at once. And we can even see a rendering is now having all sorts of spikes because of how many
things you can see actually you can notice this frame
drops happening right now. And the memories also
going a bit mad. The physics is now, this is actually almost
identical to what it was. It's just more of
those board because everything has now
been zoomed out. But there's actually
a good example. Now, if your graphs like this, your game might be
slightly too intensive on your GPU or CPU and minds definitely too much
on my CPU and GPU. But yeah, we can actually
see that the frame rate has dropped considerably
after I've changed this. And if I were to change the
start lifetime to be 500, eventually my thing would start freezing and we can
actually go out here. We can see just how
much is being rendered. And that's actually
going to stop this pyramid While it's
going to start going up, but turn up the speed
something like 50. Now we should actually
dropped my CPU, write down. We can see now I'm running
pretty close to 30 frames, almost 15 frames a second. And we can see now
that's very nice, but with those blobs
going up and down, the GPU is being
used considerably less because there's
maximum particles, I believe actually
have been reached until we're stopping
rendering things. But the rendering you can
see is still going on. The memory is being
used more and the physics still has those collisions
every now and again. So this is obviously a very
exaggerated example when your game might not be as
clear as to what's going on. But if you simply
look at the key on the left and you can analyze what's going
on on the graph, you should be able to get
a decent idea of what is slowing your game down
or just by the menus. If your GPU is really, really high and
your CPU is really, really low, then I would recommend obviously based
on your computers specs, but I would recommend maybe
using less fancy effects or less political systems or
less complicated sprites, for instance, that
kind of thing. Or if your CPU is really, really high and your GPUs low, maybe there's too much going on, There's too many physics
calculations or there's too many scripts
that are running all at once, anything like that. So hopefully that gives you
a bit of an overview of how the profile work and I'll help you analyze your
game's performance. I hope that you can understand pretty much everything
that we went through with that example because
I felt that it was a pretty good way
of illustrating how the profiler can be
used to analyze your game. And you could obviously
use this in multiple, multiple instances,
especially in test it with a whole
bunch of different games. And especially with
those games that are more demanding
of your resources, it's more important to
know exactly what's happening when you don't really gain that computers can't run. But yeah, hopefully that
makes a whole lot of sense. I'm gonna see you in the next
video where we'll go over the final aspect of unity,
which is gonna be building. Thank you for watching.
16. Building your Game: Hey there and welcome back
to the final aspect of unity will be covering in
this course, building. Now, building is Unity's way of wording that you're
exporting your game. Once you've finished your game, you can want to build
it so that it's able to be played on
multiple devices. Obviously, can't play
the game as Unity file. You need to build it into whatever file format you need so that it can
be played whether it's executable or have an Android or Apple use
anything like that. You're going to want to
basically build your games that you can distribute
it to your player base. And you're gonna
do that by going to File and build settings. So in this video, I'm
going to show you all the different
settings you need to take note of when
you build new game. And then finally, how to build your game so that it's able to be played by whoever you
want to play your game. Top left over here,
you're going to start by going to file, just like we did right the
beginning of the course. You're gonna wanna
select Build Settings. And build sense is going
to take you to this menu. This obviously where
you're able to change the platform,
you boot and fall. For this tutorial
I'm going to be showing you how to
build for a computer. As I leave, that
is the most common platform for Unity development. However, all of the platforms that
you're gonna be willing for oral going to be fairly similar in the way
that you build. There are going to be just
a few distinct differences. Like for instance, over here, I've specified my target
platform being windows, and I have to check my
architecture is 64, 32-bit. For Android, I would have to obviously select the
texture compression. And what I want you to build
an app bundle which is Google plays format,
all that kind of thing. But don't worry, all of that
is pretty self-explanatory. The main thing
you're going to be focusing on all these
players settings. So in terms of tampering
with Build Settings, I wouldn't do so when
you start an annuity, you're probably going to
need just the default ones. There are a few that you might have changed in place settings, and I'm a girl of all of those. But over here, these
normal Build Settings, you're going to want
to leave, as they are. Obviously, makes sure
your architecture is set to the right one if you've written for a Windows
computer or Mac or Linux. But yeah, that's basically
you don't want to do. I've changed any
of the other ones. Now, the last thing that is
very important, however, before we move on
to play sentence or the scenes and you'll build and the order of those scenes. So obviously
throughout our course, we haven't really
been burned the game. So I don't have more
than one scene. But if I had to go over
here and I could go create, Let's say I want to
create a new scene. I go create seen and I'll
call this one tutorial. When I build my
game, I would want my tutorial seen shrub
before my other scenes. If I close this and
open my tutorial scene, which is like a whole
new different scene. Obviously they look
very similar because I haven't changed
anything in either. But then I'm gonna go
here, File Build Settings. I'm going to click Add open CDS. That's going to add my tutorial. Because of the scenes that
build all of the scenes I currently have my
solvent seeing on my main seen before my store, but I can actually
just drag that and put the tutorial
first if I wanted to. This is gonna be the order
that you'll scenes appear. So obviously if you
have one CPU main menu, one CPU level select, and then one scene for your main game and the level loader. Then you're going to
put that in that order, main menu, level select,
and then level loader. That is actually going to be just exactly how you
build your game. And this tells you which
seeing you on first, It's pretty much all the
other settings, like I said, just leave them as
they are and you just want to edit the rest
in player settings. So go down here
to play settings, and these are gonna be
all of the settings of your game, right? The top, you want to set
your company name to whatever company or brand you're using to
develop your games. I could call mine
Unity game dev. For instance. Obviously that's not
the greatest name, but whatever you've named yours, just put it over there.
Then your product name. Obviously, I'm not creating
a product, but if I were, I could make a game, for
instance, flappy car. And then I would change
the name based on that. And then you want to set
your version number. All of this is going
to be reflected in the game Build file. So make sure to set
it to what you want. And this obviously
is not going to change too much based
on what these are. But like I said, if
you go to the file, you can be able to find
the sum of the property, so make sure you set them
to wherever you want. And then you just want to select the default icon on
the default cursor. Changing these will just change whatever icon or whatever
cursor your game uses. Obviously very self-explanatory. Obviously both of these
are just using texture 2D. So if I had more tension
here, I could, for instance, use this font texture
as ID for icons not going to load very well or can use a default particle. And then my icon will
be this particle. And then, I mean, it's not the worst I've
been in the world, so it's not the
greatest accuracy. Also select a curse. I could make this
knob my cursor. And then whenever I played, I'm going to have this
knobby, my curse. You can see at the bottom it
says invalid texture used. Precursor doesn't
necessarily mean that it's not going to work, but it does mean that it's
not going to work fully. So make sure you
read these warnings and see what you have to change. Obviously, Unity has a few specifications for
their cursors. They must be RGBA 32 have alpha transparency must be reasonable and
having no MIB chain. So make sure that
you have all of those things being complied to. Once you have
created your cursor. Then after that, cause a
hotspot refers to where your T replay or sets your cursor in reference
to your mouse pointer. So you can tamper with
that if you want. Obviously, I wouldn't recommend just changing these
two random things. But if you can understand
that you want to have a cursor slide to
the right or whatever. You can obviously change that accordingly and make
it some x value. Then underneath this,
I would go ahead and ignore these two settings since we are not
building for Android. And obviously if you go
over here, you change it. You can see actually
the platform is changing based on what
we're selecting it. So since we're
selecting for Windows, I would leave that as windows. And red here we have our icon. This icon, we can see our icon selected in all
of the different formats. It looks alright, I'd say you obviously also select this
override and then you're able to choose new icons which will override the current
AC when you have. So, you can change them
for different resolutions. And then underneath this
we have resolution and presentation where
you're able to edit all of the
resolution settings. So obviously you can make the
full-screen mode exclusive full-screen maximize
window, window, full-screen window,
anything that you want as your default thing, you can enable whether you want your game to be able to
run in the background. And then you can change
some other settings. Like I said, I
wouldn't recommend tampering with any of these, but all of these are
quite self-explanatory. I would leave them
all as defaults unless you want
to change it from window to full-screen
window to maximize window, et cetera, things like that. Underneath this, however, this is you currently go wrong
with a splash image. It's basically what,
I don't know if you've ever played
a game before, but has it before. But if you click Preview,
you can see over here has a made with
Unity symbols like that. And you can actually change this and add your own splash
screen on top of this. If I go over here and I want to add my own little
back over here, and I can select, for instance, this checkmark to be my logo. I could go over
here. And if I hit preview to see me with purity
and my check-mark on top, it doesn't look too great. But if I wanted them
to go off or another, I just have to find
the right settings. If I go here, I
go all sequential and then I have the Unity thing and then my logo afterward. And that will look
something like this. And then I'll have my logo. Obviously, I'm not going to
use that as my actual logo. But like I said, all
these settings are fairly easy to figure out once
you've just read them. But the splash image is basically that thing
that will show up once you build your game
for the first time and your place again to see it when they open it the first time. Then you can also change
the background color if you want to make it maybe
lighter, for instance. And then see how that looks. If I go ahead and hit preview, we can see over here it's
much lighter and I mean, it doesn't look great,
but like I said, we're just messing around here. And then underneath
here you can have a background image
if you prefer, you could check or uncheck
to blur that image. Like I said, we're not
going to see that now, but if I were had
an image that I can use and you just have
to select that there. And then obviously, all of these other settings are
fairly self-explanatory, most of them explaining
exactly what they do. After this, we have
other settings and these get a little
more complicated. We can see we have
setting specifically regarding rendering
Vulcan settings, Mac, App Store, options, configuration, and
macro figuration. I would recommend leaving
pretty much all of these, especially if you're not
entirely sure what they do. Because if you change them, you can actually mess up
your game pretty easily. And if you don't know
what you've changed, then you'd have to
search them and try and find the thing that
you need to change back. So I'd recommend
just leaving these. I wouldn't mess around
with these too much. But the two things that
I wouldn't know when you're going through
these is first of all, you need to make
sure that you know which API compatibility level you are pulling force
currently we're boon for net sanitary 0.1. You don't need to
necessarily change that, but just that's a good thing to know where to find
your other settings. You go down here
and you can find your API compatibility level. And then if you also
go right to the top, you can also see that we
are in the middle rather, you can see that we have
this bundle identifier. That's another good
thing to note. If you're building for, for
instance, for the App Store, this bundle identifier,
I found that I use a lot of times I'll
have to refer to it. So just keep in mind again, that is where your
bundle identifier is. And you can also change the
build and the category. Like you said, if you're not building for the Mac App Store, that's not too important, but that's another
good thing to note. So just in these other settings, you will API compatibility
level is here, also your scripting backend. That's another good
thing to note with scripting backend your
API compatibility level, and also your build
and maxed or category. Those are four things that I would note in these
other settings, but other than that, I
wouldn't worry about them too much and I also wouldn't mess
around with them too much. Once you've done all of that, you've pretty much
edited Who game however you want and now
you're able to play it. If I go ahead, I'm going
to hit build and run. That's actually
going to make prompt me to choose somewhere. So this is the file
where my thanks to aids. I'm just gonna go ahead and
choose the build my game into the new folder and
call this folder Builds. And I'm actually just going
to build my game in there. This is quite a lengthy process. It will take awhile,
especially first-time, if you build it and you
want to rebuild again, it'll take much but the second time
because of the memory. So don't worry about
that too much. But like I said, there's quite a lengthy process. And obviously we don't have
the most complicated game, so it shouldn't take too long. But nonetheless, in
other words, actually, our game isn't going
to be anything at all. It's just too empty scenes. But it's still good to show exactly how this
boom person works. To just let that run through. And then once that's
finished building, you should be able to see
our game load up just fine. And we have our two splash screens and then
everything works. I'm just gonna press out
there for and we can actually see that was the game for head
build and run again, it's gonna be a lot
faster this time. Go battlefields. And it should, everything
should be perfectly fine. I'll go over here
and click alt tab. I can actually see my
game over there with the right icon and the
name of them, the corner. And that's actually pretty
cool because that is your game in completion and it has been exported correctly, so everything is worked fine. If you run any building errors, then you might have some glitch in your game that you
haven't quite fixed. I would recommend just reading. These are searching on
the Internet and you should find someone
who does have the same area that you did. I have had quite a few warnings here when I'm traveling my game. Obviously it seems like mine are mostly just because
I'm trying to use a invalid texture
for my cursor, which obviously we
expect it to happen. Generally speaking,
you shouldn't have a lot of these
when you're building, but sometimes you do get them and it's not your fault at all. So it just could be a glitch in Unity I've had that
happened to me before, but just keep an eye
on your warnings. Obviously, if you
have errors are not going to let you
build correctly, so make sure that you
fix any of those. And like I said, you
can just search them up if you can't find any solution. But those are all the basics. How are you going to
build your community? You can obviously bypass
all those boots settings by just clicking build and run if you're not
going to change. So it's just for
testing your game. And that is everything
that you need to know about building games in Unity. That actually marks the end of our last basic concept of unity. Hopefully, everything
in your teeth should make a little more sense. Now, obviously, we haven't
gone super in-depth with any specific one things such as physics or animation or sprites. But hopefully the background or the foundation we've
provided with every single constant we've
covered will allow you to build games annuity
with much more ease. Like I said, a lot
of annuity is just familiarizing yourself
with the engine and getting used to things. And you should be able to
figure out a lot more, a lot faster now that
you've watched this course, obviously there is one more
conclusion video after this. I'll see you in
that one hopefully. But I want to thank you
very much for taking this course and I hope
you've learned a lot. I see you in the next video.
17. Conclusion: Hey there, and welcome back to the final video of my course. Thank you very much
for allowing me to provide you with
what I hoped was a helpful guide centered around the basics of the
Unity game engine. Learning how to use a game
engine is not a hard task, but it can feel
intimidating at first. By taking this
course, you've build a foundation for your game development journey
that will allow you to expand your
knowledge of unity and game development in general
at a greatly increased rate. By taking the time to
learn the basics of unity and how they
all work together, you've gained the
knowledge you need to start creating your
very first game. I want to take this
opportunity to once again, thank you for taking this class and seeing it
through to the end. I hope you found it to be both
informative and enjoyable. And I'm certain that the
skills you learn will be incredibly beneficial during your game
development journey. You've gained incredibly
valuable knowledge and skills by taking the time to
learn the basics of unity. If you have any
comments or queries, do not hesitate to post a
comment on this courses page, and I'll get back to
you as soon as I can. In addition, if you
enjoyed this course, please leave a review as your feedback allows others
to gain a more in-depth perspective of what's covered in this course and supports
me a great deal as well. Please also feel free
to send me any feedback you may have directly. Anyway. Thanks again for
enrolling in my course. And I have no doubt that the skills you learn
will prove to be incredibly valuable
during your journey of becoming a game developer. Have a great day
and thanks again.
 Tirion Learning, Software Engineer