Transcripts
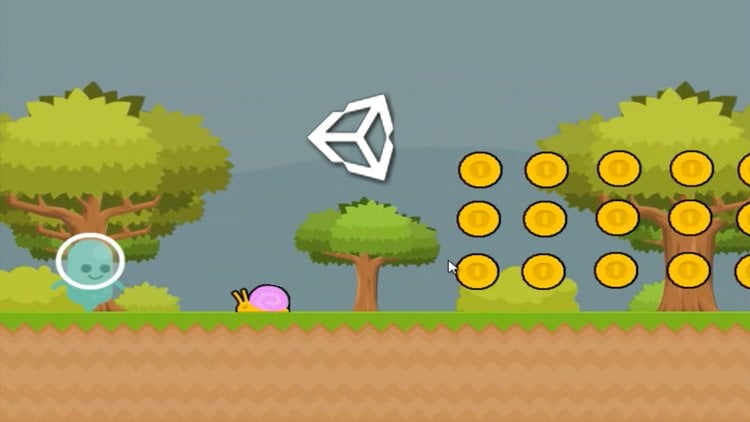
1. Creating the Sticky Ball and Ground: in this video, I'm gonna show you how to create our sticky ball. It's simply made of a bunch of spears that a materials applied to it. The ball has little NA jewels on it, and this allows our spear to move in a regular pattern. We're also going to create the ground, and that's just made of a plane. So let's go ahead. After we create our project, go to game object three D object and will create a sphere right click to rename Chemical. It are sticky ball that actually we want to do is create spears for our na Jewel's. So let's go ahead and do that right click to rename. Now we're going to set the scale in The Inspector for X, Y and Z. So just change your manly 2.5 point 5.5. Now click on a nodule weaken, duplicate it. Pressing control D. We want six of them total, so let's press it five times. Let's click on the bottom nodule and then shift click to the top to have them all selected . We're gonna drag it onto our sticky ball. That way they'll be Children, and they'll move with the ball. Now we're gonna add a component to our sticky ball, A rigid body. This allows it to have gravity. So make sure gravity's text and we're gonna apply interpretation. This sort of smooths out the movement. Make sure that you have not the constraints ticked off. Now we're gonna manually move each of our NA jewels over. You could press the w hockey, inert it, pop up the translation keys, so we're just gonna drag it over. And now, in the inspector, you can see that the position was moving over an ex and it's close to 0.3. We could be very exactly put it as 0.3 right there and do that for each of them. But it doesn't really matter for this project, so we're going to do it all custom, so just drag that over there, select an excellent will. Bring this one towards us one for the back Here. You can look at your inspector if you want to be more precise. Perfect. Now we're gonna go toe assets and we're going to create a new folder. Let's David materials double click on it, right. Click and create a new material. This is gonna be blue. So over the Inspector Nextel Beato We could see that we can set the color so he's gonna pick the blue here. If you want. Apply material to our game objects simply drag it over. It looks like the camera or the light is blocking it. So that's why I can't go on that one nodule. We're going to create a new material. It's gonna be orange, and it's gonna be for a na Jewell's. So let's drag that on. In this case, I'm dragging on to the NA Jewel's sort of in the hierarchy. This works the same way. Looks like we missed one of the bottom and then we just have one back here. Now we're gonna move the camera over, can use the W hockey for translation. We could press the e hot key, and that allows us to rotate. Let's go ahead and create the ground for a ball to roll on so good a game object and will create a plane right click to rename. We'll name it Kraut. Now our city ball is sort of sticking into the ground so oppressed W and move it up, and we're going to create a new material for a ground. These colors could be anything you want
2. Making the Camera Script: in this video, we're going to create a C sharp script for our camera. This is gonna lower camera toe. Look at the ball. Actually, it's gonna look at an offset just about the ball. That way we can have a good view. So let's go ahead and create our script, click on the camera and then click on Get component. And then we're going to type in the name of our camera script. Now we're going to double click on it to open our I. D. So now we're going to set up our camera, look at ball script. So we're just going to create a couple of variables here, a public game object, and this is gonna act as a reference and we're also going to create a Vector three for the offset above the ball in the start function, we're going to set up our vector three. So we're gonna create a new factor three, and we're gonna move the Y position up. So x zero, why is 1.5 and Z is zero Now we're going to set the actual look at transform, so we're going to take the reference of our ball and get the position, then we're gonna add our look at offset, so we look just above and that's it. So we created that ball reference, but we didn't actually put it on there. If it doesn't pop up for you, you may need to fiddle around in the editor because sometimes unity is a bit slow. You could try resetting if you want or pressing, play and stop. In my experience, these are the things that tend to work. So let's go and grab that sticky ball and we'll drag it onto that reference we created. You should also make sure that the references public in your script or it won't show up.
3. Making the Ball Controller: in this video, We're going to write our script for the player controls We're gonna be rotating around the Y axis. Have you ever seen the movie The Exorcist, where the girl rotates airhead 360 degrees around? Well, that's what our rotation is gonna be like. And then depending on where we're rotating, we're gonna apply force in that direction. So we're gonna go ahead and create a few cubes. This will give us a reference point because just looking at the plane doesn't really give us a good perspective. But where we are and who knows, maybe we'll be picking them up in the future. So let's go ahead and click on her sticky ball at a component and Creator script. We're gonna call it Sticky Ball. The first is going to be a degree for our facing angle. We're also going to get input for Accent Z, and we're going to create a vector to Unit Vector. This is going to be for translating our angle into a unit vector. If you don't know what a unit vector is, it's just another way of saying, Hey, we're facing this direction. But with X and my components Let's go ahead and create a reference to our camera. And we're also going to create a float that determines the distance from our sticky ball to the camera. I'm gonna set It is five. You can set it as whatever you want, but it's gonna be growing as we pick up more stuff. So we have a better view now. We're going to get input from the user. The first is going to be for the horizontal axis. That's the A and D keys for the left and right arrows. So we'll go input, Doc, get access and then we're right in the access his name, and we're gonna be multiplying it by time dot Delta time and a multiplier. Now, I said this multiplier equal to negative because the natural get access is actually backwards from what we want. So we're doing the same thing for the vertical input and these multipliers here, like negative 105 100. They're just something that I thought worked well, you can actually fiddle with these numbers if you'd like, but I would make sure that the project is working. How I have it set up first. Now we're gonna actually increase the angle. Using what we got from the user, we're gonna take our angle and we're going to convert it into a unit vector. This is going to be used to apply force to our ball and also to position our camera. Let's go ahead and apply the force to our ball. Depending on which angle we're facing. Think back to the girl from The Exorcist that rotates her head around. So wherever head is facing, if we press Ford, then she's gonna move in that direction. So it's going to get the rigid body and we're gonna add a force. It's gonna be a new Vector three, and we're just going to use the angle. But we're gonna write in a weird way that's basically using a unit vector notation. Make sure that you copy this exactly because the why here you might think, Hey, that should be a Z. But we're actually converting from the vector to to a vector three. So we have to do that. So now we're gonna set the camera position behind the ball based on its rotation. So we're gonna grab that camera reference on this position, and we're gonna make a new Vector three. We're gonna do the same thing with these unit vectors, but this time we're gonna be multiplying by the distance to the camera. - Now we have to do a couple things, really click on our sticky bowl, and we're going to set the reference that we made for the camera. So go ahead and grab the mean camera and just drag it onto there. Let's go and change the drag. 2.8 and the angular dragged 2.8 and press play.
4. Making Objects Stick to the Ball: So in this video things were going to get exciting because we're going to be able to roll onto objects and pick them up. So I want you to click on a cube and then add it. Take just click that little plus there. I'm going to create a new one called Sticky. Now go back to the Cube and it's not actually set. So let's set. It is sticky. Let's actually shift. Click. So we select all of the cubes and we're gonna take them all. Now in order to pick him up we wanna have is trigger selected on our box collider. So let's go ahead and create the script for picking up our objects. It's going to be in on trigger enter. So on our box flatter. We said it is triggered. If we didn't, we wouldn't actually be interacting. We're going to see if the thing that would collide with has the tag sticky. If we collided with the thing, we're actually gonna grow. So let's increase our local scale. You can actually set these values to anything you want, but it may be a little bit ridiculous if you said it too large. Now we haven't actually made this variable yet. So we have toe declare it up here called size, and it's just going to keep track of the size that are. Ball is. We're also gonna increase the distance to the camera so that as our ball increases in size , we have a better view. You can also fiddle with these numbers if you want. Now we're going to make the thing that we Clyde with a child of our sticky ball. This will make it so that it stays with the ball. We also need to disable the thing that we collided with. If we didn't do that, we would actually have the things that we have attached to us be able to pick up objects as well. And we kind of grow too quickly if we did that, so make sure that you disable it that way. The objects you pick up will only stick to your sphere. So these cubes, all our take sticky and they all have is trigger selected. We're going to create a cylinder and let's take it sticky and press play the moment of truth. Nice, but we can't pick up the cylinder. So what did we do wrong? Oh, man, we forgot is trigger. And actually, the is trigger is what is going to create our core game dynamic in the future because we're gonna enable his trigger and disable this trigger based upon our size and thats going, allow us to bump into certain things and pick up other things.
5. Importing Custom Sticky Assets: So let's go and look for some assets on the asset store. Let's search for low poli assets because they're a little bit better on performance. Now we're just gonna click on Price and dragged the maximum range down to zero. So it's free and we'll select this low poli free pack. I actually already have it downloaded so I could just import it. Now if we look in her assets will find a folder that we just imported. So double quick on it and we'll see that we have all of these different objects here. Let's drag in this tree now. This tree is actually a bit different than our old cube here because it's actually is a child of another object. That's kind of useless. So we could actually take that child and drag it out of there and then delete that parent. Now we're gonna send the tag a sticky, and we want to make sure that we select convex and we want to make it a trigger so we can pick it up. Awesome. It works. Now. Let's use a different example. Go in search for low police stylized cars, and this is a free asset as well. Now we're gonna open it in our Assets folder and click on pre fats. Let's drag in this ambulance here. Now take a look at the game object. We can see that it's a little bit different. Um, it's actually missing a mesh collider, so we need to actually manually add that and let's click Convex and is triggered and set the tag a sticky. Now it still has that weird parenting thing happening, so let's fix that. So let's go and download a different asset simple, low Pali Village buildings. So we'll open it up in our assets, and then it looks like this one is under models. So let's drag in this house and, well, this is a problem with really small. So let's resize it. We could also manually do it in the inspector, so let's just make it into a kind of skyscraper type thing. It also has an animator, which we don't really need, and it's missing a mesh collider again. So let's add that. Make sure it's convex and it is a trigger, and let's had a sticky. Now, when we ruled this up, it kind of looks really stupid because our ball is so small, but in the future will have different tiers of things that we can pick up and we'll have a very large ball and it's gonna be really cool.
6. Setting up Object Categories: So in this video, we're going to create the different size categories for objects in the last video showing you how you need on trigger in order to pick up the item. Well, we're actually going to use that to our advantage. We're gonna make it so that all of the objects start so that they're not a trigger. And then in our code, we're gonna enable categories as our size increases to be beyond it, we're just going to set up the references to our different categories. Now you can name these whatever you want. We're gonna have three total. Be sure that rename them accordingly. Now we're going to create the function for unlocking the different categories. We need to call our function, and we're going to do that and fixed update. If you don't call it, we're not gonna be using it. We're gonna check if Category one is unlocked and it's actually equal false. So we're going to check, see if size is greater than or equal to one. Then we're going to set the category to be unlocked. These sizes for the different categories can be anything you want, and you could have as many categories as you want. If you want it up 10 categories with different objects. You could do that. You could grow from peanuts to skyscrapers. It's totally up to your imagination. That said, I would stick to the code that I'm doing right now before you start getting two out of hand , so gonna create a four loop here and that's going to search through all of the Children in that category. We're going to get that specific child in the for loop and we're gonna grab its collider, and we're gonna make it. So that is trigger equals True. Now we did collider and not Box Collider or anything like that, because collider works for a wide range of things. I just copied and pasted all these different categories, and I'm changing to make sure that they're set accordingly. So I'm sending all the ones equals three here, make sure you don't miss any, and let's make these in the outset statements. Now all the categories are actually set for size greater than or equal to one. So let's go ahead and make it so that they have different sizes. The second category is gonna be unlocked when our size is greater than or equal the 1.5 and the third when were greater than or equal to two. These numbers can be whatever you like, So we're going to go ahead and actually create the categories in our code. We just set references to them. So we're gonna go to game object and created empty game object, and then we're gonna rename it for our first category. Now, these names could be anything you like. Just make sure that in your Hioki you have them all in order so that when we drag the references over, it's not confusing for you. We're gonna go ahead and drag these cubes into category one, and disable is triggered. Make sure that you disable is trigger on all the objects in your game. Because if you don't, we're gonna be able to pick up anything. So we're gonna need the second category category 1.5, and now this might not be the best naming convention. Maybe you want to call it category two, and I was going to scale up these cubes in Category two here and let's go ahead and create 1/3 category and will make these cubes even bigger, and his trigger is not selected. That's perfect. Let's take our ambulance and we'll drag it into Category three and make sure that it's trigger is not selected. I know I'm beating a dead horse, but it's important. Let's take the tree and dragon into Category two and let's delete the other objects that we're not going to use now. We actually create our categories, and we set up the references, but we need to drag the actual objects onto those references. So let's do that now. We can pick up all the objects in Category one, but we can't pick up the objects in Category two. If we had a ton of objects of Category one, then our size would grow large enough to be greater than or equal to 1.5. Then we would unlock it from our code, and we'd be able to pick up those objects in Category two. The same goes for Category three or however many categories that you decide to create
7. Creating your own Custom Level: So go ahead and import the assets you want to use in your level into each of the three categories. I arranged it so that the big objects Aaron Category three, the Medium Objects Aaron, Category two and the smaller objects Aaron, Category one. You can implement really cool game mechanics by putting certain things in certain categories, like in Category two. We have the fences, so when we're really small, we just bump into them and they concern of actors boundaries. But once we grow large enough, we can pick them up. The same thing goes for ramps. We can use ramps in Category two, and we can roll off of them when we're in category one, and then as we grow, we can pick them up, and that's something that's really cool. So let's go ahead and create a cube, and we're gonna make it ramp out of it, so be sure to take it sticky, and we're gonna dragon into Category two. You could also apply immaterial to it, too. So this is just a speed built to give you an idea of how to make your own level. This was done really quickly, and maybe a bit sloppily, but I hope it gives you some ideas. You can get incredibly creative with this. Use the different objects as a way to implement different game mechanics. Like these ramps we're gonna ramp over these fences ever is gonna place a bunch of these little objects around. We want to make sure that we have enough in category one so that we can actually grow to the other categories. - So I can duplicate these objects pressing controlled the and they're going to stay in the same category that they were originally in. If you didn't initially put them in those categories than things could get messy because you'd have to manually actually put the minute there afterwards and they could be all shuffled up. So be sure to put the assets you want to use in the categories before duplicating them. You could create levels that are just massive if you want. I really want to see what you guys make. So be sure to like post screenshots or links to screenshots and videos
8. Displaying Ball Mass UI: Now we're gonna set up a little text display in the top left corner, so go to game object. You I and credit canvas when you have it selected press set and it'll zoom out. Now we're going to create another game. Object. You. I text and let's just set the name temporarily. We can also pick a color, and I recommend you also make it bold. Let's increase the wit to 400 on the height to 200 and then we'll just drag it and make sure that it's in the corner. You can also press two D If you want a better perspective. Let's increase the font size. It could be anything you like. Let's go into our sticky ball code and will create a reference to Are you I We'll call it size You I now we're gonna important library going using unity engine, don't you? I also make sure that you import using system in our own trigger. Enter. We're gonna change the text so sized at you. I don't get component tax dot text and we're going to say that it has a mass and we're gonna round it off to, let's say, two decimal places. And then we're going to cast it to a string so that it could be displayed. Now click on your sticky bowl, and we're just gonna drag that tax reference right on top there.
9. Importing Music and a Pickup Sound Effect: in this video, we're going to bring in our own music for a game as well as create sound effects and be FX are I went to Purple Dash planet dot com to find royalty free music. Go ahead and download the song that you like, drag your downloaded song into your assets holder, and now we're gonna drag it into our scene. When you have the some selected, make sure that it plays on Wake and it loops. Now you should have music in your game. Head over to be FX are dot net, and you can either down the standalone client or, if you have flash enabled, you can do it right in your browser. Once you've created a sound you like, just export the wave and drag it into your unity project. Now we're going to set up our audio clip to play. So let's create it on audio clip, whole pick up sound and in our own trigger enter when we Clyde with an object, we're gonna grab that audio source, and we're gonna play one shot of that audio clip. Now be sure to drag that pick up sound onto the actual reference that we just created. If you press play and you pick something up, it should work
10. A Heart Warming Conclusion Video: I'm in a little bit of a rush, so I'm gonna have my friend do this conclusion Video for me. How low? They're my friends. I'm Deckard. Cade. I'm from Tristram. Have you guys seen Diablo? Anyways? David told me that you made this awesome sticky ballgame. That's great. We'd like to see Screenshots, so be sure to post them for us to see if you have any questions and can't get your game working properly. Just ask. We're here to help. Well, I have to go now. I lost my Harajuku Cube. Goodbye, my friends. Now, where did I put my pants?
 Make Games, Make games!