Transcripts
1. Class Trailer: Hey there, and
welcome to my class on creating an
intermediate platform, a game using the
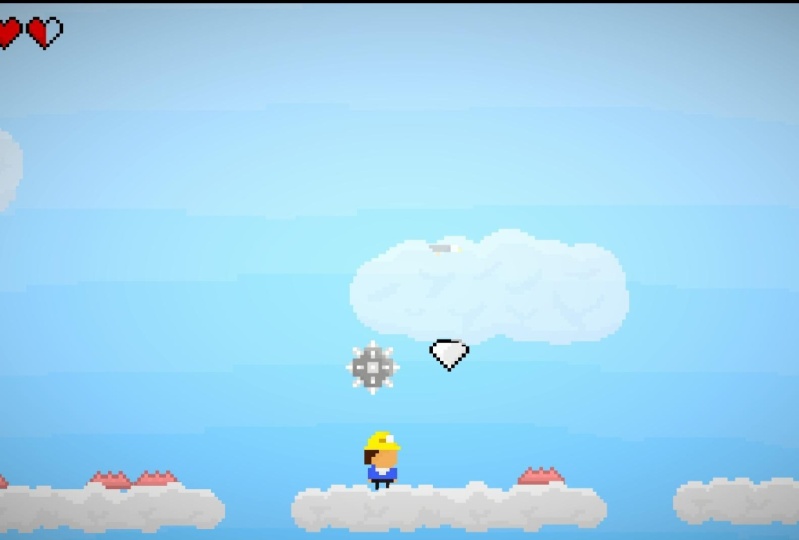
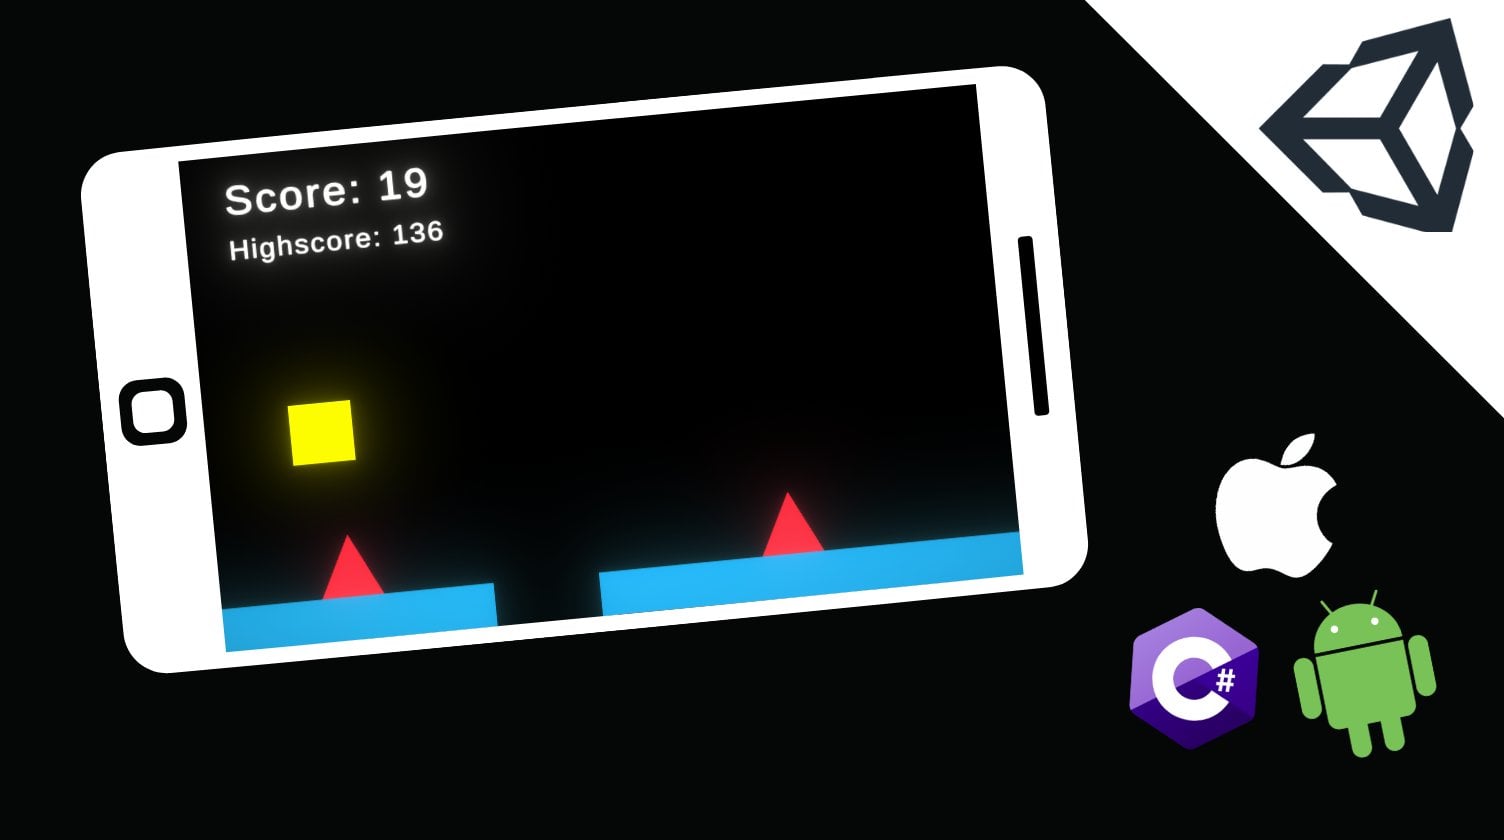
Unity Game engine. In this class, we'll build from scratch the game you're
seeing right now. And in doing so, learn all the fundamentals of game
design and development, including everything you'll
need to know to make a game exactly like
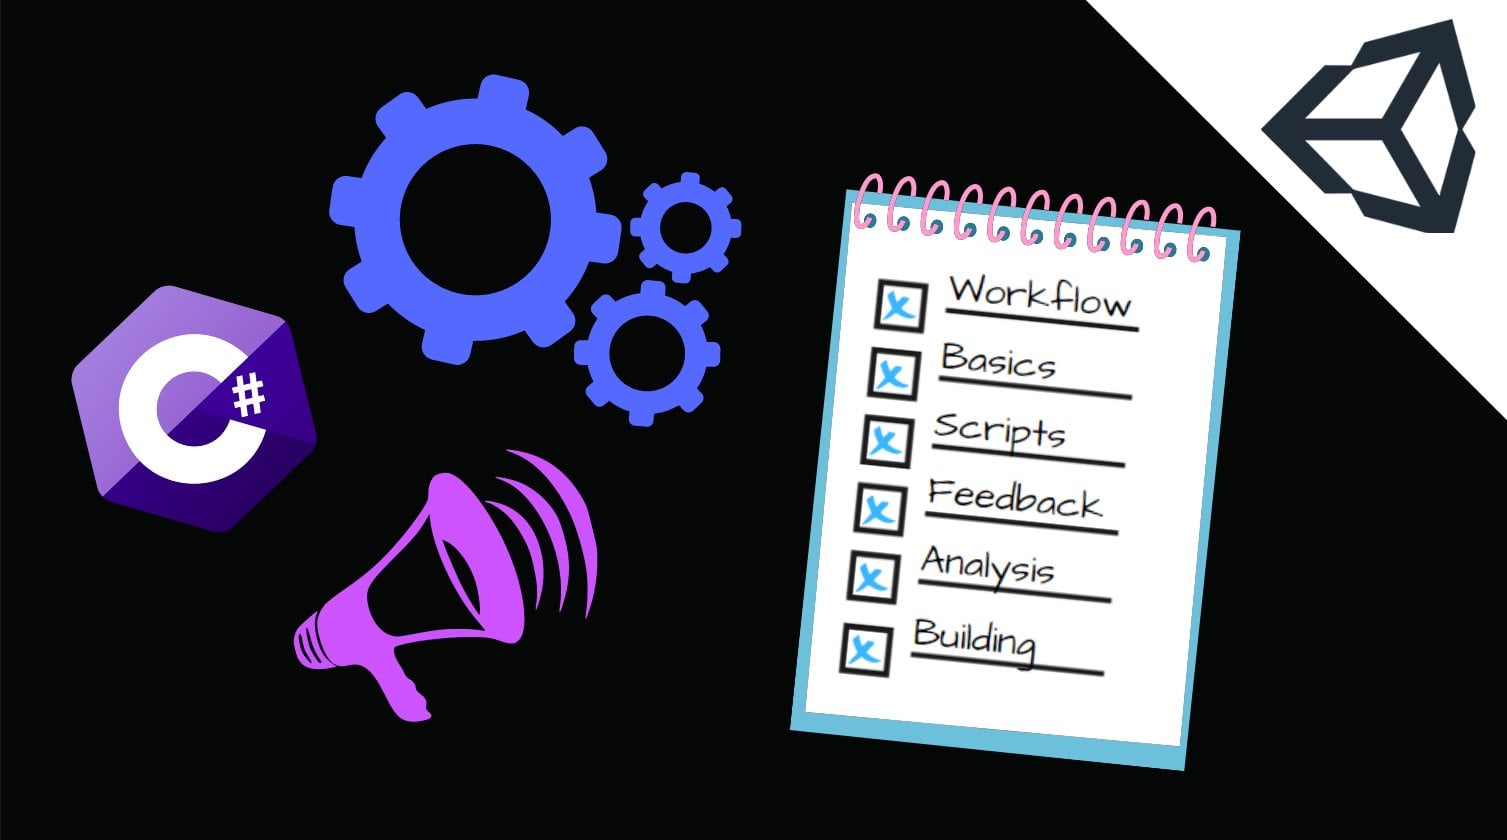
this on your own. This class will be split
up into 18 videos, each covering a
different topic of game design and a new stage
in our games development. From getting started with
writing code all the way to particle systems
and audio management. By taking this short
six hour class, you can in less than a day, learn everything you
need to know to start developing your very
own games and Unity. For more information about
this class and its format, check out the other
class trailer below. And I'll see you in the
first lesson. Cheers.
2. Lesson 1 - Setting up our scene: Hey there, and welcome to the
first video of this course on building an intermediate
platform, a game using Unity. Now, before I begin, I just want to say a huge thank you to you for your support
in enrolling in this course or class. It's support like
this that allows me to continue to make courses. And I really do appreciate
that you chose mine. Now if you've watched
the road map, you'll have basically
seen an overview of what this course is going to entail and all of
the different videos and sections we're
going to be having. You'll also have seen the
game that we're going to be making by the time
this course is done. Hopefully, this game looks
pretty cool and you're excited to be able to
make a game like that. If it looks complicated, don't worry, it isn't actually
that complicated at all. And you'll be quite surprised at how capable you are to
make a game like that. Not that much time at all. Now that being said, obviously
making a game does take a little bit of
time and we can't make it all in one video. All we're going to be
doing in this lesson is we're going to be introducing
the Unity editor. And we're going to be
creating our scene to set up where we can
start making our game. Now if you've never
used Unity before, I do suggest you watch
this entire video. If you've used
Unity a little bit and you actually understand
the layout of the editor, you can skip ahead
to a timestamp or put on the screen right
now where you can skip to, because when we start actually using Unity to make our scene. But if you haven't
used Unity before, I do recommend just watching the next few minutes
while I explain exactly what
everything is and how the editor works. So
let's get started. Before we begin, I'm
using Unity version 2023, 0.1 0.5 and I have the
default layout on. I recommend you change to
the same layout as me, so you can follow along the way. You do that is you
go right up to the top here you click Window, then you go down to Layouts and just choose the default one. It should reload your scene
and make it look like this. I don't like this little
AI navigation window. I'm just going to drag that down there and it's going to go away. And then we basically have the entire Unity editor
at our disposal. I'm going to start
over here at the top left, This is our scene. And you can see we start with
a scene named Sample Scene. This is a default scene
that Unity made for us. And if we click
this little arrow, we can see all that's in the
scene right now is a camera. Now this camera is
basically what's going to be recording our game, and this is basically going
to be the eyes of our player. This camera is actually what's called an object, I'll
get into that later. But basically you can think of a scene as kind of like a level in a game and think of object
as the things in the level. A player, a bullet, a coin. These are going to be objects and then a level
would be a scene. Right now, we only
have one level and our only object is
the actual camera. But you'll see as we make our game and we develop
further and further, we're going to
populate our scene and add more and more things in basically this hierarchy window over here is where
you're going to create objects or things in your game, you want
to make a character. If you want to pretty much change anything
about your scene, you're going to be
doing it over here in terms of adding or
removing objects. Then over here, this big
window in the middle is actually where
you're going to be editing the layout
of your scene, or where things are, how big they are, all of
those kind of things. That's where you're
going to be doing it. Here, it's kind of like
this is your palette and this is your canvas if you want to use an art analogy. But as we use the Unity
editor more and more, this is just going to become
second nature to you. How to use these two things, especially as well
as the inspector, which I'll get to in a minute. Then before I move
on to the inspector, the last thing I want to
mention is this game window. And this is basically
just a testing space. It's just blue right now because we don't have
anything in our scene. But if I were to put something inside our scene over here, let's say I put a
little block inside and I went to the game window,
I'd be able to see it. And I'll show you
that later when we start actually setting up our first level,
or rather our scene. Moving on, we have
the inspector window, and this is basically
where you're going to view information about
a specific object. So you can see if we don't
have any object selected, it's blank because we don't have anything we're
highlighting. But if we click on an
object like our camera, we can see all of the
information about our object. And I'll explain this as we
add our things to our scene. But basically this transform
component over here, every single object has, and it's basically how you orientate your object
inside this scene. It's got a position,
it's got a rotation, it's got a scale
which is a size. And you can change
all of these values. Obviously, we're going
to be using two D games, so we don't really
need the z axis for most of these things. But it does come in handy for rotation because z axis
rotation is actually this way. You can see if we
change it like that, we can actually rotate it. But regardless, this
transform is where we edit the position and
our rotation and the scale of our objects. Underneath this,
we've got a camera. And you might be confused
because you're like, okay, well this is a
camera. What's this? This is actually a script
that's made by Unity. To program all of this for us, what Unity effectively
does is it simplifies the game
development process by having a whole bunch of
code pre written for us in the form of these things which are
called components. So this might sound
like a lot to take in, but trust me, it'll
become second nature as you use
it more and more. Basically, this main camera is an object which has a position and a rotation in the scale. And then they've added this
pre written Unity script which is called Camera, as well as this audio
listener script, which you don't need
to worry about, but it's basically
part of the camera. And these two scripts make
this act how it does. And you can add other scripts which are called components. Or you can add your own scripts which are just called scripts. And basically this
is going to be how you program your game in Unity. We'll make a player object. Then let's say we want to add a sprite which is like
image or a photo, basically how we're going
to represent our player. We're going to add a sprite
renderer component and that's going to allow us to
add some art to our game. We'll add a box
collider component, which is basically how we're going to be adding physics in. Basically the whole of
Unity works by making these objects and adding in
either pre written scripts, which are components,
or our own scripts. Right, right now
we've got the camera, it comes pre loaded with
two pre written scripts. But we can obviously add
other scripts if we wanted. And when we make
our own objects, I'll show you which scripts
we're going to add. If this seems all
confusing like a bit much right now,
don't worry about it. It will become very, very simple as we
use Unity more, but basically that is the gist of how the object
inspector works. Moving down over
here to the bottom, this is just the project window. It's basically just a
representation of the folder where your program is stored or rather
your game is stored. You can see I've got one
folder here called Scenes, which is in my Assets folder. But I've got assets
and packages, and these are actually
stored on my computer. This is just Unity's
way of showing you, instead of using File Explorer, it's in Unity itself. So it's the exact same thing. This is how we're
going to import basically files into our
games or make new files. It's all saved in here, and then that actually
goes on your computer. This is kind of just
showing you where it is. And then lastly, the
very last thing that we have right here
is a console window. Now, this is not amazingly important at the moment because we haven't
started coding. But it is very useful
because this is where we're going to be able to
print out things. If you've coded before, you'll be familiar with Hello World as the first program you write in a new
programming language. Which basically prints out
to the screen Hello World. If you were to write
this in Unity, you would have it
printed out over here. This is where you'll
get error messages, you'll get warnings
about your game. You'll get messages if
you want to log things. Like if you want
to, for instance, create a game where
you have players fighting each other
and you don't want to program health yet. You just want to see
if the code that says, okay, this player hit the
other one actually works. You would maybe print it out to this console and you
would say player was hit. And that's basically how
you're going to use this. It's very good for
debugging or for basically outputting evidence of your
code working in your games. That's a pretty brief summary of how the Unity editor works. If this seemed a bit
confusing, like I said, don't worry about
it because you will pick this up as second nature
as we use it more and more. But hopefully it
gave you just a bit of a better idea of
how everything works. Now the last thing we're
going to do in this video, since we've basically just introduced the engine and
talked about the course, is we're going to
actually get started just making a very simple
scene so that we can get started with
our player next episode to make a scene. Let's go over here to
our hierarchy right now. This little star over here, I think it's worth mentioning. This means that our
scene is not saved. If I click control S, you
can see it goes away. If you see that
little star there, maybe just go ahead
and save your program. Either control S or file save. Just so you make sure you don't lose any of your progress. Now we want to make a scene for our player to be able to
live in when we make it. And we haven't
made our play yet. So we need to make, first
of all, like a mini map. First, I'm going to make
an incredibly simple one. I'm going to right
click over here because I want to
make a new object. And I'm going to select
two D object sprites and I'm going to
choose a square. What that's actually going
to make for me right now is just a little square. All a square is a Unity object. It's got a transform, so
it's got a position and its rotation and its scale,
just like we mentioned. And it's got a Sprite renderer, which basically
allows it to have the square sprite that
is showing on my screen. If I click it, I can
actually move it around. This is what I'm going to use as a platform for my
player to exist on. So I'm going to make a
couple. I'm going to make one platform up here. I'm
going to make one down there. And going to make
one more up here. When I program my player, I can add in jumping and
see that it all works. Now there's a couple
of things we need to do to set up this map properly. First of all, we can't have a platform which
is just a square, because that's pretty
hard to bounce on. Let's start by clicking and dragging it to make it bigger. You can do this in
this mode here. This is basically
like your Tools menu. If you select different tools, they allow you to do different
things with the objects. For instance, this one
is moving it around. This one is rotating it. This one is obviously going
to be scaling it up and down. This one over here is
like a combination. It's like you'll see in
image editing software, but you can also
actually do all of that from this transform
window over here. Which is what I'm going to
do because it's a little more exact and I can basically control
exactly how much I want this thing
to rotate or scale. So I'm going to first set
my z rotation to zero. This over here basically
chooses whether we want our scale to be
constrained for x and Y. So if I click it, then as
I increase x and y and z, they all go up or down,
basically scales in proportion. But I don't want that. I'm going to make
sure it's got a line through it and then I'm
going to scale y down. So it's not a super long
platform. Super tall, sorry. I'm going to scale x
a little bit there, I'd say that's a
good platform and I'm just going to move
it down to over there. Now, before I make
the other platforms, I actually need to finish
making this one first. Right now all this is is
an object with a sprite. So it's not actually
anything yet. It's just basically
like a photograph. If I now want to
add in a player, there's nothing that says
when I land on this, I should stop moving or I
should do anything at all. It's actually just like a photo. I'm going to add a new component which is a new script
written by Unity. And I'm going to call it bid tut or rather
I'm going to search, box Alida, Tout. That's
what it's called. And when I click on
that, you'll see it adds a new little script
to my object. Now my square object
over here has a sprite renderer
and a box collider. And if you actually zoom
in with the scroll, you can see a faint green
outline outside this thing. If you select it, obviously you can't
see it if you don't, but maybe you can see
it a little better if I enable this motor here. I don't know if you can
see it on my screen, but hopefully on
yours you can see a faint green outline on the
outside of your platform, and that is the box collider. What a box collider
basically does is it tells Unity that this thing
is an object in space. If I have something
that's falling and it hits the box collider, Unity will say, okay,
stop falling because this is an actual object,
it's a thing, right? Unity is going to
automatically, in my case, put my box collider perfectly
around my platform. But if I wanted to change it, I could click this
thing over here, which says Edit Collider. And then you can see I can now basically have control there. You can see the
green box. I have control over how big I
want my colliders pie. If I wanted it to be like that, then if a player was falling, it would stop over there rather than falling
all the way down. I don't actually want that,
so I'm just going to click control Z and I'm going to have it right back
to where it was. But this is how you
edit your box collider. Now before we continue,
one other thing I should mention is that this and every single other kind of
label that you see over here are sort of like
attributes of the script. You can think of
them like variables, but what they really
are is attributes of the script which basically allow you to change how it works. This script is obviously
a very general script, this one as well. You can't have a box
glider that says, okay, make a box glider of
this exact dimensions because we want to be
able to customize it. Unity is actually built
all of that in for us. Generally speaking,
when we add these, I'm going to be telling
you what to change. So don't go around
filling with them because they do change it
quite drastically. Unless obviously you know what you're doing or you want to make something slightly
different than I'm making, then by all means. But right now for
instance, our box glider has all the default settings
are actually perfect for us. This one for example,
this is trigger. If I were to select
this, it means that this box glider will not
actually influence physics. It's going to instead send a signal and say,
okay, I was hit. We could use that for something like a bullet or like an enemy. Where we want maybe
the player to be able to pass through them. But we do want to
be able to know when we've hit them
for this platform. However, we definitely don't
want that because we want to be able to have the player
stop when they land on it. Let's leave all of that for now. As well as the sprite render, these are all actually good
as the default settings. And then what I'm
going to do, because I don't feel like doing
all of this again, is I'm just going to say control C and control V and I'm going to copy our square
platform and move it down. I said I was going
to have one up here and let me maybe make
it slightly more short and then I'm going to do it one more
time and I'm going to move it over here
to maybe down a bit. I'm going to make this one
shorter as well and move it over there there. We have now made three
objects over here. We've called them
square square one and square two, which
aren't very good names. We'll rename them in a minute, but basically these are going to be the start of our game. These are the three
objects we've made which we're going to add
a player in next lesson. And we're going to be able
to jump on these objects to show that our movement
and everything works. But I'm getting ahead of myself. Basically, this is the
start of our game. We have three platforms, and they all have box colliders to show that they are
objects in space. Last, I'm going to do is
I'm going to name them. I'll name this floor one. I'll name this one floor two. I'll name this one floor three. The very last thing I'm
actually going to do is I'm going to organize
our scene a little bit. First, I'm going to save because I can see
that icons there. Then I'm going to say, okay, I don't actually
want all of these to be on the same level
as main camera. I want to make like a folder, you know how in Windows or
in File Explorer or Mac, whatever, you'd store
your files in folders. You wouldn't just have all your files out
in the same place. The same thing
here. I don't want these three objects to be on the same level as my cameras. I'm going to right
click and I'm going to say create, empty, empty. Technically it's
an empty object. It obviously has a
transform because every object has to
have a position. But you can use
it like a folder, like it's basically just like an empty folder which you
use to store other folders. That's how you can think of it. I'm going to name
this one storage. I'm going to put my three
floors inside storage by holding down shift and selecting them and
then dragging them in. You can see now they
are stored inside it. Now I have a slightly
cleaner scene and it makes it look
a little bit better. If I want to see
where are my flaws, I just click this
little arrow and I can see all three
of them are there. Hopefully, that was a
pretty good introduction to this course and how it's
going to be structured. I hope that you
were able to follow along and just make
three level platforms. They don't have to
be exactly the same, but obviously just
have three platforms. And we're going to get started
in the next video with adding in our player
character. Thanks.
3. Lesson 2 - Creating our character: Hey there, and welcome to the
second video of my course. Now in the last
video, we introduced the Unity editor and basically explained what all of these
different windows do. Once we've finished
with that, we set up this basic scene for us to
start building our game on. Now all we have right now in our scene is this
main camera and the storage object which has our three pieces
of flaw inside it. But this isn't much of a
game right now, in fact, if which we didn't do last time. But I'm going to show
you now, there's not a hell of a lot
exciting that happens. We just have three objects which are actually
just three sprites, so they're like three
photos with colliders. So they are objects in space, but they're not much else. If we want to make
a slightly more interesting game than
this, which we do, we're going to have to
add in another object and actually a whole
bunch more objects. But the first other
object we're going to add in is going
to be our player. Because if you don't
have a player, you don't really have a game. We're obviously going to
want to add in our player. And then we can start adding in our other objects
and our enemies, and everything else. That
makes a game a game. But let's not get ahead
of ourselves too much. Basically, what we need
to do in this video is we're going to add
in our player object. We're going to add
our player object in the exact same way that we
created these floor objects. We're going to right
click over here. We're going to go create two, the object and we're
actually going to create a square sprite. Now you can see over here,
if I create my sprite, I have this white block
which is our player. For now, this is obviously
a placeholder because we're going to add in sprites
and art to our game later. But for now it will
have to do so. I'm going to go
ahead and click on that twice and name it Player. He can also do that by
clicking click Rename. Right now I have
my player object, but there's nothing
that actually differentiates him from
these three objects. In fact, they're pretty
much exactly the same. They're just squares that
have been scaled differently. The first thing I'm
going to do is I'm going to change the size of my player. I'm going to make it
0.65 instead of one, and that's going to make
him a little bit smaller. You'll see later on when we
add in sprites to our game, we'll actually be able to see exactly how big to
make everything, because I'm going to
be using pixel art. You don't have to use pixel art. But obviously if you
want to make the exact same game that I am, you will obviously be
using the same sprites. I'll obviously link them linked inside every single video
where we do use them, so you can use the
same ones that I am. But basically for now I'm
getting ahead of myself. All we have is a square and so we can choose
whatever size we want. Now below this, we actually have a sprite render
component as well. And you can see just like
these three floor objects do, that is the only thing
that's added to this object. It's basically like
an empty object with a sprite with something to
show the object is there? The first thing I'm going
to do is I'm going to change this color
over here to yellow. Just so I can see that it's different from the
rest of my scene. We can actually see
that. We can now see our floor is white
and our player is yellow. Just to give the player a
little bit of differentiation, if I click play right now, not a hell of a lot is going to be different from when
we played before. In fact, it's going
to look pretty much the same. Nothing's
going to move. And this player is not able to interact with the
environment at all, which is one of the things
we need for our game. So we're going to
start by adding the exact same component
we did to these to let it know that this
is also an object in space and also needs
to be collided with. Let's add another
box collider two D. Like I said last time, you can pretty much leave all of these exactly how they are. Obviously, if you want
to change it, you can. But I'm not going
to be doing that. So I'm going to click
Control Z and move it back to how it was right. Now we have a box collider. Now you might expect that if
we click Play and we move our player down to where
the other blocks are, I'm not going to be
able to move past it, but this is not
actually the case and it's for two main reasons. One of them, which is
like the sub reason, is because Unity's
physics engine isn't really built for
detecting collisions, like detecting
movement like this, because this is not something the player would
ever be able to do. I'm actually editing my scene
right now and I'm saying, okay, Unity editor now
detect a collision. And even though Unity is actually detecting
that collision, it can't really do
anything about it. Because I haven't
actually followed Unity's physics laws to put my thing there so it doesn't
really know what to do. That's kind of the sub reason. But the main reason
why unity isn't actually able to show
that we are blocking this or show that that collision is happening is because we haven't added what is called
a rigid body to this player. And a rigid body is
basically like a built in physics
component that kind of generalizes
every single aspect of classical physics that
you need for an object. So it makes it able
to accelerate, makes it able to fall
according to gravity, it makes it able to move. Right now, Unity doesn't really have any way of
moving this object, even via code or whatever. You could do it maybe by
moving the transform, But there's no reliable
way for Unity to actually implement physics and motion
and forces to this object. To add that, we need to just
add one more component, which I mentioned is
the rigid body two D. This is kind of like
a general component, like I said, which basically
adds physics to this object. That's quite a basic
way of putting it, but it is what it does. I'm going to go
ahead and actually change this angular
drag to zero. And I'm going to click
over here on constraints, and I'm going to freeze
the rotation of Z. Now that might seem
like I've done a lot of things and I've
just introduced it, but I'm going to
explain it more. And you'll become
more familiar with these objects and
exactly what they do, or rather these components,
as we move on in the course. So don't worry too much about every single one of
these little things, but basically what this object
does is it adds physics. Now the way it works is
not of massive importance, especially for this course, because it's built into Unity. This is basically a
very complicated script that Unity has written for us. And these are all of the
variables which we can change. So we can change
the gravity scale, we can change the drag, I set that to zero just because it's not of an
immense importance, but you don't have to
change that to zero. You can kind of keep it, it's not really going
to make a difference. And then the only
other thing I changed was the rotation of the Z axis. And what that's
going to do is if I hadn't changed that and I
put my object over there, when I click the game,
it's going to fall down. And then it's actually
going to rotate this way, just like it would in real life. Which is not something
I want for my game. And I really don't recommend you use it for platform of games because unless you're using squares, it doesn't
look very good. I'm going to be using pixel art, so it's not going to
look good at all. But once you've added this
rigid body component and froze the rotation on the Z axis and set the angular drag to
zero if you want to. That's pretty much all
the set up we need to do. And now we're going
to have a object in our game which can actually
obey the laws of physics. If we click Play, we can see
that our object will fall down and stop the minute we land on another collider, which is exactly what we want. And we can actually go back
and move this back up. And we can see that it works exactly like we'd expect it to. Obviously, we're not
going to be able to throw our object or
anything like that. And that's kind of
for the sub reason I mentioned earlier in that this isn't actually technically Unity's physics
engine at player. This is me editing my game and then being
like, okay, Unity Takeover. And so Unity doesn't
have information how fast I flung it or whether
I've done anything like that. I've just dropped my player down to the bottom of the map. So I'm just going to
move him back up. Let's move him ten minute
like that. Missed it again. See what's actually
happening now is the player is moving so fast that it can no
longer detect collisions. Which actually brings me to
another important point. If you think you're
going to be having a platform with incredibly
fast collisions, you're going to want to
change that to continuous. And I'll basically be able to
illustrate what that does. Now if I do the exact same
thing I did beforehand, and I have the player fall
down and then pick up speed, obviously as it accelerates fast and fast
towards the ground. I'm going to wait a while, I'm going to change this to five. No, to set that to zero. You can see I was actually
able to stop at this time. So that was not
entirely intentional. But that's actually a
good teaching moment for how unity's
rigid body works. So it's really up to you whether you want to
have this setting on. It is slightly more
intensive to have continuous checking
on, I do believe. But it is actually generally something I do like
to add to my games. So in summary, we've basically just added in our Player object, we've got a sprite
render right here. We've added a collider to tell Unity it's an object in space. We've got our rigid
body over here as well, which we've changed
the angular drag on. We've set the
collision detection to continuous because of
that thing that we accidentally discovered and
we froze the Z rotation. And these are actually all
the set up things that we're going to need to do to
start making our player. Right now we've basically
got a platform, a game, but you can't actually play
it, you can just fall. So what we're going
to get started on in the next episode is basically adding in our movement script to make our player able to jump and fall and move left and right and everything
else that we'll need. So we're going to get started with coding in the next episode, but right now, you
should have your scene set up pretty much
exactly like mine is.
4. Lesson 3 - Adding player movement: Hey there, and welcome
back to Unity. Now this is the third
lesson of our course. So far, what we've added is
a player object which can fall and collide with three floor objects we
created before that. But we don't really
have a game yet. What we actually have is an incredibly simple
physics demonstration. Falls and stops there. But this is not the
most interesting thing. And to make it more interesting, what we're going to add is a script which is
basically going to allow the player to move and
basically play our game. Because without a script we
don't really have a game because we don't
really have any way of influencing the outcome, which is the whole point. So to get started, we're first going to go onto this
Assets folder over here. And depending on whether
you've been ported files already, if you've
been following along, you'll should look
pretty much exactly like mine with just one
scenes folder. And inside the scene we have our scene over here which
is called Sample Scene. Now I'm going to go back to the Assets folder and I'm
actually going to write click and go Create new
folder and call it scripts. And this is where
I'm going to put every single piece of code
I write for this project. You don't have to follow
it exactly like me. This is just how I like to order my scripts and my
folder for my game, so I'm going to go
double click on that. And now I'm going
to get started with making my very first
C Sharp script. Now if you've never
coded in C Sharp before, then obviously
you're going to want to watch this entire video. If you've coded C sharp and
you don't need as much help, then you can go ahead and write
your own movement script. But I'm going to be
writing a rather simple one just to
introduce the idea. And then we might change
it as we go along. I'm going to write Click
and I'm going to go Create C sharp script and I'm going to call
it player movement. The minute I've done that,
we can actually click on the script and view
it in a preview mode. Over here we can see right now we've got a class
which was made for us and we've got two voids
which are like methods. I'll explain all of this.
You don't really need to worry too much about
the coding terminology, but basically just follow along. And you should become a lot more familiar with C sharp as
we code more and more. But I will be explaining
everything, so don't worry. Let's go ahead and double
click that to open it up. I'm going to be using
Visual Studio as my IDE. What an IDE is, is you can think of it
like a code editor, like you'd use Word or
Google Docs to edit essays. This is what you
used to edit code. You can use whatever
one you want, but I do recommend
Visual Studio. I'm using quite an old version, but pretty much any of them are really good,
especially for Unity. Immediately, open it up, it might seem a little confusing, like what are all
these words and what are the different
colors mean? Like I said, don't worry too much about
everything so far. I'm going to explain all
the important things at the top we've got. Using. Without going too much into the terminology of
actually what this means, think of it like we're telling unity which parts of
unity we want to use. So if we wanted to use something
which was based in UI, we'd have to add a new line over here that says
using Unity Engine. Basically, this is telling us, okay, this is the parts
of Unity that I need. These default ones are actually
going to be pretty much fine for most of our scripts
we're going to write. And if we need to
add a different one, I will obviously
tell you as I write the script because you'll
be writing along with me, so don't worry about
that too much. Underneath here is
our public class. Again, don't worry too much about what a
class exactly is. But you can kind of
think about this like a container for all of our code. All of this is coding terminology, which if
you really want to, you can go and research on
the Internet and kind of understand exactly what the definitions for all of it are. But I'm not going
to be saying too much time on that in this course because it's really
not that important to Unity development. What we're actually
going to be focused on is more how to develop games. And you don't really
need to be able to define these
different concepts, You not just need to know
how to be able to code. Obviously, the more you code, the more you will discover and the more you'll
learn about them. But for now, don't worry too much about them because
it can be quite intimidating to have
to learn all of that kind of thing off
by heart right now. And it's really not
that important for us. That being said, there are a few things that need to go over. First of all, this is a comment. And a comment is basically like piece of code that
isn't actually code at all. It's like a line to tell
somebody who's reading the code, what is what they're denoted by these two forward slashes before, if you put it like that, you can write
whatever you want and the IDE or the editor
will know that. This is not code that
needs to be run. It doesn't actually
have to decipher. What does this statement mean? It's just a comment. This is comments that are
written by Unity. For us to explain what these
two different voids are, it says that start
is called before the first frame, update and update is called once per frame. Now these two voids,
the last thing I want to mention are like methods. You can think about
methods like sections of our code that we can
call at certain times. Right now we've
loaded in our code. This is our massive program.
This is a section of our code which we're going to call before the
first frame update. This is a section of
our code which we're going to call every
single frame. And this is obviously
all done by Unity for us when we
create our own methods. Later on we're going to have
to choose when to call them. But these are the two
methods which we're going to basically build our
entire code from. Obviously, the start
method is going to run the minute this code
is executed by Unity, before the first frame plays, we can write some
stuff in here and say, okay, this, do this, do
this, and Unity will do it. And this code over here is going to be run
every single frame, every single frame. This
is going to be called. If I say print a number, every single frame, it's
going to print that number. And if I say print
a number here, it's going to print it once
before the game starts, and then it's not
going to do anymore. That should be a pretty quick and maybe a little bit
confusing over you, but hopefully the basic
concepts do make sense. And like I said,
don't worry too much about the specifics
as you follow along, you will understand
it more and more. And if it seems a little
intimidating at first, don't worry, it'll
get easier later on. But in terms of getting
started with actual coding, let's first start by
going over here to the top and creating what
is called a variable. Now a variable is like a
storage space in code, so we're going to
create a variable, let's call it movement speed. And then that is a
storage space where every time I want to access how fast the player must move, I'm going to look in
that variable and see, okay, what is stored here. You have different
types of variables. I'm just going to cover
a few ones briefly and now we'll get started
into actual coding. But basically there are
integers which are numbers. There are strings which
are like words or text. There are also characters
which are single letters. And then you have booleans
which are true or false. Lastly, you have floats which are basically
like decimals, so don't worry about
too much those either. At the moment, like
I said, all of this is going to
come more naturally. But I just wanted
to give you kind of a basic overview of all of the basics of
coding you're going to need for this lesson. To get started, we're going
to create our first variable, and we're going to
call it a public, which basically means that
it can be accessed by anything in this
entire script float. And we're going to
call it player speed. Then we're going to add
a semicolon at the end. This public player
speed we're going to use to determine how
fast our player must go. We're going to create a new one. Public float, another
public float, we're going to call
it jump height. Now basically what we've told the IDE or told Unity rather, is we want a public so it can be accessed by
anything in the script. Don't worry about these too
much either at the moment, but just copy along
as I do it float, which means it's
a decimal number and this is what it's called. The reason we're actually
using public is so that we can access it in
the Unity editors. If I go ahead and drag this
script onto an object, I'll be able to see this
in the Unity editor, which is why I'm using public. But just follow along for now and do exactly as I'm doing. And it should all make
sense because like I said, even if it seems a
little intimidating at first, it'll
get a lot easier. Now, before I move on, there's a few more things I need
to add at the top here. First four is going
to be a reference to the components which
we've added to our object. We added a rigid body which
basically says, okay, obey the laws of physics, but we need to
basically be able to access that rigid
body in our codes. I'm going to create
public rigid body two D and call it RB. This is basically
going to say, okay, now I have a reference to that rigid body so
I can effect it. The way we're going to
create movement is we're going to be changing the
velocity of my body. So I'm going to say when
I click this key down, make it move this fast
in this direction. To do that we obviously
need a reference to the physics
component of my object, which is this rigid body. Once I've done that, I've pretty much got
everything that I need to start coding my
very basic movement script. I'm going to add one more
thing underneath it, a public bullion, which
means a true or false. It's called a bull in C sharp, and we're going to
call it is grounded. This is basically going to tell us are we on
the ground or not? Now, the minute you've made these four variables and this reference to this
component over here, we've got everything we need
to start coding our game. The first thing I'm
going to do is I'm going to create a new void. And this void is going to
be called fixed update. Now this is actually
another void that's created automatically
for us by Unity. It's just like update,
it's just fixed. Update isn't based on the
speed of your computer. Update is called every
single frame, right? Obviously, if you
have a fast computer, that's going to be
called a lot faster. If you have a slow
computer fixed update is instead called at a very,
very short interval. So, pretty much as much as
update is on most computers, obviously, you have a
super fast computer, might be a little slower. If you have a super
slow computer, it might be a little faster. But it is a good
method to put physics, logic and other things
like that in your game. Because you don't want someone
who has a faster computer to be able to do
more in your game than someone who has
a slow computer. For instance, you wouldn't
want them to fall faster. We're going to be using a
general form of update. It's still pretty much
called every frame, you can think of it
like the same thing, but it's just good
convention to do that. Now we're going to start
coding the actual movement for our game inside this fixed
update, follow along as I do. The first thing I'm going
to do is I'm going to create a new variable and
I'm going to call it x. And I can actually just do
that by typing float x. The difference
between the variable up here in the variable up here is this variable is accessed
by everything in the script. All of these places
where we call code can talk about
these variables. But inside one of these, if I create a variable that can only be accessed
inside this. If I go into update and
I try to talk about x, it's not going to know
what I'm talking about, but inside fixed update it will. And that's fine for our purposes because we actually
only need this float x to be inside fixed update
going to go equals input, get axis raw, open parentheses, double quote, and then
type the word horizontal. What this is basically going to do is it's another
feature of Unity. It's basically going to
allow us to simplify our movement by quite a bit
because instead of saying, okay, if the player is
holding this key, do this. If they're holding
this key, do this. What we're saying here
is creative variable called x. It's type float. And what this variable is
going to be used for is storing whether the player is
holding down certain keys. What this line over
here, input get axis horizontal does,
is it says to unity. If the minute run this code, the player is holding down either the right arrow
key or the D key for SD, then put a value of one in x. If they're holding down the
A key or the left arrow, put a value of negative one in. And if they're not holding
down any of those keys, then put in a value of zero. So you can see basically
what this is going to do is every single frame
it's going to say, okay, are they
holding down forward? If so, make this one. Are they holding
down back? If so, make this minus one. Are
they not touching anything? Okay? Make this
zero. And you can imagine how this is going
to be useful for our game, because this is basically
going to allow us every single frame check whether the player wants us
to move or whether we should keep moving or whether
we should move backwards, et cetera, et cetera, et cetera. This is the first line
of code for our script. And underneath this
we're going to write another line of code
which is going to say R B reference to our
ridge body velocity. So we're going to edit
basically how fast we're moving equals vector two. Now this is not
massively important, it's basically a vector, two is a vector of two components. I'm saying, okay, I
want my velocity, obviously velocity,
I'm going to have an x velocity and y velocity. And I want this to be, I'm going to assign things
to this using vector. If I assigned 1.1 it says, okay, make the x one
and make the y one. If I set it 2.1 it says make
the x two and the y one. This is basically, like I said,
it's not super important. Think of it like
a storage space. If you know what
a vector is, then I'm sure it makes
a lot of sense. But if you haven't
encountered a vector or you haven't done
a lot of physics, then just think of it like a storage space for two
numbers or two values rather. Right now I'm
saying, okay, I want my RB velocity is
this new vector two, And I'm going to have to put in an x and a y because I obviously have x velocity horizontal
and a y velocity vertical. I'm going to make
my x velocity equal to x and I'm going to separate them by a comma and
I'm going to make my y velocity RB velocity Y. That's basically
like saying, okay, take the velocity of
my rigid body and make the x velocity x and make the
y velocity the y velocity, the y velocity isn't changed. If I made this RB
do velocity dot x, this line would do
absolutely nothing. Because it's basic saying,
okay, take the velocity of the rigid body and make it what the velocity of
the rigid body is, which obviously doesn't
have any effect. And that's what I
want for the y axis, because I don't want the
player to be mid air falling. And then I click the
right arrow and I just suddenly start moving
in a straight line. And that's what would happen
if I set this to zero, for instance, or
some other number. I don't want this to change, but I do want this to change
because I want to be able to influence where the player
is moving left and right. This is actually pretty much the two lines of code we need to build the most rudimentary
movement possible. If I go back into Unity and I go to my play
object over here. Once it's finished
reloading my script, I go over here to my play
object and I drag this in here. Let's move it down
to the bottom. And let's drag it over there. We can see I have my incredibly simple
script and I'm going to drag this rigid body over here so my script knows where
the rigid body is. Then I'm talking about,
because I'm talking about it, but I haven't
actually linked it. This is how we're going
to link it in Unity. It's one of the easiest ways, and I don't actually
have to change these variables
because I haven't used them in my script at all. But you'll see if I go
ahead and click play. Right now I fall like normal. But if I click
the, all the keys, all the arrow keys as well, I can move along just like I would be able to in
any other platform. Again, obviously this is not a very good movement
script because I can't jump, I
can't do anything. In fact, I can't
even make it across this thing without
falling into the abyss. If I try, I'm just
going to fall. So it's not a very
good movement script because I'm not moving
fast enough, I can't jump. But this is the basis
for my movement script. I've said, okay, depending on whether I'm
holding certain keys, set this value and then assign that value to the
velocity of my rigid body. So make sure I'm moving in the direction that that
value should make me move. But obviously we want to make it a little
more interesting. So let's start by multiplying
this by player speed. And this where we're going to
start using our variables. Now this is going to
allow us to determine how fast the player moves based on this players
speed variable. And I'm actually going to
delete this start board because I'm not actually
going to need it right now. I might add it in
later depending on how I edit the script. But for now, it's actually all fine to have it like it is now. Now actually there's a few
changes I want to make. This is kind of just
to illustrate how we're going to be building
our moved script. I was trying to
explain how different variables work and how it works, but we want to make
this slightly better. So the first thing
we're going to do is going to go to the top, and we're going to create
a new public float. Call it x, so we're
actually going to be not referring to a variable
just inside this method. We want it to be a
variable that can be accessed anywhere
inside the script. And then we're going to go
ahead and actually move this fixed update code
to the update block. And what that's going
to do is basically, instead of basing this value
on a certain interval, we're going to want to update
this every single frame. Which is a much
better way to code. You can kind of think
as a general rule, you have to follow any
code that is based on input or what the players doing should go under update. Any code that's based
on physics or moving things based on that
should go in fixed update. Because this is basically going
to allow us to say, okay, if you have a faster
computer, sure, you should be able
to react faster. But then you're going
to be able to move the same speed as someone with a slower computer
because that's fair, greatly over exaggerating
how much this has an effect. Because I promise you could code your entire thing and
update a fixed update. You probably wouldn't be able to tell a massive difference, but it's just really
good coding convention to do what I'm doing over here. That being said, we've got
a few more things to add to our script just to make it a slightly better movement script. We've already multiplied by
player speed, obviously. But the last thing we're
going to add is a jump, so we can actually start moving. And I'm going to create
a new public void, which is like I want a new
block of code that I can call. At a certain time,
I'm going to call it jump inside this public void. I'm going to copy
this code over here. Copy it, and put it back there. And I'm going to say
now when I jump, I want my RV velocity, so the velocity of my player to be another new vector two. Rb velocity x. This time we're not changing
the x velocity at all. We want the x velocity to
stay the same when we jump. Because obviously
we don't want to jump forward or jump backward, we just want to jump up whatever the x velocity is, set
it to what it was. And we also obviously
don't want it to be that it has to be zero. Because then if you're
moving along, you try jump, you're just going
to jump in place, stay whatever speed
you are moving. But we want to jump up, so we're going to set the
y velocity to this value. Jump height, which we can
obviously change as well. Now what this is going to do is every time we call this void, we're going to change our velocity and
we're going to say, okay, move along as
you were with x, but jump up as far as
this value allows you to. With the y velocity, what
we're actually saying is change your velocity
to some value. And so that's going to
cause you to shoot up, and then obviously
as gravity comes, you're going to fall
back to the ground. But that's what the script does. Now this actually
brings us almost to the end of our script.
It's incredibly simple. There's three lines
of code so far, and we've actually
got everything we need to be able to move
and jump in Unity. If I go back here, I'm going to actually change
these values right now. Let's make jump height
something like ten. Let's make play a speed of five. You can see actually, if I
move along and I go like this, I should be able
to move and jump. But there's one thing missing. We're never actually
calling this block of code. So there's no way of me
telling myself, okay, I want to call this
code for that, we're going to need to use
another input command. Let's go down here. Let's say if which, saying as long as this condition is true, do the code below it, input dot get key down, open parentheses, keycode space or whatever
you want it to be. I'm actually going to
use keycode because I prefer to have jumping
SD rather than space, but you can use whatever
you want. Feel game. Then we're going to put
a curly bracket here and visual Studio or
whatever you're going to use is going to
automatically fill that in. You basically want one C bracket there and one co bracket there. And this is going to
tell us what code is inside this if statement,
as long as this is true, as long as you're
pressing the key, or as long as you just press
the WK. Then run this code. And all I'm going to
want to do is I'm going to call that jump void. So hopefully this all makes
quite a lot of sense. I'm moving quite quickly and there are a lot
of concepts here, especially if you've
never coded before, which might seem a
little intimidating. But basically all
we've got right now is we've got
this storage space, we've got our
variables which are storing things like settings. Then we're setting this value based on what the
player is moving. And we're saying if
they're pressing the Wkey, then call this code over here. And this code is saying,
okay, move in this direction. And this code over here, every single frame
is saying move in this direction according to what the player is currently
doing with their keyboard. So like I said, it might not seem super intuitive
at the moment, but hopefully it does make a little bit of sense
what we're trying to do. And if I go back into my game, I will be able to jump if RestWK But there's one more
change I want to make. And I only want to
be able to jump as long as I'm grounded. So let's go ahead back here
and we're going to add a double ampersand
and say is grounded. And that's going to
say only as long as we're grounded can we
actually run this code. Because I don't want to be able to jump in the
middle of there. I only want to be able
to jump from the ground. And we're going to add in
one more condition which is going to allow us to determine whether
we're grounded here. We're going to say void
on collision enter two D, if collision, this
is basically saying, once we collide those colliders that we added
earlier in the box, colliders are going to
call this void over here. As long as you
collide, they're okay. We've collided call this void. This collision is storing
what we collided into. We're going to say
if collision do game object dot compare tag going to open princes and
we're going to type ground. Then we're going to say
is grounded equals true. We're going to do a
very similar piece of code for exiting a collision. Copy this code exactly except
set grounded to force. Now this might seem like a lot, it might seem a little confusing especially compared to
the rest of the script, but it's actually very easy. This void over here,
just like update and start are called by Unity,
is called by Unity. Every time we collide
with something, the physics engine
takes care of that, then we're colliding with
this thing and we're storing it in this
variable collision. And underneath that what
we're saying is, okay, if collision the
thing we collided with or rather the
collider we collided with. If the object that that's
attached to has a tag ground, then I want to make
sure that I've set this variable over here
is grounded to true, and that's going to
allow me to jump. Otherwise, if we
exit a collision, if we exit from a collider, if the collider we exited
from is called ground, I want to do the same thing
except set it to force. The last thing we need
to do before we actually go test this is go
back into our game, go into our storage, select
our three floor things, and we want to add in
this grounded tag. Click add tag, over here, click the plus and
type in ground. No, I'm going to go back
to my floors and I'm going to make sure they're all
set to the ground tag. These tags are basically a
way if you've been able to identify certain objects
or groups of objects. All of these objects are part of the floor and I want them
all to be ground tag. And this allows me
to write this code over here that tells me when
I've hit the floor or not. That's actually
everything we're going to need to make our games movement. If we go back to
player, we see over here we obviously edited
these last time in play mode. So let's change these in
normal mode, it saves, I got to make this six, I'll make the jump height five. I'm obviously not going to
want to change either of those because those are
taken care of in my code. We click on Player and click, let's watch what happens. First things first,
we fall down, just like we have, and
we land on the ground. If I scroll down, I can
see my is grounded, is true, which is
exactly what I want. And if I click the WK, it goes from false to
true. And I can jump. If I click the WK mid
air, it doesn't work. So my jumping is
actually working great. And if I move left and right, we can see it's a little fast. I want to make this movement
four, go back in my game. And this should actually
be everything we need for a basic movement,
scripting fall. And I jump and I can obviously move around
just like I need to. Now, this might look
a little goofy, and obviously we're going
to tweak it as we go along. But this is kind of the
basic for our game. What I'm actually going to want, based on the platform I want, I want to make it a
slightly faster speed, a slightly higher jump. And I'm actually
going to want to change this gravity
scale to two. And I might need to change
these a little higher. I might need to make
this eight over here. We can see what that looks like. Looks a little bit better. I know it looks a little
jerky with this movement, but it's quite a retro kind
of style and easy to move, but in case you actually
don't want this, and I'm actually not sure
I'm going to keep this in. I just added it originally
because it was quite simple. There's actually
a very simple fix to make this
different right now. You can see it's
quite a jerky thing. If you don't want that, then
you're going to go ahead into our code and we're just going to remove this word raw. That's basically
going to tell Unity, Okay, don't round it up to 10. Make it a more gradual thing depending on how long they've been
holding the key. If we move that, we can
see that in action over here a little more smooth
based on how you want to move. I actually forgot to
change these back, so let's go ahead
and make this a 6.8 and change
glarity scale two. If we can play again, we can see that we've now got slightly smoother movement and it makes it look a lot better. Now the reason I did
it rule first was because I thought it was an easier way to
illustrate the concept. But it is generally
better to use this axis which softens the thing because it looks just
a little more natural. I might change this
back. We can tweak it, obviously, as we go
throughout a game. Hopefully you've been following along and you've
been able to create this very simple movement
script and we can jump along. Now that is the
end of the video. But there is one last
thing I want to add, just while we've added movement, and it's an incredibly
simple change, all we want to do is we're
going to go out here and we want to create a new
physics material. We're going to find out
here two physics material, two D, we're going
to call it player. And we're going to set
the friction to zero. This is basically
going to allow us to not get stuck to the walls. I don't know if you
saw the last time, we're going to add it
to our box collider. Now if we jump ahead against the wall, we're
not going to stick to it. Because what happened
before was if we land against the wall
and we stick to it, we actually stuck
there, but now we roll right back through. That
is actually the end. I know this is
quite a long video and there was quite a
lot that was going on, but it was the
very first script. So obviously it's quite a
lot of new concepts at once. So hopefully you've followed
along and hopefully you've been able to create this movement script
just like I have. It's incredibly
simple, like I said. And I'm changed the
access to this now, but I might tweak
it as I go along my game because I'm not
sure how much I like it, but I'll see basically that is the game for now and that is everything that
we need to have. So if you've been
following along, you've got your movement
just like it is mine. Great. And I'll see
in the next video where we're going
to start adding more and more concepts to make our game a more
impressive platform. But if you've got just where I have for now, that's great.
5. Lesson 4 - Introducing prefabs: Hey there, and welcome
back to Unity. Now in the last episode, we did quite a few things. We added our player, we
added our movement script. Well, we made our player
so we can actually jump around and added
our first line of code, all our entire script. And then we also actually made this player material
right at the end. I hope that you were able
to follow it all and get to the stage that
I am in my game. Now if not, and yours is
looking a little different, I just recommend
maybe going back and rewatching it maybe
once or twice, just so you can follow
along and make sure that you've got everything
as I do right now. Obviously, like I
said, my script is going to be attached
to every single video. And pretty much every single
file that I make alongside this course is going to be attached in the
respective videos. So you can go ahead
and download it. If yours isn't working,
maybe see where your code is different than mine or what you're
doing differently. And obviously using
my files should make it work completely fine. So just go ahead and don't get too intimidated by
the pace of things. And you could rewatch things
and use the files and should be able to
follow along and have everything
working in no time. So don't get discouraged. Game development is hard, but if you've got everything to the point that I
do now, great job. Because we've
actually done quite a long, the last episode. If you write caught up to
where I am, then that's great. Now, before we get started
with this episode, which is going to be
all about prefabs, we're first going
to start by just reordering this assets
folder a little bit. So let's go ahead
and right click. Let's create a new folder. And I'm going to call
this miscellaneous because there's always
like random files in the project that you
don't really need to have their own
dedicated folder for, like this physics material. We're not going to be making
a hell of a lot of these. I'm just going to put
that in my Misk folder. And anything else that I
come along in my game, I'm going to put in
that Misk folder if it doesn't fit in any of
the other folders. Now that being said, we
are going to need to create a new folder
down here as well, and we're going to
call it prefabs. We're going to get
into exactly what a prefab is and how we get
to make them in a minute. But for now, just make the
folder because you're going to want to have a storage
space for your prefabs. Now, what exactly is a prefab? We've mentioned
that these things we have up here are objects. Now, they're the building blocks of our game
that we're going to assign logic to in
the form of components. And that's going to allow us to build our game up from scratch. But we can only create these objects while we're developing in Unity
at the moment. Like if I wanted to
create a new enemy, I'd have to go over
here and create a new object like this
to the object sprite, maybe get a triangle, change the color, add logic from there. But in game
development, generally, you want to be able to
create objects at run time. Which means while
the game is running, while the player is
actually playing, you want to be able to
create and destroy objects. And to do that, we're
going to use prefabs. Now, if this is a little
confusing at first why we need to do this, let
me give you an example. Say we've got a player and he needs to be able
to shoot things. When you shoot something, you actually want to create
a bullet object. You want to create
a new object that shoots from your gun and travels across the screen and does certain things when
it hits an enemy. Now the only way, or the easiest way rather to do this is actually using prefabs. Because basically it's
going to allow you to create an object at run time, your bullet, have it exist for its duration,
and then destroy it. When you don't need
it anymore, say when it hits an enemy or a wall, you can destroy that object. So it only exists for a limited
amount of the playtime. And I'm going to explain
exactly how they work, how you can create
these prefabs, and how they can be
used to bring objects into your games in a minute. But right now, all you
kind of need to know is that prefabs are used
to make objects. So how exactly do we use
prefabs to make objects? Well, we start it just like
we would anything else. We go over here to the
hierarchy and we right click Create to the object. And I'm going to make,
the first prefab I'm going to make is a spike. So the enemy has something
they can fall into and die to the object
sprite triangle. Just to make the game's
first kind of enemy, I'm going to call this spike. Go ahead and size it
down just a little bit. Let's say 0.8 on the x and y, and I'm going to
change its color to red so we know it's an enemy. So now we have our first enemy. Obviously, this is
nowhere near done. There's a few other
things we have to add. First, the first thing I'm
going to do is I'm going to change this tag, just
like I did with the ground. I'm going to click Add Tag. And I'm going to make
it an enemy tag. And we're not going to
use this right away, but this is going to
come in handy later. So make sure that you don't
leave up this step for now. The next thing I'm going
to do is I'm going to add a type of alida. If I search Alida, you can see I've got a whole
bunch of Kaliders. But the one that fits this
one best is a polygon Alider, which is obviously
like four a triangle. You can see if you scroll down, there's pretty
much colliders for every kind of object you
could possibly have. Obviously avoid the ones
which aren't two D, like a sphere collider
or a box collider, or a capsule collider, because the two D ones are
what we're going to be using. But this polygon collider only has a two D version,
so don't worry, there's no three D triangle
or pyramid collider, so you can't really go wrong. But what we've done now is we've added our polygon collider. And actually before I
forget, I also want to make this a trigger now. This is not incredibly important at the moment because
we're actually only going to add our enemy
logic and the fact that you can die when
you hit these later on. But these are just kind
of steps you want to do now so that you can set
up your enemy correctly. So we want to name
it, we're naming. It's not that important,
but it's just useful. We want to make sure
we've set the tag. We want to add a
collider, and we want to make it a
trigger collider. So you can see now
if we click play, obviously nothing is going to happen when we walk into that. But you should be able to see we are actually able
to pass through, which is kind of
what we want because we don't want this object to be something that
can exist in space, more to be kind of like
a signal that when I hit it I can take
damage or something. You obviously don't want to actually not be able
to move past it. Because if you're running
along and you hit an object, you want to be able to pass
through it and take damage, but not stop and kind of not
be able to pass through. So that is all the
set up we need to do for our object
at the moment. But make sure that
you've kind of followed along and you've added the polygon collider and
changed it to the enemy tag. Now this is actually what
we're going to be using to make our first prefab. So
let's double click this. I'm going to take it over
here. Click on the object. I'm going to drag it down
into my Assets folder. And what that's
going to do is it's going to create this new file and it's going to be
called spike prefab acid. And you can see over here,
it actually changes to blue. Now what this prefab is, you can kind of think of it
like an object template. So what I'm basically doing
here is I'm saying, okay, I've got this object
I want to make like a template or
kind of like a stamp. And so I can make copies of that object and bring
them into my game. This is kind of the template
for the object I'm creating. So I can then go in some
code and I can say, okay, spawn in a spike. And it knows to spawn in this specific object with
this specific sprite and this specific polygon and pretty much all the other qualities that I've just added right now, it knows that that is what I'm referring to when I want
to spawn in a spike. So I'm going to go ahead and delete that extra one for now. And I'm actually also
going to go ahead and delete this
from my scene now. Don't worry, because
this doesn't actually get rid of the spike. We can see it's still
down here in prefabs, and if I double click it, I
can edit the actual prefab. So here I'm editing the actual
template for the prefab. If I drag a prefab in, it's instantiating that object
or creating that object. Creating an instance of that
prefab is what it's called. If I change things on this
prefab here in the game, make sure to note
that it doesn't actually override the prefab. It's changing this specific
instance of a prefab. So I've kind of like
spawned it in already. I can do whatever I
want to this one. But it's not going
to change the fact that when I spawn another one, it'll be exactly the same. If I want to change
the actual stamp or the actual template, I
have to do that in here. Because if I make this,
for instance, orange, you can see now
every single time I spawn in these prefabs,
they are orange. Also note that this prefab, which we didn't change, is
linked to the original file. The minute we make
a change to it, the link changes because
I've changed this color. If I go ahead and change
this back to red, we can see that the green and the yellow one are going
to stay green and yellow. But the ones I haven't
changed are red. But other quantities of it which I haven't changed
will be effective. For instance, if
I make the scale 0.85 that's not 85, make
it slightly bigger. We can see all of these prefabs did actually get quite bigger, but this one did not, because this one we'd
already changed. It was 214-41-2616 And if I go back here and I
change this back to eight, we can see it remains at 214-41-2616 Because
we have basically, the minute you change a certain
quality on this prefab, it's its own prefab. And so you won't
get overridden by this original prefab that's denoted by this little
blue line here. These are the things that
I've changed in the prefab. That's just something
you need to note, it's not super important. But just note if you want to
change your actual prefab, you've got to do it over here. So I'm going to go
ahead and actually delete all of those
spikes for now. And I'm going to
get started before I start making
some more prefabs. Let me make one more simple one, create two the object and
I'm going to make a circle. And this is going to be another enemy later on, it's
going to be a spike ball. You'll see when we add in spikes and sprites and everything, but let's change
this to red as well. Let's add a circle collider. And let's make sure
it's got the tag enemy. Make sure that's a trigger,
that is everything we need. We can also make this maybe
a slight bit smaller. This is actually
everything that we need to make our new prefabs. So let's drag it down again. We can see now we've
got our two prefabs. I'm going to delete
this. I'm actually going to rename
this to spike ball. Now if we double
click, we can see we've got our spike
and our spike ball, they're both enemies
and they're both red. And they both have colliders attached, which are triggers. So they won't be affected
by space as much, But they will let
the game engine know, okay, I've hit something. It's important to
note that other colliders do also
do that as well. It's just they also have the
added functionality of also existing as object in space time which can influence physics. Let's go back to these prefabs
and let's make sure that they're all pretty much set up exactly how we
want them to be. Because now what we're
going to do is we're going to create a new prefab, and that's going to
be our map tile. The reason why we're creating these prefabs is
because we're going to actually get started creating
our map generation script. Right now we've got
a player and we've got three blocks that
he can jump from. But that's kind of it. We
don't have an infinite game. We don't have anything
we can move to. We just have three things, and that's kind of
the entire game. So even though I have filled
these with all sorts of interesting obstacles,
there's only three of them. And we obviously want
the game to kind of be continue on and have
as many as possible. So to do that we're
going to have to create a pre fab with this floor object and put
whatever we want on it. And then we're going
to want to write code that's going
to spawn that in. Now, I'm going to get
started doing just that, but before I do, let me just
say a disclaimer quickly. The way we're going to do
this is we're going to create a whole bunch of
different floor tiles. Kind of think of them like
platforms in the game, and you can make kind
of as many as you want. We'll get to that when
we code it later on. But basically these
are going to be the full list of possible
tiles the game can spawn in. If you only make one
with a single spike, your game is just going
to be a whole bunch of things with a whole
bunch of spikes. That's it. But if we make one with a
spike, one with two spikes, maybe one with three spikes, one with a spike
and a spike ball, one with two spike balls. The more you add in, the more varied your
game is going to get. And you'll see as we
add in more enemies and more exciting things, we can make more
varied platforms and make a more
interesting game. But I'm getting ahead of myself. I'm just going to get
started by making a basic one and
showing you how I can spawn it in to make
a pre fab floor. I'm going to do the exact
same thing I did before. I'm going to make
this slightly bigger, just I think that's about a
good size for a platform. I'm going to drag it down and now we can see I've got a
new prefab called floor two. I'm going to name this
to floor tile one. And this is going to be
my basic floor tile. If I double click on this now you can see that I can access it inside my prefab editor and I can actually customize
this exactly high want. Now like I said, what this is is it's going to be the tiles which we're going to be
spawning in our game right now. It's just a basic tile,
there's no enemies, there's no obstacles,
it's just a tile. So we're going to make it
a little more interesting. I'm going to start by
adding in a spike. Let me drag from my prefix
up to this prefabittor. We can see now we've added in, this is what's called
a child object. It's linked to the
original object and if I move the original
object, it moves with it. We saw that earlier
when we stored all of our flaws inside
the storage parent object. You can think of it
like the greater object or like the folder
object over here. It's called the parent object. And we're adding in a spike
inside our parent object. I'm going to put one
spike down there. It's pretty well centered. It doesn't matter too much about making this look too nice, because we're
obviously going to add sprites and everything
else later on. But this is placeholder,
but I'm going to copy this, and I'm going to put
another one over there. Move it down slightly. That is pretty much
our first object finished and created. Obviously, we haven't created any death effect or
any health system. It's not going to do much now. But if we go back to our game
and we see our floor tile, we can see that it actually
is linked to our object and has created exactly what we wanted when we're
playing the game. We're going to write a script
that's going to say, okay, put one there, and put one
there, and put one there. We can see we've got a platform, a game that's starting to form. If we kick, we can move around and we can pretend like we're
playing the game. We can jump over that platform
and jump over this one. Obviously, we would
have died there. But you get the gist. Our game will not be
this hard, don't worry. But that is going to be how
we're going to be using these objects to play our game and make
our interesting map. So what I'm going to
do with the rest of this video is just make
a couple more prefabs. You don't have to follow
exactly what I'm doing, you can make them pretty
much how you want. I would recommend following
my spike and spike ball as our enemies because we're going to add in some
sprites later on. And if you want to
use my sprites, I've already got those
sprites created. So if you make up
some other enemy, then you're going to either
have to make your own sprite or have to come up with
an alternative plan. But if you want to make the game exactly
like I'm making it, maybe stick with these
two just for now. Obviously, once you've gone
further in the course, you can maybe start adding your own enemies and making
your own tiles. But especially if it's your
first time using Unity, follow along with these two
objects as much as possible. But that being said, you can make whatever tiles you want, so you don't have to make
two, you can make three. Obviously, make
them all possible, because you want something in
your game to be impossible. But you can get
creative and make different tiles as
much as you want. You can make as many tiles
as you want as well. The more actually, like I
said, you have the better. Because it means the game
is going to be more varied. Obviously, you want
to have more tiles, which you can possibly
have to get started by copying this, pasting it down. And I'm going to call
this floor tile two. I'm actually going to
do that a whole bunch of times because I'm going to start off by making
eight tiles over here. I've got eight actually
make ten right now. They've got weird names and they're obviously
all the same. But I'm going to edit them now. So I've got floor tile
one, floor tile two. I'll make this floor tile three. This of course, floor tile four. And so on and so forth, all the way up to
floor tile ten. See, now I have my
ten floor tiles. Now while I'm doing
this, I'm actually going to make my game
even more ordered. I'm going to right click and I'm going to make a new folder. I'm going to call
this one floor tiles. I'm actually going to put
all of these in here, drag them in, and I'm going
to double click on each one. And then when I
want to edit them, obviously if I want
to add enemies, have to go right out, back up to prefabs and add them in like so. But it means that all
of my floor tiles are stored in here so I can keep track of them and know
where they all are. So I'm going to
keep my floor tile one as I had it. I think
that's pretty good. My floor tile two, I'm going
to make a rather simple one, it's just going to have a
single spike in the middle. And then floor tile three, I'm going to have a double
spike near the end. Like I said, you can do
whatever you want with these. It doesn't have to be
exactly what I'm doing. Let me move that down slightly, but these are the first three. I'm going to make
floor tile over there, add the double spike,
Then floor tile four, I'm going to start adding in
something more interesting. So I'm going to take
that one away and I'm going to add in a
spike ball over there. I think it looks quite cool. That is for tile.
Floor. Tile five. I think I'm going to have a double spike at the beginning. Then let's maybe add a spike
ball over here near the end. Like I said, you can really do whatever you want with these. You can follow
along if you want, but you really don't have
to floor tile eight. I think I'm just going
to have spike balls. Let me get rid of
that. I'm going to have one spike
ball over here. Maybe one down over there, so you have to jump over it. We're going to tweak
the movement script as we go along the game
to make sure that it's always possible because
this might actually not be a possible jump in the
current state of the game. Just keep in mind that
you're always keeping your scripts as adjustable as possible as you
can make tweaks them. Luckily with our
script, we obviously did add in those
variables over here. Jump height and play speeds. We can kind of tweak whatever we want about the script for now, but we might add
other stuff later on. Just make sure to keep in mind that the key to good
game development, at least one of them, is always making sure you're adapting
your game as you go along. Don't get caught trying to stick with something which isn't working before I get back
to creating more tires. I'm actually going to
delete these three prefabs. And I'm also actually going
to change this prefab. What I'm going to do
is I'm going to do what's called
unpacking a prefab, which basically tells
the game, okay? I don't actually want this
to be a prefab anymore. I want it to be its own object. Again, I'm going to right click prefab and I'm going to
select unpacked completely. And then I'm going to go ahead and get rid of these spikes. Now I have my
original object back. Basically what I've
just told Unity is even though I based my entire
prefab off that object, I want to make it so it's
its original object. Again, I want to sever the link between that
and the prefab. I still have all my prefabs, but now this is just an object.
Again, it's not linked. And you can see that it went
from blue to normal colored. Again, let's go back over here, make a few more floor tiles. I think it's good to have
maybe another one with double. Move that down slightly, then we can have a spike
ball just over it. That's going to be quite
a hard ones there. That's a little similar to 45, but I think it maybe be slight different. So
let's move that there. May move it, you have to, it's a little higher up, so
it's quite easy I guess. Then floor tile eight. I'm just going to
make rather simple. Again, this one is actually just going to be a spike
ball in the middle. We'll obviously edit
these as we add more things because this isn't
very exciting on its own. But once we play in the game, we're going to obviously have to run past to keep up
with the camera. Even something like
this might be a little more interesting than it
actually seems at first. But anyway, moving on
to floor tile nine. I'm going to have a spipal at the beginning because I don't
think I've done that yet. We have to pass
under that and jump over and then floor tile ten. Let's have three spikes. Those are all my tiles for now. I've got four with spike
balls, without spike balls, and I've got six
with spike balls and all of them have spikes pretty much except
floor tile eight. These are going to be the
building blocks for our map. And I mean that quite literally because they're actually
what we're going to be spawning in when we write
our map generation script. Now if you follow along this lesson and you've
got a set of tiles, that's all you need to do. What we've done is we've created our enemy prefabs over here. And now we've created a bunch
of tile prefabs as well. We're going to get started
in the next lesson is we're going to actually write a
script which is going to say, okay, spawn in these prefabs randomly so we can start
generating our map. And then after we've done
that, we're actually going to add in a
camera pan script. Or maybe we might do
that first actually. So make sure that the
camera is continually panning and the player has
to keep up with the camera. And that's basically
going to add in our game. So you have to constantly
be moving to keep all of the camera and dodging
these obstacles. So all of that's coming
in the next video. But if you follow
along everything and you've got your ten tiles, that's great and
we're going to start using them in the
next video. Thanks.
6. Lesson 5 - Generating our map: Hey there, and welcome
back to Unity. Now, in the last video, obviously we created all
of our prefabs and all of our different objects
which we're going to spawn in when we
start making our map. But now we need to actually
write the code which is going to tell Unity to
spawn in our objects. This might seem like quite a tedious and complicated task, but it's actually a lot
simpler than you might think. And we're going to split
it up into two parts. The first thing we're
going to do is we're going to write a script
that basically tells the camera to
constantly pan across the screen so we have something
for the player to follow. Then second of all, we're going to write a
script that basically determines that we want to spawn things based on the
position of the camera. In other words, when the cameras over here spawn something there, and when the cameras over there spawn something
over there, we constantly have these objects that are spawned as
we're moving along. Before I get to ahead of myself, let's just get started by
making that camera pan script. Let's open up
scripts, our folder. Let's right click go Create new C sharp script
and we're going to call it camera move. Now this is actually going to be an incredibly simple script. It's going to be a two lines of code, or actually even one. Or we're going to have is
we're going to first get rid of both of these
voids and we're going to use fixed update because we're simply going to have
physics based output, or rather physics
based calculations and processes in here. And we're not going to use any input or anything
for this script. All we're going to have
is this void over here, which is obviously going to run every fixed interval
about a frame. And we're going to
create two variables. The first of them
it's going to be a public ridge body two D and
we're going to call it RB. You don't have to worry about coming up with different names as long as they're in
different scripts, you can use the same names. Obviously, you can't name two
things, R B in one script, but we're allowed to use the
same R B name over here, even though we're actually
talking about something else. Anyway, the second
thing we're going to have is a public float, and we're going to
call it camera speed. All the code we need
to right over here is actually very
similar to the code we wrote for the
player movement. We're going to go rigid body
lost his new vector two. We're going to set it to
camera speed and to zero. We don't actually need
to set this to zero, we could also set it
to the RB do losityty, but because we generally don't want our camera to be
moving up and down, it really doesn't make
that much of a difference. Let's just go ahead and set
that zero, it doesn't matter. You could also just
set it to blosityy, because you'll see when
we set up our rigid body, it's really not
going to make any difference because
we're basically going to make it so the camera
isn't affected by gravity. I'll get to that in a minute. But this is actually
all the code that we need to have a camera that is going to pan along as we make our game more
and more complicated. We might fix this and maybe make the camera
speed up over time. In which case we're
going to have a variable which
increases with distance. And then every few, um, meters, or every few hundred
meters or whatever, we're going to increase
the camera speed. But for now, this
will do just fine. Let's head back into Unity and go to our main
camera object. We're going to drag our camera
movement script onto it. Now we have our rigid body
and our camera speed, but we haven't actually added a rigid body to this main camera. If we try and run the script, it's going to give
us an error saying, I don't know what
this rigid body is. You're trying to basically
refer to it by saying, oh, set us velocity to this, but I don't have anything there so I can't actually do it. We're going to need
to add a rigid body to our camera and let's go add component rigid body
two D and click Play. You might be thinking, well, isn't this going to cause
the camera to fall? And you'd be 100% right. In fact, if we right now
we're going to see that our camera is actually
going to fall down. It might look like
everything's going up, but the camera is
actually falling down. You can see it go down there, which is really
not what we want, but it's actually a
very easy thing to fix. Because we're not
going to be using the same type of rigid body
we used for our player. Our player uses what's
called a dynamic rigid body. And that's basically
a Ridgid body, which is affected by
forces and gravity and a whole bunch of stuff
externally by Unity. There's another
type of rigid body, which is called a
kinematic rigid body, which is influenced
only by forces. This is like the normal, automated ridgid body in a way like it does
things for you. It falls in free space. It knows when to
stop and it knows when to move and slide. You can obviously
add more movement to that like we did over
here like we made, okay. When you click this button,
then move in this direction. But it obviously does a whole bunch of stuff for us as well, specifically the falling and the movement before
we add any coding. Now if I go to my main camera, I don't want that for this. I want this camera to only
move when I tell it to move. Specifically, like in a script, we can actually see over here, the variable R B of camera
move has not been assigned, was the error which
popped up over here and we got it
every single frame, which is what I
said would happen. To fix this, what we're going to do is we're
going to change this body type to what is
called a kinematic ridge. Body can see the
minute we do that, all of these variables massly
in a drag gravity scale, all go away instantly. Because a kinematic rigid body is not affected by
gravity or anything else. It only moves when
I tell it to move. And we're going to go ahead
and drag that into my script. Now what I have is a rigid
body which is sort of like a rigid body that
is fully manual, so I have to tell it, okay, I want its velocity to be this, just like I've done
over here, okay? Set the velocity to this
variable camera speed. When I change this
variable camera speed, it's actually going to
change the velocity. You see an action over here. If I click play, it's
going to load my game, and right now it's set to zero. I think I click play twice.
Let's click that again. Click. Right now it's set to zero, so it
doesn't move at all. But if I set this to one, we can see the camera
slowly start to pan across. If I said to minus one, I'm going to move in
the same direction. If I set something like five, you can see I go a lot faster. And minus ten I zoom back. You can obviously edit
this to be what you want. I'm going to start off
with a basic panic speed of three because I think that
will be good for the start, especially while I'm developing
my game like you said, you can obviously tweak
all of this stuff. Now, that actually
might be a little fast. I'm going to make this 1.8
that looks a lot better to me. And you can see now I can
follow along with the camera. I obviously can't
make that jump yet, but basically now we have a
script that tells the camera, okay, move along at this speed. That's all grade and all, but we don't have a map to generate. We don't actually know
what to spawn in, and we don't really know where to jump to
because we can't. First thing I want to do is I'm going to move that
down over there. Because I don't really want
it to be an impossible map, especially if it's
the first thing that you encounter when
you play the game. What I'm going to
do is I'm going to now start writing code, which is basically going to tell the camera or whatever
object I want, but I'm going to use the camera to spawn in certain objects. The minute I reach
certain length, at a certain interval, I want to spawn in an object. And the way I'm going
to do this is I'm going to look at the
length of my objects, go to open prefabs, and I'm going to see how
far apart my objects be. I'm going to start
by clearing out a few of these floor
tires I had originally, not permanently, but I'm
going to click three of them and I'm going to click
the little icon on them. They are hidden from screen. I don't actually
need to select them, it doesn't make a difference. But I've just hidden
them for now. They're still there, but I don't want them to be in my screen. You can hide them or show
them using a little icon. In fact, you can hide
the entire scene if you want, but we
don't want to do that. I just want to hide my
three floor objects. What I'm going to do is I'm
going to add in new objects. I want an object about there. I think I want the spaced
objects to be about that big. Let's see if I've
got my first object. I'm going to set it as
an easier position. Let's make it negative 6.5 I'm going to make my new
object 1.5 See over here. Now we've got two objects which are pretty evenly spaced out. Let's add another one over
here and we'll make this 19.5 We add one more after that. Let's add in floor tile seven, and then maybe floor
tile eight of that, we can make 17.5
We can make 25.5 We can see we've got
negative 6.5 then we've got 1.5 then we've got 9.5 Got 17.5 and we've got 25.5 We can see we want these to be about eight
units apart each, so I'm going to
keep that in mind. And I'm going to say every eight units that
the camera moves, I'm going to want to spawn in a new object because it means that I'll have moved about
one of these things. The way I'm going
to do that is I'm going to create a new script. And I'm going to call
it map generation. The minute that script
has been maimed, I'm going to double
click to open it. This is where I'm going to
actually create the logic to spawn in my different object. I'm going to first start by
making a new public void. I'm going to call
it spawn map piece. What this method
is going to do is it is basically
going to take one of the random map pieces
that we designed earlier and spawn
it into my game. Now the way I'm going to
get a random map piece is I'm going to create a data structure known as an array. This is quite an
advanced coding concept. It's actually quite
a rudimentary one. But in terms of
what we've covered already, it's quite a leap. So I'm not going
to explain exactly how it works and all its uses. Basically, you can think
about it like a list. I've got data types, which you've already
talked about. Like I want to store numbers, I put them in an integer. If I want to store
lots of things, whether it's a lot of
numbers or a lot of words, I put them in what is
called an array or a list. And the way you declare an
array is you go public, you're going to type the data type which you
want in your list. I actually want game objects
because game objects, like we mentioned before are the boding blocks of our game. And all of those tiles
which we made are actually examples of objects
even though they're prefabs. So they're like
object templates. They're still of the
data type object. To show that it's a list
and not just one game. Which I'm going to add these two square brackets afterward, which tells Unity, okay, this isn't one thing,
it's a list of things. I'm going to call it map tiles. Now this is basically where I'm going to store all
of my map tiles. If I go back into Unity and
I go back to my main camera, I'm going to see over here, if I drag in my map
generation script, let's put it above
the rigid body and let's actually move the
ridge body up over there. See now I have
this map tiles and it's currently got nothing
in it Says list is empty. But I'm going to
start populating it. I'm going to put ten
things in my list. So I'm going to change
this number ten. I'm going to add in the ten map tiles which we
created earlier. Let's go to prefabs floor
tiles and just put in floor tile one floor tile
two floor tile three, floor tile four, et
cetera, et cetera. Until we have every
single floor tile which we've just made
inside this list, this is actually going to be how we're going to spawn
them in randomly. Don't worry about
exactly how a rays work. Like I said, like there's
a few finicky things, especially if you
have encoded before, like they start at index zero, this is actually element
nine, even though Element. Obviously,
these game object, the actual concept
of variables and all that stuff might
seem a little confusing, especially if you've
never coded before. But just think about it
like a list of objects. We've covered what objects are, the building blocks
are our games, and we've got a list
of object templates, which we're going to spawn in. Basically we're saying, okay,
all these files we've made, put them in the data structure,
which is called an array. And I'm going to pick one
out of this array randomly every time I want to spawn
one in and put it in my game. The next thing I need to do is I need to actually write
the code to do this. Let's go back into
my code over here. And I'm going to say pick a random member of my
array and spawn it in. The way I'm going to
do that is as follows. I'm going to say
game object tile. So I've got a new local variable which is like a
local storage space. It's only accessible
inside this method. I don't have to put it in here, but it just is better
for performance because I don't need it to
be accessible anywhere else. I only need it in here,
say equals map tiles. Now to access a specific element of the array, I use
square bracket. So this is saying, okay,
open the first one. What this code will
do is it will say, okay, take the first
element in map tiles, which is floor tile one, and put it in the
storage space tiles. But I don't only want
to be the first one, I want to be a random one. To do that I'm going
to use a random, I'm going to go random do range. What this is basically
going to do is, is going to allow me to
pick a random number from a specified range as
you can probably guess from the name going to
go open parentheses. And now we need a
minimum inclusive and a maximum inclusive. Now I don't exactly know why
they say maximum inclusive, because random range 1-2 will actually only ever
return the number one. The reason why they
say inclusive I think is maybe
referring to floats, but with integers it isn't actually inclusive for the top, it's only inclusive
for the bottom value. Let's go over here and let's set the bottom value to zero, which is, like we said, the very first
element of our array, which over here is
floor tile one. But we want it to be any
one of these elements. And we could just enter from element zero
to element nine. We could just enter
something like this. Obviously, like I said,
it's non inclusive. We'd have to put
ten in over there. But this is actually
going to work perfectly fine for our purposes. This needs to be
a square bracket, not a round bracket because
we're referring to an array. And an array, you use square brackets to say what
index you're referring to. Anyway, this would work
perfectly fine for our purposes because
you're going to pick a random number
every single time. We call that from zero
all the way up to nine. But the reason why we don't
want to code it like this, this is what's known
as hard coding, where you put in exact values instead of what is known as, I guess, dynamic or
variable values. The reason why we don't want
to do this is because let's say we decided to add in a
whole bunch of new tires. We add them to our array. We have to go back and change this code
instead of having it automatically update to include the entire length of the
array, which is what we want. Instead of using ten,
we're going to go map tiles dot length. Map tile dot length is actually going to give us the
number ten over here, because we can see we have ten different
elements over here. Map tiles has a length of ten. I think that's maybe one of the reasons why the
index starts at zero because this range command is obviously not going to
include this top boundary. And we're never
actually going to try and access the
tenth element, which would give us an error because there is
no tenth element, there's only a ninth one all the way down to a zeroth one. It's a little
confusing at first, but you should be able to get
it the more you use arrays. And it's a convention
in computer science, I guess you get used to
it after a while as well. But regardless, this code
over here is going to say, okay, give me any element
in the entire array. It might seem a
little confusing, but basically all we're
doing is saying, okay, we've got this list of things
and at the specific index, from the smallest index all the way up to one plus
the biggest index, which will give us all the
way up to the biggest index. Give me an index from there. That is going to give us now a random tile every
time, which is half. What we need to do
now, all we need to do is actually
spawn in that tile. So we're going to say
instantiate tile as game object. This line of code over here is basically what
we're going to be using to spawn in our prefab. So we're saying, okay,
I've got this tie over here now and I want
to put it in my game. But we can see over here we get an error message
that says, okay, only assignment call
increment, decrement a weight. And new object expressions
can be used in a statement. Which is basically like saying, we've got half a statement here, we've equals five, we
haven't got the other side. So I'm saying, okay, I want to instantiate as a game object, but what do I want
to do with that? We're going to have to store
that in another variable. Call this game object map tile equals instantiate
tile as game object. This is not incredibly
like needed code. We didn't really need
this variable because we could have actually just taken
this and put it in there. But I'm going to lay
it out like this just because it makes it a
little nicer to read. First, we've got this
game object tile, which is a random tile. And then we're going to
instantiate this tile and we're going to call it Map tile
or rather Game tile. The actual tile may well change
the name to Spawned tile. We can differentiate
between what we were going to spawn and once
we've actually spawned it, now we're referring to the
actual object created, not the prefab. So
this is the prefab. The actual object that it made. And we need to add a few things. First of all, we need to
change where its position is. Actually, that's
all we need to add, because right now it's
going to be spawning it, but we don't know where it's
going to be spawning it, we want to change
where its position is. We're going to do
that by changing this variable, a spawned tile. Let's go spawn tiled,
transformed position equals. Then we're going to take our current position of our camera. We can do that by using a
lower case game object, which is saying, okay, refer to the game object which this script is
currently attached to, which is going to be our
camera transform position. That's basically saying, okay, set our transformed
opposition of our spawn tile to exactly
where the camera is. We don't really want it to be exactly where the camera is, we want to be
slightly different. Let's create a new vector three. This is saying we want
to store three things. We're going to have x, y, and z. Let's set the game object
transform position to our current position of
our camera plus some offset. And we'll create a new variable, public float offset X and add it to our players rather our cameras
current position. Now this is going to do
is going to say, okay, spawn in a tile and put it at wherever my camera
is plus a position. So this should be good enough. But we want to, remember,
we also don't really want it at the Y
position of our camera, because our camera
is going to have probably around a
zero Y position. And we want it to be on the
bottom half of the screen. We don't want to be in
the middle of the screen, so we're going to create a new position for
spawning in our objects, but we want to know what the boundaries of
that should be. And to do that we're
going to hop right back into the Unity editor. We're going to see, okay,
where about should be. I'm going to look at
this and I'm going to look at these y values and decide I think I want my object
to be anywhere from say, -4.5 I think that's about the lowest I
want it all the way, all the way up to maybe -3.5
might not seem like a lot, but it is quite a
variable amount of space, especially for our
small jump height. We might change that
jump height later on, but I think that's good for now. Let's go ahead and set
this to minus four. I can't remember
exactly what it was, but I think it was around -3.9 Now we're going to use another random range statement
to basically say, okay, anywhere between
those two points, I'm going to use those points
actually as variables. Again, public float
min Y and max Y, which we're going to assign
in the Unity editor, which we'll get to later. But I'm going to say, okay,
I want my Y position to be anywhere from
this random range, just like we used previously. And I'm going to say my all
the way up to max Y. Lastly, we can just set its position to zero because we're
using a two D game. Now what this is going to do
is, is going to say, okay, every time we call
this spawn map piece, we're going to spawn
a new map piece. And we want to spawn it
wherever we are in our game. Plus an offset X,
which we'll figure out as we're playing the
game experimentally. We're going to go
figure that out now. And we want a random range from -4.5 -3.5 which we're
also going to add now. Now the last thing I'm going
to do before I go back to Unity is I'm going to basically allow me to test the script. I'm going to say if input
get key down keycode space, then call my spawn map piece. I didn't add the
code back over here. This is the same thing because it's only one line of code. You don't actually need
them, but you can split them in if you want to and just make sure it's inside that block. But just for the record, having an indented line
is the exact same thing. It just looks a little bit neater over here
we're saying okay, every time I click the
space bar, run this code. This is actually
going to allow us to test our map spawning script. To make sure it works, let's
go right back into Unity. Let's see, right into
our main camera script. The first thing we
want to do is we want to configure this offset wise. I'm going to guess
it's going to be, if I go over here and I move it, I'm going to want to
spawn it about there. That's about 15 hour
cameras at zero. So I'm going to guess
it's going to be around. But I'm obviously
going to be able to configure that as I move on. I think this was 6.5 Let's go ahead and set
that offset y to 15. We want our min Y to be -4.5 max y to be 3.5 Let's
see if that works. I'm going to start by not
moving my camera at all, just so I can see
if that spawning does actually look around where I want it to be ahead
I'm going to hit. You can see actually
when I click my game, my three floors that I hit before are
actually still here. We go back in there and go ahead and delete
this floor tile. And I have it like
I had it before. I'm actually going to
move these a little bit. I don't. It seems like
they've adjusted. I'm not entirely sure why. Interesting. Regardless, let's
go ahead and click Play. And then let's see what
happens if we click the Spacebar. We go
back into our scene. We can see, okay,
we've actually got a random thing spawning,
which is great. We want, if we move it away, click a space bar again, we've got a different
thing spawning. And that actually looks
pretty perfect to me. If I click it a bunch of times, they've actually got
variable height. So some of them are spawning slightly higher
than the old ones, and we've got different
things spawning, which is perfect, this is
actually exactly what we want. The last thing we need
to do now is we need to make sure that this is
happening automatically. As long as the camera
moves every eight units, we want to spawn a new one. So the way they're
going to do that is going to head back
right into our code. And the first thing we're
going to do is we're going to get rid of this testing code because you don't
want to spawn in our tiles every time
we cook the space bar, we want to spawn in every time we travel a certain distance. The first thing we're
going to do is we're going to create a
few move variables. Let's create a public float and we'll call it Spawn Position. This is going to keep
track of exactly where on the X plane we spawned
our last map piece. Then let's go ahead under our start void and
spawn a map piece. This is basic, going to say at the very start of the game, reber these parentheses when you're calling a
specific block of code at the start of our game before you even start playing
Spawn in a map piece. Because we can see
if we go to Unity, we don't actually have
anything over this. We want to do it the
minute we spawn in. But then the last thing we're going to do to make sure that we know to spawn in a new
one every time we need one, it's going to go down here to the spawn position
variable and we're going to set it to our
current transform position x. This is basically
a shorthand way of saying game object
transform position X. We actually don't need
this game object thing over here because using a lower case refers to the transform attached to this game object
you see over here. If we hover, it
explains it for us. This is saying, okay, set our current
spawn position to the transferred opposition
dot X of our camera object. The minute we spawn
in a map piece, keep track of where is we
spawned it on the X plane. Then we're going to add in our if statement to our void plate. We'll say my current position
minus my spawn position. In other words, if my displacement
from where I currently am to where I last spawned my last tile
is greater than eight. In other words, if I've moved eight units since I
spawned a last tile, it's time to spawn a new tile. We have to write
if my transferred opposition dot x
minus spawn position, put parentheses around those is greater than or
equal to eight. In other words, if we've either moved eight or more tiles, then we want to call in
our spawn map piece. That's obviously going to reset our spawn position to my
current transfer position to X. Then the next update, this
will not be eight anymore. If everything is
written here correctly, it should spawn in every eight
piece is a new map piece, and we should see
that in action. Or you go back to the game. Let's go ahead and
click that, make sure that everything is
configured like we need to be able to set this back to 1.8 Let's keep track of the spawn position variable
as we click play. Let's go ahead and hit play. See what happens moving along, looks like our first tile
did spawn in perfectly well. And actually if we look along, we can see it is spawning
just like we needed to be. We go into the scene
view, we can actually see these tiles getting
made as we move along, just in perfect time. Over here, a new style
spawn spring out exactly as we needed to the minute before it
hits the screen. We've got our new
tile over there, and obviously the players
getting left behind a bit here. But we can actually
see this is creating a pretty cool auto
generating map. And this is actually going to be the heart of our
platform, a game. We're obviously going
to change this and add a lot of new cool things, and different objects,
and different templates as we
get onto our game. But this is basically
going to be the template for how we're going to start making our game and how
everything's going to work. Right now, we've
actually created the basis for what is
a pretty cool system for spawning in tiles and creating an auto generating map. Now the very last thing we
need to do is we need to make sure that we
actually delete the tiles that we're
no longer using. If we go ahead and we hit play, we can see that we can spawn in tiles great. And they
actually work perfectly. We can see over there, they
get created over here, but they never actually go away. As this continues on,
if I ramp up the speed, this will actually work just as well because it's
based on position, not anything to do with time. So we can actually see we
make more and more tiles, and it all works perfectly. But these tiles are
here and they're actually clogging up my scene. And I don't really
want them to be there. After a while, what
I'm going to do is I'm going to add
one more line of code, which I'm going to
attach to the tiles. I'm going to have
a little line of code on each tile which says, if I am this far away from the camera, I
can destroy myself. Let's go ahead and measure
what that doesn't should be. I think that the minute
tiles are around here, they should probably
get destroyed. This is currently at Exhibition
111.8 Let's say it's 112 and the camera is at
01:20 Let's say it's 130, let's say the minute they are
18 units behind the camera, then they can
destroy themselves. And that's an incredibly
easy script to write. Let's go right click,
Create C sharp script, we'll call it tile clear. I'm going to add this
to every single tile, Double click to open it up. And we're just going to need
one variable over here, and it's actually going to be a reference to our main camera. So I'm going to create
a public transform. This is actually referring
to a game object, but I'm saying I only need the position and the rotation and the scale of
the game object. I'm going to reference my
camera in this variable, but I only want its position.
I don't need anything else. Call it. Now the important thing to note is that
we usually assign these transforms in
the Unity editor. If we drag it onto our
prefab and we say, okay, I want that camera. But the thing is because prefabs aren't actually
objects in the game, they are technically
files in our program, We can't really do
the same thing here. I actually want to
go ahead and drag the script onto every
single one of my prefabs. So I can do that by going
onto every single one of my prefabs and clicking
Add Components, and our name, what I
call it, tile clear. This tile clear script
to every single one of them. Just do it quickly. I believe you can actually
do it multiple times, once if you select all of
them and then add tile clear, it should add to
every single one of these. I think that worked. You can see every single one of them has this tile clear script now attached, which
is pretty cool. But the problem is
we can't actually reference this camera because
like I said, this camera, it's looking for an object
and we can't drag in the camera because
this is a file object. You need to write some code to find that. It's quite simple. We're going to say cam
equals game object. Find, call it main camera because that is
what it's called. And that's going to say the
minute I get into the game, the minute I start existing, find main camera, which
we have right over here, and assign it to this variable. It's basically like we dragged
it in just like before. It's just a different
way of doing it. And I'll go ahead
and go transform, because I only need the
transform of that game object. Then the last bit
of code that we need just to say
basically destroy myself when far away is I say
if my position transform dot position x minus
the cameras position. In other words, cam position x. We say if I am more
than 18 units behind, if my position is zero and
the camera position is 18, I'm going to be
negative 18 to say is less than or equal
to negative 18. I could actually write this the other way around and say if the cameras position minus
my position is more than 18, if the displacement is greater, this is the exact same thing. Then I'm going to say
destroy game object. In other words, remove
myself from the scene. This is actually all the
code we're going to need to take care of that problem
we're talking about before. Before I do that, there's one more thing I'm
going to do over here. And it's just going to
be a really simple fix. I'm going to create a
new public transform. I'm going to call it tile
storage underneath over here. Once I've created my spawn
tile, Spawn tile transform. Set parent, which is
basically saying, okay, set the parent object. We're going to use a
folder just like we did in the past and we're going
to set it to tile storage. That's basically just
going to say, okay, the minute I make my new object, put it underneath
this empty object, which I'm going to create now
call it map tile storage. Let's set it to zero over here. This is going to be what we're going to put all
of our objects on this. Let's go back to the main
camera and drag that over here into tile storage so
we have our new transform. Lastly, the last thing
we're going to do is make sure that our tile
spawn script works. Delete script rather. Let's go ahead and click play. And we should see everything
work just as it has been. See over here, it got put into tile storage,
which is great. And let's watch what
happens as we move along. We've got all of our
new tiles going here. This tile here does have
the tile clear script. The minute it is a certain
distance from the camera, it should actually delete itself and stop existing.
I think it will. There you go. This actually
worked really, really well. This is going to be
the base of our game. We can make this camera
as fast as you want. It doesn't really
make a difference. We can see exactly how
it's going to work. This is how the game
is going to play. We're going to have
all of these tiles which are ranoally being made. You can see some
have duplicates, but this is going to be
the gist of the game. Go ahead and play, stop. And I said this to a slight
more exciting speed, like three, and I
hit play again. I can get a gist of
what the game is going to be like once I'm
playing, as I'm moving along. And I'm always going
to have to dodge certain things and play like. So this is going to be the
basis of my platform game. Obviously we're going to
add in sprites and make it look a lot more
interesting and exciting. But this is what we're
working with at the moment. I don't think it's going to
be this fast because this is, um, I guess, intense, especially for a game which is going to
have things like coins as well and more
complicated enemies. But this is going to be the gist that is the basis for our
map generation script. And I said this back to 1.8 That is basically all we're
going to do in this video. We've created all
of my prefabs in the last video and now we've created not only a
camera pan script, but also a dynamically
spawning map, which is really, really cool. This is actually the first
kind of main aspect of our game which we've completed, which is really, really sick. Good job on following the video if you
made it all the way through and hopefully your game is working just as
well as mine is. Obviously link all of
my code and my prefabs in the folder just like I have been doing
this entire time. And if you need any help
and need to look over them, you can go and find
them over there. But hopefully your
thing is working just as well as
everything mine is. And it's all going
pretty smoothly. And you're making some
pretty good progress with your intermediate
platform game. In the next video,
we're actually going to get started adding
sprites and you're going to see this game
start to come to life and look a hell of a lot better
than it does right now. Then we're going to
start adding more interesting enemies and
everything else after that. But for now, that is
all we need to do. And we've kind of
got the basis of our game running, so great job. And in the next video,
we'll get started adding our sprites. Thanks.
7. Lesson 6 - Adding sprites: Hey there, and welcome
back to Unity. Over the last few lessons, we've created what is pretty much the basis of a
platform, a game. We've created a
character who can move. We've created a map which
can generate randomly. And we've got obstacles
which we can dodge. And we have a camera which
is continually panning, which we have to keep up with. That's pretty much
everything that we need to make a basic platform, a game like we've
done it already, but there are a few
things missing. First of all, you can run into the obstacles and
nothing happens. Second of all, the camera doesn't actually make
you stay with it. You can go out and come back in. There's no penalty for that. Third and almost
most importantly, the game doesn't look great. We've got a square, jumping on other
rectangles and dodging triangles and circles which
are yellow, white, and red. That's it. You can make
a game with shapes. I've done it quite a few
times in the past actually, But for this specific platform, because it's an
intermediate platformer, I thought it'd be good to use sprites and I'm going
to be using pixel art now all of the sprites I'm
going to be making for my project are going to be
linked throughout this course. You can find all of them as downloadable links as I go
along and I import new files. Any file that I use throughout
this entire project, you should be able
to find as well. I've made a whole bunch
of sprites for this game. If you want to use the same
sprites that I'm using, you just have to go ahead
and download them from this video's description
or underneath the course, you can find a link for
this video's downloads. Now like I said, you don't
have to use my sprites. You can use your own sprites, or you can use squares
and triangles. It doesn't really
make a difference. But if you want to follow along and use the sprites I'm using, then you are going to have to obviously download those files. You can use the same
ones. That being said, like I said, you don't have to use the same sprites as me. But it is important to
note that sprites do in quite a few ways determine how we're going to
balance our game. For instance, if we
had the sprites I'm going to be using are going
to be a minor, and clouds. And so I'm going to want to tweak a few things
about the game. I may be going to
make him jump higher. We want to make
the spawn further apart just to make it
look more like clouds. And those kind of tweaks
we can make because we've got variables on our scripts that allow us to control that. Like we've got a jump
height here and we've got a spawn distance for
the forms over here. You obviously don't have
to copy my exact values. But if it's your first time coding and Unity
and making a game, I would recommend following
along with me as I do import sprites and use the
same sprites I'm using, as well as maybe
the same values. Because it's going
to make it a little easier to compare
your game to mine. And you'd be
surprised at how much tweaking little things can
make a game feel different. You don't have to do
exactly what I'm doing. You don't have to use
the same sprites, I am. But I would recommend if you
want to make the same game. I'm maybe do use the
same sprites and maybe just tweak it as I do because it'll feel very much the same. Like you don't want to get
stuck with a similar game. That's not really
what you wanted. With all of that
being said, like I said, totally your decision. But I'm going to get started
using my own sprites. I'm going to go down here to the project folder, right click. I'm going to go create a folder and I'm going to
call it sprites. Now there are a few ways you can put sprites into your game. Sprites are actually just files, They're visual
representations of objects, is what I
like to call them. We've actually got a few ready. Like we've got a
square sprite there and rectangle sprites down here. Well, they're actually just
stretched square sprites. But we want something
slightly more interesting. We're going to need to
import files into our game. There's a few ways
you can do this. You can double click
the sprites folder and you can go import New Asset. You can open up File
Explorer and you can drag them into
this window over here. Or you can actually go
into File Explorer, find where your game is saved, and just copy them into this specific folder
you've just created. This is not the
best way to do it. I recommend you choose
one of the first two. I mentioned just because the way Unity works is when
you import a file, it creates another file which it needs called the metafile. For every single
file you import, let's say you import
something p four, it'll create something meta
or something p four domtaI'm, not sure exactly
what it calls it, but it basically
creates a metaphile. Which without needing to
go into too much detail, is how unity works
with imported files. It needs it to
function properly. And these metaphiles are
automatically created when you import your
files through Unity. But if you don't have Unity
open, or even if you do, and you do it directly
with File Explorer, then it's not going to
make those files for you. Unity does a pretty
good job of creating them automatically on launch
and things like that, but just to avoid any
hassle which may arise, I recommend you
import your files using this important new
asset window over here. Let's go into our folder.
Let's go import new asset. Let's put in these
four sprite assets which have made, like I said, these are all obviously
linked underneath the video, so you can just import them
into your game like so. There's a few things
we need to do before we put them in our game. I'm going to select all of them. The first thing I'm going to
do is I'm going to change this filter mode to
Point No Filter, because this is a
setting you want for Pixelate and you can actually obviously have to
click Save before I show you. But you can also click
Apply over here. Now you've got Point No Filter, and you click Apply to add that. The reason for that is because this filter mode actually
blurs the sprite slightly. And if you use pixel, it
doesn't look very good. I'll show you that if I drag the sprite
into my game and I scroll down so I can see the sprite there, you
can see all the pixels. If I choose bilinear
filter and click Apply, you can see it makes
it very blurred, which is not what I want. I want to choose Point no filter so that I have the
entire sprite clear. Then second thing I'm going
to do is I'm going to change this pixels per unit because I don't want sprite
to be that small. I want it to be maybe ten. And actually, the
lower this number is, the bigger the sprite
is going to be. I think that's quite
a good setting for me for now ten pixels per unit. And I'm obviously
going to want to change that to all
of them out here, make sure all these pixels
per unit are set to ten. And the filter mode is 0.0
Filter and click Apply. The way I could actually
see that sprite is by dragging it
directly into my game. And what this does is it creates an object for my sprite
with a sprite render. So it's actually the same
as going right click, new object chooses a triangle. It's the exact same
thing, it's just this uses a triangle
and this obviously sets whatever sprite I've dragged in as the
default sprite. But I'm going to delete
these because I don't want actually want to make
any new objects. I want to assign these files directly to the sprite
renderers I already have, which are the square and the stretch square and the
triangle and the circle. That's a lot of terminology I'm throwing at you and it
might be a little bit confusing to think
about everything in game development context. But just know that at the moment all we've done is we've imported these four files
which we're going to use to add a bit
of lifestyle game. And we've currently
got sprite renderers, which are rendering kind
of default sprites. We're going to
replace those with these sprites which
we've created. So make sure you get
the settings as I do. And then we're going to
first start with the player. Let's go to the player and we've got a sprite quality over here, which is where we're going
to drag in our sprite. Let's drag in minor one. We see instantly, it looks
a little bit sickly. And that's because we've got the color still set to yellow. Let's set that to
white, I'd say. That's actually a pretty
good size for my player. I want it to be a
rather small player in the middle of the screen, I think that's actually good. But there are a few
things I need to change. And this is what I
meant when I said that sprites affect your
game quite a bit. Obviously, all the colliders
and the jump heights and every other variable or
tweak you have to make, your game is centered
around how big the sprites are or rather
what the sprites look like. If you are using my sprites, which I do recommend
that you do, it will be a lot
easier to follow along exactly what I'm doing
than if you use your own. But that being said, you can use your own if you know
what you're doing, because you just have to make similar tweaks for your game. Anyway, that being said,
let me first change this Box Glider to make sure
that it fits my sprite. And you might think
that this is actually a pretty good kind of
fit for my sprite, but I'm actually going to
make it a little bit smaller. And the reason for
that is if we're playing a game and you
have something like a bullet or a projectile hit this very top of
your screen over here. So let's say something goes
and it hits you like there. That's not actually
hitting the sprite, but it would hit the collider. And so the enemy, you rather the player
would take damage, which can be quite frustrating
if you're playing a game. So generally, it's
a good idea to put this sprite render sort of
as low as you can over here, so you obviously don't
fall through the ground. But then we want to make
it a little bit smaller, so we want to make it
something like this. Now if you get hit here, technically you won't die. But if you get hit over there, anywhere inside this block, which is the main player,
we can actually even make it a little bit
smaller, like over there. Then you're going to take damage or maybe even die and have
to start the game over. But basically, it just
makes it a little bit more fun for the player
to play a game where he's not constantly
being penalized for being hit at the top right
pixel of the character. Follow that along.
Obviously, whatever player you've got to make
sure that he or she fits inside the
bounds of the box clider, but not exactly that
you have blank spaces. I think that's pretty
good. For now. I've changed my box Clider. I don't need to
change anything else. The ridge body isn't
affected by sprites. The player movement
should be fine. It's about the same size and
I've changed my sprites. If we go ahead and hit Play, you can see now I actually have a minor character and I can
move them around and jump. Obviously doesn't
have any animation, so it looks a little bit goofy. But this is actually the start of adding in sprite style game. And you can see
that actually makes a pretty considerable improvement
to how our game looks. I mean, obviously, like I
said, it looks dumb now. But if you kind of just took a freeze frame over
there and looked at it, even though it doesn't really
fit with the art style, It looks a lot
nicer when you have actual things in your
game than squares. A lot of the time, like I
said, squares can be cool. I've made lots of games
with just shapes. But in this kind of instance,
for this kind of game, it makes it look a little
more professional to have actual sprites. So
let's not stop there. Let's actually go
ahead and add all of the other sprites we need
to our other objects. There's a few changes we're
going to need to make here. The first thing is
because we're going to be using clouds
as the platforms, we obviously need them
all to be the same size because we've only got
one cloud sprites. They all need to be that big. That isn't actually an issue for all of our tiles over here, because they all
are the same size. But these three ones at the beginning are
different sizes. So we're going to have to
change those a little bit. I'll get to that. But
let's just start by going over here into my sprites folder and dragging in this cloud. Now we can see already it makes it look a
little bit weird. We've got an incredibly
long and flat cloud, and I'm going to fix that by setting the scale back to one. We have the default
size for our cloud. I'm going to do
that with the other two floor objects as well. I'm actually not going
to choose three because two are more than big
enough for my game. I am going to tweak this a little bit as I get
further along in my game, but for now, that is fine as a starting
point for my game. The last thing I need to do is obviously change the colliders. Because that is not the collide. I want, I want it to be
something more like this. Let's drag it up a little bit. Over there and down across. Like I said, you obviously
don't want the collider to be necessarily like
this because then they can stand on nothing, but you also don't
want it to be here As they are halfway
through the cloud. I'd say a good balance would
be somewhere around there. You can still get a little
bit behind the clouds, but you can still see yourself, maybe move it a bit
up, obviously down. It matters less because
you're probably not going to be jumping
them from below. But that should be good. You don't want to really do this kind of thing with project, with clouds as much. Because you wouldn't
really want to fall off if there
is cloud there. But you can do it a little bit, maybe something like that. Like I said, this doesn't
have to be perfectly exact, but you will get a feel for it as you play your game
and be able to tweak it. These are obviously
your colliders. I'm actually going to
delete this flaw and just kind of copy this one along because I don't feel like
resizing that again. And they should all have the
same sort of size collider. If I go ahead and hit play now
we can see how that looks. Jump in and I can fall onto this cloud and I
can move along it. And I mean, it looks pretty. Okay. The one problem is the player is kind of continually
in front of the cloud. And that's actually not
what I want. I'd rather have the player be
behind the cloud. To do that, I'm
actually going to use a variable inside this
Sprite renderer script, and it's called order in layer. I'm going to set clouds
to be order in layer six. I'm going to set my player
to be order in layer five. Now we can see when we go
ahead and play the game, we should be able to see
the player actually fall behind the clouds just a
little bit more what I wanted. And I think that
looks a little bit better in terms of
gameplay design. Now, we obviously
have just added these sprites in for the
first two platforms. We haven't added any of
the floor tiles over here. There are still the
default rectangle, so we're going to
need to fix that. Let's start by going back into sprites and dragging that
cloud right back in, setting the scale back to one. And now it's going
to be a little bit tricky because
we're going to have to change this exactly like we've been trying to
do the whole time. We first have to
change the Box glider, and then we're going to have to adjust every single one of these child objects so that they are the correct
size for the sprite. This unfortunately
is going to be quite a lot of work because
we now have to remake all of our sprites that
or rather all of our tiles which we've already made in terms of
the new sprites. If we were to go into
every single one, we have to edit the Box glider, we have to add new things,
we have to change it all. It's a bit confusing and
it's quite a lot of work. There's actually an
easy way around it. It might seem a
little car intuitive, but what we're going to do
is we're actually going to back space that we have
exactly like we had before. Set it just like it was normally before we added in that sprite. And then we're going to
create ten new prefabs, and we're going to use these as reference points to make our new prefabs
with our sprites. Then we're just going to
delete them afterward. This might sound like
a lot more work, but it's actually
considerably easier in the long run to do it this
way than what we did before. The first thing we're
going to do is we're going to change the spike and spike ball prefabs because that's actually
the first step. We have to remember that
these prefabs inside our prefabs are actually prefabs themselves. So
we have to change these. Let's get started by changing the spike to the spikes sprite. See that actually
doesn't look that bad. We have to change the
scale back to one. It's very important that you use the same scale when
you're using pixel art. Because you can't
have one pixel be smaller than the size of the
other, it looks really bad. Make sure all of your
scales are set to one. I actually need to remember to do that with the player as well. Before I forget, I might
have to change the size of the sprites per pixel unit, which we set originally over
here, this pixels per unit. But make sure you set
everything to the scale one, otherwise it's not
going to look great. We've got our clouds at
one and our player at one. That's good. Let's go back to our pre fads and let's
show our spike is at one, and we need our spike ball
to be at one as well. Anyway, let's go back
here. Let's start by making the color normal
color, which is white. So we're not going to
change it in any way. And then I'm actually going to remove this polygon collider, and I'm going to add in
a simple box collider. And you might think that
it makes more sense to add in maybe three
polygon colliders, but trust me, this is incredibly overcomplicated for
what we're adding here. It just needs to be a
kind of basic collider mistake that a lot of new
Unity developers make, is they try and make their
colliders as accurate as possible as adding maybe a line here, a line
here, line here. It's really not a good
use of your time. And you can make
something like this and it will get the job
done perfectly well. It actually makes the game
a little more enjoyable to play because
you don't want to die if you hit, like I said, the tiny little top of
a spike right there and the player won't even notice when they're
playing the game. Just you can use box
glides for a lot of stuff, Obviously we're going
to use a circle here. But for this, a box glider
will do more than fine. Anyway, let's open up the spike ball and
do the same here. Go to sprites and drag in
the spike ball sprite, change it to white so we
have the normal color. And then we can
actually just increase the size of the circ
lide a little bit. Instead of using
this edit collider, I'm going to use
this radius set to 0.6 I think that's actually quite good already
because like I said, you don't want to die
if you hit the end. But this is the majority of
the sprite, so that's fine. Yeah, that skid right now, we've got our prefabs for
our sprites actually done. We've changed the
sprite and we've edited the colliders and we made
sure it's set to scale one. Now if we go back
into our floor tiles, we'll be able to see
them add it to a game. But they might not
look that great. Like for instance, this
one's in the cloud and they're a little bit
bigger than they were before. Something like this is
merging them together, Obviously they're
a lot lower down. So it makes that
jump a little bit harder because
they're also wider. Like I said, all of
these prefabs are actually a little bit
ruined now in a way. But we're going
to do what I said before and actually just
use a whole bunch of new prefabs because
I think it is actually going to make it
easier in the long run. You can either way is going
to probably take about the same amount of
time because we could just change every single
one of these sprites, add the box Clyde, add to them, but then we have to move all of these up to adjust
for the new size. You God, have to change pretty much everything
we've already added. And it's really, in my opinion, not that much faster or even faster at all than just
making new prefabs. So let's go ahead and
drag down a new floor. So we have a new prefab. And let's start just by
unpacking this prefab. It's no longer linked. We've
just created a reference, now we've got our new prefab. Let's call it floor tile, one A. I was going to
copy this ten times. We've got floor tile one A, we're going to have
floor tile two A floor tile three A
floor tile four A, et cetera, until we have all ten floor tiles with a
copy of themselves made. Once you've done that, you can pretty much
just get started remaking all of your old
prefabs as new ones. I'm going to skip
ahead because it's quite a tedious process and you don't really need to
see me editing mind. But basically with
the new sprites, just make a whole
bunch of new prefabs based on the old ones you had. And make sure that once
you've finished your prefabs, they have all of the attributes
that the old ones did. So your tile, clear script and your box slide and
all of that stuff. Make sure that that's
all on the prefabs. And once you've done that,
then you're good to go. Once you've finished
making all your prefabs, that should actually be
everything as we needed done, but there's a few more
changes we need to make. First of all, we need
to delete all of our old tiles over here because we don't
need them anymore. We've got our new tiles
with all of our sprites. We've got floor tile one A, all the way through to ten A. The other thing we do
need to change though is we need to go over
here to this main camera. We can see our map tiles
are all now missing. Because what we've done is an
array over here that says, okay, use this map tile, but the map tile is
not there anymore. It says, I don't know
where the file is. We need to replace them all with these new tiles
we've created over here because they are actually new objects that we've made or rather new files
that we've made. That is actually everything
we need to do to create our new sprite based game. Let's go ahead and hit play. And we can see now we have clouds and a minor
jumping on clouds. We have our new sprites spawning in just like
we wanted them to. We've got our sprite over here, which has two clouds, and
we've got a spike there. The one problem, however, is that you'll notice
that the sprites are actually way
too close to each other and the jump pit
isn't high enough. These are all tweaks
we need to make. We had to test our
game to see them, but the clouds are actually spawning on top of each other. That's not good. This isn't actually exactly what we want. Let's go ahead and actually
fix this a little bit. First thing, luckily,
is that we've actually created all of our scripts
pretty much dynamically. We've got this offset
variable over here, which denotes how far the
clouds should be away from each other before we spawn a new
one, we look at this one, it's negative 5.55 this one is 4.2 These are technically
less than 15 apart, but when we actually start
adding in our script, it doesn't work
exactly like that. What we're trying to change is how frequently they are,
not how much they spawn. We go back into the script over here which
generates our map. We can actually, we've
hard coded this value over here to eight and it's not actually a
variable we've used. Let's fix that. Let's
go back here and let's call it spawn frequency. Let's make sure we set that
to the variable over here. Obviously, offset is actually how far away it spawns
in front of the camera. Sorry, I forgot about that. That's why those didn't add up. But how far they spawn
away from each other is this new variable which
we actually had hard coded in and we fixed it. Now let's go back to
the main camera and let's change that to
something like 12. And let's see if that
looks a little bit better. Offset is currently 15. Let's see if we spawn
in the first one over there and the second one. Okay. 12 is a little high. Let's set it to
something like ten. See if that works. Ten
looks quite promising. I think that could be good. Yeah. All right. I'm going to actually make it 11 just because I do want to change a few more
things about this. The second thing I actually
want to do, stop this. I want to change this to 11. Second thing, I don't
like the fact that the clouds are spawning right
at the bottom of the map, so let me change this
minimum Y to minus four. I'm actually going to make the maximum Y
something like two. It's a little bit easier to
move the clouds up and down. Then I obviously need
to change my players jump height to something
more like ten, or maybe even 12,
so that they're able to jump properly
over to the new clouds. Let's see, with
all these tweaks, we've now got a slightly
different feeling game. The player can
jump a lot higher. Maybe 12 is a bit high, but I can fix that obviously. Let's make it maybe ten and
go back and see how it looks. Now with the jump height of ten, I'd say that looks a lot better. The gravity scale might
be a little lower. Storks floating
towards the ground, but this actually looks like a pretty decent
figure for my game. I can make that jump, just maybe I have to change that
a little bit as well. I might make the jump
height slightly higher, but then the gravity
scale as well. But it looks like all of these
are actually possible with this new variable that I have decided that's
actually pretty good. And we can see now we've made a slightly more
good looking game. Everything's a little bit cleaner and it all
looks a lot nicer. The one thing I'm going to change before I end this video, I know it's been
quite a long one, is I'm going to make
all the sprites ever so slightly smaller. I'm going to make one, make them quite a
bit smaller game. Let's maybe said to 12. Yeah, I'd say 12 is
quite good, like I said. Because now I've decided to make my sprites a little bit smaller. I'm going to have to obviously tweak all of my colliders and maybe the spawn frequency of the cloud so that they're
still the same distance apart. But because of the way
we've coded our scripts, this is actually
quite easy to do. And I do recommend you keep adapting your game
as you develop it. It's a very normal aspect of game development to change
your game as you're making it. And this might seem
annoying to constantly be making changes to your game and having to go and fix things. But trust me, it's
a lot better than the alternative
of having a game, which you're not
particularly happy with because you didn't want
to change anything. So make sure you're
constantly adapting your game so that it reflects
exactly what you want. I want my game to have a
little bit smaller sprites. I'm going to have to
adjust all of my tiles, my prefabs as well as the
colliders on my enemy. Maybe on pretty much all my sprites actually
on my player as well. And then I'm just going
to have to maybe tweak the map generation script how
frequently they've sport, because I want them to be the same kind of distance apart. So I'm going to
have to make that a slightly smaller value as well. But once I've done all of that, it shouldn't take too long
and I'll have a game, which I'm probably going to be a lot more happy with
because it reflects kind of what I have
in mind. Cool. And then the last
thing is to just test. We might have to
change these variables one more time before
we end the video, but let me see. Because I kind of wanted to be jumping from cloud to cloud. Oh, I forgot to
adjust the box glider of the player. Let's
do that quickly. And the actual cloud itself, I think should be fine,
but let me just make sure it should be
good for the player. Let's see the clouds. Just adjust those as well. Should be fine. I'm going
to copy this component, so I have to do the
same thing over here and paste its values. It's like copy paste
should be good. I'm going to do the
same thing with all of the prefabs just to make sure
I don't have to redo those. Let me go ahead and paste component values
for all of these. Now I know it seems like we've done a bunch of stuff
and then changed it, and then done again
and changed it. It's actually not a bad
thing. It means that you're following specific game
that you've got in mind. And the fact that
you're tweaking things and changing it means
it's a little bit more like an actual organism rather than this static thing. And that is what a game should be as you're
developing it. But anyway, let's see if that is actually pre suited
with what I want. I've got high jumps, I've got from cloud to cloud. This is actually looking a
lot better, in my opinion. I think that's actually quite good. This is actually great. We've got pretty much
everything I try to save the scene in play mode, which you're not allowed to do. We've got pretty
much everything I actually wanted at this
point in the game. You've got clouds
you can jump to, you've got obstacles in them. This is actually pretty cool. Obviously it doesn't look
great because the player is not animated and spike balls. Now the spikes are
moving or anything. We're going to get started
animation in the next video. But hopefully if
you followed along, you've got a slightly
better looking game. Even though we just
added sprites and we didn't actually change
much else you can see, obviously we had to
tweak a lot of the parts of our game because we
added the sprites in, you can add sprites
from the get go. But I think a lot of
developers prefer to build it with
templates first and then just adjust
things as they go because it makes it easier. You don't have to do all
the art before you start. But this is actually all
we want to get done today. And I think it's safe to
say our game looks a lot better now than it did at
the start of the video. We're going to see
in the next video, after we've added in animation, how the game really starts
actually coming to life. And we're going to make a few more tweaks
with the player to make him face the other way when he's turning
left and right. Which will improve how
the game looks a lot. But for now I think it looks a lot better than
when we started. And hopefully you've been able
to follow along and add in either these or your own
sprites to the game. Thanks.
8. Lesson 7 - Animating our characters: Here and welcome back to Unity. In the last episode, we added all of our sprites
into our games. We've got a minor
for our player. We've got a whole bunch of
clouds for the platforms. And we've got spiky
balls and spikes in the clouds for the things we have to dodge the obstacles. Obviously, we had to
spend quite a lot of time last episode tweaking things and moving them around so they're all in
the correct position. I had to do it a little
bit as well afterward just to make sure they're all actually exactly
where they should be. But that's going to
be subjective to you. You obviously know where
the right position is for your game and for
your project as well. Even though even if you're
following along with me, it's not going to look
exactly like mine. You're going to have them
in the exact same position. So as long as it all
looks good and it's all in the right
position for your game, then that's great we can
get moving on to animation. Because if we play
the game right now, we can see even though all the sprites and
everything looks good, it looks all right now
as a freeze frame. But the minute we
start moving around, the fact that the player isn't
moving at all and kind of just sliding along and
he's pretty lifeless. Actually, it makes
the game look a little bit kind of
cheap or rushed, and we obviously don't want our game to look
cheap or rushed, but we want to look a little bit more like an
actual game that you would see on Steam or
in arcade, or wherever. So to do that, we're
going to actually have to add in
animation to our game. And the way we're
going to animate, I'm going to show you, it's a decently
complicated process if you get quite into it. Because obviously
there are entire jobs built around animation for games in those massive games that you see like
Treble Studios. It's very different
from what we're going to be doing today, but in Unity, even though it's quite
a complicated process, it actually provides quite
an easy way to do it. And I'm going to be walking
you through it and you're going to find that
you're probably going to get it quite quickly. Before I get ahead
of myself too much, Let's just introduce what
we're going to be doing. We're going to be animating
just the player for now. Obviously, as we get on
further in the game, there might be other
things we have to animate. And we might animate new
things as we add them. But for now, let's just
get started animating the player because that is
the most important part. To start, let's go
into assets and create a new folder
called Animation. This is where we're
going to store all of our animation files. Now just like how sprites are
files, our code is files. Even our scenes and our prefabs are
actually files as well. Animations that we create
are going to be files too. And it's important for
some terminology here. An animation or
an animation clip is like a looping video
of a specific thing. Like a running animation.
Or a jumping animation. That's going to be
a looping video, you can call it, but it's a
looping changing of sprites. So it's going to have a
moving a certain way. That is going to be what one
of the animations is called. Then the way we're
going to animate in Unity is we're going to store those animation files
because they're saved as files
inside this folder. Then we're going to create
a new object called the controller is going to tell Unity which one
to use at what point, and that's where we
put in our logic. But before I get ahead
of myself too much, let's just get started with
the actual animations. Now, in terms of the actual sprites we're
going to be using, I've obviously made a few more sprites for the animations. We're going to be doing what is called sprite based animation, where you have a whole
bunch of different sprites. Like you have a running
sprite where maybe this leg is lifted up
and then one down, and then one to the side,
and then one down again. And I've obviously made
those sprites already. They will of course be
linked by this video. Basically, all our animation
is going to do is tell Unity which of those
sprites to switch to at what time. It's
actually quite easy. There's another type
of animation where you basically take the entire object you've created here
and you make all of these little parts
of the body sub object. The one arm would be an object, the one leg would be an object. Basically tell Unity, okay, rotate this at this time, then
move it back at this time. And that's quite a
bit more complicated than what we're going
to be doing today. It is obviously a
much better way to animate for more
complicated things. Like if you're not creating a Pixelart game, for instance. That is pretty much
how you're going to have to animate actually. Because you can't create
a different sprite for every single frame
that you want it to be. But for Pilar, just like they
used to in the olden days, we're going to use
sprite based animation. And it actually looks a lot better for pilot in my opinion. You can never really get it
exactly like you want it without using this for Pix L, That's what we're
going to be doing. Now, obviously, once you've downloaded all of
those sprite files, I'm going to port the same ones. These are going to
be the sprites we need for our running animation. And they're sprites
minus two through six. Now I've actually just put
them in the wrong place. Let me cut those and
put them in sprites. Because they are sprites,
there are animations. But obviously when you
do import it right into the sprite folder and we need to make the two change
we did last time, set this to 12 and set
this to point. No filter. We can see now they are exactly the same as all
my other sprites. If I go here to minor, we
can see there's absolutely no difference between
these two except the name. If I go to my player, I can actually drag them
in as sprites. I'll say, okay, I want the
player to be a running sprite. And we can see now
he's just stuck there. But we always don't
want our player to always be in that
running sprite. We want it to change from
one sprite to another. And to do that we're
going to need a new component called an animator, as we've searched up already, but we have to add
this animator. This animator basically
allows unity to say, okay, this is something which has
an animation controller, or this is something
which has animations. It's going to be
swapping between. I explain all the
terminology as we get to it, but this component
over here is basically just a reference to the fact
that we are animating it. The reference to the fact
that it has a controller. Now to add a controller, which is the key
thing we need here, let's go window animation, and then animation again. And that's going to open up
the second window over here. Window animation. Animation.
Or you can click control six and you open up this animation window
and it's going to say, to begin animated player, create an animation clip which is like
running or jumping. That's the actual clip
we were talking about. This keeps track of what
object we've currently select. If we select main
camera, it says. Creates an animator
and an animation clip. Obviously it only said
create an animation clip because we've already got
an animator for player. But I think if you
click create here, it's just going to
create that animator object for you automatically. It's just good to kind
of create yourself so you can be aware that it's
a part of the process. Anyway, to create
an animation clip, we just click the
spot over here. We want to go into
assets animation, because that's where I'm
going to be storing my clips and I'm going to
call it player run. Now I've created what
is called a clip, and we can see a lot of this has now actually
been filled in. We've now got what is
called a controller. If we close this
and go back into our animation, we've
got two files. We've got this player run,
which is my new clip. But I've also got this new object over
here which is called an animator controller rather. This is the heart
of the animator. This is going to be
what is telling it which animation to
do, at what point. If we double click
on this, we can actually see this new
window open up over here. And this is my controller, this is my player animator. This over here is
my animation clip. To give a brief summary
step back a little bit, this is a component
we just added. This basically just says, okay, this object is something
which has a controller. This controller is what
I'm looking at over here. This is saying, okay,
which animation do I want to be
in, at what point? And this animation is
this clip over here, which is the specific things. I'm going to have a running one, I'm going to have a jumping one, I'm going to have an idle one. And then my controller
is going to say, okay, be in this one when
I'm doing this, Be in this one when I'm
doing this, be in this one. When I'm doing this, you can
think of the player run. Or the animations as
like looping videos, running, jumping,
falling, et cetera. You can think of
this player kind of like the thing
that's telling Unity, okay, which video to
play, at what time? And then this
animator controller basically just says
to the object, okay, I've got this player
controller attached. Use it kind of thing. So this
is a lot less important. But it's based
just saying, okay, this is something
which has a controller and you have to use
the controller. Obviously it's important. If
I disabled it wouldn't work. But this controller is actually
a file inside my game. So I need to create a link to this controller and
this specific object, which is what Unity
has done for me here. But anyway, don't
get too worried about what every single
one of these things mean, just follow along as I'm doing, obviously We've just created
an animator and then we've got window
animation animation. And we've created a new file for my player called player run. And that created a controller
for us automatically. So let's get started animating player runs. Let's
zoom into my player. And I'm going to click
this Record button, which basically says I am
currently recording things. My animation. In the first
part of my animation, I want to be on this
sprite over here. I'm going to choose
minus two over here. This is the very
first sprite I want. The reason I have this record button down is that it basically says whatever changes
they're making editor now are actually
part of the animation. If I move it over
here that it's going to change my position as
part of the animation. But I actually don't want that. I just want it to be the sprite. I'm going to change my
sprite to minus two, Move a quarter of a second. Obviously 60 is a second
in this view over here. And if I click Play, I
can't see anything yet because I haven't done anything.
But I'll show you later. I'm going to change
to minus three. I want that actually
to be at 15. Then at 30 I want to
choose minus four. Then at 45 I want to
choose minus five. I've got the four sprites which you're going to make up
my running animation. You can see coming
together there. I actually want to add in
one more thing over here. It doesn't really
matter what I add in, but as long as I
have something here, I'm going to make it
back to minus two. As long as I have
something there, the unity knows that this animation is
exactly 1 second long. This frame actually only lasts for one frame, and then
it goes back to there. I don't have this
here, even though it's not technically part of
the running animation. Unity is going to skip
over this or rather run it for one frame and then
go right back to that one. I don't want that, let me make sure I
have something here. If I click play, we can actually
see that kind of coming together and it looks okay.
It looks pretty cool. In my opinion, I'm not
the greatest animator, but this is going to be our running animation
for our game. We can always tweak
the speed and things like that inside
this actual controller. If we're over here,
click on the animation, We can change the playback
speed when we're in the game, but for now it's like
a basic animation. I'd say it looks pretty
good for running. Let's go ahead and create
two more animations. Player Idol. This is actually going to be
an incredibly simple thing. We're just going to
make sure that Unity knows we want to
be on this sprite, so it's not really an animation, it's just like a sprite setting. But we're going to be
using it to tell Unity. Okay, make sure you're
in that sprite. So our animation is
just one single sprite. We're going to do the
exact same thing for jump, Play a jump, and we're going
to choose sprite minus six, which is our jumping animation. See over here now
it's out jumping. If either we're going
to be like that, if we're running, we're
going to be doing that. So now we have all of our
animations completed and fixed. Now what's left to do
is build the logic to tell it which one
to do at what point. And then the last we need to do is just adding a little bit of code which is going
to be crucial for defining that logic. To create that
logic, we're going to go to these parameters here. And these are like
conditions we want to set. So we want to have a condition to know whether we're
running or not, obviously, because
we need to know whether to play the
running animations. Let's call it is running. Let's create another
billion we're going to call it is
grounded because we want to know whether we're
jumping or not or rather whether we're on the
ground over here. If we actually look at these,
these are two billions. They can either
be true or false. What I'm going to do
now is I'm going to create logic which
basically defines these three animations
as playing at certain times based on which of these is true
and which are false. So to do that, I'm going to
go over here to any state. This is actually very, very useful in terms of the animator. And it's basically saying, okay, no matter what
animation is playing, because these are what
are called state nodes. And they're like saying, okay, as long as I'm in the
player run animation, I'm in this player run state and I can be in
player idle state. I can be in player jump state. We're creating a very
basic state machine. But this any state node
basically allows us to say, okay, no matter what state I'm
in, go from there to this. And the way we're going
to go from there to this, or rather between these
different animations, is using transitions. If I go ahead and
I read over here, I can go make transition, okay? Transition from that to that. And inside this transition
is where I set my logic. Let's say I want to, as long as I'm not running, is
running is false. I want to go to idle. As long as I am not grounded, I want to go from idle to jump. And as long as I am grounded I want to
go from jump to run. This might look
good like we've got a pretty basic rudimentary
kind of structure here. But this is actually very flawed because we
don't have any way, first of all, to go
from run to jump. As long as we're running
and we're jumping, we can only ever go to idle. If we're running and we don't
stop running and we jump, we're not going to
move, we're going to stay in my running animation. On top of that, if I'm jumping
and I actually am still, when I land, I'm still
going to go back to running and then I'm going to transition to idle because I have
this thing over here. But it's a very kind
of flawed machine because I don't even have
states defining for everything. If I want to make this
actually complete, I'd have to make a
transition there, a transition over there, as well as a
transition over there. And then it would be
slightly more complete. But all of this is quite a
complicated way of doing it. And I'm not going
to be using this. I want to delete these. Instead I'm going to use
this any state mode, which is going to make
this process a lot easier. First of all, I'm going
to go from any state, I'm going to say
make transition just like it did last time,
right click and click. Make transition to go to idle. And I say, as long
as I am not running, as long as I am grounded, I want to be idle because
that means I'm standing still on the ground over here. I want to say as long
as I am grounded, in other words I'm not in
the air and I am running, then I want to be
running over here. I want to say any time I'm not grounded, I
want to be jumping. Because my jump animation is actually more like a
fall in animation. You can see over here
if we go into the game and we click animation, you select the player, we look
at our jumping animation, we play it, it actually is
like a falling animation. It obviously works for
jumping or falling, but it's going to look
quite good when we use it because it's going
to play whenever we jump or even if we just
fall off something, which is exactly what we want. Now this is actually pretty much almost everything we need to
do for our logic machine. But there's a few more
tweaks. First of all, let's set this as the default we right click go set as
layer default state. It doesn't really make
that much of a difference, but it just feels like
the idle animation should be a default one
rather than the running one. It automatically set to running because it's the
first one we made. But it doesn't really make a difference, it's
completely fine. Second thing we want to
do is we want to set this transition duration
fall of them to zero. Because I find
that with Pixi Lad it looks a lot
better if it's zero. Sometimes you can tweak with a little bit
because you might want to be 0.1 0.2 I
prefer to set to zero, but I might actually
change that as well. I'll see, just for now,
I'm going to set to zero and make sure all my
conditions are right. As long as I'm not running and I am grounded, I want
to be idle up. As long as I'm
grounded and running, I going to be running. Yep. And anytime I'm not
grounded I want to be jumping. Perfect. So this is actually pretty much everything
we need to actually do. If I click play right now you can see I have my player and he's going to stay in
the jumping animation because I was not grounded. And he's actually, if we
just look at it over here, we've currently got a
player and he's jumping. But based on what
I choose, let's say I set grounded true. Now I'm actually
going to be idle. You can see I'm staying there. If I set running true, I
should be in my running state, which I believe I am. Looks like that's all working. Everything should be
working fine over here. In fact, it looks like our transitions are
pretty much good. But we obviously don't want
to have to be clicking this based on what we want when we're actually playing the game. We want to be able to say, okay, when I'm doing this
specific thing, set these, do a thing when I'm running,
set this to running, rather than have me
come and click there. And we're going to
use code to do that. Let's go over here
to my code scripts. And I'm going to
open up player move. We're going to use
the exact same script we used to denote when I'm moving to basically show whether I am going to be
playing certain animations. And I'm going to first of
all, create a reference to that animator, call it Anum. Even though I'm referring
to the animator, I'm conferring to the
animator controller. It says interface to control the Mec Anum animation system. But yeah, I'm basically
referring to the controller. I'm going to be referring to these parameters
we've just defined. I'm going to go
over here, back to my script and I'm going to say underneath these collision
things because this is when we basically change,
this is ground variable. You can see I've
atually already got a variable here that tells me whether they're
on the ground. I actually need to make
sure it's basically aligned with my
animator parameter. So you access the
animators parameter, we're going anambool, open parentheses and you
say the name of the bool, My b is grounded. Then I'm going to set it
to my grounded variable. I'm actually only going
to do this over here, and over here, I could do
this every frame if I wanted. The reason I'm only doing it here is because
these are actually the only two points
in my entire script where I changed the
ground variable. And there's nowhere else where
it could possibly change. So this is the only
time I need to update my animator and say, okay, if I've collided
with something it's true. And then make sure my
animator sets it to true. If I leave something it's false. And make sure my animator knows that I have to set to false. And this is actually
just the basis for what we need for our is
grounded system. If we were to play
the game now it should actually work
pretty much fine. Whenever we land we're
going to have is grounded, this set to true and
then it's going to play the right animation
whether it's idle or jump. But we still don't
have any way of controlling my is
running animation. So we're going to add one
line of code over here. And that section,
to be very simple, we just going to anim. Set bool, just like last time. We want to set the is running bulow where we're going to determine whether
we're running or not is using this x float. Now remember this x float is changed based on what keys
they're pressing down. As long as they're
pressing down a or D, or the back or forward arrows, it's going to basically say, okay, set x to a number
that allows us to say, as long as x is a
number we're running. But as long as x is not a
number, we're not running. And we don't have to
worry about whether we're running in mid air or not. Because if we remember, our
animation controller doesn't actually factor in whether we're running or not in mid air. All we need for running is the fact that we're
grounded and running. And as long as
we're not grounded, even if we're running, it's still going to play
the right animation. We should need to worry
about setting this is running variable based on
whether we're moving or not. We're going to do that. We're
going to type is running, set it to x is not
equal to zero. That's going to say when
x is equal to zero, this is going to be
false because this says x is not equal to zero. As long as x is not zero,
this is going to be true. It's going to say, okay, set
running to this statement. This statement is
actually returning a Boolean true or false. When x is zero,
it returns false. And when x is not
zero, it returns true. We're saying okay, as
long as x is not zero. In other words, as long as we're moving set is running to true. When x is zero, set
is running to false. This is actually going
to be all the code we need to perfectly
set up our animator. If we go back into Unity,
go into our scene, make sure that we
have a reference to that animator we
just created over here, drag it in, just like
that. We hit play. We should actually see
all of the animations come to life perfectly well. We can see we fall, we land, and we have our
running animation. Oh, it doesn't look
like it's working. It looks like it's
just the first frame which is
quite interesting. So we have something we
need to sort out there, but for now, this actually does seem like everything
else is working fine. We should have to
sort out why is our running animation only
playing the first frame? And it's this over here
can transition to self. It's actually something
I forgot to mention, this can transition
just self state. You have to actually remember
to not use if you're using this any state controller.
I forgot about that. But what's going to happen is
with these two animations, we didn't notice it
because these animations aren't actually
really animations. They're kind of
just single kind of frames we were continually
transitioning to them. But we didn't notice a difference because
they're just one frame. But we could see
with player run, we were only transitioning to the beginning of the animation. If we uncheck that,
it's going to not allow us to continually
basically be refreshing this. We're saying only move to it once and don't
keep moving to it. You can stay in it as long as you're not
moving to the other one. As long as we unchecked this, it's actually going
to fix everything and it's going to
make it so that it doesn't continually
keep refreshing its transition to this thing. It just transitions once. And then when it trines to transition to other
places, it does. But it doesn't need to continue going towards itself,
which is good. And if minute we've
made that fix, that should actually be
everything that we need to do to have a working
animation system. Now we can see we run like
normal, just like we wanted. Obviously we don't
turn around yet, which is the last
thing I'm going to add before we close up this video. But we do run and jump,
just like we wanted. First I'm going to do is I'm just going to make
this a little bit faster because I think
one is a little slow. And hopefully that should
be everything we need to make our game look a
little more lifelike. Yeah, we can see it now.
It looks quite good now actually we've got
everything running, and we've got a jump. And everything is
actually looking a lot better than it was before. But there is one thing
we need to change, and that is the fact that the player is always
facing forward. And that's actually
a very easy change. All we're going to do is
we're going to go over here, down to this fixed
update statement. And we're going to say if RB, velocity x is less than zero. In other words, if
we're moving backwards, then set the players
transform his rotation. We're going to write
Quaternion Euler. Just a fancy way
of saying angles. Don't worry too much about it. We're going to set
it to our x zero, our Y to 180, and our X00. If we go into our game, we can actually see what
that's going to do. Open up my platform game
here, go to player. We can see we have
them set zero. If I set a y to 180, it's going to flip
my player around, which is exactly what I want. And then as long as I have
set to zero, it's not. And that's going to
update all of our animations just
like that for us. Because we're actually
rotating the object itself, which is actually quite useful. We're just going to
add one more line of code over here that says else if R vlocity x is
greater than zero, in other words, if
we're moving forward, then we want to be having
a normal rotation. This is obviously, like
I said, going to take care of all the animation
actually for us, it should be everything
done automatically. If I hit play, we can see now this new code is going to
allow us to face backwards, which is actually going to
look a lot better in our game, Hopefully now you can see
everything coming to life, and our game looks a lot
better than it did previously. And we have all of my animations
and everything working pretty seamlessly.
That's pretty cool. Hopefully you've been able to
follow along and you've got a pretty similar
looking game and it looks a lot better
than it did originally. And you kind of get
in a feel for how we're going to be making
the rest of this game. But as long as for now, if you've got everything working just like I do, that's awesome. And I hope that
you've been able to follow along what
we've been doing, and you've been able
to animate your own player in the
same way that I have. In the next video, we're
going to be adding in enemies and a whole bunch
of new interesting enemies. And we're going to be making
a bunch of more tires with those enemies just to make our
game a little more varied. And then from then on we'll get started with all the last
things you have to do, which is obviously
hit detection, and audio and sound,
everything else after that. As well as some final touches just to make it look better. And also a game loop of course. But right now we've got
the very building blocks of our game kind of completed. And we've added in sprites to
make it look a lot better. So that's everything
for this video. And in the next
video, like I said, we're going to add some
more interesting enemies. But for now, if
you've got everything working like I do, that's great. And we're going to
get started with some new development next video. Thanks.
9. Lesson 8 - Adding more interesting enemies: Hey there, and welcome
back to Unity. Now in this episode, we're going to be adding a few more interesting
enemies to our game. Because right now we've just
got spikes and spiky balls. Even though these are somewhat varied in all the tires we have, they're not the most
interesting enemy types and they're actually
just obstacles. We're going to add
two new enemy types, and I've obviously built
spikes for these already. One of them is going to
be a patrolling enemy, and the other one is going
to be like a timed enemies. Every now and again
it's dangerous, but then it turns off and
then it's not dangerous. And to start, we're
first going to import all the
sprites ball needs. I'm going to right
click Import New Acid. And these are actually all of the new sprites which
we need for our enemy. So we've got four robot sprites, two sprites for this
shocking enemy, and then one extra sprite
for our spike ball. The reason we got this extra
spike ball sprite is because we're actually going to be animating our spike
ball a little bit. And that's actually what I'm
going to start with first, and to make sure
all of these are set to the right
settings obviously. And actually do this just by selecting every single sprite. It's going to overwrite those, but it's fine as long as
they're all the same. 12 point filter and hit Apply and everything we
now know is the same. And that's also how you
can actually check that you've got all your
sprites the same. As long as these are
filled in, you're good. We're going to go into prefabs. We're going to create a
couple of new prefabs. I'm going to open this one up
and I'm actually just going to copy these across so I
keep the tags the same. This one is going
to be our robot, and this one is going
to be like a battery. Before I do that, I'm
actually going to first fix my spike ball by animate and I'm going to go window
animation, animation. All of that extra stuff
we did in terms of phases and states and all that
stuff, that is animation. And it's quite simple, but we can have even
simpler animation if we just have one animation. If we want a continual kind of animation that is
playing the entire time, which is what I want
with a spike ball, all I have to do is go create, go into my assets, go animation, and
call it spike ball. Then every half a
second I'm going to want to change to the
second spike ball sprite, which is the one I
have over there. Copy this across and go there. You can see that in action here. This is going to be our
spikeball animation. It just makes the game look
a little more interesting. That's actually all we
need to do, because if we open up our animated, we
can go into animation. We can open up our spike ball. See, I've got one state. Sure. But I don't
need any parameters or transit or anything because this is the only state I ever
want to be in if I go back, as long as I'm a spike ball obviously, which that object is. As long as I go back
into my game and I can see the minute
I get a spike ball, see that animation
is actually running perfectly and it makes the
game look a lot nicer. I might have to move
these a little bit because they're still
looking quite close. Everything is still rather big, but it is actually looking
pretty good for now. And the spit balls are animating just like
we need them to. That's the time of
animation we're going to have for the rest of
our enemies as well. Let's go back over here to our robot and let's get started, first of all by
animating this one. I'm going to delete the
circle collider and I'm going to change this
to robot sprite. Then exactly the same
thing is before. It's going to make
an animator for me, I'm going to go to
Assets animation. Call it robot animation. Then I'm, I think I have four
different robot sprites. And they're just going
to be the wheel turning. And the eyes slightly
changing color. There we are. We can see that in
action over here, the wheel is obviously
going to turn. And the eyes, and
if you can see it, they slightly change
color and go back. That's going to be
all the animation we need for our robot. Now we've got our
robot sorted out. Let's do the exact same
thing with our last one, which is going to
be our battery. And this one is going to be
a little more complicated. Let's first start by going. I've caught shocker
in the files, I'm not sure why, But this is going to be the start
for our battery. We've got this
battery over here. The way this animation
is going to work, it's going to be
slightly differently. I'm do, the reason I say it
for last is quite specific. We're still only going
to have one animation, but it's going to be an
animation with a little bit of logic to it in a different
way that we had before. Let's name it battery dot. We basically not want
to want to animate it. Let's say a good while, let's say 3 seconds. We don't want anything to
happen for the first 3 seconds, we just want to stay on
this sprite we're currently set to shocker one, we're
staying over there. Then the minute 3
seconds are up four. The next 2 seconds we want to be having the
shock animation, which I've got
sprites over here. Just make sure that
is as 3 seconds. For the next 2 seconds we're
going to be doing that, and then we're going to return
back to our normal thing. We don't actually need to put it afterward because it's
going to do it for us. But then for the next
half a second over here, minute 3 seconds are up, which we can use these little things to
skip to the next thing. One frame later,
we want to change to this new animation of
here, which is shock er, two. And we can see if there we
start changing the animation. And there from 1 second
or rather one frame after 3 seconds all way
up to 20 frames after. We're going to want
to go in that one, we're going to want to change
it and then go back to this one at 40 and
then change it again. We can see that's going
to look like this. I think we should have
it one more time. Switch up. I think that
is the frame we want. That's the wrong,
sorry, I've copied the same one twice. Let
me put it there. Then over here we are going
to want to end the animation. So it's going to be still for 3 seconds and then it's
going to have that active, and then it's going
to stop again. And then 3 seconds later
it's going to move. And that is going to be the
gist of our sprite over here. And that's actually also going
to be how the enemy works. And we have to add a little bit of logic
to this animation, because we've finally
got this working fine. But we need to have
something that tells the game when it's in this
state and when it's not. We're going to use over
here what's called events. So let's make sure we go exactly one frame after 3 seconds. Let's add an event over here. And also right at the end
of our animation over here. Or rather actually
I'm going to put it at the start of the new one, just so we have it over
here right at the start of our frame to have one
more event over here. And I'm going to
explain how these work, but basically there
are ways of accessing the code attached to
this battery to say, okay, yeah, this is now has to be active and this is what you have to
do at this point. I'm going to get started
with adding my colliders. Now explain how we're going to get this battery one to work, but it's actually going
to be quite simple. Let's start by adding
the collider to this. Actually, let's add
a box collider. These are all of the
parts which we want to be the minute the
shocking thing is active. You don't want to be able
to touch any of this, this entire bit over here, as well as this over here, which is going to be the
actual battery itself. Perfect. I'm just
going to make sure I set both of these two triggers. Obviously, if this was an
enemy on its own like this, it would be completely
impossible to dodge because there's no way you cannot
touch any of this thing. But that's where the events
are going to come in handy. We're only going to
have these box gliders active for that period because
they're both triggers, so we're obviously going to
be walk through it anyway. But for that period
they're going to be active and then when
that period is over, they're not going
to be active again. Actually, let's
code that quickly. Let's create a new script. We'll call it battery script.
We're going to load it in. And we'll also have to create a script for another
enemy as well, the robot, which I'll
get to in a minute. But let's first make
this battery script. And we're just actually going
to have two simple voids. Going to have a public void, call it battery off. I'm going to create another one underneath and call
it battery on. We're going to create a reference
to our two box gliders. Public box, slide two D, we're going to have box
one and call it box two. All these boys are going
to say is when battery is box one enabled equals false, box two enabled equals false, Then we're going to do
the exact same thing with battery on except
set them to true. What is going to say is that the minute I call
this void over here, battery on enable both
of these box gliders. But the minute I
call this void over here battery disable them. We're actually going to start
with them disabled as well. This is going to say that the minute this object spawns in, it doesn't have anything active. But the minute that shocking
animation is playing, we want this to be active
and this to be active. And because it's an enemy tag, then we're going to
code in logically says, okay, you have to take damage. But then when that's over, we
want this to be off again. We're going to go back into
our animation over here. We're going back to
our event over here. And we just actually get to choose a function to call here, but it has to be a function
of a script that's attached. So we're going to drag
on our battery script. Let's move right to the
bottom and put it over there. And we can see over here we have our battery script right there. We've got battery script here, which is written down there, and we've got our actual script. I found that sometimes when
you're adding in things with names like battery
script or something script, it might give you
an error that says, oh, we can't find the script. Make sure the class exists. And it might be
because you've named your script or reserved word. For instance, I want to try
to call my one script camera. And I kept get an error and
I don't know what it is. It's because you can't
actually use the word camera. The way you solve this
is just actually by changing this word over here
and this word over here. And that's how you
rename your script. If I was worried about this one, because I have had
some errors in past, I thought I'd just mentioned it. I'll call it battery. Then it's going to
give me an error here because now it doesn't
actually know what battery is or it actually
doesn't, but it should. Then I'm going to over
here to battery as well, and I'm going to
rename it to battery. And make sure you
rename both of those. Make sure you rename the
name of the file and the actual name of the
class inside the file. And then you should
have problem solved. If you encounter any issues the entire time we're developing, that is how you fix them. But anyway, that should
be everything we need. And let's add our box
gliders right there. Let's go back to our animation, which we've got open over here. And let's go to our
event and choose this event battery methods. And then we choose battery
off for the beginning. Only over here do we
choose battery on, battery on there, and
battery off over there. That should actually
work perfectly fine. We've now created a prefab
with our script over here. As long as this
animation is playing, the minute it reaches
this point here, it's going to call this void and it's going to activate
these colliders. And you won't see
it here, but you'll see it when we're actually
playing the game. Then you can see it
actually should work perfectly fine, which
is really, really cool. Let's go back out and let's
go back to our prefabs. We've still got one
more prefab here, which are robot prefab, which
we haven't finished yet. Let's add a box collider two D. Let's resize it just
a little bit over here. Keep in mind this is
not actually going to be where he can
fall, et cetera. It's going to be
where the hit box is. Let's make it a little
bit smaller than. Usual, just like we have
the whole time but not too small because we do want
it to be able to hit, especially with this
little red things. Let's actually move this
out a bit and down. That should be good for now. Let's make sure we
set it to trigger. Just make sure all
of the other ones are also set to triggers just in case we've forgotten
anything they are in fact, which is cool, we've got our animators on these two and we've just got our
animator over here. We've got our three
animated enemies, as well as our
Spike, which is the only one which we
haven't animated. That is actually pretty much
everything we need to do except for adding in some logic
for our robot patrolling, because this is a
patrolling enemy. Before we do that, let's
create a few more tires quickly just to show
against these new enemies. I'm not going to make
too many, but you can obviously add
quite a few more. And just for the sake of time, I'll add a little more in between this and the next video. But Right. I'm just going to
make three just to showcase these new enemies. And they're going
to be very boring. They're all going to have
either just one robot or robot, and the shocker thing. So this one over here, I'm
actually just going to use a single one of
these batteries. Put it over there. Now obviously my battery enemy is
quite hard to see. If I were to put it like I normally would like
something like that, then you won't really
be able to see the wire, which
makes it quite hard. So I'm going to
put this in front, I'm going to say order in
layer to six or rather seven. And I'm going to
make it so that it is in front of everything
else on the cloud. Does look a little bit weird, but we can tweak that as we go. Just makes it so it's a
little easier to see. Let's move it up. I think
that should be fine. Obviously, like I said, we
can tweak it as we go along, but for now, that should be pretty good as an
enemy in the game. That's our floor
tile 11, I believe. Let's make sure we
go to floor tile 12. And let's just add in a single
robot right over there. Should have been
moving down a bit because we can obviously
see without that, let's make sure
he's always riding on the ground. Yeah,
that should be good. Then last of all, we
are going to have let's say one robot and a spike. Just to show you can obviously
use multiple per thing. That should be everything
we need to do. Now, the last thing we need
to actually do is just code in our logic for the robot
patrolling to and from. We're going to use quite
an easy thing here. We're just going
to have a variable on here which sets the limits. Patrol two there and
patrol two there. And then we're just
going to have some code that says, okay, as
long as I'm moving, as long as I'm lean this way, as long as less than
this, move that way. And I'll show you exactly
how to write the code. But before we do
that, we do actually need to add a rigid body, our robot, so he can move. But we want to make
sure we set it to a kinematic rigid body so that he doesn't fall
through the cloud. Because he doesn't have an actual collider
attached to him, he just moves along
according to code. Then let's go to Scripts
and let's quickly write our very
simple robot script. Call it robot move. Let's go ahead and double
click that to open it. Then all we need to
do, like I said, is we need to set, first of all, let's make a float called
speed to how fast he goes. Then we're going to
have two floats. We'll call it min x and max x, which are basically going
to be the two positions where he can go from. Then we're just going to
have inside our fixed, update it over here. We're going to code
in our rigid body. We're going to go
public, Richard, body two, D, call it R B. Then we're going to say RB, velocity equals vector
three, vector two. We're going to want
to set our velocity over here to some x values. Let's create one more
variable, call it X. Then we want our RV Y velocity two B zero always because we're not going to be moving up
and down with a robot. Then the last thing
we need to do is over here in
this update frame. We need to say if
transform position x is less than our
minimum x value. In other words, if we
passed our minimum x value, then we need to do two things. First of all, we need
to make sure we're facing the right way and
we're going to rotate the robot just like we
did the player trans stop rotation is quaternion.u0. 0.0 Then the second thing we're going to do is
we're going to set our x to our positive
value for speed. Then otherwise we're going to write an L s course
and we're going to say if transform dot position x is greater than our maximum x. In other words, if we're not
smaller than our minimum x, but we're not greater than our
maximum x because we don't want to be too big
either. Too far, right? In other words,
we're going to copy this exact thing
over here and change this value there to 180 and
this to negative speed. What this code is going
to do is going to say, every single frame check, I'm not below this
minimum limit. If I am, then turn me around. If I'm greater than
this maximum limit, in other words, if
I'm not greater than the minimum
limit, that's great. But this implies that I'm
bigger than the minimum limits. I could be moving to
the right. If I'm bigger than the
certain other limit, then turn me the other way. This actually should be
all the code we need to write our robot logic. Let's go to the robot. Let's add in the script over
here. Robot move. Let's make sure we assign
the rigid body over there. I want to pick a starting
speed of something like five, then this minimum X, Y, I'm actually going
to choose based on the tile for this first tile. I think I want my minimum x
to be -2.9 Let's go here. It's at minimum x -2.9 I'm assuming my maximum x is going to be
pretty close to 2.9. Yeah, I'm going to
make it 2.8 Actually here my maximum x is 2.8
You can see over here, this is in bold because these
are values I'm editing for this specific example of the template, the
specific instance. But that's actually fine,
that's actually what you want. This x variable is obviously going to be dependent on speeds. We'll see that change as we go. But last thing I can do to
see these robots in action, I'm actually going to quickly change this map tower script. I'm going to make it
only have two elements in it so I can test them. I'm first going to put in my one with the robot over here. Tow, I'm actually going to
put both of the Rob and now, because that's the
only way I've tested, Just to make sure
that it does work, I'm going to hit play. See if I run into any errors. There might be something
which might happen where they are, that's what
I thought might happen. So the roads actually
currently flying off the clouds and it's
because we referred to a specific position over
here when we wrote the code. And we put it in this prefab, we see we've got these values
over here that say, okay, as long as you're not less
than this and less than this, but what we're forgetting
is that this is actually a child object of this
bigger parent object. So that's choosing
a point in space, not a point reference
to this cloud. To fix that, all we need to do, we need to change this to
transform local position dot x. Change this to transform
local position do x. Then I actually noticed that
I've swapped these around. So this should be 180, this should be zero because this is where we're
moving forward, and this is where
we're moving backward. Then the last thing that we
want to do is we want to go over here and we
actually want to add in our start void back. We want to start by setting
x equal to speed because this x variable denotes
whether we're moving and it only gets assigned if we exceed one
of the boundaries. We want to set it at
the beginning as well. All of those changes we've
just made have made sense. Don't worry too much about
the local positions. But basically it wasn't
working because we were referring to global
positions when we actually wanted
local positions. And we've just added this tweak. So we start by moving as well, and we've made sure we
turn the right way, because that was actually
an issue we had. Um, so let's go ahead and
go back into our game, and let's see if this works now. Hopefully it should all be good. You can see over here
we have a robot. Annie's walking towards the end. Annie actually turns
around, which is perfect. If I can catch up, I don't know if I'm
going to be able to make it. So let's
just start again. We should be able to see our
game now with our animations And everything can run along and we can run
into these robots, and obviously we're going to
have to try and dodge them. But that is kind of cool. It's a great new enemy
to have in our games. And they're kind of
patrolling alongside. Obviously, they're not
going to look like this because they're all
kind of in sync now, which makes it a lot harder. But as we add in like
different tiles and things and set different positions,
that's all going to be good. Let's go ahead and
open this new one. And it's actually going
to be slightly different. I'm going to want this
one to stop about there, which is -1.17 I'm going to set the
maximum y to 2.72 0.8. Other than that, that
should all be good. The last thing we need to test is this battery tile over here. So let's go back into
our game and let's make sure that we add
in the battery tile, 11 A and see if it
works perfectly fine. We're going to test
is we're actually just going to pause
the game and look at the tags to make sure that everything is working as needed. So we've currently
got a robot to start, a robot after that. Hopefully, we're going
to have a battery soon. It looks like we have a battery, so currently the shock mechanic does look like it's working. But we're going to have to
do a more thorough test. We're going to pause
it now because now is when the colliders
should be active. We're going to go over
here to this floor tire. We're going to go to the
battery. And let's go to see. Okay, both colliders are active. Which is exactly what we want because now the
enemy thing is it. Let's pause it and wait
till it's stopped. And we can see both
are deactivated. So that is actually
everything that we need now completed
for our new enemies. Like I said, obviously you can make a whole bunch of new tires. I've just made a few now, but
I will make a few more for the next video so that we have a slightly more varied game. You can make as
many as you want, especially with these new
enemies we've added now should have a whole bunch of
extra things you can make. And we might run into one or two bugs with these new enemies
as we move in. Because they are brand new
additions to our games, we're going to see how we
have to tweak it alongside. But hopefully it is in a pretty
stable state the moment. I haven't found anything
that makes it not work. And so hopefully
everything is good at the moment and your game is running just
as well as minus. We're going to get started
in the later videos on adding in hit detection as well as an actual health system. So we have a game where you can actually lose and restart. And then we're actually just
going to have to add in all of the additional things
like post processing and fixing up the sky and all of those things to
make the game look a little better
than it does now. But hopefully you've got the basis for a
pretty cool platform, a game written in Unity. So far, we've currently got
12 or 13 different tiles. And I'm going to add a few
more now, like I said, And this should
allow you to make a pretty varied and
cool platform again. So a good job on making it through this video
was quite a hard one, especially quite a
few new concepts. And we've got a
patrolling enemy and an enemy which is only
active at certain times. But hopefully you were
able to follow along. And I'll see you in the next video where
we're going to get started with adding in
Hit Detection. Thanks.
10. Lesson 9 - Introducing hit detection: Hey there, and welcome
back to Unity. Now, in the last episode, we added a whole
bunch of new enemies, as well as animating
a few enemies we already had
added to the game. And then basically
made a whole bunch of a few new tiles to test these out and make sure they
all work perfectly. I told you that if you want
to add more tiles, you can. And like I said, I did make a few more tiles in between
the last video and this one. I've now got full tile, 13 A, and then haven't
actually named them yet, but 141-516-1718 19.20 So the first thing we need
to do is actually fix our spawning strip so it's
spawns from everything again. Because the last
thing we changed was we were just testing
the new ones, but now we want to be
all of them again. And like I said,
I've got 20 now. So let's quickly add all
of those to this list. Once we've added everything
to this map tiles list, we should be able
to hit play and see our entire game with all
of the new tiles added in. I've made a few, like
one with two robots, one with two of these
battery things. Obviously, you'd
have to jump there. This would be very hard. We might have to
tweak the length of this animation because
it is quite regular. Or I might have to change
the actual block itself. But currently this is
looking pretty good so far. In my opinion, we've got
this 12 robots as well. Yeah, they're obviously
quite hard to dodge, but this is going
to be the basis for the blocks we're
going to have in my game. What I need to now actually add is a hit detection system. Because currently this
is all well and good. But you can't die. You
can't even lose the game. In fact, even if you jump off the entire map, you can't lose. What I'm going to
get started with in this video is getting
hit detection working. And then the next
video, we're going to get started with a
health system and we're going to make a health system and an ability to actually die. But this episode, all we're going to get done is
the hit detection, which is actually quite simple. So all we need to do is we
need to make a new script. I'm going to call
it Player Health. Let's open it up. Actually, all we're going to add here is a void to make sure that we know when
we're taking damage. We're going to get started with all the other health
stuff later on. Right now, all we need is a
public void, take damage. We're going to do what's
called a parameter, which is like a value you
can pass into a void. Now like I said, a
void is a method, It's a block of code
that you can call. This parameter is a value
you can put into this block. When you call it, I'm
going to say into damage. Then every time I call
this block of code, I can choose how much
damage I want to do. In other words, I
can choose what I want this value to be. I'm going to get rid
of that. I'm just going to write print player. Then I'm going to put my variable damage
damage full stop. Add a space over there and I'm going to make sure
this says two string, so it's the correct
type of variable. Now this is using a few things we haven't
actually covered. Like I said, parameters
and two string methods, but it's not that important. Basically, like I said, a method is something which you can call at a
certain time and the code inside it will run all this integer over here
is saying when I call this, I also get to choose in a value. So I can now choose
different things, can do different
amounts of damage. Like maybe a robot
can do two damage, but a spike only does one. Then all I do when
I call this is I say I print out to the screen. I say this player took and then I give the amount of damage
I took. So I wrote damage. And because it's an integer, I have to change it to a string. If I want to use it
in a print statement, then I say damage. Now actually all I need to do is need to create a new void. I'm going to call it a void
on trigger two D and it's actually very similar to
this on collision void we've used before except
it's just four colliders which have set to
trigger which is all the ones we've
used on our enemies. We're going to say if collision game object dot compare tag, just like we did before. This time if it's
a tag type enemy, then what we want
to do is we want to now access how much
damage we need to do. To do that, we're going to
need to write another script. Let's go over here and
let's create a new script, call it enemy info. Inside the script, we're going to create a bunch of variables. This is like a stats
column for the enemy. So we're going to
create public T, then we're going to
call it player damages. We're going to add the script to every single one of our enemies. And then every time we
collide with an enemy, we're going to go and look at that script with the particular enemy
you've collided with. And that's where
we're going to get our damage variable from. This might seem a
little confusing, but just bear with me. If we have collided with
something that is an enemy, we'll say collision dot game
object dot get component. In other words, get a component attached to what we
just collided with. Collision is the collider
we just collided with. If the game object that
that's attached to, in other words our
enemy is an enemy, then go and get another script
attached to this enemy, which is called enemy info. Parentheses after
that. After this and then we go player damage. We can now access the
variable explicitly. This is basically, this statement isn't
actually doing anything, but it's saying get player damage from whatever
we've collided with. Now all we need to
do is we need to put this as our
parameter damage. So we're going to write to take damage open block and we're going to put
this code inside here. Like I said, even
though this is only technically two lines of code, it might seem a
little confusing, but it's actually not that bad. All we're doing is we've defined this code up here
that says, okay, when I call this I want to
play took this much damage. Obviously, we're going to
flesh this out later on. But right now all it does is it says, okay, a
player took damage, but how much damage
we take is determined by this void over here
on trigger enter two D. We're saying every time we
enter a trigger collider, if that collider is
attached to an enemy, then call this take damage void. In other words, run this code and set the amount
of damage I want to take to the amount of damage that is stored in this
enemy info column, which we are going
to assign when we add this to every single
one of our enemies. Let's go back out.
Go into our prefabs. Over here is where all
my enemies are stored. And I'm going to add in enemy info to every single
one of these. Right enemy info. Let's have
the battery do to damage. I think the robot should
only do one damage. Spike I think should
also only do one damage. And then I'm going
to have the spike ball do one damage as well. It's just the battery
actually. Or maybe let's have a spike
ball do two damage. Just make things a
little more interesting. Now, every single one
of these things has this script attached
which is going to store how much
damage it does. Last thing we're going to
do is we want to make sure they're all set to tag enemy. It looks like they
are. Now all we need to do is need to
go back to our player. Let's add in this new script we just here called Player Health. Put it underneath
the player movement. We don't actually need
to assign anything here because we don't have
any variables over here. We've just got a void
that says take damage. We've got an event. Whenever we collide with the collider,
take that much damage. Now, what should
happen if we go ahead and clear that console
and click Play? We can see nothing
is printed now, but as we run
along, let's go and interact with that Spipal
and see what happens. And we can see there, we
have player took two damage. I do it again, it
runs again Here, player took one damage. Here player took one damage.
And let's try and do that. Player took two
damage, two damage, because both player
took two damage, player took one damage, one damage, one damage. Perfect. This is actually
working really, really well. Now, the last thing
I do want to add just so the next
video isn't too long, is an invincibility time. This is actually also quite
easy to make because this is the script we're going to be using for all our player health. I'm just going to start
fleshing it out now, but basically all we need
to do is we need to, let's get our void update
back. So every single frame. And then let's have
a float up here. Call it Max invincibility time. Then we're going to
have another float which is going to be
called invincibility time. All we're going to do is
inside this void update, we're going to say if
invincibility time is greater than zero, then we're going to decrease
the invincibility time by the amount of
time that has passed since the last frame,
time delta time. What's going to do
is it's going to say every single frame if
this value is not zero, in other words, if
it's five minus however much time has passed
since the last frame. So in other words,
basically count down. Well, this is actually just
going to work as a time, but we're going to say if
it's greater than five, then count down back to zero. And then all we're
going to do is underneath this
take damage void. We're going to add in another if statement condition
up top here. We're going to say if we
have collided with enemy and our invincibility time is
less than or equal to zero. In other words, if we're not currently in a time
when we're invincible. Let's add some more
parentheses around there then, and only then take damage. The last thing I'm
actually going to do is I'm just
going to remove this word Enter and
change it to a word stay. The reason why we can
do this now is that this trigger event over here is actually called once per frame for every collided
to you that is touching. In other words, if I
were to collide with something and I
were to stay there, I will continually damage
every single frame. But because we've added in
this invincibility time, we can now write
the code like this and set a time that we
cannot take damage. Because the reason I didn't do this originally was because we would have seen 100,000 messages every time
we touch something. Because it's going
to run every frame. But because now we're only taking damage every
time that we can. In other words, only every set interval which we're
going to set over here, we can't take damage
all the time. I can now write this
code like this. And this is actually a lot better because it
means that if we stay on a spikes or
something like that, we're going to continually take damage as long as
we're on the spikes. And that's actually
what we want. Before we actually
go back to my game, there's one last
thing I need to do. I need to make
sure that I always set my invincibility time over here equal to my maximum
invincibility time as long as I've
just taken damage. The minute I take damage,
reset that kind of time. Basically, that is pretty much all the code we should need to write to have a basic
system for taking damage. Let's go back into Unity. Let's set my maximum,
my time to 1.5 seconds. Let's see this in
action. If I go ahead and hit play, can run along. And we're going to actually
watch these two variables. So we can see if it's working. Watch this one. Every one a 2 seconds, I'm
going to take damage. You can see over there,
player took one damage, play took one damage, play
took one damage provided. I'm staying on these colliders, I actually continually take damage every single
time I'm on one, which is exactly what I want. Now there's one more
change I want to make as long as I'm busy
doing things in my game. And it is going to be adding in a hit detection animation. We're actually going
to go ahead to my player and we could animate it so that
whenever they take damage, there is a certain effect that plays, et
cetera, et cetera. And we write that in the
animation window over here. That's going to
make things quite complicated because
we already got all of these animations
over here and adding in a hurt animation. Then we need hurt while idle, hurt while running, et cetera. Instead, we're going to
use a simple effect, which is going to be a red
block that goes like that. When I take damage and
then changes back. I'm going to flash
red momentarily. And then I'm going to stop. The way we're
actually going to do that is entirely using codes. We're going to go over here
in my player health script, we're going to write what
is called a co routine. So we're going to write
numerator, take damage. This is going to allow
us to program in like timers actually wait
for this amount of seconds. I'm going to write
the following. I'm going to say
at the top here, I'm going to have a
public reference to my Sprite Renderer,
call it Sprite. I'm going to say inside
my take damage void. Don't get confused about
this. This is basically, just think about it like a void. But I can use commands that allow me to wait for a
certain amount of seconds. That's not exactly
what it is, but that's just what we're
going to be using it for. Just think of it
like a void with an extra ability, obviously. Don't use this instead of voids. Only use it in the way
that I'm using it now, but don't worry
about it too much. You're going to say yield
return weight for seconds. Then we're going to enter a
certain amount of seconds. I'm going to use invariable to decide that's what
I'm going to say. Public float color change time. This color change time variable
is what we are going to use to determine how long we should wait for before
changing colors. First I'm going to go sprite
color equals color white. Then I'm going to
go ahead and wait for however long my
color change time is. Then I'm going to change from, I'm actually going to put
red at the top of here. I originally go red, wait for amount of
seconds, then I go white. And that is actually pretty much everything that we're
going to need to do. We're going to set
the sprite color to red the minute we want to, and then when we're
done taking damage, we're going to set
it back to white. And obviously this is every
single time we take damage, we're going to call
this co routine. Now two things. First of all, this is actually named
the same as voids. I'm going to call it take damage effect instead it's
slightly better name. And second of all
we're going to have to invoke this every
time I'm going to underneath this and write
start co routine again. Don't worry about
this thing too much. It's really not that
important and I don't actually want to spend
too much time going into it. But basically just
think about it like a void which allows us to wait for a certain
amount of time. Then we're going to
call this specific void over here which allows
us to take damage. And this means
every time we take damage, we're going
to change to red. And then for however
long we want to be red, we're going to keep it. And then we're going
to go back to white. This is pretty much
everything that we need to do to make ourselves
have a hit indicator. Let's go ahead back to Unity. Go right back to play. Let's set the color change
time to 0.2 seconds. Now if everything
works as it should, we should be able to run along just like we normally have been. Just like normal
when we take damage, we should change to red. We haven't assigned sprite,
let's make sure we do that. Drag this down over here. Assign the sprite variable
to the sprite thing. Let's try that again,
running along, if we take damage, we flash red, which is exactly what we want. And that's actually pretty
good in my opinion. You can clearly see when you
take damage and you can see, obviously, if you
stay inside it, you take continual damage. That's pretty much good. The only last thing is how
long we're invincible four and we're going to
write another co routine for that as well. Let's just go down here and take enumerator call it
invincibility time. We're going to say
while in other words, do this until this thing
is no longer true. Invincibility time is
greater than zero. In other words, while we're
currently invincible. Let's go ahead and flash
in and out of the screen. We're going to do the same
thing we do with color. Let's go sprite color
equals new color. We're going to set
this new color to be pretty much exactly
how we have white, except with a slightly
less evident alpha. It's going to be
somewhat transparent. Set this to 111, which is the maximum value, and then we'll set alpha. Let's use a variable
for this as well. Public float transparency. Let's go ahead and copy that
in and put it over there. This is actually pretty
much exactly what we want. While this invisibility
time is holding true, going to change to in, we're going to change to
slightly transparent. And then we're going to
write a new yield return to wait for seconds. I'm going to use another
variable over here. I'm going to call this
one invincibility delay. In other words, how long we want the time between flashes to be. Let's write invincibility
delay over there. And then let's go ahead
and set our thing back over here, normal 1111. I'm actually going to repeat this process a fair few times. In other words, we're going to change the transparent color, change back to normal color, and then wait for another
amount of seconds. After doing that, we
become transparent. We wait, we become
normal, we wait. And then if we're
still invincible, we become transparent again. Wait, this is going
to repeat on and on, until this is no longer true
and then it's going to stop. It's important to note
that because we've, the way we've written this code, it's never going to stop
when you're transparent. Because it's only
going to check if invincibility time is greater than zero at the
end of this code, it's not going to be able to stop in the middle of the code. It's going to run at
once and then say, okay, do I need to do it again? You have to worry about being
stuck half transparent. Now, before we go back to Unity, we have to actually
do one thing. We have to make sure we
actually call this cotine. Otherwise it's never
going to take its effect and we won't be able to see
it. Let's go to the top here. Remember to write
in Start Corotine Invincibility Time,
just like this. This is actually going to
allow us to call the corotine. Make sure to put a
semicolon at the end. Now if we go back into Unity, we can make sure to edit
these values in our player. Let's make this invincibility
delay 0.2 seconds. Let's make my transparency 0.5 has to be a value 0-1
Keep that in mind. Now this should actually be everything that we need to have a properly working
invincibility effect. Let's see if it works.
If I load up my game, obviously we had the red
damage effect working. But let's test if this
one does as well. You can see it actually
works perfectly fine. It's just we seem to have
lost our damage effect. And the reason for
that is because we're actually overriding our color. Let's go back here and just
quickly make a small fix. We're not going to
want to change it. What we're happening is
we're changing it to red. But this code over here
is making it white again. Instead of saying, okay,
change it to white, I'm going to say change it to whatever it was before.
Sprite dot color. Sprite color. Sprite dot cool dog. And for red, green, and blue C, that should work a lot better. Now, we're no longer going
to be changing any of the actual aspects
of the color except its alpha channel, which
is exactly what we want. Let's go back here and see if
this works a little better. And I think it
should make sure to watch that intervinsibility
time variable. If we take damage, we can see it actually works
perfectly fine. As long as we're counting
down at spirit time, we flash and the
minute we stop, stop, which gives us a pretty
good indication of our game and the damage system
working, which is great. That's pretty much everything we need to get done in this video. Obviously, now we can see we can actually take damage and all we need to get started with now
is our health system, um, which should help us make this game a lot more
fun and actually, well, more like a game
than it is right now. So I hope your game is working just as well as
minus at the moment. Obviously, need
to tweak this and make sure that everything
is working just like minus before you continue onto
the next video where we're going to get started with
our health system. Thanks.
11. Lesson 10 - Adding player health: Hey there, and welcome
back to Unity. Now in the last episode, we added in Hit Detection, which allowed our player
to show when he has taken damage and also how long he's invincible for before
he can take damage. Again, we can see all
of that in action over here with the
taking damage and the flashing while
you can see where you've just stopped taking damage and you're
now invincible. And then when it
wears off as well, that's all well and good, but we still don't have a system that actually shows, okay, how much health do I have and how long until I actually die? And it's game over because the player doesn't
have infinite health. It wouldn't be a very
interesting game if you could never die. What we need to add
in this episode is a health system
to show, okay, the player has this
much health left, and when the player reaches
this health then he dies. And to do that, we're
actually just going to use the exact same script we've
been using all along, this player health script. So let's go into scripts and double click player
health to open it up. In visual studio, we should be able to see everything
that we coded last time. Right over here.
Perfect. Now all we're going to do is
add in a public int, call it Max health. This is something which you
don't really have to add to a variable because
what this is going to say is how much health we
should have at a maximum. In other words, like
how much health do I want when I'm full health? And you might think, oh, that's a good thing to
have as a variable. But because I've already made
the sprites and everything, I know how much max
health I'm going to have. It's going to be six, but you can add this
in if you want to. It's just good program
practice too regardless. But we're going to leave
it in there and also add in a new public into current health which
is going to be called, he actually call
it current health. Cool. Then all we're
going to do is we're going to go over here to my
take damage void over here. And I'm going to say current
health minus equals. In other words, current
health is equal to current health minus. And then we're going
to say damage, in other words, decrease current health by the
amount of damage. I'm actually going to remove this print statement
over here which says how much damage I took because that was
just for testing. Then all I need to do over
here is I need to have another void underneath this which I'm going to
call check dead. I'm going to call this void
the minute I take damage, before I even do
any of the effects or invincibility time
or anything like that. I'm going to say if my health current health is less than or equal
to zero, then I'm dead. I need to invoke another void. I'm going to write
underneath here, death. Let's go ahead and
add that in there. Damage void where I decrease my current health by the
amount of damage I took. I have my check dead
void where I say, okay, if my current health is
less equal zero, call this. And I have my death void
over here which says okay, now once I'm dead,
what I want to do, so I'm going to actually get
started, program in this. And then I'm going to add in a final thing to the
top here that says, okay, set my current health to the max health
at the beginning. Actually, I'll just do that now. Let's go ahead and
say void start current health is
equal to max health. In other words, everything
is all well and good. We're starting again and we've got my current health
to the maximum health. Then underneath
in my death void, we're going to say okay, what do I want to happen when I die? Well the first thing
I want is In't want the player to be
able to move anymore. The way I'm going to do that is I'm actually going to access the game object that this is currently attached
to, which is the player. I'm going to go Game object and then I'm going to find
another script on this. In other words, the
Get movement script. I'm going to go Player do get
component Player movement. I'm going to say
enabled equals force. In other words, I'm going to stop that script from
being currently enabled. I'm going to say
okay, it's gone. What this is going to do is, is basically going to allow me to disable the movement
as long as Glary is dead. I also don't want
my rigid body to have any gravity affect me. I
don't want to fall anymore. I'm going to say do get
component rigid body two D gravity scale. I'm going to set
that equal to zero. In other words I
don't want to fall, I'm staying in the middle of the air and I
currently can't move. Then there's a few more
things I want to do. I want to actually disable the animator which
is on my component, on my object right now. Now I can't change animation. Then last of all,
I want to change my sprite to a
specific death sprite, which I'm going
to put over here. I'm going to say public
sprite, call it dead. I'm going to say get component
Sprite Renderer Sprite equals and then dead. These four lines of code over here are basically
going to say, okay, the minute I die, disable
my movement scripts. Now I can't move anymore
because it's game over, right? I also don't want
to be able to fall, so set my gravity go zero. I'm just suspend
in the middle of the air, not moving right. I'm actually going to add
one more thing before I do that is I'm going
to say game object, get component rigid body two D velocity is
equal to vector 20. In other words, stop me midair because the way
this works currently, if I were to die and then
I did all of this stuff, I would continue to
move along the screen, which I don't want. So first I want to make
it so I can't move. I want to stop myself midair
and disable my gravity. So I'm standing in the
middle of the screen. And rather just there in
the middle of the screen, I want to disable my animator. So I don't longer have
any of the things, okay, if I'm grounded or not,
whether I'm falling, I'm just disabling
this outright. And then I'm going
to set my component of Sprite Renderer, the thing that tells me
what sprites currently display to this special
sprite over here, which I'm going to add as well. This is pretty much
all the code we should need to create
a health system. I'm going to say at
the start of the game, set my health to the max health. And then every time I take
damage minus it from it, and the minute I am dead, then call this Spoid over here, which basically makes it
pretty clear that I've died. Let's open up Unity,
Go into Player. Let's see which of
these we have to add. Let's set my maximum health to six and we need to add
in this dead sprites. I'm going to go into
sprites, right click and right import a new asset
and it's minus seven. It should be linked underneath this video just like all
the other ones were. I'm going to update these
while I'm actually added. I'm also going to import
these heart sprites which we're going to use for our
health system in a little bit. Let's go ahead and
make those also 12 and Point No
Filter and Perfect. We're going to check it
like we did last time, make sure those both fill in. Perfect. Let's
scroll down here and let's make sure we
have my minus sprites set to this minus seven. Let's see if this all works
just like we intended. We've got our last sprite
added, everything else. Let's if we go to my player, we can see right now
I have current health of six and max health of six. Now my health is at four
because I just took damage, Health is now at three. And if I take two damage from this, health
will be at one. Now what should happen if
I run into the sprite? I should stop Miller and change into a tombstone,
which is perfect. I still have the deaf
effect which I need to fix. But you can see, obviously we haven't
disabled all, the scripts are not fully dead, but this tombstone does
seem to be working. I have a tombstone over here, and that's all pretty cool. There's a few more tweaks
I want to make to this before I start adding
in my heart system. The first one, I think
the tombstone should be slightly higher up in the
air than whenever you died. Let's start by saying over here where all of the
rest of this code is. Let's also go ahead and say transform position
equals new vector three. Transform position x, transformed opposition dot
y transferred opposition. Obviously, this statement
doesn't do anything yet. I'm just saying
transformed opposition equals transformed opposition. But then we're going to go to the top here and
we're going to add in y offset for when we die. Let's copy that down there, and then let's add
that over here. And I think something
like two or three will make this
look a lot better. Then after we've done
that, the last thing we want to do is add
a new variable, call it is dead. And this is going to allow
us to keep track of when we are actually alive and not over here at the
start of the game. We want to set is
dead equal to false, because we're not over
here when we die. We want to set is
dead equal to true. The reason we're
going to do this is we're going to actually take care of all of those things we were doing previously
where it was still taking damage and invisibility time was still taking effect
all of that stuff. And the place we're going
to put this in is we're actually going to move
this script over here. Let's go ahead and look at
my check debt script over here and say if current health is less
than equal to zero death. And then underneath this,
before we call the other stuff, we'll say if not is dead, in other words if
I'm still alive, then you can do all
this other stuff. Then you can set the start time, you can invoke the
damage things. But if we've just died, we don't really want
that to happen. We could actually also put
this as an L statement. You could say else,
in other words, if my current health
is not there, which I'm going to do just to make procincts slightly better, but it really doesn't
make a difference. In fact, this dead variable
is not actually 100% needed over here
because we could just write else and then
not use it at all. But I think it's still a
good thing to have just to keep track of whether the
player is alive or not. Let's go back to player and let's my Y offset something like two and see if all of these
changes are going to work. Let's go click play and see
if I continually take damage. That's two, that's
four, that's five. On the sixth one, we
can see over there, two might be a little high,
let's set it to maybe one. But it actually did work
pretty much perfectly. We've got everything
working fine. If we die in front of
something like a spike, we'll go in front of the spike, but we won't continue to take damage or have damage shown. Let's let the robot
kill us. Almost. That's four. Therefore, if
we die here, there we go. We should see over there, we've got our death effect over there. And we also want
the camera to stop. But we're going to
add that right now. Let's go over here to my camera. Let's go to find where
it is over here. Camera speed under the
camera move script, underneath this dead
void over here. I'm going to say game
object dot find. In other words,
get in the scene, my main camera, find it. Then we say get component, find on that my camera move
script going to set my speed, camera speed equal to zero. This is actually
everything that we need. Now the minute I die, I should have my camera
speed set to zero and everything should
work perfectly fine. Let's go back into my game. I'm going to want to
adjust my y offset actually to something like 0.5 Think one was still
a little high. Let's see if this
all works just like we anticipated running along. The sake of testing,
I actually just going to set my health to one, Have to continue
to test this out. Let's set current
health. You go to one and see if we
run into that spike. We can see we do in fact die and the camera stops,
which is great. It's exactly what we
want. That is pretty much everything
that we need to do in terms of showing
that we're dying. But we still need a
way for the player to see how much health
they have remaining. To get started with
that, we need to get started with our user interface. Let's right click and go Create. I' going to want to
create an image. You can see it makes this
massive canvas and this is actually much bigger than that. There's our game down there. This might look a little
bit confusing it. This is a screen space overlay. I much prefer to use the
screen space camera mode. And you can drag your camera
right in there and then you can see your UI in
front of your game. There's not a massive
amount of difference, it's just a thing of preference. But I generally do prefer to use the screen space, camera mode. I think there are some
distinct advantages, but I've never really
researched them extensively because I've never had a
problem with the camera mode. Let's go ahead and use camera inside this image over here. Let's first rename
our canvas to UI. This canvas is like a building block for all
of the UI components. And this event system allows
us to have buttons working. All of these are
going to be created automatically when you
create a new image, just like the animator was
created when you created, or rather the
controller was created when you created an animation. Leave them all.
Don't delete them. Leave the event
system where it is, and leave the UI
canvas as it is. Obviously without the canvas, none of these
images are actually going to work and they're
not going to show up. If we move it out of the canvas, we can see it no longer gets
rendered on our screen. Let's just leave
that all as it is. Change this to heart, then let's go ahead
and drag in our heart. For the source image,
we're going to click Set Native Size so we can
see exactly how it works. It seems to only be rendering a specific portion
of my heart sprite. I think the reason for that, if we look at these
arrows over here, we can see that there
are three things that pop up as opposed to
everything else only has one. For some reason,
Unity automatically thinks it's being
clever and tries to separate these into
three different sprites when I actually only
want them to be one. I'm going to select
all of these, Make sure I set the sprite
mode to single head apply. Then if I go back over here and try and drag in my sprite, everything works much better. I didn't actually realize
that would be an issue, but just make sure
you do do that, especially if using my sprites. Now I think a lot of
them are actually set to multiple by default. But
it's not even an issue. Like for instance, this minor is multiple, but it's only one. In fact, I think
every single one of my other sprites
are actually one, even though they're
all set to multiple. So it doesn't really make
too much difference. You can leave those there, just make sure this one
is set to single, because otherwise
Unity, we'll try and split it up into different
sprites for you. That's obviously not
what want for my game. Now let's go ahead back
to my heart over here. We now need a click
set native size to make sure they are fitting
with everything else. Then we need, now
obviously scale these down so they're
the same proportion. Let's go ahead and drag that until the pixels
are the same size. You can see there
they are not yet. Let's drag it a little bit more. We're actually almost there. Let's just go slightly
larger until it fits in. It doesn't have to be exact,
but the closer you get it, the better your game
is going to look like. It doesn't really make a
difference at this point. I think that's pretty much
exact. That should be good. It's going to look
completely fine like this. But let's move that to
the top of the screen. Now we can see those
hearts are going to be there while I'm playing the
game, which is perfect. That's exactly,
actually what I want. Now we need to do is we
need to link these hearts to the code over here which
basically sets my health. The way I'm going to do
that is I'm going to go ahead into my health
script over here, which is under script, I'm
going to click Player Health. I remember right at the
beginning of the course, I mentioned these three
things at the top. If you need to use
different things in Unity like you have to add in a line. And that's what
we're going to do here. We're going to say using
Unity engine user interface. That's just so we can talk
about things like images. We're going to go over here
underneath all of this, going to create a
public sprite array, in other words, a
list of sprites, and we'll call it hearts. We want this hearts to be from zero all the
way up to five. Because there's going to be
six different types of heart spend on how much health
you have, neath this. We're going to
create a reference to my image and this
wouldn't show up, but we haven't typed UIs To make sure you have
it at the top there, we're going to call
it heart icon. Now over here we have our hearts icon, and we have our hearts. Let me change that
to heart's icon. These two things are
going to be able to show the player how much
health they have remaining. Let's go over here to my void over here where I take damage. And I want to make sure
that I set my damage or rather my new kind sprite over here to whatever the
heart's icon is. I'm actually going
to put it over here with all of my other things because I don't want to really
bother with updating them. If I'm dead, I can just
set it to the default one, which is the lowest
one, obviously. And I'm actually going
to do that as well. But before I get too
ahead of myself, let me just focus on
changing it over here. I'm going to say obviously
on a scale 0-6 I want to set my hearts icon sprite equals
hearts open brackets. And then we're going to
have the remaining health, current health minus one, because obviously in
a ray starts at zero, If we're on one health,
you want the first image. This is actually pretty much
all the actual code we need. The last thing I want to do is underneath my depoid over here, I'm going to write the bottom, make sure I set
my thing to zero. Actually, it just occurred to me that we will also need to show different hearts if we
have absolutely zero health. So let's actually set
that to current health because that is the correct one. For one health we want to be on. The second thing, current health over here and zero over there. Let's go back into unity Now, the last thing we need to do
is we need to, first of all, create a reference
to that Heart Cycon, which we're just going
to drag in right there. And second of all,
we actually need seven elements in this array because there's six
different hearts, Health you can have,
and then one with zero. Let's go back to sprites
and drag in all of these. We've got hearts, seven heart, six hearts, five hearts, 432.1 That should actually be pretty much
everything we need to do to get this system to work. If we go ahead and hit play, we can see we have three hearts. And then depending on
how much damage we take, those hearts should go down.
So we start, we take one. You can see over
there we show it has half a heart, then another half. And then the more damage
we take, obviously, the more lower health we
get until we go all the way to zero hearts and then we turn into this little tombstone. That's everything we need to do to build our health system. Our game is actually working
pretty much perfectly now. We can even die and we can lose. Obviously, there's a few final touches
we still have to make. We have to add in a game loop. We have to improve
the visuals and obviously all the audio things, but this is actually
turning out to be a decent amount of our
game already done for us. It might not look
like it's done yet, but we've actually got a lot of the basic mechanics out the way. And what's kind of
left after this is a lot more kind of additions
and like funner stuff. We've built most of
the building blocks. I hope you've been following
along and that you've been able to get a hard system
working just like I have, as well as the health and
all the damage indicators. In the next episode,
we're going to start adding in currency. We're going to add in diamonds, and every single cloud
is going to have a pretty low chance of
spawning in a diamond. We're going to get started
in the next episode, but hopefully you've been able
following so far and that your game is in
shaping up. Thanks.
12. Lesson 11 - Introducing gems: Hey, welcome back to Unity. Now we've already added in
our players health system. And pretty much
everything else so far that a platform
game would need. Except for a scoring
mechanic or like coins or gems or something
you can pick up to show that you're
progressing through the game. That's what we're going
to add in this episode and we're going to
be using diamonds. Now's start, let's import our diamond sprite because
I've already made that. Import diamond dong, which is obviously linked in this
folder of the video. Then go set this
pictures unit to whateverthing else is and set
the filter mode to point. Now we have a
diamond which we can obviously collect in our
game, which is pretty cool. Now this diamond, just
like the hearts have added an outline
around it just to make it a little clearer that there are hearts and scoring mechanic, I might remove this
later on in the game, but for now I think it
does a pretty good job of just outlining that it is
different from everything else. I'm actually also going
to want to set this to be a higher order and layer
than the rest of the game, so that it doesn't get
hidden amongst the clouds. But I'll get to all
of that in a minute. Let me just first start by dragging it into the
screen like I just did. And that's basically
a shorthand way of creating an object with
a sprite renderer. With this particular sprite, I'm going to waste
no time in making this into a prefab
called diamond. Then I'm going to delete
this one I have over here and open up
my diamond prefab. Now this diamond prefab
we're actually going to use, obviously, to code in a lot of the logic we want
for my diamond. And before I get started
with actually writing code, we have to basically decide how the system is going to work. The system that I've
settled on doing is having every single cloud have
a certain probability, we can make it one
in 31 in four, whatever we want of spawning a diamond when the player
lands on the cloud. And when you jump at a cloud, there's a chance that
the cloud is going to shoot up a diamond
out of around a position and you're
going to have to catch that diamond
before it lands. I think I'll start with it just shooting directly up
so you can see it. But the diamonds are not going
to be part of the cloud. They're going to jump up
and then fall through. So you have to be
able to grab it by either in the mid air or
as it's falling back down. But it's not going to
stay there for long, It's going to jump up
and then fall back down. So we obviously
don't want to have a normal box glider, We
want to have a trigger. So let's get started. I'm
going to add a circle glider. Actually, not a box glider just because I could add
a polygon as well. But in this instance, having like a circle
isn't the worst thing in the world because
you want to be a little more forgiving
with power ups than you do with hit boxes. Because no one's going to be annoyed that they
collected something. Obviously, don't
make it ridiculous. And I'm going to set the
offset to zero, right? Let me keep that at 0.1 0.05 Let's make it
three. There we go. Like I said, no
one's going to be annoyed that they collected
something like this, but you obviously don't
want to make it ridiculous, just make it about that size. And I'd say that's
probably good. Then make sure to
set it as a trigger and we're going to have
to create a new tag. We're going to call it diamond. Now before we get, let's obviously assign that
there before I forget, before we get started with
adding in all of the logic for how the scoring and
keeping track of diamonds and having
like diamonds per run, all of that thing
is going to work. Let's first just get
done with the logic of actually spawning
the diamonds when we want them to spawn, and then we can add all
the other stuff later. To do that, we're going
to have to go into my Clouds and let's go back
into my prefabs over here. And I'm going to want
to add to every single one of these prefabs
a script that says, okay, you have in this many chances of
spawning in a diamond. Let's get started with
that script over here. I'm going to create
a C sharp script. I'm going to call
it diamond spawn. I'm going to double
click to open that up in visual studio. Where I want the
script to work is. I want to say that whenever
a player jumps on me, that's when the one in three
chance is calculated of whether I want to
spawn in a diamond. But that's a little confusing because it's quite
hard to differentiate. Okay. Is this the first time
the players jumped to me? Because I obvious don't want the player to be able to jump as many times he wants and
eventually spawn in a diamond. I want it to be decided before
he's even jumped on it, whether it's going to
spawn a diamond or not. I'm going to use a bit of a strange method of coding here, but it's actually one
of the best ways, in my opinion, to do this. I'm going to get started
under my original void. I'm going to say let an integer
x equal a random range. Keep in mind, we
decided range was inclusive in the minimum,
but not at the maximum. I think if you use
floats it's inclusive, but with integers it isn't. And we're going to set over here public integer and we're
going to have the chance, this is the one in
how many chances? I'm going to go from one to
my chance variable plus one. In other words, if
I do 1.2 it'll go 1-3 which is either going
to give me a one or two. Then I'm going to say if
x is equal to chance, because that's
probably the best way of coding it, Obviously, if we are equal to
the maximum number, for instance, if this is three, it's going to pick 1-3 And
if it's equal to three, we know that there's always that many chances of getting it. Pretty much anything
actually works. You could say chance
minus one or even 001, but this is a good way of knowing that it will
be in the range. Let's add round brackets
around that if statement. And then inside this
code over here, this is where we're going to say what happens if we're
at this chance. Now actually this is
not what we want, we want to say if we're
not in this chance, if I get anything other than the number
which I want to get, I'm going to want to destroy or delete this actual script
attached to my code. I'm going to say
gameobject, Get component. In other words, find
on my game object something called diamond spawn which is this current script. And then delete it. This might seem a
little confusing, but basically what
I'm doing is I'm going, okay, start the game. Pick a random number from
one to let's say three. And if you've got anything
other than three, then destroy the script. What this is going to do is
going to mean, on average, only one in every three of these actual scripts is going to remain on my game object. When I have the game, that is how many clouds
are going to spawns? There's one in three chance
of this script surviving. And then I'm going to write some code undneath this
that says, okay, if I interact with the player, then spawn in the diamond. And then also actually going
to delete the script as well because they
don't want to spawn in more diamonds after
I've spawned one. Before I get to ahead of myself, let's create some
more variables, public gameobject,
diamond, and I'm actually going to
create a reference to a rigid body as well. Then I'm going to go ahead
into my update void. I delete it, I'm going to
replace it with a void on collision enter
two D. I'm going to say if collision game object dot compare
tag is a player. In other words if I've just
collided with the player. And this code is obviously only going to be checked if
I've hit that 13 chance. If I collide with the player
I want to spawn my thing. I'm going to say
game object D is instantiate diamond
as game object. I'm going to set the position of my new game object deed of
transformed opposition equal to my current
position on the cloud which is going to be
transform position. I might actually not
launch this to spawn exactly in the same
position as the clouds. I'm going to create
a new vector. Three, go transformed
opposition, do x, transformed opposition y plus an offset which I'm going
to choose over now. And then transformed opsitionI'm create a new float,
call it offset. And that's going to
allow me to choose where above the clouds
I want to spawn. The last I'm going to do is
I'm actually going to set RB, which is my reference to
a rigid body equal to D, which is my newly
created diamond. Do get component rigid
body two D. I'm going to add a rigid body
to my diamond and that's how I'm going to
make it jump up in the air. I'm going to go Rb,
velocity is new vector two, set it to zero and
I'm going to set, I'm going to create a
new float up here which is going to be my
diamond launch speed. So I'm just going
to call it launch. This going to denote
pretty much how high in the air the diamond
is going to fall up. Then I'm going to
actually create a separate script on top of my diamond which is going to say if I go live
with the player, do this, otherwise I'm going to want to delete
myself the minute I reach this level of
kind of y position. Because the way
it's going to work is every time I land on a cloud, it's going to shoot
up a diamond. Then it's going to fall. If
the player doesn't hit it, we don't want to be
falling forever. That's going to take
a lot of kind of calculations and computing
power away from the game, even though it's not even
happening on screen. So let's go ahead and
leave this for now. Basically what we're
doing is we're saying as long as
we still exist, by the time the
player lands on us, then spawn in a diamond. Set its position to slightly above us and shoot
it up into the sky. So before we actually chest, if this works, there's a
few things we need to do. First, we'll need to make sure that the player is tag player. So let's go ahead and
tag him as player, which we hadn't
actually done before. The second thing
we need to do is we need to go into my prefab. And I need to go and
make sure to add the script to every
single one of these. Let's go ahead and type in my script poetry
we've just done here. Let's set the chance
to 1.3 For now, let's go to prefabs
and set our diamond as the prefab rigid bodies is going to be assigned
when we spawn in. And then let's set the
offset to something like 0.5 and the launch to
something like five for now. We can obviously
tweak that later on, but just make sure it is
obviously editing every single one of those
prefabs which mine was. And we can obviously
change those as need be. But the last thing we
need to do right now, this is actually going
to work pretty well. We're going to spawn
in our diamond. And it's all going to work
except for the rigid body because we don't
have a rigid body attached to our
diamond just yet. Let's fix that by adding
in a rigid body two D. That is pretty much actually everything
that we need to do. I'm going to freeze
the rotation Z, even though it doesn't
really make a difference. I'm going to make sure
that the collider is a trigger, which
is what I wanted. This is actually
everything that we need to do when we're
creating our script. We've got this script up
here which is going to say, okay, spawn in our diamond. It should be that every
one in three clouds is going to spawn a diamond.
Let's test if this works. Let's hit play and
see as we run along. We've got a spawning cloud. Let's see if it kept a script.
The script is not on this. I guess that one wasn't
the one in three. Let's see if there's
one after this. That one also
doesn't have it on. That one clearly
obviously got destroyed. My God, that's hard.
You can see over there, that was the one
in three chance we can see the diamond spawned in. Now the problem is we haven't actually
destroyed the script, so this is going to
happen every single time. But I think it
looks pretty cool. It actually works quite well, and we have a
diamond spawning in. I want to make a few tweaks. First of all, I want to change that launch speed
to something like 6.8 just so we have a bit of a better
spawning chance now. It's going to be a little easier to catch that diamond
as it goes up. I'm actually going to make it something more like
eight, in fact, and just see if that's
a little ridiculous, but it might work quite well. Let me just test that obviously. And then obviously in
my player as well, I actually want to make
his speed a little bit lower and make the jump
height a bit higher. I actually might even increase the gravity scale
just a little bit. These are just kind
of tweaks I'm making. So I'm changing
my gravity scale, going to make it 2.5 I'm going to make the
jump height 12, and I'm going to
make the speed five. And let's see how that
game plays because it's feeling a little bit kind
of floating at the moment. That is actually a lot
better than I was expecting. This is a lot better and a lot more like what
I want you see now. It's a lot easier to
catch those diamonds. Obviously, they are still
spawning infinitely, But this should be good for now. So let's quickly make that
tweet that we need to make. The minute we spawn
a, a diamond, we obviously want to delete our script because we don't
want to spawn in multiple. So let's just copy that over. And then all we need to do
after that is actually add a script to the diamond itself that says if I
collide with the player, then increase this
variable on the player. And I'm going to have a
new script over here. I'm going to have
two new scripts. One of them is going to
be addited to the player, which is going to keep track of how many diamonds
the player has. And one of them is going to
be added to the diamonds that keeps track when the player
collides with the diamond. Let's go ahead and
create a C sharp script, call it player diamonds. This is actually not
really going to be much of a script, it's just
going to be an integer, which going to say
public int diamonds. We're actually also
going to have a public int high score diamonds. There's going to be the
diamond, the current run and there's going
to be our high school. We'll get to that
later, but these are the only ones we need for now. Then all we're going
to do after that is we're going to create
a new script as well. Here I'm going to create
a shop script and call it diamond on the script. All I'm going to have is a single event void on
trigger enter two D, if collision game object
compare tag player, then we go collision the
thing I collided with on that find a component
called player diamonds. Let's go ahead and actually put curly brackets here so we can put this entire thing inside the statement and find a variable on that
called diamonds and incremented by one. In other words, if
I collide with the player increases
diamonds by one. And then we need to actually delete the instance
of this prefab. So let's go ahead
destroy game object, which is basically going to
delete this current diamond. Then the last thing
we're going to do is add in a condition if we collide with the
bottom of the map, we actually also want to
do that exact same thing, destroy myself and not
increment it this time. To do that, we're
actually going to add in a collider to the bottom
of the main camera, because that is where the
game play is going to happen. And we're going to add in
an edge collider two D, We're going to go and
see it over there. This is what's
going to be used to basically track of whether we have hit the end
of the map or not. I'm going to move the offset of the Y down to about there. We can have a little
bit under the screen, doesn't really
make a difference. Then let's set the
points to negative five, or rather negative
ten, maybe even. Actually, we want to be
greater than the screen. Let's say negative 12.12 Now this is going to be a
trigger collider as well. Then we're just going
to have a little line of code inside here that says else if collision game
object dot compare tag. If I hit the main camera, then I still want to delete
the instance of this prefab. This should actually work pretty well if we collide
with the player. We want to delete
the game object but also add it to the
player's inventory. If we collide with
the main camera, we also just want
to cease existing. Let's see if this works.
I'm first going to try not adding a diamond at all. Before I actually
test that, I have to obviously add in my
player diamond script, which I forgot to do, and keep track of how many
diamonds we have. I actually also forgot to add the diamond
script to the diamond. Let's go here and add
in the diamond script. And I think that's everything. Because the diamond spawn
we've already added. Let's hit play and test exactly
if this does work or not. We're going to have to test
to see if diamonds spawn or no diamonds have spawned yet. We're going to have to keep up with the
camera, obviously, to see if we're going
to miss one there. Diamond did spawn. It looks like it says tag main
camera is not defined. Oh, we spelt it wrong. That's a very easy fix.
Let's just go ahead and remove that space
and test it again, because we're currently
getting errors that say, okay, I don't know what
main camera is, but that's just main camera. One word. Let's try that again. It should work now. Nope, this game is
worryingly hard, but I get there in a minute. Obviously, the tweaking of the game generally
comes from how hard you make these ofscles
that you've created. I'm going to cheat a bit and put my health back up to Max
because I'm about to die. Let's set current health to six. It's one of the cool things
about developing the game. This is also impossible,
which I need to fix as is. There we go. There
we have a diamond, and it looks like it did
spawn, which is great. Let's set my health
back to ten this time. We're going to get some
errors because we're not actually meant to have health
above ten. But it's fine. It's not going to
break the game. I'm going to try to collect a diamond and it looked like it worked perfectly well.
I collect a diamond. If we go to my player, we can see I have
diamonds as one. Pretty much everything actually worked really, really well. Now all we need to do
is adding a counter so we can know how many
diamonds we've collected. Let's go into my UI
over here at the top, underneath hearts, we're going to want to create a new image. I'm just going to copy this for now and move it slightly down. I'm going to want this
image to be a diamond. I'm going to set
set native size. I'm going to want to just obviously need to scale it down, just like I did
with the other one, to make sure that the
pixels are the same size, it's a little bit bigger. See, that looks
about good to me. Obviously, like I said, doesn't have to be perfectly exact, but it does have to
be quite accurate. If you want a game to look good, then all we need to do, actually, is we
need to move this. Instead of having
directly under, I'm going to have this on
the other side, like so. Now I'm going to have the
score on the left of it, which might look a little
weird to some people, but you can choose
whatever you want to do. I actually might
change that later on, but for now I think
it'll work quite well. Let's move that
down, it's in line, then we're actually going
to call this diamond. Then all we need to do
is we need to go into my UI and create
another object UI, call it a text, and you have to create a text mesh pro. You're
going to get this pop up. Just click Import, and
it's going to import all of the files it needs for
this specific package. You don't really
need the examples in extras, so I'm not
going to import that. Then I'm going to take
my new textbox and I'm going to put it as a
child object of this diamond. I'm going to drag
it underneath it, just like we did right at the beginning of the
game with storage. I'm going to adjust the
position X to be something like -100 position Y to be zero. It's in the middle.
I'm just going to adjust the rest of
this box as I see fit. I think that's probably good. Move it up and down then. I'm just going to make sure
I have the right sense here. I want it to be right aligned. I think that the pin enabled, I'm going to keep ph now
because I can't actually imagine any instance where
you'd use up the entire thing. You'd have to collect
a lot of diamonds. But just to be safe, I'm
going to move it that way and I'm actually going to
set wrapin disabled. It doesn't do that. There
we go, much better. It will now extend as far
as possible, above across. Then I'm going to want
to have to choose how much of this I
obviously want to display. Let's test in a default value of 540 that does
not look very good. You're going to have
to obviously choose a different font and
everything else. Let's see, we have
a drop shadow font. Doesn't look great. An
outline font might look okay. You can't really see
it as there aren't an amazing amount of fonts available for you just
built into Unity, which is why I've actually
included another font which is the same font I'm going to be using, which I found
on the Internet. You can find a whole
bunch of fonts for free on various sites. Make sure they have
the correct license. But if you can find
one of those fonts, then you can find a
font which should fit your game style pretty well.
I'm going to use that one. Let's go ahead
into miscellaneous and click Important New Asset. Here it is, Bloopf. We have a font size here. I wouldn't mess with
these too much. We can try them out once
we've added the font in, but just leave them as they are. Now to use an extra font, we actually can't use
this text mesh prose. We're going to have
to delete this and create a new one UI. We're just going to
want a normal text. I have to go under
Legacy and click Text. Let's name this counter. Then I'm going to drag
exactly like I did last time. I'm going to set the horizontal
overflow to overflow. And I'm going to set it right
aligned. Move it this way. I want it to be
centered in the middle. I want it to be font
bloop, you see there. It looks all right. It's
very blurred though. And the way we fix that,
we're actually going to size the font size up, going to move the thing as
large as it could possibly be. You can make it a
maximum of 300. And I find that this
is generally what you have to do to get pixel to render right then you just got to drop the scale
all the way down. Let's scale that down. Let's click these and scale in proportion all the way
down to what we want. I think we need a little
bit smaller than that. Actually, let's try a
0.12 That might be fine. Let's try to change the color to what we actually want it
to be, which is white. It is center aligned, but it doesn't look like
it's in the center. So I'm going to set
it to bottom aligned. And let's try 150.
That looks okay. I might not be your
favorite font, but it's the one I'm
going to be using for the purpose of
this demonstration. You can obviously find a different font online
if you want to, but I think for now it
actually works pretty well. Let's make it a
little bit darker, so it's not bright white, But that should work as our basic font for keeping track of how
many gems we have. Now we obviously just need
to write the code that says, okay, display the
right number here. And that's all going to be done inside our player diamond
script over here. We're going to create a
reference to Eyes in Unity. We're going to go public
void update text. And inside it, above that, actually we're going to create a reference to our counter. We're going to say counter text equals diamonds, Two string. In other words, set
the text variable, which is what we're writing
in this little box over here. When we clicked on that, what this little box has inside of it that set that to whatever my current
diamonds value is as a string, it's stored as an integer. We have to convert
it to text format. Before we can do that, we're
going to obviously call this update text void every single time we increment text. Let's go collision get component diamonds, update text. This should actually
work pretty well. All we need to do is go back into Unity and make sure that we have assigned these
two variables as well. Let's go to the counter
over here and drag it in. Let's start it with
a value of zero, so we don't start with
some random amount of diamonds and see if
that actually works. If we click play now got our diamonds counter
on the right. We've got our
hearts on the left. Let's see if we can collect
and make this game easier. Let's see if we can
collect diamonds. I actually might
even increase the jump height a little bit more. I'm going to make it from 12, I'm going to make it 14. Let's see if that
works a little better. It might be a bit high. Let's keep it at 12, but maybe increase the
speed a little bit. Let's make the speed six. I know it was originally six, but I think it actually
worked a little better. Yeah, that's slightly
easier to traverse. That should be good. We
obviously just have to wait for a dim spawn to see if we can test out our diamond collection. I don't think I would have
gotten that one anyway. No, no diamond over there. There's one. There
we go. And you can see it works
really, really well. We have one diamond now
and we collected it, and hopefully it's there we go. There's two diamonds.
That's pretty much the basis for our
diamond collection system. Obviously, we're
going to get started with the ending finishing
touches of our game. But we've got all the basics
down before we can build it. We have to add in
postprocessing, make it look a lot better, audio and music, and
everything else. And we also have to
add in savings so we can make sure we save how
many diamonds we have. But I think we've
gotten pretty far so far and we've actually
done a decent amount of the game if you've
followed along and your game is actually
like mine is right now, a good job because you've pretty much a platform game already. Like everything else
we're going to add now is going to make
it a lot better. But these are all of the basics. We've got enemies, we've
got a health system, and we've got me mechanics, and we've also got a count of how many diamonds
you collect. Everything is pretty much working exactly as we needed to. In the next video,
we're going to add in a game loop so
we can continually play the game without having to click and click to restart. But once we've done that, you'll have pretty much
finished the game, all of its basic components, by no means finish the game. Because you'll still have
to add in the music and all the other postprocessing things to make it look better. But you'll finish the basis of the game is
what I should say. Anyway, that's all
in the next video. And if you follow along so
far, great job. Thanks.
13. Lesson 12 - Creating a game loop: Hey there, and welcome
back to Unity. There's one more
thing we need to add to get this game
to be pretty much all the basics of a game we should be able to play.
And that's a game loop. In other words, we
can keep playing the game for as long as we want, because right now, if we
jump off the map or we die, if something happens, that's it. We don't really have
anything else happen. And we can't even actually die that way. That's the first
thing we need to fix. But we obviously can't
continue to play the game, which is the problem first. Let's add in the mechanic that says if we touch the back of the screen or if we fall into
the bottom, then we die. Let's start by actually
moving this up a little bit over here to make it pretty much just right
the bottom of the screen. Obviously, if you touch
that, you're not going to be able to get back up in
the way you can fly back. That's fine. Let's actually add another edge collider this time. We're going to add it to
the sides of the screens. I'm going to click
Edit Collider. And I'm going to drag
the one over there. I think that that is
actually a little too close. I'm going to drag it
just behind that screen. And the second one I'm
going to drag down here. And then I'm just going to
adjust these so that exact same distance I'm going to
make it -10.8 for both. I'm going to make the y element
five and negative five. That should actually be pretty
much everything we need. All we need to do
now is we need to add in a script onto
my main camera, onto my player, which says if I touch the main camera
I have to die as well. Let's go back into scripts. Open up player health over here under my trigger
stay three D thing I'm going to say if I collide
with an enemy and invisibility time is
this, then do this. Otherwise, if it's non enemy, if I collide with
the main camera, in other words the
boundaries of the map, then it doesn't matter how
much invisibility time left. Anything else like that,
I need to instantly die. I'm instead of calling
the take damage void, just going to do a certain amount of
damage and check if I'm dead and if I'm dead,
then call the death void. Otherwise, call
there is dead void. I'm just going to
straight up call the death void myself and say, okay, then I need to obviously die and the
game needs to stop. This is actually pretty
much all the code we need to make sure that is
an added feature. Now there's one more thing we need to actually remember to do. I forgot to make
these both triggers, which or rather
this one a trigger, that bottom ones trigger, but
this one should be as well. Let's hit play a
test if this works. If we're running
along and we jump up to the wall,
we instantly die. We can see we actually
flew up there. Which highlights
something else I thought might be
an issue because I remember seeing
it once or twice, but I wasn't actually sure why the tombstone moved up
higher than it should. This actually makes
it a lot clearer. What's happening is that because this is a trigger stay event, we're calling the death
void multiple times. I'm going to have to actually
make sure that we only call the death void as
long as we're not dead. If my current health is great
and zero, I'm not dead. In other words, I can't die
twice. I can only die once. Because what's happening here is every single time we die, it's doing all of
this stuff again. And it's like moving me
up ever so slightly, which actually explains
why sometimes I died, it looked like I
moved up as well. I'm glad that we got that out the way I was
wondering what it was. We have to add this and not is dead clause over
here which says, okay, only kill me if
I'm not already dead. Need to add the exact same
thing over here is dead. Let's just make sure that
that is both here and here. In other words, we can't call the death clause if we've already called the death
clause once before. Those are the only two places in the entire script where
I called death clause. Everything should
be good. Let's go back and see if it works now. It should do a jump there. You can see I die instantly, which is perfectly what I
want. And it should also work. If I fall off the
bottom of the map, I should die as well,
which is great. That's everything sorted
out as I needed to. Now obviously, I need
to add in my game loop, because right now I
just die and there's no way of playing
the game again. I'm going to add in a bit of code here that's going
to say when I die, stop for a minute, then it's
going to fade to black. And then it's going
to fade out of black, having spawned in a
new kind of scene. And the way I'm actually
going to do that, I'm actually going to
reset the scene itself. So instead of trying to reset everything
back to how it was, instead of trying okay re enable all of these scripts
and put in back way, I'm just going to
reload the scene, which is effectively the same as clicking this button again, going like this and
then going okay, do it again kind of thing. Which is actually
going to work really, really well for me because I will have a faded
out black screen. I should be able to load
it again and then do it. And it's actually going
to be good as well because I won't have
to code in any of the extra stuff
to set it back to the state which I want to
be, which is this one. So I'm going to create
a new to D object. I'm going to create a square, and I'm going to call it curtain because it's not
actually a curtain. It's going to act
like a curtain. Going to make it bigger than my entire game about that big. Let me turn down this alpha
so I can see where it is. Say that's about good. And
obviously with a zero offset, then I'm going to
turn up the Alpa. I'm going to make it
completely black. I'm going to make
it order and layer 100 so it's in front of
absolutely everything. This curtain. I'm not going to have existing for the vast
majority of the game. But then the minute I wanted to, I'm going to spawn it in and it's going to fade into black, and then it's going to exist. Then the minute I start I'm
going to want to fade from black to clear and
then disable itself. I'm going to do all of
this using animations. First I'm going to
create a new script. I'm going to call
it Curtain Script. Before I actually
code. At this time, I'm going to add it to
my curtain objects. I'm going to go here
and I'm going to add curtain script to my
curtain object. Like so. Then once I've done that,
I'm going to open up curtain script and I'm going
to create a new public void. Call it deactivate. That's just going to say game
object set active, false. In other words, stop existing. We're going to have to enable this object again
from another script. Which is actually
going to be fine for our purposes because on this death script we're
going to re enable the object and we're going
to call a specific void. We're saying okay, fade to
black, not fade from black. But right now we
need this void over here which says,
okay, stop existing. I'm going to use this in
the animation to say, okay, yeah, that's all good. Then I'm going to have
a new void over here and call it fade two. Inside this void is going to be where all of my
animation code is. I'm going to go public animator, pull it an I'm going to say an set bool fade out and I'm
going to set it to truth. What this is going to
do is going to have a bull in which allows
me to control, okay, I need to fade out now
and then I'm going to do the rest using those
events in the animator. But I need one more
void and it's going to be the void to reload the scene. And the way we're
going to code this, we're going to go
to the top of here and we're going to go
using Unity Engine, Scene Manager, or Scene
management rather, this code is going to say
scene manager, load scene, open parentheses, scene manager, get active scene name. What this is going to do
is going to basically load whatever the name of
the active scene I have, which is my only scene. If I go back into Unity, I've got Sable scene. Let's rename this because
that's not the greatest name. I'm just going to call
it main scene because it's the only scene we're going to be using for this game. We're going to be building
everything inside it. And we're going to have this
code over here which says, okay, when this void is called, which is going to be called
by the animation use in an event, disable myself. Then when this code
is called over here, fade two, which is going to be called by the
player health script. I'm going to set my fade out to true and I'm going to fade out. And then the minute this code, which is also going to be
called by the animation, I'm going to reload
the scene entirely and it's going to start me
exactly where I want to be. Let's go back into
Unity and create a new animation. Sure,
we're going to need two. The first animation is going to be called Curtain Fade In. And we obviously want to fade
from full black to nothing. And we're going to
add a buffer here. It's going to mess
with animation, but let's just set that
to zero over there. And then make sure that we've
got the set 20 as well. Now I have a fade in
and then it stays here. And the reason I'm
adding this in iscause I'm going to add a
event over here. Sometimes you add an event
right at the end of a frame. It gives you some
issues because it doesn't actually exist at
this frame for very long. If it doesn't technically
call the event, sometimes it goes to the
beginning without calling in, then it's going to repeat twice
just to save all of that, I'm going to give it plenty
of time to call this event. And trust me, a third of a
second is more than enough. I'm going to go curtain script, and I'm going to say deactivate. Once I've faded in, it's
going to deactivate itself. Let's just make sure that
if we open up curtain, that is the default
thing, because that's the thing I
want to happen first. The minute I start the game,
it's going to do this. Then I'm going to
create a new script. Call it curtain fade out. This script, or rather
this animation, sorry, is only going to be
called as long as a parameter of type
fade out is true. I think that's what we called
it if we go back here. Yeah, we called it fade out. Only when fade out is true. We're not going to be using
any state here because this is the world's
simplest state machine. But we're going to
set X time off, we're going to set
transition duration to zero. We're going to set
the conditions to be. Fade out is equal to true, then as long as fader is true, we're going to call this
fade out animation. That's going to say,
okay, from nothing, we're going to want
to fade out to black. Then what we're doing
over here after this, after we fade out to black, we then want to
call a new event. We're going to do the
exact same thing here. We're going to add a buffer
over here at 1 second. We're going to call
that new event which is going to be reload scene. Now this is pretty
much everything we need to do because
right now we've got all of the code to
fade out the minute we start or fade in
rather the minute we start the scene and fade out. But we still need something
to call these scripts. In other words, the minute
we die after waiting like maybe one or 2 seconds,
we want to call this script. Let's go into my player
health script over here. Let's first of all create
a new I numerator. Call it reload, Delay. It's
going to be very simple. We're just going to
say yield, return, wait for seconds, and we're
going to wait for 2 seconds. Then we're going to
want to do two things. First of all, we're
going to want to activate that game
object Curtain. Let's create a reference
to it. Let's go public game object,
call it curtain. We're going to go
curtain set active. In other words,
activate curtain again. Then we're going to want
to call this fade to void. Immediately we're going to
go curtain, get component, curtain, script, fade two. I think that's what
the void is called. Yeah, fade two. In other words, when we
die, wait for 2 seconds. Set curtain active and make him fade out. Or
make it fade out. All we need to do over here
at the bottom of death is call this reload delay void. I think that should be everything we need
to work, obviously. Let's check it because there's often bugs when
we're doing this. But let's make sure that
everything is as we need it. We obviously only changed this
curtain script over here. And look, we haven't
activated the animator, But other than that, I think
everything should be fine. Oh, we almost forgot to
actually assign the curtains. Let's go here to play our
health and make sure we've assigned curtain properly.
Let's see if this works. If we had play can see
in just like we want to, which is great if we die. Let's try there. We wait for 2 seconds, which might be a little long. Then we can see curtain doesn't seem like it's actually
being activated. Might have some issue over here. Let's just go back
and look at our code. How long we wait for 2 seconds and we set
curtain active a true. Let's make sure this
reload delay is being called by setting a print
statement over here. This is how you
got to test this. Thing's not how you have to do, this is how I like to
do it. Let's try again. And we can see that the print statement
clearly isn't working. So this corotine is
not being called. And it's because we didn't
write start corotine. See, it's a finicky thing. Sometimes I forgot at that time. But let's write Start Corotine, reload delay, and hopefully
everything should work. Now let's go back into my game. So click play and
see if we work. When we die, we fall down. There we go. Now we
got to wait 2 seconds. Let's get to fade out, and we're going to fade
back into the game. This is actually
working pretty well. The last thing is obviously
the fade in isn't really having effect because
it's only doing it on the specific
location of the screen, which is not what we want at all to be exactly where
the main camera is. Just going to write one more
tiny little bit of code. First of all, we're going to make the curtain a little bit bigger because the
camera starts by moving. That's actually
going to change when we add in our starting hub. But for now, let's just make it slightly larger just to
be on the safe side. Let's up this scale
by a little bit, just so we don't fade
out of it already. Then last of all,
we're going to go here where we're going to say transform do position is equal to game object
Find in our scene, find a main camera. The position of that main
camera is where I want to be. Let's see if that works. It
should work perfectly fine. We now hit the play button. We can see we have a
perfect fade in animation working seamlessly if we die
going to wait for 2 seconds, which might be a
little long, but I'll see it doesn't look
like it's working. I think what the
issue is, it might be changing the Z
position. It's finicky. Things like this
most of the time. Let's go game object dot
find main camera position. And then let's go ahead and make sure that we actually change that position to
zero on the z axis, and that might actually
solve our problem. Let's see if it
does. There we go. It's always weird,
things like that. The main camera is
slightly behind the scene, that's why it gave us a
bit of a glitchy look. But that be everything
that we need to do. We've made sure the
position is the same. Now we can play the
game infinitely. We have what is
called a game loop, which is really, really cool, because that's the basis
we need for our game. We've made everything
we need now, except all of the extra things like audio and music
and all of that. Let's just go ahead and delete that testing script we put over here which was the
printing of the one. We've obviously
changed the position now that it resets
the zero position. But everything else
should be fine. We've actually now
not only a game, this fading in animation
to make the game look slightly more, I
guess, professional. So that is the basis
of this episode, completed as well as
the basis of our game. Pretty much done,
which is pretty cool. In the next video, we're going to get started
with saving, so that we can save how many
diamonds we actually keep. And we have a high
school, which is continuing even after
we quit the game, so we don't lose our
progress every time. But that is pretty much
everything for this video. And if you followed
along and everything is working just like mine
is, that's great. And hopefully your game loop
is working just like this. And you've managed
to build pretty much the entire basis of
a platform, a game. Congratulations for
making it this far. And if everything
is working out just like mine is, that's
great. Thanks.
14. Lesson 13 - Saving our game: Hey there, and welcome
back to Unity. Now this is probably going to
be the shortest episode of the entire course because
all we're going to add in this episode is saving. That might seem like
it's quite complicated. In fact, if we use certain
methods of saving, this would be a lot more difficult than what
we're going to do. But we're going to be using
the most simple and basic way Unity allows you to save
in its game engine, which is called Player Prefs. Now just as a disclaimer, if you do plan on
releasing this game and maybe especially if it's like a multiplayer game or
something like that. I mean, I don't exactly
know how you're going to jump from this platform
to a multiplayer game. But you know, if you use
this as a springboard to start game development and you plan on releasing a proper, commercially viable
release, then you are probably going to have to choose to save your games
a different way. Because the way I'm going
to save my games is by saving specific
files on the computer. And I'm kind of
just saving them in not the most
encrypted or sort of, I guess hard to crack way. So if I saved my
entire game like this, it wouldn't take someone a lot of difficulty to go and edit those files and give themselves a whole bunch of extra
abilities or coins. Now this is not the massiveest
issue because, I mean, if someone really
wants to do that for a single player game,
they sort of can. And not that many
people who play video games end up tampering
with the files anyway. But if you're planning on making something like a
multiplayer game, this is obviously an
incredibly bad thing to have. Because you can't have
some players able to give themselves a whole
bunch of things and other players not Anyway, With that disclaimer
out of the way, saving for most basic
indie platforms is going to be pretty
much fine, in my opinion. Some people might disagree, but it is quite easy
to tamper with. But that's not really an issue
for indie games like this, because the enjoyment is
determined by the player, and if they want to
mess it up, they can. But I guess that's true
of any game in general. Let's get started with
the saving script because it's not going to
take very long at all. All we need to do is
we need to go over here to our diamond
script over here. Not a diamond script. I'll play a diamond script over here. I'm going to double
click on this. And we're going to
have a new void. Going to call it public void. Save diamonds inside this block wing around
if statement to say if diamonds is greater
than high school diamonds. In other words if we've
gotten our high school, then we want to go player
prefs set in diamonds, we want to set it to diamonds. This short line of code over here is basically
just going to say, okay, take whatever
I want to put in, which is my diamonds variable, and put it in this integer in Playerprefs called diamonds, which is basically saying
save it in a file. If I want to get that
later on I can go Playerprefs, get in diamonds. I'm actually going
to do that right at the top of here
in my start void. I'm going to say void start. And I'm going to say high
school diamonds is equal to Playerprefs get into diamonds. This actually is only going to work after we've played
the game at least once, because until then we're not going to have any value in here. So let's just add a
quick if statement if player prefs has key diamonds, in other words, if we've
already saved something inside this diamonds
thing, then get it out. This code is obviously not going to run the first time
we play the game. High schol diamonds is
going to be set to zero. We can actually set
that value over there as a default value, which is good programming
convention as well. Because Unity sets
these values all by default to zero because we've
assigned them in the air. But if you're using
a different engine or different programming
language, it might not. So let's just go
ahead and do that. And then let's say a start void. If we have something
saved in diamonds, then bring it out and put
it in high school diamonds. Then the saved
diamonds void here. If our current score
is better than that, then we want to replace it. All we're going to do underneath
this is we're going to click Player prefs, Save. Let's go ahead and put all of
this inside the statement. That is going to be pretty much all the code
that we need to save our game and have things working in between sessions. All we need to do now is
obviously call this void. Let's go back to player health. The minute we die, this is going to be attached
to our player as well. Let's go Game object dot get Component Player
diamonds, save diamonds. Let's test this out.
If we go back into our game, we click on my player. We can see all of
our default values are going to be over
here. Let's click Play. Let's see if we've
got diamonds zero and high school
diamonds is zero. And that's not going to change.
We're not going to have any error because we've
used that has key thing. Let's see if we can
try and get a diamond. It doesn't look like
any luck so far. The minute we get one,
I'm going to test out this code one. I've got one diamond, now
current diamonds is set to one. I'm going to die.
Let's see if it works. Currently, we're
going to reset it. Now, let's just pause it quickly and if we go back to my player, we should be able
to see that we do in fact have high school
diamonds set to one. The next time I die, I'm not going to have
higher than one diamond. So I'm going to restart
my game play again. Let's see if everything works just like we
anticipated it would. We still have high school
diamonds set to one, and that actually works no matter how many times
you play the game, no matter how many times
you close it or whatever. The saving system is going
to work because we're now saving the value in our
game into a separate file. That is everything
we need to do to get saving to work in my game. I'm obviously going to
add in starting hub later on where I can show
the high score of the player as well as the
title and everything else. But for now we can know that everything is working
just as it should. That is really the very last mechanical we need
to add to our game. After this, we're going to improve the visuals
and we're going to add in the starting hub and
all the other extra stuff, audio and visual improvements. But for now, this is kind of the last step in
making our game. And we have done
everything so far. A great job if you followed along to the point where I am. Now obviously we do need to make some tweaks with these still because some of them
are impossible. And maybe do a little
bit of debugging to make sure our game
looks a bit smoother. But so far everything
is actually working pretty much how
you would expect it to. And we don't seem to have any massive
issues at the moment. So our game is in a
pretty good state and we've all the basic mechanics, like I said, if you've been able to follow along and your game is like mine at the
moment, great job. Because that's actually a pretty impressive
game to have made, especially if you haven't made Unity games in the past before. Great job on following this
video wrap until the end. Make sure you are
up to date with this video before you
watch the next one, because then we're going to be adding in the last
touch to the game. And you want to get to this
point before you move on. But hopefully
everything works in your computer just
like it does in mine. In the next video,
we'll get started with adding in our visual
improvements. Thanks.
15. Lesson 14 - Improving visuals: Hey there, and welcome
back to Unity. Now I mentioned in the
last video that we've pretty much finished all
the basics of our game. And I know I've said
that quite a few times, but it's actually pretty
much completely true. Now we've done everything that you need for
a basic platform. Again, we've got random
infinite map generation. We've got a game loops,
you can die and restart. We've got a score
system with saving, and we've got a whole bunch of enemies and varied obscles
and everything else. And obviously, like I
said, you can die and respawn and everything
gets saved. And it's all pretty much
working just like we needed to. But there's a few things
we haven't added. First of all, one of
them is a starting hub, which we'll get to a little
bit later in the course, so you don't have to instantly jump right back to the game. You can relax for a little bit. Second of all, we
don't have any way of showing your high scores, even though it's saved,
it's not actually there. Which we're going to get you
in the starting hub as well. But most importantly, the game still doesn't look very good. If I go ahead and
disable this curtain, if you could, exactly like me, you can just disable this
whenever you need to because all it's going to do is disable the fade in animation. We actually do
disable this and then re enable it via code later on. The fade out is
still going to work, but if you want to see
things in your game without having to disable this
and move it around, then just disable it for now. I'm going to do that, The
game doesn't look great. We've got this massive,
big, dark blue background. We don't have any things in
the background going on. We still don't really
have any effects for when we die
or collect coins. We just get them all
changed sprite immediately. We're going to change all
of that in this video and get started with a visual
upgrade to the game. But before I get
started with that, I just thought I would mention that I have changed a few of these floor tiles in between
this and the last video. Now this is of no importance
whatsoever because I'm almost certain you don't have the exact same floor
tiles that I do. But a few of my floor tiles were impossible to get through. I just thought I would
mention, if anyone notices, they look slightly different, I have moved a few
things around. Like for instance, I moved this up slightly and this down, I think this one used
to be impossible, so I moved this up as well.
And this one I moved down. They're pretty much
exactly the same as they were just with some
slight alterations. But like I said, this
isn't important at all. I just thought I'd
mentioned it in case anyone is confused and
they notice a difference. But regardless,
we're going to get started updating the
visuals of this project. Let's go into sprites and go important new assets
just like we always do. These ten sprite assets
over here will obviously always be linked underneath the video and they are
under this one as well. Let's go ahead and select all ten new sprites we
just collected over there. And then let's just set
all these settings to single 12 and point no filter. Obviously if your pixels per unit are different then
use your own value. But you should set this to
point of using pixel art. And I'm just going to
set the single for good measure because we ran to some issues
with the heart, but it's not a massive deal. Anyway, let's get started by dragging this
background into our game. We've never actually created
an object like this before, but it just
automatically creates a sprite object with this
current sprite enabled. I think we did do it once and
I'm just going to be doing it again because it's the
easiest way to create a sprite. Then all I'm going to
do is I'm going to drag this underneath my
main camera like this, and I'm going to make sure
that it is now a child object of the main camera and I'm
going to zero its position. This is actually going
to allow me to do is have this always be moving
with the main camera. If I move the main
camera like this, you can see the background
moves with the main camera. You can imagine as
we're playing the game, it's going to look
something like that. This is always going to
be in the background, which is pretty much
exactly what we want for a background
object like this. So let's just go
ahead and make sure it is a child object
just like this, and we've set its
position to zero. Then if we go ahead
and hit play, we can actually
see the difference this makes already to our game. We've now got a much
better looking game. We don't have these kind of random blue things
in the background. Now we have a kind of
actually looking all right. Game. But there
are a few issues. First of all, our
hearts are gone. I seem to randomly take
damage on this thing. And it doesn't look like
there are any enemies at all. But I'm still taking damage except these ones
for some reason. The reason for this is
actually to do with the order and layer
of our sprites. Most of my sprites are set
at order and layer zero because that's the default and that doesn't
cause any issues. But now that we've
added a background which also has order
and layer zero, it just randomly
gets priority over those sprites so we
can't see anything. Let's set this to something
like negative five. It doesn't matter
what you set it, as long as it's less than
the rest of your game. Let's also go ahead
and actually reset my main camera because I
didn't actually realize. But I did move it
slightly to the left, so that's why that first
cloud was a little off. Now if we had play,
we should be able to see of these issues
have been resolved, we have our hearts and
our little counterback, and we've now got normal
spawning things with diamonds. And we can see this
makes the game look a lot better already. We've kind of had a
massive improvement, but we don't really have
anything else in the background. We kind of just got this sky and we have these
clouds spawning, which are the foreground
and the game. But we don't have any interesting things
in the background. And I've created
these background clouds as well as this eagle, which are both
going to be pretty interesting to have
flying through our game, but we haven't added them yet. To do that, we need
to write a script. Before I write my script though, I'm going to make a pre
fab for all of these. Because if you've guessed it, we're going to be spawning
these pretty much exactly like we spawn
the rest of our map, just they're going to
be in the background so they're not going to
be actually important, they're just going to
be sprites that move through to bring in my clouds. I'm going to do exactly like
I did with the background. Just drag them in there, like see all of them on screen now,
they look pretty cool. I might have to actually change this overt, slightly less. So you can see that
they're not part of the game and they're
part of the background. But I'll worry about
that in a minute. First, let me just
make my prefabs. I'm going to go to
prefabs and I call, I'm going to actually keep
them named as background cloud 12.3 I think it sums
them up pretty well. Now I'm going to delete
these objects from my scene. Now I have my three prefabs with my background
clouds over here. Before I get started
with anything else, I'm actually going to
add in a rigid body which might seem a
little confusing, but it's going to
do with how I want my clouds to move
through the air. I'm going to be
using rigid bodies to move the clouds
through the sky. Let's go ahead and have three rigid body two D's on these. Select all of them and
actually make sure they're all set to kinematic as well. Now that I've got I have
to do this manually. It's a bit of a shame. There we go. I must
have missed that one. All right, so now I have three kinematic rigid bodies
added to my clouds. And that's actually
all I need for them. But the ego is a little
more complicated because obviously the
eagle has an animation. Instead of animating
this like we've done, I'm going to show you a trick. If you select four
sprites and drag them in, Unity actually creates an
animation for you already, like automatically, because this is the only animation
we want to have. It's actually going
to work perfectly. I'm going to name this eagle an actually we that created for us. We've got this eagle,
one sprite over here, we've got an eagle controller. And if we go to open
up the animator, we can see we've already
got this eagle animation, which if we double click on it or rather open it up like so, we can see that we
have an ego animation, which is going to change
from all four of my sprites. If I go to my eagle
and I click Play, we should be able to see that working pretty much
perfectly, which is great. That's actually pretty much everything I was
going to have to do, but done for me, I
don't think that that flapping is necessarily
the best speeds. I'm going to go ahead and
change this to a playback speed of 0.5 and then if I hit play, I'll be able to see
this in the action. And let me see if I decide, I think that's a lot
better for an eagle. But pretty much
what we did here, you cannot do it manually. We went to an animation and we created a new animation clip, added an animator component. And obviously, when
we created our clip, that created a
controller for us, and then we made our clip
the default animation. But obviously Unity kind
of did that all for us. If you'd like to do it
manually, you can also do that. Just follow the exact same
process we had done before. But if you want to
create an object quickly and an animation and
you only need one animation, or you want to have something like this where
it's an animation, it's always going to be playing. That is quite an
easy way to do it. And then you can just
change the playback speed, something that you like. That's my Eagle Done. Let me go ahead and drag that
into prefabs as well. I'm going to rename this to
Eagle rather than Eagle One. Then all I'm going
to do is open up that and I'm going to
go back to my scene and add a rigid body
just like I did for the other ones except
make this one Kinematic. Now what I'm going to
do is I'm going to write some short scripts. I'm basically going
to have one script which is going to
spawn in an eagle, and another script which is
going to spawn in the clouds. And I'm going to have them
travel across the speed, at random speeds
across the screen. At random speeds, um, from a specified range. And then the minute they reach a certain thing on
the other side, they're going to deactivate. Now, I'm not going
to use any kind of boundary on the right
side of the screen. I'm not going to say put a
boundary over here and say, okay, if the eagle hits this. Because I don't want the
player to be able to run into boundaries and die on
that side of the screen. I think it only needs
to be on the left. You should be able to
go ahead of the game. I'm going to need to
code in manually. I need to say once this position is passed a certain position, then you need to call it a day. I'm actually going to
do that in a bit of a sort of slight handed way, but it's going to
work a lot better. I'm going to have a
boundary object over here, and I'm going to
move it like so. And then all I'm going to do is, instead of trying to
constantly calculate, okay, where am I reference
to the main camera? How far is my actual position
and my relative position? I'm going to say the minute I'm past this boundary object, I'm actually going to
put it on the other side because things are going to be spawning in from both sides. So let me move it one over
there and one over there. Let's say the minute I'm past one of these
boundary objects, then I can call it a day
and that's everything done. The E is going to be
flying from right to left and the clouds going to
be going from left to right. So I just need to make sure I keep track of which
one is which. But that's going to
work pretty much well. I'll call this one
boundary left. I'll call this one over
here, Boundary right. These are going to
allow me to keep track of what is where. I'm going to change this
to -11.5 and make this 111.5 Then the minute I have
my object past this point, I'm going to have a spawn. I'm actually going to move
this a little bit like this way because the
clouds are quite big and I don't want them to spawn off screen rather on screen.
Let's make that 14. The eagles are pretty small, so I think 12 should
be good here. That's pretty much everything we need to do to set up our scene. Now we just need to write the
script for this spawning. I'm going to stop the Eagles, let's create a C sharp script
and call it eagle spawn. Let's double click
it to open it up. Now all we need to do is write
some code that says, okay, every random interval
spawn in a new eagle. Let's create a,
let's call it float. We'll call this minimum
Y and maximum Y, and this is going
to be where we want to spawn on the Y axis. Then we're going to create
another public float, call it min time
and maximum time. That's how long we want
to wait between eagles. Then all we're going to need
to do is create a reference to my Eagle prefab public
game object Eagle. Then before I get started,
I'm going to delete this void update and
create a new routine. I numerator, call
it spawn delay. Then inside this, all I'm going to do is I'm going to say yield, return new weight for seconds from minimum time all
the way up to maximum time. I'm going to wait for a
random number inside there. I actually forgot my
random dot range. Let me write random range from minimum time all the
way up to maximum time. It's going to pick a
random umber inside that interval and then wait for that long
minute that's done. I want to create a new void. Call it spawn eagle. Let's go back up here and
call my spawn eagle void. So the minute we've done that, now we just need to code this actual thing
over here which is going to determine what to do when we want to spawn an eagle. The first thing, just
like I've done before, is I'm going to say game
object for eagle equals instantiate Eagle
as game object. In other words, create an instance of this
prefab in my game. Now I want my S position to
be behind the main camera. And this script
is actually going to be attached to
the main camera. Let me say transformed
opposition equals new vector three. Let me create an offset
variable up here, just like we've done
the entire time. Let's go my transformed
opposition. Do the camera plus this offset, and it's going to be
a negative value. Becaus I want to be behind. Then I'm going to want to pick a random number inside my
minimum Y and maximum Y. Let's go to random range
between min Y and May. Then I'm just going to set my Z to zero because
it's a two D game, doesn't really
make a difference. Then all I actually need
to do now is create another script which is going
to attach to the Eagle. And I'm going to say, okay, travel for this long. And then the minute I'm behind this boundary, then delete. I'm going to write the same script for the
Eagle and the Cloud. I'm going to call it sky object. That's going to make it slightly
more complicated to do, but it's going to be a slightly better way to code it as well. Let's double the up
inside the script. We're going to want
a public transform. We're going to call it boundary. This thing we're going
to be watching out for. We're going to have a public boolean and we're going to call it traveling right because obviously the eagle is going
to be traveling right. The clouds going to
be traveling left. So we're going to use to
determine which way we're going. Then underneath this, the last thing we need is a
reference to a rigid body. I'm obviously just going
to drag that in when I have my objects
created inside my game. I'm going to put
it on the prefabs. The last thing I want is a
public float called velocity. All I'm going to do
inside fixed update is I'm going to say
every single frame, make sure that my velocity
of my rigid body is equal to a new vector two and whatever my
velocity should be, as well as zero because I don't want them to be
moving up and down. Now I'm going to every frame, make sure I'm
traveling in that way. Then underneath every
single frame as well. I'm going to say if
traveling right then, I know that I have to
be behind the boundary. If I'm ahead of the boundary, I want to make sure to destroy this instantiation
of the objects. I'm going to say if
traveling right. And then inside this
I'm going to say if transform position x is greater
than boundary position x, then I want to make sure to destroy this instance
of my game object. In other words, delete whatever object this is attached to. If I'm not traveling right, means I'm traveling left. So let me copy this exact code. Just say if my
traveling position x is less than my boundary, then I want to destroy this
instance of the game object. This is actually all the code
we need to make sure that our objects are going to
travel at the right way. But we obviously need to
assign values to this, because right now this has absolutely no value for boundary or traveling
right or velocity. It only has a rigid body value. Let's go back into eagle spawn and create a few new variables. Public float, min
speed as well as max speed and that's how we're going to choose
the speed of our eagles. We're going to go get component and we're
going to find the sky object script
on top of our Eagle. We're going to say
velocity is equal to random range between
our minimum speed and our maximum speed. Now we have this velocity
checked off and we obviously already
have the ridge body which is going to drag that in. Now we need is this
traveling right variable. And we know for an eagle
that's going to be true. Let's go ahead and
copy this entire line of code to lead up
to here and just say traveling right is equal to true because es are going to be moving
from left to right. The last of all, we need this boundary and
we're going to create a reference to the boundary
for eagles up here transform, call it Eagle bound. Then let's copy the code again. And underneath here just say dart boundary is
equal to Eagle bound. We're actually going to call this rotine from the start of our game the minute we start
our game starts spawning. In this behavior, wait for a number of seconds and then start spawning in an eagle, which is pretty much
all we need to do. All we need now is to
actually assign all of these things in the editor
and test if it works. I think it should.
The only last thing we need to add
underneath all of this Is obviously call
the corotine again, so that we can say whether we want to spawn another eagle. This is obviously going
to continue playing even after the player is
dead. But that's fine. You can have clouds passing and eagles flying by after
the player is dead. It's not too much of an issue. And obviously, the
player is only dead for like 2 seconds anyway. So it doesn't really
make a difference. But this is all
the code we need. We're starting our
cotine at the beginning. We're saying, okay, wait
for a number of seconds. Then spawning this eagle, set his position
to behind us and then a random y position and then make sure his velocity
is this random number. The fact that he's
traveling right is true and set this
boundary to this thing. And then inside the Eagle, we've assigned all these values over here and every
single frame, we're making sure
we're traveling at the right velocity and checking we are not past
where we should be. Let's open up Unity, Go back
into our prefabs and we're going to add this object sky
object script to our Eagle. The only thing we're going
to sign is the rigid body. Everything else is going
to be done for us. Actually, just for the
sake of being efficient, we're going to add it
to the clouds as well. For now, just so we don't
have to do it later, let's go sky object over here to this cloud sky object over here to this cloud and sky object over
here to this cloud. And make sure we drag
in our rigid bodies. You don't have to
do this right now, but I'm just going to then let's go to main camera and
let's add a new components. And we're going to add in
my eagle spawner over here. I'm going to set
the minimum y to be negative 0.6 and then
the maximum y to be, let's say 2.5 negative 0.6 and 2.5 Let's go ahead and
assign that over here, negative 0.62 0.5 I'd say
I want the minimum time between eagles to be at
least 10 seconds and the maximum time to be
somewhere around 14. I'm going to assign
this eagle over here. I think the offset.
Let's just test it. But it should probably be a, I'd say maybe negative 12. If we look at the main
camera at position zero, the player is
currently negative 12. That's about where I want
the Eagles to spawn. Let's set that as well. Go on here and set off set to negative 12, then minimum speed. I'm just going to
start at three and set the maximum speed to four. Keep in mind the
camera is moving at currently 1.8 It will be
faster than the camera, but it might not be that
much faster, which is good. Actually, let's set it to 2.5
and 3.5 Then last of all, eagle bound, we are
going to set to be this right hand
boundary over here. Let's see if all of
this actually works. If I hit the play
button, make sure we haven't forgotten anything
or run to any bugs. Let's see, over here, we've
currently playing the game. The minute we spawn
it, we should have this eagle, which
show up behind us. So let's see if we
watch over there. Oh, that was a diamond. Whoops. We'll be at least 10
seconds before we see one. Ah, there's one right
there. We've got an eagle. That does look a little bit
like an enemy. I won't lie. So we're going to have
to make it a little bit higher just because I don't know if that should be exactly where it is. I'm going to actually
set the boundary bit up and I'm also going to make sure that the time is a little bit different
because we don't really want that many eagles. Let's make a few adjustments. Let's set the
minimum y to be one, the maximum y to be three. Let's at the minimum time
to be 10 seconds and the maximum time to be
something like 20 seconds. Then let's make the
minimum speed, maximum. I think those are both good. Let's just maybe make
the eagle slightly more transparent so he doesn't look like he's so much
a part of the game. Let's make this 180. This might be a weird design
choice, but trust me, it's going to make
it look a little bit more distinguishable, that he's not really
part of the game. We can obviously tweak
that as need be, but let's just test how
that works for now. Obviously we have to wait
for a bit for the thing to spawn, but it should
be coming out. There's an eagle right
there. And there we have it. You can see it looks like it's
misted out by the clouds. But that looks quite
cool in my opinion. Obviously, we need to
add in a few more clouds and it's going to make
it look a lot better. But for now, I think
the Eagles are a success. Did not
mean to do that. We can see we've got
quite a few of them. We might even have to make
that time a little bit longer. But let's just
change that quickly. I want to actually make
this 30 seconds and ten, and then I'm going to
maybe them a little bit faster as well so
they can fly past. But that is pretty
much all the eagles spawning script we need so far. Now we have to get
started on the clouds. The cloud script
is actually going to be so similar to
the Eagle script. I'm going to copy
this entire thing and I'm going to
create a new script, call it cloud spawn. I'm actually going to
paste the entire thing. Now there's a few things
I have to keep in mind. First of all, it's going
to give me a whole bunch of errors because I've got the same class over here without explaining too
much what a class is. Basically, this is how unity tells or rather
sharp tells unity. Which kind of identity of code. This is the fact that they've got the same name
now is an issue. Let's go ahead and change
that to cloud spawn. It has to be the exact same
name as you've got over here. And that should actually get rid of every single
one of our errors. Now you can use all the
same variable names, none of that section issue, but we obviously have to
change a few of them. Let's go ahead first and
change this to spawn cloud, then we're going to have
to update that as well. Then let's change this
to cloud to cloud bound. It might look like we
could have done this in one script and we
honestly could have. I thought that it'd be better to do two just because
we're going to make a few differences
and alterations. And it's going to make
it a little bit easier to understand if we have
two different scripts, rather than trying
to group it into one and spawn eagles and
clouds simultaneously. Yeah, we could have done
this in one script, but I'm just going to use two. For the sake of efficiency
or rather simplicity, I can keep this minimum Y and maximum Y because
I still need that. I obviously still want my time. I have my game object cloud. I want my offset
just like it was. It's obviously going to
be a positive value now. And I have my minimum
and maximum speed which are going to be
different and my transform, pretty much everything else actually we can keep the same. We've got the spawn delay. We're going to
instantiate a cloud. We're spawning at a position, we're saying it to
a random speed. We're going to set traveling
right to faults over here, and we make sure that we
have the right boundary. That should be pretty
much everything we need for our clouds. Let's go back into my game. Go to my main camera. I'm now going to add in this cloud spawn script
underneath it. And obviously you can see
it looks very similar to the Eagle script because it's pretty much the same script. We can pretty much go ahead
and use the exact same thing, but we've got a
bit of a problem. We've only got one
object here for a cloud because we
only had one eagle. But for the clouds we need to pick from a random of three. That's actually quite
easy to do. All we need to do is make
this into an array. Then instead of saying
instantiate cloud as object, we'll say instantiate
open square brackets, random range from zero
to the length of cloud. So we'll go cloud dot length, and then close bracket. Close square bracket. And that should be everything
we need to do now, We're basically just picking a random thing from this array. Instead, let's go
back into Unity. If we scroll down,
we can see now we have a cloud array,
which is what we need. Let's drag in all three
of our objects over here. Let's set the minimum Y to be zero and the
maximum Y to be three. So you can have cloud spawning. I'm actually going to
make this minimum Y negative two and the
maximum Y three, I'm going to set
the minimum time to 2 seconds and the maximum
time to 4 seconds. I'm going to set the
minimum speed to negative one and the maximum
speed to be zero. The negative 0.5 the offset, I'm going to make 12 because
it's tell the other way. That should be pretty much everything we need
so far obviously. Just make sure we have
our boundary on the left. Almost click the
wrong one, boundary on the left as our cloud bound. Let's go down and check that. Let's see if this works. If we hit play now we should be able to see cloud spawning in from the right pretty soon after we start
playing the game. Let's go ahead and
see if it's working. And there we have a
cloud that is spawning. But this is quite obviously looks like a part of the game. That's a bit of an issue for us because we
obviously want it. We can also see
them spawning in, which is also a bit of an issue. We clearly have to make
that offset slightly more, and we have to make them
slightly more transparent. Let's make the offset
something more like 20. Then let's go ahead to every
single cloud and maybe make the alpha something like
180 instead of 255. This might be a little drastic, but we'll can
adjust it as we go. I think it should
be fine for now. Let's go back into my game, and I think the clouds can move a little faster past
the player as well. Let's go back to main camera and make the minimum
speed negative one. And the maximum
speed is negative 0.5 They are actually
moving always. Now let's see if that
looks a little bit better. As we're spawning in the game, we should be able to
see cloud spawning in right then it's coming in from the side there we have a
cloud which actually makes the game look a lot
nicer, obviously. Now there's a bit of a delay at the beginning
where we don't have any cloud to make simplicity
a little bit easier. I'm just going to drag in a few from the start of the game, just like this, and make the game look a little more alive from the beginning. Obviously, I'm going
to have to set these velocity values on their own because these
are special cases, they're not media assigned. Forming I'm going to make the velocity negative
0.5 I'm also going to change those and I'm
going to make sure I set the boundary to
the one on the left. Then let me go
ahead, I'm actually going to set the velocity
to zero just for now. They only get destroyed
once we move past them. Let's go ahead and see if
that looks a little better. Maybe this very
specific one can have a velocity of negative 0.2 and this one can be negative
0.1 Just to give it a little bit of uniqueness, if we go ahead and hit play
now we can actually see both our Clouds and our
Eagles are now in our game. And it makes it look, in
my opinion, a lot better. There is still this little
weird gap over here. So I'm going to add in
maybe one more cloud over there just to make
it look a little better. But I think that's actually
a pretty cool start to our projects visual updates. And we've actually done
quite a lot so far. We've obviously
add the background and the eagles and the clouds, and in my opinion,
it's looking a lot nicer than it did before. But there's two more
things we have to add. And they're quite easy to add, they're not super complicated. This actually also
adds a nice effect where the spie balls are hidden, which makes a game maybe a
little bit more difficult. But I think that overall,
this makes the game look a lot nicer and a lot
more kind of alive as you kind of jumping
through clouds instead of just wandering through
this blue sort of mass. And we can see the clouds are a getting destroyed, just
like they should be. The eagles are taking
their sweet time. But I'm there we are,
There's our first one. I think it makes the game look a lot nicer, which is pretty cool. But anyway, like I was saying, there is no particle effect, not only when you
collect a diamond, but also when you die. And I think that
you'll find by adding these small little
things to your game, it makes it look a lot more
impressive in the long run. Especially to
someone who doesn't necessarily know how
kind of simple they are. Actually to add in makes the game look a lot
more impressive than it's kind of actually the amount of work
it takes to add in. So I'm going to show you
exactly how to do that now. We're going to go to
my diamond sprite. I'm going to add a component
called a particle system. Now this is arguably one of the most complicated components
in the whole of Unity. I don't even fully understand
how it works, to be honest, but I have found a way of working with it
that does usually work for most of my games. And I think it's quite an
easy way to do it as well. So I'm going to show you now without going into
too much detail. Obviously this particle
system is based on a whole bunch of
different things over here which you
can see listed. We've got velocity of a
lifetime, shape, emission, render all of these pretty
overcomplicated things, but we don't actually need to worry about most
of them for now. In fact, I'm going to show you which ones are going to enable, we need emission
and we need shape. We don't need any of these ones. We're going to need
color over lifetime and we're going to need
size over lifetime. Then none of the other ones
should be that necessary. We might have to enable
text sheet animation depending on what we want to do. But let's just try it
like this for now. Once you've gone
ahead and enabled these five different menus, open up the renderer
and make sure you set this material to be a
sprites default material. Now we're spawning
in random sprites. There's actually one
more sick thing. We need to add this
text, a sheet animation. We're going to select
that. We're going to select mode to be sprites. And we're going to go ahead
and this is for our diamond, we want to spawn in our diamond, star sprites, we're
going to choose star. Now we have a whole bunch of stars flying off this diamond, which looks pretty
cool on its own. I'm not going to lie,
but we only want this to happen once we
collect the diamond, we've set our texture
animation up and the only thing we
need to change in renderer was this material. Once we've done that, we've got all of we need from
these two menu. The last ones are coming
from these ones over here. Let's start by going
to my original menu, actually at the top here.
This is also a menu. I'm going to make the
duration 0.3 seconds. I'm going to set looping off, I'm going to make the start
lifetime of these 1 second, or rather 0.6 Actually, obviously you're going to
need to tweak this as you go. And let's see how
that looks over here. We have a few things spawning, which looks pretty
good to me so far. I want the start size to be one is maybe a
little smaller. I'm going to make the start
size two, see how that looks. I'm actually going to keep
that at one for hour because what's running it is the size of a lifetime, not this value. I'm going to set the 0.3
seconds, not looping. Zero for the start delay is
0.6 for the start lifetime. Five for a start speed is fine, and one for a start size. I'm going to keep the rest of
these as they are for now. Then I to change this rate over time of emission
to something like 30 and see what that looks like. It's a
whole bunch more. I think that should be
okay for now as well. Let's go ahead to the shape. This shape is a cone. It doesn't really
matter too much. We use, we could use
a sphere as well. I'm going to use a sphere, and I'm going to make the radius 0.2 So they're all coming from
the center of the diamond. I think that looks
quite cool as well. Now we need to go to
color over lifetime. If this is hard to follow along, don't worry too much, because I will go over
everything we've done. But just try and follow as
best you can right now. Let's go to Color over Lifetime. And now we're going to open
up this window over here. We're going to click Mu.
Then we're going to go over here to this thing at the top and set the
alpha to be zero. We're basically creating
a gradient here. We're saying from the start, set white at the
end, still be white, but at the start of
here have full alpha, and at the end be
completely translucent. We can see the effect
of that. Now it looks a lot more
like a particle. Then the last thing
we're going to change, we're going to go
size over a lifetime. We're going to
click on this size, and we're going to make
it this one over here. It's going from big to small.
You can see the effect. I'm going for it
like this cloud of sparks that dissipates right now all I've kind of changes, I've changed the duration
to be 0.3 seconds. If you'd like, you can pause the video and copy these along. I will kind of scroll
through them all quickly, but I'm going to change
them a little bit more. So maybe just stick with
me a little bit while I go back to all
of these and make sure I have them set high. I want I'm going to
keep the duration at 0.3 seconds. I
think that's good. I'm going to make
the start lifetime 0.6 I think that's fine as well. The start speed, I'm going to increase maybe to
something more like six. Just to see how that looks, I think that's a little better. Maybe even something like two might actually give
a nice effect, considering the particle
actually gets destroyed. I'm going to set it to
something more like one, just so it's more like a
lingering thing that you have. After you've collected,
I'm going to set the start size to 0.5
and see how that looks. I think that looks
a little better. Then I'm going to go to my color over lifetime and maybe actually change
this a little bit. I don't want them to be
com
16. Lesson 15 - Creating a starting hub: Hither. And welcome
back to Unity. Now in this episode, we're
going to be creating a starting hub for
our platform, a game. We're also going to
be giving it a name. A name I arrived
on is Sky Miner, which is God awful. But thankfully, this game isn't going to be
released to anyone. It's just for you guys to
learn how to create platforms. I've settled on Sky
Miner and I'm going to create a starting
hub for this game. As well as make it
so that you don't automatically play the game.
The minute we click play. Right now we're in leapt
right into the game. And I don't want to be like
that. I want it to be so that you can choose when to start. I'll explain how I'm going
to be doing all of this, but basically I'm
going to be building like a starting hub
at the original, making it sound pretty dramatic, it's just a big cloud. I'm going to have the
title in the top as well. Then I'm going to make it
so that the minute you pass along a certain point,
then the game starts. Not the minute you
start the game, the minute you pass
a certain point before I get to ahead of myself. Let me go ahead and import
all of my different assets. I'm going to go right click. Import New Asset,
just like always. Then I'm going to import
these two assets which I've created called
starting and title. Let's just set them to 12, single point, no filter. And then I'm actually going to go to this cloud over here. And I'm going to delete it because I'm going
to replace that. I'm also going to
go to these prefab clouds and I'm going
to put them in storage because I don't
like the fact that they're just sitting
underneath it. That looks a lot
neat, in my opinion. Then I'm going to drag
this starting cloud in. You can see what it looks like. This is what I've got envision
for the start of the game. You start with this massive, obviously not like that,
has to be about there. You start with this big cloud in the middle and I'm actually
going to move it down Us don't want to
take up that much of the screen but don't
want that little either. I think that's
probably maybe good. I might adjust this as I go on, but I actually think I'm going
to move it up a bit more. Actually, let's see. We can obviously change
this as we move on, but I think that's actually
pretty good to start now. I'm going to have the
title in the middle of the screen just so I can see
everything that's going on. I'm going to click this icons. I can hide all of
this extra stuff, but I might also choose to
move some of these clouds now that I'm creating
this new hub area, but I'll get to that later. First, let me just
disable these clouds. I'm also going to
drag in my title, and you can see my title over there in the middle
of the screen. I think it's a somewhat decent
title. At least for now. I'm actually going
to disable them just because hiding them only
works in the editor, and I want to see it in
the middle of the screen. Then I'm going to
go to my title, which I'm actually going to
want to keep as a sprite. I don't want to be a UI object, center it at zero and then put it right at the top over here. I'm also just for
the time being, going to disable this
UI because I don't want that to show up at the
beginning of my game either. I'll obviously fix all of this when I'm going to
create my game. But just bear with
me from a minute. First of all, I'm going to
have this right over here. Sky Miner. Actually, the first thing
I'm going to want to do is create a title animation. Let's go create new animation. I'm going to call
its title then. I'm just going to make this
slowly go up and down. Let's have the first
30 seconds moving, let's say from 2.6 to
2.4 You go like this, and then I want to
stay at 2.4 and move slightly down over the next
30 seconds to maybe 2.3. So we go then we want to go back up to 2.4 Slightly faster. Then back up to what we
originally had up here, which was, I think 2.6 Yeah. Let's see how that looks. See if we're going to the game
that's a little fast, but I think it
gets the job done. It looks pretty. All right, as a subtle
looping animation, let's make this 0.3 speed. Let's see if we hit
play how that looks. So we're going to have
to see the camera move along and we're going to die in Son, because
there's no things. But I think that does
a pretty good job. It's moving very slowly
through the thing. That actually brings me to
the next thing I want to do, which is get started actually building
this starting area, not just having a square. Let's add a box collider two D. We're going to have to
obviously tag this as ground. Let's go ahead and
make sure this is the correct dimensions. It might be quite hard to see this if you have all
the things I do. So I'm just going to disable
the background as well now. I'll be able to
see it. Now let's move this to about there. There doesn't need
to be that much higher here because you shouldn't really be
able to fall through. That should be everything
done over there. Let's now test if we
can play the game. I've always disabled my
background in the editor. It's going to show here
that looks pretty good. I'm actually going to make
this ever so slightly smaller. I'll move it down
to about there. That is pretty much the. I just realized this is going to
be a bit of a problem. Let's move this like maybe
a bit and down a bit more. I think that's probably good now you can stand on the
end of the cloud, but it's not too
much of an issue. That is going to be the basic for my starting
block over here. And I've got my title which is going to move up and
down. The title. I actually never want to move. I want to keep it
here all the time. I don't need to do
anything with this. Same with starting. These
are fixed positions. But what I do want to do is I
want to, so that the things Follow the camera
like the UI or only enabled once we've
walked through this. And I also only want
to start the game. Once we've walked through
this imaginary point over here on the
middle of starting, I'm going to create
a new empty object. And I'm going to
call it boundary, just like we've done before. Over here at this boundary, I'm going to make a collider. I'm going to make
it an edge collider because it's going
to be a boundary. I'm going to make the 0.0
0.5 and negative five, it's a long boundary. It's going to be a trigger
and it's going to be of type start zone. In terms of tags, I'm going
to make the tag start zone and I've got this
big trigger collider. And I'm going to
say once the player passes this, I want
to start the game. So obviously you can
see we can move along. I'm actually going to make
this just a little bit longer because otherwise it's going to be able
to fall through. Depending on how
weird this looks, I might make this a box collider and then another
collide undernath, But that seems like a bit of extra work for a small
change, I'll see. But right now all we're focused on is having
this boundary. And we want to say,
okay, the minute the player passes this boundary, then we want to start the game. We've labeled this
tag start zone. But we're going to
actually be doing the coding on this thing itself. We're going to say when I
collide with the player, we're not going to worry about the player colliding with it. This is just a formality. I'm going to re enable
storage so I can see all of the things I have and I'm going to start customizing this. I don't really want that
cloud there anymore. I don't really want
this cloud here. Whoops, I did not mean
to delete the entire UI. I don't want this cloud or
this cloud here actually, because our game looks all
right with just the sky thing. Since we've now added
in the other stuff, I don't even really
want that cloud. But I'm going to put this
cloud over here just so I have something to jump
to when the game does start. Move this cloud
up here slightly. We have one cloud
to start us off. That's going to be how the
game looks when you start. Obviously, once you
pass this point, we want the game to start. Let's go ahead and
write a new script and we'll call it start Game. The way the script
is going to work is we're going to replace a lot of these void starts we've got which start when
the game starts. Two voids we're going to call. The only ones we're
actually going to be concerned with are the camera movement script and
the map generation script. If we go over here, we can
see camera moves over here. We're going to want
to concern ourselves with this one and
we also want to concern ourselves with this map generation script over here. These are the two ones
you can see over here. We've got to spawn piece, but we want to
change this to begin game and we're going to
make it a public void. We don't actually even
need to make this void. We could just stray
up, spawn a mappiece. But for convention,
I'm just going to have it be this thing over here where we
only start when we call this game void. This update void is
not really going to be a problem because we're not going to be moving the camera, so we don't have to
worry about spawning more map pieces as well. Let's go back to my
game and let's create a collision on trigger event. On trigger enter two D collision game
object dot compare tag. Just like we've done the
whole time is player. In other words, if the
player just walked into us then we want to
start the game. We're going to create a
reference to these two scripts. Camera move, we're going
to call it camera move. We're going to create
a reference to our map generation script
as well. Call it map. We're going to do is we're
going to say map begin game. In other words, start the game. We're going to say camera, camera move. Camera
speed equals. And then we're going to
have this default value over here on our camera move, which is going to be what
we want the speed to be. I'm actually going
to change this. I'm going to make this
public float camera speed. Then we're going to have a
public float underneath it, which I'm going to call speed. The speed over here, I'm going to set to be the variable
which is moving it. And then this camera speed
is like this setting I want, I'm going to set
this in the game, but it's only going to
be influenced by speed. And I'm going to
say camera speed is equal to camera speed. In other words, I've got
this setting over here, camera move, camera speed, I've got the setting over here, which tells me how fast
I should be moving. Then I've got the
speed variable, which is obviously going
to start off at zero. Then the minute I start
my game and I say, okay, set the speed to
the camera speed, then it's going to
change to whatever I've put in here and I'm going
to start moving us along. This is pretty much all the
code we should actually need to start our game manually. The way we can test is we can go into our boundary over here. So let's go ahead and
drag in start game. And then drag our
camera move script from our camera and our map generation
script from our camera. Then that we can see the
minute I touch a player, I should start this code.
I should start moving. Let's go back to my main camera. Let's set my camera speed to
one point. My speed is zero. Now have a hit play.
I should not start the game until I move along there. Let's
see if that works. Currently moving,
nothing has spawned yet. Obviously, the clouds
are still spawning, which I do want, but
nothing else has. But the minute I cross
this boundary over here, the game does start.
See over here. Now I can start actually playing the game, which is
exactly what I want. Obviously, this first cloud
is a little bit weird, because spawn on
top of another one. I might just have to adjust that initial offset and make it start slightly further along, but I think that would be fine. We can change that a little bit. Let's just get focused
on moving this. Maybe you don't even have to
jump for the first cloud, it's just a cloud
into another cloud. Then the first cloud
should spawn above that, so it's going to
look a lot better. Now, that actually
worked perfectly fine. I'm going to move this boundary a little bit to
the side of here. The minute you pass a certain
thing, it actually goes. But there's two more
things I want to do. First of all, I want
to make sure this sign displays your high
school of diamonds. That's actually also
quite easy to do. All you need to do
is I need to go into my UI and I'm going to
create a new text over here. Let's go Legacy Text, because we don't want
to use the text me. Let's call this diamonds. I'm
going to move it over here. I'm actually, for
simplicity sake, just going to copy this diamonds counter
I've got over here. And move it over here. Then I'm going to set a
test value of 300 or so. It doesn't seem like
anything showing. Let's try to resize
it. It's behind it. I'm actually going
to have to change the order of this canvas. I'm going to make the
canvas order in layer two instead of one or
actually even five, because we pretty much want the canvas from
front everything. So let me just make it ten, see if that has fixed our issue. If we go back here. Yeah,
now we can see we have this showing up in front,
which is exactly what we want. I'm going to rotate
the slightly because the sign is a little
bit crooked itself. I'm going to resize it back to what it should be, which was
something more like that. I'm going to set that to that. I'm going to rotate
it a little bit more. I think that's probably good. Might have rotated a bit much. Let's turn it back a bit. There we can see now we have
a little marker that shows us what our maximum diamonds collected in one of the run was. Now we need obviously program this to actually
display the high score. That's actually incredibly easy. All we need to do, it doesn't really matter
what script we pick. We can pick anyone,
but I'm going to pick this player diamond
script over here. Because that's already
got UI here and it's already got a
reference to text object. Let's create a new one, public
text, call it high school. Then all I need to do under
the start void is say high school dot text is equal to high school diamonds
dot two string. That's going to
basically say okay, when I start the game, make sure to set that
text or whatever my best score is
if we go back into my game now let's go to my player and see
if that does work. Let's find over here
we've got high school. Set it to this counter. I'm going to rename this
to high score count. Then if we had play, we
should override that. At the start of the game
with our high school, which it looks like it has done, our high school shouldn't
be zero, it should be one. We seem to have a bit of
a bug, but I believe, actually the only
issue is the fact that we're assigning it before. We've assigned the variable over here, which is
exactly what it is. Let's just go back here
and put it underneath. And then it should
work perfectly fine. If we go back into our game, we hit play, We should see, now this should change to one the minute we
start the game. And it looks like it
is. That is perfect. Now we have a high
school counter. We have this thing that allows us to start the game
by walking through it. And we have everything else
working just like it should, which is pretty cool. All we need to do now, the very last thing that we actually need to make sure is just make sure that when
we start again, it doesn't give us any glitches. What I'm actually
going to do instead of moving this cloud
is just make it so the first cloud spawns a
little bit further along. And then I'm going to do
that, I'm going to go into my map generation script. I'm going to have bullion over
here to be starting block. In other words, if it's
the very first one, I'm going to set to
false over here, but over here it
always needs to be true is the very first block. And that just
basically allows us, when we call in this object, to call in this method, we can enter a value over here
when we call it from here, we can differentiate from
where we call it from here. Then all we need to do need to go and add a little
if statement at the end. We need to say starting. In other words, if there's
the very first one, then I just want to move it
a little bit to the side. I'm going to say saw spawned
tile, transfered opposition. Let's add a starting offset. So let's go public float start offset and we're
going to make it slightly bigger than the
one we have over here. Just put that over there. And we're basically
going to say, okay, let's put the tile there. But if it's a very first tile, I actually want to put
it somewhere else. So let me put it there. It is going to spawn it
in a different place, but it really doesn't
make a difference. Let's go back over here, and let's go back to
our main camera. And let's make the starting offset 18 rather than 15,
and see if that works. We now move that a little bit, let's see if that works a little bit better in terms of spacing. Let's then test
that lasting mold, which was see if the rest of
the game does run smoothly. It looks like 18 is actually
working pretty well. We've got an issue over
here with the one which you need to fix,
it's not going away. We've actually also got
an issue with the UI, which I also want
to fix so that it doesn't stay when you're
not playing the game. But let's just first
test the other thing, die, then camera still moves. That's another problem
we need to fix. Let's go back and everything
seems to be working fine. Let's go ahead and quickly just look at what
we've got to fix. First of all, the reason
why the camera is still moving is because this
original script over here, which edited the camera
speed when you die, changed the camera
speed variable. We want to change
the speed variable because we've changed
how that script works. And so we want to make
it change the speed, not the camera speed.
That's the first thing. The second thing we want
to do is we want to make sure that this text over here that we have does not keep moving as
the camera moves. The way I'm going to do that is I'm going to actually create a new UI and have that one stored in there and
make that one not move. And then have this
UI that I can edit and spawn in when I
want to start the game. We've already done
quite a lot of episode, I know it's been a while,
but we're almost done. So just bear with me as we
finish these last two things. First I'm going to
do is I'm going to go to the starting
thing and I'm going to create a new canvas. I'm going to call this two. Then I'm going to copy my high
school account and put it inside two instead of
where it was originally. And I'm just going to
change UI two to screen Space camera and
drag in my camera, then double click on it
and let's see where it is, not where it should be, but
let's just move it back up. We're going to change
this order and layer to be ten as well, just
like the other one. Then let's move it to there. I think that's
about where it was. We can obviously adjust
it as we play the game, but I think that's
pretty good for now. Then actually, once
I've oriented this, I'm going to go back
and I'm going to change this to world space. In other words, it's not going
to move with the camera. Once I've positioned
it perfectly, that should actually
work perfectly. And now we have this UI which is not going to move
with the rest of the world. So if we now hit play, and we see if that does work, this UI is going to stay
exactly where it is. And as we move along, it doesn't follow us,
which is perfect. Obviously, this UI is still here, which is a
bit of an issue. Let's make this UI
only get activated. The minute we land on this
starting position over here, we're going to have
a little animation just so it looks
a little better. Let's go window animation. Go to my U over here and
let's create two animations. Actually, let's go
to assets animation. And the first one is going
to be a fade in animation. Then the second animation
we're going to have is going to be what we're just going
to call a static animation. And that's just
going to say, okay, keep the positions
exactly where they are. Let's set hearts to this
position over here, 498.5 And let's set diamond
to this position over here, 52.94 59.8 sorry. Um, and these should now states, now if we play as
animation, it works. Let's see how my faded
animation works. I want this to go from here
over there about 2 seconds. I want it to fade into
there to where it was, which is position 400. And what was the position? I think it was 459. Let's go to our other
animation just to see it. 502.9 for the diamonds, and then 459.8 for these. Let's copy these
hearts position. Go back over here,
and then over here. At this point I want the
hearts to be at that position. Let's change it to 459.8 And then I want to do the pretty much
the exact same thing, with the diamond going
to go from here. Then 2 seconds later, I want it to be at the other position, which let's go get
52.9 over here. At this point, I want the
diamonds to be there as well. See, now they're going
to fade in like this, and then the game
is going to start. All we need to do,
need to, right? Oh, let's also have
one more animation where they're out of view. Let's create a new one and
we'll call it out of view. That's actually just
going to be when these two are kind
of off screen. It doesn't really matter where they are as long asy're hit. And we could also have them kind of be actually deactivated. But I'm just going to do it like this for now because it makes it a little easier since we're only changing their positions. This is actually going to
be the default animation. We're going to start
with this or out of view things. Let's
open up the UI. Let's set this to
the default state. Then we want to make
sure that the minute we faded in, we go
right to statics. Let's go make
transition over here. This is going to introduce us to a new concept which is like
automatic transitions. We're going to set
these both to zero, but then we're going
to keep, this, has exit time changed. This means the
minute this is done, change to static
and exit time of zero means it's going to complete the animation
and then move here. Which is going to
look pretty cool. Now all we need to do is have a trigger which is a new
type of parameter as well. It's very similar to a Boolean. Think of it like a button
instead of a lever. We're just going
to call it start. We're going to go
over here and we're going to make this
transition condition. Start this to zero, make sure it doesn't
have extra time and the transition duration
to zero as well. This is basically
going to work that the minute we click this over here, it's going to fade in
and then stay there. This is all we need to
code to make sure that our UI doesn't start
when we start the game. Now we need to add in
one more parameter over here to our
start game code. Going to create a
public animator, which is going to be our anum. Then let's just go
underneath here and say I an set trigger, I think we called it start. Now these three things together are basically
going to allow us to start the game
manually from that event. And this one over here is going to make it so that we make sure our UI only starts
when we start the game. Let's go back into
my starting script. Over here, boundary,
it was here. Let's drag in that UI animator and see if everything works
just like we needed to. Let's play, and let's see. We start with the UI out of screen, exactly like one or two. We start with the score
of one, nothing else. In the minute I start this game, we can see my UI fade in. And that actually looks
really, really cool. Now I can start playing
my game just like normal. That is the last big
change when you make to our games need to still
add audio and sound. I know I say that pretty
much every single episode, but I think this is
a pretty cool change we've made to our game so far. And we've made it so that
it looks a lot nicer, especially with
the extra visuals. And now with all
this other stuff. And now we've also
got to start in hubs. So if we die and
we lose the game, we see everything go away, then we're going to start
over and we start again, just like where we were
with a new high score because we got a lot
more dimes that time, which is really, really cool. So that's everything
for this episode. We're going to obviously add in our audio and music
next episode, and then we should
make a few final touches and we're
done with our game. So you're almost actually completed with this
entire course, which is really great and great job if you've
been able to follow along everything so far and your game is looking like mine. If you've got a few things
that are different, maybe just go back and watch
a few videos and download the resources to see where
yours are different from mine. Because you should
be able to build my exact game pretty much using the files and recess that I provide under all the videos. So just make sure that you
have everything the same. And I've even attached my code in case you want to
check that as well. So hopefully you've
got your game in the exact same state
that mine is now. And you've been able to follow along everything in this video. Great job in making it this far. And we're going to
get started adding audio and music in
the next episode. Thanks.
17. Lesson 16 - Adding sound effects and music: Hey there, and welcome
back to Unity. Now the time has
come for our game to finally add an audio, because even though we've done pretty much
everything else, our game is still
entirely silent. Adding an audio is just one of the other
things that makes your game feel a lot more responsive and alive
to the player. To add an audio, we're going to follow a pretty
simple process. We're first going to
create a new object called an Audio Manager, and this where we're
going to keep track of all the central audio, things like whether
audio is enabled or disabled, and
what to play when. Then we're going to edit
all of our scripts and we're going to say play
a sound at this point. To start, let's
create a new object, call it Audio Manager. I'm just going to
set it to zero for no reason other than preference. Then I'm going to create a
new script and I'm going to give it the same
name audio manager. Then inside my audio
manager script, I'm going to have a reference to every single audio source, which is where
we're going to play audio from in the game. And then going to
have different voids for each one that's
going to say play this, play this, play this, et cetera. I'm actually going
to simplify it. I'm going to have one void and I'm going to say play the sound. But I'm getting ahead of myself. Let me first just write
a public audio source. I'm going to have to
create one of these for every single audio
file that I have. Now, before I create this, let me first actually
import my audio files. I'll go and create a new
folder, call it audio, and then inside this, I'm going to want to put
every single one of, I think there are seven
audio files I have so far. So let's go ahead and
import all of those. I've got all of them here and I'm going to leave all of
these settings for now. These are basically just a
whole bunch of audio files. This is for collecting diamonds, this is for the batteries. Make a Zap. Sound This
can be a game of a sound. This is take damage,
Sound, a jump, the music of the game, and then also sound effects
for the robot. I'll get into all of that now, but for the time being, let
me just add an audio source, or actually I'm going to
add seven audio sources to this audio manager script, and then I'm going to create
a reference to everyone. So let me go ahead and
type in audio source. I'm going to add seven of
these, seven right here. And the miner I've done
that, I'm going to now get started with basically
mixing my audio. So let me go ahead and
disable all of these. And these are all different
sounds and some of them are a lot louder
than I want them to be. Now, due to the recording
software that I'm using, you may not be able to
hear the audio from my game coming directly
through the video. If that is the case,
then you just want to obviously follow
along the process. View will be exactly the same
and you just want to adjust the volume of each audio clip as you added into your game. So let me first start
with the music. I'm going to drag the clip
into this audio clip property. I'm going to set play a wake true and loop true
for the music. And now I just want to
change this volume. I can tell already one is
going to be way too loud, so let me try 0.2 at first and see how I
need to adjust it. I think 0.1 is slightly nicer, just so it's more like
background music. Let's maybe set 0.15
is probably a good in between then I'm going to do the exact same thing with every single other one of these. I'm, instead of changing it, I'm just going to mute
the one above it and then make the jump sound play
on a wake and loop. So I can get a good
volume for that as well. Obviously, that's
a little too loud. Let's make it 0.20 0.2
is still too loud. 0.10 0.05 I think 0.1 is probably probably
a good in between. Let's make it 0.1 I'm just going to repeat this process on and on until we've done this
every single thing. Then I'm going to basically
disable all of these ones, which I don't want to be set on awake if you've
been following a long, hopefully have similar audios
to me, I found these works. You can obviously adjust
them for your game. I might change these as I go, but that's how I'm going to get all my audio mixed and
then I'm just going to go ahead and uncheck
Play on awake for pretty much every
single one as well as mute and loop because
I don't want any of these looping or
playing on a wake. Really same thing with the hit, like that I don't want
the game over either to be any of these
things, nor the robot. And then I'm going to
set the same thing for jump over here, which we're going
to set off as well. The music, I'm going to
keep playing awake and loop on just because you do want to obviously play the
music when it's on. Now, before I go any further, I'm going to get
started with adding in a mute and a sound off bun. Which is going to basically
program these to say, okay, disable all of those
and save all of those. The way I going to do
that is I'm going to create a public
audio source array. This is going to be
the sound effect to create another
public audio source. And this one is going
to be for the music. Then I'm going to
create a few voids. The first void is going
to be a mute music void, which is going to
set Music mute. Equal to true. I could actually create another void over here that says unmute. Music But I'm actually
combine them into one void. I'm going to call it un, mute. Mute. Music It's going to
have a bullion over here, which is going to
be called muted. It's originally going
to be set to false. Then I'm just going to
set muted equal to muted. In other words, change
whatever muted was. And I'm going to set this
over here to muted as well. Not muted. The first
time I click this, it's going to say,
okay, muted is false. Set mute to not
muted, which is true. And then set muted equal to
not muted, muted is false. Therefore, set muted at true. Then the second time,
it's going to say set muted to not muted,
muted, it's not true. So it's going to set to false. Basically, this is going to alternate there every
time we call it. I'm going to write
the exact same void for the sound effects, mute, mute sound effects. We're going to write
for each audio source AS I have to type it like this, because as is a
reserved word in SFX. Other words, every
single audio source we're going to assign
to this object S, S is first, can
be the first one, then the second one for
every single one in here. This is what's known
as a four loop. It's actually a for each loop, but you can think of them
as like repeating code O. This is saying for
every single S it's written for
us a little bit, but just think of it like for every single audio source
inside this thing. Set the mute value of it equal to not
whatever my muted is. For SX, this is muted. Music This is going
to be muted SFX. Let me change that quickly then. Just copy this over
here, over here. I'm going to say muted FX. In other words, update every single thing,
so it's the same. Then set muted SFX to
whatever it wasn't before. In other words, alternated This code over here
is going to allow us to enable or disable every single audio source
we have in our game. Now we need to write codes for playing the specific
audio sources, But I'm going to combine
that into one void. I'm going to call it
public void, call it play. Sound As an input, we're going to basically
input an audio source. We're going to
input audio source AS the entire void is
going to be as play. In other words,
we're going to play an audio source that we
are choosing from here. Then I'm going to
call this void. I'm going to create
a reference to this audio manager script in a bunch of other scripts
where I need to call voids. Call this void specifically and I'm going to pass in
the sound that I want. Let's get started with
filling in all the sounds. First of all, we've got our game over Sound as well as
our damage sounds. Let's go over to Player Health. Let's create a reference to my audio manager.
Let's call it AM. Then over here inside
my take damage void over here I'm going
to write AM Fx. Now I need to choose whatever
index I'm going to have. Let me start actually
assigning the indexes on this. Before I do the rest
of this over here, let's go ahead and drag my audio manager script
to the bottom here. I just make all of
these minimized because I don't need to
edit the settings anymore. Now I'm going to have
Music This source up here and all the other sources. There should be
six other sources I'm just going to
drag in like this. And you can see it's actually giving us a bit of an issue. Now we have these
ones that's not here. So I'm just going to delete
those right clicking and saying delete Array Element. And then I've got my six
audio sources and then jump, then robot, then game over. Then hit, then electrical, and then diamond collect the one that I want
to refer to here. Hit is the fourth one. It's element three over here. And you can see that over
here, this is element three. Hit. Let's go back to my code and let's say Am element three. And I'm going to pass
that into AM, Play Sound. Let's go ahead, go like that. This is basically
going to say, okay, play a sound and play whatever audio source
you have stored in. The third thing, which
is the one we just made, I'm going to repeat this
process pretty much wherever we have a sound we want to
play, let's go to the Death. In the death one we want
to play the game over. Sound Which is, so believe
it's the second last one. It's actually, it's
the third one I think. Yeah, it's the third one,
which is element two. Let's go over here and let's
play element two here. Now we've got two
of them sorted. We still need to add
in the jump sounds. Let's go to the movement script. I believe it's over
here. Player movement. We're going to create
another reference to my audio manager, call it AM. Let's go over here to my
jump void and say AM Play. Sound And we now have
to find the jump sound. I honestly can't remember
because haven't been memorizing these. But I
want to say it's the first. Yeah, it's the first one.
Let's go over here and let's play the very first sound. Now, we've done three of them. There's only three more
to go. We obviously need the sound for
the electricity, as well as the sound
for the robot. And we need the sound for
the Diamond Collection. Let's go to the Diamond
collection, One first. We're going to have to on this event over here
play the sounds. Let's get public
audio manager AM underneath the particle system. Let's go AM to play Sound. I believe Diamond Collect
is the very last sound. Let's just confirm. Yeah it is. That's element five over here. Let's go there and
play the last one. Now we've got two more sounds. We've got the robot Sound,
which we need to play whenever there's a robot on screens
that's a little bit different. This is actually going to
be a little more tricky. So I'm going to change
what I'm doing here. Instead of having
this sound be a part of the array that I'm going
to necessarily focus on, I'm going to have the sound
play in awake and be looped. But instead, I'm going
to have it muted. And then whenever I have
a robot spawning in, I'm just going to
make sure that I set this thing so
that it is muted. And every time I have
a robot that dies, I'm going to set it so
it's no longer muted. This is going to
work for the most part they might give us if there's a robot that
spawns and then dies while another
one still on screen, It might be one
robot without Sound, but for our time being, it's going to be a pretty
much perfectly fine solution. Let's go over here to
my void over here. Let's see in my script, when I start as a robot, I'm going to want to
set my audio source, which I'm going to create a reference to the
audio manager. Again, M over here, I'm just going to say AM of X. I'm going to refer to it
is the first element. I believe it's secondly
the second one, but it's element
one in the array. Mute equals false. In other words, play the robot. Sound Then the minute
this robot dies, the minute it no longer
exists on screen, we're going to want to set
that mute to true again. The way they're going to
do this is actually by editing the script
which is above the, which tells what to delete. We're going to go
into that script over here which is called Tile clear. This is the script
that is going to destroy the tiles.
The minute there. I'm going to add a new variable, call it robot, on board. And it's going to
be of type bullion. Then over here when I
destroy my game object, I'm just going to add another
line right underneath. And I'm going to say if
a robot was on board, then I want to make sure that my audio manager is no
longer playing a sound. I'm not going to create a reference like I
don't know here. I'm going to use Game Object Find Audio Manager because
that's going to be a lot easier for a pre
fab Get component. Then I'm going to find an audio manager script
attached to it. I'm going to say X, attach the element two or
was it element one? I believe it might
have been element one. Actually, yeah, it
was mute equals true. All I need to do in
this robot script of here is the minute I mute it, I need to attach, go to my parent objects and
transform parent. Then I'm going to
say get component tile clear and I'm going to say robot on
board equals true. This might be a bit of
a weird way to do it, honestly, if you really
don't want to add in this robot Sound, it's
not the end of the world. Basically what I'm doing
is, I'm just saying, okay, this specific element of the array it doesn't
actually need in the array. I'm just keeping it there
kind of for keepsakes. And I'm saying, okay, mute. It set the mute to false
the minute I spawn in and make sure I tell my tile that there's
a robot on here, and the minute my tile
then gets destroyed, if there was a robot on there, it has to make sure that
this mute is set to true. We could also actually just
set it to true every time we destroy a tile that wouldn't work anywhere
near as well, because then any
tile would mute. The robots here don't exist
for a momentary time. So this is going to hopefully survive for most of
the robots lifespan. And it's going to work
just fine for now. If we go back to
my audio manager, I've already programmed in my music script and
I've got the jump done, I've done the robot now,
done the game over, and I've done the
hit as well as, But the electricity. Sound
I've done the diamond as well. Let's go to the
electricity Sound Which is going to be in the
battery script over here. Let's find my battery script, it's actually in Unity store,
it hasn't been opened. Then are going to do this
battery void over here. We're going to have a
reference to my audio manager. Again, I'm going to have
to assign this one via code as well because it's
going to be a prefabs. I'm going to say M equals
game object dot find audio manager get component. Now I'm going to find an
audio manager script on that. I'm going to make sure I've
assigned that correctly. And then all I'm going to
do is I'm going to say this code just like I've
said on all the other ones, like Player Health over
here, it's here AM. Play Sound And then I'm going
to choose an array element. I'm going to play the sound
when the battery turns on. I believe it's the fifth sound. Let me just check to be safe
it let's play element five. Now the way this is
going to work is now we've created
our audio manager, which has every single
sound stored in it, as well as the script, which is hopefully going to allow us
to mute the music and not And we haven't
programmed that in yet. But we're going to
add that the minute we've got all the
sounds working. Then hopefully we've
been able to call every single sound appropriately
from every script, so that we are able to play
the sounds when we need them. Let's remember all
the sounds we first did Music Which didn't
have any programming. The jump was referenced
in the players Sound Let's make sure we assign the audio manager over here. Just like that. Let's go back, let's see what else
we've already done. The robot is going to be
assigned by the robot. And actually just
realize that we haven't created a reference to this audio manager
script in Start. Which we probably should do because this is another prefab. So let's write the exact
same code we wrote for the battery inside
this other prefab. The reason why we're
doing this for prefabs is because generally when we
have objects, we can say, okay, put this in this object, but because these objects
haven't been created yet, these are like
robots and enemies. We have to write in
code to do it for us, because we're not there to drag it in them and at
the game starts. So that's why four,
a few of these, we've had to write
this code over here. Anyway, that should be
the code we need to assign the robot. So let's
see what else we have. The robot is done,
the jump is done, game over and hit are both going to be on player health
which are assigned now. As well as diamond collects
is going to be on diamonds. And I think diamonds, I can't
remember if we remember to assign it via code,
but I don't think we did. So let's do the exact same
thing we've done there. Just make sure we
assign it via code. We did do that for
the battery as well. That means the last
one we have is just for the player taking
damage and dying. So let's go to Audio Manager, go to Player and make
sure that we assign the player health script to be this audio manager
script over here. Now let's go ahead
and hit Player. There might be some issues, but we're going to fix
them along the way. But hopefully we've done everything so we
don't have any bugs. And we can hear the music and let's hit play and see
if everything works. It looks like jumping works. We have our audio, we
have the jumping sound. We're going to test
every single one, Obviously, I'm actually going to go ahead and mute the music just so I can hear
everything else. It doesn't look
like my heart Sound seems to be working my battery. Sound Doesn't seem to
be. But let's test. Heart is obviously
working my jump, My game over seems to
be, which is great. That's actually most of them. Let's see what ones
are remaining. Going to go ahead and
mute the music again, the jump sounds working. I have to test the robot and the gameover is
working. Hits working. I have to test the electricity. Doesn't seem to be working. Diamond collector, I
haven't tested yet. And the robot I don't think is working either.
Let's just go ahead. We've got an error
here that says object reference not set
to instance of an object. Yeah, it seems like our
code isn't working exactly. And I think the reason is over here we've sort
audio manager wrong. Let's just go ahead
and fix that. We put a space there where
it shouldn't have been. We have to go I think
we wrote this in these three lines of code over here and we also wrote
it in tile clear. Let's make sure we are we
got to right that time. Right. Let's go ahead
and try that again. I see all of those errors were trying to play sounds
but they couldn't because they couldn't find
an audio manager object with a space which
makes complete sense. Let's try again.
I'm going to turn the jump down just a bit
because it is quite loud. Let's try that
again. I'm going to mute the music again so
I can hear everything. Let's see, Jumping
seems to be working. We've got a diamond. It seems like the diamond
Sound is playing here. At least something's playing, but we've got the
wrong sound playing. Let's just test. We made
any other mistakes. The diamond Sound
is playing when we collect a diamond as well. Interesting that
probably actually we assigned it in
the array wrong, but let's go ahead and try that. The robot Sound is also
working, which is great. Let's go back to my array.
Let's go over here. Electricity Sound Should
be the fifth one. Let's go ahead and drag
that in and just see because I don't think
it was assigned properly, that was
probably the issue. Let's just go to my
battery and check if we're calling the right thing and
we're calling element five, we are actually calling
the wrong ones. Let's change that to four. We got one more error over here which said object
reference not set to instance of an object and
it says script robot moves. Let's go ahead and see what
exactly the issue is here, finding an audio manager and we should be able to get
this code working as well. It looks like the
issue might be over here with this get
component tile clear. Obviously all of our tiles should have that
script over there which make sure they delete themselves once they
reach certain height. I made a new few new tiles. At some point I might
have gone to add them on. Let's just make sure it's
not on all of my tiles. Let's just check which
ones don't have it. Those all do, Those all do that one does,
that one doesn't. So these two don't
have tile clear. Go ahead and add that to them. We don't have to set
anything, obviously. And then to the rest of them. Yeah, they do, It's
just those two. Now, if we go back
into the game, everything should be
working pretty much fine and all of our sounds and
everything should be great. Just go ahead and hit
play and see if it all does work perfect. So we've got my music playing. The minute I start playing
everything hoops in, Looks, I've sounds
working as well. Seem to have a bit of a glitch where two have spawn
on top of each other entirely.
Sure what that is. But it looks cool. Whoops. You can hear
everything going on, You can hear the
zapping, and you can hear the robot ever so slyly. Obviously, if you die, we
have that all starting again, which is really cool. That is pretty
much all the audio setup we need to
do for our game. The very last thing is
we need to now add in something that allows us to
mute the audio and the sound, because we coded that
right at the beginning. Let's go into my UI. I'm going to go to this UI over here. This Camas I made, I'm
going to create a button. I'm going to have two buttons. Let's go legacy. I don't need button
with Text me. I'm just going to move
this down over here. And I'm going to delete the text component and just rename this to Fx and rename the one
underneath it to Music. I'm going to put
them about there. I think I want on my cloud to be able to mute
the music like so. Obviously going to use
actual sprites here. I'll set these positions. Negative 4.445
negative 445, cool. Then let's go into
my sprites and let's get these two sprites which I made specifically
for the following. Music And I think the other
one was called Sound. There it is. Let's
import those two. Make sure we have
both selected and do the normal thing that we
do when we add a new sprites. Let's just go over here into the source image and make
sure to the X one we drag in our sound sprite like
so click set native size. Then we're going to
have to scale this according to the
rest of the game. But before we do that,
let's add pixels. Let's add Music So we can do
the same at the same time. Then let's just see how
we need to change this. That is obviously one pixel. It needs to be a, it's a
little big scale down. Again, that should be fine. Perfect. I think
that's good enough. Maybe a time it's smaller. Yeah. Now we need to do is we need to go back into
the scheme over here. Let's just make
sure that we have an event system
because that's what we need for these
buttons to work. Let's go ahead and
drag that one up here, and this one down here, until they're looking like that, maybe a little bit to the side. I'm actually going to want
both of them at the bottom. I think like this. Let's go
ahead to music and move it. We have our buttons
there. I'm actually going to move both of them
a little bit up as well. I think that looks
all right for now. Now all I need to do is I
need to make sure that that code that I made runs
when I do these buttons. So let's go ahead select them. And then on click I'm going to drag in this audio
manager object and I'm going to choose Audio
Manager mute S of X. And then for music, I'm
going to change that to mute mute Music. Let's
see if these work. What should happen is actually the last
thing I'm going to do before I'm done with that is I'm going to go back
to audio Manager. I'm just going to make a
reference to these two buttons. Let's go using Unity Engine. Let's create a reference
to my two buttons, Public button X and the other one is
music with a capital. This time then all I'm going to do is I'm
going to say, okay, if I'm actually going to
create a couple of colors, I'm going to create one
color called Grade out. All I'm going to do is
I'm going to say, okay, if you have now muted the music, then gray out Music You
can see the change. Let's go ahead over
here and let's say if muted Music
In other words, if we've now muted
mic muted will be set to true the minute Music In other words,
if we've muted it, let's set my music image
color equal to grade. Then underneath that
I'm going to write L. Music Image color is
equal to color white. I'm to write pretty much
the exact same code underneath the sound
effects over here. Say if muted X, then X dot image
dot color is gray. Otherwise set it to white. Let's go back into my game then. Underneath my audio
manager script over here, I just need to create a
reference to these two. Let's drag X in there
and let's drag music like let's make the create
color something like this. And see if we can see that in
action as we play the game. Let's go ahead and hit Play. And just test out these two
buttons, see if they work. It looks like it does. I'll see if we click
the sound thing. We shouldn't have
any sounds at all. So let's go ahead and mute
both while I'm talking, just to test if anything
is not working. It seems like robot
is still an issue. And the reason for
that is because we're actually unmuting this manually. What I'm going to do
instead is I'm going to say set the volume
instead of muted. And then set the volume back. Which is actually quite cool. I didn't actually think of that. But let's just quickly
make that change. Instead of saying mute is false, I'm going to say do
volume is equal to. And then what is the volume which I want my robot
to normally be, it's usually at 0.01 So I'm
going to set the volume to 0.01 Just put an after that. That's what you need
to do. Then what's going to be dictated
when that's off again, is when I have, my tile
gets cleared. So let's set. Instead of saying mute, I'll say volume
is equal to zero. Then actually the last
change you need to make after doing this is need
to go back into my game. I need to go to this
script over here. And I need to
actually set that to zero at the beginning
of the game. And not muted just like that. Now when I play my game, I shouldn't have
any robot noises. When I start, if I mute
both sound and audio, that should not be
a problem I have anymore where we can test. Actually, this should
still be going up to 0.01 when I play it, because it's muted
when I hear it. We should have a robot on
screen now, which is perfect. You can see it is
actually working. Then the minute
this robot actually gets destroyed by the cloud, See no sound effects playing. Nothing is playing, which
is exactly what we want. The minute this robot
actually gets destroyed, we should have this
drop back to zero, which it looks like it just did. Which is great. That's
actually all of the sound we need
done for our game. And now you can obviously change that whenever you
spawn into the game. You can select that whether
you want it on or off. It will be on by
default obviously. But then you can
just turn it off on whether you want it,
which is pretty cool. That's actually the last thing. Now, to make our game complete, the last thing now we
need is final touches. But after that,
we've pretty much finished our game, which
is really, really cool. Obviously, like I said
in the next video, we're is going to be adding
up some final touches to make everything
look a little better. But we've pretty much done, so if you follow along and
you've got a game that looks like this, that's
really, really cool. Because obviously this is quite an impressive
game to make if you've never really used Unity
that much before. So good job on following along. And hopefully your
game you're quite impressed with and quite
proud of it at the moment. And like I mentioned
in the next video, we are going to be covering
just some final touches to make our game look
a little better. But hopefully, like
I said, you're happy with how it is so
far and everything is working well on your game as well, just like
it is on mine. We'll be wrapping
up this course over the next two videos
and the next one, we're just going to be
adding some final touches. And then I'll show you
how to build and export this game and conclude
this course. Thanks.
18. Lesson 17 - Final touches: Hey there, and welcome
back to Unity for the last actual lesson where we're going to be
developing this game. Now in this lesson,
we're going to be adding in just some
final touches. We're going to be
adding two things. First of all, we're
going to be making the camera speed up over time. Then we're also going to be
adding in post processing, which is like full
screen visual effects, which just make the game
look a little bit better. It's quite hard to explain, but you'll see once
we've added it in, starting with the original
thing, before I do that, I'm just going to
actually enable this curtain because
I disabled it quite a few episodes ago and
before I forget about it, when I try and actually
build my game, I think it's look a lot
cooler with that fade in. Let's go ahead and just
see if that all works. So we have our fade
in and our audio and sound is working just like
it was before obviously. Let's get started with
that. Camera speed up. I'm going to go to scripts and I'm going to create a new one. I'm going to call
it camera speed up, the way the script is
actually going to work. There's quite a few ways
you can go about this, but the way I'm going to choose is going to give the player quite a lot of control over the camera speed
at certain points. I'm going to have
a variable over here called time elapsed. Every single frame I'm
going to increment time elapsed by time delta time. In other words, time elapsed
is going to increase, is basically going
to be a counter. And if we go ahead and
put this on an object, I'm going to put it on the
main camera, for instance. Let's go ahead and add
in my script over here which was called camera speed
up, right to the bottom. There you go. Anyway, if we just watch that time
elapse variable, I'm going to mute the music so I can speak
while it's playing. Let's scroll down and
let's just see over here we have this value
counting up and up and up. We have an error right
at the beginning which says value cannot be null, which I'm guessing
is referring to that time elapsed because we
haven't initialized it yet, which I'm going to
get to in a minute. But basically it's just a timer. I just want to show
you what it is. Let's originally start
by setting this to zero, and it's now a timer. What we're going to
do every single frame is we're going to say if time elapsed is greater than a value, which we're going to have
basically mean step up a level, then we're going to step
up the level of that. Camera speeds, we're going to
have an array up top here. Public float array, It's
going to be camera speeds. Then we're going to have
an array next to it, which is going to be times. What we're going to
basically say is the minute I'm
greater than a time, then you have to up this
camera speed by that amount. This time variable
we're going to store in another float
called current time. The minute we start the game,
the minute this starts, we're going to set current time equal to the very first
time on our time. It's going to be times zero. Obviously, camera speed is going to be set to zero as well. We're going to need
to create a reference to my camera speed over here. Let's go public camera, move, call it camera speed. Camera script rather. Then we're going to
say camera script. Camera speed is equal
to camera speeds zero. This is going to
allow us to do is we're basically
going to allow us to change the speed
of the camera. This actually makes that
change we made earlier where we separated the camera
speed and its current speed, a really useful one because
now we can change the speed without worrying how fast the
camera is actually moving. This is just how fast it
should be moving, right? But it doesn't mean it's
going to start moving if certain time elapses while we're dead or
anything like that. Which is really,
really cool right now. We have a script
up here that says set the current time
to zero and set the camera script to
this camera speed because we're using the
same variable over here. I'm actually going
to set this to another variable, call it index. At the start, we're going
to set index equal to zero, and we're just going to
set this equal to index. And then every single
time we have time elapse, we're going to
increment time elapse. And we're going to say if
time elapsed is greater than times of index plus one. In other words, if
we've moved up, if we've now passed enough
time to go to the next level, then the first thing
we're going to do is we're going to
increment index. We're going to index plus, plus, in other words,
increase it by one. Then we're going
to say underneath this, actually before this. Rather we're going to
say camera script, camera speed is equal
to camera speed index. And we're actually going
to move that below. Basically what we're going
to do is we're going to increment camera
speeds by that amount. Well, this is going to
allow to do the way this code is going to
work, like I've explained. We're going to have
a time lapse area which is going to
count up from zero. We're going to have a
list of camera speeds and a list of respective times. And we're going to
have a current time and a camera speed
and a current index. This current time variable
we don't actually need. I don't know why I created it, I can actually remove
both of these over here. Basically, all we need
to do is we need to have this float over here
that says time elapsed, camera speeds, times, as well as a reference
to the script and an index at the start
index is set to zero. We set our camera speed
to the original one. Then as long as the time elapsed is greater
than whatever, the index is greater than one. Obviously, the minute we run out of a raise is
going to give error. I'm going ad a little
code erneath it that says As long as we're not at the maximum index and the minute we're at
the maximum index, I'm actually just going to
destroy the script entirely. But until then I'm going to increment my thing every single time we have time elapsed is actually greater than
the one that's next. They're going to increase index
and then I'm going to set the camera speed
to whatever that is over here underneath this. I'm going to say if index
is equal to camera speeds, length, in other words,
if we've reached the maximum, index will work
as long as it's one less. But the minute it's one more, in other words we're
at the maximum thing, I'm going to delete
this script off. It's not going to be an
issue because when we reload the scene,
it'll be back there. But basically just for the time being because I
don't need anymore, I'll say destroy game object dot get component camera speed up. Or rather instead
of destroyer, I'll say game object dot get component camera
speed up enabled. Because I think destroy
might actually get rid of the game object
itself equals false. Basically the minute I run out of stuff, just disable myself. And obviously they'll be reenabled when we
start the scene. But this should actually
work pretty well in terms of telling us how fast the
camera speed should be. Let's go to main camera,
score it onto the bottom, and let's set my camera speeds. I'm going to set initially
four I'm going to set. This obviously has to
be the same length, say after 2 seconds passed, after 4 seconds,
after 6 seconds, after 8 seconds, I'm
going to make it 123.4 So we'll be able to
basically see everything. They're going to pick
my camera move script. I'm going to go
ahead and hit play. And let's see exactly
how this works. We now no longer actually
need this camera variable. We've got over here camera
speed to be assigned of there. This is not going to
make a difference. Let's go ahead and just re zero. That doesn't really matter. Then let's go ahead
and hit play. And before we actually hit play, I just realized that we're
going to be assigned the camera speed before
anything actually starts. We only want this void to be called when we actually
start the game. Let's go public void begin. And it's going to
actually be called by that start manager script
we made a while ago. Let's go back here
and let's create a public camera speed up speed. Let's go over here here
and say cam speed begin. Otherwise the camera is
going to start moving before we start the game.
Let's go back here. Let's go to my starting script
over here to the boundary. Let's make sure we add my
camera speed up script there. Let's see if it works. Now what should happen is
we should have 4 seconds, the first second, or
rather 8 seconds, and four different speeds
depending on how long we're playing the T,
we start the game, we should still have
the camera move at all, which is hopefully what
is going to happen. Great, I'm going to mute
this so I can explain. Then the minute I
start move past, I'm moving at one,
2 seconds past. Then I should be moving at two. It looks like it says index is outside the bounds, the ray. Let's just look at
what the issue is. Apparently, the index is
outside the boundary ray, which means we're
trying to reference something which
doesn't exist here. Let's just look at how
we've coded this over here. This is actually meant
to be, is equal to camera length minus one. The index is actually one less than the camera length if
the camera length is three. When the index is two,
there's not going to be any third element over here.
This needs to be minus one. Actually, I just
realized that we also, I don't think have
anywhere coded the fact that the
camera script should actually be the speed that
we've programmed over here. We're going to assume
that the minute we begin it's going
to sign it fine. But every single
time we do this, we want to be making sure
that we're elapsing, we're making sure
that the camera speed is actually what the maximum
camera speed should be. Do that we do actually have to take in the death into account. Let's create a reference to my public player
health, call it Player. Then let's just go
over here and we'll say all of this code
over here is only going to run if the player is
not dead equals false. Let's go back over here. And then let's go to my
camera speed and say camera script speed is equal to camera
script camera speed. This should actually have everything working
perfectly fine. Now we're going to test again,
obviously because you run into bugs like this every single time you're developing a game. Obviously, we've now hopefully fixed everything. Let's go back. Let's just see, the way we've coded this actually takes into account that we don't
need a time here because we're never really
referring to this time. We're only referring to as long as this many seconds are passed. So let's go ahead and actually
make one more change. Before we do that, we only
want to factor in time, elapse the minute the game
has actually started playing. Let's go ahead and
say, if we need another bullion, call it begun. Let's say if begun,
in other words, if we're actually
playing the game that begun is only going
to be set true over here. Let's go ahead and take
a look at the new code. There were quite few errors actually here that
we need to fix, but they should all be done. Now let's go back into our game. Let's look at all of the
different things we've got over here in our new script. We should have this time lapse zero until the game starts. And then we should be able
to see the camera speed up. I almost forgot to
assign player health. Let's go back here and
assign this to my player, the double click or
rather single click. Let's see if everything
works right now. Begun is set to false,
just like it should be. Let's disable the. Sound. Let's see if we don't
have time elapse the minute we walk through.
Time starts counting. Perfect, we currently have 1 minute, 4 seconds have passed. We should speed up now to two. It doesn't look like
we're speeding up again. Let's just go back to script. Camera speed is
currently set to one. Now camera speed isn't updating, maybe the dead variable
is the problem. Let's go ahead and see
because I don't think our index is actually
updating. Yeah, it's not. Our index is sticking at zero. Let's go back and see
if we can fix it. Third time is the charm. I think dead actually is not all. Yeah, is dead is the bullion. Let's go ahead and
change that is dead. That is actually
I think a sprite. Yeah, that's clearly
why it wasn't working. Now if we go back into
my game over here, we should be able to
see the camera speed up as we go along. Let's go ahead and hit play to test If it does actually work. We should be starting with
time elapsed of zero. The time shouldn't
actually count down until we start playing, which looks like what we have. Let's go ahead and
run into the game. And now we start off
with a speed of one. And it looks like that
is going to stay at one, maybe it's own out increase two, not increase three, and
out increase to four. Obviously we can see
the game speed up quite drastically,
which is pretty cool. As we speed up the
camera, these things get further and further apart. Actually, they don't
get further apart, but they do get more frequent. But hopefully this
makes the game look a little more scalable. Obviously, it's quite a fair bit harder to keep up
with the camera, and if you don't, then
you obviously die. What you're going to
actually need to do is edit kind of what you
want these to be. I'm going to set it 1.8 at the beginning,
just like we had it. Then I think I
want to set to 2.2 0.4 Then I'm basically going to actually increment
this quite a lot. I'm going to make ten of them
say from 2.4 we can go to 2.6 and then 2.62 0.82 0.83 and then we're
going to go 3.23 point, 4.3 0.6 And I think that it should be at maximum 3.6 after you've been playing
for a fair while. So let's set the time elapsed. It should only change from
this after about 20 seconds, 30 seconds, 40
seconds, 50 seconds. And I'm going to
say that you reach max speed after playing
for about 100 seconds. And I mean, you don't have
to use these exact values. These just can be the
ones I'm going to use, But I think they
should work quite well for how we've
played the game so far. So let's see if
this actually does work and feels natural
for the beginning. At the very least, let's
disable the sound. Just see we've got
that same kind of speed we always got used to. And then 20 seconds
time we should have the speed increasing and
increasing, which is cool. So that's the first kind
of step we need to do to the final cush we need
to make to our game. The second thing is postpcing. Hopefully, luckily, it's a lot less kind of coding
and a lot easier. Let's first start by creating
a post processing object. And we're going to go Window
Package Manager right now. We're going to find
this postpcing package. What you need to do is
you need to go into packages you might
have in project set. So let's go to the
Unity registry and find this post
processing object. Then you're going
to click Install. This is going to
install this stack or package into your project. It's going to say installing.
It might take a while, depending on how fast your
computer and or Wi Fi is. But after that it's
done installing. You can see you'll have
this pop up over here, then everything should load in. Now what this postpsing
stack allows to, I'm actually going to get rid of the curtain in the editor. We're using this
button. It's not going to affect the
game, which is cool. I should have done that earlier. But anyway, what this is actually going to
allow us to do is basically add in visual
effects to our games. Let's first go to this postpsing object
we've got over here. The first thing we need to
do is go to my camera and I need to add a post
processing layer. Let's type posts, we can see if you've got all
these new things. It might take a while
to load them all in, but we've got a debug which we're not going to
concern ourselves with. We've got a layer,
we've got a volume. Just wait for that to reload. And then let's go back down here and add a layer to the camera. Now you can leave
pretty much all of these settings as they are, except you obviously
need to choose a layer to be affected
by postpsing, which is like our
special effects. I'm going to go
overhead and make a new layer, that's a tag. I'm going to make a new layer, I'm going to call
it post process. Go to my postpsing and make
sure it's on that layer. I'm going to go to my
main camera and I'm going to set my main camera to be that post processing layer which should have
everything working. I'm going to leave the
rest as they are for now. Now I'm going to go to my
post processing object over here and I'm going to
add a post processing volume. This is going to allow me
to basically edit my game. I'm actually going to disable
this now so I can see it, because you can only see
postprocessing in the game. I'm going to be able to add a whole bunch of really
cool special effects, you can play around with these. I'm not the greatest at
using this, to be honest. This is basically
editing its core. You're going to have
a whole bunch of different settings
and obviously, the better you are
at photo editing and postpsing editing, I guess video editing, all of that thing is
going to tie to this. I've gotten a few tricks
that I use for my games, but I'm not the most
experienced in this. Anyway, it's quite
easy to learn, just like the particle systems, you need to start by
creating a new profile. Then you can start
adding effect. Let's go Unity and
let's add in bloom. This is the favorite
effect of most people. Now, before we're going to be able to see the
effect of this, we're going to have to
check, this is global box. Then you can see
as you're going to scale up the intensity
of the bloom. You can see the game
becomes bright, obviously, we don't want
it to be like that. But you can see if
you have something like zero or you have something like 0.30 0.5 even. It makes the game look
just a little bit nicer. It might not be super easy
to see in the video quality, but obviously as you
go to 0.7 or 0.8 even, you can see the game come
to life a little bit. I want to set mine 20.8
which is quite high, but I'm going to leave
it there for now. I'm going to lower
the threshold just a little bit or rather
raise the threshold. You can see there as I
increase the intensity, some things are affected,
but I think that, that looks quite cool for now. Quite a high threshold.
But then I'm also going to have a
decently high Bloom. Let's actually set it to two, just to test if it is actually doing anything. You can
click that on and off. My threshold might
be a bit high, set at 1.2 You can see now you can see a
slight difference. I'm going to leave
it at that for now. I'm going to add a new effect. The next thing I'm going
to add is going to be a vignette or a vinette. I'm not sure, This is just a
blacking around the edges. So I'm going to add a
tiny bit on the sides, like, so just to make my
game slightly more framed. Then after that, I'm going to
add in some color grading. This is an incredibly
complicated one. I don't usually use this
too much in my games, but I'm going to set the
low definition range because it seems to
be preferring that. Then I'm just going
to go ahead and I can obviously change my temperature, which I'm not
really going to do. Leave that as that for now. I might make it -0.1 just to see if it makes
any difference at all. You can see a bit
of a difference, but I'm going to make
it 0.2 And then I can obviously add in a color
filter if I were inclined. I don't really want to
do that, to be honest. But if I wanted, I could
add in some filter, may make a game a little bit
darker if I were wanting to, but I'm going to leave
that out for now. Then you can also change
things like the brightness, obviously like I
mentioned, you can. I'm going to make game one more bright and I am
actually going to edit the contrast just a
little bit of my game. Make it negative two
or negative three. Just to make things a clearer negative five should be good. These are the three effects
that I've used so far. There are actually a
whole bunch here that you can use depending on what
you want for your game. You could add in
grain, for instance. Maybe you can see
what that does. This is obviously not the
effect I'm going for, but if you wanted to, you could. I guess very large grains might look cool depending on what style you're going for if you're making a retro game. But I'm not going to do anything other than what I've got so far. You should be able to see that take effect, you can
see the difference. And just make the game look, in my opinion, just
a little bit better. I'm actually going to up
the bloom just slightly. I'm going to make my color
grading slightly less. I don't really
want my brightness to be as effective as it was. Um, I'm actually not sure the color grading
is a good change at all. I might actually
delete that entirely. But like I said, you can play around these as much
as you want to. And you can see now
if I go ahead and reenable my curtain
and play my game, I can now see what is my
finished Sky Miner game. And this is the
intermediate platform that we've been making over
the last few weeks or however long you've been
taking the course rolling. We can see, obviously everything looks a little nicer now. And then when we jump
in, things slide in. And we can see this game in
full development completed, which is pretty cool, especially if this is
one of the first games you've made in Unity. I seem to have died. This is one of the first games
you've ever made in Unity. It's pretty impressive to have been able to
make all of this. If you've made
everything and it's all working just like minus, then that's really
great and good job on being able to follow
along just like this. In the next video,
we're going to be building and
exporting this game. And that is not
really even a video. It's just me showing
you how to build it to a project so you
can play it properly. But for now, we've pretty much finished everything
for this game. If you follow along
and everything's working just like
minus, I hope it is. And I hope you've
been able to learn quite a lot as you've
made this game. And maybe you can even morph
it into a game that you want to release onto mobile or
PC or something like that. But for now, great job on making it all the
way through the course. And congratulations
on making your game. Thanks.
19. Lesson 18 - Building and exporting: Hey there, and welcome
back to Unity. Now we've pretty much finished. Well, actually we have
entirely finished our sky miner intermedia
platform game. Over the last while, we've spent countless
hours or minutes, depending on how fast you were able to get through
all the videos, building what we
have in front of us, which is actually
really, really cool, that we've been able to
make a game like this in, presumably not actually
that much time. Like I said in the last video, congratulations on
making it this far. And if you've managed
to make it to the end of the
course like this and your game is working just like mine is working, then great job. And that is actually
pretty impressive, especially if this is one of your first games you main Unity. But even if it isn't
to made a game Unity, any game in general is
an accolade in itself, but especially one with
sprites and music and scaling, difficulty and random
map generation. All of that is a pretty
cool accomplishment. So well done. Now we still need
to be able to build the game because we
can't exactly be like, oh yeah, check out my
game and then load up Unity every time we want
to show it to someone. So we have to be able
to export this game to a file so that we don't have
to play it in the editor. That's going to be the
purpose of this video. I'm just going to show you quickly how to
export your game and play it in a massive
full screen window. And then I'm going to
conclude the course While I'm playing the
game in the background, let's go ahead to
the top here and click File Build Settings. And this is where
you're going to edit the entire kind building
aspect of the game. Now I'm not going to
go too detail into every single one
of these because if you click Play A Sets, you can see just how
many there really are. There's all of these.
There's preset management. Well actually not
forget about that. There's icon which
you can change here, there's resolution,
there's a splash image, which is kind of played
at the start of the game. Then there's a whole
bunch of other settings which you really shouldn't
fiddle around too much with, especially if you don't really
know what you're doing. Because, well, they
can break the game. But for now all
we're actually going to do is leave these default. This is the platform over here which we're
going to build for. If you want to change
this to an Andro game, you actually just
install the module and click switch platform. And it does a lot
of stuff for you. But we're going to be building
our game for a computer. We're not going to
be worried with any of these players scenes for now. But you can obviously
change all of these. These are going to be built
into the application. So you can change your company
name, the product name. I can change to Sky
Miner if I wanted to. And I can change the icon, the cursor, and pretty
much everything else here. Like I said, don't filter with these other settings
too much unless you know what you're
doing or have Googled it. But these ones
over here, you can kind of make whatever you want. You can change the icon. You
can change the resolution. And you can also change
the splash image, which like I said, if we click Preview, we
can see it actually. It's an image which
Unity displays when you start a game like this, which I'm actually happy with. I think that's all good for now. So I'm going to leave
those settings default and just actually get started
with building my game. We build it for 64 bit and
I'm going to click Build. Bill is going to open
up File Explorer. I get to choose where
to put my game. Now this is the folder
where my entire project is, so I'm going to
create a new folder inside this call it builds. And I'm going to
double click on that and use this as a folder
to build my game. And that's going to
start this process full building my entire game. Now, this does take some time, especially depending on
how fast your computer is. But just in general, this is
quite an intensive process. Just wait this, it should
take anywhere 1-2 minutes, depending on how big
your project is. For me, it might not take too long because it's
not a very big game. But depending like I
said on your project and everything else and also all of our post pressing we've added, it might take a
while to compile. Just sit here and don't
touch too much on your computer because
it is running quite a few processes right now. Now, after a while,
mind took 65 seconds. You should have this
file over here, which gets created with
the name of your project. And this is actually the executable file
which you can use to run your game if you
go over here to build. If we double click this file, we actually are going
to load up our game. Now before I do that,
I just want to say a disclaimer that the first
time you load the game, you might have some
aspect ratio issues. For instance, actually, if
I were to load this up now, I'm almost fairly
certain I would let me just test it and see. Because this is the last
thing we need to fix for our game. And sure
enough, there you go. We've got a few things
that aren't really exactly where they should be.
Let's go into the game. And the way we're going to
fix these is by choosing an aspect over
here, 1920 by 1080. And I'm going to go
ahead and get rid of my curtain just
so I can see things. This is going to allow me to resize everything and move it, so it should be the exact
orientation that I want it. I'm going to move these
to the side like that. That should be good. I'm going to move this cloud over there. I actually think I might
also need to actually increase the spawn in
time for the beginning. I'm going to make
this 20 instead. Now I need to obviously increase the size
of these as well. The hearts and the
diamonds are both now the wrong size pixel wise. Let's go ahead and scale
those up a little bit. Let's just see where
we've got them. Depending on your
computer and how much you've followed,
exactly what I've done. You may or may not
have this issue, I just happen to your computer might not. It really depends. But like I said, if
you go to the game and you change this
setting over here, you can build the game four
different resolutions. I'm building it for 1920
by 1080 at the moment. Let me just make
sure I recite that correctly just to get
like a general view. It's not even close. Let's recess it up a
bit more. Let's see. I'd say that's pretty good. Let's go ahead and
put this back where it was up at the top over here. Put this over here as well. And then let's go to my counter. Move it there and scale
this up a bit as well. About that should be good. Now. We're obviously just going
to have to obviously test our UI animations as well
since we've moved them. So let's see how those look. Fade in, Yeah, it's obviously
now the wrong positions, so we're just going
to have to set the start positions out
there and out there. And then the fade in positions are now going
to have to be over here. And over here should
be good for now. Let's just make sure we
have the same settings, 880 and minus 772
for the static, which we should be able
to see if we play it now. And then out of view
doesn't really matter, but they have to be
out of view obviously. Let's go ahead and
move those as well. Now, this process of scaling
game does take some time. There's a chance we might be done here, there's a
chance we might not. But the only way we can do
is if we build and run it again and test to see if we have any other issues or anything
else we need to fix. Let's see, now we load it up. It's actually looking
pretty good so far. We can click these buttons and everything seems
to be working. My graphic driver
thinks it's a game, which I guess it is.
You can see over there. Actually, everything
seems to be working fine. In my case, the
only thing I need to change was that one setting, and the rest of my
game is actually working great, which
is pretty cool. Like I said, you might be
different depending on how much you've changed your aspect ratio and how much you followed along. But it's pretty cool
that this kind of game is kind of so easy
to whip together. I mean, obviously it's not easy and the more
you kind of code, the harder the easier it gets. But to be able to make something
like this without being too experienced developer is
pretty cool in my opinion. I just want to say a massive. Thank you to you for
supporting my course and for purchasing it and
for making this game. And I hope that you're really happy with what you
were able to make and that you learned quite a lot throughout the entire process. At any point, if you
need help with anything with bugs or anything issues with
your game that you have, you can use any form
of discussion on this course page or
leave it in a review, Whatever you want to do anyway. A massive thank you
again for purchasing this course and I hope
that you're really happy with what you
were able to make. And there is no next video, so I won't be able to tell
you what we're doing next, but I hope that if you
do decide to develop games as a hobby or
even as a career, you're able to make something
really, really cool. Thanks again for
purchasing this course, and I really hope you
didn't enjoy it. Cheers.
 Tirion Learning, Software Engineer