Transcripts
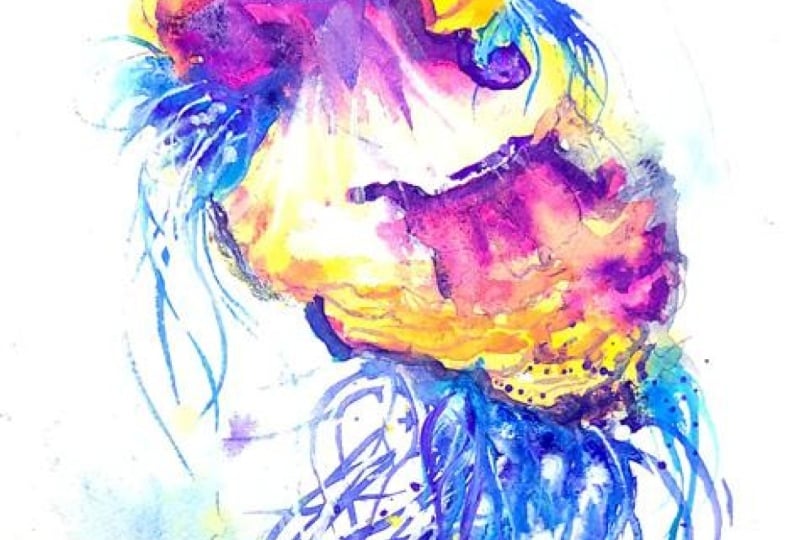
1. Intro: Underwater Animals in Watercolors: Hello, and welcome
to my home studio. I'm Emily, and in today's
Skillshare class, our goal is to relax and have fun while painting
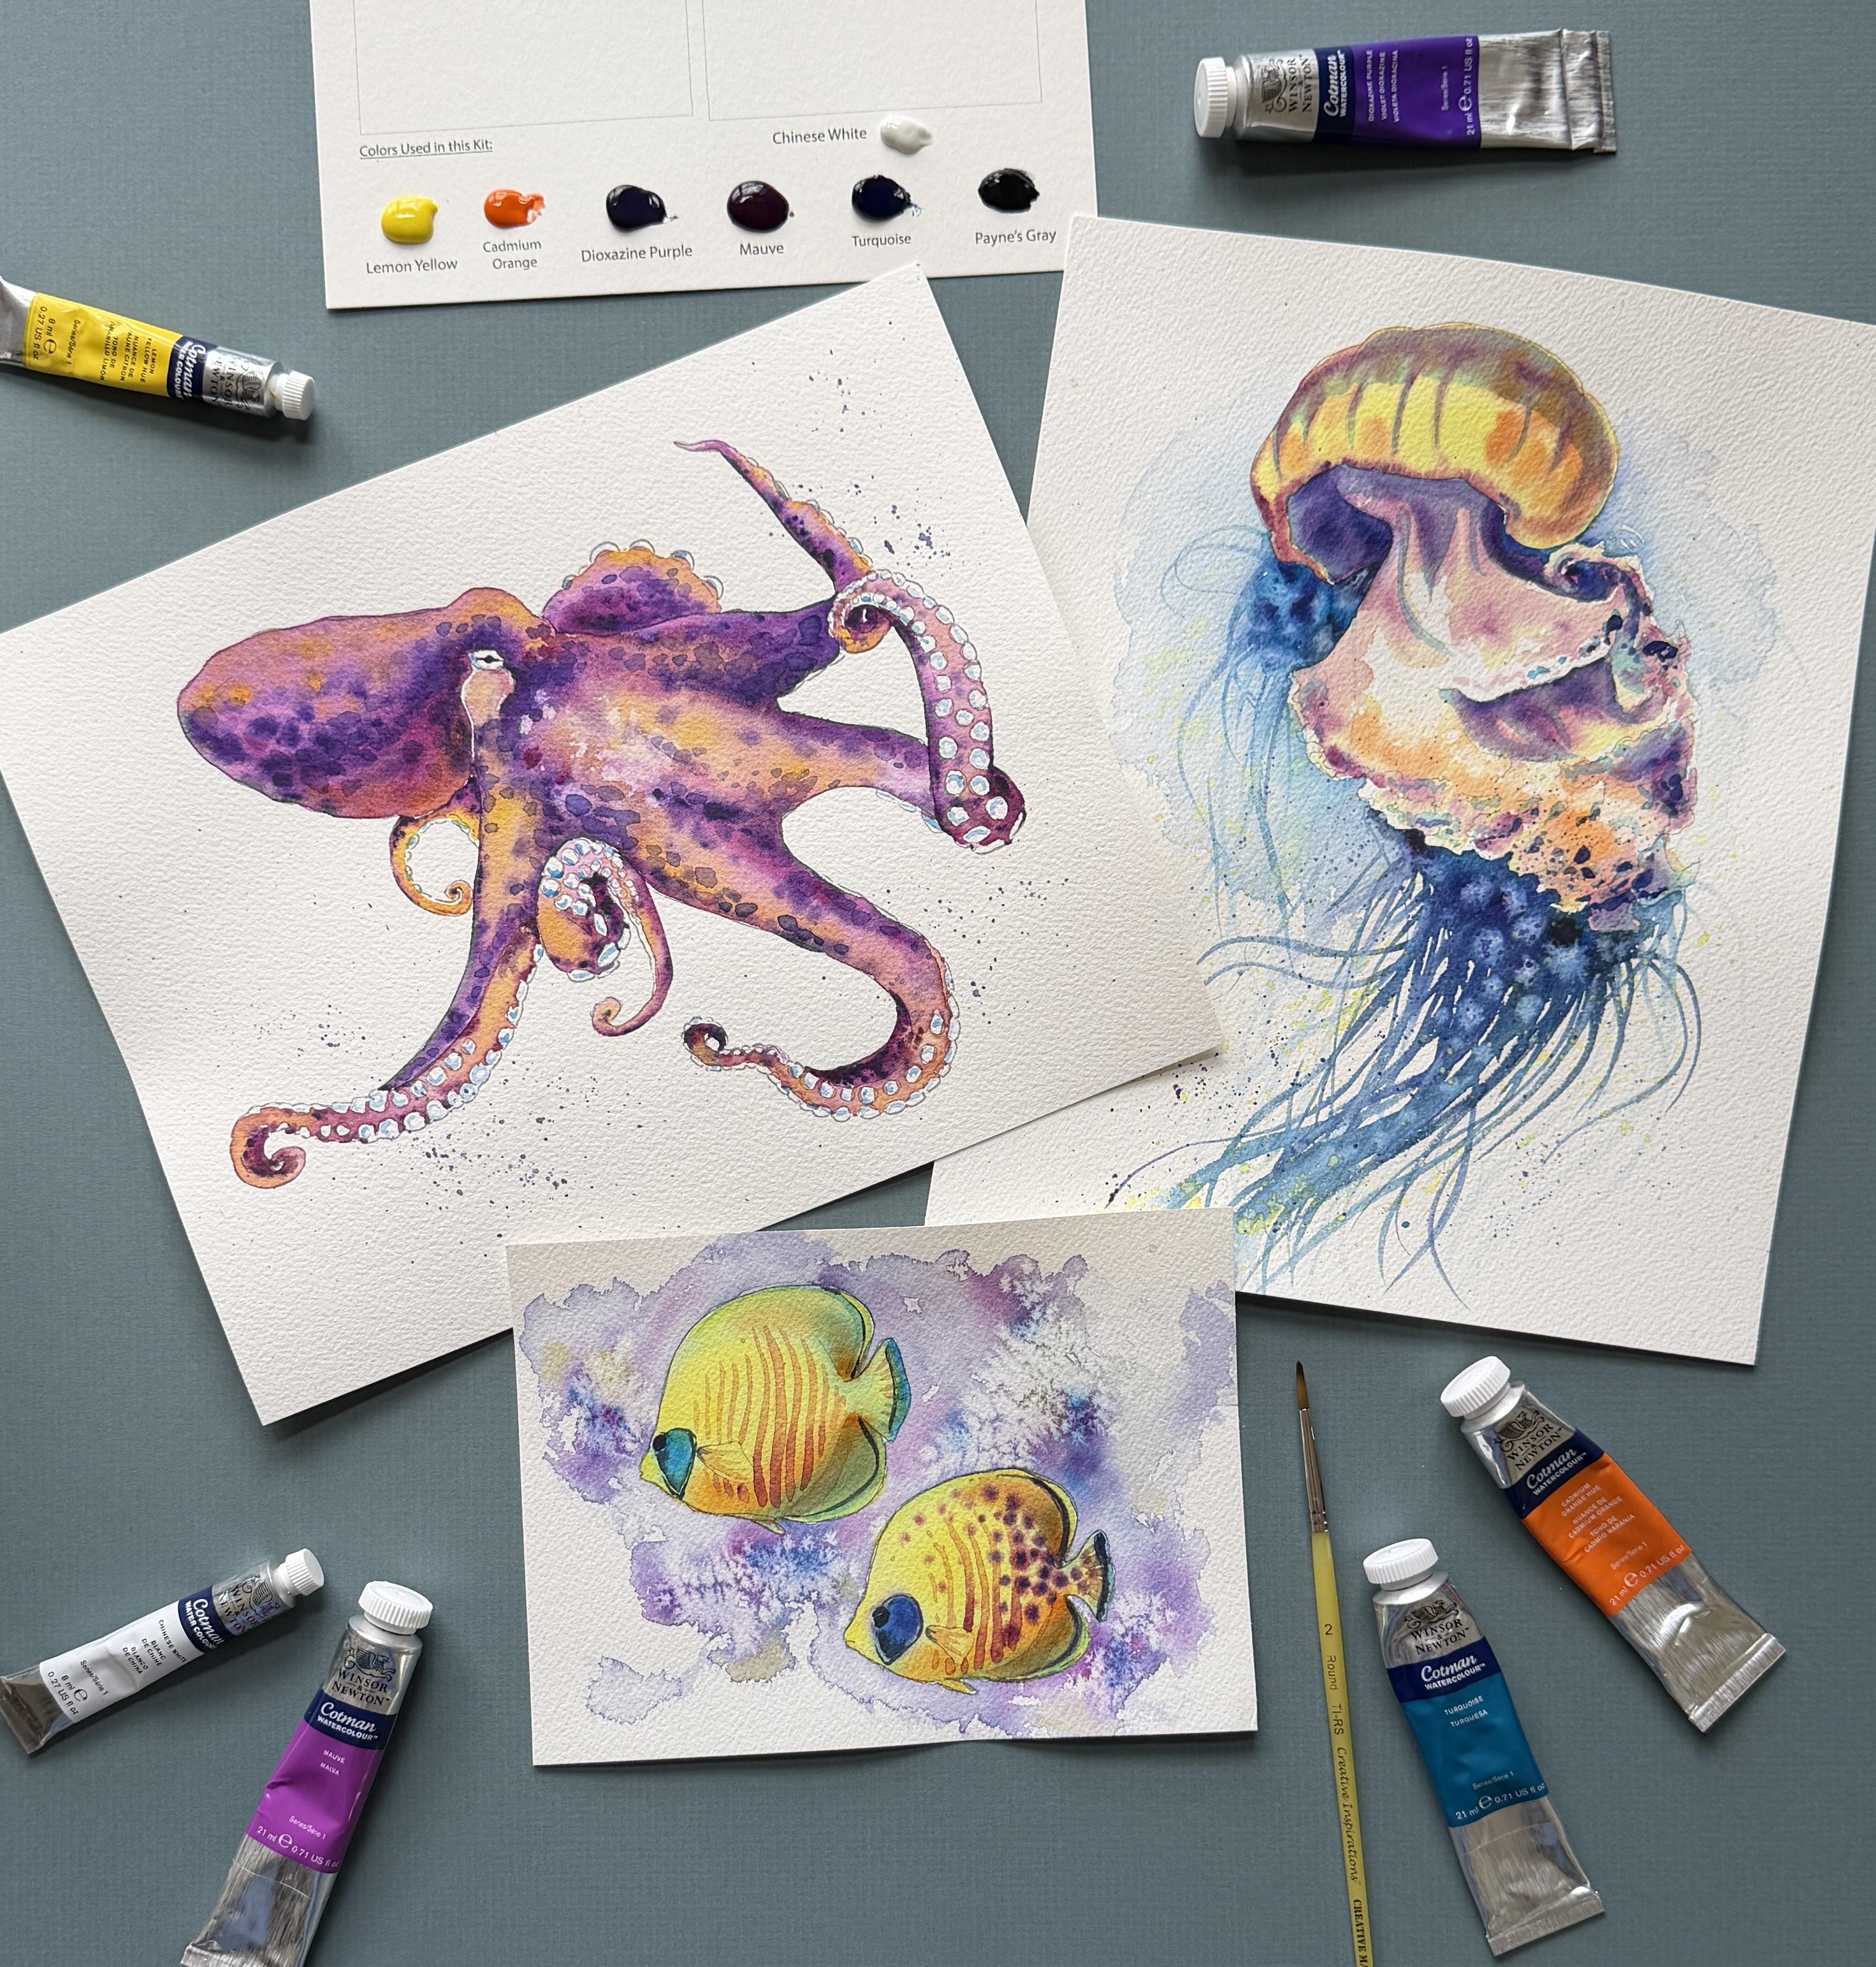
with watercolors. In this Skillshare tutorial, you'd learn how to paint three different underwater
creatures tropical fish, an octopus, and a jellyfish
all using watercolors. You'll have access to
printable templates for all three projects
that you can either print using your home printer or trace using a light
box or a window. You'll also have access to watercolor supplies and all of the colors used
in this tutorial. This class is great for
beginners as well as intermediate watercolor
artists as we look at some of the very basic techniques
in watercolors and we look at how to push them to really make R sea creatures pop. We'll also look at
specialty techniques like salt splatter, blooms and learning how to
underpaint your shadows first. So grab your watercolor paints, brushes, and paper,
and let's get started.
2. Supplies: Alright, so let's talk about supplies for our
underwater animals. So, I wanted to start out by mentioning that all the
videos in this tutorial were part of a watercolor kit that I created with the same
name underwater Animals. So you'll notice
that the videos in the tutorial are all
using these dot cards. So I'm using a very limited
palette for these tutorials. I'm also using a limited brush, as it's what comes in the kit. However, know that you can use whatever colors
that you have at home. You can try finding
the same exact colors that's listed in
the supplies guide, or you can mix up
your own and use your own for all of
our animals here. So let's talk about our
paper choice first. So all of the projects were printed on arches,
cold pressed paper. It's 140 pound paper. I do suggest using cold
pressed for these tutorials as we're going to be wetting
large areas of our paper, and we want to make
sure that those areas stay nice and wet. And so we have the longest
amount of time to paint. You'll notice in the
tutorials that I did not tape my projects to a board. However, I do
suggest if you have a plastic corrugated board
or that you even tape it to your desk that you're working at just to keep
that paper nice and sturdy while you're wetting a very large portion
of your paper. You'll notice from
the tutorial that it's not 100% necessary, but it might make your
life a little bit easier. As far as brushes that you'll
need for this tutorial, you'll notice I'm
only using one brush. That's a round size two. However, you can use a variety of round brushes
for this tutorial. You will want a medium
to medium small brush, either size two or size four for painting the majority
of your projects. You might want a slightly
larger brush for larger areas like the head of the octopus or the
body of the fish. It can be useful for you. However, from the video, you can see it's not
totally necessary. And then you might want
a small detail brush for some of the smaller
areas of your painting. You're going to need a
paper towel or a rag, a cup of water, your
watercolor paints. And then there's also an option in the tutorial to use salt. Now, if you have
coarse sea salt, your blooms are gonna
be much larger. In the tutorial, I'm using just regular table salt from my shaker than I have at home, and those blooms will
be much smaller. So you can decide based off
of what salt you have at home and how large you want your little
firework blooms to be. Alright, that's all.
Let's get started.
3. Tropical fish, part 1: Alright, so to paint
our two tropical fish, you will need the five
by seven included in your kit with the fish template
printed on your paper. You'll need your practice sheet with the colors down below. You'll need a mixing plate. I'm using the top of
a yogurt container, a cup of water, the brush included in your kit. This is around size two and
a paper towel or a cloth. Alright, let's get started. So the very first thing
that we're going to do for a tropical fish
is we're actually going to paint an
underlayer of blue shadow. So this blue shadow is
going to help give us a little bit of contrast
to the yellow on top. So oftentimes we can use
blue for a shadow color. And then when we add
layers of color on top, the blue changes colors, and it's not quite as
bright of blue anymore, but it gives this really
nice shadow effect, especially for underwater fish. So we're going to
start by adding some water to our plate, and then to that water, we'll add some of our turquoise color. Now, our first layer
needs to be really nice and light in color. So I'm watering down
some of this turquoise. But I also know that
I have some turquoise here on the plate that's going
to be a little bit darker. So my light, transparent
turquoise looks like that. Whereas if I were to take some turquoise directly
from my paper, it's gonna look a
little bit darker. Okay? So we want
those two tones. Now, I'm going to
start by painting my fish wet on wet. So
what does that mean? It means I'm gonna wet. The whole area that
I want to work with, which is going to
be the whole fish. And then I'm gonna
drop in some color. Now I can go right
over everything. And kind of the nice part
about this is that if I end up going over the
outer edge lines at all, we will be adding a
slight background. So try your best to stay within the lines for wetting your fish. However, if you do
go over the lines, we'll always be
able to correct it. Now, as you notice, I'm
grabbing more and more water. I want to make sure
that this whole fish stays wet so that I
can drop in that blue. So I'm tilting my
head to one side. And I'm going back
to where I started. I'm making sure that my
whole fish is nice and wet. Remember that you can
tell that it's wet you have if you can see the reflection and
it's nice and shiny. Now that my whole fish is wet, now I can start
dropping in some color. In the areas where it's going to be nice and light in color, I can use this
watered down blue. So kind of around the
outside edge of my fish, here it's going to be a
little bit lighter of blue. So I'm going to grab and add a little bit of light blue
to the outside edges. And then it's gonna
be nice and dark blue here by where we've got
this little section. So I can grab some blue
directly from my paper, and I can add some of that
blue directly to this section. If that blue starts to spread
at all, that's no problem. We are going to allow it to spread for a little bit,
and then we'll fix it. I'm going to add a
little bit darker blue to the outside
of the back fin. And then I might drop in just a little
bit more blue here. I do really want,
especially the bottom side here to be a little bit darker, since this is kind of towards
the bottom of the water, towards the top, it might
be a little bit lighter. So now we have this blue kind of spider veining
all throughout. So I can wash my brush, dry it on my paper towel, and I can use that dry brush, just kind of soak up some
of those spider veins. Now, your edges are still
going to be soft edges. That means that the
blue is going to spread evenly and
nicely into the water. So I don't need this blue
to have a really hard edge. That means I don't need to stop the blue where I see
the little lines. So if there's some blue
that comes more off of this edge of the
tail, that's okay. I do, however, want
to make sure that certain areas just don't
have too much blue. So where I've got
the mouth here, I don't want the mouth
to be overrun by blue. So something similar to that. If you have blue that
went too far into one spot and you need to lift it up more than what
the brush can do, you can take your
paper towel and blot off wherever you need
that blue taken away. Now at this stage
of my painting, I do not want to add more
water. So what does that mean? I don't want to
add a full drop of water onto one of
these sections, which is why I'm always drying off my brush before I lift. If I add a drop of water, it's gonna push
that pigment away. Alright, so we'll
do the same thing on this lower fish now. We'll wet it first with water, and then we'll add our blue. Now, you might notice that
as I'm working on this fish, I'm noticing that
there's a little bit more blue going where
I don't want it to go. So I'll use my dry
brush and I'll soak it up as I see it moving. No. All right. And now that we have our
underlayer of blue shadow, we're going to let this
dry and then we'll look at adding a
second layer on top. So we'll take about 5
minutes and let this dry and come back and see if it's dry enough for a second layer. Alright, so I gave
the first layer of my shadow a little
bit of time to dry. And so now I'm ready
for my second layer, which is going to be
a layer of yellow. So, if you have space on your plate,
you can leave the blue. Otherwise, you can wipe it
off with your paper towel, if you're not wanting your blue to accidentally mix with you, yellow. And then we'll
do the same thing. We'll add some water to a
new section of your plate. And then we'll get some of this lemon yellow here and
we'll add it to our water. Once again, we'll do something
similar to with the blue, where we will wet our
whole fish first, and then we'll drop in some
of our lighter yellows, and we can also drop in
some yellow directly from our paper for those sections where we want it to be
really nice and opaque. All right. So we're going to start by wedding on
top of this blue. Now, if you start to paint
on top of your blue, and then you notice
the blues starting to kind of lift up slightly, that means that your first
layer wasn't dry enough, and so you'll want to
stop and try your best to kind of clean it off
a little bit and wait until that
first layer is dry. Alright, so now we're ready
to layer on our second layer, which is going to be our yellow. So I'm going to start by adding my yellow kind of over
pretty much everything. And now, since it is
this nice light yellow, we're gonna notice a few things
happening with our blue. Now, where we layer
the yellow on top, it's going to turn
a little teal. So if I want any sections of this blue to stand out, like, at the end of the tail
or around the eye here, I'm going to want to try to keep that section
clean from yellow. Now, I don't mind
adding the yellow on top on the top fin
and the lower fin. And now that I've got my
whole layer of light yellow, now I can go back and I
can add a little bit of this more opaque
yellow from my paper. And I'm going to take a peek
at where I want kind of some of these
highlights to happen. So I'm going to want the
lighter yellow along the body. And since my paper
is nice and wet, it's gonna help
with these edges. So if I don't wet my fish first and I just add
my yellow on top, I'm not going to have
these really nice gradient from dark yellow
to light yellow. And so this is why we often add that extra step
of wetting first. I can add a little bit of darker yellow along the
outermost of the fin. So I'm kind of leaving a few of these sections to be this intermediate with the
blue shadow underneath. And now I can always go in, while it's still wet, and I can add a little bit
of orange, if I would like. So on the bottom side
of some of our fish, we have a little
bit of orange hue, since it's more in the shadow. So I'm going to add a little
bit of orange down below. No, I can always have that orange slightly
follow up on my fish. If I don't want that much
orange along the belly, I'm gonna dry my brush and
then kind of use my brush, my dry brush to just
gradually allow that orange to fade into yellow. I'm going to add just a
little hint of orange here at the tail
and here as well. We can kind of play around with this as long as it's still wet. So maybe I'll add
a little bit of orange in the shadow area. It's really up to you. You can kind of play around. Like I said, as long as it's still as long as it's still wet, you've got a little
bit of extra time.
4. Tropical fish, part 2: Alright, and now we'll do the same thing with the fish below. We'll start by wetting
over our whole fish. Now, remember that if
this first layer dried too quickly on you before you are able to drop in your orange, make sure that now you
add a little bit of extra water to this second fish. All right. Now,
just like before, we'll add a little bit
of water down yellow, basically to the
whole fish itself. Except for, we're
going to try to keep this area in front a little clean and also a little section of
the tail in the back. We'll try to keep that a
little clean from our yellow. And then we can take our yellow
directly from our plate. So I'm having it nice
and concentrated. And I'm going to add yellow first to the
main body because I want that main body to be
really nice and bright yellow over this front fin. I'm also going to add some bright yellow to the tail here. I can add some bright yellow around the edge here of my fish. Along the mouth area. And now before it dries, I can add a little
bit of orange. I'm gonna roll my brush
around in that orange. I'm going to start with my
orange way at the bottom here. Try my best to keep
it out of that fin. And remember if we need
to blend it at all, we can dry our brush. Use our dry brush, just kind of blend that edge
where we need to blend it. And then we can grab
a little bit more, and we can always drop in
more along these corners here where kind of the
top and bottom flare out. I have that kind of going
around just a little bit. I got a little too dark. And now, I'm going to just show you a little slight extra. Now at this same stage, if you had wanted to
do any sort of, like, bright dots, dots work best if you do the first layer of dots using
this wet on wet technique. So while your fish is still wet, you're going to want to grab a pigment directly from
your plate from your paper, and you want to make
sure you don't have too much liquid on your brush. If you have too much
liquid on your brush, that liquid is going to
push everything else away. So you notice I don't have a puddle of water with my mouth. I have just the
move on my brush. And I'm just going to
add some dots here. So when I'm adding these dots, I'm kind of just making it up. You could always use
a reference photo. My kind of gut instinct
is saying that these dots are going to get a little larger around
the backside. And maybe as they come forward, they might they might
get a little bit smaller and a little bit
further away in distance. So some of these dots here close to the back
side of the body, I'm going to make them
a little bit bigger. Now, as you're
making these dots, if you choose to make dots, if your dots, like I said, are starting to spread, you probably have too much
water on your brush, and you need to tap some water
off and grab just pigment. So when I grab some
of this purple, this purple is dry. So I'm going to grab some of
this purple with my brush. If it looks like it
has too much liquid, I'm going to come to the
end here, not the tip, but the end of my brush
where it connects to the metal and touch it and grab a little
bit of that liquid off. And now, when I touch
it to my paper, it doesn't have quite
as much liquid, and it's not going
to spread all over. It's gonna spread just
enough to give you this really nice
effect where it's just kind of spraying
out slightly. So I'm using this
purple in some of the larger spots just to make it a little bit more
dark and dense and opaque. You see where
there's a little bit more water at this end, and I touched it
there, and I went Osh. So, if that happens to you, don't panic. Dry your brush. Use a dry brush. Just
kind of lift it off. Now that we lifted it off, if we go back in, we can add a little
bit more pigment. And now, because there's not
so much water on my paper, it's going to stay where I
put it a whole lot better. And maybe I'll add
just a little bit of purple to the tail here. We'll kind of make two
slightly different fish here just so you can
see the difference. Now, you could
continue working here. You can add little details
wherever you want. I'm noticing that my paper
is starting to dry slightly, and so this is gonna be
probably where I stop. Now, if anything got a
little bit too dark, I can always use my brush, a dry brush to lift
if it got too dark, or I can also use my paper towel and lift if it got
too dark anywhere. Alright, so now we'll let
these two layers dry and we'll add then some wet on wet
layers as our last layers. As your layers are drying, you might notice the
spidering effect happening. If you like that spider
effect, leave it. If you don't like it, use a damp to dry brush and just go around the edges and kind of circle
around the edges there. It's just going to help lift up some of that spidering
that's happening. Alright, so I've let this
layer dry just slightly. And so now I'm ready to
add a little wet on dry. Now, I do need to be a
little cautious here because wet on dry means that this first layer needs
to be completely dry. So actually, I think
before I do that, to give it a little bit
more chance to dry, let's add some of
our pains gray. So our really dark black
details in the eye area, and that'll help us check. So I have a wet
brush. I'm just going to take a little bit
of pains gray here. And I'll add a little bit of
pains gray to the eye area, and that's gonna help me
see is this going to start? Is the pains gray
staining where I put it? Or is it starting to bleed
and spread everywhere? If it's starting to
bleed and spread, that means that my paper
is not dry enough. So I'm starting to see a
little bit of spidering there. So it might not be
quite ready yet. I can always add, though, a few little dark details. If I wanted to kind
of highlight some of some of these
edges of my fish, I can always add a
few details there. I know this one already
has a little purple, but I can add a
little bit of black. Since that was starting
to spider out, I decided to dry it off with my paper towel
and then try it again. It's looking a
little bit better.
5. Tropical Fish, part 3: Now that we've given it a
little bit of time to dry, now I'm going to look at adding a second layer
of wet on dry stripes. So for this, I'm going to
be using my cadmium orange. So I'm going to add
it to my water here. And I think I want to darken
this orange just slightly. So I'm going to add a
little bit of this mauve to my orange just to darken
it up a little bit. I don't want it quite as
bright as that orange. Now, how opaque is this? It's still transparent,
as you can see, so we can still see the
colors that are underneath. But it's just opaque
enough that we can use it on top of our fish and let it be kind of this
nice second layer of details. Alright, so I'm going to start
at the belly of my fish, and I'm going to work
up with my lines. Now, my lines are going to stop around this arch of my fish, and they're gonna start
to kind of belly up and make this half moon
shape slightly. So they're going to follow
kind of this angle. Okay? So I'm going to start with my longest of lines
at the base here. I'm going to come up
and around and stop. Now, you can see that it's still my papers not dry enough. You can see the spidering. So I'm gonna dry it. And I'm going to let it
dry a little bit more. That's a cute to me as
the artist that says, Oh, that layer is not dry enough
for your second layer. So let's pause the video and we'll let our paintings
dry a little bit more. Alright, so I gave my fischer a little bit more time to dry. Now, my color did dry, so I'm gonna mix a little
bit more of it up. Once again, that was
my cadmium orange with a little bit of
mauve to darken it. Alright, so now we're
ready. Everything is dry. I've got my second
layer of color, and I'm going to add
some stripes here. So once again, I'm going to start at the base of the body, and I'm going to slightly curve
along with the body here. So I'm slightly curving this
way as I make my way up. And I'm going to start
pulling my brush up and lift it mainly
kind of around where the shadow starts
because that's where I'm wanting the lightest of lines to be the
skinniest of lines. I'm gonna do that again. Now my lines don't
have to be perfect. Now, the further back you go, you are gonna want to
start to come up slightly. And do these kind of
slightly smaller lines. Now, before these lines dry, you can always drop
in a little bit of that mouth at the
base if you want a little bit more contrast between the dark at the bottom
and then light at the top. But remember that
this is easiest to do when these lines are still wet. Once they start to dry, then it becomes
harder to do that. Now, here at the fin,
we are going to have to add a line then
just kind of jump up And then our lines are gonna
start to get really thin. So I'm gonna I'm barely
touching my paper here. And I'm just adding a few
coming down at the base here. Make them a little bit darker. If those lines get a little too dark, you can
dry your brush, and you can use your brush like a sponge
and just soak it up. No, I'm also going to use this orange to add a few
lines down the fin here. So I'm starting at
this angle here, and then I'm just going to add a few lines coming out that way. And I can dry my
brush off and use my dry brush to kind of help with some of
those little tiny lines. I can also add some
little lines from the back of the fin pulling in. So I'm really just looking at where do I want to
add a little bit of extra texture and a little bit of extra definition
to my painting? Looks like there's
I can add, like, another little kind
of shadow line just define this undershadow
a little bit more. I'm going to do the same
thing with this other one, so I'm using kind of the edge of my brush and just defining that shadow
just slightly more. I do that on the top one of
the slower one, as well. And now I did add all these
little dots on this fish. I can always add
stripes if I want to, or I can just leave it
with just the dots. I think I won't add
quite as many stripes, but maybe I'll just add a few to see what that looks like. It does give it a little
bit more definition, a little bit more detail,
kind of looks a little cool. Remember that anything that
you add at this layer, at this stage of your painting, when you're painting
wet on dry paper, remember we didn't wet
these sections first. We're painting it on dry paper. So when you're
painting wet on dry, remember that your edges
are going to be hard edges. So at the edges there, that's where I have
my hard edges. Alright, and then I think the last little thing
that I'm going to do, I'm going to grab a little bit
of blue of this turquoise. This turquoise leans a little
bit more blue than green. And then now I'm going to
add just a second layer of blue along this little
blue patch in the eye. I just want to make it
a little bit brighter. And then same thing if you had sections of yours that you
wanted to add more blue to, whether it's kind of tracing some of these
lines that you already made or adding a little bit
more blue around the tail, you're more than
welcome to do that. Now, to this blue,
if you wanted to add a little darker on one side, you can always grab a
little pains gray using your wet brush and drop it in in any section where you think you want
a little bit darker. Using that pains gray to
just kind of trace around. And then I'll grab a
little bit of that blue. I'll do the same
in the fish blow. It
6. Tropical Fish, part 4: Mmm. Alright, so
now that we have kind of the tops of
our fishes done, and we have our
few layers of wet on wet followed by a
layer of wet on dry. Now we're ready to look
at our background. So we can do a few different
things with our background. We can do a little bit of color. We can also add some salt. It doesn't have to be sea salt. It can be small salt. It could be coarse grain salt
or just regular table salt. Any kind of salt will work. And when we add salt, we're going to get a
little bit of texture. So with coarse grain salt, you're going to get a
little larger texture. With table salt, it's going
to look a little bit finer. So I think I'm going to
try this with table salt, and I want to get my
colors ready first. I'm going to wash off my plate. And I think I want to add
some slightly darker colors, but I also kind of want it to look a little bit like coral. So I'm going to add my water. I want kind of a base color in the background that then I can add some darker colors too. Now, I think this base layer in the background I'm debating
on if I want to do a purple or if I want to do a pink or if I want to do a
teal. I'm not quite sure. I think I'm going to take a peek at what does it look like to have a little bit of
a purple background. So maybe to this
purple because purple is a complimentary
color to yellow. It's a color the opposite
of the color wheel. And so it complements
that color really well. But I'm also gonna use a little bit of this Chinese white, and I'm going to add a
little Chinese white to that purple to kind of
make it more of a pastel. And maybe I'll add
just a little bit of blue to that purple so
it's not so bright. So it's looking more
like a periwinkle blue. Periwinkle purple.
Alright, and now here is where I'm going to start with
painting around my fish. I think I'm going to
go diagonal here. I'm going to turn my paper. I'll start by kind of outlining a little bit this fish
that's down below. So I'm using this color
that I just mixed. And I'm going to do this just
a small section at a time, because I don't want
this whole section. I don't want to go
around and then have it the edges dry out. So I want to be able
to pull my edges out. Now, I'm adding kind
of a line of color, and then I'm pressing down
with my brush so that the metal part of my brush is kind of pushing
up against the paper, and I'm going back and forth. As I'm pulling my brush out, so I'm pushing down fairly hard. Now, this is called dry brush, where you can see all the
texture of the paper. Now, we can let some
areas be connected. We can add even
more water to this. I can add just like
drops of water. Because remember, I'm wanting to keep this kind of
looking coral like. And so there's going to be certain sections of my
coral that's going to be a little bit darker and other sections
that are going to be lighter. So I'm just taking dots
of water at this point. And now I'll start outlining. I'm gonna now continue
to move on to this fish here since my water is
starting to touch this fish. So I'm going to start by
outlining it slightly. And then dry brush
to the edge and add a little bit of drops
of water if I wanted to. Now, before I continue
moving around, I think I'm going to take
a peek at this and see, do I want to add more
color in this background? So what would it look like if I grabbed some mauve, for example, and added a little bit of
mauve coming in to the wet. So I'm looking at kind of adding a little bit
of extra color here. I can use really any of these colors that I
have on my paper. I can mix them directly on
my paper or I can mix them on I can mix them on my plate or I can mix
them directly on my paper. Maybe I'll add. Let's see what happens if I add a
little bit of yellow. I know that it's going to add some of these,
like, darker tones. If I start adding yellow
closest to the blue here, it's going to end up
looking slightly green. If there's any mixing
that you don't like, you can take your paper towel, blot it up a little bit, add more water to kind of
force these blooms to happen. So adding water is a
great way to kind of push pigment around and to
make these hard edges. And now I'm going
to continue kind of working around in a similar way. So I've got my base
color that I'll start by kind of outlining a
new section of my fish. And then I'll take
the edge of my brush, and I'll push down
and kind of scratch out leaving some of that white of the paper
to shine through. Before I move on to new section, I can add drops of water to purposefully make
those sections bloom. I'm gonna keep moving on
before I drop in more color. I'm gonna try to purposefully leave a little bit of
that white paper out there just to give it a
little bit more variety, so it's not just
the same shapes. And before I move on, let's add some blooms by dropping
little droplets of water. And then to those
little droplets of water or to that area
that's still wet, I can add some extra
color if I want. This is where watercolors gets quite fun where you're working with these
different colors and allowing the
water to just kind of blend and move. Right. And then before it dries, if you had wanted two, you can always add a little bit of salt. Like I said, the table salt is going to give you a
little bit more actually, I shouldn't have put
that in my fingers. Let's put it in my palm first. The table salt is
going to give you a little bit more
of a large bloom, but it's not going to be
as solid in one spot. Whereas the coarse grain, you might actually
notice kind of the outline of the coarse grain of salt as it stays
on the paper there. So if I use a little bit
finer of grains of salt, I want to add the salt
while it's still wet. If your paper is dry, it's not going to do anything. If your paper is soaking wet, it also is not going
to do anything. So it's kind of this
in between stage of not too wet and not too dry. And all I'm doing is I'm just dropping in a little bit
of salt here and there. And now we need to let
it just sit and wait. The salt will start to soak
up some of that pigment. And as it dries, you're going to
notice some little, like, fireworks happening. Now, when the painting is dry, then we can brush the salt off, but we have to let it
dry completely first. Alright, so after you
let your fish painting dry completely in the background dry completely with the salt on, then when it's completely dry, you can rub your salt off
just using your fingers. And then you'll be left with this really nice blooms that
kind of represents coral.
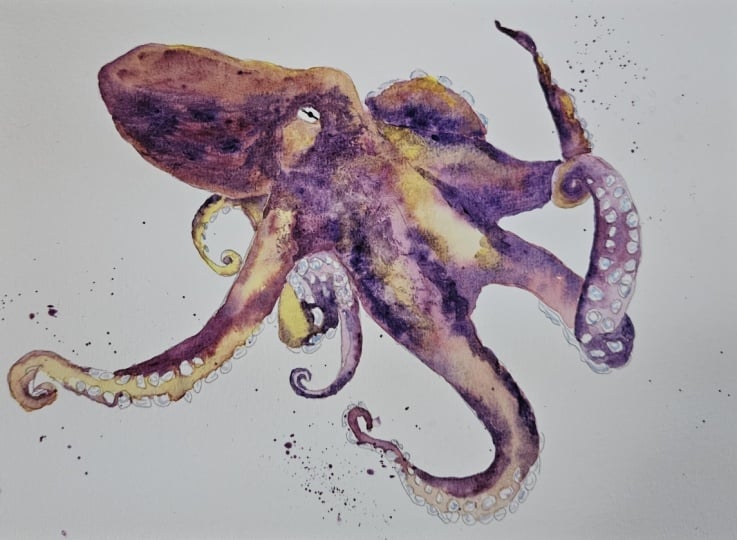
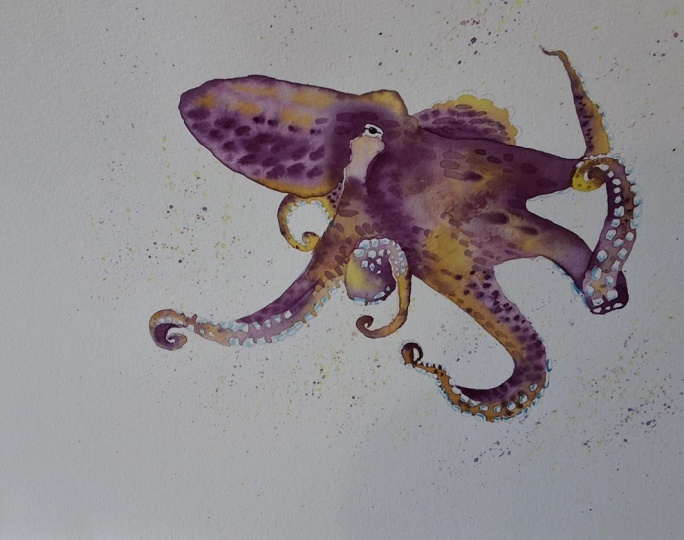
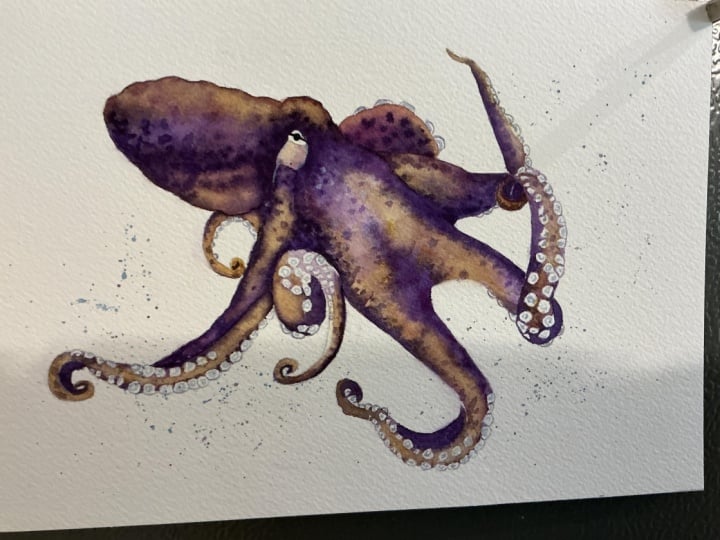
7. Octopus, part 1: So we're going to be
painting this octopus using a wet on wet technique first, where we wet the
area using a color. And then, will
that color is wet, we'll drop in some other colors to create these soft blends. So my base layer color, I want this move. So I'm going to
grab my water and add quite a lot of
water onto my plate. Now, this might be the section of the class where
you just drop some water, pour a little bit of
water onto your plate. We do need quite a bit. And then I'm going to take
quite a bit of time to add some of this
mouth to my color. Now, I'm looking for a
medium transparency, medium to medium light. So I do want quite a bit
of color in this water. I might have added too much water,
actually, to be honest. Soak up a little
bit of that water so that I have
enough pigment left. Alright, so when I
take a peek at what this mouth looks like
on my practice sheet, I'm noticing it's kind
of a medium opacity. That's great because
to this color, we can drop in more moth, or we can drop in
our purple or we can drop in our lemon yellow to create these nice peachy tones. Alright, so the very first step, I'm actually going to I know I'm wanting to start
with this big old head here, but that's a really large
spot to start with, and that's kind of where
our eyes are going. And so instead of starting with where our focus
is going to be, I'm going to start somewhere
else just so that I can do a little bit of practice before I get to the section that's going
to be the hardest. So I think this little
tentacle that's kind of off in the background is going to be a
great spot to start. So I'm going to load my brush up with this
water down moth. And now I want to start
where it's the darkest, which is going to be right
up next to the body. And as I bring this
color outwards, I am going to try
my best to keep a little ring of white
here on these tentacles. Because if you notice
on the tentacles, the ends of these tentacles
are really nice and light. So I don't want to paint
my Mava on top of that. And leave a little ring. The rest of it,
though, gets painted. Now, now that this is wet, now I can drop in
some of my colors. I'm going to wash
my brush because I'm going to start
with my highlight, which is this lemon yellow. So this color is
already starting to soften up because I
had water on top. I'm going to grab just
a little bit of it, and I'm going to add a
little bit of that lemon yellow to the outside
edge. That's going to act. It's going to mix with my mauve, and it's going to create
this nice peachy tone. Now I can take my brush, dry it, and soak up
some of that color. I want to do this
quickly, though, because I still want time to
drop in some darker colors. So I want to drop in
more intense mouth here. Wow, this first layer is wet. Then I also want to go and
grab some of that dots purple. I'm not washing my
brush off for this because the purples will
mix really nicely together, and so I don't need
to wash my brush. Now, I can add some dots using this purple to kind
of create some texture. Wherever you see a little bit of texture here in the skin, I can just kind of
add some dots there. Now, if there's any section that you don't
like how it looks, you can wash your brush, dry it off, and use a
dry brush just kind of soak up if any of those
pigments ran too far. Now, for this tutorial, we do really want to have
our individual colors shine. We don't want to
over mix our colors. So when I lay a color down, I don't want to
go back and forth and back and forth
while it's on my paper, or otherwise it's going to
mix to a new color, okay? So I'm kind of being very aware that the
color I place down, the water that's already on my paper is going to
help to blend it. I don't really need
to do as much work. Now, I can't paint
any section of my octopus along this
edge that's wet. So I'm gonna skip and jump around and paint some
of these tentacles. And then once I've gained a little bit more confidence
in this technique, then I can go back to the head. Alright, so I'm
looking for some of these tentacles that are
kind of smaller and cut off. So these ones here along the edges are
gonna be great for that. Eventually, this one, too. This tentacle is
connected to the body, and so this is going to be a little bit more
challenging to do. I want to gain a little bit more confidence with
these ones in the back. So this first layer of moth, I can wash my brush. I'm tapping it
along the side so I don't have too much
water on my brush. And then I'm going to
grab some of that yellow. And I want this lemon
yellow closest to where my tentacles are because that's where it's going
to be the lightest. So along this little wrap around here and
along the tentacles, I'm still trying to leave these suctions of the tentacles
to be a little white. And then I can go back. I
can add a little bit of that mauve where it
would be the darkest, which would be along
the outside edge. And I can also add a little
bit of this dioxyine purple. Now, remember I did not
add any extra water. I'm using these dark
colors directly from my paper so that they can be the most
concentrated and dark. We'll move on to
another section. So potentially I'll do this
tentacle in the back here. Wash my brush, tap it so I don't have too
much liquid on my brush, and I'll grab some
of that lemon, drop it in and paint along
closest to the tentacles. I'm going to allow those two
colors to blend together. And now I can wash and dry my brush and add a little bit of darker mauve and
that dark purple to the backside of the tentacle. Now, if you have too much
liquid on your brush, when you add these colors, the colors, if there's
too much liquid, it's going to push
everything away. And so this whole class
here is for you to practice how much liquid is on your brush and how
much is on your paper. If you have too much liquid, all of these dark colors
are going to push and expand and blend with
all of your lighter colors. If you don't have enough liquid and your brush is too dry, the color is going to just
sit and your edges are going to be very hard and your colors aren't
going to blend at all. So it's a very fine
line between having enough water on your brush
and having too much water. And so this is a great
tutorial for practicing that. Remember that you might not get it right the first few times. That's to be expected. But this is why we're starting on some of our smaller
sections first. Right, I'm going
to take a peek at this tentacle that's
wrapping around. Now, when we start
to see some of the suctions here
on the back side, we're actually going to
do our best to paint around those suctions so
that we leave those white. So as I paint my first layer of color using this
water down mouth, I'm going to try my best
to go around these. Now, I'm not worrying if I accidentally
go over the edges, and I'm using still quite
a watered down brush. And then I'm moving that
watered down pigment and kind of tracing around
these suctions. Going to stop part way
here because I don't want this to dry before I get a chance to drop in
some extra color. Then I can go back
with my water down layer and I can finish the
rest of this tentacle. H If I have too much water on this tentacle, I can soak up some of it so
that when I add my yellow, my yellow will stay more
or less where it's placed instead of mixing
with everything else. So I'm going to grab a
little bit of yellow. On these smaller tentacles, you might not have a ton of ability to mix these
colors, and that's okay. Grab a little bit of
that darker mauve. Try my best to add a little bit of darkness
along the edge, although I know I'm not
going to be able to add a whole lot because
it's pretty small. As this is starting to dry, if I'm noticing it
didn't get dark enough, I can always add more. You can pretty much
continue working in any of these areas as
long as it's still wet. Once that color starts to dry, that's our cue as artists, especially when we're doing
this first layer wet on wet. That's our cue to stop working
and let it dry on its own.
8. Octopus, part 2: So I'm going to start
working on this one. I just want to be careful
where it's touching up against the tentacle
that I already painted. So I'm going to start
on this bottom, and it looks like I'm
going to have to do a lot of painting around. So I might stop halfway here
because I'm going to want to drop in some other colors
here before it dries. So I'm going to kind of
chunk it into sections here. Now, let's say, as
you're painting, if you go over some of these tentacles on
accident, that's okay. You can take your paper towel, press down as hard as you can, and you're going to basically
lift that color up. And then you can start over. Now, we can do that because this is high quality paper
that you're painting on. This is arches, cold
press watercolor paper. In my opinion, it
is one of the best, if not the best watercolor papers that you can find
in the entire world. And so, because it is
a high quality paper, we're able to lift up these colors if we
go over the lines. Now I am still going over
some of these tentacle lines, and I'm not worried about
that because I do know that this whole painting
isn't going to be perfect. I'm keeping it a little bit, I don't want to say messy, but I'm keeping it a little bit looser so that it gives it a little bit
more motion and movement. We'll add a little bit darker around the bottom here
where it's twisting. That would be naturally where there's a
little bit of shadow. And then I'm also gonna add
a little bit of shadow along this top side of the tentacle. Grab a little bit more
of that DaxinPurple. And then we'll continue painting the rest
of the tentacle. Alright, so now I'm
taking a peek at where I can section off some of my octopus so that I can do smaller sections so I don't have hard edges
where it dries. And one of the sections that I'm noticing is that there's
a little bit of a line here kind of where
the underside of the tentacle with
all the suctions and then the top of it. So I'm going to do the underside
of this tentacle first. And then I'll let
it dry completely, and I can come back and
then do the main body here. So I'm noticing that the
underside of the tentacle is a little bit more
of a peachy color. So I'm going to make sure to add more of my lemon yellow here. Once again, I can do
this in sections here. I'm getting up close to
the other tentacles, but I'm trying my
best to not touch it. And I'll continue now painting
the rest of this tentacle. Now, this is perfectly okay
if we've got a little bit of variant with the
mauve to the yellow. It doesn't have to
be perfect here. Then I can add a little bit
of darker on the center, as well as a little bit
of that dark purple. I'm going to do the same
thing with this tentacle. I know we're kind of doing a lot of the details here first. But remember, we're
just practicing all of these color mixing. So I'm going to do
the same thing, and I'm going to
arbitrarily kind of stop it more or
less right here. And so I'll do from this
section all the way out.
9. Octopus, part 3: Alright, so now that
we've had some time to practice this technique of
wetting and dropping in, now I think we're ready
for the largest sections. Now, I still need to chunk
this into sections because doing both the head and the body here is going
to be way too much, and I do want to keep
the sections wet. So I'm going to start
with the head here. And I'm noticing there's
a natural break here by where the eye is where it's a little bit lighter
under the eye. And then it's dark
until roughly here. So it kind of comes dark
and comes up like this. This is the section that
I'm going to paint. I also am doing this
section because I gave these two tentacles
some time to dry, whereas these ones down here
are still a little wet. So I want to make sure
that I still have quite a lot of my
base color here. If you don't have enough, please mix some
more to get ready. I also want to make sure that my accent colors here
are wet and so I can drop a few drops of water onto my lemon
yellow, and my purple. And now we can get started. Now, when I paint this really
big section of the head, I can turn it if I need to so that it's a
little closer to me, and so I'm not accidentally
resting my head. If this is confusing to you, though, keep it in one spot. And now I do need to kind of really make sure that
this section is wet. I can actually drop if you
do this carefully enough, if you can't do this careful
enough, maybe don't do it. But you can drop a whole, like, pool of color and then push
that pool to the edge. It makes it a
little bit quicker. The other thing that
you could do if you had a slightly larger
capacity brush at home, you can also use that larger capacity
brush for that section. I want to be careful
around the eyes here. So that I'm not going over this lighter
ring around the eye. And I think this front part
comes down roughly here. So we're going to stop it there. I'll come back. Before
this section dries, I'm going to add
my pigment here, make sure that my edges are nice and tight edges so that I'm going all
the way up to the line. And now that I'm done, I'm not done yet,
because, remember, I want to go back to the start, make sure that I have
all of this evenly wet. I don't want one
section of this head to start drying before I
can drop in the color. Now that it's wet, now I'm going to start with
my highlights first. So I wash my brush, and I'm going to grab
some of that lemon, and I'm going to start with adding some highlights
towards the top. Now, I can add more texture
here by adding dots here. I can soak up some of that pink that mauve
color at the base if I want more of this undercolor to shine through or more of the yellow to shine
through here. So I'm going to keep
some of these dots of yellow towards the top. And then before it dries, remember, we got
to do this quick. I'm going to add some of
that move to my base here, a little bit more water here. So I'm making it a
little bit darker here, and I'm kind of following
the shape of the head here. It's a little darker
around the eye, it seems. You know, and there
is a little bit of, like, a peachy color
on the underside, so I can always add a little bit of yellow on the underside, keeping it really
nice and wet here. And then before it dries, I can add some of
my dxyine purple. Now, I have quite a lot of
this purple on my brush, and I do really like how when
I have a lot of this color, and I'm adding some of these
dots here or some lines, you can also add some lines
coming from this purple. Now, I do like how much texture you're seeing with that
deep dark purple here. It's very watered down. So well, I shouldn't
say it's watered down. It's a very wet section. And I'm adding some very
intense pigment here. And I'm going to leave it
then because I like that. I don't want to over mix. I don't want to overcomplicate. I do like the darkness
of these colors. If I need to lift at all, I can use my dry brush and
lift with my dry brush. If I need to fix any
of these lines here, if they got out of
control, I can fix. But because we're doing
underwater animals, it does make sense for a lot of these a lot of these blooms where you see the pigment kind
of spider veining, it kind of makes sense
to have it like that. So I don't mind
it. Alright, now, as we look at the body here, the body is a lot
lighter in color. And so I can either attempt
to do the whole body at once, or I can attempt to do
this in little sections, just how I've been
doing it earlier. I think I'm going to
chunk it into sections, but I think I can do two or I
can do three sections here. I can do this section
along the side, and I can do this
section along this side. And then these two together are going to
be all one section. So I'm going to start
maybe with this section. No, you know what?
I'm going to let this edge dry a
little bit better. I'm going to start with
this section here. So I'm going to turn
my paper so that I've got a little bit
easier of a time here. And I'm going to follow kind of the natural the
natural shadows here. So I've got this kind of edge where this upper
tentacle is coming out. All right. And then when I take a peek at my reference photo, it does look quite
dark here up on the top and a little bit
lighter towards the base. So I can add a
little bit more of my peachy color in
towards the base here. And then I can add more
of my mouth at the top. And more of my purple. So I'm using my purple
here is actually quite a lot of water
here with my purple, and that's how I'm getting
these really nice blooms here where it pushes the pigment away and you get
a lot of texture. So you notice that there's a lot of liquid here and this purple. Now I'm also noticing where
this where this creases, there's a little
bit more of purple. And I can just kind
of add more texture by taking and dotting that
purple wherever I want to.it.
10. Octopus, part 4: Alright, then we will continue to this section here.
Well, no, you know what? We're going to continue on with this section because this is
going to be the lightest. So I'm going to do
the same thing. I'm going to drop
a little bit here. And then the rest of it
is just going to be water because this is going to be
my most peachy of colors. We can touch along this edge because we did
just finish painting it. I'm using the edge of my brush to just kind of push
that liquid around. And I'm gonna use
this natural edge here to suction the rest
of my octopus painting. All right. And then where we've
got these edges here, I can just kind of re
wet those edges and kind of scrub them a little bit so that it reactivates that edge, and I can scrub that
edge out a little bit. Same right here. If I
don't like how this edges, I can take my brush, kind of scrub out this
edge a little bit. Alright, now, before this dries, we've got to drop in some of our yellows to get kind of
these peachy tones here. I can also since
it's looking like it's quite lighter in color, I can also use my paper
towel or add more water here to kind of
lift some of that up if it got a
little bit too dark, but also know that we're using this reference
photo as a guide. It doesn't have to
be an exact replica. So I've got my lightest
of yellows here. And then where we notice
our darkest shadows, that's where we're
gonna want to spend a little bit more
time with our colors. So I've got my mauve here. I'm noticing that there's some darker colors coming in from the bottom here and around. I'm noticing there's
a little bit of shadow kind of coming
up from this bottom, a little bit of
shadow coming in, a little bit of shadow on the bottom side of
this tentacle here. Almost in this little
suction in between. There's a little
bit of shadow here. And then there's shadow along
this right side of the leg. Now, this is where it's going to be the most challenging because we're doing a lot of
area all at once. So know that if you have some hard edges where our wet sections are budding
up against our dry sections, that's okay for
now. Don't worry. I kind of comes around here. And then I'll add
my watery purple. Remember, I'm going to add it to where it's the darkest first, which it seems like it's around kind of the
bottom of the eye here, around the bottom of
the tentacle here. I've got quite a lot of texture, so I can add some dots of texture along where
I see some of these shadows
dotting some texture using this purple is a great
way of adding texture. So I've got kind of
these two corridors. I've got this dark corridor
and this dark corridor. And then I've just
got some texture dotting this purple in between. Remember, I'm not
mixing these colors. So I'm not sitting here with my paintbrush mixing
them together. I'm keeping them
separate by just dotting the color
and then letting that wet paper mix it for me. And if it got too
dark in any sections, I can take my paper
towel and lift up. However, remember that
this color is gonna dry just slightly lighter than what it looks like
when it's wet. So, um, you know, I don't have to
worry about lifting up too much color
with my paper towel. I do want those vibrant colors. And then we'll do the same
thing with the tentacle here. Now, I'm kind of
out of my color. But I'm still gonna
see if I can get a drop or so of color here. Her. Now, with this section, I just want to be careful
touching the back of the head. And then coming up here, I'm going to dry
my brush and use a dry brush here
because I do want this section to stay
really nice and dark. And if I touch my wet brush up against this
wet section here, I'm going to move a lot
of the pigment away. So I'm drying my brush off, and I'm taking just
a little bit of that pigment coming up
along the base here, and then adding a little bit of a shadow under the eye here. Okay. And then I can always fix that edge and
fix the shadow later. Okay? So I'm just getting
that pigment down here. If you're like me and you
have too much pigment, you put too much on the paper. You can always dab
some off. All right. And now this section, we are going to kind of slightly make up
what it looks like. So I'm going to add some yellow right where I see
this lightest section here. Can make it really nice
and bright with yellow. And then I can add some
darker along this backside. Same thing. If you
need to lift up any pigment there,
you can lift it up. Now here, I can always add just the slightest amount of
yellow in this area here. It's almost looking
like it was too white. So I can add a little bit of yellow to kind of make
it a little peachy. Lift if it got too dark. The only section that
I definitely want to keep that white is just
around the eye there. Seems like it actually
is darker here. So we're just gonna
try our best, and then we're gonna let it dry.
11. Octopus, part 5: If you're like, M and
you got any sort of little drops of water
around the outside edges, don't worry about
that. All right. So now that we're letting
this first layer dry, we can go back to some of
these white tentacles, and we can add just the slightest of color to
these white tentacles. So I already have some of
this mouth on my plate. I'm going to see what
it would be like to just add a little
bit of turquoise. So I want to add just a
slightly new color here. So this is making
kind of a blue tint. I still have a lot
of water here. But if I mix it on my
plate on my paper, it looks slightly blue. Now, you can have it be
more blue or you can not have any mouth at all and have it be
totally turquoise. We're gonna use this just
to add a little tiny, quick, like, partial circle
to some of these tentacles. So I'm coming on the
inside where it's white, and using this water down color, I'm adding just kind of
like either a ma on some, or for some of those
that are bigger, I can actually add
a full circle. I just want to be
careful that I'm not touching these
sections that are wet. So it seems like a lot of
these I'm going to have, like, partial circles,
just little commas. And you notice that I'm
doing this quickly, so I'm not worried about
having this be perfect. I just want to add just
an extra little bit of color so it's not
solid white there. Okay, so I'm going
to go around and add a little extra of this blue, adding just some mas to
these white sections. All right. And then I
also do want to add just a little bit more
black to this eye. So I'm going to
wet my pains gray. And I'm going to
do this carefully. I want to make sure that no
section of this eye is wet. And then I'm going to take
that black, well, pain's gray. Add that center dot first, and then pull a little
line on each side. Now, as this is drying, I kind of like how that texture of lifting up with a
paper towel looks. I can I don't think it's gonna
actually lift up anymore, but you can always try to over accentuate that if
you had wanted to. And now I can leave it
like this if I want to. I have a few other options, though, if you had
wanted to, for example, if you have some
of your outside of the white of the paper that
got a little too dark, maybe you have some stains there from little droplets,
things like that. You can always mix some
color and do a little bit of splatter more
around your tentacles. And so I'm going to show
you what that'll look like. I'm going to use a scratch sheet of paper first to just show you and then you can decide if you want to
do it on your painting. Now, we can use whatever color
is currently on our plate, or we can add more color to it. So here's I'm adding a little
bit of purple to this. We do need it quite
watered down. Now, I would move
your final piece well far away so that it doesn't accidentally
get any drops on it. And you can do this
splatter one of two ways. You would fill up
your brush as much as you can and tap it
on top of your hand. If you have another brush
or another pencil at home, you can hold that
loaded brush in your non dominant hand and use a different brush to tap
and knock it on top. This might create more splatter, and it might also help to keep the splatter kind
of where you want it. So that's what your
splatter is going to do. It's really all
up to you whether or not you want to add a
little bit of splatter. Splatter. What splatter
is going to do is splatter is going to give it
a little bit more motion, a little bit more energy. And so when I take a
peek at my octopus, I might want to add a little
bit of energy down towards the tentacles to kind of make
it look like it's moving. And so I'm going to grab
load at my brush and add just a few splatter marks along the bottom of
the tentacles here. I want to try to keep
it away from the head, but I'm just kind of going to
go around the bottom here. And add a little bit of
splatter along the outside. A little goes a long
way, of course. And so I do think splatter does add quite
a lot to our paintings. It also can help to give it
a little bit more shape. So by keeping the splatter
around this outside ring, I have really balanced
my painting here. Now, although this is
where I am stopping, I do want to mention that you might be interested
at home on doing a second layer of
color just to add a little bit more texture
in certain spots. So depending on how dark your background
layer of color is, you can always add a
second layer of color. And now, if I were to add
a second layer of color, I can use whatever
colors on my plate. I might add just a little bit
more mauve to that color. My second layer still
needs to be watered down, so you notice it's still
nice and watered down here. But I'm going to add it to just add a little bit of
texture in certain locations. Now, I don't want to add any of this texture where
my paper is still wet. So if I were to look
at where it's dry, if I wanted to add more texture, I would add more texture, not with the tip of my brush because that's going to
be too small of dots, but I would add a
little bit of texture, making little blobs with
the edge of my brush. So there are just
different size blobs. Some of them can be connected. Some of them can be separate. And I would add these blobs more in where you
see the shadow. So wherever I might see
certain shadow spots, I can add some texture, and I can bring a little
bit of texture up into where the
highlighted area is. So if I'm adding a
little bit of texture, say to this section here, I can add a few blobs of color. Now, you aren't going to notice a whole lot of difference here. But where you will notice it is in these lighter
areas where you have just a little bit of
extra almost like spots here. Now, I probably wouldn't
add a whole lot of these spots in the center
area here in the middle, but you can add some
of these dots and spots along the base
and then slowly make your way up and make
them a little bit less prominent and smaller as you get to the
highlighted section. And like I said, this is
completely an optional step. If you like how your
painting is looking, this is definitely not
something that you have to do. It just all depends on how dark your first layer got
and if you were able to get some nice texture spots using that wet on wet technique. And if you weren't able to get a whole lot of texture spots, this is a great way to add a little bit more texture
in those shadowed areas. When I'm adding texture
to the head here, I am only adding
a little texture along this center line here. I'm not really
going to be adding that texture to the
top or to the bottom. Making sure that you're not over adding texture is challenging, but it is really going to
help your piece overall. So I can add, like I said, a few more of these dots to
where there's more texture, where I'm noticing more shadow. This also is a great way to kind of clean up some
of these edges where you had two edges where you
had to work in sections. And so if your
sections dried, funny, where you've got a hard
edge between your sections, this texture is a
great way to kind of mesh those sections together. And I think that's all
I'm going to add for now. I'm gonna let it
fully dry because once this texture dries fully, since it is quite watered down, it is going to soften a
little bit as it dries, and then we'll be totally done.
12. Jellyfish part 1: Alright, so we're
going to start by taking a peek at our
reference photo. Now, the fun part about
jellyfish is that you can paint your jellyfish whatever
colors you would like. So you can use your colors that are listed at the bottom of the
practice sheet. Just know that
we're going to need your jellyfish body to kind
of stick around two colors. You need your lightest color
for a lot of the highlights, and then you need
a color that you can drop in for the shadows. So if I wet all of
my colors here, I'm going to wet my yellow, wet my orange, my purple, my mouth, my blue, my pain's gray, and my white. And then if you are
doing colors that are not the same colors
as my jellyfish, I would suggest that you test out your colors on a section on your practice
sheet first to make sure that those color
combinations will work. Now, I'm choosing
to start with a lemon yellow on the main body, and then I'm going to
drop in this mauve color. I might also drop in a little
bit of cadmium orange, so I'm kind of sticking between these three colors for the body. I'm also going to stick
to those same colors, but just a little
bit more transparent for some of these cloth like sections that are
coming out of the body. Out of the head. And then for all of the little
fine tentacles underneath, I'm going to use
some darker colors, some turquoise, along
with my purple, maybe even a little
bit of pains gray. And then this is where
I'm going to start using a little bit of
my Chinese white. So I am not going to paint
all the way to the edge. However, if you are painting all the way to the edge at home, I do suggest that you use
some painter's tape and tape on all four edges of your watercolor paper
onto a flat surface, either the surface
you're painting on, or you can also tape it onto a corrugated plastic
board like this. All right. So first, we are
going to mix our base color. So I've got a bunch of water. I'm going to take
some of that water and add it to a
section on my plate. I'm looking to have around
a half dollar coin size of water here I can always
mix more if I need to. And then to that, I'm going to add some of my lemon yellow. Now, similarly to all of the other animals in
this underwater kit, I'm looking to make a base color first that I will then
paint wherever I want, and then I can drop in
more concentrated color, or I can drop in shadow like
cadmium orange or mauve. Alright, so I'm
going to start with the head of my jellyfish. And so the head is
all going to be just slightly darker than
the rest of the bonnie. So I'm going to start by sectioning off for
sure, this top section. Now, there's a little
section here underneath. I'm not going to paint that yet because I want to chunk
it into sections, and this section underneath
is going to be the darkest. So I'm going to start
by adding quite a bit of liquid with this mixture. Continuously grabbing more. I'm really soaking up as much of that first
color as I can get. I'm just kind of adding, like, a puddle of that color and then pushing that puddle
of color around. Remember, we do want
this first layer to stay to stay wet while we drop
in the rest of our colors. All right. Now, I'm already noticing that this section
is starting to dry, so I'm going to go back,
re wet the section, add a little bit more
because, of course, this is where I started,
so it's going to start drying a little bit
faster over on that side. And now that I have a very even wetness
throughout the top. Now I can add either
more of this yellow. So maybe I want a brighter
yellow on the underside. Or I can add some shadow. So it looks like
there's a little bit of shadow on the top, so I'm going to
use my mauve color and add some of that
mauve along the top. Now, because this is wet on wet, I can allow these colors
to nicely blend together. I can always outline
some of these kind of vertical lines
using that mouth. I can also somewhat outline the bottom
here using this mouth. It looks like
there's a little bit almost of a hard edge
along the bottom. And I can always add a little bit of
orange if I wanted to, so maybe I want to drop in
a little bit of orange. This is pretty much where you can start to
play a little bit. Remember, just like
with our octopus, if you are adding
any other colors onto a section
that's already wet, you want to make sure
that you are not wetting your brush and adding too much water
into that section. Adding too much water
is simply going to make that extra color move and bloom all around your paper. Alright, so I'm gonna
leave it there because I do want to keep some
of these colors, um, without blending
them together. Alright, so then while
that section dries, I'm going to move on to this
kind of cloth like body. I'm going to mix a little
bit more of my yellow. So I'm adding more water
here to my yellow. A little bit more yellow. And now, because we have some
really bright spots here, I'm going to do
this section wet on dry because I don't
want to run the risk of having some of this
yellow go into a section where it is
really light in color. So instead, I'll
paint on dry paper, and then I can always drop in the same colors
wherever I see shadow. I am going to make
sure that I'm not connecting completely
with the main body. So I'm going to
actually take a peek at these little
frills underneath. And I know these little frills are going to be the darkest. So I'm going to start here
on this little under ridge. So I'm looking at this
shadow section right there, and I'm going to add some
of that yellow wet on dry, my paper is dry. As I get to the edge, I'm just going to use
whatever's left on my brush to just dry brush down. So I'm continuing to
make brush movements, but there's going to be some
space in between my brush, and that's going to be
the white of the paper. Now, to this, remember, before I let it dry, I do want to add some
of that mauve color. Seems like it's drying
up a little bit. So I can add it coming
from the underbelly. I can also add just
a little hint of that dioxyze purple where
it would be the darkest. So it seems like there's
a few little chunks of darkness under
there, as well. I kind of comes out and under. Alright, and then I will take a peek at some of the
other dark section. So it looks like this section immediately underneath
is going to be lighter, and there's going to be
a little dark section in this bottom corner. Now, if I go on top of some of these sections that
are supposed to be light, that's okay. This is just kind of
a rough guideline. So I've got this
section under here. Seems like my mauve
color is drying up, so I'll add a little
bit of water to that. And once again, I'll drop in some of that mouth and then also just
a little bit of that purple where it
would be the darkest. Now, this didn't blend
as well as I want, so I'm gonna wash my brush, tap it on my paper
towel so it's not soaking wet and then
use that slightly damp brush just to help mix some of those
colors a little bit better. Alright, now from here, I'm going to take a peek at some of the little tiny
frills down here. Now, I'm imagining that it's going to be a little bit
darker towards the bottom. It looks like it's a
little bit darker where it's here in the background. So I'm using the
edge of my brush, and I'm dry brushing all
along the bottom here. So that means that I am using the edge of my
brush and pushing down so that there's some space from the paper
that's shining through. So if I were to pick
this up and tilt it, you're going to be
able to see there's some paper that's
coming through. And so that those sections
are going to stay white. This is much easier to do with dry brush if
you use the edge, and you just kind of push
the edge of the brush along. Now, remember,
before this dries, we do want to add in some
of our darker colors. So I'll come down here, add
in some of my mauve color. I'll bring a little bit
of the mauve uptop. And I'm just kind
of dotting it along here and there because
I want some shadow, but I also want some of that
yellow to shine through. So if it's a little darker in
one section, that's great. Maybe I'll add just a
little bit of orange. And then if there's
certain sections that you don't like
how they look, we can always use a wet brush, and we can kind of blend
those sections out, or you can take your paper towel and you can lift, as well.
13. Jellyfish, part 2: Alright, we'll continue
moving upwards. So, this whole section
is pretty bright. I do notice there's
a little bit of shadow just kind of within here. So maybe I'll add almost, like, a little triangle
shape of shadow here, a little shadow along
this edge line. Still starting with this yellow, just so that I can kind of control the shadow a
little bit better. Alright, so I've got this kind of triangle
and this triangle here. Now I can add just a
little hint of that mauve. I might not want quite as much as down in
these lower shadows. And it does seem
like there's, like, some little texture
along some of this edge. I can always add
some little dots with some to add a
little bit of texture. And then I'm going
to add a little bit more yellow 'cause I'm running
out of my yellow again. And then I'll finish with
this section of shadow underneath the head here since the top is
starting to dry. So the underside here is definitely going
to be in shadow. It's gonna be the darkest
of my shadows here. So, same thing. Add a little
bit of that mauve here. And then I can also add just a little bit of
that purple, as well. Now, I definitely don't
want it to be the darkest of purples because this section here to the left is where it's going
to be a little bit darker. So I think that's good. Now here, I'll just kind of
finish up a little bit of these dots along
the outside edge. So I'm taking my yellow. And I'm just kind of adding
some dots here and there, some larger dots using
the edge of my brush. And then to those, then I'll add some dots using the edge of my brush
using that mouth. So all this is doing
is it's adding just a little bit of
texture around the edge. We'll add more texture
once it dries. We just kind of want to
get down some color first. Alright, and then the
last little section of the body is gonna be
this little shadow here. So, same thing. I'm
going to start with that yellow painting
on dry paper. If it butts up against this section here and
it's not totally dry, it's not a huge deal. However, you can always let this shadow dry a little
bit more if you wanted to. Grab a little bit
of that mauve here. I want my darkest of values
to be on this underside. But I can still leave
a little bit of that yellow to shine through
on the edge here. Kind of, by doing that, it does kind of give us
this effect of it glowing. And I'm adding now a little bit of that purple while it's wet. I think I want to add a little bit more purple here
on this right side. I think this will be a
little bit darker, too. Alright, so we will
let this layer dry. And as we let this layer dry, we're going to start working
on some of the tentacles. Alright, so to work
on the tentacles, I did a little practice of what I'm thinking or hoping
that it might look like. I might change, obviously,
as we're doing this. And so if it changes,
that's okay. But what I want to
do is I want to add quite a lot of water
on this underside here where the tentacles
are starting to come out and different
colors to that water, that watery blue and purple, so dark colors here. And then I'll add some white
blooms using my white paint. And also using my white paint, I will pull some
extra tentacles out. Okay? So this is going to be something
that I'm going to need quite a lot of liquid for. So I will clean off
my plate first.
14. Jellyfish, part 3: Alright, so I'm going to add some water to one
section of my plate. I'm looking to have around
a quarter size of water. And now to that,
I'm going to add my base layer of the darkest
section of my tentacles. So for that base layer, I think I'm going to
use my turquoise. So I'm gonna roll around
on my turquoise add quite a few brushfuls here. Now, if you wanted to make this turquoise
a little darker, you could add a
little bit of paints gray to it if you wanted to, or you can just keep it that really nice bright turquoise. It's up to you. And then now with
this turquoise here, I'm wanting to paint a section of the
tentacles that's coming out from around this third way through point to
around this bottom. And I'm going to look to
create a big area of liquid here where I'm going to
take caution and care painting along the upper
edge of this pool of liquid. But then I'm going to make sure that this pool of
liquid is really, really nice and opaque. Well, that it's very liquidy. So I'm going to continue to
go back to where I started, and I'm really adding a lot
of liquid from that brush. If I were to pick up
my paper right now, it might start
dripping slightly. And I'm going to end
around this area. And now I do want this liquid to come this whole kind of pool area to come down
just a little bit. So I have kind of like a
triangular shape right here. And now to this pool, I'm going to add just a
little bit more liquid. So right now I'm just
adding liquid to this pool. If I get some splatters
on my paper, that's okay. I'm going to add
more intense color. So I'm going to add
some color from my plate or from my
paper, excuse me. I can add more of
that turquoise. I can add some darker
dioxyine purple. Basically, I'm just wanting
to add more intense color. I can add a little
bit of Payne's gray. I'm kind of just splotching
the color right here. And then now to this, I am going to take
some more of my color. I already have a
lot of color here. So I'm going to start by
dragging some of that liquid. It's like a pool. I hope you
can see that in the video. So if I were to lift it up, it's kind of like
a pool of liquid. And I'm going to use that
pool of liquid to help me pull some tentacles out. Now, I'm starting
off with just some of the whatever colors are here. And I'm making sure that these
tentacles are overlapping. I can change kind of the
border of these tentacles. So if I wanted this whole shape to be a little bit
more triangular, I can kind of come in and
close some of these gaps here. And I'm going to make some of these little tentacles
coming off the edge here. I want to try to keep most of my tentacles within
kind of this area here, but I can always play around
and see what it would be like to add a little bit
more color along the lines. I can add some
thicker tentacles, so it looks like
the center here is just kind of like a
bigger mass of tentacles. Now, if you're getting
some of this texture of the paper shining through
and you don't like that, make sure that your
brush is fully loaded. That means that I have as
much liquid soaked up in this brush as I can get
before I paint on my paper. And now, once I get a few of these little tentacles and I'm happy with the
way that it's going, I'm going to wash my brush. I want to do this before
this section dries, and I'm going to grab this Chinese white
directly from my paper. Now, normally, we don't use
white in watercolor painting, but we will use it to
create a pastel colors. I'm using it to create almost
like a little galaxy type coloring to the base of my jellyfish here
to these tentacles. And if you like how
this is looking, you could always kind of
expand this big section of color here and make this galaxy look a
little bit more intense. So right now, I'm grabbing as much of this Chinese white
on my brush as I can get, and I'm dotting into
the wet sections. I can also dot into these larger sections
of tentacles below. And what this is doing
is it's creating these little blooms to
come out and appear. Now, I can also take some
of this Chinese white, and I can add I might need to add a little
bit more water to my brush, maybe even to a section
of my mixing palette, still completely loaded up. And then I can
always add some of these tentacles using
this Chinese white. Now, I'm coming up and I'm
grabbing a little bit of the pigment from this pool
here with the Chinese white. And so what you're gonna
get is you're going to get some of that color pulled down into
the Chinese white. So you can see some
of this is gonna some of that Chinese white is
gonna pull into the purple. So is gonna pull into the blue. And this Chinese white
is a great option for a lot of these tentacles
that are kind of towards the edges because we want a lot of these
tentacles to show up, but we want them to
be just slightly more transparent and translucent
around the edges. And so this Chinese white
is going to give it kind of like an under the sea effect without having to paint the whole background
and then leave these tentacles to be lighter. Now, I might just have to
babysit these blooms here. So as the paper starts drying, I can always add more
Chinese white on top to make these blooms
a little bit bigger. Or I can just let
it dry like that. Now, there's one other
section here that I do want to add the same
tentacle work to, and that would be the
section up on top. And so I'm going to do
that. Exact same thing that I showed you earlier where I add this blue first and then drop in dark colors
and then add my white. And I'm going to add it to
a smaller section here. So I'm going to turn my paper so I don't rest my hand here. Alright, I add more of just the liquid to
keep it nice and wet. I can drop in some more
of that turquoise. I can drop in more
of that purple. I can drop in paints
gray if I want this section in the upper corner to be really nice and dark. And then I'm gonna
wash my brush. I can grab more of that color. Remember, we're going
to add a few of these little tentacles coming out using just the
liquid on the brush. So we're gonna kind
of mimic some of these curves that were
printed on the paper. I think I don't like
it going in front. If you don't like any
of these tentacles that you created, you can always use your
paper towel while it's still wet and drop in or lift up
using your paper towel. And now before it dries, I'm going to clean my brush and grab some of
this Chinese white. Remember, we're going to add a few little dots first
using that Chinese white. And now using that
Chinese white, I can also add a few more tentacles using
a Chinese white. Now, we do want slightly less tentacles up
in this section. And if you are noticing that your painting is looking
a little one sided, you can always add a little bit of blue
to this right side. So here I'm just
taking a wet brush, and I'm gonna kind of
blend out some of these. I didn't really like how the tentacles were
looking on the side. So instead, I'm going to
take my water and just kind of blend out some
of those tentacles. Let's see what it's like if I blend out some of the
tentacles on this side, as well, so I can
add some water here. Add a little bit of that
Chinese white as well to kind of blend
around these edges and kind of create almost like a little shadow here
on these edges. If you like how
your tentacles are looking on this left side, you definitely don't have
to blend out with water. But just know that
blending with water, adding water to
certain sections. And I'm using actually
quite a course. I'm pushing down
hard with my brush. And what that does
is it just lifts up some of that color
that's underneath. You can hear how much
I'm actually scratching. Now, because this is nice paper, the paper will be able to
take that without ripping. And then I can always use
my paper towel to just kind of soften up the
edges a little bit. But since I'm using just water, your edges shouldn't
be too, um, too crazy.
15. Jellyfish, part 4: Alright, so now,
as I let this area dry because I will be adding
a little bit of splatter, I do want to connect
the blue from the tentacles to the
jellyfish itself. And the way I'm
going to do that is by painting a shadow on top of certain sections of
the jellyfish using a blue. So, I am going to
remix my color. I guess you could use the same
exact color that you had, or you can remix your color. So here I've got water. I had a little bit
of white in my blue, and that's why I'm remixing it. So adding to that water a
little bit of turquoise. You can either keep
this nice and bright or you can add just a little
touch of Payne's gray. We're making a little shadow
color for our jellyfish. Now, the shadow color
still needs to be nice and light and transparent, so you should be able
to see through it. And now to our jellyfish,
we're going to add. We're going to see
where our shadows are. So I noticed a shadow
here along the top, and then it's also shadow
around the base here. So I think maybe let's start on the base here of
the center section. So I'll zoom in here. I'm taking a peek at this area here. So it's kind of all
in shadow underneath the kind of cap of my jellyfish. I'm going to start by adding a very water down line here
along the base of the cap. Going to fill in the whole cap underneath on this left side. But you notice I'm
leaving a little bit of that original color. And now I can add some shadows in these little
sections that we notice. So there's a little bit of outline here printed
on your paper. There's a little triangle here, and then there's a
little line here. So I'm going to fill both of
those in using that blue. And then I can always add a little extra line of
shadow running down here. Now, I'm not blending out
any of these shadows, so these edges are going to
stay hard. I don't mind that. And then I'm also going to use this shadow color
down in these folds. So I'm noticing that right
here on my jellyfish, there are some shadows that sort kind of
in this upper area. Nice and loaded brush filled
with all of this blue. I'll come underneath and first paint this
underside with one layer. And now I can once again pull from that a few little
extra shadow lines. So I've got a little bit
of extra shadow lines running along this line
that's printed out. Now, on this right side, where you've got all and
this underside where you have all of this almost
like lacey looking texture, we can always come in and add
a few of these little dots. Kind of like how we did in the first time where we're
using the edge of our brush. We're not adding dots like this. We're using the edge of
our brush to add like little blobs blob shapes
using a shadow color. And I'm going to keep
these blob shapes kind of in these little sections
that you see that are already printed out that have kind of these
little cut out shapes. I'm also going to
keep these blobs kind of towards the outer edge. The other thing that I notice is this whole section
here is in shadow. And so I can add some of that blue to this whole
lower section here. Just be cautious. If your other blue color
is still very wet, you might want to wait for
that to dry just slightly. I think this little kind
of section right here. I should have I'm looking
at this section here. I'm going to add and make
this a little bit darker. Yeah, let's mix a little bit more shadow color
so that we can add a little shadow to the
cap of our jellyfish. So I'm adding a little
bit more water. One brushfl of that turquoise. Nice and light and transparent. I think I forgot to add a little bit of shadow
along this ridge here. Right now using
this shadow color, I'm going to come
in and take a peek at then the cap here. Now, for the cap for the
shadowing on the cap, we already did the underside, and now I'm noticing that
there's kind of a ring of shadow along this top half. And so I'm going to use
the edge of my brush, a fully loaded brush that
has lots of water on it. And I'm going to just paint
this upper half using that blue going down to
about this halfway line. It's very watered down. And then I can always
take this blue and pull some fine lines I'm using a very gentle
touch on my brush, and I can pull a few of these lines down
the center as well. Now this blue doesn't have to totally touch that upper edge. We can leave a little hint of that colored background of
the cap there, that yellow. Because if you do notice in a reference photo,
because of the shape, it is slightly highlighted
on the edge there, and that kind of helps us to
see it as a rounded shape. Now that we've done
this shadow color, you can see how then our painting kind of
connects a little bit more instead of having
two separate colors. Now they seem a little bit more joined together,
which I appreciate. Alright, the last little step is an optional step for you. So adding splatter, just like how we added some
splatter to our octopus, we can also add a little
bit of splatter to show movement towards the
base of our jellyfish. Instead of using I usually
would use a dark splatter. I'm going to see what
it's going to look like with a light
colored splatter, something like
that lemon yellow. I want to try to give a
little bit more of this kind of look where it's almost
dscent a neon like. So we'll see if my yellow
will show up as splatter. Sometimes you try splatter
with lighter colors, and then it's really hard
to see the splatter. And so if I can't see
the splatter too well, I can always add
darker splatter. So we'll add some of that nice
lemon yellow to our water. You can also just
do this blatter directly from this lemon yellow. You just have to make
sure that you have enough liquid on your brush. So you're trying to hold as much liquid in the
brush as you can. Hold it in your
non dominant hand and grab a different
brush or a pencil, whatever you have at home. You'll want to keep any
other paintings away. And I'm going to hold my brush fairly close to my painting, and I'm gonna tap it
using that other brush. Now, if you're
having a hard time getting these colors
off of your brush, instead of gripping
your brush really, really hard, have a light
grip on your brush. And I'm going to add this yellow mainly to this lower section, but it can always add this splatter over the
bottom of my jellyfish. Grab a little bit more. It's just gonna show up a little bit better
around the bottom. Well, There we go. Now I can let it dry and I can see if I want to
add more splatter. I can always add a dark
splatter if I had wanted, or I can darken up
some of these areas. If I wanted to darken up
the area of the cap there, I can if I wanted to add
more tentacles, I can. But sometimes letting
your painting dry and letting it sit
and seeing what it looks like afterwards is a
great way to check and see if you really need to add all those extras or not. Alright, so I let
my painting dry, and I actually decided to add some more splatter to the
lower section of my jellyfish. I added some splatter using
my purple and my turquoise. I felt like it just needed a little bit more dark details down here since the yellow
dried, very, very light. And so I made sure
to splatter around the lower little tentacles, but also around the bottom here, and that added a
really nice texture, in my opinion. Here's
the final piece.
 Emily Marie Watercolors, Watercolor Artist and Dog Lover