Transcripts
1. introduction: Hello everyone. I'm welcome to the complete pencil drawing and shading course. And this course, I'm going to teach you these items. Introducing the needed agreements for rescheduling acquaintance with shadings and color. Inches. Learning how to make this simple geometrical shapes volume. Learning how to stage and shades simple shapes like tree, flower, the NVENC, and horse. With the principles of making volume and how to use different pencils for shading the shapes. Teaching how to draw a real eye from a photo. Teaching how to draw an ellipse from a photo, and teaching how to draw a radial nodes from a photo. I hope you enjoy this course and it will be the one that you are always looking for. Wait for my next courses.
2. Introducing all of the Equipments that we will use in this course: Hello my friends. Today I'm going to show you the equipment we need to do this course. The pencils we usually use are these graphite pencils gold favor, and they have different kinds, H and B, but we usually use kinds, especially B2 and B6. You can also use other pencils, but the darkness of these pencils are enough for our job. We can also use the Staedtler Mars LUMO graphs that I usually use, the V8. The pencils that we use for primary sketch are these. But for this course you can also use content pencils and be prepared for next courses. Konnte pencils that we use are different. We have Faber Castile, which has hard, soft, and medium. All different kinds of Parisians content. For example, B, HB, and this kind of content that you can use it too. Now, aside from the pencils, we use different kinds of erasers in a new job. One of the most usable erasers are this kind of erasers, knock eraser, that we sharpen it with a cutter and we use it in different parts of our job. Days. Kind of erasers have different variations. One of them is like this or one which has a thinner edge. And we have this pencil eraser. You can cut here with the cutter and you clean your job. The brush. The other eraser is an eraser. Fish are actually celled cubic and are like this. They are soft like DO. And I tell you later that where we can use them. Elasto eraser, I'm going to show you is the electric eraser has different brands. But the most important thing is that he should have, it should has a great engine. And they can, they have batteries. And we sharpen the top of the eraser and we can use it for adding the lightest spots. And you push here terms. Now we go to our other equipments. Definitely you would a sharp nerve for your pencils. And we use a cutter for sharpening the cone TE and erasers. And even the paper. Other equipments are different types of faders. They have different sizes. You can have some of them and use them when it's needed. And main equipment for our job, our brushes. We have different kinds of brushes, but the one which has the most short for me are Bristol flat brushes. As you can see. This is Bristow brush. They have a main job in our work and have them in different sizes. We can also use different kinds of brushes. For example, these brushes, which are a little more softer than the other brushes I showed you. These have less use, but they are flat and more soft. And we can use them for so little parcel our job. Maybe we have to use the oval shape. They call them cat tongue brushes because of the shape of the edge. Sometimes, sometimes it May use them on our job. And one of our most usable brush is 0 brushes. It has a big hedge, put the cut it so we can use it for details. We have just some other pigments I need to show you. One of them is graphite pencils, which has different kinds. Some of them are like base, which we use to transfer our sketch. And also the sender. Soundings. They can be soft or hard that we use both of them. And definitely we have a ruler. It's so good for us. It helps us. Something that we don't use in this course, but you may, It's better for you to know that. And you can also use the discourse with these is cold. I use Crito caller calls that has two kinds, piped or cubic, that each one has their own use. And I tell you about the uses and next courses. And at last, one of the most important things are our papers. This as a stem BAC card, which is a creamy or milky. And then way is no, it has a low gram. But if you're using content and, or coal, you can use Fabriano card, which is, as you see, is whiter than Shambhala. Steinbach is 120 grams, but Fabriano is 220 grams. And it has different textures in front and back that if you want to use, we use the back of the current cardboard. But for now we use a stem NBA for discourse. France. Now we go to the sketch.
3. Introducing the pencils and taking a closer look at them: Hello my friends. Today I am going to talk about the pen, says that we're going to use. The pencils we use are graphite pencils called favor. But you can also use other brands and maybe we use it. But the things I'm going to tell you today are true for other brands to pay attention to the number of the pencils. As you can see, we have H series, F pencil, pencil or H B, which has between them and be sorry, pencil. We use these kinds of pencils in this catching things you should know about this. First about H series. They are lighter and they have a harder tip of the pencil goes higher. Age C2H4 h. Our pencil will get lighter and gets harder. Pencils a, F&B or in the middle. And B-series to B4, B5, B and C expand my face. As the number goes higher, they get darker and tip will get softer. Now I'm going to show this to you on the paper. I put them aside. Look, this is B6 pencil. You can see the darkness of this pencil here. This one is a B5 pencil. I tried to use all of the pencils with the same hand pressure so you can see the difference in darkness and other things here. This is before pencil. And aside that you can see the lines we can draw with them. Five and the four. This one is B to C. I use the same hand pressure, but this lighter pencil. If you pay attention. When we are coming to age series pen so slowly, we have less fading in the shadows. I mean, less fading in the shades. Actually. H pencil. H pencil. We have the colors difficult. It's hard to get the colors with these kinds of pencils. And a 4 H pencil. And also the H series continues like these numbers. Here. You can compare days, colors and shades together and compare the pencils together. And many are using them for different darkness. You can use different pencils for making darker spots or firm drawing different lines. Depending on how much dark you want. You can use these kind of.
4. How to make shades with different tonnage with pencil : Hello, my friends and friends. Previous practices, spectrums, theories and other practice that we can do for this really to draw the small squares or rectangles separately in days. Depending on your time and your patients with practice, you can just add today's rectangles or lower numbers. Our goal is to have cohesive shadings, different spectrums in these rectangles. For example, in this form, we have dimmers, dark shape that we can get from a V6 pencil. We tried to do this with a good head pressure and in one direction, corners and size which had left butt. I don't want to have spectrum and we just want to feel the rectangle with cohesive shape. We can lose their pencil. The thing is improving here is your head pressure that she be safe and should not change during the shading and or heart is failing to take off a pencil where it was left. You can feel it. Now we are going to fail our second rectangle. Bit. Lighter shades. Try not to jar kinda corridors up the shades. Shading color. Who? The same contrast. You demo praises. And more rectangles. Shading colors is better for you. The next queue, the end is lighter than the previous one. Change my pencil case. The goal is to have a better control on your hand. And it can make all nasals patrons and different colored shadings. We'd want then. You can also have it with different pencils. Can do it with our pencils. Too dark and his editor just from the title. And the next one. We want to make it lighter than that. And as much as you want. And if you have more time, we can do it from this shade, from those Shane and 12 sections to have rectangles. So the shades completely then.
5. How to create a shadow with different tonnages - the step of fading the shadows: Actually for having a more clear and cohesive shape, you can use fader and make it more cohesive. But the point is for the parts that are completely dark, the fader makes them a little bit lighter. When you're using a fader, be careful to control your hand pressure. And because if your hand pressure is more or less good fader, that can cause problems in your work. For other parts. Because they are lighter. First, I get sanding and I clean my fader. They take the extra darkness. And we'd clean to clean took up Fader. You can continue your toe like this. Maybe you pay attention. For these paintings. I use the side, so the faders, and I use the tip of the fader lists. And again, I cleaned my failure with sanding so it won't bring darkness into my work. And these basic practices will be so good for you. So I advice you to reforest starting your job.
6. Dark to light spectrum of the shadings: My friends. Today we're going to practice shading and contrasts and how we can make a different shadings. One of the good practices for this is to work with different pencils. Now, I've chosen basics pencil and you can do this practice with different pencils, different shapes, bit different pencils. For this, I press the tip of the pencil to the paper. So I take its sharpness. I want to use the side of the pencil like this and make the shadings like this. For having this shade. We start from here. And we want to do the shadings from dark to light. What we do is we put the side of the pencil on the paper and we assert to shading. As we come down slowly, we reduce our hand pressure. Again. We come to the top and with a little more hand pressure. And by doing it again, the Doric and the shapes. But as we come down, we pay attention that we lighten the shades, the reducing and pressure. We come to the topic and we go there again. It repeating the shadings. You will definitely know that the shading that you are gaining just fails the paper. Each time you repeat the shading, you feel the white space as white spots on the paper. And the dark part, you have a more cohesive darkness and as same as middle and light parts that it makes the whole or cohesive. And as you come down, you have a clean and clear shape. This is one of the best practices for having the contrast and shadings very well. And semi shapes. And other practice says as the practice of Globe and other things that we drew, you can use this practice to make your shadings better. If you pay attention. In this way, we just pick one direction to do with the shadings. For example, only from right to left, or the opposite way. But we just do it in, only, in only one direction. So our hand will get us do it in one direction, not going and turning back. Because if he go in, come back, you do the shadings as going and come back. It makes it makes some spots. And our work won't be in order and discipline. Or if you want to start again, you can do it the opposite way, but you shouldn't go toward and backward and vision and go forward and backward. Just do it in one direction. It should be in one direction from the beginning to the end. This practice helps you a lot to take control of your head perfectly. It teaches you how to control your hand. When you need more darkness, put more hand pressure, and when you need less, but less hand pressure. And you will learn that which darkness will come by which hand pressure. You can do it with different kinds of pencils. So you can learn each one of these pencils, what differences they have, what kind of contrast and different shades they gave you. And it helps you that when you're sketching and shading, it helps you to know your pencils but you're using and where to use each pencil. The next levels, you will see these kind shadings. And for you to remember, I write for you that this is basics that we used and you can use other different pencils. Many a TTR, a spectrum. You can do it with a pencil or you can go to fader and use a fader and use it like this. Try to control your hand pressure gearing. Fader, planar part of the fader, I use it. Now. We have a completely dark to light shade. Now, you can do it the other way. I mean, you can go from the light to dark. But this is a more basic practice because in the sketches we always do the shadings from the dark horse to the light parts.
7. How to draw a sphere using a circle (the first step of shading the sub-work): Today we are going to work on geometric shapes, some simple geometric shapes, and make them into box and volumes. The first shape we are going to practice is to draw a circle and turn it into a globe. For drawing a circle, there are different ways. One of them is to rotate the paper. You can sign dissenter, better and easier and you'll have a complete perfect circle. Okay? For some wrong parts and imperfections, we can correct them slowly. For sketching, I'm using a B2 pencil because at the same time that it has enough darkness, I can easily erase it. So if some part of the job went wrong, I can easily corrected with an eraser. Of course, all of the pencils can be erased. But H series pencils because they have a hoarder tip. The line that we though we done, is harder to erase. So for sketching, reuse lower kind of B-series like B2 or B3. I'm going to shade this way. We are going to shade circular thing with curvature. It's better for you to keep your hand at the inside of the curvature because of the hands anatomy and because it's easier for your wrist too, turn from inside, it's better to do it that way. Because this way it's harder. The second thing which is important for shading phase or sayings or volumes, is that you should always do the shadings from the dark parts to the light parts. Because we turn a geometric shape to a bulk. We can do this with shading. For shading the globe. We start to increase the Shays and come forward. Never tried to get the final results in just one step. Do it step-by-step, slowly, so it will come clean and better. The hand pressure in this kind of shape is so important. If it's enough, you can get enough darkness. And also the increase or decrease of the hand pressure causes the increase or decrease of the shadings. So you should have complete control on your hand pressure. So you can put more darkness in place you want, and less darkness in the place you want. You can show the volume very val try to feel the white parts of the paper. Okay. To get the shades more for our art. Of course, the shading depends on the material to, but now here our goal is not to show the material is just to make the volume. So now it don't pay much attention to the material. Mean how we shade to show each material. It's not important now. Just focus on making the volumes, which shading. The other thing I forgot to say is that now for shading, I am using a B6 pencil because I want lots of darkness in my work. And for more darkness is whether to use a darker pencil to take the darkness with other. When I'm coming to the light parts, I can use some lighter pencils and harder pencils like b2. This part is better to shade this in the direction of up to down. See the direction that you shade is important because it gave a shape to the volume and the geometric shape. So be careful with the directions for each day should be correct directions. Again, rotate the paper and have the easier direction for the curvature, your shading or the shape that you're drawing. The opposite port. For sketching this kind of glow. As much time as you can have the other shapes, but there are shades. And you can field is light parts completely so it can be in a better shape. And complete these dark parts as much as I have the time. But it has lots of work to do. And you can do it.
8. How to draw a sphere using a circle (the second part: completing the darkness and volume of the sphe: Okay. We continue to darkening the job. If you pay attention, the slat of the pencil just drags on the paper. This thing helps the fading of the shapes, but it helps our job. Or a shape-shifting more clean. We shaded more insight. Something I need to tell you is that when you want to hold the pencil in your hand, you have to find ways. One of the ways is like how you want to write. It, can do it this way. The other way is that you put on your palm like this. And it's good for shading with the side of the pencil, which you can keep it with your finger and you hold up the pencil with these two fingers. I have different ways sketching. We usually use these ways. Pay attention then you can use your wrist very well and your hand should be free, and it should turn free and don't take your hand so hard. It should be free. The fingers, the wrist, and the R should be free. So you can get more result. As much as you do. More shading is better, but now I think it's enough.
9. How to make a pyramid with drawing a triangle and shading it: In this set, because we want to make another practice for the volume and having the volume which shades to sketch a cone together. For sketching the cone, we have a horizontal line which the bottom of the cone is there. There is an overhaul, which is actually the bottom part of the cone. We determine the middle of it. We draw a very pale line and determine the central dot, v. Connect these two dots together. And then we have the cone shape. It both sides, we do it for both sides. We have a simple cone, is actually a triangle with an oval at the bottom. Now I want to make it a cone. For this thing. For this job, we are going to shade it from one side. Dark shading from the side. We drag them upside and in the opposite way. The important thing is that they be, they should be cohesive and the shape should be completely correct. Together. Be careful that the bottom of the cone has more heart shadings. Comparing to the upper part. We come forward, we lighten the shades. And in this part, we're going to show the light here. In this part. We rotate. From this side. Again, we do some shading, just a little thin shaving. So now we are going to darken is more have more darkness. In these lighten parts. You can use the pencils. Like for example, before. This part should be feeling very well. Made this part smart, clear from darkness to light parts. And make things as much as you are. A variety of gray and gray colors. When you come from dark to light, you will have better volumes and other shapes. For this, you should have more practice on shadings or half shadings. You get this better shapes. Shavings. In the opposite way. Helps us to and make actually helps for having more accurate shape and the shapes that we did before. And it actually fades somehow. The previous shapes. Generally when we are shaping in their correct placement. And we do it repeatedly. It will get so beautiful and natural. Shapes here needs more work. Okay.
11. Drawing a tree (Part 1 - Initial Drawing and Shadows): Hello to all my friends. Okay? And last step is we get to u. We know about the pencils now we're going to use them to have some simple sketches. One of the most simple sketches is the sketch of a tree. I started. While I'm doing it, I'll explain some points. Drawing, primary sketch. We can use a B2C pencil, which has an average darkness. We tried to do the primary a sketch very light. So when we are adding the details, we add darkness to. To start off, our sketching should be just a general escape. No details. Bridges have a general shape of the tree trunk. The general shape of the leaves. Just show it with simple lines and don't make it difficult for yourself. Next steps, we go into more details and then more focus. We show that it's hails. Sketching the trees are so enjoyable and interesting because you can go into the nature and I have the sketch of different kinds of trees and get a good experience. Now it determined a general shape, which was our goal. Now we are going to do some details. And these details are still down to any shadings. We just do some texturizing of the tree leaves which we sell. For example, we can complete these parts and gave them more shape because a real tree Is not this normal and the leaves can be more inside or more outside and they don't have any special order. And generally anything in the nature can have order and disorder at the same time, which gives them and natural beauty. And darkness here we determined the branches here. Now we want to Dave's here, which are going to separate from the side beliefs. Up to here, we just determined a general shape. And we just continue with the tree trunk and try to get a better texture from it. Also shows some air in the bag. Usually the parts in the bag should be more opaque. From our original sketch, our main sketch, LAR going for a tails. Well to make this branch in the bag and days branches and the front. First sketching data k things, I want to use a darker pencil which is B6. I want to darken this part and hotel so I can show the deepness of the leaves in these parts. Because we are drawing a tree. And then these cards, we're going to show leaves. We shouldn't have any orders. And during the shadings, we should show the disorder and the texture up the leaves. Move your pencil on their work freely and don't take it hard on yourself. Let it move freely so it can gives you better textures. Maybe a branch here makes them more, work, more beautiful, natural. And on the other hand, we all tend to have, again, a deep part here. You make the shadings. This part two, we want to make depth of the leaves. These parts of the leaves that you want to make them prominent. We keep them light and for every Cupid for later. Again, in these parts, we can even tell the chip off the leaves should be darker. When needed enough darkness with B6 pencil pressure to get lighter shades. For getting the lighter shades, we have two ways. First way is that you can change your pencil and have a pencil with a lighter color. Changes to reduce your hand pressure. And get the lighter shade through the pencil that you have. I'm doing the second way now. Slowly. We feel the light parts. If you pay attention, I didn't change the pen subtle and doing the lighter shades with that basics pencil. Now, I want to change my pencil so you can see you can do this both ways. I picked a B2 pencil, as you can see. And I slowly fail these parts, these spaces. And I pay attention to the shape of the leaves. So day gets into the right direction. First sketching different trees. It can do it in different ways. For example, tree which has, which has leaves or other kinds of debates. Each one of them can get done. We different ways. You can be creative and just do the leaves in different ways. Here we put some darkness. We do the lighter leaves in this part. And here we can use an H pencil or frond lidar leaves. You do the shadings and they, they'll dead leaves which are on top and in front. I think our B pencil can make a better shape here. But the part that got the most light, don't lose the lie there and don't let it, let the work to be flat and in one color. So just keep the light there. And I shade a little on the tree trunk. Our goal here is to make sure it's just to draw the simple shapes and practice with our pencils so we can get ready for and then more difficult as sketches or faces sketches. So now we just don't get into that texture x sketching. But later when you get used to using pencils, we can easily do the wooden texture, the metal takes sure, or other textures. In your even very simple sketches, you can show them. You see in the leaves. I use the tip-off pencil more. But I could even used side of the pencil like this or like that. It doesn't matter really. It depends on you that how you want to shade it, and you can just put some variety in your work. We'd shade with the different parts of your pencil with the tip or with the side. You can have different kinds of shades. Depends on you. Any, they'll darkness. Here. You see. After that, it is shaped with a ladle. You understand that which part needs more darkness. And you can add these darkness so you can have a better volume. I want to separate these kinds of leaves, this group of leaves and adult, or darken these parts. So the light and prominence of the middle part shows more. The more time you put on it. You can even have simple sketches, but very beautiful and natural as sketches at the same time. Don't forget that all of us can paint and draw. It's just important that we look correctly and we do it correctly. Maybe some of the bleep, these leaves are coming down. Any disorder just makes our job looks, look better. It may seem more natural. If you like, you can use any fader on your job. And the parts which you darkened. You can use the fader. So it gets more natural. Sometimes you just don't want to fake the parts. We just want to show the hatches were made to be shown. Very well. As I said, it depends on you. You don't have any necessity to fade them. It's just it's just a tree. And you tried to do it real and natural. But it's not just it should then just exactly look alike the picture you drew from. So it should have been necessary for you to fade all of the jaw. Just try to enjoy your sketching and do it as you like.
13. Drawing a Rose (part one: drawing and shading flowers with a pencil): To continue our practice spade graphite pencils. We're going to sketch gross flower as we do the tree. Or going to draw the general shape of the flower. Then we add the tails and at last gave our flower then volumes, damages determining some lines. See, I don't get in sketching details or curvatures here. I'll just do a general, general shape of the flower here. With some sharp lines. I have a general shape of the flower. Now we're going to make more details on it. For example, here, to show these PEDOT that is a big curve to the outside. Or here we add a petal along this line. This part, the lines to the downside. And inner part of our flower. Inside of our flower. Inside of the rose flowers. If you paid attention, it's actually you can see these twisted petals. I can maze. So we determine the placement of them. I think pedal and could come from here to this car and another one here. And this petal which went out this way. To enter PEDOT, redraw it. A smaller. You should be careful to show the special order that the pedals are on each other, that the pills have. We missed a petal here and this inner part. Now, up to now we have a general shape of the flower we want to draw. I want to add a petal here to have a more beautiful flower. And just continue this pedal and the outer. Well here. I think if it's bigger, it would be more natural and more beautiful. So we erase the our primary line. Needed anymore, erased it, and this pedal gets complete almost. And we can also drive more wide. So our rose flower looks more Baker. Now I'm using To pencil for my primary sketch. B to HB. B and F are good pencils for primary sketches because they are dark and light enough. So we can erase them easily. And we can see them easily. If you use an H pencil, when you want to erase it, you will have some difficulty, but We p-series. You won't have any problems. As you can see, I can erase them easily. The outer petals which are bigger, I'm going to complete them now like this. With completing them, I'm actually giving them the shapes too, at the same time. Hanging their shapes. The pedals that went out from here. We can show that these pedals had some returns. They were vented inside the prominence of the rose flower here. And the shapes it can get. And from this side can make it more open. Paste the flower more open to show its beauty. When you're copying from a model. You'll have limits if you want to do a natural thing. But if you are doing it without a model or you're not stimulating, you can use your creativity and your more free. You can add some details that may sit more beautiful. Or even. You can just correct some wrong things you see in the job. And this part we determined. You can also put a drop here. And one or 12. And the shape of these parts of the flower, which is actually the beginning of the pedicle. These green parts on there. Idols. He determined them and eat them more darker. Now we want to shade our flower slowly. Usually the tip of the pedals. They have some curvature and prominence parts. Now, we can just show on our pedals and shape them bigger than what we drew before. And just erase the extra lines which we don't need anymore and our primary lines. You should definitely erase them from your work to start darkening taste parts. And as we are correcting the shapes, making them as we want. We also try to determine the dark parts. So the volume of our war gets, I mean, we can make the volume, our work the same. You can shade it in different ways. You can do it in circular movement or hatching. Or you can just turn your pencils. I mean, you can use you can use the tip of your pencil or you can use the side of your pencil to shade it. And it depends on you which one you want to do. So you can shade it in different ways. But generally, our goal is just to have the volume and make them volume. So the way of shading is up to your choice. One of the commitments that you can use in these kinds of shadings is fader. After you made the darkness with their pencil, you can go to your fader. And for fading and scattering the shades, you can use them. But if you don't like to use a fader, you should change your pencil time to time. For shading the lighter parts. Pay attention to direction of that. Pedals. Sometimes they go, sometimes they are provenance or go outside or inside. So pay attention. So you can shape them in a correct way. Now I'm doing the basic and primary shadings and these parts. And then I use the fader to scatter and fade them. Usually you can see some very, very tiny small thin lines in the pedals. Or these cars which the head as bent to outside is bent it outside. They under the petals are darker. And also his part, which is going from down to downside to the outside. You should know that it needs more darkening. The country. These parts shadings. Some parts we need really heavy and strong darkness. Like for example, the Spark Core showing the depth of this part. We use more shapes and make it darker. And in the contrary, we keep this part quite the contrary. We can just show up Banting. And I come to that bigger petal. You can shape these part that shading. Pay attention to the venting of the petal. Beneath the petal. That picture here. Again, the edge of the petal is shaded so carefully and shapes. It shows us the direction of the painting. They had shit or shaded. In some places. Because we don't only want actually this order, we make a bit disorder to make our job more neutral. And of course, the sides should be more darker. This part, in this outer darkness. A pay attention that especially in rows fors, the outer petals are more open. So comparing to the inner petals, they have different, more different shape. As you can see here. Again, if you pay attention, the, consider the curvature of the petal and do the shadings. Guitar can then lower part of the petal more than the other parts. Chrome decide we do the same in our pedal, should have some shapes here. And I truly, this spurred the inner part and the shape the inner parts. And you shade the middle parts. And try not to shade outer part so much. They just keep the light. I got this part. We do the same. We don't put a lot of shapes. We try to make the lower part more dark. So we can show that painting petal better. Of course, the shapes in the light parts. We make the shapes in the light parts. So we can show that it's not flat and it has volume. So for you to show the volume, you need the shapes. Because the lines by themselves, they cannot show the volume of some ink, can not show the bulk. Just complete your shadings slowly. It has a lot of patients. Also the pedicle of the flower. We darken it into placement in the place which is under the leaves. This is a simple flower that we could try it together. And next level, I put more details.
14. Drawing a Rose (Part 2: Working with Eraser and Completing the Flower Design): Okay, we are going to use a fader to scatter the shapes we did. For this shabby can use side of the fader or the tip of the fader. I shall explain that. You can just claim the failure or sweep ascending. You just drag them understanding and you can clean the sides of it. From here we start to scattering the shades. Become too down. Become down into parts which you want to keep completely wide. Use your fader. Or at least not when you use the fader in dark parts before. And it's black. It can just use it for having more shades in the course to shade it before. And if you want to do the light part so you can just go cranial fader and then do it for them. Like parse, he uses foreign a light parts. You see even the parts you didn't shade with the pencil, but you want to, uh, you want them to have a little bit of color or darkness. You can do it with your fader. When you, when you are using a BCL3 pencils, you can use a fader, but remember the H series. The H series pencils cannot be easily fade with fader because they are harder, they have harder tips, so we cannot use our fader as easy and as we use it on B series. And we try and draw up here that after we did the failings, we can shape to drop and we can work under drought more from the air. When we are going to alight parse reaches considered directions and tried to get the shapes in the right directions. And even from the down part. Today, we tried to get the right directions, which is fade. The light shades on our pedals and recur to the smaller petals here. To shape. To keep a shape to the shapes we made and have their correct form. Correct shape. Just shape with the fader. And who's the fader? A new linear movement. And now scattered lines, we fade it. Wherever you want. You can use rigid sand to clean your fader. Or you can do it on a clear surface. So a pencil powder gets clear and don't let the powder into your light parts. It's more clean now. I just want to try and get a little more lighter planes. Lighter parts here. So I can make these shapes. As you can see, is we could just sketch a beautiful flower so easily without any complicated equations. We did it and he had a good result. Now about this drop here, we are going to forget. I should say that oocyst shape it with a pencil. We darken it and it'll in some parts. And again, we get a fader, the dark in the upper part of it. We try to keep the light with a hot, with an H pencil. We draw a line beneath it. And when an eraser, we make more likes. Rich shading beneath the drop and darkening this side. Petal. We can get the shape of the drop, dead air. I sharpen our eraser until you get lie more light in our eye drop. And you can also do this thing, bid and electronic eraser. That and next steps and next levels, I explained explained that how you can use those kind of erasers. Best practices. You can draw beautiful flowers with this way.
15. Landscape and building drawing (Part 1: Linear drawing of the building): Good evening my friends, my dear friends. Today we are going to draw a photo of a lighthouse. This is catch. We're going to use the volumes that box, the geometrical shapes we have learned and to shavings. For days we do a primary read, just drive primary, a sketch of our vitals. First we come to the light part, I think to me, the light tower. Religious make the shapes. I'm using an H pencil for this. And the night before the primal sketch, it's better to use a light pencil to curvature that we had here. We tried to have the exact curve here to go too much further details. I mean, actually we don't go for it in details at all because we just want to have a general shape and an x instead pages complete this sketch and we add so much more details until it P1 to show the building of our lighthouse. And for this, we draw a roof top 48. This roof to maybe Collin shapes in here to hearing and we determine the order of the rooftop. This word here again, we have something like something like a chimney and just slop bridges. In this part. They add on both sides. To speak as employee perspective. The slop on this side can be ML snow or less a snob in this side because I've been perspective. This part. Make it a bit longer or longer. Then they add our site. Like this, the shape it is far enough that they obtain the data to data. And also decide. Now we can determine to placement that doors in your brain does. It goes up into the perspective previous Harmon than we knows, we can have questions out the door. The app. So here, it's good to be here. Great example. We can have a down point here. It down by prior year, just going to the back of the building and everything. And they officers here and here. This far is we can draw some fancy sign up to be a link. And showing along this way. Again. Or we can put this behind these fences. For example. Here we have some trees. Then we work on and maybe some humans, son Cato can be here or here. The general shape of their work.
16. Landscape and building drawing (Part 2: Adding details and shaping the building): And the rest of our work. I have friends who are going to start from the upper part, Kleon to determine the darkness to dark bars. So will the volume off these parts can be shown well, we had a strong darkness, could make it beneath this part. And we draw these Parts line here because our sketch is actually linger. There are logs and we can't do anything about it. But when we are doing a realistic sketches, we can just keep the lines these easily. And we should just have the volumes with shading stopped with the lines. This is like the cube that we've said before. It has angles and sharp sites. So each shade of a, each part can be separated from the other part. The first part B, keep it like this part. We have a medium shade. The prominent parts we want to show we keep them more light and smart. Again, we separated the shadings. Maybe we can show some more Baker lines here. We just want to say that these two parts are darker than the other parts. So we made this difference in the shape. Generally we can show this edge ladder to say that foreigners got more light. Teh upper part, which is which the light can be there or lighthouse can be either. We are going to shape them, shape it a little, drag the corners and edges more to the outside. And we drove in inner edge in the inside part. Really tried to keep them. Who should keep the cemetery? And the lines which came from here. And we draw them, shape them. Maybe two lines can be seen here, 22 columns. And maybe there is a ladder here. The upper part of this part. He shave it. In the course which they have angle or the columns have come today. We can have these shapes, are these edges which are coming side. But be careful. In the shading phase. Shape them like the parts we shade the globe. Become from the dark parts to delight. Henry tried to show the globe all shape, the circular shape. The shading can include two shapes to global shapes that we shape them to. This far. We don't forget the inner product here because we want to show the depth of it, the dark in it. And we actually make a shape here. And from here to down. It can be any shape. And the columns which are behind it redraw them lighter. For making gains, for giving it a better shape. We should. Radar can sides to get into better shape, which can be anything. From here to down. Then you're coming down. The make strong lines. And here we tried to do the same. And it should be symmetrical. And we draw the shape of this part very well. But as main window here, which is actually a window in the hallway into a stairway, actually in the lighthouse, stairway from inside. And half circles here. Maybe some crescent here parallel to these darkness you've made. So it can just completes here are column shaped, cylinder shape. You can feel the rest of the part, the rest of the space with hatching. Actually this part as a cylinder shape for us. And the shades day down to cut. Suddenly. They come from dark to light part. And a shade here beneath this part should be stronger because the shadow of our lighthouse is actually here. And the shades should be stronger. Now, this part just done good to launch into the details. This side we do. Considering the light's direction, which is from here. We shade this part. The Create, then CNAME, shade, shade and darkness which is needed. We do it the darker pen. So we did with hatching. A darker pens. Thank you for making the shape of the roof tell. Domain hatches should be in the direction of their rooftop. Her camps, days parts. Even do SMM cheat the opposite way. And I'm the two here. He's made our rooftop. Now remarking of the downtime, doing the darkening and lightness. Maybe if this part is now coming, it's better for the roof, which is the words, you dry it. And the outer line of the beam. Now we want to give one more shape to our windows. Just be careful to keep the cemetery sites parallel lines and straight lines needed for shaping our Windows. Windows. And then you can have some details in your genome. Darn can enter part the inside and maybe interested in Puritans. Puritans here. You can kinda inside the inner current, determine the windows this far to be, show the thickness of the word. And again, the dark in the inner parts. Always places which are like these spaces inside of the window. Dad, darkness, clear. We can see clear shapes inside except there to light. Some parts from them. We have darkening.
17. Landscape and building drawing (Part 3: Completing the building and drawing a simple landscape): To continue our work, we go to the front of our building and we should draw the door. We knows. We tried to turn to observe perspective, perspective to darkness, to show the dead space in here. In these parts. We are on the edge of the windows, dapper parts. We want to make the inside of spaces. And we do a three hour for H pencil which has a senior tick. And it's more. And I'm gonna quit for this part. We can show two series of these shapes in here. And we darken down widow parts. B, c, expense, so we can show the depths of these parts. Now, we darken deadlines we drew, and they tell and lead them to show themselves more. The second window. And we repeat these things in there to do the same thing for that. By darkening and the depth of the mean to get to these parts here. And darkening the lines side of the window. And we do these two windows in the back. Who knows which own the home. These parallel lines, to make me show that they've mistaken and I say false law shouldn't that your primary lines should be lighter. So if you've made a mistake like me, you can just corrected instantly. Sees windows are all. Either way. I just put the darkest spots as to why this falls will show themselves As magically that force on the muscle. The main lines of that window. Now we go for the door, and that door is open and we make this part edge of the door that shows the thickness of the wall. Radar can inside of this part. The main draw, the main line. This side of the bed saying with this angle. Because they've imagine that this side of the building has got done light. Because of the live interface cards. We don't shape this shape depart. We don't do much shading in this side of the building. Now we've drew, now we have actually drawn here event and we darken it. So we showed the depth. And the same step. Draw on the bottom line. We bolt the bottom line, which has actually separated from the ground. We can do the shading and a hatching way. And for this thing, for this work, I decided to work with HB pencil. You can do your hashes in one or two directions. It depends on you and your interest. We feel like you can use the pencil to make fade shades, deciding shapes instead of hatching. But now I've decided to do to hatch in general sketch. And I don't want to do so much of the details, just the general shape. I shoot opposite direction on the day. I like to put the opposite shadings and some places which can have more shades and can lead to darken them. Now I want to keep the car to developing touched. We're not going to work on some part of it. So we can keep failing to the bears that this board has got more lights. Now we're going to work more on the details of the slide house in front of the lighthouse and read these two pens. So we're working on this shapes, shapes that we have made. And they tell the path that is going to reach the fences. So we can connect these parts. Defenses can join together, read so thin lines, spots. They can show the warriors that connected them together. Because these fences have actually wooden texture. We make shapes in some parts. So we can keep the wooden texture. We can make this better. For these parts. We can use the 5 or B6 pencil. I want to see these parts and rake the graph and shape. Side up our pencil. Behind these wires and fences. Around the house. Some grass can be seen. Faze fans that we've considered in this far. They can come more and more and actually determine wall or a wooden fence here for this house. So we have some plants there. And in the back that we encountered work more on them and made them more beautiful. But before that, I think it's better to go to this side of the building and completed that. It's better to first be complete this wooden wall here that they've considered for this parallel lines. To know part, we want to continue our wall. I think up to here. Firm a yard of this filming is enough. Airline doesn't have so much order. Being determined. Our ear is better than some of them are darker and gives us more variety. Because because we want to have the connection between these fences to the ground and make it more natural. We can have some grass and plants here. Again in the bottom. We can make them with the side of our pencil or the two color pencil. You learned to work with different kinds of textures on different material. Try to control your hand pressure. Because if you reduce it. Places and increase in the other places. It gives you a mortgage from shape and a better volume for your leaves. Maybe it's better to do the same for the Spark 2 and gave a better shape to these plants were made here. So these will be cohesive with the other side of the building. And we can work with thinner lines better. As we go to the end of our job. We tried to have more contrast in some parts, then have more darkness and some parts so it can have a better, a more natural. The sketch. We've considered two trees here that I want to give them a better shape in previous practice to draw a simple tree so they can get help from it. Partly few arms. If you want your tree to have another or different shape. You can go through the environment and C and D idea. And due to reshape that you want a change here. And the leaves are horizontal way. Because I think for this space, for this environment, face kind of threes are better and gave more beauty and more natural way. And of course, for this external part, this outer part. If you want to make it more beautiful, which is continuous. Django shape the air in the back. Even here, you can take small shapes of grasses you see here of the grass he see here can make them more lighter. Be careful not to give this kind of textures to March because it can ruin your job, because it should be this ordered. Okay, We go back to our trains. Complete darkness. Because we've considered that the light should come from this way. So the more darkness should be in the right side of the trace. And the left side has more lines. Of course. Generally the upper part of the branches which the leaves themselves, they got the shadows and then the dark in their home because of the lime is coming from the left side. The left side will be lighter. This sort of make disordered textures that gives us the shape of the leaves of these trees. And at the other hand, although they have disorderliness, but they should have a general order because they are actually oh, one kind of leaves of one tree. And you can continue feeling based part. We've considered too small. The immense here. We just do the general shape for them because they are in a far distance, is not necessary to work on a day to a general shape of them. And defenses that we have made. We can shade the bottom part suite of B2 pencil so they won't get too dark. Reach are actually deployed. Switch got less light and they have more shapes in here. I want to continue on. These. Can work on them aloud. You can. Many things. This force are a bit darker, of course. And you can darken them by hatching. Or for example, the upper part of the journal, you can draw some birds. And this word can be continuous. So much more than this. I hope that you can do well practices with this way and I can see them.
18. Drawing a Horse (part one: creating the basic shape of the horse body with simple shapes): Hello again, my dear artists friends. Today in this course, I want to talk about animals, a sketching. With all the things we've learned up to here, we're going to draw the horse. For this beginning work. You can use kinds of pencils, leg B2 or H pencil. And you have a light primaries sketch, but H pencils are just too light. So I've chosen a B, two pencil so you can see them. Okay, First we're going to show a general shape of our horse with geometrical shapes. And then we go to the two shapes. This is the bottom of our ours. We've get Chairman Dan. Bottom of our horse. We can show the front parts. Its neck, which we can show a triangle. And the connection of this triangle to the body. And this far is we have a horse's head. And now we just determined them with some legs. And it makes us that we just focus more on these legs. The tanks. Just draw it so easily and freely. Don't struggle with the details. Because next step, we're definitely going to add some details and work on them. This is a general shape of it. And here is the horse's tail. This is the general shape. Now. One to just, I want to do more care main shapes. We turn these sharp an AG lines to a beautiful shape, that is soda two, I prefer to start from this bar from the head of the horse and show the curvatures all the way down to the bottom. Snag. We take it along to say sometimes readjust, get out of their primary lives that read through the front of its body, which has these prominent course. We show it. The parts. Legs are so creative. Part of the horse's body is thinner and it gets a curve here. He determined this part. Yeah, I want to draw on the horse's legs. India parts. The legs are incur as we go down, the legs gets thinner. Definitely in the first animals is catching. You really need to look at some models and photos because you are not so familiar to me to animals and their bodies. But just try to look at the photos more and continue.
19. Drawing a Horse (Part 2: Completing the horse body lines and drawing the horse's head and mane): To continue, you come to the back leg, this leg. And we determine the shape of it. The horse said, we are drawing. Consider that this force is actually running. And we want to show the movement for showing the movement pre-shared. Draw the legs into shape. Then they show versus one over. So well. The bank legs, because we considered the snakes as they're willing and movements and they are all from the ground. There are no touching the ground. And that includes definitely should be onto grabbed subpart of sketching. We just pay attention to draw them on the ground. So it's better to determine the grounds for our answer. And we know that how much we should continue your licks. Limited space like this and this parse up the legs, which is cleaner than the upper part. This can be a little bit higher. It's above the ground. And click the link bridges behind this one. Can we complete land? Grant the leg behind this, as I told you, we draw from here. And then the frog leg shake off, the leg is bent to the forward. Prominent part of that can be seen less. Then we horse's hoof in the tower, newer system. And this is our horse's legs. Me definitely consider a beautiful TE for our horse. And again, as this horse is, movement is running. We should draw their tail and crest and beautiful way that show some movement. Then we go to the horse's face. The problem card here, right at two forces. We determined the placement, the face. Be careful always. You should do the general shape of this sketch. And then you can go again and add some more details that you want to put first, just do the general shape. Horse's ears, which we draw light in the primary sketch. Now. Another we are sure about the general shape of the horse's face. We can determine prominent ports or concavities, which it might have been different ports. They can show them and have the correct complete shape of it at the ball to ears and placement courses, I, we determine this sparks. Of course, if they had a full press wavy, because CIDR for our horse, we tried and we add some shading storage. So we complete our horse.
20. Drawing a Horse (shaping the body by adding eye shadows and completing the work): We've finished sketching America, the shading phase. The shading with so small hatching, formed by a circle the face. Depending parts. Day won't. Darker shades. I'm doing get rid, be four pins. So try to keep curving shapes for disport, which for these parts which have curvatures, try to keep these shapes. Which shadings. From this part. We should be careful that if you want to add any details, some prominent parts. Now with the shadings, if you want to show the concavity and prominent parts, see the parse tree dark and more. You're actually shined a concave t in days parts. So don't do the shadings or to Hashim sweep that a go h one of them separately, each one of the hatches. Dear friend meanings and special meanings. To switch our buck. We share them with more darkness, forehead pressure or a darker pencil. Now we just put pressures so we don't need to change our plans. So this part is because they're actually in the back. They are darker and shadow of the body is on the Solvay are darker. Or some parts left at joints in these parts should be darker. Sign honestly, as we are working on this chart, reshape this neck to and at the same time as we would just add lines which are needed in the current. Thank them. They have some more or more darkness. In this part two, here. Muscles in the spring day at work concavity that we darkening ridges make these concavities. And with the hatches that we bring from darkness to the light parts, we shaped days curvature. Beneath the horse's body. It has more darkness. First we just do medium hatching and then slowly which is stark in the lower hatches and shading. So the volume of the horse's body can be shown better. Be careful about the curvatures. They follow, they are doing, we are doing good. They'd had chains. It's supposed to show the prominent parts or the concavity is up the horse's body. Layer of head change. In the garden. Baker, back to this guard again. Some center hatches just determined the horse's body. And I actually shows this prominent parts more weaker horse's body. We see pray also served to patching and shading. Slowly. We go to the legs and we do some dark shapes in the back par. So the bank makes this is from parts. We don't shake them to launch this far wishes and back the horse's body. We start strong darkness. We make a dark hatching in the whole part of this leg. As we come down. We can reduce the hedges and considered more. I mean, they can be lighter. We don't forget this part and we shade it. And also here, it means more darkness because aids done bottom part. For having to correct volume of horses body, we need to have a darker shade here. They shake all parts carefully and we do too dark needs to be name and do the darkening the needed from each for it. I want to do they horses. The horses crust here from this sort poor, important here to serve some lines toward outside. And we showed them because we did this as matching and we didn't do rationalists think shades on the air. And under Chris and obtain. They just do as much as it's obey cohesive braid their own work and just shows the shake. We were together though. The TE again, as we said, the nice part up to TE and they'll be darker so it gets more volume. And a outer side of the tape is lighter. You should have this ordered pair in the middle of them so you can show the movement of the horse very well. I hope you have enjoyed it. And you can do more beautiful wars like that.
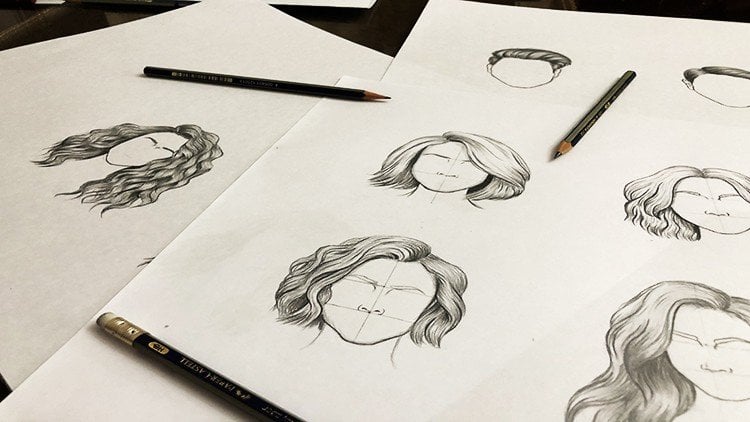
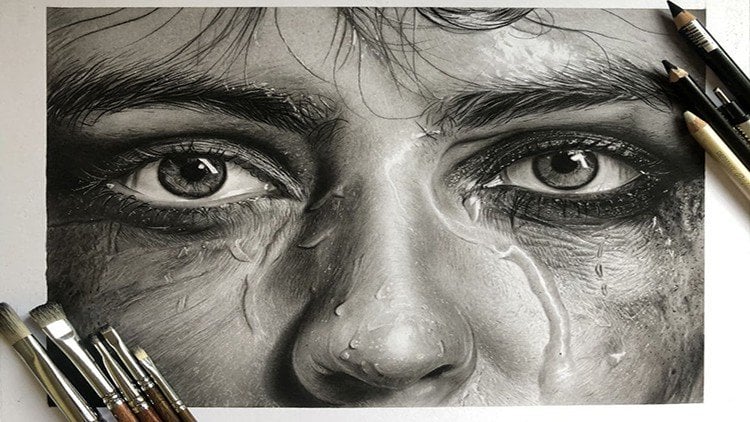
21. Primary sketch of an eye from the photo: Hello my friends, and good evening. Today we want to learn and practice on the learner and primary sketch off the eyes. To begin. First, we draw some guidelines. I've decided to work on this I together. That is an almost normal eye and can be generalized to many other models. For this, we draw some lines in our picture. I use a ruler so we can see the placement of the lines well, the horrors in light. When we are using guidelines, it can be one of the best guidelines for us. We dry it from the inner corner of the eye. And we draw an angle line from the inner corner of the eye to the outer corner of the eye. Can see when we draw a line from outer corner perpendicular to the horizon line, we make a triangle in this part. And two other lines are also our guide. One line from this side, from the right side of the iris and one from the left side of the iris from the most permanent part, will be perpendicular to our horizontal. I will have this same lines for eyebrows. It means we have a line which is a horizontal line for our eyebrow and an angle line. We draw the horizontal line from the beginning of the eyebrow and the angle line from the beginning of the eyebrow to the end of it as forests safe. Now what we do is transfer our guidelines, which are actually here to our paper. Which means we draw the horizontal line. It's better to get the sizes with a pencil. You think it's too soon and there are high possibilities for errors and mistakes for you. It can do it with a ruler for a short time, it's okay, but don't get used to use a ruler. As you can see, we drew a horizontal line and the angle line, the lines which show the placement of the iris. When your goal is to simulate the model, try to draw the guidelines with complete precision. Erase the extra lines. So this sketch will be clean, dry. Lower part of I from here. Look, what you should pay attention to is these negative spaces that are between these lines here, these triangles that be made in these parts. When you pay attention to this, you can do a more accurate job. It makes this catching and drying easier for you. We actually consider the space beneath the eye lashes. Remember this? Because eyelashes occupy some space, which we show that the space with a line separately. We determine the upper lead lied and the iris line at the same time. And we draw a circle. So if there's a problem, we can figure it now. Incorrect it. Dear friends, be careful when we are drawing a full phase that the eyes are looking straight. I raise should be completely around if it was anything else but this, if it was in an oval shape, know that you did something wrong. But when its side view or the eyes are looking straight, there is a possibility that iris shape will be different, won't be around anymore. It will become oval and when it goes to side view, it will be in crescent shape. We save some space for details inside of the eye, for example, where the lights are sparkling. The more accurate you are in this part, I will be better. And when you get to the shading phase, you search lists for details. We put the corner of the eye in its place. And we determine this space. This part. Because gingiva I, normally a part of lower gingiva, I can be seen in full face, in facing angle. But usually the upper gingiva, I can be seen in this angle unless the head is a bit then back, or when the shape of the head and face is different. This part, this part that I'm determining is the part that will be filled with eyelashes shape. Actually, it's this part. We don't draw the eye lashes and first-level, so you'll get used to sketching. And then we draw the eyelashes. In the next step, we go for our lid line. About the lid. You should pay attention to the distance between it and eyelashes and the lower lid light rays angled where it's thicker and has a direction change. The highest part of it, which can be seen. Because these things will help you a lot simulating better. And this is our leaf shape. And here we see a concavity in our model that we draw. We go to horizontal line of the eyebrow. We draw it. We shouldn't know how much the beginning of the eyebrow is in front of the eye and how much the end of it is behind the eye. Compared to these lines, we determine where to start and end the eyebrow. Ebit behind. Here. You say it's not necessary to fail everywhere with lines. Let us sketch be clean. Sometimes a DOD is enough for guidance. So don't failure work with lines. We match these lines, which is our eyebrow guideline. And we determined the lower part of eyebrow. Then the upper part of it. At this level, we only work on the shape of eyebrow, not the shades or other things. My dear friends. He didn't make sliver and other parts a next episode. Thank you for watching this.
22. How to draw the iris of the eye (Part 1: Creating shadows and the initial shape of the iris): Like to her friends in previous level, we did this catching and this eye. He made the back of our design black. You put it on the cardboard. Read through it so it will be bold. And we sticked Papert glue around our design. So at last we can have a good result. We start with B6 pencil. We can clip the dark and our pupil with a sharp pencil. Here, Paso should be so sharp, so there won't be any white spots in the sketch. Then we go around our iris. Be careful not to feel this part like lines. This should be like shading. Even if you come with lines, don't have any hint pressure. And darken it by repeating this parts. So the iris will be in good shape. We dark in around the iris so easily. But in the eyes which don't have this dark parts, be careful to use the pencil less. Upper part of the iris, which is actually beneath the upper lead, always has a special darkness. If you pay attention, this bird is usually darker. Okay. Now, we want to fade away to darkness. We made the medium size drauf flat brush. We fade away. Two are the inside of the eye. We should have a circular movement. Generally shading with brush is with circular movement. When we skim part, I explain it completely. With Fay. There are a small brush. We fade away inside of the pupil, IL-2 and even parts so it toward outside. Nevertheless, the extra pencil powder is stay on your sketch because it makes your work therapy. We use a 0 brush. We organized the darkness we have and we scatter it. Don't have any rush for darkening. You have time to draw here or sketch and paste and darken. Again. We go back to pencil and darken these parts more. And in fact, we draw two lines which are in our iris with more details. This part completely has darkness. These lines are actually the muscles in the eye. These muscles are usually seen darker into play speech, they joined the iris. And also when they come from the corner to this center, where it's lighter, you can change your pencil and use B2. But since this iris is generally a dark iris, from beginning up to now, I only used a B6 pencil. Be careful not to keep these lines to marsh or there. It makes your eye unnatural. We try to keep the light in the parts inside of the eye. Light. And darkness we make around the light shouldn't be darker than the darkness inside of the eye. Because it ruins your sketch has shape. And we tar can this upper part more. Because as I said, beneath the lead, time should always be darker. And can we go to the brushes? And Faye Dunaway, the line sweep true and Lido. Since the middle part is not completely white, he make it gray a little. And we reduce from its complete brightness. Okay? In this step, we need a little pencil powder for making it. We should use sanding. We'll pick up our soft 400 sanding and we drag the pencil onto it. With the dragging, we will have a soft powder which we put on the paper and use it. Be careful to drag your pencil slowly so the wooden part of it won't be tracked at all. Okay. We pick a bit of pencil pattern and we use it for the parts, be one to darken. Without using a pencil. We usually make the pencil powder with a B6 pencil. But of course, all of pencils can be used when need that. But right now, we use the basics pencil powder. And you can also buy pencil powders from the stores and markets if you want to buy. But you don't need to and can make it yourself. And also we can use a fader to create some spots like this. For the parts which are light, but D-ring to shading the light will be disappear. He can use this kind of eraser for this. You should sharpen it. You cut it toward outside and optically and return the eraser and do the same for the other side. Then it's sharp and we can use it for details. For example, we can show it as Show. Use it for showing the eyelashes reflection. Also, if you have darken some parts too much, he can lighten them with this eraser and OK. And you can also use our electric eraser to lighten this area. First sharpening this one, we use rough sanding and drag the eraser on it until it will be sharp enough.
23. How to draw the iris of the eye (Part 2: Completing the iris by creating the final lights and darkne: Good job tier friends. We continue the rest of the sketch. So we want to make more details. In this part, we have the reflection of the IMS shifts. He should, the light then this part, Ellie, no more. Dear friends. We continue our sketch. And this part of the eye, we see the reflection of eyelashes. We draw. These parts are in darkness and they don't show so much. P1 to detail this part a little. In fact, on this stack, we are adding lines to our sketch. A bit pencil powder and shaping parts here. And here we try to phase this border here, but it's actually lighter. So, oh, we use our eraser to reduce the darkness. We usually use sharp eraser, but when we want to lighten it whole part, we can use it like this. And this part was brush, so it got a bit lighter. And we then electric eraser, let me turn it. Let me turn it so you can see, well, if sharpen it, so now, now it's in a better shape and more similar to our mono. There is the line in the middle of this part which we draw. And we then 0 brush. We darken it. And we determine these shades like shapes which are here. Well, I think it's almost enough for the IRS. Now we go to lines. Look, we draw this part here, upper lid line, not completely linear and not with hand pressure. So soft. Just for separating the parts. We do this. If you pay attention to This part, is more recognize the book. And here.
24. Shaping the whites of the eyes (eye ball) and shading the eyelids: Well, now we want to determine and darken the interior parts of I, like the corner of the eye. For these parts, we darken them with a pencil and we make the shapes. And then with a fader or a small crash, this scatter to shades. This I that we have, doesn't have so much light in the corner. And it's dark. But we pay attention to its volume. So The Meno, which is an embossed, should stay lighter so we can have the correct shape. We pick some pencil powder, create airbrush, and B, come to the wide part of our eye. Don't worry with the shades pH are out of line because they have with the shape of lead shape off the island. Even from the areas to art. Outside, we bring the shapes so we can make the faded parts around the iris. And we bring the shades LAL to upper part so we can draw our lid after their deaths. Darkness of this side is enough so we come to the other side. This side is lighter, but actually we should fade this part so the iris fits perfectly. As you can see, we moved up, brush circularly. The line above the eyelid is so dark, so we can easily dried, but a pencil. To this side, we make the line more narrow. This part is darker and we draw a thicker line so we can use its darkness. Before we start shading. Firstly, scatter the line we true. Then we go for our shading. We start from dark side, which is here. Movements shape-based, solved and circular to more perpendicular brush is. Better it is. But I keep the brush a little obliquely so you can see better. We always do the shadings from dark side to light side. And if it was needed to take our brush off the paper. When you want to put it back again, start from the dark part and circularly movie toward the light parts. Pay attention. It's important that your hand pressure is stable throughout the whole shading. I chose a bigger brush to feel this part more cohesively. And then they'll append so powder. Okay. Okay, For this part, this brush is a bit big, so we change our brush. These parts of the eye. And these parts should be darker. So the lower parts can be shown better. This I, that I chose for you doesn't have so much takes chair. And it's good for the first practice. The next, I will be harder. And we'll have more texture. This is the placement of eyelashes, but radar can underneath it. Darkness of them I laid shouldn't be too much. So if you want to texturize ed, they show themselves.
25. Creating shadows around the eyes (creating shadows under the eyes and above the eyelid with a brush): Now we want to shade the lower part of the eye. In pencil powder. We start from apart beaches dark. Phrase sample from here. Or from here. I prefer to start. Again, I'd say get your brush as much perpendicular. Now I don't do it because of the camera. So you can see this pitch. And we shape the skin too. And we did with an almost big brush. We use a big brush for this because it has a great darkness. And we want this to scatter equally. All of our scanner. We always do the bay spit big brush and add the text chairs with a smaller brush. Don't forget. So colored movements. Now that we've turned it upside down, we do the purlin part. For this cane shadowing. Make sure you pay attention to the direction of the scans. Elongation. We drag the darkness and scatter it so slowly and soft plane shadings slowly to make this part. And be sure that you want all of the results in one step. It's normal. You should add shading layer by layer to get a good result and different colour shades. To have a natural scale. The corner of the eye should be darker.
26. Adding darkness and Make volume around the eyes: Okay. My friends, I did more of the sides and the upper eyelid. Now I want to shade this part. We should pay more attention and the alley. Okay, It's good job up to here. Next step. We want to do the skin above the eye. Bro, Alina. This key now, the forehead is unmixed. Maybe there should be lighter in prominent parts, but in this design, now our model has almost flat for her. So we shade it flat for now. And then we go for details. See when you choose a big brush for the base, you can shade very fast. Okay, friends, I complete this came part and we continue in the next episode.
27. Creating textures around the eyes: He can't see shaded this can completely and took the paperclips up. I want to sharpen my eraser and get some takes. This mother's a scan data and have lots of takes, shares, peers and another here in here. And Alaina, beneath the eye. For texturizing. Do some lines here. These lines, darkness and light beam makes the light parts with tests and also the light parts here. At these light parts, orange, so linear. But the ones above the eye are Lehner. In this part, we have the small texture. You can use different kinds of erasers. Usually for the leaner parts. This kind is okay. And for parts that have lots of light, we use electric eraser. And same for dots. Mean we use electric erasers, four dots if they're too bright. But if not, we can use usual eraser like this. After with it, some light lines to dark lines beneath them. Each of the dark lines shows concave a T that we should work on to make. The shapes. And prominent parts show themselves. This part is too bright, so we are committed. And this part beneath the needs or darkness. And we do this well takes sure here. We texturize thing around the dark and light parts, but it's not always necessary. If there are parts, darkness we can use append. So thank this.
28. Creating complementary eye shadows and drawing eyelashes: Okay.
29. Completing eyelash drawing: We sharpen our pencil because it's important to have a sharp pencil for eyelashes. Again, I say we haven't worked so much on this. Iss takes Sure. Our goal was to get the shades and the volume of the eye. If needed. We use 0 brush on our eyelash to make it look more natural. As you can see here, that can take Beta of iris has curvature and we darken this spurred a little. Next level, we're going to draw the eyebrow.
30. Drawing the Model’s eyebrow : Okay, Now we want to go for, I pray for this. We start from the beginning of the eyebrow and we see how much further than the eye it asserts. Different eyebrows, depending on their shapes, can also have different ways for trying. But generally for drying the eyebrows. So much attention is needed. Issue, let your hand be free for drawing the lines. Try to simplify the sketching of eyebrows, which are complicated for yourself. It means determining the shapes, Determine the prominent parts concavities. So it helps you to find the correct shape. So generally for any kinds of hair, the most important thing is to have the correct formation. And after that, you can work on the thickness and darkness of the hair. State-owned have such thickness. I prefer to use B2 pencil to get the shapes and then do the thickness and darkness of the hair with the basics pencil. For drawing this kind of hair, it's better to change direction of your hand. For this, I rotate it so I can have the right angles. I mean the hair which are coming this way. You see we continue. A rotating disk edge can help you a lot for finding the right angles. Having your hand in a good position, curvatures. You can draw them easily. When the hand is in the direction of inside of the curvature, which is actually related to bodies anatomy. First, I draw deadlines which are going downward. Then I turn and draw the rest of them, which are going upward. Well, an important point is to rotate the model. As you rotate the sketch. It's really important because here I can make a mistake. And you see, you might see the directions wrong. But when you rotate the model to, the risk of mistake reduces a lot and you see, you can do it better. You see, uh, we don't darken it in this step. We're just. Basement is going upward. Careful with most of the times, go often, students do this mistake so they see the thickness of this part. So they make this part Baker. And also they get bigger I breath then model. So just be careful about it and pay attention to this from the beginning. Okay? Now we want to darken them, read basics pencil in a step before using a pencil, a few that felt that it is darker than it should be. You can correct it with a sharp eraser, but our sketch is okay now, so he continue within term in here. The details. At last, we can use fader or a brush and the eyebrows. It will become more natural. Trying the eyebrow issue or a con it several times. Don't expect to have a similar model with just one step or in the first time. We also shape beneath the eye. Now I think it can be good to lighten some parts of the eye. Darkness. 0. Good job.
31. Basic drawing of eyebrow exercise 1 (line connection exercise in eyebrow ): Hello, my dear friends. Good afternoon. Okay. The primary eyebrow practices will include two practices which are followed by hedging. In each one of these, we'll start with a simple eyebrow shape that we drew ourselves without a model. Versus step are the lines which we drove from up to down. We then B2 pencil, beginning of the eyebrow. We'd completely sharp lines. First to the liver, then up and then write each sheet end in this space. From here, which is the body of the eyebrow. Their hair will be a lying position and each one of them should have a different angle. This is the first step of our work. Second step are the hair we drew in opposite direction versus steps here. For this, we're having an easier hand movement. We rotated. We want to draw the L along the first steps here means we served from almost the end of these hair with flinging. For the beginning of the eyebrow. We continue this and leave the eye of the hair sharp with the end of the hair sharp. But in the body of my browser here should be longer. Each redraw will get in line position on the previous hair that we drew up to here with the general shape. I want to work on Darkness and thickness of the hair. In the third step, usually, we do these things, darkness and thickness. Usually the lower part of the eyebrow has more darkness. And our pencil should be completely sharp. We want to make more of these darkness. Here. It, having these darkness, we are actually giving volume to our eyebrow. Darkness. Hello, the eyebrow. The upper part of the eyebrow. And definitely shouldn't be completely white.
32. Basic drawing of eyebrow exercise 1 (Creating darkness and thickness and volume of the eyebrows): Between the air we date for the beginning of the eyebrow. We're makes this corridor. Also if the thickness of your hairs and was knows okay. You can drag these parts below and lead tail so the thickness will be okay. If you like, you can use the fader athletes and make a better shape. But because indicis, the goal is to draw lines. Don't put so much time on it and just do it quickly. And here is our eyebrows.
33. Basic drawing of eyebrow exercise 2 (Exercise for hair rotation in the eyebrows): Hello my dear friends. Today we want to learn the second level of eyebrow hatching, which is actually a primary practice for drawing an eyebrow to this level, is to draw the hair from up to down. Just like this. So the first is that is from here to here. And this step, the directions of the hair are different. But drawing them, we rotate this sketch. First, we draw them playing along the first steps here. And in this part, read there are the hair like this. With a crescent shape. We have slowly fail the crescent with the hair. Draw the hair abruptly to the end, draw them little by little to keep the good shape. And so they get filled up to here, the proportion is important. The next step, which is the third, you should draw to the end along this. And step 4, which is exactly the opposite towel. Third step, it means we do their hair, we did in third step in the opposite direction. It's simple reason that the connection between bass part and the Kirsten part is correct. And also the connection or the beginning of the eyebrow to the crescent. With the job, we go to the fifth step which is editing. Wherever is needed. We add darkness, thickness, sticking the hair to each other for for making him more natural shape. Although I tried to do the first is the width of B2 pencil. And for fifth is 70. Can use a darker pencil like B6 for editing. As I said, this is a primary practice and it's only for you to know how we do this. Thanks for your attention.
34. Drawing Lip from photo (Part 1: Lower lip drawing using guidelines): Hello my dear friends. We want to do the sketching. Primary is sketch out lips. We use two guidelines. There is one horizontal line. As you can see from one of the lips corners. And draw the lines. We should draw the line exactly along the horizontal and the vertical line from the wedging the middle of the lips. Careful look for example here the line is not crossing the middle of the teeth. You should consider the wedge in the middle of the leaf. The leaves which are in different angles like these. Again, we have these two lines, one line from the corner of the layers and one from the lips, which we should determine some hose size of the list. Above it and beneath it. Also this part that actually are prelate was separated and this bird for lower. Transferring these lines and points to our paper space is exactly what we did for high. If the placement of the line is correct, yes. We can simultaneously these measurements, you can measure this bar, see if you've done it right or not on purpose. So we can also have a practice on teeth. Try to keep this middle part. Determine the teeth placement. Pay attention to the distance or how much it's beneath the horizontal line. You should pay a lot of attention to the curved mistake. Can you just be careful about this?
35. Drawing Lip from photo (Part 2: Drawing the upper lip and teeth): Again, you measure this distance to the next to be careful that you don't have to do your sketching fast. Now I did fast search Videos lens will be short hair and you can see the results easier. And of course it reduces my accuracy, but you try to do it more accurate. To have a better result. At the end, can determine their lives which are on the teeth. So according to them, you realize whether you drew your teeth size, okay or not. But now I chose basics pencil, which is darker. So it would be more clear on the video, but you can use a B2 pencil, which has less darkness and is easier to erase. We draw the opera lips, shape. This art. We determined allies and the lips. We show here curvature. Actually it is light parts are, either parts. Go on to show much detail so you can determine this part. From this side too. We should have had this part, actually this shape from this side because it's in darkness. If a scene. And after this step, we draw the main lip lines, which are then wedges on the lips. Show we should peas. We can do these shading phase 2 with more details but and do eat in this phase, it helps you locate. And you actually saw these details. And also when you get to the shading, you don't have to look for lines anymore because they've been determined before. I bought the main lines here to be seen better. Complete this sketch like this. So thanks we go today shading.
36. Lip and tooth drawing with chiaroscuro technique (part one: creating darkness around the teeth): Hello, My dearest friends. Well, we go for shading now that we did this sketching before. Okay, we want to do this live today. First we do the T, Then and a darkness next to the teeth. And though early and then opera loop. First, we feel that darkness between lips in the mouth. With the basics pencil. Your appends the should be sharp to fill it completely and we know why the spots why we are doing the darkening, we can do it here to play the funder lips. This model, the darkness is from here to here. So we can do these too soon. The next steps we'll have an easier job. We are led, the teeth are placed in darkness. We darken next to them. And I think those so we can use it for darkening the T. Also we can dark in the upper part. And let's up with a suitable push. The fade these darkness in their places. And and so powder reach has been left here. Or did teeth in darkness. We can use this darkening with the pen set powder and shape them because they're not shown so much for us to work on it and locked. And then we come to the front T Slowly, which are being shown more. Luck. Tooth is kind of bone texture that has a striped texture when you zoom on it. So we drag out a brush, a striped lay. So if there was any lines showing, it would be natural. We'll be looking at in the same direction of the texture. This far that the tooth is under the live has a darkness which is the result of lips provenance. And we try to keep this part and this part, then this part darker.
37. Lip and tooth drawing with chiaroscuro technique (Part 2: Shaping the teeth): If they're light was God, we can have it again. We'd eraser. I use a bigger brush to have her cause the size of these tooth that has to use a bigger brush. Up to here we did a base shade. And in this lower part, there is this particle up the teeth. In this bar, you can use an eraser. If needed, an electronic eraser to determine the placement of the lights on the TI, though their teeth takes cherry's not complete yet. But it's better to have the places for light so there's white parse don't go away completely. It's very to determine the placement of the lights in the space. They work anytime on the upper lip, it's better to work on the upper lip burst so the teeth would be shown there with this darkness. And then we come to their lower lip. Any darkening by Penn cell before a scattering and definitely should be faded. Okay, Now we see less dark. It is compared to the mono. Each we slowly increase the darkness prime here and the pencil patterns so we can increase it. Okay, now I want to use a bit of my pencil pattern. Remember to remove the brush from darkness to light. Always. Kay? To make the shapes and lines more clearly than 0, brush between the teeth be heresy. Now, I work more on the slides. And let us see the result. Be careful. It the space between teeth cause this darkness next to them. I actually shows their thickness. So it should be so careful about it.
38. Lip and tooth drawing with chiaroscuro technique (Part 3: Adding light and shadow and completing the: Okay, In this step we want to do some major and in turn slides on the teeth. We does electronic eraser. Okay. Our major lines are Nase. If that edge of the teeth were not clean enough. You can use this kind of eraser to make it more clean edge of those eraser. And we just, we balanced the light with these eraser and across at the same time like this. Because sometimes the light that electronic eraser gives us is more than enough, but we have to use it. And after after that, again balanced the lights red brush. Okay, we can darken this part more. But of course we can. Again at the end of the work after WE DO x up to here.
39. Lip and tooth drawing with chiaroscuro technique (Part 4: Shadow under the lower lip): Hello my friends. And we are going to continue shading of an ellipse the sketch. They want to shake the lower lip. First we do the parts which we can dark and with a pencil. For shading the lips. We can do in different ways and orders. One way for the lives which have lots of texture is to proceed part by part. It means to make the texture and shade shaded simultaneously. But for their lips which have less texture, we can use the other way, which is actually the opposite way. It means first we make the ellipse volume and then we do the texturizing. And most of the times, we actually do both ways together. Look, wherever I use more pens of our than as needed, I just blows away. If it stays on this cage, it can make an MSc or Verdi. If you forget that there is a pencil powder on that part of the sketch. So be careful where you have extra pencil powder. We should definitely just erase it or eliminate it somehow. Delete it. Okay. I want to do some of these big textures with my pencil powder. Big ones. I don't want to do it in one pays due to volume and then do the textures. I want to determine the texture generally and then go to making the volume. It is sketching the lips. We have two subjects, the volume and the texture. And both are so important for us. If you don't texturize it, your work won't be so natural. And if you've done make the volumes, your work is basically wrong. I'm just building these lines so I won't lose them in next step when they get brushed. And an important point about the lips texture is that it can be dry. It's not just about the skin. It can be about the live, it can be about the skin. It can be dry or salt. Now these loops are soft. But sometimes you see the skin is dry. The difference between these two is how much you can use a pencil and how you executed. The more dry your skin is, the more pencil you can use and softer it is you use, you should use less than so. Because using pen cell makes the skin dry year. And if it's soft, it's a soft this game use basics or by V8 pencils more, but not with hand pressure because the goal is not to get the darkness. The goal is that they're powder is soft and we can fade them if necessary. And if the lips or skin where dry, you can use a dryer pencil like H pencils. And you can use pencils more easily, move freely. I picked a bit of pencil pattern and I want to make volume. Although we are moving line on the left, we have two. We have to have a small circular movements. Be careful not to make the teeth 30. These two sides of the ellipse are more behind so they get more darkness. We rotated to have more control on the lower part and start a scattering the darkness from here. This part as a darker line in model. We drag it up. And this word darker.
40. Lip and tooth drawing with chiaroscuro technique (Part 5: Creating textures and primary light on the: My friends, I completed base. Now I want to texturize it is slowly up to have more light or darkness. We go to eraser pencil. Now because we already determined dark parts. I want to show my light parts with an eraser. Generally in texturizing, both dark and light parts will make your shape together. Makes to most of the dark parts should make it like part unless the darkness or the texture is too small. Which for them, we may use only darkness. Only light. In this step I mostly showing bigger textures, small ones. And we determined a major or in terms slides. Later we can sparkle. Well, we also use these erasers in the dark parts. Even do this. We don't see live in this part that later when we crush the parts, when we have lightened too much, it makes l live friends in collars. And actually it gives us good results. What the color of our lives. More work to be done? Generally. Whether in a skin rash when your texts rising, I you should work on it many times to get a good result. Spark. Any slight wanted to show you that it's wet. The liquid sequence wet on wet faces. It's not hard to learn how to read parts. You just need to know how to do it. Keep more there between a clear border between dark and light parts. Major difference. You can easily show a red texture. These parts, it's better to first get the dark parts and then lighten it. Again. We want to make dark text. As we are making textures. We also tried to make similar color. As I do Walmart's have the work for you. We can use a pencil and return the darkness. Couldn't do this with a brush. B6 pencil. To complete texture icing.
41. Lip and tooth drawing with chiaroscuro technique (Part 6: Completing the darkness, texture and light: Hello, We continue our sketch. I added some details. If you pay attention, I made some more textures here and are kinda leave a liter per texturizing. I used 0 brush, B2, and B6 pencil. And you have to brush after you used a pen cell, definitely. For example, when we add lines here, live has lots of textures that you pay attention. You can do so much details, but very careful you brush it shortly and that are needed. Lighten. Makes pseudo texture with a sharp eraser to have a good shape and volume actually declined. I want to work as this glitter and Luke. Four, this sharpen your electronic eraser like this. And then you start to put very tiny dots with this eraser. Erasers should be sharp and your hand should be perpendicular. Don't put any pressure and let them just stay as tiny dots. And then again, crashing. We have a color layer on them. And we have to be careful not to overdo them. And the goal is mostly seen in light parts. Okay, we need to sharpen it again. Okay? Array, continue this to the point is needed. And then we make brush, independence or powder to take the extra light of these dots. Do this event two or three times. So you have different light ranges of this texture.
42. Lip and tooth drawing with chiaroscuro technique (Part 7: Drawing the under work and make volume of : My friends, I work more on the lips. And as I said, I shaded it many times. Again. Make those dots with eraser and shade it. Then again. I want to work on the opera lives volume. We did a darkness beneath the lips. You see, as I said before, I use a big brush for base. As we feel our texture faster and it's more cohesive. We first get a clear result. If you pay attention, I have rotated this sketch. Generally you should move it to the point your hand is convenient so you can have the best results. Now I don't do it. I don't want a lot of movements on the camera. You should let your head be free. The brush, I said before, but I remind you again, As much better shape you want. You should have brought more perpendicular. But now cause the texture has a lot of wrinkles that that's important and you can lie down sometimes. It won't make any problems for you. Spots or a darker pencil pattern. Dark Kingdom actually is related to the part of the leg which has concavity. Well here we have smaller space, so I use a smaller brush. I prefer this. So I don't get all the lights in this part here. Mean I don't lose all my life. In these parts here. Color then you can assert adding textures.
43. Lip and tooth drawing with chiaroscuro technique (Part 8: Starting the construction of the upper lip: Dear friends is part of the Opera only be colored with these two graphs. Russia's 14 and six brushes. And we made their lives. First this and then these eraser day friends by terrain model. Some parts are more lights and perks or not. Then we go to the opera lives texture. I want to do a part of it for you. So you know how to do it. This part, because we have a lot of darkness. We use a DC expensive. We add lines with P6. My friends be careful that you should be sharp even if you think it's not necessary, but it should be. If it's not show it can't feel them, the paper as actually want to have text. But there are not so deep. So we don't use a pen Soviet. Just pay these ones to tour side. And from inside the US. Marry sir, To make the volume. Although we should take these lights here, because m This is paid is so dark. Sharpen our Eraser again. It's suitable. We do the rest of the texture with our eraser. Textures may not be seen so clearly some points, but don't make them. So organize. It should be disorder. We can add some texture. Then you give it some darkness. So it would be more natural. Darkness next to the eye takes sure. Makes darker and it gives a very good volume to your textures. But all of these depends on how your model is. Be careful in parts which are more dark. You should use pencil to make textures first and then lighten it. And when it's more like you can do it opposite way. He dark in this garden little by little. And as we continue, so this space will be field with our textures. Just send light and each are in these parts.
44. Lip and tooth drawing with chiaroscuro technique (Part 9: Completing the upper lip textures): Okay, My dear friends, I completed all the textures with and lines with B6 pencil in the upper loop. And now we want to feel, complete this texture year together up to in which direction the darkness is. We just Fei these lines. Of course. The variety of textures in this lives is so much.
45. Lip and tooth drawing with chiaroscuro technique (Part 10: Creating the very fine textures of the up: Okay, my friends did all the lines here in this bird and its eyes on the texture of the ellipse. Now, I use the 0 brush or a fader to complete and fade these parts. These parts lines. They should have at the same time that we are fading. Depending on our model. If you fill that, we need more darkness. We pick a bit more of a pencil powder and we darken them more. For example, these lines are deeper. So we should definitely use pencil pattern, so it won't be flat. The lines of our work won't be flat. And sometimes the lights are so many so we can do all of them. So we just do the texturizing. More generally. We just determined the texture and we do the directions, but the texture will be everyday bit bigger than it should be. Here we have more darkness. Of course, I even worked on some lines in different directions and they're lower lived. So the shape of our lives will be more similar to the model. The more time you put four takes a lot texturize model. We see Maureen, we can do more. So this is said that in the city us to have better texturizing. Instead, I will get used to it. So it's important to know how to do each texture. But more important is to, is for you to know, uh, to see the texture in the first place correctly. And we use our Eraser again. Our lines are more to the inside. You have these sharp lines. Don't be worried about lice we are making, we should again faded later. Now, the important thing is to have these differences so the darkness will be shown well. Now a little. He is scattered at darkness. So more than enough lights will be less than the lights, which are not needed. The texture up to the end of this part of the lip is the same. As to say. Okay, my friends, this is the result. The add darkness completed texturize and we did theater located. I hope you've enjoyed it a lot and got ticket experiences.
46. Lip and tooth drawing with chiaroscuro technique (Part 10: Creating the very fine textures of the up: Hello, my dear friends. Today we are going to teach you have to sketch. As you can see in this picture is that all of the pictures here, Nelson will be the volume of the nose will be more shown by shapes that lines. So it will be much easier than lifts and eyes, but still you need a primary a sketch. For this, you should start from one of those trails and draw recently. And we have a vertical line which is, we tried to dry it from the middle of the mouse. For example, here, this part is a little bit smaller then this book or this nose which is in profile, we should draw a line about here. So it's just an imaginary line and it's not a rule. You can change the placement of the bus. You should determine this parts, this parts upper part. And if you wanted to draw the eyes simultaneously, should determine those placements. As you can see, I drew the vertical and horizontal line. Please start determined and drag job. We tried to sketch the lower part first. We can measure this distance. Let's see where the nostril joins your horizontal line. This measurement is, this distance is exactly, is equal S We true and false. True. Begins. To start drawing the lower part of the nose. We use the IV, check the height to it till the smaller this line. The lower part. Careful to just draw a smaller nostril then you see in the model. So when you are darkening, darkening good. And neon to darken inside of the nostril. You will have enough space to this part. C, we're going to have lots of work in is catching the nose. But the little things with determining the sketching, we will help you a lot in shading phase. So you don't look for the placement of the shades and you won't be mistaken. So the accurate as much as you can. In this part, we just determined the placement of the shapes and you can not do it. But I just want to show you, Sorry, important. So I'm drawing it for you, or you can just do the generalists and go for shadings, which got light. Also. Determine the placement of the eyes with drawing a horizontal line. And by measuring this distance and determine the placement of the measuring, this part is the sketch was complete. We are going to assert the I from here. From this side we do the same. We can continue this line and this line. Or I can draw another line because it's higher than the other. I continue this line. This horizontal line is a bit higher, so we start our eye from here a little higher than the other eye. And we just draw the shape of the day. We determine this darkness parts. We can erase the extra lines. It's terrain, then. Safe parenthesis in high. Correct. With the dark parts here too. And as they escaped and nose as omega 2 next part, which is shading.
47. Nose volume and shading (Part 1: Creating dark part of the tip of the nose): Okay, my friends, we are going to start shading on the nose. We copied the sketch. This was, this can actually make the back of it black and competent to their cart. Or usually we do this because some for new V's, which are not good at sketching, they can use eraser on the card bird. So they can do it before starting to work for avoiding this problem and for them not to not have to tear the cardboard apart. We use this way, which we sketched the design on paper. And we make black at the back of the sketch with a graphitic pencil. And then we transfer it today Card bird like this. This way they didn't copy this sketch completely and they will have a cleaner sketch. For diapers which are completely dark. We determine them with a pencil. In the beginning of our work. Like this. If the lower part of the nose was not this dark, you just do the darkness in the nostrils and then you go for your brush. Now we want to fade the darkness and little in their places with number two, brush is parse. Should come debate toward outside the shades. But the nostril themselves should be fade. At Care, play with the Dry Valleys of this darkness upward. Because you can see it easier in the video. I have the brush in this position, which is not so usual and normal but I do it so you can see the brushing better. This start to scattering the darkness. Also. Upward. I take a bigger brush, a little bigger brush. Now, I have a number 6 brush. Okay.
48. Nose volume and shading (Part 2: Shaping the protrusion of the tip of the nose): Okay, We make some powder pencil and we pay kit. Because we have lumps of darkness. We can sometimes put the powder pencil. I'm directly on our sketch. Like this part. The lower part that be determined. This part here. Okay. Now we shape the darkness we made and they tell. Giving them directions. Development of the brush should be still circularity. Don't forget it. Is scattered. A darkness along your sketch. Is still this part needs a little bit more darkness. As much as you get your brush more perpendicular, you'll get better shapes. Here. Because the camera is so close to the sketch. We can take the brush perpendicularly. Being, make more of the darkness of the other side to this side.
49. Nose volume and shading (Part 3: Completing the blades and the tip of the nose and shaping the heigh: Hello my friends. He continue the nose lesson. And the darkness we made thanks to the nose. In the corner of the nose be shaped them, give them directions. Don't take a lot of powder, pencil, pencil, powder. It should be Alito. And you should have circular movement. With and moving upward. We fade this part. You take any Dunmore powder. We take the extra powder from our brush and in this space we scatter our pencil powder. We have, we will get a bigger brush to get the shape of the nose tip. Start to do the shadings on the nose tip. Again, I emphasize that as much as you take the brush more perpendicularly will have better shades. I can't, unfortunately because of the camera. So you can see the shapes, shapes, and colors. When you seeing the first step. I don't use much of powder pencil. I just try to use from the darkness I made before to get the general volume of the nodes. And then if needed later, we can use more pencil powder. Now, again, we, as we did before, we use a bigger brush too. Get the shades cohesively and if there was needed, we can use a smaller brushes later. We gave base shade here and here decide the lower part of the nose needs more darkness and we darken it more. Also this phase parts from dark parts to the light would do it little by little and fade the sudden. Or they're often light and shade. Okay, Now, to darkness of these parts here, we take the pencil powder directly, put it on their sketch. The extra powder from the sketch scattered a darkness and fading the shapes. Again, we take a visa to darkness, pencil powder. And we feel this part discards this dark parts here we consider it. And they're the eye. It could darkness in its place. And again, with a bigger brush. You make the general form of this reshaped, the general thermal. This part. Again, we go to the edge over their nose. And more darkness in these parts. Also. Do this for the other side. We always move to brush from dark to the light parts. Never forget this. When you want to shake some parts of the skin, the careful about the direction of the shadings, but it depends on the stretch of the skin on the heart. In this parts, tragedy of this part shows us that the shading should be from up to down. This far, needs a bit more darkness. Drag the darkness, charge inside little by little and fade them. We do this from both sides of the nose. Try not to give shapes to the middle part which got light. Just like this failed. The whole part.
50. Nose volume and shading (Part 4: Shading the sides of the nose ): Okay, Now we go to this side of our sketch. We work on the parts which are left from the dark parts to the outside and the light parts. When we are shading the Scan. Be careful a lot. So if you want to have a clean as Skane, your hand pressure shouldn't be more or less, it should be a stable. And then parse, we want to make it darker. Don't change your hand pressure just had changed the amount of your powder pen so and make it darker or lighter. Now we want to darken this part below the eye here. We get a lot more pencil powder. We do the darkness here. And bad debt eyes, which you can see in the corner of the eye, in the corner of the sketch, you can draw them with a B five or B6 pencil. So as this side, we can have the lead line here. I midline. You can't see much of the ice here. In this part. We go to our brush and we fade and little lines vitro with pencils as this side. You see. And now it shows that we should darken it more because in our model we have darkness exactly up to our eyelid line. And we even darken this part and I now toward offside. And we give the darkness out our brush to the paper. Says, Many fit. This inner part should be darker. And these cards have a little texture which we can apply later. But now we should just give it a basic color and base color. And we complete the darkness above the eyelid line. I picked a bigger brush. The lower parts should be dark enough for this prominent parts to pop up and show themselves. And don't care about. And these parts which are out of this cache, because we got this. Before. So when we take this paper, paper glues off, clean a sketch. I will complete this darkness later. And also these parts of the Nez needs a little bit more darkness. And try to check it after your sketch hat in a volume. Okay. Now we want to work on lower parts on the nose and shape it. We take pencil powder and we put it directly in our sketch. Be careful when you pencil powder directly on this gauge. Be careful not to go further than you need. And definitely blow away the extra pencil pattern before you are on the other parts. I take a bigger brush and we color the whole space and edit. This side of the work we should color. It's still dark and this first. So we add some dark where we can slowly. This nice moose. It was a little incomplete. This part. Okay. Well, you can continue adding the darkness, but I don't want to make video longer, so continue like this.
51. Nose volume and shading (Part 5: Creating highlights with a variety of erasers and completing the de: Hello my friends. We improved up to this bar that we almost completed. Knows well Liam's, and this time I just added more darkness and this part and this part. And then the next step, I shaped it more. Now today we want to work on, Let's look at the model, this part and this part. And now still we have a little light. And if their lives on the nostril was less than we would do them too. But in the corner of the eye. So we have added sunlight to which we can use an eraser. For using an eraser we can, we should use a combination of the erasers. I use this kind of eraser here. Now we tried to save some whites parts here. We then lose them. If we had lows Now we could again Dane them with this kind of eraser and work on them again. Okay. With this kind of eraser now, you can use a normal eraser with sharp edge like this, or you can use an eraser like this. Cave, the darkness was too much that the normal erasers didn't work. You can use the light to make the light curves with electronic eraser. It could just and is it, for example? I do is for the corner of the eyes, Alito, you see it's sharp enough. And of course you can ads it's to edges of the erasing parts. So it can do, it would be more natural. This parts had some lines which we can execute that this eraser much better for having that takes shares. It should just be careful that in which part, which eraser you should use. When you know the tools and know where to use them. It's so easy to get the result that you want. We do the same for discard and they don't. These ending part which we need to less. Why is that kind of eraser? And we use a pencil to make it from one edge to make it cohesive with the merge node separately from it. Well, I noticed that I should say is that sometimes in there like words, we see some dark dots. So for this we can use a fader, the dark skin and dark dots if they're needed. That sometimes life is so intense that that takes is not seeable anymore. A few on to work on the details on the scan. There is a loss of work you can do, but as long as the goal is to sketch the nose and make its lolly and shades. This is enough. And then to work, they're going to take this paper goes. So we get good, clean sketch. And we can enjoy the results of our work. Done. Make these careless moves. And so careful. Well, this is the result of our job. I love you. Use them.
52. Initial volume of hand fingers and palms: Hello my dear friends and good evening. Today we want to work one of the handles sketches that we've created and I want to shade them. I've decided this one to start my shadings and that I actually chose this sketch because it has so much a strong darkness and so much a strong lights. In the beginning as we've done in the previous tutorials, we are going to work on this strong darkness that we can use a pencil on them. And I'm using my B6 pencil for creating these parts. The bark departs at the back of the fingers have almost so much darkness that we're just going to create them. If you have paid attention and had a model that I've showed you was actually a colored model. But from this level on, your eyes aim, your hands should be stronger and for creating your work. You can also work from colored models. So you shouldn't just limit yourself to the black and white sketches and models. If you think it's still hard for you, you can make your model in black and white and then sketch them. We create these darkness between the fingers as so slowly and without any hand pressure. Because in fact, these should not look like a specific lines. And we should cover these parts of when you are doing the shadings and get it, get them out of there linearly shape. And the parts which are lighter, we would go LIDAR and we would go more carefully. I made a little mistake in my sketch which I am editing right now and placing my darkness. And there's a very small part of darkness in here. I'm creating this work on my Fabriano cardboard, exceptionally. But you can see I've used other cardboards for the other works. But because I wanted to, I wanted to show you that the sketches can be applied in different types of cardboards. I am going to work on it and show you this because a next tutorials, you can work with Kiara screw technique. And you can see one side of it is a stripped and one side of it is flat. That we will work our chiaroscuro on the flat side, the simple side. It doesn't mean that you cannot create works on a striped side of the cardboard. Sometimes the textures of the face would be even better on that side, but it should be careful and you should decide that which side of the cardboard Do you want to start working gone. So now I'm using LR Fabriano cardboard, 220 grams. Now I can see some wrinkles which are bigger and have more darkness like these that you can see in the model. These are actually strong wrinkles. I'm going to create these with my pencil. But as we get to a smaller wrinkles, we denote, go for them in this step and we wait until we create a big volumes of our work. And then later on we would work on those little details. Also the darkness we have here are so strong. The curved parts like this for a showing them completely. And in here let me put a pay her underneath my hand so I would not make our work a bit messy. And also in this side we're going to show our shapes are wrinkles. The big ones, of course. In here we need more darkness that we apply. Pay attention my friends, when you're applying the darkness, you should not suddenly dark in your area. Although you have to face the darkness when you want to use your brush or fader. But anyways, you should keep that faded look even when you're working with your pins. So okay, up to here we've created a general shape from the inner part of the hand. Now we want to move on to our brushes and we tried to create a faded areas with them and spatter our darkness with them. Just like before. You should have your pencil powder on another paper. This is actually the B6 pencil powder. And we start shading and creating volumes for this area. First we start with the darker parts because the size of our work is not so big. We will be careful and we will use not too big brushes for our foundation and backgrounds. Because you would normally say that when you're working on the background and the foundation, you, you should use a big brush and cover all the parts. But because here, the whole work is in a smaller size, we cannot go for our big brushes so much. If the size of your work was larger and bigger, you can easily use your bigger brushes. For now. The maximum size that we can use is this one that even this is so big and you should move it with so much control. You should be very careful with it. In this power set, we have honest, strong darkness retry to create some volume for them. And of course, if you've paid attention in your model around this model, around hand should be dark. So the hand would show itself. Because we have lights all around the hand on the size and the edges. And they will show themselves just in case that he would darken the whole background of it. So in this step, our focus is on the general shapes and we haven't got to the details yet. Try not to cover the lights which are at the edges and the size of the hands. You would definitely need to work with their erasers at the end of your work and create some lights, but keep the natural lights as much as you can because they will actually give a better look to your work. Try to keep the lights as much as you can. I took a smaller brush. So I can work with this smaller areas which are a bit harder to reach like this part. Just like the previous tutorials, I would tell you that if you keep your brush vertical on your cardboard, it would be the best position. If I do not do that, I would want you to see the work which I'm doing if I put my brush vertical on my cardboard, you might have face some problems for watching the video and seeing our steps. Wherever you feel like that. The powder of B6 pencil is not dark enough for you. You can also use your B eight powder pencil. The graphite pencils also have up to be 12, but we do not want to work on them so much. Because if you want to work on sketch, that dark would prefer to use the Keras crew technique. But if you cannot get enough darkness in some parts 3D or B6 powder, you can use the BAA to powder for this sketch. Or the sketches similar to this one. I think the darkness for this area is enough for this level. And now we want to work on the fingers and show their volumes. Careful that the lines that you've created, your shadings should be closer to the lines that you've created. And the top of this fingers, this one has more darkness comparing to the ones that are coming in the front and they have more light. So I'm just going to shade this area a bit more so I can get to color that I want out of it. We would create darkness for here, toward upside. And we can also use a bigger brush. Again, I will take a smaller brush. So I can work on a smaller area and dark and and smaller area. And it spit or to rotate my work. So I can have a better angle for creating the shades over here for our model. So I can create a good volume for this finger here. Your hand should be in a comfortable and easier position. As I told you before, if it was so hard for you to work from colored model, because it's natural. For beginners or some intermediates. You should make your model black and white. And you can also work on the contrast of the darkness and the lights. And then you can work on that model. Our goal for creating these lines is not to create any frameworks for the fingers. If you pay attention. During our work, we will fade all of these lines into our work and just mix them. So they would look like shadings, not any frameworks. So it doesn't matter what a sketch you're doing. You should always avoid a framework for your work. For your sketches. Make it look unnatural and unpleasant. So be careful about that. K. And we've got the volume of this finger. So we'll move onto the next one. We will add the darkness it needs and getting a bit of powder in here. And if you pay attention in works which we can create a volume like hand, like ears, like nose. You start from the dark nets. So we've first shape the darkness. And as a result, the lights will show themselves to us. And there we can create a great volume for our work. This finger is almost a very light finger and it goes so much light. So he tried to keep the light for it and do not dark and it's so much as much as we can, of course. Okay. We'll leave this opera Prize for now. And we'll move on to the next finger. We will add to darkness related to these parts in their own placement. And we will fade them from both sides of the lines. This will actually make the middle parts Show more prominent. And further finger itself. We haven't actually done anything special yet. We've just created a general shape of the fingers. Shades. Haven't gone into the details. We give this finger and just some background color. Also from this side we'll move on and little we will move forward. You should pay attention so much to your model for the prominence part and a curve parsed curved parts of your hand. You should add so many researchers and issue a read about the anatomy of the hand. So when a UCF being a fist said, you would see which parts are popping out, which parts are going in, and so on. So you should just study or models very well when you're creating shapes like this, rank show you parts of the body. The NS me is very important in these kinds of sketches. So just drag this darkness a little bit outward. Just like this. And we come a little to this side. Then I think it's better to work on it with a smaller brush. So I will change my brush, I'll take a bit of powder and I start shading. Go over here. Okay. We can say we have a general shape of the fingers for now. And I want to create the knuckles. The bones which are existing in this part of the hand. We just want to show the middle ISIL. See, our hand is being shaped so easily. You just need to spend enough amount of time on it, spend half amount of patients in it, and keep an eye on your model. The back also have more light on them, so keep them light as much as we can. So after we've darken the whole background, we will work on those back parts more because they are light parts. I want to work on these parts for now and create a shape for them. Because right now we are working on the dark parts, not the light ones yet. These are just big textures and we haven't worked on any details yet. So slowly with so much cautious we will add to the darkness so we would complete our volumes for the finger, for the palm. Now, in this part we want to add some darkness. So this area would actually get that primary color that we want. And later on we can work on its details and smaller textures. Because I want to add the darkness little by little. And I don't want to create a big amount of darkness suddenly. That's why I'm using a smaller brush. Now when you've determined that darkness, you would drag that to the outside. So slowly, considering the prominence part which exist in this part of your hand, just guy this darkness toward outside. Drag it out. When you take the pencil powder again, you start from the dark parts again and then you'll drag it outside. Do not start from this outer parts. Each time we start from the dark side, we do not go so much for word because is near parts are so light and white we do not want to miss them up. Just enough to create a background color and a foundation for darker spots on our work. We just move forward that much. And there are even some darker spots over here. So you can add them little by little. You would do the same. So we'll move on to the next level.
53. Drawing the initial volume of the wrist and forearm area: Hello again to my friends, and good evening again to my dear friends. Alright, in this level, in this step, we want to work a little on the lower side of the hand tourist and are now going to take a middle size brush. I've chosen the size ten. We start coloring here and shading here. First, we will work on the parts like here, which have busier shadings and more shadings. And then we will move on to the lighter parts. Pay so much attention to the prominent parts and a curved parts. They are so important. Knowing the volume daddy or shading is actually going to help you. To create better shadings further. I'm taking a bigger brush so I can drag these shades to the outer side of the hand and just spatter this darkness toward the out. And just like this, you can get a better shape from this area. And again, I'm going to continue with the previous brush. And we would work on the darkness in this part. And I'm just going to create this shape which has resulted by the muscles being stretched. In this part. I've chosen a smaller brush. I'm using size two brush right now. But anyway, the size of the brush is not that important. And I usually don't tell you which brush I'm using. Because when you're working on your sketch during your work, you would figure out and reach brush you can use and which brush you're more comfortable with. For example, the parts that you see, it says smaller yeah. Or its details. You should use a smaller brush and departs, which you can see there's a large area to cover or is just a background color for medium to large area, you should choose bigger rushes to work with. In this part we have a strong darkness. But if you've remembered, because if definitely listened to our advice as in previous parts, you should not add as strong darkness. All, all of the sudden. These parts, you should add to darkness little by little, step-by-step. So it would not run your work. And you can add your ultimate darkness at the last episodes and a steps of your work. Especially because we are working this sketch on our Fabriano cardboard. Because our Fabriano cardboard gets the darkness less. Comparing to the stem Box. Cardboards. To Fabriano cardboards will actually get the darkness. Cannot less, but it takes more time for them to be darker. But you can also do this on other types of the cardboards. Do not be afraid to try them. Can practice with different kinds of cardboards. We will just give it a background color to this lower part of the hand. And we would get these parts out of being only white because we want to show the hand to show itself. Uh, sorry, because we want our hand to show itself. So it would work on the details a little bit more. We need to darken the background of our work. For that. Who gets a big amount of B6 pencil of how dare? And first we will start at the sides. You should start from a coroner. And so slowly, you would actually create a dark area next to here. And very slowly you should drag your powder to our outside area. Because I don't want this pencil powder to get into my work so much. I've worked at working with a smaller brush for creating the first shades next to the hand. But even if it got into your hand a little bit, don't worry, you can always use your eraser for that. And after using this small brush, I'm working with a bigger brush so I can spatter the leftover shadings all around this place. And we don't want to get this area too dark. Because if you bake your model into black and white, you can see the background is actually some kind of gray. But we want to keep this tonnage of color will give a background, a whole background color, and we will come back for details.
54. How to create the background of hand work: Okay, My dear friends, as you can see, I've darken this area around the hand and I haven't cleaned to enter some parts of the hand would buy eraser. And I haven't done this side completely. So I would do it again in front of you. So if you had any problems, it will be solved for you. See, in these parts at the size and the edges, it shouldn't be like a framework. We should just go over it so lightly. So later you, it wouldn't be like, Hey, I cannot take away this line around my hand and try to keep it to the outside. Do not go into the hand. Just try and departs when you're actually separating the borders. It's okay to move your brush in a linear way. But It's only if you can keep that linearly shading pattern all through the shadings for that area. So it would not actually be separated from the risks of your work. Here and just dragging these shades or downside. We have a large area. I do not jump into big brush right away. First we are going to work on these shadings at the edge of our hand. And we tried to slightly drag them outside because these are some fine shadings. And then I'll move on to a bigger rush. I will take a bit of my pencil powder and we start from this part, which I need it to be darker. And continue on. And pay attention my friends for the hand itself. We have just created the foundation, a background color on the end. It has way too much work to create. The details, the textures, and working with the eraser so we can have the wrinkles and so on. All of these has been left for the next step. So don't worry about it too much right now. Now, if you pay attention and if you want to create this experience on a Fabriano cardboard, you can see you can have more gray color on Fabriano cardboard comparing to the stem Box. And the reason is that the Fabriano cardboard, for example, the one we are using to 120 grams have more grams of comparing traditional MBA, which had six cigarettes. So as much grams as your cardboard have. It doesn't have very big textures, but it has more grams. Which is actually going to cause actually, for feeling this cardboard and gets enough darkness into itself. It may need more darker materials comparing to depend. So for example, like coal. Or it needs to go over it over and over again, like to thing we're doing here. And it doesn't get too dark, too easy, doesn't get so black. For example, it would be like here, which we can have a great gray color. So when we want to start working on the sketch, we can decide our cardboard even by paying attention to the colors that we have in our model. Or we want to have. The background has a bit of color. And I think it's good, a god forbid, alive. And we want to keep the outer border of the model light. So we've created these dark sides next to that. You can do this with similar sketches. You would create the background. So it can show the volume of your hand and actually keep the sides lighter. And then you can go on and work on your details more.
55. Completing the volume and darkness of the fingers: Okay. My friends, I worked on the volumes of these fires allele more. I will explain it for you that I've worked on these forests with our rash, created some lines and we'll actually faded them. The position in the opposite direction, and we were just faded the shadings. Now we will move on to the rest of our work. The lines, the ups and downs, prominent parts and the curved parts we see in our work. We should create each one of them so finely and so smoothly. The lines that we've created in our primary sketch. If there is anything left from them, we would bolt them, so not lose them. And We've dark and also this area a bit more so you can show there's a curve on the hand in this area. In this area, you should pay so much attention to your model. Because the general shading has almost been completed. And now we are working on the details so we'll move forward with much more cautious. It would be more careful. So we can create a correct volume for our hand. As you can clearly see, I'm using a small brush, even for spattering the shadings, I would not choose a big brush Nazi in here because it's small area. In this is more appropriate for this part. This part will allow us to take a bigger rush, but just the little, not too much. All right. Now if you pay attention to our model, the little you can see MEC, if you want to even work on a colored model, if you pay attention these wide parts, you can see them in here, in this the prominent parts of the bones on the hand. But these words are light but they're not completely white. So we need to drag some shadings on these parts. And when we want to shade these areas, we will see the lower parts that we've shaded before. She'd be darker. So come back to our fingers and we will add some more darkness to these areas. We should have some shadings on their fingers, so later on we can create better lights. Do not take so much of the pencil powder. Denote take too much. Even if you take a little, it will give you enough darkness for these parts because they are not. So dark spots. This side of the work should be lighter. Here. It's actually the distance between the knuckles. I will take away the darkness which has been created here with our tougher a sir. I'll take a smaller brush. First without tapping get into powder. I tried to create a darkness that I need and create the prominent shape of this knuckles on my fingers. Because at the difference between the colors and the shadings or less, you should be very careful to control the amount of darkness that you have. Okay, It's gunnery well up to this point. And we need a little bit of darkness under bone on the finger here, which you need to take a bit of our pencil powder because the brush itself doesn't create the darkness that we need here. So I took a little bit of my powder, just dragged it over here. The shavings for these parts should be done. And of course, this finger which has actually turned inside and we haven't worked on it completely. We are going to come late it in this step. If it's possible that your hand will come on your work, you should not forget about placing another paper underneath your hand. In all of the steps. It should be underneath your hand button some steps. I'm going to use it less. So you would not get a darker spot first seeing. And you can see all the steps so clear without any problem. And of course that out we are determining some lines. I can see that we could work on these parts more on these lines. Make them more bold. I do use the same darkness and that we've created. And all the spatter to darkness around here. You do not need as much extra pencil powder. We can use existing darkness which we have on our hand. They haven't worked on our thin and fine lines yet. For now, we're just adding the big shades after we've created the foundations and background colors. So I'm now, I'm completing a debate or shades and general shapes. And a next step, we would move on to the smaller details. When you have small area for fading, you should be very, very careful in placing the darkness because if you put an extra, a little extra darkness, then you need fading would be so hard for you and the result might not come out very well. This upper area also have so much whiteness and I'm using my 10 size brush for just giving this part a little color and take away that white color from it. If you look at your work in this stage from afar, you can see the volume of the work is getting better and better. Buy it a second. And you can always see the difference that you're going to make each second in your work? My dear friends, I take the pencil powder, but I will take the extra powder off another paper. So I would not have extra powder on my work. I've already explained it to you. So be careful about that. To this part of the hand has more darkness. There are more free to create darkness in this finger. And again, we will take a bigger brush to take away the white color from this part. And of course, again, we will work on the knuckles. You should be very careful about this area because it's one of the most importance. One of the most important parts of the hand are the NAACP calls and veins. Dads will actually going to help you to shape your hand where you well. Sometimes the students might have problems forgetting the right position for these bones are veins in other sketches. But if you pay enough attention, you can see in which parts you can create these bones and knuckles and reduce the problems that you might face. I'm going to take a lighter pencil, for example, B3. I'm going to shape these parts, which I can see on my model and create them on my finger. And then later, I will use my brush to take them into my work and mix them up. Behind this bone also needs more darkness. He can see as much time as we spend on our work is we'll get a better shape. Alright. Now because this part actually lost all of its light, I try to use my eraser and here on this step, so we can show the lights over here until the next step. So we would complete it more. We will go to this little finger. Shri can see only a little part of it. Add a bit more darkness to that. And of course, we lost some of the lights over year. So I used my dove for Acer to make it a bit lighter. And definitely the part above this finger needs to be darker. I mean, the background color. So again, I rotate my work and I will darken this background area a bit more. Pay attention if you want to leave the background gray, like this model. You should add your gray color step-by-step. Because if you get a more darkness that you need, lighten it up, might actually miss your work and make it messy. But when you are going to dark in it step-by-step, you would not have to worry about getting your work. Missy. Now we'll come back to our own work, which you are going to come late. The fingers. I want to work on some of my model. A little more darkness in here, which we can see is completely coming up. We'll continue this line up to here. Of course in here you have some lines that we've created, the vague wrinkled for that. And later on we come back and create the smaller wrinkles. And the inner parts of your work done them before. But I've lost a little of darkness because we've worked on them with brush. Generally. The area of the finger needs more color up to this part. Just like this. And of course, this lower area needs more darkening so the volumes will show themselves better and more. From now on. We are going to create the textures in our work. And it should be so similar to creating a wrinkled skin. But obviously this work is easier because the amount of wrinkles are less than a wrinkled skin and wrinkled face. But anyway, it has so much similarity to that. And if you have that experience, your work is easier here. And if not, we'd working on this, you would get more familiar to creating during close, and it's a very easy task to do. It needs some patience and time. You should create dark lines next to them. You should spatter to darkness. So you can get a general shape here. And of course, it's a general procedure. And for getting them more precise, they need more details. And you should work on these parts with your erasers tool so you can complete during calls. In this step. Actually, I'm going to work on the parts which need to be volume eyes are creating the volumes. So in next is then going to create the wrinkles under palm and on the other parts. And you please do the same to all the shadings, create all the volume so we can continue on the next step.
56. Drawing the details and wrinkles of the palm: Okay. My friends because I wanted to pick up the pace a little. I've darken this area of it and more and now I want to add some details over here. So I've decided to start a video right now so you can see the textures. I'm going to add that I'm going to work on these parts. And I'm going to create these shapes on these muscles and the lower part of the hand richer are being stretched. You can use an old brush or you can get help from your 0 brush. You see this brush, it's an old one. Some of its hair on the tip of it has been sanded away and gone away. This will actually make the tip of them a bit rigid and rough. That might help us in some parts are going to create the shading somehow. And we're going to show that a stretching look in the muscles of the hand in this area. Of course, when we use our eraser, it would be shaped more and it will show itself better. And this part of the hand has been left so untouched. So you are going to work on this part too little. We were working on the lines which we had here. So we're just going to complete them. You don't want to lose the lines that we've created in our primary sketch. It got a bit darker then really wanted it. Got a little bit out of my hand. So should drag our brush on it so slowly. So we would take the powder of our work before it gets into the card bird. That's what I did here. That's actually another hint. If you got too much pattering in place, you can use your brush to take it up. As I said before, for the lines which are darker, you can use your pencil. And also this area here needs a bit of dark dense, more than it already has. And of course, this line that we've created are here has more shadings according to our model that we will create them with our small brush, size two brush. And we can create these shadings very easily and very well. Denote be so worried about the shadings get a little into the other parts and the other areas. Try not to do that, but if it happened, Do not worry about it so much because we will use our eraser on it later. And we can fix these mistakes and show the textures. From here we go to the outside of the hand. And we'll move on with the shadings. Also in this part we can see a curve that we can create it and shape it. Be careful that your shavings would know it just cut off the dark spots and you would not have any we do not want any borders between the dark, darker spots and Eliza spots. Especially in the parts which are a big curved like here. So create the shadings from the darkest spots and transform them into the light ones.
57. Lighting and completing the texture of the palm: Okay, My dear friends we've created to shadings up to this point. And now I want to work on the textures and the parts which we need to work with our eraser on them. We will sharpen our editor erasers. This one like this from both sides. And this, if you just sharpen it in a flat way, it would be enough. Now would work on the edges all our work, which might have got some shadings from the outside, from the background. And you can use your eraser or your mono Zero URI sir. To clean these shadings and get them off of these edges. Just Mono Zero erasers are better because they can be more precise and they would not get out of the lines so much. Definitely when you want to work with a erasers, try to have an appropriate angle for looking. And of course, for your hand. Your perspective is important. And angle of your hand is very important. Because right now I don't have a good angle for seeing my work. Because you can see the work better. I've actually made a camera more closer to my work, so I don't have a complete good angle for watching my own work and for taking these darkness off. You can also use your deliveries CR, depending on the place that you want to take up the darkness you can shape your Fraser. And just like this, you would create lights. The thing about that on which parts you should use, which erasers? It depends so much on you. That rich eraser are you comfortable with in creating that part? But it has they have their own placement. When you want to take a spot, a whole the spot of darkness out of your work. The Dilfer Acer might be a very, very good choice for you. And for the parts which are more linearly, you can use your other erasers. Erasers. I can actually make these lines which are literary, more smooth. Then after we've created, we've worked with our editor racers who can work with our diaphoresis. There's two. Now, I see this part is not completely got the volume that we wanted to get. So I'm just dragging these shadings a bit downward. We are working with their erasers because your focus would be much more especially under lights. You can also see the details that you may have lost and the shadings. And you can also edit your shadings and fix them if they're not completely correct. When you are using your eraser, try to remember that you do not have to push the eraser into your cardboard so much in if you drag it a slightly on your cardboard, it would take off the extra shadings from your work. In these areas, I need to take less shading so I will decrease my hand pressure. And I tried to just create some lights with tapping my eraser into my work. That's one of the other ways that you can take the shadings off. Okay? Up to some point, we've understood a rich parts. We need more and stronger lights. And now we want to work on the parts which have a smaller lights like these parts here. These are actually some lines on this scan which are a chart. In fact, the textures of the skin. In here, we might need a small fader that you can clean the tip of it. Where do your sanding like this? You just drag it on sanding and the tip of it will be clean. Rotate to your fader on the sanding that at the same time that you're getting a cleaner tip. You would also get a sharper tip for that 11 sound to birds. And now you can take a little of pencil harder and create some textures that hasn't been done in our work yet. You can create them with this small fader. Small lines, dark mass. I'll take so, so little of my pencil powder again, so little. And I will complete the lines which are in here. For creating lines like this, different tools might be useful for you as 0 brush, a paper cone, or a fader, or things like this. They all can be useful for you in parts like this. There was also another line here that we actually lost during the shadings. I'm going to create this line because it's very deep. I'm creating good with my pencil. And then I will go over it with my fader ones. Okay? And now, because we want to make these textures look more natural, we look at our model and we see enrich parts. We see more light and enrich parts. We see more darkness. In the course that we sue more lives. We obviously are going to create some Lights lines. I'm using my mono 0 areas surfer that you see some light lines over here. And it can also fade the darkness again. Now that we are using our eraser and we are adding some lights, we should definitely work on the lights in these parts. Create some. He can see when the lights are coming next to the darkness that we've created. The volume of the hand is actually showing itself more. And attractiveness. Our sketch would be way more than before. She pay attention to these parts. There are some parts of the hand and certainly more work stealing to create textures on them. But if you want to create aged takes Sure. There for you individually, it might take so many hours. But I'm just going to create some parts for you so you can learn how to do them. You can get an idea. So you would know how to continue the rest of the work. It might be possible for some of our friends that have not worked on these kinds of sketches so much before. They might seem like when we are creating these lines, they say all we do not see these march lines in our work. But it depends on your practice and your exercises. Because with the practice, you are not only training your hand, you're also training your eye because during a time and throughout your work, you can see more textures into your work. Now for creating these lines over here, I'm using my H pencils. The one that I'm using right now is three h. You are using H pencils. If you've watched my previous tutorials, I've already told you that you should be very, very careful when you're using your H pencils. Although they are very light colors and light pencils. But because the graphite pencils are so rigid and rough, fading them or erasing them would be so hard because a trace of them would be left on the cardboard so hard. So you cannot erase them so easily. You should, when you're using them, you should be so careful because not all the parts are appropriate for you to use your H pencils. Now, I've cleaned the tip of my eraser terabit ways. There is a light side next to the darkness that we've created. Now this slide, how much it should be seen? It depends on our model. Usually we create the lights with our erasers. But if we've seen that we need more lights, we would actually go over it with our brush or fader. But if you're, for example, creating this line and next to it, and you would actually cover the lightning so it darkness that delights got. It's obviously less than the one you've created with your pencil. So we would have two types of darkness and light to degrees. And this contrast is actually what is going to create your volume. I'm using with my B3 pencil right now. So next to each dark side, dark line, we need kind of a light. But we need to, we don't need to create each one of these lines exactly same as we see in the model. If you see some parts have so much takes shares, you can move your hand more freely and create different textures. So the shape of our work would be better. Because we can definitely put all the textures in there, exact same place of them might go off her or lower. As you can see, these parts are getting shaped slowly and the wrinkles are showing themselves more and more. Now when we're ever, you see the wrinkles. Like here you see in these bars the wrinkles are like stains. So in these parts, you are allowed to use your delivery service. You should shape the tip of this stuff or Acer and without any hand pressure, you would tap your eraser on the work. So you can create those stains like shapes. Do not want to overdo and over create these parts. Don't want to make them too much. And of course, after you've used your different sir, he would go over these parts with your brush ones and get it a shading. It should have a light shading. It should have a light color. And of course there is another texture here that we can work on it more. As I've told you before, the subject of creating texture is very extended.
58. Creating the finger texture and also drawing hand hair and completing the work: And it might take so much of your time. Okay, My friends, as you can clearly see, I've went all over around my hand with my eraser and I've cleaned them for creating the lights all around my work. I worked under textures in this area a bit. And of course there is, the work is all the same. They have the same procedure and this doesn't have anything new for you. I just wanted to work on one of the fingers so you can see how to work and create the textures on our fingers. I left one for you to see. We create the lines on the fingers, especially in the parts that they are turned in. We're just create them so lightly and smoothly as you can see. We show one or two of them which are bolder, but the rest of them should be shown. Lighter and more Smith. And this part of the finger, we can see some hair that we will create them. But before that. In addition to the dark lines that we've created here, you also need some light lines. Over here. Has an explanation and I wanted to give you the model.fit chosen does not have a very big size of 40 Keras crew technique. Because in Keras Curry technique, as much as your work would be in a bigger size, your work will be easier. Of course, it would take more time from you for creating the textures or the shadings, but you would definitely work easier when your work is in a bigger size. You can move your hand more freely and different tools will give you better. Results. Would be generally easier for you. And again, I will say as much bigger as your work get. Your tools will get more easier on your work. For example, the eraser I'm using here, you're creating the lights in millimeters. But if this sketch was bigger, you could actually double it. Of course, the bigger size need their own cautious and their own specific parts. But it would be really easier for you. Do not worry about it. You might even think that the bigger sizes are harder, but they're not, can't even work in, in a size which is double this size. And you can easily see that the work is easier. It just takes a bit more of your time. You should spend more time on them, but creating your textures and working with the erasers would be way more easier for you in bigger sizes. Delight in this area is a bit more. So I'm using my bigger eraser. And you can also use your brush eraser for the prize, which you can, for the parts which you want to erase these areas that can actually be helpful for you. Now about these lines and textures, I should tell you. If you feel like there's more light into some part. First you should create delights. But if you can see the lights, sorry the darkness more, you should first create the darkness and then move on to a light parts. So it depends which part you can see more dark or light. Then you can use your fader or your 0 brush to create some dark lines next to the light lines that we've created. I will apply a part of their hands hair for you. And we will finish our work now for creating the hair of the hand. To more appropriate pencil is the one which is lighter. You can use lower B pencils or H pencils, H series pencils. In this part of the hand that we can see some hair whose creates some here. So fine and so thin. And you should not overdo it again, I will say it, you should not do them too much. I hope it's visible and clear enough for you in the video. And take a brush on them. So they will just mix into the work in combining to the work. Just enough to make them makes not, we do not want to take them off, are working in and there are even some hair in this part. You can see them in your model. You will create these hair with our lighter pencils and the hair which are coming outside of the hand. You can create them with your eraser. So thin, so fine to not do them so much, to not overdo them. So the shape, AVI or work would not be a ruined. Because exaggerating the hair, especially the hair of the body and the parts of the body will actually ruin your work. But if you create the hair in a normal amount that you can see in your model, it will actually help your work. So the more natural. You see like this, we've created the hair. Take almost a big brush and go over them once. Of course they had has been our work and these areas that I should work on it more. But because you got the general procedure, I want to pick up the pace here so you would not get bored or tired. And in these files that we want to create the hair toward outside, I'm going to use the sharp tip of my eraser. It doesn't matter. You can use both eraser or mono Zero Eraser. Just create some hair and just guide them toward the outside. We can see it's completely shaped. And even dragged him a little more toward inside. Just like this, who create all the hair around these parts and create the textures which are existing on the head. And you can have a great and beautiful outcome that you can use it in your other sketches because the element of the hand is one of the hardest sketches for some students and they might face some problems. But as you saw, you can create that very well if you pay attention enough, I wish you all the best and wait for the next tutorial.
59. Basic drawing of the foot from the photo (measuring and drawing the right foot of the model): Hello, my dear friends and good evening to you all. Today we have a virtual tutorial of creating defeat. My friends that got up to this level would definitely got the video for creating a hand and day. No, It's actually a more precise comparing to other sketches. And it's the same for the feet. Into beginner tutorials, we told you how to create feet with basic shapes, geometrical shapes that will be used, for example, circles and squares. So we can know the different placement of the ankles, toes, and all other parts of the feet. Now, we want to create a professional sketching here. For hyperreal paintings. For that, it's better for us to use guidelines. Now, where should we put our guidelines? It depends on your angle of seeing the model. The angle of your vision. I think. You don't have to create a guide lines wherever I exactly do. Someone like to create them from ankles, soma like to create them from toes. So it depends definitely on you. Well, I prefer to start from here. The meeting point of the left point of the left foot, right foot. To create my vertical line. And you can also create a horizontal line from medulla via our work, almost. So it would be sintered and it would be more useful to me. This area is my choice for creating the horizontal line. Okay, The first is several of your work is that you create the same lines in your sketching paper. There goes the vertical line, and here it goes a horizontal line. And the second step of our work, we want to actually find a framework of your feet on the paper that you've created, meaning that the obs add the toughest part, the lowest part, and the right and left side of your foot. And your right foot and left foot. For example. It should be here. We just mark these parts so we can find them in our sketching paper. And also this lower part of the foot, which have so much more details. My advice for creating some sketches like this that the lower parts are so important and detail too, is that you create another guideline for the lower parts. For example, another one in here. Okay, I think here is good for our second guideline. For getting your work and precise. You can actually measure this second line, the distance between the first and the second line. So you come down that much and you create one over here. You should be so careful and precise in creating the guidelines and you should not rush through them because they are very important. And if they go around, your whole sketch will go wrong. And I've actually insisted on it from the very first term of your workings. So the basic of your work is actually the guidelines, which is you create them. So much cautious creative framework for our feet. The second guidelines that we've created that actually showing this part for us more. And we're doing the measurements for keeping our feet in, derive the spots. We measure the toes to our vertical line. And this part, which I have a curve in our work, we actually determine them with a very, very small lines. I hope it is visible for an individual because you don't have to make these lines so bold or dark, you can create them so lightly. Now, we measure the long part of the foot. Thank this. To determine the placement and for getting the correct position of them. You can also measure this distance to. This is the toughest part of the foot. And we can actually clean the extra line so we won't get mistaken. And the other hand, if you continue this line, you can see in this part we will reach the second line. So we'll make our Herge easier for ourselves. But continue this slide and we get to the ending point, the second line, we measure again. So again, see how much we should continue until we get here. This is a meeting point that as a god down here, it will come down and we will determine this part of our work. Okay. Let us work on day as primary is sketching for our right foot first. Then we will move on to our left. But actually this part doesn't have so much to do with sketching the foot because it's actually a graphic photo. But because I want to start sketching from the top. First, we are going to create this part together. Measure again how much tall this curve should be. Recreate the line which is related to the thickness of this part. And actually we should edit them later. Definitely. Okay. Yes, started working on this area according to the curve that we see in the model. Because it's a straight line. You pay attention to the curved parts because you want your work to be more precise. You can also continue the line from the down part as. As the same time as you're coming down. So he can meet deadlines together. And you can actually shape this. Like it's also the same from this side. We measure this bar so we can see if the measurements are correct. Because as I told you before, we are actually going forward according to the guidelines and first measurements that we've created. So if we mistake any parse, it will show itself so much. And, and NOT are line that came in, in this part. From this side we come down. And as I said, at the same time, we will go forward from this part. Create this far that is coming out is C. And for making it even more precise, you can create a vertical line here. You can do the measurements. So it will come up to this part. It's exactly going good. Considering the part, if determined here, will actually guide this line toward upside. We make a curve. And it's better to measure this part to it can and should have come a bit out outer. So it'll connect this part and we will erase this extra line TO Julie, have to edit our work. Now. Actually, the ankle of the foot is completely shaped. I have a very small triangle here into meeting point of our guidelines. So, so slowly and so smoothly, we will connect these lines together. Now in the lower parts of a foot, that is actually a main part. We can do the same as we did on day hand. Actually. Make this into a simpler shape, this part of the foot like this. So I will continue this line. We see how much our line is coming out. And from here, we will connect it to the part that we want. And we can see in our model also the same for this side. Now with this doing, we can actually show the toes, the placement of the toes, and you can create them so simpler. You can do this in all parts, but for the upper parts, because there was no such complexity, you should prefer not to do that. But in here because it's a bit my, my get a bit complex. It's better to do it. And again, we can create some simpler shape in here. Considering the measurements that we have. If you are in any second that you need more measurements, you should do that too. But you should do them so small. Even if you like it, you can separate the toes. Meaning that you measure this. For one of the toes. Determine and the second finger, second toe. The third one and the last one. You can clearly see its placement. So like this with these Very small lines that you create. You can actually separate the placement of the toes. You can also create this by so necessary, but it can make your work easier. When you are creating the toes, you should be very careful and you should go forward so slowly. So you can simulate more. As I TO data first, there are simple ways for creating a foot, but we've already told you those ways in creating the body parts in beginner levels. But in here we want to use a high parallel steps for creating a hyperreal work. And we want it to be so similar to our model. Because we want to do a very, very extra simulation. You need extra caution more than you need a normal sketches. So you don't think that's a sketching a foot can be so and time taking and so complex always. Now we have a general shape for our toes we want now we should work some details on it and create some smaller parts. And then nails are one of those most important details that can actually, it gets a very important shape and a very good look to the shape of your toes. Issued. Create the shapes correctly and properly. Of course, generally the volume of the foot as actually going to show it creating the shadings. But any ways, the primary is sketch has so much importance, especially in details section. You should be careful that as much as the toe is more flat, more horizontal than nails are showing less. Okay, I should check this area once more. In here I think I need more prominence. Departs on top of the foot we can create a diverse set the muscles are showing nor the curves and the prominent parts. The veins would be determined their positions. Just like this we showed the placement of the veins. But of course we can work on them more in the shading phase, but it's good to have a primary sketch of them in our primary, his sketch in our foundation. So note lose their positions. Can actually make your work easier. Trying to do to sketches yourself, my friends, because there are so many simpler ways to copy or model. But actually some part of the value of your work is to create your sketch yourself and know how to do that and not using copy. We have done one of our feet. Next is civil do the second foot. And who go to shadings?
60. Initial drawing of the foot from the photo (measurements of the model's left foot): Okay, My dear friends, we want to work on the left foot. The procedure is the same, but just to give you a practice, I will make the rest of the work so you can see it and have a review. You see the line that we've created here. We can actually continue that. So we see where it cuts the second foot. Okay? Actually, these lines that we are creating, our kind of our guideline that we are adding to our work in the middle of it. So the picture and the work that we are creating would be completely precise. I try to I try to determine the placement of these curved lines and curved lines here. But I've told you before this part is actually related to the foot. It's actually related to the graphic picture which was edited. But because it was a good model for us, because if fate had great angles, the toes were shown perfectly, the veins were shown clearly. So I chose this sketch and this model so we can work on different parts of it and learn different things and how to create them. Just like this with shape, this oval. Okay. Now we will move on to our main part. You see how much it's above our guideline. It has here. So we create this line according to the curve that we can see in our model. Just create the back part for our feet. Now we will move on to the opposite side. First, we measure the start of the asserting of it according to our first horizontal guideline. Again, considering the curve is seen the model we both created from the top side and lower side, and then connect these two lines together. Of course, you can find all of your key points and then you start creating the lines and curves. But you can also do it like what I'm doing here. Parsed by part depends on you, how you want to improve your work. You want to first do that all the key marks or not. Wanna do it part by part, like the way I'm doing it. Now, the lower part of the foot, which is almost here. Recheck our meeting part. And about this foot. We can do exactly the same as we did for here. Recreate a zone. Also on this side we create some lines. And here for the tip of the toes. Start rates simpler shapes. We can also continue this slide. So it can have it as a guide. And for transferring these lines into our work if we want to work so precise. We should measure this part first and the next parts after each other. We can just mark the parse that these two lines meet each other and use them in our benefit. This was the first line that we've created here is the coronaries line. The next line is here. Which a meeting point is this part? Submit Out of the foot. But first you should determine how much it goes out from both sides and compare it to our vertical line, measure it, it would be here. But I didn't know how much it should be lower or how much it should be lower from the horizontal line, which I can see it's here. So the line that we want to continue from this part, it should connect to this point. And we will erase the extra lines. And the other two lines because they're short lines. I prefer not to measure them and just create them. Approximately. One of them is like this and the other one would be like this. So this actually created a framework and a zone for our foot. Now we'll start from this side to create a curves that we can see on the foot. In this part we have a prominent part. After that, we have curves. And before we get here, we will create the shape of the little finger, little toe with a small curve. We don't get too distant from this line. And here we go. You can see we could easily create these shapes on the foot that curves. Now we'll move on to the next part, which is actually about the toes in this area. If the toes, we're not completely precise at the beginning, it's okay. There isn't any problem. You just create the approximate placement of the toes. And the next step you can just create them more precisely and better. You're going to also use measuring in this step two. So you can add to your accuracy. I chose not to, but you can do it a few feel like needed. Just like this. We shape this area and we will also work on this part. So the shape of our work will be better. We place the curves and a prominent parts into their own placements. Into their own positions. You can see that the framework of our foot is completely shaped. Now it's just about the details. There's a line which should come up to here even a little more, I think. Yeah, it should be a bit wider. Because this dough is the biggest. And from this angle, it should take more space from our work. The shape of the nail. Or generally if you pay attention, this nail because it's more into the vision, looks bigger comparing to the right foot. Because right foot, because the angle of division is from the front, the nail actually seems a smaller. The second TO that continuous lines will go to the upside of the foot. And the third that we can see more of it in our work. Comparing to the second toe. And a fourth one, which you can see most of its nail and a little of itself. And for now we have the general shape of the foot. You can create the veins on the foot. Create them. So finally, of course, in these parts, as I've told you in previous part, they will shape more in the shading phase and get a better shape. But for being more comfortable in the shading phase, it's better to show these details in your work right now in this primary sketches. And I had to transferring them. A sketch that you've created about transferring good into your cardboard for making your work so clean. And you want to have to create it directly into the cardboard. In some parts. You need to erase some parts and your cardboard will get messy. You can create a sketch on a paper like what I did. And then you can darken the whole sketch at the back of your paper, at the other side of your paper. And after that, you can transfer it to your cardboard. Actually darkening the back of the sketch is actually like making it into a carbon. So you can easily transfer it to your cardboard. So this easily you can create even more complex parts of the body, which the two of them are hands and feet. A next step, we are going to shade our work. I hope you've enjoyed it and it was helpful for you.
61. Make volume and creating the basic shadows of the right foot: Hello my dear friends. And again, good evening to you all. Okay, in previous steps, we actually chose a model and create at the primary sketch for it. Now we want to assert on shading days fate. He transferred our primary sketch to our cardboard because we wanted to transfer it cleanly and do not mess up with our Cardboard we've created on a paper, dark and the back of the paper. Put it on your work, tape, it on your cardboard, go over your lines, so give it have primary escaped on your cardboard. Well, I've chosen A4 size for my work, but for your practice you can also use a three. We start with an almost big brush. I've chosen size 16, and I want to start from the sides and create this upper part of the foot and volume for upper part of the foot. And one thing that you can do for getting a clean volume, you can use part of a cardboard or part of plastic cardboards. And the part that you don't want the shading to get out of. You can cover it with this. You can cover the outer part with a cardboard or something like that. So when you're shading, your shading do not get out of this line that you want. Just like this. You can keep your shadings in these areas and do not get out of line so much so your work will be cleaner and better. Of course, this area, because around it is completely white. You can easily erase it, but you can use this procedure in other parts which have a different background. So because we could use it here, I wanted to tell you about this idea. So you can know. You might have to use it in some parts, in some sketches. As slowly we are adding the darkness to our spattering is, and we are creating a volume for our foot. According to what we have done up to here. Because we are creating a background color for this area and a foundation. We are using an almost big brush. It's something that we use for actually everywhere in chiaroscuro, a technique. And we have the background, color and foundation with a big brush. Even in these bars, I can even use a bigger brush, for example, size 20. It's a big area. For now because we have a border line here. We do not have any problems with that. And so easily we will drive the shadings to the front. In this part, if you like, you can also put your cardboards so your shadings would not go out of their line. And they would stay in the area that you want. Or you can work your shadings very slowly with so much cautious. So your shadings with not get out of the lines. I try not to rotate my work so much. So not ruin your angle of seeing the video. I tried to rotate my hand, but for you that you're doing it in home, you can easily rotate your work and get a comfortable angle for your eyes and for your hand. Will create a very light background color for this part for now. And do not rush through darkening this area so much. Now for here I really have to rotate my work because I cannot turn my wrist that much. The model is right next to me. And as I've told you before and you've learned before, I would tell you that whenever you rotate your work, you should rotate your work in the same angle. This way you will challenge your eyes less. So you can find which part we are shading now, how much it should be shaded, how it should be shaded and someone. So it's better whenever you rotate your work here, rotate your model picture. These parts will be shaded in lighter colors. For now, we just want a foundation and a background color and nothing more really. If you have paid attention, I didn't put my brush in into the powder anymore. And I've used the leftover darkness in my brush or the leftover darkness that I have in the upper part. I try to use the same powder to create by colors in this background color. This will be actually very easy for you because up to now you've learned so much for shading, creating the background and so on. So this should be very easy for you. Okay? We want to work on some parts which are a little darker. And it's better to separate them in this very step. For example, here, it is darker and definitely it shouldn't need more darkness even. But just to create a general volume for our foot, we add this darkness. Between the toes. There are parts that needs placing the darkness with our pencil, but we can also use brush for a little for creating those parts. Because the parts we need more lines would definitely be these toes. And for separating them, we should definitely use our pencils. But we can create some darkness to them right now. Up to a point. Then we can actually complete them with our pencil. In this area. We have a prominent part like this that has created a shade. Okay, we can move on one step and actually dark canal shadings a bit more. I will take more pencil powder on my brush. And I will come back to my shadings again. And I try to give more volume. Today's shadings. Be careful about that. You may have some wood of the pencil in your powder. So b, so much careful about that. You do not bring it into your work. Can make your work less cohesive or it can create some stains would definitely not be very helpful for what we're doing here. I will take a smaller brush. I will continue to shadings toward down. There are parts that you can see the veins on the foot. In the primary sketch, we've actually determined some of these and creative them. And when we're doing the background colors, we might lose them and fade them up to a high level. But before losing them, we can use our brush to create a very slightly shade next to them. And then we will move on Doris of our work. This can actually help us to be less engaged into looking for curves and prominent parts and veins and stuff like that. But of course, all of them needs to be shaded. And for an address because we want to not lose the primary sketch. We're just going over them once, making them a bit bold. So it would not lose them. And we can see some veins which are here to exist here in these parts. Okay, on this slide, well, we can go to our pencil and create some of these areas with our pencils. I mean, the areas between the toes. Let me zoom in a little for you so you can see what I'm doing. So, so lightly, we will apply our pencil. Not so much because actually you should not see lines in our work that much. Even from the first steps that we've started, we've said that we do not have any separate lines in hyperreal pictures and paintings. And they should be completely faded. So it will apply the darkness. And then with the help of our brush, we will fade them. But anyway, the separations should be done by our pencils because the darkness in these areas are so much. Okay As you can clearly see. We will add our darkness with Sam much accuracy. Even these darkness which are actually the shadow of the foot, they're going to help us so much in creating the volume of the foot. Because even the shape and the color of the background is effective on creating your work. So in this very beginning of our work, we will create the darkness which we have in our background. The very strong effects that the background color has on our work is that it's, we'll show our work to look more natural and it gives it a third dimensional look. And it can even show how this foot is placed on the ground. You see in adding darkness, we do not create them so much on, we do not overdo them because if you pay attention in this model, you can see the darkness is not so much. You have a very thin layer of darkness and then you should fade it toward outside so you can show the foot is on the ground. When you want to apply the darkness, try not to rush through it always. Because if the thickness of darkness is less than you thought, you can easily add to that. But if you've added more than it needs to be, erasing, that might actually make your work messy and ruin it. So in the first step when you are creating the darkness, you should be very careful and accurate and you should go on very slowly with so much patients. And k. As you can see, we've created the darkness and we needed, but we'll definitely need these darker spots to be more and it should add to them. But for now, this is enough because you just wanted to see how our sketch will come out. For these parts which are so small, I prefer to create them with our 0 brush. Or if you don't have that, you can also use your fader will drive these shadings a little bit towards the outside. And then later you can even complete them more. Before we go to the volume of the toes. You should Fei these darkness that we've created in these areas between the toes. Go over them once with our flat brush and a nexus, we will create the volumes.
62. Initial shaping and volume of the right toes: Okay, My dear friends indices. So we want to work the volumes of the toes and just create the shapes for them. As you can clearly see, the area for the fingers as a small area. So we are going to use our small brushes for this part. The first thing I want to do is to determine the placement of our nails a little with our fader. So when we start shading, we can be careful about this area and he won't be lost. And it doesn't get faded away in our shadings. I've got so little pencil powder on the tip of my fader. And I bolded these areas. Now, I'm going to use a smaller brush, for example, brush size 2. And slowly we start to create the shapes. From this corner. Slowly we add to the darkness and reshape them actually. First, we will go for the darker shadings and recreate them. We can also use the darkness that we've created in the distances between their toes or beneath the foot. The only reason for us to use a small brush in here is that we've decided is smaller size for general size of our work. And then the date that even for the background colorings, we have to use a smaller brushes. If you are creating it in a bigger size, you can use bigger brushes because I'm just doing a background color and the darkness are not clear so much right now. I tried to control the degree of my darkness and do not dark and eight so much. Narrowly, wherever there is a curve, we have more shading and more darkness in those parts. And generally the dark shadings start from that parts and they actually come to our, to our lidar parts. Therefore, we will shape the corners like this and we create their shapes. And they actually dragged darkness that we've created in these lower parts. To the upper parts. Just guide them. Again in this area. And a little under the males. As you can clearly see, the slowly we are creating a very small volume on our toes. The biggest needs more darkness underneath it. Therefore, I will take a bit of pencil powder into my brush and then I brought it into my work. Do not worry about these bars getting out of the line. Because in this work, the background is light and white and you can easily erase around your work. Let me take a bigger brush. And I would go to these parts. Be careful if you have chosen a bigger size for general of your work. You need bigger brushes for here. For example. Now I'm using Bryce size 2. You might need a brush, size 4 or size six, a fee are doing the whole thing in a bigger size. The tip of this brush is a bit disordered. In situations like this, you might just cut to a little bit of the tip of your brush. So you can make it flat and all one size. And you can also do it on the sanding like this. Then again, you can use the same brushes on your works. Again. K slowly will add at the amount of our shadings to the volumes. You see the toes are having a shape to themselves. And they're actually getting meaning. But should consider that when you print your picture, you should control the amount of dark and light. Maybe in your printed picture the photo would be darker or lighter. So the amount of darkness and the light that you're using in your rug also depends on your printed picture or whatever you're working on from. And on the other hand, it goes back to your personal taste. I chose a bigger brush. I'm using brush size 14. These areas need more darkening that are actually completing them. And as you can see, I've created as some lines for the veins from before. You should definitely do that too. You should make these lines darker. So you would be easier. In creating these works, the side parts needs a so much darkness that creating that darkness. Darkness needs more time. So I would generally do some work for you. And then later, according to them, you can complete the other parts. Two. In this area, as you can clearly seem to photo, there's a darkness which actually connects to this vein we have here. So before we get to the details of the veins and show them, we would actually determine our darkest spots more. As you can see in some parts. We need to take more pencil powder into our work. So we would have the darkness that we want. And we can shape it. You see, with adding these darkness, even though they're little. How much you can have impact on the area of your work and give color to that. You can clearly see that venue of created basic background color on the toes and other parts of the foot, how much it had effect on creating the volume for our work. You can see these parts need more darkness. Just thank this. And the nails are not like that, they don't have any color. So according to what we see on the model will give color to our nails a little. Actually, we would not leave any white parts. This part needs more darkness that I want to add this darkness in this step like this. And I'll take a smaller brush. I want to use 0 brush. And I want to add to the darkness to these areas. As it goes up. It has more space. And again, I can use a bigger brush because as I said, the area will allow us to use a bigger one. As much time as you spend on your volumes, you can see that your work will be shaped more. There is a line over here that we forgot to create it. Okay. A line which is a big curcuit here. In this area that we have even more darkness, I will take more pencil powder and I will darken this area even more. Just like this. That of course it has some textures. And finally, we'll go to the base TO first separating days part. It needs to be more dark skin. And this darkness will spatter. In this area with our brush. We will spatter disbarred completely. This line which exists here, would be more bold. And we will add today shadings of this TO from the inside. So the separation of these two toes would be better. If you pay attention in your model. You can see in here, the biggest row, the first row is darker. Comparing to the second one. We will spatter to darkness very well. You say we keep a part lidar. It doesn't mean that we keep that part white. It actually means that comparing to the other parts that we are shading, we should keep that pie part and litres so at the volume of that area will be more correct. In this part. Under the nail. If you pay attention, there is a curve that can actually darken the area more. And actually a bit, it got a bit busy with shadings. So we can determine the position of the nail with a use of our eraser. But definitely for creating the shape of our nail. We will work on it more so it can be shaped more. Okay, My friends, as you can see, we'd working as slowly and moving forward slowly. We can get the shape of our toes. And of course it needs more time. We need to spend more time on it so you can shape completely. You should go on exactly like this. Work on the toes and your conduct curves more. So we can move on to the next step. You tried to go up to this step and then we'll come back and we want to explain you about the shadings on these parts. I will complete the shadings on these fires and create the shapes and the volume. And you do the same so we can move forward.
63. How to form and draw veins and bumps on the surface of the foot: All right, my dear friends. As I told you at the end of the next previous step, I added darkness to those parts and the toes actually. And this part, which is not really related to the foot, but I added darkness because it is in the model. And for darkening that part, I actually transferred pencil powder, direct my rough brush into my work. I didn't work on these parts more so we can do it together. For creating these parts which are actually related to the veins on the foot. He should be very careful about them. And you should add the darkness step-by-step and slowly to our work. And at the same time, you can get a very good volume from your work. I will zoom in a little so you can see better. Okay? Do you think you need to do is that you will take a little bit of pencil powder with your small brush here, 0 brush. And you will show these prominent parts and these curves on this placement and the position of the veins. You just determine their placement like this. Keep your eye on the model always and create these lines as the way, as your model is telling you. Of course, I've created all of these parts and my primary sketch, but they got a bit faded in shading. But in previous part, I've used my brush for sketching them again, and I didn't go to my pencil because I didn't want any pencil trace to be left on these parts. And in the original model, this part of the foot has a stain and that is actually was on the model itself that I prefer to eliminate it. And I create a normal foot. Just like this. We create a darkness in these areas. I haven't darken this part yet. It should be darker than this. For now, we do not go to those very small veins or very small ups and downs. First, recreate the main parts and the bigger parts. Then a next step that we've created the volume for these parts. We will move on to those details and we can actually tell them the decoration of her work. If you pay attention. Our work is like we're going from the general shapes to the details. First create digital shapes that create a general volumes. And then after that, after that is set, we will move on to the details. And we will go is smaller in every step. In this very first step, we can add these darkness that are actually separating the placement of the toes and this prominent part from the rest of our work here, we can create it in this step easily. And at the same time, it will create its shadings so it can be shaped correctly. From the inside. I will add to the darkness. Also in here. That word might be not complete to you. It is correct Because our work has so much more to do. Now we move to the heel and we kinda add the darkness to that area. Because the heel is also darker. This area needs we need light so we don't go too much into it. And it will add to the darkness to the Hill. We're going to work with our pencil and determine this area here. You should have no hand pressure. Okay. Now we want to work on the parts that we've almost created the veins. Something that needs to be added in here is that between these veins, we need to add more color, more shading, more darkness. So these areas would be shaped. As we come to the lower parts of the foot, it gets more light. Therefore, we do not dark in these areas so much. But if you pay attention, if you'll move on with these upper parts, in addition to that, the color of the foot will be shaped it spontaneously. The placement of the veins will show themselves. You can see how easily we can create these ups and downs. On the surface of the foot. The Spain is completely prominent now. And very, very lost. The lights in some parts. It's okay. You can use your eraser a little. And again, do your shadings. I want to use my fader a little so I can create more volume for these veins. And just like this, I will create the darkness for the top of my veins. You don't have to go forward as same degree of darkness in each part. You can actually use a variety in your darker spots and lightest bonds. So these veins would actually have different shapes and they do not look alike. Should also give color to this part. As you can see, this area has so much darkness and this might not seem so much. So we will come into our work with our eraser a little. And we will lighten the area just like this. And we'll actually add some more darkness to the right side of it. And we will create a volume for that. It's a very, very simple thing to do and it's so enjoyable. Do not be afraid for creating textures and volumes like this. First, create the background of your work. And after that, it was shaped according to your own personal creativity. You can create the textures. And again, I say when you do not be afraid of creating these textures, they can actually be enjoyable for you and you will know how to use your tools to get a very unique outcome. We will add the darkness for these inner veins to. And after creating the darkness, as we did on the previous step, we will fade these parts and shade these parts. Just a thing is that these veins which are most inside, are thinner and finer. And just like this, you should add to your shadings. And then also from the opposite side. For each part after you've created the volume and after that you felt like you need more a little veins to be created in them. You should not get stressed. And as you've seen there, we can use our eraser on the part that you want to create the vein. But be careful you shouldn't generally erase that part. Should just create the prominent part. And with adding the appropriate darkness so that part, you can actually complete your work. One of the most important things that we have to be careful about, and it can be very effective in creating the textures, is that you would be so patient and you do your work without any rush. If you rush through things so much ill actually make you not be successful in creating the textures. In the mall that you have. These veins are more prominent. And for them to be shown more, we might have to darken some areas. And again, you should remember that if you have a bigger size for your work, creating these kinds of textures are definitely easier for you. Now I'm using a small size. Just like this. We would work on all the foot and create all ups and downs, all prominent parts, and all curves. And we actually shaped all of them. Okay. It's not bad to use our pencils for some parts and complete some lines a bit more. For example, here. Now that we've Anne got all these shadings, I think it's better for us to have some pencil lines. Or even here. And of course the shading should come toward inside. Also from the side. We'll drag our brush on it a little. Just like this. You see are prominent parts and our curves are getting into their own placement little by little. And attractiveness of our work is being more and more generally, creating any shape is so enjoyable, even if it's a simple cube or a simple globe or ball. Either is the parts of the body or more complex things. And k, they have a line which is almost in here. This is actually one of the veins. On the foot. From one side, it should get faded toward upside. And on the other side of it, it should get a bit more color. So this area would be shaved and separated. Okay. I think the darkness of our parts are enough. Now maybe it's better to go to details of these bones here. For example, we have a bone over here and it has a darkness like this. Or the prominent parts which are being shaped here. Maybe it's better to shade beneath this prominent part. And from here we go up. So the shape of this prominent part will show itself. Just like this. As you can clearly see. The shape of our foot is mostly done and it's shaped. Here we have more darkness. And we will use our fader a little. You haven't worked on the toenails yet, but we will do the same for creating the rest of the veins. So later we can go to the next step.
64. Volume and texture construction on the foot: Okay, My dear friends, as you can see, I've created some lines that needs to be here. And I've used my 0 brush for adding the darkness. And in the parse, which I have very strong darkness, I used my pencil a little on them. And I decided that he would be saying this step, which we need to use our eraser is a little and create some more volumes. So be careful about the progress that we've created these darkness at the sites of them. This darkness needs to be a bit faded toward the outside. Because it comes from a deep part, a curved part toward a prominent part. In this part we have less darkness that we are going to add to it with our pencil. And we'll drag it to this site. These bars don't have actually any white parts, but for creating that contrast, we are going to use our areas are a little to create some volume to our work. Is he? Now, you might think like this area is too dark. But because the areas next to them needs more darkness, it would be okay because when you add the darkness behind them to the back ground of them, you can see this darkness is not so much. Now the outer parts have some darkness which we create. So we can see the volume of these veins are being shaped so simply and so well. Do not get afraid about the complexity that you might see in your work when you create them slowly and step-by-step, you can see that you'll get your result that you want it perfectly. You should work on these parts EBIT, finer and thinner because the whole size of our work is a small and this areas is small. We should be careful about not losing any spaces. Pay attention when we want to create a texture and a volume like that. And you shouldn't add a darkness and a light right next to each other. From the darkness to the light, they should be in steps and levels. So when you start from the darkness, slowly, your shading should transfer to the lighter colors. So as you can see this darkness as a goes to the left side of it. And the shading will get a bit faded so we can get volumes correctly. It's also the same for here. Explaining the things on this area I think is more visible for you because it's bigger. And you can clearly see the change when we complete the shadings. In here. Then domains connects to this side, needs more light. And this lower part needs a bit of darkness. And this darkness will be continued and here. So the volume of this vein next to it will be completed. Be careful not to lose this area. But of course you should not be so afraid. And it should not worry. If it got a bit darker that you needed it to be. You can easily use your eraser on that. And we have a small vein over here. Because this work takes so much time doing them one by one. I do not create all of them in the video for you, but it's better for you to pay attention on this part so you would know how to create the rest of our work. And all of the veins on the food will be done with the same procedure and this same tools that we've worked up to now. If you need to use your pencil on a part, pay attention so much that you do not press your pencil into your work so much. So when you go over it with your brush and you will create the shadings, you would definitely get that faded color that you want. But of course in here we do not have any veins. It's a prominent parts on the foot. It's for here. And of course, I've told you in the previous part two, if we have a stain on this foot that I've actually eliminated it, I prefer to create my foot cohesively and a one-color. Don't want any extra stains in my work. Okay. Should always remember that before adding the before taking the final darkness of your work, you would determine the placement of these veins, of these curves and darkness is in your work that when you're shading, even without using the eraser, you can show these curved parts. There's a very small prominent here, permanent part here. Now for showing that you should complete the shadings. The opposite side of it. We leave this light and we will darken this middle area. This can actually help you to keep this middle part light so it would show more prominent. And it can get the shape of your model. So easily. You see in these parts we can almost see the shape that we can see in the model. So many parts. You do not have to take the pencil powder. You can use the darkness that is left on the tip of your brush to create the shadings in some parts. And the parts that you lose your lights a little, do not worry about them either. You can easily use your brush eraser or your eraser and bring back those lights into your work. But if you pay attention during the shadings that your light will stay as much as you need them. You can have more smooth work. Just like this, we add the darkness, these areas. The darkness that we've created with our 0 brush should be a spattered of it. Now, the lines in these areas which are here, the lies are at the right side of them. And it completely depends on the angle that the light is coming from. If you pay attention, you can see on this side, the light was on the left of the curves. And in this side, the lice are coming from the right side. And we'll work on these parts for you a little bit. So you can see and you can do the work yourself. I'm going to use my fader and level. Now for shaping areas like this. You have to have so much patients and you should do them so slowly step-by-step. Because it doesn't have a general big shape that we can say we can do it so fast and get over it. We should move on very slowly, so much principles like this. And at the same time as we're creating, the texture will shape this darkness we have in this area. This area of the food actually has some curves in it. When you're creating the textures. Some of the lines might get faded that you can easily bring them back to your work like this. And of course, as I told you before, as much as your work is in a bigger size, you can create these kind of textures easier. Also in here, we can see three prominent parts that we will create, their placement and their positions. We will use our eraser on it a little. And then in this part, we can also see a prominent shape like this. It's actually a vein coming up like this. And because we have less light, first we are going to create it with our eraser. And then next to that, meaning, on the right side of it will create its darkness. That of course, this darkness will get a stronger in here. And we should add that we should actually have the same darkness in those two areas of the foot that in next level I will do that. Now on these prominent parts, you can go over them and add more shading to them. And we will actually reduce the white-collar of this area. It's definitely is prominent, but is not that much that these parts will be seen completely white. Be careful about that. As you can see here. It'll work on these prominent parse and these curved parts actually led them to show themselves. This lower part also needs more darkness. That from my point of view, because this far it should not be white. It should be at a contrast that actually separate these parts. So you should so smoothly and Stoli shade that part with your pencil at first. Okay, My dear friends, I think it's enough for this step. You've already got familiar how to work on these parts. Especially this part has so many textures yet, and we should work on it so slowly. It's so much patients, but the procedure is the same. I will add the darkness IO completed and veins. And we will work on the next part of our foot, but at the same time. And you can actually do the background shading for this other foot too. Because again, I say the procedure for both foot feet are at a same as the same color as the same time that we are creating the veins on the right foot. Redo the background color for the left one.
65. Completing the darkness and lightening of the left foot: Okay, My dear friends in the previous step, I've told you the basic procedure. Because of that, I'll just explain this part more fast. We will use our big rough brush on these parts to complete their shades a bit more. We will work on the lower parts of the foot width as smaller brushes will also do the same for the left side of the foot. You'll add a darkness so that we can show and the curves, and we can see the prominent parts at the sides, at the middle of the foot showing itself more. We'll get to extra shadings. And at the both sides of our work. We will do the same and we will make our work look more clean. Rule use our mono Zero Eraser and this edge, light edge we can see on the photo. And you will complete the darkness with our pencil. So we can actually have very fine edges for our work. Departs, think cities. Top of the foot, the surface of the foot. We should create some darkness that I'm using a medium-size brush for that. And vid, a bigger brush who will fade them. We've actually made, are shadings more cohesive, vivid, a big brush. All right, now you will go to our left foot of our model. First we will add the darkness beneath foot is actually the shadow of the foot on the ground that we are creating it with our B6 pencil. Wherever on our sketch that it can see strong darkness. And in the way that we can directly created with our pencil, we will apply them right now, for example, I can see darkness, these wrinkles on the ankle that we can create them with our pencil. They are almost a strong darkness. That's why we can use our pencil directly to create them, the wrinkles and ankle. If they were light, we would have created them with our brush. We will lightly create a border between the toes with our pencil. Then we go to this side of the foot. As you can see, you can also work on the outer border of the right foot because it has so much darkness, we will apply it with our pencil and we will faded with our brush. Now, we will come back to our left foot and we'll fade these darkness that we've created underneath our foot. Also, the textures that we've created on the side of the foot and up to the ankle. We will fade these darkness in their own placements. And slowly we try to create some volume for this left foot. Now we will take almost bigger brushes and we'll add to the darkness around the ankle. And also in these lower parts of the foot. Because the lower part of the foot, it's facing the ground. It has more darkness. It has darker shading. So we start from there and we drag the darkness toward up. Now we'll take a big brush, size 22 or 24, will shade the surface and the top of the foot and create volume for them. Then we will come back to the textures on the side of our foot. On the parts that we've created, the lines, we will bring some pattern or pencil pattern next to them. And we'll actually make those lines to some wrinkles. At the side of the foot. Will take a smaller brush. We will use our brush for the wrinkles. For a smaller wrinkles. Pressure is Sir can create our lights in this area because they're not as strong lies of sale. We need some lights. Very slowly. We worked with our brush eraser because it creates a medium light in our work and we can easily use it to show are prominent parts on this foot. We continue creating the volume in the smaller parts of the foot. The small Bosch, for example, by size two or four. At the same time as we are creating the textures. We will also use our eraser so we would not lose the prominent parts that are for the veins and the inner side of the foot. And we will create them with our eraser. So at the same time, we will get the texture and the color of the foot. We will create more darkness and more shadings in the curved parts and in the prominent parts, we should have more lights. We will drag these shadings toward upside. From the size and the edges. We go from darker colors. And we come to the center with lidar colors. According to the model that we have, this right side of the foot have more darkness because it is in the darker position. So we're going to take our pencil powder and it creates some volume for that. From both sides, we drag the shadings toward the center of the foot. And the center of the foot where the light has been shining on it. We'll keep it lighter. Also in this food will erase the shadings that got out of line, will clean all around our work. Just be careful if the background of our work was dark. We didn't have to clean does shadings, but because it's not, we have to. And we also add to the darkness on that top area. And we will give a dimension to our work. And we'll use our eraser for this edge, which you can see in the model. Alright. Now we can come back to these lower parts of the foot and the toes. I'm going to use a small brush to create the shadings on this area and the surface of the toes. And then with a bigger brush, we will fade them. The slowly we will add to the tonnage of day, to the range of the darkness. And it will add to the darkness these lower parts of the foot. For creating more volume and better shapes for them. We will create the border of the toes with our 0 racer, also the shape of the nail. We will use our 0 brush or our fader for creating those shapes. Now I'm using 0 brush. You can also use your fader for that. We're adding these darkness and toes. Actually the volume of the toes are being shaped more and more and l are getting better shapes to continuous of the toes. If you pay attention. There are some bones that are coming toward, up to and we can see a little bit of their shapes. Therefore, we will continue the shading of their toes and create the shape of those bones. And then we will use our eraser on them to make them more prominent. Will add a layer of shading to the lower parts of the foot and underneath the toe. And we're going to use our brush eraser for some parts to make them more prominent. Wherever you felt like it needs more darkness, you can use your mono 0 or even your electronic eraser if you had a strong lights around and toenails. We need a very, very light border that we've created them with our pencil.
66. Initial drawing of dark hair above the head: Hello my dear friends, and good evening to you all. For the tutorial of the hair, I've decided and chosen this model for you to work on it together. As you can see, I've already did the primary sketch on our cardboard. And for creating that primary sketch, you can create some vertical and horizontal lines on your model. For example, in these parts, you can create your vertical lines and, and this part it can have a horizontal line and another one underneath the chin. So you can separate the model in different parts and create a primary sketches. All from these parts. You can create a sketch on a usual paper, A4 or Paypal. And just a sketch behind it, dark and behind it, shades behind it. And then you can transfer your sketch into your cardboard. We will do that. So we will not have any MS in our cardboard. We start from the upper part of the hair. I've decided this because we both have a straight hair and wavy hair. And we can show both of them in one sketch. You start from the straight part of the hair and we start sketching. We take our B6 pencil, we will sharpen it completely because we're going to create hair and a purse which we can see strong darkness. We would go over them with their pencil, Try to keep the placement of the lights. Of course, we would work on our sketch with our erasers. But when we are using the pencil directly, it would be difficult later to work on it with our eraser. That's why we tried to keep the lights on the parts that we can obviously see them. Pay so much attention to the direction of the hair. This is actually one of the most important things in creating the hair. Try to rotate your pencil in your hand continuously. So you would find the sharp edge of your pencil. So we're rotating the tip of the pencil in your hand. You can find almost sharper part of your pencil and use it better. And when ever you, you felt like you've lost even that quality and option in your pencil, you would do yourself a favor. And you'll sharpen your pencil for creating a hair like the previous tutorials. And I've told you, do not rush through it. So you created in one or two step and just let it go. You might even take the darkness so much into the light parts because you rush through it. And darkness that is coming into the light bars would not be actually, you would not be able to take them away. But if you work a slowly, if you have enough patients, you can control your darkness more, you can work with so much more peace without any stress. And it would be careful about the darkness not coming to the light sides. Although we've created a very precise and grades primary sketch. But we should always keep an eye on the model itself. So we would not misplace any of the parts. Try to separate the parts of the hair as you can see in your model. I've also forgotten about this part. There's a very strong darkness that is coming down from here. And it's a part of hair. So finally, I'll sit in these Pirates fans strong darkness. Do all of this area and fill it like this.
67. Drawing darkness in the area where the hair connects to the scalp: We'll continue our work. We're working on the start of these hair coming out of this clip. Will be more careful in here. Do not create the lines with so much hand pressure. Create them so smoothly. So later that when you want it to fade them or you wanted to use your eraser, they would then look like any borders or they won't leave any traces. So you can really fade them into your work. Be careful for the hair like this, which are actually so clean and they're not too wild there, so neat and clean. You should have an order in creating your hair so you can get the correct color and the correct a smooth shape that the model has. It should show them perfectly. Or in other cases, when you have wild hair, which means they're not completely neat and touched, your hand is more free to move and create the hair, and it would be actually easier for you. But in here, we have a special order. Just like this, we add the darkness. We also need darkness from the top of the hair. Although the top of the hair is lighter comparing to the lower part. But anyways, it got some shadings and it needs a bit more darkness.
68. Shaping the volume of hair in the straight part of the hair: In this step, B12, some of the darkness that we've already created. And even add to the darkness of the model with our pencil powder a little. First we drag our brush on the hair that they've already created. And we would actually mix them into our work. There is one thing about using the brush when you want to create hair. When you're creating hair. In the contrary of the other parts that I insisted that you should move your brush in circularity movements in here. You should not do that. And actually you should move your brush linearly. And you should move it in the direction of hair being stretched. You should just go and come back. It shouldn't be circularity. In the contrary of all the other sketches that we have worked together. And there is another thing that I think it's better to explain it for you. Generally for the light hair or the hair that you need to use your eraser so much on them. You should try to use less pencil and actually create the hair and the volumes more rich shadings. And another thing is that for the hair like this, which has so much light, and they are light, it's better to use your soft brushes. Like this brush. You see it has a very soft tip. And look, I'm taking a bit of pencil pattern and you see it's very, very good for this part here. You see the shade that it creates is so smooth and so light. And the reason that we use a soft brush is that it will actually get a less powder into the texture of our card board. And when the cardboard gets less darkness into its texture and it only stays on the surface. You can use your eraser on it way more easier and you can easily get the powder of your cardboard with your eraser and create the shape for the hair that you want. Again, I say it's better for the hair which have so much light like this one that I'm using. Sorry, I'm sketching. And of course, this hair needs more darkness in the dark parts. I'm using my soft brush still, and I am directly transferring the powder into this dark area. But of course in this hair, it's not necessary to use a soft brush. Because with Raph and Tip brush, you can also get the same result. But I advise you to have a soft brush on a medium size. Think is better for you. And if you want to know about these soft brushes, they are actually brushes for oil paints, brushes painting. And if you look at the tip, it looks like a cat's tongue. So that's what they called cat tongue brush. And I'm using size 10 for now. These parts at the end of the hair that we don't have enough area to drag our brush in a linear way. I have to move it a bit circular E so I can create enough darkness because I don't have enough area to go up and down. Spattered how they're completely up to a point, you will get the color of this area completely.
69. Create highlights on top hair with eraser: Okay, My dear friends, we've gone so far. I've add darkness. Today's two parts, a little bit with my soft brush and a little love my rough brush. And I added some pencil powder and these parts, and I've darkened them. Now I want to work on the lights which are in the middle of the hair. For this, you can use different erasers. For example, the ETO do usual eraser like these, which I have sharpened both sides of them. Or you can use mono Zero, which has a cube tip like this, and another one which is in circles and it's a smaller, each one of them can be helpful for us in different situations. Now I'm just going to use usual at moderate serves. You start from a corner in the side and we start applying the lights on the hair. Try to keep your hand vertical on your word for creating these lights as much as you can and drive them onto the darkness. So the shape of these lights would be as the way as we want. Pay attention that we would work on it later. And it's not. Our last step of the work is still how work on this part. The thing I told you about using the pencil and rotating it into your word continuously. It's also true when you are using your eraser. So you should constantly rotate your eraser in your hands so you can use a sharp edge of it and also the cleaner edge of it. So you can use it better, faster and easier. To see. I haven't sharpen my eraser yet. But if you felt like your eraser needs to be sharpened again, you should definitely do that. So you can create so fine and smooth lines here. Because we want the lines of the eraser so fine and thin in your work, you should always be careful that you would not press your eraser too much into your work and your hand pressure should not be much. Because if you do that, if you push your eraser into your cardboard, it would not make a great thin lines. You see if the tip of the eraser is sharp enough. Just a tad and a touch will be enough so it can give you delights that you want. These parts are not so light into our model. It's not as light as the middle part, the center part. So we just go over them with our eraser so we can get the correct shape of the hair. And then later on, we will create some darkness on top of it. Again. This actually make sewer, makes layers of darkness and lightness on top of each other. And it will make your work look more natural. We will do the same for the bottom part of the hair. The darkness should come up this part. But we will work on it later. Now we're just adding the lights. And after this again, we're going to use almost rough brush. And we will add to the dark as in our work. And we'll darken this area. Keep an eye on your model and do exactly as you can see in your work.
70. Drawing hair on the front side of the head: Now I want to work on this front part of the hair. From here on did general procedure is the same as if I said up to now. It's just sad. We should be more careful with keeping the lights and creating the texture. And something that is important is to continue to direction of the hair will. Because if you have any problems into direction of the hair and a whole hair can lose its natural shape. So that is very, very important. You should keep this hint in mind that when we want to create a hair which has a very light color, but still you can see each hair. You can use your lighter pencils. For example, right now I am using B6 pencil. But you can even use lighter ones like before or even B2. So you can keep the light that you need to have. We work on these lower parts of slowly. We don't want to rush through anything. Now when the tip of your pencil has lost its sharpness, it should definitely put it aside or sharpen it again. So your work would not lose any quality. So the time us spend would be useful and you do not lose your time. When you come to these parts which are less twisted, then you can work on them one by one and part by part. For example. Who work on one part, which is to instead of video or pencil. And then when you got a shape, you will move onto your brush and due to fading. And then after that, we'll move on to the eraser and do it. And at last, we would create some little hair with our pencil again. And again as I told you before, as much as you work on your hair, you can show the volume of the hair better and more. So you will go through all of these steps, ones, meaning that doing, creating them with their pencil. And then you would go with Annette with a brush. You would work with your eraser. And then you repeat them all again. Sorry, creating a small heavier pencil and then you go all over them again so it can be better result. I'm sorry. For this part because it's a small area. I am getting thinner brush. This is size six because here we have kind of a small area to cover. Try to separate the part of the hair from each other because this was actually going to help your work. You can also do this with a soft brush. So it's kinda your choice. Wherever you felt like the darkness of the area is less. You can use your pencil powdered, take it in your cardboard and spatter it. I'm going to use my soft brush.
71. Completing shading, volume and lightening of the hair on the front side of the head: You see, you should be very careful. Hair is like the we've created. It has a volume that you should paying attention to. That in addition to that, you're creating each one hair very well. You can get a good volume from the hair that you're doing. This part of the hair has so much dark mass, so we easily bring our pencil powder to our work and get the darkness that we want. In here, the choice of the hair is more. So we can see a twist and curve here. You should create this shape with adding the darkness in the correct position. Love to extra powder from your work. I'll take a bigger brush and make our work look more cohesive and altogether. And then we want to work on our erasers. Erasers. And I wanted to tell you about in previous part, is this mono Zero eraser. You see? This eraser has a very thin tip. And It's very good for having the eraser on hair or on any thin lines. You can also use this eraser for creating day hair that lies for the hair. And when you want to work with this, you don't have to cut both sides of it. You just need to create a cut like this. And you use the tip of it. And you can use all around your eraser. If you pay attention. The times that I've, I'm going to sharpen this eraser is less than the times. That we've worked with usual edge at erasers. But again, I tell you it's not necessary for you to have this. You can do this video or a normal erasers to bugs. You might need to sharpen your erasers more often. Now, it needs a bit more sharpening, which I'm using my cutter for that. You see, I'm cutting it and this angle, take the two cuvette completely off. And then again we'll start working. And F there, this step. Again, you can use your B2 pencil or B6 pencil depending on depart that you want to work on it again. You can come to your hair again and get a better shape for your hair. Will get more shape for them. Just like the way I'm doing it right now.
72. Adding dark hair strand to the front of the hair: Okay, now I have rotated my work so I can put my hand in a better angle and more comfortable angle. So I can add today here and use my pencil more. And at the same time, I will not lose any directions. We can see in these parts we have parts of hair that at the same time that they have a special or there they don't hand. It might be a bit confusing for you, but if you pay attention to your model, you can clearly see dad. And it can actually help you to have more natural hair. And another thing that we can do is that here we can use a smaller brushes. In these middle parts. There are some darker parts. So we can create them very well and continue it on Word so it can get a better shape and better volume for this twist set part. Now I'm using my size two brush that you can clearly see. The tip of it has been sanded away a little. That's because I've used it a lot and it's an old brush. Do not forget that when you've added your erasers and worked a little, you would need to work with your erasers again. And when you're using your eraser again, you don't have to repeat all the lights that you had before. You just need to insist on some parts and focus on some parts more. And you can get the shapes more correctly. Create a darkness, sorry, create the lightness and darkness you add it. Okay.
73. Start drawing of styled parts of hair (creating darkness and shadows and volume): Hello, my dear friends. We are going on with the rest of our tutorial. And today we want to work on these twist at the lower part of the hair. According to what we've done on these upper parts. First, we start with these bars, which we have more dark, more darkness. We create them with our pencil and we feel all those parts with our pencil powder. For now, I'm creating a strong darkness with my B6 pencil. As we have always done. We work with the dark parts first. These inner parts have almost a strong darkness. The parts which are underneath obviously should have more darkness. So we do the same. In some parts. It's so obvious that you need darkness. Even if you don't pay attention to our model or even you want to not work from the model and be creative. You can definitely see that some parts are, have to be darkness. For example, these lower parts, these parts which are beneath and underneath, and they don't get any light, they would definitely be darker. But for example, here, for getting this part more curved, showing this part is more curved. We'll create a darkness here, but afterwards, we can show it better with using are shadings and are erasers. We will complete days parts. For now. We do not work on the clay ponder hair. Later. If we had time, we would work on it more. Here the hair are coming this way. The directions are very, very important in creating the hair. And now they're part, which is not bad to create some darkness for is this part, but it's not very strong darkness in here. We can see a strong darkness in here. Now we are going to work on these curves. And the lower part of the hair. I prefer to get a sharper pencil. It's correct that day do not look like hair at the end of your work. I mean, each one of the hair do not show themselves separately. But your work would be a way more beautiful. If you first created with this sharp pencils. And even controlling your hand is more easier for you and you can easily see the direction that your hair is going to be placed. Darkness. We determined the placement of darkness so easily like this. So many people are so hard on themselves for creating the hair and it might seem a bit problematic for them. But if you go step-by-step, first, add the darkness. At the pencil powder. Or some of you might not use chiaroscuro techniques and you want to only shade with the pencils. Anyway. After completing the shades, you should move on to the eraser and create the shape of your hair with your eraser to even in the parts that are not so light, even in those parts, we need to use our eraser. Because that can actually make the layers of your hair being shaped completely. Vineyard ONE, use your eraser. The volume that you get from your work will actually be more attractive for you and it would be so much better for you. It doesn't look flat. And you can clearly show the shape of your hair. Try to determine the placement of the hair correctly. It when you're doing the primary is sketch because that actually helps you to have an easier simulation. In here, they have a dark area too. And also here in these parts you can see the darkness less. That's what we are doing. This complete this part more, and then we'll move on to the other parts. We take a smaller size brush. And for times like this, you can use brushes which are not completely new because these kinds of brushes also a God, darkness into them and you can easily dark in your area. Do not be worried about areas like this because israel shaped by our eraser and I'll come back again. Again. I'm going to remind you. Here is one of the compartments that for creating it. You don't have to create your shadings with circular movements in most of the parts. The shadings are spattering in literary ways. Guide the rest of the pencil powder to this side. Be careful that your brush should go in the same direction as your hair is being stretched and twist set. And in this case, creating the shapes and using your erasers and next steps would be way more easier for you. These are the horse which we've used our pencils on. So we go over them with my brush and we're going to fade them more bit. And it also needs more pencil powder. When you get professional in creating the hair, you can see it's one of the most enjoyable and most attractive parts in creating a hair. And sorry, and creating a face. Because I'm taking the video for you. I do not rotate my cardboard so much. But you should do that. Because when you rotate your work, your work actually, your hand gets into better angle and you can get the shadings better. Now because I don't want you don't want your eyes to be uncomfortable. It try not to rotate my work so much. You can use your smaller brushes for this. But because we are only doing foundational, foundational background color, I prefer to use a bigger brush to get the darkness faster. By you. Definitely can use smaller brushes. Pay attention to your model and add the darkness to the parts that you think it needs more darkness. For example, I can see more darkness in these parts here in my model. Pay attention to one other thing too that you had definitely paid attention to before. But the printed photo that I have here might actually be different from the one that you have. And this can actually affect your work. So try to get a well printed photo with the appropriate amount of darkness. So your work will be exactly as the way as you want. The darkness of here is so much because we haven't worked on the lower darkness. You do not go over them. Right now. First we are going to create some curves and twists in here with the rest of our powder, which has been left on our brush. And so easily you've created the shape of this part of the hair. I'm just going to use a lighter shade in here because there are parts of hair getting into each other. So I can completed a slowly later. Just need a darker shade in this middle part. And this part. All right. So we'll move on to shadings, on to these fours and then we will use our erasers. Let me sharpen my pencil again. And then we will move on to creating the darkness on this part two, we denote move on to the clip so much because it's not what we are going to work. All right. Now, we tried to work on the hair, the distance between them, this space between them. And if you can see in this bar, you can see we have so many wild hair in this part. So we are now going to use our pencil on them so much. And our focus would be more on our brushes, but we should definitely use a smaller brushes. So at first we're just going to determine the placements with our pencil, tell. And then we're going to work with our brush. Maybe we can add more pencil to these parts because the model is actually giving us this permission. And also this part. Also the circle Larry shape in here. Beneath this part. You see as we move on to the hair which are more underneath, we can more easily work with our pencil and try to create their shapes. You should pay attention that it's natural that you would lose the placement of the hair in some parts. For example, I know right now, evade M sake. You should be patient and you should not rush through it. It's correct that we say we might say that it's hair, it's okay to put a hair. Bill. Oliver are lower than they are, but trying to keep it in the way that you think it's more accurate. Okay, now I'm going to use my brush to add more darkness into these parts. In this stage, as you can see, when I take the extra pencil from my work, actually I don't do that. So I directly transfer the powder that I take into my work and I don't take the extra part out of it. The parts which are almost wide, we are going to create a slight shade in those parts to this area is a bit larger. So I prefer to use a bigger brush for here. I change my brush again. And for now I'm using my brush size to the one that I was using before was my size 10. This is size two. We will add darkness to the area. Still it needs more darkness. So we'll make him more stronger in this part. Also in here. To not be so picky de, important thing in here is that your shadings would be linearly and in the correct direction. In this way you can go to the next is sage. More easily. You can see the volume of the hair is being shaped right now. So in this is our priority is to create the volume of the hair. You might say that. Why is it circularity in here is because the twist and a curve that we have in this part of the hair. So it actually forces me that I should do it in a circularity weigh in here. And I don't have any permission to work on it in a literary way. Well, approximately the whole procedure for creating the hair until the lower area is the same. But in the lower areas, we might have a bit difference because of the lives that we have of the hair. I'll complete these parts of it more and then I'll come back to you with the rest of our work. So use our eraser on these parts and shape our hair.
74. Adding lightness to styled hair: Now we want to use our erasers on the purse that we've shaded. It starts so smoothly. To create our shadings. You can use your eraser. And also you can use your small entity eraser, which is mono 0. Actually. You can use both erasers. Totally your choice. The tip of my eraser is losing its sharpness. You should sharpen it again, definitely. You cannot create very good shapes and you cannot create hair without an eraser which doesn't have a sharp tip. Maybe in depressed, sad you want to completely erase some part. It would be good. But when you want to create hair, the tip of your pencil should definitely be sharp. Just like this. We're going to work through all the war, all the hair here in the parse that we have light hair on the hair underneath them. Like here, you might have to drag your eraser stronger and get a bigger, stronger, lighter area. Which can actually show that it's the hair which is coming on the top. And don't worry about it, you can complete the shapes of it later with your pencil. When the tip of your eraser lost its sharpness, you should cut it with your cutters so you can get the sharpness that you want. Cb haven't gone to these hair, which are a bit wild. We haven't gotten to this yet. First I want to complete the general shape and the details. And then we'll put these hair for the last episodes and last steps that will create some of these here and we'll finish our work. But in this essay we are still creating the volume of the hair. And in some parts we might need shadings again. So creating those hair which are coming on the top layer of the hair, might be actually a useless work to do. And you might do it several times. So we would not go to those hair. Does wild hair on the toughest layer of the hairs. In here, we'll also have a layer of the hair which is lighter. So we can get darker layer beneath it. Better. I clean the tip of my eraser again so I can use it in here again. Because it hasn't lost as sharpness yet and well, it got kind of dark and black because of the shadings that we worked on. So just like this, we create the shadings and lights. And we are actually giving our hair a good volume. The power set are not all to be lived. Light, do not get so picky about the eraser lines to be showing so much, as much as you get the correct shape in your foundation and background, it would affect your work so much. So do not worry about it and do not get too picky. Maybe some would be satisfied by creating their hair up to this point, but you should not get satisfied, satisfied so soon. Because working with a hair, creating the shadings using your eraser is an atlas. Using your pencil again, it will actually make your work look more attractive. And that is what makes your result unique and make it different from everybody else's. This patient can actually make your work more beautiful, especially about the hair in the face. That is actually going to make it so beautiful. If you have enough patients, you can get the result that you want from your work. You see up to here. Because we have just created some lies and we didn't do anything special. The shape of the hair has got so beautiful. You should remember that you should always take off the extra eraser from your work. Should clean it up because when you use your eraser, it leaves some pieces of it on the cardboard. You should definitely take them off your work or day would affect your work. Actually. He will shape these here too. But in this part we need to work on It's so much with our pencil to get the shape that we want. So for now we create the parts with eraser. And our final steps, we're going to work with our pencil to work on this part more for never just creating the erasers, creating the lights actually with eraser. So again, we're going to create some light in here so we can get the shape of the lights that are coming into the hair. And of course this part needs to get dark and a bit more and they can't be this light. And in this area, according to the direction of the hair, we're going to create them. We would shape the lights. You see that when we clean our eraser or when we sharpened edge, we can get better lights. So we will work with this eraser as much as we can. And then again, we clean it. And once more we go over the parts that needs more light. Okay.
75. Completing the darkness in the curled area of the hair and adding dark hair strands: Okay, My dear friends, in this step, we want to work on the hair with our pencil. Now that we've done our eraser work up to a level, we start from these corners to create the hair. One by one. From the parse that we have darkness at the corner. We're slowly create the hair into the part that we've used our eraser on. For starters, I'm using the B6 pencil in the power set. I can see the hair is lighter. I will take a lighter pencil in my hand, for example, V2 or V3, or four parts, which are too light. I'm going to use my H pencils. This is B6 pencil. But the H pencil that I want to, I may use later in this work is h3 pencil. So finally, and without any extra hand pressure, you should do this because if you have hand pressure in here, when you are holding a dark pencil like big six set you're using now, the tip of the pencil might actually get a bit fractured. So that would actually make the thickness of your hair more and you might lose the thin look of the hair. Now, I working with my B3 pencil. So it's less than my B6 pencil. And I can create my hair more easily. I keep this part light. I even use my eraser on it to add some more lights into this part. I drag it into the parts which I have pencil, so I can show the shine of the hair in these area. And even if you felt like you need more here in this area or you wanted to get more separated. You should use your HB pencil. It's so easy. Try to enjoy the work that you're doing and go forward slowly and step-by-step add to the darkness and create GR hair. This front area is a bit lighter. I leave it for creating good with my B3 pencil. And these parts which are darker, I'm going to use my B6 pencil. And wherever you felt like your darkness is more than you want, do not get so picky about it. You can go over them so slowly with your eraser and actually lighten them up. Just like this. This separating line in here should be lighter. I'm going to use my eraser to lighten it. Now I will use my B3 pencil in this middle part that I can see a darker line. They'll just put it in our work like this. It's very easy really. And in these parts that you want to show that day hair are getting separated from each other and darkness for that part underneath them is being shown. You can create a very slightly darkness and create that shape. In these parts, we also need some darkness that should be separated. They shouldn't stick to each other. So we can show the hair are separated from each other. And then we will use our eraser, will create the light parts like this. Then of course now I need to sharpen my eraser bid. So these light lines will get more beautiful and more stronger. Now on this upper part, because it's so light, we're going to use our H pencil and we're going to create the lights. So finally, so thin and above this area is a bit darker, which I will use my darker pencil for creating a border on that place. Was in this area. I don't use any B-series pencil. I use my H pencil so I would not lose the light of this area. It's so easy. You should just go into the same direction and create them. Create your hair in the correct direction. And just as easy as that, you can get a great result and outcome from your work. My dear friends should never forget a paper underneath your hand because the darkness of your work here is so much. And if your hand gets only your work to darkness will spatter and a can actually ruin your work. And of course, even you should change a paper dads you're using underneath your hand because after a while it gets a bit of darkness into itself. And when it moves, it can join your work and make it messy, which is exactly what we don't want. Of course, this inner part here that needs more darkness. But I actually prefer to create the hair with H pencil ones. And then I will move on to my darker pencil and add some more darkness into some parts. You can see that our area is being shaped and completely well. Wherever you felt like the shadings are need to be more faded. Use your brush, do not afraid. Do not worry. Use your brush, fade those parts and work on those parts again. These upper parts of this area, they actually needed darker lines that we added them. Here is one of the parts that as much time as you spend on that and work on it more. You can see it improving and getting better and more beautiful, and also getting closer to what you want or to your model. So work with patients and do not, do not rush through everything. Do not Harry, just take it easy, take it a slow. You see our layers are completely being shaped. We'll move on to these LIDAR parts here. The layers that are shaped in this area are coming out and they're showing themselves. Pay attention even and the layers are light. Day are actually going to create some shadows and shapes even though they are light. So you can separate these parts a little, just a little. This area has almost a strong light. I'm gonna make it white completely. And then I create a hearing the direction of upwards and downwards. This area gets darker. So this hair, this trace of hair coming out of this part can show itself better and more. It's very small trace of hair. Now we'll go to the lower parts, which are actually in the continuous of these parts. Let me zoom out a little so you can see that whole area and see it better. I'm using my B3 pencil for the darker parts. In this area. We also have darkness that we haven't created in the first place. So we are going to create them in this series. Your pencil should become lately sharp. You can easily see the difference that when you sharpen your pencil as so finer, so thinner, so much more smooth. It's actually cleaner and neat. It's banner in every ways. As you do your work. Much more cautious in this step, the simulation will be better. Because it's a virtual tutorial and we should actually video time. I might lose a bit of cautious here and a bit of accuracy. But you should spend so much more time on it. Pay attention so much SIR model and work with a way more accuracy. So you can get whatever you see in your model exactly the same. Almost exactly the same. You can see that with creating the darkness for these parts, this twist, an arc of the hair is showing itself more. It's the same for these parts. We should add the darkness little by little so the twists can show themselves. So the light that you've created can show itself. The lower part should be darker and the other part should be lighter. You can see these parts lighter in the model. So I'm using my H pencil more and I will add to delights of this area. K. Just like this, we give a volume to this area. And also in these parts we need to bring some pencil to them. Then also the foundation of it needs more work. It's better for me not to work on it right now. So in this session, we've done some pencils and some parts. I will complete the foundation for the rest of the work, use some eraser and come back.
76. Completing the rest of the styled hair according to what was said in the previous steps: Okay, My friends are going to continue with our arc. As a previous parts. First, we field the dark parts with our pencil powder and a big brush. In the parse that we have a smaller area, we will change our brush, we take a smaller one and use it to feel that dark spot. We will actually spatter the darkness into parts which we can see more concentration or where we can't see less of them according to our model. And we try to determine the placement of the trusses of hair. As the same time as we are placing the darkness. The light parts are actually showing themselves the placement of them. And we try to create the volume for the light parts with the same brush dab be having our hand with the leftover pencil powder, which are on them. In this step, as we said before, you're actually creating the volume for the hair. You are shaping the areas and creating the volumes for them. And yet you haven't done anything for creating the texture of their hair yet. India's side parts who are going to continue our work to, we will take off the extra powder from our work so it would not get our work messy. And it will stay neat and clean. When we get to the clip on their hair little by little, we will feel the empty parts which are between the perils of the clip. So it can become the same color as the hair will go to these lower parts of the hair and we will complete them. Just remember that in case you wanted to complete this sketch and shade the body too. For these lower parts. First, you should just create a general shaping and a general volume. Then you should work on the skin. And then again, you should come back to the hair and complete them. But because now our goal is not to teach you about the skin and we just want the hair will not go to that part again. We take our mono Zero eraser and little by little we create the shape of the hair. Wherever you feel it's needed. You can use your usual as an eraser to actually using the mono Zero eraser is an advantage and as an option because it's a smaller eraser and it can create finer lines for you. But it doesn't mean that you cannot use your usual eraser. I'm using both of them. So you can see, you can use both two and get a good outcome. Generally in all parts, even in the darker parts which are gray. You can show the shape of your hair. Because these can actually complete the volume of the hair. It can actually complete the volume the hair underneath, and then you can shade it again. So both from the texture and the volume, your hair would be shaped better. In some parts that we have a very specific border of darkness. You can use your pencil on them and show that border. We create the strong dark this which are, exists in this tresses, in their lower tresses of hair. Generally day here that V we've chosen is a light hair. And working on the light hair is not that easy because as much darker as your hair gets, you can use your pencils more easily and you can create Day here. Easier. But I wanted to choose a model for you that can challenge you more. So I've chosen an almost lighter hair. So you can know how to create it with using volumes and powder. Okay, up to this point, our hair is shaped. Now we want to add textures to it with our pencil. Want to show each, each hair by itself on the parts that we can see darkness and it needs more pencil doing on it. And choosing the pencils are actually depending on the light of part that we are working on. If it's light gray, we can use B2 pencil if it's too dark, we can use basic expensive and the parts which are too light and you can see some white traces in the here. You can use H pencils. They can shape your hair and at the same time, it keeps the light. As you can see with adding and applying the pencil darkness, the volume of the hair is being completed. The curves and the twists are showing themselves. And wherever the top hair are on the hair beneath them, they have actually created a shadow onto the hair underneath them that we should create the veil. So you can show that these hair are coming on top of each other layer by layer. So creating those shadows are important. After using our pencil. For one or two layers complete the darkness. And actually these dark parts will make your light parts showing more. And of course doing better. We are almost getting close to the end of our work to here are well shaped. The volumes have been created and the shapes are done. There are just some little hairs left to be adding. And we just need to create more simulation to our model. All the little hair that are in this twisted and curly part of the hair. We see them and we add them to our work so we can have more attractiveness in our work. The lower parts hasn't been pencil. The ad, the ad the darkness. We complete the volume and we work on them with our pencil so we can finish it.
77. Drawing scattered hair around the head and neck and performing a sample of pearls on the head flower: Okay, my friends, very good job. As you've seen in the previous video, we've came up to this point. But because it didn't need any special explanation and the procedures and the steps where the same. I've actually fast-forward the video so we can save more time and we can get the result as soon as we can. But of course, again, I say day hair is a part of body that even as much time as you spend, you can still see that you can shape it more and get into better shape. For now, we did not take care about the face or the skin because you are now learning about the hair. But because the students that are coming to this point, they have worked on the eyes, nose, lips, and the skin. They can easily create a skin color for this model too. But to only thing left for us is secrete those small hair on our traces of hair. For that, you'll sharpen your eta d raise, sir. And you will work on the parts who don't want to get to a exact in this part. Because it can, it can actually get the beauty out of your work and your hair because you might throw off your hand at the end less. So we try these little wild hair and we try to create some hair randomly. We do not want to be exactly in the same spot as we've seen the model. Just get the correct area for that. Now I seemed with miss some parts because they needed more hair, more eraser. Then of course I will do these parts. And I will check by work again definitely. And you should do the same. You should definitely check your work several times so you would not lose any hair or any texture or any lights. I mean, big traces of hair. Because these little hairs will need definitely more work. The little hair that we are creating now are two types. One of them are light and colors are light and we should create them with eraser like what I'm doing. The second type are dark. They have dark color and you should create them with your pencils. Okay, we've already created the lights for this area. It's more in these side parts. I can see them more in here. That also has a strong darkness. But of course, I should tell you one more thing too. For now. These hair as God's volume themselves, but they didn't get into the body very well. It's because of that. When you want to mix two parts together, you want to put it on top of each other or whatever. You should shade at the edges and the sides. So you can show this hair is on the skin, on the back. You see there are still some parts that needs more work. But I don't want to get engaged with a repetitive works. Because I think you've already figured out the principles for creating the hair. The basic steps. You're working on Cardboard and on this cardboard cutter doesn't actually help us so much. I mean, these cutters, the surgery cutters. For some parts you can use a tip-off cutter for creating a scratches and creating very, very thin and fine hair. But because this cardboard is so thin, I prefer not to use this gutter on this cardboard, but I just wanted to explain you that it can be so helpful for us. In some parts, but more than in Keras crew technique, they use these colors for creating hair in works with colored pencils. Okay, I take my h3 pencil. And in the parts that I think it's needed, I'm going to create some spreaded and spatter tear in the place where I think it's needed. For example here. Now of course, if you pay attention, the model you see in here in these parts, the hair are light. And we create them as much as we can. But these a hair, light hairs are actually need a dark background. So the lighter would show themselves. But now we don't want to create that dark background, so we cannot create them. Therefore, we are trying to create these hair as much as we can. But if you've created the dark background for yourself, you can make your hair more complete. Also, these middle parts have so many of these little hairs. You can see when we are doing this with our H pencil, we can see a very thin and fine hairs. And you do not have to worry about the thickness of your hair. They will look bad or they'll get out of shaped. You should just be careful about the shape and direction of your hair. The parts which are behind. A bit darker. So I used my B3 pencil on them so they would look more natural and better. Or the parts like this, which we can see some twists it hair coming out. In here, we might need a bit more light. And in this area, again, we have some little hair that we're playing with the lines a bit. We can create them easily. And the end part of them, meaning the first part of that coming out of here. I'm just going to darken it a little so you can get a more natural shape. But of course you can create these lines with your B2, B3, or even B6 pencil with so much hand control. So the point is that you should control your hand pressures so much ended tip of your pencil should be very, very sharp. So you can get the result that you want. And if you have H pencil, it's better to use that. And as you can see, as we're moving forward, our work is looking way more bed or we can easily just compare it. In some parts, even in these little hair, we need to give the hair more volume. Just like this. Generally, generally creating hair like this in your work can have a very, very positive effect on it. And it can actually make your work more natural. Because in reality, when you look on a hair, you see that even the most need hair. And as much as they tried to get all of them packed and clipped. And so neat and clean. Especially in a wavy hair and curly hair, you can see some hair coming out of their special order and dare trusses. So you can see they cannot be completely 100% in order. Okay, I think it's enough up to this point of our work. Then again, you can check your work again and you see wherever you can add these little hair, you should add them. I will finish the work for you and I will put up a picture from our work for you so you can see it better. Just another thing that I wanted to give a general explanation on about these circles on the clip. But even if you finish their hair, if you don't want to work on the lower part of the body or the face, it's better not to leave this part untouched. You should feel these parts between the parallels with a small brush and even use some eraser. Now, for these pearls on the clip, you can use your fader to shape them a little. Color it actually, and then use your eraser a little. But just be careful if you wanted to use your pencil on the edges of these parallels. Do not. Let it be like your work is being framed and you've created borders. Does these lower parts get more shadings? Because they create some shadows on the hair. So you can create some lines with your pencils and spread them so you can show those shadows. Also from this side. Determine the placement of each one of these. And because we want them to look like some crystal shape, we need to create some strong glides in some parts of them, which I'm using my electronic eraser for that. Because we want a strong lights just like this. And then we will work on it and little With our pencil. These parts which they came on top of each other, we can separate their borders with H pencil very slowly. Because there are various small parts. You don't want to mess that up. We will add to the lights of these parts. And very slowly, we'll create various small shadings in them with our pencil. So we can get the shape that we can see in the model. Actually the darkness next to them are very important. So they would not get a batch shape and look like you've actually framed your work. I see more darkness in this part of our model, so I'm applying it, but I will actually spread and spatter this darkness among the hair that exist in this place. You see these pearls are showing themselves slowly. You can dark in the upper area, leave the lower area lighter, or even using your pencil on them and little. These are the ones which look like crystal and some of them are looking like pearls. That they don't want this much work, are you? And you should just create them with shadings. I will finish and I will send you the results of our work. I hope you've enjoyed our hair tutorial and I wish you the best. I wish your practice well and be safe and send your works the results for me. Thank you, everyone.
 Homa Choopan Tayefeh, Drawing Teacher