Transcripts
1. Introduction: Sketching faces is one of the most important interests of designers and painters. Sometimes the students draw all the components of the face well and put them together. But in this stage of creating the hair, they're not able to give variety to sketching to Harris science. This can be very problematic, especially in imaginary models and character creations. To solve this problem, learning different hairstyles and fostering creativity in this field can definitely be helpful. In these videos, I have provided tutorials on the sketching different styles and shapes of the hair that can help you learn the basics of hair sketching and fostering your own creativity.
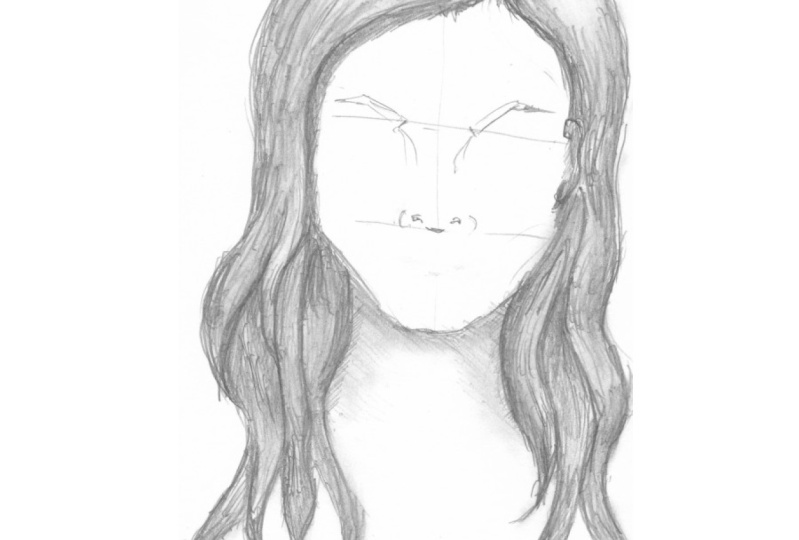
2. How to draw short hair of a girl (straight shaped hair): Hello my dear friends and good evening to you. All. The tutorial that we learned to work together today is creating the different types of hair. Today we are focusing on the shapes and styles. A women's hair, short hair, the medium hair, and a lawn care. And also about being the hair straight, wavy, or curly. We would talk about them and we would create some examples for them. Now, for starters, I want to create a simple style for showing the style of the hair. We need to create a general separation and division and we have a general shape of the face and a hit. So as I had tutorials before for you, the first horizontal line is for the nose, beneath the nose, and the upper one is beneath the eyebrows. And because I don't want to waste any time, I've created this shape. And of course, in different parts. I'm going to create it. And in the next episodes, I also tell you how to create this phase. Again, of course, we don't care too much about the face and how it's done. We would just focus on the hair. And we create the face in order to create the hair in a good position as it comes down next to the face. So I create the nose over here so you won't be mistaken to think that this line is for the lips. Just a general, general shape. These are the nostrils. And as I said before, these two lines will show the area beneath the eyebrow. It can look like this. And the shape of the eyebrows can be different. And because we want to create a part of the hair coming onto the face, I would not continue this eyebrow too much. And video not want to get too much into the details of the face because we don't want to talk about them today. Our goal is to talk about the hair. Just to complete the shape of this area. It's better for you to create the neck as well. Thickness of the neck can be different. We can dark in our main lines a little like this. The shape of the chin. Much as kind of big for this one. With a strong draw angle. That can make our face look so attractive. So for this first example, I want to create almost a straight and short hair which came down from both sides of the face. And from one side it's almost coming down. I consider a corner ways parting for her from this side, for example. So this would be the left part of the hair. We continue this line like this. They hair which are in here. And if we consider this area, the front of the hair in here, we should just shape our hair and create a part for it. See always you should pay so much attention to the parts of the hair in simple hair. When you see them part by part and create them, you see how easily you can create them. And when you look at them, generally, most people are terrified and they say, How hard it is and how can we create it. But when you created part by part, it would be very easy for you. So we show the shape of the hair like this in here. And for hair as your lives are more throwing golf I D, and you would be more successful in their result. This would be the part of the hair and beneath. Okay. So this would be the general shape of this side of the hair. And then we move on to create the other side. In here to here will come up and we should decide how much their hair should come to the face. I like the hair to come down to the face like this because I've left this part empty and it goes out like this. This would be my main shape of the front part of the hair. We can even have more hair coming out. And that depends on new completely because we're just creating an imaginary model. It's from our imagination. This area should have some puff on it. For example, if they come down to here, the shape of the head would be better because if we continue to roundness of the head, it will come down to that part. And because the hair is not a stock to the scalp, you should give it a distance from it. Irrational one. And now the area that we've brought like this, we should shape it. Okay. This is the general shape of it. So we will create the lower sketching forehead and pay attention that the height of hair would be almost equal at both sides of the hair. It shouldn't be too long at one part and too short and another part. But of course, the Harris, the highs are different and maybe say, someone has this style that's one side of it is shorter and the other side is longer. If that was his thought. Yes, of course you can do that. But now we're just explaining a simple, simple style just to show you how to create it. And as you can see, if it comes down to this part, we can consider it shorter. The area which comes beneath this round part should definitely be darker. This is certain matter. Now we complete the rest of this shape. So we are going to crane more details and some darkness. Now we have created the general shape of the hair. Now, with applying the darkness, we want to give our hair some volume and we want to add some lines. As hair. Of course, in this course and in this tutorial, our goal is not to create very realistic hair. It's just for us to show the different size and different shapes of the hair. And even in that, we have to create some details for you. Right now, I'm working with B2 pencil, My darlings. I don't want to change my pencil too much so I can get involved in darkness and lights and different kinds of pens, pencils. Because definitely you have learned that in other to totally tutorials. In this one, we just want to be focused on creating this styles and the shape of the hair. At last, in some parts that we think that darkness is too much, we can use our B6 pencil. Let your hand move freely. So the shape of the hair will be created. Be careful that if you move from the corner to decenter. We have some contrasts, we have some dark shades and light ones. We can also divide this part into half cell. We can give our hair more volume. I mean, my hand is spontaneously goes toward shading more. But as I told you before, our goal here is not to shade. And our goal is just the general shape of the hair. We work on the shapes. Also, from this side, you see each line that you create on the head and on the hair. If he created in this way, it will show the hair more puffy, but if you create day hair straight or you'll give it a curve, it would get it deformed. And in a very unnatural shape, you might even create two lines, not too much, but even them will deform your shape, will make it look unnatural and bad. So you should be very careful for each line that you create in your work. These parts which are underneath our darker, the parts that I told you, you can use your B6 pencil to do them. If my base expense is approachable right now, let me see. I will work on this area with that. Here. I'm going to color this area with my B6 pencil like this. You see in this area, they can have so much darkness. And this darkness can have even don't have to, doesn't have to include hair textures because it's too dark. It's not really visible for us. And definitely this part should be darker. Because the hair which are underneath, We'll go inside of the face. And the hair which are coming in front of them will make the previous one, the back ones darker completely. Of course. We also create some dark touches over here so we can have this dark area all around our face. Again, we move on to our V2 pencil and we completed with that. Okay? So this front part needs some lines that can actually shape our area. We might even have some hair on the forehead. But in this model, the shape is more important than the details, so we work on them, but maybe in next, models will be more advanced and we will more and more details on our hair might get so precise. You see in these first because they are coming from beneath the other hair, it should be darker but not as much as the ones around the face. So you just give it a medium darkness, not too much. And that is small. We don't want them to be too light or too dark. We create deadlines very, very smoothly. And finally, as you can see, the area which is underneath is definitely darker comparing to the part which is on top. Okay, So this was our first lesson in our hair tutorial anaphase. I hope you're satisfied with this tutorial. We are going to work on another model which is also a short hair, but it's a bit more wavy Then this one. So it will just change this style. For making your sketch more attractive. You can also shade, It's her face from the sides, from the edges. Sell. Your work will look better and more attractive. We should also give a shade to this area as well. So this was our first hair sketch and we move on to the next one. And we do it together. So again, see how much wavy short hair would look like.
3. How to draw short hair of a girl (styled hair): Okay, My dear friends. Now we want to work on our second model, our second short hair model for that first, we are going to create divisions of the face. I gave a general explanation. If you want to create it simply, you can create almost a five centimeters line, a vertical one. So almost five centimeters. And if you want to divide it, we get 1.6. Then another 1.6 from that. And the rest of it would be the forehead. These 1.6, as that live considered rare, going to create a horizontal line on each one of them. This would actually be beneath our nose. The second one would be beneath our eyebrows. Now, if you want to know how much these lines you continue from the sides. If you consider 1.6 from each side for this lower line, that would be enough that I'll be appropriate part. And another one from here. But what we want to talk about the upper part of the phase, which is beneath the eyebrows. It's better if you consider it 1.8 or approximately 1.9. Because we don't want to get too much into the details of the phases that we are creating now, we're just considering a general shape of the face. We can just do it in different ways, but we've chosen the simplest way right now. We want to consider acinar chin for this model comparing to the other one. And like this, we would continue this up or so. The general shape of the face can be shaped. And also from this side, maybe even consider a curve for the chicks and for the chin and connect it to here. Now, we want to create a hair coming down from this side of the face which is a wavy, of course, short as well. If they're that they've created the general framework of the face can also determine the shape of the eyebrows and the nose. As I told you before. It doesn't matter that how you would consider the shape of this area. Because right now we're just determining the placements. We don't want to work too much on details. You know, that would be the nose bridge and the nose itself. Just like this, we show it very simply. So this would be the framework of our face generally, of course, only the neck has been left, which I'm going to create. And of course in next models I tried to create different angles of the face so you get to know them and you would know how to create hair if your face is. In a different angle. This part, which is on the top of our five centimeters, would be the placement of the hair growing. If you want to consider a scalp, this would be the scalp. This would be the skull and the scalp of our model. But we don't want to work on it right now. We prefer not to have this line so I erase it. I've showed this gap to you because the hair should not be lower than this line. Never. Actually even in the parse that the hair all completely stuck on the skull, they would be on that line of the skull. We wanted to consider it a hair coming from this side. And in spite of that, in addition to that, we want the hair to be wavy. Now for the way we hair. First, we should decide that how much turns and how much curves they have. If we want them to be too wavy, curly, or we just want them to have a very light wave. On this model. I want to consider my hair. Get a very light wave here because a long hair styles we are going to have a complete curly hair. Therefore, I just want to have this one as a slide way. Now I want you to create these parts of your hair. Very precisely. If this is a hair coming to the front and if you want to bring a hair onto the face, it would go down and who will guide it out. So we want to work on the parts which are a little bit behind. This was a frontier. This could actually go underneath and the other one comes on top of it. Don't worry about the parts which will be actually don't worry about this space is that would be created between the parts of the hair. You'll feel them with hair or with the darkness that has been resulted by the hair coming in front of them. And now we are going to create some more hair at this back. And the lower part tried to create a little complexity in your head. At the same time as your work can be seen. You know, more crowded, more concentrated, it will look better. I might not give this advice to you in other places, I would tell you, created more simple to make it more beautiful, but about hair, I don't give you that advice. As more crowded as it would be. It would be prettier. Now if you want to create it from this side, it would be the same. Of course, and direction, which is not the direction of the partying or the direction of the hair coming onto the face. Concentration of the hair would be less comparing to the other side. And the top part should have a normal shape. Create the puff on it. This is actually the shape of creating a wavy short hair. Now if you want to make it more complete, we move on to our V6 pencil. First, we want to create the darkness for it. Of course, we can first work on the framework of the face to be two pencil is suitable for lat. Now we the V6 pencil. We work on the parts which have too much darkness and tried to divide them. Life is the parts under this side do not have a very strong darkness. And as long as we get RBC expense, we also create a darkness for this side. And then we move on and we work with our b2 pencil. These parcel almost dark here we need some are dark hair. Also, this area. You see the parts which are between add a waves of the hair and the hair which are placed in behind. Needs darkness and very wordy here are coming on top of each other. The border between them can be darker. But of course we can create these would be two pencil as well. So I want to focus on our B6 pencil too much. I change it with a B2 Panza, which has a sharper tip, a finer tip, and we can work with it easier. Let me erase the lines that are here. I want to create some darkness over here and then I want to continue my work in C. Because. This area has been placed in a part which doesn't get too much light. The darkness of it would be more. Then we will create some more finer lines. We'd be two pencil on the rest of our work. Like this. In some parts. We just emphasize underlines, make them darker a bit more so we can show the division and the separation between the parts of the hair with creating those darkness. Now on the hair, we can use different types of the pencils. And some series of them are very good for creating very light hair. But as you can see, we're not going to use them in here I now, because our focus here is about sketching with sketching hair in different styles and different shapes. I want this to be our main focus. Therefore, I don't want you to get too involved with the details. Just we have to create a curve of this area perfectly because it has a very strong effect on our work. You should keep some parts lie. So we can show actually does light shining on the hair. And we create some little hair here with some dark lines. And the part that has gone to the back here and process it too much. The hair of this lower part will be darker from the lower part and the top part. And of course you can continue this hair and shape this hair. Okay? So we've created this parts with B6 pencil will just complete the shape of the hair more. And this hair on top. We're going to create the lines for it. Shaded a little. And then we move on to this part. In some parts, we have to create thicker lines for showing the shape of the hair. Do it in those parts specifically. So the hair and divisions of the hair can be shown perfectly and the shadings with actually more look more natural. Okay? Except this part. We've completed the rest of it. Almost. Of course. Of course this is a very simple shape of the hair. Dad v have to work on it a lot. We can work on it a lot. The sports should be done. Shaping these parts. We will apply the darkness to the lower parts in a correct direction. And the parts which come on top would be a little bit lighter. We shaved the parts of the hair. The parts which are rich in East darkness, we would apply them so the parts can be actually separated from each other. And at last, this top part of this side of the hair should be shaped, which can be created very simply. We can show the hair on it very, very simply. And on this side, according to the extra considering the path that we have considered for the hair, you will be shaping this area, shouldn't be stuck to the scalp. Okay, My dear friends, this was our second model, our second sketch that we did together for a very short hair. And for different size of the hair. Of course. We've created very simply, a very simple sketch. It's not very realistic yet, it's a short style. And in next tutorial we want to work on the hair which have a different length. Maybe they are medium and long. So you would know how to create them as well. I hope you've enjoyed it up to here and it was useful for you.
4. How to draw medium hair of a girl: Hello my dear friends again. Today we want to work on another hair is styled together. In our previous sessions, we worked on to shore terrorist cells together, of course, for women. And today, The Harris style that we want to work on is actually a medium height hair. For starters, we want to first create the shape of the face and general shape, of course, just like before. And then we start to create the hair. For the hair. This time, I've decided this angled line. We have distance between the nose and the eyebrows, and it's the same distance as the nose and the chin. It would be about 1.4 or 0.5 centimeters. And we consider the same distance for beneath the eyebrows. Of course, we're not simulating anything. And we just wanted to create a shape of the face. And then the distance between the lowest part of the eyebrows till the part which we have the hair growing is a little bit more than the other distances. And a distance of these for the side of the face can be around 1.8 centimeters. Just be careful when we have a different angle of the face. Of course, the lines that we are considering horizontally should be in the same angle. You know, they should just go vertical from each other. For the eyes, sorry, for the below parts of the eyebrows. You can consider more area. But in the model that we are going to create, we want the hair to go actually to come into the face. So we just create a simple shape of the face. For this model, we can consider a sharper chin comparing to the other ones, which had more strong chins. Cubes, cubic, rounded. But this one can have a sharper chin. There's nothing against it. Just like this. Just created lightly. So whenever we want to have the hair coming into the, into the phase, we don't continue them and we will not have any problem. I just create the shape of the nose very simply. This is the shape of our nose. And in here we have the upper part of the nose which can connect to the eyebrows and their shapes. You can even determine these parts because our goal here is the construction and not even construction actually creating the shape of the hair and learning different types of them, different styles. The hair that we've consider for this model is a straight partying, a middle parting, and maybe a bit wavy. So we start from the growing part of the hair. And as you can see, it's been curved upward and then it comes down. So we can show it like this. We do the same for the other side because we have a centered parting for the hair. We don't say it should be completely symmetrical 100%, but well, normally. If it doesn't have any special hairstyle, it would just come down the same from both sides of the face. Now that I came down, we can show some shapes on it. We can have some wave on it. Because as we said, we wanted to have to be a wavy hair. And we can just do some separations to have different parts for our hair. Also do this same for the other side, give it a shape. Going up. This part which we have the parting of the hair. I erase this line and I showed a parting with very little and short lines right next to each other. Just to make the shape of the hair more beautiful and you don't want them to be stuck into her scalp. Who just create a shape over here so we can show our hair has some volume. And we can even part these areas, actually separate these areas into different parts so they can have a better shape. Also from this side we can have some shaping, some separations in the hair. Of course. It's better that we can have the curves and the twist of the hearing the same direction and in the same area. Because when you do your hair and your curve, your hair curling or naturally wavy, the beauty of it is in a way that they go into same direction. So our hair is supposed to be medium-high it, so we just finish it there and we create the risks of the hair like this. It's better to separate this into two parts, divide it just like this. And of course here we can have the neck of our model from this part coming forward. And we can also create a hair for this side like this. Just create a shape overhead because the head is coming toward this way. The length of the hair will come down because the head is a bit tilting. So they have this side. They heard they have the same length of the other side, but because of the tilt of the head, they come down a little bit more. So day look longer and would just give a curve in this area to our hair and we shape it. Now we have a general shape of our model's hair. That's very good. That's very well. For the first step. Now we can work on it without other pencils to create some more details. Now we can use our darker pencil, meaning B6 pencil to emphasize on its darkness. But before that, first I prefer to use a lighter pencil like before or B2. So we can determine the shape of the face better. It can be seen better. Here we are. Here we go. Should definitely edit the parts which where you have multiple lines and isn't just make it into one line so your work would be seen cleaner and better. Of course. Don't forget to do that. Whenever you see multiple lines. And I also darken these parts and little bit more. But these are the parts which are main parts and they need to be darkened before pencil is enough for this model and for this area. But if you want, you can also use your B6 pencil, the parts which are beneath the hair. And we have to show the shape of the neck. Like this. On day hair themselves. On some parts of it. You can add some darkness. So we can have thickness to our lines. And doing that just makes our work look more attractive. The thickness of the lines have their own meaning. They gave depth through your work. Day. Separate the shadings for you. So be careful about the thickness of the hair. Then we are talking about the shape of the hair. The thickness is a very important part in our work. Because right now if I were working on our realists, they care we wouldn't have create this line like this. Because creating border in hyperreal is sketching and technique is not a very correct thing to do, is a not very right thing to do. But right now we're just showing the shapes. Therefore. We can even use border lines. Will start from the growing part of the hair into partying. And we start creating hair from there. And when you are working on the hair which are coming in between and the medulla VR here, like here. It is very crucial that you pay attention to the curve of the hair in that area, the wave and the curve of it. For example here. If you create your hair in the opposite direction of the rest of the curve and the wave. It would look very unnatural and very ugly. To be honest. In here in which we have some lighter lines we can use that are darker pencils and we can add some more darkness to it. Okay, here we go. Where ever it was needed. Wherever it needed more depth. We will add to the darkness so our work would look more deep, deeper, and deeper. And as for the lower part of the hair, we're going to shape them slowly with our shadings. And in the same time we just add to the darkness of our hair. The parts which are coming from here, from underneath day should be definitely darker. And also this area, it's the same because it's the part underneath deface. We would add some more darkness to it. Here we have more darkness. Alright. The hair of this side has the shape that we wanted up to some levels. We can just add some more lines over here. To make sure it has completely dead look that we want. Maybe even darken departing hair a little. I mean, the hair which exist in departing area. So the shape would be better. Okay. Now we move on to the other side of the hip and the hair will start from departing. And sometimes we can even continue these lines. So day would get a better shape. Just like this. And lines which are at the side of dephase, which are coming down on the edge here, which came from underneath, and creating the shape of the hair. You should always put your hand in a correct and a comfortable angle and position because I didn't want to cover the worst. So you can see, my hand was not in a very good place. But now I just rotate at my work a little so I can create better lines. As you can see, we are shaping the hair part by part. We can't add some more darkness in this area. And we can divide the hair and separate them from each other so they won't all just cling to each other and stick to each other. That will make good. So I'll change my pencil because the tip of it is not sharp anymore. Or of course, you can always sharpen your pencil if it looked like this. And then you can continue with the risks of the hair. Okay, my friends, because the shape of the medium and long hair look so much like each other. Just the lens of them are different. I don't want to waste too much time on this type of the hair because the shape would be the same. The length of it would be different. And apart from this tutorial, I'm going to teach you about the straight or curly hair in different heights, short, medium, or long, and you can create them easier. So after this, we are going to work on long hair together and then we will move on to the different types of hair astray too wavy and curly. Which of course, you already got acquainted and familiar with creating different kinds of hair, especially wavy hair. But anyway, we're going to work on them as well. Now we weren't supposed to work too much on the hairs details. But I can't help myself. I like to work on my hair more and more. But I think it's enough up to this level for just about to learning the Harris style in a medium height, shoulder length, medium limb. So try to do this, practice it so we can move on and create different Harris cells together. So this is our work together, better and more realistic shape of the hair which came down here. You can add some more shadow and shading on the face like the previous ones that we've worked together. Just to give it a more natural look. And that's would be enough like this. So this is it.
5. How to draw long hair of a girl: Okay, My dear friends, now you want to work on a long hair shape. For that again, we create an imaginary face. I've created my guideline. I've determined the placement of the nose and chin and apart beneath the eyebrows. As I said before, the distance between these parts are almost the same. And then we have the distance from here to here, which is a growing part of the hair, is a little less than twice of those distances. And here would be the top of our hit. Now we are going to create it in a three phases angle. When it's like that, you should consider them. And if you want to create the face in a three-phase angle, this side, this distance should be shorter and smaller than the other side. Meaning here, in this side it would be more and almost twice as the distance as we have on the left side. Although again, it depends on the angle of your face that how much it's, your face is turned and twisted in a three-phase angle. But of course, I will tell you about this in other tutorials, which we are working on creating the head in different angles. Because right now our goal is to work on the hair so we do not put so much time into it right now. Create the shape of the head very simply, you should not get too worked up on it, which is how to create a shape. So later we want to, when we want to create a hair, you would know how you should show it. Comparing an according. Today are risks of the face. So we want the right side of the head to be free. I mean, to here on the right side would be go would be going behind the ear. So I would create the shape of the face on this side completely, but on the left side, we will have the hair coming down, maybe a little even into the face. Here, into continuous of the eyebrows. We should have the ear. And according to, according to the placement of the forehead. We can insert this shape of the hair in this area just like this. With this shape that we are actually creating day hair coming down on one side of the face and maybe even a little into it. Their hair should come only on one side, not only but more on one side. And then we show the placement of the face components and little, we do not work too much on them to select the previous sketches. Create the shape of the eyebrows. Maybe even a little longer, because it's in three phases angle also from this side, but we can just create the beginning of the eyebrow because it goes underneath the hair. And then we would have the shape of the nose. According to the angle of our phase. It would look like this. Just the shape. Oh, it would be enough a little. Now the placement of the face components are clearly determined. Now, we want to work on the hair. We want to create some long hair for this character and for creating that. We create a hair like this, which are coming down from one side of the face. Well, we almost want to say this area can be continued up to this part. And we can also show this part like here. What we want to create these curves and these waves. We should have them in a special direction. So as they come to the head, day would get center. Again, we can shave the hair which exists here. Then we can actually separate the neck and create more long hair which are coming down on the body. In here. Kind of a thick part of hair. And in this area, if we considered a hair longer, we can continue like this. These are the hair which are actually curvy, wavy and long. Straight hair are very easier. And in shapes like this, because they don't need to be separated and parts, you might have some separations for it, some parts for it, but not as much as this one. Here. We have wavy long hair. So maybe I have to change this area, little making a thinker into two different parts. You can find a lot of Harris stars in the Internet and you can create from them. You can crave your work according to them. And I put a lot of them for you. I put pictures of them for you. So you can easily create them. I still necessary that they would be on actually your sketches would be from others sketches you can use pictures or live models or whatever you want to. This totally depends on you. Now, because we've created a hair like this that are coming to the left side of the hair. The volume of the hair on the right side are definitely less because more of the hair are coming down from the left side. Therefore, the puff of it would be less. Okay. Now, like this. Now because it covered the neck, kind of we do not create any neck lines for it. Then we have some hair in these zeros actions. Okay? Now that general shape of our work is showing itself is almost done. Now we try to make our work a little more bolder and we showed the shape of the hair. More in this sketch. We create the shape of this face in a three angle way. Let me just correct this area because it was too sharp, it should be more rounded. Like this. In this area we usually have a bump and a prominent part. Then we create the placement of the ear. And we can create a darkness that we see in these lower parts. These parts, which are in beneath, can use our pencil to create them. Again, we shape the area of the ear along to work on the year too much. Just enough as you can see. Hey, it's an ear over here. And as we did for the previous ones, you'll make these ones more clear. And on this side of the face, we can bring some darkness into our work. Basically, this part which is underneath here, would be to beneath area, would be darker. Comparing to the other parts. Be careful about the thickness of the parts. Wherever we feel like we need more thickness. We do that so we can have our shapes correctly. All right, so as you can see, are continuing with the wavy long hair, you see we are literally clarifying the separations that we did under primary sketched at parse that we think we need more darkness or more separation. We're going to show them more. Because this hair is longer. Therefore, we can work on it more and more, especially on its details. So our hand can be a little more free. If you learn to create the shape of the hair. And then you would learn how to create each hair. You would definitely have so much fun and you would enjoy creating the hair so much. There are some of my friends that I know they're not really acquainted with creating the hair. So when they get to the part to create hair in a muscle or in a sketch. They would be so frustrated that they wanted to work on here. On the other hand, if you learn how to properly create hair, this would be actually one of the most enjoyable parts of your work because it is very, very easy. If you have a little less or a little more hair, it won't have any big problems in your simulations. So you would have less stress with creating it. For example, why you are creating the eyebrows or the eyes or any other competence of the face. Definitely. You are not allowed to change this shape too much. And you have to be very precise and go exactly by the rules. But in here, your hand could be more free. And it's really easier and it's really going to be fun after you've learned it. Okay? This is really enjoyable. And so fun. You should definitely practice a lot and you should have even repetition in models and practices. Island to where I can work on so many different types of hair right now, but I don't want it to be boring for you. So I put some pictures as models for you and then you can do it yourself at home. As a practice. You can use even different pencils. So. You'd get acquainted with the darkness of the pencils, with the way that they create lines for you. And all the darkness that I've created by now was would be six pencil. But right now I'm just using my V2 pencil. As I've told you before. You should pay so much attention to the direction of the curves. Wherever you need light. Try to create them lighter and keep the more light for it. For example, here. There are some parts of this work that we need to add more darkness to it. So I'm going to use a darker pencil. I will use my before pencil and I try to create some lines between the ones that I've created. So as these lines are in between, they're not as dark as B6 pencil and as light as B2 pencil. It's almost in-between. But let me tell you one thing. You can also create all of your work with a medium dark pencil. For example, if you have B6 pencil, if you sharpen it, and if you have a very low hand pressure, you can get these very fine lines that we are getting from our before pencils. So don't worry about it. Even if you just have one pencil, you can always create your work. You should just be careful about your hand pressure. I went too much down. So I prefer to work on these upper parts a little bit more and then continue my work downward. In here we have a shape like this. Day hair coming back. Bending downward. You see just spontaneously, my hand will rotate in some parts and it doesn't stay in one place. Because if we can see different types and different colors of the hair, It's better to create them as we can see. So like this, we can move on step by step. And wherever we see the curves, we can easily create it. But a little bit of the hands rotation, as you can see, I'm continuously rotating my pencil in my hand so I can always get sharp lines. So create some medium dark hair over here, lines and hair which the top should be a little bit darker. So the shape of the hair can be seen completely. Even maybe a little layer over here. All right. You see these lines themselves will show this part of the hair so puffy in, so prominent or the darkness that you bring in this below part. You can show that this area is on top of the other part. So we can show everything with our contrast and we can have a great volume. All right, Let's complete this area and then we can move on to the opposite side. The parts which we can see some curves. Okay? Now, we also want to work on the right side, right side of the hair a little. And then we will move on to our next tutorial, which is about the shape of the straight hair, the wavy hair, and a curly hair. Of course, we've almost as a too much about the wavy hair. So try to explain them shorter in other parts, other episodes. And we try to focus on the other kinds of the hair, straight and curly. Although up to this level of our work, we've just work on the hair of the women. And we still have some space to work on the different shapes of the men's hair. A little, just the shape of them or maybe a little bit the color of them. And next to that, even we can maybe talk a little about creating the beard and mustache in the man's face. Might have a small tutorial for that. Because we want to show this area, have some light shining on it. We don't work on it too much. Right now I'm working with B2 pencil. I've chosen a LIDAR pencil. So I can create these parts. I was using my before pencil. Before that. Now I'm using B2. Okay. Now should create some hair like this. Can also have them over here a little. Okay, My do France. So this is very long hair that we wanted to work on with. Now if you wanted, if you want to make it even more natural, you can use a little bit of your fader or you can use your finger and you drag your finger on these parts just to fade them a little. Dat will make it look more natural. You see this fading will actually make your darkness get, makes stubbing your work. And you may even need to work on it again. Use your pencil on it again so we can see more lines in their work. Even if it was needed. You can use some of your erasers for some of its lights. Your edit eraser, of course. And you can create lights with that. Right now, I will darken this area a little bit more so you can see better like this. And a field liked. And if it was needed, we can bring some eraser on to your work, your editor eraser, just to create some lights. Of course, this is more related to the process of the hair, but I just wanted to tell you you can do this. Next step. We're going to work on another and a new tutorial of the hair.
6. How to draw straight hair: Hello, my dear friends and good evening to you. Today we came back with another tutorial with different types of the hair. In previous tutorials, we worked on a short, medium and long hair for the agreement. Now we want to create three different types of the hair and compare them to the together. But of course, in our previous tutorial, we worked on a wavy hair up to some level. We tutorial of this episode, we want to create straight hair in different shapes and then we want to compare them with each other. I don't want to create too much detail, so very fast. I just create a general shape of the face in a three faces angle. So as I said before, I don't want to work on the details too much right now, and I just wanted to create a general shape of the head and face and this area because I want the hair to come down on the face. I don't create too much details for it. May just create and place determined the placement of the eyebrows. And it would be like the previous tutorials. You can find each one of them one by one according to the guidelines and work on it. More precise thing. But I don't want to put too much time in creating the face. I want to put more time creating our hair. Now for this model, we actually want to sketch some straight hair. Straight hair with a parting, with a straight partying in the middle. I really wanted to consider it for this, we have to consider the middle and the center of the face. And we should continue this line to the head. So this would be to straight partying for the hair. The find the placement of the hair growing, which can be different in different persons, in different people. And then we showed a placement of the hair because their hair is a straight here. Therefore, if the front of the hair is long, it will all come down very simply. And if we consider the placement of the neck here, this would be the shape of the hair. Well, this straight hair. Well, actually in different parts, but they're all going in one direction. It doesn't have too much turns and curves. They come down very easily and all together and creating it, I think, is very, very easy or comparing to the other styles and other shapes of the hair. And the other thing that you should be careful about and you should pay attention to is that the hair which are so straight will actually stick to the scalp unless they have especially on the Style. Other than that. It's like the way that I've just created here. And a way that the hair comes out here depends on the volume of the hair and the shape of the hair. Because there are some people who have straight hair, but the volume of their hair is a lot. So the hair would come out and the parts of the hair will actually take more space and day would look wider. Okay. And if it consider this area, the hair has gone to the back of the head. One or two part of the hair are coming forward and the rest would be in the back. We also create the shape of this side of the head because it's in. Tree faces angle, a three-phase angle. This part of the head can be more prominent and it can be a little above the other side of the head you see? Because of the angle of the face. And then we bring it down like this. For example, the right side is all free and the left side is actually behind the ear. This would be the other side of the neck. And this is the hair coming from the back to the front. And we can shape them very easily part by part and create them just like this. Okay? Now, this is the shape of the hair. This is our straight hair. Now we want to process it and let L constructed a little, add some more details and make it look more beautiful. So first we erase our guide line. And then we start with our pencil. First we determine the lines of the face once more. The chin of my model is to y. Let me make it thinner so to face, can look better. Like this. You don't get too much into the details of the ear still. And we move on to the hair, which is our main goal here. It's better if I use a sharper pencil. Now I took my HB pencil, which has a very sharp tip. Of course, I could use my B2 pencil as well. I just had to sharpen the tip of it. But this one is sharper. Because we say to hair is a straight. We create the ending of the hair here, connected to the face a little. And then from the parting of the head, we go out, we come out like this, creating lines with a very slight curve. And as you can see, I'm just throwing my hands up the cardboard, LSD paper, a dam, and its area is very light, but it can create a good background for us. And in this area to hair should be straight. The only thing is that the hair are concentrated behind the ear. So create a little bit more darkness there, just to show that the hair are more in that area. And just like this, we drive their hair down ward. Straight hair. All of them should be darker of course, but we're just going to create a background at first. And here we are at the bottom. We keep them lighter because we want to show that this area has some light on it. It's been some light on it. So we work on the lower parts and we divide them like this very easily. Okay. This is one of the darker pencils. One of our darker pencils may sharpen them, for example, B2 or before. And then we start with our sharp tip pencil. And we create lines on our work. We complete these parts more. We add more darkness and we complete the lines more. And we complete the shapes in general. Okay, because our work is a very simple sketch, doesn't make us any problem if you go around, work on the edges and we just create a then a framework for the hair. We create darker lines in here, so day would look better and more natural. Alright. Then we come down all the way down here. And we also apply the darkness from this part as well. These are the hair coming from the back to the front. And actually they're coming from behind the ear. So they have more darkness, they are in a darker place. And when we create darkness, we can actually show this better that DES, hair are coming from behind the ear. And it's better to create the proteins of this lower parts. Better. Like this. Now, in wavy or curly hair, these parts of the hair can be seen more. And in a straight hair it's less of course, but for showing the style of your hair better, your hair has to have a small division and some different parts of the hair partings. And because we don't want to leave this area to white, they're just bring some lines in it. On this side of the face. This area needs more darkness. It can actually be completely dark. So we consider that they come onto the chin line and a went to the back of the head. And we keep some more light hair just to give it a good shape. Keeps some light over here to keep the shape. Now that we are working on this lower part. B also do the parties on this lower part and then move on to the top of the head. But of course, like the previous parts, we can use lidar pins cells first and then, for example, like HB pencil. And then we move on to a darker pencil. Right now, I'm using a B for pencil for this area. You see I say the light and dark colors. Because you would know if you didn't have before pencil, you can use B5 or B6. I don't want to put so many limits for you and say if you don't have this pencil, you cannot create this schedule until you buy that pencil. You can use different pencils that you have for creating this sketch that you want to add for your practices. Let me put it in a way that there would be less shadow on the work and you can see better. Now the curve that we create here, we should have the straight hair into continuous of that. Okay? These parts of the hair are very, very important in here. So. Okay, Now that we've created a good shape for our hair, we will come back to placing the darkness again. We keep departing of our head and into continuous of that we apply our darkness. It would be very, very easy, especially because it's a straight hair. Although delight dat, is appearing on the hair, depends on the source of your light, which is different in different sketches and different models. You should keep the lies and create delight depending and according to the model that you have, either it's a photo or it's a person. But even if you are working with imaginary models and you're just making it up yourself. Again, you should consider a light source for yourself. And depending on that, based on that, you should aspire to darkness and aligns in your work. Okay. Now, we would dark and is lower parts a little bit more. You see? Their hair doesn't have any curve or a wave. They just came down part by part. That's it. Completely straight. Only wherever the direction of the hair has changed. You should just pay a little bit extra attention. For example, when it got twisted and it went behind the neck or the hair which has a came on the shoulder. Of course. Anything that comes here on this part of the body would be a little bit twisted and turned. So it's the reason of that. Okay. So this is it. This was another style of our straight hair that we've worked on it together. In our next episode, we will work on a wavy hair and then the curly hair. We practice these two styles together. And then we move on to the short man's hair.
7. Drawing the initial sketch of styled hair: Okay, My dear friends, in our new tutorial, we want to work on the wavy hair, which is between a straight hair, curly hair. It's a bit of both of them. If you remember in our previous models. For example, here, we've created some examples of wavy hair, these parts, these ones, this is almost against, say, it's wavy. Because we've worked on these kinds of styles which we have wavy hair with a long front. For this tutorial, I've decided to create kind of a hair which has bangs in front of them. And it's also a V. Now, the shape that I want to create for you is a full face. For example, here. This would be the chin. Again, I say you can create it with divisions and guidelines. And just not to lose time. I just created so fast. So it can move on with our work. So this would be the general shape of our face. This, the shape of the chain should be a bit more asymmetrical. Because you want to create banks for our phase. You don't have to even proceed to the forehead. We can show this area like this. So the placement of the other components would be clear for you. On the faces which we have bangs on him. The face itself would be seen smaller because majority part of the face, which is forehead, is actually underneath the hair. So generally the face will be seen smaller. Okay. Banks will start from here. But it's better for us not to show it with lines. If you want to continue the scalp and the head, we could continue up to this part. This would be the top of our head, which can we show the parting of it. And this is actually a good distance between all of them. And in the terms of anatomy, they are correct. And if it consider this area at the top of our head, now will be the shape of two sides. And this upper part looks like a parting. And of course, we shouldn't forget that fee are going to create wavy hair. In these parts. We will have our bangs up to here. And also from this side, it should continue up to here. So into continuous of this we have departing of our head and Doris of the hair. Even I think we can take it higher, even higher than this. Like this, because right now we want to show wavy hair. Actually the top of it. The puff of it can be more comparing to the hair that we've created in previous tutorial, which was a straight, generally in a wavy or even curly hair. We have more puff and they can go higher at the top. You should also create and determine the lower part of the hair. For example, we consider this area a curve and a wave for the hair, and he gets a shape like this. Now, we can connect here which came from the banks, from the size of the banks to this part. And we create a shape for it like this. You see. And in this area still continues. We shape it. We connect them together and we create different shapes into hair. Well, we can say from this area it has another curve, so we can show it more wavy and curvy. And we can just create some more shapes saying here, as it came down like this. And we can also create there is solid with various small hair. You see. We can clearly see that wavy shape in it. And exactly on this side from the size of the bags, we can't create a part which can be shorter comparing to the other parts which came all the way down. We just give it a curve and create the shape of it. Maybe we can even consider it up to here. Like this. Then we move on to the rest of our work. Just like this. We create a wavy hair, we shape them. If we create the shape of these kinds of hair imaginary and all by your imagination, you might not have any problems with it. But creating wavy hair from a model and simulating them might be a little difficult for you at first because they don't have very special shape and for getting the shapes of their hair precisely similar to your model. You should just look at your model very closely and just follow each hair to get the correct shape out of it. So it might be a little bit difficult for you at first. Okay. So this is a general shape of the hair, which we've created part by part. And then we want to shape them a little more and actually complete the shape of it.
8. Drawing and shaping of styled hair: Okay, Now for creating the lines on the hair shapes and assign this part, I want to use my edit so you can see a dip procedure with the etiquette and you can clearly see that there's no difference with using your edited or using your other pencils. So I'm gonna do this. And for starters, I'm going to start from the parting of the hit and creating the darkness. The difference exists here is that when we start from the party, we should feel a circle as, as we come to the banks, toward the banks. As direction of these lines will turn and twist toward the direction of the banks and it shouldn't be actually caught off at any part. And you want to continue. There are some of the line. In some parts the banks could be indifferent. Others size, but in this style that I'm creating right now, the bags are in front of the head and I want the hair to have a twist all around the head. So as the, as the bangs are coming from departing, I want to show this to us. I try not to have any hand pressure. And I would just show the shape of the hair. And as much as my pencil brings, darkness brings into the paper that will be enough. And later if I thought I need more darkness, I will apply it. We do the same for the other side. As I said before, we are actually creating and feeling is circle over here. Pay attention that this parting of the head should be left as small whiteness. If it wasn't even a complete whiteness, it should be a very, very small light area. And you should feel the other parts of it because if you can see the scalp of the model, it will actually look bad. So we create this twist on the banks and let them come in different directions as the others on the other side. Okay? Now, the banks, there is a point that banks are more prominent in the middle of them, in the center of them. This is kind of a rule. So as we have the rule that we have more light on the more prominent parts. Therefore, you would just darken the upper part and the lower part, actually the top part and a bottom part of the banks. So they look more curved in and more flat. And diminish part in between them. Can be seen more prominent as we keep it lighter. Okay, With this actually, and a concentration of our bangs are increasing. If you felt like the darkness is a little bit more in some parts, you can use your eraser to decrease the darkness of the middle part of the bank's. You see darkening this area. How much darkening this area actually affects your Work and this side on the shape of your hair. Also. You dark in the lower area. And I've created these bars a little bit out of there, straight shapes so it would look more natural. And table leg just so straightway, cot k. So we are going to continue to create the rest of the hair, read at it. You can use as different pencils for doing that. But just be careful you should use a pen so that you can get enough darkness from it. If the pencil that you choose is a very light pencil, you should use a darker pencil alongside with it. So you can get colors that you want in your hair and you would have enough darkness. Now d Eta I'm using right now, has a B2 tip. It has both good light and good darkness. So if I decrease my hand pressure, it will give me light lines. And if I increase my hand pressure or with repetition, I can get darker lines. But anyway, it was needed. Anywhere I needed, I will have more darker pencils along with me so I can use them. And be careful to see which parts should be lighter or which birds should be darker. According to the waves that we've created. Definitely the parts which are on top would be lighter and the ones which are going underneath needs more darkness and more shading. Okay. These parts which are the sides of the face and we have the hair coming from the underneath. Toward the outside. We should have more darkness which we place, and we combine it with the darkness of the rest of the hair. Just like this. And the hair which are coming on top of the other ones should keep their colors. Now I'm doing them. So I would not lose the color of them In wavy hairs because part of the hair will come some launch on top of each other. Definitely did dark parts between day here are too much. You should be careful about them and tried to create those dark parts so you can give a great volume to our hair. Careful when our hair is wavy. Each part of the hair that you create should be in the direction of the waves, so it would look more natural and prettier. So we continue our work as we did up to now. And in some parts with darkness, we can actually separate different parts of the hair. In here. We can have this strong darkness. Here. We can have some more darkness and create another part of the hair, another section. And we can actually bring some more hair to this side. And as much as we create more sections and parts on top of each other, on top of each other in wavy hair. The volume of the hair would look more and more. And of course better. Now, if you do this with powder and brush, well, actually the rules will not change. The procedure is the same, the rules are the same. Just our materials are different. And when you use a powder in brush, we will use eraser on our work more than we use it here. Because we should create some of our hair with our eraser. In there. We can have another dark part of the hair over here. To corres that we give to this hair will actually shape them and create a very good form for them. Okay, this part of the hair is almost shaped up to some level. So I want to work on this side of it as well. I tried to work faster. So you can get to notice the shape of this side as well, which doesn't actually have so much difference. From the left side. The procedure is the same and we're just actually repeating it for this side. And this part that comes from back of the head, you'll definitely have more dark missing here. Again, I emphasize it. I'm using my editor then this work right now. Just so you can see you can use any other tools. And you can just show your work and create your work with so many different tools. It doesn't have to be especially pencils. It's better that you practice it video pencils, but after that, you can use any other tools or materials to create your hair. Even you can create them with pens. In colored pencils, Any other and techniques that you want. But of course, in colored sketches. In addition to knowing how to create the hair, how to create the texture of the hair. You would have to know about the mixture and a combination of the colors as well. But anyway, I'm just saying that practicing these kind of stuff, these basics will actually help you a lot for doing these textures in any other techniques. Any other materials. And I am creating these wavy laura lower parts so we can move on later to the upper parts. If you're not sure about the darkness of your work, you can just create a general color in the whole work. And after that, you can add darkness to it little by little, part by part. Wherever you feel like it's needed. You see when you're more patient and you will work very slowly. You can work on the details more. You can get the shapes better. And in any other parts that needs more details and they have special shapes. You should work with so much more patients. And imports which we have this wavy shape. As much as you put the darkness in its right place. The curves show the shape of it better and better. For example, in these parts, we add to the darkness so we have more curves. Now we are coming to the upper part, little by little, stale part by part. And now we work on this area. It's kinda kinda related to the banks as well. We just create them length is. And we also create this upper part. We should actually feel the partying, as I told you before, because we have still a wide area that is not really natural, should be like this. Still. We have to create the herring here and the top of the head. And in here we have some light, therefore, it needs less darkness.
9. Curly hair design (drawing the initial design of the face and curly hair and the construction of the: Hello again, my dear friends. Well, our previous tutorials, we've worked on a straight hair and convey. We hear this sign today. We want to work on curly hair together. Well, of course, based on previous tutorials, we just create a very simple general shape of the face. I don't get too involved with the guidelines and stuff like this. I just create a general shape for my face. And if you want to show something so completely, you can create your guidelines and then you have details on your face as well. But because right now I don't want to do that. And I just create everything. Approximately, not too precise. And this is my symmetrical line. These are the parts for the nose branch and my models eyebrows. I didn't complete the other side of the face because I want to bring some of the herring side of the face, so that will be enough for now. From this side, I will consider the forehead a little bit less and live shorter. This would be the top part of the head and the part which the hair is growing. Because I wanted to hair coming down through one side of the face. Actually wanted to hair coming down from one side. I will considered a parting from here To currently here are so puffy and they have so much more volume. And if you pay attention, you see comparing to the straight hair, the hair is actually lying on the scalp and they are in the shape of this scalp. Underway we hear it's a little bit more prominent comparing to the straight ones. And they're not completely lying on this scale, but about Dick currently hair. The hair are so much more wider and they have so much more powerful than them. And they won't get laid out on the scalp at all. If it's a model and that will be to curl. It would be so much dissent from our model. But of course it depends on the style and the design of the head as well. Because you see, you can create even the curly hair in some ways that they lie down on the scalp. But we're just talking about the nature of the curly hair. If you just leave it, leave them be in a natural way. They won't lie down on the scalp. You see it usually in curly hair. We have more sections and parts. If we want to create curly hair, it would look like this. Usually the top of the hair is a little bit more straight. As we come down to the middle and the bottom. Did curls are just increasing. It would be more curly. And we can even have some of them on the shoulder in a shape like this. Now, to him to give these curls being grounded and twist sit into each other. Depends on our model. Completely depends on model. Some of our models have more twisted hair and they have smaller curly hair. And some of them are bigger. This one's that we are doing right now is actually a medium curly hair. Curls are medium to twist our medium. So and as it gets bigger, it gets more similar to the wavy hair that we did together. You see in some parts, in some twists, we can see more thickness in some parts and less sick thickness in other parts. And we do not give them various special order, so it would look more natural. And eventing coming back. We can show the rest of the hair. This part actually got some special shape and we create a general shape for the whole head at both sides. And then we will move on to creating some more details for it. The curly hair is going to come down from one side of the face. We will definitely have a shape like this at the top of the head. And from here we as shard, curling hair. And even if you want the hair to come and inside of death phase, even more twists of it will be more added, can even give it good shape to our model's face. When we do these things, when we create these sections, the parts which are going up will usually have more thickness. And as we come down, because at a concentration of the hair would be less the thickness of the sections and the parts would be list. This is the very, very natural thing. And in here, if you want to give it a more beautiful twist, we can just add one more curly hair from underneath it toward outside. That if you wanted to change that iteration of it here. But it would be the continuous of this hair. We should make it thin and then we continue it in the direction of the rest of the hair. It looks like the hair got a bit of twist in here. And then you'll continue depending on the length that you want. We also get another section from here. And the last twist of the hair is very, very important in making your hair Beautiful. Plays. Be careful that you create the last part of your hair would a good twist with a good shape? And even in here, the definitely these twists and curves should be existed here. And why we are going to shade this area. It will definitely give it more darkness because it is coming from the back, from the behind, from the beneath towards the outside. We should have this shape for our head. Well, the prominence of the hair, curly hair is in a way that it doesn't lay down on the scalp at all, as we said before. So it should just start from here. And we should also have this curves and ups and downs in here. And I told you before, curves and a twist. Our list at the top of the head. But still they exist, so they're less but they still exist. And we bring another part from this side. So it would show the prominence of the hair and the ups and downs of it. If you want to complete this that we brought down up to here, we will create a connection in this area between the hair which are coming from the top and they're going to the middle. And we can actually spatter it in the rest of the hair. In some parts we can bring one part of the hair coming out from the other parts so we can create a good shape out of it. Because we cannot give any special order in curly hair. Generally, we don't have to create any special order in the hair. In any kinds of hair. I don't say they should be very messy, but they should have a very smooth order. At the same time as they have their natural Disorder, illness. You see, that's what makes our work look pretty and natural. Who've shaped these parts and little? Let's work on this back parts and shape them. And if this area the curls would be smaller, the shape would be better. So we create the parts which are on top. And then later they work on a parts which have more shape. If we consider these from parts, they came down, up to here. Now we try and complete the curl shapes that twists here. And of course we can just consider these hair one-by-one and part by part on top of each other. But anyway, that all depends on you that if you're working from a model, we are simulating or you are just doing an imaginary model. So that's for you to decide how I got some very fancy animated looking like cartoony hair. I think she looks like a Disney princess, like Exactly. That was what I trying to I tell you. The curly hair have a lot more volume and a live so beautiful. Okay. Up to here we have a general shape of our hair. We can even make this one thinner, and now we're going to process it and complete the shape. All right. I want to use my B2 pencil a little for actually dark and the shape of my face a little more than it is right now. And if you have this problem like me that your hand, my sweat a little, you should put a paper underneath your hand. Because I've created several sketches next to each other or even my pet paper itself. If your hands sweat, you should put a paper underneath your hand so your paper would not get wet or messy. Or even when you are working with pencil, digraph it of the pencil while might get on your hand on the side of your head. So you place your hand then on other parts of your sketch and it might create some problems for you. Would make your work look messy. So you should definitely have a clean paper underneath your hand. Now the parts which are completely dark are here, which I create them. The complete dark parts around in our head, our year we have so much darkness. Then I even dark in the eyebrows so it would look more cohesive with the whole area. Then you move on to this part. Now, almost all around to face we have this darkness, so we apply it, this batter, this darkness. And we will add this to our hair. Pay attention to the direction of the hair. It is very important that the shape that you're creating would be in the correct direction is very, very important. You see, even darkening these parts will actually help you a lot in creating good volume. Therefore, you shouldn't miss any simple small thing, even the things that may seem so unnecessary for you. Now that we've determined these parts will work on the shape of the hair even more. Because here comes to the forehead a little at the same time as we are creating the darkness. We tried to and create the darkness and we create a twist. And they would be actually as the opposite from the other side. And the shape of them, the direction of them should be correct. So be careful about that. We work on these parts like this. And we create them. The curves, the ups and downs. And you should create lines with different thickness. When the thickness of your line is actually so has so much variety is very, very effective on the whole general shape of your sketch. And in addition to that, you should pay attention to the curves, for example, on the hair. If we work on these curved parts and we shape them like this, may be the thickness. The more thickness of the line would show these prominent parts look better. And even at anyway, anywhere in your work. If the thickness of your line will change, it will make your sketch more advanced. But of course, this is very controversial and. You can talk about it. You can work on it when you are sketching with your pencil. Otherwise, when you get into the techniques and really gets into the painting, creating specific lines doesn't even mean anything. So be careful about that. Now we are just working on the lines which are related to the sketching. Right? Now we can add at some more shapes little by little. And the parts which are coming inside and the parts which are underneath the other parts of the hair are darker so we can show them easier. With more shadings, with applying more darkness on them. You have to feel everywhere red lines. If you just get the shapes correctly and leave some parts light, it can even add to the attraction of your work. And you can keep some parts, even light parts which you believe has some light shone on them. Usually inside of the curves, the lines and the darkness will be seen more in the curves. You see. Right now we don't want to bring too much technique into our work. We just wanted to create a general shape due to basic sketching. And our goal is just to talk about creating the hair, creating the shape of the hair, the style of the hair, and maybe creating volume with the pencil for making this kind of sketching surrealists thick. You can do so many other things. You can create them on a cardboard. You can do so much fading on it, and make your model to look more natural. But anyway, our goal right now is that if you saw a curly hair, how you should create it, how you should divide it into different parts. How you can make it simpler to create it at first and then process it as you move on. And of course, how you make your volume. And in creating day hair, it can add the technique in next steps. And this is actually the base of our work in the sketching. It you should see, make it simpler in your mind. Understand it because it's very, very important if you understand your model. And with that understanding, with the whole area of your model, you would Astarte creating your work. That is a very important point. Now we can dark in some parts completely so we can show them. They are coming from underneath and maybe they came from the back of the head. You see, as much as the layers of the hair will increase, the volume will increase as well. And it can be seen even more. And definitely there's one thing in all kinds of hair, but it's very especially in curly hair that you see very small hair coming out of the parts that you've just determined. So it would be nutshell because you can not see a hair like this which are all in one direction. You see spontaneously. Hand will just slip on some parts. And I've created some darkness right here. So don't worry about it. The freedom of the hand is very important in your Mazda while you are creating your sketch. But it doesn't mean that you shouldn't lose focus on the part that you're creating. But anyway, because your eye is just moving around your work constantly, your head might just a slip a little onto the parts that you think you should work on them more. So try to work on all the parts and then you can come back on the parts that you think they need more work. And if you consider that the endings of the hair are clear over here, we can create some lines like this to show that. Maybe we can just create a very thin hair from here. You can work on them hours and hours just to make them better. And about the small hair coming out of the and sections and parts of the hair. You can vary. Finally, create them like this. From outside towards the inside. We're given a shape to this side of the hair and we move on to the other side.
10. Curly hair design (curly hair design on the front of the head and face): Okay, Now we want to work on the other side of the hair. And we start from this side to create the hair. And the hair which are coming from the lower part will be darker. And we try to work on the hair which is in the front. We pay attention to the curve and a twist of the hair. The continuous of them. And the hair which are at the top of the head, should be divided in as many parts. They can't be all in one part. They should be divided and separate it in here. Even at the top of the head. It should come down to here with the shape of these curves and is curls. And it will connect to the rest of the hair. Do not be afraid of applying the darkness in parts which should be completely dark. Apply your darkness and lead to your work. Be dark and show the volume that you want. We shape the hair. It should be, it should have darkness over here. Sea. Creating curly hair. Maybe look a little difficult or takes more time creating it while we are creating the twists and a curves, it takes more time to create curly hair comparing to the other two styles, the way v or the straight. But at the end of the work, your viewer will definitely see that how much time you spend on it, because you had to get all the twists correctly and get all the shapes correct. Here we go. We should create all the darkness and light in all parts of our twists and all parts of our curly hair. Because these parts are the layers which are beneath the others. There is a possibility that they have more darkness in them. So we apply more darkness is stronger darkness and we increase our head pressure or the repetition of our pencil movements so we can have darker lines comparing to the hair which come on top of them. And definitely in all of them we pay attention. We pay so much attention to the twists and to the curves. The direction of the hair is very, very important. These parts of the hair which come on top should be lighter comparing to the other ones. Maybe we should just add more darkness on the curves and on the prominent parts we try to work lighter. And again, we've talked about the ones which are beneath the underneath layers. Has men discussed? We create the parts like this. You should know that which part is in front, which part is in top? When we consider this one in the front, we should keep the other one dark.
11. Curly hair design (design and construction of the right side of curly hair): Alright, now into continuous of our work, we will create the rest of the hair. According to what we've done so far. Into curves, we can add more darkness into twists. Also to saying, and they come from underneath. It should be darker. And the ones which are in top should be lighter obviously. And now you should pay attention that if you have considered a source of light for your work, that is, the line is shining on your work from a very special place. You should consider that add a hair which are closer to that light source should be lighter. Generally, in this sketch, we have considered the light source. Again, generally, we haven't decided that it's shining from one special point. Therefore, we are just considering the lights on the prominent parts of the hair, not all of it. The parse which we came from underneath considering the shape of the hair that we've created should have darkness and shades in order for us to get that good volume out of it. Okay, here we go. We should just work on all the parts here. I'm still working with B2 pencil. And for the parts which are too much in depth, we can completely darken them and make them black so we can show they are so behind that, the texture of the hair are not really visible in those parts. Just like this. Now, creating the curly hair is one of the most time taking at one of the most hard-working kind of hair that you want to create. Of course, it depends on the technique and the shape of the curly hair. There might be very small curls and you just have to create very small lines into each other with your pencil. But even that takes so much effort and so much time from you comparing to the other styles of the hair. So when you choose a sketch for creating good if the, if that sketch, if that model has curly hair. And if you want to think about the time of your sketching and your work, you should consider a lot more time comparing to the time that you consider for a straight or wavy hair. And of course, for creating a hair like this, There's a procedure that you can go on with is that you can have a model or a person that has a curly hair. And you can move on to that. But of course, you should show some creativity from yourself so you can find the directions and get a good shape from your work. Okay. I even added a lot of disordered, messy hair coming out of the parts. So it would look more natural. Of course. Now we are completing the parts which have been left untouched. And if you felt like the tip of your pencil is too much rounded and it's not sharp anymore. You should definitely sharpen it. Sorry. I'm continuously and constantly rotating the pencil in my hand. So I would find the sharper edge of my pencil. And this way, I would need the sharp now lists. You see these per parts. They have very small, yet attractive curves at the top of our head, which looks at just so beautiful and elegant. And as these bars are at the top of the head, obviously, they've got more light on them. So they should be lighter. In a normal lightning AP course. These are getting to be a very beautiful, beautiful, long limbed concentrated. And her h shaped hair, curly hair. I said before, it looks Thanks them. Disney character right hand, Disney princes who had a very beautiful curly hair and vein, just made that together. It should be proud of yourselves. I'm not I know that you got it right as well as I did. And with even a little bit more practice, it'll become the best. Tried to work on different models with stray too wavy and curly hair. All of them. Then we add some darkness over here. We want to show that this is more inside. Therefore, we add more darkness. And the last tray of hair, which is this top part, should be light. We create a curve of it. We add the darkness inside of the curve and a twist. And then we just give a very light color to the prominent part with very, very fine and thin lines. Okay, My dear friends, this is one way to create curly hair. And we have so many different ways. This was the most simple one that we've done it together with practice it together. I hope you get ideas from it and use it in your own works. This was the shape. And in next part, we will talk about different types of hair, the bones, the pony tails, and we work on them as well. I hope you've enjoyed it up to here and this tutorial was useful for you. Good luck to you all for next sessions.
12. How to draw Braided hair: Hello everyone and good evening to you all. Today we want to work on a shape of a braid hair. It kind of hair which can be braided from the back of a woman's hit. And for starting that, we want to start with a most simpler way to learn how we can create a braided hair. For that, you can use two parallel lines. This is our first guide for creating our bright hair. Just like this, we create these two lines and if you want to consider as the hair is coming down, it's getting thinner. We can get these two lines out of the parallel way. And as they come down, they can get closer to each other. So that depends on you. The upper part of it would be thicker and the lower part would be thinner. And in the middle of it we create some lines. And then we create some corner rail lines from both sides toward the middle, toward dissenter of our lines. Now we do the same on the opposite side as well. We just repeat the lines I've, we've created over here. So this is a primary shape of a braid hair. Now we want to process it. Now I'm going to make it darker so the shape of the hair would be shown. And we're going to create these a little more prominent on the edges. And then later we are going to bring them down. And for making it more natural, you can create some disorderliness, some of them and can be thicker, some of them can be thinner. Some of them can be bumped out more, and some others not. As we come down. These shapes are going to get thin there because usually the ending part of the braid are a little more closed and volume of the hair would be less at the ending part of the braid. And you can put the right side on top. You can bring to shapes like this. All derived braided would be on top. And you can bring all of them down like this. So the hair on the left side will actually go under, meaning that you just continue the lower part of it. As you can see, we've continued the top of it on the right side and the lower part on the left side. So we can show one side of it is going on there and one side is going gone to top. And you can use different ways to create that. But this is one of the simplest ways that I'm just telling you and you will get the results more easily. So this is our general shape. And you can just put this general shape and different types of braided hair. For example. We can create a clip on here, eclipse, or we can create the ending part of the hair just like this. But we are just creating the shape of it. Not to literally Burgess, creating a model for it. If you want to show that it's hair, we should definitely create some textures like this so we can show that we are having hair details here. The ending part and the beginning part of the hair would be darker and the parts in the middle which are more prominent would be lighter. And of course, you should pay attention to the turns of the hair. For example, here, the hair should come at the back, from the back actually. And here they should come from the inside because the direction of the hair that we show here is actually very effective in shaping these areas. Even in some parts. You have to create some disordered darkness in the middle. Not too much, but a little. As you can see. It will be more look like hair. As you see, we are working on paper and we cannot just do too much shading while we are working on the paper. For the hair texture, of course. But later we will work on the hair more just to see the texture of the hair easier on a cardboard. But of course, if you think about which parts should be darker or lighter, definitely depends on the direction of the light being shown to this. So it's not a very definite point. And it's not for every hair that we should say this, but should be darker and this part should be lighter. It sees normally and usually like this because apart, when comes apart which comes from beneath another one, would be darker. But here, you know, Burgess craning a general shapes. So of course, if you're working on a model, it depends on the direction of the light as well. All right. Now I am creating this shape with my B2 pencil. From the beginning of my work, I was working with by B2 pencil. This upper part needs more darkness because we have kind of a shadow of the upper part of the braid on it. And even here, in the parts which this braided hair has went inside each other are more darker always because a day have a twist toward inside. I mean, at the same time that they are coming from beneath, they have a twist toward inside that makes them more darker. And we also darken this parts because we want to show that these parts have some depth. As you can see, we have some prominent part of this edges. We have prominence at the sides, so we should have a B, sorry, we have two dark in the other parts. So this prominent can show itself. We can keep this part lighter, too dark. So I'm going to use my eraser on it a little. Don't worry. And in here, I'll shape it like this. Again, I say the rest of the hair or the shape of the braided hair depends on your model. You're the one who choose to see what shape it is to the left, to the right or whatsoever or like it's going to continue to the sides of the head and the rest of the hair will be not braided. So the shape of it completely depends on your choice. See, we can definitely consider this a hair which has been braided from the top of the head. If it's like this, we can totally shape it in this way. And we do not want to take this straight. We're just going to bend all these lines so we can get to the end of the hair. This would be the end of it. And in here, we can again have Eclipse or coupon or in whatever shape that we want. And dad, if it is at the back of the head, we can create a top of the head like this. Also from this side. We're going to continue creating the shape of the head. We can consider it in the three faces or completely from behind. If you're going to consider the back of the head and completely from the behind. You should consider two sides of the braided hair equally. This would be the top. Recreate this side of the head length S. And equally. On the other side, we go out and we create our lines are circle. This area would be the back of her neck. And we can also create the shape of the neck as well. Again, that's solely your choice. Now you would understand that whereas the placement allow braided hair. Even want to show some hair on this area. We can show is here because usually when people break their hair like this and the rest of the hair has been taught that to the top of the head. They have vane is stretched up, so the bottom of the hair would look like this. And in this area which we have the braided hair, the hair can come out like this in all directions because in, from all directions the hair are coming to the point of the braided hair. So we can create these lines to show that the hair are concentrated in this area. And that depends on you because in some parts you can Show that the hair, it has been braided so hard or not so much. That totally depends on you. Our total and main goal was that you would know how to create this kind of braided hair. So you would know how you can create the braided hair. Now we consider the simpler way. And we continue the hair in different directions like this. And if it's the back of the head, we can have the ears in here. Although it's a situation that the hair are being in a way that is being connected to the head completely. I mean, they would be a stock on the head completely. These parts would come down and connect to this area like this. From the front of the head. And again, the shape of the head for different people are different. So according to its differences, you can create your head differently. So again, that depends on the anatomy of each person's hit. So like this, we complete these parts. Usually in a situation like this, the hair are completely brushed and they are so perfectly coming to the back. Someone who braid their hair like this, they would brush him completely and they would perfectly in order. And they're known as spattered. Just in the beginning for for these parts, because we want to show the twist of the hair and the turn of the hair we are giving a direction. And two are actually giving an angle to these hair. You see, we are working from both sides at the same time. So we can get them together in a correct direction. Be careful to have the rotation of the hair in this middle part of your head because if that wouldn't be correct, Lee, the overall shape of your hair would be some messy and it wouldn't look good anymore. So I changed my pencil is sharp or one and a darker one. And on these parts we can dark in the hair a little more. It's the same for this part underneath the hair because at the same time it's on the back of the head and it's underneath debrided part. So the shadow of the braided hair is placing on this part of the hair. We work on this hair more so we can get more volume out of it. Just be careful I've told you before. If you create the hair on the cardboard, you can create more volume. But right now because our main goal is to create the shape of the hair, we're doing good on the paper. But when you get to the part that I would tell you to how to create the hair we details and the texture of the hair is perfectly, it's better for you to do the steps on a cardboard so you can get a better result out of your work. So we will have to darken this area even more. And we can also the dark and we can also dock in these parts. And we can clarify it as shape of the ears. Even more. More darkness around our work. Okay. I think it's enough up to here. And you've got acquainted with the shape of the braided hair up to some level. So you should try to create these differentiates as shapes of braided hair. Maybe they came on the head again. They look different. Or the rest of the hair would be not braided and open, straight lay down. So you should work and practice on different shapes and types of the hair so you can get it better. I tried to play some pictures for you. So you can practice them more and more. Okay. Now, because our goal was to create a braided hair, I don't continue it more than this. You can complete this shape. Create more hair for details. So it would be more realistic. And in our next tutorials, we can talk about the different shapes of the hair more and more. I hope you've enjoyed this tutorial and it would be useful for you.
13. Drawing the initial design of the weft hair on the head: Hello, my dear friends and good evening to you all. Today we came back with a new tutorial with different shapes of the hair. In this tutorial, we want to work on the hair which are in a bond or a pony tail. And how they can be seen from the side view. For this, at the first, I'm going to create first a side view of the face. Just so you know, it is a side view. And then later I would not create a face again. Because our goal here is to create how we can. Sorry, because our goal here is to know how we can create the hair from the site. But just right now because I want you to completely understand how it's done. First, I'm going to create a side view face for you. The placement of the eye, the nose, the curve of the nose, which comes to the lips, and a curve of it which depends on the shape of the lips. We did not want to get too much into the details of the face, so we instantly finish this part and shape of the chin, the placement of the eyes and the eyebrows. And also the placement of the ear, which is continuous of the eyebrow until the nose. Again, I emphasize that depending on the shape of your face, this can also be different. The size of the year or the placement of it. Okay. Now we do not get too much into the details of this area. Now about to head because you want to create the shape of it first, we start from behind the ear to create the jaw line, the jaw angle. So just like that, we connect it to this area and get a little bit of the sharpness of the Chan because I think this curve was too much for this kind of Chin. I'm trying to make him more round. And like this would be better. The placement of the neck, which comes from here and from this side we can say this would be the end of the neck. Now we should create the shape of the head approximately because we are going to bring some hair on it on the head and then we bring the hair on the scalp. It can be seen anymore. Now we have a general primary shape of the scalp, but it can be different from each face. Again, I say, now on this head that we've created, that mean, bolded a little so you can see the shape of it better. Because we haven't created the hair. We don't go too much up. And we come down connecting the jaw lines and at last the ear. Now in this area we've determined the shape of the head and the ER. Now we want to work on the hair. We want to have a braid hair, but on the scalp. First we should determine the shape of the hair. So if we consider that this person does it any bangs, this would be the placement of the hair. And also from this side, from behind the ear, we can come to the back of the head, and of course, it can be even more behind of our skull. And from here we start a little bit. I'll per than the scalp. That's that would be the area for abrogated hair. So if it comes there, this area for our braided hair, we erase the lines for the scalp and then we start sketching. For creating the sketch of this area. You can use lines which are in the central of our great. I consider this area the center of my bright. As you can see, I've determined it very lightly. Then become to create these parts in here, a part should be lower and the other one should be above it. One goes down, one goes on top when goes on there, and one goes on top. The thickness of the parts of the hair can be different. It depends on you, on your model or how you want to create your work. Okay? We apply the next parts just like this very easily. And of course when this line comes, it should be like this. The next part, the next stem. And we are the person who decides to, who decides that which part should go under and which part should go on top. This is how we create the braided hair and for the parts above it, the rest of the hair. The easiest way is that we consider the hair being separated into some parts. It a little bit out of the scalp. We shape it in here. We have a curve. You have a twisted her and a little out of the border line. Just to create that prominent shape of the hair, that prominent feeling of the hair. Because we wanted to give some volume to our hair. And one of them can go from the front to the back.
14. Design and construction of weft hair on the head: All right, now into continuous of our work, he should consider this back part of the hair, which is continued up to here almost. You should bring bread at hair downward so it can cover this area completely. Or if you don't want to do that, you should create some hair over there. And even another thing that you can do is you can create a braided hair over the ear. It means it can even cover a part of the ear to, and we can have some hair at the back of our neck a little. And if you want to create a braided hair over the ear, we can erase this part of the ear to the top of the ear, and then we can shape this braid like this. Okay? Now the general shape of the hair is shaped. And now we want to create some details for our hair. We erase the extra lines. And then we move on to the shape of the hair. We start from the top and recreate the hair in these parts which the hair are actually collided together. And here we should have more darkness. We show these parts like this. We've created darkness of hair that went into each other. I need a sharper pencils so I can show the hair one by one. And these parts that came from underneath the previous hair should be darker. And it should create some darker lines over here. So you can create some variety in your work and it doesn't look all the same. You can have different shapes. Just like this. We move on to our second part of the braid. Now we come to this side. We create these darkness and we'd give volume to our hair. We keep the middle part, the central part, LIDAR and the corners and the sides would be darker. Of course. I think if we create this area on top, the shape of it would be better. Let me change this. Twist mean, we can create it like this. So you can have a better shape. Although if you want to do this, we should do this in the rest of them as well. So now that we've decided to change the direction so it can be pretty air. We should bring the darkness to this side so we can show these are coming on top and the other side will go under also these parts. From the top of them, we start from the darkness and we get to the lighter colors. And in here we have darkness at the bottom of them as well. Here we should have darkness and as we go to the top, it should be lighter. Actually, it should be dark on the both ends and in the middle. We should keep it lighter. That's how it's gonna work. And also, and the opposite side we can see the lower parts are darker. And as we go up, the light is more. In here. We should make this area darker. And again, we dark in the lower area. And just like this, we give it a shape to this braid. Then as we enter the next part, we'd do the same. So the process is the same. You just have to do it. For several times. Psi just determined the braids right? To the end comes inside and another one comes out. This upper part has some darkness. The middle part, which is more prominent, is lighter, of course. And on this side, it's the same. In here we can have some darkness because it's an area which they hair is coming from the beneath. So it has some darkness on it. Same same as before. The sides are darker and a middle part, the center would be lighter. We've considered this area's braid to be thicker. So it can cover up some parts of the ear and back of the head. Because this area is placed on the lower part, it should be darker. And then we come back to the last part of the brain and it looks like the half of it is gone to the other side of the head so we cannot see it completely. I can also start this area a little bit from beneath and below so the shape of it would look better and more accurate. So this is the braided part of our hair which is almost completely shaped. And we can also have some hair on this part of the face. And we can show it like this. Just a little, not too much. You don't want to overdo anything. And even here, they can have some hair trembling down. There are trickling down. And also the back of the head. We can have some hair coming down or we can have some hair going up. Because this hair is giving us the impression that it is wavy. Or maybe even currently. Therefore, it can have a shape like this, which can show that. And of course, day hair on the back are going upward because it can clearly see the hair are being braided and all stretched upward. These fires which go underneath, will definitely have more darkness in them. For example, here, it would look like this. And, uh, from strong darkness it came to this way. We should determine the shape of it. And here instead of separating these parts, we are going to separate them from here. So maybe if it's a little bit more prominent, the shape of it would be prettier. Because it has, you know, in real life, when you do your hair, you make it a little bit more, you know, prominent and puffy so it would look better. I'm going to use my edited a little to create some hair over here. Although the tip of my exit is kindness so similar to the pencil that I was just using. So it's not like that the tip of my eta is darker than my pencil. Just because I don't want to continuously and constantly sharpen my pencil and just make my work easier in that area. I am using my edit here. And you see you can have no problem using kids, but you should be careful that you would not create very sharp pair. In that case, it's better not to use an edit and use a normal pencil. Because the normal pencil can have both a sharp tip and a normal tip. And you can even use the side of the tip, which can be needed and which can be necessary in a sketching sometimes, but in the case of edited, you cannot do these things very easily because the tip of the head is almost always sharp. So it might create some too sharp lines for you, which we don't want. But in here That's okay because I can easily control it. So it wouldn't make any problems for us know, right now even. So it just did some shading. And then we have our volume for our braided hair. And at last, we also shape this area and work would be done. See, I'm not emphasizing on the darkness too much right now. Just enough to show our volumes would be enough. Because as I said before, and this is the most important thing for us, is that you can know the shapes, how to create them, and how would they look? The volume too much. So this was a kind of a braided hair. And next is cell. We might work on it with Kiara screw technique and process it even more constructed more so you can get to know about this technique more and more. I hope you've enjoyed it, you use it. And in next step, we can practice on More Shapes.
15. Men's hair drawing with a sloping top and towards down: Hello to my dear friends and good evening to you all. Today we want to work on the hair into continuous of our previous tutorials today we want to work on a male hair, the shape and the forms for the male hair. For that. First you should create a head or a skull, a face. And I've already told you about creating the face and the head so we don't talk about it too much. We just created general shape and then we move on to the shape of the hair. Here we go. Try to create the shape of your head very lightly. So ever, ever made a mistake, you can easily corrected and even erase it. And after that, you've created the hair and you are sure about the shape of the head, then is the time that you can go over your lines and make your headlines darker and emphasize on them. Then we create the ears almost asymmetrical as much as we can. Okay. This is the shape of the head and the ears. I've created them very lightly so I can correct them and edit them whenever I want. This would be the placement of the hair growing. Now we want to shape the hair. Maybe we want to show that the hair are dribbling down on the head, on the forehead. And if you want to show that, you should decide how you would bring the hair into the face from this part, which is the growing part of the hair. For example, we want it to have a shape like this, which is great, a general shape for that first and then we will add the details. And from this side it can also come on to the ER and Lidl and cover a part of the ear as well. From this side, again, if you want to create the shape of the hair, it can come on the air a little as well. We don't need this line anymore because we've created a hair in a way that day are coming onto the face. And on the other hand, we should erase this line as well. But before that, we should show how much is the volume of the hair in this upper part of the head? Because if the heads are too straight and there just to lay lay down on the head. That's only when we create the hair exactly on the line of the skull and the head. Otherwise, we should consider the hair coming a little above the shape of the skull and the head. So we should also erase the other line that we've created for the top of the head. I've did it so you can see how much this then we would have in this part of the head. According to the base under hair, I have to consider that the lines are coming on, the hair is coming on the ER. We should erase the upper line for the ear and then we should bring the hair on the year. That totally depends on how much hot, what shape Have you considered for your hair. And we can just divide the hair into different parts, into different sections. And when we do that, the hair will get a good shape. For example, this would be the parting of our head. And in here, the hair should become into several parts, should be cut to several parts like this. You see, we're just doing this very easily and we are dividing the parts of the hair and we are adding to them. Here we go. Creating a good shape, good volume for the hair. Okay? After that VIV shape, these partings up to some levels. Now we want to finalize the shape of the head and the face and then give a good shading to the hair so it will have a good texture and a good hair shape. First, I want to determine the shape of the face for you so it would be completely visible and clear because it's the shape of the man's face. The jaw is a little bigger. Because usually men have bigger jaws. Comparing two women. It's not a rule. But we're just considering a general happening. Now I want to start with a darker pencil, apply some darkness, and then I would move on to the parts which have lights. For example, I've got a B3 pencil in my hand right now, and I want to show these shapes. There are other, we've created these curves. We can just divide these parts more from each other. So it would get a better shape. So this part, which is the furthest part from the parts in the front, we consider that this got the most light, sorry, the less light and the frontal parts got the most light. So we will darken this area more. And we can even use the side of our pencil, reshape it and we bring the darkness forward in the direction of the hair. You see because I want to see the shape. I want to just show the shape. Mostly. I'm just creating the colors. Slow layer and sorry, faster and you can do it a slow year. And you can do it slower and you can be more precise about the colors. We want to have more light in this area, so brainless darkness in them. Okay? And now still, we want to increase the darkness of these parts in my hair. And on the course, which are actually kind of a border for different sections of my hair. I tried to divide and separate the hair. Now I haven't creates so many details for my hair. I'm just adding darkness a little. So you can see the separations. I do the same thing for the opposite side, for the right side. And we start from the parting of the head. Bit more darkness, we come down. We can also use the side of our pins cell for this part as we did for the other side. And we apply the darkness for our area. Just that your hand should be in a way that just twists easily. In this side because the volume of their hair is less. I apply less darkness and I keep a placement so I can create that light highlights in here. Just try to keep a space. Now we have a general shape of our hair. And male short hairstyle with this shape that they are coming onto the face. But of course we say it's a male hairstyle because it is for men usually buy. You can also see these kinds of heresies on women as well. Now, I'm going to use my eta, or you can use a very sharp pencil to create each hair. And that hair texture in your work, even on the dark parts, try to create the hair texture and add them to your work. So it will look more natural. Even in these par set at a parting of the hair is from here. We can have more hair coming out. That obviously, and that truly most of people have that in the part that their hair starts to grow. We show the hair texture in these parts as well. Now, if you feel like you've covered the lighter areas too much and you cannot see any highlights. You should definitely use your edit erasers that you cut the tip of it and sharpen them so you can create those light hair and the highlights that show the prominent part of the hair in some parts. Now we want to keep this part light because we want to show that here is more prominent. And with shading and had training, I will keep this area lighter obviously. And just as easy as that, we get the style and the shape of this hair, which is so cool. And then because we want this area to be more natural, we add some darkness between these lights so we can show the separation between the different parts of the hair with that darkness that we create. And if it's needed, that they hair will have some curve so you can easily create them in this step. And again, and each part of the hair that you consider is more on the front, underneath it and behind it should be darker. So we can actually show that it's more in the front. We've completed this hair is styled this male hair cell very easily. And I hope you've enjoyed it and use this tutorial. In our nice tutorials, we are going to work on some different hairstyles for man.
16. How to draw Men's hair that shaped upwards: Hello again, my dear friends and good evening to you all. All right. Now, this time we came back with an other and a new form and shape for man here. That was the first shape. And now we're going to create the second shape. So far. Do that. For doing that first, we should create the shape of our models hit. It's not necessary that this head would be exactly like the previous one. You can change the bone, the structures, and change the shapes a little, but it should still stay man's head. Just because I want to, I want these models to look more cohesive next to each other. I have just determined the top and the bottom part of the man's face. Of course, the upper part should be bigger like this. Now we have a general shape of the man's skull here. Now you want to work on a new Harris science together. Then we first create the ears as well. And then we will move on to our new hairstyle. That of course, in as many styles when we create the hair, the ear with the top of the ear will go underneath the hair. We can determine this part as the growth part of the hair. But obviously, it depends on day Harris. This shape can be different, meaning that like the previous model, the hair can come onto the face. But for our second model, we want, we don't want the hair to come on the face. We consider a party for him in here and then we want to create very short hair. But in a way that from this side they go up coronaries. Sorry. And for that, we give it a shape like this because it will definitely come onto the sideburns as well. From this side if you want to show them so simple. We can create the shape of the hair with two or three lines like this. And we just have to create a shape like this over here. And then from this sides we should pause the hair a little comparing to the skull, like this. But in a part that the concentration of the hair is more meaning the right side where the party has opened and he went on to depart, which has more concentration. It will definitely have more prominence and more puff. Like this. It moves shaped like this. And on the part behind the ear. It can go thin, elegant. Now this is a general shape of the hair. Now we can erase the extra and the guidelines so we can show the shape of the hair better. Okay? Now you can see the shape of the hair. And now we will make this shape very thinner and finer, smaller. We want to show that this went up like this. It has a shape like this. And it just went up. We just divide the hair into parts. And we continue these curves up to this part. The curves which are going up. And from here to here can come down a little and it doesn't have that much effect on these parts, the sections. Now if you want to consider this area a little bit more prominent, we should show that puff in this area as well. On the other hand, we can divide this part of the hair into different sections and parts. Maybe in lower parts, they don't show themselves completely, but in this lower part, you can definitely see the parts. Now, this is a general shape of our hip and our hairstyle. Now we want to determine the shape of the face, making more clear angles for it. And then we will move on to shading the head hair. Sorry. We need a wider chin. Like this. And as I said before, our focus is not to work on the details of the face or to hit, so we don't get too much into them and we don't process them too much. Now, we Assad from the parting of our head and we start adding darkness from the partying that we've considered for this model. And obviously, we pay attention to that the parts which are darker are the parts which have depth. And in this kind of hair, because it comes up, we want to show a prominence part, a bump on the top of the hair. So we should dark and the lower areas more so we can show there is a prominent part. Even obviously like previous model, you can use the side of your pencil as well. Not too much, but you can use it in some parts. Okay. Now, on this bar that we want to show their hair are underneath these prominent parse. We should have more darkness. Therefore, we darken this area completely. After we've separated it. As we come down. It can have a little bit more light. And it can have a, can be a little lighter. And pay attention on this part and this area. The shape of the hair can be looked like this because there's an open down here, a curved here. So we can show it like this. You should pay attention to and a sections and the parts of your hair. Try to show them. We can also do this with edited. And be careful not to create so much ordering your work. Now in this upper part, we have a curve for the hair. We need more darkness. And that's why you should apply here. Pay attention that you would have this curve. Because if you don't do that, the shape of your hair may not look very natural. Generally when the hair is straight and it's not really wavy or curly, you should pay attention to these curves so much so they would look good because the hair should not look at interrupted or cut. You want them to look so cohesive together. Okay, now we can work on this part. On the opposite side of the hair. Just a little. The concentration of this side will be less. But anyways, week, we have some darkness as well. In these bars. They have more darkness coming up. And then we will add our darkness to them little by little. It will shape them, we will give direction to them. And we apply the darkness more concentrated because we want to show this area to have some light on it. So we shouldn't just darken the whole area. Now we can use our edit to create some hair. And we can just get them out of this one. Simple look. We can create variety in our hair. Also the same in this area. You see, now when you look, you can see this part of the hair being more prominent. And on this side, this part would look more prominent. Little by little, we add to the volume of the darkness until we only keep the parts where we want the light to exist and get the volume that we want out of it. Just like this. And little by little we get the result that we want. All right, so this was our second Harris style male Harrison that we did together. I hope you've used it and enjoyed it. See you on next tutorial and goodbye.
17. How to draw fashion Men's hair: Hello again, my dear friends and good evening. I'm homo tie a fan today I'm here with you for another beautiful male hairstyle that I want to teach you. Well, as same as we did for the other models. First, we should create a general shape of a head and a face. For that, we determined a top part and the bottom part so we can have the general area for the head. Then we will determine the shape for the jaw and chin. Here we go. And then we create the skull from both sides. And it went a little above the line that we've determined. But it's not very important because we're just creating a general shape and we are not simulating for a specific person, so we would get to a specific on the details. Then we determined the placement of the ears approximately like this. All right, now we have a very simple shape of a man's face. If we consider, this is the part where his hair is starting to grow. This line that we've determined who will be the placement of his hair growth. Now we can complete it a even more. For example, we want to create a very modern heresies. So because we want to show this hair so well and concentrate it, we can bring this part down. Because if you paid attention when the age is going up, the possibility of hair loss will be more in this part and this pattern. But if you want to show young person that has a lot of hair, we can determine the placement of the hair growth and little lower than we usually do. Now, we want to create the hair of this person, coronaries, but not like our previous model with a very ordered and hair dried hair in a very specific order, just in one direction. Now, we just wanted to create this one a little more different like this. This is a general shape for his hair. Now we want to erase the extra lines and we show the division and the different sections of the hair on it. We will erase the extra lines for this area as well. And then we move on to divide the hair into different parts and sections for that. First, we start from this front parts, which can be seen more. And we will connect them to each other with a curve. Be careful that this partying should also have some kind of disorder, illness in itself. Meaning that this parts of the hair that you are dividing, they shouldn't be all the same size. They shouldn't be all equal. They should be very different. They should have some variety in themselves. So they would look more natural. And of course, as you've seen, every day, there is a new model and here is coming on. And to the fashion. So we just want to create a database of individuals who want to teach you the basics of how to create different kinds of hairstyles. Therefore, you can create any kind of hair cell that you want. And it's not necessary that you have been tutored each one of them in here. Even if your practice one shape, one hairstyle. From this video, you can easily get the rest of them, which are similar to that. Also, from this side we can come down a little and we create the shape of it like this. You see, now we have the shape of the hair. Now, we're, the only thing left for us is to give volume to it, create a darkness, and create the hair with details. I take a darker pencil. Before that, let me shape my face a little bit more. We can show that his face is a bit more raw. It has firm bonus structures, especially in the jaw area. And we also create the shape of the ears. And then we'll move on to the rest of our work, which is the shape of the hair. Now these parts, obviously, as they are intended to come down, they would look like this. So try to create some hair downward direction. But about these parts that just went up, you should be very careful in working on each part and section because we don't want this area to be seen as a line, as a specific line. We lighten that line with our eraser and we try to shape this area with the hair that we are actually creating. This would look better and more natural. And the direction of the hair depends completely on the shape of your hair in these parts. So it's, it can be totally different if you are trying a different hairstyle. Right now. I'm not just emphasizing under darkness, I'm just creating the placement of the hair. So just again, I say I'm just determining the placement and the direction of the hair in these parts. Now I want to apply more darkness with my B3 pencil. For example. The part that is placed here and is in front. This should obviously stay lighter and got more light on it. For showing that light. We should apply darkness on the sides of it, on the parts which went back. But be careful, we do not want this darkness to be all in one color because that would make your work look so natural. It is true that we are not working hyper-realistic here, and we're just learning the shapes and styles. But at the same time we do not want it to look cartoony and too unnatural. Unless we are trying to use these shapes and sizes for fantasy and fantasy characters. Or again, cartoony characters. Otherwise, we should try to make them more natural. So for his hair, you can use the same process according to the character you've created. For example, I've told you that this kind of hair looks for its suitable for a young person. Now if you want to create a cartoony character or fantasy character, you should use. This is, for example, for a young character. But also when a person is creating a character. They also pay attention to the character's personality, the way he behaves. So then they can create the Harris style. According to that, for example, this can be a Harris for a small boy who studies a lot, who is a bookworm and stuff like that. But if they try to create a young adult or a boy who is not a day might go back to this Harris style. Therefore, you can use these styles even when you're creating characters for yourselves and create different hairstyles. And if the personalities with different hairs. Now maybe we can even add one part of the hair in this part. Because here the hair is coming from underneath, it can have more darkness. You see the direction of the hair, the direction that you give to your hair is very important in creating the style of your hair. And of course, you should pay attention to the ending part of your hair. Maybe the darkness that you have on this front part of the hair. You don't need them at the end, at the end, at the back of your hair. But they need to be darker comparing to the central part, the middle part, which has got more light. Okay, Now we can give darkness is back part's a little bit more so we can have a better shape. And then we can shape the hair over here. And of course, because this is the lower part of the hair, we can see more darkness. Now we will move on to our edit and we create some smaller here in these parts as well. We don't want to lift it untouched. Be careful that the continuous of the light that exists on this area, it should have a very as symmetrical shape together. It shouldn't be that one of them should be at the top, one of them should be at the bottom. They should look cohesive together on each part that we are creating. It should really look cohesive. Alright? Now we get to this part. The continuance of the lines that we've created should be dragged out to here. And also in here. You can see the shape of the hair is being completed as we wanted them to be. It is looking so cute and great. But of course you can expand this style and created a little bit more messy or even created longer than this, that depends on your own personal taste. And the top of our head, for example, we can have some shape like this, so can show it's a bit messier and it's not just also neat. So specially ordered. That's just the way we do it. Okay, My dear friends, I hope you've used these tutorials. You've got the most out of them. Do not. Just seeing these heresies, I'm Mano savvy work dog are enough. Try to practice and practice more and more. You don't have to just create imaginary models. You can create your models from pictures and photos or even paintings. Tried to practice more and more so you'll get a hand of it. And I hope this collective of tutorials was good and useful for you. Please share your practices and exercises with me and wait for our next tutorial. Thank you and goodbye everyone.
 Homa Choopan Tayefeh, Drawing Teacher