Transcripts
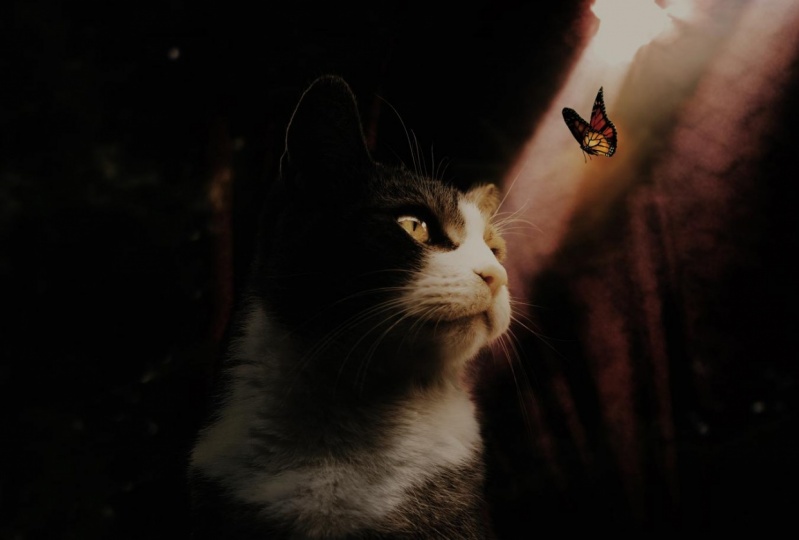
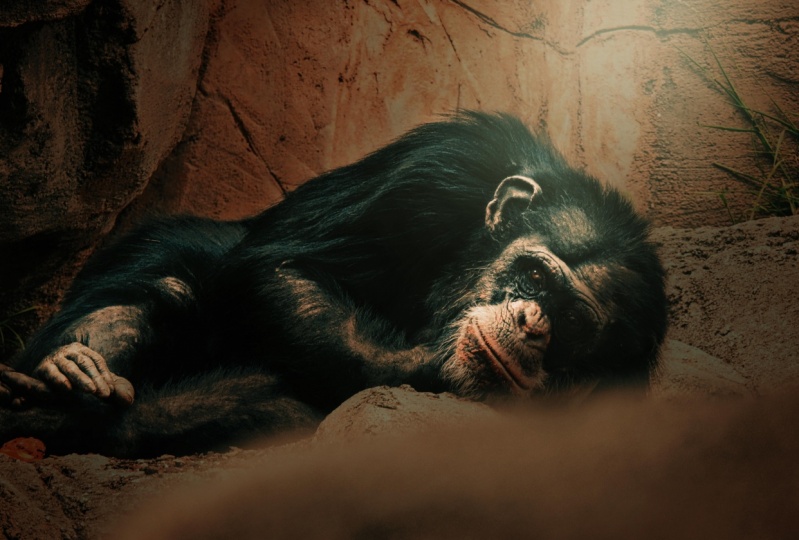
1. Introduction: Hello, everyone. My name is Sonya, and I am a digital artist. I work a lot of photo shop, especially with animals with anything Animal photos. And my specialty is animal portrait. So in this tutorial, I will show you how we are going to change this stock image into this one. So we'll show all the steps I did to create this. This looks something that could be in a Disney movie or something. So we will work on the lighting. Here. We will change the lighting off this whole images you could see here. This is just a normal photo. Think it's even taken at the zoo and we will put this in something like this. So we will use the touch parental. We're gonna explain everything really slow and steady. So you understand every step I did here, we will change lighting here, get some areas lighter and darker with the Dutch in parental, and you will learn how to make this look like a real composition or something that could be in the Lanqing. For instance, this was inspired by Lanqing movie poster. So I created this out. If it so this was the image that we are going to start with, and this is how it would look at the end. So if you which everything step by step, you'll create exactly the same image yourself. So let's just start off from this photo.
2. Using Curves: All right, let's start off with opening this fall into for a shop when she got it opening full show. We're going to start with creating lie either in dark areas. So for this, I'm going to go here to create a curves adjustment layer based on the group's industrindo will pop up. No, If we raise this, we only affect the layer on the needed. That's exactly what we want. And I'm gonna take the highlights and bring them down slightly like that. Maybe a little bit here like that. Now, I want to get some more contrast in this image. So I'm gonna take this one and bring this also that Now what I want to do here is I want to make sure one side is lighted in the other side. So what I'm gonna do is press on the mosque of this girl slayer, go to your brushes, slick the brush, click here up and selected. So front general pressure bring the hardness down to zero Livedoor, basically flow it 100 and let's make one side lighter. So what I want to do is gonna create lighting on the rights out of this image. So to make sure its rights and will be dark will be light. Sorry and start brushing. Make sure you have black. Selected here is a color. So with this black, we can bring back the light from the original image by a bit. Maybe a little bit here. If the background is, it is just the face on the right side. We're going to split the face into two sections. One document light. And I also want to make sure decisis light. So I'm gonna make this light again. I get now let's great another curves adjustment layer go to curse again. Make sure to process against him only affect the background layer. And this time I'm gonna make some more conscious to it like death and let's bring highlights. It's like up. I did maybe if more All right, this looks good, but I want to make the eyes light again. So I'm gonna press in a mask of it with a black brush. I can make guys back to normal again, So this looks pretty good. Next, we can make sure this background isn't visible, so I'm gonna bring a little bit more here so you won't see anything from big around anymore because it's in the dark, somber behind them. This makes you don't see that anymore.
3. Dodge & Burn: all right, now we have the curse. Now we can do some touch and bird did that compare me? Can make areas darker and lighter. So for the Dutch Imbert, I'm going to create a new layer Goto edit feel select 50% Gray changed James of Glenmont. Awful A and select the Dutch tool. But it did. Still, I can lighting up areas. What I want to do is light up these eyes even more. So I'm gonna go here to the settings off the digital, and it's like mittens and bring him to 50% around 50 and start brushing the I lighter. Just press a couple of times, and this I will be lighter and the same goes for that. Decide. So now we get some really nice glowing ice. If you do this too much, it will look on riel. So try to release slightly like that. And if you did it too much, you can drop the opacity here. Maybe around 50%. Whatever you like next is the Brent Oh, What a bunch of will can make areas even darker. So I'm gonna create new layer again. Go to edit, feel select 50% gray again, Chris. Okay, Chase blend mode off late again. And now you want to select the Bertel? Hey, we want to select Natural if we want to select highlights first and let's bring exposure up . So we start with something around, let's say 40% and start making areas darker. If you look at shadows in this emergency here, it's dark area. Try to make them even darker. So press cup of times on these areas. We have dark areas. Don't do it too much. Just do it slightly to get more details in this image a bit. Here it's also lose some off the ear. This said on this junior, maybe something like that. All right. Once she got that, it could go to the highlights and change those mittens. Now you want to drop the exposure to, let's say, around 20% and just basically do the same and make the breast smaller. As you can see, we get all these little details. Now this image start brushing these dark areas again. You can even take little parts out, for instance, here, just to get more details, just burst all these areas dark. If you disable this lady could see this was before this afternoon. We get a nice dark area on the left side. All right. Less one is the shadows. Let's drop this to around under 10%. Let's make the breast pick and just press a little bit like that just to make everything slightly darker. All right? When she got that and you're satisfied with it, You complain with these capacity to drop this slightly. This is too much. Just trumpet around 80%. And that's fine. Maybe this was too harsh, so I'm gonna get rid of that one.
4. Creating a Light Source: we have lighter area on the right side of its face, so we need to make sure to have light source here. So to do that, I'm going to create a new layer. Select brush. It's big, White as a color. Bring the hardens down to zero. Leave the best inflow it 100%. Let's make this little bigger and make a little dot like that. We can move these dirt around we want. So, for instance, I could put it here, but I want to stretch it out. So what I'm going to do is press control or command d to bring up the free tennis forming, though. And 12. Hold it down, Quintal, or command on Mick. Let's stretch out one corner like that. So we have some sort of light being coming in. Now we can rotate this and move it up, and I'm gonna hold on shift and make a bit like that. Maybe even more. Just a little light source from up. I'm going to zoom out and make this even bigger so we'll see better and rotate is to make sure it's on the right side off its face.
5. Color Corrections: Let's get the colors right. So first I want to change the color of the eyes here. Gonna select something? Let's do something orange. Something like this. Press. OK. And while you select the concentration above it, create a new layer. Now select the normal brush. Bring the hardness all the way down again. Zoom in here and just make like this a little fresh in the size like that. Now, what we can do here is change, blend motor off life. So this plans better together. So this looks pretty nice or we can make it something, like maybe white. So I'm gonna press criminal command you to bring up to your situation here and now you can play with the lightness here, or it can change the color here. I want it. But I was planning to do despite so gonna if this as it was and just bring up the lightness . So something like this looks nice press okay. And that's it for the eyes. I want to press on the layer on top of everything and create a new layer. And I want to change the color off this light here. So what I'm gonna do is. Make it dark again, drink it here and change it to a play. Let's make this really big. And now we can move this around to see what looks best. We can also try. So, Flight, this plan's better or off lay and trouble. Basically, if this is too colorful, control you again to change this color, maybe want a little more wide ish and less color like that. So it blends better with this image. I'm going to duplicate this layer by pressing control J and some of this to decide because we have, like, this orange lining on the right side. I want to make sure this side is always from this light. I'm gonna press quantity now and holding down shift. I can make it smaller. Stretch it like that. So we only affecting the rights out of this off this line and not left side baked it and we can try soft life here so it blends better. All right. This lighting used to go a little bit up
6. Color Grading: because we changed the lighting from day to night. We also need to get rid off some off this colors in this line. So for this, I'm going to create human situation there. Prestes. So we only affect Slayer off this line and let's bring down the situation. Let's bring it all the way down, like minus 35 or minus 30 is fine. Let's get the contrast right. And at the Grady int to this. So for Grady and I'm gonna slit Grady. And map here suggests a player on top off all the other ones. And if you import the great of maps that I edit in this project, he could find all this Grady INTs. And for this one, I'm going to this one so you could find it somewhere at the end. And only thing I have to do here is change the blend moto. So flight and drop the opacity around 50%. So get a little bit more color in this. Next I'm going to do is to create a curves adjustment layer on top of it, and let's bring up the highlights and let's make the doctor don't slightly darker, thank you. Standing in a dark
7. Background Blending: I had a background in this composition. I got this photo. So if you open this up a photo shop selected all with control, command A and press control command, See to copy it and let's put this on the need. Our Grady it map layer here. Now, as you can see, this background is not really black. It's that grace. I'm gonna press going to come and tell to bring up the levels and X like this black picker here and click on the grey area. So it's black now it's OK, Let's press right mouse and convert this to a smart object. It's changed a blend more screen, and that's it. And now we can move this around where we want it. We have this light source coming from there, so I'm gonna make sure that is in the same places are light source. So first I'm gonna flip this words and thought, God get it. Transform and flip horizontal. There's a girl in this photo, but he wants here because she will be behind these lines now. Press contact Monte to bring up the free transform. Well, the out of school, you mouse, Zoom out. Let's make sure this fits the composition can slightly rotate this even bigger. Just make sure that white areas at our light source like debt presenter. All right, now we can Bresson parts away. So let's first make a mask on this layer Press on the mask of it So they selected Now I think a black brush and start breast in these areas away on its face Make sure to bring him the opacity and flow And make sure you have black selected There's a foreground color. It's breast. He's away. Don't need else anymore. Just make sure to press all these parts way All right, this is way too light now in the background. So what I'm gonna do here is change the opacity of this to say around 50%. So we only have this in the background like did Now I feel like this background this a little bit too orange for me. So what I'm gonna do here is great. Take your situation, layer on top of it. Prestes we only think the lay on the needed and let's drop the situation here Something like minus 60 because we have a dark area I want to make sure we don't have much colors, and now we can brush bars back again. So make this really precise hole. It looks real now when she got it. All right, if you want to, that's precious Little bit like that. Now we can add simpler titties because I wanna have this background slightly blurred out. So if all focus on this one, this line so what? I'm gonna do this like this layer, go to filter Blur. It's like, Gosh, we can also use lens loaded Looks pretty good, but for that we need to restaurants this layer. So if you happy with this got are you made this with the brushing? Maybe a little bit more here, just to make sure you don't see any anything. Front background on this line, it's still a bit more here. It's restaurants. This latest looks pretty good. Restaurants is go to filter, learn lens blur. Make sure it's like the late itself and at the Moscow fit. And here we can increase the radius are we want to. So this takes a little bit of a time sometimes because let's bring takes a lot of time to love. So
8. Final Adjustments: let's do some final adjustments to this. So first thing here, this lights or it's a really a little bit too bright. So I'm gonna drop the opacity off this slightly darker like that and also this background. I want a pair for Theis highlights little bit lighter, so I'm gonna grate coarsely on top of it and slightly increased these highlights just a little bit more. Let's leave that one there just a little bit lighter like that. All right, now we can get the colors right. That's great. Call a balance on top of everything. Let's give it a bit more blue like I did, even also the yellow that also works nice. Maybe yellow, blue ish. It's great to curse layer on top of everything to get this light even more popping out. That's changed this one. The green and red and blue. It also teaches DesCartes, so usually I just drink this slightly to the right. So I get all the colors right. Let's create a new layer on top of everything, and I'm going to select something here. Just give it a bit more glow there to dump like that. So I think this is done
 Zenja Gammer, Digital Artist & Educator