Transcripts
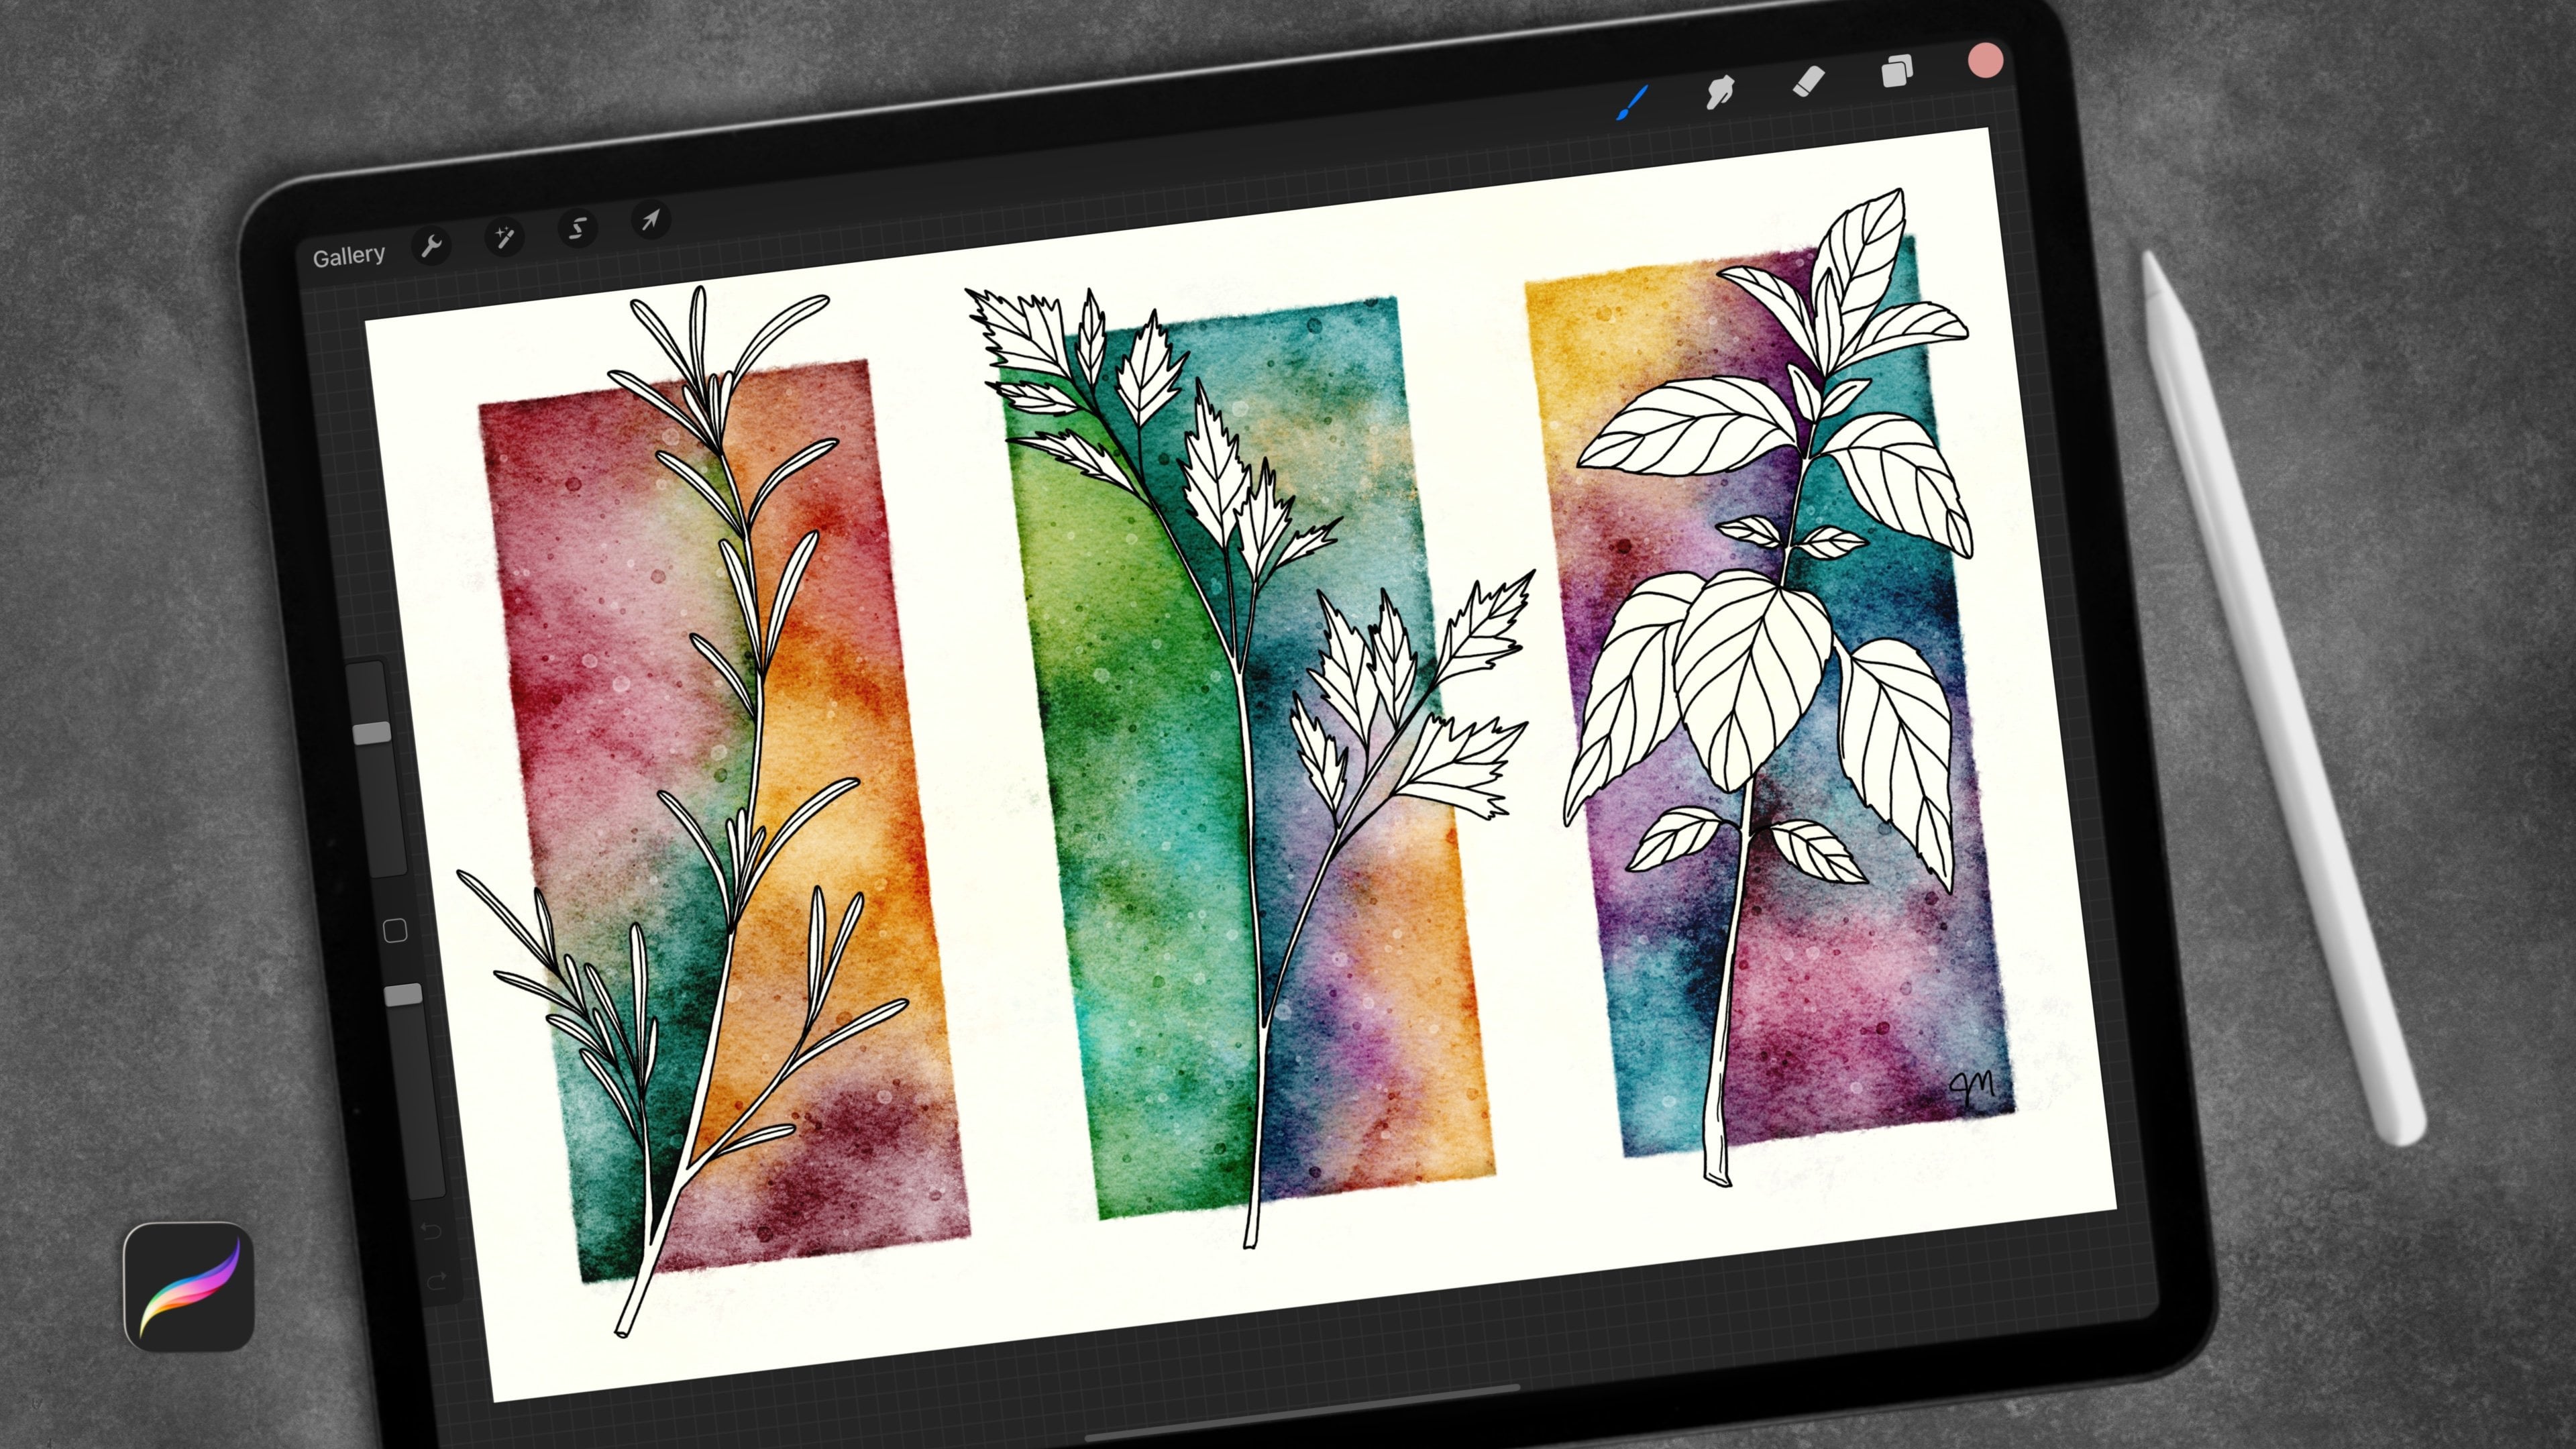
1. Intro: we're gonna learn about two styles of Scandinavian art. The 1st 1 is a more classic Scandinavian full cart, and the 2nd 1 is a Norwegian Rose mulling. I provide you with plenty of downloads, pallets and free brushes and all the things that you'll need to make your own. Including these three sketches for a rose mulling that you can use Teoh venture off on your own illustrations, so it's gonna be a lot of fun. I'll also teach you how to make a stamp brush. Join me over on Facebook and Instagram, and all of these links are in my skill share Profile si in glass.
2. Downloading Resources: to download. Resource is, you need to be in landscape mode on your iPad, not in the app, but in a browser. So once you're in the class that you need the downloads for, just go down to the tabs here to projects and resource is and you should see them on the right hand side, depending on your browser, this will be, um, slightly different. So I'm gonna walk you through all of the's. I have appropriate file. I have a palate, which is the dots watches. I have a brush set and I have an image. The other thing, actually that I don't have here is an individual brush. If you download an individual brush, it will go into your imported category of brushes in your category in your list of brushes . So for safari, you can tap and hold is one way to do it or you can just tap. And there's a few ways this actually says download really small. Let's tap it one time. So opened in a new um tab and it is tapped, download, and right up here is this little arrow and it bounced down, which means it was downloading and then it completed. So I'm gonna leave that there while I get the rest of my things. Hedgehog swatches. So watch this little arrow. Little did a little bounce. Sometimes they'll be a little progress bar for a larger Della like that. Hey, go. And this will just open up into a new tab and show you the image. And then if you want to save it to your camera, you can tap and hold and tap. Add two photos. So now let's go to this download button. And there you have your downloads so you can tap on those. So it looks like it was a zip file. So that is right here. Gonna go back? Oh, I think it got all of them. Maybe I don't have to do these one at a time. So that was appropriate file. And so it opened right into procreate, and it opened into my very first spot on the gallery. But the rest of the stuff is in the files tab. If you can't find it, you need to just go because from safari, it just kind of bounced us over to file. So if you're not familiar with files and then you go to downloads and then you find the name of what you have. It's gonna be in alphabetical order. So if you tap on this thankfully, I'm with the update them, you know, several months ago, toe IOS 13 ipads Condell with zip files Now. So if you tap on the swatches imports right into procreate, if you go into a one of your files, you can see in your list of pallets it will be right down at the bottom. And then I believe you can move it around, go back into files and this is the brush set and it's at the top and then my imported brushes that are way down at the bottom because I don't use them that often. So if you have a separate brush that you have a download of, that's individual and it's not in a set, it'll be in your imported brush section, and then you can drag it out and drop it into any, uh, category you want. I would suggest keeping them fairly organized
3. Canvas Set-Up For Class: I'm gonna show you a quick little video to get your canvas ready each time. So tap the plus sign, and if you don't already have the canvas you want in your list, tap this plus sign and use the dimensions that you're familiar with. I go two inches, and for this I've been doing eight inches by 10 inches, 300 d p. I create, and then you have your canvas. Go to the wrench Tool will be using symmetry a lot, So in the wrench tool under canvas, the drawing guide and at it drawing guide are right here. You need to turn drawing guide on, and then you can go into edit drawing guide. You can change the line color of your drawing. Guide the thickness and opacity for me personally. When I'm drawing and I need the guide, I turn it so it's almost invisible for the video. I turn it black and thick. Just turn it to whatever works for you, and then we'll go to symmetry options, and we'll be playing around with the symmetry quite a bit in all of these lessons. So this is how you get to that. It automatically goes to vertical, and we will not be using rotational symmetry. So leave that off. This assisted drawing just means that the the layer were making right now is going toe already have the symmetry turned on. So once you tap done then you can see on that layer it says assisted. And that means that whatever you dio has the symmetry set. If you add a new layer, it does not say assisted and it does not have the symmetry set. You can turn it on easily by tapping the layer and topping drying assist. So we will be toggle ing that on and off throughout these lessons as well. One of the other things that will be doing is bringing in one of our sketches. I just go tap on it and have copy. I'm gonna clear these layers. I'm actually adding a layer with no symmetry on it. And I'm gonna turn the background dark because that later we just tapped was white, the layer we copied and then three finger swipe down and paste tap to de select. So it's perfectly in the center. And then you can use that all those sketches I provide you can use as a guide for your work and will be doing this particular one at the end of class. So we're going to do two types of Scandinavian art today, and this one's called Rose Mauling, and it's pretty fun. Can't wait to get started.
4. Making Stamp Brushes: All right, We're gonna make a brush stamp. I use a six b pencil and just make sketchy stamps because I end up tracing over them later in my work, they're just kind of, um a nice guide to trace over. Go ahead and take the blank stamp brush that I provided and duplicated, which is what this one is. So you just slide to the left and top duplicate. We're going to be changing the shape source, and then you're gonna go into about brush and put in the name of your brush right here by tapping on it and tap your type your name in and sign your name and create a new set point . And then it'll, um, name your brush and you'll be all set. The reason I have a blank win in here is because thes I'll have my name in them so you can start with a blank win and get your own name put in them. I am going to go to my six b. You have to start out with a square canvas 10 inches at 300 d. P. I is just fine for a stamp brush, so keep that in mind, it has to be square and we're doing black on white. Go ahead and pull your photos over and in your downloads, you should have a file that has this in appropriate file as well as other layers within that file that have leaves and another little guide so you can save it as a JPEG and just refer to it over here on the side. Or you can copy and paste it into your document. However you want to use that, I'm just going to use this as a little reference. Most of the stamp brushes are thes top view flowers. So let's make ah, very simple side view brush Go to the wrench tool and we're going to turn on symmetry. So go to a drawing guide at it, drawing guide symmetry, and it automatically goes to vertical. I'm gonna change my guide to black and nice and thick just for the camera and tap. Done. Now I'm looking over here and pretending I can see the middle line up in the middle so I have a paddle like this and I have a little flip like this and then almost a little s the little AV you'll down here and the little Siebel's. This doesn't need to be perfect, cause I just use them as a bit of ah, sketch when I use the brush. So it's just a little bit of a reference when I'm drawing more involved illustrations later . I'm gonna go ahead and try to fill this canvas a little bit more with this shape before I save it. So tap select mixture, uniforms on and Magnetics is on and then just pinched out. Pinch out. Is that a thing? I don't know. Anyways, you just open it like that, be careful not to put two fingers on, and then and then just hold it there because it might undo. All right, Once you're happy with that, just save it as a JPEG into your camera roll. And now we're gonna go into that duplicated blank stamp. Go to the shape source. This view is looking like this because we have a shorter screen because of this Open Over here, it looks a little different than when you have the full screen. So I'm I'm gonna go ahead and go to full screen tap, edit, import, and then we're importing a photo from our photos. There it is. Now. This looks deceiving because it looks like that's how you want your stamp toe look, So that's how you're going to save it. However, what you really want is a black background with a white light so two finger tap goes back and forth between those tap done and then you can test it out over here. I hope it's super tiny. It is pressure sensitive when you're using your pencil. Oh, I didn't name it. Let's go back and name it. So go down to about this brush and let's do to lip stamp. Type your name. Do your little signature and create new set point. You have to get rid of your people there and type, save, tap, save and then done. You can barely see it here. If you want it to be a little bit bigger, you can go into properties, and the preview size needs to be bumped up a little bit. Now it's a little bigger, and let's test it on a new layer. Let's turn that one off. Looks great. If you want it at a different angle, you can turn your campus, and if you want consistent sizing right now. It's pressure sensitive. Depending on how hard do you tap your finger will not be pressure sensitive. So it will be the same size depending on what you have over here. I want to show you really quick. My guide is up here. If you tap this square and pull out, you can move this. Um, so I don't know why it was up there, but, um, that's good information to know, because I accidentally moved it once and couldn't figure out how to get it back. All right, so that is how you make a stamp brush, and you can make them as elaborate as you like. In the next video. I'm gonna show you how to illustrate one flower before we move on to a full illustration. See, there
5. Flower Illustration: All right, let's go ahead and do a 10 inch canvas again. I have it in my drop down list if you're not quite sure how to do that. And you skipped the other video. There is a video about canvas set up, so this is just 10 inches square right now. That doesn't really matter. We're just gonna practice one flower. So if you want, you can use that to up stamp. Or you can pull up your photos again and use this reference here and decide what flower you would like to learn on. I'm just going to do this one right here. Let's turn on our symmetry. So, canvas, turn on drawing guide at a drawing guide. Symmetry. I'm gonna change my line. You can change yours too. However you like it. I'm gonna go back to my sketch brush. And on this flower, I have just a simple you right here. Practice that till you're happy with it. And then a little scalloped edge on top can have this many scallops is E one, and then a little scallop on the back. That just kind of implies there's an open flower here. It kind of just makes it look open at the top for the little pistols and stay hman. If you want to do some of them with the symmetry on and then turn the symmetry off to do a center one. It's a nice way to not get a little double line at the center. Turn the assist back on and then just kind of sketch out where you think you might want your decorations need the little ob UAL. This doesn't have any See pulls on it, but you could add your see pulls in any decorative form you like. The stem is kind of something we will worry about later. And make that a little thick for this illustration. We don't really need to worry about the stem and any other lines. You want to dio thes lines on this. Go up. I'm gonna have my goat down, so just use this as you know, just a little bit of a guide, and then you can change it however you like. All right, I'm happy with that, and I can turn this off now, Maybe put little tops on these. I'm going to move that to the top layer. Turn drawing assist on this new layer and then duplicate that several times, and that just makes it so I don't have to turn drawing assist on each time, going to this sketch and gonna move it down a little bit. It moved right along the line because Magnetics is on, so make sure you don't shift it to the side. We still need it on that symmetry line and tap the little end and turn the opacity down on that layer. Now we need to pick a palette I provided to Scan de Pallets. I just I hopes candy isn't a bad word. Who is Scandinavian? It it just was my short version of that. And then the three rows mauling pallets Rose mulling we're going to do later in class. It's a little bit more detailed, but for this I'm just gonna pick this bright palette that were already on scanty to will use this bright palette over here and clear my history. So the first thing that you're gonna want to do is get your base colors down. So think about wets on top of other things that this is going to be in the back. This back section right here. This is going to be on top of that. And then any decorations on top of that will be on layers higher. And you just kind of work through from Louis toe highest. Or however it feels good to you. It really doesn't matter. I'm going to go to the monoline brush to a really small size that gives us a nice, clean line that we can drag and drop our colors, too. I'm gonna go to this red right here for that back section, and this front section is going to be covering most of it. So this part down here doesn't matter what it looks like. But up here will be seen and make sure your shape is closed. Dragon, drop to fill. Go on a layer above that and get this next. I picked these colors because that is just gonna end up looking like a darker area of this flower. So it almost just looks like a darker orange right now. So it's kind of implying that it's shaded in there, and then it's further away. And any decorations here on top, I'll go to a new layer. Good a yellow here. So I'm going to turn this into a clipping mask so that I can go over the edge without it showing. So let me show you what that does when I turn it into a clipping mask. It doesn't show anything that's out of the, um, edge of this orange. It only shows above any pixels that are already on the layer it's clipped to. So let's go ahead with a little bit of yellow. I want some more colors down here, too. And I think I'm going to need them to be under the yellow. So I'm gonna tap on the orange at a plus at a layer with the plus sign, make sure that drawing a cyst is on. And now anything that is appear is gonna not be seen because it'll be under the yellow. So let's just do and nice pink and super bright. And I made sure I kept the shape close. I drew a crossed underneath that yellow. All right, coming to go ahead, make some pink dots there. All right. I'm happy with that. And down here, I'm gonna come down under everything. And I could also be on the layer that has this red because I'm way down here. I just need to be somewhere under the orange. So let's go ahead and just go to the red layer and to some green, make sure my shape is closed. I'm on that really big modeling brush that works. Make sure may shape is closed. Now, I want to do the little pistols and statement. I need to be on a layer that's under the orange, but above the red. So I need to add a layer. Turn on drawing. Assist. It's not a clipping. Mask on. I'm gonna go to the lighter green. Turn off drawing assist. The pistol is the big centerpiece. Sticky on the end. And now I can turn my sketch off. All right. These aren't colors I normally use. Hopefully, you can see that pink. I'm not a big fan of that pink, so I'm gonna go to that pink layer and tap Alfa lock, and I'm gonna play around with a different color here. I'm not sure I'm gonna like any of these colors there. Well, it's a little better. You can see it a little easier. And as I'm looking at these dots, I think I want them to curve in the same ways this yellow line. So I'm going to turn Alfa, lock off, go to my big modeling brush, and I'm just going to start over so I can guarantee I have the same size for all of them. Will my brush and then kind of make sure I have a curve, so that looks like a nice curve going that way, he's to look a little too close to me. Obviously, that can be something that's played around with quite a bit. So once you get your base colors, then you can either be done or you can, um, add a whole bunch of texture and change the hard edge to a feathered edge. So I'm going to show you that next. But first, I want to show you an example of something that we do later in this class that just keeps everything clean and crisp like this. So this is an illustration that we're going to do later in class, and I didn't do any blending and kept everything clean and crisp. So that is just one look and there's, you know, a 1,000,000 different ways to do this, so I'm gonna show you another way, and, um, and then another example of that look. All right. When you don't want a clean and crisp look like this, you just need to start playing around with more clipping masks. Um, or Alfa look. So, for example, on this yellow, it's a small enough space. I'll probably just elf a locket, go to that yellow and then play around getting in a darker version of that yellow. I'm just on my modeling brush. I am not on. Oh, I am on join Assist. Sorry, because I'm still on that yellow layer. I'm gonna go to a really light color for this center, and then I'm going to this big paint streaks brush and I'm gonna turn off drawing assist. Let's zoom in here. And I just turned the symmetry off so that, um, I can, you know, maybe vary it a little bit. Have it be maybe pull some of the white over this way on this side. But pull some of this dark this way on this side, and you can use any blend brush you want. I just like the streaky nous of this one. Let's go to this Teal Alfa. Look, go to the teal. Let's go to a slightly greener and lighter. Get some in the center and then slightly bluer and darker. Let's go to the smudge tool and a bigger brush this time. Hopefully you can see how streaky that IHS, I'm going to go to the base orange. Turn on Alfa Luck top that color. Actually, I'm gonna go to that red, that red right there to add some red down here. And I'm just gonna pull it up and go in the direction that the the veins in the leaves when you're doing leaves and the flower petals would go maybe do some more up here. Probably not enough for this red back here. I might go even darker. Go down to that layer, Alfa Lock and just get a little shadowing down in there. So I like the flower. I need to do these dots, though. Go back to the teal layer and I'm just gonna add a little lightness on the ends in the center of those. It might need a smaller brush for this kind of tricky to do. Small spaces. Maybe just a little swirl. If you blend too much, it's just gonna make it a new color. Gonna kind of blend it into a new color. All right. And you can continue to do that. Um, just using l flock and, um, staying right on that, but that you still have that clean, crisp edge. So to get rid of the clean, crisp edge, if that's a lucky one, you would turn Alfa lock off and smudge it so you can smudge it in this direction. Now you're smudging the work that you did on top. So keep that in mind so you can smudge it in that direction. You can just smudge it along this direction. Keep in mind today, since l Flock is off, it will also smudge over here. Oh, guess what? We're on a clipping mask, so it's not gonna smudge over there because it's staying right on top of the orange. So that's a good thing. Except if you don't want that edge on your orange, that sharp edge, you're going to come over and so much of that as well. So this just takes a lot of practice to get the look and illustration style that you prefer the overall like I really like a smudgy look like this. Go to take Alfa. Lock off of this teal layer. Who? That one pulled some of the teal right up which, exposed to some of the red underneath. That might not be a look that you want. So if you you don't just need to double tap to finger tap or you can drag things back down , you can also drag things over. These are going to be tricky. Could a small size here. All right, so we just go around the edge here. It just gets rid of that sharp edge, keeps it a nice circle, and you can continue going on and on. We didn't do any shading on the, um steeples and stem and the pistols and statement, but it's all the same idea, all for all of it. So you can use clipping masks on top of it if you don't want to change the layer itself. Uh, and I think it looks better. Things in general will look better with three colors. So we did the solid base of teal and then we did a lighter and a darker, so that would be three. We did a yellow with the darker and then the lighter for this orange layer. We only did a darker so we did the orange and then the red. All right, so we have our single flower, and I'm going to show you a complete illustration that has this sort of a look, Um, instead of that crisp edge Look, we still have a crisp edge on that flower itself. So if you carefully take Alfa Lakoff and carefully go around the edge of that, you can soften that edge up as well. And that's all you need to dio. So here is the same exact illustration that will do in class, but with different colors and with more of that textured look for everything. I didn't soften all the edges of everything. I had just added more clipping masks and more colors. You can see a light orange to dark orange, a lot of the teal, and you can see how it gives a completely different look
6. Quick Leaf Info: all right, I have another 10 inch canvas, and I'm just gonna show you Leaves really quick and let's pull up the guy. Do you have for the leaves? So let's focus on just one simple shape. I've provided four different shapes. What they look like without veins with veins doubled up, doubled up with stems and then a vine. I'm going to May 6 b brush, and you can practice this sort of almond shape there. It could be skinnier, whiter, and it can have a leaf stem. Make sure that stem is kind of an extension of the vein that might be coming down the center of the leaf, and you can decide if you want to illustrate things. With or without veins, you can do little decorative designs inside. You can do kind of big, bulky veins. There's lots of different ways. Look online for some Scandinavian inspiration, And, um, if you do ah, vine of leaves, then you're just gonna do the whole thing all at once. So do your vine and then get all your leaves on the whole mine. And then as your illustrating you do, um, you do your coloring on each leaf on the individual layers. Hold on. That doesn't make very much sense. So that's your sketch. Turn your sketch down. Get a nice, solid, brash and all right, I'm gonna turn this sketch layer off. I started out with quite a dark color here. I'm gonna add a layer and make it a clipping mask. And now, whatever I decide to do for my design, I'm going to do it to each leaf on the vine. So if I were doing one big leaf, I would do it the same way. I would add a clipping mask and add a new color right on top of my base color. If I goof and I go onto the stem a little bit, which I did really badly right here, I can erase it because it's just a clipping mask and it's not gonna do anything to my base designed there. And you can add another clipping mask. If you want to keep going, you can go to this six or the detail ng pen, which has pressure sensitivity to make little dots bigger dots, bigger dots, little or knots, littler dots, depending on the pressure you views and just go through and decorate your entire leaf are your entire vine, I should say, and the same thing we did with the flower. If you want to have more texture and color variety, um, you could do it the same exact way. So use this. Sn inspiration for your final design and, um, the flower one as well. Or look online. Get some flour ideas. I'm have Ah, um, a few things in mind before our next lesson, and we'll get started learning about filling the whole page with your illustration, using the symmetry and the color palettes to make sure you get all the downloads and let's get started.
7. Scandi Sketch: I'm going to stick with the 10 by 10 because I have a feeling I'm gonna need a lot of layers and that offers me more layers than a 12 by 12 Would going to tap the wrench tool, canvas drawing guide, edit, drawing guide, cemetery options. And this time I'm gonna be alternating actually between quadrant and radio and I'll show you why So first and going to turn my line super visible for you and I've got it on quadrant. So for quadrant, let's go to when they start color here. Cuadra is just going Teoh have things you know in force. So if I have a flower here, there's going to be four flowers. Um, this is a nice look for a nice main feature in your illustration Nice and main flower and just great. Um, I can also do a main flower here, but if you see what happened here, it only went here in here. But it didn't go here in here. So in order to get that same flower on all four, you can come back over, go into there, symmetry options and go to radio. And from here I can do my flower here and it went on all four sides. So you just need Teoh kind of toggle back and forth to depending on how you want your design. And maybe you do want this flower in this flower to be different from this lower in this flower. So that's just something that you would You would keep it on quadrant and do a different flower here That would translate over here, and he would do different flower here. That would be the same down here. The other thing about quadrant or ah, radio is now I can fill this type of space symmetrically into all eight of these little triangles. So again, when the search color says a little bit more obvious and no goto, uh, super bright blue here. So if I want something right here and I want it to be in all of those gaps, then I'm on radio to do that. If I weren't on radio for that step and I'm back on quadrant, then when I draw something here, it's not going to drive here. It's only going to drive here, here, in here. Oh, sorry. It just do it. They're and they're so in order for safe you if you turn on this rotational symmetry, man lips. I went to erase this. If I do to finger and do, it's not going to erase it in the way that I wanted Teoh. So then it's here, here, here and here. And maybe you want that and have different things there and there. So you have to go back and forth. Rotational means it kind of. It's hard to explain. So if you take that one section of the symmetry and rotate it, so that's why it's called Rotational. I guess he rotated and it's gonna look the same. You rotate it, it's gonna look the same, whereas without rotational adjusted it across this vertical line. So now that we just had a crash course in the symmetry, I'm gonna clear this layer. And I think I'll leave radial symmetry on, and I just want to get an idea of where I want my flowers to be. If you want your illustration toe, look quiet, a bit more condensed, I guess like this, then you're going to start out with a much smaller a flower. So with symmetry, remember, you can't select and then shrink the size because it moves the whole flower. So make sure you know exactly what you want. It's not clearing. There we go. It's a It's a good reason to make a sketch. Maybe you want the center to be a nice flower. - So for me, it's getting to the point where rotational symmetry is a little much. I don't want eight of everything on here or in this case, four. Do I want a flower right here in every single spot? I don't think so. Do we want a flower right here that's going to be here, Here, in here as well. Now's the time to do that. Maybe. Yeah, and let's go ahead and switch to quadrant. So for quadrant, maybe I want going to bring up my flowers. Well, actually, want to show you an example of using your stamp brushes on this job first? So let's try any of your front facing or top view flower stamp brushes. I'm gonna go to a new layer just because in turn, dryness is done because I want to be able to move this on what I'm about to do here. So as I go back and forth with my design. I have to remember. Was I on radial symmetry or was I on quadrant symmetry? Because when I come back to color it that matters. So if you went to do your very first design just using one or the other until you really get the hang of it before you start switching back and forth, that might be a good plan. Um, and it's just something to think about along the way. So for the sketch and for this, I think I can remember that most of this is radial symmetry so far. And now I'm doing quadrant. We'll just keep it, keep it going here with quadrant. So I think that's the Onley flour and gonna have using my stamp brush. And I'm gonna come back to my sketch. Brash. Maybe this stem is gonna continue to come down. So basically, you're just getting an idea of this isn't doesn't have to be a final sketch. You're getting an idea of where your big elements are. And once you know where your big elements are, then you can start filling in with your smaller ones. I just did This stems on these in quadrant symmetry, even though I drew these flowers in radial symmetry. I am so if you want to them super identical. Since it's the sketch layer, it didn't matter. Later, when I'm drawing the actual flower, I would make sure you go back to rotate a radial symmetry before I'd do the stems on those . So, like you see here, it wouldn't really work for me to do the leaves on this flower unless I didn't want the leaves on this flower to be identical to the leaves on this flower. And maybe that's the case. Maybe this flower is a little bit too close. So I'm gonna do my leaf like this. Make it similar enough. But then I have that flower. They're kind of covering it up. All right. I have all my big elements and then the rest You can just do little flourishes. You can do little waves. You can do kind of like a danda lion. Let's see. So I'm getting fairly quick with my work here because it is just a sketch and you can come up with all sorts of little filler designs. Yes, I think I like that just like that. And I realized I'm on two separate layers to so you can combine those. I thought I was gonna move the flowers a little bit. Um, so I did the this flower stamp on a different layer. I'm just sketching on top of that flower stamp. Right in the next video will get it all filled in. See them.
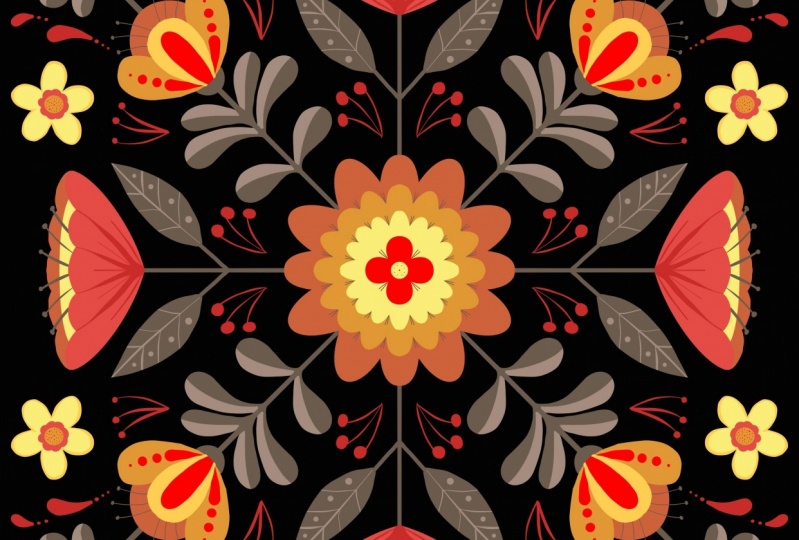
8. Scandi Base Colors: All right, We have our sketch. We're gonna turn the opacity way down and let's bring that sketch to the top. I'm gonna turn on drawing assist, and I'm going to duplicate ah whole bunch of these drawing assistant players. And now I need to think about what is underneath everything else. If anything. Maybe there's nothing that overlaps for me. I have the flower stamp overlapping the leaves here, in here. And I have the stems of these flowers going underneath this big flower. And other than that, I really just need to focus on the flower petals. So this when this one, I have all these little ones underneath this big one, all of these little ones on top of this big one, this centre flower has 1234 layers. So just start thinking about what is on the bottom. Let's go way down and let's pick. I'm gonna pick this pallet right here. You're going to see this pallet? Well, hold on. Let's go to this palette. I'm gonna go to scan the one and I'm going to use this pallet right here. I like keeping this view. You can keep it however you like it. And so we're gonna do this one, which is nice and warm, and I'm gonna leave the background white. I might change that later, but for now, let's leave it white. Let's turn down the sketch. All right? I'm just going to jump in. I'm going to start doing some of the lower layers. I know that this flower was done on radial symmetry, so I need to go back in two options and she's radio. I'm gonna go ahead and stick with my model a brush and fill that layer. I'm gonna go to a layer above that, go to a new color. Hopefully, you can see earlier above that, a new color and a leer above that. And I actually go to a super deep center color. It's gonna get a bumpy, jagged e center there. All right, so I already have four layers. Now I'm gonna think about what else could be on these same layers. I can do stuff way over here. We over here so I can go to some lower layers of these pedals. Go back down to the lowest layer here. I think I might kind of do this same color pattern here. I need to make sure I haven't enclosed shape. Gonna do both of these pedals. Good. This car outlier this color, that same layer. And finally this break bread on that bright red layer. Great. I love it. LF hobbies tie into that. All right, what else can I do on those same layers? So maybe I can look at these four flowers now, if I do, I need Teoh. Actually, I think I'm on radial symmetry for those flowers too. So we'll stick with that. And we're gonna stay on this bright red and then come back down to that lower layer. Go up one layer. I'm gonna hop over to this tangerine color here. Oh, right. So, as you can see, you just need toe work your way through trying to use a minimal amount of layers for this step because you are also going to be using clipping masks. On top of all of this, when you're dense, you're gonna have even more layers Teoh to go through. And this is a fairly simple design as faras the number of layers that are needed where, as you can see how much more complicated something like this is with quite a few more flowers and quite a few more flourishes. So if you need to keep track of your layers, you can go to the wrench tool campus information layers and you can see how many you have, how many you've used, how many are still available. When I go to the stems, I need to go under all of these colors that we have currently. So I'm gonna hop back down to the very bottom layer that we haven't used yet. I don't have a green in this palette. This palette. I'm gonna use these kind of warm greys for stems. I go to a bigger brush size headache. This stem. I'm just gonna go now. See, I have the symmetry on and so it's difficult to, um, try to go right up the line. You can let it snap in place and it sometimes can work, but you can see it. It can be a little bit wonky. So if it's easier to get that line by turning symmetry off, um, then now is the time to do that. Usually drag and hold. We'll get you where you need. And I think I'm gonna go ahead and make these little Avi walls the same color. Is there anything else I can put on that very, very low layer? I'm looking around at my sketch. I think I might go ahead and put my leaves on that layer. I'm gonna keep the outline of these leaves in the same color as my stem. Wow. I'm really liking these colors. Nice, muted, warm kind of fall colors. Now there's a whole bunch of flourishes on here that aren't touching anything else. So those can go on any layer and I'm gonna go on a layer. Let's see, I'm looking at this flower. That flower was with quadrant symmetry. So I'm just gonna come on it too. The layer that this yellow is on and add my flower I need to go back in to edit drawing guide symmetry options in quadrant and done. And now we can draw that flower. What colored we went that flower. I think I might want a nice bright spot. Let's try this creamy yellow here and on the layer. Right above that, I'm going to do the center and I'm going to turn my Sketchley or off and have a look my flowers kind of floating here. I need its stem. So on that basis yellow color, I'm gonna go to the layer under that I'm gonna be a little bit careful, because that layer has this on it. So when I draw my stem, I need to make sure I stopped before I hit that orange. I'm going to do the stem in this lighter gray. All right, so that is on top of this one, too. So I have a dilemma. I have a dilemma because I don't want this stem to be on the same layer. Is that stem? Right now if I go one more layer down and put this stem on, um, the next layer down that I'm still on this layer and I need to be under that layer. If I go under that layer right now, I'm going to be on the same layer as this. So what I'm gonna do is add another layer and pull it down underneath this very bottom layer that has this on it. Tap it, tap drawing, assist. Where is that? I need to find the later that my stem is on any race that really quick and go back down to that very bottom layer and get that stem on there. I'm not sure how I want that stem toe. Look, There we go. I like that. When you're driving a stem, think about where it's coming from. It's coming from the center of a flower, so your stem is not going to be from over here unless it's a daffodil. So draw from the center. If it's a curve, that's fine as long as it's looking like it's gonna end at the center. Alright, Right now I have a lot of available layers. I'm not too worried about the fact that the only thing I have on this very bottom layer are these teeny tiny stance on probably absent leaves, maybe some other flourishes. Let's turn this sketch layer off. Let's turn during guide off. I really, really like this color palette. This is the first time I've used this color palette. I think this flower needs a little bit more something so I'm going to come down to. So I have this red on this top layer and I have the yellow on this next layer. I need a layer in between. I'm gonna go ahead and add it. This is where you start to really get. Um, thick, I guess, is the word with how many layers you're gonna end up using. So if you want to make a change and not have to add another layer to get another color under this red, you're going to have to move some of these other ones. You're gonna have to move. Let's delete that. You gonna have to move this yellow so we could do that. That was not a difficult flour to make. Was Turner sketch back on? We're gonna go down a layer for that yellow, and we're on this later That has this orange pedal and this medium orange here. So as long as you don't come near, those should be just fine. Gonna choose that creamy color Amman quadrant Symmetry come down in size. I'm roughly sketching on top of what we did earlier. And now I'm going to go on the layer above that, which is under this little red dot layer since exactly where I want to be. And I'm gonna add this bright orange again. Maybe I might come back to that and change that, but I like the colors. Kinda looks like orange Blueberry on top. I really like the colors for this. And next up, we're just going to start doing some shading and some detail work, like with the lines in the leads that we did earlier and get a finished illustration here. All right, See, in the next video.
9. Scandi Details: All right, let's get to shadowing Tin Teen adding a little bit more color here and there. And to do that, I'm going to I already have all these assisted layers with the drawing assist turned on and I'm gonna just drag them down. So I have one above each of my layers that have a foundation color on them. I did switch a couple of things. I added another flower to match this one. So I have it on quadrant symmetry. And I added this set here, and the other thing I did was I had this stem as the very bottom layer. I just moved it up so that this stem right here, which is on the same layer, is that one came up above that leaf. So down here, these super dark leaves are at the very bottom now. So now I have a layer above each of my color layers. Assist is turned on. And now I need to turn collecting mask on while I'm doing this. I want to tell you, Casey, you're new to clipping masks, clipping masks. Just have color. Show up right on top of whatever color is already on the layer. it's clipped to so it won't show anywhere else. Just on the layer. It's clipped to, and it keeps those two colors separate so you don't have to use Alfa lock to color directly on a color. You can add a layer above it, and then you have a little bit more flexibility. But you can see it's a lot of layers for this illustration. It we've kept it pretty simple. We have 123456 main color layers. Um, that is pretty simple. The ones I've done in the past, I've had a lot more, and then each one of those has a clipping mask so it can get it can add up really quickly. And we're not really done yet either. We have little stamens to add and other things, too. So we're going to be playing around with this summer. We need to remember if we were on radial symmetry or a quadrant symmetry. As we use the clipping masks for each of these layers, I'm gonna go ahead and start with this big flower in the center. So this main color right here is on this layer, and I'm kind of looking around to see what else is on this layer. So this red ISS and then this brownish orange is as well. I'm gonna go on the assisted layer clipping mask above that and think about what color I want. Also, let's see what symmetry was that on that was on radial symmetry. So I want to make sure if you turned your drying guide off earlier, you won't be able to edit your drawing guide unless it's turned back on. So if you're trying to figure out why your edit drawing guy doesn't work, it's because you actually need to turn the guide on again options and radio. Alright, so I've got radial symmetry turned back on on this color. I think I want a lighter color, So I'm gonna be choosing the's colors in here. I think I'm gonna go with that color. Actually, this detail ng pen IHS um, a nice solid texture or a solid, uh, edge. It's kind of a little bit fuzzy, but it's pressure sensitive, So I like that to actually like that a lot, because then I can get a little bit more detail than just with this model, a brush where I'm just gonna end up having solid lines even if they're curved. I can't go thinner to thicker. So let's go to the detail ing brush. You can either start outfit can lighten up as you go up or start out thin and press said you go down. For some reason, most of the brushes do a better job starting out lighter and going thicker than they do starting out thicker and going lighter. You can see it was much harder for me to get a lighter end. And do we want to do anything on this while I'm on this clipping mask? Maybe just a simple outline, and this red was also on that clipping mask. I haven't used this color yet. I don't know if I want to start now. I might go to this, which is similar to this, but it's a little bit darker, and here I am noticing. I didn't do a very clean job on this orange layer, so I will come back to that when I get to that later and clean that up a little bit. I think for now I'm going to be done with that clipping mask. Now we're looking at this creamy yellow this orange this second row of pedals in here and this brownish yellow right here rape. While I'm on that particular layer, I'm gonna go ahead and clean up that orange tap and hold the eraser so my eraser switches to the brush. I was using some cleanup to do here, too, but that's a different layer. Okay, Go to the collecting mask up of it. Add some details. Starting with this flower. It's got a bright orange. All right. Where else are we here? This creamy yellow, this orange And that orange? I'm gonna add more of this creamy yellow to this flower right here. And I think I'm going to stick with this creamy yellow for this flower. No rhyme or reason here. I'm just getting some little fun details for the creamy yellow itself. I might go Teoh this color right here. Let's see, um, on a clipping mask, which means I won't go over the edge of the pedal. And I think I want to outline these pedals because it kind of looks like one big pedal right now. I want at least outline parts of them. I'll show you an example of why I like clipping mask here. I've gone over where I don't want to be, but I can just erase it. And it isn't affecting what I've got underneath. - Oh , I just goofed. So here. Look what's going on here. These flowers were done with quadrant symmetry. Instead of starting over, I'm gonna turn symmetry off. Turn dryness is stuff. Got a nice, big modeling eraser and just erase where that showed up that I don't want it to show up. All right, So those four flowers air just fine. Now I can turn drawing assist back on and go back in to edit drawing guide in turn, Quadrant on. Before I finished thes for flowers, I don't think I'm doing anything to these stems. I'm on quadrant symmetry, but the only thing I have on here, left for quadrant is the centres of these flowers. So I need to decide if I'm doing anything to the centers. I think I want to add this dark gray. I'm not sure what I want to do here. I'm on the wrong leader, though, so let's go to the layer that's above the red. So here's my red go up here to the clipping mask above the red determine size up a little bit. This is a pressure sensitive brush. So as I'm tapping, I can tap harder for bigger dots and lighter for smaller dots and have a nice variety and come over here to this flower to do the same. And now I need to decide if I'm doing anything with that orange circle. The orange layer is on this one. So that could be mascot off that, you know, I think that all I'm gonna do for that is give the illusion of some little stamen. And as long as I stay with in this orange circle, if I go off the circle, it's not gonna show. So as long as I do this within the circle, all these stay hman. We'll have that. Just be right there underneath that red. I like that. So you can see I am just figuring stuff out as I go. There's no rules. I'm kind of sticking to this somewhat limited color palette. There's there, several colors here. I'm not using them all but a minute. I'm not using this super bright red Not yet anyways. Ah, and I'm not using this. I'm using in most of these other ones, and I just really like how it's all tied together. Now I'm popping in really quick for a little a little interruption because my video went a little too long and I'm having to break this up into two parts. So we will finish this illustration just like this in the next video.
10. Scandi Finish!: So I'm gonna walk away from these flowers for now, which means I need to turn radial symmetry back on. Now, let's come back to this red. I think I want to do a little bit more with that red. So that red is on this layer. I'm gonna go to the clipping mask above it. Oh, I also messed up thes dots. Oh, no, I didn't. I think I accidentally erased these dots when I was erasing over here. Okay, so let's fix that. The stops around this clipping mask, I just erased all of them and they come back to that creamy color and still on that detail pen. I didn't realize I was erasing those when I goofed on the's flowers having the wrong symmetry on. Okay, that's all good. Any other erased spots that I didn't notice? So this layer has this red on it going to go to the clipping mask above that? I already have this on that clipping mask, which is this color right here. And I like that. I think I'm just gonna extend. I also abandoned this flower. Let's come back to this flower. This layer right here is right here. go to the clipping mask right above it. Let's pick a color. I'm gonna go to that light, Creamy yellow Now my pedals air here something I don't know if I like that light, Creamy yellow, Let's see. And if we should go with that dark stem color Now that I see that stem color this brownish grey I think I might change all of those to that color. So to do that, I need to go find the layer. So here's the layer for this one. Gonna turn on Alfa Lock, Go to my big modeling brush color those in. I can probably take Alfa lock off now and then the layer that these red ones are on. Go to that one. Turn on Alfa Lock Ooh, I like that much, much, much, much, much better. So you are never stuck with a particular color. I do see a little flip here that I would like to fix, and finally the center for that. I'm going to turn our drawing guide off so I can really see the center and let's find the center. Here's the center, so I'm gonna go on the drawing The clipping mask of of that. And I think I might put little dots in it just like we had over here. I don't want the monoline brush because I want to vary the size of those dots. And I also want to turn the drawing assist off because I don't want them to be symmetrical in here. This is a really difficult area, Teoh to do much with this kind of radial symmetry, cause there's a teeny tiny little sections in here and let me show you what I mean by that . So I can't really do much that it is not looking symmetrical because it's just a very condensed space in there were all those lines meet, so I'll turn radio M sorry. I'll turn drawing assist off, and then I can do whatever I want on top of this, very my dots maybe make more of the larger size since it's such a large flower. And now that I'm seeing that, I might turn on Alfa lock and go to the lighter stem color and change those. Yeah, I don't know. We'll see. Make sure if you turned on Al Pha lack that you turn it back off or you won't be able to draw anywhere else. Alfa Lock makes it so you can't draw any where except what already is on the page on that layer. So this big leaf layer, for example, If I'm on that layer and it's pick a nice contrast in color, I can draw anywhere on that layer. But if I Alfa Lockett, I can only draw where there's already pixels on the page so I can drive over here and over here there's already pixels on the page on that layer in those spots. So if I forget, the Alfa lock is on and I know him on the right layer and I want to add something over here , and I can't figure out why it's not working. That's why it's not working. So you have to go in and turn healthful. Lakoff. I want to focus on these flowers, the center here a little bit more and really liking how this is going so far. All right, so let's do this big yellow layer right here. So go to the clipping mask above it and pick a color. You picked the dark stem color. Finally, that red layer itself. I need to erase a tiny bit here and then go to the layer above It looks like me dry and assist is off because that was the center of the big flower. We just did. So turn drawing assist back on. We are on radio, right? Yes. I'm going to pick the creamy yellow withdrawing assist on. I am putting some dots there and then I'm turning drying assist off for this center. Okay, I'm really happy with all of our flowers, and I want to focus on these leaves. Although when I look at this flower, part of me wants to do a little outline like this on each of these layers. So I'm gonna go ahead and fast forward that and do that really quick. I'm just going to choose a slightly darker color of what we already have, and I'm doing it on the clipping mask, which means I need to be careful not to bump into these little lions here. I think that gives it a more complete look. And now let's go to the leaves. Here's my clipping mask above my leaf layer. I'm gonna go to my lighter leaf color. I think I'm gonna call this finished. I can see some little changes I might make here in there. But that's just something that takes time for kind of going through and, um, thinking about things sleeping on it, coming back to the next day, seeing if you want to fill in some more spaces, and I'm just having a lot of fun with it. Obviously, I can't spend hours and hours on this in class, but I could easily spend hours and hours sitting on the couch and playing around with this color. We didn't use any of the blending that I showed you in the to the leaf tutorial and the flower tutorial. But that is just a preference, so you could do it this way with clean, crisp edges. Or you can spend a bunch of time blending. It could look really pretty to have this orange blended up into this creamy yellow or have these edges be blended and so on. And as I zoom way out, I think I'll probably fill in thes inner gaps a little bit and leave these outer gaps. So if you continue with class, I'm going to show you an entirely different type of Scandinavian art, and it's going to look like this. I thought I'd come back and show you just a couple little things. I added after I went and sat down with my iPad when I was done recording, I added some leaves on these yellow flowers, and that kind of filled in some of that space there, and I added the little red flourishes. But I also added the little statement on these two flowers, and I'm pretty happy with this on. And there's really zero texture on this, which is also a little unusual for me. If you want texture, you can continue on adding another clipping mask to each of your current clipping masks and just keep adding more and more texture or color. Do you different, um, things with your shading? Like, for example, I'll just give you one quick example. So for this yellow layer, if I go to the clipping mask above it, actually go to the yellow layer itself and add a layer so that it's automatically a clipping mask and then turn drawing assist on. I am not sure if I think I'm on quadrant right now. Nope, I'm on radio, so that's good. And then go to that color. Maybe go to that deeper color and you can just add with your monoline and then go toothy blend tool, the smudge tool. I like to go to the paint streaks like we did in the very first flower tutorial so you can go through your whole entire illustration and add more shading and textures. I would try to kind of keep a consistent look overall and have fun with it.
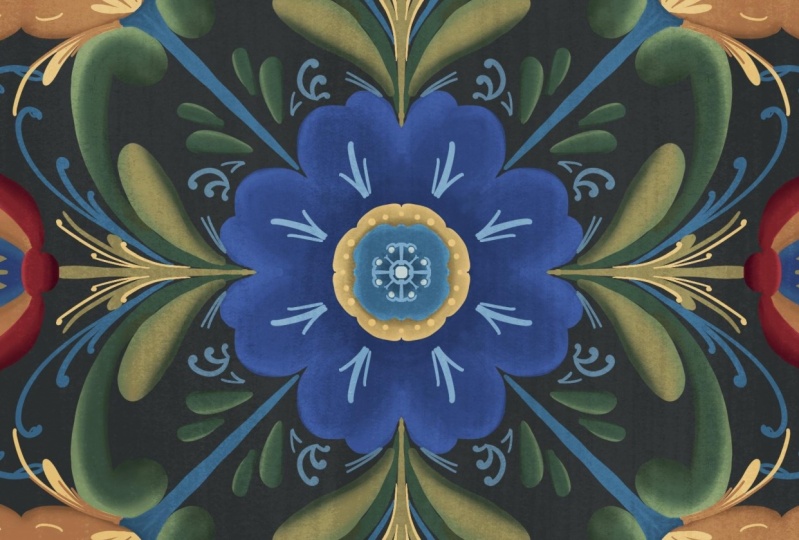
11. Rosemaling & Brushes: I came up with some brushes to get this, um, really fun. Old Norwegian Rose Moline. Look to digital art. This is done in a very specific way. Ah, lot of people who are really into Rose Moline were trained by very specific people in the field. So there's some very specific techniques and things that you're supposed to know when you're painting, and I'm not concerned with all of that. I came up with some brushes that just I'm couldn't give this fun. Look, make sure you go to the link that I provided on, um, a little booklet for sure. For some of the main types of Rose mulling this originated in Norway and was really popular in the mid 17 hundreds to the mid 18 hundreds. The different regions of Norway developed their own styles, So there's quite a few styles and there's, you know, even several main styles that are well known. Um, so that brochure talks about those, and some of those styles are known for their symmetry. So that's what we're gonna do today. But if you like some of the other styles, you can actually use the same brushes and do whatever style you like. They used these, um, painting techniques mostly on things like wooden chairs and other useful items. This isn't the type of thing that they used to paint a picture to hang up on the wall. It was always on some really useful wooden things, so I thought that was interesting. At least I also provided a link to a YouTube tutorial that talks about one particular Norwegian painter who's known for Hiss Rose. Mulling for the brushes, I provided a bumpy edged one. Let me go to a new palette here I have three rows mulling pallets and you can just come up with any palate you like. I'm gonna go ahead with this dark. When most Rose Mulling was on a dark background in my palettes. If you see a row of all one color, that is my way of telling you that would be the background color. So here's black, and then this orange and dark blue. I think you might want to go with this orange line, so when you're doing your work, you can go ahead and change your background color to whatever you have in your palate and let me show you the bumpy edged one really quick. This might be too bright for the video. Hopefully, it's OK where you can really see the bumps is the little end there. This orange is already bothering me, so let's do some blue. The regular just straight up rose mulling brush is very smooth. This flat, streaky brushes. Exactly. It doesn't start out that skinny. Oops, and you have to practice this little curve with your brush at the end. And that's actually a lot like the technique that's used with real brushes. You go up and they curve at the end. I tried and tried and tried to tweak this brush so that it didn't have so many gaps in the streaks on this outside curve, and I couldn't get it. So I still prefer this brush. But I might go over it a second time just to fill in some of those gaps. But then it kind of gets rid of the streaks at the same time, So leave that up to you. The painterly brush is just a little bit more like a paintbrush. Pretty opaque paint brush. This is our smudge brush, and I will show you that later. The detail. ING Brush has a lot of pressure. Sensitivity. There's a lot of little flourishes that end with little squiggles. This is just my sketch brush. I provide for everybody in most classes. And I'm not sure we'll be using these brushes so much these we used with the last technique . All right. And I'll show you those as we go along. So you will want to really practice see what brush I'm on. You want to practice this big C and amusing pressure when I do that, I'm really light here. And then I'm slowly getting heavier with the pressure and the reason you need a practice that is just so you have a smooth line. I did have the setting set so that it's easier to get a smooth line. But if you're finding it difficult, just do a lot of practicing. You're almost making little commas for Rosa Moline. DSC shape and the S shape are used a lot, So this sea would just be like this and s might be like that. Said this would be this so you'll see those a lot and then we're also going to do a little bit of additional flourishes right along the same lines. All right, said those of the brushes. And in the next video, I'm gonna show you how to get this shading in rows, Molly ing. They start out with a, um are they? Don't start out. They do. Ah, one stroke that has radiance. And they get their brush ready by dipping one side in light, one side and dark and going back and forth like this on their palate until those air blended and smooth transition all the way to the center. We can't really do that SARS. I know with our brushes and procreate, so I'll be showing you how to get that look by having kind of the middle tone and then having a clipping mask and having the lighter on one side and the darker on the other side . And then using our blend tool to get the look of rose mowing. So it's a little bit tricky, but you can get that shaded look, So let's get started
12. Rosemaling Base Colors: grab one of the sketches that I provided for, um, thes Rose mauling illustrations and just put it into whatever campus size you think you might wanna print at. I made an eight by 10 at 300 d. P. I and I set the drawing guide two vertical symmetry. I'm gonna change my background. I'm on Rose mulling when? And I think I'm going to go with this nice, dark background. I haven't done one like this yet, so that will be fun. Now, I can't see my sketch. So if you Alfa lock your sketch and choose a lighter color, yours might already be light in your file and then fill the layer. Since its alfa locked, it just lightened the sketch. Now I need a whole bunch of layers with drawing assist on. So once you have one layer withdrawing assist on, you can just start duplicating. All right, I am going to turn my opacity down. If I were you, I would turn it down as much as possible so that you can barely see it. I am a little worried you're not gonna be able to see it on video, so I'm keeping mine a little higher. Yes. Now I'm just gonna kind of sketch out where I want my colors in rows mulling They like you to have quadrants of color. So if you have read here in here, then you have read here and here and so on. So on one of my blank layers, I'm just gonna play around. I'm on this Rose mulling one pallet and I'm doing this first palette here. I'm going to play around with some colors. I'll just use my big model a brush and get some colors on here. Maybe make my tulips this creamy color. Maybe even make this flower in the middle, that creamy color, But then go back to the red for the center. I'm going to go to this light light gray for the pedals on this flower here. My brush is a little bit big for what I'm doing here, but we're just kind of roughing this out here. The's greens, air very dark. I might change this palette a little bit and brighten these greens up and called green for that. Maybe lighter. We have some little flowers up here. Since we have this deeper kind of brown here, I might go ahead and make this part the same color. Oh, I have a leaf here. Let's go with this darker Brown. I think I like that for relief for some reason. So as you can see, you're just kind of going through and figuring out where you want your colors. I'm gonna go with this really dark red for the little av UAL and Cibeles on this. Think that looks kind of interesting instead of green. I'm not sure this teal is gonna show up very well. No, that doesn't show up very well. So now I have all these little flourishes left. I'm not quite sure what color I want to put their. I might go with some of this really light, grayish, creamy grey. We put here the stems for these flowers. I might go ahead with the dark green. It's really hard to see. I know. All right? I'm just looking everything over. I think I'm happy with that. So I'm going to use this as a reference and just kind of remind myself where I want particular colors and get started. I do know that I'm going to start with the green swirls, So let's come down to a pretty low layer. Do this lighter green here. I'm tempted to help over to these brighter greens, but we can also change that later. And once you've played around a lot with these brushes, you're going to have a favorite. I'm gonna go ahead. And the streaky one is my favorite because I like the paint streaks that it gives. But I'm gonna go ahead and use the regular rose mauling brush and just get started. You don't need to follow the lines perfectly. So you do need to think about do I wanna have thes on the separate layers? I'm gonna have an overlap here of this one Libs, this one and this one. So let me think if I want those on separate layers, I think I do. Um, this one is going to be on the very top, but this one is above that one. So we're gonna have three layers of the green, so I'm going up one layer. I have my s. And now I'm going to dio this little section right here. You can switch colors if you want to make sure. Um, it's easier to see that way. I might need a light in my background color so you can see this better in the video. Let's go with that. So I have this one, and I think I need this one right on top of this one as well. So I'm gonna go ahead and add one here. My brush did a funny thing down here. Something to start over. This one seems to be on the very top of everything, but I think I can get this one on this same layer. I have a lot of house noises today about this when I think almost needs to go under our main layer. So let's go down below this layer, and then I can hide this green under. Well, I pressed really hard on that one coming back and then a very top layer. So we're gonna have four layers of all of these swipes here going to go back to our lighter green and again. All right, so we have our esses and our seas. Spend a bunch of time became sure you have some nice curves. I'm going to go through and clean up my edges here a little bit. We're using clipping masks on top of this. So everything is going to show. Oops. However, we are also going to add details at the end that will cover any funny transitions. So don't worry too much about how each of these little transitions looks. I'm going to turn off my sketch layer so you can see what we have. So far, I'm wondering if I need to turn background up all the way to a white. I think I'm going to keep it dark. All right, We're not going to add any shading yet, but when we do, we're gonna use clipping masks for all of these. Let's turn this sketch layer back on, remind ourselves where our colors are. All right, I'm gonna focus on these flowers right here. For those this red is going to be on top of the white. So I need the white to be under some other things, which means that can come down to a lower layer. Choose that very light color here. - So anything else we can have on a lower layer, we can probably have the pedals on this flower on a lower layer. So let's remind ourselves what color those are. Go to that color. And I think I'll go ahead and do these flowers on this same layer. Same color. I think I'll go toothy detail and pen brush. - And now I'm looking around to see what else I can have on this layer. I think I'm going to stick with that for now and go on a layer higher than that. So now I'm on one of my green layers, This first layer here, and I'm gonna get my red. I'm using this brighter red. I'm still in the little detail brush for this. So that happened because I didn't have my shape closed. So if you close your shape, then it won't happen. And red for this center here. All right. I need to go under this layer right here in order to get the nice orange little kind of peddling things on here And have all the weird ends be hidden under this nice swirl. So that layer is right here. So I'm going to the layer under it, which we've already used. I'm going to remind myself what color I want There. It's that deeper orange right here. Now under here, I want to make sure I complete my shapes. I'm just coming back over to the beginning over here and drag and drop. All right, What else? Lips. A lot of the little stems and flourishes air going underneath all these other things. So I'm just gonna do those in a sec. I have my cibeles on these and those need to go on top of this peach color. So this is the layer my peach color is on right here. I'm gonna go above that one layer. It is the layer that my red is on, but I'm not drawing anywhere near that read so I can go ahead and draw my deep, deep red on these. I'm still on the detail ing brush because I'm just kidding. Since skinny little lines done here and that's that, That's ah, swoop that they do with a certain kind of brush. That again I can't really do with procreate. And let's think about where those flowers air going. We're going to go to a darker color. We're gonna go back down to this color and we can really go on any layer for those because those are not touching anything. Some coming back down to this first layer that we have color on, and I'm going back to this medium brown and then on a layer right above that, I can add a center color, and I think I'm gonna make it this peach color right here. I don't know. I might change that to a read later. Or maybe even to this cream color. Yeah, let's do that cream color. I think I went some more of those flowers down here, so I am gonna add when? Right here. So let's go back down earlier and back to that middle. Brown. If you don't feel comfortable drawing a little flower like that, you can use one of the stamp brushes on a sketch lier. Not on this final layer. Back up earlier, back to that light color for the center. I like those little flowers. I might even add somewhere over here, but we can do that later. We're gonna finish this first and the final little detail before we do all these little flourishes are these leaves right here. I need those leaves to go under this color. So I need to go down to a brand new layer here. Let's remind ourselves what color we wanted to use so that darker brown right here and I'll probably use that layer for a lot of other things. Um, that I want hidden under everything else. I'm also seen the little av UAL on the's flowers that never got added. So I think I'll stick with that brown color for that. And I'm already on a layer that's underneath everything else. So it's just gonna hide, and they're right. So I'm gonna stop right there. And in the next video, I'll show you how to do all the shading. I'm gonna go ahead and turn this sketch layer off. For now, all the other little details are not going to have all the shading on them, so we will add that all later.
13. Rosemaling C & S Shading: So I have all these assisted layers. And just like in the last illustration, I'm just gonna drag one of them above each of these other layers we have color already on so that I can turn them into clipping masks. So go ahead and do that. So you have when clipping mask above each of your layers. And that clipping mask is withdrawing, Assists already turned on. Think about, Is your paintbrush going to be darker on this side and lighter on this side or lighter on this side and darker on this site? And I am going to go ahead and turn off as we work with all these green layers. I want to turn all the other ones off and only work with one at a time, So I'm gonna work on our original layer. This is kind of messy looking right now because I have other things that are going to cover that up. So I wasn't too worried about that, But I want to get a nice world. That layer is right here, so find your layer and go to the clipping mask above it. Go to the green that you have, and you're gonna want to do a little bit lighter and a little bit darker. So let's start with lighter. This one is the light green on our little palate here. So I'm just going to make my own gonna bring it up to a slightly lighter green, gonna bump it more towards green as well. The brush your on doesn't make a huge difference for this. So you can just stick with this detail brush for now. And I'm going to Amman a clipping mask and I'm gonna add light along this edge and it's gonna go that lights going all the way around and then I'm going to add another layer. Turn that drawing assist on Call it the mask on. I'm gonna go to a darker green and I'm going green on this side of it. It's gonna end at that little floop. This side's gonna go all the way around and pick one of those to start with. I'll go back down to the light switch to my rose mauling smudge. I like a fairly big size now when you're blending. If you start your brush up here were on the light layer. So we're only on this layer right here. If you start up here and then start swiping down, it's just gonna pull nothing because you have nothing up here, it's gonna pull nothing down, and it's just gonna push the Inca right off. So if you start on the ink itself or right near the ink, I know I'm calling a think that's OK and do a nice, gentle hand. You could even turn the opacity down a little bit. So this much effect is a little less. Then you're gonna be able to spread that out. I'm gonna turn this much back up because it was leaving a little hard edge there. So I'm right on the edge of the cream kind of greenie cream color there, and I'm coming down with it now. If you get really good at practicing this, you can do this all in one stroke. If you need to stop and start over again, try to start in a similar spot right on the edge. That was kind of a funny little swoop there, So I'm gonna focus on that a little bit more till I'm happy with that, looking at reference photos to see and of how those air supposed to look knowing that we're still going to be adding some more details later says spend some time on this. Don't get frustrated and let's go to the dark. Could be mask with this dark stripe on it. And in the end, you're gonna have dark to medium toe light Here. I just pushed it the color right off the edge. I just Kim like this and pushed it right off the edge. So be careful with that. Anything. I am gonna push this color right off the edge because I don't want so much dark right there . And it looks like I need to come back to this light side and get that smudged a little bit more. Many have it so you can play around with that quiet a lot. I'm barely tapping my brush, and I want to smear this over a little bit more, really Have fun kind of painting. Actually, the reason I do my light and dark on separate layers is because it takes a lot of effort to get the light exactly where you want it or any of the color exactly where you want it. And then if I did my dark on the same layer. It would totally mess up the light. So I'm gonna leave that one, and we'll turn on the next one above it. So this one, we're getting a little tricky cause there's some spaces where they meet down here. So I made sure those look nice and a nice little tapering line there, and I'm going to go to a drawing assisted layer above it. I know I'm gonna need to. So go ahead and go to the main one and add a lair. And that adds a could be mask. But then it still needs to have drawing. Assistant turned on this one. We started with it being dark. I did that so we could see better. And I think I wouldn't end up having it start as that same green as the other one. So I'm going to turn on Alfa Lock, go to that green Phil layer. So we're starting out with the same green. And the reason for that is the painter would be doing the same thing. He would have hiss a little smudged, faded little green toe white, a brush, and be doing all of these with that same stroke. Let's go to a layer above that and in your history should go ahead. You should have the lighter green that we used among May detail ng pen. And it's good of the the light on this here. Go to another assisted layer right above that and go to the dark that we used. And now let's blend. - And now we have this area down here where everything's overlapping a little bit and just kind of spend some time making that look how you want it to look. So, one of the things you can do to do to fix that harsh edge on those which, of course, we wouldn't have with a real paintbrush is go to the layer that has this color on it. The main layer, not the clipping masks. Um, I had Alfa Luck on, so turn Alfa lock off and blended a little bit. I'm gonna blend up. All right, Time for another layer. All right, we have this one, and I think we have one more down here, so let's do this one. We have the clipping mask above it. I'm gonna add another clipping mask and turn drawing assist on. Get my light green. I'll do light around the outside edge, go to another layer clipping mask and get my dark green and my smidge. All right. I'm already happy with that. And then the last one is way down here and it's this really dark one. I think I might keep it dark. There's one assisted layer above it. I'm gonna add another one and turn drawing a system. Sorry. It was a clipping mask above it. And for this one, I can go ahead and use the green. That was our main green for this. Said this green right here. And I'm gonna go this super dark green right here. Groups, they need to be on a new layer. It looks like I just need it right here. It might be too dark tidying up that little curl. That's different. I like it. I'll leave that If you want to keep all those colors consistent, then you can switch those colors around just like I showed you on the last one with the Alfa lock. And I think I might do a little bit of blending right here so that waas this one just don't want it to be quite so harsh. But now I've exposed that blue under there too. And I think I'm going to fix that on a different layer so I can go underneath that main layer Iman Right to there. Pick that green that we've been using. Well, it looks like we were using a darker green in there. Here we go. Just feeling that blue space that was exposed. If you expose one, all right, next step we're gonna do the flowers and I think I'm gonna fix this. I think that dark is bothering me. So since we have a whole bunch of flowers on this layer that has this main color what you do, you don't need Teoh Alfa Lockett. You can drag and drop to that color. Since it was a solid one. It just went right to the color. You dragged and filled in all those pixels. And now I can Alfa lock this black layer. Choose the dark green we've been using filled layer Alfa, lock the lighter layer which is now the main green and go to the lighter green. We've been using film and this has exposed some Messi edges here, so I'm gonna find those and I think it might be our initial s. So this right here going to that main layer, I'm just gonna smudge it a little bit. So this was the trickiest part of the whole thing. And and that mostly is just because we're having to pretend that we're painting with a Grady int paint brush. So just play. Play, play until you get it toe. Look how you'd like it to look. All right, let's do flowers next.
14. Rosemaling Finish Shading: when you think about this technique where we have light to dark, we're sort of doing that everywhere, everywhere in the rose mulling painting, they're going to take that brush that has the Grady int colors on it and do a swipe. So if we look at our pedals on this flower, each of these pedals is going to go from dark to light or light to dark. This is our middle tone, so we're gonna be doing dark light. So our pedals are on this layer, so we're gonna go turn Alfa lock off and good use thes two clipping masks above it. So we have this as our medium color we can use. Either. Visas are darker color being a little dark, do a little smudging. That smudge went way over into this panel, so I just really did it real quick. Spend a little time getting that nice and painterly looking nice and streaky. Let's do the same thing to this one. Down here, go to the clipping mask above it. We're gonna go to that light color that our base color is, and we need a lighter color. So just slide it up, maybe bump it over towards yellow, A little bit more, Pick a lighter color. Now I'm on a different clipping mask. So I'm not gonna mess with the dark that we just did the turn, the little intersections. They're going to be a little bit fussy on this particular flower. So you're really just dragging around paint. If you think of it as paint, you're just kind of dragging it into place when you're smudging. So if you want more of the light down here, you touch the light and pull it down. I want this light to come down more, but I don't want it to be there. So I can go to the eraser to speak one that you have a lot of control with, maybe even the modeling, and just erased that edge. All right, so our pedals air down on our two lips or whatever those are. And let's go to this flower. So this one is already quite light. I'm just gonna add some color around the pedal edges. You got to find where that flower is. So we're already on the right clipping masks for that flower, and I think I'm going to I'm gonna pick one of thes. Let's try the, um, peachy color here before I do the other flowers the same way. I just want to make sure I like this trying to get a nice painterly look here. All right. And we need to do this same thing for this panel flower, so we can just stick with the same layer. I think I want to add some of the deep red that we used on these steeples. I'm going to another clipping mask since we already have two clipping masks set up. And I'm gonna go to this really light color right there and just get a little bit of light in the center. And now I'm gonna do this leaf, which is a way down here. Um, I think I'm gonna use the light peach just on one engine. It looks like I missed a section on that leaf when I filled it in. So I can go back and fix that in a second. Right here I see a little gap. So these little av you'll zehr also on that same layer. I'm gonna use that same color, so I'm just getting a little painterly effect on all the little parts. And now we have these little flowers and this I'm not sure if that's a flower or what? Let's see those air on this layer. So I'm gonna come back to these two clipping masks. I am going to come to this light peach for this one, and those are pretty small. I think I'm just gonna do some fine details on those at the end. Let's just look around and see what else is missing. All of the red is missing some painterly texture. So I'm gonna find my red layers. It's all in one layer. Here's me, red layers. I'm going to go up to one of the clipping masks above it for this one. I think I will just add Let's see how this light color looks. I like that. Maybe go ahead and you to see the little left are people too. So I didn't said this ice world too much, and I just kind of turned it into a muddy pink. I just want to do some streaks, is all. It's good, that painterly look. And now the Reds here in here. I think for those, I'm gonna go to this really deep red right here. We haven't used that yet. I'm gonna turn symmetry off. It's just too tricky to get it toe look normal took right. So I'm just playing around with it till I get a nice Grady int from light to dark. Gets a nice, streaky lines in there. And while symmetry is off, I'm gonna go ahead and get this, Dennis. Well, so aside from these little flowers, we have a nice, painterly look on all of our main sections and in the next video will finish off with all the little details.
15. Rosemaling Details: we're done with clipping masks, and we're gonna add all of our little details. Some of them are going to try to hide underneath these main layers just to hide the little ends, and some of them are meant to go on top, so you'll need a new layer that's got the dryness is turned on. That's not a clipping mask on top, and you'll need one down below as well. Let's turn our sketch layer back on and go ahead and try to turn it down as far as you can . So all the little details that you see on top will go on this layer. Um, things like these little flourishes on the leaves, right? Anything that is a stem is gonna go down underneath so that it hides the end under the flower. I need to start with the stems. As for color, Oops, I just realized I didn't fill in that gap there, so I'm going to come back to that leaf figure out where that leaf iss What layer is that? Lee fun. Here it is. And let's go to that dark color. Just fill in that gap. That's the nice thing about using clipping masks if I had to fill in that gap. Um, after I did all this blending, it would just It would just cover up the blending with that brown. So instead, the blending is still there just as we had it and the brown got filled in underneath it. So if he used Alfa Luck, that would not be the case. All right, let's do our stem layers way down below and any flourishes that need to be under I want all these little lines to not be very hidden. So I'm gonna choose some of the brighter colors like the light here, the peach and maybe even that read. I'm also gonna choose this green color and kind of bump it up a little bit and I'm on my detail ing brush Try to blend those little stems in here for this stem. I need to turn this symmetry off. So tap it turned drawing assist off so that I don't have a double line up the middle. And the same thing goes for this flower that comes down to here. And this stone that comes down to here now I can turn drying assist back on for this detail ing brush. If you press as you go, you're going to get a nice little flourish so you can do that along these. It looks like I'm gonna stick with this green here, and I'm also doing all of these underneath right down so I can hide all the little tales underneath. Think I won't do green for that? - I'm gonna go with us really dark, basically black right here and just looking around. So I have thes flourishes on these flowers, but I need them on the's flowers. Now, I think I have everything I need for the underlay side layer here, and I'm going to go above to the very top player. Now I need to think about if I'm going in light or dark. So this is the layer where we can hide some imperfections. So all the little lines in here about where you have some imperfections, you want to just go right over the top? I'm going to use this dark, dark, brick red. I'm gonna turn drying assist off. I'm just kind of looking around, seeing if I want this red anywhere else. I'm going to turn my sketch layer off, so I can see more clearly. And now I'm gonna go to this light color that we used on these flowers. We just went drawing assist on There's a little wobbly and this is the part where you can hide some details. Hi. It's some things. Have you want to turn the streamline way up that will help you be a little less wobbly. - So this part you're just gonna play around with add ings and little additional flourishes. You can always come in and erase little areas that need to be fixed up. - Generally speaking, the light flourishes you're adding are going to go on the light side The dark flourishes air going to go on the dark side. So if you want to go down not quite toe black but go to a pretty dark green that just popped over to black and maybe go on a different layer I'm gonna bring that later under just turned into a coping masks and we don't take that off and I can hide my dark under that Maybe I do need to go with that black and again Drying assist wasn't on some starting light and impressing to get a little variation in my line. And I want to add something to these. Still something to go back to that almost black that might be too dark. So maybe we'll when they use the dark brown on that right here. All right. I'm just kind of looking overall at all of the lights and the darks to see if I want to add any more. If you change your mind about any of the colors, you can just go ahead and Alfa lock whatever layer it's on. So, for example, this layer that has a lot of the stems turn on Alfa lock, not clipping mask. I could change them to this whiter color and see how that looks. I think that brightens it up a little bit. That black was on the same layer. So just be careful. Yeah, I think I like that better. Maybe this stem to and I think I'll leave these ones. Let's test it though. No, because like those light as well. So I'm just going to come through and turn a bunch of those green stems into this lighter white dish color. Oh, I like that a lot. Then we can turn our during guide off now. We originally started with a darker background color. I'm liking this color, but let's test out what it was supposed to be. Now, I don't like that so much because, um, it's hiding a lot of our dark details, so just play around with whatever background color you think works. That's pretty. So we're not quite done. We're almost done. And in the next video, super quick, I'm gonna show you how to give this a bit of a would look.
16. Rosemaling Wood Grain & Finish!: So I am back to one that I've done before. And since Rose Mauling is done mostly on wood, Um, I I ended up finding a nice blend mode, and I made a nice brush that gives this streaky would look and I have to would brushes. But I'm going to show you this one first. So go back and on the very top layer above everything else. I'm gonna set my blend mode. Well, let's let's leave the blend mode for now to normal so we can see really well what we're doing and just go to Ah, a nice gray, depending on what palette you're on. Don't worry about that. Just go straight across Teoh a nice gray, and we can change that toe lighter or darker. Later, we're going to this big paint streaks brush, and we're gonna make it really big. Get some nice streaks. Don't overdo it cause it'll fill in. But you can set the eraser to this same brushed to remove some of the color if you get too solid. So when a tap and hold the eraser still on a big size, we're gonna go full opacity. But I'm going to just press really lightly and have some unevenness. Maybe come back and add some more if you raced too much. But I'm going in nice up and down strokes here and now we're gonna turn our blend mode on overlay. So top this end and go down to overlay. So now you can play around with it some more to make sure you have some, you know, streaks in all of your various areas. Oh, so when I add more of the gray, it's just filling in. So I want a race I'm gonna erase in the areas that need more streaks so you can play around with different blend modes. This was it. What you should look for when you're playing around with different blend modes, is how do the lights look and how do the darks look? And then you can also play around with different colors to use on the the brush on the layer itself. I just used gray, but you can use, um like some pale orange is sometimes given interesting Look, I like overlay because I can see the texture on the whites and the darks, and some of the blend modes don't do that they end up having whites look super bright with no texture. But everything else has texture. So what you're going for is an overall streaking texture, as if you were painting on a wood green and the paint is kind of sinking into those little divots, and it gives it a nice little would look. The other would Brush I have is just a wood green brush, and you can play around with that, too. You might want to go under all the layers for that turn, assist off, play around with a blend mode on that, you can also play around with capacities. If it looks crazy dark, don't worry about it too much. Oh, that's kind of interesting. The vivid light, linear light. So depending on what shade of grey or what color you chose here for the stroke, the brush itself, you're gonna get different looks. So now we have an actual wood grain look as well as the overall streaky texture on top, and then you can also play around with the capacity of that texture layer. I'm back up to my overlay streaky texture layer, and you can play around with the hue, saturation brightness on it. And that's the, um that's why it's important to pick just the right gray. If you went to light, it's gonna have a totally different effect. And if you go to dark, it also has a totally different effect. I kind of like that, though, looks a little bit more antique E And then if it goes a little too dark, you can again play around with the opacity. So there you go. I just love it. I, um, didn't have a plan for colors and just figured it out as we went. And I think it's really fun. Thes air, really tricky. And then these little swirls A really tricky as well. Um, but it's just fun. I can't wait to see what you do. Make sure you sign your work, and I've been taking screenshots lately so that I'm not posting my original all the time. But make sure you start with a size that you think you might want to print if you think you want to print it, So don't start with a four by five, you know, maybe start with eight by 10 depending on how many layers you have, you might want Teoh start with a smaller size. If you're limited on layers and, um, pretty much always do 300 deep Ei, that's kind of a given. Let's see, I'm probably going to nit pick this a little bit more, but, um, one of the things that I see right now that we could do is add some light up here. So, um, I'm not going to do that for class, but I will be so excited to see you post in the project section of class. Um, if you're in my Facebook group, um, of course, post there, too. And have fun. I'll see you later.
 Jennifer Nichols, Artist & Teacher, Procreate