Transcripts
1. All About This Class: [MUSIC] Learning how to
paint can be frustrating. Most of us easily give up when we don't see the
result that we're expecting when our paintings don't look the same as
the ones that we admire. But what we don't
realize is that those masters that we admire
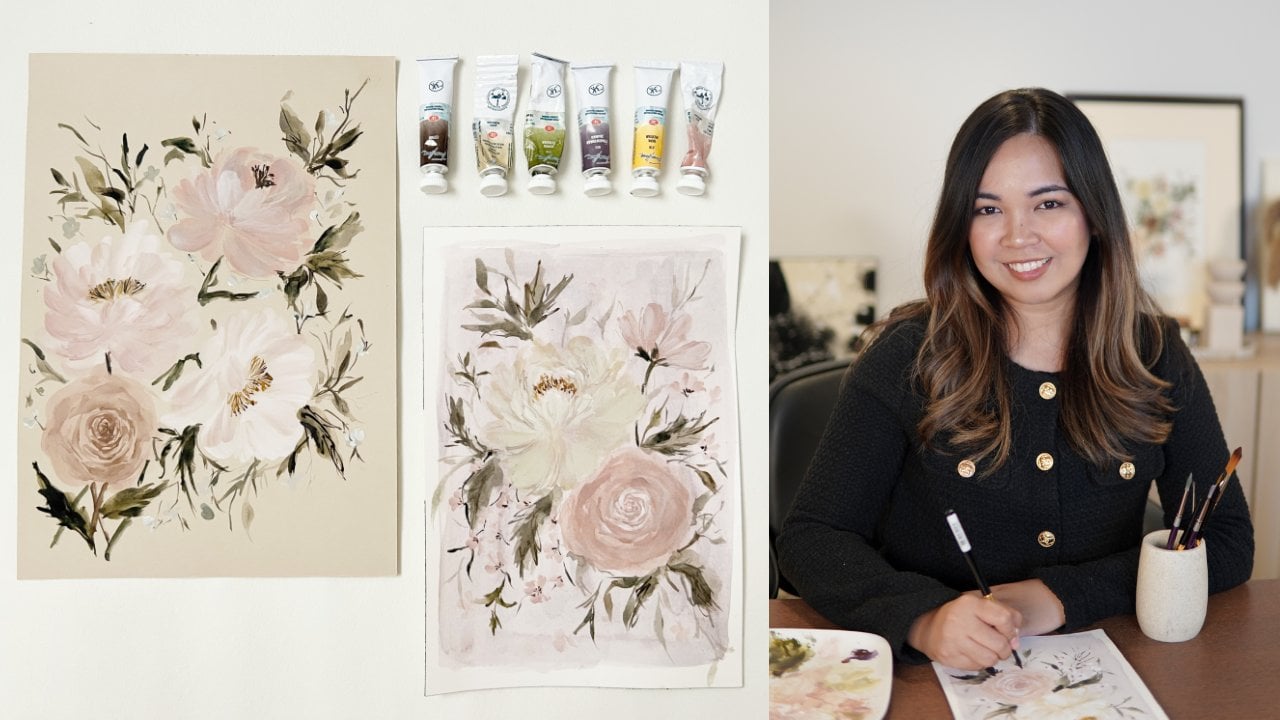
used to be beginners too. Hi, my name is Jenny. I'm an artist, educator, and creative entrepreneur
from the Philippines. I'm a brand ambassador for a well-known brush brand,
Silver Brush Limited. My works have been featured in various media and articles. I am not a born artist. In fact, here's what
my painting looks like when I was starting
to explore watercolor. In case you don't get it,
they're actually flowers. But wait, here's what my
painting looks like now. Wonder what I did the turn
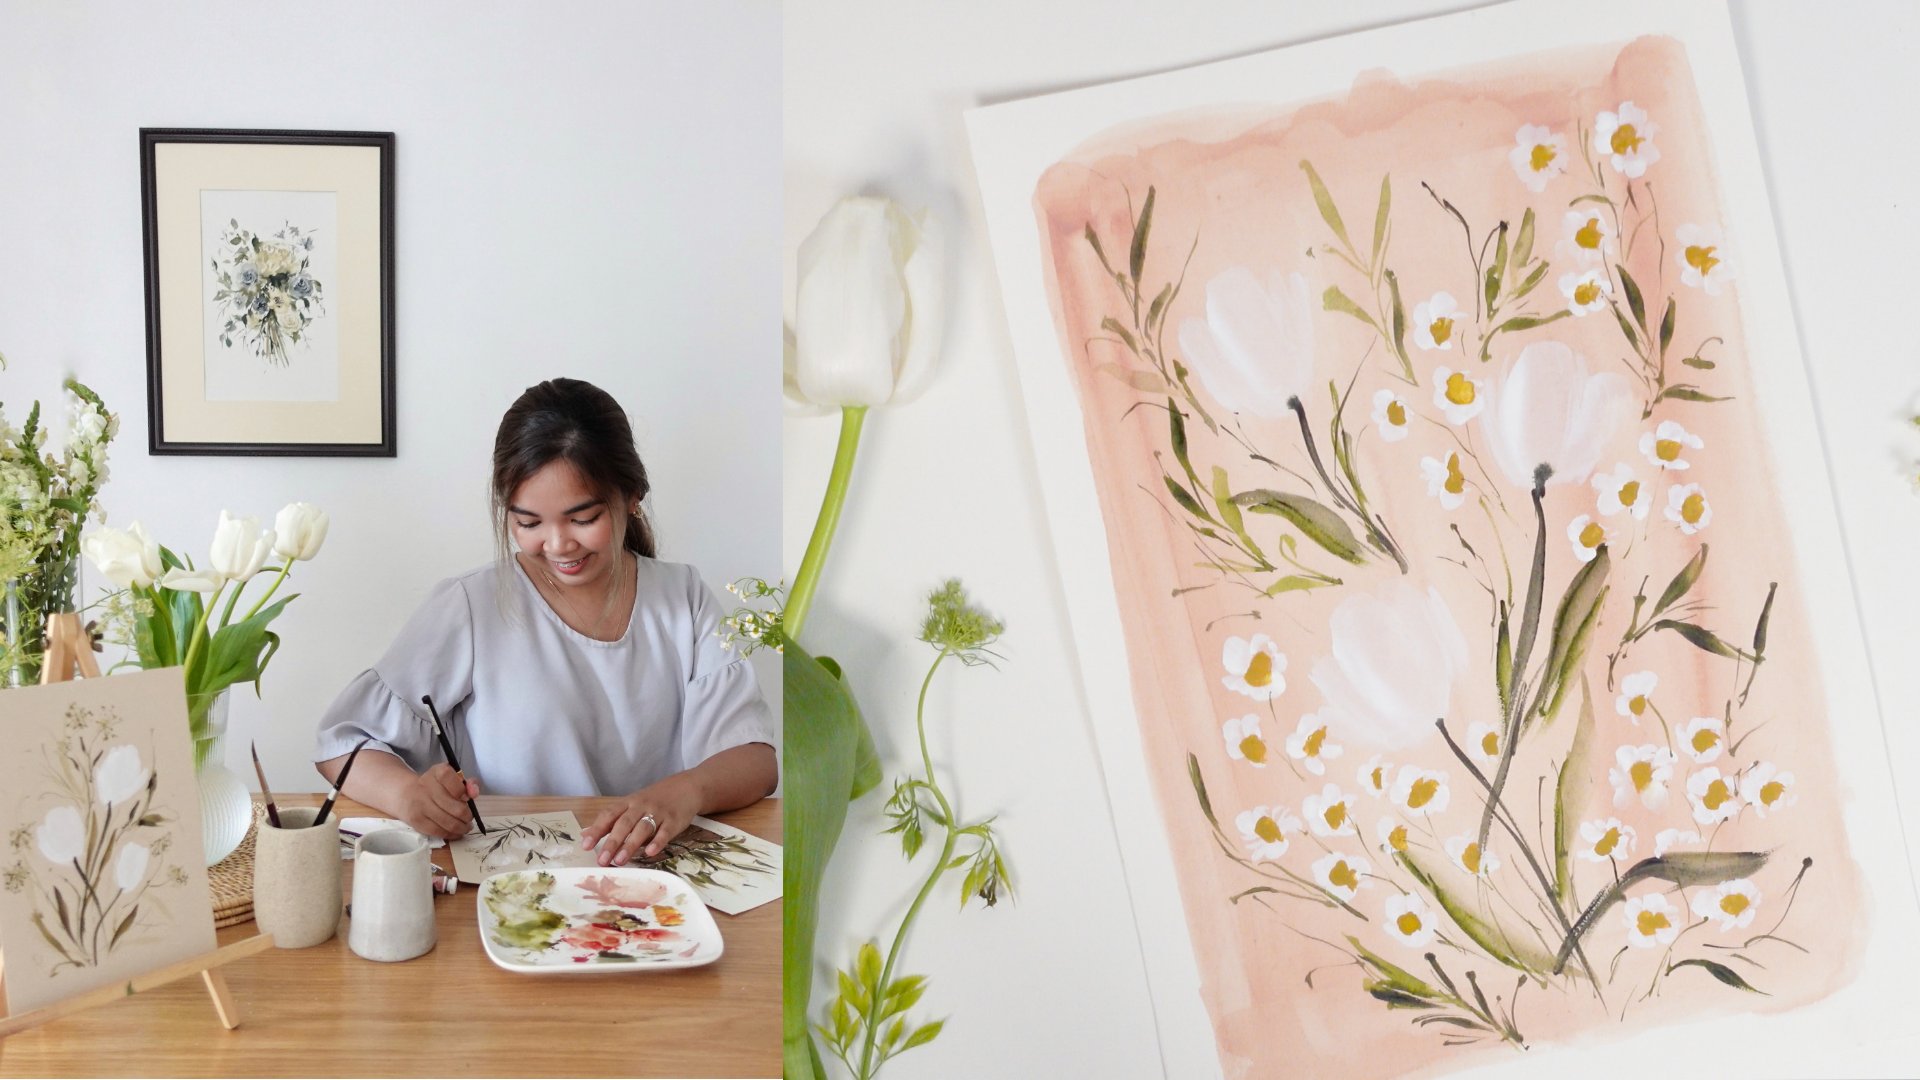
those blobs into blooms? Practice. I love painting
flowers ever since. I spent around 20 minutes a day in the first year of
my creative journey, practicing and
learning the basics of floral watercolor painting. This habit helped me not
only learn how to paint in watercolor but also became a way for me to develop
my painting style. You're in good hands because in this class I'm going to teach
you how to paint flowers. At the same time, I'm going to help you build
a habit of practicing daily through our seven-day
painting prompts. We'll start the class
by knowing what are the right materials for
watercolor painting. Then I'll introduce you to the simple yet attractive
dried flower bouquet elements. I'll teach you how to paint
pampas, straw flowers, palm leaf, dry twig, and of course, my
favorite roses. From there, we will
jump into combining those elements to create beautiful and frame
worthy paintings. Each day for seven days, we will paint one composition. By the end of this class, you will not only have
seven worthy paintings, but more importantly, you will learn and build a
habit of painting. I'm sure you're very much
excited to start your journey. Pick up your brush and
let's get started.
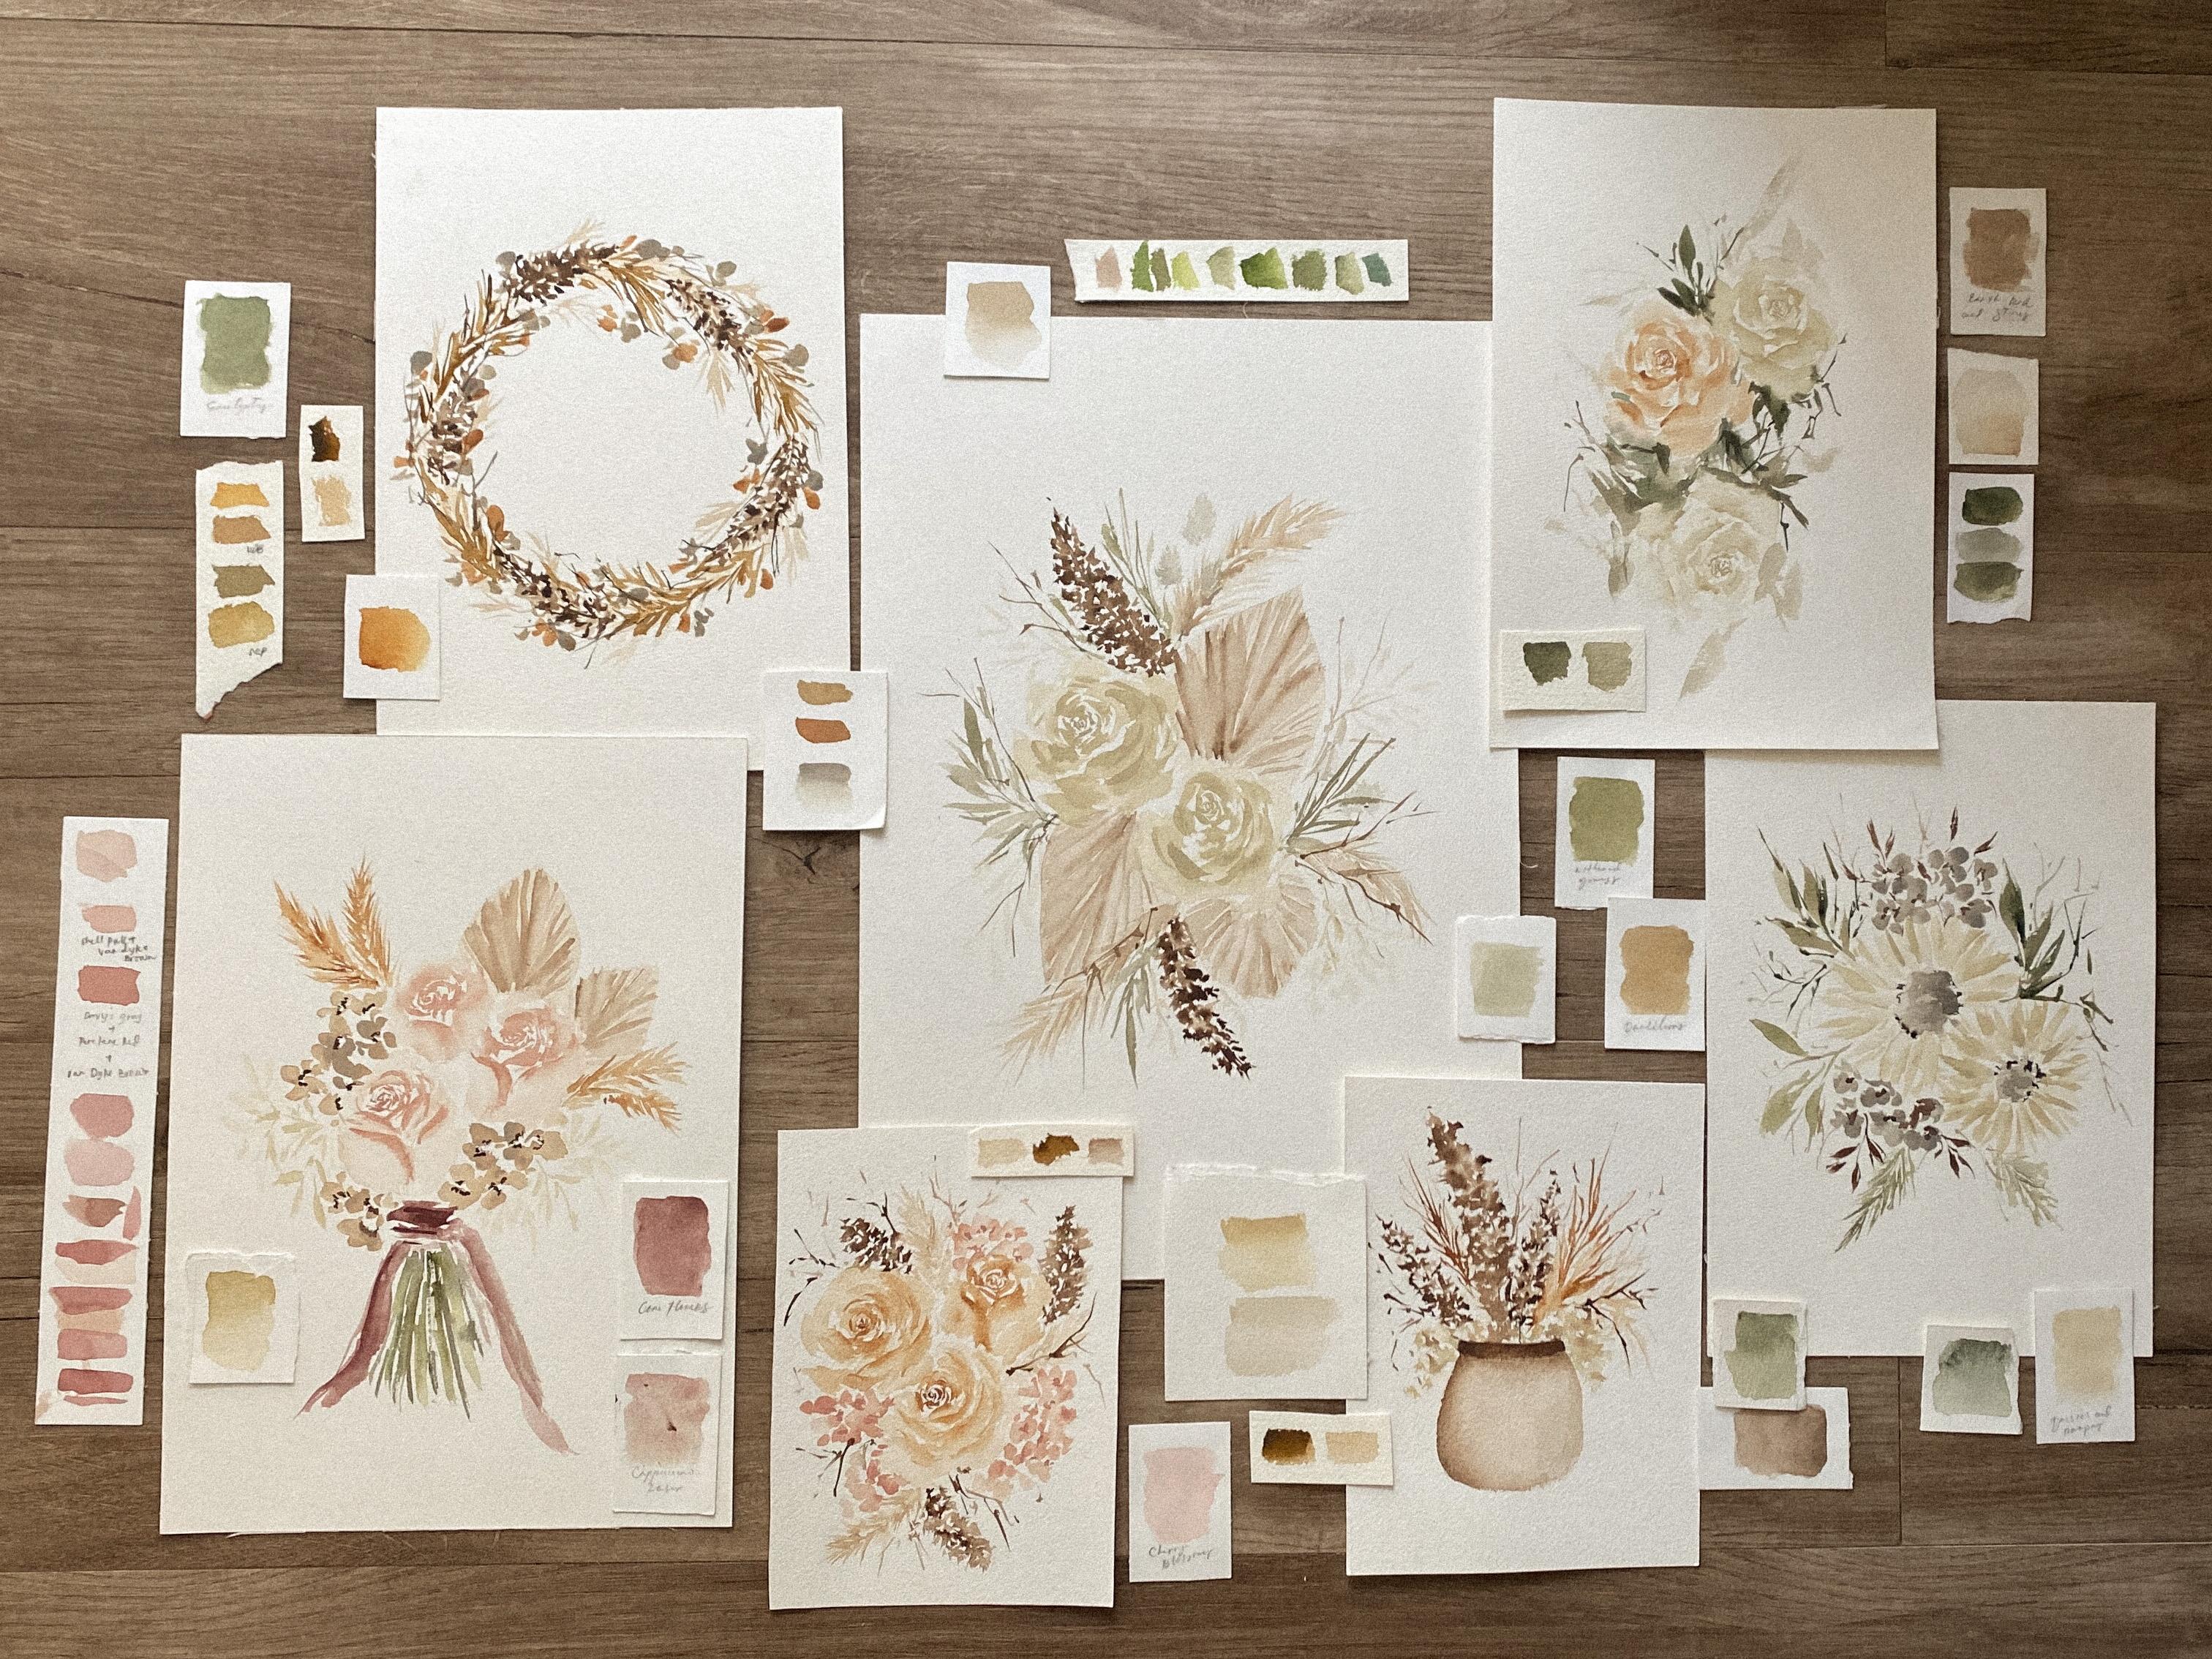
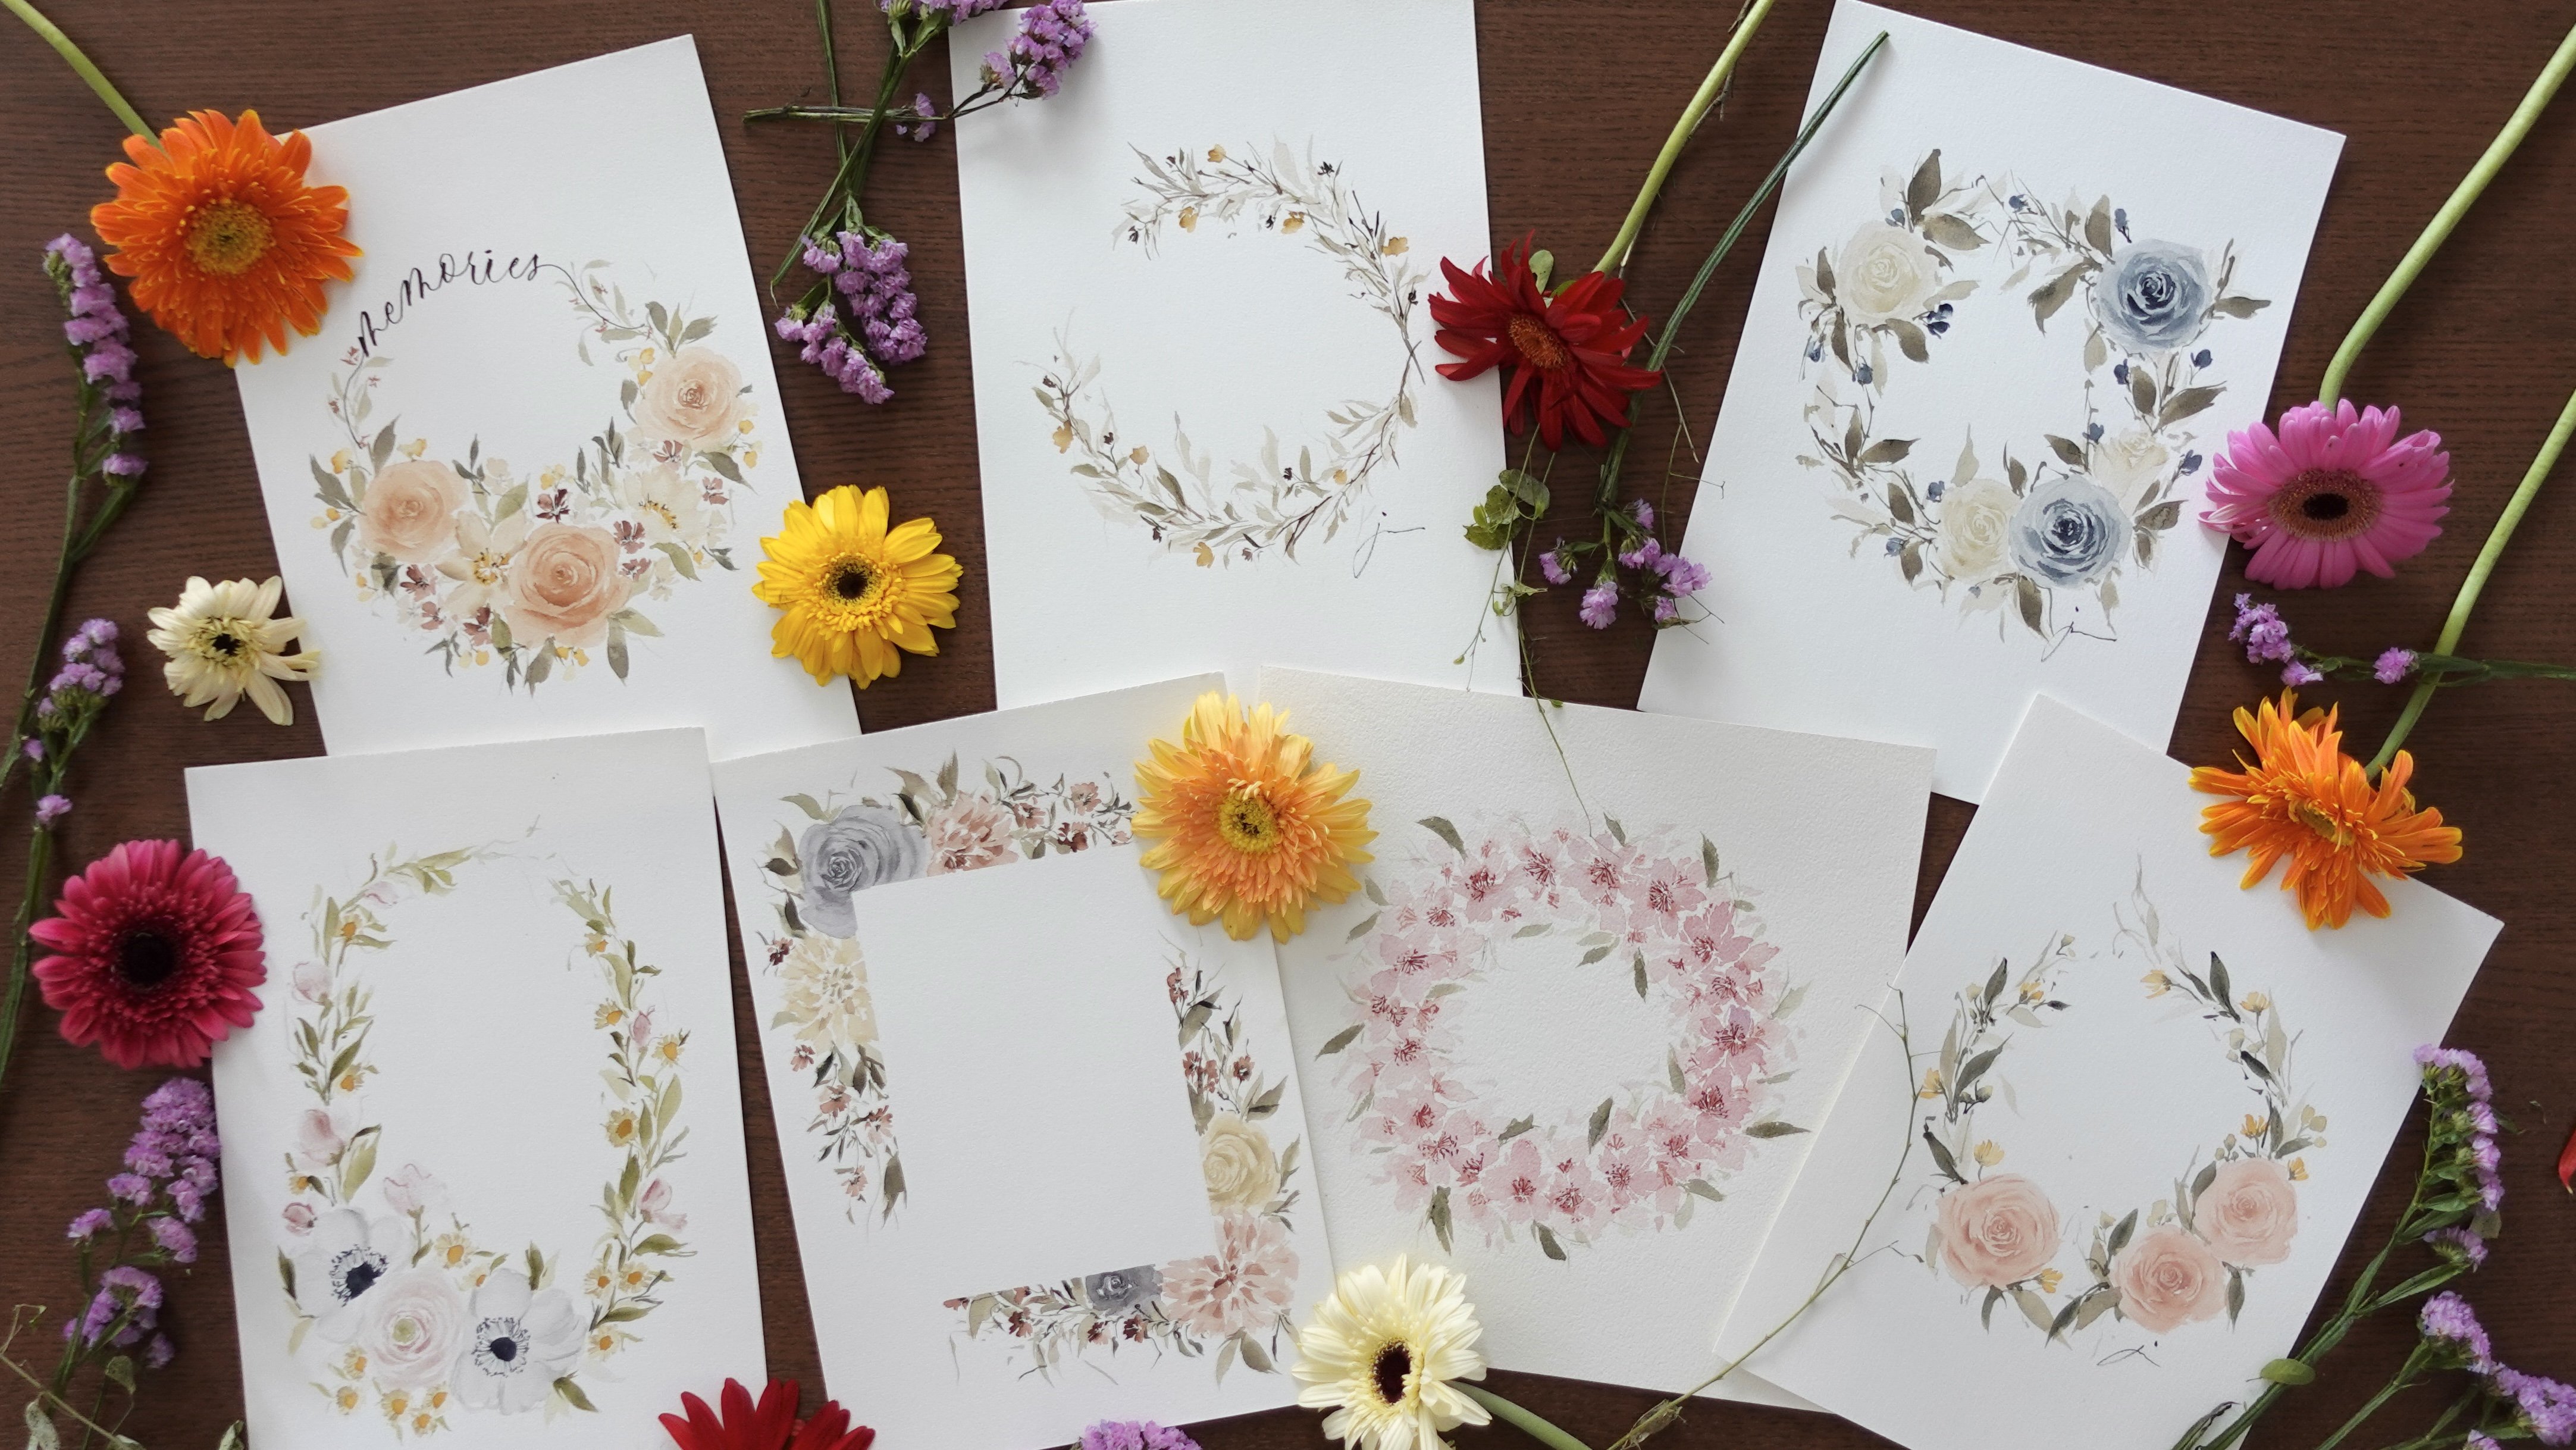
2. Class Project Overview: [MUSIC] For the class project, you are going to be
following along with me as I paint these seven
dried flower composition. Those seven paintings
are going to be your class project
and here are they. For day 1, day 2, day 3, day 4, day 5, day 6, and day 7. I will explain to you the
process on how to create these seven paintings
and we will apply all the things that
you will learn on our pre-challenge day. I encourage you to upload
your daily paintings on our class project section so I can check it out and
give you some feedbacks. By the end of this class, you will not only have seven frame-worthy paintings,
but more importantly, you will learn and build
a habit of painting, a habit that can help you master this medium and develop
your own painting style. [MUSIC]
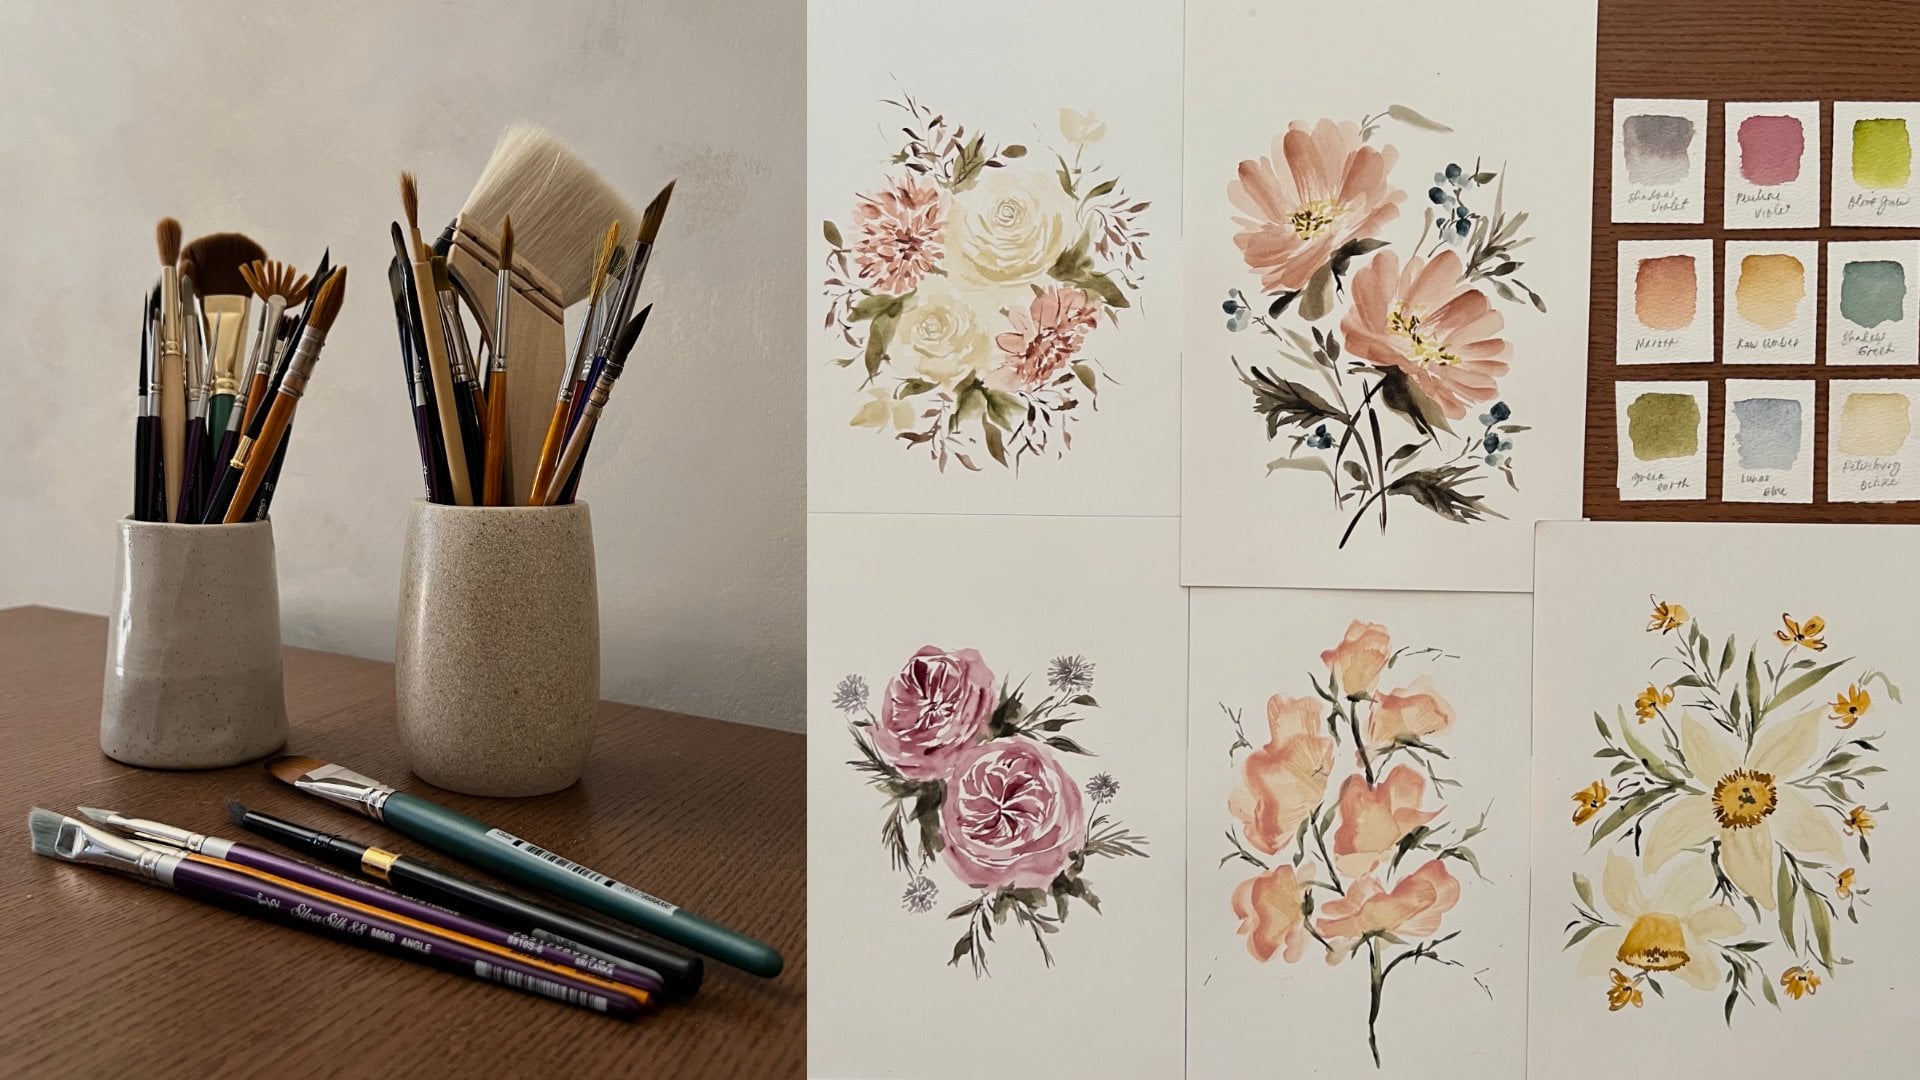
3. Materials We Need: [MUSIC] Hi everyone. Welcome to the materials
part of our class. On this part, I'm
going to share with you all the materials that I suggest for you to use on
your watercolor journey. For the paper, I
always use this one. This is the Baohong
Academy watercolor pad. This one is in 300 GSM
and the size is 10 by 7. If you don't have this
specific watercolor paper, you may use some other
options like the Arches or Fabriano or the
Canson [inaudible]. If you find 100
percent cotton paper a little bit expensive
for your practice, I would suggest Canson Montval or Fabriano 25 percent cotton. You can also use Canson XL. There are some other
cheaper option like this Canson and this
Fabriano paper. But I would not suggest
for you to use this papers because they will ruin the
result that you will create. They're actually meant
for kids paintings. If you really want to take your watercolor
journey seriously, it is better if you
will invest on paper. Aside from paper,
we'll also use colors. The colors that
we will mostly be using are Van **** brown, sepia, Petersburg ocher, dunes, mocha, green earth. We'll also be adding some
other colors like brown ocher, under sea green, gray titanium and shadow green. For the brushes, what I usually
use are my black velvet. I have here size 2, 4, 6, 8. For this specific class, I will mostly use
size 8 and size 2. If you have any other brand of brush that is around brush, it's okay to use that, but personally I love
using black velvet. Because of it's pointed tip plus the belly holds a lot
of pigment and water. Now, the next thing
that we have here is the silver black velvet
in script liner size 1. I usually use this to add long lines like later
on for the twigs, I'll be using this one. Again, the black velvet
script liner brush. Then the newest brush
that I usually use is the oval crescent
brush in size 3 or the 8. This is the one from the silver
silk eighth, eighth line. I'll be using this later
on for the hydrangea. Then the next brush is the golden natural ultra
round brush in size 10. I always use this one also. I use this mostly for detailing and small details like the core of my rows,
something like that. I always use silver brush, limited brushes because the
quality is really good. They're just perfect
for that type of art that I'm creating. We also need a mixing palette. I'm using here a
ceramic mixing palette, but you can use a plastic one. Then of course we need water. I have here a glass of water for cleaning my brush later
on and some tissue. We'll use the tissue
later on to remove excess paint or excess
color from our brush. Basically, those are the
things that we need to start our printing journey. It's just 1, 2, 3, 4, 5, 6, just six items. I would suggest that
you guys prepare your materials in advance
before we start painting, so it would be easier
for you to set up. It would be nice if you
will clean them right after you use them so that for the next session
that we'll have, you won't need to cram or
you won't need to rush to cleaning and you'll be
ready to start right away. That is it for the materials and I'll see you
in our next topic.
4. Painting Pampas: [MUSIC] We are down to the
painting part of this class. But before we start our
seven day challenge, I'll first teach you how to paint dried flower
elements that we will later on combine to create our seven framework
decomposition. Let's start off with these
beautiful pampas with me. I have here two kinds of pampas. This one and this one. Pampas is one of the most popular dried flowers and actually is not a
flower, it's a grass. As you can see on this
particular pampas grass, it has long strands that when you lay it down
you will notice that it has lean depth and
it's quite unique compared to the
usual leaves that we see when we're painting. Let's translate those
the characteristics into watercolor painting. For this particular pampas, I'll be using my Size 2 round
brush and for the color, I'll be using the brown ocher. You can also use yellow ocher or any shade of orange or
brown on your palette. We begin the process
by loading our brush with a very light
mixture of brown ocher. Then I'm just going to create a thin stroke with this and add some more thin strokes as the
main strands of our pampas. The secret here is to have
control on your brush. If you think that your
strokes are still big, you can switch to a
smaller size of brush. If you're using Size 2, then switch down
to Size 1 or zero. After that, load your brush with a more
concentrated mixture of the color that
you're using and add it on the strands
of your pampas. This will serve as the depth for your painting and it will add more character on your creation. That is how we create a pampas. Now let's try doing this again, but this time we will be
using Van **** brown. Same procedures, just
load your brush with a very light mixture of the
color that you're using, and then create thin
strokes like this. While your first layer is
still a little bit wet, load your brush with a more concentrated mixture
of the color that you're using and create a second
layer for your pampas. That is it for the
first type of pampas. Now let's go and try to
paint the second one. As you can see, this one is fluffier and it has more texture compared
to the other one. Actually, I liked this better. Let's translate those
characteristics into watercolor painting. For this particular pampas, I'll be using the Size 10 golden natural ultra round
brush and for the color, I'll be using Van **** brown. Same procedure,
what we just need to do is create our main stem. Just create a thin
line like this. Then for our fur, what we're going to do is, dab our brush and
create some checkmarks. Something like this. This one is quite
shorter compared to the shape of the strokes that we did for our
first type of pampas. But for this one
we're going to create a shape that is a little bit
bigger on the belly area. We are going to concentrate
on some areas here. By the way, guys, I am
using a thin mixture or a very light mixture
of Van **** brown here, and then for the second layer, while my first
layer is still wet, I am adding a more
concentrated mixture, which is water mixture. [MUSIC] Let's try doing it again. Create your main stem and then
add the checkmark strokes. Then we'll add the
second layer by adding more concentrated
mixture of our Van **** brown. [MUSIC] Now the third pampas
that we'll create is somehow a different one. It's perfect as a filler in both painting and
real-life arrangement. This is how we do
the third pampas. Again, I'll be using
my Size 2 round brush for this one and for the color, I'll be using my brown ocher. If you don't have the
Size 2 round brush, you can use smaller versions
like Size 1 or Size 0, and if you have Size 4, that would be a good
choice as well. Here we are just going to
create thin strokes like this. It's just random thin strokes that are going back and forth. Again, for this one, you just need to add a
little bit of control. If in case you
created a little bit of thicker strokes, that's okay. What you can do here as well is mix different water and
color ratio for the color that you're using to add
a little bit of detail. That is it for our dried pampas. Now let's go and paint our
next dried flower elements. [MUSIC]
5. Painting Palm Leaf: [MUSIC] What I have here is not the fan although
it can also be used as one. But this one is
called a palm leaf. This one is one of my favorite
right flower element, and I love it because of
its unique characteristics. This one is usually
used as backdrop and they add it at the
back of the arrangement, like in bouquets and hanging arrangement or
on events backdrops as a background for your main
subject to be more visible. In painting a palm leaf, I only use two types of brushes. You can actually use three. First is the size 8 eight brush. Second, is the size
2 round brush. Third and optional is
my ultra round brush. When painting a palm leaf, there are just two things
that we should focus on. First is the shape of it. The shape of a palm leaf
is somehow like a spade. Then the second thing
that we should focus on, are the details. So this stripes like this, or they call it folds. Here's how we do
those two things. Again, I will start
with the base layer. For the base layer, I'm going to use a very
light mixture of my Van **** brown and using
my size 8 round brush, I'm going to create
the base layer. Again, the shape is
somehow like a spade. We will let for
this layer to dry. While waiting, let's
create another one. I'm going to create
the third base layer. This time I am going to use a very light mixture
of my brown ocher. Now that we're done
on the first layer, we will let that layer dry up first before we add another one. Make sure that the first
layer is completely dry before you add the second layer because
it will get through in. Now that the basic
layer is already dry, I'm going to create the folds. Using my ultra round brush, I'm going to add
lines like this. Here I am using a milk
mixture of my colors, so this one is darker
compared to the base layer, but at the same time, not as pigmented as
the water mixture, which the most concentrated
mixture of our color. I'm switching my
size 2 round brush and my golden natural size then. I am just loading a
little bit of water after my stroke to loosen and to
soften the edge of my stroke. I am just repeating
the same process until I completed my palm leaf. That is it for our palm leaf. Let's create the details
for this palm leaf. Again, same procedure, just add the lines. Then while it's still wet, you can dissolve it. Or if you think that the
lines are already soft, you don't need to dissolve them. While creating the details for this particular palm leaf, one of the struggles that I face was I created some curvy lines. My hands were shaking
while creating the lines. I know some of you will
encounter that problem too, and that is okay. You don't have to create perfect lines for
your family because even the ones on the real life dry palm leaves
are not really straight. That is okay if your lines
are a little bit shaky. If you feel like you still need to add a
little bit of detail, you can get a milk mixture or a little bit of darker mixture of the color that you use, and add some of it on some
areas of your palm leaf. Just make sure that the
strokes that you're creating, is not too dark
and not too heavy. If that happens, the
thing that you can do is dissolve it by loading your brush with a
little bit of water. Let's compare our painting
to our real life palm leaf. As you can see, we were able to translate the characteristics
of our palm leaf into painting by
adding a little bit of dark lines on our painting. Now let's go and try painting a palm leaf using another
color which is brown ocher. Let's do the same
process and add the lines in the lower
part of our palm leaf. It's just the same. I'm using a light mixture of the color and I'm dissolving a little
bit of it using clear water. The most important thing that
you need to remember while doing this process
is to enjoy it. You don't need to
create perfect lines, you don't need to create
perfect palm leaf. What you need to do is just
translate whatever you're seeing in real life or in
pictures through painting, and that's the most
important thing. For the last part
of our process, we're going to add the
handle of our palm leaf. I just use the butter mixture of Van **** brown and brown ocher. That is it for
painting palm leaves. I hope you guys
enjoyed because I love this dry and flower
elements so much. Now let's go to our next
dry flower elements, which is called rescars.
6. Painting Ruscus: [MUSIC] We are down to our
third dried flower element, and this time we
are going to paint this beautiful thing
called ruscus. As you can see, this
dried flower element is very beautiful and it has
a lot of details in it. What I personally
notice about this is it has lots of leaves that are
going on different direction. As you can see,
something is going here, something is going on this area. Now let's translate those
characteristics into painting. For the ruscus, I'll be using my
size 2 round brush. For the color, I'll be
using my Van **** brown, but later on I'll
show you how to paint the ruscus using
Petersburg ocher. We will start by
creating the main stem. What we're going to do is just create a long line like this. I would prepare for you guys not to create a straight line, but rather create a
little bit of curvy line because the actual ruscus doesn't have a
straight line also. After that we will
create the leaves, which is done by combining
thick and then thin strokes. All you need to do is press
your brush and then lift it. I want you guys to be
careful on this part. I want you also to mix different
water and color ratio. Meaning I want you to add
light shade of brown, dark shade of brown, and a little bit of dark to light shade
of brown just to give an effect that there are
some leaves in front and some leaves at the back
part of our ruscus. If you're not familiar with
the song that we're creating, it's just like this. All you need to do is
press and then lift. [MUSIC] Keep on adding leaves again in different
water and color ratio until you're able
to fill everything. [MUSIC] Another reminder in
creating the leaves of our ruscus is please do not
make everything a pair. Let some of the
leaves go downwards, some of the leaves go
upward just to have a natural effect because as you can see on
our example here, not all the ruscus
have the same look. [MUSIC] That is it for our ruscus. Now let's go and try it again. This time we will use the color Petersburg ocher
from white nights. This is a creamy shade of white, which is very similar to our
real-life ruscus example. This is the swatch of
our Petersburg ocher. We'll do the same procedure as the one that we did earlier. All we need to do is
create the main stem and add some other
stems beside it. Then after that we
will add leaves. Again, please use different water and color
ratio for each of your leaves. [MUSIC] As you can see guys, creating ruscus is very easy, yet it gives a very nice
effect on your creation, especially when you add it on a bouquet arrangement or
on a bouquet painting. That is it for our quick
tutorial on how to paint ruscus. Let's now go to our next
dried flower element.
7. Painting Dried Twigs: [MUSIC] I've always used
twigs as part of my creation. Even if I'm painting
fresh flowers, I always add twigs
around my painting. For me, it just adds a lot
of details and beauty in my composition when I add those random thin
and thick strokes. Today, we are going
to paint dry twigs. Here's a real-life dry twig. As you can see, each stem
has different thickness. It's wild and unpredictable, which makes it really beautiful. Let's translate those
characteristics into painting. For this one, I love using my script liner brush in size 1, and in this particular painting, I use different water
and color ratio. If you're not familiar with
water and color ratio, it's the amount of water
and the amount of color that you mix in order
to create a shade. For example, you want to create a lighter shade of brown, you should add more water. If you want a more concentrated
or darker shade of brown, you should remove water
and add more pigment. For this particular twig, I will combine different
water and color ratio to give an effect that there are some
branches of the twig in front and some are
at the back part. As I've mentioned,
we're just going to create random thin
and thick strokes. To create those effect, what we are going to do
is release some stress on our hand and on our brush on some parts to create
the thick strokes. If you want to create
the thin strokes, you have to lift
your brush a little and do not add stress
on your brush. Just let your liner brush create the strokes for you
and let it dance. [MUSIC] As I've mentioned
earlier as well, we need to use different water and color ratio on each of our stroke to create the effect that there
are some branches at the back part and some
branches in front. That is it on painting twigs, now let's go to our next
dry flower element.
8. Painting Roses: [MUSIC] For our next
dried flower element, we are going to paint roses. As you know, rose is my favorite flower and one of my favorite
things to paint. Over the years, I have developed different style in painting loose roses, and today, I'm going to
share with you one of them. For my roses, I always
start with the core. For my core, I'll be using
my size 2 round brush. If we take a look at the
structure of a rose, you will notice here that the details are
mostly in the core, so there are a lot of lines. You will notice here that
there are dark areas, and most of them are
in the core part. Those dark areas are actually where the petals are tucked in. Let's translate those
characteristics into painting. In creating your core, you need to create C strokes, which is a combination of
thin and thick strokes. I am using the size
2 round brush here. As you can see, I'm just creating
small C strokes. But the trick here is, as you go out of the first C stroke
that you have created, your strokes are getting bigger. You are adding more
stress on your brush to create bigger and
longer see strokes. [MUSIC] Once your
core is already done, what we're going to
do is we are going to load some water on our brush and loosen the last strokes that
we have created. As you noticed here, the last strokes that
I have created became lighter because of
the clean water that I loaded on my brush. Now, I switched to
a bigger brush, which is the size 8 round brush, and I'll create bigger C stroke. These strokes are the
main petals of my roses. As you can see, I'm not
just creating C strokes, but also I'm adding a little bit of thin strokes on some areas. This is to create an
effect that there are some folded petals in the
middle of my big petals. Also, as I create my petals, I am adding a more
concentrated version of the color that I am using. This is to add depth
on my painting. I guess one of the
hardest thing in painting a rose is to know when to stop. This is one of the
most common struggles that students who are learning
how to paint roses face. If you are struggling and
you don't know when to stop, the trick that I am using
is to check on your core. If you think that the core is already too small for the
size of your whole rose, that means that you have been exceeding the petals already. Always be mindful of your
core because it will be your guide on the size
of your whole rose. Since we are painting
in loose style, we will not be painting
all the details of a rose. That's the reason why I
always make sure to add leaves to compensate for the details that we
would not paint. That is it on painting roses. If you want to learn more
about painting roses, I have some other
classes that has in-depth discussion on painting different styles and
different kinds of roses. I'll link them down below
so you can also watch them.
9. Painting Straw Flowers and Leaves: [MUSIC] In case you're not
familiar with strawflowers, this is how they look. They may be small, but they're usually use as
one of the main flowers for an arrangement whether it's an actual arrangement
or a painting. In paintings strawflowers, I always start in
painting the core. I have here my size
8 round brush. For the core, I'll be
using my gray titanium. It's a beigey shade of gray. What we're going to do is
just dab our brush and create a circle but I'll
leave a little bit of white spaces to represent
the highlights. You're going to dab some more of the gray titanium on this area. Just add a little bit
of shadow and dab. Now after creating
the base of the core, I now switch my color
to Petersburg ocher. I just created this long, thick, thin stroke
for the petals. For the petals I will be using different water and color
ratio as you can see. There are also different shades of the creamy white
for the petals. That is the reason
why I'm going to use different water
and color ratio. On some areas, I'll be using concentrated color and on some, I'll be using more pale. [MUSIC] I also add a little bit of
random thin strokes like lines on some areas. The reason behind that is I want to give an
effect that there are some petals that are really behind those which are in front. [MUSIC] For the final step, I loaded my brush with
sepia and I'm adding long dots on some areas of
my strawflower painting. This is to add a little bit
of shadow for the core, and of course, an
extra deep layer. Aside from the
strawflower itself, I also want to share
with you today how to paint those dried leaves. In painting those dried leaves, I am just going to
use the green earth from their [inaudible] and
using my size 8 round brush, we are going to create this double stroke
in creating a leaf. After creating,
those two strokes, we are going to add
random thin stroke to add the looseness and natural
effect on our dried leaves. Let us now add those
leaves on our strawflower. In this step, I want you
guys to be carefree. Add a lot of leaves, add a lot of random thin
lines around your leaves. I want you to be expressive, create the leaves on
different direction. You don't need to add a beautiful leaf that is
very straightforward or something that looks
exactly like a leaf because as you can see
on our example here, the leaves are dry and they are a little bit curly and not flat. I want you to translate those characteristics
into painting by adding a little bit of rawness and natural strokes
on your painting. That is how we paint
strawflowers and leaves. Let's try painting it again. Again, we will first do the core and I am using the gray
titanium day for this. Using my size 8 round brush, we're going to dab
some colors and leave a little bit of white spaces
to represent the highlights. [MUSIC] Once we are done with the core we're
going to add the petals. Again, we're going to use different water and
color ratio for the color that we're using
on each of our petals. [MUSIC] Now that we're done
with the petals, we're going to add sepia
on some edge of our core, to add a little bit of details. [MUSIC] Time to add our leaves so again, we are going to create raw
looking leaves by creating the double stroke of thick
and thin strokes and then add them random thin
lines on our leaves. [MUSIC] That is it on
painting strawflower. Let's now go to our next
straight flower element [MUSIC].
10. Painting Hydrangea: [MUSIC] We are down to our last dried flower element before we proceed on
our 7 Day challenge. We have here hydrangea. So as you can see, this one that I have here is such a beautiful brown
colored hydrangea and for hydrangea, I always use my filbert brush
or the oval crescent brush because it has a
nice overall depth that mimics the
petals of hydrangea. As I have mentioned, our brush already
got its oval shape. So what we're going
to do right now is just stamp it on our paper. So I'll just do
something like this. Based on our example earlier
on our real-life hydrangea, some of the petals are
not really visible. So that's the reason why I
am adding a little bit of small oval-shaped
strokes on our painting. In painting loose hydrangea, what do we need to
do is just mimic the whole image of hydrangea. We don't need to copy each of the petals and exactly
paint everything. We just need to make
the whole painting look like a big bunch of flower. So after creating your petals, what we're going to do is get our size two round
brush and add the stem of our flower [MUSIC]. So I'm going to create
another one again, and this time I'm
going to use mocha. So same procedure, I am twisting my
brush a little on some petals to create an
effect that there are some petals that are in the middle part and not so
visible on our aerial view. I am also using
different water in coloration here to give
an effect that there are some petals that
are in front for sure more visible and some
are at the back part. Painting hydrangea is very easy and I'm sure
you will enjoy it. If you don't have a filbert brush or an
oval crescent brush, you may use your round brush, but of course, the tip of a round brush it's
a little bit pointy so there will be a little bit of difference between our strokes. As you can see here on
our actual hydrangea, there's a little
bit of the detail on each of our small flower, which is somehow
in the core part. So we are also going to translate that into
painting and we'll do that by getting our size
two round brush and adding some small dots in the middle
of our hydrangea flowers. Just create small
dots like this. I am using a
concentrated version of my Van **** brown here, and I'm just adding it on some of the flowers [MUSIC]. To finalize our hydrangea, we're going to add this stem that connects all our petals. [MUSIC]. That is it on
painting hydrangea. Finally we were able to complete all our dried flower elements. So I'm sure you
guys are ready and excited to proceed
to the challenge. But before that, I want to introduce to you some tips first in how to create a habit of painting so that when
we start our challenge, you will be able to continue
and enjoy the process. So I'll see you on
our next topic.
11. Building a Habit of Painting: Habits are things that you do
without thinking about it. It's a routine or a behavior
done on a regular basis. Building a habit of painting
could be difficult, especially if you're doing so
much things aside from art. But once you get to form
the habit of painting, even for just 15 minutes a day, the reward could be enormous. Before we begin our challenge, here are some tips
that could help you build the habit of
painting easier. Tip number 1, set a dedicated space. Whether it's your art table, your kitchen table,
your dining table, or even your floor, make sure you have a dedicated
space to create art. Having a consistent
area where you create, will make it easy for
you to start daily. You wouldn't have to think every day where will you
set your stuff? Where will you start
creating and so much more? Second tip is set
a range of time. Pick time where you
feel most inspired. It is better if you will
choose two ranges of time. It could be one in the
morning and one in the afternoon or one in the afternoon and
one in the evening. The reason why I want you
to pick two ranges is that if something came up on
your first range of time, you still have another one left. Remember, consistency
is very important, especially in the
first few days. Make sure you'll
never miss a session. But what if you did miss one? Here's a rule I learned from the book I read 'Atomic Habits'. Never miss twice. For whatever reason you miss
one day of your session, Be sure not to miss
the next one again. Because it is when the
snowball effect will begin. Again, never miss twice. The third tip that
I have for you is prepare your supplies in
advance and clean it after. If you're blessed enough to have a table dedicated for art, it would be best to lay out all your
suppliers in advance. If you don't have a
specific table or studio, you can gather all your
essential supplies in a bag, so it will be easier
for you to lay them out when you're about
to start painting. Also, don't forget to clean your supplies right
after you use them. Clean your brushes to
unnecessary papers, clean your cup and
plate if you need to. This will help you prepare for tomorrow's session and we will set your modes on
the Start mode. Imagine if your supplies are not yet clean when you're
about to start again, your time and your
enthusiasm will be affected. Make sure to reset daily. Four depth that I have for
you is inspire yourself. Whenever you're not painting, whether you're having
your lunch break or making yourself fall asleep, it is better if you use those
time to inspire yourself, gather inspiration
from Pinterest, check out other artists'
works on Instagram, or maybe watch some
Skillshare classes. Through this, your mood
will be uplifted and you'll be excited to start
your session the next day. As I have mentioned, on the next seven days, we will paint the seventh, youthful yet easy composition to help you build a healthy
habit of painting daily. During those seven days, I hope you'll get to apply
not only the exercises that we did earlier
when it comes to painting dried flowers, but also those four
tips that I've mentioned in building
a habit of painting. Let's go and start our
seven-day challenge.
12. Day 1: Golden Brown Roses: [MUSIC] Welcome to the day 1
of our seven day challenge. I know you guys are very
much excited, and so am I. For our day 1 of painting, we are going to paint this beautiful roses and
hydrangea painting beside me. I framed it, and you guys
can frame yours too. In painting this one, we are going to use brown ocher, mocha, Petersburg ocher, and Van **** brown. If you don't have those colors, I can share with you the
recipe in mixing them. All you have to do is upload
at least one project, and as a reward, I will send with
you the PDF copy of the color recipe
for our class today. For the materials, we
will be using the usuals, the silver Black Velvet
size 2 and size 8, the Silver Silk oval
crescent brush in size 3/4, and my Golden Natural
ultra round brush. Then for the paper, it's the same thing, the Baohong Academy
watercolor paper. Now, let's go and start
our day 1 of challenge. Let's start with the first rose. We are going to create
the core of our rose. I'm using my size
2 round brush here and my brown ocher color. Now, once you're satisfied
with the size of your core, just dissolve the last
edge with clean water, and then change your
brush to a bigger one. Basically, we'll just
apply everything that we've learned on our
pre-challenge day. Remember how we paint
the golden rose there? That's the same thing
that we'll apply here. Now, let's begin
our second rose. Same thing, I am using my size 2 round brush
for the core of my rose. Now, I switched
to a bigger brush for the bigger
petals of my rose. Now, let's begin our third rose. This time, we're going
to paint a rose bud. The thing that you have to
remember here is to make sure that you're not
occupying all the space. Since we're painting in
a small size of paper, it is very important to
leave a little bit of space for the fillers and other
elements of our composition. Now, let's begin our
first ever pampas. I'm using my size 2
round brush here, and I'm just applying a
very light mixture of my Van **** brown as the base
layer off my first pampas. We'll do the same process
for our second pampas. We'll apply a very light mixture of Van **** brown first, and then after that, we'll put up a little bit of more concentrated version of
Van **** brown on top of it. Third pampas will be on the lower left part
of our composition. Same procedure, just
create the base layer, and then add a little bit of more concentrated
mixture on top of it. Since the base layer of
our rose is already dry, what we're going
to do right now is add a lot of details
on top of it. I picked a concentrated
mixture of my brown ocher and just
place strokes like this, and then I'm going
to dissolve it with clean water to
soften the edge. Apply the same process
on our other roses. Put a concentrated version of the color that you're using, and then blend it by loading
your brush with water. Now, we're going to
add our hydrangea. I got my oval crescent brush, and I'm stamping it on the lower left part
of my composition. I am using different
water and color ratio for each of the petals, and we're applying
all the principles that we have studied earlier. Remember, you don't
have to create a very straightforward
type of hydrangea. You just need to create
a loose version of it, and create an
illusion that there are petals at the back part, there are petals that are flat, there are petals that
are not very visible on the viewer's point of view. Just keep on painting, keep on enjoying the process. Add different water
and color ratio for the color that you're using. Now, we'll create
the version 2 pampas that we have studied. In here, I am using Van **** brown in a
very light mixture, and then later on, I'll add a more concentrated
mixture of Van **** brown. We'll add another
pampas on this area. Same procedure, just create those check marks that
we have studied earlier. I'll be adding the
third pampas here going to the right direction. Same procedure, just apply
a very light mixture, and then later on, add a more concentrated mixture. To add more detail, we are going to add some
dry twigs on some areas. In here, we need to mix different water and
color ratio again. As you can see, I'm
using Van **** brown in light and moderate and
concentrated versions. You don't have to copy
everything that I am doing. You can add your
own personal style in painting this composition. You can use different colors, and you can add more
details if you want to. We're almost done
with the composition. What we're going
to do now is just make our composition more balanced by adding a
little bit more details on the empty spaces. Like in this part, I think it's more open, so I'll be adding more
hydrangea in this area. Final detail is to add
details on our hydrangea, so I got my very concentrated
mixture of mocha, and I'm just adding the
core of my hydrangea. Now, that is it for
our day 1 challenge. I hope you guys were
able to follow along, and I'm so excited to see
your artwork for today, so I hope you can upload it on the project section
of this class. I'll see you for
our second session.
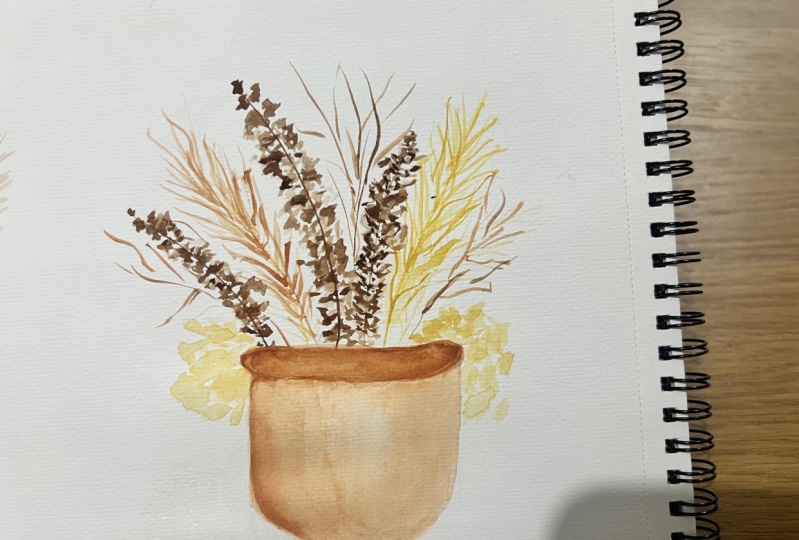
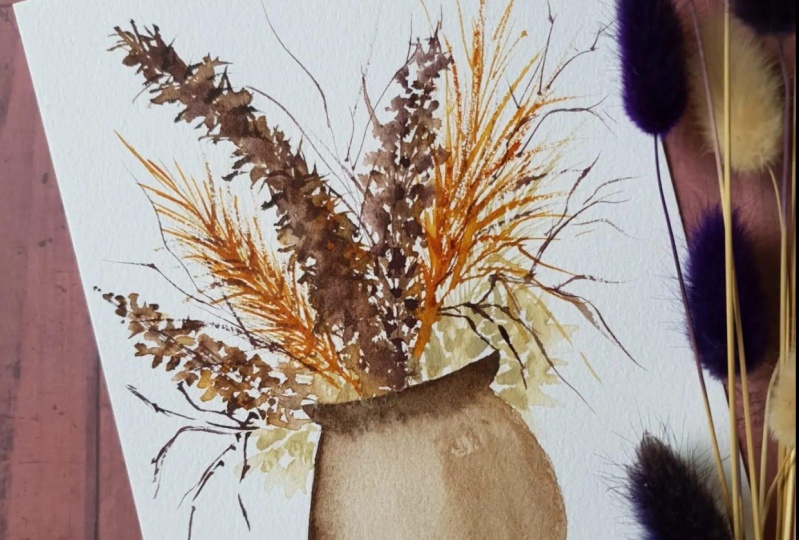
13. Day 2: Dried Flowers on a Vase: [MUSIC] Welcome to the day 2
of our seven-day challenge. For today, we are going to paint this beautiful
composition, which is striped
pampas in a jar. Now for this one, I am going to use the
usual brushes that we have used earlier
and for the color, I have here my Van **** brown, brown ocher, and
Petersburg ocher. Now, if you don't have
those colors again, just upload any of our class
projects and I'll send you the PDF copy of the color
recipe that I have created. Let's go and start painting
our second project. The first thing that we
need to do is to draw our guide for the
jar or our vase. I have here my regular pencil and I'm drawing the
guide for my vase. Then after this one, I'm going to erase
a little bit of this so that it won't be very visible when I paint
it over with watercolor. Just draw the usual jar and if you need to erase or
redo something, just do it. Make sure that the jar or
the vase is in the center of your paper just so it will look balanced later on
once we paint it over. Now that we have
our guide already, I'm going to paint it over with a very light mixture
of Van **** brown. This is the first
layer of our vase. While the first
layer is still dry, I'm going to add a more
concentrated mixture of Van **** brown and I'm going to add
it on the left side only. This will serve as the
shadow for our vase. Now that we're done
with the second layer, I'm going to get a more
concentrated mixture and then this time, I'm going to put it on
the collar of my vase. This will be the shadow of
the top part of my vase. Let's go and create
our first pampas. I'm using my size 2
round brush here and for the color I am using
Petersburg ocher. I'm doing the first pampas
that we have studied earlier, the one with thin
strokes around it. We'll do another
one, same color, Petersburg ocher, and I'll be using the same brush
that I used earlier. For our next element
we are going to do the second version of pampas
that we have studied, the one with small check marks. In here I am using
Van **** brown. Again, for the first layer, we will be using a very
light mixture and then later on we will add a more
concentrated mixture. Let's add another element. We're going to do the
same thing as the one we did on our third element, the pampas version 2. I'll be using the same color, which is Van **** brown. We're going to dab some hydrangea fillers
around our base. Using my Petersburg ocher
and size two round brush, I'm going to dab a little
bit of color on my vase. Here I'm using different
water and color ratio for my Petersburg ocher and I'm going to add
it on both sides. Remember, the third version of pampas we're going
to use that now. Using our brown ocher, I am going to add
the strokes that we practiced earlier for the
third version of pampas. Still in here I am using a different watercolor
ratio for my brown ocher. I'm going to add
another big pampas on this side to balance
our composition. I chose to use the
version 2 of our pampas, and later on I'll dab the more concentrated
shade of Van **** brown. Time to add deeper colors
on our composition. I picked a darker shade
of Van **** brown and I'm creating our third
version of pampas. I also noticed that our hydrangea is quite
few on this side, so I'll be adding more dabs
of Petersburg ocher here. Our composition is
almost complete, so to make it more full, I'm adding some dried twigs
on some areas just to add a little bit of color and also to make
it look more wild. We're almost done, so I'll
just add a darker shade of brown on our vase to
add some details. If this happens to you as well, if you think that some
color spilled a little, what you can do is lift it off. Just get some tissue and
then dab it on the area that you don't want the color to go down, and then lift it. Now, that is it for our
second class project. I hope you guys
were able to follow along and I'm very excited to see how you guys created
our second-day project. Please upload it on the
project section of this class. Again, see you tomorrow
for our third session.
14. Day 3: Hand-Held Bouquet: We're down to the third day of our
seven-day painting challenge. I'm so happy to see your
projects on the project section. For our third project, we're going to paint this hand bouquet with
roses and pampas. For this particular project, we are going to use the
colors mocha, Van **** brown, brown ocher, green earth, and a little bit of
Petersburg ocher. Now let's go and paint
our third-day project. We'll begin our composition
by painting our main subject, which are the rosebuds. I am using mocha for the color, and for the brush, I am using the ultra
round brush in size 10. After painting the core, I am using my size
8 round brush to loosen the last few
strokes that I made. You will now create the
body of a rose bud. Painting a rose bud may
seem intimidating at first, but once you get the whole shape of your
rose bud, it's easier. This one is actually easier
compared to a flat rose. You just need to
practice and repeat the process to master it. We are done with
our first rose bud. Now let's go to the second
one and I'm going to put it on the upper right
side of our paper. We are going to add
our third rose bud in the middle of the first
two that we have created. Again, this is just your guide. If you think that some of your rose bud
should be placed on other direction or in
other places, that's okay. It's your call,
but make sure that the overall look of your
composition is balanced. Now that the first layer of my two rose buds
are already dry, I am just going to add
some more details on it. Those are our three
main subjects. Now let's add more details. This time, I want to
add the fillers first. I am going to switch my brush to my oval crescent brush
and I'm going to add some hydrangea on this part. Just like what we have studied, we're just stamping our brush and creating the
shape of hydrangea. The next thing that we're
going to create is ruscus. I'm going to put some ruscus using Petersburg
ocher on this area. For this one, I am using my
size 10 ultra round brush. For our ruscus, we will be using
different watercolor in ratio for our
Petersburg ocher. Again, the color that I'm
using is just optional. If you want to switch it to Van **** brown or brown ocher or yellow ocher,
that's totally fine. As long as the whole look of your composition
is still balanced. Now, time to add some palm leaf. I'll be putting
two palm leaves on the upper right side
of my composition. I'll be creating a
medium-sized palm leaf. If you accidentally
created a big palm leaf, you don't need to
add another one. It's okay if you're
just putting one, you just need to add a
little bit more filler or anything that will make your
composition more balanced. It's optional if you want to add two or just one palm leaf. I'm going to create my
second palm leaf here. I am using a very light
mixture of Van **** brown. For the brush, I am using
my round brush in size 8. The next thing that
we're going to paint are two pampas on this area. I am using my size
2 round brush, and for the color, I'm
using brown ocher. This is the first version of
pampas that we have studied. Again, we're just going to
create one main long stroke. Then we're going
to surround that with smaller strokes around it. For the colors, we will be using different water and color
ratio for our brown ocher. You can also use Van ****
brown here if you want a little bit of difference
between our creation. But again, it's up to you. Now, time to create the ribbon. I am using the color caput
mortuum for this one. If you don't have this color, you can just use red and mix it with a little
bit of Van **** brown. For this one, I am using my
round brush in size 8 and I'm just creating strokes
like this, soft strokes, and I'm mixing different
water and color ratio to give an effect that there
are highlights, and there are some dark areas, and that the ribbon is
flowing nicely and naturally. Now to make our bouquet composition
look more balanced, I'll be adding some
hydrangea again here. If you don't like
to add hydrangea, you can actually add Ruscus. If your composition
looks full already, you can just skip this part. Let's now add the
stems of our flowers. I am using green earth in different water and
color ratio here. You can use any shade of green or you can actually
use brown, if you want to. Just create strokes like this. You can actually add
a little bit of dot to represent the
thorns of our roses. Now, I'll be adding
a little bit of detail on the ribbon. I got the concentrated
mixture of caput mortuum, which is the color
that I'm using, and I'm just adding
details like this to represent some depth and a little bit of
fold on my ribbon. Now, I'll be adding some
details on my hydrangea. I got a concentrated
mixture of Van **** brown, and I'm using my
ultra round brush, which is pointy, that's why I'm using it. But if you have detail brush, you can also use that. I'm just adding dots like this to create the core
of my hydrangea. Our composition is
coming to life already, so I'll be adding more pampas on this area just to give
more color on this part. To make it more balanced, I'll also add some Ruscus here, and I'm using
Petersburg Ochre also. It's time to add the last
detail for our composition. I got my Petersburg Ochre
mixed with Van **** brown, and I'll be adding the
folds of our palm leaf. I will now add a little bit
of detail and darker folds, so I got Van **** brown and
I'm adding this detail. If you accidentally
ruin your creation, you can just wet your brush with clean water
and lift the color. Don't be afraid to add
darker shade of brown because a real live palm leaf, as you can see on
our example here, really has darker
shades of folds. Let's do the second palm leaf. We are done. Now, that is it for our
third day class project. I hope you guys
were able to follow along and by this time, I'm sure you're slowly building the habit
of painting daily. Again, I'm excited to see your project on the project
section of this class, so I hope you can
upload it there. Again, see you on the
fourth day of our session.
15. Day 4: Dried Flowers Wreath: [MUSIC] Hello, so welcome to
the fourth day of our seven-day class challenge. For the fourth day, we are going to paint
this beautiful wreath made up of pampas, a little bit of twigs, and a little bit of hydrangea. For this particular project, we're going to use the
colors Van **** brown, brown ocher, and gray titanium. Let's go and start painting
our dried flowers wreath. We will start our wreath
by creating our guides. So you can use anything that is circular to create your guide. I will erase the guide that I created so it won't be very
visible when I paint it over. For our first element, we are going to paint the first version of pampas
that we have studied. I am using brown
ocher in a very, very light mixture, and for the brush, I'm using my size 10 ultra round brush. So for the first set of
pampas that we will paint, we're going to create the
background of a wreath. We will complete the circle until we go back to
where we started. Then after that,
we're going to add the next set of element
that we are going to paint. I find it easier to paint
wreaths when I turn my paper, so you can do the same. We're almost done
with the first layer. As you can see, the layer
that we have created is very, very light, but don't worry because this is just
the base layer. What we're going to do next
is add the version 2 pampas. I am using Van ****
brown and for the brush, I am using my size
2 round brush. Let's paint the base layer using a very light mixture
of Van **** brown, and then later on we will add a more concentrated mixture. Same thing, we will
cover the whole circle, but this time what I want you
to do is leave a little bit of space between the pampas
that you are creating. Here's my second pampas. As you can see, I left
a little bit of space, and that is because
I will be inserting something in the middle of
these two pampas later on. So I want you guys
to do the same, so we can add more dried
flower elements on the wreath. For our third element, we're going to create
the version 3 pampas. I am using brown ocher for
my color and for the brush, I am using ultra round size 10. I am combining different
water and color ratio for each of the strokes that I'm creating just to add
interest in detail on my pampas. I want you guys to do the same. Also, if you don't
have brown ocher, you can switch it to yellow
ocher or orangey shade. It's up to you. The main thing that you should remember is that the whole color
or the palette that you are creating should
complement with each other. If you're not sure if the
color that you will be putting will match your
overall color palette, then just stick to
what we're doing. But if you want to experiment, feel free to do so. It's part of the journey and
it will teach you something. We are now down to my favorite
part which is dried twigs. I am using my liner brush in
size 1 and for the color, I am using Van **** brown in different
water and color ratio. Basically, we'll just add the pops of dried twigs
all over a wreath, but please don't
overdo this process. As you can see, our wreath
is already coming to life. Actually, you can stop here. But if you want to
add more details, just continue because we
will add more elements. Now we are down to
our next element, and this time we are going
to add the version 1 pampas. But for this one, I am using Petersburg ocher. As you can see, I'm just creating smaller
version of the pampas and I want you guys to
place this type of element on areas
that you feel empty. I know some of you may have created a wreath that
is not very similar to mine and some of the elements
that we're creating were not placed on the same
areas as where I place it, and that's totally fine. I want you guys to express
your creativity here, add pops of details
that I'm not doing. I want to see how you guys will insert your own version
on this wreath. So feel free to be creative and feel free to add details
that you want to add. Remember our hydrangea? Let's pretend that
some of the petals of our hydrangea are
falling on our wreath. I want you to stamp your oval crescent brush around your wreath and
add these details. So it will look as if there are some falling hydrangea
petals around our wreath. I will add another shade
of hydrangea petals. This time I am using
gray titanium. Similar process will happen, so we'll just stamp our
brush around our wreath. I am using different
water and color ratio for my gray titanium just to add interest in
detail on my painting. Feel free to twist and
turn your brush so it will create different shapes
and sizes of strokes. We are almost done, but as you can see here, this area are not balanced. What I'm going to do right
now is add more detail on the upper part of my wreath just to
balance everything out. If you think that some areas of your wreath doesn't
look balanced as well, feel free to add elements that you think will
fit in that area. Also, what I can recommend
you is to take a photo of your current wreath
painting and check it on your phone if
everything looks balanced. Sometimes you will see
it clearly when you look at it on your phone than when
you look at it in person. So that's the trick
that I'm always using. Even in painting bouquets
or any big composition, I always use my phone to
check the whole composition, if everything looks balanced and everything looks organized. Our wreath is finally done. Now, that is it for the day 4 of our seven-day challenge. Congratulations if you
have reached this point. I'm so excited to see your
work for today's challenge, so please upload it on the
project section of our class. I'll see you on the fifth
session of our challenge.
16. Day 5: Straw Flower Mini Bouquet: [MUSIC] Welcome to the Day 5
of our seven-day challenge. For today's artwork, we're going to focus on
this strawflower. For this particular artwork, we're going to use
Petersburg Ocher, gray titanium, Van **** Brown, green earth, and a
little bit of Sepia. Let's go and start painting
our strawflower composition. We'll begin our composition by creating the core
of our strawflower. I am using the oval crescent
brush and for the color, I am using my gray titanium. After creating the circular
core using our round brush, we are now going to
create our petals. For the color, I am
using Petersburg Ocher, and I'm just creating thin and thick strokes for
the petals of my strawflower. Please create different
water and color ratio for each of your petals
so there will be variation and there will be
an effect that there are some petals at the back part and there are some
petals in front. [MUSIC] I am now adding some dark mixture of my Petersburg Ocher just to add a little bit of
shadow for my petals. [MUSIC] To add details on my core, I got my Sepia and my
Size 2 round brush, and I am adding dots of
Sepia around my core. I'll also be adding some dots of concentrated gray titanium on my core just to
give more details. Now let's proceed with
the second strawflower. I am using again my
oval crescent brush. As you can see, I am leaving a little bit of white spaces. This is to represent some
highlights for my core. I switch to my round brush and create petals for
our strawflower. Again, please use different water and color ratio for each of your petals to give an effect that
there are some petals at the back part and there
are some petals in front. As you can see on the
strawflower which is laid down on our table, you can see that the petals of our strawflower example
here has different colors. That is what we are
achieving as well. [MUSIC] I'll be adding more
details on my course. I got the concentrated
mixture of my gray titanium. I'm just adding dots like this. As you can see, my core
is not clean and that is okay because we want to achieve natural look for
our strawflower. I'm now adding a little
bit of Sepia dots around my core [MUSIC]. Time to add some leaves, so I got my round
brush in Size 8. For the colors, I am
using green earth. I'm just adding a natural look of leaves on my strawflowers. This is what we have studied
on our pre-challenge day. As you can see here, I am using different
water and color ratio for each of the leaves
that I'm creating. This is to give an
effect that there are some leaves in front and
some leaves at the back. I also encourage you to
add random stain strokes or random strokes like
this on your leaves just to add some details and
to give some illusion that some leaves are
folded or curled. I'll be adding more
Sepia dots here because I find it a little
bit more empty. You can do the same as well. I'm going to add
some dried twigs. But this time instead of
using Van **** Brown, I am using my round
brush in size 2 and I'm using my green earth. The next step is to
add some hydrangea. I got my gray titanium and my oval crescent brush
and I'm applying what we have learned on
our pre-challenge day. I am just stamping my brush here and I'm twisting it
a little to create different shapes and sizes
for the hydrangea petals. [MUSIC] To make our composition more balanced, I'll be adding some
more hydrangea on the top part of
our composition. [MUSIC] To balance our composition, we'll be adding some
more leaves here. [MUSIC] We're now down to my favorite part
which is twigs. I got my liner brush. This time I'll be using green earth mixed with
a little bit of Sepia. I'll be adding some
dried twigs around my composition just to give some interest and
details as well. Using Van **** Brown, I'll connect my hydrangea
and I'll also add some small leaves to the bottom part and around it
just to give some details. These small leaves actually
looks like Ruscus. It's also a dried
flower element. [MUSIC] Now using
Van **** Brown, again I'll be adding the
core of my hydrangea. [MUSIC] I'll also use Van **** Brown for the leaves of my hydrogen here. [MUSIC] Our composition is almost done so what we're
going to do on this part is add some details that will
balance everything out. I got a very light mixture of green earth and using
my liner brush, I'm adding some more twigs. But again, since I'm
using light mixture, this is just an added effect. This won't cover the rest of the details that we
have created earlier. [MUSIC] I find that the upper part of my
composition is a little empty. What I'm going to do now is add bandpass using my green earth. I'm using my Size 2 round brush and I'm just
creating the Version 1 of our bandpass that we have studied on our
pre-challenge day. I'll be adding too. This portion is optional. If your composition
looks balanced already, you don't need to
add bandpass at the top part of your
composition [MUSIC]. I'm adding last few strokes and we are done. Now that is it for the
Day 5 of our challenge. We are almost done
with our challenge. I hope you guys didn't
miss any and if you did, you can catch up and
paint two in a row. As usual, I want to
see your work so I can comment and give a little bit of feedback on your projects. Please upload it on the
project section of this class. See you on the Day 6 of
our seven-day challenge.
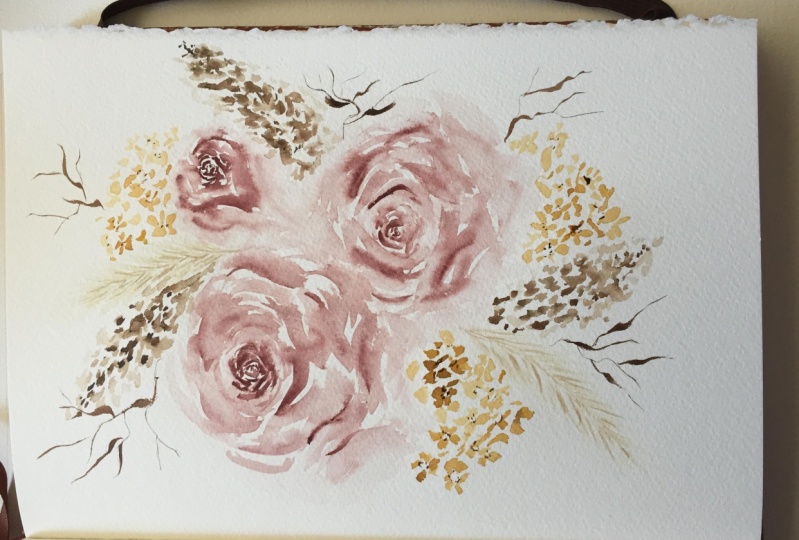
17. Day 6: Rustic Roses: [MUSIC] Welcome to the basics of our seven-day
painting challenge. For today's challenge,
we are going to paint this beautiful
rose composition. It has three roses, two in Petersburg ocher, and one in brown ocher. For the greens, I
usually use here the green earth and
the undersea green. Now let's go ahead
and start painting our composition for today. We will start the composition by creating our first rose, I'm using brown ocher
for my color and for my brush I'm using my size
2 silver black velvet. I'm now done with my course, so I switched my brush to a
bigger size which is size 8. Basically we'll just apply everything that we have learned on the pre-challenge day when
it comes to painting roses. I'm going to add my color
which is green earth mixed with a little bit of shadow green and undersea green. In my second rose, I'm using Petersburg ocher
and same thing will happen, we will use our
size 2 round brush for the core and
then we'll switch to a bigger size of brush which is size 8 for the body of our rose. My rose this time is facing on the right side
of my composition, and in here we just need to
tweak our strokes a little because we need to
make our rose look as if it's facing one direction
and not just flat. For the leaves of
my second rose, I mix undersea green
and Van **** brown. I'm going to add a little
bit of details on my rose. I got a concentrated mixture
of Petersburg ocher and I'm adding details on the
color of my petals, so this is how I do it because as you can see on the
sample rose here, there are some shadows on the edge of the
color of our roses, so we have to copy that. I switched my brush to size 4 round brush and I got
concentrated mixture of green, and I'm adding some leaves beside the first layer of leaves that I've
created earlier. The last rose which is the last subject that
we're going to create. This one is facing downward, so I'm going to use the rose that I have here
as my inspiration, and again, the same
process will apply, we're just going to create
the core first and then later on we will be
adding some big petals. While my third
rose is still wet, I'll be adding leaves beside it just so it
will bleed a little. I'm going to turn my paper
again and paint normally. On this part we are going
to start add details that will make our composition
more balanced. For this part, I'm using my liner brush and I'll
be adding some twigs, so this is a mixture of green
earth and Van **** brown. I'll be adding more
leaves to make my composition look
more balanced, but this time instead of creating concentrated
color for my leaves, I'm using very light mixture of beam because I want
to add an effect that the leaves that
I'm adding right now are leaves for the back
part of my composition. Now, that is it for the Day 6 of our painting challenge, I hope you guys are
able to follow along. As usual, please upload your class project on
the project section of this class so that I can give a little bit of
feedback. [MUSIC]
18. Day 7: Palm Leaf & Rose Bouquet: Welcome to the day 7 of our seven-day
painting challenge. I'm so happy and
at the same time sad because our challenge
is about to end already, but I know that through this challenge you
guys were able to build a habit of painting
and this will not end here. For today's challenge,
our last challenge, we are going to paint this huge composition
made up of roses, palm leaves, pampas, twigs, and a little
bit of rascus. For this painting, we are
going to use Van **** Brown, Petersburg Ocher,
and Green Earth. Let's go and start painting our last project
for this challenge. We begin our composition by
creating our first subject, which is the white rose. I am using size two
round brush for this one and for the color
I'm using Petersburg Ocher. We will just apply
everything that we've learned on our free
challenge day. I'm going to switch my
brush to a bigger one, so this one is size 8, and I'll create bigger
C strokes for my rose. Now it's time to add
our second rose, so we'll create the core by
creating small C strokes. Now I will add bigger petals, so I switched my
brush to a bigger one and continue creating C strokes. I will add more depth to my rose by getting a more
concentrated mixture of Petersburg Ocher and
I'm adding it on the shadows of my petals. I'll add another one here. This will create
depth to our rose. Now it's time to
add our palm leaf. I'll add a big palm lip here. Then to make our
composition balanced, I'll also add a big palm leaf on the lower left side
of our composition. I decided to add
another palm leaf here just to add interest
on our composition, just so it won't
look like everything is equally done
from left to right. I will be adding more details for my rose just to add a little
bit more depth. Since we're creating
white roses, it is very important to
add a lot of shadows and a lot of depth just so it
won't look like a big blob. I'm going to add my
first pampas now. I'll be using the
second version of pampas for this one and
for the color, of course, I'll be using Van **** Brown
and later on I'll be adding a more concentrated version
of Van **** Brown as shadows. I'll be adding the same
pampas on this side. Time to add the details
of our palm leaves. I am using my ultra
round round brush as well as my size
2 round brush, and I'm creating the
details of our palm lea. As you can see here, I am mixing different water and coloration for the details. There will be dark folds and light folds
for our palm leaf. Now it's time to add a
surprise dried flower element, which is called bunny tails. In creating bunny tails, you just need to get
your detailed brush and create something
like a pampas. But for this one, you will just create
the fur on the head. You're not going to create the fur all throughout the stem, only on the top part. For this one, I am
actually using a very, very light mixture
of green earth. Let's add more bunny
tails on this area. Same procedure, just create
something like a pampas. But instead of creating the fur or the strands all
throughout the main stem, you'll just put it
on the top part. The next dried flower
element that we'll add is the version 3 pampas. I'll be using green
earth for this one. As you can see, I'm just creating the
version 3 of our pampas. I want you to experiment on
this one and be creative. Use different water
and color ratio. Of course, guys, using green
earth is just an option. If you want to use other color, if you want to use brown
ocher, that's totally fine. Now we will add our
pampas in version 1. For this one, I am using a very light mixture
of Van **** brown. I think this is a
composition wherein we can use everything that we have learned on the free
challenge day, and it is good challenge ender so you can recall everything
that we have learned. I hope you are enjoying
this process and if your composition
doesn't look the same as mine, that's
totally fine. Be creative and express your creativity on
this composition, add details that I'm not adding, as long as the whole look of your composition is balanced and it's complementing
each other. I'll add one more
pampas version 3 on this area just to make
the area look more balanced. Then after this one, I'd like to add twigs
around my composition. I have here my liner brush
and my Van **** brown, and I'll be adding twigs in different water and color ratio. I'll turn my paper to make
it easier for me to paint. This time, I will be
adding details for the two palm leaves at the
bottom of my composition. Remember, guys, you don't need to create straight lines for the
details of your palm leaf. It's okay to make it
a little bit curly. If your hands are shaking,
that's totally fine. Because as you can see here
on our actual palm leaf, the folds are not
straight as well. So don't be hard on yourself. Don't push yourself to create straight lines because
you're not required. I'll turn back my paper to its normal position so
that I can paint normally. This time I will be adding
Ruscus because I think that our composition is lacking
when it comes to fillers. I'll just fill the
empty spaces on my composition and
you can do the same. You don't really need
to add the Ruscus on the lower right side of your painting if your right
side is already full. Just add it on the
areas that you think is a little bit emptier
compared to the other areas. I think that the upper
left side is also empty, so I'll be adding
Ruscus here as well. Our composition is almost done. If you want to add more twigs on your composition,
that's totally fine. If you think that it
lacks darker shade, you can add more pampas. Our painting is finally done. That is it for the day 7
of our painting challenge. Again, I hope you can
upload your project on the project section so I can give a little bit of feedback.
19. Thank You + Giveaway: Thank you so much guys
for attending this class. Again, congratulations for completing the
seven-day challenge. I am very thankful that you spent your time with me
attending this class, learning from me, and
I'm so excited to see your progress on
your creative journey. If you want to
learn more from me, you can suggest the next
classes that I should create on the discussion
section of this class. If you want to leave a review
for this particular class, you can put it on the review
section of this class. I am very, very thankful for your support and I'm very much excited to create more classes and to share more of my
fashion with you guys. Before I forget, we
are going to have a giveaway for this
particular class. You can check the details on the class description and
I hope you guys can join. Before I leave, I hope
you guys can follow me on Instagram @jennyfloresart. Follow me on TikTok
@jennyfloresart. Thank you so much and I'll
see you on my next class. Bye. [MUSIC]
 Jenny Flores Art, Top Teacher | Watercolor & Gouache