Transcripts
1. Introduction: Your brush is your main weapon
when it comes to painting. It is very important
to get to know it so you can use it to
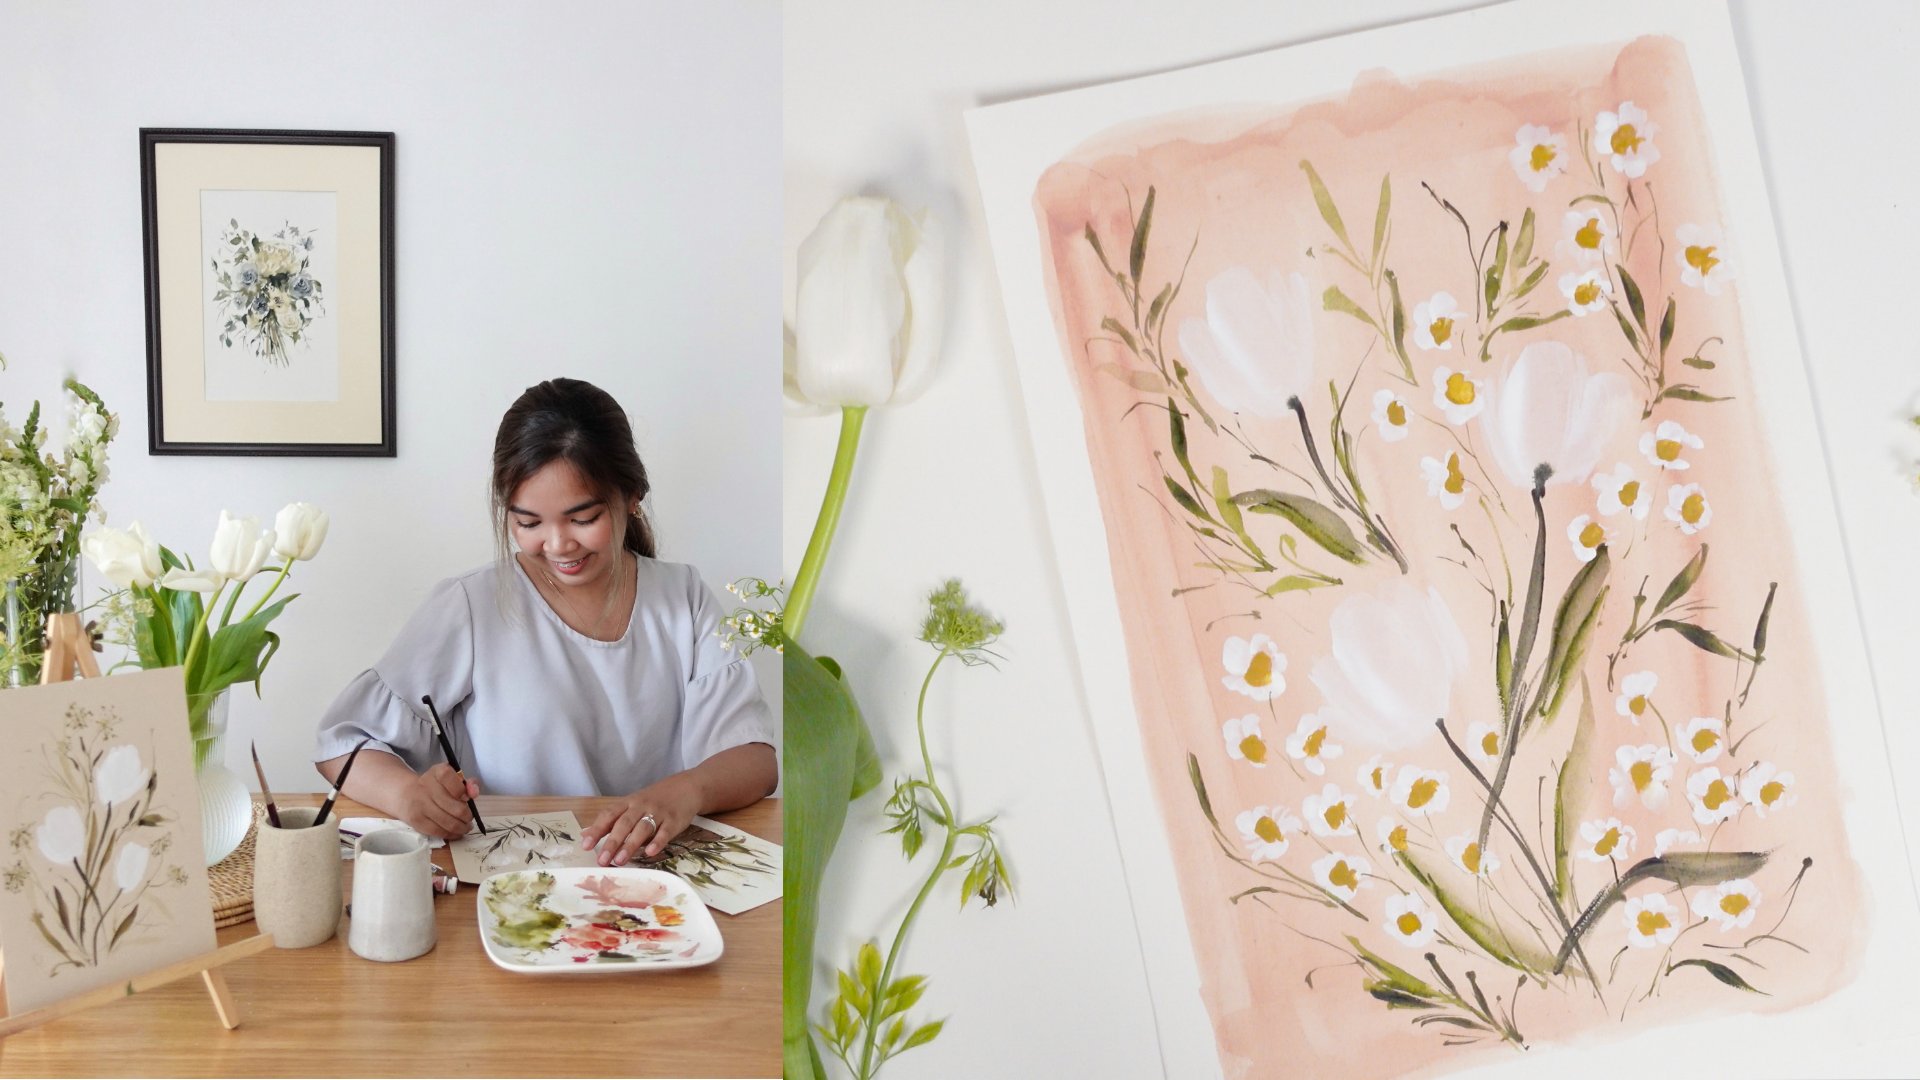
its full potential. Hi, everyone. My name
is Jenny Flores. I'm a creative coach and
artist from the Philippines. I teach painting, calligraphy, and creative entrepreneurship
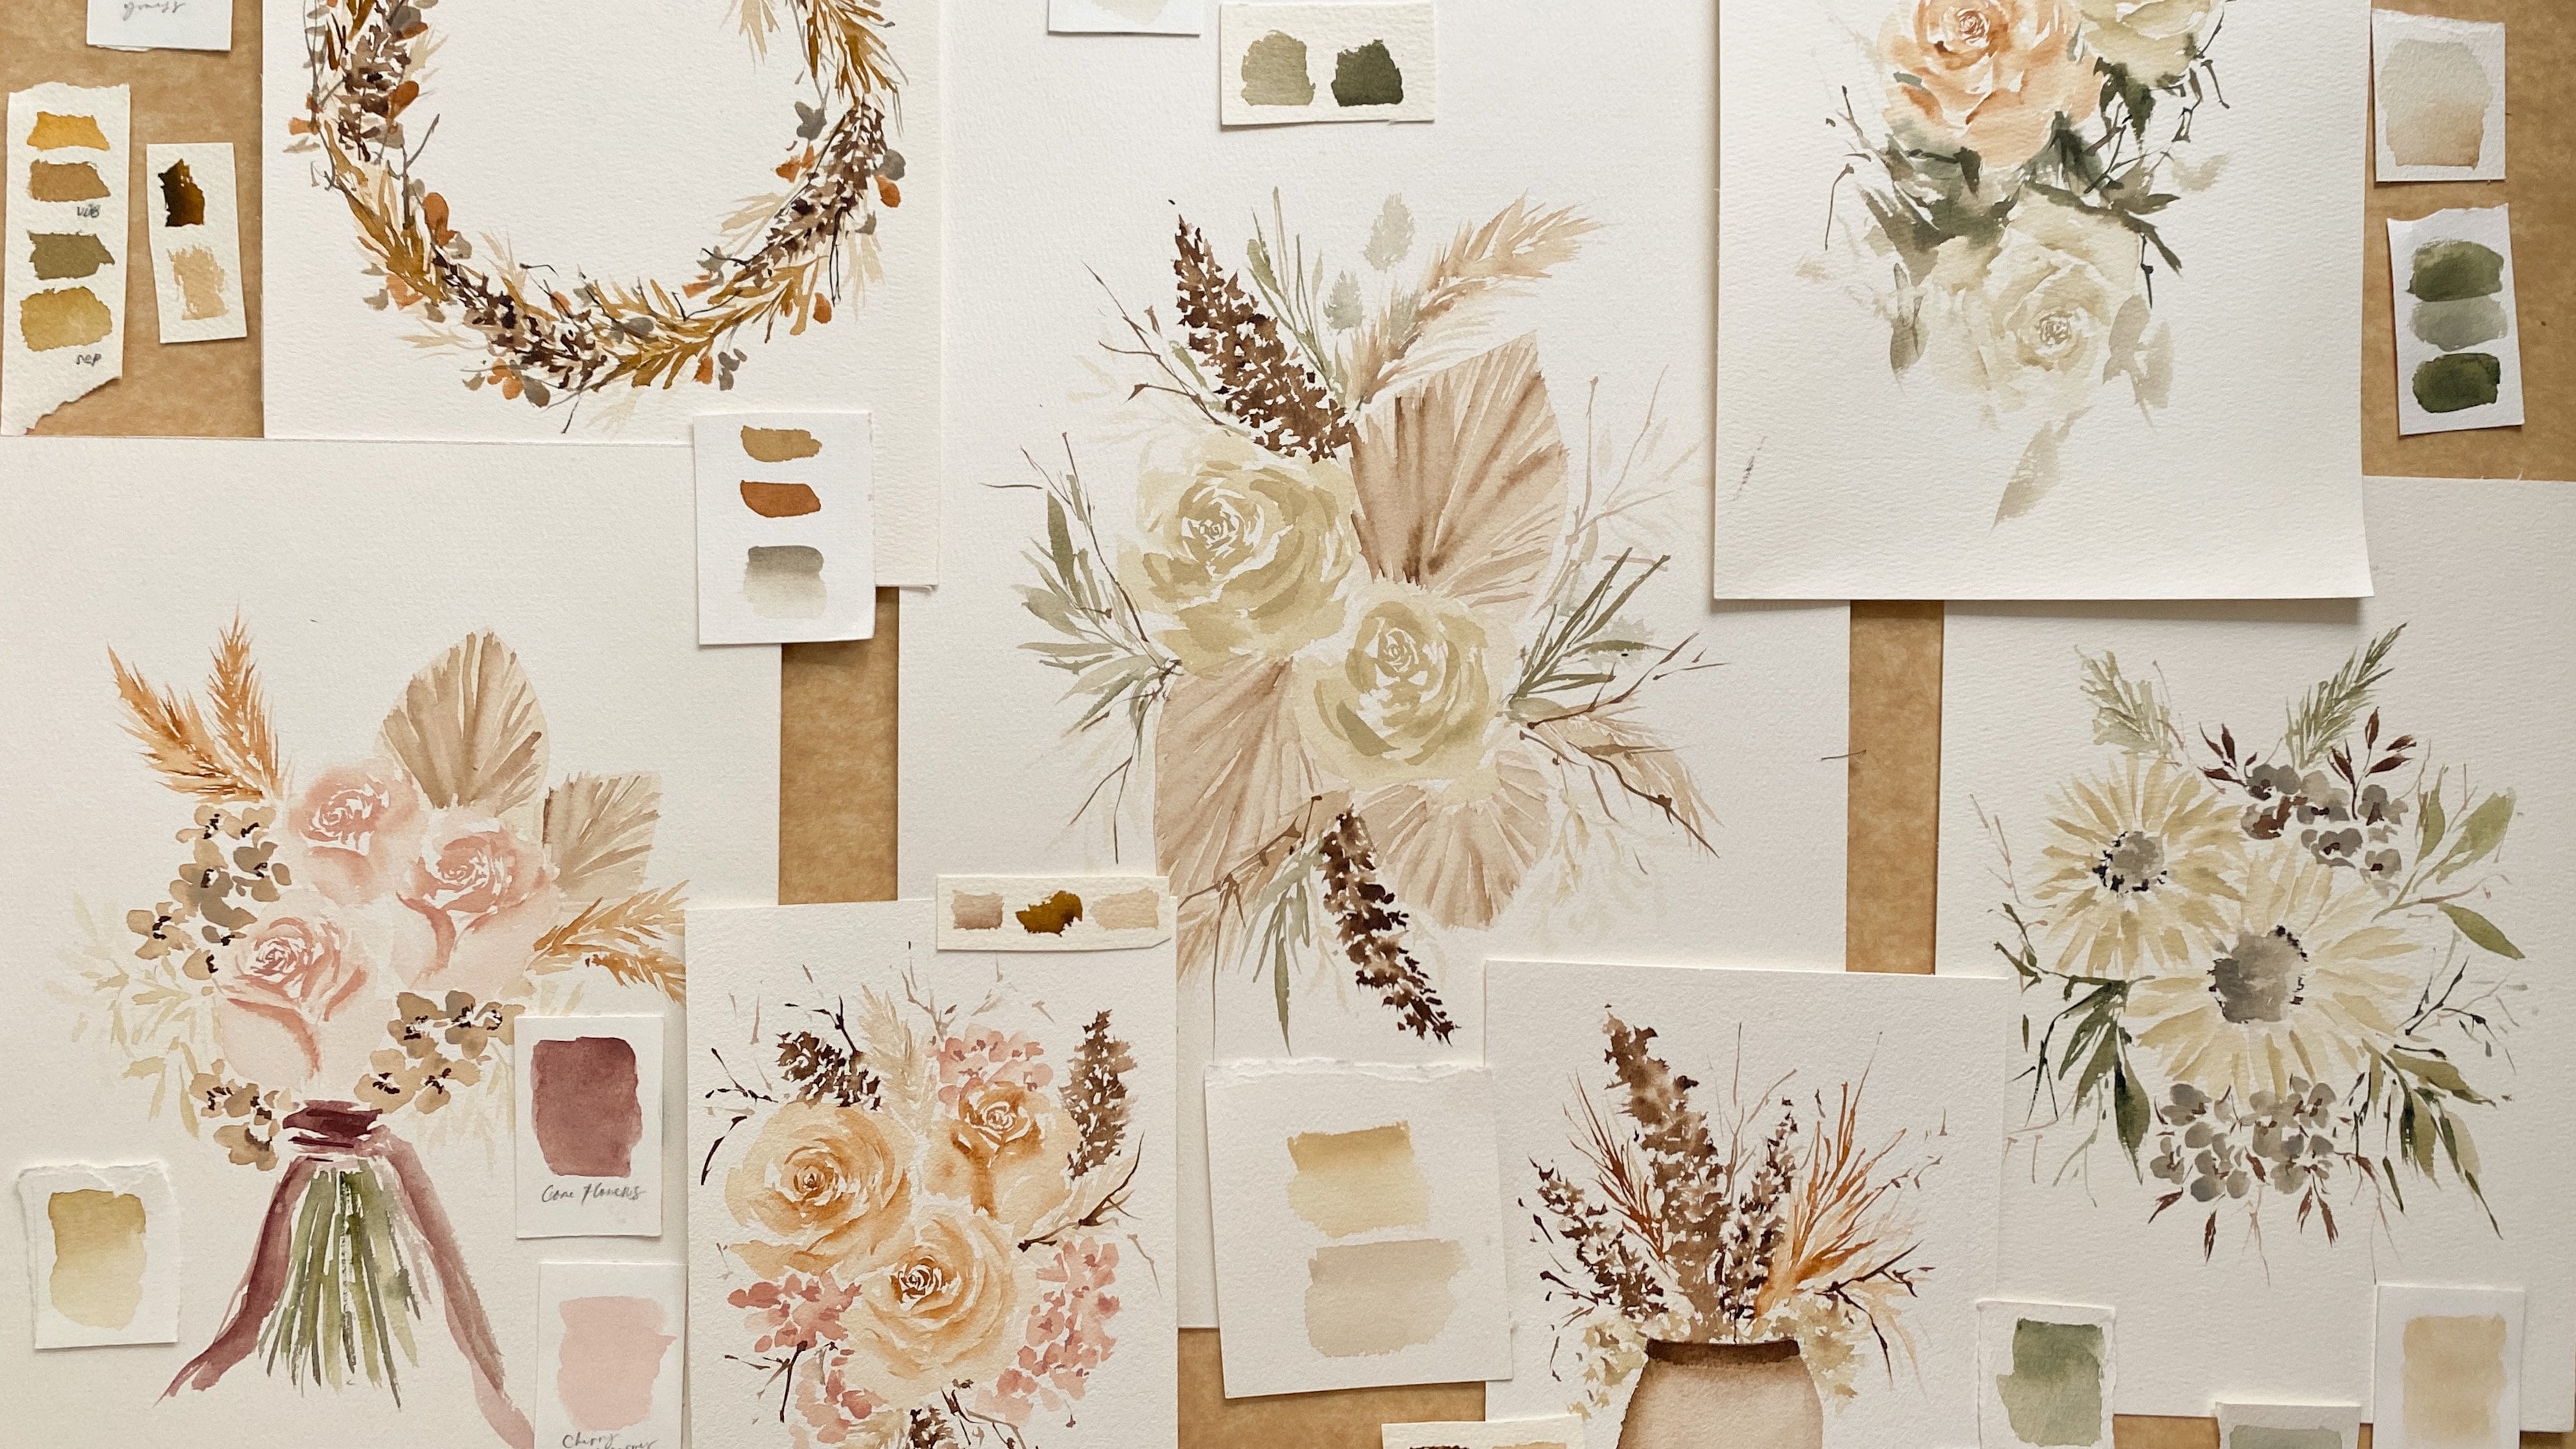
in-person and online. My work as an artist usually revolves around this
object of botanicals, bouquets, reeds, and different
floral arrangements. Today's class is
all about brushes. We're going to do
a basic overview of the different
types of brushes, starting from bristles, build, and most
importantly, shapes. In the next seven
days we will spend our time dragging, swirling, and dabbing around filbert, flat, cat's tongue,
and dagger brushes. Then we will use all
the strokes that we have discovered
and paint this five exquisite
floral compositions that I'm sure you will love. This class isn't about rules. It's all about exploring and enjoying every
stroke that you make so you can use your brushes
to their full potential. Whether you're a
beginner artist who wants to learn how
to paint or an experienced artist who wants to understand about what
your brush is capable of, you're very much
welcome in this class. I'm so excited to
explore with you. Now let's pick up our brushes
and let's get started.
2. Our Class Projects: For our class project, we will paint five beautiful
floral compositions. On each artwork,
we will highlight the different brushstrokes that a single unique brush
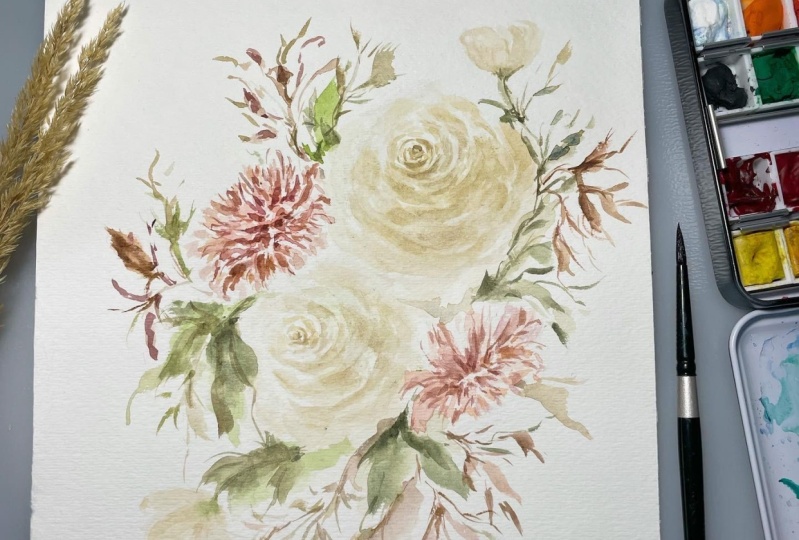
shape can make. Our first project is this beautiful roses and
dahlias composition, which will be done using a
couple of round brushes. Our second project is an
exploration of filbert brush, and we will paint this beautiful cosmos
artwork as our art piece. For our third project, we will drag and swirl our
dagger brushes and reduce this David Austin roses artwork using literally just one brush. Then our fourth project is this charming and lively art
piece made of daffodils, which is done using a
capstone brush alone. In our fifth project, we will experiment with
flat brushes to make this delicate and charming,
sweet decomposition. Although I'll be covering a variety of brushes
in this class, you don't need to own them
all to complete the projects. This is about exploring what you already have and getting to know the brushes that you're interested in buying
in the future, so no need to feel pressured and buy everything all at once. When you're done
with your projects, upload your completed work at the class project
section of our class. Upload both the
class cover image, which might be your
favorite art piece from the artworks
that we have created, but also upload the rest of
the project so we can see all of your beautiful work and give some feedback about it. I'm looking forward to seeing your outbreaks, so let's begin.
3. Supplies: In this section, I
will walk you through the different supplies that I will be using in this class. I will also share with you
some alternatives that you may use if you find my
supplies unavailable. Let's begin with colors. We have five main
projects for this class, which means there will be a lot of colors that will be used. If you want to alter
some color combinations for the paintings
that we will do, feel free to do so. For this class, I'll specifically use the
following colors. Undersea Green, Shadow Green, Green Earth, Olive
Green, Yellow Ocher, Raw Umber, Irgazin Yellow, Van **** Brown, Sepia, Petersburg Ochre. Maroon, Mocha, Lunar Blue, Perelene Violet
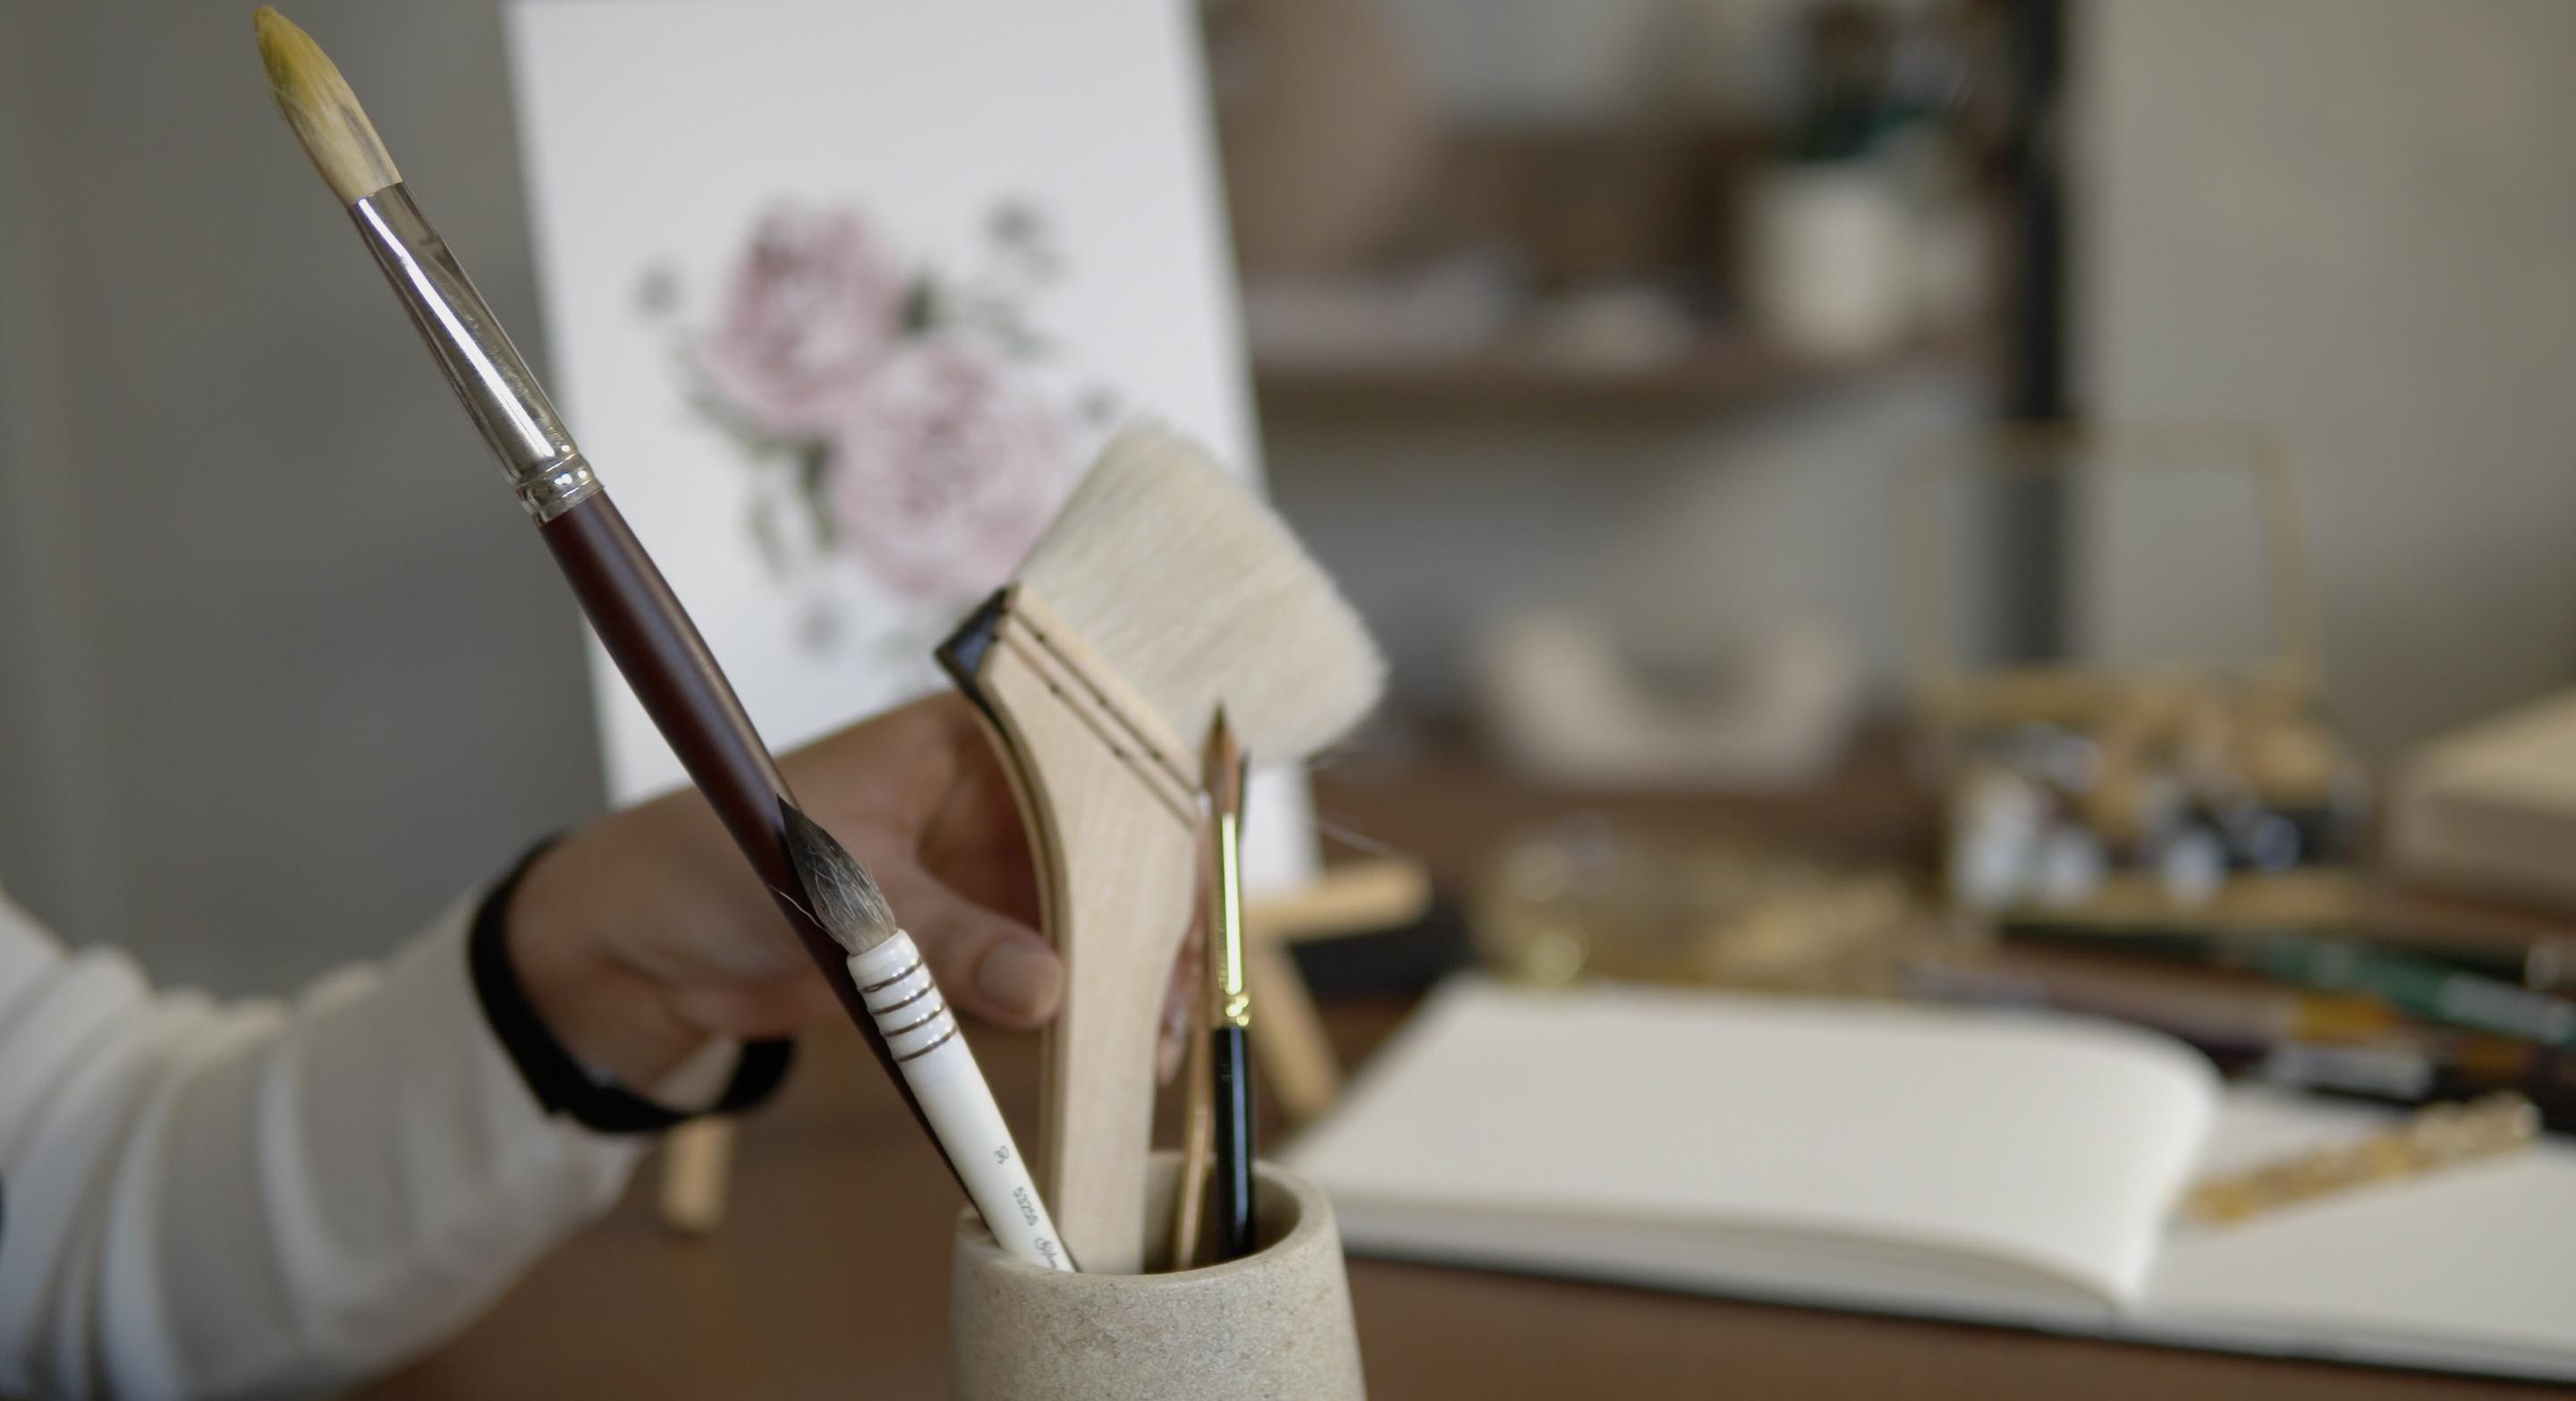
and Shadow Violet. I will be using a
couple of brushes in various shapes and
sizes for our projects. I'll be covering different
brushes in this class, and you are not required to have them all to complete
our projects. This is about exploring
what we already have and getting to
know the brush you would like to buy in the future. Again, no need to feel
rushed and buy everything. For this class though, I will be using the
following brushes. Silver black velvet
round brushes in size 2, 4, 6 and 8. Crystal pointed oval
brush in size 3, 4. Crystal filbert brush in size 2. Silver silk 88 cat's
tongue brush in size 6. Golden natural dagger
striper brush in size 1/4. Golden natural flat
brush in size 1. Silver silk 88 chisel
blender brush in size 6. For the paper, I will be using a hot press watercolor
paper from Arches. This one is in 300
GSM, 7 by 10". In painting using
watercolor or any medium, it is important to have some
tissue paper in nearby, as well as a cup of
water so you can clean your brush easily
when changing colors. Last thing that we need
is a mixing palette. I use a ceramic
palette because it's easier to clean and
for me it's cute. But the plastic
palette we'll do. Now that you know the
supplies that I'll use, let's go to the next topic and discover more about our brushes.
4. Day 1: Natural Bristle Brushes: When I was starting
my creative journey, I didn't know much
about brushes. When I go to a store, I always get overwhelmed with
all the available choices. I even remember asking some artists about what
brushes they were using, but the problem was I didn't ask what medium
they were using, so I ended up buying the wrong set of
brushes for watercolor. Five years later, after all the misadventures,
thorough research, and a lot of wasted
and damaged brushes, I'm now more knowledgeable
and equipped to share with you everything that I
know about paint brushes. Before we begin, I
want to help you understand the different
parts of a brush first. First is the tip, which is the very end
of the brush head. Second is the belly, which is the widest
part of our brush, where the most color is held. Next is the neck, where the bristles
meet the ferrule. Ferrule is what
holds the bristles and connects the head of
the brush to the handle. Next is the crimp. An epoxy-sealed crimp holds the ferrule to the handle
and helps keep moisture out. Lastly, is the handle, which is usually made
of wood or plastic. This lesson covers
different types of brushes. Specifically, we will dive
into the different brush bristles and appropriate
medium for them. Bristles are the
hairs of our brush. They're actually the main
part of any brush and somehow the ones that will determine the price
of our brushes. Brush bristles can
either be synthetic, natural, or a
combination of both. Natural bristles consist of hair that comes
directly from animals, mostly from sable, hogs, squirrels, and goats. There are also some brushes that are made of hairs from ox, pony, camel, wolf, and badger. Today, I'll cover a few of
these natural hair brushes, show you some examples, and also let you know which of these brushes are appropriate for the medium of your choice. Let's start with sable brushes. Sable brushes are actually
made of breed of weasel. The kolinsky sable is
named for the area of Kola in Russia where
they are usually found. The majority of these
brushes are referred to as red sable brushes because the kolinsky in particular
has a reddish color. The animal's long tail is
used by brush makers to create the finest
watercolor brush available in the market. Kolinsky sable brushes are
known for their soft hairs, good snap, and pointy tips. I have an example of a
kolinsky sable brush here. This one is called the
Renaissance brush. As you can see, this brush has a nice big belly that
can hold a good amount of color and water so you don't have to reload your
brush as often. It also has a sharp
tip that will surely give you a clean and pointy
stroke all the time. Aside from watercolor, kolinsky sable brushes can also be used for oil paintings. However, most of the sable
brushes should not be used for acrylic as this medium can be a bit harsh for the hair. If you're not sure if your sable brush can be
used for a certain medium, you may check the brush details
from the manufacturers. Most of them have a
user guide like this to help you identify the allowed
medium for your brush. It really pays to
read stuff like this because brushes
are really expensive. A sable brush alone can cost
you 200 USD or even more, so I'm sure you don't want
to ruin it in a snap. Now that we're done with sables, let's go with squirrel brushes. As the name suggests, squirrel brushes came from the finest quality of
Russian squirrel hair. These brushes are really
soft, and I'm telling you, it's really soft, and they are much cheaper
compared to sable brushes. However, the downside of
squirrel hairs are their snap. They lack spring, which makes
them difficult to control. I have here a Raphael
Petit Gris Pur brush, which, as you can see, has the hairs that
are really soft. But take a look at it when
I drag it on my paper, it doesn't go back to
its original shape. I have to touch it
to make it go back, which could be an extra work
if you're not used to it. Though it doesn't
have a good snap, a squirrel brush has
got a nice pointed tip. That's why most
people use them as an alternative for
sable brushes. This type of brush
is also best for thin mediums like
watercolor and ink. They're not usually used for
thicker mediums like oil and acrylic because they
do not hold up well. Next on the natural hair
brushes are goat hair brushes. If you are familiar
with Hake brushes, they are usually made
up of goat hair. Goat hairs can be either white or black depending
on the goat itself. They work great for wetting paper when used for paintings. In addition to hake, you can also find goat hairs in quill brushes like this one. This is the Atelier
Goat Hair quill line, and these brushes are
perfect for oils, acrylics, or watercolors. They are supreme detail
brushes that will last a lifetime due to the specially
dressed natural hairs. When you say dressed or
dressing in brushes, it means the process of
cleaning the bristle material. It includes washing, picking, and combing so that
the hair length is uniform and no other
debris is in the hair. Goat hair brushes,
like squirrels, lack snap, but they have
a pointed tip as well. Last for the natural hair
brushes are hog hair. Hog bristles are taken from the back part and
neck part of a pig. This brush has a
very snappy hair, and as you can see here, in one of my hog hair brushes, it really goes back to its original shape
after every stroke. This brush, in particular, is perfectly balanced in shape, and they feature interlocked
100% chunking white hog hair bristles for maximum
color carrying capacity. Hog bristle brushes carry a good amount of
paint and are usually used for thicker
paint consistencies like oils and acrylics. What I like the most
about hog bristle brushes is they get better
as they age, like wine. The bristles become softer and more responsive as you use them. As I have mentioned earlier, there are tons of other natural hair brushes available
on the market, like ox, sheep, pony, badger, camel, and even wolf. But again, it pays to read the details before buying
so you can make sure that whatever you're
purchasing is really useful for the medium that
you wanted to explore. Also, painting with natural paintbrush is surely
a very expensive habit, but it is also worth pursuing. Although most of them are
quite high maintenance, these brushes last
decades and are very good investment
for serious artists.
5. Day 1: Synthetic & Mixed Bristle Brushes: Now that we have
a great overview of natural bristle brushes, let's move forward to another bristle type
which is synthetic hair. Synthetic bristles are created
to mimic the properties of natural hair bristles without requiring the maintenance
that a natural hair brush do. Synthetic bristles are more
versatile and do not easily get damaged when used for solvents are other
painting chemicals. If you are an artist
who's looking for a great brushes but do not have much budget displayed on natural vessels then
go for synthetic ones. We can use this for so many mediums because
they snap back quickly, keep their shape intact, and last use if you
take good care of them which is a topic that
we will discuss later on. Those synthetic brushes
are commonly made of polyester and nylon fibers. There are also others
that specifically come from plants and other
synthetic materials. Today I will show
you a couple of synthetic brushes and we
will start with this one. I have here a brush
called Silver white. This one is made with high-quality Japanese
synthetic filaments. That imitate the natural stable. According to the manufacturer, it's designed for
use in watercolor, wash fluid acrylic, inks, and dyes. This is actually one of my
go-to synthetic brushes because it has a good snap but still has a great
point it there. Next we have another
one and as you can see, this one is called
the silver sulfatate. I use this mostly on my classes here on
Skillshare as well. This one is made
of high-quality, multi-diameter Japanese
synthetic filaments that imitate the absorbency, spring and feel of inexpensive natural hairs
at a fraction of the cost. The last example here is
this brush called Rubisapen. Rubisapen fine art brushes
be true multi diameters, synthetic filaments that
are designed to imitate the exact snap and feel
of natural mongoose. These brushes are medium firm, snappy and can carry heavy
bodied acrylic or oil paints. Synthetic brushes are not only expensive and low maintenance. These brushes are also
cruelty free and that's one of the reasons why a lot
of artists love using them. Now that we are done with
the natural hair brushes, and we have also discussed
the synthetic hair, let's now proceed to
the third type of brush bristles which
is the mixed hair. One of the first brushes
I got as an artist was this silver
black velvet brush. I can still remember
how proud I was when I got that because I was really excited and I really
wanted to get one. All along I thought it was
a pure natural hair brush until a friend Broke the news that no it was
just a mixed hair. I mean, not just because
it's still expensive. Anyway, I learned that
this brush is a mixture of natural squirrel hair
and durable synthetics. The natural hair gives the black belt with a
big belly that holds a good amount of color so you don't have to reload
your brush as often. Well, the synthetic
cares provide a slide snap that ensures the brush will always go back to its shape and will
maintain a pointy tip. Remember my pure squirrel brush, it doesn't go back to
its original shape because it's too
soft and that's what the black velvet
brush result may adding some synthetic
hairs on the brush. Black velvet can be
used in watercolor, gouache, inks, and dyes. Another mixed hair
that I love as the golden natural blend brush. You guys can see this on my social media posts and Skillshare classes
most of the time. Golden natural hair
brush has a unique blend of natural hair and tapered
golden background filaments. This is one of my
favorite brushes because it's not too soft and that's also a reason
why this one brush alone can be used in
a lot of mediums, including watercolor,
acrylic, and oil. If you asked me what type
of brush should you get? I would say it always
depends on your budget, your commitment, and your style. Whether synthetic,
natural or mix, they all have their
own advantages. A I guess based on the information that I
shared with you today, you already have an idea of what type of brush
suits you well. Even so if you still have any question or you need advice, the discussion section
is always open. I'll be more than
happy to help you. I'll see you on our next topic.
6. Day 2: Handles and Shapes: Now that we have a
good overview of the different types of brushes based on their
bristles and purpose. It's time to talk
about the handles. I'm sure some of you
are also curious why some artists are
using long handles, why some are using
short handles, and why others prepare the
travel version handles. The short ones have
a length similar to a pen or a pencil,
something like this. They're actually
short so the fields are natural when
someone is using them. While long-handled brushes
are something like this. As you can see, it's so long. Long handled brushes can be as long as a ruler or even more. So, long-handled brushes are often used by artists
who uses ethos. They prefer them
because they work from a distance and because they usually work on bigger pieces. Now artists who work on sketchbooks or paper
pads usually use short-handled brushes
for more control and easier close-up work. As for travel brushes like this, they're usually used
by artists on the go. They like it because
they can keep the bristles save and because
they are easier to store. So to sum up, it's really just a matter
of personal preference, whether you use a long handle or short handle
or treble version brush your work would
probably look the same as long as you're used
to the width of your brush. Now that we already know the different brushes
based on results, purpose, and handles, it's time to finally discuss the shapes. It's so easy to become
overwhelmed at the great available options
for brush shapes. To be safe, most of us are just sticking to what is karma
and wishes from brushes. But I want to help you and educate you more
about other styles available because they're really going to change
the way you paint. Some will even make
your life easier that you'd feel like you're
cheating already. But it's true. Some or a lot of brushes out there will really
change the way you paint. Some of the unique
brush shapes are fan brush, liner, brush, wash brush, grass,
filbert brush, deer foot brush, and a lot more. But for today, we will go
through a few of the common yet sometimes overlooked
brush shapes like flat brush, filbert, dagger, capstone,
and the famous round brush. In the next class videos, we will go through these five
different brush shapes and explore them in a more
personal and meditative way. I will also share with you the other names that
some manufacturer called these brushes and introduce you to
their subcategories. I know you're excited
to start painting, so let's get those
brushes swirling.
7. Day 3: Exploring Round Brush: Finally, it's time to
use those brushes. But before you start swirling, let me share with you some
more information about the most commonly used brush
shape, the round brush. If you take a look
at the round brush, most of these brushes have
a big belly and pointy tip. Of course, depending on
the type of bristle used, some round brushes are
more pointy than others. Round brushes can be as
small as 20/0 and as big as size 20 or even bigger
for some Chinese brushes. You can see round brushes in
a typical form like this, which has a metal ferrule, or it can be
something like this, which is called a quill brush. Quill brushes has a
transparent plastic parallel that is used to hold the hair together and tighten with wire. That is it for the
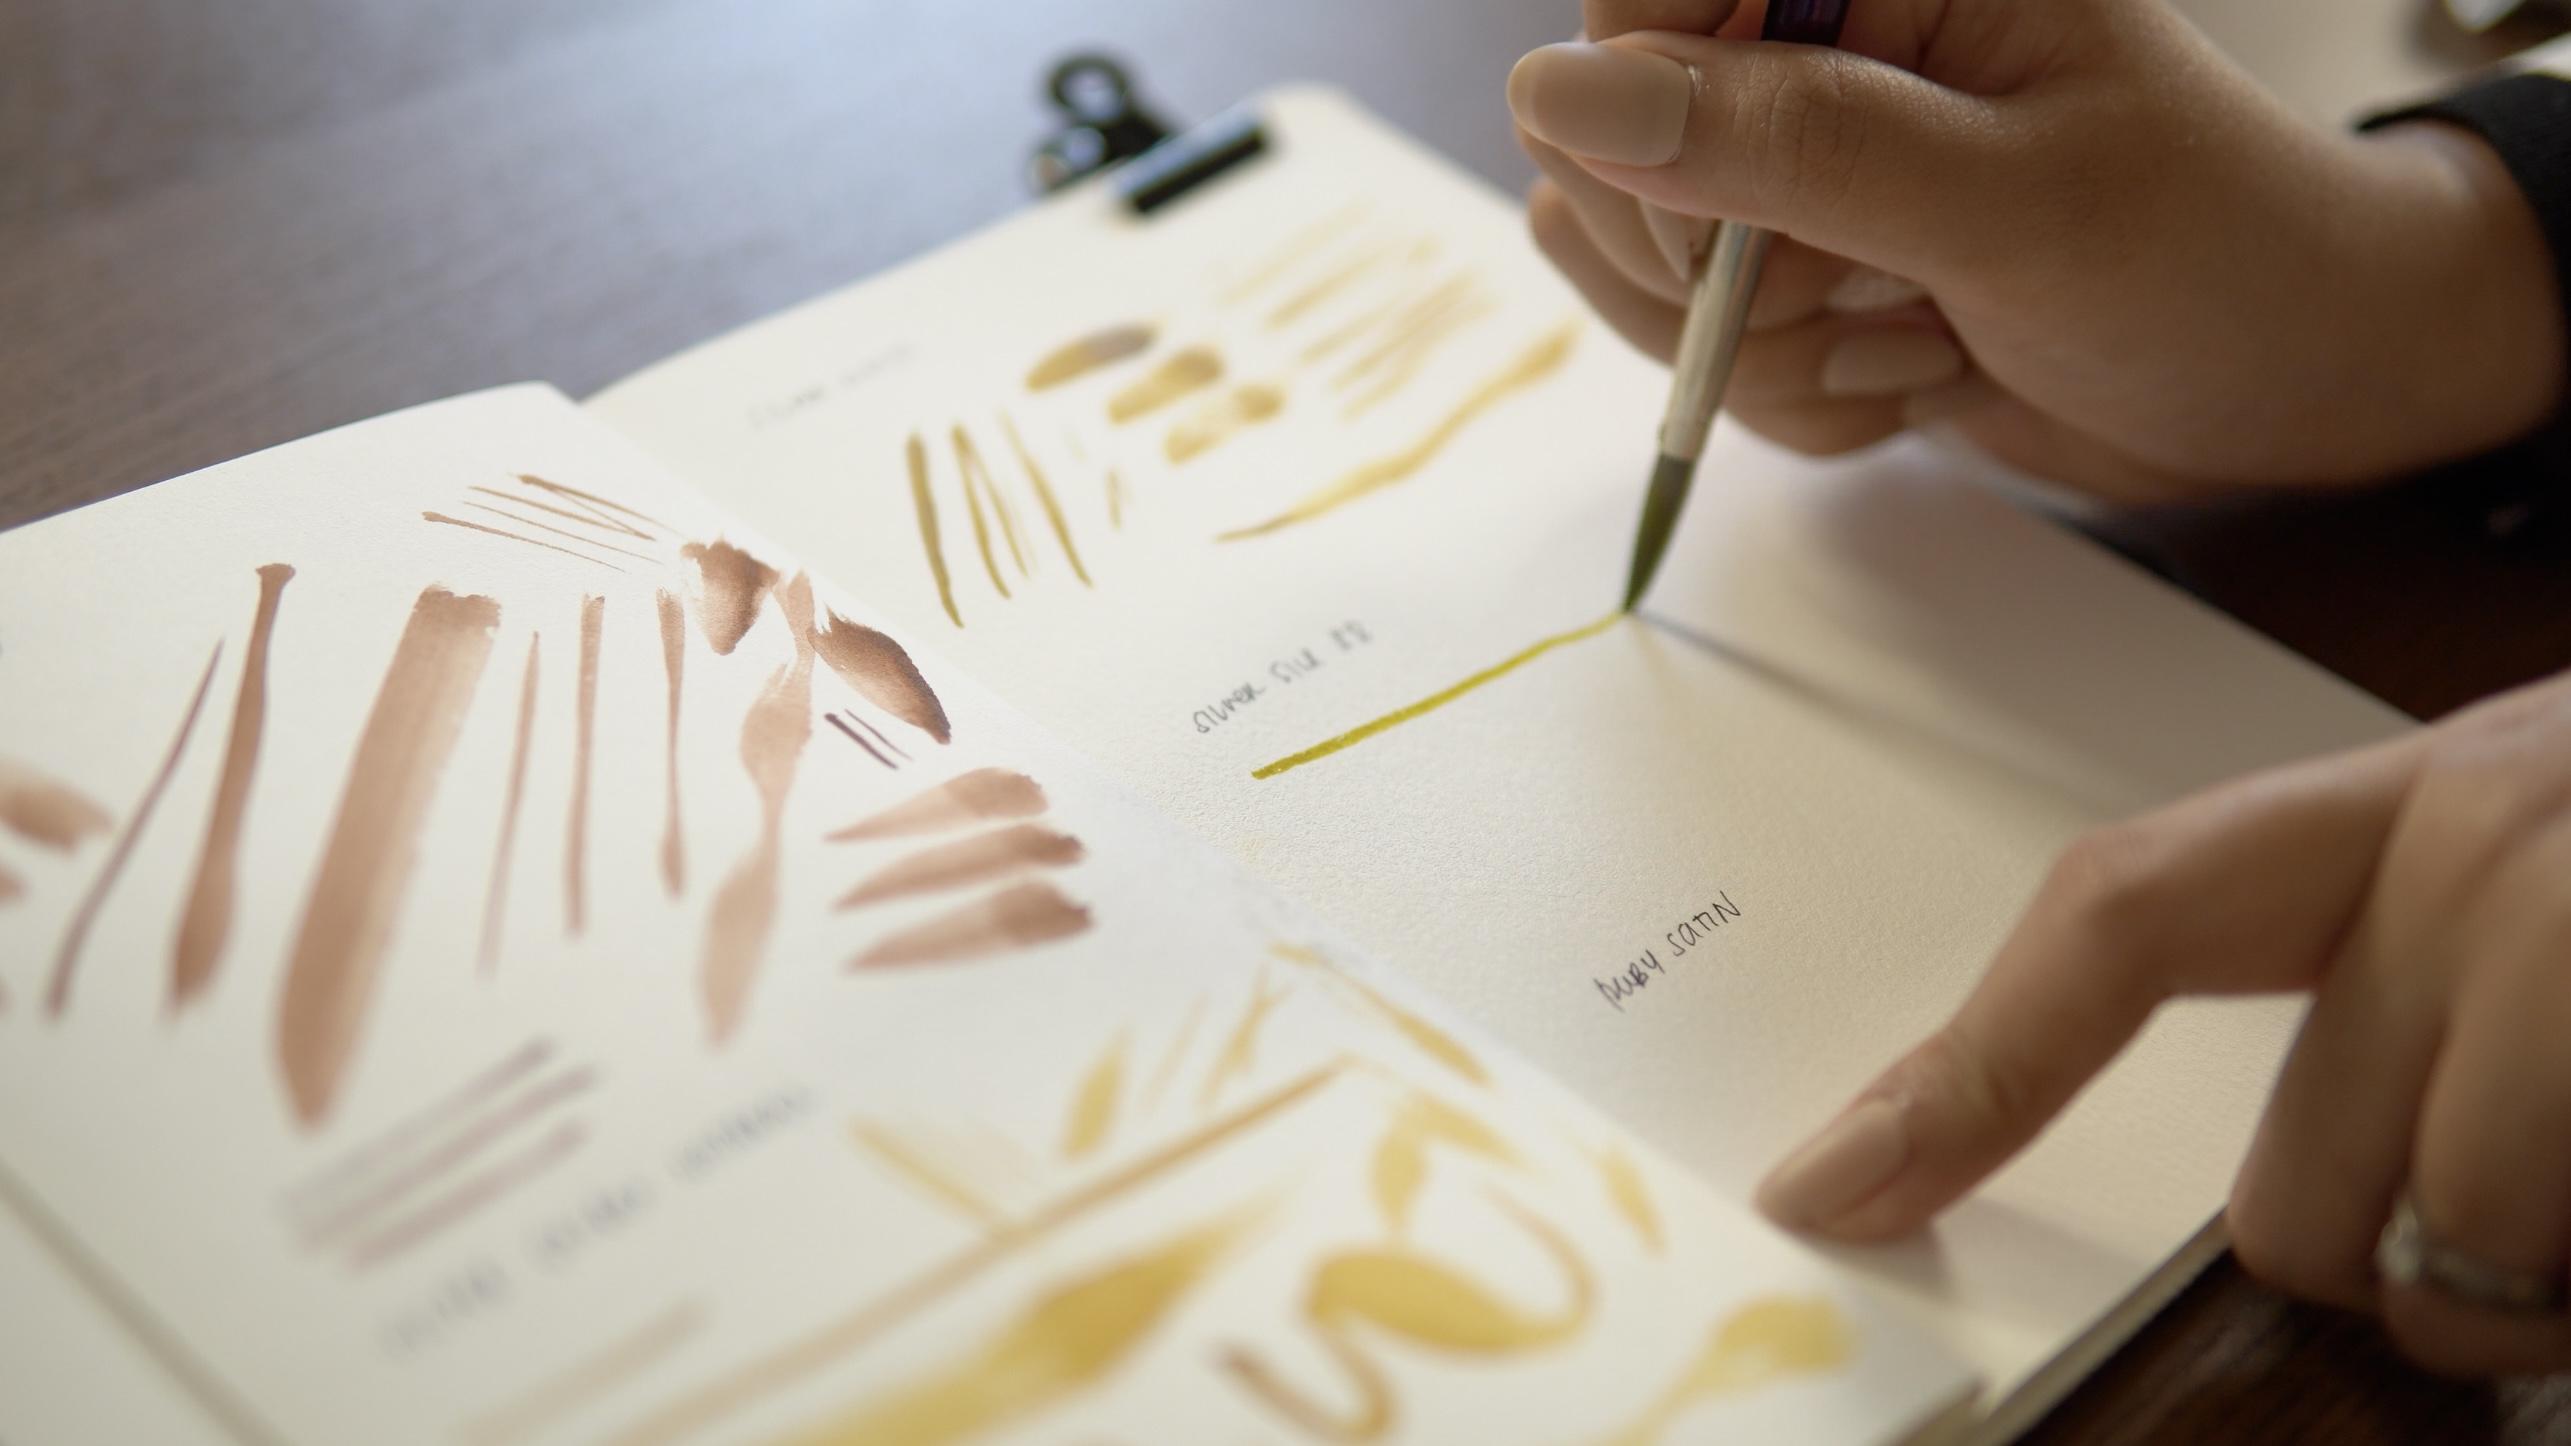
round brushes. Now to get to know someone, it is so important to spend
time with that person, and that is the
same with our art. In the next two minutes, we will spend our
time getting to know what our round
brushes can do. Jag it, use the tip, the body and create shapes and discovers through
combinations on your own. If you have different
kinds of round brushes, you can just pick one or two and do the same exploration
for those selected brushes. I have here a scratch paper, which is also a hot
pressed watercolor paper. I chose to use a scratch so I won't feel good doing just
random strokes on it. You can also do the same
so you can say paper and be more carefree
in your exploration. Are you ready? Because I am. That our two-minute
exploration start now. I chose to use a Size 8 round
brush for my exploration. But again, you can pick your own size and your
own style of round brush. Our two minutes starts now. I'm going to load my brush
first with my color, and for my first stroke, I plan to try the thinnest
strokes that this brush can create and then
I'm slowly adding some pressure on my brush. Again, do not be afraid to drag your brush because
your brush will not get damaged when you
use it even if you drag it, even if you use a
dry brush technique. Your brush will probably
get damaged if you do not clean it after use or
you did not store it well. But in using it and dragging it, there is no problem. Add a lot of pressure, swipe it, drag it, combine different mixture
of strokes, stamp it, and really enjoy and discover the things that
your brush can create. The thickness and thinness of the strokes that
you can create would really depend on the size and the type of
hair of your brush. I'm using a mixed hair that's why it's a little bit pointy compared to a
synthetic hair brush. Continue doing it. Explore more. You can overlap the strokes that you have
created if you don't have space anymore or you can
get the new scratch paper. Also be mindful of the strokes
that you are creating. Make sure you're getting to know your brush and
you are discovering the strokes and
not just dragging your brush without understanding what strokes did you make. Our two minutes is
almost done and I hope you were able to
create a lot of strokes. We still have a
few seconds left. [NOISE] Our exploration
phase is officially over. If you want to extend
your exploration period, feel free to do so. But if you think
you're good to go, let's now start painting
with our round brushes.
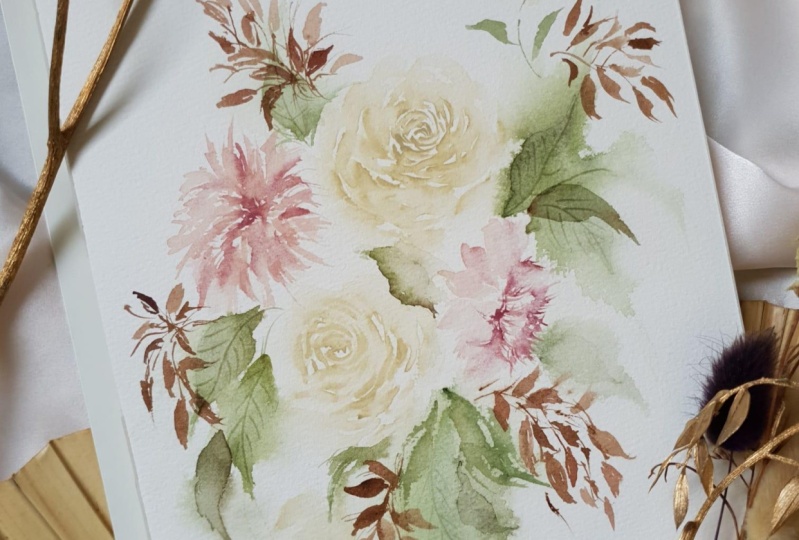
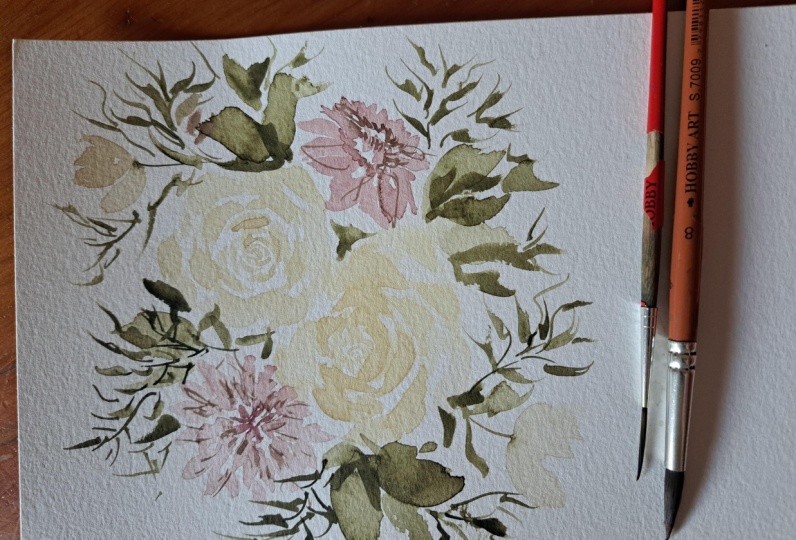
8. Day 3: Roses & Dahlias Using Round Brush: For a round brush project, we are going to paint this
beautiful composition with dahlias and roses. We're only going to use four round brushes in
different sizes to paint this. I have here my Size 2, 4, 6, and 8 round brushes from
silver black velvet line. For the paper, I'll use
the arches hot press paper in Size 7 by 10 inches. For the colors, here are
the shades that I will use, Petersburg ocher, maroon, Van **** brown, and green earth. Let's go and paint with
our round brushes. Before we begin, I
want you to take a good look on the photo
of our project first. As you can see, the painting
has four main subjects, which are two white
roses and two dahlias. We will begin our painting
process by painting these main subjects then proceed to the rest
of the details. First, let's start
with the rose. I will use the smallest brush, which is the Size 2 round brush, and we will paint the
center of the rose first. In painting the
center of the rose, which is also known as the core, we will just create thin
strokes in C-shape. All you need to do is
just press your brush, drag it a little
and then lift it. Once done with the core, we will switch our brush
to a medium-size brush. I'll be using Size 4 here
and make bigger C strokes. We switch to a bigger brush so we can easily make
bigger strokes. These round brushes
have more hairs, hence they can create wider C strokes as compared
to a Size 2 brush. I switch to a bigger size again.
9. Day 4: Exploring Filbert Brush: Filbert brushes are
sometimes called oval brush, pointed ovals, or
rounded oval brushes. This brush got its name
because they say it looked like the same as the
knot of a filbert tree. This versatile brush has
a feature similar to flat brush but with the hair round it into an
oval at the tip. This is one of the best brushes
available in the market. I personally love it
because it's very useful. As an artist who
usually paint flowers, having a brush
with a rounded tip saves me time when
painting petals. Not only that, it is also best for creating
soft shaped leaves. It's really a must have for me. The main brushstroke that
a filbert brush can create is a broad yet soft
stroke like this. If you use the side, though, it can produce a thin line or a thinner oval
stroke like this. To explore more of what
this brush can do, we will spend two minutes
dragging, swirling, and dabbing this brush just like what we did with
the round brush. Again, don't be afraid. Enjoy the process and be mindful of every stroke
that you will create. Our two-minute
exploration starts now. For my filbert
brush exploration, I chose to use this pointed
oval brush in size 3/4, but you can pick a
smaller brush if you want to fill your paper
with more strokes. Let's officially start
our exploration period. Of course, load your brush
with the color of your choice. As for me, I always use the tip of my brush
first when doing an exploration because
I want to see the thinnest and the thickest
strokes that it can create. Next I will be doing a
flat stroke like this. Guys, you don't have to follow
exactly what I'm doing. I want you to explore on your own and discover
the strokes on your own because it is the best way to learn and
get to know your brush. Now, I'm going to use the side. Again, the best thing to do
is to use all the parts of your brush so you will see the different strokes
that it can create. It is also nice to do twisting like this so you can
see the combination of different parts of
your brush and see what are the things that it
can create on one stroke. Now, this time, I'm
trying to create a rose just like how I
do it on round brush. But of course, since
this is a filbert brush, it can help create the same beauty that a
round brush can create. It has its own beauty. I'm here to discover it. I'm trying some leaves as
well and then I'll be doing more thin and thick
strokes to see how responsive this brush is when I add a little
bit of pressure on it. We have less than a
minute to explore. I hope your scratch paper is
a little bit full by now. We have 10 seconds left. Twist your brush, drag it, swirl it. Time is up. I hope you
were able to explore your brush and discover
a lot of strokes. If you want to extend
your exploration period, feel free to do so. But if you think
you're good to go, let's now start painting actual flowers with
our filbert brush.
10. Day 4: Cosmos Using Filbert Brush: For our filbert brush project, we are going to paint this beautiful floral
composition and we are only going to use
two filbert brushes. I have my three port pointed oval brush and my
number 2 filbert brush. For the paper, I'll use
the Arches hot pressed watercolor paper in
size 10 by 7 inches. For the colors, here are
the shades that I will be using, undersea green, shadow green, irgazin yellow, maroon, lunar blue, and sepia. Let's go and start painting
with our filbert brushes. I want you to take
a good look on the finished class project
that we have here. If you observe, this
composition has two main flowers which are painted using the color maroon, a couple of round fillers
painted in lunar blue, and of course some
leaves painting using a very nice mixture of greens. As usual, we will begin in
painting the main subjects. I will use my tree fort
filbert brush for the petals. We just need to do a flat
stroke to paint our petals. Press your brush and
then drag it down. You may also combine it with some sides strokes to add
dimension on your painting. Continue adding the
petals until you have created a side view
cosmos flower. Once done, you may add
another layer of petals with a slightly darker tone on
top of the base layer. Again, this is to create
depth on our painting. Once done with
your first cosmos, paint the second
one and place it on the lower right
side of your paper. We will do the same strokes
for everything starting from the base petals up
until the second layer. Once the first flower
is dry already, I decided to add
another layer so that the texture of our cosmos
will be established. As we know, cosmos is a flower
with layers and textures, so adding layers on our painting
as well would be great. We are done with the
base of our flowers. It's time to add the leaves. For the leaves, I mix shadow
green, undersea green, and Vandyke brown to arrive in this very nice vintage
shade of green. To create a leaf,
just press your brush and then slowly twist
it while lifting it. You can also use the side of your brush to
create thin leaves. It is also nice if you
will add dark leaves on the base of your leaves to
create depth and interest. You may add a bit of sepia to your color to create this shape. Using the same brush, use the tip of it
and drag it down to create the stems of our flowers. As you notice, the
thickness of my stem isn't uniform and I did that to give extra detail
to our painting. We're painting in a loose
style so effects like this every now and then would be
nice for overall composition. To make the bottom part of
our painting look full, we will add some
leaves with stem. I will still use the same
brush for this one I will paint the leaves but
using the same method. What will be unique
in this step though is we will add extra
spikes on the leaves. As you can notice, I'm not adding the leaves
all in the same way and this is just a style that I
prefer to do ever since. If you want the leaves to look uniform, you can still do it. Again, I'm just here
to guide you on your painting process
and it is still best if you will add your own personal touch on
each elements that you paint. Add more big leaves and you guys may use a
lighter shade of color. This will create an
effect that some of the leaves are
at the back part. We're basically done with the base structure
of our composition. The next piece, we will add the fillers and other details
to complete our project. Let's begin by adding
the core over cosmos. Using a small type
of filbert brush. I'm using a size 2 here and
the color, irgazin yellow. I will dab the tip of
my brush to the center of my flower to
establish the core. Do this on both flowers. For the next detail, we will add a rounded fillers. Using the color lunar blue, load your size 2 filbert
brush with a good amount of color and create flat
strokes on your paper. As you notice, even by
just stamping the brush, we were able to create
a rounded filler and that's the beauty
of a filbert brush. Continue adding this strokes, still you have distributed the filler all over your paper. You may also add a
little bit of water to your brush to light and the
shade that you're using. For the next step,
we will add a bit of depth to our floral core. Mix sepia with your
irgazin yellow to create a darker shade of yellow and add the second
layer on your core. You don't need to add this on
all the parts of your core. Just a bit on some
sides is enough. We are almost done and to complete the look of our leaves, let's add a darker
shade of green and some thin strokes
in the middle. This will give our plane-looking
leaves some depth. Last detail before we officially
put down our brushes. Let's connect the
rounded fillers to the main bouquet by
creating some small stems. Use the tip of your
brush to do this. The strokes have
to be very thin, so you need to
control the pressure that you're giving
to your brush. Finally, we are done. This is one of my
favorite projects. I'm excited to see how
your work turned out. Don't forget to post it on the project section so I can give you some feedback about it. See you on our next topic.
11. Day 5: Exploring Dagger Brush: We are done with the round brush as well as the filbert brush. Now let's go and try something
not usual for some of you. A dagger brush. You may have heard of this brush before or may have
seen one of it. Dagger brushes are
sometimes called striper, sword or knife brushes. Though some manufacturers have a distinguished
difference between each of these brushes, they all have the
same general form. Long hairs with a
triangular shape. Dagger brushes feral is flat
like a normal flat brush, but one side of the hair is much longer than the other side. Most artists find this brush
difficult to deal with because it can generate so
many different brushstrokes. Use the tip of it and
create long length, stamp it and create
triangular shape, twist it and create rose petals. It's so true that
it's a little bit confusing to paint
with this brush. But true practice
and exploration, you can get to know this
wonderful and very useful brush and use it to its
full potential. In the next two minutes, we are going to explore
our dagger brushes, just like what we did with
around and filbert brushes. Pick up your brush because
our timer starts now. For this exploration, I will use this dagger brush in size 1,4. Let's start. Again, I start by using the
tip of my brush to see how this brush reacts on
light and hard pressure. Since this has a different
amount of hair on each side, creating a stroke going
to the left creates thicker mark compared to a
stroke going to the right. If you use the body
of your brush, you can also create
thicker stroke like this. So it's a full big stroke
like a square or a block. Using solely the tip creates
very thin line like this. It is as thin as a detail brush. Now what's unique in this
brush is this type of stroke, which is something like a leaf. It is best to combine
the different areas of your brush to see what type of stroke
they can create, because exploring the
different areas of this brush gives you
a lot of advantage, especially if you master it. You can easily create
a rose petal using the stroke discreet
c-strokes like this. Again, it's easy to create c-strokes like what we're
doing for our rose petals using this brush because the shape of it is
already in c. It's also nice to create
small that's like this because it has thin tip
and check marks like this. This is what I use when I'm creating the core
for my dahlias. As you can see, it looks like dahlia petals because again, it's shape is like that. We are done with our
exploration phase. Again, if you want to extend you're very
much free to do so. But if you're satisfied already, let's move forward to painting flowers with our dagger brush.
12. Day 5: Austin Roses Using Dagger Brush: For our dagger brush project, we are going to
paint a composition consisting of two
David Austin roses. If you're not familiar
with David Austin roses, this is what it looks like. I'll be using one brush
for this artwork. Just one brush. I have here my Golden
Natural dagger striper brush in size 1/4 and this is the only brush
that I will twist and swirl all throughout
this session. I will use the same
paper which is Arches hot press watercolor
paper in seven by 10 inches. For the colors, I will
use Perylene violet, undersea green, shadow violet, shadow green and sepia. Let's begin painting. We will start by painting
our main subjects, which are the two
David Austin roses. We will maximize the
shape of our brush as we create the core of our
flower and of course, the petals around it. To begin the process, let's load our brush with
the color of our choice. Mine is Perylene Violet
from Daniel Smith. To create the core
of David Austin, all we need to do is press
our brush like this. As we notice on the
actual David Austin rose, the core is somehow leaning to one direction like
an LEC of a fan. That's what we're
aiming here as well. To fill the spaces in
between these strokes, we will add small thin strokes using the tip of
our dagger brush. To build a fluffy-looking core, we will continue to add
more flat strokes and thin strokes until we have reached the size of
the core that we want. Just keep on combining
the flat dagger strokes and some thin lines using
the tip of your brush. Now that we are
done with the core, I hope yours are
looking fluffy as well. It's time to create the petals. For the petals, we will do some C strokes and
surround our core with it until we have reached the perfect size of
our Austin rose. Just press, then
drag, then lift. You may also add
few thin strokes in between to represent
some small petals. We are finally done with
our first Austin rose. It's time to paint the next one. This time, our flower will be facing a little bit upward, so we need to
create a dimension. To do that we need to make the strokes for
the upper part of our core longer compared to
the one at the bottom part, and combining the
same strokes here, dagger, flat and thin strokes. It's time to add the petals. I'm doing C strokes again, so press, drag, then
lift your brush. What's going to be different
here is that we will add more petals at the bottom part compared to the upper portion. Again, this is for us to
create an illusion that the flower is facing
upward to the left. We are done with
the main subjects. It's time to add the rest of the details to
complete our painting. First, let's start
with the leaves. As I have mentioned
in the past projects, when I paint leaves, I really don't want
it to look uniform. For our dagger brush leaves, I'll just be pressing my brush slightly brushing the color to the paper and
then lifting it. However you do it, your leaves will always
look like leaves as long as you're lifting your
brush after dragging it. Add these leaves in some
areas of your main flowers. We will add more later on when we still find big empty spaces. But for now, I'm
okay with these. It's time to add
some smaller ones. I'll add one here. Let's make this stem then stamp our brush to make
the small leaves. I'll add another one here. To make our simple composition
a little bit fancy, we will add another
type of leaf. I'll use the tip of my brush
and create thin lines like this to create a leaf
similar to pine needles. How are you guys doing? I hope you're getting to
know your dagger brush even more as we paint
our botanical elements. It's time to add the fillers. For this artwork, our fillers will be just simple
pompom flowers in purple. I'll use the tip
of my dagger brush to create the petals and we'll create very thin strokes
like this. Super easy. You may refer to the finished
painting on the project and resources section to see the
placing of these fillers, but feel free to place it
on areas that you prefer. Our composition is
technically done. However, as I step back and
take a good look on my work, I find some areas that
are still a bit spacious. I'll be adding some
layers of leaves and a bit more greenery
on some areas. If your work looks
full and done already, you don't have to do
this step anymore. I'm finally done. I hope you are too. As usual, let's
upload our works on the project section so we can give feedback to
each other's work. See you on our next topic.
13. Day 6: Exploring Cat's Tongue Brush: Oh no, this one is not
made of cat's tongue. No cats were harmed
in making this brush. This brush is so-called
because of its shape. As you can see, it has a black body
and a pointy tip. This brush is also called oval wash brush by some
manufacturers. When I started my
painting journey, I didn't have much information
about this type of brush, but when I started
using it, oh my, it's like having multiple
brushes in a form of one. A pointed tip that is similar to a detail brush a flat
belly like a flat brush, a floppy and white side that can mimic the strokes of
brown brush and more. The thinness and width of the stroke that
you can create mainly depends on the type
of hair that you will get and the size
of brush itself. For the next two minutes, we will explore this brush and discover more
of what it can do. Our timer starts now. For this exploration phase, I have here my cat's
tongue brush in size 6. This is a synthetic brush, so it may not be as pointy
as cat's tongue sable brush, but as you can see, it can
still create thin lines. Again, I'm testing the
pressure of this brush, I'm testing if it can
create thin lines and thicker lines if I add a little medium and
a lot of pressure. This is the flat stroke, another flat stroke, as you can see,
it's a little big. Let's try the side one. This is the side stroke. It's in medium-size
and I think that this brush is nice because it didn't carry a good
amount of color and water. As you can see, I don't
have to reload it as often. Here comes the good part. This is one of the best strokes that this brush can create. It's like a leaf. All you need to do is stamp
your brush and drag it. As you can see, I
was able to create leaves by just doing that. Guys, you don't have to copy everything that
I'm doing here. I want you to
explore on your own. But you can also try doing
the same procedure that I'm making if you're feeling lost or if you don't know what
stroke you should create. But I suggest that you try
the different sides of your brush and if you already
tried all of the sides, try combining two
or three sides of your brush to see what are the combinations strokes
that they can create. We have less than a minute. Be fast, but at the same time, be mindful of all the strokes
that you're creating. What's important
here is you get to discover all the
strokes and if not all, most of the strokes
that your brush can do. [NOISE] Brush down for now. If you want to
continue, just do so. But if you are good already, let's proceed to painting a composition with our
cat's tongue brush.
14. Day 6: Daffodils Using Cat's Tongue Brush: For our cat's tongue
painting project, we will paint some daffodils. If you're not familiar
with daffodils, this is what they look like. I chose this flower because
cat's tongue brush can be useful in creating
different strokes that is essential
for this flower. For this project, I will use the Silver Silk 88 cat's
tongue brush in size 6 alone. I will use the same paper
as our previous project, which is the Arches hot pressed watercolor paper
in size 7 by 10. Lastly, for the colors, I will use Petersburg ocher, yellow ocher, raw umber, sepia, olive green,
and undersea green. Let's get started.
Time to paint again. You guys know the drill. We will begin with the subject. We have here two daffodils. Then after that, we will do the main leaves,
then the fillers. Let's begin with the daffodils. Since I'm using a size
6 cat's tongue brush, I have to do two strokes to
create one daffodil petal. If your brush is big
enough to create a petal with just
one flat stroke, that would be perfect. Let's press our brush then
lift it and give it a partner. I'll be making five of these
daffodil petals, so here. Now that I'm done, I'll add thin lines
on the petals using a little bit more
concentrated mixture of Petersburg ocher. As you can see here on the
actual photo of the daffodils, the petals got some texture. That's what we're
trying to achieve here, thin lines using the
tip of your brush. Once done with the
base of your daffodil, let's go to the second one. Our second flower will
be facing downward, but at this point, we don't need to
change anything yet. We will add dimension later on. For this flower, we'll just do the same base petals
as our first daffodil. We are done with the
bases of our daffodils. We will let this
layer dry up first. For now, let's proceed
with the big leaves. In creating long leaves, all you need to do is use
this side of your brush, press it and then drag a
little longer, then lift. So easy. As usual, you may add a little
bit of thin lines to add some extra
detail on your leaves. Spread the big leaves on different areas of your
painting to fill it up. After painting your main leaves, it's time to add our fillers. For the fillers, I chose to add some small yellow flowers to
complement our daffodils. In creating this, we will just stamp our
brush on our paper, combining flat and side strokes. Spread the fillers in different
parts of your painting, especially on areas
with big spaces. Add thin lines to connect the fillers to the
main bouquets. I'm using green to connect
it to my main bouquet. This is also the
perfect time to add some small leaves to the
composition. Do it now. The base of our painting
is basically done. It's time to add the
last few details before we put our brushes down. Let's start with our daffodils. Daffodils has extra yellow
tube in the middle. Since our first daffodil
is in aerial view, we don't need to do any
dimensional effect here. All we need to do is paint
yellow color like this, so I'm using yellow
ocher for this one, then we will add a watery shade of the
same color in the middle. For the second daffodil though, we need to show some dimension as this one is facing down. To do that, use the
side of your brush and create an A-shaped
tube like this. Then to give more dimension, we will get a darker mixture of yellow ocher and establish
the tip of the tube. I'll also be lifting
a bit of color in the middle to create
highlight inside the tube. Lastly, there are some texture. We will let this layer dry
again before we continue. For now, let's go
back to the fillers. To make our painting extra, we will create thin lines
on our fillers like this. I'm using raw umber here, but yellow ocher
would also be good. We will also add a
bit of raw umber at the tip of our
daffodil tubes. I'll be creating short
thin strokes like this and also do it on
the second daffodil. But make sure that the base
layer of your daffodil is 100 percent dry already
before doing this step. For our final detail, we will add the last few strokes for our daffodil's fillers and we will also
add a few leaves for some areas that
are still empty. On this part, I want you to add your personal touch
on your work. You may add extra filler in different shape or
maybe some leaves in different shades
of green or maybe add another type of
flower. It's your call. I'm done here and I
hope you are done too. I'm excited to see how you added your personal touch here, so please upload your work on
the class project section. I'll see you on our next topic.
15. Day 7: Exploring Flat Brush: Basically any brush
with a flat top can be justifiably
called a flat brush. But after years of development, manufacturers decided to call the other flat top
brush another name. Let's have a little quiz
so we can check if you see the differences
between these brushes. Can you guess what's
the name of this brush? It's the black
velvet flat brush. This one, this one is called
crystal wide wash brush. Next, this is the silver
white bright brush. Another one. This is called silver
silk 88 chisel blender. Next and last. This is the [FOREIGN]
Hake brush. Are you confused? I was too. Actually, it's still okay
to call these brushes a flat brush because again,
they're flat brushes. But to explain
their differences, here's a quick guide for you. Bright brushes are
a bit much the same as flat brushes with
shorter bristles. They are useful for short
controlled strokes. Chisel, blender, and bright
brushes are just the same. It just depends on the manufacturer how
they want to call it. Wash brushes, on the other hand, are flat top brushes that
are used to wet papers. Hake brushes are
wash brushes that have wooden handle
and wired ferrule. That's the explanation. For this lesson, I
will be focusing on a flat brush and
a chisel brush. For the next two minutes, we will explore these brush type and discover more of
what our brushes can do. Our two minutes starts now. To be honest, I want to
explore both of these brushes, but I'll just set
settle with a size 6 small brush because I want
to create a lot of strokes. This is the flat stroke
that this brush can create. As you can see, it's so
controlled and very nice, crisp. As you can see it looks
like a rectangle. It doesn't have any
round the edges. This is the thin strokes
that this brush can create. I actually love
this brush so much because it has short hairs. It's easier for me to control it and it's
so easy for me to create strokes that are
clean because again, it has shorter hair. Longer hairs tend to be softer, so it's harder to control. Again, stamp your
brush, drag it, create long lines if you
want to because it will test how much water and
color your brush can carry. Also try to create different shapes or different types of
botanical elements, like flowers or leaves. Or if you are into
landscape painting, try also creating mountains
or stairs or ocean. Discover it in a way that it
will be beneficial to you and in the style and in the subject that you're
always creating. We're almost done
so try to combine different sides of their brush to see what strokes
they can create. This is actually the
last brush shape that we will explore
in our class. But if you have other brush
shapes that you want to try on, like triangle brush, deer foot, grass filbert, feel free to create
your own exploration about these brushes. We are done with our
exploration phase. Again, if you want to extend, you're very much
welcome to do so. But if you're satisfied already, let's move forward to painting flowers with our flat brush.
16. Day 7: Sweet Peas using Flat Brush: For our flat brush
painting project, we are going to paint this beautiful sweet pea composition. If you are not familiar
with sweet peas, this is what they look
like in real life. For this project,
we are going to use a flat brush and a chisel brush. For paper, again, just say the arches hot press watercolor paper
and size 7 by 10. For the colors we only
have yellow ocher, mocha, shadow green,
and under sea green. Let's go and start painting. For the beginning
stage of our painting, I will use the big brush, which is this flat
brush in size 1. Then I'll eventually switch to the smaller chisel brush
when I start adding details, I really wanted to achieve or somehow translate
into watercolor, this beautiful combination of old rows and vintage yellow. I'll be mixing yellow ocher with a bit of mocha for the
base of my sweet pea. Then at the tip
of my flat brush, I'll load the concentrated
mixture of mocha. For my first stroke, I will just wiggle my
brush on my paper. As you notice, there's
a nice pink there for my sweet pea and a
vintage yellow buddy. I love how it turned
out. Let's do it again. Keep on doing the same
wiggly flat stroke until you have completed the
base of your composition. If you want to create your own, placing a flower is the
best thing to do is get an actual photo of
a bunch of sweet pea in the Internet and
copy the placing of that photo on your
painting and that way, you are sure that no flower will be placed in an
awkward location. On this space, you
cannot add another layer of petals on top of
your first layer, because as you notice, the layer is still very wet. What you can do though is add extra petals beside the
first stroke like this. I'm sure by this time
you can really see the importance of getting
used to twisting your brush. I hope you are doing
well in your painting and if your petals
are looking weird, that's normal. Just let it be. We're done with a base layer, we will let this
layer dry first, and while we wait, let's
proceed to the stem. I will use the chisel brush
and using its flat there, I will create an imperfect stem. You have to add
some mini stems on some sites to connect
other petals. This is the perfect, then add a little bit
of leaves as well. Let's do it here now. To make leaves, just twist your brush a little or
stamp it on your paper. Again here, you
don't really need to paint a leaf that is
looking like a leaf. Generally, when you paint loose, whatever is in your
paper that is called the Green will be taken by
your audience as a leaf. You don't really need
to paint it as is. As you see all the strokes
that I made here are just combination of twisty
and dragging off my brush. Just be careful. My base layer are dry already and
it's the perfect time to add another sweet pea petals. I'm going to do this
same wiggly strokes, but I will avoid to fully
cover my base layer. I know some of you might
be afraid to layer, but as long as your
base layer is dry, no need to worry, just keep on wiggling
those brushes. Also to avoid awkward strokes, make sure to refer to your reference photo
are finished painting. It's time for drying again. We will focus on adding
texture later on, but since it's still wet, we got to leave it alone first, while waiting, I'll
focus on adding a darker layer of
stem and leaves. I mixed undersea green with shadow green to create
darker mixture of green, and I'll be adding
thinner strokes to one side of my stem
to create dimension. If you notice here on
the reference photo, sweet pea petals got a
little bit of texture too. It may not be very visible
to all parts of the flower, but some parts have
very obvious texture. To translate that, I will
stamp my brush to my petals. Just pick a very light mixture
of your color and stamp it carefully on some parts following the direction
of the petals. If it's leaning to
the right side, lean your stamp to
the right side also. As my final detail, I will add some petals at
the bottom of some flowers, and I'll do that using
my chisel blender brush. Just again, wiggle your brush. We are done. Congratulations for
completing our last project. You know the drill, upload this on the class
project section. Don't go yet because I have a bonus lecture waiting for you. I'll see you on that video.
17. Brush Care: Investment, that's how we
should treat our brushes. Whether you have a natural hair, synthetic, or mixed, taking care of your brush is
very important as this is one of our main tools in creating a beautiful
piece of art. In this bonus class, I will share with you the
proper ways to clean, dry, and store your
brush so you can be sure that they will
last longer and give you the absolute best painting experience
with every stroke. First is cleaning. Cleaning your brush after
every use is a must. Letting paint dry in brush
can cause the bristles to get damaged and
eventually lose their shape. There are tons of ways to clean your brush depending
on the medium you use. But for today, I'll
share with you the ones that I use for both
gouache and watercolor. First is water. Of course, if you feel lazy after
painting session, cleaning your brush with
running water while massaging it will take
off paint from the brush. When massaging, focus on the neck or that last
part before the ferrule. This is where the
paint usually sticks, and if you're done, repeat the process if necessary. Second is soap. If you're feeling
more determined, you can use mild soap
to clean your brushes. I personally use my
liquid hand soap to quickly clean my brush. After a quick rinse with water, add a little amount
of mild soap to your hand and use this
to massage your brush. Again, focus on the neck or that last part
before the ferrule, this is where the
paint usually sticks. Repeat if necessary. Third is brush, soap, and water. There soaps
specifically made for brushes and they are
called brush cleaners. Well, so these brush cleaners
work on oils, acrylics, watercolors, varnishes, and
most synthetic finishes. They also claim to restore most hardened brushes
to new conditions. To use this, all
you need to do is rinse your brush
with warm water, swirl the brush around the brush cleaner.
Don't be afraid. Push the brush against the soap so that the color will take off. The cleanser feels
like a bar of soap and it's hard but leathers
up when it gets wet. Rinse the brush in
warm water again. After this rinse, you immediately feel the
difference in the bristles. They become a lot softer, and you can also easily reshape them to
their normal point. Repeat if needed. Forth option is silicon cleaner. I guess among all the
cleaners available, this one is my favorite. I have two versions
of these cleaners, the suction and the cup. If you take a look at
this silicon cleaner, it has texture like these, and these are actually
what cleanse the brush. What I usually do is rinse
my brush with water first, then I add a little soap
to the silicon cleaner. After that, I swirl and rub my brush against
the texture, and as you can see, the paint really come off. After this, I rinse my
brush with water and voila, fresh and clean brush. Those are the methods that
I use to clean my brush. The next thing is, how do we dry our
brush after cleaning? The best practice is to lay your brush flat with a
tissue or rag under it. This way, the excess water
and even excess colors will go down to the tissue
as your brush dries up. Never ever dry your brush like this because the water will go down to the
ferrule and damage the epoxy barrier that
holds your brush together. Another way to dry your brush is by getting a brush drier like this or storing it with a
brush holder like this. In this manner, the
water will surely go down to the tip and
not to the ferrule. After drying, we still need to store our brush
properly so we can maintain its shape and properly use it on our next
painting session. Make sure brushes are perfectly
dry before storing them. Also, always store brushes
in a dry environment. If brushes are in a
moist environment, they are susceptible to
mildew and corrosion. There are tons of
cases and holders available in the market for
you to store your brush. But I personally
use these three. First is a brush
holder like this. When using a brush holder, make sure that the brush hair is on top and not at the bottom. It should be facing like this. You can also use a brush drawer like this and lay flat
your brush in it. Just be sure that there are enough space for your brush
when you use a drawer. Another way to store your brush is to store it in a brush case. When choosing a brush case, always remember that
it must be wearable. The best type of brush case
are canvas or leather. Just remember, do not store
your brush on areas that stay moist unless you want molds to welcome you on your
next painting session. Before I end this topic, I also want to remind you
not to leave your brushes on your water cup while
painting, like this. Leaving brushes in fluid for extended periods of time
can damage the brush. Fluids sieves into the ferrule, that slides to the
epoxy barrier. Then the fluid will
eventually go to the handle and damage
to whole brush. Again, brushes are expensive so we must take
good care of them.
18. Processing The Lessons: I have mentioned this a
lot of times already. To get to know someone you have to spend time with that person. That's the same when
it comes to your art. The lessons that I've shared
with you in this class are just introductions of
what your brushes can do. As you spend more time jogging, spilling, and dabbing them. You'll discover so much more and possibly develop your own
painting style through them. But that's for another lesson. For now, I really encourage
you to continue painting. If you find yourself struggling
with one or two brushes, don't let frustration
get in the way. Continue trying and
experimenting with that brush, until you find your group
and get used to it. On the other hand, if you
decide that this brush isn't something that you want
to work with in the future. Feel free to skip it
and focus on getting to know what you feel would be helpful with your
painting style. If you have any questions or if you struggle with
any of your brushes, or maybe want some advice about the brush that
you're planning to get. Feel free to leave your
question on the discussion tab. I'd be honored to help
you and guide you. Thank you, and I'll see
you on our next video.
19. Final Thoughts: Finally, we are done
with the class. Thank you so much for joining me and well done for
finishing the lessons. I hope you learned and
enjoyed as much as I did and I hope you get to know your brush better
through this class. I am very excited to see the projects that you
have created so please take some photos of
your paintings and upload them into the project
section of our class. I would love to give some
personal feedback on your work. If you found this class helpful, I hope you can leave a review
in the review section. Let me know if this class
met your expectation, what you enjoy the most
and what can be improved. All of your suggestion
would be very valuable to me as I
make my future classes. Also, don't forget to follow
me here on Skillshare, so you get notified about my upcoming classes
and giveaways. You can also follow me
on Instagram to get instant updates about my
latest works and events. Lastly, feel free to
share your project on Instagram and
Instagram stories and tag me @jennyfloresart and Skillshares Instagram
@skillshare. I will surely share your
work with my community. I hope you loved this class
and learned something new. Thank you so much for joining and I'll see you on
the next one.Bye.
 Jenny Flores Art, Top Teacher | Watercolor & Gouache