Transcripts
1. Introduction: This project is a fantastic way to overcome a creative block by selecting a few alphabets and illustrating
around a chosen theme, you can unlock your creativity in a fun and structured way. In this class, I'll be walking
you through the step by step process of creating these tropical
alphabets in Procreate. Hi, I'm Vinita, an illustrator and a designer
based in Singapore. We'll start this class with some helpful tips on
sketching and composition. Next, I'll show you
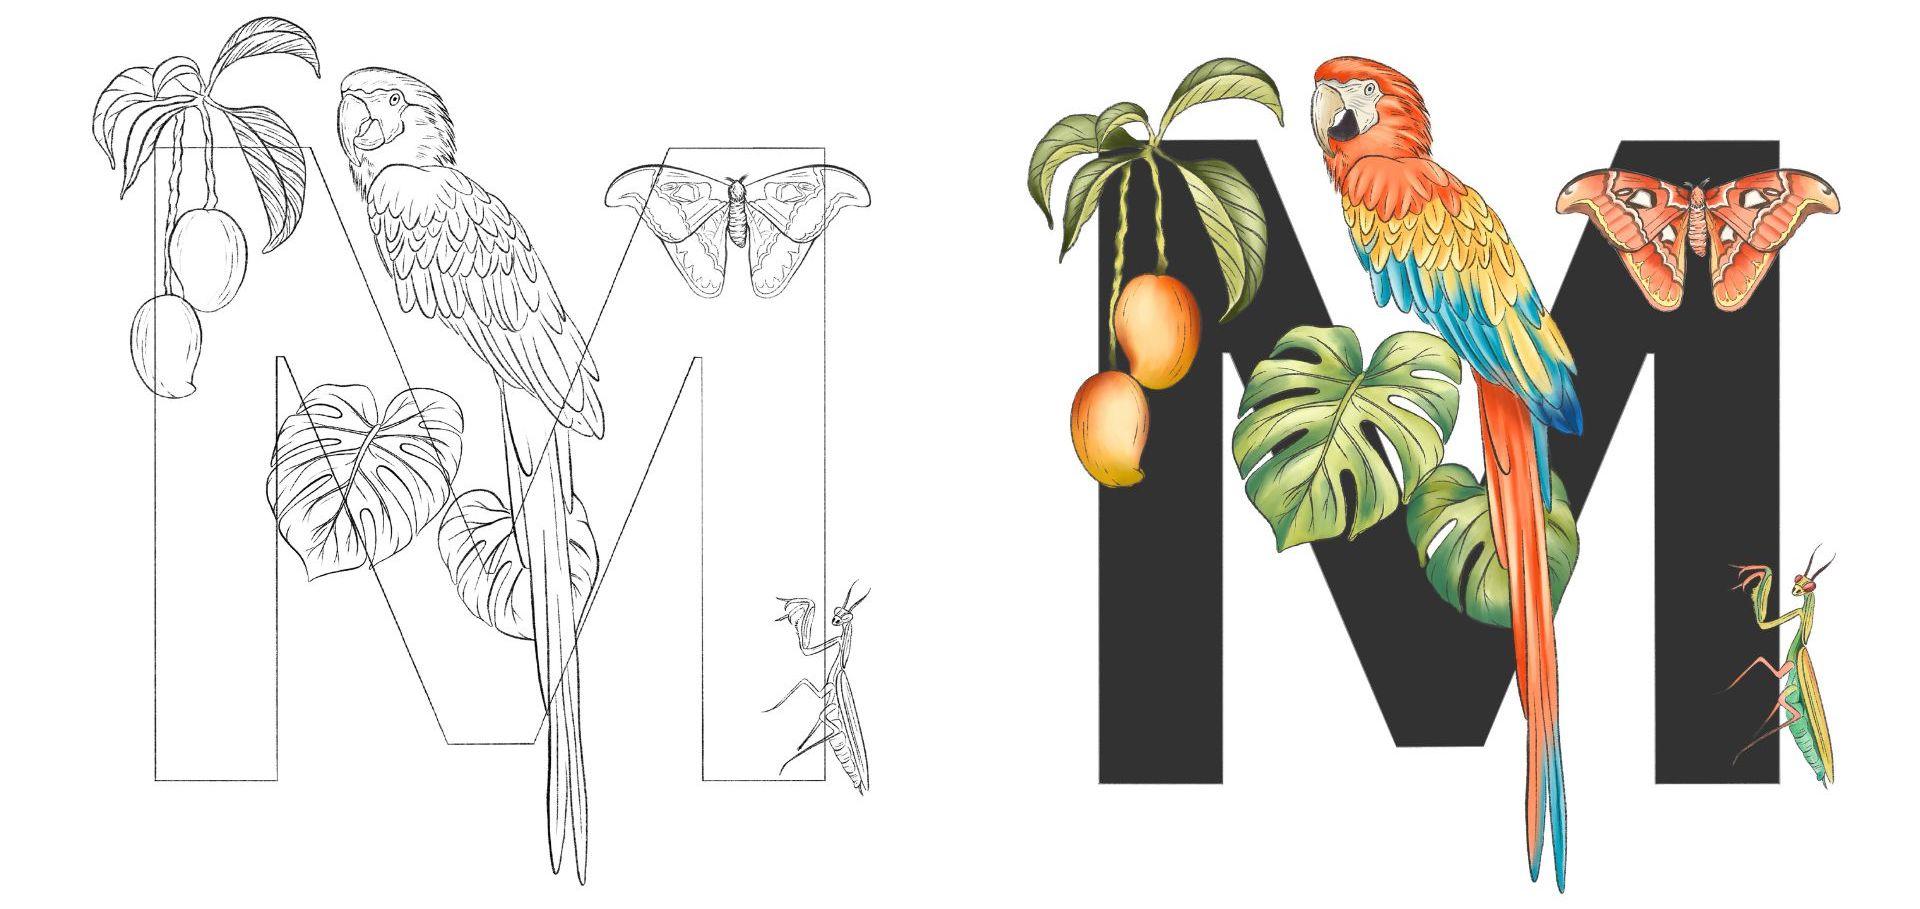
how you can create a detailed line art
for the macau bird. Followed by adding color
with shadow and highlights. For the other elements, I'll provide finished examples. But you can apply the same
steps we used for the Macao. For my project, I have this
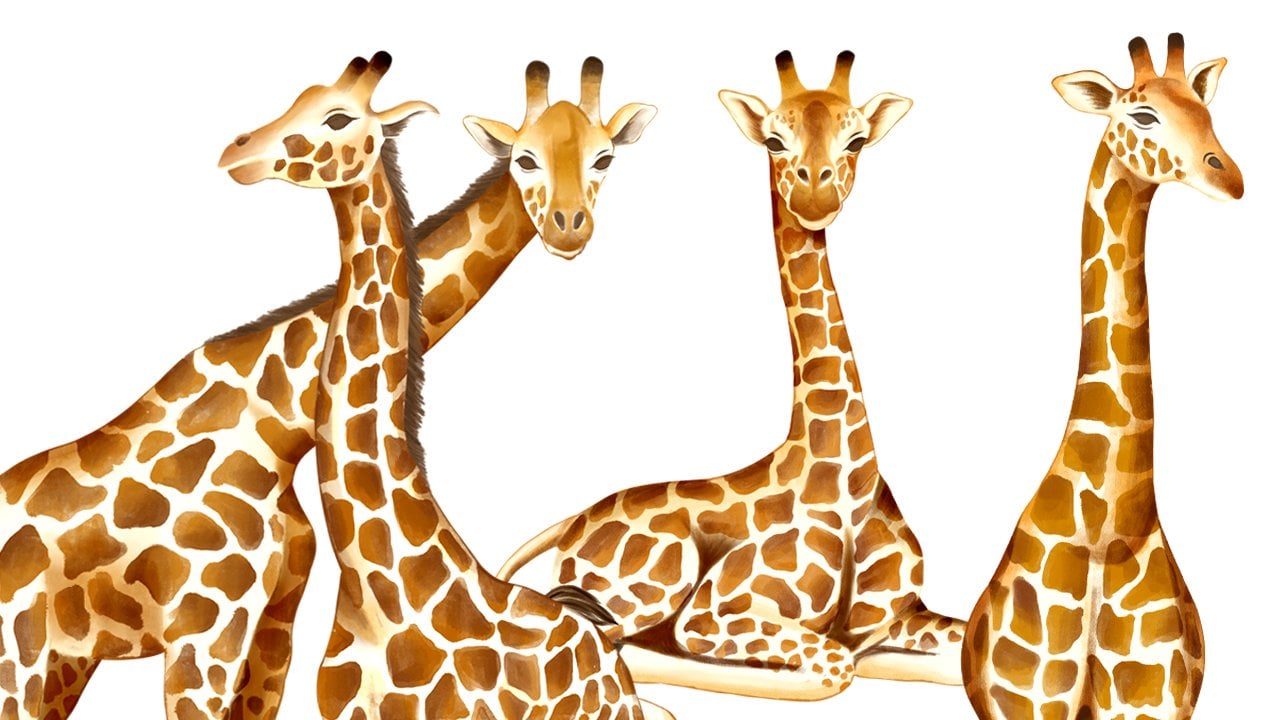
tropical theme with bird as the hero element while incorporating the other
supporting elements. There are few examples
and resources to inspire you to start
your own alphabet CDs. You can experiment
with different subjects like animals or flowers as your hero element to make your design
uniquely yours. So see you in the class.
2. Project & Examples: For your class project,
you can choose any alphabet or theme
of your choice. In the resource section, you can find the sketches and the procreate brush
for the letter M. You can either create
the same artwork or experiment with different
letters and compositions. There's also a prompt list that includes five elements
for each letter. Feel free to follow the prompts or develop
your own unique concept. Are the examples of
other tropical letters. Each letter has five elements
that includes a bird, fruit, insect,
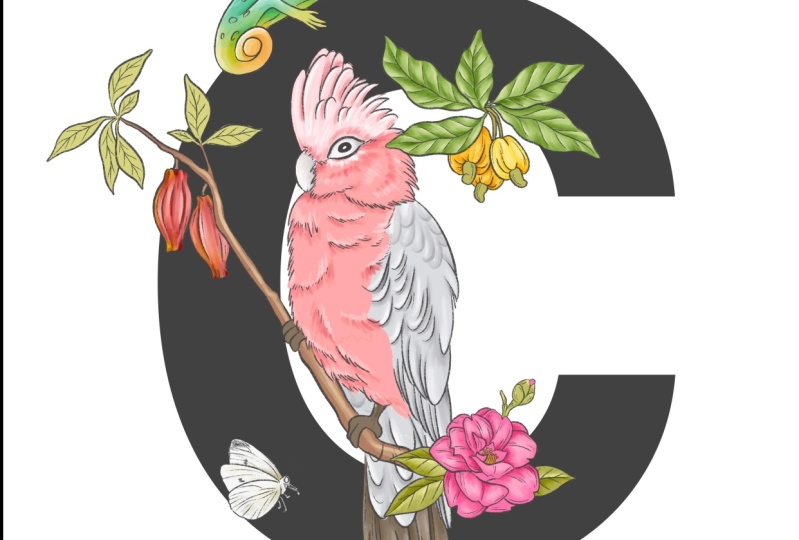
butterfly, and a flower. This is letter C, with the
acato as the hero element, with the Cameleon, cacao bean, cashew, and cameela flower. This is letter F
with flamingo as the hero element,
pyrnapani flower, a fig and the fern
and the butterfly as flotil Letter S with
the stoked bird, sunflower, the snake plant, swallowtail butterfly,
and the strawberry. Letter E with a two
can, tangerine, tiger lily, tansy, and two
tailed pasha butterfly. I hope this project and examples inspires you to create your
own unique collection. I will be looking forward to your unique artwork in the
project section of this class.
3. Canvas Brush Setup: So let's see what
canvas size and brush set you can
use for this class. When you go to the resource
section of this class, you will be able to download
my Canvas and the brush set. When you open my
file in Procreate, you'll be able to see in
the left corner here, tap and open this canvas, and this is what my
file looks like. It's a rough sketch
of each element, and they are all on
a different layer. So when you go to layers, you will see each one is
on a different layer. This will help you rearrange and recreate your own
unique composition. For example, if I tap on the Macau layer and
select this layer, you can move around
this element. You can place it depending
on your focal point, and you can even resize it. Let's move on to the brushes. When you go to the
brush library, you will be able to find my
brush set on the top here. I have included
three basic brushes. And I have customized
them depending on the stabilization and
the pressure I need. The first one is a
six B pencil brush. We will be using this
to create the line art. Second one is Tamar to
add the base color, shadow, and the highlights. Monoline can be
used for the letter M. I will quickly show you the demo on what
the brush looks like. So this is a pressure
based brush. So the more pressure you
add with your Apple pencil, the wider and darker it gets. So when I add shadow
with the darker color, you can see it
blends really well. So when you need darker, you can add more pressure
in the same stroke. Now, let's see a lighter
shade for the highlights. The second one is a six B
pencil brush for the outline. This again is a
pressure base brush. So when you add pressure,
it gets thicker. You can also select any other brush of your choice
depending on your style. The third one is
a monolin brush. This can be used
for the alphabets. So let's start the illustration with sketching and composition.
4. Sketching & Composition: You can either start your
project with my file or you can even add your own elements
and your own composition. If you're planning
to have your own, you can use images from the Internet or royalty
free sources as references. On a blank Canvas, you can go to action and add. Under AD, you'll find this
option called Insert a photo, Swipe Left, and there is an option called Insert
a private Photo. This will open your
photo gallery, and you can insert the
reference image on your Canvas, and then you can start
with your rough sketch. Make sure you're sketching each element on a
separate layer. This will give you
a better control when planning the composition. For symmetrical
elements like mode, you can use the symmetry tool. This will save you some time. So let's move on to
finalizing the composition. So our first step is to have an extra copy of this sketch. For that, I'll go to layers. I'll select all the layers
here and group them, tap on this option called group. And I'll close this group, so I left and tap duplicate. I'll hide my first group,
open my second group. So now we can start moving
our elements around. I'll start with one
element at a time, so I'll hide all
the other elements, and we can start with
the macau first. I'll select the macau layer. Now here, before you start, you need to decide what you
want your viewers focus to be on and make the most prominent part
of your composition. For example, in my
case, I want Macao, the bird to be the most focal and the most important
part of my illustration. You can even resize
your element. You can even create
few rough compositions to experiment with different
layouts and ideas. This will help you visualize the composition before you start with your
final illustration. Once you're ready with
your final illustration, you have to avoid moving
around the elements too much. This can make your elements pixelated and spoil the
quality of your illustration. I'm happy with my
composition now. I want the sketch
to be slightly in the center and smaller. Now to get the sketch
exactly in the center, you have to make
sure under snapping, your magnetic snapping is on. Now, when you move your sketch, you can see these
golden lines to ensure that it is exactly in the center, and I'll deselect. Next, we can duplicate
this composition. So we have an extra copy of it. I'll hide the first group, pinch and merge
one of the group, and we can drag this final
composition on a new canvas. You can drag and hold the layer, tap on gallery, and drop
it in your library. This is the new canvas, tap on this canvas. Now when you go to layers, you'll see there's
just one layer with the merged composition. You can reduce the
opacity of your sketch. So this is the new canvas where we will start with
our final illustration. I'll add a new layer, and let's move on to
our first step of adding Lina to our illustration.
5. Lineart: Once you're happy with
your composition, we can move on to
our final line art. You have to make
sure each line art is on a different layer. So we'll go to add a new layer, and I'll rename this
layer as Macau line art. So for each element, we will be adding a new layer. Next under brush library, make sure your six B
pencil brush is selected. Next under the color panel, I'll select this dark
charcoal gray color. Here on the left side,
you can see there's this tab where you can save
the size of your brush. For example, for my
thicker outline, I want it to be 50%. I'll save the size so I
don't need to remember. I'll select the size and
tap on this plus sign. I'll repeat the same steps for the thinner brush size that I'll be using to add details
to these elements. I've reduced the opacity of my sketch layer so you can
see the lines clearly. Because this is a
pressure based brush, you can add thick and thin
line in the same stroke. So I'm adding more pressure on my Apple pencil where I feel
the lines can be thicker. This adds more depth and
interest to your illustration. You can even choose another brush depending on your style. This pencil brush has
a texture and gives a very sketchy and pencil
finish to your illustration. But for a more smooth
and clean lines, you can select a brush like studio pen brush or a
technical pen Brush. You can even experiment with
the color of your outline. Instead of sticking with black, you can try using
colored lines to create a softer or more cohesive look that blends with
your color palette. Once you're done with the
outline with a thick brush, you can make the size
of the brush smaller. This is to add smaller
line art details. You can also experiment with these lines depending
on your style. You have to make sure whatever
brush or style you are using for your first element needs to be followed
for the other elements, too, so that there is a consistency and cohesive
feel to the whole artwork. Let's hide the sketch layer. We are done with the
outline of our macau here. I'll be showing you
the other elements where I have already
finished the line art. So the video is not too long, and you can follow the same
steps we did for the macau. This is the second element
that is the monstera leaf. It is on a separate layer and it is overlapping
with the parrot. The third element is the mango. Moving on to the fourth
element that is this moth, and the fifth one is Mantis. And this is how the
finished line art looks on the final artwork. Now, let's move on
to the next step of adding some colors
to these elements.
6. Adding Colours: Before we start adding
colors to our elements, I want to show you a technique how you can pick colors
for your elements. So for each color,
we need a highlight, a mid tone, and a shadow
shade of the same color. So I'll select my Tamar brush. Go to the color panel, and I can give you
an example with a bright red color
for the macau. The first color has
to be the mid tone. So we need to select a color that is not too light
and not too dark. I'll select this orangish red. So this is how my
mid tone looks like. The next one is
the shadow color. We have to go diagonally
down on the right side. Now, if you want it
to be more darker, you have to continue
going diagonally down on the same line. Now for the highlights, too, I'll follow the same, but we
will be going diagonally up. Now, if you want to
make this more lighter, you have to go further
diagonally up. So this is the
technique that you can follow for each
color and element. Another example with
the green color. So this is what my Canvas
is looking like right now with the final line
R done for each element, and they are all on
a separate layer. Now, tap on layers. And here we need a new layer under the Macau line art layer. Now to add a new layer, I'll select the letter M layer
and tap on the plus sign, and you can see a new layer
below our Macau layer. Go to the color panel, and I'll select this
bright orangish red color. Make sure this color
is a mid tone color, not too dark, not too light. From the brush library, I will select my Tamil brush, and I'll start adding my
base color for the macau. I've increased the speed of the process so that the
video is not too long, but you can pause the
video and take your time. You can also have some
images for your reference to understand how in real the colors are
looking on the Macau bird. Reference images can also be
very helpful to pick colors. Next, I'll select a
nice deep yellow color, and I'll continue below the red. Next below this yellow color is this bright turquoise
blue color. On the tail, again, it has to be red, so I'll pick the same
color from the head. So we are done with the base
color of the body here. We can add some base color for the beak and the face, too. Let's zoom into the face, and I'll select an off
white color for the beak. Let's move on to the face. Now, this part of the
face has to be white. I'll select this white
color and we'll change the color of the background because the background
is already white. Now when we draw, we
can see it clearly. I'll fill in the whole face
area with this white color. I think the lower
beak needs to be of a darker charcoal color. I'll select a dark gray color, and I'll fill the bottom
part of this beak. So now we are ready with the base color for the whole parrot. We'll move on to
the shadow layer. We'll go to layer,
and you have to add a new layer above
this base layer. And this new layer
is to add shadow. We'll start with the red first. I'll select the red first. I'll pick the color red. Then I'll diagonally
go right down, select a darker shade
of the same red. Make sure your tamer
brush is selected, and with a smaller size brush, we can start adding
some shadows. Now, with the same shade, we can also add
to the tail area. Et's move on to the shadow
for the second color. That is this yellow color. I'll select the color,
diagonally go down, and I can add shadow
to the yellow area. Now, let's move on
to the blue color. I'll follow the same steps, select a darker shade
of the same color. And we can add some shadow
to the blue feather area. There's this one tip
that you can follow for your shadow layer is you
can go to the shadow layer, tap on this tiny end, and you can see all
the filters here. You can select the multiply. You can see it enhances
your shadow effect. You can even control this with the opacity if you feel
the shadow looks too dark. I'll keep my opacity
at around 80%. And let's move on
to our highlights. I'll add a new layer
about this shadow layer. Uh. Once you're done adding your shadow
and highlights, if you feel the lines
needs to be smudged, you can select the smudge tool. With any soft brush, you can blend the edges where you feel they are
too hard or too rough. I'll go back to my
highlight layer and we can continue
with the yellow color. I'll select the yellow color, go to your color panel, and diagonally select a
bright lighter yellow color. Now for the blue again, I'll select the color. I'll pick the mid tone, and I'll diagonally go up and select a lighter,
brighter color. If you see a reference
image of this red Macao, you can see there's
another color of this darker royal blue. This is towards the
end of the feather. So we are almost ready
with our macau here. I need to add a little
detail on the face, on the beak and the face
part of this macau. I'll follow the same steps. I'll select a darker and a lighter color of the
same off white shade, the beige shade to create a little shadow and highlights that can help you
create this depth. On the face, I'll use this
lighter shade of gray. If you closely see
a reference image, you can see the stripe
pattern on a macau face. So we have completed our
Macau illustration here. I'll show you the
colored version of the other elements too. So this is what it looks like with all the elements colored. You can follow the same steps
like we did for the Macao. You need to create a base color, a shadow layer, and
the highlight layer. Next, we need to add color for
our letter M. Before that, you need to make sure you have each element on a
different layer, and they can also be merged. Make sure to have
a duplicate canvas before you merge all the layers. I'll select the letter M layer, add a new layer above
your letter M layer, tap on the layer and
select reference. Next, you have to select the new layer that
you just added. Go to the color panel, and I'll select this dark
charcoal black color, and you can drop this color on your letter M. If that
fills your whole canvas, you have to reduce
the threshold. This is also happening
because the outline on my layer is with the
six B pencil brush. If you have an outline done with a more opaque brush,
this might not happen. And we are done with
our artwork here.
7. Final Thoughts: Congratulations for
completing this class. To recap, we learned
some tips on sketching and composition of
these tropical alphabets, how to add line art, and how to add color with
shadow and highlights and plenty of examples
to inspire you to create your own
alphabet series. I hope this class has
been beneficial to you and adds value to your
illustration journey. If you have any
doubt or questions regarding the class or
the illustration process, you can post in the
discussion section of this class. I'm
here to assist you. Your feedback through
review helps me improve and plan
my future classes. You can follow me on Skill Share to get notified when I publish a new class and you can
follow me on Instagram two. Thank you for taking
this class with me. See you in my next class.
 Vinita Upadhya, Illustrator & Pattern Designer