Transcripts
1. Introduction: Travel photography isn't just about taking a pretty picture. We've all seen the postcards. But how do you actually capture
the feeling of your trip? So that way, all
your friends go, Wait, I want to be there. My name is Finn Badgley. I'm a fashion and commercial photographer,
and anywhere I go, I have my camera with me, but I like to document my travels in a very
particular way. As a photographer, I've gone
to many places, but as I do, I want to show it off in
the best way possible, and in a way that only I know
my experience of that trip. I'm going to teach you how to capture your experience
in a way that feels authentic and
wants to take you back the moment you
see your photos. We're going to look at how
to capture your journey. This is travel photography
for beginners, places, people, and stories. Travel photography isn't
about having the best camera, a drone, any of that. It's about learning to see. Learning to find the
little pockets in your environment and how to
capture them effectively. I don't just look to capture the iconic shots that have
been taken 1 million times. I look for things that
are unique to that place, little things that will
make me remember that trip, make me remember that place
and take me back there. And that's what you're
going to learn here. The composition
rules that I use to find little pockets that some
people might just overlook. The wider landscapes of how to actually capture the grandness
of an amazing place. And not to mention how to capture better photos
of your loved ones, that they will remember forever. So if you're looking to capture better stories of your travels, ones that you want to keep
looking at and go back to, this is the class for you.
2. Project: Get into the project
aspect of this. You're going to deliver a
three shot mini travel story. Now, you don't actually
have to travel. If you're not on an
adventure at the moment, you can become a tourist
in your own city. This is something that
I've learned to do to see my own environment
a little differently. So go out there, whether
you're on vacation, whether you're in your
hometown, wherever you are. Look for the unique moments. Use the techniques that you're going to learn in this class to create three shots that fit
together to tell a story. Use the wides, use the tights. Use the unexpected. Look for light and
shadow and find your three best photos that
tell the story of that place. And I can't wait to see
what all of you create. I'm actually
traveling right now. So I'm going to be sharing my own three shot mini story so you guys can see what
I did and then how you can take inspiration
to find your own shots, take some ideas from
this class and develop them into your own
photographic style.
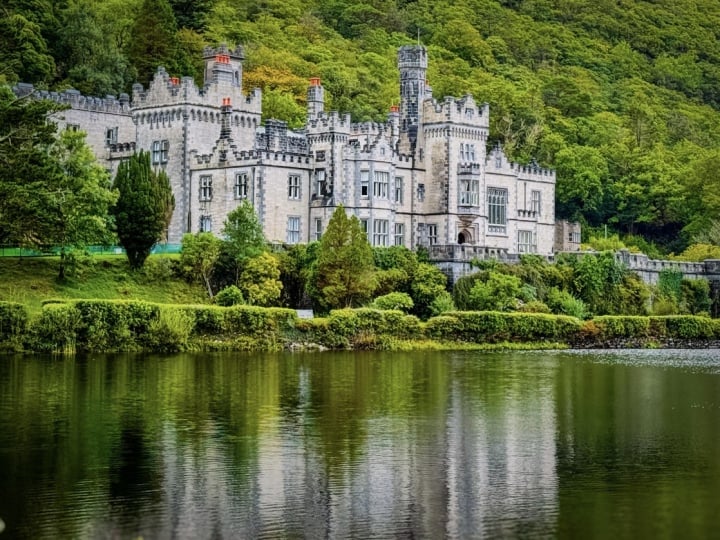
3. Framing New Places: Alright, let's jump right in. Also from different hotel and different country this time. Last time I was in Greece, now I'm in Sicily in Italy. And I've been documenting
my travels the entire way. So, the first thing is my
approach to landmarks, views, the things that you
want to see, the sight. When you're out traveling. Now, some of these places can be quite congested by tourists, by other people trying
to get their shot. I'm also not looking to have the same shot as somebody else. So here's a few things that I look for when taking
these photos. First things first, I
find most of the time, you're almost too far away. You're almost too wide. So I
like to find I like to zoom in and find a unique
spot about something. I find often if
you're looking at a fantastic panoramic view, it's hard to single out
one particular thing. But what I do is I look for
something to be my subject, and I zoom in just on that. Now, here's the same photo, but taken wider and taken
just a little closer. Zoomed in a little bit. This is the same if
you're using your phone, if you're using a camera
with a lens that you can zoom in on,
same thing applies. I try to just zoom in
a little bit further than you would initially
think and also move around. Don't just take the same shot everybody else as
they see the view. You take the photo, look around and see what makes
it interesting, find your own spin on it. Look for what jumps out at you and how you can
frame that accordingly. Something that I
really like to do is have something
in the foreground. So there's something
in front of the photo. There's your main subject here, and there's something
that helps draw your eye in to that. The other benefit of zooming in for your shot
is you often avoid other tourists in your
photo that either take away from it or you would have to remove after the fact anyways. So that's one way I look for
these specific subjects, whether it's a mountain in the background or if it's part of an
architectural building, something that I can punch
in on and make my subject. Even if it's a larger view, maybe I'll focus in if there's
a sailboat at the bottom. You make that my focus. And I'm using
compositional rules here. So a lot of times
you'll notice I try to place these within one of
the thirds of the frame. On a lot of your cameras,
you'll have a grid. It's six grid lines. And I try to place my subject on those grid lines because it
makes it more impactful. That's why it's a
compositional rule. And you start combining some of these
compositional rules. You use that. You use framing. So you're using a
frame within a frame. Maybe there's a cutout
of an old building, and then there's something
in front of that, and you use that archway to
frame your subject below. Something like that can give you a really unique perspective and add some more interest
to the photo. I also don't try
to take them from eye level because if
you just take it, you're getting the same
shot as everybody else, and it's almost too
commonplace because that's what our eye naturally sees
and that's what it's used to. So something I look for to
change this up is I'll either get lower in a frame or I'll
get higher and look down. Higher is really
good for a view. If you're up high, you kind
of tilt down a little, and you see more
of what's below, and it kind of guides
your eye up the frame. Or if you're in a
monument or something, maybe get a little
lower and it'll capture the grandeur of
the place that you're in. It's just one little way to add some more character,
spice up your photos, make it a little
different and help tell that story better because if
you're in a grand monument, getting that lower angle
is going to add to it. If you're punching in on
something that's going to do. What it tells your eye is, Hey, this is important. Look at this, and it makes a
more impactful photo versus having a bunch of clutter and a wide shot that just
doesn't really work. It's just the first
base covered. That's your places. And this can be anywhere. And I'm always keeping my eye out for these interesting spots. Is there a symmetrical
view here? Is there a different side
of things that I can see? Am I always try to keep my
eyes open for what could be an interesting photo and tell a great story
of where you are. And the main thing to
remember throughout all of this is you're not just
documenting the place. You're documenting
your journey there, the stories of that. Doesn't stop there. In
fact, it just starts there. That's just the places, but there's so much
more to travel photography than just that. We still have
elements of how you can tell a compelling story, and we got to get into
the people aspect.
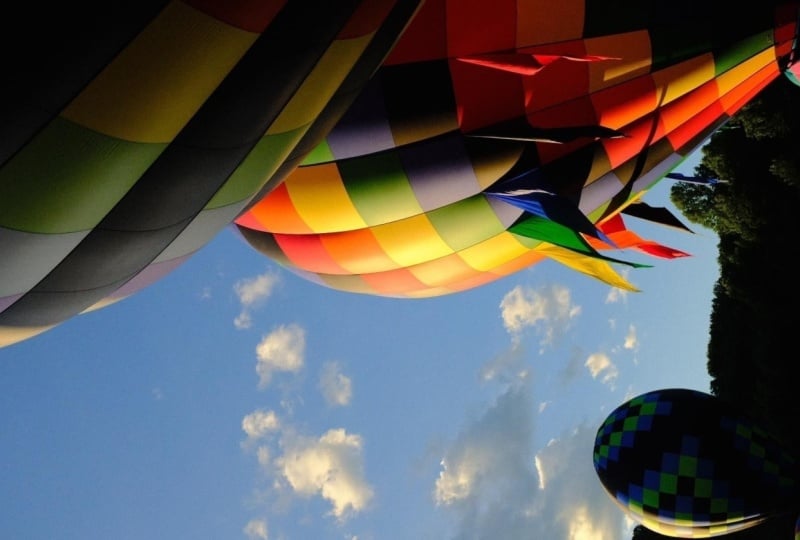
4. Building The Story Details: Now you have your places down, but something I really like to do is find a detail
shot somewhere, something that's a
little abstract, something that's a
little more interesting. So I was just in Greece, and a lot of the architecture
is super interesting. There's a lot of curves and flow to how all these
buildings are made. And I wanted to find a
unique way to capture that. And I noticed when
it was really sunny, the shadows really help play with that so you get
the dark and the light. So what I would
start doing is punch in on these areas,
zoom in really close. So you maybe don't even
know it's a building. You're not really
sure what it is, but you see the light,
the dark, the shadows, and it tells and it helps tell the story without
giving too much away, just a little detail. Now, they don't have to be just these little details
of buildings, per se. It can be something
unique about your food or the people you're
with capturing just a close up detail
shot of something. And when I'm using my phone, I like to zoom in
a little bit more. Darken that image down
just a little bit, because I find sometimes, especially if you're
using an iPhone, it tends to have the brightness almost a
little too high sometimes. So that's when I
tap the screen and I just lower that sun down. It helps your photo
be a little moodier. But also, if you know
camera mechanics, it ups your shutter speed a little and you'll get
less motion blur. About it. As you're
looking around, what's a cool detail shot? It could be the
floor where you are, capturing it slightly
on a canted angle. That's like a bit
of a Dutch angle where instead of having
lalines perfect, maybe they're a little off and zooming in
capturing that detail, or it could be something in
a shop that you really like. Or, again, your food or
something you're drinking, and it doesn't have
to be perfect. Sometimes the messiness of something is part of that story. This isn't about perfection. It's not about
technical anything. This is about capturing stories
that are unique to you. What's a detail that you
can look at and be like, Oh, this is a
unique thing to me. And if you're into
posting a bunch of photos in a
carousel on Instagram, this is a great way to
add a little touch to it. It's something a
little less expected, but it's unique to
you and your travels. And it also shows
what your eye sees, what do you gravitate toward? A great example of this is
when I was in Greece in Milos, were all these swirls
in Syracinco Beach, and they're on the rocks, just the way the
light bends through them and the little hints of light and dark that
you get in there. I'm always looking for light and shadow and
interesting patterns. That's exactly what this is. And I thought, You know what? I might not think
it is what it is. But then if you're posting a carousel of a bunch of
photos with Sara kineco Beach, this ties in perfectly. So I'm looking at that.
I'm looking for textures. I'm looking for what's cool.
And then I just go top down, zoom in on just these
swirls and the rocks, and it makes for a
fantastic photo. It's something that I
would even actually have printed because I
like it that much. It's just so
interesting to the eye. This is where
before, when you're trying to define your subject, you can zoom in and try to find a particular aspect of
these swirls or say, if you're photographing tile
on a floor or a ceiling. If you're going to
Europe, sometimes they have really
interesting ceiling. So going up, zooming in or even having a wider
shot and capturing that, it's not necessarily just
about close ups for details, but how can you capture
a detail of something? How can you capture something unexpected that adds a
certain level to your story? That's what we're looking for
here, the unexpected shot, something that adds to the narrative that
tells more about it. That tells your hotel experience
or if something happened while you were on a train or
just a funny moment that Oh, this photo encapsulates that, but maybe not everybody gets it, but you and the people
that were there get it. And when you see it, it takes
you back to that place. It takes you back to the
swirls at the beach and the warmth and how we woke up
early to catch the sunrise. Those moments take
you back there, and it makes you
want to go back. It tells another layer of the story that you're not
just seeing if you have a wide shot like you'd
see on a postcard, right? So this is what
we're looking for. Now, before we go any further, I have a quick
assignment for you. Look around the room you're
in right now. Find a detail. It can be a close upshot of the knob on a wardrobe
and capturing that. It can be if you have a unique pattern on your
duvet or on your chair, I'm literally looking around the room right now to
see what I can find. And I'm going to add some shots because I'm going to
do the same thing. Look around your room right now. Zoom in, find a detail, and then add it to your
project because I want to see what your eye thinks of
just in the room around you. You don't have to go to anywhere spectacular to capture
interesting photos. This is how I'm
training you to see interesting things in
the environment you're already in and how to
frame them differently. With the places and the
detail shot taken care of, there is one more thing and arguably the most important
thing we have to cover, and that's photographing people.
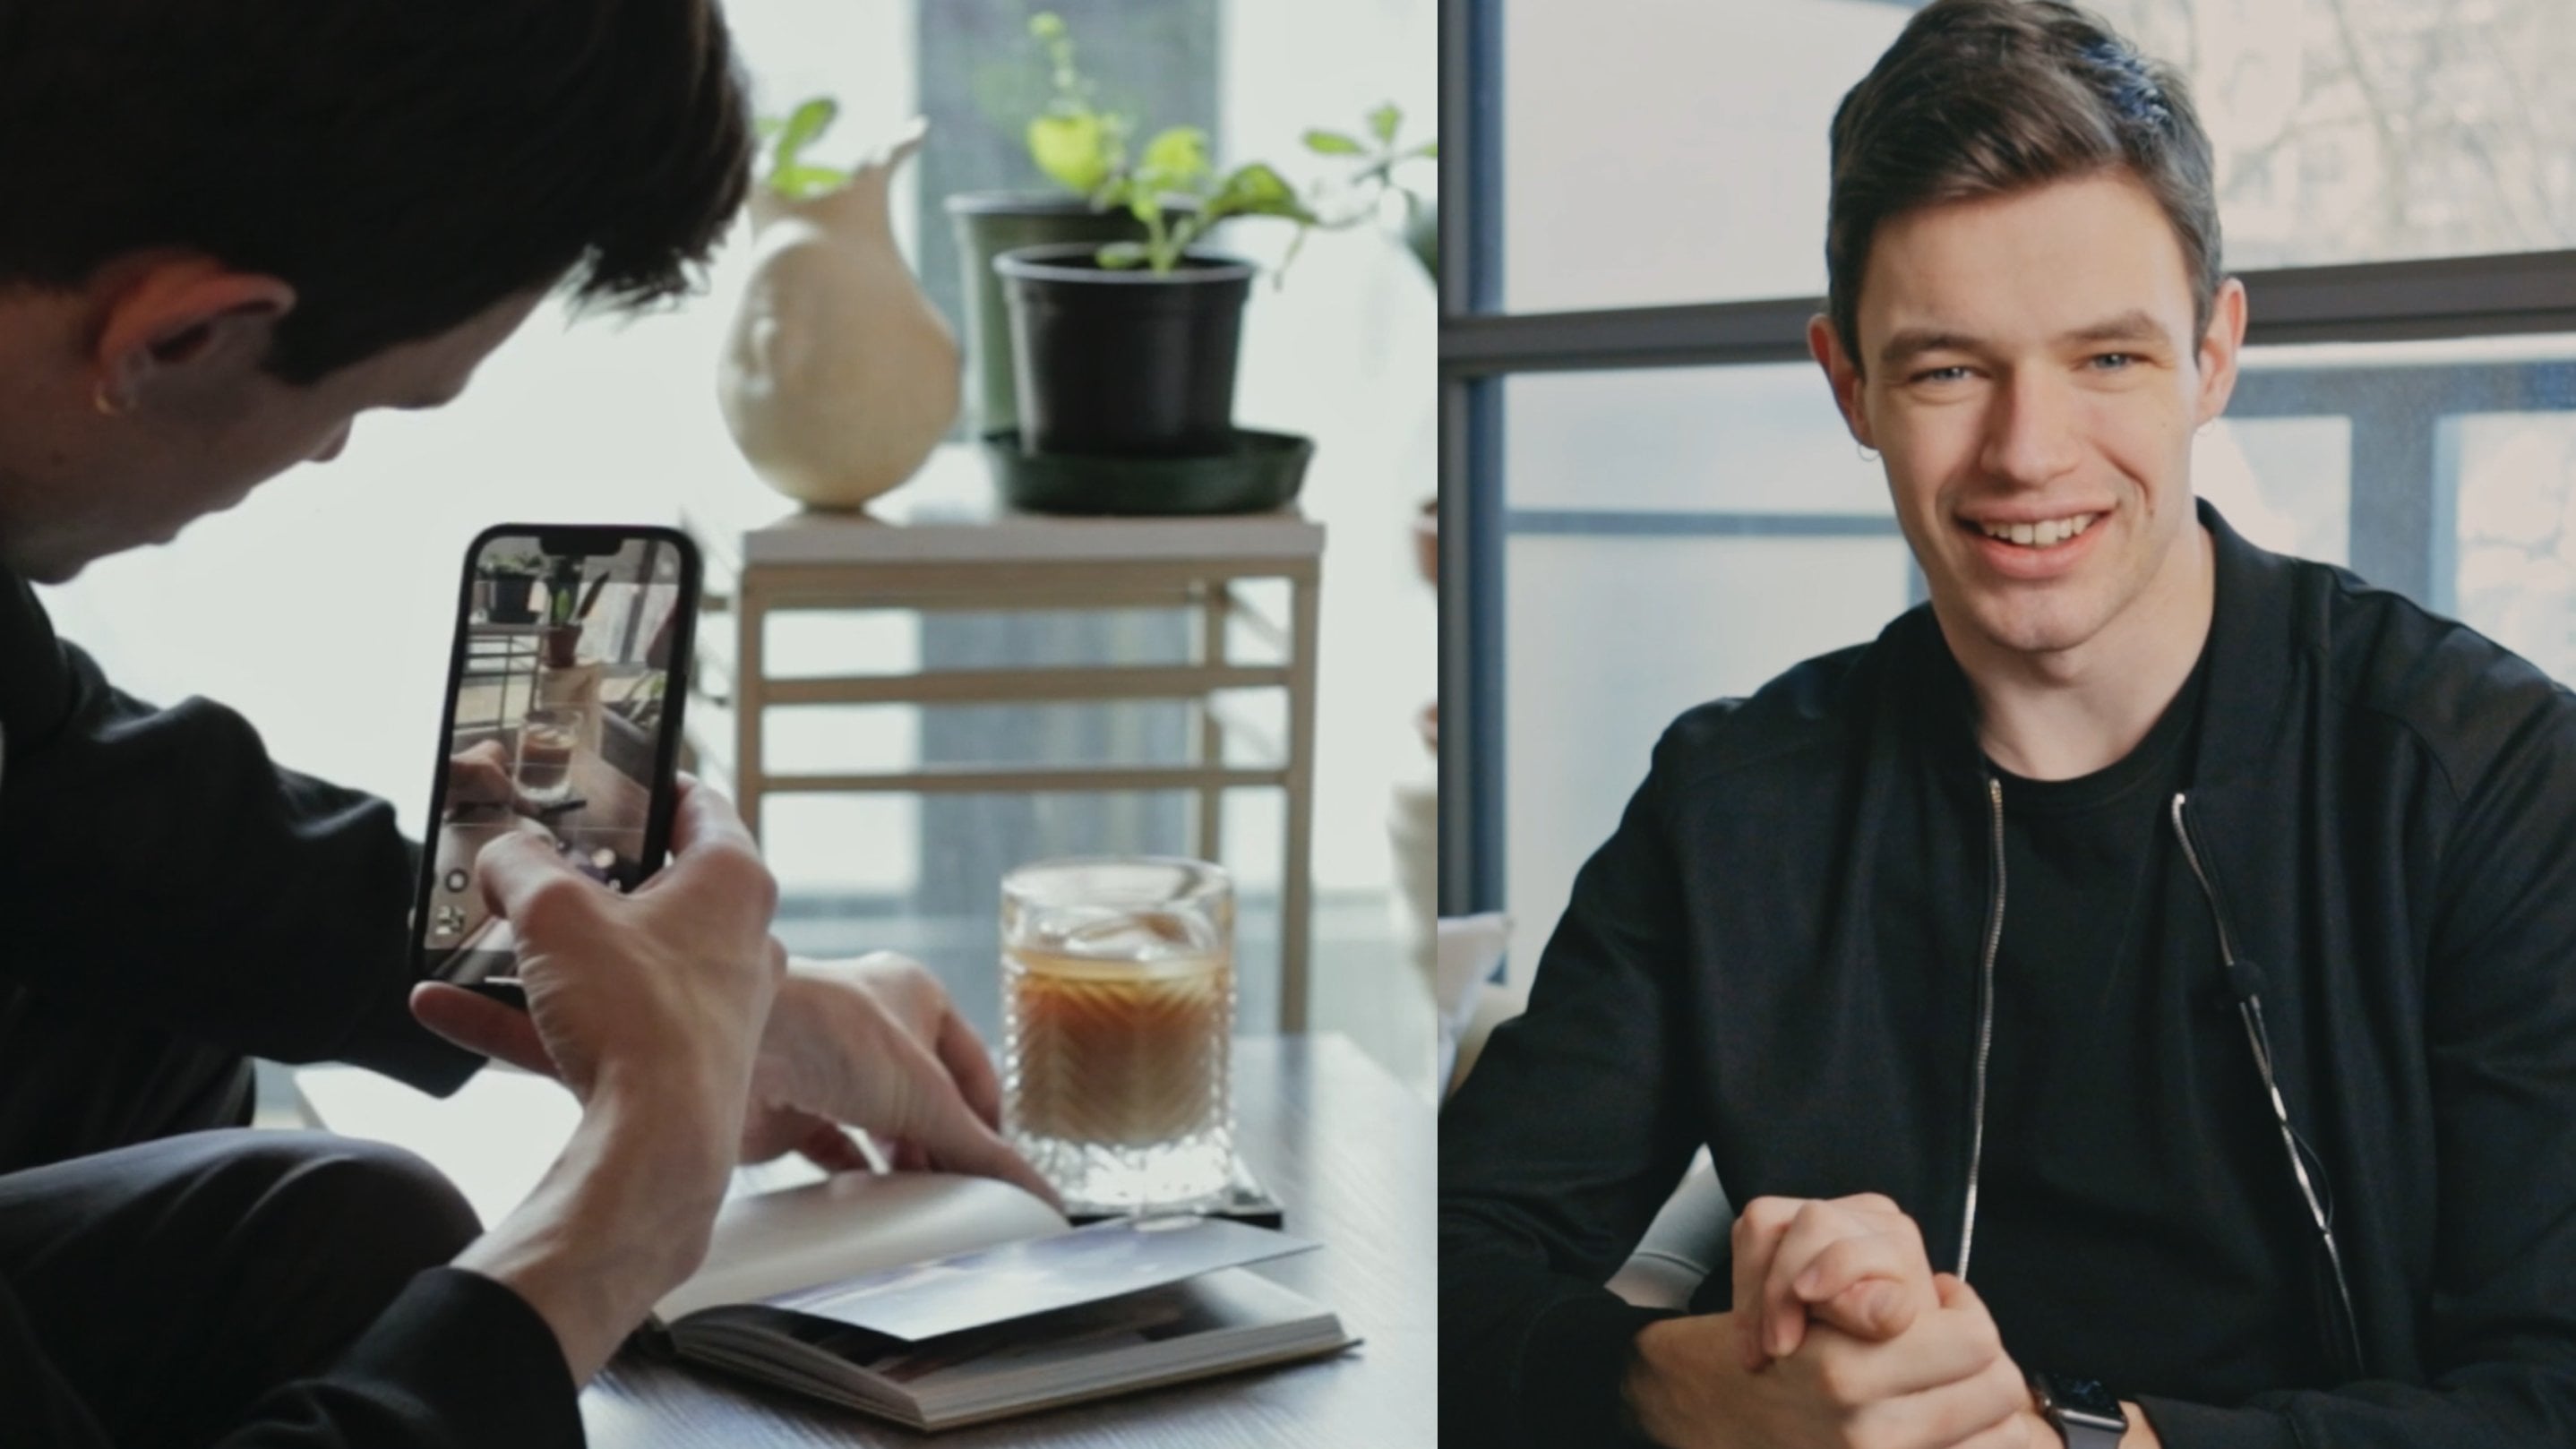
5. Capturing Your People: Most important part,
how to better capture photos of the people
in your life, the people you're traveling with because they're going to
want their photo taken, you're going to want
your photo taken. And here's how to do it best. Both of us are picky when
it comes to our photos, and these are the things that
we've learned to do to get the best shots possible and
to tell a better story. We've all had you're standing in front of a
place smiling photo. Now, that's great. This is
how you can take it better. The first thing you can
do is frame them with it. So, are they close to it, and is it really large
in the background? Then I'm going to need to
go wider to capture that. And I'm keeping in mind
my composition of roof. I'm trying to make sure all
the lines are straight. I'm ideally keeping
the monument and the people in a third
of the frame somewhere. So maybe the people are
down at the bottom. Let's say that monument
or that mountain, volcano, whatever
is further away. A step back and then zoom in
because when you do that, it brings what's far away and what's close
closer together. So if you're on a wider lens, if you're at a wider angle, it's going to actually
separate them more. So it looks like there's
more distance between them, but you take a step
back and you zoom in, it's actually going to
bring them closer together, creating a more impactful shot. That's just a quick example
for smiling photos. What I like to do personally is I like something a
little more candid. So something I'm going
to do a lot of times, if there's a railing, I
might put my arm on it, and I'll just look out in a way that makes it so you
can still see my face, but maybe I'm just
looking out to the side. Almost like I'm taking in
the environment I'm in. It gives a more candid feel. I like to have a good
amount of my full body in the shot where my head is
in that top right third. And you can still see the vista or the monument
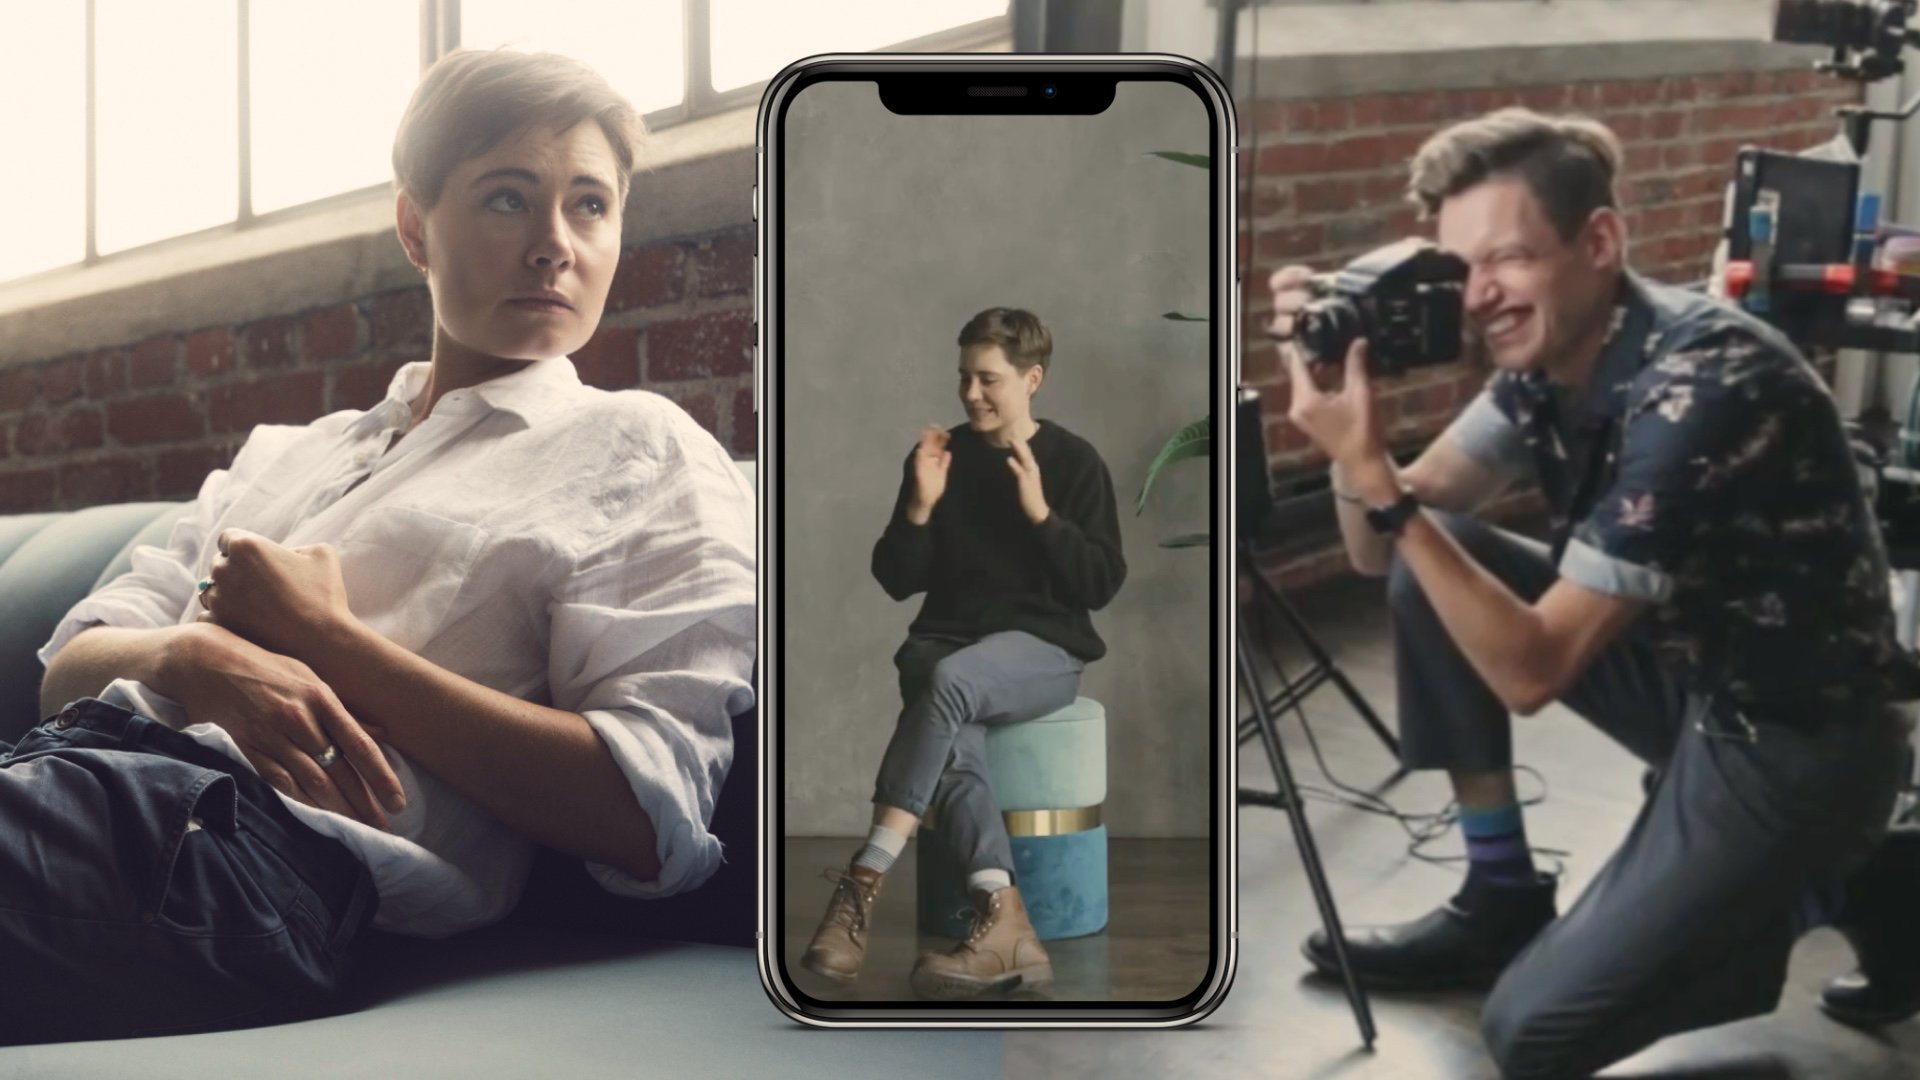
or whatever is behind me. Something my girlfriend
is really great at is she'll line up a frame
and then hand me the photo. I'll usually put her in
the bottom right third or have her take up both the bottom and
the top right third. So her head is at
the top right third or top left third
depends on the angle, and it's going to be
a more candid shot. So maybe she's sipping a coffee, but she's not looking
towards the camera. She's looking just
off a little bit. You might have people be a
little awkward in front of the camera sometimes and they might not be as
used to doing this. Something I love
to do if you like smiling photos is push out a laugh or make the
people you're there with laugh and it'll
make for a better shot. Or maybe you're walking down the street and just slowly walk, maybe laugh a little bit,
taking in the moment, and somebody's capturing that, right? That's what I'm doing. I'm capturing somebody
just in that moment. I want to make sure I'm
eliminating distractions. Sometimes that means doing that same thing when you're
taking landscape shot, zooming in a little bit more. It can also mean taking
different angles of somebody. Maybe I'll take a
full body shot. Then maybe I'll come
in closer and I'll do this in a matter
of seconds on a phone because I'm
taking a bunch of photos. I'm that guy that my thumb is
just going on that button. So I'm taking a bunch
of wider shots. I'm coming in closer. I'm coming in for the detail, and I'm getting all these
shots in the same time. Well, essentially the same. The same breath, almost. The age role question, how do I stand? Where do
I put my hands? How do I pose for things? If you're a woman, this is going to be the
easiest pose I can give you. You're going to stand
slightly at an angle. You're going to bend one leg
and kind of have your hand just on you're on your thigh. So there's a slight
bend to your elbow, and then you can look
off one direction. You can look at the
camera. You can look down is a
good candid angle. If you're looking
at your shoulder, you're looking towards
your feet, can even let out a little laugh. It makes for a really good
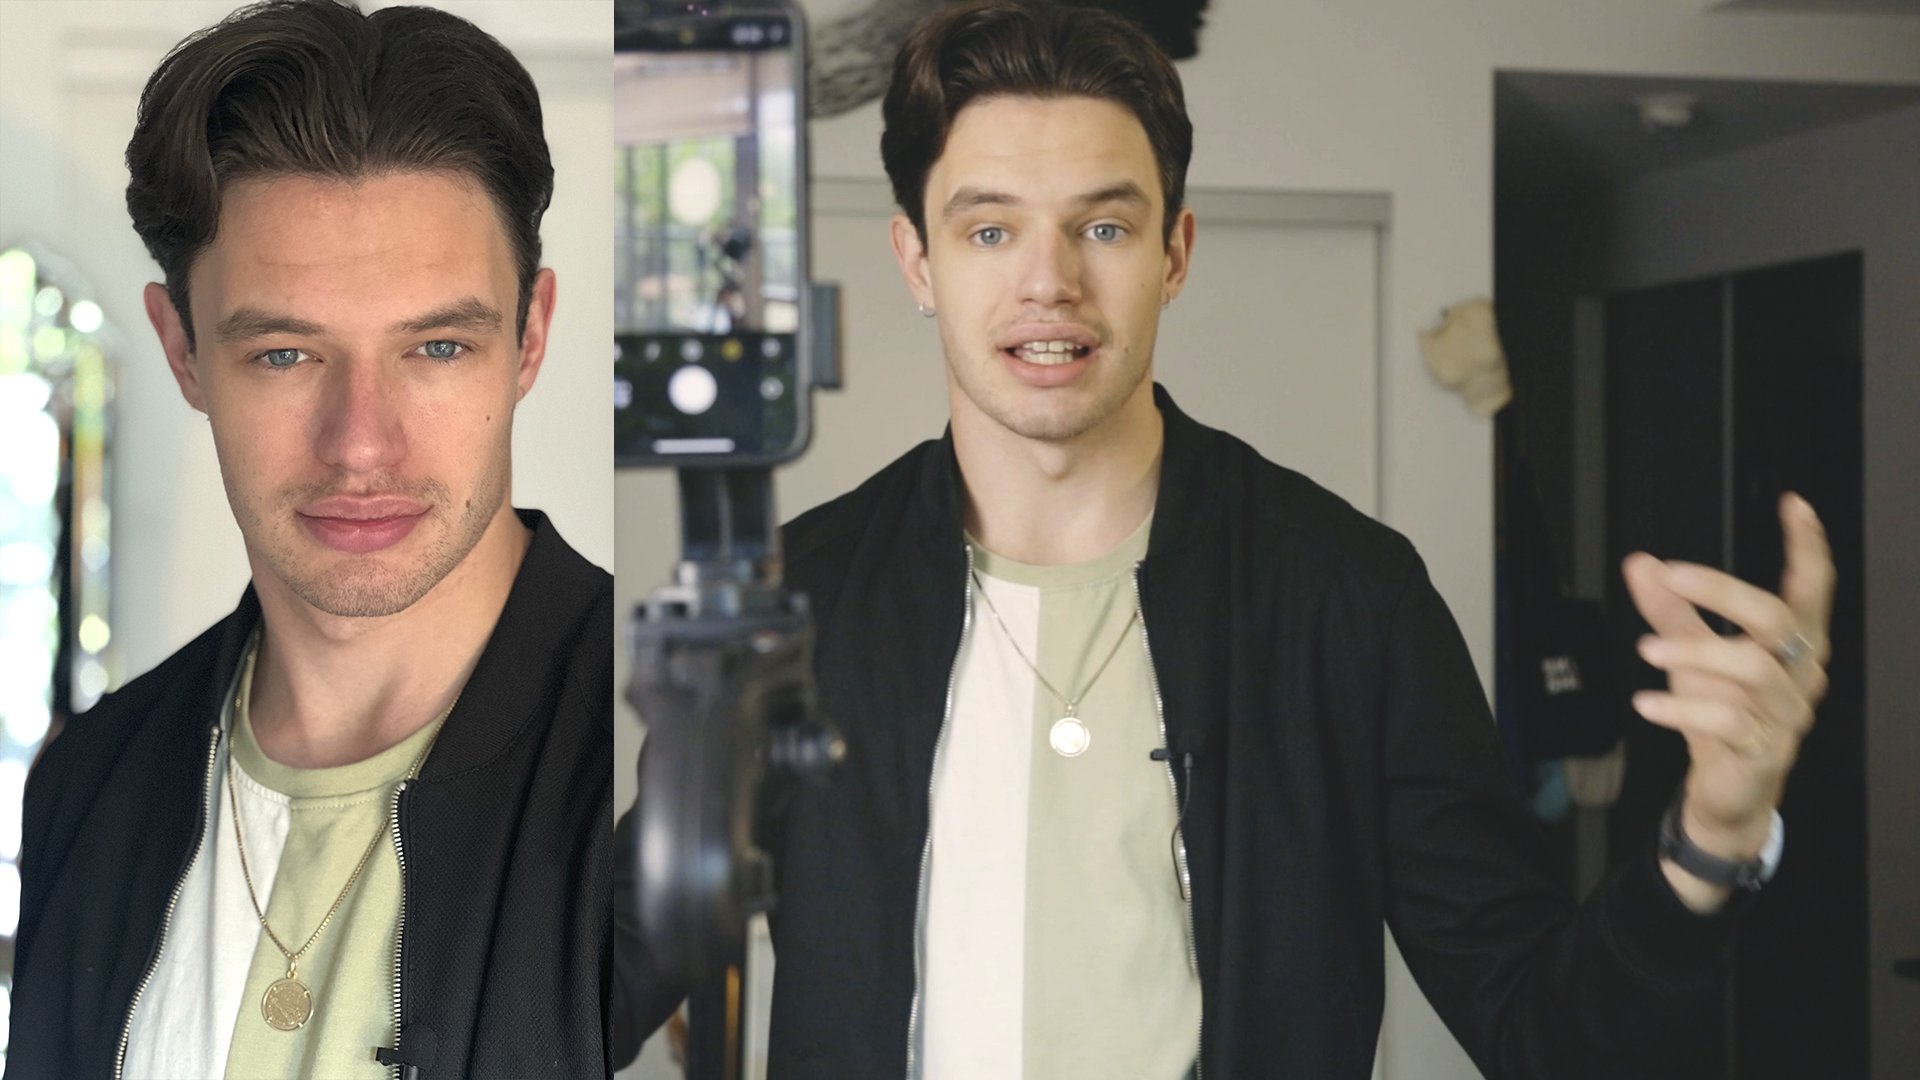
looking, candid moment. Now, if you're a guy, I do want to keep the one
shoulder closer to the camera, I'll put my weight
back on my one leg, and then from there, I'm able to look
different directions. And this helps give
a bit more interest, and you're not just flat onto the camera like it's a mugshot. I'm looking for angles
and different ways to add some visual interests that make for a better looking photo. As for hands, if you're a guy, sometimes I'll put one
hand in the pocket. I can have an elbow
leaning on a railing. But honestly, sometimes I'll just have my hands at my sides. And provided you're
not too stiff, it actually makes
for a decent photo. Just keep your shoulders back. You're still relaxed
and same thing goes. You can push out a laugh, and that gives for
a better smile. Basically, all we're
trying to do here is create a little more shape,
a little more angle. It's more flattering for you. And it just creates a
more pleasing photo. So you're not just, like,
standing straight on, like, the full body
version of a mugshot. These are your vacation photos. So we tell aunt
mugshots out of them. That's how you can
take those and how you can take of the
people in your life. I'm making sure
that their heads, their bodies aren't covering major landmarks or anything
I may want to point out. I'm also getting
different angles. I'm moving my feet.
I'm zooming in. I'm zooming out, trying
to find what works best. Sometimes I want
the focus to be on the person themselves
and less so the place. So maybe if they're
up on a cliff, I'm looking for more water, less sky, something like that, keeping it a little simpler, or sometimes I like what's
in the background and want to position that person
so there's more of that. If there's a cliff, if there's a building or something
interesting in the background, maybe I want to work with that. But I assess the
situation and go, Okay, what looks interesting here? What works for this? A good way to practice this
is you can take a photo of a friend of yours or even just set your phone
up on a self timer, and you can sit at, say, your kitchen table and just
enjoy a cup of coffee. Something I like to do
is you just sat off to one side, and you can look out. You can look this way. But I'm not face onto the camera looking in, drinking
that coffee. That doesn't quite work. So that's what
we're trying to do. We're not just standing
in front of a place. Maybe push out a laugh, add a little smile in there, or you can be the cool guy, look out over the edge. This is how you create different looking
photos that your mom, when you send her will love. Also, if you're taking a selfie, hold it up high to get that
background in the view. Plus, you can hit the expanded view and you can see more of
what's behind you. Or if there's something really
cool up high behind you, then lower it down so you
can see more of that.
6. Final Thoughts: First off, thank
you for watching till the end of this class. I hope you're able to really capture your travels in a
way that is unique to you. The next time you go out, experiment, try
different things. And I can't wait
to see the photos that you take from your travels, the stories that you're able to capture down in the projects. If you enjoyed this class, follow me along on Skillshare. As I'm always posting
more classes. Let me know in the discussions what you guys want
to see from me, as I'm always looking to deliver the best information to you. If you're not tired
of me talking yet, you can follow me along on these different platforms,
YouTube, Instagram, Tik Tok, all of them to
see what I've got going on and to see some photos from the trip that
I'm currently on. I'm going to continue
on with my travels and document the entire thing. Thank you for spending
your time with me and remember as
always to work hard, rest often, and have
a super creative day.
 Fynn Badgley, Fashion & Portrait Photographer