Transcripts
1. Intro: So you want to learn how to
create explainer videos. That's awesome. It means you are serious
about your career. Maybe you also want to
master product demo videos, documentaries for YouTube, or
even animated music videos. Do you know what all of these
projects have in common? Transitions. Let me explain. All these types of
complex projects consist of multiple stints. For example, explainer
videos can include anywhere 5-20 stents,
sometimes even more. When I was a beginner
motion designer, after receiving the script for my clients and
designing the stints, I still felt super afraid
to take on these projects. The reason I didn't
understand how to smoothly connect all the
stints in the animation phase. I didn't know how to transition from one scene to another. A few years later, after mastering explainer videos and becoming an after
effects instructor, to my surprise, the
number one question I kept getting from my
students was the same. How do we transition from
one scene to another? Most of them had the
same fear I once had, and it was holding them back
from taking on big projects. At that moment, I realized I wanted to solve this
problem once and for all. More importantly,
I wanted to teach it in a fun and easy
to understand way. And that's how transition
mastery was born. The course kicks off with the first two lessons where
I'll take you through the basics and break down the different types of
transitions from scratch. Then I'll walk you through some key things you need to know in the preparation phase
before we dive into animation. In these two lessons, you won't need to do anything. Just sit back, watch and listen. Once you've got the
basics down and a solid understanding
of transition types, we dive right into the
practical side of things, and that's when you take action. During the course, you will
gain a deep understanding of the most commonly used
transitions in complex projects. This skill will not only
help you animate smoothly, but also help you plan
your projects better, structure them for easy changes, and even estimate project
costs more accurately because you will
finally understand what it takes to work
on complex projects. You will also discover
how to achieve the highest quality for
your projects and spot potential problems that
may come up during the process along with practical
solutions to fix them. At the end of the course, you'll be filled with tons of ideas for a variety
of transitions, and more importantly,
you will know how to create them
in after effects. You'll get the hang of the
right workflow for handling complex animations like when to use camera and
when to skip it, when and why you should
precompose your layers, and how to mix three
D and to the stings smoothly to take your
animations to the next level. Don't worry if you feel that
it's not a course you can handle because I'll guide
you with helpful cues, so you always know when to just listen and when to
jump and follow along. You will also get a mid
class questions to help you memorize key techniques and remember all the
important stuff. And don't worry, I'll remind
you to take breaks at just the right times so you stay fresh and don't burn out. Plus, all the lessons come with a professional voiceover that's
super easy to understand, perfect for non native
English speakers. Moreover, throughout the course, we'll dive into some fun stuff you want to practice every day, like making three D objects
and text animations. We'll also design
awesome backgrounds and even try out some
basic character animation. You'll get to play around
with bounce animation, eye catching shape
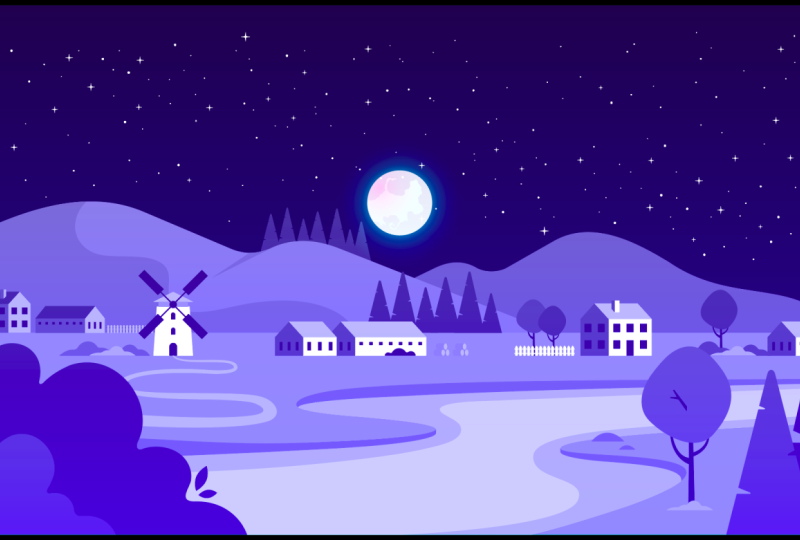
animations, and so much more. And to wrap things up, I've got a fun
home task for you. I've designed three different small projects ready
for animation. For every project,
you will find a video showcasing the transition
I want you to create. The screen designs are simple, so you can focus entirely on
perfecting your transitions. You can start
animating right away, but if you're not feeling
confident enough, you can check out how I
created the transition in the after effects project
file provided for each task. So if you're ready to level up your motion design skills and finally take on big projects with confidence,
don't waste any time. Let me guide you with my years of experience so you can short out your learning curve and start mastering
transition today. Take the leap,
conquer your fears, and let your creativity shine
with transition mastery.
2. Transitions you can make in After Effects: Hi, and welcome to
the first lesson. In this lesson, you don't
need to do anything, just watch and listen. We will start with
basic transitions that most of you are probably
already familiar with. You might feel like you
don't need to watch this, but I insist that
you do because I'm sure you'll discover a lot
of things you didn't know. Most importantly,
this lesson will warm up your brain before
we dive into animation. Let's start with the basics. In my case, I'm demonstrating the examples
using videos of animals, but this could be a pre comp or any other layers
in your project. Using these basic transitions with videos because
they work better for real life footage like this rather than for motion graphics. Of course, you can use these transitions in your motion design
projects if you want, but they tend to work better
with real life videos. We'll explore transitions
specifically for motion design projects
right after these ones, and we'll practice them
later in the course. For now, it's very important to me that you become
familiar with the basics. I'll demonstrate how to create all the transitions using the precomps I've already
prepared for this lesson. This way, we can learn how to approach each transition
from scratch, not just see how they look. We'll begin with the simplest
one, the cut transition. A cut transition happens
when we end one sequence at a specific point in time and immediately start the
next one right after it. First, I'll find the
moment in my video where I want it to end where the
Panther rotates its head. Now I'll press Alt in the right bracket to crop this
layer from the right side. That is from the
end of this layer. Next, I'll find the moment in the second video where
I want it to start. Let's say somewhere around here. I'll press salt in
the left bracket. To crop it from the left side, that is the beginning
of this layer. Now, all I need to do is place the second layer
right after the first one. After checking that, it
looks good, I can move on. When making cut transitions, it's important to
ensure the layers are placed immediately
after one another. Sometimes we might accidentally leave a gap of one
or two frames, which can cause
unnecessary empty frames between the layers,
like you can see now. So make sure to
zoom in and check that there is no gap
between the layers. All right let's
move on to the next one and create a
dissolved transition. A dissolved transition is when the first sequence fades out
and reveals the next one. It's very simple to create. First, we need to
find the point in time where we want the
first sequence to end. Then press T to open the opacity property of the layer to create the
dissolving animation. Now I'll create the first
keyframe with a value of 100%. Let's say I want the
dissolve to last 1 second, at that point in time, I'll
bring the opacity to 0%. Now I can crop this layer at the end using Alt and
the right bracket. Then I'll easy ease
the key frames to create a smoother
disappearing animation. Here's the shortcut for
the easy ease function. To finish things
up, I need to find the moment in the
second sequence where I want it to start. Let's say right before the
lion rotates its head. I'll move the layer to the left. Let's see. A bit more. Now I can crop this layer from the moment when the
dissolve animation starts. Let's see how that
looks altogether. I think it looks great. Now we can move on to the next one. This time, we'll create
a white dissolve, which involves using
a layer to cover the entire frame as a way to transition
between sequences. The layer doesn't
have to be white. You can use any other color, but most of the time, it's
better to use white or black. For this transition, first, we need to crop the first
sequence at the point in time where we want the
transition to happen. Then find the moment for the second sequence
to start and place the two layers one
after the other similar to how we did
with the cut transition. In my case, after
checking the video, I see that the
best point in time to start the second video
is from the beginning. I'll place the layer here. After that, we'll create
a white solid layer or a white shaped layer that
covers the entire frame. This time, I will
use a shape layer. For this, make sure no layer is selected to avoid creating
an unnecessary mask. Then double click on
the rectangle tool. This will create a rectangle exactly the same size as
your composition dimensions. Next, make sure to choose the right color and turn off
the stroke for this shape. Now, press enter on the layer, to rename it to white dissolve and place it above
the two sequences. Next, crop this layer. For example, let's say it
starts at 13 seconds and 20 frames and ends at 14
seconds and 20 frames, which is exactly 1 second later
and crop it from the end. Now, go to the beginning
of this layer and press T to use the
opacity property again. This time, I'll create the first keyframe
with a value of zero. Then I'll go to the
center of this layer and change the opacity
value to 100%. Finally, I'll go to the end of the layer and bring the
opacity back to zero. Now I can easy ease
the key frames. After that, I'll
place the layer so that when the
opacity is at 100%, it aligns exactly
with the point in time when there's a cut
between the two sequences. This way, the cut is hidden because the
white shape covers it, creating a smooth, white
dissolved transition. Just make sure
that if you change the timing of the transition
between the sequences, you also move the dissolved
layer accordingly. This ensures that the moment when the dissolved layer reaches 100% opacity aligns
perfectly with the cut. Let's see how that looks. Awesome. Moving on
to the next one. This time, we'll create a flicker transition that adds an energetic
vibe to the scene. It's super simple to create and is very similar to
the dissolve animation, as we'll use the
opacity property again. First, we need to find the transition point
between the two sequences. I will speed up this process. Then I'll duplicate the
white dissolve layer using Control or Command D. Now I'll bring this layer above the two sequences
and place it here for now. Then I'll press you and
delete its key frames. Now, I'll bring the
opacity to zero and now I will position this layer at the point in time where I
want the flicker to start. Let's start this layer from here and rename
it to flicker. Great. Now I'll press T to open the opacity property and create the first keyframe
with a value of zero. Then I'll move one frame forward and set the opacity to 100%. Let's zoom into the timeline for better visibility and here is a shortcut to move
one frame at a time. Hold control or
command and press the right arrow key to move
forward one more frame. Now, I'll set the
value to zero again. Move another frame forward
and set the opacity to 100%. Instead of repeating
this action manually, I can copy the keyframes
I've already created. Move one frame forward,
and paste them. I'll repeat this process
a couple more times. To finish, make sure the last keyframe
has a value of zero. Now I don't want this
flicker to last too long. I'll go to the last keyframe and crop the layer at the right
side to end it there. Finally, I'll position
the flicker layer so that at the cut moment
between the two sequences, the opacity is at 100%. This ensures the flicker
fully covers the cut, giving us a cool
flicker transition. Let's see how that looks
one more time. Awesome. Now we can move on to our
last basic transition, which is the overlay transition. This involves using
another piece of footage to cover the
cut moment between the two sequences for a very short period of time.
Let's see how to do it. First, as always, we
need to find the moment where the first
sequence should end and crop the layer
to this point. Let's say I want it to end here. Then find the starting point for the second sequence and
crop the unnecessary part. I can now zoom in on the
timeline to check that my two sequences are placed correctly and I don't have
any gaps between them. After setting up the
transition point, we can use some
interesting footage as an overlay for
the transition. In my case, I found this cool
video of old TV visuals. I'll place it above
the two sequences, and now I'll find a nice moment in this footage to use
for the transition. For example, this moment with
the circle and the title. Next, I'll crop this
layer from the left, so it starts being
visible at this point. Then I'll find an endpoint for this section and crop the
layer from the right. Now I have a very short
piece of footage that I can use as an overlay
transition for my sequences. I'll place it right at the
moment when the cut happens. And there it is a
nice transition. I can tag it in blue to identify it as a transition
layer in my timeline. So with this, we've
finished exploring the basic transitions
we can use with videos. Now let's move on to some more advanced
transition techniques. For example, MAT transitions. I'll be demonstrating them with real life videos for
easier understanding, but you can also use these transitions and
motion design projects. MAT based transitions involve
using specific types of footage to create
a unique way to reveal or hide our sequences. We can even animate the footage to achieve
specific results, like I did in this example, by animating the scale of this ink footage to create
a reveal animation. Essentially, we're using
another piece of footage as a mask for our sequences through the Track MT options
and after effects. If you're not familiar with the track MAT
function, don't worry. I'll explain this topic
briefly in a moment. However, to understand
it in more detail, I highly recommend checking
out my free course, the beginner's guide
to after effects, where I cover this
topic in depth. You can find the link to the course and the
description of this video. In the meantime, I'll open
the non animated pre comp ie prepared for this lesson and let's see how to
make this happen. To create this type
of transition, you'll typically work with
black and white ink footage like this one or brush
animations like this one. Let me bring these two pieces
of footage into my scene. Before moving on, let me do a quick recap of what Track
Matt is in after effects. There are two main types
of track Matt functions, Alpha mat and luma mat. Let's start by understanding
what alpha Mt is. As you can see, I
have a sphere with a black to white gradient
and a video layer. This video could also be a precomp or any other
layer in after effects. Here are the Track
Matt functions. The Track Matt function
is essentially another way to describe masking options
and after effects, similar to a clipping mask
in Photoshop or Illustrator. Means we can use one layer
as a mask for another layer. If I want the video to
use the sphere as a mask, I just need to drag the
pick whip of the track Matt function from the video
layer to the sphere layer. Now the sphere
automatically turns off and my video is visible only within the
boundaries of the sphere. This means the
form of the sphere is being used as a
mask for the video. The video will only appear
within the spheres area. We can also click here to invert the Alpha mat, which
does the opposite. Now in the area of the sphere, the video will not be visible. To cancel the mat, all I need to do is open the Track Matt
menu and select none. To bring it back, I'll drag the PI whip from the video layer to the sphere layer again. Let's move on and learn
what a luma mat is. Here, we have the
exact same setup with the gradient
sphere and the video. By the way, if you don't see
the track Mat functions, just click Toggle
Switches down here. Now, let's use the luma mat. First, I'll drag the PI whip from the video layer
to the sphere layer. Then I'll change the alpha mat to luma mat by clicking here. Now we're using the
luma matte function. Unlike Alpha mat, which uses only the shape and dimensions of the sphere layer
to create a mask, the luma mat also
uses the brightness, the white colors, and
darkness, the black colors. In our case, the
gradient sphere. This creates a more complex
masking effect for our video. With luma matte, aftereffects not only uses the
sphere's shape, but also the brightness and
darkness of the sphere to determine which parts of the
video are visible or hidden. In this case, the bright
areas of the sphere make the video visible while
the darker areas hide it. If we invert the luma nat, the bright areas
will hide the video and the dark areas will
make the video visible. Now that we understand the
two track mat options, I'll close the precomps
and we'll see how to apply this technique to
create beautiful transitions. The first transition we'll create is a brush
reveal animation, as shown in this example, we have the video of
the lion and then it disappears in a brush style revealing the video behind it. Let's see how to
create this effect. Here's my brush strokes footage. I'll leave it here and move the rest of the layers
to the side for now. Next, I'll bring in the video
I want to interact with it. In this case, the snow leopard. I'll place it below
the brush footage. Before applying the tract mat, I can tag this layer with a different color to keep
my timeline organized. As you might remember, the
track mat functions will use the shape of this layer to interact with
the video below it. Keep in mind that this footage
has a rectangular form, which is important for
what we're about to do. For now, let's crop this footage at the point in
time where the screen goes completely black
because we don't want to use the rest of the footage
for the reveal effect. I'll stand at this point, press salt and the right
bracket to crop it. Next, I'll drag the pick whip of the track mat function from the video layer to
the brush footage. In the newest versions
of after effects, the track mat will
automatically switch to Luma inverted mat to create the correct interaction
between the two layers. However, most of the time
when we drag the pick whip, the first mat applied
is the alpha mat. Let me reset it to the
default alpha mat option. Now, we don't see
anything happening. That's because, as
you might remember, Alpha mat only
considers the shape of the matte layer and ignores
its color information. In this case, as
I showed earlier, the footage has a
rectangular shape. This means we've
essentially created a rectangular mask
for the video below, which is not what we need. To make after effects recognize the color
information in this footage, we need to click here and
switch it to Luma Matte. Now, we can see some interaction
between the two layers. The dark areas of
the brush footage will hide the video below it, while the bright areas
will make it visible. But let's say I want
this interaction to happen later in the timeline. Let's say starting
from the first second. Right now, I don't see
anything happening because the footage layer
is not interacting with the layer below
it in this time range. The interaction starts only at the first second where the
brush stroke footage begins. As you can see,
the white areas of the footage make the
layer below it visible. This means we need to extend
the white frame so that it starts where the video
of the snow leopard begins. For this, I have a cool
trick to show you. In this situation, I can
right click on the footage, go to time, and enable
time remapping. This creates key frames for the start and end
points of the video. Now I can extend the
footage from the left side because we've converted the time of this layer into keyframes, everything before the first
keyframe will freeze. This allows us to stretch the
footage to include more of the bright areas which will interact with
the layer below it. I can even start the footage
later in the timeline and expand it back to the point where the
video below it begins. That's how we create
the disappearing transition for the video. Now, let's use this footage
to reveal the video. To do this, all we need to
do is invert the luma mat. This makes the bright areas of the footage hide the video while the dark areas make it visible and that's the
transition I was aiming for. I wanted to reveal this
video in that way. Next, I'll crop the unnecessary
parts of the footage. Now, I'll decide where in the video I want the
reveal to happen. Let's say somewhere around here. I'll bring the
footage to this point and crop it to start from here. We don't need to extend
the footage in this case, because with an
inverted luma mat, the dark areas of
the footage act like empty space that doesn't interact with the
video below it. I know that in the
beginning it may feel super confusing,
but trust me, after playing around with track mat functions a few times, you'll get the hang
of it very quickly. Don't worry if you don't
remember which type of luma mat to use for
a specific effect. Just toggle between the regular and inverted luma options a few times and see which works best for the
animation you're going for. Now I'll place the
lion video here and find a good point
in time to start it. Here looks good, just before
the lion turns its head. After the lion turns its head, I'll start the reveal
animation of the snow leopard. It's very important to ensure the first video lasts until the reveal animation
is complete. Otherwise, we'll have an
empty area in the timeline. Now let's move to the next one. I'll tag this footage in blue and let me demonstrate
this process again. To use the ink footage to interact with the
Black Panther video, I'll first drag the
Track Matt pick whip of the video layer
onto the ink footage. Once again, the Track Matt automatically sets
to inverted Luma, which creates a
revealing animation. If I turn off the
invert function, we'll get a
disappearing animation. In this case, we want
to reveal the video. Now I need to place these
layers above all the others. Let's say I want the
Black Panther video to start at this point in time. Now, the dark areas of the ink footage make
the video visible, while the bright areas
make it invisible. As soon as the dark
areas start to spread, more of the video
becomes visible. However, this time
the dark areas don't cover the entire frame, which means we won't see
the full video beneath it. Situations like this, we can simply create a
scaling animation. First, I'll move the anchor
point of the ink footage to the upper left corner because that's the direction
I want it to grow. This way, I'll get more of the dark areas
covering the frame. Then I'll use the
scale property to create a scaling animation
for the ink footage. Now we have the black color
covering the entire frame. But because we
scaled the footage, it lost some of its quality. In these cases, I love to activate the quality and
sampling function here. This can improve the
look a little bit. Now I can see the Black
Panther video entirely. Let's check how it
all looks together. Awesome. With this, we've
finished covering the basic transitions that are most commonly used
when editing videos. Now let's move on
and learn about basic transitions specifically for motion design projects. The first transition
we'll discuss is the super handy
matchcut transition. A match cut transition is a cool trick used in motion
design and video editing. It connects two shots
in a smooth way by matching visual elements
or movements between them. This makes the transition feel seamless and pretty satisfying. We can create a match
cut transition using different properties like
position, scale or rotation. Now I'll go over
each one and create them from scratch so you
can see how simple it is. Let's start by creating
a match cut using the position movement of
two elements in the scene. For this example, we'll create a transition between
two text layers. First, I need to place them
both at the same position. Do that, I can use
the align tool. After that, I'll
select both layers, press P to open the
position property, and create a simple position
animation for each layer, moving them from top to bottom. As you can see, the movement of these layers is
currently linear, meaning they move at a constant speed throughout
the animation. To create the match cut effect, we need them to move very fast at a specific point
during the animation. We can achieve this by easing the keyframes and then adjusting them in
the graph editor. Make sure you're using
the speed graph. The speed graph, we can see
the speed of the animation. At the beginning, the speed
is zero pixels per second, but in the middle
of the animation, it peaks at over 50
pixels per second. The speed changes
because we converted the keyframes from linear
to Easy Ease keyframes. Now, we need to exaggerate this change
and speed even more. We can do this by
dragging the handle of the first keyframes to the right and the handle of the end
keyframes to the left. Now the speed in the middle of the animation is over 2000, we're just one step away
from creating the match cut. Before we do that, I want to remind you
that you don't have to manually adjust the speed of the keyframes and
the speed graph. You can do this using the
keyframe velocity panel. To use the keyframe
velocity panel, first, make sure you've
selected the keyframes. Then hold down Alt or Option on Mac and double click
on one of the keyframes. This will open the
velocity settings. Here, I can change the
influence percentage, which corresponds to what
we adjusted earlier in the speed graph to 85% for both incoming
and outgoing velocities. In the graph editor, this will look as if we manually adjusted the keyframes to
achieve the same effect. It's important to note
that you cannot adjust the keyframe velocity for different property
types at once. For example, if you select scale and position property
keyframes at the same time, the velocity
adjustment will only apply to the property of the
keyframe you clicked on. To avoid this, finish adjusting one properties keyframes
before moving on to another. Now to create a better
match cut effect, let's increase the velocity
influence even more to create even greater speed at the middle of the animation. Setting the velocity
influence to 95% will make the motion slow at the beginning
a bit more, but it will then skyrocket
the speed in the middle of the motion and slow down
to the starting speed. This will make the layers move super fast in the middle
of the animation. Right. Now to actually
create the match cut effect, all we need to do
is split the layers at the point where their
speed is at its peak. To do this, I'll select
the first text layer and go to the point in time where the speed is at its maximum. In our case, as we saw
in the graph editor, it's in the middle
of the animation. Then I'll press Alt and the right bracket to
crop it from the end. I'll do the same for
the second text layer, cropping it from the beginning
to the same point in time. Since both layers have the
exact same speed and movement, this creates a super
fast transition between them during the
position animation. You can see, it looks
very smooth and dynamic and it's
super easy to create. Now, let me show you how to achieve this effect
using a scale animation. This is pretty much
the same process, but this time I'm using a scale animation
instead of position. First, I will select both
layers and align them to the center of the comp using the shortcut control shift home. Then I'll go to the beginning of the animation press and create the first keyframe
for both with a value of 20. Next, I'll move 1 second
forward and scale them up. It's too much. Let's
try 120, maybe 110. Now I'll adjust the velocity. And after that, I will stand in the middle of the animation
and the first word at this point in time and crop the second word to start from
this exact point in time. There it is. We have a nice
scaling match cut transition. The cut between the layers matches the animation
of the two layers. To help you remember
this technique better, let me show you how to create the effect using a
rotation animation. First, I'll place the layers
in the same position. Then I'll create a similar rotation
animation for both layers. Next, I'll adjust the
speed of the motion. Finally, I'll find the
point in time where the speed is at its peak and
crop the layers accordingly. Now that we've learned how to create a match cut
between layers, let's level up and
see how we can use this principle to create a match cut transition
between two scenes. As you can see, I have two
scenes in my composition. These could be scenes
in your project with multiple layers
and various elements. In the first scene, I have
a rotation text layer. While in the second precomp, I have a different design
with different layers. There's also an object
with a rotation animation. When we play the animation, you'll notice that even though the rotating layer
in the first scene is completely different from the rotating object
in the second scene, and even though the colors and designs are entirely different, we still achieve a smooth and visually
pleasing transition. This is the magic of the match
cut technique and it's how you can use it to transition between scenes and
your projects. Let's see how this is done. To begin, I'll enter the first scene and prepare
it for the transition. But before that, I'll close all the open
precomps I have here. Now let's say this is
a scene in my project, and I want to create
a transition to the next one using the match
cut effect with rotation. I'll start by
determining the point in time when the first
scene starts to end. From there, I'll create a rotation animation for the text layer as
we did earlier. I'll set the duration
to exactly 1 second and make the layer
complete a full rotation. Finally, I'll adjust
the velocity. That is the speed
of the animation to make it super fast in the
middle of the motion. Let's see how that looks. Next, I'll go to the
second scene and create the same rotation
animation for the shape layer, starting from the
exact point in time when the animation begins
in the first scene. This simplifies
the demonstration and ensures a
seamless transition. Here is the point in time where the speed of my shape
is at its peak. I'll go back to
the main comp and crop this precomp from the
beginning to this point. Then I'll crop the first scene
to end at this sa point. Now, I've created
continuous motion for the layers
inside both scenes, resulting in a super cool
transition between the scenes. Let's see how that
looks together. Great. Now let's move
on to the next example. Sometimes we can use precomps as layers to create a
match cut transition, like I did here using
a scale animation, exactly like we did with the text layers in
the earlier examples. The difference
here is that we're animating the
precomps themselves. Let me show how I
did it real quick. First, I selected
both of the precomps and created the same
scale animation for both. Then I adjusted the
velocity and moved the keyframes to the point in time where I wanted the
transition to start. After checking the
animation a few times, I placed the time
indicator in the middle of the motion and cropped
both comps accordingly. That's how we create a cool
scaling match cut transition. With this, we've finished
the match cut examples. Now let's move on to the next transition
technique that you'll use frequently in your
motion design projects, the panning transition. A panning transition is a super straightforward
technique that involves creating
a panning movement to transition from
one scene to another. There are many different
approaches to this transition. Let's start with the basics
and see how to create a simple panning transition from the first scene
to the second. Let's say you're
working on a project and your timeline already
has a lot of layers. Some layers belong to the first scene while others
belong to the second scene. In this situation,
you'll need to precompose the layers
for each scene. For example, let's precompose the layers that make
up the first scene. Select all the relevant layers, then right click, choose
precompose, and name it. Scene one. I make sure both functions here are selected and then click Okay. Next, do the same for the
layers of the second scene. I'll call this one scene two. Now you'll have two precomps, which you can see in
the project Pamel. Before moving on, I
recommend organizing your project by placing the precomps into
a separate folder. This helps keep things
clean and manageable. Now, let's say all the action in the first scene ends at a
specific point in time. First, I'll select the scene one precomp and press P to open the position property and create the first keyframe
at this point in time. Next, I'll move 1 second
forward on the timeline. Now I can decide what
kind of panning I want. Don't have to move it
only to the sides. I can animate this pre
comp up and down as well. In this case, I'll move the first scene to
the left. All right. Now I'll easy ease
the key frames and adjust the velocity to
create smoother motion. That's how we create a basic
panning transition where the first scene moves out of the frame, revealing
the second one. Now, let's make it a
bit more interesting. Let's have the second
scene enter from the right side just as the first scene starts
moving to the left. For this, we don't
need to create a position animation
for the second scene. Instead, all we
need to do is move it to the right side
out of the frame. I'll place it exactly
beside the first scene. Next, move the time indicator to a point just
before the animation of the first scene starts and parent the second
scene to the first one. This way, we achieve the panning movement
we're aiming for. This is an example of creating a panning transition by
animating the precomps. Now let's explore
another approach to creating a nice
panning transition. Unlike the previous example, this method involves
animating the layers inside the precomps instead of
the precomps themselves. This approach might take a
bit more time to set up, but it looks better
because you can create a cool delay between the
layers motion. All right. Let's see how to create
this transition. First, I'll duplicate the
scenes I created earlier from the Project panel so
I can make changes to the new ones without affecting
the original versions. Now let's start working
on the transition. First, I will enter
my first scene. Before continuing, let me switch the precomps names and the
Project panel real quick because this precomp
needs to be called pre comp five since it's the first scene
in this sequence, and this pre comp
will be scene six. All right, back to
the transition. Now I'm inside the precomp
called scene five, the first scene.'s
imagine I'm working on a project and I decide that this scene
will end at second two. I'll select all the layers, press P to reveal the
position property, and bring the time
indicator to second two since that's where I
want the scene to end. Next, I'll create a keyframe
for all the selected layers. Then I'll move 2 seconds
forward to second four, as I want the outtro
animation to last 2 seconds. I'll drag all the
selected layers out of the frame
to the left side. To improve the motion, I'll easy ease the key frames and adjust the velocity
for a smoother result. After checking the motion, I'll start creating a
delay for the layers. I want the layers closest to the left side to
start moving first. For better organization
of the timeline, I'll bring this layer up here. Then I'll bring the
black sphere closest to the left side below it
and move its key frames. Let's say three frames
forward, maybe four frames. After checking the motion, I will place the next closest
layers to the left side, which is my text layer in
the third place and move its keyframes four frames after the last layers keyframes. Finally, I'll
repeat this process for the last three layers, which are already in the correct order in my layers panel. Let's see how that
looks together. If the intro animation
feels too slow, I'll adjust the timing. For example, if the
animation starts at second two and
ends at second four, I'll select the last keyframes and drag them back
to second three, ensuring the entire animation
now lasts 1 second. Let's see that once again. Now I think the
delay is too long. To shorten the delay
between layers, I'll select all the keyframes, excluding those of
the first layer and drag them backward
by about three frames. A useful shortcut for this
is to hold At or option on Mac and use the arrow keys to move the selected keyframes
one frame at a time. Let's see what we've got. All right. Once I'm done
animating my first scene, now, I need to shorten
the work area of this precomp because I don't need it to
last for 9 seconds, my animation ends
around second four. To do this, I'll place the
time indicator at this point. Press in to set the end of the work area to this point and then right click on the timeline and choose Trim
Comp to work area. Great. Now I've
trimmed the precomp to match the outtro animation
of the first scene. Next, I'll create an intro animation for
the second scene. Create an intro animation when the final design of the
scene is already in place. Like in our case, we
need to work backwards. Let me explain what I mean. Since I know that the end of the intro animation needs to look exactly like
the current design, I'll first create a
position keyframe for all the layers
and drag it to second one because
I know this is the position they all need to be in after
entering the scene. Then I'll go backward to
the start of the animation, the beginning of the timeline, and drag the layers out of
the frame to the right side. Next, I'll adjust the animation and start adding delays
between the layers. I want the background layer
to enter the scene first. Then the layer closest to the left side of the
frame should enter next. To do this, I'll select
all the keyframes except the background layer and move them two
frames forward. I'll repeat this process
for the remaining layers, staggering their
keyframes slightly. After checking the motion, I'll return to the main comp
to time the two scenes. First, I'll check where the outtro animation of
the first scene starts. Then bring the second scene to start at this point
in the timeline. Now, I'll check the transition. If I notice that the motion
of the outtro animation of the first scene
doesn't perfectly align with the intro animation
of the second scene, I'll tweak the timing by moving the second scene backward or forward in the timeline until the transition feels seamless. Awesome. That's another way to create
a simple panning transition. Now let's move on to a more complex type of panning
transition like this one, where we have three D layers involved in the
scene and an element such as a stroke that starts in one scene
and ends in the other. This is one of the
trickiest transitions for many beginner
motion designers, especially when creating
transitions between scenes that involve three D layers
positioned in three D space. Be honest, this is one of the most used transition
techniques in my projects. Now, I'll explain the basics
of this transition and then dive into a more complex version involving three D layers. First, let me close all
irrelevant precomps and open the non animated comp I prepared for this lesson. All right, so here we are
working on a project, and I've decided to create a seamless panning transition
between two scenes. For this type of transition, the key is to start with
a wider composition that can fit the
layers of both scenes. Then we'll animate
the two scenes as a single precomp in
our main composition. This approach is different from our previous panning
example where we split the layers into
two separate precomps. Let me show you what I mean. I'll enter this precomp
to copy the layers and show you how it's done from
scratch in our new example. These layers belong
to the first scene, and now I'll bring in the layers that make up the second scene. Now let's begin creating
this transition. Before we start animating
the scenes and layers, I'll select all the layers and precompose them
into one precomp. I'll name it scene one and two. Now I'll enter this pre comp and start preparing the
scene for animation. Since
3. Pros and cons of the preparation process: Welcome back. In
this short lesson, I want to show you the important
steps in my process of creating designs in Illustrator before importing them
into after effects. Just like in the
previous lesson, I'd like you to sit back, watch and listen
without doing anything. The design process for preparing scenes is
incredibly important, and I'm sure you'll discover a few handy tricks in Illustrator that you
might have missed. Tricks that can really
help improve your workflow when creating complex
motion design projects. Let's start with the first tip, which is all about
setting up your document. The first thing I love to do is choose the film
and video format. This setup provides built in guides specifically
for animation, which you'll see
in just a minute. When I design scenes, I like to work on the
entire project at once so I can see all
the scenes side by side. For this example, I'll
name the project TM All scenes where TM stands
for transition Mastery. After naming the
file, I'll create 16 boards to
represent my scenes. I choose 16 because most explainer videos consist
of five to 20 scenes. Later, I can add or delete
our boards if needed. For now, I don't need to change anything else,
so I'll hit Create. Before I start working, I usually set my workspace
layout to essentials classic. This arrangement displays all the necessary
panels for my workflow. Now, I want to show you how to adjust the preview
of your workspace in case you don't like
the default look of the film and video
document setup. To do this, I'll go to file
and click on Document Setup. Here, I can make various
adjustments to the workspace. We can also reach this
panel by clicking on the document setup in the
quick Actions tab found here. This panel, you can
customize grid colors. For example, I can click on Custom and choose a color
for the first grid. Let's say I pick a dark gray
for the first grid color. After selecting it, a pop up will appear for the
second grid color, where I'll choose
the same dark gray. Now the grid has a
subtle uniform look. For this example, I'll
reset the grid back to the default colors and move on to adjusting the
artboard spacing. Right now, all the artboards
are too close together, which I don't like because I prefer more space to
design my scenes. To spread out the artboards, I'll go back to document setup and click on Edit artboards. Then in the quick access panel, I'll click on the
rearrange all button. Here, I can adjust the number of columns and the spacing
between artboards. Let's set the spacing
to 500 pixels. Now all the R boards
are 500 pixels apart. If I want to change the spacing, I can simply re enter the rearrange all menu
and adjust it again. For example, I might set it to 300 pixels or even 200 pixels, whichever feels right
for my workflow. Once I'm happy with the setup, it's time to save the file. At this point, I'll create a new folder on my
computer called AI to store all the Adobe Illustrator files
for this project. After naming the
file and ensuring it's being saved as at AI file, I'll click Save and then hit Okay. That's it for this step. Now let's jump into
the second tip, which is all about
the design process. In the early stages
of my design process, I usually work with
only two layers, one for the background and
another for the graphics. Keeping it simple at this
stage helps me stay organized. Later in the lessons,
I'll explain when and how we can split layers
in a super efficient way. Another important tip for
the design process is handling continuous scenes that you want to see side by side. For example, in this case, I want to create another scene that continues from
the first one. To do this, I use the
RbardTol and select all the R boards in
the arboards panel to move them to the left. Next, I'll click on one
R board to deselect all the R boards and then select only the ones
I want to move. While holding Shift, I'll select the three
R boards I need, then hold down Alt
or Option on Mac to duplicate them and move the copies to the new position. Sometimes when moving R boards, you might accidentally
select unnecessary layers. Don't worry. Just switch
to the selection tool, select the layers
you don't need in the new scene and delete them. Now I can continue designing the next scene that belongs
to this animation sequence. Visually, this approach
is very organized and it helps me imagine the transitions I can create within
the sequence. Now, let me show you some common mistakes you might encounter
during this process. For instance, after selecting the artboards you want to move, it's easy to forget
that you're using the artboard tool and accidentally
create new artboards. To avoid this, double
check your selections and delete any unnecessary
artboards from the list. Then you can move on
to create your scene. If you need to adjust the
position of your R boards, select them all again
and move them to align perfectly with
the previous scenes. This ensures everything
stays neat and visually consistent.
All right. Moving on. Now let me show you what to do after finishing
your scene designs. As you remember, we've been working with only
two layers so far, but now is a good time to split the layers for each scene. This allows you to have
the relevant layers for each individual scene.
Here's how I do it. First, to make things
easier to work with, I'll grab this panel
from the gray area and move it into this
section of the interface. Now I want to
separate each piece of graphic content
into its own layer. You can do this manually, but let me show you
a useful trick. Before splitting the layers, ensure that none of
them are grouped. After ensuring
everything is ungrouped, I can select the layer
containing all my graphics. Then I'll click on the
Hamburger menu to open the panel options and select
release to layers sequence. Now Illustrator
separates the contents of this layer into
individual layers. Next, I'll select
all these new layers and drag them out of
the original layer. This will leave an
empty layer behind, which I can recognize
because it no longer has the small
arrow Ica next to it. Once confirmed, I'll
delete this empty layer. Awesome. Now I'll repeat the same process for
the background layers, select the layer,
release the layers, move the new layers out,
and delete the empty layer. Now I can group the layers
that belong to each scene. This grouping will
be very useful in the next step where we'll import each board
into after effects. Soon, you'll see why
this step is important. For example, I now
have one group that includes all the layers
creating the first scene. I'll repeat this process
for the rest of the scenes. By the way, the
shortcut for grouping layers is Control or
Command on Mac plus G. You might not
fully understand why we're organizing the file
this way, but bear with me. It'll all make
sense in a moment. I'll speed up this
process for now. Once I've grouped the layers
for each scene, I'll get rid of any empty layers created during the
grouping process. As mentioned earlier,
you can identify an empty layer because it lacks the small arrow icon beside it. Let me speed up this
process as well. Great. Now I have 21 layers
that represent each scene. Next, I'll open the
artboard panel and place it close to the layers
panel for easier access. I need to ensure the artboards
are in the correct order. Right now, for example, if I click on the fifth scene, it appears as the 16th
artboard in the panel. This will create issues later
during the saving process, it's important to fix this now. To reorder the arboards, I'll select the desired scene
in the Layers panel and Illustrator will highlight
its corresponding artboard in the artboard panel. Then I'll drag the artboard
to its correct position. This point, I'm selecting
the designs while watching the Artboard panel to see if the selected artboard fits the order of the
scene in my project. When I see that the artboards don't fit the order
of my design, I move them in the correct
order on the Artboard panel. Once the Rboards are
in the proper order, I'll rename them for
better organization. All I'm doing now is selecting the arboard, double click on it, and renaming it to
the correct name following the chronological
order of my scenes. At this point, we can click
on each scene and check the arboard panel to double check that the scenes are
in the correct order. Everything is
organized, I'll save the artboards as separate
Illustrator files. For now, the layer
names don't matter, since we can address
that in the next step. To save the document as
separate Illustrator files, I'll go to file and
click on Save As. I'll choose to save
it on my computer, select the folder where I want to store the separated files, R boards, and
proceed from there. Next, I'll choose
a different name for the document
I'm working on now. Then I'll make sure to save
it as an Illustrator file. After clicking Save, I'll choose the option to save each
arboard as a separate file. I'll select all the R
boards and hit Okay. Now, I'll wait for the
saving process to complete. Now when I open the folder, I'll see all the
separated artboards saved as individual
Illustrator files. The first file will always be a copy of the original document, the one that includes
all the scenes we've just been working on. However, in this case, I don't like the names of
the Illustrator files. I want the names to
represent the scenes. To fix this, I'll reopen the original file and close
the newly created files. Then I'll delete all
the Illustrator files I just saved and go back to change the names
of the R boards. It's important for me
to show you these steps because I want you to work
in a very organized way. I also want you to be aware
of potential mistakes you might make and how to fix
them before it's too late, like finding out during
the animation phase, which could lead to a
total mess in the project, especially after you've
already animated a few scenes. After renaming the Rbards, I'll press Control
or Command on Mac pluss to save the
changes to the document. Then I'll save each Rboard
as a separate file again, just like I did earlier. Now, I have all the files
saved in a very organized way. One of the files
will still be the same as my original document, so I can delete it if I want. Before doing that, I'll
close Illustrator to avoid confusion and then delete the duplicate file since I
don't need two copies of it. Before starting the import
process in after effects, I like to create a new
folder specifically for the artboard files
that represent the scenes. This helps me stay
organized because the main AI folder might also contain other Illustrator
files for the project. Keeping the scene file separate ensures everything
is easy to find. Now that I've prepared all the design files
for animation, we're ready to move on
to the animation phase. This is where you can
finally grab your mouse and join me in creating an entire explainer video from scratch, focusing on learning
different approaches to create seamless transitions. It's going to be
awesome, see you there.
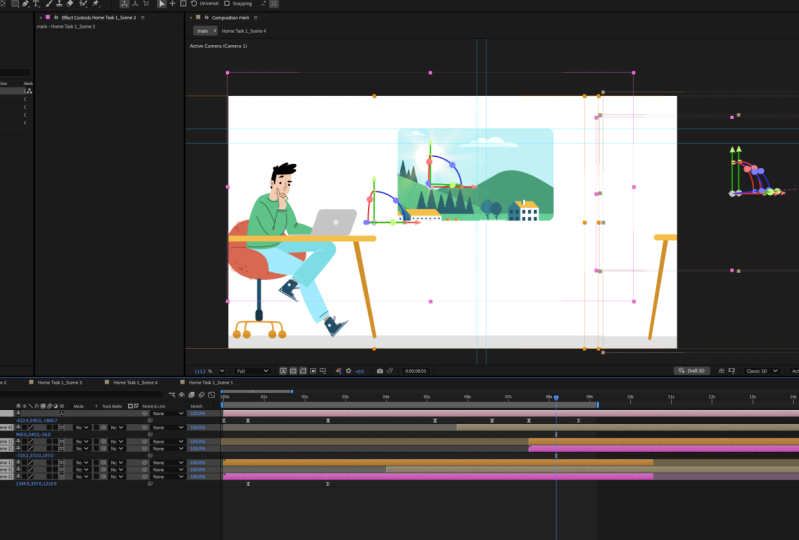
4. Complex zoom-in transition in a 3D space: Hi there. Now we're diving into after effects to start
animating our scenes. This is the lesson where you'll begin working alongside me. It's important to mention
that we'll start by creating the most complex transitions
for the first scenes in the project and then
move on to easier ones. I've structured it this
way to take advantage of your initial focus levels at
the beginning of the course. That said, let's make
sure we're all on the same page regarding
software settings. First, click on the
default workspace to see the same panel
arrangement as mine. Next, go to edit preferences
and click on General. Ensure all the
settings match mine. Once done, please set the
language of your computer to English so all the shortcuts we'll use will work properly. All right. Now let's create
our first composition. We can call it Master Comp. We'll work in full
HD resolution 1920 by 1080 with a frame rate
of 30 frames per second. Since we don't know the
duration of the final video, let's set it to 3
minutes from now. You can leave the
preview background color as black and then click Okay. Now, before importing
the designs, I recommend saving the
project to activate the autosave function in
case the project crashes. Let's go to file and click Save. Now, let's create a
new folder called AE and then enter it to
save the project here. Let's name this
project TM Project. Once done, hit the Save button. When working on
complex projects, I like to open the
main design file to see all my scenes
in one place. Sometimes this helps
me come up with new ideas for transitions
between scenes. To start, let's work on these two animated sequences that make up the first
scene of our project. For now, I'll import
only these two designs, not all the designs I have. Now, before importing the two
files into after effects, I'll open the files
and adjust the layers. Note that you don't
need to do that because you already have the
finalized design files. At this point, just listen and watch how I prepare these
files for animation. Soon we will import them
to after effects together. This is the point
where I can work individually and
adjust the layers in each design rather than managing all the layers across all
the designs in one document. In my opinion, this is a
very efficient way to work. It keeps your focus on each scene and makes
it much easier to handle a document with fewer layers rather than
navigating a cluttered file. For example, in this design, I'll separate the sphere layers from the line layers
because I'll need them on separate
layers to create the transition I've
planned for this scene. However, when I try to separate the layers
as we did earlier, it won't work because the
graphics are still grouped. To fix this, I'll ungroup all the graphics
in the layer first. Only then I can use
the function to separate the graphics
into individual layers. Now, I'll move all the layers
out from the main layer. Once that's done, I can delete the empty layers that
are no longer needed. At this point, you can name the layers to
keep them organized. In my case, I won't
do this because we're going to recreate this scene from scratch and after effects. Sometimes if a scene consists
of simple geometric shapes, I prefer to create it
directly in after effects. This is a great habit
to develop because it can save you a lot of
time in future projects. Of course, we can also animate the layers from the
Illustrator files if needed. But in this lesson, I want
to encourage you to get comfortable building scenes from scratch and after effects. It's an invaluable skill for
streamlining your workflow. Showing you this process
right now because there are scenes that we cannot create from scratch
and after effects. I use this simple
scene to explain the preparation process for an individual scene so you
can understand it better. Let me go through the process one more time for the
first scene as well. After ungrouping the design, I can separate the
layers and then get them out of the
main one and delete it. It's very important that
you hit Controls to save the files after adjusting them before importing them
into after effects. For these specific two scenes, it's not as crucial
because we'll create them from scratch
and after effects, but it's good to build the
habit for the other scenes. All right after
saving the designs, let's import the files
into after effects. Now it's your turn to grab the
mouse and do this with me. The first thing you need
to know is that you cannot import more than
one file at a time. If you do, after effects
will import them as a flat layer without the separate layers
we just prepared. If you accidentally do this, press Control Z or Command Z on Mac to undo and import
each file one by one. When you drag the file
into after effects, you'll see a pop up asking how you want to import
the Illustrator file. We don't want it as
a flattened layer, so we won't choose footage. Instead, we'll
select composition. This option imports all the
layers and automatically creates a pre comp for the file with all the layers inside. Next, you'll be asked whether you want to import the file with layer size or document size.
Here's the difference. Document size, the
layer boundaries will match the original
document dimensions. This can make animation
more challenging. In layer size, the
layer boundaries will fit the specific
content of each layer, making it much
easier to animate. Make sure to choose layer
size for this project. Great. Now let's bring in
the second scene as well. To keep the project
panel organized, I like to click here to
sort the assets by order. Then I tag my master
composition with a separate color
to differentiate it from the other comps
I'll create in the future. Now is a good time to press Controls or Command S
to save your progress. Make it a habit to save
every few minutes. Now let's enter the first scene and take a look at
what we've got. You'll notice it might look
a bit different from mine. If I move the layers around, you'll see that in my project, the layers are cropped, while in yours, they're not. That's because you're working
with the fixed version. Let me show you how I fixed it. In cases like this, all you
need to do is go back to your Illustrator design and move all the layers that are outside the scene into the
seeing boundaries. Once you've done that,
save the project. When you return
to after effects, you'll find the layers uncropped
and ready for animation. All right. Now let's start
animating this scene. As I mentioned
earlier, you can use the Illustrator files and the pre made scene
to animate it, and we'll do this for the
next scenes in this project. But since I want
to teach you how to get the most out
of after effects, I'd like you to learn how to create simple scenes
from scratch. This skill will save you a lot of time in future projects. Let's practice this
approach together. We can select the pre
comp here and use it as a small reference window to see how the
scene should look. To begin, let's create a gray
sphere without a stroke. Now, change its size to 300. If you don't see
these properties, it's likely because you're using an older version
of after effects. In that case, you can find all these settings by opening
the layer properties. Here's the size of the shape. Great. Next, select the layer and press Enter to
rename it to sphere one. Now duplicate the layer
four times to create five spheres because there are five different colored
spheres in the design. Let's move the new sphere here and continue
this process four more times. All right. Now let's color each sphere. You can change the color
from this panel or by using the Eyedropper tool to sample the colors
directly from the design. Repeat this process for
the rest of the spheres. Great. Now, move the
spheres up here and create a new white solid layer to serve as a background layer. So right click here, go
to New and select solid. Name it BG one. Sample the color from the design and ensure the size matches
the composition. Awesome. Next, let's create
the title for this scene. Select the text tool and type. Welcome. Change it
to the correct font, which in our case
is Poppins bold, which can be found in the pre installed fonts
and after effects. But in case you can't find it, you can activate it
from the Adobe Fonts or download it for free
from Google Fonts. All right, back to the project. Now, to find the correct size, you can jump into the design, double click on the text, and now here I can
see the correct size. Back to after effects. Let's change the
font size to 50. Go to the paragraph panel and align the text
to the center. Then ensure the text direction
is set to left to right. If you don't see these panels, you can find them
under the window menu. Now align the text
to the center of the comp using the align tool and center the anchor point. To do this quickly, hold Control or Command on Mac and double click the
AnchorPoint tool. Awesome. Now we're ready to prepare the scene
for animation. But first, press V to go back to the selection
tool. All right. Now we'll animate the
scene in three D space. First, let's create
a new camera. Now, use a one node camera with a 35 millimeters
lens and hit Okay. After Effects will prompt you saying there are no three
delayers in the scene, click Okay and convert the existing layers
to three delayers. If you don't see the
three defunction icon, click here to enable it. Convert all layers except
for the background layer, which we can lock for now. Save the project
before moving on. Now, let's spread out the layers to create the desired look. To do this, we'll
work with two views. Ensure you're using the
classic three D renderer. If you don't see this, press Control K to open the
composition settings. Then go to three D renderer and change the
setting from there. Now let's select the left view and set it to the top view. This is one of the
most convenient angles for arranging your camera
and layers in the scene. Use this view to start
spreading the layers in three D space while
referencing the design. Keep an eye on your reference
window at the top of the screen as you move the
spheres to match the layout. If your preview doesn't
look like mine, select the view
and set it to fit. And now continue adjusting the spheres using the two views. Top view is great for
moving layers along the Z axis closer or
farther from the camera. Active camera view
is better for moving layers up down or to the sides. Let's duplicate this one. I'll duplicate this one as well. Sometimes we can use the position property values from the layer to move
the layers around. Let's duplicate this one. This is a good example where it is much more
convenient to change the values from the layer to find the right position
for the sphere. Now, let's duplicate
the dark one as well. I'll duplicate this one as well. Let's duplicate
the blue one, too. I see that we have a
bright blue sphere that needs to be far
away from the camera. Let's duplicate this one and place the new
one in the back. Now I see that we have another sphere that
needs to be placed far away in the back.
It's a dark one. Let's go back to after effects
and duplicate this one. Now let's place it
far away in the back. If I zoom out in the top view, I can see the layers
positions from above and how far they are from each
other. All right. And now let's close
the layers and save the project before moving on to start animating the scene. Great. Now when we have our
scene ready for animation, we can go back to work with one view and finally start
animating the scene. To animate the intro
of this scene, we'll use the reverse
animation technique. Since we know that
all the layers should look exactly
as they do right now, I'll move to, let's say the two second mark and create a keyframe for the
position of the spheres. Let's select them all, press
P, and create a keyframe. Then I'll go back to the
beginning of the timeline and move all the spheres
to the center of the comp. Using the align tool won't work since we're dealing
with three D layers, but I have a nice trick. We can set the Z axis
value to zero for all the layers and
then align them manually to the center
using the title safe grid. Let's turn the safe action grid on and use it to find
the center of the frame. We can turn off the
text layer for now and keep adjusting the
position for all the spheres. We have a smooth
position animation. Next, let's animate the scale of the spheres using the same
reverse animation technique. At the two second mark, I'll create a keyframe for the current scale value because I know that
at this point, the spheres need to
look as they do now. Then I'll move backward in time and set the scale value to zero. If your computer
isn't very powerful, you can lower the preview
quality to improve performance. Try to set it to quarter
if that's not enough. I'll bring it back to full and now deselect all the layers and press you twice to collapse the keyframe
display for all layers. Let's preview what
we've created. I think it looks fine
and we can move on. Since we've spread these spheres across the three D space, with each sphere positioned
differently along the Z axis, moving the camera creates
a cool parallax effect, just as I mentioned earlier. All right. Let's press Control or Command ZA few times to bring everything
back to normal and now start creating
the transition for the next scene where we see the little graph and
the text below it. For this, we'll use a
Zoom in animation with the camera and animate a few of the spheres to connect
them to the next scene. To start, let's
bring the text layer back and switch to two views to better position the layers. And now since there's another
title in the next scene, I'll duplicate the
current text layer and move it slightly backward
along the Z axis, placing it somewhere
in the back. This will be the point where
we create the second scene. Why this specific position? Honestly, I'm just guessing, there's no right or
wrong choice here. This is what animation
is all about, experimenting,
making adjustments, and refining as needed. Mistakes are part
of the process, so don't worry about them. They're how we
learn and improve. Okay. Now let's look
at our reference and move some layers to the positions needed
for the next scene. In this case, we need
to move four spheres. Let's start with this one, hold control or command on Mac, and continue selecting
another three spheres. Make sure you are selecting
the right colored spheres. That's where the
small reference panel above the project
panel comes in handy. Once selected, let's place them up here to have an
organized timeline. We can also tag them in
different colors to indicate they're going to be used in
the next scene. All right. Now let's turn off
the first text layer and change the text
for the second title. Copy the text from the design and make sure the
details are correct. In our case, all the
details are correct, since it's a duplicate of the first title that needs to
look exactly like this one. Next, let's add the line
we see in the scene. To find it, I'll search for it in the
second scene layers. I think it's this
one. To confirm, we can double click on
the layer to preview it. Let's turn on the transparency
background in the preview, and as you can see, this
is the layer we need. Now, let's drag it
into the composition. To animate it, we can
convert it to a shape layer. After doing that, delete the Illustrator file
and rename it stroke. Let's also tag it in purple to indicate that it belongs
to the second scene. Now let's convert this shape into a three D layer and move it to the same Zeaxis position as the title of
the second scene. To do this precisely, check the Xaxis value of the title layer and set the same value for
the stroke layer. To make it easier, we can change it to
some rounded number that we will remember and then set this number for
the stroke layer. Awesome. Next, let's
adjust the position. Bring the title layer downwards slightly and move the
stroke layer upward. Nice. We've just finished
preparing the second scene. Now we can start working
on the transition. But before that, let's create a nice intro animation for the first title using
the scale property. So first, let's turn
off the layers of the second scene and
turn on the first title. Now, to start the animation
of this text layer, let's go to the beginning
of the timeline. Isolate the layer, turn on
the transparent background, and switch back to work with one view to focus
on the animation. And now let's create a cool
pop up intro animation. Create the first keyframe
with the scales set to zero. Then go to the 1 second mark
and set the value to 100. After that, at frame 15, the middle of this animation, scale it up to 150 or
maybe even 200. All right. Now let's easy ease
the keyframes. Now, instead of adjusting the velocity manually
in the graph editor, we can use a quicker method. Select the keyframes, hold
Alt or Option on Mac, and double click one of them
to open the velocity panel. Set the incoming and
outgoing velocity to 85%. Let's see how that looks. Okay, I think this looks nice. Now, let's adjust the
spheres animation as well. Our goal is to time
the animation of the spheres to the pop up
animation of the text. So first, solo all of them to focus on
their animation and then press P to open the position property and see all the key
frames we have here. Let's easy ease all the position
keyframes and this time, use the graph editor
to make the animation start quickly and then
slow down as it ends. Let's see what we've got. Great. Now let's adjust the scale animation
for the spheres. Select all the scale
keyframes and create the same animation as we
did for the position. Let's watch it one more time. I think this looks good. Now, let's time the
animation in the scene. I want the spheres to enter the scene after the
title animation. To do this, first, let's view the keyframes we created
for all the layers. Make sure no layer is
selected and press you. Viewing all the keyframes for
all the layers will help us time the text and the spheres
animation. All right. Let's select all the
sphere layers and find the right moment in the timeline for their entrance
into the scene. We can solo the first
text layer as well. Next, we need to watch the text layer animation and adjust the spheres
timing accordingly. Let's move the spheres
here and review the animation a few times
to see if it feels right. I think we can move
the spheres animation to start from frame number 20. Now it feels like the text
is activating the spheres, which is exactly the effect
I'm aiming for. All right. Let's bring everything
back to normal and start working on the
transition to the next scene. To start, we'll animate the spheres that need to
appear in the second scene. Let's decide that the transition starts at the 1 second mark. Let's select the four
spheres and press P to see their position
key frames. A quick tip. When you have layers
transitioning from one scene to the next, always create a
small pause between their first animation
and their next movement. Our case, I won't start
moving the spheres to their new positions immediately after they finish
their first animation. Instead, I'll give a
few frames of pause by creating a keyframe with the
same value as the last one. Only after that I will go, let's say 2 seconds forward and start moving the spheres
to their new positions. Let's set the Xaxis value
for the spheres to 3,333, as this matches the value of the second title and
the stroke layer. Now that the Zeaxis is
set for the spheres, we can move them up down, left or right to roughly position them
where they need to be. While doing this, I
always keep an eye on the reference to ensure each
sphere is placed correctly. Let's start moving the
spheres and try to place them in the right
position using the reference. Soon we will deal with
their sizes as well. That's how I like to work when I'm dealing with a
bunch of layers. I first create an
initial animation for one property and after that, I'm creating an animation for
another property if needed. Only after that, I'll improve
the animation by adjusting the velocity and the timing
of the animation I created. Once the position
animation is complete, let's move on to the scale
animation for the spheres. As with the position,
I'll start by creating a short pause by setting the same scale value
at this point in time. Then I'll go 2 seconds forward and adjust the
scale to fit the design. I think a value of 20
works well for now. After that, press you to
reveal all the keyframes and fine tune the last position keyframes to achieve
the desired look. All right. I think
it looks great. Now we can move on to creating the camera animation for the transition from the
first scene to the second. Let's start the camera
animation at the point where the four spheres begin moving toward the stroke
in the second scene. Then move 2 seconds forward and bring
the camera closer to the layers in the second scene by adjusting it's
the axis position. O for now, let's place the
camera somewhere around here. If needed, you can also adjust the wide position for
better alignment. Next, let's remove the
sphere that shouldn't be visible when we're already
seeing the second scene. To do this, go to the point
where the camera starts moving because this is the point where our four
spheres start to move, and this is the point in time where the
transition begins. This will be the
timing to animate the unwanted sphere we
have in the second scene. In our case, it is at
the three second mark. Create a keyframe for the
position of this sphere, then move 2 seconds forward and move the sphere out of view by adjusting its the axis value. Great. Now we can save
the project and move on. And now we'll start
finalizing the second scene. For instance, let's adjust the animation of the four
spheres in this scene. I want to fix the
final position of one sphere because it's not aligned with
the stroke layer. To do this, we can
lower the opacity of all the spheres and adjust their final position keyframes. This way, I can easily see whether the spheres are
aligned with the stroke. Once done, bring the
opacity back to 100. Now press S to adjust the
scale of the spheres. In my opinion, they're
too big right now. A value of 15 looks
much better. All right. Now let's talk about the
fact that even if we place the stroke layer below all the layers
in the timeline, it will still appear on
top of them in the scene. This happens because
we're working with three D layers and
in three D layers, the layer order in the timeline has no effect on the scene. What determines
the appearance in the scene is the
Z position value. To fix this, we need to move the stroke layer one pixel
backward along the Z axis. This adjustment ensures its
place behind the spheres. Let's go back to one view
to see how it looks. As you can see, there's a
point in time where the light blue sphere collides with the stroke
for a few frames. This happens because
at that moment, there's the axis
positions are the same. This isn't a problem at
all because we can adjust the position path of the
sphere. Let me show you how. First, we need to find the point in time where
the collision happens. It looks like it's around here. This sphere moves from behind the stroke and before
reaching its final position, it passes through the stroke. To fix this, let's go a
few frames backward and move this sphere upward so it goes over the stroke
instead of through it. Let's see if we fix the problem. It is very hard for
me to see it clearly, so let's select the left view and change it to one
of the side angles. Let's say the left view and observe what's
happening from this angle. Here we can see the camera looking at the stroke
and the sphere. Let's pay attention
to the left side view and try to see what's
happening here. From this perspective, it's
clear the stroke needs a bit more adjustment to its
position animation path. Let's tag the stroke layer in a different color
for convenience. Now, let's stand on the
keyframe we created and adjust the spheres path so it doesn't just go
over the stroke, but is placed in front of it along the Zeaxis at that moment. This ensures there's
no collision between the sphere
and the stroke. It already looks much better. We can also tweak
the keyframe to make the stroke move
slightly to the side. To make the animation
look smoother, we can use the
convert vertex tool to curve the path of the sphere, creating a smoother motion. I think it looks
great. Don't forget to go back to the selection
tool when you're done. Now let's move on to adjust the position
of the first title. I want the text
to be centered in the scene when the
camera moves forward. But before that, let's select the left view and bring
it back to the top angle. Let's go back to work
with one view. All right. Now let's make the camera
go through the first text. To achieve this, let's
create a keyframe for the position of the text layer at the moment the
camera starts moving. Then go a bit
forward in time and adjust the position of the
text to align it perfectly. Go back and forward to
see how that looks. I need to move the text
down a little bit. I'll stand at the keyframe
and adjust the position. Let's see what we've got. I think it looks great now. Let's place the second
keyframe at second five to create a slower
movement for the text. It already looks much better. With that done,
let's move on and create an intro animation
for the second title. We'll use the text animator to create a nice and
simple text animation, which I often use in
my explainer videos. Open the text, select it, and add a new animator with
the position property. There's a lot to learn about using text animators
and after effects. So if you feel like you
don't know much about them, I highly recommend checking
out my course text in motion. This course, I explain
everything in depth about using text animators and share other super useful tricks to create eye catching
text animations. All right, back to the project. We've chosen the position
property because we want the text to animate from the bottom to its
original position. Set a value for the
position property to define the starting
point of the animation. Next, open the range selector and then open the advanced menu. Change the shape animation setting for this
animator to ramp up, which makes the text start
animating from left to right. Then adjust the setting so the text animates by words
instead of characters. Now that the text
animator is set up, it's time to create
the animation. First, find the point in time where the
animation should start. Let's say 4 seconds
and 15 frames. Set the offset property to -100, which positions the text
according to the value we set for the position property
in the range selector menu. Now create a keyframe
at this point. Then go to 5 seconds
and 15 frames, exactly 1 second later and
set the offset to 100. To finish, go to the point in time where the text
animation ends. Right click on the text and create a new mask
to reveal the text. That gives us a clean revealing text animation in no time. To improve the animation, adjust the easing
of the keyframes directly in the text animator. This is similar to how we do it in the keyframe velocity panel, but here you can
do it by setting the Es high to 20% and
the E's low to 80%. It will make your
text animations look smooth and professional. With this, we're almost
finished with these two scenes. To keep things organized, we can crop the layers
we no longer need. For example, stand at second five and crop the spheres
from the first scene, since we no longer see
them in the animation. Great. Now, to make things
a bit more interesting, let's create a nice
intro animation for the stroke layer at second three just before transitioning into
the second scene. We can do this using
the trim paths effect. Add the trim paths effect to the stroke layer to
begin animating it. To better see what we're doing, scale the stroke with slightly and start creating
the animation. At second three, let's set the end value to zero
and create a keyframe. After that, let's move to
second five and set it to 100. Now we can bring the stroke with back to two and see
how that looks. To finish things up, let's easy ase the text layer because
we didn't do it earlier. Let's do the same for the
stroke animation as well. For the stroke, we can set
the velocity to 85% for both incoming and
outgoing animations to make it look a bit
more interesting. For the text, we don't need
to adjust the velocity. I love how it moves. However, we can apply
this adjustment to the camera movement
and see how it looks. A quick reminder, setting
the velocity to 85% for both incoming and
outgoing animations makes the motion start slow, gain speed, and slow down
again right before it ends. Let's check how it looks. I think it's great,
but I notice that the animation of the four
spheres feels a bit off. So let's select these layers and press you to see the key frames. Now, to focus on
their animation, let's solo these spheres. And now I want to explain to you what exactly I didn't like
about the animation here. As you can see, their animation starts too fast very
early in the timeline. I'd like the spheres to move in sync with our camera motion, starting slow, gaining
speed, and slowing down. If I select the keyframes
and go to the graph editor, we will see that that
is not the case. For now, the spheres
are starting to move fast at the
beginning of the animation. To make it match our camera
animation, first thing, first, let's open the position
property for each sphere. Now, select the keyframes
and set the velocity to 85%. It's better now, but I
don't like the pause and the motion of the
bright blue sphere caused by the adjusted velocity. To fix this, hover over
the second keyframe, hold control or command on Mac, and click on the
problematic keyframe once. Then once again, it will convert the eased keyframe to
a continuous keyframe, preventing it from dropping
the speed at this moment. The motion looks better now, but I don't like how this sphere collides with the bright one. Let's go to the
middle keyframe and adjust the sphere's position
to the left at this moment. I think it looks better now. Let's solo the stroke layer as well to see how it
looks together. Okay, I think it looks nice. Now let's select the spheres and presses to open the
scale property. Then adjust the velocity to 85% to better fit the position animation and our
camera movement. Let's watch it again. I noticed that the two blue spheres that are in the middle
are colliding now, and I don't like how that
looks, let's try to fix it. Let's move the middle keyframes position path to the right. After watching it a few times, now I notice the blue sphere collides with
the bright one. Let's move this point down and see if that
solves the problem. Awesome. We finally
got it right. Let's watch this part
once again to be sure. Alright, I think it
looks pretty good now. This is a crucial part of creating motion design projects. Always check the animation multiple times before moving on. This ensures that
we're as confident as possible before
starting the next scene. I think everything looks great, except for the second text. I feel it should enter the
scene earlier and that the animation should last a bit longer. Let's adjust that. First, let's start
this animation from second four
and see the timing. All right, the timing is great. Now let's move the
second keyframe to second six and
watch it once again. Awesome. Now it looks great. With this, we're
ready to move on to the next scene or
animated sequence. You can call it
whatever you prefer. To transition from the last
scene to the next one, we can use a simple
match cut transition. Let's have the
bright sphere exit the scene from the right
side and then start the new scene with
the same sphere continuing its movement
from the previous scene. Let's decide that this
transition will start at second six since we want to give viewers enough
time to read the text. Pro tip, when working with text, always keep this in mind. If the viewer doesn't have
enough time to read the text, your client won't be satisfied. Your client, it's
more important that the audience can
read the message than just admire the animation. Ensure text animations are
clear and timed appropriately. Before moving the sphere
out of the scene, it's a good idea to draw the
viewers attention to it. We can do this by creating a pop up animation using
the scale property. Let's decide that the
spheres scale will be 100 at second six and
also at second seven. In between, at 6
seconds and 15 frames, we'll set the scale
to 30 or maybe 50. Now let's adjust the velocity to make the animation
a bit more dynamic. Let's select the key frames
and set the velocity to 85%. Great. Starting at second seven, let's create the outtro
animation for the sphere. First, create a keyframe for the position
property of the sphere. Then move 2 seconds forward and position the sphere so
it moves out of the frame. Now for the match cut
transition to work, let's make the sphere
leave the frame at high speed toward the
end of its animation. We can do it by
adjusting the handles of this animation in
the graph editor. Let's see how that looks. We can make the outtro animation last 1 second to speed it up. I'll bring the second key frames to the eight second mark. I think we can increase the
speed at the end even more. Awesome. Now let's
create a line that will extend out from the sphere to fit the design of
the next scene. To do this, we can duplicate the stroke layer we have here
and then adjust its path. But before adjusting
the path, first, let's bring the new stroke
layer up and adjust its position so it starts from the upper point of the
first stroke layer. All right, now use the Pen tool to select the middle points of the
path and delete them. Now we have a straight line that needs to align with
the sphere's movement. That means we need to bring this point somewhere
around here. To make the line straight, we can use a grid and adjust
the point of the path. Our goal is to create the illusion that the
sphere and the stroke are connected and make
the stroke appear when the sphere starts
moving out of the frame. Now let's zoom in and
position the last point of the line so it's
at the center of the sphere when the
animation finishes. This will help the illusion we are aiming to
create be accurate. Now, press you on
the new stroke layer and adjust the timing of the trim path animation to match the outtro
animation of the sphere. Move the trim path
animation to align with the sphere's movement and
make it last for 1 second. The timing looks great, but the easing of
the two layers is different. Let's fix that. Select the keyframes,
press F nine, or FNF nine on Mac
to reset the easing, and then adjust both layers
in the graph editor. Let's see how that looks. That looks nice. Let's preview the entire animation
we've created so far. Everything looks fine, but I think the scene would benefit from a slow Zoom in animation
to make it less static. Let me show you what I mean. Since the camera already
has an animation, we don't want to mess it up. In situations like this, we can use a null object. Let's create one real quick. Now, after creating
a null object, open the top view, convert
the null to a three D layer. Then rename the null to null camera and position
it near the camera. You can use the top
view to do that. Then parent the
camera to the null. Now, along with the
existing camera animation, we can create another
position animation for the camera using
the null object. Go to the beginning
of the timeline, move the null backwards slightly to give
room for the Zoom in animation and create a keyframe for the nulls position property. Then let's find the point in time where our bright
sphere exits the scene. That is where is the
end of this scene. We can select the
bright sphere and pre
5. Seamless side panning transition: Hi. In this lesson, we'll work on this entire
long scene that includes four animated sequences
or four short scenes. We'll create simple
panning transitions for the first three scenes and a cool Zoom in animation
for the last scene, which will lead us
into the next one. This combination of
transitions is commonly used, so it's important to master creating it. Let's get started. As I mentioned in
the previous lesson, when working with designs
from Illustrator, instead of creating everything from scratch and after effects, it's essential to open the individual Illustrator
files saved earlier. This allows us to
check if we need to separate any
layers for animation. While there are elements we can create directly
in after effects, like text boxes and
line animations, it's always a good
idea to ensure the design file is
ready for animation. So let me open all the
relevant seeing files. I told you in the
previous lesson, you don't need to
open them since you already have the finalized
Illustrator files. For now, just watch and listen. What's most important
for me is for you to understand why specific layers are separated and
the others are not. Let's go over the designs and decide which layers
should be separated. For example, I see
there's a gear here that I'll definitely want to
animate in after effects. First, I'll ungroup this design, select the layer, and then separate it using the
release to layers function. Afterward, I'll drag
the layers out of the main layer and
delete the empty one. Now that the layers
are separated, we need to check if we've achieved the correct separation. For example, I see that the circle of the gear
is in a separate layer. In this case, I don't
need it to be separated, so I'll select both the
circle and the gear while holding Shift and
then group them together. Next, I'll delete
the empty layer. Since this layer will be
animated in after effects, I'll also give it a name. In my projects, I don't waste time naming
all the layers in the Illustrator files because I know I won't use most of
them in after effects. Only name the important layers. Awesome. Now, I'll do the
same for this design. For example, since I know I want to create an animation
where the lock unlocks, I'll make sure the two parts
of the lock are separated. I'll also label these layers to make things easier
in after effects. I can call them lock
one and lock two. Let's see what we
have in this design. I'll leave it as it is, since I can create this in
seconds in after effects. Before importing the designs, don't forget to save the
changes made to the designs. I'll enter each file
and press Controls. Alright, now it's your
turn to work with me. Let's import the designs
one by one while choosing to import them as
composition with layer sizes. Now, I'll show you the best
way to prepare these designs and after effects to create the panning
transition we plan. When creating a
panning animation, it's essential to
know how many scenes will be part of the
animation sequence. In our case, we
have scenes three, four, five and six. Scene seven comes after the Zoom in animation
in scene six, so it won't be part of
the panning transition. This means there are four scenes to include in the
panning animation. Let's create a new composition. You can do this manually
or use the shortcut. I'll name it scene two.
The important part here is that we need to adjust
the compositions width to fit all four scenes. I'll use the width box
as a calculator and multiply the full HD
width 1920 by four. This gives us a
composition wide enough to include all the scenes we need
for the panning animation. Now, we'll create these scenes
within the composition. In such cases, I bring the design precomps into the composition as
guides or references. Let's start by importing scene three and aligning
it to the left. Next, bring in scene
four and activate the snapping function to place it directly
beside scene three. Repeat this for the
remaining scenes. We won't add scene seven since it's not part of
the panning transition. Now we have one
large composition combining all four scenes. We can begin creating the
objects for this scene using Illustrator layers
or by creating elements from scratch and
after effects, we'll do both. It's important to show you how to create design
elements from scratch and after effects because along with
learning transitions, I want you to discover after effects capabilities
you might have missed. Let's start by lowering the opacity of the layers
to use them as references. Turn off the transparency
background to see them better and lock the layers to avoid accidentally
moving them. We'll begin by creating the
title in the first scene. If you don't see the text menus, open them from the Window menu. Let's open the
paragraph tab as well. Now, let's adjust the color, the font, and the
size of the text. We can check for
the exact numbers in the Illustrator design. Now, adjust the leading as well. Once done, switch back to the selection tool and
place the text in position. Let me correct a spelling
mistake here real quick. Now, let's create the
text box below the title. Since we'll need
multiple text boxes, we'll create a new
composition that we can duplicate and
modify as needed. Press Control or Command N.
Let's name it text box one. The size doesn't
need to be too big. HD resolution dimensions
will work for now. You can see the right
dimensions here. All right. Let's change the width
first and then the height. We can adjust it
later if necessary. Now I'll teach you how to create an automatically
adjusting text box that resizes based on
the text inside it. Let's start by creating
the text layer. In this case, we'll
write course. Let's see the size this text
needs to be in the design. The size is 50. Then adjust the text to the center and make sure it's aligned
left to right. Now let's align it to
the center of the comp. Then align the anchor
point by holding Control or command and double clicking
the anchor point tool. Now, let's create the text box. Go to the Effects
and Presets panel and search for text box. This ready made preset
is super useful, but dragging it to the
layers panel won't work. To use it, double click on it. Once applied, place the text box below the text and
adjust its parameters. First, make it interact
with the text layer, turn off the stroke and
color the box white. Then change the text
color to black. Great. Now let's select the text box and open the scaling and
the padding options. Next, adjust the padding
of the box to scale it a bit and then let's
set the corner roundness. Check the exact value in the Illustrator design by selecting the box with the
direct selection tool. This way, I can see the
rounded corners of this shape. Then I can go back to the project and set the
roundness to the correct value. Once done, the text box will automatically resize
whenever the text changes. Now let's adjust the
compositions size because as you've noticed, it's too big right now. Let's find a nice
proportion for it. We can divide the dimensions
we have here and see how it looks. That looks fine. Awesome. Now let's go back to our scene and
bring this precomp here. But before that,
let's tag the scene to comp and blue for a
more organized project. Now drag the text
box into our scene. Let's place it in
the right position. If you want to
scale the text box to fit exactly with the design, you can do it by scaling
the layer and activating the collapse transformations
function for better quality. Alternatively, we can go inside the precomp and scale
the overall padding. Let's set it to 70.
That looks nice. Let's activate the collapse transformations function anyway, in case we decide to create some scaling animation
for this precomp later. All right. Let's move
to the next part. We need to create
another text box here. For this, let's duplicate the text box precomp we have
from the project panel. Enter it and change the text. You can copy the text from
the design in Illustrator. Awesome. Now let's bring this precomp to the scene and place it in the
correct position. Next, we need to
create the lock. This is a perfect example of a case where it's better to use the Illustrator layer instead of creating it from scratch
and after effects. Okay, so let's enter the
precomp created from the Illustrator file and
copy the necessary layers. But before that, let
me show you something. The sphere that
needs to be part of the lock one layer is
currently on a separate layer. Your case, you won't see this because you're using
my final files. Watch and listen to what
I'm about to show you. This is a situation
that can happen often. During the preparation process, we might miss a few things and it's important
to know how to handle these situations once we're already in the
animation phase. For instance, working with an extra layer won't
ruin the project, but I prefer to avoid unnecessary
layers in the timeline. If you try to fix
this issue by editing the design file and saving it after importing the layers
into after effects, it can mess up your project. Therefore, it's crucial
to identify and resolve such issues before adding keyframes to the layers. In this case, I can
delete the layers folder and the precomp for this scene from my after effects project. Once done, I'll go back
to the design file, cut the sphere, and paste
it into the relevant layer. After deleting the empty
layer, I'll save the file. Then I can reimport
the design into after effects without worrying about breaking anything
in the project. Now I'll bring my new precomp to the scene to use
it as a reference, just as I used the previous
precomp before I deleted it. I'll enter the precomp, and now let's get back
to work together. Copy the two layers of the lock and paste
them into our scene. Place them in the correct
position and don't forget to collapse the layers so that if we scale
them in the future, they'll remain in
the best quality. As you can see, after
scaling the layers, they will lose a bit of quality. Let's collapse these two layers. All right, I'll
bring them back to normal and let's move on. A quick reminder. Click here if you don't see the
collapse function. Great. Now let's move
on to the next part. First, duplicate the
text box precomp again and change
the text inside it. Now, I see that the comp size
is too small for this one, so let's adjust it real quick. That's better. Now bring
this precomp to the scene. Don't forget to
collapse the comp, and let's move on and bring the gear layer from the
precomp of the design. Enter scene five, select the gear layer and
copy it from there. Now go back to the main
scene and paste it here. Let's zoom out to see where it is and now bring it to
the correct position. Awesome. We've finished creating the first three scenes that will be part of the
panning animation. Now, let's address how to
handle situations where we want to combine a composition with three D layers into
our two D scene. In such cases, it's better to
create the three D scene in a separate pre comp rather than dealing with three Dlayers
directly in the main comp. Let's create a new comp, name it three D box, and set it to full
HD resolution. Now let's learn a quick way
to create a three D box. First, we need to create
the walls of the box. For this, select the
rectangle tool and double click on it to create a shape with the exact
dimensions of the comp. Our next step for
creating all the walls of the three D box is to duplicate the shape we
created four times, so we have a total of
five shape layers. After that, ensure
the snapping tool is activated and now move
the shapes to the sides. Then move the rest to
the top and bottom. Next, select the
anchor point tool and adjust the anchor points for each wall so that when
you rotate them in the three D space,
they rotate correctly. Great. And now let's convert all the layers
to three D layers. Select all the
duplicated ones and press R to open the
rotation property. Now we need to adjust
the rotation axis for each layer to
create the box. For the walls on the sides, we will adjust the
Y rotation axis. For the top and bottom walls, it will be the X axis. Nice. Now we can close the layers and parent the duplicated layers
to the first one. By doing that, we can control the position of the entire
box from one layer. All right, so let's
place it here and set the Xaxis to 2000. Now let's select this scene from the project panel to use it as a reference to
color the walls. If you're using the latest
version of After Effects, you can use the eyedropper from the Essential
Graphics panel. But if not, you can do it the old school way and
change the color from the layers properties
menu. Great. Now let's deal with the
upper and lower shapes because they're too short. For this, open the scale
property and uncheck the constrained proportions to scale them only on the Y axis. We can set it to 175. Let's do the same
for the upper part. Awesome. Now we
have a three D box. Since we already know
that we want to create a Zoom and animation to
transition to the next scene, let's create a camera. Now, let's press P and place the camera so the box
will be inside the frame. I see we need to adjust the size of the upper
and lower parts again. Let's fix that real quick. Just try a different
value until you see the shape aligns with
the rest of the walls. All right, we're done creating
the three D box comp, and now it's time to bring
it into our main scene. First of all, let's
go back to scene two and then drag the three
D box pre comp into it. Let's use the align tool to align it to the right
side of this scene. Do not activate the collapse
transformations function for this comp because
the layers will interact with the dimensions
of this comps resolution, and that's not what we want. We'll revisit this part soon. But first, let's
learn how to create smooth panning transitions
for this entire scene. To start, we need to create the line animation
because this is the main object that will
lead the entire scene. Now when I have a bunch of
scenes used as a reference, I love to set a
different opacity for each precomp to know
where each scene ends. This helps me understand where the line and sphere
should be placed. If we didn't have reference
precomps to use as guides, I'd create three shape layers, 1920 pixels wide and 1080 pixels tall and spread them across
the scene to act as guides. All right. Now let's learn how to create
the line animation. First, we will create the line. Make sure no layer is selected, then select the Pen tool and set the stroke color to black
and the stroke width to two. Then turn off the fill, zoom in on the preview, and start drawing the line. Don't create the
line too close to the scene as we need some
space for the sphere, create the first point here. Now hold Shift and
create the next point. Then release shift to create
the diagonal path freely. Don't worry about the
misalignment here. Just keep creating the line. Let's finish the
path somewhere in the center of the last
scene in this comp. Finally, rename the
layer to line or stroke and temporarily scale the stroke width so we
can see what we're doing. Awesome. Now let's learn how to create the
animation with the sphere. For convenience, let's isolate this layer and turn on the transparent
preview background. Now, before creating the sphere, let's also isolate
the first scene in this comp so we can
use it as a reference. Make sure no layer is selected, then create a small sphere. We can select the
first design scene to sample the right color of
this bright blue sphere. Now, let's turn
off the stroke and set the size of it to
some rounded value. If you don't see the
size property here, you can find it in the
shape layer properties. Let's not forget to
change the name. Great. Now we no longer
need the reference, so we can start
creating the animation. We practice this process in the logo animation
course when creating a super
cool logo animation for a made up tech company. For those who watched it, this will be a great refresher. For those who
haven't, this will be a super cool trick to learn and use in
your next projects. Let's start by selecting the
path of the shape layer. Next, go to the Window menu, scroll down and open the built in script called
Create Nulls from Path. Once you have the panel open, choose the trace path option. This will generate
a null object with keyframes that represent
its motion along the path. For now, the animation
loops by default, but since we need it to play
only once, we'll fix that. Select the null object, go to the Effects Control panel and uncheck the loop option. Now the null will travel
along the path just once. Now to make the line appear
only where the null moves, we'll apply the trim paths
effect to the stroke layer. After adding the effect, we'll link the end property of the trim paths to the progress
property of the null. This will synchronize
the visibility of the line with the
movement of the null. Next, we need to attach
the sphere to the null. For this, hold Shift and then parent the
sphere to the null. This will snap the
sphere directly to the null's current
position while creating a parent child
relationship between the two. Now since the corners of
the line look too sharp, we'll add a rounded corners
affect to the stroke layer. Adjusting the radius to
around 50 will smooth out the edges and make the line look cleaner and more polished. Now it's time to animate the sphere and the
line together. To start, we can bring the
stroke with back to two. Then let's disable
the solo function to see back all the layers. And save the project before
moving on. All right. Now let's go to the start of
the path animation and turn off the transparent background so we can see what
we are doing better. Next, let's bring the
null object above to focus on it and press you
to see its keyframes, which we will
adjust and animate. Let's leave the first
keyframe at zero. Now, let's stand on the
second keyframe and change the value until we see the sphere pass the text box. We can set it to 20 for now. Let's see how that looks. I think it's too fast. So let's place the
second keyframe at the two second mark and see how that looks. All right. Now let's go to the
four second mark and move the sphere
a bit forward. By doing this, we create a nice slow motion
effect in the animation. Great. Now let's
move 2 seconds again and position the sphere somewhere after the
second text box. Then after another 2 seconds, let's move it forward
a little more to create that cool,
slow motion effect. Slowing down the sphere
before transitioning to the next scene is not
just for aesthetics. We do this to give the viewer enough time to read
the text boxes. In our case, we are giving
the viewer 2 seconds to read. However, if you
have longer titles, you can give a bit
more time. All right. Now let's repeat the same
process for the final part. At the ten second mark, let's place the sphere
somewhere around here. Then at the 12 second mark, let's move it a bit forward. Great. Now let's go to the 14 second mark and
set the value to 100. Now I want to talk
about something very important when creating path
animations like we just did. A crucial thing to know
about this technique is that when you adjust the points
of the path, for example, if we want to bring
the final position of the path a bit higher, you'll need to ensure
everything aligns correctly. Let's do it real quick. First, stand at the
final position. Then select the Pen tool, zoom in a bit and select
the stroke layer. Click once on the last point and place it somewhere in
the center of the frame. After doing that,
the path is changed, and therefore the animation
of the null is also adjusted. This means we need to go over all the keyframes and ensure that the
position of the null, which is the sphere
is still accurate. Okay, here, let's say we want to correct the
sphere's position. To do this, make sure you
are standing on the keyframe before adjusting the value and only then adjust the values. All right, I think
everything else looks good, and we are ready to
check the animation. At this stage, the
animation looks great, but to make it even
more engaging, we'll add some
micro animations to the objects above
the text boxes. For instance, we
can rotate the gear and animate the lock to create
an unlocking animation. These small details will give the scene more depth
and personality, bringing the overall
design to life. Let's start by creating a cool animation for the
big title we have here. I want to make something
interesting happen with the text when this sphere touches the text box
at this point in time. Let's say this title
represents a logo for the company and you've been asked to create a complex
animation for it. This is a good example of when it's helpful to pre compose the layer and work
on the animation inside a separate precomp. This case, let's not spend too much time creating
something overly complex. I just want to show you when
and why precomps are useful. For now, let's add
some sparkles. First, let's precompose
this title layer so that we don't clutter the timeline with
too many layers. We can name the
precomp main title. Make sure to select both
options and then hit OK. Now, let's enter this precomp, align the layer to the center, and adjust the comp size to fit the animation
we'll be creating. Press Control or Command K and let's see what will be the best dimensions for this precomp. Alright. Now let's make
sure no layers are selected and create a sparkle shape using
the Ellipse tool. We can name this shape sparkle. Once done, let's add
the pucker and bloat effect to turn the circle
into a sparkle shape. Let's try setting it
to -90, maybe -80. That looks better. Perfect.
Next, let's animate it. Go to the beginning of the timeline and instead of
using the scale property, we'll animate the
size of the shape. Soon, you'll understand why
this is a better approach. First, set the size to zero and create the
first keyframe. Then move 1 second forward and set another keyframe
with the same value. Now at frame 15, set the size to 100. Let's easy ease the keyframes
and adjust their velocity. Let's preview the
animation. It looks good. Now duplicate the
sparkle layer and let's place it somewhere in the bottom right
area of the text. Now press S to open the scale property and shrink
this duplicate a little. This is why we animated the size property
instead of scale. It lets us resize the layer without messing
up the animation. All right. Now let's return to the main comp and position this precomp to
match the design. Don't forget to enable collapse transformations
for the highest quality. The next thing we
need to do is to time the sparkles to
appear exactly when the sphere touches the text box at 1 second and 15 frames. To do this, let's enter the sparkle precomp and shift the animation so it starts
at the right moment. Finally, to make the
sparkles look more dynamic, create a small delay by moving the smaller sparkles animation
a few frames forward. That looks great and we
are ready to move on. Now I'll change the blue
color of this precomp. To do that, I'll locate
it in the project panel, change the color there, and then adjust it in
the layers panel. It's blue because
it was created from a precomp that was colored
blue in the project panel. Now let's preview the scene. I think it looks great, so we can move on to
animating the lock. First, we need to find the best timing to start
the animation of the lock. We'll start the
lock animation at 5 seconds and 15 frames. Select the lock two layer, open the position property, and create the first keyframe by lowering this part of the
lock so it looks closed. Then move forward by 1
second and raise it back up. Let's place it here. Now, let's easy ease the keyframes to make
the motion smoother. Then let's adjust the timing
and see how it looks. It seems okay for now, so let's proceed to
animating the gear. First, let's find out
when to start it. We'll start its animation
at 9 seconds and 15 frames, and this time we'll use
the rotation property. Let's create an interesting
rotation sequence. First, create a key frame
with the current value, then move forward by 15 frames and rotate the gear
backward to -45 degrees. Now go forward by 1 second and 15 frames and set the rotation
to complete one full turn. For this, we need to rotate
it in the opposite direction until we see one rotation
and a positive 45 degrees. Now let's adjust the motion
and preview the animation. I noticed that the second
rotation seems too fast, so let's fix it using
the graph editor. First, we need to select
the problematic keyframes, then enter the graph editor
and adjust their handles. We'll leave the first
rotation as is and only adjust the handles
of the second pair of keyframes to smooth it out. That's much better. With this, we've finished animating
the first three parts. Now it's time to improve
the animation and learn some handy tricks
for refining keyframes. First, let's focus on
enhancing the line animation. To make it easier to see, let's turn off all the
reference precomps and change the preview background
color to a neutral gray. You can do this by pressing Control K and adjusting
the composition settings. Next, let's isolate only
the layers that create the line animation so we can focus on them without the rest
of the layers interfering. This way, we can
see the line much better and we are ready
to improve its motion. Let's press you
on the null layer to reveal the keyframes. The first step is to convert
these keyframes to easy ease by pressing F nine
or FNF nine on Mac. This will smooth
out the animation. Now, let's adjust the
preview panel so we can see the entire scene to check how the animation looks after
easing the keyframes. As you can see, the
animation looks smoother, but because of the easing, we might notice
some odd pauses in the motion where the sphere
slows down too much. These pauses occur
because there are points where the spheres
speed drops to zero, and that's not what we want. We aim for a fluid and
continuous animation. Don't worry, we'll
fix this soon. For now, let's make this sphere
enter the scene quickly, as we're aiming to create
a match cut transition from the previous scene we
animated in the last lesson. For this, let's enter
the graph editor and drag the handle of
this keyframe to the left. This will make the sphere enter
quickly at the beginning. Ignore the pause we
have here for now. We will fix this in a moment. Let's move on. Let's make the sphere go a bit faster
at this point in time. We can do this by adjusting the velocity of
these two keyframes, ensuring not to affect
the previous keyframe. If you're wondering
why we didn't use the keyframe velocity panel, it's because doing
so would affect the velocity of the
previous keyframe, as well. As you can see, if I
set the influence for both keyframes to 85% and
check it in the graph editor, we can see that this action affects the motion before
and after this part. So I'll press Control
or Command Z to undo the action and bring
the handles back to the state where we
adjusted them manually. Let's see how that looks. That looks fine, but there are still pauses
during the animation, and we'll address
them very soon. For now, let's continue
adjusting the keyframes where we want the sphere to speed up like at this point in time. Let's adjust the handles of these keyframes just
as we did earlier. If we want to be very precise, we can try to maintain the same velocity
for these sections. Let's make this sphere go faster when it transitions
to the next scene. Now, let's adjust
this part as well. Try adjusting the
handles until you see the velocity around 80 or 85%. Make sure the influence
is within that range. Now let's adjust the velocity of the final part when the sphere
moves to the next scene. Looks nice. Let's now go
back to the main scene and review the animation once again before fixing the pause
parts in the motion. All right. As you can see, we now have a much
smoother motion, but the pauses still look odd. Let's finally address those. First, we need to understand
why this is happening. These pauses occur because
after easing the keyframes, there are parts in
the animation where the spheres speed drops to
zero, like in these areas. To fix this, all we need to do is increase the speed
during these sections. We could manually bring
each key frame up, but that wouldn't
be very efficient. Instead, we can select
these keyframes and double click on them to open
the keyframe velocity panel. Here, check the
continuous checkbox. This ensures that the
keyframes are connected, allowing us to raise them slightly so they don't
reach a speed of zero. Let's apply the same technique
to this other section. Let's check how it looks. That looks much better. Now let's fix the other parts where the speed drops to zero. Check the animation
in the tricky parts and adjust the handles to
create a smooth curve. All right. Let's watch the animation from the
beginning to the end. I think it looks amazing, and we can now save the
project and move on. After creating the
initial animation, I always review it once
more with the rest of the scene to check if any
adjustments are needed. The timing here is good. In this case, I feel the locks opening animation
happens too quickly, so I'll open its key frames and drag the last one
a second forward. That looks much better. I also want the gear
animation to last longer. I'll open its key frames
and move the last one too. Let's say, second 12. I think it looks awesome. Let's close the
open precomps here before moving on. Nice. Now that we've adjusted
the animation, I'll delete the reference
precomps and create a proper background
for this composition in case we want to add
special colors later. To create a background, we can use a solid
layer or a shape layer. In this case, I'll create a shape layer because it's
easier to control the color. First, ensure no
layer is selected. Then choose the rectangle
tool and turn off the stroke. Select the appropriate color. We can sample it from here. Now, double click
the rectangle tool to create a shape the
size of the composition. Let's rename this
layer too, BG one. I prefer to create three separate background
layers for each part in case we decide to use different colors for
specific sections. Open the properties of the
shape and change the size. If you're using an older
version of after effects, you can also adjust it
from the layer itself. Let's uncheck constrained
proportions to modify only the width
and set it to 1920. After that, recheck constrained
proportions and align this layer to the left side to serve as the background
for the first section. Now I want to share a
quick tip that can be very useful when creating
panning transitions, like the one we're
working on here. To make it easier to control
the panning animation, we can use the background
layers as guides. This will make more
sense shortly. For now, let's turn
on the stroke, set its color to black, and adjust the width to ten. Next, duplicate this layer and place it for
the next section, ensuring it aligns correctly. To make this easier, activate the snapping
function and grab the layer by the specific
area you want to align. This ensures the snapping
works as intended. Let's create another one
for the third section. Now we have three backgrounds, each representing a scene, and we can clearly see
where each scene starts and ends thanks to the strokes
we added to the backgrounds. We will use these as guides when creating the
panning animation. But before moving on to do that, let's purge the project. After effects, the
purge function clears the cache or memory, freeing up resources and
improving performance, especially when
things start to slow down or you need to
refresh preview renders. Once purged, let's return to the master composition and bring in the long scene
we created earlier. Position it above
the first scene, and now we need to find the
correct starting point. Since we're aiming for
a match cut transition, the second scene
should begin exactly when the sphere from the
first scene exits the frame. Let's scrub through the timeline
to pinpoint that moment. Somewhere around
here. Now, let's crop this precamp at the end. And now let's bring it to the second scene so it starts
right after the first one. First, we need to align it to the left because that's
where the scene begins. Next, we need to
find the point in time where the sphere
enters the second scene. This is a good
moment. Let's trim it from the beginning
to this point in time. Finally, let's place
the second scene to start right after
the first one. Now we have a nice
match cut transition from the first scene
to the second. Now we are ready to practice
the panning animation. First things first, we
need to find the point in time where the sphere moves from the first part
to the second. As you can see in our case, this happens at the keyframe
at the four second mark. From this point in
time, the sphere goes to the next section. Let's place the time
indicator here. This is where the panning
motion should begin. In the master composition, open the position
property of the precomp and create a keyframe
at this point in time. Let's zoom in on the
timeline for accuracy. Next, go back into
the precomp to find the exact frame where the sphere enters the second
part of the scene. It happens here at second six. Returning to the master comp, you'll notice the time indicator is already at the right spot. From this point in time, start moving the precomp
to the left side. Ensure a smooth and
continuous motion, don't move it all
the way to the left. Instead, stop a few pixels before reaching
the next section. Use the action
grid to guide you. This is where the stroke layers we created earlier
come in handy. They clearly indicate the
boundaries between scenes. By using these guides, the panning animation becomes
much easier to control and aligns perfectly
with the transitions between parts of the long scene. Now let's move 2 seconds forward in the
timeline because we know that the sphere will move slowly for 2 seconds once
it enters the scene. At this point, move
the precomp to the left again until the end
of this part is visible, guided by the stroke of
the background layer. This ensures a seamless and
continuous panning motion that matches perfectly with
the sphere's animation. Let's keep aligning
the animation of the sphere with
the panning movement. Since the sphere moves
every 2 seconds, move 2 seconds forward
in time again, shift the precomp left, and position it over the
third part just like before. Repeat this process. Move 2 seconds forward, shift the precomp, and align
it with the final part. And now when moving
to the last section, bring the pre comp
all the way to the left side to reveal
the end of the scene. Note that relying
solely on snapping for alignment here might
not work perfectly. So take a moment to manually
adjust the placement. To ensure everything is correct, toggle the transparent
preview background on and off to check for any gaps or empty
areas in the composition. Now let's review the animation
to see how it looks. To summarize, all we've done is align the
panning animation of the pre coom's position with the sphere's
internal motion. The result looks great so far, but I want to enhance
the movement at the beginning of this
scene. Let me explain. I don't want the precomp to stay static at the start
of the animation. Instead, I'd like to create a subtle continuous
movement that leads into the first
entrance of the sphere. To do this, let's stand on the first keyframe and move
the precomp to the left. Then move 2 seconds
backward in time. To work more precisely, you can position the
time indicator here and change the time value directly
in the settings to nine. Now let's move the
precomp to the right. After that, let's
go to the start of the precomp and bring it
to its initial position. Let's see what we've got. The precomp starts
moving with the sphere, but not in the right direction.
6. Preparing a scene for a 3D up-panning transition: Hi there, and welcome back. We'll start this lesson by reviewing the next scenes
we need to animate. This time, we'll focus on the scenes featuring
the characters, the laptop, and the key. We need to create transitions
for each of these scenes. Pro tip, try not to work on more than three or
four scenes at a time. Handling too many scenes
simultaneously can complicate your
animation process and mess up your project. For example, we could jump into animating the next scene
after the key scene, but I prefer not to
do that right now. Will do it after I
finished creating the animation for the four
scenes before at first, which will help me work more efficiently and stay organized. With that said, I'm
planning to create a nice panning
transition animation for the first three scenes
and then we will create a Zoom in transition
when we reach the laptop. This time, we will not create a simple side
panning animation. Instead, we will make an
upward panning animation and to make it more interesting, we will do it in three D space. Now let's start working on the scenes and preparing
them for animation. Quick reminder, you don't have to do this because
you already have the finalized Illustrator files after I finish preparing
them for animation. For now, I want you to watch and focus on the process
and listen to me as I explain the
thinking behind the preparation
process. Don't worry. I'll let you know
when it's time to grab the mouse and take action. Before I begin, let me close all the irrelevant
files I have here. All right. Now I will
open the relevant ones, starting with scene
eight. Awesome. Next, I'll open scene nine
and scene ten as well. These are the scenes that will be floating in the
three D space. We will deal with the
laptop scene later. Now I'll start
preparing the scenes, beginning with the
eighth scene design. First, we need to think about which layers we want to
separate for animation. So I'll ungroup the design. Then I'll make sure there
are no groups left here. This can stay as a group
for now because I don't need all the objects here
to be on separate layers. Now while this
layer is selected, I'll separate the layers using the release
to layers function. Then I'll bring all
the layers out of this layer and delete
the empty one. Next, I'll ensure
all the layers fit within the canvas to avoid
cropping when importing. Now, I also want to separate
the time indicator from the group because
I plan to animate it later. I'll
double click on it. Press Control X to cut
it, open a new layer, and press Control Shift V to paste it in the same
position on the new layer. Name this layer UI
panel one, and for now, I'll copy this name
and paste it to the layer with the time
indicator illustration. Great. Let's move on
to the character. First, I'll ungroup this design. Since this isn't a course on character animation and I don't want to
overcomplicate things, I'll only animate the
character's hand this time. This is the part that will
move in after effects, so I'll cut it and paste
it onto a new layer. I'll also label the layers related to the
character for clarity. Now I'll check for any
adjustments needed in the design. For example, I don't need this blue color here,
so I'll delete it. However, after deleting it, I see that I need this part
to animate the hand properly, so I'll bring it back and color it to match
the rest of the boy. This demonstrates how
important preparation is. It can prevent a lot
of headaches later. Always plan what you want in the animation and prepare the
design files accordingly. I'll continue separating this
part from the hand because it needs to float in the air when the character
moves its hand. Once I'm done with
a small UI panel, I'll move on to deal
with the finger. I'll cut the finger and paste
it onto a new layer above the small UI part because I need the finger to be on
top of it and not below it. Now, I'll label the layers for easier organization
in after effects. Just like last time, I'm only naming the layers
I plan to animate. Sometimes I name all the
layers in my design files, but this time, I want
to keep it quick. Just remember, if you're
not into naming everything, at least label the
layers you're going to animate like I'm doing
here. All right. I think this scene is ready, and now I'll move on to
prepare the next one. This scene is very similar
to the previous one, so the process will be the same. Therefore, I'll speed
up this process. First, I ungroup the design
and separate the layers. Then I identify which elements need to be
separated for animation, like the time indicator. After that, I label
the relevant layers. Next, I toggle the layers on and off to ensure
everything is properly separated and
continue separating other parts like the
character's hands. I'll ungroup the hand
once again to cut only the arm part without
the shoulder part. Now I'll make sure I'm
selecting all the objects relating to the icon and
then cut it from the layer. Finally, I'm creating
a new layer above the icon layer and
pasting the finger here. Now I'm making sure
all the layers are separated by toddling
the layers on and off. Then I'll make some adjustments, like in this area of the hand. I'll bring the finger
up a little bit. Now I'm making sure to bring the cloud layers
into the scene, and then I can move
on to the next scene. To be honest, I'm planning to create this
scene from scratch and after effects because I want to teach you how to make
a three D laptop. Still, I'll separate the
layers just in case. I won't name these
layers though, since we'll handle them
directly in after effects. As for the clouds, I
prefer to prepare them in a separate Illustrator file containing all the cloud
designs in one place. This is especially helpful when working with designs
found online, like the Cloud designs
I got from Freepik. When I use a file I
downloaded from the Internet, I usually do not work
on the original file. Instead, I'm saving this file as a new Illustrator file
that will be used specifically in the project
I'm working on right now in case I need to use
it in the future again. I'll give it a name and ensure it's saved as an
Illustrator file. Now I'll prepare this
file by deleting unnecessary layers and
separating the clouds. You may not see the
purpose of this step now, but in other cases such as working with similar design
elements like icons, avatars, or other
repetitive components. It's useful to have them all in one file at consistent sizes. For now, I'll
separate the layers. I'll ungroup the design and use the release to layers
function as usual. But as you can see,
it didn't work. At this point, we need to see the all separated layers
under the main layer, but we don't see them right now. The designs you download from the Internet can be
tricky sometimes. For example, after
separating the layers, it seems they are grouped
inside another group. In this case, we need to ungroup the design once again and
only then release the layers. Great. Now we see all
the separated layers. I'll bring them out
from the first group, delete the empty layer, and then take them out of the second group and
delete it as well. Now I can check that each
cloud is on a separate layer. I'm showing you this process
to highlight that sometimes the assets we download from the Internet require in death
checking and adjustments. Always investigate the file and prepare it to
fit your needs. Now we're ready to jump
into after effects, but before that, we must
save the files we worked on. All right. Now it's your time to grab the mouse and
get back to action. Before importing the next scene, let's organize the
project a bit. As you can see,
the project panel is starting to get messy. First, let's create a
new folder called assets and drag all the folders with the Illustrator
layers into it. Next, let's create
another folder called precomps and move all the
precomps we've created into it. We can leave the scene comps
outside for now because we want to have quick access to them during
creating the project. For now, select the
rest of the precomps we have here and drag them
into the precomps folder. Now let's import the next relevant designs
into the project. We'll bring in scenes
eight, nine and ten. That's enough for now because these scenes need
to work together. All right. Now since
they work together, we'll create a new
big composition for the upward panning
transition animation. Press Control N or Command N on Mac to
create a new composition. This time, we'll set the
panning motion to go up. First, bring the width
back to the default, name this comp scene three. Now let's multiply the
height by three so we can get enough space to fit all three scenes vertically. Awesome. Now we have
a new composition. Now, once again, I will show
you my method to create this big scenes that include three different small
scenes as in our case. I want you to get
used to creating scenes from scratch
and after effects. First, we need to
create guides to indicate where each
scene starts and ends. For this, we'll use
the rectangle tool. Now make sure you set the stroke color to black
and for the fill color, you can set it to gray. Now with the timeline selected, double click the rectangle
tool to create a shape layer. Then let's open the shape
properties and uncheck the constrained proportion for the size to set only
the height to 1080. We can check the constrained
proportion back on. After that, let's align this shape to the
button of the comp. Now we will duplicate this layer and place it in
the center of the comp. We can use the snapping
tool for that. Finally, let's duplicate it once again for the upper part. All right. Now we have guides showing where
each scene will be. These will help us organize
the objects across the scene. Lock the guides and start creating the first
part of the scene. Let's open the design
for scene eight. Now let's copy the main
elements we have in the scene. In this case, it's the character layers
and the icon layers. Let's start by copying all the layers related
to the character. Now let's go back
to the main scene and paste the layers here. Position them in the
bottom part of the comp. You can turn off
snapping if needed. Let's place them in
the right place. Then go back to the design
and copy the UI panel layers. Let's place them
somewhere around here. If you zoom in, you
might notice that the layer order gets messed up during the copying process. Adjust the order for
both the UI panel and the character layers. I'll explain why this happens and how to avoid it in a moment. For now, let's discuss
something important, and it's answering the
common beginner's question about how we can know when to precompose
layers and where not. This scene is a perfect example
to answer that question. When you want to create
micro animations involving specific layers, you should precompose
those layers. This makes it easier to
work on the animation, similar to what we did with the main title animation
in the previous lesson. This scene, I want to
animate the time indicator, which is part of the UI panel. Therefore, I'll precompose
the related layers and name the precomp UI panel one because there will be
another one in the next part. Now let's enter the new
precomp and adjust its size. The precomp currently
has the same dimensions as the one from which the
layers will be precomposed. To fix this, use the region of interest tool to
select the area you need, then go to composition and select Crop Comp to
region of interest. Now to align these two
layers to the center, let's first parent the
time indicator layer to the main UI layer
and then select the main UI panel and align
it to the center of the comp. Finally, let's press Control K to adjust the size
of the composition. We don't have to do
this. I just love to round the dimensions for
a more organized project. This setup makes animating
the UI panel much easier. When you return
to the main comp, you'll notice the UI panel is in a different location because the precomp size was adjusted. Simply reposition it. Next, repeat this process
for the character layers. First, we will precompose
the relevant layers. We can call it man character. Then let's enter the precomp
and adjust its dimensions. When adjusting the comp size, leave some extra room
at the top because the character will throw
the UI panel it's holding. Let's adjust the comp
dimensions and then enter the comp settings to round the values
of the dimensions. We can leave the
height as it is. Awesome. Now let's go back to the main scene and adjust the position of the
character preComp. Now it's time to add
the cloud layers. As mentioned earlier,
I prefer importing them from the separate
Illustrator file we prepared, go to the AI folder and drag the Cloud file
into the project. Import it as a composition
with layer sizes. Once imported, let's now choose some big Cloud design to
add below the character. I'll pick this one, drag it into the comp and
scale it as needed. Let's try 500. Too big. Let's make it 400. That's better. Don't worry
about the low quality. Later we will use the collapsed
transformation function on all the illustrator layers in the scene to have them
at the highest quality. For now, let's move on to the next part and start putting
together the next scene. Let's enter scene nine, and as we did before, we will copy the
relevant layers. But before doing that,
I noticed that I didn't name the layers of the
character in Illustrator. Already have the final files, so everything is
fine on your end. For now, just watch
and listen because this situation can happen to
any of us during a project. It's important to understand
how to deal with it. First of all, you can rename the layers
and after effects. But what if I want to
rename the layers in the original file to keep
everything organized in case I need to share this project with
someone else or send the project file
with all the assets and designs to a client. In such cases, I prefer to adjust the names in
the original file. Will rename all the layers
related to the woman, then hit Controls
to save the file. Now when I go back
to after effects, it won't recognize
the layers because the file was updated and the
layer names are different, which after effects
doesn't recognize. This will show us missing files. In such cases, where
we haven't started animating the layers and we find the issue in the early
stages like now, we can simply
delete the comp and the folder of this design
and then reimport it. Later, we'll learn
how to deal with the same problem when we've
already animated the layers. For now, let's get back to work and continue
setting up the scene. Do you remember when
we copied and pasted the layers earlier and the
layer order wasn't correct? Then we had to adjust
the order of the layers. Now, let's learn
why this happens. It's very simple. After effects, the selection order plays
a significant role. The first layer you select will appear on top when pasted. I want the time indicator layer to be first in the layers stack, I need to select it first when I'm about to copy
the two layers. This means we need to start
by selecting this layer, then the second one, and so on. When we paste them
into the main scene, the layer order will be correct. The same applies to
the woman's layers. If we want to
preserve their order, we need to start
selecting them from the topmost layer
and work downwards. When pasting them, the layers will then retain
the correct order. So when copying layers, pay attention to the
selection order. All right. Now we have a bunch of
layers in the scene, and we know that we need to create some micro
animations for them. With that said,
here's a question. What do we need to
do at this point? In this situation, we need
to precompose the layers. Let's start by precomposing
the woman's layers. Now, let's precompose
the UI panel layers. Let's call this precomp
UI panel two. Awesome. Next, let's enter
the UI comp and adjust the comp size
as we did earlier. First, I will parent
the first layer to the second one so I can align both of them to
the center at once. Then I'll check
the dimensions of the first UI panels comp and set the same
dimensions for this one. Great. Next, I'll check
the dimensions of the first character's
comp and set the same dimensions
for the women's comp. That's why I love to round
the values of the dimension. That way, it's easier to
remember the numbers. All right. And now let's enter
the woman pre comp and adjust the
dimensions of this comp. Let's now move the layers
to the right place. To finish things up, let's bring a nice cloud
into the scene. I think this one will work. Now, let's scale it.
I think 600 will fit. Great. Let's save the
project before moving on to the next part where we see the laptop and the next
scene inside the screen. To make things more interesting, I decided not to use the
laptop from the design. Instead, I'll create one
from scratch in three D, using the Cinema
four D render engine built into after effects. Cinema four D
render allows us to extrude shape layers and add
real three D depth to them. We add this feature when
installing after effects. This can be more interesting if we animate the
laptop opening up. I want to teach you how to
combine a complex scene with both regular three D layers and cinema four D
rendered layers. But for now, I don't want
to change the renderer and the main scene because the
cinema four D renderer can be demanding
on the computer, especially with high
resolution comps. Let's create a new
comp for the laptop. We will convert the render
of this pre comp into a cinema four D renderer to
create the three D laptop. Soon you will get what I mean. Let's make this a full HD composition for
now and hit Okay. Now let's bring the laptop from the design to
use as a reference. And before starting
to create the laptop, let's align it to the center, turn off the transparency
background and lock this layer. Now, let's start
creating the laptop. First, select the
rectangle tool to create a shape for the
upper part of the laptop. Turn off the stroke and open the layer to adjust the
shape's dimensions. Uncheck the constrained
proportions and let's round
the numbers here. Let's now round the corners of this shape. We can set it to 20. Great. Now, move
it to the side and change the color to light
blue as in the design. Simply sample this color. Bring the shape
back to the center. Before we move on, I want to
note something important. Notice that I move the shape inside the layer and
not the layer itself. This causes the anchor
point to be off center. If this happens, use
the anchor point tool, hold control or command, and double click on it to
center the anchor point. Let's continue designing
the upper part. Next, we need to
create the screen. For this, duplicate the
shape in this layer. You can do this from here or go old school and do
it from the layer. So open the layer
and the contents of it to select the
rectangle we have here. Once selected, press
Control or Command D to duplicate it. Open the size properties of the news shape and
scale it down. We can select the scene from the project panel to
see how it should look, or we can use the
laptop layer we have in the scene as a reference and for sampling
the right colors. Now, go back to the new shape. Once selected, let's color it white and add a black stroke. Let's set the stroke
width to ten. Now I see that we need to adjust the dimensions
of this shape a little bit as they might not match the first shape perfectly. We can uncheck
constrained proportions and adjust each
axis individually. Scale the width a bit
and reduce the height. That looks better. Now
adjust the corners as well. Finally, refine the
dimensions a little more. Perfect. All right. Now let's create the
second part of the laptop. For this, we can
duplicate this layer. Let's turn it off for now. Next, let's open the
second shape and use the smaller rectangle
we have here to transform it into the
laptop's track pad. First, turn off the stroke. Now, sample the correct color. Then open the first shape and change its color
to a lighter blue. Great. Now, go back to the second shape and
adjust its dimensions. Make sure to uncheck the constrained proportions and let's try to set
the width to 200, the height to, let's
say 150 or 120. That looks good. Move it down and let's start
creating the keyboard. To create the keyboard, we need to create another
shape inside this layer, make sure the layer is selected. Now, create a symmetrical square inside the layer by holding the Shift key while drawing it. Let's now open the new rectangle and adjust its dimensions. We can set it to 35. Now, let's round its
corners to fit the design. I think we can set it to ten. Then change the color to a darker blue
from the reference. Now, let's learn how to create multiple copies without
manually duplicating them. First, make sure this
shape is selected, then click on AD and choose
the repeater effect. Now, let's adjust the
parameters for this effect. Let's make ten copies. Next, open the
transform properties of this effect and
adjust the position. In our case, we
can set it to 46. Awesome. Before moving on, we can close the
properties of this shape. Now, duplicate this
rectangle shape with the effect applied
and move it down. Use the selection
tool to do that. Once in place, press
Control or Command D to duplicate it once again and then place it below
the second row. Finally, let's do this
process one more time. It's important for me to
show you this process to help you understand how to
use the shape layer tool. Shape layers are one of the most underrated topics in after effects for beginners, but I hope this process helps you realize
how useful they are. Now let's convert it
to a three D shape. First, scale down the
reference layer and move it to the side to keep things from getting in the way
while we're working. Now turn the upper part back on and move the lower part down. Use the snapping function
to grab the layer from the upper area so it
will snap to the upper part. Great. Next, bring
the anchor point of the upper part to the
bottom of the layer. Then bring the anchor point of the bottom part
to the top area. Now convert the layers
to three Dlayers. This way, when we rotate
the X axis of the layers, they will rotate in a way that simulates the laptop
opening and closing. We can set the X
rotation axis of the bottom part of the
laptop to -80 for now. The same goes for
the upper part. But for now, let's leave the X axis of this
one at zero degrees. Awesome. Now let's change the renderer to the
cinema four D renderer. Wait a few seconds
for the update. If you don't see the
little renderer menu, you can also go to the
composition settings, head over to the three D renderer and change
it from there. If you don't see this option, it's probably because you
didn't check the box for Cinema four D functions during after effects
installation. In that case, save the
project, exit after effects, uninstall it, and reinstall it, making sure to include
cinema four D functions. Now when we open the layer, we'll see geometry options where we can set the
extrusion depth. Let's change the view
to see how it looks. As you can see, it's now
a real three D object. Let's set the depth
to, let's say 30. Next, let's do the same
for the second part. On second thought,
30 seems too much. Let's set it to 20 and change it for the
first layer as well. Note that the more
depth you add, the harder it will
be for your computer to preview and render the scene. Now let's go back
to the regular view and continue
designing the laptop. As you can see, there are slightly darker colors in some areas of the laptop design. Let's learn how to do that, starting with the bottom part. Open the contents
of this layer and select the shape you want to
add an additional color to. In our case, this is
the first rectangle. While this shape is selected, go to add, then side
and click on color. Sample the color
from the design. Now move on to the upper part of the laptop and color
its sides as well. Let's select this
layer press R and now rotate it so we can see
the sides of this shape. After that, don't forget to select the rectangle
you want to adjust in the contents of this shape and only after that
add a side color. If you don't select the
rectangle, it won't work. This time, I'll choose
a brighter color. With this, we have finished
designing the laptop. Can now delete the
reference layer, bring everything back
to normal, and move on. Let's bring the rotation of the upper part of
the laptop to zero. The next thing we should
do is adjust the comp size because we don't need all these empty areas around the laptop. Make sure to check the preview box to see what you are doing. We can set the width to
800 and the height to 750. That looks good enough. Now we have a pre comp
with a cinema for D render and we can go to our main scene and bring
this pre comp into it. Let's place it here for now and organize our project
before moving on, starting with closing all the
open precomps we have here. Keep scene two and
the master comp open. Next, let's tag our new scene in blue so all the main scenes
will have the same color. Then let's bring all the
newly created precomps to the precomps folder. We can also move these precomps, including the main
characters precomp. Finally, let's move
the folders of the Illustrator layers to
the assets folder. Let's not forget the
clouds folder as well. All right. Now we are ready
to start animating the scene. Since we've been using after effects for a long
period of time, it's a good idea to purge the software to clean up
everything in the back end, preventing errors during the animation of
this complex scene. And now before moving
on to the animation, let's add the titles
for each of the scenes. To do it, we can copy them
from the main design. Scale down the font and
adjust the leading as needed. Now, to keep the
timeline organized, let's place this title beside
the layers of the scene. Then duplicate the text
layer and move it up. Let's also bring it to the
right position in the scene. We can place it above the
second UI panel pre comp. Once done, let's go back to the design to copy
the second title. Don't forget to adjust the
font size and the leading. Great. Now, we have one last thing to do before
starting the animation, and that's bringing the
rest of the clouds to the scene and converting
all the layers to three D layers because
we want to create an uphanding animation with
a nice parallax effect. First, let's start by converting the layers we have here
into three D layers. Click here if you can't
see the three D icon. Now before bringing the
rest of the clouds, let's create a new
camera in the scene. When working with
a three D scene, it's better to create a
35 millimeters camera, even if we won't animate it. This makes spreading the three
D layers more convenient since we know exactly where
the camera is located. Now let's open the clouds folder and start scattering
them around the scene. First, bring in this one and place it beside the
first scene layers. Now let's find a nice
place for it in the scene. We can turn off the snapping
to move the layers freely. Now open the scale
of this layer, scale it to 400, collapse it, and let's position it
somewhere around here for now. Great. Now, before bringing the next cloud into the scene, let's practice working
more efficiently. First, convert this cloud
to a three D layer. Then duplicate this layer and move it to the
desired position. While this layer is selected, hold down Alt or option and drag the next cloud
onto it to replace it. This avoids bringing in
the second cloud manually, adjusting its scale, and converting it to
a three D layer. Now, let's use
this technique and continue arranging the rest
of the clouds in the scene. For now, spread the clouds
across the scene as you want. Soon we will check the design
to adjust their location. Speed up this process now. All right, I think it
looks good for now. Next, let's organize
our timeline because we have a
lot of layers here. First, tag all the
clouds in purple. Now, let's select all the layers that belong to the first scene, including the character
precomp and tag them in a different
color. Let's say green. After that, select the layers of the second scene and
tag them in orange. This way, we can easily differentiate between the
layers of each scene. Now, since we're dealing
with three D layers, the order of the layers
doesn't affect the scene. Let's move all the clouds
above the other layers, separating them from
the scene layer. That way, it will
be easier for us to spread them across
the three D space. Great. Now let's switch
to the top view and start adjusting the position
of the clouds to create some nice
depth in the scene. All I'm doing now is just
moving the clouds closer or farther from the camera to create an interesting
look for the scene. Moreover, the more the
layers are spread, the better the
parallax effect will look like when we create
the panning motion. If you are not sure
where to move them, select the pre comp of the design to see how
it's supposed to look. I think we need to add
another cloud here. Let's duplicate this one, move it down and replace it with another cloud. Looks good. Now, let's continue distributing the layers in three
dimensional space. I'll speed up this process now. As you can see, I'm using
both views for this task. When I want to move the layer closer or farther
from the camera, I use the top view. For moving the layers up
down or side to side, I use the active camera view. We can also adjust the position of the rest of the layers in the scene. All right. With this, we've finished
setting up this big scene, which includes
three scenes in it. Now we're ready to
start animating it. We'll do that in the next
lesson, so see you there.
7. Animating a 3D up-panning transition: Hi, we will start this lesson focusing on
animating this scene. First, we will animate
the main elements, and after that, we will animate some micro animations
that need to happen here. First of all, let's remember how the
previous scene ended. I see that we plan
to create another match cut where the
small sphere goes up. This means that this sphere
needs to enter our new scene. Therefore, let's copy this layer and paste it into our new scene. You can select the camera to
paste it above this layer. Let's bring this layer down. But before that, delete
the keyframes on it. Press you and click on the stopwatches of the position
and the scale properties. We can go back to
work with One View. Now let's think of a way
to animate this sphere. I want this sphere to
enter the scene from the bottom part and go up while pausing
beside the titles. That is, I want to
create a panning motion, but this time, an
upward panning. All right. Let's
make this sphere enter the scene and
stand beside the title. Let's bring it down here, out of the scene, align
it to the center, make sure we're at the
beginning of the timeline, and now create the
first keyframe for the position property. We can zoom in on the timeline
to see the timestamps as seconds to create the
animation more comfortably. Now let's move 1 second forward and bring the
sphere beside the title. In these situations, as I
already mentioned before, we need to give some time for the viewer to read the text. Therefore, we will
make the sphere stay at this point
for about 2 seconds, move to second three and click the stopwatch to create a keyframe with
the current value. All right. Now I want the sphere to slowly move
to the next position. Let's move 2 seconds forward in time and bring the sphere
to the second title. Let's make this sphere stay
here for 2 seconds and then move 2 seconds forward again to bring
it to the third scene. We can use the align tool to place it in the
center at this point. Awesome. The next thing
we should do now is improve the path of
the spheres position because it's too
straight right now. For this, we can use the
convert vertex tool. So long press the Pen tool and select the
convert vertex tool. Now click once on this point, then press V to go back to the selection tool and start adjusting the
handles of this point. Drag the handle created by the Vertex tool to the left to make the path a bit rounded. All right. Now let's adjust the first keyframe as well and make the sphere go
up at the beginning. I think it looks nice, and we can move on to the next part. Let's click this keyframe
and bring the handle down. That looks fine for now. Let's check the final part. I don't think we need to adjust anything for
the final part. Let's move on to
improving the motion. For this, first things first, let's convert all the
keyframes to Easy Ease. Now let's enter the
speed graph editor and start adjusting the handles. Let's make this sphere enter the scenes super quickly
in the beginning, so our match cut transition
works perfectly. Looks good. Now let's make this sphere move to the second title slowly, then gain speed and slow down again before it
reaches the title. Let's see how that looks
before moving on to the final part. Looks great. Let's do the same
for the final part. Let's see how everything
looks together. Awesome. Now, after finishing
the animation for the main element
in this scene, we can move on to creating the panning up transition
animation in the master comp. Why is this the main element
of the scene you ask? It's because the
animation of the sphere decides where we will transition from one scene to the other. Let's go back to our master comp and add the new scene
we just created, making it work with the previous one by creating a
match cut transition. First, let's crop this
comp where it ends. For this, we can enter it and see where the
last keyframe is. Let's stand here and press in to shorten the work
area to this point. Now, right click
and crop the comp. Back to the master comp. Let's zoom a bit into
the timeline and see where the exact moment is where the sphere is
out of the scene. I see that's happening
somewhere around here. Let's crop this
comp to that point. Now, let's bring our new scene. After that, position it so we will see the first
scene inside it. That is, bring the pre comp to start from the bottom part, since that is the beginning of the scene and start
this comp from the point where the
sphere is about to enter the scene
somewhere around here. Let's crop this comp
from the beginning and move it right after
the previous scene. By doing that, we created
a perfect match cut. This sphere's motion seamlessly transitions from one
scene to the other. Awesome. Now we are ready to create the
panning up transition. As I mentioned earlier, the animation of the sphere will decide where the transition
needs to happen. So first, let's stand at the
beginning of this scene, and now let's create the first position
keyframe for this comp. Next, let's enter the
scene and stand at the point in time
where the sphere arrives at the first title. If we are not sure where it is, press you on the sphere
layer to see its keyframes. Now we can follow the
keyframes here to help us create the panning
keyframes in the master comp. At this point, we can
move the scene up a little bit to create a
gentle panning up animation. Let's see what we've
got. Looks nice for now. Next, let's enter the
scene again and stand at the point in time where
the sphere is still standing. Back to the master comp. Now let's move the comp down a little more to continue
the gentle movement. We don't want the scene to be static when the
sphere is not moving. It will look better if
there's a bit of movement in this situation to
avoid a boring pause. All right, so now we know
that after the pause, the sphere will arrive at its next position
after 2 seconds. Therefore, we can change
the number here to 31, which will place
the time indicator exactly 2 seconds forward. Now let's move the comp
somewhere around here. After that, let's move 2
seconds more and create a gentle upward animation for the pause moment by
moving the comp down. Then after 2 seconds, let's move the comp
further down to get to the final scene where
we see the laptop. Note that if you want to use the aligned tool to align
this comp to the upper area, it won't work since there
are keyframes on this comp. Therefore, manually ensure that the comp is perfectly aligned. That's where the guides
we created come in handy. Now we can start adjusting the motion of our
panning animation. First, let's convert
the keyframes to eases and then enter the graph editor to
adjust the motion. For the first keyframe, we can match it with the
motion of the sphere. All right. Now let's match the transition parts
when the comp goes from one scene to the
other approximately the same way we did
for the sphere. Make the motion start slow, gain speed, and slow
down towards the end. Let's do the same
for the final part. And now let's see how
that looks. Awesome. I think it looks nice,
and now we can adjust the weird pauses we created
after easing the keyframes. To fix this, we can select these keyframes and double click on them to make
them continuous. This will allow us to
grab these keyframes and move them up a bit so
their speed won't be zero. So now after the sphere arrives, the upper panning
motion will continue. Let's do the same for the
rest of the pause moments. I'll speed this process
up a little bit. Let's see what we've got. All right, everything
looks great. Now, after creating
the animation for the main element inside this comp and then
creating the transitions, we can finally create some nice micro animations
inside the scene. We won't make something complex. That's not the goal
of the course. I just want to show you the process of creating
complex projects with scenes containing a
few animated sequences. All right. The first micro animation
we will create is the animation inside
the first UI panel when the sphere arrives here. While standing at
this point in time, let's enter the first
UI panel pre comp and animate the time
indicator we see here. Can create the first
keyframe here. Let's move the layer so
it starts from this area. Now let's move 1 second forward
and move it to the right. Finally, let's
adjust the velocity and see how that looks. Let's go back to the
main scene and see how that looks
again with the rest of the elements in the scene. I think it's too fast. Let's make it last for 2
seconds instead of one. While standing here, move the last keyframe to
this point in time. Looks great. Now, from
this exact point in time, let's create some micro
animation for the character. Character animation isn't the
main topic of this course, but I do want to teach you some key tricks for animating characters and after effects, especially without rigging
them using rigging plugins. So stand at second one and
enter the character pre comp. Now before starting to
animate the layers, when working with characters, I drop the opacity of
the layers to 50%. This makes it easier to see clearly where the
parts are connected. Need to know when the parts
are connected because I need to move the anchor points of
the layers I will animate. Like in this layer, let's
select the anchor point tool and move it to the center of the area where the two
layers are connected. If you move it to
the wrong place, the movement will look weird. But when it's in the
center, it will work fine. Place it here and check
the rotation. Looks good. Next, we can parent the finger
layer to the hand layer, so it will move
together with it. That looks great. Now we can also parent the UI
icon to the hand as well. This way, all the relevant
layers will move together. Now from this point in time, let's create a nice
rotation animation for the hand to make it look
like it's throwing the icon. First, let's create
the first keyframe where the rotation
is set to -30. Now let's move 1
second forward and rotate the hand, set it to zero. Finally, move another
second forward and copy the first keyframe so the hand will return to its
initial position. As we do for all
types of animations, we first create the initial
movement and then improve it. Now that we have
the base movement, let's make it a bit
more interesting by making the hand go
down before going up. Then we can make the hand go downward just before
reaching its final position. This technique is one
of the 12 principles of animation called follow through
and overlapping action, which makes the
motion of elements feel more natural
and less robotic. Now from this point in time, we need to make the
icon fly in the air. We will create the first
position keyframe here, then go to the 1 second
mark and bring the icon up. Finally, copy the first keyframe to make it return to
its initial position. When checking the animation, I see that the icon starts
going up too early. To fix this, let's move
the first keyframe five frames forward so the
animation will start later. Let's do the same for
the landing animation. Let's make the landing
happen earlier. Now the icon layers start
going up at the right time. Awesome. Now we can create a nice rotation during
the flying animation. Press R, create the
first keyframe, then go to the landing keyframe and make the icon complete one full rotation. Looks nice. Great. Now we can
bring the opacity back to normal and start improving the animation we just created. Starting with the main animated element in this animation, which is the hand,
because the hand is the layer that the rest of
the layers are parented to. First, let's convert all
the keyframes to easy Es. Now let's change the velocity to 85% and see how that looks. I'll check the animation
two times to make sure. I think it looks great. Now let's easy ease the rest of the key frames. Looks good. But I think we can make
the icon stay a bit longer in the air by adjusting
the handles like this, making the layer slow down when it's reaching
the top position. Let's watch it one more time. All that looks great. Now let's go to the main scene and move
on to the next thing, which will be animating all
the micro animations for the next scene from the point in time where the sphere
arrives at the second title. But before that, let's watch the animation we created
for this scene to see if the timing of
our micro animation here is okay. Looks awesome. Now we can move on
to the next part. So first, we need to
stand at the moment in time where we want the
micro animation to start. In our case, it is when the sphere stops at
second number five, and as with the previous part. Let's start with
animating the UI panel. Create the first keyframe
at this point in time. Let's start the animation of this layer from
the left side. Then let's move 2
seconds forward. That is to second eight and move the time
indicator to the right. Let's adjust the easing
and see how that looks. Great. Now we can animate the woman character exactly as we animated the
man character. So enter the precomp and now start by lowering the
opacity of all the layers. Next, adjust the anchor point of the main layer we
will animate and start creating the
rotation animation exactly as we did for
the first character. But before the animation, don't forget to
parent the finger and the icon layers to
the hand. All right. Now this time, we can set the first rotation key frame
to a value of 20 degrees. We can zoom in on the timeline to see the timestamps
as seconds. Let's create the first keyframe. Now, move to second eight and
create the same keyframe. Then in the middle
of these keyframes, set the hand rotation to zero. Now let's improve the animation by making the hand go down a bit before going up and then go down again before returning to
the original position. Similar to how we did for the man character in
the previous part. Now from this point in time, we can make the icon
fly in the air. Then let's move to 6 seconds and 15 frames
and bring the layer up. Finally, let's go to 7 seconds and copy the
first keyframe here. Let's also make it rotate
during the flying animation. Everything looks okay for now. Let's now select all the layers, bring the opacity back to
100 and see how that looks. I think the icon rotates
on the wrong axis. Let's change its last
rotation key frame to minus one so it
rotates to the left side. Now let's adjust the keyframes
and check what we have. First, let's improve the
animation of the hand. Enter the velocity panel
and set it to 85%. After that, let's improve
the animation of the icon. As we did the previous time, let's make it slow down
while hovering in the air. For some reason, the
animation seems super slow. I think I didn't
match the timing and duration of this animated
sequence correctly. Let's go back to the
first character comp and see what the animation
duration is there. Let's focus on the timing
of the hand animation. This animation lasts for five frames and
after five frames, the icon starts to fly. Let's see what we did in
the woman character comp. I see now, we need to shorten all the animations
here by five frames. First, let's bring the hand keyframes a few frames backward. Next, bring the
icon keyframes to start from 5 seconds
and 20 frames. Then bring the
last two keyframes of the hand to start
from 7 seconds. Let's see how that looks. I think we can move the middle key frame of the hand here. I wanted to show you that
sometimes during the process, we can make mistakes and not perfectly match and
time the animations. This is why it's so important
to take the time to check every animation a few
times before moving on. Even after adjusting the
timing of the woman character, the animation still doesn't last exactly like the man
character's animation. Man character's animation
last exactly 2 seconds while the woman
character's animation lasts 2 seconds and ten frames. That's okay for me because
the second title is a bit longer and it's good to give the viewer an extra
ten frames to read it. With that said, let's now improve the look
of the scene with some cool depth of field effect using our camera in the scene. Since we want the sphere to interact with our
camera depth of field, let's convert the
sphere layer to a three D layer as well as the rest of the
layers in this scene. That way, the camera will interact with all the
layers we have here. And we will be able to create an interesting look
for the scene. First, let's open
the camera options and then activate the
depth of field here. Now, let's open the top view and adjust the focus distance. Since we place the most important layers
at this position, we need to bring the
focus distance here. We can adjust the
value manually. Now let's play around
with the aperture and the blur level to get a nice
depth effect in the scene. I think it looks great, but
I do think we need to adjust the positions of
some of the clouds to achieve a more
balanced composition. If you want to learn more about creating better
compositions and designs and understand where your composition
needs adjustments, I highly recommend checking out my eBook, motion by Design. In this book, you'll learn essential design principles and the fundamentals
of graphic design, allowing you to create more engaging and high quality scenes in your animation projects. It's basically
everything I learned in four years of college while
earning my bachelor's degree in visual communication
condensed into seven super easy
to understand chapters. Knowledge will help you stand out from other motion designers, give it a chance if you're
serious about your career. Back to the lesson. Now I
will speed this process up. All I'm doing here is
moving the position of the clouds to create a
more balanced composition. Okay. Now let's go to the master comp and see how
everything looks together. I think we should zoom out a
little bit because right now the scenes are too close and
everything looks too big. Let's go back to the scene. Since we have a camera here, it will be very easy to
make everything look a bit smaller by moving the
camera backwards slightly, and we will do that by
adjusting the Zaxis. Adjust your active
camera preview to fit the preview panel so you
can see the entire scene. Let's select the top
view and do the same. Now let's move the camera
back a little bit. That's enough. Afterward, don't forget to adjust the focus
distance accordingly. All right. I think
it looks better now. Let's check it in the
master comp as well. I think everything looks great and we are
ready to move on. Let's enter the
scene we worked on and now delete the guide
layers we created in the beginning because we no
longer need these guides and instead create a new solid to use as a background
for the entire scene. As you can see in the design, there is one color for the background for
these three parts. Let's right click here, go to New and select solid. Let's sample the blue
color from the design. We can rename it to BG Sky. Then make sure it's comp
size, and hit Okay. Let's now bring it
below all the layers. Now we are ready to move on. Let's close all the precomps
we have here and go back to the master comp to see what our next
step should be. I think at this point we
can make something more interesting instead of
just presenting the title. For example, we can
add some sparkles. Let's enter the
second scene and use the sparkles we created for the first title
of this scene. Let's enter the first
main title precomp, now copy the spark we have here. But before that, let's
use this opportunity. Let's press you to see where the animation on these
layers ends and crop the layer accordingly.
Now let's copy them. Now go back to the main scene and after that enter
the box scene. Now, scroll down in
the Layers panel, select the title and
paste them here. Finally, let's zoom out
in the timeline to find the sparkle layers and adjust the timing of the sparkles when we see the
final title here. We can start their animation
at around second 17. Let's check the timing. Let's move them to start from the second 17 and 20 frames. And now let's not
forget to adjust the position of the sparkles according to the title location. I will place the big one
somewhere around here, and after that, I'll bring the small one below
the letter end. Let's see what we
got. Okay, let's now go back to the master comp to see it with the
rest of the scenes. Everything looks nice and
we are ready to finish animating the third
scene by creating the Zoom in transition
to the laptop, leading into the next scene. To do this, we'll add the
design of the next scene into the laptop comp and
use the camera we have in this scene to create
the Zoom in animation. During this complex transition, we'll encounter a lot of issues, so get ready to learn
some awesome tricks. To start, we first need to prepare the design
file and Illustrator. You don't need to
do anything since you already have the
finalized design file. Just watch and listen. Open the design of this
scene and start by ungrouping the design so I
can separate the layers. After that, I'll get them out of the grouped
layer and delete it. Now since I already plan
to use the small sphere inside the key to use as a transition object
for the next scene, this sphere will turn to the background of the
scene after that. This is why I will
make sure to separate this layer from the key so I
can animate it separately. Now I'll label the
important layers and save this design before importing
it into after effects. Now it's your turn
to get back to work. Let's drag the 11th
scene into our project. This case, we won't create this scene from scratch
and after effects. We'll use the design precomp
we already have here. First, let's enter
the laptop comp and bring this precomp inside. Now we need to convert
this layer into a three D layer so it interacts with the
rest of the elements. Now, let's adjust
the size of the comp and place it at the center
of the laptop screen. To fit the precomp, exactly in the laptop, we can set the size to 23.5. Let's zoom in and make sure it's aligned to the center
of the laptop. Great. To make things
more interesting, I want to create an opening
animation for the laptop. First, we need to find the point in time where
it needs to happen. We can start from the point
where the sphere is about to move We can open the key frames of the sphere and see where it's happening. The sphere is starting to move toward the laptop
from second seven. Place the time indicator here
and enter the laptop comp. We can turn off this
precomp for now. Now, let's open the rotation
properties for both layers and use the X axis rotation to create the opening animation. At this point in time, set the value to -90
for the lower part, and for the upper
part, set it to 90. Now let's move 1 second forward and set the value
to zero for the upper part. For the lower part,
we can set it to -80. Now let's adjust the velocity
and see what we've got. I always go back
to the master comp to see how it looks in
the finalized form. As you can see, the laptop is already opened before
the sphere arrives. That means that we need to
delay the animation slightly. Let's start the animation
from somewhere around here. Enter the laptop precomp and shift the keyframes to
this point in time. Let's go back to the master
comp and check it once again. That looks better. Now let's turn the scene 11
precomp back on. Now we need to make the precomp move together with the
upper part of the laptop. For this, while the
laptop is already opened, let's parent this comp to
the first shape layer, which is the upper
part of the laptop. Awesome. Now it's attached to the laptop screen and
everything looks fine for now. Next, we can move on and start creating the
Zoom and animation. To see how much to Zoom
and with the camera, we need to see the
dimensions of this precomp. Soon you will understand why. For now, let's enter this precomp and add the fill
effect to the background. Our goal is to change the
color of the background to make it visible on the
white screen of the laptop. This way, we can clearly see
the borders of the scene. All right. Let's go back to our main scene and start
creating the Zoom and animation. First, we need to find the point in time
to start zooming. I think we can start right after the sphere
arrives in this scene. Open the position property for the camera and create the
first keyframe at this point. Now move 2 seconds forward and start adjusting
the position values. But before that, make sure you can see the
top of the scene. This way, we'll know when to stop zooming with the camera. Now, we need to bring
the camera closer to the laptop screen until we see the key precomp
covering the entire frame. For this, make sure to move the camera down
and up as well. The depth of field is
interfering right now, so access the camera options
and turn it off for now. Great. Let's continue adjusting
the camera's position. I see we've already reached the upper border of the scene. That's why we colored
the background to gray. By doing that, we now know that we can stop zooming
with the camera. Let's check how it looks
in the master comp. We can still see an
empty area here. That means that we need to lower the camera and zoom
in a little bit more. Let's check how that looks
in the master comp now. I think that looks better now. Let's turn on the action
grid here to see if the scene is aligned to
the center. Looks great. Now we can go back
to the scene and improve the key frames we
just created for the camera. Before we move on, I want to point out a minor
mistake we made here. Let me explain. When we
entered the scene to adjust the zooming of the camera after checking it
in the master comp, I didn't stand exactly at the second keyframe of the
camera while adjusting it. That means we created
a new keyframe for the adjusted camera position instead of replacing
the old one. This is why we see
another keyframe here. This keyframe represents the
adjusted camera position, but it's not at the
correct point in time. Therefore, we will stand
at the second keyframe, delete it, and move the new
one to the correct position. This is one of the most common mistakes beginner
motion designers make. Showed you this mistake so you remember to make
sure to stand at the keyframe before adjusting
its value. All right. Now let's adjust the easing of the camera's motion
to make it look less robotic and see how that
looks. That looks very good. Now let's check it in the
master comp as well. All right. That looks great. Now let's go back to the scene and
continue animating it. We can now bring back the
depth of field for the camera. Now, since we don't need blur for the scene when
entering the new scene, we'll animate the blur level. Let's create the first
keyframe for the blur at second nine and
then after 1 second, set the blur level to zero. Let's easy ease the keyframes
and see how that looks. I think this animation
happens too early, so let's move it 1 second forward to start
from second ten. Let's see how that looks. I think we can start
at 15 frames earlier. Okay, I think it looks better now and we can move
on to the next step. This time, we'll
learn how to achieve the highest quality
resolution for a project when dealing
with such a complex scene. Even if we set the
preview quality to full, the scene might still
not look sharp. First, let's learn
what we can do to improve the look of the
scene involving the key. The first thing to understand
is that activating the collapse transformations
function won't work in this case because it will
mess up the elements inside the precomp created with the cinema for D renderer. So don't think this is
because of the camera blur. We don't have blur at
this point in time. In these situations, we need to activate the collapse
transformations function, but not for the time period
when the laptop is shown. Stand at the point in time where the camera animation
is about to end. Then select the
laptop precomp and press Control Shift D to split this precomp
at that point. Now, we'll collapse
only the second comp. Furthermore, to hide
the unsharp parts, we can increase the blur at the end of the camera animation. For this, first, let's move the blur animation to end
with the camera animation. Now at this point,
set the blur to 20. After that, to make a
smoother blur animation, let's stand at this point in
time and set the blur to 50. By doing this, we've created a smooth and unseen transition between the uncollapsed
comp and the collapsed one. All right, I think it
looks great and we can now move on to creating the transition for
the next scene. Remember, you need to give the viewer enough time
to read the text. To check this, read the text yourself and see
how long it takes you. I think we can start the
transition from second 13. Now let's enter the laptop comp and then enter the
scene pre comp. Now to create the transition, place the sphere
above all the layers and create a scaling
animation for the sphere. At this point in time,
create the first keyframe. Then move 2 seconds forward and scale the sphere until it
covers the entire frame. Now, collapse this
layer to make it sharp and then adjust
the key frames. Let's set the
velocity to 85% and see how that looks. Looks great. To wrap this scene,
let's collapse the rest of the illustrator layers we have here for better quality. Finally, let's turn off the fill effect we have
in the background layer. Don't forget to collapse
this layer as well. Let's go back to the main
scene and see how that looks. All right, I think
it looks great. Now let's create some
nice text animation in this scene to make it
a bit more interesting. Since we cannot do something creative with the
Illustrator layer, let's copy the text
from the design and create a new text layer in
after effects with this text. Align it to the composition and place it in the
correct position. We can now delete the old layer. Now I'll show you how
to create a cool, wavy text animation
using text animators. I won't explain it
in depth because I cover this in my course,
text and motion. If you want to learn more about text animation and after
effects, go check it out. All right. First, we'll create an animator for the
position property. Set the position to -80
so the text moves upward. Next, open the range selector
and the advanced menu. If we move the offset, you'll see the text animates every character, which
is not what I want. I want the animator to
animate every word, so I'll select words
in the based on menu. That's better. After that, I'll make sure the animation starts from the first
word in the text, animating from left to right. For this, we need
to change the shape of the animator.
Let's try ramp up. Now when I go from -100
to 100 in the offset, the text starts to go down
and that's not what I need. I want it to go from down to up. Let's change the shape to
ramp down and check it again. Yes, that's much better. Now we can start
creating the animation. Let's begin the
animation at second 11. Create the first keyframe for the offset property
and set it to -100. Move 1 second forward
and change it to 100. Then adjust the easing
of this animation. Set the E's height to 20 and the Es low to 80. Let's
see what we've got. Great. Now the text moves
up in a wavy motion. Next, duplicate the
animator we created. Then press you to see
the keyframes and move the second animators keyframes five frames after the first one. Finally, open the
second animator and change the position
value from -80 to 80. Now, if we check the animation, we will see that we created a nice wavy text animation.
Everything looks good. I think we can now go back to the main scene and
see how that looks. If you're previewing
at full resolution, it might take a few seconds, so be patient or lower the
preview quality to quarter. The text looks great
and the timing is fine, but I see we need to place the sphere above the text layer. So let's get back
to the pre comp and place the sphere layer
above all the layers. Now let's go back to the scene and check it out once again. All right. Everything
looks good. At this point, we can
crop the timeline. But don't crop your scenes exactly where the
animation ends. Always give yourself
a few extra seconds. Now let's go to the laptop comp and crop the timeline
there accordingly. Now let's close the
not relevant precomps and go to the main scene to adjust the timeline
there as well. I'll crop the timeline here to this point in time. All right. And now let's close all
the open precomps and go to the master comp to watch the entire animation
we created so far. And before that, we can stand at second 16 to bring here
the workflow area. By doing this, it will be a
little bit easier for after effects to preview the project. Okay. Everything looks super nice, but I'd like to finish
this lesson by creating a subtle zoom in animation
when we enter the key scene. Let's enter the scene and
create a new null object. Convert the null to
a three D layer. After that, let's open the top view and place the
null beside the camera. Now let's rename the null. And finally, parent the
camera to the null. Now we can create the
Zoom in animation without affecting the
existing camera keyframes. Close the top view and change
the quality to quarter. Now let's start the Zoom
in animation at second 11. Create the first keyframe, move to second 14 and 15 frames, and adjust the nulls
the axis position. We might also need to adjust the X axis to ensure a
symmetrical zoom in, bring the camera
down a little bit. Let's see how that looks. First, I think we need to start the Zoom and
animation a bit earlier. Let's start it from
second ten and 25 frames. Okay, so the zooming
starts at good timing. Now let's go back
to the master comp to see if that
looks symmetrical. After watching it a few times, I noticed that we need
to bring the camera up a little bit because right now it looks like it
zooms in and goes down. So enter the scene and adjust the X axis to bring the
camera down a little bit. Let's watch it one
more time. Looks good. Let's watch it in the
master comp as well. All right, that
looks much better. We're now ready to move
on to the next lesson. Before that, let's go to the project panel and
move the folder for the 11th scene into the assets folder to keep
the project well organized. To start the next
lesson smoothly, let's purge the cache,
which is always a good idea after working
on such a complex scene. With that said,
we've just finished creating the most complex
scene in the project. From now on, it'll
be pure fun as we explore some other interesting
transition techniques. But before you continue, make sure to take a short break. Your brain and body needed
after such a long session. See you in the next lesson.
8. Complex zoom-out transition in a 3D space: Hi there, and welcome back. Before we start working
on the next scene, I want to show you
a potential issue that you might encounter
and how to fix it. For now, you don't
need to do anything, just watch and listen. During the project, after I had already imported the
designs into after effects, I noticed that one
of the layers in these designs
needed to be fixed. However, as you can understand, I had already animated
this layer in After Effects. Here it is. Let's see what happens when I change the name of this layer and how we can resolve any issues that might
arise during this process. First, I'll fix the name in Illustrator and
save the file. Now, when I go back
to after effects, it shows that the
file is missing. This happens because the
names no longer match. In situations like this, we need to search
for the missing file in the project panel. Double click on
the missing file, then select the design
that the layer belongs to. In this case, it's part of
the design for scene eight. I'll select it and make
sure to uncheck this box. This way, after effects
will automatically detect the specific layers instead of importing the
entire file again. Great. Now everything looks
correct and we're ready to explore the next scene in Illustrator before importing
it into after effects. Want to remind you that
you still don't need to do anything because you already have the finalized design files. Just observe what I'm doing and soon we'll import them
together into after effects. All right, the next
scenes will be working on our scene 12 and scene 13. Since we'll create a transition
between these two scenes, I'll also open scene 14. Now let me prepare the
scene before animation, starting with scene 12. We will create this scene from
scratch and after effects since we already have a
text box pre comp prepared. We can simply duplicate it and update the
information inside. That is exactly what we will
do to create this scene. However, I'll still separate the layers and
Illustrator just in case. The most important
thing is to remember to save the file after
making any adjustments. Let's move on to the next scene. For this one, I want to use
the layers as they are. We won't create this from
scratch and after effects, so I'll make sure to
separate them and give this design some
extra attention. First, I'll check that
each element is separated. While clicking on each object, I'm looking at the layers panel to verify that it's separated. Then I'll move the
podium layers up slightly to ensure they're imported without being cropped. Once everything is ready, I'll save the project and
move to the next scene. For this next scene,
I'll also separate the layers because
I'll definitely use them in after effects. After verifying that each
element is separated, I'll save the project
and prepare to import all three scenes
into after effects. Now it's your turn to join me. Let's import these three designs into our project together. So bring scene 12, scene 13, and scene 14. As always, the first step
is setting up the scenes. Let's start by creating
the first scene in the animated sequence that
involves these three scenes. As I mentioned earlier, we'll create this
scene from scratch. Let's begin by creating
a new composition. We'll name this
comp, scene four. Make sure it's in
full HD resolution and ensure it's not set to
the cinema four D renderer. All right. Let's get
started with this scene. First, let's create a new
solid for the background. We can sample the color
from the design pre comp. Next, locate the
textbox precomps and duplicate the last one to
use it for our new scene. Enter the duplicated textbox
precomp and update the text. You can copy the text
directly from the design. Let's go back to Illustrator
and copy the text. Back to After Effects, let's paste the text and
adjust the font size to 50. I'll reset the leading as well. Let's go back to the
selection tool now and bring the new text box
into the main scene. We can place it
somewhere around here. Now, let's duplicate the
last textbox precomp in the Project panel to create the next text box we
need for this scene. Next, enter the new
text box precomp and replace the text using
the design from Illustrator. Copy this text, then go back to After Effects
and paste it here. Before moving on
to the next one, let's adjust the
precomp dimensions to fit the text box properly. To do this, press Control or Command K and set the width to
fit the text box. Make sure the preview
option is checked so you can see the
adjustments in real time. A width of 840 should
work well. All right. Now let's bring the
new text box into the scene and move on to create the rest of the
text boxes we need. We can duplicate the
last textbox twice and then select the two new ones and open them simultaneously. Let's start with this one. Go to Illustrator,
copy the next text, and then paste it
into after effects. As you can see, we need
to adjust the font size, so let's set it to 50, then enter the comp settings
to adjust the width. This time, we can set it to 900. Okay. Now let's go to the last textbox pre comp and adjust the
info here as well. I'll reset the leading
here and I'll do the same for the
previous one because I think I forgot to do that. Great. Now let's go back to the main scene and bring
the new text boxes here. Don't worry about
the position of the layers for now
because we will adjust them in a minute
when converting them to three D layers. All right. Now, once all the text
boxes are created, close the precomps and let's move on to
animating the scene. Start by locking the
background layer. Next, convert all the text
boxes into three D layers. After that, create a camera, making sure the depth
of field is turned off for now to speed up after
effects performance, select the camera
and press it twice. In my case, it's
already turned off. We'll enable it later once we
finish animating the scene. Now, let's add
another view preview, then select it and make sure
we set it to the top view. Next, let's start positioning the layers across
the three D space, ensuring they are
all evenly spaced. Let me show you what I mean. Let's start with Text Box four. Move it toward the camera. We can press P on
this layer to reveal the position properties and
now we can adjust the Zaxis, set its Zaxis position to -500. Now, leave Text Box five in its current position
at zero on the Xaxis. Next, move text box seven
backward to 500 on the Z axis. Finally, move the last textbox further back and set
its axis to 1,000. Now, all the text boxes
are evenly spaced. That is, each of them is exactly 500 pixels
away from each other. Next, we'll animate the camera to create a backward motion. But before animating the camera, let's use the active
camera view to adjust the X and Y axis of the
layers and the scene. Our goal is to ensure
they stay within the boundaries of the frame when we create the backward
camera movement. All that looks good. Now we can start
animating the camera. Start by positioning
the camera at 750 on the Zaxis.
Set a keyframe here. Then let's zoom in on the timeline and move to
around the eight second mark. At this point, move the camera
backward to where we have enough space to transition to the second scene that
comes after this one. I think we can set
the Zaxis to -2,400. Let's preview the
animation to ensure there's enough time to
read all the text boxes. While the camera moves, read the titles to ensure there is enough time for
viewers to read them. In scenes with text,
this is how we can determine if we're ready
to start the next scene. I think we have enough time. Now, before moving on, let's adjust the position of any layers that go out of frame. That looks better. Next,
scrub back and forth in the timeline to
see if there are any other layers
we need to adjust. I think we can lower this one slightly and move it a bit to the right. Looks great. Now it's time to bring the next scene into our composition. Insert the precomp for scene
13 into the main scene comp, convert it to a three D layer, and place it somewhere
around here for now. Enter the precomp and delete
the background layer. Also, delete the title layer since we'll create a new
text layer for it later. It's better to
create text layers and after effects because it makes it easier to update them if the client
requests changes. Now, select the podium layers and align them to the
bottom of the composition. Make sure to change
the alignment setting to composition and
then click here. Awesome. Now let's go back to the main scene and continue building this animated sequence. First, let's figure out the best placement
for this scene. I think somewhere around
here should work. Now, select the camera, move 2 seconds forward from the last keyframe and
move the camera backward. We can set the Z axis
to -3,300 for now. Next, let's create an intro
for the podium scene. Go to the eight
second mark and place the precomp down here
so it's not visible. Now, open the position property and create a keyframe
with the current value. Then move to the point
where the camera finishes its movement and position
the precomp up here. To create a seamless
transition to the next scene, ensure the podium covers the entire composition
at the bottom. To achieve this, go to
the final keyframe of the camera movement and bring
the camera a little closer. Will make it easier
to animate the camera moving down into the next scene
with the blue background. Now, move 2 seconds forward
and adjust the camera slightly backward to create a gentle zoom out animation
during this scene. Again, ensure the blue podium fully covers the
width at the bottom. If this doesn't make
sense yet, it will soon. For now, let's add the title that will
accompany the podium scene. This time, let's create the text layer for
the podium scene directly in the main scene and not inside the pre
comp of the podium. This way, the entire sequence
will look a bit more interesting because
we will achieve a nice parallax effect
in the final result. Now let's convert the text to a three D layer and position
it in front of the podium. Somewhere around here, let's press the semicolon
key to open the grid. That way, we can see if the layer is aligned to
the center of the comp. As you can see, this approach makes the scene look
much more dynamic. Right now bring the text
below the camera in the layer panel and press P on the camera to
open the position. Next, go 2 seconds
forward and move the camera down until the blue podium is
no longer visible. As you can see, the text
boxes are still visible. Let's create a simple
outtro animation for them. Start at the eight second
mark where the camera enters the new scene and press T to
open the opacity property. Create the first keyframe
with the opacity set to 100%. Move 1 second forward and
lower the opacity to zero. Apply an easy ease to these keyframes and
check how it looks. I accidentally animated the podium scene's
opacity as well, so I'll delete those keyframes. Now, to make the outtro
animation more interesting, let's add a delay between
the disappearing text boxes. Start by fading out
the first text box visible in the scene at
the seven second mark. Now, move five frames forward and fade out
the next text box. We'll leave the third text box as is and move the final one, five frames further
before fading it out. Let's see how that looks. All right, I think
it looks good. Let's review all the animations we've created for
this scene so far. I think we need a
little more time before moving down after
the scene with the podium, as we need more time to
read the title here. To fix this, let's move the last two keyframes of
the camera 1 second forward. Then check it again and read the title to ensure
there is enough time. That looks better. Now, let's adjust the easing
of the keyframes, starting with these two. Convert them to
easy ease and open the graph editor to
tweak the handles. That's better, but I don't
like the pause here. Let's select these
keyframes, hold out, and double click them to enable
the continuous checkbox. Now move them up here. Next, bring the first
keyframe down here as well to make the motion
more consistent in speed. Bring it to the same speed
level as the next keyframe. Let's see what we've got. Looks good. Let's remove
the pause in this part. Now let's exit the graph editor, then apply easy ease to
the last two keyframes. Then go back to the
graph and adjust the motion to make it a
bit more interesting. Let's see how that looks. Afterward, adjust the timing to ensure there's no
pause here either. Let's see how that looks. So I see the motion
looks a bit odd. It happened because after
adjusting the key frames, we got a moment when the speed of the motion is at zero speed. In such cases, we should
always adjust the easing by tweaking the motion speed and constantly
checking how it looks. I'm showing you this
process to emphasize that creating smooth and pleasant
motion often takes time, so don't be afraid to experiment
with your key frames. That's the best way
to learn how to control motion
effectively. All right. I think this animation
looks super smooth now. Let's move on to adjusting the animation for the
intro of the next scene. First, let's apply Easy Ease to these keyframes and
adjust the velocity. In the graph editor, it
should look like this. Awesome. Now, I'll move this keyframe
slightly to the right to align it better
with the scenes intro. It seems the scene
enters too quickly. Let's move the first keyframe 1 second backward and
see how it looks. My goal is to create a
subtle slow motion effect. We could also try moving
the camera's first keyframe 1 second backward
to see the effect. I think it looks
much better now. But I think that
now the entrance of the podium scene can
start a bit earlier. Let's move the two last keyframes
of the camera 2 seconds earlier to start from second
11 and see how that looks. Awesome. It looks super cool. Now, let's create a nice
intro animation for the text. We'll use the text
animators for this, but this time, we'll create
a three D animation. To do this, first, enable three D functionality
for the text layer. Then create an animator
using the position property. Thanks to enabling the
three D functionality, we now have a Xaxis and
the position controls. Let's make the text enter
from this position. Set the Xaxis value to -330. Next, change the shape to ramp up and set the animation
to occur per word. Now, let's create a smooth three D animation
for the text intro. Set the offset to zero for now because I want to add additional properties for this animator. Select it and now let's
add blur to this animator. Let's set the blur to 30. Then add the opacity
property and set it to zero. Now, when the offset is at -100, the text will inherit all the properties set
in the range selector. When the offset is at 100, the text will return
to its initial state. Let's bring the offset
to -100 and now go to second eight and 15 frames to start the animation
from this point in time. Create a keyframe with
the offset set to -100. Move forward 2 seconds
to 10 seconds and 15 frames and set
the offset to 100. Adjust the easing and
see how it looks. I think it looks great. Now we can move on to
inserting the next scene, which will appear after
the camera moves down. First, go to the point in time where the camera
finishes its animation. We want to find the right point in time to start the next scene. To make our life easier, we can find the perfect
moment by selecting the camera and pressing you
to reveal the key frames. This will show us the moment in time where we can
start the next scene. Let's bring the next
scene into the timeline. Now convert the layer to a three D layer and use the top view to
position it correctly. For the transition between
the blue podium and the blue background of this
scene to work seamlessly, open the position property
of the podium precomp, copy its Xaxis value, and paste it onto the new scene. This way, both are at the same
distance from the camera. Next, use the Y axis
to move the new scene downward. Position it here. Let's check how it looks
with the camera motion. I think the transition
works very well. Now, move 1 second forward and add a
slight zoom out motion. Make sure not to move the
camera too much backward. Let's see how that looks. It seems too fast at the moment. Let's move this keyframe
1 second forward. That's better. However, there's
an unpleasant pause here. Let's select this keyframe and use the graph editor
to smooth it out. I think it looks
much better now, but I don't want the
motion to ease at the end. To fix this, I'll hold
Control or command and click once on
this keyframe to convert it back to
a linear keyframe. This should fix the speed at this point and make
the motion continuous. That looks much better
now. All right. Now I want to show
you a cool trick for creating a parallax effect
during the transition. We've got these great
icons inside the precomp. To make them interact with the
camera and the main scene, we can enter the precomp
and make some adjustments. First, adjust the panel view so we can see all the layers. Then convert all the layers
into three D layers. Switch to the top view
and start spreading the layers along the
Xaxis in three D space. What we're learning here is
that we don't need to move all these layers into the
main scene individually. Instead, we can keep them
inside a separate pre comp, adjust the design as needed, and still make them interact
with our main scene. You'll see how this
works shortly. For now, let's continue adjusting the position
of these layers. I'll speed up this process now. I'll leave the title layer in its current position so it remains at the center
of the three D space. Moreover, we could
create a camera inside the precomp and
refine the scene further, but adding a camera here isn't necessary. Let me show you why. If we go back to the main scene, we'll see that
although the layers are at different distances, they're not interacting with the camera in the main scene. There's no parallax effect. To fix this, all we need to do is collapse
the precomp layer. Once collapsed, the animation will show a nice
parallax effect, meaning the layers
inside the precomp are now interacting with
the main scenes camera. We can even delete or disable the camera inside the precomp without affecting this setup. Let's go ahead and delete the precomp camera and scale up the background layer
inside the scene. Set the scale to 135, then check how it looks
in the main scene. Now when we check the scene, we can see there's
a little problem caused by the interaction between the camera in this scene and the icon pre comp scene. As you can see, the
background is too big and some icons are beyond the
boundaries of the scene. I'd prefer to have all the
icons inside the frame. This means we need
to make some changes inside the icon scene. It would be awesome if we could see the changes we make in the icon scene reflected in
real time in the main scene. To view the changes
we make inside the pre comp directly
in the main scene, lock the main scenes
view panel from here. Then enter the precomp and drag its view
panel to the side. This way, we can see both views simultaneously as we
make adjustments. Let's start with the
background layer. Let's scale the
background to 130 and collapse this layer to maintain the highest quality
after scaling. Let's collapse all the
illustrator layers here for better quality. Next, adjust the positions
of the icons while observing the main scene to
ensure everything looks good. While I'm moving
the layers inside the pre comp and watching how that looks in
the main scene, my goal is to create a
balanced composition where all the icons are within the
boundaries of the scene. I'll speed up this process now. Before moving on, always
go back and forward in the timeline to see that the adjustments you made look
good through the animation. I think it looks
much better now. Let's close the precomp
panel and return to the main scene to see how
everything looks together. Awesome. Everything looks great. So now we can move this
scene into the master comp. Before that, let's tag it in blue to match the rest
of the main scenes. Now go to the master comp, expand the timeline and
bring this scene in. Look for a good point in
time to start this scene. For example, when the sphere from the previous scene opens, that's a nice starting point. Let's place the new scene
there and check how it looks. Let's lower the quality to speed up the
preview render time. It seems there's too
much empty space before the text boxes appear. We can fix this timing issue
with a few techniques. Let's crop the com
from the start to the exact moment the first
text box enters the scene. Now we can make the new
scene start even earlier, right from the
point in time where the sphere is about
to cover the frame. However, since there's a background layer
in the new scene, we can't see the
sphere animation. In this situation, we can enter the new scene and adjust the start time of the
background layer. Let's set it to start
from frame ten. Let's preview how that looks. It's not quite right.
Let's go back to the scene and just the start time again, perhaps from here. Let's check it again. I think we can start the background
layer at this point, let's align the layer
to the time indicator. Now, let's return to the
master comp and crop the end of the previous scene to match this exact point in time. Since the sphere's color matches the new scene's
background color, we achieve a smooth,
seamless transition. This is another simple trick to create interesting
transitions in your project. Let's continue
watching the animation to check for any issues. To see it better, let's scale the preview panel and
set the preview to fit. Now let's keep watching
the animation to spot any issues. I noticed something. As we are about to
transition to the podium, we can still see
the blue background of the scene with the icons. Let's enter the precomp
to understand why. It's the blue background
from scene 14. Our goal now is to make this precomp visible only from
the right moment in time. This means that we now
need to find the moment in time when this scene needs
to start to be visible. Since this scene doesn't
need to be visible yet, we'll open the camera
view to pinpoint where the transition
to this scene begins. Let's crop the precomp to start
from that point. Awesome. Now the blue background is gone. Next, let's use this
opportunity and crop the text box precomps when they already
finished their animation. Let me show you what I mean. The last one finishes here, so we can crop them
all up to this point. Great. Now, let's take
this opportunity to tag these precomps with different colors to keep
the timeline organized. Let's watch the animation again. I just noticed that
the blue background is still visible because the
camera can see its layer. Pay attention to this area. Let's open the
camera key frames, and now we need to make the blue background
of the next scene not visible for more frames before the transition happens. In this case, we can work with two panels again
to troubleshoot. Lock this panel,
open the icon scene. Let's turn off the top view. And now drag this panel
to the right side. Let's scale the layer slightly and see if that
solves the problem. First things first, let's find the moment in time where
the problem occurs. Once identified, select
the background layer and press S to reveal
its scale property. Now adjust the scale value
until the problem is fixed. In our case, we can set it to 125 to resolve the
issue. Looks better now. But when we check the
main scene animation, the issue persists because the camera still
captures the layer. In this case, we'll use a simple but effective solution and it's adjusting
the camera keyframes. Let me show you what I mean. Go to the keyframe when we are about to transition
to the next scene. Make sure to stand
on the keyframe, then move the camera
forward slightly. This will position the podium to cover the problematic area. All right. Now
everything looks good. However, since we previously
scaled the blue background, we need to reset it to 130 in the precomp to
maintain consistency. As you can see, at
this point in time, the background seems too small because the camera goes
backward at this point. Let's enter the icons precomp
and scale the background. Let's set it to 130 and see how that looks
in the main scene. Looks awesome. Let's
finalize the scene by adjusting the icons inside the precomp for a more
balanced composition. After making changes, always check the scene to ensure
everything works well. It looks great. We
can also refine the camera motion slightly
as it's not smooth enough. All right, enough with
the final touches. Let's move on to the next step. I think the next step should
be adding a nice depth of field effect to the scene to make it more visually engaging. But before that, let me adjust the camera position here because I can still see the
blue background. Enter the scene,
select the camera, press you, stand
on the keyframe, and adjust the position. All right. Now everything
looks perfect. We're ready to enhance
the scene's appearance by adding a beautiful
depth of field effect. Let's start at the beginning of the scene where all the
text boxes are visible. Now, press the A key twice
to open the camera options. Turn on the depth of field, and let's open the
top view so we can adjust the focus distance
to the right location. I think we can align the focus with the camera's position. Since the camera is moving, each text box will get its moment and focus
during the motion. Now, let's increase the aperture to 150 and see how it looks. Looking at the
depth of field now, I think we should
increase it a bit more. Let's try 200 for the aperture and set
the blur level to 200. That looks better. Now, I want to remove the
blurriness when the podium scene
enters because I want the entire scene
to be in focus. At this point in time, let's create a keyframe
for the blur level. Then 1 second later, set the blur level to zero. Apply Easy Ease to these keyframes and
preview the result. All right. I think
that looks nice. Let's go back to
the master comp and review all the animations
we've created so far. Before previewing the animation, we can stand at the end of the icon scene animation and press in to shorten
the workflow area. This will make it easier for after effects to
preview the project. As you may notice, After
Effects struggles to preview the laptop scene
smoothly because we use the cinema four
D renderer there. To make the preview
process easier, let's enter the scene
and locate the point in time where the laptop
is no longer visible. In our case, this happens somewhere here after
the Zoom animation. Since the laptop isn't
visible anymore, we can enter the laptop
precomp and crop the three D layers for the
laptop to end at this point. This way, After Effects doesn't need to render those
layers unnecessarily, improving the
preview performance. Let's continue watching
the animation. At this point in time, I notice there's too much aperture
in the depth of field. Let's enter this scene while
watching the text boxes, try to adjust the depth of field values to
get a better look. For example, we can set
the aperture to 100. That looks much better. Now, I want to change the
order of the text boxes. Want to do it so we can practice changing precomps with
different text inside each one because this is a common action the client can
ask us during the project. Let's get started. First, select the precomp for the first text
box visible in the scene. Then go to the project panel and open the precomps folder. I want this specific
text to appear first. With Text Box four selected, hold Alt or option and drag Text Box five
over it to replace it. Similarly, replace Text Box
six with Text Box four. Showing you this process
because sometimes a client will ask you to change the order of titles
in your project. For example, in this case, I wanted the explainer videos title to appear
first in the scene, so I decided to
reorder the precomps. Now, let's do it one more time with the final
text box in the scene. And now we can adjust the position of the
precomps in the scene. So just move back and forward to check where to move the
problematic precomps. After verifying that
everything looks good, we can conclude this lesson. In the next lesson, we'll continue animating
the rest of the scene and explore even
more creative ways to design engaging transitions. So see you in the next one.
9. Smart object use for scene transitions: Hi there. In this lesson, we are going to create a transition
from this scene to the one with the
colorful background using the text layer, join. We'll mask the previous
scene with this word, revealing the next
scene below it. Sounds impossible. Let me
show you how easy it is. For now, as you already know, you have the finalized
design files. Don't try to follow along because I'm showing
you how I prepared these scenes before
importing them into after effects. All right. I'll also open scene 16 because we'll create another
transition to this scene. I'll also open scene 17, just to prepare it
for the next lesson. Notice that this is
part of my workflow. I always work on
three or four scenes at once, no more than that. I highly recommend you adopt
the same approach when working on projects with
many scenes. All right. In this scene, I'll make sure that I'm separating
all the layers, especially because I need
those two diamonds separated. Don't want to create them from
scratch and after effects. Then I'll name the
diamond layers. Finally, I'll rotate
them to zero degrees, animating their rotation and after effects will
be more convenient. Once that's done, I'll save the file and move
on to the next one. I'll separate the
layers in this scene as well and do the same
for the next design. Let me speed things up for now. Now, since I plan to create a nice text animation with the letters in this
animated sequence, I'll go back to the
previous scene design and now I'll make sure to separate each letter
from the group. Then I'll name the layers
according to each letter. I'll speed this process up now. Great. I can save
the project now. For the next scene,
I won't separate the letters because
I already have them separated in
the previous scene. I'll just make sure
to save the file. Awesome. Now let's get
back to work together. Before importing the files, let's drag the previous
design file folders to the assets folder. Then we'll import the
next three scenes. So bring scenes 15, 16 and 17. Great. Let's also move these folders to the assets
folder before continuing. All right. We'll start by creating the transition
for scene 15. To do this, let's expand our timeline and find a good point to start
the transition, somewhere around the
55 or 56 second mark. This ensures there's enough
time to read the text here. Now, let's enter the next
scene and learn how to use the joint text layer as
a mask for our transition. First of all, we need to create the text layer and paste
it into the master comp. Above the scene we want to mask. In this case, it's scene four. Let's grab the text tool
and create the text. To make it easier, set the
text size to a large value. 500 should work well. Next, hover over the
anchor point tool, hold control or command, and double click it to center the anchor point of the layer. Then make sure the
text is centered in the paragraph panel and aligned to the center
of the composition. Now to use this text
as the mask layer, we'll use the track
Matt function. Set scene four to use the
text layer as an alpha mat. Now we'll see the scene only inside the shape of the text. With the help of this setup, we can scale the text layer and create some interesting
transitions with it. The next step is to
position this text layer so it starts at the point in
time where the scene begins, not where the
transition happens. Place it at the start
of the scene like this. This ensures the scene is visible from the very beginning. Since the Alpha function limits the scene to
the shape of the text, we need to position it
accordingly. All right. Now there are two options
to create the transition. The idea is to scale the text so it covers
the entire frame. Let's look at the first method. I don't want you to
do this with me. We won't use this method. Instead, we'll go with
the second method. I'm just showing the first
method so you know it exists. For the first method, I'll start by creating the
initial keyframes for the scale and
position properties somewhere in the middle
of the animation. Then go back in time. Let's say about 4
seconds and adjust the properties until the text
covers the entire frame. Scale it and move
it so the letter I will be in the center when
this animation starts. Now, if I turn back
off the Alpha layer, which is our text, the
transition can work. For it to work, we need to continue adjusting
the scale and the position until the letter
I covers the entire frame, which can take a
lot of time and be annoying because we
control two properties. I think you get the idea. Now I want to show you the second method
which you can do it by controlling
just one property. Let me bring everything
back to normal and you can grab the mouse
and do it together with me. For the second method we'll first convert the layer
into a three D layer. Now instead of scaling it, we'll use the
position property on the Zaxis to adjust
the size of the text. This way, we bring the text closer to the
default camera view. Now, all we need
to do is to ensure the letter I is covering
the entire frame. After that, let's create
the first keyframe. Next, move about 2
seconds forward and adjust the position so it
matches the original design. But for now, we don't really know where exactly
to place the text, so we need to see the original design to know it for sure. To do this, bring in
the design layer, lower its opacity
and lock the layer. This way, we can see clearly
where the text should be. Let's keep adjusting
the position. We are almost there.
I'll now zoom in to adjust the position as closely
as possible to the design. Awesome. Soon we will see
where to start this animation. But for now, we can unlock the reference
layer and delete it. Now when we turn off the
visibility of the text layer, the alpha mat will activate and we'll see the
transition created. What's left is to
refine the timing. Let's check the animation and read the text to check
when we finish reading it. That will tell us
the ideal moment to start the transition. Let's move the keyframes to
start at the 54 second mark. Now, place the last
keyframe at second 56, so the transition
lasts for 2 seconds. Finally, adjust the easing
and see how it looks. I think we can make it shorter about 1 second because it feels too slow. I think that's better. Let's also activate
the motion blur for this layer and
see how it looks. I think it's much better
with the motion blur. All right, so now we need to change the color
of this text to white because this text needs to appear in white for the
scene he belongs to. Since it's a mask
of the scene below, we can't directly change
the text layer's color. Instead, we need to enter the mask scene and create
a new white solid layer. We will use this layer
to color the text. In a second, you will
get what I mean. Place this solid above all other layers and start
it from second 14 for now. Let's create a simple
intro animation for it using the
opacity property. This is what will make
the text appear in white when we check it
in the master comp. Now, let's go back to the master comp and
see how it looks. I want the text to appear
white at this point in time. So let's enter the
precomp and move the solid so its final keyframe
is at this moment. All right, I think
it should work. Let's go back to the
master comp and check it again. Looks great. We can now move on
to the next step. Now is a good time to
insert the next scene. Let's drag scene 15
into our timeline. We need to ensure it starts
before the transition occurs, so we don't have an empty area when the text masks
the previous scene. That means we need to start
this scene a few frames before the moment when the
text starts moving backward. Let's place it at 53
seconds and 15 frames. Great. But now we
have a small problem. We're seeing the
word join twice. Let's figure out what to do
in situations like this. To fix this, crop the mask layer to the
end of its animation. After that, at this exact point, we'll start the actual text
layer inside the scene. Make sure you're at the
correct point in time, then enter the scene and start
the text layer from here. By doing this, we'll see the mask layer for the
transition in the master comp, followed by the actual text
layer inside the scene. It's a nice trick for creating
text based transitions. Moreover, if you want to use the text layer instead of the Illustrator layer
inside the precomp, expand the mask layer and split it at the point where
the animation ends. While standing at
this point in time, press Control Shift D
to split the layer. Now select the second part and press Control X to
cut it from here. Then enter the scene and
paste this layer here. Next, press the left
bracket key to bring the layer to this point in
time and turn on this layer. After that, delete the first
and second keyframes to match the text position
exactly as in the master comp. Finally, we can turn off
the Illustrator layer and go back to the master comp to check if everything is okay. If you're wondering why
I did this process, it's because I prefer to have
an editable text layer in the scene just in case the client asks me to
change this word later. Now we can go back to the scene and delete the Illustrator
layer from here. Before moving on,
let's also disable the motion blur
since we don't need it here because the
text is not moving. Great. Now we can move on and create the sparkles
we need for this scene. In this case, we already have
them in the second scene. We created nice sparkles for the main title
in this scene, which we can find in the first
part of this long scene. Let's enter the
main title pre Cump and now copy the two shaped
layers we have here. Now let's go back
to the scene we are working on and
paste them here. Let's now place them
in the right position, the big one we can place here. Now for the small one, we can follow the design
and place it in this area. After that, delete the
Illustrator files. Looks awesome. I'll just reorder them because I prefer the sequence this way. All right. Now let's
animate the diamonds. I want to create a slow motion animation for them
during this scene. Before we start, let's
duplicate one of the diamonds to use it later
for another transition. We can turn it off for now. Back to the slow motion
diamond animation. It's super simple. First, open the rotation property for both diamonds and
adjust their angles. Next, go to the beginning of the timeline and open the position property
for both layers. Create the first keyframe, then move to second six and adjust their positions
upwards slightly. For the first key frame, move them down a bit more
to emphasize the motion. Let's see how that looks. That looks great. Now, let's add a subtle rotation
animation for both diamonds. For the small diamond
on the left side, we can set the rotation to
-20 and create a keyframe. Now for the bigger one
on the right side, set the rotation to 20. Select both layers and press you to reveal the
position keyframes. Now let's go to the end of the position animation
and rotate them both. Set the rotation to 40. For the smaller
one, set it to -40. Let's see what we've
got. That looks nice. Next, let's create
a pop up animation for the main title using
the scale property. For now, let's decide to start this animation at 1
second and 15 frames. First, create the
initial keyframe for the scale with
its current value. Next, move 1 second forward and create another keyframe
with the same value. Then in the middle
of this animation, scale the layer
two. Let's say 120. Finally, adjust the easing
and check how it looks. It's awesome, but I think the sparkles should start
after the pop up animation. Let's move them to
start afterward. Now let's learn how to create a super cool animated
gradient background. There are many ways to do this, but I'll show you the
best method I know. To keep things organized, let's precompose this layer because we'll add
additional layers to create the animated
gradient background from scratch and after effects. Make sure to check this box. The easiest way to do this is by creating a few spheres
using a shape layer. Make sure no layers
are selected, then create a medium sized
sphere in the scene. Set the size to 800 so we
all be on the same track. Let's place it here for now and change its
color to this one. Now, move this sphere
to this position. Notice that if you
move this sphere, without first selecting
it in the layers panel, you might accidentally
move the shape inside the layer instead of
moving the actual layer. This causes the anchor
point to become uncentered. If that happens, simply hover
over the anchor point tool, hold control, and double click it to center the
anchor point for the layer. Next, duplicate the sphere and change its
color to this one. Continue duplicating
and changing the colors until you have
all the colors ready. Now, arrange the spheres near the corresponding
colors in the design. To make it look like a gradient, create a new
adjustment layer above all the layers and add the
fast box blur effect to it. Let's change the name of
this adjustment layer to blur and now set
the blur radius to, let's say 80. We
are almost there. Now we need to avoid the empty areas in
the comp to do that, we can scale the spheres, select them all and
set the scale to 150. You can reorder
the spheres if you want a slightly
different result. In my case, I'm happy
with the current order, but I think setting the
scale to 130 instead of 150. Next, create a white solid layer because as we move the spheres, there might be empty areas and the white solid will
help blend them better. Before animating this sphere, let's scale down
the orange sphere and also make the
spheres blend better by selecting the
adjustment layer and scaling the
blur radius to 120. All right, now we need to
move the spheres randomly. To do this, open the position property for a sphere and use a
simple expression. For this, hold down
Altar Option on Mac and click on the stopwatch Ca next to the
position property. Type wiggle, then select
it from the list. Inside the parentheses,
we one, 50. Click outside the
expression textbox and see how it looks. It
moves too little. Let's increase the second
number to something higher, like 550 and check
it once again. That's too much. Let's set it to 500 and reduce the
first number to 0.5. Let's see how that looks now. That looks better. Now, right click on the property and
select Copy expression only. Then select the
other spheres and press Control V to
paste the expression. Let's go to the beginning of the timeline and see how
it all looks together. That looks awesome.
Let's try turning off the white layer and turning on the original background
to see how it looks. I think it looks
better this way. We can also adjust
the blur radius to make the gradient
areas appear larger. To do it, all we need
to do is increase the blur radius we have in the fast box blur effect we
have on the adjustment layer. In my case, I will
leave it at 120. All right. Let's
return to the scene, collapse the precomp, and see how it looks with
the rest of the layers. I think it looks very cool, but it's a bit too fast. In this case, don't enter the precomp to adjust
the expression. Instead, use the time
stretch function. If you don't see it,
right click here, go to columns and
select stretch. Click on it and change the value to 200 to slow down the precomp. This way, the animation of
this com be two times slower, which looks much
better in my opinion. Awesome. Now, before moving on, let's collapse the Illustrator
layers in this scene. All right. Now it's time to use the diamond
layer we duplicated earlier to create
another cool but super simple transition
for the next scene. We'll use this layer as an object to hide
the current scene. While the diamond covers
the entire frame, we'll start the next scene. Simple but super useful. Let's see how to do
it. First, we need to cut this layer from here and paste it into
the master comp. Let's watch this
animation a few times to decide the best point in time
to start the transition. I think we can let
this scene play for about 3 seconds and then
introduce the large diamond. But before that, let's add
a light Zoom in animation to the current scene as it
looks too static right now. Stand here, create
a scale keyframe, and then move to second 59. Why exactly to that point? No particular reason. I just want to create a
slow Zoom in animation. Scale the precomp to 105. Let's see how that looks. H h that looks great. By the way, we didn't start the scaling from the beginning
of the precomp because that would cause the
join text to change size at some point, which
is not what we want. Make sure to start the Zoom
and animation only after the join text is no
longer visible. Great. So once we finish with
the scale animation, and we can now collapse this precomp for the
highest quality. All right. Now let's paste the
diamond we cut from the last scene and use it to create the transition
for the next scene. Press Control or Command
V to paste the diamond. Awesome. Now we need to find the right moment to start
animating the transition. I think we can start
this transition at minute one for now. Now let's place this
layer in the center of the comp and to start
creating the transition. First, we need to scale it up until it almost covers
the entire frame. Awesome. Now since we scaled this layer,
we lost his quality. To fix this, let's
collapse this layer. Great. Before moving on, let's shorten scene four because there's nothing happening
at this point in time. We can crop this precomp
to end at second 55 or 56, enter scene four and crop it to the 16 second mark. Perfect. Now we can crop it
here because it's no longer visible at
this point in time. Now let's decide the best timing for the transition
to the next scene. I think we can start
it at second 57, first, bring the
big diamond here. At this point, we can turn off the grid so we can see
better what we are doing. Then scale the
diamond up further, set the scale to around 1,000. Idea is to scale it
enough for the diamond to fully cover the upper and
lower parts of the frame. Let's try creating
the transition when the scale is at 800. To start, move the
layer to the left side out of the frame and then
open the position property. Create the first keyframe here. Then go 2 seconds forward and move the diamond to the
opposite side of the frame. Now, in the middle
of the animation, make sure the diamond
fully covers the frame. Open the scale property, create the first key frame, and move it to the
beginning of the layer. At this midpoint,
set the scale to a larger value while adjusting the position to
ensure it covers the frame. Finally, move to the end
of the animation and return the scale to its original value from
the beginning. We can copy and paste
the first keyframe here. We can also add a
gentle rotation to the diamond to make
it more interesting. In the middle of the animation, create the first keyframe with the current rotation value. Then at the beginning
of the animation, set it to -45 and at
the end, set it to 45. Now, we need to make
sure the diamond still covers the entire frame after adding the
rotation animation. Sand in the middle of
this animation and ensure the diamond still
covers the entire frame. Looks good. Let's adjust the keyframes to make
the motion more dynamic. Let's remove the pause we see here before we jump to the
graph editor to fix this, let's first try to convert the middle keyframes to regular ones to see
if it will help. Select the middle key frames, hold control or command, and click on them to convert
them into regular keyframes. That looks better, but we can improve it further by
using the graph editor. Let's adjust each properties keyframes to enhance
the movement. First, select the middle
position keyframes and make them continuous so you can
adjust the handles smoothly. Let's see how that looks. Now the motion of the
position looks much smoother. Next, let's refine
the scale keyframes. Move the handles to the sides
and see how that looks. Looks nice, and I think we don't need to adjust the
rotation key frames, as we already have a
nice and smooth motion. We can now move on
to the next step, which is trimming the
last scene we worked on. The animation ends
around this area. So let's leave a few
seconds of buffer for safety and trim the
comp at second five. Back to the master comp. Let's crop this scene to
the point where the diamond fully covers the frame and
then insert the next scene. In our case, it's the
design of scene 16. Now, let's press you on the diamond layer and crop it to the end
of its animation. Now we have a nice transition
from scene 15 to 16, which is another idea you
can use in your projects. Before wrapping up this lesson and moving on to
the final lesson, let's bring the diamond
layer down here so it stays grouped with the two
scenes it was used for. After reviewing the
animation one more time, let's organize the project panel to prepare for the next lesson. First, we can drag the animated background precomp
to the precomps folder. Now, since we use
the design precomp of scene 15 as a main
scene in our project, let's rename this precomp. This will now be
called scene five. Next, let's color it in blue. Color it blue here as well. Great. In the next lesson, we'll animate the remaining
scenes for the project. But before jumping into
animating the next scene, let's take this opportunity
to save everything we've done so far and purge the project to clean
it from the cache. This way, we can start
the next lesson fresh. Awesome. With that done, I highly recommend you
take a ten minute break now so you can start the next
lesson feeling refreshed.
10. Mood-Changing transition: Welcome back. We will
start this lesson by creating a unique transition
based on changing text, as well as the environment and
overall vibe of the scene, transitioning from a dark
mood to a brighter one. During this process, we'll also practice mastering
keyframes by creating a super cool bouncing ball
animation. Let's begin. First, let's enter the
next scene pre comp. As always, we'll start by
preparing it for animation. Let's begin by
creating the text box. To do this, search for the
text boxes in the project, duplicate the last one, bring it into the scene, enter
it, and change the text. Press Control or Command
Enter to exit the text tool. Finally, go back to the scene and position the text
box in the right place. Once it's placed, you can delete this layer
from the scene. Now that we've
created the text box, we can start setting
the initial keyframes for the bouncing
animation of the sphere. Let's call it the
ball in this lesson. To do this, we'll use
the position property. At this stage, we're not worrying about the
duration of the animation. For now, we'll create keyframes at 1 second intervals
and adjust them later. Let's go to the beginning of
the timeline and position the ball outside the scene so it enters from
the upper area. Create the first keyframe here. Then move 1 second forward and place the
ball on the text box. Zoom and if needed
for better precision, adjust the position
slightly if necessary. Next, move forward another second and place the
ball in this area. Zoom out and position it
roughly where it needs to be. Continue by moving
1 second forward again and place the ball
on top of the letter I. The goal is for the ball to bounce first on the
I, then on the M, and finally land beside
the letter P. Move 1 second forward and lift
the ball to create a bounce. Then move another second forward and position
it on top of the M. Let's zoom
out in the timeline, and now move one more second forward to
create another bounce. And finally, another second forward to land the
ball beside the P. Let's zoom out to
review how it looks. At this point, it's clear that the animation doesn't
look polished yet. This is part of the process. We start with an initial animation and refine
it over time. All right, now select all the keyframes and
convert them to easy es. Then enter the graph editor to adjust the velocity
of the key frames. The goal is to
make the ball move quickly when it lands
and bounces back, creating a realistic motion. Now after the ball
hits the ground, he needs to bounce
up super fast. We can increase the speed at the bounce point to make
it look more natural. Let's see what we've got.
To improve the motion, we can curve the path points where the ball is in the air. We can use the convert
vertex tool for this. Select the layer, click on
each point to convert it, and later we'll
adjust the handles. For now, focus on
curving all the points. All right. Now we can
press V to return to the selection tool
and start adjusting the handles to make the
motion path more rounded. Move the handles of each point to make it smooth and rounded. Et's see how that looks. Soon, we'll address
the pause moments. But for now, let's finish
creating the bouncing motion. Enter the graph editor and continue adjusting
the keyframes, just like we did for
the first bounce. That means we need to
make the ball drop super fast when it's about
to hit the letter I. And then we need
to make him bounce fast as well when it's about
to go to the next letter. Let's repeat this process
for the next bouncing point. Finally, let's make the ball drop fast at the end
of its animation. Great. Now we're ready to fix the pause moments where the
ball hovers in the air. To do this, select the
problematic keyframes, double click on them, and
check the continuous checkbox. Then adjust the motion upward slightly so the speed
doesn't drop to zero. Repeat this process for all the moments where the
ball hovers in the air. That's looking great.
However, as you can see, the animation is too slow. It currently lasts 7 seconds. Let's see how it
looks at 3 seconds. To speed up the animation while maintaining the spacing
between keyframes, select all the keyframes, hold Alt or option, and drag the last keyframe to the time
indicator's position. Watch the animation a few times to see if the
timing feels right. Let's zoom out and
watch it once again. I think it looks great, so we can move on to creating the falling
letters animation. We'll start by
animating the letter I from the moment
the ball hits it. Position the timeline
indicator at this moment, then select the letter and press P to reveal the
position property. Create the first keyframe here. Next, move forward
in the timeline. Let's say to the two second mark and move the letter downward
until it exits the frame. Now, repeat the same
steps for the moment the ball hits the letter
M. So selected and press P. Now create
a keyframe and then move 2 seconds forward and bring it down
out of the frame. All right. Let's convert the keyframes to easy Es
and see how it looks. I think it looks very nice, but we can improve
the motion even more. Let me show you how. To make
the animation more natural, let's enter the graph editor
and adjust the motion curve so the letters start moving slowly and speed
up toward the end. That looks much better now. We can further improve
the animation by adding some rotation to the layers during the position animation. Let's start with
the first letter. Create the first
rotation key frame, move to the end of the
animation and rotate the layer, let's say by 50 degrees. Now, convert the keyframes to easy ease and
preview the animation. I think it rotates
a bit too much, so let's adjust the final rotation key frame
to 40 degrees. Now, let's do the same
for the second letter. Let's see how that looks.
That looks awesome. Finally, we're ready to create some bouncing
animation for the remaining letters to add an impactful motion when
the ball hits the ground. This will also help draw
the viewers attention to the new word formed
after the two letters drop. First things first, let's
tag the two letters we've already animated with
a different color for better organization. We can lock the
background layer. Now grab all the other letters. Make sure you're at the
right point in the timeline, open the position property and create the first
keyframe here. Next, move 1 second forward and create another keyframe
with the same value. Now, move to the middle
of the animation and shift all the letters upward while holding Shift
to keep them aligned. Before moving on, let's
place the text box below all the letters so it
will appear behind them. Now let's improve the animation. Our goal is to make
a bouncy animation when the ball hits the ground. For this, first, let's easy ease the keyframes and
in the graph editor, adjust the curve so the
letters move upward quickly, hover in the air briefly
and then land quickly. Let's see how it looks. I think it's a bit too slow. Let's stand in the middle
of this animation, then select all the layers and while holding Alt or option, drag them to the times
indicators position. That's much better.
Now, let's make the letters jump
one after the other by creating a delay
in the animation. Leave the letter P in place because we do want it to
start to bounce first. For the other letters, select them and move them
one frame forward by holding Alt or option and pressing
the right arrow key. Repeat this for each letter. Et's watch the animation
a few times to see if it feels right. That looks awesome. Next, let's change
their colors during the bouncing animation
using the fill effect. To do this, first
let's search for the fill effect in the
effects and presets menu. Now let's drag the effect
onto the first letter. Now let's turn it off
for a second to sample the original red color from the letter. Then
turn it back on. Now let's press you to find the moment when the
letter starts to bounce. At this point in time, we now create the first keyframe
with the current color. Then move to the end of the animation and change
the color to white, matching the design
in the precomp. So let's go back to the effect and change the color to white. Convert the key frames to easy
ease and before moving on, let's purge the project. After effects can
sometimes slow down, so it's a good habit
to purge the project every few minutes to
ensure smooth performance. All right, back to business. Now, copy the fill effect
from the first layer, select the rest of the letters. Press you to reveal
all the keyframes and paste the effect onto them. Now let's press
you one more time to see our new keyframes. Then adjust the fill
effect keyframes for each layer to match its
position animation. Just select the fill
effect keyframes and align them with the
position keyframes. Let's do it for the
rest of the layers. Once done, let's
see how that looks. That looks awesome.
Now, let's close all the layers and review the entire animation we've
created so far in this scene. That looks very
cool, but I think the ball goes too much to the left after its first bounce. To fix this, we can drag
this point to the right. I think it looks much
better this way. Now, let's create an Outro
animation for the text box, starting from the moment
the ball hits the ground. We'll use the scale
property for this. Create the first keyframe
at this point in time, then move 1 second and
set the value to zero. Now, let's easy ease
the keyframes and make the text box scale
down quickly at the beginning of the animation by moving this
handle to the left. Finally, to wrap up this scene, let's create an outtro animation
for the blue background, to transition the vibe of the
scene from dark to bright. We can use the shape
tool for this. Make sure no layers
are selected, then select the ellipse tool, change the color
to the blue shade and create a large sphere. Set the size to 1,500 to ensure we're all
on the same page. Align the sphere
to the center of the composition and position it to start at the
three second mark. Place this layer below all other layers but above
the dark background. Now use the scale property to create an intro animation
for this background. Let's now move 1
second forward and scale the shape until it
covers the entire frame. Let's set it to 155. Finally, let's make
this shape enter the scene quickly at the
beginning of its animation. Let's preview it. All right, the timing looks perfect. Let's set the
preview to fit so we can watch it one more
time in a bigger preview. All right, I think
everything looks okay in this scene in
terms of the animation. Now let's go back
to the master comp to see how that looks
with the previous scene, where we got the big diamond here used as a
transition object. As you can see, the ball
starts to fall too early. This means we need to delay all the animations in
this scene so that the animation begins when the big diamond passes
the center of the frame. Let's start the animation
here from frame 15. To do this, ensure no
layers are selected. Press you to reveal
all key frames on all layers and select
all the key frames. Now drag them together to
the new starting point. While we're here, let's type
the letters in yellow for better organization
and collapse the illustrator layers to ensure
they appear sharp and clean. Let's also rename the background layer to
background blue. Now, when we check
the animation in the master comp,
everything looks great. However, I noticed
that the text box is interfering with the
other animations and drawing too much attention. Let's fix this by entering the scene and starting
the outtro animation of the text box right
after the ball bounces on it for the first time at the beginning of the scene. That looks much better now. Great, Let's go back to the master comp and
close all open precomps. Then color this scene in blue
and rename it to scene six. Don't forget to update the
color tag here as well. Now is a good time to save the project before moving
on to the next scene. In the next scene, we'll focus mainly on creating the
opening animation. Let me show you this in
our main design document. Before we begin, we'll create a transition from the current
scene to the next one. First, I'll open the design for this scene to prepare
it for animation. Remember, you don't
need to follow along because you already
have the finished files. Just watch and listen. As always, I'll start by ungrouping the design and
separating the layers. After ensuring all the layers
are properly separated, I'll name the important ones that will be used
in after effects. In this case, these are all the layers related
to the eye design. Then I'll press
Control as to save the project before importing
it into after effects. Alright, now it's your
turn to follow along. Import the design into
the project and place the Illustrator layers folder
into the assets folder. Then open the new scene to
prepare it for animation. If you're wondering
why we're not creating the transition from
the previous scene to this one before animating it, here's the reason
in cases like this, where I plan to create a seamless panning transition
between two scenes, it's better to finish
animating both scenes first. After that, we'll
combine them and time the transition properly.
Let's get started. First, turn off the text
and background layers so we can focus solely
on the eyes layer. Now we will start animating this sequence by animating
the main eye layer. Animate the main
part of the eye, right click on the layer and
convert it to a shape layer. Once that's done, delete the original layer and rename the new shape
layer appropriately. Now we have a shape layer that allows us to
animate its path. Turn off the remaining layers to get a clearer view of
what we're working on. Open the shape layer, navigate to the group, and
select the path of the shape. You'll notice that it
has too many points which makes animating
it more complicated. To simplify, we'll
delete some of these points before doing so, let's activate the
proportional grid because it will come handy when we start
adjusting the path. Now let's simplify this shape by deleting a few
points on its path. Make sure not to delete the
middle points of the shape. We can use the delete
Vertex tool to remove the unnecessary
points by clicking on them. Once done, switch back
to the Pen tool to make further adjustments and then use the selection tool to
fine tune the shape. Curve the middle points by
clicking on each point and dragging the left handle to the left and the right
handle to the right. Repeat this process for
the bottom point as well. Now that the shape is ready, we can start animating it. Since this is the final form of the eye, when it's fully open, go to the 1 second
mark and create the first keyframe for the
path as it appears now. Next, move to the beginning of the timeline and bring the upper point
down to the center. Then bring the bottom
point up to the center, Zoom and to ensure
the points are perfectly aligned to
form a straight line. Awesome. Now we have an
opening eye animation. However, you'll notice
some unpleasant shapes forming along the sides
during the animation. Let me zoom in for a second so you can see
what I'm talking about. I don't like the pointy
edges we see here. To fix this, open
the stroke settings for the shape and adjust the
joints to make them rounded. Set both parameters to round it. Now the edges look
much smoother. When the eye opens and closes, it looks much better this way. Now, let's bring back the rest of the eye
layers and ensure they are all contained within the main eye shape
we just animated. To do this, we'll use
the Track Matt function, select all the eye
layers and drag their Track Matt pick whip
to the main shape layer. We're using Alpha mat, so the shape layer is
automatically hidden. Just don't forget
to turn it back on. That looks nice, but
there's a small issue. We can't see the outline of the shape because the eye
layers are placed above it. To fix this, duplicate
the shape layer, move the duplicate
above the eye layers, and turn off the fill
for the duplicate. Then for the
original shape layer at the bottom, turn
off the stroke. Now, the upper layer is used for the black outline while the bottom layer is
for the white fill. The stroke looks
a bit too thick, so let's set its width to eight. Awesome. Now collapse
the Illustrator layers, and let's make this animation
a bit more interesting by adding a subtle scale
animation to the two eye layers. Go to the 1 second mark, select these two layers and create a keyframe for
the scale property. Now move to a point
where you can clearly see the layers
and scale them up. Let's now select the
I three layer and set its scale to 200 for a
more interesting look. Next, drag the keyframes to the beginning of the
animation and preview it. I think it looks great, now
let's refine the animation. Unselect all the layers, press you to reveal
all the key frames, select them all, convert them to easy ease and enter
the graph editor. Adjust the curves so the
animation starts quickly. Let's see the
result. Looks great. Now, let's create an intro
animation for the eye outline. We don't need to animate
the path for this. Instead, we can use
the Pen tool to create a simple line that matches
the shape of the outline. Make sure no layers are
selected and draw the line. Rename the new layer to stroke, and now to animate it, use the trim paths effect. At the beginning
of the animation, set the end property to 50 and
create the first keyframe. Then set the start property to 50 and create another keyframe. Move 1 second forward. Now let's isolate this layer for better visibility and set the end to 100 and
the start to zero. Awesome. Now we have the
opening line animation. Let's refine it by
rounding the ends of the stroke as the sharp edges don't look good in my opinion. Looks much better now.
Once that's done, easy ease the key frames
and adjust the animation in the graph editor for
smoother motion. Great. Finally, let's unsolo this layer and align it to the center
of the composition. Now let's time this animation with the eye opening animation. First, let's tag
the eye layers in orange to keep the
timeline organized. Next, move all the eye layers to start at the 1 second mark. Since we don't need
to stroke layer after it finishes its
opening animation, crop it to end at
the 1 second mark. That looks super cool. If you'd like, you
can move this layer lower in the layer stack
for better organization. Now that we've created the
main animation for this scene, we can go back to the master
comp and start creating the transition from
the previous scene to the scene we just animated. I want the ball to move left, reach the center, and then start the opening
line animation. Do this, we can either
place the scene in the master comp or we can keep the master comp clean and
bring the ICmp to this scene. First, we need to understand where the scene should begin. In this case, it's
from second five, where the bouncing
letters animation ends. By doing this, it
will be much easier for us to create the transition
between these two scenes, especially since
these two scenes share the same background color. Stand at the five
second mark where the previous animation ends and bring the scene to start
from this point in time. Now move the ICN comp to the left so it's
initially out of the frame. Great. Now we are ready
to create the transition. We now create the illusion that the ball moves to the left. Before moving on, let's
organize the timeline by cropping layers that are no longer needed for the
rest of the animation. For example, crop the layers of the first two letters that are no longer visible in the frame after they
finish their animations. We can also crop the
dark background layer as it becomes fully covered by the blue sphere
after its animation finishes, making it unnecessary. Let's double check if there are any other layers we can
crop before continuing. Question, what layer can we crop now since it's no longer
visible in the scene? In this case, we can crop
the text box layer as it finishes its animation
at 1 second and 15 frames. Now, I want to show you a new trick to create the
illusion of a panning to the side transition
without scaling the width of the scene or combining the two
scenes into one, as we practiced
earlier in the course. Our goal is to create the
illusion of the ball moving to the left and transitioning
into the scene. To achieve this,
start by creating a new null object and
name it transition. Let's start the in
a little earlier so we can see it during
the panning animation. Place the Sine at 4 seconds
and 15 frames for now and make sure the
precomp is perfectly aligned to the left side
of the composition. Make sure it's
perfectly aligned. Next, parent the e scene
to the null object. Then parent the remaining
layers that are still visible from the previous scene to the null as well. In this case, that includes all the
remaining text layers. Note that you don't need
to parent the ball. Now when we move the null, we'll control both
scenes simultaneously. This allows us to create the
panning animation easily. However, since both scenes
share the same background, we can optimize
things by entering the e scene and turning off
the blue background layer. As you'll notice, this doesn't affect the look
of the main scene. Let's start animating
the null object. Begin by setting the null start position at
this point in time. Press P to reveal the position property and
create the first keyframe. Move forward 1 second to
5 seconds and 15 frames and shift the null
to the right until the eye scene is perfectly
aligned to the center. Let's zoom in to see it better and adjust
the position value manually. That looks good. Now, let's improve the easing of the animation using the
keyframe velocity panel. At this point, it
may look a bit odd. To make the illusion work,
we need to animate the ball. Before doing that, let's adjust the timing of the
Scenes animation. The cene should start a
bit later because we don't want the line animation to
begin during the transition. It should start after
the transition ends. Let's make the Snee start
from this point in time at second five and 15 frames
where the transition ends. To do it, let's
enter the I Precomp. Now, select the relevant layers and shift them to match
the new starting point. Let's go back to the main scene to see how that looks now. That looks much better now. With everything in place, we can start animating the ball. From the point where
the transition starts, create the first keyframe for
the position of the ball. Then move to the end
of the transition, enable the action grid, and position the ball at
the center of the frame. It may feel a bit confusing
to you right now, but bear with me and you will understand what we are
doing in a second. All right now match
the velocity to the movement of
the null to ensure the animations aligned smoothly. You preview the animation, you'll see the illusion of the ball moving to the
left into the next. Now to make the transition
more interesting, let's stand in the middle
of the transition, then open the scale property of the ball and create a
keyframe at this point. Then go to the beginning of the transition and create another keyframe
with the same value. For the middle keyframe, set the scale to 200 and for the end of the
transition, set it to zero. Finally, let's es ase
the keyframes and using the graph editor
make the motion of the ball slow down in the
middle of the animation. This adds an extra illusion that the ball is moving
closer to the camera, creating a simple yet visually engaging
panning transition. And with this, we are ready to create the
next transition. But before that, let's
save the project. The next step will be creating the transition for
the upcoming scene, which features an
awesome dive animation. But before adding
it to the project, let's organize
everything and create the outtro animation for the current scene
we just worked on. To begin, let's locate
this pre comp in the project panel and
change the name to I comp. Place this precomp into the precomps folder for
better organization. And now let's start working on the outtro animation
of the current scene. For this, we first need to find the moment in time to start
the outtro animation. Don't forget to make sure that there is enough time
to read the text here. In our case, we can start it from second seven and 15 frames. So now let's enter the I Precomp and create an outtro animation
from this point in time. To simplify the process, let's reverse the
intro animation. So first, let's open
the key frames for the layer and now move
15 frames forward. Now copy the intro
animation keyframes, paste them at this point, and reverse them to create
the reverse animation. Do the same for the upper layer, which is the stroke
of the main shape. I'll copy the key
frames and paste them here and reverse them to
create the reverse animation. Let's see how that looks. I think it's too slow. To fix this, let's
stand at second four and drag the last keyframes
to this point in time. Let's watch this again.
That looks better now. Now, at the end
of the animation, let's select all
the eye layers and crop them since we want
to have a clean timeline. Then duplicate the stroke layer, place it above all layers, then bring it to the
end of the animation, and now open its keyframes
to reverse the animation. In my opinion, it's too slow. Let's bring the last key
frames to second four and 20 frames to speed this animation up a little bit.
That looks better. Now let's go back to
the main scene and trim the timeline to the end of the animation of the scene. In this case, it's
when the eye closes. But let's not trim the
timeline to this point. Let's give ourselves an
extra second just in case we need to adjust the timing of the animation in the
scene in the future. Awesome. So now we
are ready to start creating the next scene
and the next transition. This time we will
learn how to create a super cool tunnel
dive animation using simple techniques. But before that, as usual, we will check the design file to prepare it for animation. You don't need to do this,
so just watch for now. To be honest, we won't use the Illustrator layers
to create this scene. We will create it from
scratch and after effects. If you're wondering
why we're not using the original
layers from Illustrator, it's because each layer
has a different size, which can make the
rounded corners inconsistent after scaling. Additionally, I want to
show you how to create simple scenes like this directly and after effects to save time, rather than relying
on Illustrator or Photoshop for everything. Now, let's get back
to work together and import the design file
into our project. We'll use this precomp as a reference to color the scene
we'll create from scratch. First, we'll create
a new composition. Press Control or Command
N, name it scene seven. Make sure it's a full HD
composition and click Okay. Let's close any open
precomps to keep our workspace clean and select the design
precomp for reference. This dive scene is very
simple to recreate. To start, select
the rectangle tool, ensure the stroke is turned off, and set the fill color
to white for now. Then double click the
rectangle tool to create a rectangle that matches the
size of the composition. To give it a polished look, adjust the corner
roundness to 90, which you can find in the rectangle properties
of the shaped layer. Next, change the
rectangle's color to the dark blue
from the design. Once that's done,
duplicate the layer and update its color to match the
next shape in the design. Make sure to sample
the right color. Now let's keep
duplicating the shape and color the new duplicate
according to the design. We need to have six
shapes in total. All right. And now we are
ready to start to animate. Start by selecting
all the layers and moving to the
beginning of the timeline. Let's zoom in on the timeline so we can see the
timestamps in seconds. Now, open the scale
property by pressing S, set the scale to zero for all layers and
create a keyframe. Move forward to the 1
second mark and scale the shapes so they exceed the
composition size slightly. 110% should work well. Once the keyframes are set, select all of them and
adjust their velocity to 85% in the keyframe
velocity panel. It's too fast. Let's bring the last keyframes to second two to slow it
down a little bit. That looks better now to create the illusion
of the diving animation, we need to delay
between the layers. Let me show you what I mean. First, let's stand
at frame number ten. Let's zoom out in the timeline, and now leave the
first shaped layer in place while selecting the rest and shifting them ten
frames forward one by one. Once done, let's
check what we've got. In my opinion, it's too slow and it's happening because
the delay is ten frames. Let's make the delay five frames instead of ten and
see how it will look. This adjustment creates a much better flow. Now the scene looks much better and now to make
the dive last longer, we need to repeat the entire
animation one more time. To do this, select
all the layers and duplicate them using
Control or Command D, place the new layers above
the original ones and tag them with a different
color for better organization. Start the second sequence
five frames after the previous one to create
a seamless continuation. Let's preview how that looks. I think it's great and we're ready to finish the
diving animation. To wrap this up, we'll use the last layer as a mask
for the entire scene. For this, we'll apply the silhouette alpha
blending mode to the layer. This setting will
turn the layer into an Alpha mat for all
the layers below it, creating the effect of an
opening for the next scene. Now let's precompose
all these layers and name the precomp
tunnel comp. Make sure both options are
selected before hitting Okay. Awesome. Before moving on, locate this scene in
the project panel and tag it blue for consistency. Next, go back to the master comp and bring this scene
into the timeline. At this point, we need to figure out the best timing for
starting the new scene. I want it to begin right after the line from the
previous scene closes. In this case, I just go back and forward in the
timeline while watching the animation to understand what can be the best moment
for the scene to start. Maybe here. Et's place it at 7 seconds for now
and see how it looks. It's great. But if we turn on the transparent
background in the preview, we'll notice some empty areas. This happens because the
previous scene ends too early. To fix this, enter
the previous scene, press Control K and add a
few seconds to the timeline. Then zoom out,
expand the layers, and especially extend the
blue background layer. With this issue resolved, we can crop the
tunnel comp after it fully covers the
frame at 1 minute, 8 seconds, and 20 frames. Once the transition into the tunnel scene is
working correctly, we can go back and finish
the animation here. At this stage, we'll create a flying animation for the gray sphere that
leads the entire project. This will enhance the
illusion of diving into the tunnel scene.
Let's get started. First, we will
create the sphere. Grab the ellipse
tool and make sure no layers are selected to
avoid creating a mask. Draw a small sphere and
set its size to 50. Switch back to the
selection tool, select the layer, and
move it into position. Turn off the
transparent background and rename the layer to sphere. Next, let's align the sphere to the center and move it
down out of the frame. Make sure you're at the
beginning of the timeline. Press P to reveal the position property
and create a key frame. Move forward 1 second and position the sphere
somewhere around here. Then move forward another
second and place it here. The goal is to create
an interesting path for the end of the
tunnel dive animation. Let's keep positioning the
sphere in a wavy path. Now, let's refine the
path by rounding it. Use the Vertex tool to click on the points
and round them. After that, press V to switch
to the selection tool and adjust the handles to create a more dynamic and
visually engaging path. Once you're happy with the path, we can improve the animation
by adding the illusion of the sphere moving closer to
the camera and further away, similar to what we did
in the previous scene. Question, what property do we use to create this illusion? To achieve this, we'll create a scale animation that matches the timing of
the position animation. At the start of the animation, leave the scale as it is. Then increase it to 200. After that, bring
it back to 100, then scale it to 201 more time. And finally, bring it
to 100 once again. Let's see how that looks. It's a bit boring for now. So let's easy ease the key frames and watch it once again. Soon we will address the pauses in the
position animation. At this point, we'll adjust the position animation
for smoother motion. Let's select the
position keyframes, enter the graph editor, and tweak the curves to make the sphere enter
the frame quickly. For now, let's make the sphere slow down as
it approaches a curve, speed up while
navigating the turn, and then slow down again
before reaching the next turn. Finally, we will have the
sphere exit the frame quickly. Let's see what we've
got. Great. Now let's select the position
property once again. This time, make sure we do not have any weird pauses
during the motion. Let's watch it once again. Looks awesome. Now let's exit the graph
editor and move on. If everything looks good, we don't need to make
further adjustments to the scaling animation. Let's bring back the
tunnel comp and return to the master comp to see how everything looks when combined
with the previous scene. It looks awesome. Now we can
move on to the last scenes. These are simple
enough that we don't need to create separate
comps for them. We can complete the
animation within this comp. The next two scenes are the final ones in our
main design file. Since they're straightforward,
we don't even need to import their design
files into after effects. We'll create them from scratch
in just a few seconds. First, create a new pre comp to hold this part
of the animation, name it final and ensure its full HD with enough
duration for this segment. Let's make it 30 seconds. All right now select the precomp so we can sample the colors for the background. We'll create a new
solid layer and sample the dark blue
color from the design. Name this layer background dark, make sure it matches the
comp size, and click Okay. Now, return to the second scene and copy the first title we use there as it's the same title that needs to appear
in the final scene. In real projects, this
is often used for logo animations presented both at the beginning and
end of a project. In our case, the
main title precomp, this is our logo animation. Before moving on
to the next part, which includes the scene
with the website address, let's return to scene seven and bring in the final
comp we just created. This will allow us to time it
with the tunnel animation. Find the precise point in time for the final
comp to start. Turn on the
transparent background to help visualize the timing. It needs to begin just before the tunnel starts disappearing. Let's set it to start at
1 second and 15 frames. However, as you can see, the sparkles begin too early. To fix this, we'll need
to adjust their timing. So enter the final comp. Remember that any timing
changes here will also affect scene two since the same pre
comp is being used in both. To avoid this, we'll create a
duplicate of the animation. Locate the precomp in the
project panel and duplicate it. Then go to the final comp and replace the existing
precomp with the duplicate by holding Alt or option while dragging the
duplicate onto the layer. Now, enter the duplicated
scene and adjust the timing of the sparkles to
start at around 2 seconds. Now, let's go back
to scene number
11. Polish your project before rendering: Hi there, and welcome back. Before rendering
the final project, it's important to
ensure that all layers and precomps are presented
in the highest quality. To achieve this, we need to collapse the precomps
in the project. I also love to find
the layers inside the precomp that I didn't
use and delete them. It keeps the project
clean and well organized. This is what we will
focus on in this lesson. We'll make sure
every precomp is of its best quality and delete the unnecessary layers
from the project. Now, after collapsing the scene, we should always check
if it has affected the animation or the visual
appearance of the scene. This is because
collapsing precomps can sometimes be tricky, especially when dealing
with complex scenes that involve different types of
layers and nested precomps. For now, let's start
with scene six. We'll collapse it and check the result. Everything
looks fine. Now let's enter this scene
and see if there are any layers or precomps we can collapse to improve quality. We can collapse the e precomp. Let's enter it and see if there's anything
else to collapse. Inside, we can collapse the
Illustrator text layer. For the background,
we don't need it, so we can remove it from here. We can exit this comp
and take a final look. It looks good. Let's go
back to the master comp. For the diamond layer, you can activate the
motion blur if you'd like to add a slight blur effect
during the animation. Let's see how it looks. Personally, I prefer it
without the motion blur. All right. Moving on. Scene
five has already collapsed. Let's collapse scene four
and observe the results. As you can see, collapsing scene four changes the dimensions
of the elements inside. This happens because when
we collapse the precomp, the layers inside interact
with the current comp, which is the master comp. In the master comp,
we don't have a camera like the
one in Scene four. As a result, the layers
appear as if they were placed directly in the
master comp without a camera. Let's uncollapse it
and see what we can do to retain the highest
quality in this scene. First, let's collapse
the podium scene here. As you can see, the
image changes slightly. This is due to the same
reason I explained earlier. However, in this case, the layers inside
don't have a camera. After collapsing the precomp, the two delayers inside behave
as if they were outside, interacting with the
camera in this scene. To make the layers
inside the podium scene interact correctly
with our camera, we need to collapse them. Collapsing alone won't
fully solve the issue. While we will see an
improvement in quality, the layers still won't interact with the camera as they should. To fix this, the
most important step is to convert the layers
inside to three d layers. By doing this, they will
interact perfectly with the camera even after
collapsing the precomp. It might seem confusing
right now, but don't worry. We'll practice this
in other scenes and you'll get the
hang of it very soon. If you remember, we have already practiced this process
in the previous lessons. Let me explain. This
is exactly what we did earlier with the
precomp containing the icons. We converted the icons here to three Dlayers so they
can interact with the camera outside
this precomp because we wanted to create a
cool parallax effect. Now let's try collapsing
one of the text boxes here. Collapsing makes
the layers inside act as if they are part
of the current comp. As I explained before, this comp has a camera, but inside the text box precomp, the layers are two D. Therefore, they don't interact
with the camera here because cameras cannot
interact with two D layers. However, if we enter the precomp and convert
the layers to three D, the camera in this scene
will interact with them as if they were
directly in this comp. In this case, collapsing doesn't significantly change the
quality of the text boxes, so I prefer not
to collapse them. However, this was a
simple example to help explain the concept
of how collapsing works. All right, let's close all the precomps we opened here and return to
the master comp. Now we've optimized
this scene for the highest quality and there's no need to
collapse it further. Doing so would complicate
the project since the camera in scene four does not
exist in the master comp. After collapsing, the
camera inside the scene is disabled and the layers behave as though they are
part of the master comp. But since we've already achieved the best quality
within the scene, we won't collapse it further. Let's move on to scene three, which is the most complex
scene in the project. Let's see what precomps or
layers we can collapse. Here we have the laptop precomp, but we've already handled it
while animating this scene. We know that we cannot collapse the first part of
the precomp because the layers inside would immediately start interacting
with the camera here, which would cause
some visual issues. The second part is already collapsed, so we're
good with that. Next, we have the woman
character precomp. If I zoom in, you can see it
looks slightly pixelated. However, if I collapse it now, there won't be any
noticeable change. This is because the Illustrator layers inside the precomp
are not collapsed. So we can enter the precomp
and collapse the layers now. Since we want these layers to interact with the
camera and the scene, we'll also convert them
to three D layers. Now, if we zoom in and
collapse the precomp, the quality will
improve slightly. Let's move on and
do the same with the UI panel precomp
in the scene. Collapse it, enter the precomp, collapse the layers, and
convert them to three D layers. Now let's move on and repeat the process for the
second UI panel. Let's head over to the
area of the first part of this big scene to see the UI and the man character precomps. Let's start with the UI precomp. But this time,
let's first convert the layers to three D
and then collapse them. As you can see, the layers
have shifted positions. This can happen sometimes due to differences in how
the elements were precomposed in their
original comp and then cropped or adjusted when the
precomp dimensions were set. Anyway, it's not
a problem at all. All we need to do is
center them again. Note that the align tool
won't work here since the layers are now
three D. To fix this, grab the main layer and
move it to the center. The second layer will follow because it is parented
to the main layer. You can press the
quotation mark key to activate the action grid, which helps identify the
center of the comp and align the main layer accordingly.
Back to the main scene. Now when we collapse
this precomp, it might shift to a
strange position. This happens for the same
reason I explained earlier. To fix it, we need to center the anchor point
of this precomp first. Let's hover over the
anchor point tool, hold control or command,
and double click on it. Then switch back to the selection tool and move the precomp to the
correct position. Awesome. Let's move on now and handle the man
character precomp. Let's adjust the preview
so we can see it. Now first let's collapse it. Then enter the precomp, collapse the layers, and
convert them to three D layers. When we do this,
you'll notice that the layers have jumped
to a new position. However, this scenario is more complex because we have
many animated layers here. I don't want to manually move them as it could interfere
with the animation. To solve this, we can
create a new null object. Position it near the main
character body layer and convert it to
a three D layer. Then parent the animated
layers to this null object. Be sure not to parent
the layers that are already parented to the layers we just linked to the null. Now when we move
the null object, it will control the
entire animated sequence. If the null object jumps to
an odd position, don't worry. Just adjust it so the
character is correctly placed. Once everything looks right, we can delete the null object and check that
everything is in order. Great. Now let's return
to the master comp, center the anchor point, and position this
precomp correctly. Now we have all the elements
in the highest quality. Next, I want to crop the layers that are
no longer visible in the frame after the camera moves past the areas with
the characters. I think it's somewhere
around here. As you can see, at
this point in time, the layers below the laptop
scene are no longer visible. Therefore, we can crop all these layers to this
point in time to be sure, we can open the camera
keyframes to see the moment when we are about
to zoom into the laptop. As you can see, it
happens at this moment. Now we need to return
to the master comp and thoroughly ensure that at
this specific point in time, the layers positioned beneath the computer are
no longer visible. Great. Now we know that we can crop the irrelevant
layers up to this moment. We can start by
cropping the UI and the man character from the
first part of the scene, as well as the
cloud the character is standing on and
the text layer. We can do the same in the second part with
the woman character. By doing this, we make after effects rendering process
a bit easier later. All right. Let's go back
to the master comp. Now, as for the previous scene
where the three D layers inside were already managed by collapsing the relevant
layers and pre comps, we don't need to collapse
the main scene here. Collapsing it would
complicate the look because there is no camera
in the master comp. Therefore, we will not collapse the main scene here
in the master comp. Awesome. We're almost done. Let's move on to scene two. Let's enter this scene
and see if there are any adjustments we
need to make inside. In this scene, all the precomps
are already collapsed. The only precomp that isn't collapsed is the
three D box precomp. If we collapse it, the
three D layers inside this precomp will automatically interact with the
dimensions of this scene, which would cause distortion
and a weird appearance. Therefore, we won't collapse it. However, we can enter
the precomp to check if there are any illustrator
layers we need to collapse. Looking inside, I see there are no layers here
that need collapsing. Let's exit this pre comp and close scene two to return
to the master comp. Here, we can collapse the main scene since
there's no combination of three D elements inside that would affect the look of the
scene after collapsing it. To be honest, sometimes
I don't always remember or know if collapsing will distort
the scene's appearance. That's why I always
check the look, enter the scenes
and precomps and try to figure out what's
causing any issues, whether it's a pre comp or a layer that doesn't
need to be collapsed. Don't worry if you
feel a bit confused. Just remember to follow this
process before rendering and adapt your layers
and settings as needed while checking
everything thoroughly. For example, after
collapsing the scene, we notice that all the layers
appear sharp and clean. However, this creates
a small hollow in the areas where the
background layers connect. To fix this, we can enter this comp again and
blend the layers together by creating
a new solid layer with the same color
as the background. We can call this
solid layer BG big. Make sure the solid
layer matches the comp size and place it
below all the other layers. This will resolve the issue and eliminate any empty
spaces in the scene. Now you can go back to the master comp and see that we don't have
the problem now. Let's now finish dealing
with the first scene. If we collapse it,
the appearance will change because there is a
camera inside this comp, whereas the master comp
does not have a camera. The three Dlayers
inside the comp automatically adapt to the
data in the master comp, which lacks the camera
from the SN comp. However, we don't need to
worry about collapsing this scene since it was created
using shape layers only, and shape layers always render
at the highest quality. With that taken care of, let's organize our project
panel before rendering. We can drag the tunnel precomp
into the precompse folder. We can also move this folder
to the Assets folder. Let's also move this precomp
into the preComps folder. Now let's review the entire
animation before rendering. It's essential for motion
designers to watch their animations a few times and after effects
before rendering. This helps catch any issues
that can be resolved now instead of finding them
later after rendering. So let's watch the animation patiently and focus to
see if we miss something. All right. So
during the preview, I noticed that I forgot to add a text layer to this scene. Let's go to the design
file and copy the text. Then we'll enter the scene
comp and paste the text. First, let's create a new text
layer and paste the text. Now, let's align it to
the center of the comp. Let's switch the selection tool and position the text layer above all the other layers so we can see it during
the tunnel animation. Now let's create a
position animation for this text flying
towards the camera. This will enhance the illusion
of the diving animation. Start by converting the text
layer to a three D layer. Next, center the anchor point. After that, create a
position animation from the beginning of the scene. Let's say at the start, the text will be positioned
somewhere around here. Then by the time the tunnel
ends at about second three, we'll bring the text layer
closer to the camera. Let's preview how that looks. I think we don't have enough
time to read the text, so let's adjust its
initial position to place it slightly
farther from the camera. We can also lower
it a little bit. Let's watch it
again. Looks nice. Additionally, let's create
an opacity animation to give the text a smooth intro. All right, I think
everything looks okay. Now let's return to
the master comp and see how this scene looks
together with the previous one. It seems the text
enters too early, as there's not enough time
to read the previous text. Let's delay the text entrance
to this point in time. Enter the scene and adjust the opacity keyframes
by dragging them here. Let's see how it looks now. The most important thing
with text animations and animated projects
is ensuring that the viewer has enough
time to read the text. That's why it's crucial to watch these moments
several times and test if there's enough time to comfortably read
the animated text. Our case, I think we're good. But before moving on,
let's try to see how this flying text will look if we activate the
motion blur for it. This is something I love
to test when I have large objects or fast
flying layers in the scene. I think it looks much better
with the motion blur, so we can exit the
scene and continue reviewing the rest of the
project before rendering. Now I notice that I
misspelled the website name. This is something that
can happen easily, which is why it's essential
to thoroughly check the entire project before rendering and sending
it to the client. So if you misspelled
the text like I did, let's fix this real quick. Great. Now we can close these precomps and
continue checking the project. Okay, now, I feel that the text in the last scene
goes by too quickly, leaving too little
time to read it. Let's see how we can extend
the duration of this scene. This is a great opportunity to demonstrate how to
handle changes in complex comps with
many layers and precomps affecting
each other's timing. Currently, the text
is visible for less than 2 seconds
ending at second three. To give the viewer more time, we need to extend the
tunnel animation. Let's enter the tunnel precomp
and begin by resetting the blending mode of
the last layer to normal to cancel
the masking effect. Next, select the last six layers of the tunnel and
duplicate them. Move these duplicated layers up and shift them to the right, they start five frames
after the last shape. Zoom in and make sure there is five frames
delay between them. Let's tag them with
a different color to keep things organized. By doing this, we've added a few extra seconds to
the dive animation. Now set the blending mode of the last layer to
silhouette Alpha, so it makes the scene disappear at the end of the
tunnel animation. With this adjustment, the tunnel dive animation now lasts longer. This means we also
need to adjust the sphere animation to
match the new timing, go to the end of the
tunnel animation, select all the
sphere keyframes and drag the last ones while
holding out or option. Now the tunnel opens a few seconds after the
original animation, so we'll need to delay the
final comp accordingly. Let's start it from
this point in time. Before moving on, let's
see what we've got so far. After verifying that
the timing works, we can extend the animation of the text so it flies
for a bit longer. For example, we can move the last keyframe to this point in time to make the
fly last longer. Let's see how that looks. I think it looks great, but it won't hurt to make it
last a bit longer. Let's place it at the
four second mark, and let's check it one more time to ensure everything
looks smooth. I think it looks great, but there's something bothering me, the lack of contrast
at the point where the tunnel opens and
transitions to the final comp. To add more contrast and
depth to this transition, we can create a new
black solid layer. Soon you will understand
why we are doing this and how it will help us to solve
the lack of contrast issue. Place it above the
final comp and let's start the layer at the same
point as the final comp. Now if we lower the opacity, we will get the illusion
of a nice shadow. That will create a
contrast between the tunnel animation
and the last scene. Now we can set the opacity. Let's say to 80 and
at this moment, before the tunnel
is about to end, create the first keyframe. Then as the tunnel
opens completely, bring the opacity down to 0%. Apply EZ Es to the keyframes to smooth the transition
and see how it looks. I think this makes the
transition look much better. We can now crop this layer
to the end of its animation. This is a small trick
that I use when I have tunnel opening
transitions in my projects. It's super easy to create and it looks very
natural. All right. I think we've addressed
all the issues here. So let's go back
to the master comp and rewatch the
entire animation. But before that, don't forget to save the project to secure
the changes we've made. Now, let's review the animation. After checking everything,
it looks good, so we're ready to
render the project. However, as you already know, I'm a bit of an
organization freak when it comes to project panels, so let's organize
it even further. First, let's clear the
project of any unused assets. You can do this step
after rendering or after the client
approves the animation. In our case, we'll
do it right now. To clean the project
of unused assets, first locate the comp that
includes the entire project. In our case, it's
the Master comp. With the master comp selected, go to Edit dependencies
and click Reduce Project. After Effects will now delete all unused assets
from the project. How does it know which
assets are used? This function removes assets that are not used in
the selected comp. Since the selected comp is the master comp and it contains all the
relevant elements, we know it's safe to delete
anything not included in it. Awesome. Now we can further
organize the project panel. Start by placing
the three precomps into the precomps folder. Next, open this folder and
organize its contents. Select the folder and create a new subfolder inside
it called Titles. Drag all the textbox layers and title comps
into this folder. Great. That's how your
project panel should look. We can leave the
main scene comps outside for quick
access if needed. Before rendering, we can purge the project one last time to ensure it's completely clean. Awesome. Now one last thing. This time, it's
really the last thing I want to show you before
we render the project. Now, let me show you what to
do if the client requests the project file or if you need to send it to
someone else to work on. In such cases, we need
to collect the project. To do this, go to File
dependencies, collect files. Click Save and a small
panel will appear. Here, ensure that collect source files is set to all
and then click Collect. Save it in the AE
folder of the project. Adjust the name if
needed, then click Save. Now you'll have a new folder containing everything
used in the project. Go back to the AE folder, and this is the folder you can zip and send to the
relevant person. After unzipping,
they will receive a folder with all the
files used in the project, ensuring there are no
missing file errors when they open the after
effects project file. Now we're ready to
render the project. One thing I like
to do to achieve the highest definition is to change the color
bit depth to 16. This setting enhances the
color quality significantly. Avoid using 32 bits because it increases render times
and most importantly, it alters the appearance of
effects like layer styles, glow, shadow, and more. Let's set it to 16
bits and press Okay. Next, ensure the master comp is selected so after effects
knows which comp to render. Then go to composition, add to render Q. Alternatively, you could render it
using media encoder. But honestly, there's
no difference if you're rendering a single high
quality MP four file. Like this one,
that's called H 0.2 64 40 megabits per
second format. Next, select the location
to save the render. Create a new folder in
the project's main folder and name it something
like samples or finals. Now let's enter this folder. Rename the file to match
the project name and add underscore v01 at the end to indicate this is the first
version of the render. This helps keep track, especially if adjustments
are needed after client revisions. All right. Now click the render button and wait for the
process to finish. Once the render is complete, go to the output
module and click the link to open the folder
where the file was saved. And that's it. We've
finished the course. You can now close the project, exit Illustrator, and
organize your workspace. Before wrapping up, take a short break and
when you're ready, come back to complete the homework assignment
I've prepared for you. Thanks for watching and I'll
see you in the next one.
12. Home Task: Hi, and well done on
finishing the course. Now it's time to test yourself and see
what you've learned. I've designed three
different small projects, each structured
with four scenes. I've already saved
each scene for each project as a separate
Illustrator file, and in each file, the layers are pre separated and
ready for animation. Each project, you'll see a video showcasing the transition
I want you to create. The scene designs are
very simple and that's because I want you to focus
on the transition animations. You can start
animating right away, but if you don't feel
confident enough, you can check out how I created the transition in the after
effects project file, which is available
for each home task. This will give you the
chance to explore and understand my approach to
creating the transitions. Don't expect to create a high quality transition
on your first try. Even when I created
these transitions, it took me a few hours
to figure things out and tweak a lot of keyframes until I got the
results I wanted. With that said, I
wish you the best of luck and I can't wait to
see what you come up with. Have fun and buy for now.
13. Outro: Hey, there, it's me again. I just want to say thank you
once again to everyone who watched the course and trusted me to help you learn
after effects. I hope you not only picked
up some new skills, but also boosted your creative
confidence along the way. I'd love to see
what you created. So if you feel like sharing, post your animations or
home task on social media. With that said, I wish
you the best of luck. And if you have any questions, don't hesitate to ask. I'll do my best to help you out. Bye for now and I'll see
you in the next one.
 Valeri Visuals, Adobe After Effects Instructor