Transcripts
1. Intro: Hi, my name is Valerie and welcome to Premium
Effects Collection, a series of focused After Effects courses
where I teach you the most useful effects
you need to know to elevate your projects
and get the premium look. And what makes these
effects truly special is that no AI tool
can replicate them with the same level
of perfection and customization you get when you build them natively
in After Effects. I've learned and practiced
each of these effects to the point where I can teach them in the simplest
way possible. No plugins, just After Effects. This is an intermediate
level course. So to follow along,
you need to know the basic After Effects
fundamentals like keyframes, precomps, track meds,
and the basic tools. Alright, so in this course, we are going to build a
Premium Border Beam Animation. A perfect sequence
you can use in your next SAS explainer video. I will show you not only how to make it look truly beautiful, but also what issues you might run into and
how to fix them. End of this course, you will have the knowledge, the skills, and the confidence to create this beautiful animation
and make it your own. And the best part is that
everything you will learn here is 100% native
After Effects. No plug ins needed. So if you are ready to have
fun and level up your skills, let's not waste any time and get right into it. See
you in the course.
2. Project Setup & Building the Base: Hi, and welcome to the course. Before we begin, please download the main
folder for the course. Inside, you'll find
three folders. The first one is named AE, where we will save the After Effects project we will
work on in this course. The second one is named Assets, where you will find all
the assets we will use. The assets you see here are from a made up SAS company I created so we can practice
like in a real project. And the third one
is named Final. Where you will find
the finished animation we will create in this course. As you probably
already know, this is a very common animation we see in a lot of
SAS explainer videos. Most of the time, it is used for scenes where we need to
reveal a company app, so we will not only
learn how to set up an awesome
glowing beam effect, but also create the illusion
of it revealing the design. Now, before we begin, if this is the first time you watch
one of my courses, I just want to mention the
small note you will see in the bottom left corner
saying, Let's do it together. When you see it, it
means you need to follow along and get to action. But when it changes
to watch and listen, make sure you stop working and pay attention
to my explanation. All right. With that said, now let's open After
Effects together. I'm using the Beta version so I can have all
the new features, which you will probably already
have if you're watching this course after the latest
After Effects update. In case you have an older
version of After Effects, it's totally fine. Don't worry. All the techniques we will
learn in this course can be easily applied in
any version. Alright. So once you've opened
After Effects, let's adjust some settings so we can all be
on the same page. First, let's make sure we're all using the same panel layout. For this, go to Window,
then workspace. And select the default
panels arrangement. If the default view
looks different, then click here on Reset
Default to save the layout. Next, let's go to preferences and then enter the
composition menu. Now, make sure everything
here is selected the same as in my case. All right. Once that's done, one
last thing we will do before starting is
click here to open the project settings and
go to the color menu to set the bit depth to
16 bits per channel, which will make
our gradients and glow effects look
much better. Awesome. With that done, let's create
our first composition. We can call it master comp, since it will be our
main composition. Then let's select the social
media landscape HD template with 30 frames per second. And for the duration, you
can set it to 10 seconds. Next, for the background color, let's leave it black
and finally hit Okay. Great. And now let's make sure our preview quality
is set to full. And then make sure to set the preview panel to
fit for convenience. Okay. So now, the first
thing we want to do is create our main UI panel. It doesn't matter
if you already have a design with a background
for better results, we will create the main
UI panel ourselves, and we will do that by creating a new shape layer here
inside After Effects. For this, let's make sure we're selecting the rectangle
tool and then double click on it to create a rectangle with the
comp size dimensions. Now, for the stroke, we don't need it, so
we can turn it off. To do that, hold down
the Alt key or Option on Mac and click here to toggle between the
different color options. You can see the stroke
is now turned off. Great. And now for
the fill color, we will use the color
palette I prepared. Let's say we got it from the client to find
the color palette, open the main folder for
the course that I asked you to download and enter
the assets folder. Now, let's drag
the color palette into the project. Alright. And now to use the palette, let's double click on it,
and a new preview will open. In our case, we will not use the bright theme color palette. So let's shrink this panel and zoom in so we can see
the dark theme colors. Great. With that done,
now what we need to do is select the
color for the fill. For the type of visual
style we're going for, it's better to use dark colors
for the main UI panel box. So select the rectangle we created and choose
a very dark color. Let's go with this dark color. We can always adjust the
colors later if needed. Great. And now let's adjust the
size of the rectangle. I prefer to adjust the size
of the shape rather than the scale of the layer because I'm saving the scale property
of the layer for animation. And soon you will
see what I mean. For now, let's lower the size dimensions until we get some nice rounded values. Awesome. Next, let's
round the corners. Let's set it to 60. Looks nice. Let's now turn on the transparent background
so we can see a little bit better what
we are doing. Awesome. And now let's select this layer and change
the name to main box. Cool. We can close the
layer now and keep working. At this point, we can
start working on the beam. To start, we need to
add another shape, the exact same one, but
just for the stroke. So for this, let's select the
main box we have here and press Control or Command on
Mac and D to duplicate it. On this new layer, let's press Enter and change
the name to stroke. Now, let's make sure we turn off the fill on this layer
and turn on the stroke. So hover over the
fill, and again, hold Alt or Option on Mac, and click here until
you turn off the fill. Then let's go to the
stroke and select. For now, let's say this
bright orange color. Later, we can adjust
all the colors. For now, we're just making sure we're setting
everything up properly. Next, for the stroke width, you can set it to ten for now. And now before moving on, there's a very important thing I want to do together with you. And that is parenting some properties from the
stroke to the main box. The reason for this is let's
say later in the project, we need to adjust the size and
the shape of the main box. We want the stroke
to be adjusted automatically along with it. As you can see right now, the stroke is not
being adjusted. To set this up, let's open the main box, rectangle
path properties. Once done, let's parent the stroke properties
to the main box. This way, when we change these properties
on the main box, the stroke will be
automatically adjusted as well. And now to finish the setup, let's also parent the
entire stroke layer to the main box layer. So when we want to scale or move it, everything
will move together. As you can see, we can move it and the stroke moves with it. We can also adjust
the roundness and the roundness of the stroke will be adjusted properly, as well. And, of course,
the same goes for the position and the
size of the rectangle. All right. I'll now bring everything back to
normal and we can move on. With that done, it's
a great time to save our project to secure the
progress we made so far. So let's press Catrol or
Command on Mac and S, and let's save it
in our AE folder. Let's call this project
Border Beam Animation. Great. And now we are ready
to move on to the next step in which we will focus on making the stroke look like
an elegant beam. We will do that in the next
lesson, so see you there.
3. Shaping the Beam: Come back. So our next step is to make this stroke
look like a beam. So let's see how we can do that. First, to see better
what we're doing, let's turn off the
transparent background. And now let's open
the stroke layer, select the contents, and
add a trim path effect. The trim path effect will allow us to trim the
stroke from the edges. For this, first, we need
to shorten the stroke. To do that, we need
to play around with either the end or the
start properties. Let's adjust the end
property this time. It doesn't really
matter which one. Let's set it to 20, and
now we need to adjust the offset so we can see the stroke in
the upper left corner. Somewhere around here is fine. We're bringing it here because this is where we want
the beam to appear. Let's set the offset to 200. Next, we need to sharpen
the edges of the stroke. For this, we need to open the rectangle and
find the stroke menu. Now if we scroll down, here
we can find the taper effect, which will allow us to make the edges of the stroke sharper. So let's set the start length to 100% and the end length
to 100%, as well. But as you can see, we can barely see
the stroke now. It made it look a bit too thin. To fix this, let's select the stroke and
increase the stroke width to, let's say, 20. That's better. All right. So now our next step in setting up the beam is
to add another stroke, but this time a little smaller and with a
slightly brighter color. So let's duplicate
the stroke we have. Next, let's call this
layer stroke big, and this one stroke small. Great. And now for
the stroke small, we first need to set the
color to a very bright color, maybe white or maybe
this color here. For now, let's go with this one. After that, we need to make this stroke a little bit smaller. Let's start by adjusting
the trim path effect. Let's position ourselves
here and zoom in so we can see what we're
doing. A bit better. Now, let's set the end to ten. And then let's
adjust the offset. So the smaller stroke
is positioned somewhere in the center of
the bigger stroke, as you can see, this is
already starting to look like a really nice border beam. Of course, the values of the trim path effect may change depending on the
dimensions of your main box. But the main idea is
that you need to create a nice transition between the smaller stroke and the
larger stroke. All right. So once that's done,
one final thing we can do to make it look even better is to add the CC sweep effect to
our main box layer. You've probably seen a lot of tutorials using this
effect on YouTube. But in our case,
combined with our setup, the beam is going to look like something you've never
seen in those tutorials. Okay, so let's add the
CC sweep effect now. Since I'm using a newer
version of After Effects, I can hit Catrol or Command on Mac and Enter to
open the Quick Apply panel. From this panel, I can search for any effect in After Effects. It's similar to the very popular
free plug in FX console. If you're using an older
version of After Effects, just go to the
Effects and Presets tab and search for the
effect from there. Alright. So once you've
found the effect, hit Enter to apply it
to the selected layer. And now before doing
anything else, we first need to make sure
that the property named center of this effect is
centered in our main box layer, and more importantly,
it needs to stay centered even when
we move the main box. Right now, as you can see,
the effect stays in place. When we move the layer, we need it to follow the main box. Let me bring everything back to normal and show you
how to do that. Okay, so first, we need to apply a quick expression
to the center property. For this, hover over the stopwatch of the
center property, hold down the Alt key
or Option on Mac, and click on it to open
the expression box. Then we need to type TCmp. As you can see, the tocomp expression
is already suggested. We can just press
Enter to apply it. Finally, inside the parentheses, we need to type value. This will make the center
property follow the layer. Awesome. To finish
the expression, let's click somewhere
outside of it. And before we move on, we need to make sure the center property is now in the center
of the layer. So let's bring it here. Let's zoom in for convenience
and drag it to the center. Great. Now, let's set the
preview panel back to fit. But this time, instead
of doing it manually, we can use a nice shortcut Shift and the question mark key. Awesome. And now,
as you can see, if I move our shape, the effect will
follow the layer, and the center property will stay in the center of the shape. All right. I'll press Command Z, and we can now keep
adjusting the sweep effect. Let's adjust the
direction so we can get the beam in the
correct position. Of course, we want it
to be in this area. So let's set the
direction to -60. Next, let's increase the width. Let's set it to 150 for now. Then for the sweep intensity, we need to lower it
down, set it to zero. Let's zoom in a little so we
can see what we're doing. The layer boundaries are
making it hard to see. Let's turn them off
using a shortcut. Press control or command on Mac and shift H. Now we can see
what we're doing much better. Okay, now let's move on
to the edge intensity. Let's set it to 60 for now. And for the edge thickness,
let's leave it at four. We can adjust all the
values of the effect later. For now, it looks nice. So let's move on to the color. For the color, we need to
pick something that is a bit brighter than
the main box color. This one. Now, before moving on, let's solo this layer so we
can see what we're doing. We can barely see it. Let's try scaling up the width to 200. That's better. Next, let's
try picking a brighter color. Alright. And now let's try
adjusting the thickness. Let's set it to six and see how that looks. That's better. Let's now adjust
the edge intensity. I'll set it to 120. Looks good. I'm showing you all these
back and forth steps so you can understand
which properties to play around with
and get the main idea of how the beam should
look for the best results. And for that, I also need to show you situations where the
beam doesn't look right. So that's why I'm making some wrong decisions
along the way. All right. Let's now unsolo the layer to see how it looks with
the rest of the setup. I think it looks great.
And now I want to show you a simple trick to make it
look much more premium. We're going to
create an inner glow effect that will
follow the beam. Let me show you what
I mean. First, let's make sure no layer is selected. Then select the Ellipse tool and hold Shift to create a
proportional ellipse. Let's set the size of
the ellipse to 500 and make sure to turn
off the stroke color, then add a fill color. By the way, I'm doing this
from the properties panel, but you can also
do it from here. Alright, for the color, we
need to choose something that is slightly brighter
than the main box color. For now, let's go with
this brown color. And now let's select this
layer and change the name to inner glow. All right. And now with that done, we need to make this ellipse
create the illusion of an inner glow that appears to come from the
beam in the corner. So first, let's bring the ellipse to the
upper left corner. And now we need to use the
track mat function to make the ellipse visible only
within the main box area. For this, we need to
drag the track mat pick whip of the ellipse layer
to the main box layer. So now the ellipse is visible
only within the main box. It's using that layer as a mask. The last thing we need
to do now is to turn the main box layer
back on since it was turned off automatically
after we set it as an alpha mat for
the ellipse layer. Great. And now let's move
on to the next step, which is making
this ellipse look like a glow or a spotlight. For this, we need to add
the Fast Box Blur effect. Again, I'm using the
new Quick apply panel, but you can find this
effect in the effects and presets tab as well. Okay, so once you
apply the effect, let's adjust the blur radius. Let's set it to 80 for now. As you can see, this already looks like a spotlight
coming from the beam. Later, we'll animate it
together with the beam. But for now, to finish the step, let's bring the inner glow layer below all the stroke
layers so we can see them. Awesome. That looks great. With that, we've almost completely finished setting
up the beam effect. And before we move on to improving the look with
effects and animation, we can now add the
SACUI design we got from the client or that
we designed ourselves. And we will do that
in the next lesson. So see you in the next one.
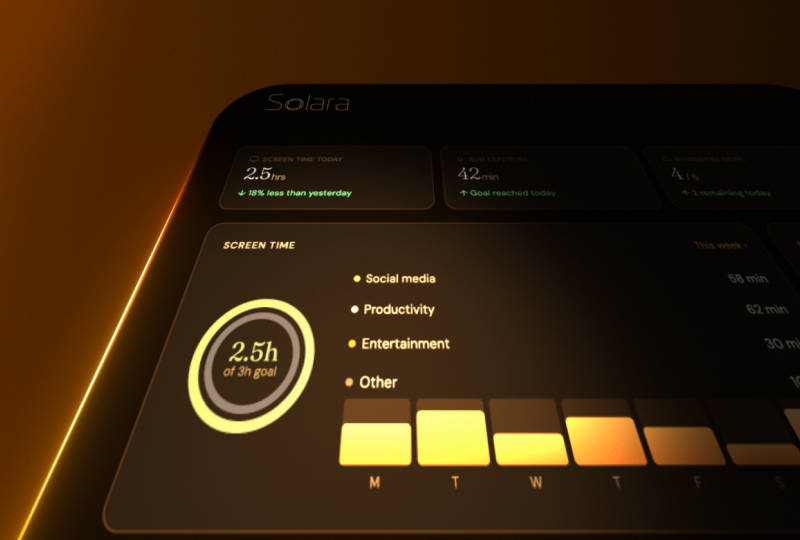
4. Adding the UI Design & Inner Glow: Welcome back. We will now
begin designing our scene, starting with the SAS UI design. In our case, let's go to
the Assets folder and drag the Solara Dashboard Illustrator
file into the project. We will import it as a
composition because we need all the layers inside
this design to be separated so we can
animate them individually. For the footage dimensions, we will choose layer size. When you import a file, you have two options document
size or layer size. Document size brings
each layer into After Effects with the dimensions of the original document
it was created in. In our case, that's the
full Illustrator document, which is very large. This means each layer will have very large layer boundaries, making it much
harder to animate. Layer size, on the other hand, brings each layer
into After Effects with the dimensions of just the element
inside that layer. So if you have a small
button in your design, its layer boundaries will be
small and tight around it, exactly the size
of that element. This makes it much
easier and more comfortable to
work with animate. Awesome. Once done, let's also import the logo
from the assets folder. This time we don't need
the layers separated, so we will import it as
footage with merge layers. This brings the entire logo into After Effects
as a single layer. Great. And now let's start by placing the logo
in the composition. The logo should go somewhere
in the upper left area. So let's find the correct scale and position for this layer. All right. Once we're
done with that, let's make sure to enable the collapse
transformations option. If you're not familiar with it, here's what it does
in simple words. Normally, in After Effects,
when you scale a layer up, it loses quality and starts
to look blurry or pixelated. When you turn on collapse
transformations, After Effects skips that process and uses the original
file data instead, which keeps the quality sharp. Now, our logo was
made in Illustrator, which is a vector based program. Vector graphics have no pixels, which means they
can be scaled up to any size without losing quality. By turning on collapse
transformations. After Effects gets that
vector data directly, so the layer will always
stay sharp and clean no matter how big you
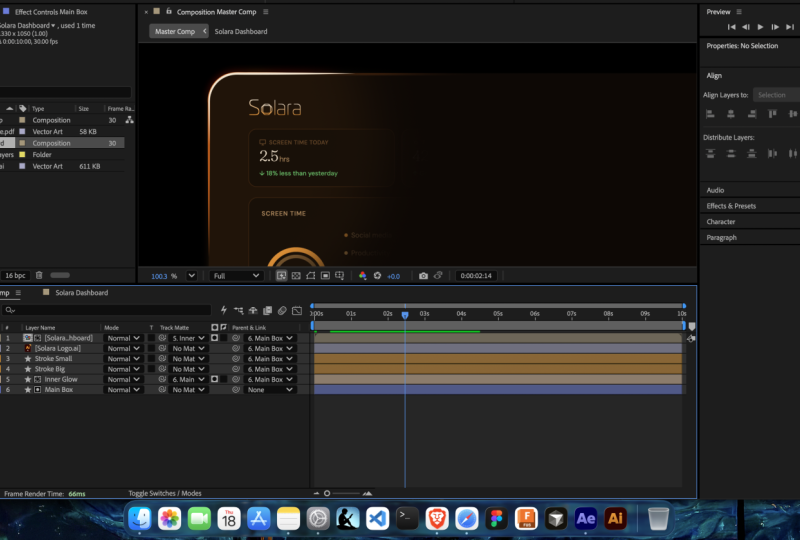
scale it. All right. With that done, let's now add the dashboard
design precomps to our scene to
create the layout we need for presenting
the SAS platform. My suggestion when you
want to create a scene with a UI design and the
Border Beam Animation, always keep your UI
design in a precomps. This will make it much
easier to animate the panels inside
later in the process. Okay, so now, in my case, I don't want to present the
full dashboard as it is. I don't want to show the left main menu or the upper area. I only want the panels inside. So let's enter the precomps
and adjust some layers. First, I'll start by turning off the background layer
since we don't need it. We already have the main
box and the main comp. All right, back in the precomps, let's now select
all the layers on the left area and turn them off. Let's do the same
with upper area. Great. With that done before
going back to the main comp, let's select all the layers with Control or Command on Mac and
A, and collapse them all. We do this because we want
all the layers to be at the highest quality
when we scale this design in the main comp. And here in the main comp, we also need to
collapse the precomps, so After Effects can show it at the highest quality
when we scale it up. Alright. With that done, let's keep adjusting
the logo and the UI design until
we get a nice layout. Okay. At this point, I want to scale the precomps to fit the width
of the main box. For this, first, I'll make sure the anchor point
is positioned in the upper left corner
of the precomps. So first select the
anchor point tool, then hold down Catrol or Command on Mac and move the anchor point to
the correct place. This way it will snap
to the corner quickly. Let's zoom in and
adjust it once more. Great. And now let's adjust the scale of the precomps until
we get something we like. I'll set it to 126 and
then make sure it's aligned to the center of
the comp. Looks great. The next step we need to
do is mask the precomps, because as you can see, a lot of the design areas going beyond
the main box dimensions. So first, let's make sure
the precomps is selected, and then let's select the
rounded rectangle tool. Now let's draw a nice
mask for the precomps. Don't release the
left click yet. I want you to use
the mouse wheel to adjust the rounded
corners of the mask. If you don't have a mouse wheel, you can also do it by pressing the up or down arrow
keys on your keyboard. Only after you've
adjusted the roundness, can you release the
click to apply the mask? Great. And now I
want to show you a small trick that will make the design look a little bit better. I don't like how the mask crops the layers at
the bottom area. To soften it, we can open up the mask properties and scale up the mask
feather property. Let's set it to 50 for now. Then let's play around with the mask expansion property
until we get a nice soft. Look, in our case, we can set it to -35. Looks much better now. But let's say you don't
want the upper inside areas to be affected by the
feathering of the mask. For this, we can select
one of the mask points, then select all the points along the upper area and move them up. Let's do the same
with the side areas. Okay, so now the setup is
basically ready for animation. But there is one
thing I want to show you that will improve the
look of the final animation, and that is making the
beam reveal the UI design. We can do that using
the inner glow layer we created. Let me show
you what I mean. To achieve the reveal effect, all we need to do is make the dashboard design precomps visible only within
the boundaries of the inner glow layer, and we can do that using
the track Mat function. We need to make the precomps use the Alpha of the
inner glow layer. So drag the trach Mat api whip of the precomp to the
inner glow layer. And to finish things up, let's not forget to turn
the inner glow back on. And now, as you can see, we get this really
cool reveal effect that looks like a spotlight from beam revealing the UI
design of the SAS company. Great. So now with that done, we have one last practical thing to do to finish the setup. As you can see, right now,
when I move the main box, all the other elements in
the scene stay in place, but we need them to move
and follow the main box, since that's the layer we'll
be animating in a minute. So before starting
the animation, let's parent all the elements
to the main box layer. Now. Et's start with
the inner glow layer. Don't confuse the pick
whip of the track mat with the pick whip of the parent and link feature. All right. And now let's parent the logo, and finally, the pre comp
with the dashboard design. Awesome. Let's save the
project before moving on. In the next lesson,
we're finally going to start animating the beam and go through
all the challenges you might run into
along the way. It's going to be a lot of
fun, so I'll see you there.
5. Animating the Beam: Come back. So at this point, we have finished
setting up our scene, and we are ready to
start animating. But before we jump in, I want to mention
something important. As we animate, we are going
to run into a few problems, and I am doing this on purpose. Instead of just telling
you what can go wrong, I want you to experience
these problems yourself the same way you would when working
on your own project. This is the best way to learn because by the end
of this lesson, you will not only know how
to fix these problems, but also how to avoid
them completely. You will know the
correct order of steps, what to do first,
what to do second, so that next time you start
animating a scene like this, you can do it smoothly and confidently without
running into these issues. So let's start animating and experience these
challenges together. Let's say, in my storyboard, I decided to present the dashboard on the right
side of the scene. So let's now scale
the main box layer and position it
properly in the scene. We can use the
proportional grid to get a nice balanced composition. Let's place it
somewhere around here. Great. We can now
turn off the grid. Awesome. And now let's start creating the animation of
the beam effect we set up. We can start by animating
the inner glow layer first. Let's make sure we're at the
beginning of the timeline. And now let's start creating the animation of the inner
glow coming from the bottom. I like to place the
inner glow layer exactly at the left
side of the main box, and then, while holding Shift, drag it down on a straight path. Now, let's press P to open
up the position property, create a first key frame
with the current values at this point in time,
and then let's go to, let's say, second three
and drag the layer upward until we reach the upper left corner
of the main box. Great. And now let's move another 3 seconds
forward to second six and move this layer out of the frame
from the right side. Awesome. So now we have
a nice reveal animation. To make the reveal a
little more noticeable, let's also add a scale
animation to this layer. So at the beginning
of the animation, the scale will be 100%. Then at second three, let's
scale it to let's say 200%. That's too much. Let's try 180. Then let's go to second six and bring the scale back to 100. Awesome. So now we have a nice spotlight animation
that reveals the UI design. And before we move on,
I want to give you a small suggestion when
you start animating. Don't rush to adjust
the easing of the keyframes and try to create
smooth motion right away. First, I suggest you finish the entire animation with
regular linear keyframes, and once you're satisfied
with the animation, then move on to
improving the motion using the speed graph editor. Alright, let's move on
with the animation. At this point, I want to improve the initial motion path
of the inner glow layer. To start, let's
select the layer. Then hold on the
Pin tool so we can open the Pin tool menu and select the convert vertex tool. And now, while the inner
glow layer is selected, let's click once
on this point to curve the position
path we created. Now, we can switch back
to the Pin tool and then the selection tool to adjust the handles
of this path. I'm just trying to create a
nice, small, rounded motion. I don't want it to move
in a sharp, straight way. Great. So it looks nice, and we're ready to move on and animate the sweep effect
on the main box layer. But before that, for better
organization in our timeline, let's select the stroke
layers and tag them in orange or any other color to differentiate them from
the rest of the layers. We can turn these
layers off for now. Let's also select
the inner glow layer and tag it in a
different color as well. We can turn this layer
off for now, too. Okay, so now we can start
animating the sweep effect. To see what we're
doing even better, let's press control
or command on Mac and shift H to hide
the layer boundaries. This way, we can see the sweep
effect much more clearly. All right. And now we'll
animate the direction property. First, of course, we
need to make sure we're at the beginning
of the timeline. And now let's start
animating the direction. As you can see, when the sweep reaches the bottom part
of the composition, we can see it becoming visible at the bottom
edge of the scene. This happened because
of how shape layers and effects work together
in After Effects. But for us, the reason
doesn't really matter. What matters is how
we can avoid it. And after some research
and trial and error, I found out that the best
and fastest solution is to apply the glow effect. Let
me show you what I mean. Let's search for the glow effect and apply it to this layer. As you can see, we
immediately get rid of that weird situation
we had before. The only downside
of this solution is that the glow effect creates a small dark shadow.
It's barely noticeable. But it's important
to mention, since we will most of the
time be creating a border beam animation for very dark scenes, this
is not a big problem. The viewer most likely won't
notice this small shadow. In the final stages
of the course, I will show you how to
get rid of it completely. But for now, I want to
show you what to do if you want to
minimize the shadow. First, you can lower the
glow radius to zero. But then I suggest you check if the sweep is still not visible at the bottom edge of the scene. As you can see, we can
still see a little. So, play around with it until
you find the right balance. Let's leave it at 30 for now. We'll come
back to it later. For now, let's keep focusing on animating the sweep effect. Our goal is to match this animation with
the inner glow motion. So while we're standing at the
beginning of the timeline, let's set the direction to -120. So the sweep will be in the
bottom part out of the frame. Now for the second keyframe, we will not create it
at the third second, like we did with the
inner glow layer. And that's because we needed the inner glow layer to reach the corner of the main box, which is why we needed
that middle keyframes. For the sweep, we
don't need to do that since the sweep follows
the corner by itself. So let's go to second six and set the
direction to a value where we can see
the sweep is out of the frame from the right side. In our case, we
can set it to 60. And now before we move on, I want to mention a
very important thing. If the sweep effect is not
centered in your layer, the sweep animation will
look a bit off and will be hard to match with
the inner glow motion. So make sure you didn't
skip the part earlier in the course where we centered
the sweep effect. Okay. So now let's turn off the
transparent background in the preview panel
and start animating the strokes. Starting
with the big one. Let me just hit Catrol and shift H once again to hide
the layer boundaries. Okay, so now let's adjust
the offset property until we see the
stroke is out of the frame from the
lower left side. Our goal is to match
the stroke animation with the inner glow motion. While I'm doing it, I'm noticing that the stroke is a bit
too long, in my opinion. To shorten it, we just need
to lower the end property. Let's set it to 15. Okay, that's better. Let's now animate the offset. At the beginning
of the animation, let's set it to -135 and
create the first keyframes. Now let's move to
second six and adjust the offset until the stroke is out of the frame from
the upper right side. We can set it to 320. As you can see, we're
already getting a really nice
border beam effect, and with the reveal animation, it looks even more premium. Great. And now to
finish things up, let's animate the small stroke. The goal is not to
push it too far behind the big stroke because we need it to match the motion of the inner glow
and the big stroke. Soon, we'll see if
we did a good job. For the last keyframes, we
can set the offset to 315. Let's now see how
everything looks together. As you can see, the small stroke is not matching the
motion of the rest, and maybe you actually
like that look. But in my opinion,
it will look much better if they're all in sync. So let's see what we
need to do to fix that. First, you can,
of course, adjust your keyframes and try to guess the best values
for the offset. But as you can see,
you'll need a lot of trial and error
until you get it right. And that's exactly
what I meant when I said before we started animating that we would run into problems during the
animation phase. This is the main problem you can run into when
using this technique. I wanted you to experience it rather than just hear about it. The problem we're
facing happened because we followed
the wrong workflow. When we're creating the
animation of the beam, we need to see the starting
position of every element and effect in our setup so we can match all
the motions together. So in our case, we started animating the effects
a little too early. In a minute, you'll understand
exactly what I mean. So let's now go through
the correct workflow. First, let's bring the
main box scale back to 100 and then let's align it to
the center of the comp. Now we can clearly see
all the design and we can see the starting positions of all the elements that
create the beam. That means we can now adjust the values for all the
keyframes we created. So make sure you're at the
beginning of the animation, and let's start by adjusting
the big stroke offset value. As you can see, the starting
point of this stroke is not matching
the starting point of the sweep in the inner glow. It's a bit behind
them, so we need to move it a little to the left. We can set the offset to 160. Great. Now, let's adjust
the small stroke. We can set the offset to 170. Once done, let's go to the end of the animation and
adjust the values there. Let's see what value works best for the offset
of the big stroke. I think we can set it to 350. And now let's move on
to the small stroke. We can set the
offset here to 360, which will show up as
one full rotation. Let's see how that
looks. Awesome. As you can see, when
everything is matched, the beam looks much better. But I think we can also adjust the motion of the inner glow to better sync it
with the strokes. I'll start with the
last keyframes. Let's move it to
the right a bit. It still seems not
fully in sync, and that's because of the
middle position keyframes. Let's delete the
middle keyframes and see if we can still get that
curve motion another way. It's actually pretty simple. All we need to do is use the
convert vertex tool again, but this time on the
first and last points of the position path
for this layer. Let's now switch back
to the selection tool and adjust the handles to
get a nice rounded motion. And now, as you can see, all the elements that
create the beam are synced perfectly together,
and it looks great. I wanted to show you this back and forth process
so you can learn what affects your
workflow and what mistakes to avoid to
get the best results. So before scaling your design, first focus on sinking
the motion and only then move on to positioning
or scaling your main design. With that said, let's now
scale the main box to 150 and position it back
in that nice spot it was. Awesome. Everything looks great. But I just noticed that
I didn't need to delete the scale keyframe for
the inner glow layer. So let's stand in the middle of the animation and scale
the layer here to 150. Let's see how that
looks. Looks nice, but I noticed I can
see the sweep effect appearing at the
edges of the comp. It's probably because
I accidentally turned off the glow effect. So let me turn that back
on. Great. With that done, we are now ready to move on to the next step where we will start improving the look of the beam using some
simple effects. And we will do all of that in
the next and final lesson. So keep your focus for just a little bit longer. See
you in the next one.
6. Final Polish & Fixing Common Issues: Welcome to the final lesson. We are now ready to move on to the next step where we will start improving the look of the beam using some
simple effects. Okay, so now let's first start
working on the Big Stroke, select it and add
the glow effect. Great. Now, let's
adjust the glow radius. I think we can set it to 60. Next, let's duplicate the effect and set the glow radius to
a slightly higher number. Let's go with 80. Now, let's
duplicate it one last time and set the glow radius
to 120. Awesome. So now we can go back
to the first glow and play around with the glow radius until we get the look we want. This is a nice way to
get a good looking glow in case you don't have
the deep glow plug in. All right. The glow looks
great, but for some reason, I can't see the sweep effect we created for the
main box layer. Let's turn off
both stroke layers and try to figure out why. First, let's jump to the time code where the
sweep should be visible. Now, let's try toggling the glow effect off and on to see if that's what's
causing the problem. I can see the sweep, but
it's barely noticeable. So I don't think the glow
effect is the issue. The real problem is that the
inner glow layer is sitting above the main box layer and blocking the sweep
effect from showing through. When you spend a lot
of time on a project, it's easy to get lost and miss what's actually
causing the problem. Most of the time, it
turns out to be something simple like the order
of your layers. So whenever something looks off, always start by checking the
simplest possible cause. Now that we know what's
causing the issue, we need to find a solution. We can't simply move
the inner glow layer below the main box because then it would be
hidden underneath it. The best approach here is to use a blending mode on the inner glow layer. Let
me show you what I mean. If you don't see the
blending modes column in your timeline, click here. In our case, the best options to try are Add, Lighten, or screen. When we apply one of
these blending modes, the dark areas of
the inner glow layer become transparent because ad, screen, and lighten all work by ignoring dark pixels and
keeping only the bright ones. This means the sweep effect from the main box layer can now show through while the
inner glow layer still looks the
way we want it to. This short video from the
Adobe video YouTube channel explains all the
blending modes in a very easy to understand way. I suggest you watch it
to finally understand all the blending modes
better and most importantly, when to use each one. All right? Back to the project. In our case, let's
go with Lighten. So now we can also see
the inner glow layer and the sweep we created
for the main box layer. We can now turn back on
all the stroke layers. Before moving on, if the
glow is too much for you, you can place the big
stroke layer with the glow effects below
the main box layer. This way, you'll get
a nice glow effect, but it will be
behind the main box, like a small light source
following the beam. In my case, I prefer
it to be on top, so I'll bring it
back to how it was. Awesome. And now this is the
step that I love the most. At this step, I love
to mess around with the setup and fine
tune the effects. For example, I can maybe adjust the sweep
effect and make it a bit larger next, I can maybe adjust the starting point of the big
stroke and lower it a bit, so we don't see it so much at the beginning
of the animation. I think I can also adjust the starting point of the
sweep and lower it a bit. I'm showing you these
steps so you know which parameters to adjust and which
ones to play around with. Okay, and now let's
move on and change the color of the beam because it looks a bit
too red, in my opinion. To change the color of the beam, you need to find the layer that the color is coming from. Most. In the setup, it's
the big stroke layer. So let's select it and
change the stroke color. But since the layer has a
few glow effects on it, even the slightest color change will dramatically
affect the look. So to change the color
in the right way, I suggest you adjust it through each color
channel individually. In my case, I'm trying to
make it more orange than red. Great. So with that done, we have finished
creating the beam, and now we can add
a nice background. For this style of scene, it's
better to use a dark one. So let's create one together. First, let's create a new solid. You can use the shortcut Cutrll
or Command on Mac and Y. We can name it BG and then
make sure it's comp size. For the color, let's
make it black. Now let's apply a simple
gradient ramp effect and create a dark
brown gradient. But first, let's move the
solid below all the layers. Right. And now let's select the effect so we can see
the gradient points. We can't see them because we hid the layer boundaries
to bring them back. Let's use the shortcut, Ctrl, and shift H. Awesome. And now let's first change
the gradient type to radial. Once done, let's pick
a color for this area. We can sample this brown color. Then for the rest
of the gradient, we can sample this
darker brown color. Great. And now let's move the brighter area
to the right and the darker area to
the lower left side. Now, to make the
scene more dynamic, let's animate the gradient. First, let's go to the
beginning of the animation and create keyframes for the
gradient start and end points. Now let's move to the end
of the animation and bring the start point down here and bring the
end point up here. This will create the illusion
that the background also has a light source that's
being affected by the beam. Looks great. But I
just noticed that the logo is not affected
by the reveal animation. To fix that, all we
need to do is set the inner glow layer as an
alpha mat for the logo layer, meaning the logo layer
will only be visible within the boundaries of
the inner glow layer, exactly the same as we did
with the dashboard precomps. Awesome. So now the
inner glow layer is revealing both the logo
and the dashboard design. Let's see how everything
looks together. I think it looks great. Now we can make the scene
look a bit more cinematic by making some small color
correction adjustments. For this, let's first create a new adjustment layer and
then apply a noise HLS effect. I prefer this noise
effect because it gives a bit more control than
the regular noise. Let's set all the property
values here to 1%. Let me zoom in to show
you the difference with and without the noise. As you can see, it makes the
gradients in the scene look better and gets rid of that overly digital
look. All right. And now let's name this adjustment layer
noise and right after it, add another new adjustment layer and apply a simple
curves effect. Let's now adjust the curves so the scene looks a little
more crisp and dramatic. That looks a bit
better, in my opinion. Let's not forget to name this layer curves
before moving on. All right. And now let's finish the course by fixing the small
shadow issue we have here. It was created because
of the glow effect. We added to the main box layer. Remember, we added it to prevent the sweep effect from becoming visible at the
edges of the comp. So now let's learn how to get rid of
that shadow for good. First things first, select the main box layer
and duplicate it. Now, change the name of
this new layer to sweep. Next, select the main box layer and turn off the effects on it. For the sweep layer, we leave
all the effects turned on, but we make one small
adjustment to the sweep effect. Change the light
reception to cut out. This way, only the effect will
be visible for this layer. The shape itself
will not be visible. To see that a bit better,
let me solo the new layer so we can see only
as you can see, we now see just
the sweep effect, leaving us only with the
brighter areas visible, which makes the
shadow created by the glow effect disappear. And that's the easiest way to perfect our border beam setup. To finish things up, let's
not forget to parent the new layer to
the main box layer. So it moves as one unit. And since we want the shape
of the new layer to also follow and stay in sync
with the main box layer, let's not forget to parent the shape properties of the sweep layer to the shape properties of
the main box layer, exactly the same way we parented the stroke
layer properties to the main box at the
beginning of the setup. With that done, we
have now completely finished our setup for the
Border Beam Animation. And before we finish,
I want to show you how you can use it
for other comps. In case you need it in
other scenes or projects, the first thing you
need to do is duplicate the pre comp with the beam
setup from the project panel. You can name this comp
Border Beam setup. Now, let's enter
this comp and adjust a few small things to prepare
it for additional use. First, let's scale
the main box back to 100 and align it to
the center of the comp. And now, if you need to
replace the UI design, just delete the current design layers in the background layer. Now, you can drag
this setup into your scene and adjust
it to fit your project. Remember that to change the
dimensions of the setup, you need to do that by adjusting the size of the main
box layer. All right. In my case, I don't
need that extra setup, so I'll delete the new comp now. Let's also close this precomps. Great. So with that done, you can now animate the
main box layer position. Usually in this type of scene, there is a slight movement
from right to left, so feel free to do that, or any other gentle
animation you like. Maybe a downward to upward motion could also
work nicely for the scene. Also, feel free to adjust some properties, if
you feel like it, for example, I feel that my reveal area should
be a bit softer, so I'll select the
inner glow layer and scale up the blur radius. And before closing the
project, let's organize it. First, let's create a new folder in the project panel named assets and drag all the assets we used in the project into it. Once done, let's
create another folder named precomps and drag all the precomps
we created during the course into it,
except for the main comp. In our case, that's only
the dashboard precomps. Awesome. And with that, we have finished the course. And yes, I know
there is a way to connect everything together
using expressions, instead of manually moving and animating each element
in this setup. But honestly, I prefer to leave it the way it
is because I love having the option to
animate each element separately in case I want
to delay the animation of certain elements and create a more interesting scene where the beam animation
is not perfectly synced. And here's another quick
technique I love to do when I want the scene
to feel more alive, and it's adding another source of light to the background. Let me show you how. You can
follow along if you want. First, make sure no layer is selected and then
select the Pen tool. Now create a simple
right angled triangle. Once done, make sure the stroke is off and the
fill is turned on. For the fill, you can pick some medium dark color from the glowing areas in the beam. Once done, let's name the layer blur shape and then apply the fast booxblur effect. For now, let's set the
blur radius to 120. Great. Next, to make
it look a bit better, you can select the Pin tool once again and create a
point in this area. Then using the Vertex tool, curve the point to get
that nice rounded look. Awesome. And now let's rotate the layer 180 degrees and place it in the
upper left corner. Somewhere around
here, I think we can change the color
to something brighter. This should work.
Now, for the blur, let's set it to 150 to
soften it a bit more. This creates an
illusion like there is a light source somewhere in the left area of
the scene. Awesome. And now let's create
another one that will serve as a source of light
coming from the beam. For this, let's duplicate the layer and rotate it
back to zero degrees. Okay. And now let's place
it somewhere around here in the bottom area where the beam is
starting to come from. Then let's darken
the color a bit. Once done, let's now add the turbulence displace effect to this layer and adjust
some basic properties. For the amount, we
can set it to 100. Then for the complexity, you
can set it to 1.5 for now. Now, let's make this
abstract light move. For this, let's create a simple expression
for the evolution. Write down time asterisk 100. Great. Once that's done, you can check out
the effect and play around with the properties to make it look
the way you want. And once you're
happy with the look, let's bring these
two layers above the background layer and animate them real quick to make
the scene feel more alive. For the bottom one,
we can move it from left to right to make
it look like the light is coming from the beam
and then disappearing slowly when the beam is
already leaving that area. Looks nice. Finally, we can now animate the upper layer
to come from left to right, as well to make it look like the beam is brightening the
scene a little with its glow. This is a simple touch you
can add to your projects, both for dark and bright scenes. And, of course, you can adjust the effects in the animation. But what's important to
me is that you understand the main idea of how
with simple steps, you can elevate your scene without extra heavy
effects or plugins. With that said,
for your homework, I want you to switch
the UI design, change the colors of the beam, and the background a little bit, and maybe adjust
the dimensions of your main box if needed. If you post it on social
media, don't forget to tag me. Thanks a lot for watching, and I'll see you in the next one.
 Valeri Visuals, Adobe After Effects Instructor